
Top 10 Health & Weight Loss Secrets You Never Knew... By Jennifer Jolan and Rich Bryda Copyright 2013 All Rights Reserved.
Top 10 Health & Weight Loss Secrets You Never Knew About By Jennifer Jolan and Rich Bryda Copyright 2013 All Rights Reserved. Loading This Book onto Your Kindle Device or App You probably received this book in either the PDF format or Kindle format. Either way, most Kindle devices can read either format. Most Kindle apps on smartphones as well as Kindle applications on Macs and PCs can also read both versions. Still, the PDF version is best read with Adobe’s Acrobat or another PDF reader. (See Adobe.com.) Although newer Kindle devices and apps can read PDF files, you may have to do a lot of scrolling left and right depending on how your Kindle or app interprets PDF files. Note: Many tablets and smartphones have free PDF-reading apps available to them and that may be your best option if this you received the PDF version and want to read this book on the go and not just at home on your computer. Whichever version you use, if you want to read it on your Kindle device or app or Kindle program on a computer, there are several ways to go about it. If you’re familiar with files and folders on your computer or smartphone or tablet, you can simply copy this file to your Kindle’s eBook folder. It may take some searching to find it and the folder names aren’t always uniform. But those familiar with file management will have no trouble doing this. You can use a USB cable to connect your tablet or cell phone to a computer with this file and copy the file to your tablet or smartphone or Kindle device that way. Such a USB cable should have come with your computer. If you aren’t all that tech savvy, there’s another way to get this file to your Kindle. Sign into your Amazon account, the one you used to register your Kindle app or device or Kindle computer program. Select the Your Account dropdown menu from Amazon’s home page (towards the upper-right of the screen) and select Manage Your Kindle. Once there, look at the left-hand column for the section entitled, Your Kindle Account. Click the option labeled Personal Document Settings. A screen will appear showing your official Amazon send-to-Kindle email address. This is an email address that Amazon assigns to your Kindle app or device or program and will not be the same email as your Amazon general sign-in email address. Note: If you have multiple Kindles, such as a Kindle Fire and a Kindle app on a smartphone, you will see assigned email addresses for each place. Use your email program to send this PDF or Kindle file. Within a few hours, and often much sooner, your Kindle’s library will show this book in your library! Table of Contents Loading This Book onto Your Kindle Device or App COPYRIGHT AND TRADEMARK NOTICES How to Lose Weight Spinning in a Circle like Kids The 20-Second Bathroom Trick for a Super-Charged Metabolism and a Flood of Energy One Tablespoon of this $6 Supplement Detoxes 900 Yards of Toxins from Your Body Do-It-Yourself Face-Lift: How to Look 5 Years Younger in 2 Weeks – Got 5 Minutes a Day? The 50-Cent Miracle Weight Loss Food You’re Not Eating #1 Cheap Supplement that Reverses Gray Hair & Infuses Health into Your Body How to Get Rid of Allergies in 90 Seconds with Water The Ultimate 3-Second Fountain of Youth “Neural” Fat Loss Exercise The 15-Second “T-Tap” for Overcoming Hypothyroidism & Sluggish Energy How to Make Healthy Ice Cream in 2 Minutes and Other Sweet Surprises! Conclusion Also by Jennifer Jolan (Click to skip to the non-legalese good stuff!) COPYRIGHT AND TRADEMARK NOTICES This book is Copyright © 2008-2013 Jennifer Jolan (the “Author”). All Rights Reserved. Published in the United States of America. The legal notices, disclosures, and disclaimers at the front of this book are Copyright © 2009 Law Office of Michael E. Young PLLC, and licensed for use by the Author. All rights reserved. No part of this book may be reproduced or transmitted in any form or by any means, electronic or mechanical, including photocopying, recording, or by an information storage and retrieval system -- except by a reviewer who may quote brief passages in a review to be printed in a magazine, newspaper, blog, or website -- without permission in writing from the Author. For information, please contact the Author by email at [email protected] or by mail at 4201 Monterey Oaks Blvd, Austin, TX 78749. All trademarks and service marks are the properties of their respective owners. All references to these properties are made solely for editorial purposes. Except for marks actually owned by the Author, the Author (as both author and as publisher) does not make any commercial claims to their use, and is not affiliated with them in any way. Unless otherwise expressly noted, none of the individuals or business entities mentioned herein has endorsed the contents of this book. LIMITS OF LIABILITY & DISCLAIMERS OF WARRANTIES This book is a general educational health-related information product. As an expressed condition to reading to this book, you understand and agree to the following terms. The book’s content is not a substitute for direct, personal, professional medical care and diagnosis. None of the exercises or treatments (including products and services) mentioned in this book should be performed or otherwise used without clearance from your physician or health care provider. There may be risks associated with participating in activities or using products mentioned in this book for people in poor health or with pre-existing physical or mental health conditions. Because these risks exist, you will not use such products or participate in such activities if you are in poor health or have a pre-existing mental or physical condition. If you choose to participate in these risks, you do so of your own free will and accord, knowingly and voluntarily assuming all risks associated with such activities. The materials in this book are provided “as is” and without warranties of any kind either expressed or implied. The Author disclaims all warranties, express or implied, including, but not limited to, implied warranties of merchantability and fitness for a particular purpose. The Author does not warrant that defects will be corrected, or that that the site or the server that makes this book available are free of viruses or other harmful components. The Author does not warrant or make any representations regarding the use or the results of the use of the materials in this book in terms of their correctness, accuracy, reliability, or otherwise. Applicable law may not allow the exclusion of implied warranties, so the above exclusion may not apply to you. Under no circumstances, including, but not limited to, negligence, shall the Author be liable for any special or consequential damages that result from the use of, or the inability to use this book, even if the Author or his authorized representative has been advised of the possibility of such damages. Applicable law may not allow the limitation or exclusion of liability or incidental or consequential damages, so the above limitation or exclusion may not apply to you. In no event shall the Author’s total liability to you for all damages, losses, and causes of action (whether in contract, tort, including but not limited to, negligence or otherwise) exceed the amount paid by you, if any, for this book. You agree to hold the Author of this book, the Author’s owners, agents, affiliates, and employees harmless from any and all liability for all claims for damages due to injuries, including attorney fees and costs, incurred by you or caused to third parties by you, arising out of the products, services, and activities discussed in this book, excepting only claims for gross negligence or intentional tort. You agree that any and all claims for gross negligence or intentional tort shall be settled solely by confidential binding arbitration per the American Arbitration Association’s commercial arbitration rules. All arbitration must occur in the municipality where the Author’s principal place of business is located. Arbitration fees and costs shall be split equally, and you are solely responsible for your own lawyer fees. Facts and information are believed to be accurate at the time they were placed in this book. All data provided in this book is to be used for information purposes only. The information contained within is not intended to provide specific physical or mental health advice, or any other advice whatsoever, for any individual or company and should not be relied upon in that regard. The services described are only offered in jurisdictions where they may be legally offered. Information provided is not all-inclusive, and is limited to information that is made available and such information should not be relied upon as all-inclusive or accurate. For more information about this policy, please contact the Author at the e-mail address listed in the Copyright Notice for this book. IF YOU DO NOT AGREE WITH THESE TERMS AND EXPRESS CONDITIONS, DO NOT READ THIS BOOK. YOUR USE OF THIS BOOK, PRODUCTS, SERVICES, AND ANY PARTICIPATION IN ACTIVITIES MENTIONED ON THIS BOOK, MEAN THAT YOU ARE AGREEING TO BE LEGALLY BOUND BY THESE TERMS. How to Lose Weight Spinning in a Circle like Kids By Jennifer Jolan and Rich Bryda Introduction Hi there. I’m Jennifer Jolan and I’m going to explain how you can spin around in circles (just as kids love to do) in order to help you change yourself in three unexpected ways: 1. You’ll lose weight! 2. You’ll re-energize your body! 3. Your overall health should improve! Yes, I know it seems kind of weird and strange. Please keep an open mind. Sometimes some of the most obvious things are overlooked. For example, I recently saw taco shells for sale where the bottom “folded” edges were flat so the taco wouldn’t fall over on the plate and spill out. Why didn’t anyone think of this obvious answer decades ago? No, taco shells aren’t the healthiest food around but it’s an example of things that are right in front of us that nobody considered... until somebody considered it. Then it seems easy and obvious. Spinning, just as kids do it, is one of those things that seem obvious once you understand what really takes place when you do it. Surprising but true. I’m amazed it hasn’t been part of a healthy workout regimen for ages. Hopefully it will be now. In this book, I’ll explain the logic and rationale behind spinning. I’ll show you why spinning around actually works for the health benefits that I just mentioned. And, if you still don’t believe me after all that you’ve read, then, I simply challenge you to spin around (as I outline) for 10 to 14 days and prove or disprove it to yourself. That’s not much to ask, is it? How I Learned About This I like to read. I read just about anything and everything when it comes to health, exercise, nutrition, or other strange things that makes me curious. My clients, readers, and my own family benefit from any tool I can add to my healthy arsenal so I stay on top of things closely. How I learned about spinning was purely accidental. The source that triggered it all came, of all places, from my reading about Sufi Muslims living in Turkey. They are called “Whirling Dervishes.” The spinning around thing that they did fascinated me. I had to know more about “why” they did it. The more I read about them and their spinning practice, I began to understand not just why they did it, but also why the actual spinning itself produced the effect they sought. I won’t get into the religious aspect of it all. That’s unnecessary for our purposes here. I will, however, say that the Sufi Muslims spin around until they reach an ecstatic state of mind as a show of love and a drama of their faith. That is the “why-they-do-it” part of this. That doesn’t account for any health benefits, however. This is what caught my eye the most the more I learned, read, and saw of them in my research of the Whirling Dervishes: All of them were thin, showed amazing energy and stamina, and were youthful looking (compared to their actual ages). I’ll Take It for a Spin Myself! So I thought to myself “Hmm, okay, what the heck. I’ll spin around and see what the big deal is about.” I did it. Just once. Wow... was that quite an experience. I’m glad I was alone! I nearly knocked over a lamp after spinning around 20 times. I had to just sit and then lie down on my couch to normalize myself. I rested and felt normal after a few minutes. Most important for our purposes though is that I also felt energized. More than usual. And I’m a person with lots of energy due to the lifestyle I lead. Again, this really was something new. As I said, I exercise often and I feel energized from exercising, but this was a different type of energy that I felt. I had a tingling sensation feeling in my head and heart. A lightness that’s hard to explain was there too. I felt more alive than before. I felt good! I wanted more. This was too good to stop now. I needed to take it to the extreme to see what the fuss was about. I always want to push things to the limit to find out as much as possible. So, I spun around again... this time 15 times. I didn’t want to get too dizzy. I spun around and on my final spin I just spun right onto my couch lying down right away. I was kind of delirious with excitement. Like a child with a new toy. Or like the feeling after a fun ride at an amusement park. It’s a good thing nobody could see what I was doing I realized. Let’s face it; it’s weird to see a grown woman spinning around like a little kid. In mulling over everything, spinning around those 15 times did feel like too much for me. Still, I wasn’t going to let that stop me. I spun some more. By the time I stopped doing the spins, 30 minutes had passed. I must have done 10 to 15 sets of spins and I never did fewer than 10 spins each time. More Research Was in Order That’s how I began this quest to see why the spinning did what it did. I also wanted to know more about the health effects. Did spinning help me or do something I’d rather not have done? If the spinning did contribute to the Sufi’s thin waistlines then exactly how did that occur? I’m positive spinning didn’t burn more calories than jogging or other traditional exercises. In fact, I suspected that spinning burned very few calories, period. I wanted to know what was going on inside when I spun around. I wanted to know what gave me the uplifting sensations as well as how those spins affected my weight and wellbeing. Findings from Research Honestly, after that first day, I was hooked. I devoted myself to doing the spins each day. And I wanted to know more about what I was getting myself into. So I dove into doing more research. I ended up learning some fascinating things. For example, I learned that those Whirling Dervishes would spin hundreds of times nonstop. By over-spinning, they’d create a huge burst of ecstatic energy that put them into an almost delirious state of mind. Note: I never do more than 20 spins in a set and you shouldn’t either. Stop after 20 and rest for at least one minute... Always! I wasn’t after the ecstatic different state of mind thing. I like to keep my senses as I’m sure you do too. I wanted the health benefits, especially since I always seemed to get a little sluggish in the mid-afternoon. But there was something else that I found out. Even though the Whirling Dervishes got huge bursts of energy, they would also have their energy come crashing down within a few hours. I experienced this too. This is not good in my opinion. I didn’t want a boost only to come down lower than I began. I wanted a nice even, all-day energy-boost. I didn’t want to have an energy-boost that was followed by a state of tiredness or exhaustion. Fortunately for me, I never went above 20 spins at a time because who knew? Maybe I’d throw up or something. I just didn’t know. This was all new to me and I was testing various things. So I put my heart into spinning, but I still kept limits. More Findings I felt great, had an extra bounce to my step and had the energy of a 4-year old child without having an energy crash by doing too many spins as the whirling dervishes do. Happily I also noticed I had become more toned than usual. Keep in mind I’ve always been in good shape because that is my job. I train and advise people on how to stay healthy and lose weight. I’m a diet and exercise info junkie and my clients and readers learn from what I learn. I’ve always thought “outside the box.” I’ve always done things my own way when it comes to training and consulting people for weight loss. If the whole world does something (such as extended aerobics, ugh!), then probably there’s a better, easier, and healthier way to approach it. Understand that I already had a grab-bag of “tricks” and “tweaks” to exercising and dieting that gave people miracle results for weight loss and health. But the spins – what began for me as a way to boost my energy levels – soon proved to be another weight loss “trick” I could add to my arsenal. But I wanted to be sure. I thought I better find out if this really works for weight loss for most people and not just for me. This was when I approached some of my personal weight loss clients and explained the spins to them. Besides the laughing I usually got to begin with, along with the “you’re crazy” looks when I mentioned all this to them, I made them do it. It was my feeling that, “Geez, if kids do this naturally, what harm could spinning do to grown women?” The proof is in the pudding as they say. Are you interested in my clients’ results? There was 100% success with only a few bumps along the road. The Successes After 14 days of spinning, all my clients had more energy, felt better, looked better, lost a few pounds (some more than others), and acted more youthful. Note: Think about all that. Even if my clients didn’t lose weight, spinning would still be awesome for all the other benefits they experienced. I consider any weight loss an extra benefit of spinning. Are you going to lose 10+ pounds in two weeks from spinning alone? No. That won’t happen. NOTE: If you want to learn how to lose weight fast, check out some of my other books and reports here: http://www.amazon.com/JenniferJolan/e/B004V1ZAB8/ref=sr_tc_2_0?qid=1362756256&sr=8-2-ent. But I don’t want to get sidetracked. I want to focus on you spinning around like kids. So, back to our regularly scheduled program... My clients loved the spinning and they got great results. To this day, they continue to get great results from spinning. Spinning has been a success for my personal clients. I first released this report to the public in a smaller, less detailed format. Since then, over 120,000 people have learned and enjoyed great health and weight loss results from spinning around in a circle. The Few Bumps in the Road Are Simple to Cross There were a few bumps along the way and it’s my duty to share those with you too. The feedback I’ve received from some of the women shows that perhaps you should ease into doing the spins. In other words, don’t attempt to do 20 spins your first time. Build-up to 20 and use 20 spins as your goal. Note: You’ll build up quickly. You should be able to do 20 spins easily in less than two weeks. Why should you build up to twenty spins? Some of the women became too dizzy and had a hard time getting normalized from the dizziness. They simply overdid the spinning. It was too much, too soon and they were unaccustomed. Their body/mind link couldn’t keep up with too many spins. Two of the women got sick from nausea. (There are solutions! I’ll tell you about those in a few moments.) The women who got too dizzy and the two women who got sick did end up getting used to spinning within one to two weeks. They didn’t give up and I was proud. They were rewarded for their persistence with better health and weight loss. They love spinning now! There was a happy ending even for those few problem cases. Some Background on Your Body’s Reaction to Spinning Before I get to the outline of how you should spin, I want to explain some of what I found out about the dynamics of why spinning helps people lose weight and gain energy. Also, there is a simple explanation as to why spinning actually makes you younger at a “cellular level.” It all centers around your endocrine system. Your endocrine system consists of seven glands: The pineal gland The pituitary gland The thyroid gland The thymus The adrenal glands The pancreas The reproductive glands (testes in men, ovaries in women) Your endocrine system is vital because it controls your metabolism. Metabolism is the key to either weight gain or weight loss. Your metabolism regulates your growth and development, controls your hormone levels (extremely vital), and plays a part in your mood. Staying Level Your endocrine system controls your overall well-being in that it helps keep your body in a constant state of homeostasis, or in layman’s terms, your endocrine system wants you to stay on an “even keel.” You want this for the most part. You never want to be too hungry, too cold, too hot, too lazy, too energetic, and so on. With rare exceptions you want to feel as though you’re in control and you’re doing just fine in every way. Many times in life we want to feel more extreme, and many times in life we accept those feelings as natural. It’s natural and healthy to feel sadness at the loss of a friend or family member. It’s natural and healthy to be completely turned on by your spouse. It’s natural and healthy to feel elation when something good happens to you such as paying off a big debt or seeing a child’s accomplishment. But none of us want those extreme feelings to last forever or we couldn’t function in our other duties. If sadness takes over long after a sad event ends, we find it difficult to get the energy to work or to be secure and joyful with family whom we love. If we are too energetic at all times we have difficulty sleeping well because our thoughts are “racing.” Our endocrine system is monitoring us constantly and is the reason we go from normal to extremes and also why we can return from the extremes to normal. (We return from the extremes when our endocrine system is functioning well.) Our endocrine system secretes whatever hormone our body needs at the time in an attempt to maintain a normal, healthy level of living. It’s almost like a beautiful ballet act that constantly goes on inside our bodies without us really being aware of it most of the time. I realize you don’t want to be bored with anatomy details, but I want to mention the background behind it all. Those seven glands I mentioned earlier are energy centers for your body. The cell signals revolve in place at each of the seven locations. They do this in a circular motion. When I say circular you probably are beginning to realize why spins can affect our endocrine system. When cell signals sent by our endocrine system are revolving in place, the signals either revolve fast, slow, or somewhere in-between. This is important because when they are revolving fast, you’re in good health and have lots of energy. Everything is going good with your body. When they are revolving too slowly, you aren’t in good health and you don’t have much energy. Too slowly means that you generally just don’t feel good. Again, our goal is to be somewhere near the middle most of the time, but that doesn’t seem to be the case if you look at others walking down the street and if you listen to others talk about the way they feel. Basically, most people aren’t at optimal health. They’re closer to poor health. Obviously this manifests itself in lack of energy and obesity. Their endocrine systems are overworked and overwhelmed Spinning the News for Good The good news is, spinning speeds up your endocrine systems ability to send cell signals. Repeated spinning daily helps to reset your revolving speed upwards. This is good for your health, good for your energy, and good for weight loss! I hope I explained all of that clearly enough without throwing too many boring details. I want you to understand that spinning can have a powerful effect to alter your health, energy, and weight positively. Now that you know the reasoning behind spinning benefits, let’s move on. Oops, I Left Out Important Information... I got so caught up in my excitement about spinning that I left out an important piece of information. This comes up more than I expected as I explain to students and clients about the benefits of spinning. Note that you can spin either way: clockwise or counter-clockwise. The Whirling Dervishes spin counter-clockwise. Me? Personally, I prefer to spin in a clockwise direction. It just feels more comfortable. But either way, it doesn’t matter which way you spin. Try both ways and see which direction you’re most comfortable with. If you want to see how the Whirling Dervishes spin around, just do a Google search on them and go to the many images and videos you’ll find. Note, when you watch the videos you’ll see that they tilt their heads while they spin. I do not want you to do that. Remember, they’re doing this to get extremely dizzy to the point of delirium. This not only can make you sick to your stomach and make your head spin, but it’s simply too much and overflows your equilibrium and your endocrine system’s mechanics. You’re not doing this to achieve delirium – you’re spinning for better health and weight loss. Keep your head straight up like normal. Don’t tilt your head... keep it straight. Another thing you may see the Whirling Dervishes do that I don’t recommend is they hold their arms against their chest when they start spinning. Don’t do this either. For your arms, put them out as if they were airplane wings: straight out at shoulder level. Then just start spinning around like kids do it. It’s fun! Your Spinning Routine Above, I described the correct way to spin around. Head straight up and your arms out like airplane wings. Now, here’s how you should start out spinning. Day 1 Begin your first day with spinning around just five times. Faster is not necessarily better, but your goal should be to spin around on the faster side as long as you remain fairly comfortable with the speed. Five times is a base level to try. If you really want to see the “real” effects of spinning, try 15 to 20 spins. If you’re hesitant and don’t want to risk extreme dizziness or nausea, just spin five times on your first set of spins. I don’t want you to have a rough first time and be afraid to spin in the future. Once you do this, think through how you feel. Any problems with completing your goal? How did it go? What is your body telling you? You goal is this and only this: spin only until you are slightly dizzy. That is your only goal for each set of spins. That is all you need to do to benefit from spinning and improve your health as well as lose some weight. The slight dizziness means you affected your equilibrium some, but you didn’t overdo things the first time. Note: Excess dizziness can make you feel not-so-good the rest of the day. Obviously. Just do yourself a favor and trust me. Take it easy and ease into it. Start with five spins and rest at least a minute before trying to do more, such as a second set of spins. Pace yourself and take a real inventory the first time. If five spins didn’t really affect you and you’re not close to being slightly dizzy, try ten or more spins in a row on your next set. Keep repeating this until you’ve done at least fifty total spins. Remember, this is just day one. I want your body and you to get a “feel” for spinning. If you need a few minutes between each set of spins, take a few minutes. If five spins didn’t do anything for you, do more. How many? Use your good judgment and guess. Pace yourself while taking constant inventory of your body and mind. Practice. Remember: Slightly dizzy Slightly dizzy Slightly dizzy That’s what you want. Watch TV, Lose Weight When you watch TV, there are usually 20 or more minutes of commercials during each hour of programming. A good idea is to do your spinning during commercials. You could easily get in one or two spin cycles during each commercial break and a minimum of eight sets during an hour of TV. It’s simple to fit these in; you have no excuses! After your first set, use your own good judgment on how long to rest and how many spins you should do for the next set. If you got really dizzy with just five spins, then consider taking a long rest and doing three spins the next time. But whatever you do, don’t quit. For almost every person who follows this outline, their body usually adjusts to the spins within two to seven days... and 14 days at the latest. It rarely takes people two weeks. That can happen though if they had problems with some extreme dizziness to begin with. If you’re one who likes to jump into the deep end of the pool right away, you’re more than welcome to just go ahead and spin around 15 to 20 times on your first try. But I must warn you, you may get really dizzy to the point of being nauseous and throwing up. My fear with you doing that is you may quit the program right away without giving it an honest chance if that happens to you. So again, you’ve been warned! Seriously, please use common sense. Listen to your body and mind. Pay attention to how your body reacts and adjust accordingly with either less or more spins per set, whether slower or faster spins, and more or less rest between each set of spins. Just remember the most important goal with spins: spin to the point where you get slightly dizzy... or at most, do 20 spins during a set. By paying attention to your reaction to each set of spins, you’ll generally know where that point is. Just know this: You’re not in a race. This is something you can and should do for the rest of your life, every day. It’s that important. Even if it takes you two weeks to get used to spinning, so be it. Your body, your health, and your lower healthcare bills will thank you for it over the years. Days Two through Five Gradually challenge your body more as time goes by. Complete more spins per set, spin faster, and rest less between each set. Build up to what your body reacts to well. Note: Each person is different so, as with most routines, don’t get caught up with the numbers. The only number that is important is the total number of spins you do each day. Eventually you’ll want to build up to 100- 200+ spins a day. But that may take a week or two or more for some people. And that’s fine. Progress is more important than speedy progress. Now, understand that 200 total spins each day is your ultimate goal. However you go about this is fine, I just don’t want you to quit during the first two weeks. I am positive that if you do the spins for two weeks, you will be so happy with the results and you’ll be more than happy to do these spins daily for a long, long time. How I Spin Each Day My daily spin routine is simple. I usually spin 20 times for each set. I do 10 to 20 sets daily for a total of 200 to 400 spins each and every day. That probably is on the excessive side, but I enjoy doing them. They make me feel awesome and help tone me up. (My children love to spin with me also!) I usually do three to five sets right when I wake up. After that, I just do them whenever I get the chance throughout the day. Basically I do them when I have room to spin, and about 30 seconds of free time. I don’t feel guilty watching TV here and there throughout the day because I get in a lot of spins during TV commercials also. So, I personally aim for 20 sets a day, but I usually end up doing 10 sets of 20 spins a day... and that is more than enough. I’ve turned them into a habit, so I don’t need to think about it. I just do them when I get a chance. This makes it easy since I don’t have to stress out about how many sets I’ve done and how many more I need to do. I simply have the habit of doing my first three to five sets when I wake up and then the rest will come throughout the day whenever possible. Final Thoughts I think of this when I think of the life-changing power spinning around in circles has for people: I don’t gamble, but imagine knowing of a casino where the blackjack dealer showed his hand before you made your move and didn’t care how many times you beat him. When would you stop going there? I hope your answer to that question would be a resounding, “Never!” (Assuming you’re sane that is!) Well, that is a perfect analogy on the power of spinning around like a child. Once you discover the powerful health and weight loss benefits of spinning around in a circle like a child by practicing it daily, why on Earth would you ever stop doing them? But guess what? I’ve had clients who lost quite a bit of weight and had a huge increase in energy and lots of other health benefits, and yet, they quit doing them. I cannot fathom why. Please, don’t you be one of them. With that said, it’s time for you to do some spins! The 20-Second Bathroom Trick for a Super-Charged Metabolism and a Flood of Energy By Jennifer Jolan and Rich Bryda Cold water, hot water, steam, and ice all produce different reactions from your body and your internal organs. You can leverage this knowledge to increase your energy and improve your metabolism with virtually no effort. Cold Water Does It For the purposes of this report, we’ll concentrate on cold water because it’s considered “alive” as opposed to hot water which is considered “dead.” Cold water energizes, invigorates, and fortifies your body. Cold water creates circulation and overcomes sluggishness while unblocking any energy barriers within your body. One of the reasons cold water works so great is because it stimulates the body into a reaction. I’ll explain this further shortly when we talk about the details of cold water treading. Cold water treading literally turns your body into a fat burning machine. The reason is simple. The cold water stimulates your body to heat up. Your body raises its core temperature as a reaction to the cold water which is in effect forcing your body to a lower core temperature. Shivering for Success Think of your natural reaction when you’re cold. You shiver. That’s your body’s way of creating heat to warm you up. This is very similar in nature. It’s basically a fight between cold water and your body. Your body is saying “Uh, nooooooo, I’m going to internally heat up to fight you. I won’t allow you to change the core temperature.” You can take advantage of this bodily reaction to cold water. Here is how you do cold water treading to force your body into a higher internal temperature that helps burn fat better. Note: This is possible only if you have a tub/shower combo. Keep reading and I’ll show you and even more powerful 20-second version than the cold water treading. Simply take your normal shower. Once you finish, plug the bathtub up while turning the water to as cold as possible. Once you get about three inches of really cold water, stop the water and start walking in place in your cold water. This is often called cold water treading. Keep up your cold water treading for three minutes after your shower. Stepping Up Your Success Now, I’m going to tell you something that is even better for fat loss and general health. It’s harder, but the results are even better: Take a cold shower… I mean a real cold shower. The shower should be so cold that you have a hard time breathing. Every second feels like a minute to you. Cold showers are better than cold water treading for general health and weight loss. A cold shower is more immersive and lasts longer than cold water treading. In spite of its advantages, most people won’t do them. I have a hard time consistently doing them myself. I understand. And women seem to have more difficulty standing in cold water than men. I will admit that I don’t do cold water treading simply because cold showers are better and produce better results. But I don’t use cold water for my entire shower. I’m realistic and know most people won’t do cold showers all the time, and neither do I except on occasion. That is why I started off this report with the next best thing: the cold water treading. Here’s My Routine So here’s exactly what I do. I take my normal shower with the water slightly colder than I prefer. I used to take a regular shower using fairly warm water. Going from that to a half minute or longer of a cold shower was just too much for me, especially in the wintertime. So I began taking “regular” showers, not using cold water, but using cooler-than-normal water. This helps my body “ease into” dropping its core temperature at the end. I find that within about five seconds of entering a slightly cool shower, I no longer notice its cooler than I used to require. Starting at a cool temperature really helps me succeed at the end of the shower where I crank it down to as cold as possible. After I’m done with my normal shower in slightly cool water, I turn the water to as cold as possible and let it spray all over my body for 20 seconds. That’s it. Just 20 seconds. Note: I can stand the cold water much longer in the summer, especially if I’ve been working outside and am hot and miserable from the heat. After my cold rinse for 20 (or more) seconds, I turn off the water and get a towel and dry off as quickly as possible! Again, some days I just can’t bring myself to do this especially on dreary, cold, winter days. You know what I mean right? But I can consistently do this about four days a week, especially when it’s not the dead of winter. One thing to keep in mind is that once you do the cold shower or cold water treading, do not use hot or warm water on your body for the next 20 minutes. You will be tempted to do this! But doing so just ruins everything. The warm water will cancel all the effects your body wants to do to warm you up. You want to give your body a chance to react to the cold. It is that reaction you need for a metabolism boost. The metabolism boost remains after the cold shower unless you shower in hot water. You’re going to first yell and curse my name when you try the cold showers, but you will soon think I’m a genius once you see the results. Try them. See for yourself. It’s 20 seconds of torture, but it’s worth it. More Advantages to Cold Water The list of advantages of cold water on our bodies is quite extensive. Here are some of the things: Enhances your immunity against infections and possibly even cancer Gives glands (thyroid, adrenals, ovaries/testes) a boost, improving hormone activity Jump-starts mood and motivation Cranks up metabolisms to fight problems such as type-2 diabetes, obesity, gout, rheumatic diseases, depression, and more Helps to normalize blood pressure Decreases chronic pain Trains and improves blood circulation Detoxifies your body Fights fatigue Strengthens exhausted, irritable nerves (this one can really come in handy some days!) Rejuvenates, heals, and tones our skin Deepens our breathing Helps with insomnia Improves kidney functioning Reduces swelling and edema Improves lymphatic circulation, thereby increasing the ability of our immune systems Reduces stress by regulating our autonomic nervous systems Regulates temperature which in turn helps to fight chronically cold hands and cold feet and excessive sweating Keeps our hair healthy Helps our bodies guard against hemorrhoids and varicose veins Reduces typical aches and pains From personal experience, I must say I cannot disagree with this list. For example, I’ve taken a cold water rinse right before bedtime and I do sleep better. Perhaps it’s because we sleep more soundly in a cool room, so by cooling down our bodies before bedtime, we kick-start our sleep cycle’s response. In addition, I can go through times where my body just won’t warm up or cool down. All women can relate to this at one time or another. Assuming there isn’t a hormone problem going on, I did begin to notice that my seemingly-always cold hands and ice-cold feet didn’t seem to happen as frequently as they used to before the cold rinsing. And who wouldn’t benefit from a little less depression from time to time? Consider this research from the Department of Radiation Oncology at Virginia Commonwealth University School of Medicine: ... indicates that short cold showers may stimulate the brain’s “blue spot”- the brain’s primary source of noradrenaline — a chemical that could help mitigate depression. I guess a bout of the blues isn’t so bad after all. Good News for Men! Men have been told from time to time to, “Go take a cold shower.” It’s often said to rev down his engine. What may surprise you is the Thrombosis Research Institute showed that taking cold showers can: ...actually increase testosterone production in men. Increased testosterone levels not only boost a man’s libido, but also his overall strength and energy level. If you’re looking to increase your testosterone, instead of juicing up like Mark McGwire, hop into a cold shower. If you’re a woman and going through fertility counseling right now, this might be a tip to tell your husband about. Medically, the reason a man’s scrotum hangs down is to keep his sperm count slightly cooler than his body’s core temperature. The little swimmers do much better in a slightly cooler environment than a warmer one. This is why couples having fertility issues are told that the man should always wear boxers to give more room for ventilation down there. The cold showers certainly don’t do any harm in that area either. Experiments done in the 1950s showed that hot baths for men were an effective contraceptive. Those men who took a half-hour hot bath every other day for three or more weeks were statistically infertile for as many as the next six months. Recently, the University of California at San Francisco studied this same issue using men who were exposed every week to a half hour of “wet heat.” Wet heat primarily included hot baths. Keep in mind, this was only once a week but when the men eliminated this exposure, their sperm count went up by almost 500%! Not only that, the sperm’s motility improved too. While switching from a hot to cold shower may not have quite as dramatic of an effect, if you’re trying to help you two create a new little life together, those cold showers surely won’t hurt. OK, how about we move on?! Keeping Our Skin Nice with Cold You surely know that after cleansing your face, rinsing with cold water helps improve your skin’s softness and look. This is because the cold water closes our pores and tightens our skin. (The opposite effect that warm water has, opening our pores, is why warm water is best to apply before we begin cleansing our face.) A website called, Secrets of Longevity, goes into great depth about the advantages of cold water, not just on our skin but on our health as well. It discusses the benefits to our circulation and also to our overall mental state. The site discusses how cold water helps flush toxins from our skin. (This is akin to the old tip that says to rinse razors in cold water and not hot water. Cold water cleans better than warm water because soap washes away more readily.) Most homes are supplied water by municipalities. And governments love to pollute us with chlorine and other toxins they add to our water supplies. The cold water showers, if you can stand them, eliminate the steam that you breathe during showers. This keeps the chlorine out of your lungs which you otherwise would inhale in a hot shower. Keep in mind that heated water is actually, until modern times, a luxury and not commonplace in every home all the time. Maybe people were heartier back then, but we can overcome today! Conclusion The bottom line is this: although nobody likes to begin the day with a cold water shower, and almost everybody hates taking cold showers from start to finish, and even cold water treading is difficult for some to endure for just 20 seconds, the wide range of benefits that cold water treatments can have on us makes it worth the effort to see just what we can reasonably take. Remember, it does get easier so don’t judge your long-term success by your first attempt or two with cold water. You can get used to more than you think. And your skin and the rest of your body will thank you for it! If possible, consider doing these 20-second cold water shower rinses twice a day for even more health benefits. One Tablespoon of this $6 Supplement Detoxes 900 Yards of Toxins from Your Body By Jennifer Jolan and Rich Bryda Many of the detoxing methods and supplements and elements remove specific toxins from specific areas of your body. This is fantastic because many toxins sink into your cells and need to be grabbed out by any means possible. Still, for the most part, your body does a good job at detoxing itself. When you eliminate urine and waste, your body has placed toxins in that waste. This is a perfect avenue for toxin elimination. When you breathe out, your mucous membranes secrete toxins that leave your body through your exhaled breath. When you sweat, your sweat glands are secreting waste out your skin’s pores. Exercising will improve the flow of those toxins, both from your sweat glands and through your intensive breathing. It turns out your skin is a major toxin remover. Not only do your sweat glands secret toxins, but waste can leave any pore in your body. Cellular and other bodily waste is eliminated through your pores. The Helpful Clay As you can see, without doing anything you are a detoxing machine. The problem is that depending on your lifestyle and the food you eat, the toxins catch up to you. Even before the somewhat dangerous and low-nutrient modern-day food supplies, and before the industrial revolution added pollutants into the air, and before plastics, pesticides, and other containments entered our water supply, our bodies would still get sick every year or so to perform an extra-powerful detox. But today’s world and our typical bad eating habits and bad food supplies means that for many, even a once a year sickness and routine bodily removal cannot keep up with the toxins that enter our systems. Some of the symptoms of routine toxicity are: Mental dullness Aching-stiff joints Gas and bloat High acidity Digestive problems with the stomach and colon Acid reflux Fatigue Let’s get back to our skin. You might already know that our skin is the largest organ of our bodies. The reason it’s large is not due to its thickness but to its surface area. Throughout our skin on every part of our bodies are pores that help keep us as clean as they can. And we can tap into those pores to enable even more toxins to leave through our pore through the use of clay, bentonite clay to be specific. More specifically known as Calcium Bentonite Clay therapy, the application of bentonite clay is one of the least invasive and safest means to detox that has been found. Plus, bentonite clay has a high negative ionic charge and is highly effective in pulling the toxins out your skin like a magnet pulls metal filings. Clay is alkaline-based, whereas we typically consume far too much acidic substances in our diets and on our skin. So after bentonite clay therapy, our skin not only has released extra toxins over the amount it released by itself, but our skin feels nice and clean afterwards and leaves us often feeling refreshed like a swim can sometimes do. The clay’s alkaline property works to balance our skin. Note: Clay is often used for acne treatment. Detoxing through the use of clay is nothing new. As a matter of fact, it may be one of the oldest detoxing methods known to man. Indigenous tribes have been using clay for skin therapy thousands of years as have more advanced civilizations. Note: Clay is even used to treat radiation exposure. Clay as a Catalyst As well as clay works on our skin, bentonite clay is also taken internally. Both on our skin and when we consume it internally, clay is a catalyst. By that I mean it becomes active in the removal process of toxins from our bodies. Technically, a catalyst boosts chemical reactions and does so efficiently. Clay’s catalyst action is so efficient it can remove toxins from our lower colons before they enter our bloodstream. This frees up nutrients to repair and revitalize our bodies. In addition to its detoxing benefits, is clay actually the foundation of eternal youth too? Dr. Alexis Carrel of the Rockefeller Institute for Medical Research seems to think so based on his experiments from way back to the 1900’s. Years to Your Health explained Dr. Carrel’s study this way: “He managed to sustain the life of cells from a chicken embryo by immersing the cells in a solution containing all the nutrients necessary for life and changing the solution daily. The cells took up nutrients from the nutrient-rich broth and excreted their wastes into the same solution. “The only thing Dr. Carrel did each day was discard the old solution and replace it with fresh nutrient solution. The chicken cells lived for 29 years until one night Dr. Carrel’s assistant forgot to change the polluted solution! We do not know how much longer the cell’s life could have been maintained. Dr. Carrel concluded at the end of his experiment that the cell is actually immortal. It is merely the fluid in which it floats which degenerates. “He is quoted saying ‘The cell is immortal. Renew this fluid at intervals gives the cell something on which to feed and, so far as we know, the pulsation of life may go on forever.’ The average chicken lives about 7 years. His detoxified, properly nourished chicken cell lived for 29 years.” The upshot was that Dr. Carrel believed we don’t get old because of time. Instead, we get old due to toxin build-up at the cell level. As it builds and our bodies cannot keep up, cell breakdowns begin to cause “aging.” The Clay Therapy Ran Knishinsky, author of The Clay Cure, is an advocate of eating or drinking clay daily. He states some of the benefits reported by people using liquid clay for a period of two to four weeks include: Improved intestinal regularity Relief from chronic constipation Diarrhea, indigestion Ulcers A surge in physical energy Clearer complexion Brighter, whiter eyes Enhanced alertness Emotional uplift Improved tissue and gum repair and increased resistance to infections. Clay works on the entire organism. No part of the body is left untouched by its healing energies. AboutClay.com suggests taking clay daily to maintain a good, clean digestive system. For adults, a normal dosage would be to take one to two ounces daily. When taking clay internally, keep your body hydrated by drinking eight to ten glasses of filtered, nonchlorinated, non-fluoridated water daily. The water helps to soften and loosen impacted fecal material lining the walls of your small intestine and colon. This material is then absorbed by the clay and removed from the body through normal elimination. Note: For an initial detox, take a higher dosage as follows: three ounces three times a day for four to six weeks and then gradually reduce to one to two ounces daily for maintenance. One of the best clays available is Great Plains Bentonite Clay. You can find it on Amazon here (I personally use this): http://www.amazon.com/Yerba-Prima-Bentonite-DetoxOunce/dp/B00016XI7A/ref=sr_1_1?s=hpc&ie=UTF8&qid=1357160080&sr=11&keywords=great+plains+clay For using clay on your skin, you should look into clay baths (you can also use it just as a facial). These are highly beneficial for detoxification, especially for cases of heavy metal poisoning. A typical clay bath would involve using a couple of cups of powdered clay in a bathtub and then run very hot water over the clay, as hot as it gets. Use a whisk to stir the clay around and to help it dissolve. When you’ve got about 3 inches of water in the tub and the clay is dissolved, start adding cooler water until the water reaches the desired temperature. The bath should neither be too hot nor too cool, but should be nice and warm, as warm as is comfortable. Bathing time depends upon your condition, but can be anywhere from 10 to 20 minutes at the most. If you stay in too long you may have what is known as a cleansing reaction and can experience fatigue, headaches, muscle soreness, and so on. If this happens to you, note how long you were in the bath and spend half that time the next session. Here is an inexpensive bentonite clay that you can purchase on Amazon (I personally use this): http://www.amazon.com/Aztec-Secret-Indian-HealingCleansing/dp/B0014P8L9W/ref=sr_1_1?ie=UTF8&qid=1363215052&sr=81&keywords=aztec+secret+indian+healing+clay Do-It-Yourself Face-Lift: How to Look 5 Years Younger in 2 Weeks – Got 5 Minutes a Day? By Jennifer Jolan Women spend billions of dollars on cosmetics each year to look younger, eliminate wrinkles, nourish the skin, cleanse the pores, and so on. You know how we are. We keep cosmetics for years and decades, holding onto all the old stuff and getting more new ones. And we don’t get rid of it unless we find it all dried up in the bottle. At that point, we agree it might be time to discard our unused cosmetics. This bonus will show you how look younger, naturally. If you’re willing to give me a few minutes of your time each day, then I promise you’ll look younger in a few weeks. About Your Face Now you must understand a little background before we go further. Your face has 85 muscles in it. These muscles support your face. Like other muscles, they need exercising if you want them to remain pliable, firm, strong, and healthy. A lot of the aging and sagging that happens to person’s face is due to those facial muscles not being able to support the covering facial skin any longer. So this report will deal with facial exercises, acupressure points on the face, and some common grocery store items that benefit and extend your facial health. Note: The DataFace web site offers lots of information about how the muscles in your face work. They have really cool videos that show which muscles produce different facial expressions. It’s true. By regularly exercising the underlying muscles in your face, you’ll be able to firm up your face, eliminate wrinkles, and reverse aging. The only way you can nourish the skin on your face is through the blood. Exercising your face brings fresh supplies of blood to your facial tissues giving you healthier, firmer skin. Many people refer to facial exercises as facial yoga due to the toning and the ability of them to retain a youthful appearance. Dr. Joseph Mercola, MD, thinks highly of these and related facial exercises. He recently wrote this on his Mercola.com daily message: Clearly, adopting a regular facial exercise routine is preferred over costly, and potentially dangerous, plastic surgeries. [These exercises] don’t require any special equipment, although you can find various contraptions that claim to help; in general, you can easily perform face yoga using nothing more than your fingers to create light resistance. Note: Throughout this report, I describe and show you several examples of facial exercises. My 11-year old niece drew the illustrations for the face exercises. I couldn’t say no to her – she’s so cute! These illustrations certainly are not of professional quality, but they are good enough to show you what you need to do. And my niece loves seeing her work as much as I do. I think you will too. Face Exercise #1 This first one is simple. Actually, they all are. Simplicity breeds consistency which breeds success. Open your mouth as wide as possible and stick your tongue out as far as possible. The main benefits of this exercise are to eliminate sagging jowls on the sides of your mouth. Doing this also helps to firm up your neck. Keep your mouth open and tongue sticking out for 10-15 seconds. Rest 10 seconds and repeat four to nine more times. Here is a picture of what this looks like: Face Exercise #2 For this one, open your mouth as wide as you can. This exercise is almost identical to the one above, but for this one do not stick out your tongue. The main benefit of this exercise is to firm up your cheeks and jowls. Keep your mouth open in this position for 10 seconds. Rest 10 to 15 seconds and repeat four to nine more times. Here is a picture: Note: Form and ease is more important than numbers when you first begin. Do as many as you feel comfortable as you go through these. If your face begins to tire, do fewer repetitions until you build up your facial muscles so you can do more. It won’t take long. Face Exercise #3 Tilt your head back and stick your chin out as far as possible but while you do this, tense your neck. The main benefit of this exercise is to firm up your neck and get rid of double chins. Note: Simplicity does not mean these are ineffective. Quite the opposite. Take these simple facial exercises seriously. Do them consistently. You will soon be rewarded with better skin and a face you like better! Hold this position for ten seconds. Rest 10 to 15 seconds and repeat four to nine more times. Here is a picture: Face Exercise #4 Open your eyes as wide as possible. This exercise helps with wrinkles around the eyes, puffiness under the eyes, and it firms up the area right above your eyes Keep your eyes open like this for ten seconds. Rest 10 to 15 seconds and repeat four to nine more times. Here is a picture: Face Exercise #5 With each of these, you are changing ever so slightly, working on a slightly different area each time. With your mouth open, clench your teeth together and tense your neck. This helps eliminate any sagging and double chins. Hold this position for ten seconds. Rest for 10 to 15 seconds and repeat four to nine more times. Here is a picture: Note: I guess my niece was trying to scare us with this picture! Face Exercise #6 Puff out your cheeks like a balloon. Puff as much as possible with as much air in your mouth as you can hold. If you need to, put a finger up to your mouth to hold the air in. Then exhale. This helps to firm up your cheeks and get rid of wrinkles. Hold this position for ten seconds then exhale. Rest 10 to 15 seconds and repeat nine more times. Here are a couple of pictures: Face Exercise #7 Close your eyes. Tense your eyelids to the point that you can feel your eyes jumping around under them. Then open your eyes. This exercise helps to firm up loose sagging skin all around your eyes and gets rid of wrinkles in the area. Hold your eyes closed like this for five to ten seconds. Open them and rest for 15 seconds. Repeat this four to nine more times. Note: Remember to tense your eyelids; don’t just close your eyes as you normally do. Here is a picture: Face Exercise #8 Keep your head back and stick your chin out as far as possible. This one will help with double chins and firm up sagging skin. Hold this position for ten seconds. Rest for ten seconds. Repeat for four to nine more times. Here is a picture: Now That Eight Exercises Are Behind Us… Let me pause for a moment before we go further. We just covered the first group of exercises. There were eight of them. You can do them in whatever order you want. You may also skip some (such as the double chin ones if your neck is fine). You may adjust the amount of time you do them. Feel free to modify the rest times between each time. There is no special order of things. You don’t need to follow them in the specific order I’ve outlined them here. For me personally, I focus mainly on exercises #2 and 6. Don’t Have Time to Exercise? Yes you do! These exercises require no gym. They require no equipment. Do them when watching television. You can do them right now and still continue reading this book! When working on the Internet or writing emails you can do some of these exercises. These are perhaps the only exercise you truly can do while you work on other things. At first you may have to do them without combining them with other tasks, but you will soon master these and doing them while working on something else makes all the sense in the world. The Rest of the Exercises The remaining exercises differ from the first eight. But understand neither these nor the ones before are more important than the other set. You can mix some of the above exercises with the exercises I’m about to give to you. Also, all of these exercises can be done while you watch TV during commercials. This is your chance to firm up your face and look younger. It is possible. Sidebar: Reflexology and Acupressure Many of these facial exercises are based on reflexology and acupressure points. By focusing on those, you can do all this: Help eliminate wrinkles all over your face Increase your energy and give yourself better skin tone. The Acupressure.com website describes acupressure like this: Acupressure is an ancient healing art using the fingers to gradually press key healing points, which stimulate the body's natural self-curative abilities. Acupressure was developed in Asia over 5,000 years ago. Using the power and sensitivity of the hand, Acupressure Therapy is effective in the relief of stress-related ailments, and is ideal for self-treatment and preventive health care for boosting the immune system. Acupressure releases tension, increases circulation, reduces pain, and develops spirituality and vibrant health. For a pressure point reference and a self-care guide for common complaints from A to Z, see Acupressure's Potent Points by Michael Reed Gach, Ph.D., with 400 illustrations and over a hundred self-acupressure healing applications. Reflexology provides points of contact that proper acupressure can trigger for improvement. Acupressure based on these reflexology based points of contact, can help improve problems you might have with all these factors: Sexual problems (physical and even emotional help) Trauma healing Emotional pain Back care Stress Beauty (this is what we’re interested in here, but really, we all want the other benefits too) Addictions (by breaking compulsive behaviors through stress and muscular tensions, pressures, and pain With that little bit of background, let’s get back to some exercises for your face. Face Exercise #9 Take your two thumbs and press about an inch under your chin. Each thumb should be about at the corner of each side of your mouth if you were to draw a line downwards. What you are doing is pressing your thumbs into your lymph nodes under the chin. This is a soft, pliable area under your chin. Keep your thumbs pressed into this area for 10 seconds. Rest 10 seconds and then repeat 9 more times. Here is a picture: Face Exercises #10 There are four pictures needed for face exercise number ten. The exercises in this group are acupressure exercises on specific reflexology points in your face and neck. By pressing these reflexology points in a clockwise motion with your finger (or an eraser of a pencil which is what I do) you will firm up your face and look young. I’m not an expert in the science behind reflexology, but these acupressure/reflexology exercises work incredibly well. My face firmed up and looked younger within five days of doing these. When I combined the other facial exercises with the acupressure/reflexology, my results were astonishing. I had a healthier looking face that looked noticeably younger. I must have gotten at least eight comments from my friends noticing how much younger and better my face looked. Back to the exercise. Press a pencil eraser moderately into your skin at each reflexology/acupressure point. Move it in a small clockwise motion at that point. Do this for 10 to 15 seconds at each point. I don’t follow a particular order, and you don’t have to either. I usually start around the eyes. Here is what I recommend: Do these acupressure/reflexology point exercises for 10-15 minutes a day for the first two weeks. After that, you can cut back to five minutes a day. Note: Be careful around your mouth. If you’ve ever gotten a cold sore around your mouth, being too vigorous with the reflexology/acupressure points around the mouth may cause a rash. You can even skip the mouth points and just do the other facial exercises that help with the jowls area (sides of your mouth). Here are the four pictures that show this complete movement. (By the way, I tried to point out the acupressure points with some numbers. When I didn’t think they’re all that readable, I had my niece add lines to “touch” the points in the third figure. I think the end result, however, is that we can all agree I’d better stick to health, diet, and beauty and perhaps not tell my niece the next time I need graphics!) Face Exercises #11 This exercise is the face tap. Simply tap all over your face and neck with your fingers tips. Just light taps. Do this for one minute twice a day. The benefit of this is that the tapping helps the circulation of blood throughout your face. This helps the blood to feed and nourish all your facial tissues and muscles keeping them more elastic, flexible, and young. There is no picture of this. The exercise is self-explanatory. In Conclusion With these face exercises, I promise that if you do them as I outlined them you will look younger and have a more vibrant, younger looking face. You can spare a few TV commercial time for a few weeks to do these exercises. You have no excuse not to! About 2 weeks from the start of this facial exercise program, you can expect the bare minimum to look at least a little younger; and perhaps 5 or more years younger. You may immediately begin to get comments about the incredible changes in your appearance from friends, family, and co-workers. Try the exercises and prove it to yourself. The 50-Cent Miracle Weight Loss Food You’re Not Eating By Jennifer Jolan and Rich Bryda Walk down any grocery store aisle in the industrialized world and you might see tens of thousands of “fat-free” products. Ever since our government decided it would dictate what is healthy and what is not, we’ve been told that fat makes us fat. The food makers followed that lead and began 30+ years ago with fat-free everything. And for 30+ years, we have been getting fatter and fatter and fatter. Hmmm. Maybe… Do you think… Is it just possible that fat does not make us fat and that reducing fat consumption may do the opposite of what we’ve been told all this time? (A sneak peak at the answer below: Yes.) We’ve Become Fat-Free Fatties Due to a government committee that I’ll tell you about in the next section, in 1982 the American Heart Association, the American Medical Association, and the USDA issued a dire and, unfortunately, very public warning against fat in food. This is why only a couple of years afterwards it seemed as though every product on the supermarket shelves was sold in a “fat free” version. That strongly correlates to why the public’s health has degraded ever since as a direct result. Today some products are difficult to find in a non-fat-free version. Look through the salad dressings in your store to see the large percentage that are fat-free. Walk into any of those Can’t-B-Yogurt stores and see how many flavors are fat-free. In some of them, every flavor is fat-free. One such store I walked into recently had absolutely no yogurts that were sugar-free! And therein lies the lie; to make fat-free “food” good enough for consumers to eat, food makers must add sugar and loads of it. But the sugar is disguised as High Fructose Corn Syrup, Fructose, Dextrose, maltodextrin, and many other nonsugar-sounding names because if they told the direct truth – that the product is loaded with sugar – you wouldn’t buy it even if it also says it is “fat-free.” What’s interesting is the result of the three-plus decades that have occurred since that dire warning against fat. The amount of fat in products worldwide has decreased dramatically. According to Dr. Robert H. Lustig, M.D., the UCSF Professor of Pediatrics in the Division of Endocrinology, from 1960 to 2000, the percentage of calories from fat has dropped systematically from 45% down to 30%, a move of 1/3rd. While all that fat has been removed from our available foods, the obesity prevalence has increased in that same time period from 14% to 30%, a whopping 200% increase in fat people! Less fat in food, but we’re far fatter than before. It’s not the fat in foods! But What About Fat, Eggs, Milk, and the Horror of Horrors Red Meats? The damage that sugar and sugar substitutes do to your brain first, and then your body, is so great that even the government’s FDA will admit eating too much sugar is bad for you. If I were a cynical person, I might say that warning against sugar is one of the only accurate statements they’ve made since the early 1980s. Others even more cynical than that might say if they could get away with not saying sugar is bad for you they would. After all, their food pyramid has been a complex system of lies that promotes a high amount of daily sugar since they released it decades ago. The food ideas that the government promote literally says: eat more unhealthy foods than healthy foods. If this surprises you, please understand that grains, the entire bottom layer of the FDA’s food pyramid, are bad for you. Grains turn to sugar almost as quickly as pure sugar turns to sugar. Yes, the fiber is okay for you but the heavy fiber recommendations that have been touted for the past many years is nothing but laxative-maker income as doctors such as William Campbell Douglass have for years been saying. You’ll get plenty of fiber through vegetables and nuts. Fruit actually turns to sugar in your blood stream more quickly than grains and the FDA has said you need lots of fruit, almost as much as grains, in your daily diet. Sugar piles up on top of sugar. I’m a huge fan of vegetables, but not all vegetables are created equal. Starches such as corn and potatoes are horrible and do you know why? Because they turn to sugar rapidly in your body! Some vegetables, however, are fabulous as opposed to flabulous. I’m going to tell you about one as soon as I get off my soapbox. Note: In a recent show, Dr. Oz mocked low-carb diets by saying he tried one for 24 hours and was jittery and anxious by lunchtime. What he dishonestly (perhaps he just didn’t realize the truth) led viewers to believe is that his lack of fruits and grains that morning made him jittery. The truth was more likely that his body was going through major sugar withdrawals. At least the FDA didn’t put meat on the very top of the food pyramid. But they want you to eat far less meat and milk and cheese than sugar in the form of grains, fruits, and indiscriminate vegetables. And fat… such as nuts and olive oil and the fats in healthy vegetables? Fat is the worst offender they say. So the FDA put the fats on the very top. Fat makes you fat right? You know the answer; at least you know what I say the answer is. George McGovern headed the committee that developed the government’s food suggestions a few decades ago. He headed the McGovern Committee that gave America and the world the food pyramid. What’s important to us is that the McGovern Committee was loaded with animal rights organization members that knew it couldn’t get America to end its healthy love affair with meat overnight. Instead, they began promoting heavily the use of sugars on top of sugars, or as they call them, grains and fruits and starchy vegetables, in an effort to get Americans to eat less meat. Along the way they came to the completely unscientific and constantly-disproved notion that fats in food make us fat so the number one enemy of their committee was fat. (NOTE: I love animals, don’t get me wrong. What I don’t love is hidden agendas.) Did you know your brain is composed mostly of fat? Your brain requires fat to be healthy. So you have two choices: 1. Make your brain fat with non-nutritional sugar from grains and lots and lots of fruits and starchy vegetables, or 2. Supply your brain with healthy fats that don’t add poundage to your hips and thighs by eating healthy meats, good dairy, and get plenty of fats from nuts and oils such as coconut, flaxseed, good non-starchy vegetables, and olive oils. As for me and my house, we’ll eat lots and lots of fats. But we’ll eat healthy fats like the ones in #2 above. Note: Did you know that farmers feed calves skim milk when they want to fatten up the calves? We turn the government’s food pyramid upside down. And our family’s blood screenings which we get annually show the direct results of eating extremely little grain except as a “treat” once in a while, far more fibrous vegetables than fruits, no fruit juices, a vast amount of cage-free organic eggs, grass-fed beef, free-range chickens, wild Alaskan salmon, nuts, seeds, olive oil, macadamia nut oil, flaxseed, coconut, and other oils that our brains soak up and utilize those good fats and nutritional foods like a sponge. (Oh… and one more little vegetable will add a tremendous bonus to your health and waistline. I’m about to tell you about it.) The reason we’re fat as a society must be something else besides fat in our diets. Only two options remain: protein or carbohydrates. All those sugars with non-sugary names aren’t made from protein; those are carbohydrates. It’s the carbs making us fat and squeezing far more fat matter into our brains where we function far less effectively resulting in our brains being hampered from keeping us fit and trim. All That to Say I suspect my Editor is going to wonder why I went into all that background before revealing this chapter’s primary subject. I did so because I care for you. I want you healthy! I want your family to be healthy! See, if I tell you the truth and if you try what I suggest, you will get great results. Then you will be glad you bought one of my books. You might even buy more of my books, especially some of my healthy eating titles that explain just what makes a perfect diet perfect. (I’m not embarrassed to tell you that a quick list of titles is here: http://www.amazon.com/JenniferJolan/e/B004V1ZAB8/ref=sr_tc_2_0?qid=1362839822&sr=8-2-ent.) But it’s not just for those reasons I’m so passionate. I think our nation cannot be healthy without healthy people. We have all sorts of problems right now, but we must fix ourselves before we feel like addressing other problems. This means telling the truth about the food lies and eating myths. Exposing the truth about fats and good proteins such as grass-fed beef, wild Alaskan salmon (about the only fish available without toxic mercury), range-free chickens and eggs, and yes, even nitrate- and nitrite-free free-range pork is the very best thing I can do for you. I do the same for every client I have. Slowly, we are actually seeing a change from the Food Pyramid lies of yesterday. People are beginning to realize we’ve been sold a bunch of myths on what makes us healthy and trim. Authors such as Tim Ferriss are finally getting enough exposure that people are severely questioning they diets and adding healthy fats back into their diets in record numbers. And the smart people always have one thing within easy reach: The avocado. All That to Talk about a Little Green Vegetable? Yes. Just as the egg – when it comes from a free-range chicken – is one of the most perfect proteins available to us today, the avocado is one of the most perfect vegetables. I’ll just say the statements up front and let you research their authenticity: Avocados are full of fat. That fat is healthy fat – extremely healthy fat. Eating an avocado daily will – assuming you lay off the starchy carbs, sugars, most grains, pastas, and reduce fruit consumption – help your body shed weight. Note: Avocados are usually about 50-cents each. Fortunately, their thick skin protects you better from pesticides that growers put on the non-organic versions. It’s probably always best to buy organic avocados if you have a choice and if you have extra money, but if not, their protective thick skins will make conventional, non-organic avocados okay for you and your family. Skip the packaged snacks and buy four or five avocados the next time you’re at the store. Your body will thank you. Read that last bulleted item once more: Eating an avocado daily will – assuming you lay off the starchy carbs, sugars, most grains, pastas, and reduce fruit consumption – help your body to shed weight. If you don’t eat avocados but do the other things (lay off the starchy carbs, sugars, most grains, pastas, and reduce your fruit consumption), you will lose weight if you’ve been overweight until then. I am going the extra step though. I’m trying to state clearly that if you do those things, and you should, if you also add avocados regularly to your diet your results will be better than if you don’t eat the avocados. But “I Hate Those Things!” Don’t like avocados? Heaven forbid! If you hate avocados, then don’t eat them. If, however, you do hate their taste (I can’t imagine that, but a small percentage of people do), try to find some way to enjoy them other than eating them raw. For example, do you like guacamole sauce? If so, most guacamole sauce is 100% healthy and good for you and encourages weight loss, so get your avocados there. Note: I’ll include a few avocado recipes a little later that you can – and should – try. I usually eat an avocado with my eggs. What They Do For you Serotonin is a brain hormone that has been called The Happy Chemical because higher levels of serotonin make you more joyful and confident. People who find they need an emotional boost often are low on serotonin. One kind of fat that benefits and stimulates serotonin production is the fat from an avocado. The avocado is a vegetable but unlike most vegetables avocados are also wonderful sources of fat. You often find avocados in Mexican food. Mexican food is wonderful for your brain and your waist (as long as you don’t eat the tortillas, chips, and rice). All that meat, salsa, vegetables, beans, sour cream (if real), and guacamole you get in Mexican food are all fantastic for you. This of course is most true if you locate a Mexican restaurant that understands the importance of organic or grass-fed beef, but lacking that you can make your own Mexican food. Your family will love dinner and they’ll begin to lose weight! Get avocados. Try to find organic ones but lacking those, buy the conventional ones. Eat as many as you want but at least one a day. Note: Remember I said the egg is a perfect food? Want to improve on perfection? Eat a half an avocado with your morning eggs. Delicious! Add some beans and you even improve upon that perfection due to all the protein, fats, and fiber in the meal. Keeping Them Fresh Avocados do go soft and mushy quickly. At the store, buy firm avocados so they last at home longer. To stay on top of things and make sure that you eat just-right and just-ripe avocados, determine how many you and your family eat daily. Get a brown paper bag. Each day, put the next day’s avocados in the bag and leave it overnight. By the way, it’s a myth that you shouldn’t keep half-cut avocados in your refrigerator. Avocados do stay good in your refrigerator. This is important if you have a half of one left over and want to eat it the next day. To save the uneaten half, keep the big seed in the half you save, put it in a baggie, and place that in the fridge. It’ll store nicely in your fridge for the next day, or even two or three days without mushing up too much. Cutting Them Properly The way you get to the edible center of the avocado affects the nutrients that end up in your body when you eat it. To preserve the area with the highest concentration of nutrients such as antioxidants, you want to peel the avocado with your hands, as you do with bananas, like this: Cut the avocado length-wise, around the seed Holding each half, twist the halves in opposite directions. This separates them from their seed Remove the seed Cut each half lengthwise Use your thumb and index finger to peel the skin off each piece More Advantages to this Perfect Vegetables Dr. Joseph Mercola, M.D., often discusses the avocado as a healthy vegetable, citing how that under-utilized veggie can help with: Cardiovascular disease Weight loss Diabetes Improves your body’s ability to absorb nutrients from other sources And the avocado is full of its own nutrients and healthful ingredients without adding fructose to your body as so many fruits will do. The avocado is known for supplying you with these and more: Fiber Potassium (more than twice the amount found in a banana, I’ll talk about this more in a moment) Vitamin E B-vitamins Folic acid In more stunning news, Dr. David Heber, M.D., PhD reported in Medical News Today the following: The researchers observed a significant peak (approximately a 70 percent increase), of IL-6 four hours after the plain burger was eaten, but less effect on IL-6 (approximately a 40 percent increase) over the same time period when fresh avocado was eaten with the burger. Additionally, the study found that when fresh Hass avocado was eaten with the burger it did not increase triglyceride levels beyond what was observed after eating the burger alone, despite the extra calories and fat from the fresh avocado... The pilot study also reported that the difference in peripheral arterial blood flow (the movement of blood to different parts of the body, as measured by PAT), a predictor of vascular health, after eating the hamburger meal compared to the hamburger-fresh avocado meal was approaching statistical significance... PAT scores significantly decreased (signifying reduced blood flow) only after the plain burger was eaten (approximately a 27 percent drop, on average) compared to a burger with fresh avocado (approximately a 4 percent drop, on average, signifying less reduction in blood flow You may have heard that salt is bad for you. This is simply untrue. What is unhealthy is an imbalance in sodium compared to potassium. If you up your salt intake, but also increase potassium, you will rarely have any problems from the salt. Note: Plus, using a good sea salt in its natural form (it comes packaged as a nonbleached rough-looking salt such as that sold by Real Salt), you improve your health even more. Your body requires sodium and sea salt is by far one of the most excellent ways you can give your body what it needs. Avocados are high in potassium and low in sodium. Therefore an avocado a day helps improve your sodium/potassium ratios, keeping your body’s “electrolytes” in balance. Raw or Otherwise, They’re Delicious! There are so many things you can do with this ultra-healthy, high-good-fat vegetable. So many people fail to understand how vital these are to our daily diets. Given how good the fat in an avocado is, for example, use an avocado as a fat replacement in your baking. Replace the fat called for (like oil, butter, or shortening) with an equal amount of avocado. You can also use the soft avocado as a first food for babies. Rotate the avocado with other kinds of early baby foods. (If you must use store-bought baby food, always get organic.) (In an unrelated note, never give your baby water tainted with fluoride.) For hundreds of unique recipes that include avocado–from salads to dessert whip and everything in between – check out the California Avocado Commission’s website here: http://www.californiaavocado.com/recipes/ One of the recipes on the site is so incredible, I must tell you about it. It’s the worldfamous California’s Best Guacamole (http://www.californiaavocado.com/recipe- details/view/31437/california%E2%80%99s-best-guacamole) that takes the following ingredients: Ingredients One Anaheim chile One heirloom tomato, diced small One clove garlic, minced One sweet onion, diced small Four ripe, fresh large California Avocados, seeded and peeled One lime for juice only Salt and pepper, to taste Preparation is so simple once you gather those ingredients: Roast chile on the stove top until the outside chars and blackens. Let it cool and then wipe off the charred layer with a towel. Cut the stem off of the chile and slit it open. Using a knife, scrape off the seeds and discard them. Dice the roasted chile and place in a medium bowl. Add remaining ingredients and mash together. Recipe creator Kate uses a bent fork to make it easy. One final bonus, you can “Serve it with everything!” If you promise me you’ll only use healthy, mercury-free wild Alaskan salmon, I’ll tell you their most-amazing Chili-Rubbed Salmon with Cilantro Avocado Salsa recipe: Medium tomatillos, husked and rinsed Quarter cup chopped green onion Quarter cup chopped fresh cilantro One and a half Tbsp. fresh lime juice One ripe, large, Fresh California Avocado, seeded and diced One tsp. jalapeño, seeded and minced (or to taste) One and a half tbsp. chili powder 1/2 tsp. cumin (an excellent spice for your brain!) One Tbsp. brown sugar One tsp. kosher salt (Real Salt sea salt is even better) Four (6-oz) wild [Alaskan] salmon fillets (The good folks at the California Avocado Commission suggest Copper River salmon but the wild Alaskan salmon is healthier and safer.) Prepare as follows and just sit back and bask in the compliments your family and guests will give you! 1. Place the tomatillos in a saucepan and cover with water. Bring to a boil, then simmer for five minutes. Remove tomatillos and when cool enough to handle, roughly chop them. 2. Combine the tomatillos, onion, cilantro and lime juice. Gently fold in the avocado and add jalapeño. 3. Season with salt to taste. 4. Preheat your oven to 350 degrees. Combine chili powder, cumin, sugar and salt. Sprinkle fish with spice mix. 5. Heat a large oven-proof nonstick skillet over medium heat. 6. Cook the salmon rub side down for two minutes then flip and place pan in the oven for about five to six minutes or until cooked through. 7. Transfer fish fillets to plates and top with the Cilantro Avocado Salsa. #1 Cheap Supplement that Reverses Gray Hair & Infuses Health into Your Body By Jennifer Jolan and Rich Bryda Let me begin this with a special warning – The results herein are had by some, but not by all. I get praise for furthering this information. I also get told it doesn’t work. Which is it? Turns out, if you have gray hair and the following advice does not reverse it, you’ll still be healthier if you do it. This information loads up your body with tons of nutrients like no other. So, if you want to reverse graying hair, your hair may benefit as some other people’s do. Some combination of this and whatever the person’s doing already seems to be the key to work that wonder. But if your hair doesn’t begin to reverse, your “feeling your age” just might because the thing I’m about to tell you about is a power-packed goodie! Possible Causes of Graying Hair Age by itself is not the cause of graying hair. Yes, more gray hair is often present the older we get. But many people go gray much earlier than some. Note: According to EarthClinic, more than 40% of Americans have some gray hair by age 40. The causes of graying hair are debated even in today’s modern world. Some attributed causes are said to be: Old age Heredity Decrease in the nutrient copper B12 deficiency Thyroid imbalance Reduced blood quality Kidney weakening Hormone imbalance Perhaps graying hair comes about as a combination of one or more of the attributes above. My Clients May Be an Indicator I will tell you a gray hair anecdote from what I’ve witnessed with my diet and exercise clients. That is, if some of my clients begin to get sloppy in taking care of themselves and they begin eating more starchy carbs and sugars and exercising less frequently (or not at all), and they begin gaining weight, one of the things I have noticed more than not is an added amount of gray hair. This added salt-and-pepper look in their hair is one common element. It always surprises me that as they lose their grasp on their health, weight, and exercise, their hair color seems to correlate with more added gray hair as they lose control. A Possible Gray Reversal Fresh wheatgrass might very well reverse your graying hair. A primary nutrient in wheatgrass is Chlorophyll, from the Chlorella family. It’s what gives grass its green color. It’s what gives wheatgrass its green color. But it won’t make your hair turn green! Algae aren’t just for the sea – they’re good for your body. Chlorella is an algae. Chlorella contains pigments, or coloring, and that coloring is green. Green in this form is good. Chlorella is the richest known source of chlorophyll on earth and is chocked full of healthy stuff. In addition to putting good things into your body, and adding energy enzymes to jump-start your body’s engine if you need a boost, its detoxing properties takes out a lot of bad stuff. Chlorella is known as a whole food supplement. It contains more than twenty different vitamins and minerals and is a rich source of amino acids, and iron, in addition to chlorophyll. Jump into a Jamba Juice If you’ve been to the juicing store called Jamba Juice, you may have seen wheatgrass on the menu. You can order a shot of wheatgrass, juiced directly from chlorophyll-laden wheatgrass. And yes, wheatgrass does look like grass! I always get a double shot of it. Nevertheless, if you haven’t had wheatgrass shots, you should begin with just a single shot. Your stomach may need some time to adapt to the powerful inflow of nutrients. Juicing with wheatgrass is like taking chlorella on steroids. The taste is a strong, green taste (stronger than any green salad you’ve ever had in your life) and is extremely powerful. Most people don’t like it the first time they try wheatgrass. Actually, I’ve had it hundreds of times and I still don’t like it! But that matters not to me. The incredibly rich vitamin and nutrients in chlorella and all chlorella’s cousin greens that comes in the wheatgrass is why I take it. Some places, such as Whole Foods, will offer wheatgrass, but they don’t cut it fresh right before they juice it. If this is the only option just save your money and look elsewhere for your chlorophyll and chlorella. Back to the Hair Wheatgrass is known to help kidneys and blood quality. According to The Wheatgrass Book by Ann Wigmore, wheatgrass cleanses your blood and even reverses your body’s entire aging process by rejuvenating aging cells and tightening loose and sagging skin. Note: Wheatgrass is a powerful anti-toxin agent for your body. The horrid heavy metal mercury, left in your body from just about any fish you’ve eaten the past 20 years and from amalgam dental fillings, is wheatgrass’s number one victim. Wheatgrass can reduce the mercury levels in most people who take it. Its wheatgrass’s ability to reverse many signs of aging and its ability to cleanse your blood that may be the reason some people see a reversal in gray hair when they take wheatgrass. Interestingly, in the book Health Magic Through Chlorophyll from Living Plant Life, the author cites cases where he was able to double the red blood cell count in a matter of days merely by having patients soak in a chlorophyll-water bath. Our skin is a powerful absorber of good or bad. Combined with taking wheatgrass by mouth, your entire wellbeing can be improved after a few weeks. So if you are seeing signs of the dreaded gray, try wheatgrass. Always get it freshly juiced if possible. (You can purchase a Champion Juicer to juice wheatgrass yourself at home. Wheatgrass isn’t difficult to grow.) One to two ounces a day are more than enough to begin to benefit from wheatgrass. If you live in a small town without a fresh wheatgrass source and you don’t have room or money for a juicer, you will benefit from a high quality wheatgrass powder such as the organic Wheat Grass Juice powdered Green Superfood here: http://www.amazon.com/Now-Foods-Organic-Powder-4-Ounce/dp/B0014M1WA0 The manufacturer NOW uses a cold temperature drying process to ensure that no vitamins or nutrients are destroyed going from the fresh wheat grass to the powered form here. I use 1-3 tablespoons of this wheat grass juice powder daily. How to Get Rid of Allergies in 90 Seconds with Water By Jennifer Jolan and Rich Bryda The neti pot (rhymes with Betty pot) is a small pot, often made of ceramic, in which you put a saline (salty) solution and use it to irrigate your nose’s nasal passageways. The process of using a neti pot is also called nasal irrigation or nasal flushing. The neti pot is an effective way to detox your nose. Your nose plays an active role in your body’s normal detoxification process. Mucus is formed and excreted through your nose. (Mucus is also excreted through your mouth when it builds up to excess levels such as when you are sick, have sinus infections, or when there is such a temporary build-up of mucus that your nose cannot handle it alone.) Normally, your nose drains mucus normally and without fuss. You don’t notice much of its activity. Just by breathing, some of the mucus dries and evaporates. Like sweat that leaves your pores and evaporates, detoxing your body through your skin, normal breathing will expel small amounts of mucus and drainage that evaporates out of your system. Sometimes you’ll need a tissue to blow your nose, even when feeling fine. By blowing you are helping to expel the mucus and other waste from your body. Nasal irrigation is said to promote good sinus and nasal health. This includes people with chronic sinusitis that can include symptoms of facial pain, headache, halitosis, cough, anterior rhinorrhea (watery discharge), and nasal congestion. These patients often find nasal irrigation using a neti pot to provide effective relief. In published studies, “daily hypertonic saline nasal irrigation [fancy talk for using a neti pot] improves sinus-related quality of life, decreases symptoms, and decreases medication use in patients with frequent sinusitis.” As long as you follow your neti pot’s instructions, it has no major side effects to speak of. When you feel yourself getting sick, it’s time to ramp up your use of the neti pot. But even when you feel fine, a neti pot helps unclog and eliminate mucus and drainage, thoroughly cleaning out your sinuses. By using a neti pot from time to time, or even on a regular basis when feeling good, you help reduce potential infections that can build up in your nasal cavity and you promote a cleaner air system in your body. The neti pot is also beneficial for those who suffer from allergies. Introducing The Neti Pot Here is a picture of a traditional neti pot: You can find these on Amazon for a great price here: http://www.amazon.com/Aromatic-Salt-Premium-CeramicGreen/dp/B0013GY8D0/ref=sr_1_9?ie=UTF8&qid=1347212536&sr=89&keywords=neti+pot. United Kingdom readers can find a similar one here: http://www.amazon.co.uk/Nettie-Elephant-Comfortable-DesignEffective/dp/B001RNGAT4/ref=sr_1_10?ie=UTF8&qid=1347214501&sr=8-10). To use it, you fill the big mouth with a salty saline solution that acts as a nasal cleanser. You use the spout– as difficult as this may sound at first! – to pour the neti pot’s solution through one of your nostrils. The solution will enter and wash your nasal cavity and expel through your other nostril. I’ll describe the use of your neti pot in far more detail a little later. Note: To those who have never used a neti pot, and especially for those who have never seen someone use one, images of waterboarding torture probably come to mind! Almost all of us who used a neti pot for the first time were amazed at how pouring a salty water solution through our primary breathing cavity is almost a non-event, hardly more of a feeling than washing our hands. In fact, irrigating your ear is far more difficult and causes greater after-effects given how difficult irrigation fluid is to get out of the ear canal. During your neti pot’s use you’ll not feel a burning or a drowning sensation. Afterward, you may need to blow your nose two or three times over the next few minutes to get all the excess moisture out but it’s hardly any more than most people do each time they take a normal shower. The Neti Pot’s Cousins As with anything, several kinds of neti pots are sold. Some people do not like to have ceramic items in their bathroom due to the possibility of dropping it during the irrigation process onto the bathroom tile or into the sink. The water and you having to lean over your sink in a slightly awkward manner increases this possibility. Breakage of any glasslike item in a bathroom is a serious problem; if this occurs you must be diligent in getting every sliver and fragment. Therefore, neti pots are available in plastic. Travel neti pots are also offered that come with their own carry bag for the neti pot and rinse solution. Ceramic neti pots are far more durable that plastic ones if you’re careful and can keep from breaking your ceramic pot. In addition, you can thoroughly clean and sanitize a ceramic neti pot (most are dishwasher safe) whereas a plastic neti pot isn’t as durable, especially under sanitizing hot water or your dishwasher. After each use you need to clean your neti pot thoroughly so as not to re-infect yourself or others so ceramic is easier to clean and sanitize. SinuCleanse makes a popular rinse. Here is the packaging showing that a plastic neti pot comes with it: The US Amazon link to the SinuCleanse solution is here: http://www.amazon.com/SinuCleanse-Nasal-System-PlasticPackets/dp/B000TFR6MG/ref=tag_dpp_lp_edpp_ttl_in The UK link is here: http://www.amazon.co.uk/Sinucleanse-Neti-Pot-System-packetsBreathe/dp/B000TFR6MG/ref=sr_1_1?s=drugstore&ie=UTF8&qid=1347215993&sr=11 Note: As mentioned before, plastic neti pots will not last as long as ceramic neti pots if you can keep from breaking your ceramic pot. Having said that, the plastic neti pots are so inexpensive and are basically free with the saline solution that many people just restock on nasal solution that comes with a plastic neti pot and discard their old neti pot. If you’re concerned about BPA (Bisphenol A) dangers in plastics, you may want to stick with a ceramic neti pot only. Although you don’t use hot water for the rinse which would otherwise raise the likelihood of BPA contaminating the solution and entering your body, you will likely use hot water when sanitizing a plastic neti pot. That can leech some BPA out of the plastic and onto the surface which might creep into the next rinse you do. Fortunately, BPA-free neti pots are becoming more common. WaterPik and others make a BPA-free plastic neti pot. Here is the US Amazon link to the WaterPik neti pot and it comes with several rinse packets: http://www.amazon.com/Waterpik-SWN-260-Sinusense-Eucalyptus/dp/B003QY8BIK Surprisingly, a search of Amazon.co.uk showed no BPA-free plastic neti pots. Note: Traditionally, BPA-free plastics are less durable than BPA-laced plastics. This further reduces your ability to use hot water or your dishwasher to sanitize a plastic neti pot. For this reason, if you have BPA concerns you’re probably better off sticking to a ceramic pot. Instead of a traditionally-shaped neti pot you can use an alternative that accomplishes the same thing. Nasaline offers a syringe device that enables you to control the flow of the rinse more easily than pouring a neti pot through a nostril allows. As inert as the sensation of using a neti pot is, some question whether you need to control the flow rate but others really like having the syringe and find it a little less messy. Here is a photo of this Nasaline alternative and the solution that comes with it: You can get the Nasaline at Amazon here: http://www.amazon.com/Nasaline-Adult-Nasal-Rinser-Ki-boxes/dp/B0001C0FLG UK Amazon buyers can get the Nasaline here: http://www.amazon.co.uk/NASALINE-SOOTHING-SALINE-IRRIGATIONSYSTEM/dp/B0027MF8J2/ref=sr_1_1?s=drugstore&ie=UTF8&qid=1347223762&sr=11 One other alternative that is extremely popular is the NeilMed that comes with a plastic dispenser you squeeze. Some find it just as effective as the more traditionally-shaped neti pot only they don’t have to lean their head as extremely to one side or the other to flush their systems. The NeilMed comes with a lot of saline packets (the typical package includes 50, more than enough to last as long as the squeeze bottle will last you). Here is the packaging for the NeilMed to give you an idea of what it is like: The NeilMed is available at Amazon.com here: http://www.amazon.com/NeilMed-Sinus-Rinse-PremixedSachets/dp/B000A0S5KC/ref=sr_1_4?s=hpc&ie=UTF8&qid=1347224141&sr=14&keywords=neilmed At Amazon.co.uk you can get the NeilMed here: http://www.amazon.co.uk/NeilMed-SinusRinse-Saline-NasalRinse/dp/B000A0S5KC/ref=sr_1_4?s=drugstore&ie=UTF8&qid=1347223762&sr=1-4 Note: All of the neti pots and alternatives shown in this book each cost less than $20 and most are closer to $10 than $20. The Nasal Rinse Solution While you can make your own nasal rinse solution, you can get the solution already mixed up and most people do this. As you saw in the previous section, almost all neti pots and alternatives come with solution packets you can mix with water. Most of the suppliers also sell the solutions without accompanying neti pots for refilling your supply. While some solutions are sold in liquid form, it takes a cup or so to fill a traditional neti pot. That is why the packets that you add water to are so much more available and offer cost savings. Note: The less you use municipal water for nasal flushing (or drinking or bathing...) the better you will be. Municipal water supplies often have chlorine and fluoride that are harmful agents to your body. Your body has to spend some healing resources to handle those toxins which takes those resources away from your nasal problems and thus requires longer to rid yourself of the nasal toxins and to help oncoming sinus problems such as sinusitis. Use distilled water, well water, or mineral water in your neti pot every time you’re able to. Safety Issues The use of the neti pot is generally considered safe and is encouraged. When a neti pot is unsafe actually has nothing to do with the process or solution but with external factors such as using an unclean neti pot. In addition, the FDA warns that using tap water can put bacteria and protozoa organisms into your system that were not in your system before which can cause your body new problems. Note: The FDA is therefore warning you not to use the very municipal water that the FDA and other government regulators tell you is safe to drink. Are you sure you don’t want to get a good water filter yet, for all your drinking and cooking and neti pot needs? So to make sure you keep your neti pot usage as safe as possible, always use filtered or non-municipal water and clean your neti pot thoroughly after each use. If your neti pot is plastic and cannot go in your dishwaher, use soap and warm water to clean it before putting it away so it’s ready for the next use. How Often to Use Your Neti Pot Some people routinely use a neti pot daily. They might be more prone to sinus infections than others, they work with sick people as in a hospital, or they simply are warding off as many potential problems as they can. Daily use certainly is fine and should pose no harm to your sinuses but daily is probably costing you a little more in solution and time than it returns in health benefits. Still, if you want to daily flush, you certainly don’t seem to be hurting yourself and you happen to rid yourself of a germ that might have otherwise turned into an infection. For normal maintenance, using a neti pot every ten days to two weeks should help you keep your passages flushed and as healthy as you can. When you get sick with any kind of respiratory problems you certainly should use your neti pot daily and then it’s best to do so twice daily, morning and evening. You will help your body flush the infectious germs and you help your nasal passages eliminate waste that is so important during those times. Allergy sufferers should flush with a neti pot fairly often during the times of the year when they have flare-ups. Again, twice daily is fine and even more if you feel it necessary. Clogged noses can sometimes be opened, at least temporarily, by the use of a neti pot. Won’t Wont the Saline Solution Burn Sensitive, Sick Noses? Although I’ve discussed this before, for newcomers it’s worth repeating. Be assured that the salty solution does not burn your sensitive nasal passageways, even after you’ve been sick for a while and your sinus passages are extremely sensitive and dry and possibly bleeding when you blow your nose. Think about how sensitive your eyes are. Yet, tens of thousands of people daily use saline-based eye drops to rinse out pollen. That saline is a conduit to let water pass through delicate nasal membranes with little or no burning or irritation, collecting infecting mucus along the way. The Details of Using a Neti Pot Using the neti pot is extremely simple. (As well as strange-sounding for those unfamiliar with it.) Even your children should be able to use a neti pot on their own once you’ve taught them and monitored them through a few initial trial runs. Note: The FDA warns that you read all the instructions with any neti pot and solution you use. That is good advice. If the instructions, for example, tell you to turn your head or keep your mouth open, be sure to do so. Improper use can cause you to swallow some of the saline solution which maybe will not burn you but does taste horrid. Through proper use, you rarely taste the solution even though a few drops will naturally drip into your mouth as you use it. Again, you’ll want to read your neti pot’s instructions but the basic use goes like this: 1. Fill the neti pot with lukewarm water. 2. Add the wash solution to the pot and stir. 3. Hold your head over your sink sideways so you are looking at the side of your sink. 4. Grab the neti pot. 5. Place your neti pot’s spout in your nostril that is closest to the ceiling. 6. Pour the solution into your nostril with your mouth open. 7. The solution will come out your bottom nostril after traveling through your nasal passageway. When you’ve used about half the neti pot’s solution, you can stop and turn your head to face the other side of your sink, and continue with your other nostril. Be certain to use body-temperature, lukewarm water. As long as you keep the temperature lukewarm or perhaps only slightly warmer than body temperature, you’ll not even notice the neti pot’s salt water cleanse. If it’s too hot it will be a hot liquid going through your nasal cavity which is quite uncomfortable. And some say that if it’s too cold you almost get the sensation of drowning. That certainly sounds horrible but your use of the neti pot with lukewarm water truly makes it hardly noticeable. Before you do this the first time, you will no doubt be hesitant! But as we’ve said several times now, the sensation is more like nothing than something. Let’s face it; if you’ve seen someone use a neti pot but haven’t yet used one yourself, you no doubt have a lot of natural hesitation to run salt water through your nasal cavity, the central point where you get your life-sustaining air that you breathe! But at a lukewarm temperature you’ll see there is hardly any sensation whatsoever. It is a non-event in spite of how it may look or sound and in spite of any apprehension you may have at first. So drop your apprehensions and trust that the neti pot wouldn’t be as popular as it is if it burned or if it was an unpleasant experience. You just need to get through your apprehension the first time. Plod through because it’ll be over before you know it and you’ll see that the experience is far less impactful to your body than it might sound. The Ultimate 3-Second Fountain of Youth “Neural” Fat Loss Exercise By Jennifer Jolan and Rich Bryda We’re just now studying the effects of this new exercise craze for an old stand-by exercise, but we wanted to tell you about it because you may find it not only great for fat loss, but also exhilarating and great for your long term health! The exercise is called Standing Vertical Jumps, SVJ’s. Boring you may think, but I hope I can convince you just how revolutionary this simple exercise can be for transforming the body and improving your health. It’s an easy exercise. Easier almost always means better compliance. Better compliance to a routine means a better waistline and well-being for you! How to Perform the SVJs These are simple but can help sculpt a tremendous abdominal core due to the neural demands it causes and due to the insulin sensitivity it elicits when done explosively. To do a Standing Vertical Jump plant your feet about shoulder width apart. The width of your feet is a fairly individual thing, but about shoulder width apart is where you want to be. Note: Many exercise-related injuries occur not because of heavy weights or difficult routines but because we get sloppy. Watch a professional power lifter. He or she will always approach the weight exactly the same way each time. A professional golfer will always address the ball the same way each time. A professional tennis player will begin and follow through on the serve exactly the same way. One professional may do something completely differently from another in the same sport, but each one will repeat his or her own approach and follow-through exactly the same way. This not only enables you to better yourself without any variables changing, but it also helps reduce injuries. Being sloppy and not planting a foot properly, for example, can take a tennis player out of the game for months. Develop habits and routines. For the SVJs, your routine is to begin with your feet planted exactly the same way each time. Once your feet are planted in a comfortable position, simply dip down as fast as possible (explosively) and explosively swing your arms up and jump up as high as you can. The key is to explosively jump because it’s that explosive aspect that gives you the greatest amount of neural activity and insulin sensitivity. Don’t worry about how high you can jump compared to other people. Just worry about trying to jump as high as you can. If your ceiling is not high enough, you may have to go outside. Hopefully you can find a room with a high enough ceiling (or you’re relatively short like I am) where you can do these anywhere in your home. The reason doing SVJs inside is important is that we want you to jump a total of 10 times a day... and you must spread these out by a minimum of at least 3 minutes between each jump. Unless you’re outside a lot, it’s not really practical to do these outside while waiting to do a jump every three minutes. But, if you exercise at a gym, you can sprinkle in these jumps between sets. After every three or so sets, do a jump. If you’re at home and want to do these jumps all at one time, just be sure to have at least three minutes between each jump. Why SVJ’s Work Jumping is intense on your Central Nervous System. In fact, jumping has been shown to cause the most CNS activation of any exercise. This neural intensity can be both good and bad for you. We want it to be good for you and your body. It’s bad if you do too many jumps in too little of a timeframe. You will end up burning out your Central Nervous System. It’s good if you space out each of your 10 daily jumps by at least 3 minutes (if you watch TV, do 1 jump during each commercial break). By not doing too many jumps in too little time, you cause massive amounts of good neural activation that causes a hormonal cascade that not only makes you feel good and energized, but again, it improves insulin sensitivity. The more insulin sensitive you are, the easier it is for you to lose weight (especially around your waist). Note: Two of my books, Stupid Hormones and Brain Controlled Weight Loss go into more depth about insulin sensitivity and other strategies that make you more insulin sensitive to help improve your health and lose weight. Now, about the neural activation that these jumps do to your body... There’s a strong connection between these jumps ramping up your Central Nervous System and increasing your Metabolic Rate (speeding up your metabolism). By speeding up your metabolism (through these daily jumps), you will lose more fat due to a higher level of fat burning activity throughout the day. Over time, this amped up neural activity, increased metabolism, and increased insulin sensitivity will cause you to get leaner. I’ll put it a different way. Your Central Nervous System, CNS, controls all your body’s physical activities. Your CNS is composed of a complex system of nerve tissues. These all reside from inside your brain down through your spinal cord. This is how your brain tells your body what to do next. The more in sync your brain and body are, due to a healthy CNS, the smoother and easier your body works as a unit. From testing these jumps out and noting the results on ourselves and others, we believe these SVJ’s done as outlined above could in fact be a revolutionary “fountain of youth” exercise. The reasoning for this is due to the fact that there really isn’t an exercise you can do that has this much of an impact on your CNS... and your CNS is key to how your body functions. If done correctly (as outlined above, 10 jumps spread out by at least three minutes or more between each jump) you will feel energized the whole day. Note: It may take your body two days to adjust to these jumps to start realizing this daily, self-generated internal energy. Every muscle fiber you have in your body will have an increased and more efficient response to each neural signal sent to it. Instead of trying to fit a circle into a square, you’re fitting a circle into a circle. What I’m saying is that your body is more efficient and effective at communicating with itself. This efficient inter-body communication can only improve your health. The by-product of this is looking and feeling younger. Much like what the spinning in a circle does for your Endocrine System, jumps do for your Central Nervous System. Note: We truly hope you do both these jumps and the spinning in a circle you read about earlier every single day. They are a powerful 1-2 punch of simple exercises you can do at home. We try to explain these complex things in as simple of a manner as possible, but sometimes we don’t explain them well enough to convince you of how great they are. If you remain unconvinced, the only thing we can fall back on in our defense is to tell you to try these out as we outline them for a few weeks. By actually doing them, you will get your answer as to whether what we say is true or not. People don’t realize how powerful and important jumps can be for improving their body and health because they never paid attention to how important certain parameters are when it comes to jumping. If you don’t follow the proper parameters, you don’t and won’t get the results that we claim you will get. Jumps may be simple, but don’t allow that fact cause you to discount them. I’m telling you right now. Jumps have been discounted for decades because people overdid them due to thinking they’re not a powerful tool that can (and will) change your body and health. Engage and activate your CNS with these ten daily SVJ’s and you can’t help but improve how your body looks; as well as your health. Don’t believe us? Okay, prove us wrong. Each jump only takes three seconds to do. Ten jumps will take you all of 30 seconds to do each day. The only thing you have to remember is to do them. For this, I suggest you get a piece of paper or an index card and write the numbers 1 through 10 on it. After each jump, cross out a number. By the end of the day make sure all 10 numbers are crossed out. Put the piece of paper somewhere where you will see it frequently. We are making some big claims here when we say this is a “fountain of youth” exercise that can rapidly speed up your metabolism, increase insulin sensitivity, and cause a whole lot of neural activity that will have a positive cascading effect on your hormones. All we ask is for you to suspend judgment on the claims and just try this exercise out every day for at least two weeks to see what it does for you. We thing you’ll be quite happy with the results. Note: If for some reason you can’t jump or it hurts you to jump, please don’t do this exercise. Unfortunately, it’s not an exercise everyone can or should do. The 15-Second “T-Tap” for Overcoming Hypothyroidism & Sluggish Energy By Jennifer Jolan and Rich Bryda A simple trick that takes only a few seconds to do can improve your energy and even help you with a hypothyroid problem. A little background will help. Hypothyroidism Fatigue-related thyroid problems are grouped together into a category known as hypothyroidism. Hypothyroidism is the result of an under-active thyroid that produces too few thyroid hormones. Hypothyroidism, therefore, is a deficiency in thyroid hormones. You can exercise all day but you just won’t lose weight or keep it off if you have a hypothyroid problem. Your body won’t allow proper weight loss because your body cannot properly regulate itself. There is just not enough thyroid activity to metabolize the fat. Women are especially prone to hypothyroidism and get hypothyroidism almost ten-toone over men. The most common age range is in the 40’s where hypothyroidism seems to flare up the most. As you age, you naturally move less. You can stay active if you consciously exercise and eat right, but life often makes that a challenge about the age of 40 and hypothyroidism problems begin to rear their ugly head. By moving less because you feel so tired, you don’t get the daily benefit of normal caloric burning through movement as much as you would if you were more active. Hyperthyroidism Your thyroid doesn’t just cause problems by being sluggish. The opposite of hypothyroidism is hyperthyroidism. That is when your thyroid goes into hyper-activity. At first you might think hyperthyroidism is beneficial because if hypothyroidism makes you gain weight, then shouldn’t we all strive for hyperthyroidism? No, not at all. We should all strive for a balanced thyroid. We want our thyroid hormone group to be at its optimum level the way they were designed to be. The autoimmune disease known as Graves Disease is a type of hyperthyroidism. Fortunately, only a small number of people are susceptible to hyperthyroidism, around 2% for women and only about 0.2% of men. Excess sweating, hypersensitivity to heat, severe weight loss, and diarrhea can be present in hyperthyroidism’s symptoms. You might note these are almost the mirror-image of hypothyroidism’s symptoms of being cold all the time, weight gain, and constipation. You want neither hyperthyroidism not hypothyroidism. Since hypothyroidism is the more common of the two problems by far, the next trick is a way to help side-step possible hypothyroid problems, or at least reduce its effects. Just Give Your Thyroid 15 Seconds of Attention Although hypothyroidism is often discussed when targeting weight loss, I want to target hypothyroidism to help your overall energy levels. More energy is almost always welcome, especially as we age. So this tip isn’t just a dietary tip, it’s an overall well-being tip for helping your thyroid that may cause you to feel sluggish and run down. Doing this routine takes only 15 seconds or so at a time. No excuses! The Routine Your thyroid gland is located on the lower-front part of your neck. This is where the “hole” is in your next. All you need to do is tap your thyroid. I call this the T-Tap. This physical tapping of your thyroid gland stimulates an under-active thyroid to become more normalized. Take one or two of your fingers and tap your thyroid with your fingertips for 15 seconds at a time. Repeat this throughout the day as you think of it. I recommend you do the T-Tap for a total of about three minutes, in 15-second intervals, each and every day. You will need to do these neck taps daily and for at least a few weeks. They’re easy and quick so I recommend that you do them every day for the rest of your life. You can do it whenever and wherever, even when you’re watching TV, so make an effort to do them so your thyroid can get back to a normal functioning level. The T-Tap may not solve your Hypothyroidism all by itself, but at the very least it most definitely will help. How to Make Healthy Ice Cream in 2 Minutes and Other Sweet Surprises! By Jennifer Jolan I will be the first to tell you to avoid sugars like the plague! I will also say I’m the first to crave sugars from time to time. I found that the better I eat, meaning the further I stray from the government’s suggested Food Pyramid, the less I crave dangerous sugary desserts. But from time to time, everyone needs something sweet. The Only Sweetener I Use There is absolutely no sweetener I use or suggest using except Stevia. Stevia is extracted from a South American herb. In other words, there are no chemicals and no toxins in quality Stevia packets or liquid drops. When you add Stevia to a drink or food you add a completely natural and original extract that has not been shown to adversely affect your health the way the other sweeteners do. (And Stevia has no extremely dangerous toxins the way aspartame is said to have.) Stevia is also fantastic for those of us who want to stay slim because Stevia: Has zero calories Has zero glycemic impact Has zero carbohydrates This means that Stevia has no carbohydrate impact on your thighs, hips, or belly. Note: I do keep Xylitol-based chewing gum around the house for my family. Xylitol is effective for removing bacteria from our teeth and is shown to help prevent plaque. Of course we never use fluoride-based toothpaste because I don’t want my family putting a major rat poison ingredient into their mouths two or three times daily. (Yes, it’s gross. I don’t say it to shock you, only to be truthful.) If you avoid sweets and starchy carbs you should not have many tooth cavity problems in life, but the Xylitol gum is just a preventative that tastes good and also offers no glycemic impact on our thighs. So, why spend all that time on Stevia when I promised you a healthy ice cream treat? This is the best place in this set of 10 reports to mention Stevia and I recommend Stevia to all my readers, students, and clients. You can cook with Stevia, add it to unsweetened recipes that otherwise require sugar, and Stevia is great in drinks from coffee and tea and even in healthy, whole, raw milk if you want to add a shake-like taste to your milk once in a while. Note: Add some cinnamon to any drink or Stevia-based dessert – or to just about anything you eat – and the cinnamon not only improves the taste of just about anything it will help reduce the impact of any carbohydrates that happen to be in your food or drink. Yes, even if you order one of the massive ice cream sundaes at Ghirardelli’s Chocolate in San Francisco, if you happen to take along a bottle of cinnamon, that rare treat will not affect your body as much as it otherwise would do. Cinnamon helps regulate your body’s insulin sensitivity levels so you don’t react as badly to sugar and other starchy carbs. By the way, use lemon juice on foods that cinnamon doesn’t work as well on, such as hamburgers with buns. Lemon juice also helps regulate your insulin and causes the carbs to impact you less. So throughout the rest of this healthy ice cream chapter, keep Stevia in mind. If the ice cream or anything else you ever eat needs a little sweet stuff, Stevia is the way to go. You can order Stevia in handy take-along packets here: http://www.amazon.com/SteviaSweetener-Raw-1000Box/dp/B006XEGXCG/ref=sr_1_4?ie=UTF8&qid=1363193125&sr=84&keywords=stevia+packets or get a little bottle of it and sprinkle it on to whatever it is you’re eating. You can get the little bottle here: http://www.amazon.com/Aztec-SecretIndian-HealingCleansing/dp/B0014P8L9W/ref=sr_1_1?ie=UTF8&qid=1363215052&sr=81&keywords=aztec+secret+indian+healing+clay And Now: Healthy Ice Cream! If you tell me you love fruit and just can’t stop eating it in spite of the tremendous fructose/glycemic impact most fruits have on your thighs, I’ll tell you great! Be sure you eat lots of berry varieties for many of your fruits. Your fruit cravings will decrease and the glycemic/fat impact on your body will be minimal. And the nutrients in berries are certainly wonderful to put into your body. Sprinkle some Stevia and cinnamon on top, perhaps eating them in a small bowl of raw, whole milk, and you have a dessert that only kings dream of! But if you tell me you want fruit juice, you won’t find me a fan of your cravings. Fruit juice is about as bad a soda pop. And although I despise the aspartame they put in diet sodas, I’d rather see you drink a diet soda than fruit juice. Fruit was made to be eaten only a few months of the year. It’s unnatural to have fruit 365 days a year, but modern times allow us to do that. Our waistlines have suffered because of it. Many of us eat lots of fruit and especially consume fruit juice to be healthy and our bodies just expand and expand. The two fruits that are the worst are: Oranges and bananas. If you can stay away from those two, go ahead and have as much fruit as you insist. Just heed my strong suggestion to stick with berries as much as possible. Now, what if you just have to have sweet, creamy, cold, sugary ice cream? And I don’t mean the stuff like FroYo at the waistline-inducing “yogurt” places. And I don’t mean the boring stuff like Sherbert. I’m talking you’ve gotta-have you some of that silky ice cream that just melts in your mouth. In that case, I say, have a banana! Only do it this way: Buy some bananas. Unlike the way many of us do when we decide to have a banana, don’t eat the banana until it gets very ripe and soft. Although some people do prefer overripe bananas, most don’t and I hate the taste of them. Except... Now once they are overripe and slightly turning brown, peel them, cut them into little pieces, and stick the peeled and cut bananas in freezer baggies. Stick them in your freezer and forget about them. When that once-in-a-blue-moon ice cream craving hits, and you will not believe what I’m about to say until you actually do it, pull your bag of frozen bananas out of the freezer and drop a couple in a blender. Blend on a fairly low setting until they become sludgy. Note: If you happen to have a Champion Juicer, the texture of the bananas will be far smoother and more like ice cream than just a blender. Put the banana mush in a bowl, grab a spoon, and ask someone in your family to try the new “banana ice cream” you just bought. They’ll try it and unless they just don’t like bananas, they will say, “That’s really good!” Now, tell them you made it yourself! Now, ask them what they think you made it with. They will say things like: Bananas of course Sugar Cream Whey Milk And not one of those is correct except for the bananas! You must trust me, this is truly sweet, delicious banana ice cream that literally is nothing more than frozen, over-ripe bananas smushed up into a rich, gooey ice cream texture. I’m not sure why it works but this is delicious “ice cream” with any ice and without any cream. Making It Even Better Sprinkle cinnamon on top of course to slow down the banana carbs. If you like cinnamon anyway, you should use it because it not only makes the banana ice cream taste better, but it reduces the negative impact of the bananas. Find some high-percentage dark chocolate bars or cacao powder. These will have very few sugar carbs. One, an amazing 99% percent dark chocolate bar, has only one sugar carb in the entire bar! A sugar-free, zero carb dieter could get by with eating one of these every day. But the drawback is that it doesn’t taste very good on its own. The reason there is no negative sugar carb impact is that there isn’t any sugar. But sprinkle some of that on top of your banana and cinnamon ice cream and mix it all in. The natural sugar in the banana will sweeten the chocolate and you’ll think you’re eating store-bought, unhealthy, zero-nutrient banana-flavored ice cream when the exact opposite is the truth! Note: Dark chocolate is healthy for you. WebMD states that dark chocolate is known to lower blood pressure as well as provide antioxidants. This is untrue for white or milk chocolate. The higher the percentage of chocolate in the bar, the better its health effects become. Of course, you don’t want to binge on dark chocolate, but again, the higher the percentage of actual chocolate, the safer it is for you to nibble away on! You can get good-tasting bar here with 85% cocoa from Lindt: http://www.amazon.com/Lindt-Excellence-Chocolate-3-5-OuncePackages/dp/B000HQNBSU/ref=sr_1_8?ie=UTF8&qid=1363195821&sr=88&keywords=dark+chocolate+bar If you want to go all the way to 99% chocolate in the bar, for one that is the highest in health benefits, here is a wonderful one, also by Lindt: http://www.amazon.com/LindtExcellence-99%25-CocoaBar/dp/B002ULCBUY/ref=sr_1_6?s=grocery&ie=UTF8&qid=1363195877&sr=16&keywords=dark+chocolate+bar+99%25 Two More Unusual Toppings to Try To spice your ice cream further, how about adding some quality whey protein powder into the mix when you blend it all up? The straight carbs that the banana put into you will give you a sugar high and you’ll come back down fast. Depending on how much you eat sugar, this can have quite a surprising and not-so-good after-effect. Note: If nothing else, you are often hungry after eating sugary things, like bananas, due to the after-effects of sugar. Adding a scoop of protein powder adds long-term energy to the bananas. The sugar carbs in the bananas will give you an energy boost but the protein will continue to give you a slower, long-term energy boost. Your metabolism will not go high and then fall because the protein will slow-release energy as time goes by. Do you like peanut butter ice cream and shakes? I sure do. I found something even better though! On my family’s banana ice cream, I often will add almond butter. Many stores such as Whole Foods will let you make almond butter from organic almonds. Unlike just about any almond or peanut butter you buy in a jar, this will have no sugar. You only get pure, healthy almonds with all the good fat and nutrients that come naturally in almonds. Put this over your ice cream or blend it in, and not only will you get a fantastic banana/nut ice cream treat but the fat in the almond butter will slow down the carbs not unlike cinnamon does. I usually add a half to one cup of unsweetened almond milk into the blender to help with the consistency of the “ice cream.” You can also use coconut or rice milk instead. Just don’t use soy milk due to the negative effect it has on your hormones. Also, don’t use regular milk (even healthy organic or raw milk) due to the excess calories. We don’t want to go overboard. There you go. Yummy! Conclusion There you have it. We hope you discovered a lot of useful and practical information in these 10 short reports that you can incorporate into your life in order to lose weight and improve your health. Most of this information is probably new to you. If that’s the case, we suggest you not try everything out all at once. That may very well overwhelm you and cause you to stop implementing the tips due to the sense of being overwhelmed. There’s no need to rush into it. Pick a few tips and start from there. Once you start using these tips and seeing the great results, we suspect you’ll be quite happy and want even more information from us. Below, we included links to our Amazon profiles which list all of our books for you to go check out. We also linked to some of our most popular books. Good luck to you! Sincerely, Jennifer Jolan and Rich Bryda Jennifer Jolan’s Amazon Profile and Book Page: http://www.amazon.com/Jennifer-Jolan/e/B004V1ZAB8/ref=ntt_athr_dp_pel_1 Rich Bryda’s Amazon Profile and Book Page: http://www.amazon.com/Rich-Bryda/e/B005HE2714/ref=ntt_aut_sim_7_1 Also by Jennifer Jolan The 1-Day Diet – The Fastest Diet in the World! The 12-Hour Flat Belly Diet Solution – Everyday Dieting Made Easy Stupid Hormones! The Hormone Weight Loss Solution – Fix Your CRAZY Hormones and Finally Lose Weight for Good Brain Controlled Weight Loss – The Solution to Failed Diets & Exercise Programs! Running Sucks! How to Run for Fast Weight Loss – For Busy Women who HATE Running The 5-Second Flat Belly Secret – Lose 2-3 Inches from Your Belly in Less than 1 Month The Ultimate Diet Guide – for Busy Women! No Starving, No Food Restrictions, No Gym Workouts Required! Apple Cider Vinegar - Old Fashioned Weight Loss & Health in a Bottle Natural Detox - 8 Cheap Ways to Detox and Cleanse Your Body Prescription & OTC Drugs, Antibiotics, and Vaccines SUCK! How to Stop Destroying Your Health Accidentally


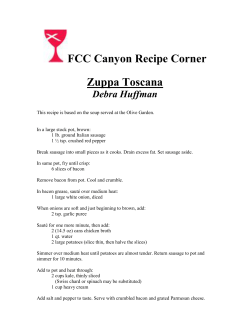

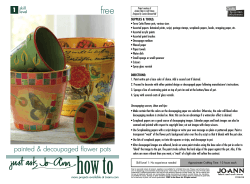


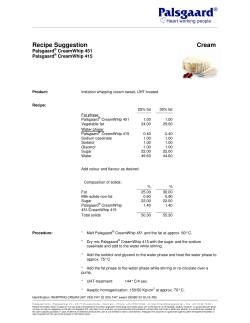

© Copyright 2026