
How to Create a Blog Using Blogger
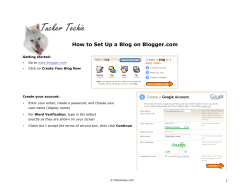
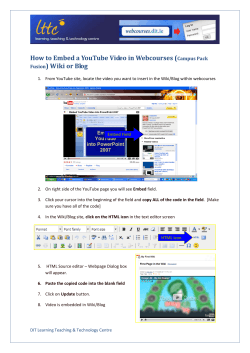
How to Create a Blog Using Blogger
Blogger is free Google software that lets you create blogs. There is nothing to download and
you can edit your blog from any computer. This setup process will take you through the steps
to set up a Google account or login using your OpenID account, and then set up a blog with
Blogger.
1. Go to www.blogger.com
2. If you have an OpenID account, log in and look for “Create a blog”.
• What is OpenID? OpenID is the decentralized, lightweight protocol for single sign-on
and portable identity. For more information go to http://openid.net/
3. If you do not have an OpenID account or a Google account, click on the big orange arrow
that reads “Create your blog now” on the right side of the page.
• Fill in the required fields to create a Google account. If you have an OpenID account,
you may skip creating a Google account and log in.
• You must provide your email address (this will be your login name)
• Create a new password for the Google account
• Create a blogging display name (this is your blogging ‘signature’ that everyone will
see when you post).
• Finally, go through the security word validation, accept the terms of service, and
submit your information. After a Google account is created, it is time to set up your
blog.
4. In step two of the process, create a title for your blog and a blog address.
• The blog URL will be http://name.blogspot.com
• Note: The title and URL are not permanent! Both of these can be changed at any
time during your blog’s life. (change under Settings – Title and Publishing)
i. The name can be whatever you want it to be when you change your blog
later; such as http://bearcatsports.blogspot.com. Keep it simple so it’s
easy to type and to remember. Also, this URL must be unique. You will be
the only blog in the blogosphere with that address!
5. Choose a pre-made template. Again, this is something you can change at any time.
• After your blog is set up, you can customize the template to meet your needs and give
the blog your own personal look.
6. You should get an encouraging message from Blogger telling you that your blog has been
created. You did it! You are now ready to become a blogging professional. Click on the
big orange arrow that says “Start Posting” to begin your blogging.
Blog Settings
Before posting to your blog, take a look at your blog settings. Go to
http://www.blogger.com/ and log into your account.
Type in your username (email address) and password, then sign in.
Click on Settings
You can adjust settings in 8 different areas.
•
•
•
Basic: change your title, add a description, choose settings, save or delete the blog
Publishing: change your URL, switch to a custom domain (not recommended unless
you have your own domain set up)
Formatting: set things like number of posts on the page, format of date and time
stamps, etc. A post template is a way to pre-format a post editor, usually in html, as
a template to use for each post.
•
•
•
•
•
Comments: set up who can comment, comment moderation if desired,
backlinks, etc. OpenID is an open standard that allows users of OpenID-enabled
services to log in to any OpenID-supported site with one set of login
credentials. Which means a reader doesn’t have to have a Google Account.
Backlinks enable you to keep track of other pages on the web that link to your
posts.
Archiving: set archive frequency and whether each post has its own page
Site Feed: settings for site feed basic and advanced so others can add your blog to
their RSS feed readers like Bloglines. FeedBurner promotes your Blog (may or may not
be desirable).
Email: if you want to post to your blog via your email, fill in the info
Permissions: invite others to author your blog either as administrators or visitors. As
visitors they can post but not do anything administrative. Choose who can view the
blog.
Template
•
•
Four layout and formatting tabs to work with: Page Elements, Fonts and Colors, Edit
HTML, Pick New Template
Page Elements: look at all sections later; work with Page Elements right now. Click
on Add a Page Element.
o Choose Picture > browse to the desktop and insert the UC logo
o Go back to Add a Page Element and add a Link List to the blog
o Now click on the View Blog tab
How to Post to Your Blog
If you’re in the blog view, create a post by clicking on New Post next to your email address in
the upper right hand corner of the screen.
If you’re in “Dashboard”, find the blog that you want to post to and click on the "New Post"
link (it will have a green plus sign).
•
Create a Welcome post.
• Title: Type Welcome in the title field. It will appear in bold looking similar to
a newspaper headline. You cannot perform any special formatting features
with the title of your post.
•
•
Body: Type a welcome message. “Welcome to my blog! My blog will
primarily be my views on what’s happening in the news. Please feel free to
add your comments to my posts.” The body of your post can be formatted in
a limited way. Some of the formatting features include a few fonts to choose
from, colors, sizes, bold, italics, justifying, bulleted lists, and spell check.
Picture: If you want to insert a picture into your blog with a post, this is the
place to do it. Use the image icon from the formatting toolbar (located the
second icon from the right).
Formatting Toolbar
Type the body of your
post here
•
Insert a picture into a post: browse to image location > insert image > choose a
layout > upload image > move image into position.
After you’ve added text and an image, click on the orange button "Publish." You've now
created a post. Go view your blog.
Edit Posts – click on “Customize” to get to Settings where you can edit the post.


© Copyright 2026