
NV11 MANUAL SET
NV11 MANUAL SET NV11 MANUAL SET INTRODUCTION NV11 Manual Set - Introduction 1 MANUAL AMENDMENTS Document Base Details Spec. Used GA963-1 GA138 GA959 Issue Date 09/09/10 01/11/10 29/03/11 Receipt Date 29/07/11 22/01/11 29/07/11 Comments Amendment Details Rev. -- Date 19/04/12 Amendment Details First Issue Copyright © Innovative Technology Ltd 2012 Issued by EAM GA963-2 NV11 Manual Set - Introduction 2 NV11 MANUAL SET - INTRODUCTION COPYRIGHT 3 LIMITED WARRANTY 3 PRODUCT SAFETY INFORMATION 3 INTRODUCTION 4 FEATURES 5 TYPICAL APPLICATIONS 5 STRUCTURE OF THIS MANUAL SET 6 WHICH SECTION IS RELEVANT TO ME? 6 MAIN HEADQUARTERS Innovative Technology Ltd Derker Street – Oldham – England - OL1 4EQ Tel: +44 161 626 9999 Fax: +44 161 620 2090 E-mail: [email protected] Web site: www.innovative-technology.co.uk BRAZIL [email protected] CHINA [email protected] GERMANY [email protected] SPAIN [email protected] UNITED KINGDOM [email protected] UNITED STATES OF AMERICA [email protected] REST OF THE WORLD [email protected] Copyright © Innovative Technology Ltd 2012 GA963-2 NV11 Manual Set - Introduction 3 COPYRIGHT This manual set is Copyright © Innovative Technology Ltd. 2012. No part of this publication may be reproduced in any form or by any means or used to make any derivative such as translation, transformation, or adaptation without permission from Innovative Technology Ltd. The contents of this manual set may be subject to change without prior notice. LIMITED WARRANTY Innovative Technology Ltd warrants each of its hardware products to be free from defects in workmanship and materials under normal use and service for a period commencing on the date of purchase from Innovative Technology Ltd or its Authorized Reseller, and extending for the length of time stipulated by Innovative Technology Ltd. A list of Innovative Technology Ltd offices can be found in every section of this manual set. If the product proves defective within the applicable warranty period, Innovative Technology Ltd will repair or replace the product. Innovative Technology Ltd shall have the sole discretion whether to repair or replace, and any replacement product supplied may be new or reconditioned. The foregoing warranties and remedies are exclusive and are in lieu of all other warranties, expressed or implied, either in fact or by operation of law, statutory or otherwise, including warranties of merchantability and fitness for a particular purpose. Innovative Technology Ltd shall not be liable under this warranty if it’s testing and examination disclose that the alleged defect in the product does not exist or was caused by the customer's or any third person's misuse, neglect, improper installation or testing, unauthorized attempts to repair, or any other cause beyond the range of the intended use. In no event will Innovative Technology Ltd be liable for any damages, including loss of profits, cost of cover or other incidental, consequential or indirect damages arising out the installation, maintenance, use, performance, failure or interruption of a Innovative Technology Ltd product, however caused. PRODUCT SAFETY INFORMATION Throughout this manual set, we may draw your attention to key safety points that you should be aware of when using or maintaining the product. These safety points will be highlighted in a box, like this: Caution! Mains voltage is present on these terminals This manual set and the information it contains is only applicable to the model stated on the front cover, and must not be used with any other make or model. Copyright © Innovative Technology Ltd 2012 GA963-2 NV11 Manual Set - Introduction 4 INTRODUCTION The NV11 validator is made up of four basic components: an NV9USB validator head, Note Float module, removable bezel and a cashbox (as shown below): Note Float module Removable bezel NV9USB validator head Cashbox The NV11 is a device that can accept, validate and store 300 or 600 bank notes of mixed denominations, and also has the capability of storing a further 30 notes in the Note Float module for future payout. NV11 Rear View Copyright © Innovative Technology Ltd 2012 NV11 Side View NV11 Front View GA963-2 NV11 Manual Set - Introduction 5 Up to 16 different denominations of bank note can be accepted and stacked, and the Note Float module can be programmed to store and dispense 30 single denomination notes. The NV11 validator leaves the factory preset to at least one currency and one firmware interface so that it is ready for immediate installation. The NV11 validator works with any NV9USB currency dataset created by Innovative Technology Ltd datasets can be downloaded from the Support section of the ITL website. FEATURES The NV11 validator has many innovative features, including: 300 or 600 note storage capacity Note Float module has 30 note capacity (single denomination) Accepts, validates and stores bank notes in less than 3 seconds Uses a secure encrypted protocol for data transfer TYPICAL APPLICATIONS The NV11 validator can be used in a variety of situations where high security and high volume bank note acceptance, validation and payout are needed. Some typical applications are: AWP and SWP applications Self-Serve and Retail Kiosks Casinos Parking and Ticketing Vending Copyright © Innovative Technology Ltd 2012 GA963-2 NV11 Manual Set - Introduction 6 STRUCTURE OF THIS MANUAL SET This manual set is made up of seven sections, each is supplied in a separate Portable Document Format (PDF) file, so you only need to download or print the section relevant to your requirements: Introduction Section 1 – Quick Start and Configuration Guide Section 2 – Field Service Manual Section 3 – ITL Software Support Guide Section 4 – Mechanical and Electrical Manual Section 5 – Software Implementation Guide Section 6 – Technical Appendices WHICH SECTION IS RELEVANT TO ME? Quick Start and Configuration Guide: – Most users should use this section; typical users are software engineers looking at how to make it work, project engineers evaluating their first unit, or installation engineers installing the unit into a host machine. – This section contains the essential information that a user needs to quickly assemble and configure the NV11 validator ready for installation into the host machine. Field Service Manual: – Typically used by a field service engineer who is maintaining the product. – This section contains the essential information that the field service engineer needs to clean, maintain and fault find an NV11 validator that is installed in a host machine. ITL Software Support Guide: – Any user who wants to test the functionality of the unit, reprogram the firmware or dataset, or set up the encryption key, address or routing for the unit. – This section contains the information needed for a user to configure and program the NV11 validator, using a range of software tools. Copyright © Innovative Technology Ltd 2012 GA963-2 NV11 Manual Set - Introduction 7 Mechanical and Electrical Manual: – Design engineers who are designing a host machine cabinet, or looking to integrate the NV11 validator into an existing cabinet. – This section contains the all the mechanical and electrical information a designer needs to effectively integrate the NV11 validator into a host machine. Software Implementation Guide: – Software engineers looking at how to implement the NV11 validator in their host machine, or design engineers looking at including the unit in their host machine. – The information in this section details the communications protocols, specific commands and interfaces used (eSSP and ccTalk). Technical Appendices: – These appendices have no specific audience, but users can find relevant and useful information here. – This section includes information on product approvals, technical specifications and ordering information. Copyright © Innovative Technology Ltd 2012 GA963-2 SECTION 1 NV11 MANUAL SET QUICK START AND CONFIGURATION GUIDE NV11 Manual Set – Section 1 2 NV11 MANUAL SET – SECTION 1 1. QUICK START AND CONFIGURATION GUIDE 3 1.1 Assembly 3 1.2 Bezel Removal and Refitting 6 1.3 Interfacing 7 1.4 Connector and Pinouts 8 1.5 Configuration 9 1.6 Status Indicators 10 1.7 Programming 10 1.8 Technical Specifications 11 1.9 NV11 Flash Codes 12 1.10 Fault Finding 14 1.11 Frequently Asked Questions 16 Copyright © Innovative Technology Ltd 2012 GA963-2 NV11 Manual Set – Section 1 1. 3 QUICK START AND CONFIGURATION GUIDE This section is one part of a complete manual set: most users should use this section of the manual - typical users are software engineers looking at how to make it work, project engineers evaluating their first unit, or installation engineers installing the unit into a host machine. This section contains the essential information that a user needs to quickly assemble and configure the NV11 validator ready for installation into the host machine. Information Validator compatibility. 1.1 The NV11 validator is pin for pin compatible with the NV7 / NV8 / NV9 / NV10 series of validators, but NOT with earlier versions of the product (NV2 – NV5). Assembly Installing the NV11 is a simple operation, but note that the validator can only be installed horizontally: 1. 2. If the validator head has a blanking plate fitted, you will need to remove this BEFORE attempting to fit the Note Float module. If the Note Float module is already fitted, please go to step 6 Blanking plate Validator head Open the validator head by sliding the red release catch on the front of the validator to the left (as indicated in the picture) Release catch Copyright © Innovative Technology Ltd 2012 GA963-2 NV11 Manual Set – Section 1 Caution! Validator head MUST be opened. 3. Remove the blanking plate by disengaging the two side clips and lifting the blanking plate upwards 4. Close the validator head and then carefully fit the Note Float module onto the validator head, making sure the rear cover is securely closed and that both latches are lined up correctly 4 Always make sure the validator head has been opened BEFORE trying to remove the blanking plate – trying to remove the blanking plate with the validator head closed will cause unit damage. Side clips Rear cover Latch 5. Make sure both latches are engaged and closed Copyright © Innovative Technology Ltd 2012 GA963-2 NV11 Manual Set – Section 1 6. The validator can be fitted with a standard or slide-on cashbox of 300 or 600 note capacity 7. If not already attached, the validator can be fitted with a horizontal bezel of your choice. 8. The cashbox is attached to the validator by locating and sliding until the cashbox is clipped securely and secured in the host machine using the studs on the bottom of the cashbox 5 Note Float module Bezel Validator head Cashbox Copyright © Innovative Technology Ltd 2012 Mounting studs GA963-2 NV11 Manual Set – Section 1 Information Check website for options. 1.2 6 There are many variants of bezel and cashbox type available for the NV11 validator. Please check the ITL website (www.innovative-technology.co.uk) for up to date information on the options available. Bezel Removal and Refitting The bezel is removed by pushing the red locking arms on both sides of the validator upwards, and sliding the bezel away from the locking arms b. Slide bezel away from locking arms a. Push locking arms upwards Lift the bezel off once the bezel has been slid fully across and is clear of the locating pins Lift upwards to remove Locating pins The bezel is refitted by pushing the bezel back onto the locating pins and sliding backwards until all six pins are engaged in the slots. The locking arms will then spring back and locate into the bezel. Caution! Check locking arms. Always make sure that BOTH locking arms are fully located in the bezel – trying to operate the validator if they are not correctly located can cause unit damage. Copyright © Innovative Technology Ltd 2012 GA963-2 NV11 Manual Set – Section 1 1.3 7 Interfacing The connector needed to set up and interface with the NV11 validator is easily accessible on the side of the unit: Interface Connector Copyright © Innovative Technology Ltd 2012 GA963-2 NV11 Manual Set – Section 1 1.4 8 Connector and Pinouts The NV11 validator has a single connector that is used to allow interfacing and programming. Information Power always required regardless of connection type. Power is always required on pins 15 and 16 of the 16 way connector. The connector is a 16 pin socket used to interface the NV11 to the host machine. The pin numbering of the socket is shown below, as well as an overview of the socket connections: Pin 1 5 11 12 13 15 16 Description Serial Data Out (Tx) Serial Data In (Rx) USB Data + USB Data USB Power (+5V) +V 0V / Ground Connection To use a USB connection with the NV11, a USB cable fitted with a 16 way connector on one end (ITL Part Number CN392) should be used. The CN392 cable fits into the 16 way connector and allows high speed programming and serial communications when used in SSP and ccTalk modes. When using the USB connection, power must be supplied to the NV11 using the CN392 cable. Copyright © Innovative Technology Ltd 2012 GA963-2 NV11 Manual Set – Section 1 1.5 9 Configuration The NV11 does not use DIP switches to configure the unit – configuration and setting is carried out by using a Configuration Button mounted on the front of the Note Float module: Note Float module Configuration Button Status LED There are several functions available when using the Configuration Button, and these are listed in this table: Copyright © Innovative Technology Ltd 2012 GA963-2 NV11 Manual Set – Section 1 Action Press and hold (more than 2 seconds) until the bezel illuminates, then release Press twice (within half a second) Press once when Note Float module status LED is flashing (transport error) Flash Count 1 6 6,1 6,1,2 1.6 10 Power Status Function Powered ON Sets validator to Programming mode (SSP) Powered ON Powered ON Interface SSP ccTalk ccTalk plain (16 bit) ccTalk (8 bit) Shows current interface type (see flash count table below) Acknowledges that a note blockage has been cleared The NV11 Validator leaves the factory preset to at least one currency and one interface so that it is ready for immediate installation. The dataset and interface used are shown on the label fixed to the front of the Note Float unit. Status Indicators The NV11 validator has two separate coloured Light Emitting Diode (LED) indicators that are used to show the status of the unit – these are located next to the configuration button on the front of the Note Float module, and behind the front bezel of the NV9USB validator head. If there is a fault or other issue with the unit, the LEDs will flash as described in subsection 1.9. 1.7 Programming Full details on programming the NV11 validator can be found in Section 3 of this manual set (ITL Software Support Guide). Copyright © Innovative Technology Ltd 2012 GA963-2 NV11 Manual Set – Section 1 1.8 11 Technical Specifications The full technical specifications for the NV11 validator can be found in Section 6, Appendix B of this manual set. A brief summary is given here: DC Voltage Absolute limits Supply ripple voltage Minimum 10.8 V 0V Nominal 12 V 0V Maximum 13.2 V 0.25 V @ 100 Hz Supply Current Standby Running Peak (motor stall) 350 mA 3A 3.5 A Interface Logic Levels Logic Low Logic High Inputs Outputs (2.2 kΩ pull-up) 0 V to +0.5 V +0.6 V +3.7 V to +12 V Pull-up voltage of host interface 50 mA per output Maximum current sink WARNING! Use suitable power supply Ensure that the supply voltage to the NV11 is not lower than 10.8 V and that the power supply can provide sufficient current to avoid incorrect operation and excessive note rejects. We recommend that your power supply is capable of supplying 12V DC at 4 A. For 12V operation, use TDK Lambda model SWS50-12. This power supply is available from a variety of suppliers including Farnell (stock code 1184645) and RS (stock code 466-5869). Copyright © Innovative Technology Ltd 2012 GA963-2 NV11 Manual Set – Section 1 1.9 12 NV11 Flash Codes The NV11 validator has inbuilt fault detection facilities. If there is a configuration or other error either the Note Float module status LED, or the NV9USB validator head front bezel will flash in a particular sequence; a summary of the Flash Codes for both units is shown below: NV9USB Bezel Flash Codes: Flashes Long Short 0 0 2 1 3 2 2 1 2 3 3 4 5 1 4 2 Indicated Error Comments None Remove obstruction and follow the cleaning Note path obstructed procedure in Section 2 of this manual set Contact ITL technical Unit not initialised support Check that the cash box note plate is free to move Cash box problem and the stacker mechanism is in the home position Firmware checksum error Interface checksum error or unable to set programmed Download new firmware interface EEPROM checksum error Dataset checksum error Check the validator Incompatible firmware is compatible with firmware the Note Float module Power supply too low Check power supply Power supply too high Copyright © Innovative Technology Ltd 2012 GA963-2 NV11 Manual Set – Section 1 13 Note Float Module Flash Codes: Flashes 0 Constant flash (1 every second) Indicated Error None Note transport error 2 Software error 3 Calibration error 4 Diverter error 5 Motor timeout Copyright © Innovative Technology Ltd 2012 Comments Remove trapped note from the Note Float module and press the configuration button once Download new dataset / firmware Return to service centre for repair Check for trapped notes stopping the diverter returning to the home position Check for trapped notes stopping the Note Float module tape from moving GA963-2 NV11 Manual Set – Section 1 14 1.10 Fault Finding Please use this flow chart with the Flash Codes in the previous sub-section as an aid to help resolve any configuration or start up problems you might have after installing the NV11 validator Incorrect currency file Check the required dataset is programmed using the Validator Manager Software (see Section 3 of this manual set). Notes not included in currency file Check the required note denomination and issue is included in the currency file using the Validator Manager Software (see Section 3 of this manual set). Notes inhibited by host machine Check the host machine is ready to accept notes and that the maximum allowed credit hasn’t been exceeded. If a coin hopper is fitted, make sure it isn’t empty. Bill path obstructed Check there is sufficient clearance for note ejection after acceptance (see Section 4 of this manual set). No power Check there is power to the validator, and that it is within the tolerances specified in the Technical Specification (see subsection 1.8 or Section 6 of this manual set). Incorrect interface programmed Check which interface the validator is programmed for by pressing the configuration button twice – the displayed code indicates which interface is programmed (see subsection 1.5 of this manual). All notes rejected (bezel LEDs ON) Notes not accepted (bezel LEDs OFF) Power supply out of specification Check voltage and current supplied to the validator are within the tolerances specified in the Technical Specification (see subsection 1.8 or Section 6 of this manual set). Check there is sufficient clearance for note ejection after acceptance (see Section 4 of this manual set). Notes accepted but no credit given Rear note detect sensor obscured Copyright © Innovative Technology Ltd 2012 Check there are no foreign objects obstructing the sensors (see Section 2 of this manual set). Check the back security flap moves freely (this is the black plastic flap at the rear underside of the validator head) GA963-2 NV11 Manual Set – Section 1 15 Foreign objects in note path Acceptor runs slowly or intermittently Incorrect supply voltage Unit damage Bezel LEDs are flashing Motor continues to run Various reasons Foreign object or note in the note path Check and clean the note path (see Section 2 of this manual set). Check drive belts are fitted correctly and that there is no debris underneath the belts. Check voltage and current supplied to the validator are within the tolerances specified in the Technical Specification (see subsection 1.8 or Section 6 of this manual set). If possible, replace damaged components (see Section 4 of this manual set). IF YOU HAVE ANY DOUBTS, RETURN THE UNIT TO ITL FOR REPAIR Check the flash code tables for an understanding of the issue (see subsection 1.9 of this manual). Check and clean the note path (see Section 2 of this manual set), then reset the validator. In some cases you may also need to reset the host machine. If you are unsure about the cause or how to resolve the problem, please contact ITL’s technical support department. Support contact details can be found on the ITL website (www.innovative-technology.co.uk), or on the last page of this section. Copyright © Innovative Technology Ltd 2012 GA963-2 NV11 Manual Set – Section 1 16 1.11 Frequently Asked Questions a. Why are there no DIP switches on the unit? The NV11 has no dipswitches. Configuring the unit is carried out by using the configuration button mounted on the front of the Note Float module – see subsection 1.5 of this manual for more information. b. In what orientation can I use the NV11 validator? The NV11 can only be mounted horizontally - see subsection 1.1 of this manual for more information on mounting the validator. Check the ITL website to see the currently available range of cashboxes and bezels. c. How do I check which interface has been set? You can check which interface has been selected by using the configuration button mounted on the front of the Note Float module – see subsection 1.3 of this manual for more information. d. How do I change the interface type? You can change the interface type by using the configuration button mounted on the front of the Note Float module – see subsection 1.5 of this manual for more information. e. Some or all notes are not accepted Check that no inhibits are set in the Validator Manager software (see Section 3 of this manual set). If the problem persists, contact ITL Support for further assistance. Copyright © Innovative Technology Ltd 2012 GA963-2 NV11 Manual Set MAIN HEADQUARTERS Innovative Technology Ltd Derker Street – Oldham – England - OL1 4EQ Tel: +44 161 626 9999 Fax: +44 161 620 2090 E-mail: [email protected] Web site: www.innovative-technology.co.uk BRAZIL [email protected] CHINA [email protected] GERMANY [email protected] SPAIN [email protected] UNITED KINGDOM [email protected] UNITED STATES OF AMERICA [email protected] REST OF THE WORLD [email protected] Copyright © Innovative Technology Ltd 2012 GA963-2 SECTION 2 NV11 MANUAL SET FIELD SERVICE MANUAL NV11 Manual Set – Section 2 2 NV11 MANUAL SET – SECTION 2 2. FIELD SERVICE MANUAL 3 2.1 Cleaning 2.2 Fault Finding - Flash Codes 10 2.3 Technical Specifications 12 2.4 Fault Finding Flow Chart 13 2.5 Frequently Asked Questions 15 2.6 Spare Parts 16 Copyright © Innovative Technology Ltd 2012 3 GA963-2 NV11 Manual Set – Section 2 2. 3 FIELD SERVICE MANUAL This section is one part of a complete manual set: typically, a field service engineer who is maintaining the product would use this section. This section contains the essential information that the field engineer needs to clean, maintain and fault find an NV11 validator that is installed in a host machine. The NV11 validator has been designed to minimise any problems or performance variations over time. This has been achieved by careful hardware and software design; this attention to the design means there is very little user maintenance required. 2.1 Cleaning The NV11 validator has been designed in a way to prevent damage and airborne contamination reaching the optical sensors; however, depending upon the environment the NV11 may require occasional cleaning or belt changing. Caution! Do not use solvent based cleaners on any part of the NV11 unit. Do not use solvent based cleaners such as alcohol, petrol, methylated spirits, white spirit or PCB cleaner. Using these solvents can cause permanent damage to the unit; only use a mild detergent solution as directed below. To clean the NV11, open the note path by sliding the red release catch on the front of the validator to the left (as indicated in the picture) - this will allow access to the lozenge and note path Release catch Copyright © Innovative Technology Ltd 2012 GA963-2 NV11 Manual Set – Section 2 4 Note path Lozenge release catch Lozenge Drive belts Note stacker Cash box spring plate Note Float module Cashbox WARNING! Disconnect power BEFORE any cleaning operation Unless stated otherwise, you should disconnect the power BEFORE carrying out any cleaning operations to avoid the risk of causing damage to the validator. Copyright © Innovative Technology Ltd 2012 GA963-2 NV11 Manual Set – Section 2 5 Ideally, you should also remove the Note Float module prior to cleaning the sensors. Removal is a very straightforward task: WARNING! Do not try to disassemble 1. Open both the Note Float side latches as shown 2. Carefully lift the Note Float module upwards and clear of the validator head 3. To refit the Note Float module, reverse the procedure – make sure that the electrical connectors and latches are lined up correctly Do not attempt to disassemble the Note Float module – there are no user serviceable parts inside and trying to disassemble the module could cause personal injury and will also damage the unit beyond repair. Electrical connector Copyright © Innovative Technology Ltd 2012 GA963-2 NV11 Manual Set – Section 2 6 Front sensors Optical sensor Start sensor Rear sensor Optical sensor Examine the note paths, lozenge and note stacker for any dirt or debris, and carefully clear and wipe the surfaces of the note paths and lozenge with a soft lint free cloth that has been dampened with a water and mild detergent solution (i.e. household washing up liquid.) - be very careful when cleaning around the sensor lenses and make sure they are clean and dry before closing the cover and restarting the unit. Do not try to polish the sensor lenses – if a lens is badly scratched, contact ITL technical support for advice. Also check that the note stacker and cash box spring plate are not jammed. Copyright © Innovative Technology Ltd 2012 GA963-2 NV11 Manual Set – Section 2 Caution! Be careful cleaning sensors. 7 When cleaning the recessed front sensor, use a small soft brush or cotton bud – do not use anything sharp or abrasive. Cleaning the belts is a simple operation. Ensure the validator is enabled (i.e. bezel lights are illuminated), then remove the bezel: The bezel is removed by pushing the red locking arms on both sides of the validator upwards, and sliding the bezel away from the locking arms b. Slide bezel away from locking arms a. Push locking arms upwards Lift the bezel off once the bezel has been slid fully across and is clear of the locating pins Lift upwards to remove Locating pins Copyright © Innovative Technology Ltd 2012 GA963-2 NV11 Manual Set – Section 2 8 Insert a piece of paper (which is narrower than the width between the two belts) in the centre of the note path to activate the drive motor Use a lint free cloth dampened with water and containing a mild detergent (such as dish detergent) and hold against each drive belt as is turns. Insert paper here Repeat this procedure until all dust and debris has been removed from both belts. Finally, use a DRY lint free cloth to remove any excess moisture and refit the bezel. The bezel is refitted by pushing the bezel back onto the locating pins and sliding backwards until all six pins are engaged in the slots. The locking arms will then spring back and locate into the bezel. Caution! Check locking arms. Caution! Do not use any lubricants. Always make sure that BOTH locking arms are fully located in the bezel – trying to operate the validator if they are not correctly located can cause unit damage. Do not lubricate any of the note transport mechanism, belts or any part of the note path, as this can affect the operation of the validator. Copyright © Innovative Technology Ltd 2012 GA963-2 NV11 Manual Set – Section 2 9 If the belts are worn or damaged, they should be replaced. This is a simple procedure, and is carried out as follows: WARNING! Do not try to disassemble Do not attempt to disassemble the validator head or Note Float module – trying to do this could cause personal injury and will damage the unit beyond repair. Open the top of the unit using the Release catch Release catch Lozenge release catch Release the lozenge by gently pressing the Lozenge release catch Remove and place the lozenge on a clean dry surface Press in the large wheels to release the belt tension and then remove the belts, sliding them off the smallest wheels first Lozenge Drive belts Replace the belts by fitting them over the lozenge, largest wheels first Reassemble and close the unit Copyright © Innovative Technology Ltd 2012 GA963-2 NV11 Manual Set – Section 2 2.2 10 Fault Finding - Flash Codes The NV11 validator has inbuilt fault detection facilities. If there is a configuration or other error either the Note Float module status LED, or the NV9USB validator head front bezel will flash in a particular sequence; a summary of the Flash Codes for both units is shown below: NV9USB Bezel Flash Codes: Flashes Long Short 0 0 2 1 3 2 2 1 2 3 3 4 5 1 4 2 Indicated Error Comments None Remove obstruction and follow the cleaning Note path obstructed procedure in Section 2 of this manual set Contact ITL technical Unit not initialised support Check that the cash box note plate is free to move Cash box problem and the stacker mechanism is in the home position Firmware checksum error Interface checksum error or unable to set programmed Download new firmware interface EEPROM checksum error Dataset checksum error Check the validator Incompatible firmware is compatible with firmware the Note Float module Power supply too low Check power supply Power supply too high Copyright © Innovative Technology Ltd 2012 GA963-2 NV11 Manual Set – Section 2 11 Note Float Module Flash Codes: Flashes 0 Constant flash (1 every second) Indicated Error None Note transport error 2 Software error 3 Calibration error 4 Diverter error 5 Motor timeout Copyright © Innovative Technology Ltd 2012 Comments Remove trapped note from the Note Float module and press the configuration button once Download new dataset / firmware Return to service centre for repair Check for trapped notes stopping the diverter returning to the home position Check for trapped notes stopping the Note Float module tape from moving GA963-2 NV11 Manual Set – Section 2 2.3 12 Technical Specifications The full technical specifications for the NV11 validator can be found in Section 6, Appendix B of this manual set. A brief summary is given here: DC Voltage Absolute limits Supply ripple voltage Minimum 10.8 V 0V Nominal 12 V 0V Maximum 13.2 V 0.25 V @ 100 Hz Supply Current Standby Running Peak (motor stall) 350 mA 3A 3.5 A Interface Logic Levels Logic Low Logic High Inputs Outputs (2.2 kΩ pull-up) 0 V to +0.5 V +0.6 V +3.7 V to +12 V Pull-up voltage of host interface 50 mA per output Maximum current sink WARNING! Use suitable power supply Ensure that the supply voltage to the NV11 is not lower than 10.8 V and that the power supply can provide sufficient current to avoid incorrect operation and excessive note rejects. We recommend that your power supply is capable of supplying 12V DC at 4 A. For 12V operation, use TDK Lambda model SWS50-12. This power supply is available from a variety of suppliers including Farnell (stock code 1184645) and RS (stock code 466-5869). Copyright © Innovative Technology Ltd 2012 GA963-2 NV11 Manual Set – Section 2 2.4 13 Fault Finding Flow Chart Please use this flow chart with the Flash Codes in subsection 2.2 as an aid to help resolve any configuration or start up problems you might have after installing the NV11 validator Incorrect currency file Check the required dataset is programmed using the Validator Manager Software (see Section 3 of this manual set). Notes not included in currency file Check the required note denomination and issue is included in the currency file using the Validator Manager Software (see Section 3 of this manual set). Notes inhibited by host machine Check the host machine is ready to accept notes and that the maximum allowed credit hasn’t been exceeded. If a coin hopper is fitted, make sure it isn’t empty. Note path obstructed Check there is sufficient clearance for note ejection after acceptance (see Section 4 of this manual set). No power Check there is power to the validator, and that it is within the tolerances specified in the Technical Specification (see subsection 2.3 of this manual). Incorrect interface programmed Check which interface the validator is programmed for by pressing the configuration button twice – the displayed code indicates which interface is programmed (see Section 1 of this manual set). All notes rejected (bezel LEDs ON) Notes not accepted (bezel LEDs OFF) Power supply out of specification Notes accepted but no credit given Rear note detect sensor obscured Check voltage and current supplied to the validator are within the tolerances specified in the Technical Specification (see subsection 2.3 of this manual). Check there is sufficient clearance for note ejection after acceptance (see Section 4 of this manual set). Check there are no foreign objects obstructing the sensors (see subsection 2.1 of this manual). Check the back security flap moves freely (this is the black plastic flap at the rear underside of the validator head) Copyright © Innovative Technology Ltd 2012 GA963-2 NV11 Manual Set – Section 2 Acceptor runs slowly or intermittently 14 Foreign objects in note path Check and clean the note path (see subsection 2.1 of this manual). Incorrect supply voltage Check voltage and current supplied to the validator are within the tolerances specified in the Technical Specification (see subsection 2.3 of this manual). Unit damage Bezel LEDs are flashing Motor continues to run Various reasons Foreign object or note in the note path If possible, replace damaged components (see Section 4 of this manual set). IF YOU HAVE ANY DOUBTS, RETURN THE UNIT TO ITL FOR REPAIR Check the flash code tables for an understanding of the issue (see Subsection 2.2 of this manual). Check and clean the note path (see Subsection 2.1 of this manual), then reset the validator. In some cases you may also need to reset the host machine. If you are unsure about the cause or how to resolve the problem, please contact ITL’s technical support department. Support contact details can be found on the ITL website (www.innovative-technology.co.uk), or on the last page of this section. Copyright © Innovative Technology Ltd 2012 GA963-2 NV11 Manual Set – Section 2 2.5 15 Frequently Asked Questions a. Why are there no DIP switches on the unit? The NV11 has no dipswitches. Configuring the unit is carried out using a configuration button mounted on the front of the Note Float module – see Section 1, subsection 1.5 of this manual set for more information. b. In what orientation can I use the NV11 validator? The NV11 can only be mounted horizontally - see Section 1, subsection 1.1 of this manual for more information on mounting the validator. Please check the ITL website to see the currently available range of cashboxes and bezels. c. Some or all notes are not accepted Check that no inhibits are set in the Validator Manager software (see Section 3 of this manual set). If the problem persists, contact ITL Support for further assistance. d. How do I clean the validator? Follow the instructions given in subsection 2.1 of this manual. Copyright © Innovative Technology Ltd 2012 GA963-2 NV11 Manual Set – Section 2 2.6 16 Spare Parts Full details of the interface cable connector pinouts, connector types / makes and other related information can be found in Section 4 of this manual set. The user can obtain the following parts for the NV11 validator: ITL Part Number Description Details CN215 Ribbon interface cable Provides connection between DA2 and NV11 Copyright © Innovative Technology Ltd 2012 GA963-2 NV11 Manual Set – Section 2 17 ITL Part Number Description Details CN292 Interface cable Provides connection between DA2 and NV11 Copyright © Innovative Technology Ltd 2012 GA963-2 NV11 Manual Set – Section 2 18 ITL Part Number Description Details CN392 Power and USB Communication Cable USB 2.0 Compliant Type A to 16 way header cable Copyright © Innovative Technology Ltd 2012 GA963-2 NV11 Manual Set – Section 2 19 Bezels ITL Part Number Description PA189 Horizontal Bezel Assembly PA268 69mm Fixed Width Horizontal Bezel PA896 Horizontal Bezel Assembly Copyright © Innovative Technology Ltd 2012 No image available GA963-2 NV11 Manual Set – Section 2 20 Cashboxes PA186 Locking Cashbox Assembly (300L) PA192 Slide-on Cashbox Assembly (300S) PA898 Standard Cashbox Assembly Copyright © Innovative Technology Ltd 2012 GA963-2 NV11 Manual Set – Section 2 Information Check website for options. 21 There are many variants of bezel and cashbox type available for the NV11 validator. Please check the ITL website (www.innovative-technology.co.uk) for up to date information on the options available. Drive Belts FD106 NV9USB Red Drive Belt Copyright © Innovative Technology Ltd 2012 GA963-2 NV11 Manual Set MAIN HEADQUARTERS Innovative Technology Ltd Derker Street – Oldham – England - OL1 4EQ Tel: +44 161 626 9999 Fax: +44 161 620 2090 E-mail: [email protected] Web site: www.innovative-technology.co.uk BRAZIL [email protected] CHINA [email protected] GERMANY [email protected] SPAIN [email protected] UNITED KINGDOM [email protected] UNITED STATES OF AMERICA [email protected] REST OF THE WORLD [email protected] Copyright © Innovative Technology Ltd 2012 GA963-2 SECTION 3 NV11 MANUAL SET ITL SOFTWARE SUPPORT GUIDE NV11 Manual Set – Section 3 2 NV11 MANUAL SET – SECTION 3 3. 3.1 ITL SOFTWARE SUPPORT GUIDE PiPS Software 3 3 3.1.1 Preparing for Installation 3 3.1.2 BV Interface Drivers 7 3.1.3 Installing the Drivers 10 3.1.4 Installing the PiPS Software 18 3.1.5 Starting the PiPS Software 21 3.1.6 Preferences, Settings and Options 24 3.2 Updating Firmware and Datasets 29 3.3 Tools 34 3.3.1 Diagnostics 34 3.3.2 Connections 40 3.4 Frequently Asked Questions Copyright © Innovative Technology Ltd 2012 42 GA963-2 NV11 Manual Set – Section 3 3. ITL SOFTWARE SUPPORT GUIDE 3.1 PiPS Software 3 PiPS (Pay in Pay out System) is a software package developed by Innovative Technology Ltd to allow customers to carry out programming, setup and operational tasks on the full range of NV11 devices. 3.1.1 Preparing for Installation If you do not have the PiPS software on CD, you can easily download it from the Innovative Technology website. Visit www.innovative-technology.co.uk, and select ‘Software Download’ from the ‘Support’ tab: Clicking this link will take you to the software download page. To download any files you must log in as a registered user – if you have not already registered this is a very quick process; just click the ‘create an account’ link and follow the on-screen instructions. Copyright © Innovative Technology Ltd 2012 GA963-2 NV11 Manual Set – Section 3 4 Enter your login details here, or create a new account After logging in, the download screen will change slightly: Your user name will be displayed in the top right hand corner of the screen The padlock icon for each file will change from locked to unlocked. To download a file, just click on the padlock icon opposite the file name. If you want to find more information about the file before you download it, you can click on the blue information icon. Copyright © Innovative Technology Ltd 2012 GA963-2 NV11 Manual Set – Section 3 5 In this case, we want to download the PiPS software, so we click on the padlock icon opposite the ‘SMART PIPS (Pay In Pay Out System)’ filename: After clicking the link, a file download dialog box will appear – choose the option to save the file: You can save the file anywhere that is convenient, as long as you can remember where it is when you want to install the software. Copyright © Innovative Technology Ltd 2012 GA963-2 NV11 Manual Set – Section 3 6 After choosing where to save the file, a file transfer dialog box will appear showing the progress of the file download: Copyright © Innovative Technology Ltd 2012 GA963-2 NV11 Manual Set – Section 3 7 3.1.2 BV Interface Drivers After downloading the Validator Manager software, you will also need to download the Banknote Validator (BV) Interface drivers – two versions are available (32 bit and 64 bit) so choose the correct type for your operating system. Again, remember where you saved the file. Both files are provided in a ‘zipped’ (compressed) form – you will need to extract the files from the zipped file before you can install the software or driver. Any version of Windows from Windows 98 onwards can open zipped files; or you may want to use a third party software tool such as Winzip or WinRAR. Copyright © Innovative Technology Ltd 2012 GA963-2 NV11 Manual Set – Section 3 8 Extract the files to a convenient location – this might be an existing folder, or you may want to save them into a new folder. In this example, the BV Interface driver files are being saved into a folder called ‘Drivers’ on the computers C: drive. Copyright © Innovative Technology Ltd 2012 GA963-2 NV11 Manual Set – Section 3 Copyright © Innovative Technology Ltd 2012 9 GA963-2 NV11 Manual Set – Section 3 10 3.1.3 Installing the Drivers There are several ways to communicate with the NV11 validator, which include using a direct connection from computer to validator with a CN392 validator to USB cable, or by using a special interface unit called a DA2. Use of the DA2 is not covered here – please refer to ITL Document number GA338-2 for more information. In this manual we will be using the USB connection method. The connector needed to set up and interface the NV11 validator is easily accessible on the side of the unit: Interface Connector Copyright © Innovative Technology Ltd 2012 GA963-2 NV11 Manual Set – Section 3 11 To use a USB connection with the NV11, a USB cable fitted with a 16 way connector on one end (ITL Part Number CN392) should be used. The CN392 cable fits into the 16 way connector and allows high speed programming and serial communications when used in SSP and ccTalk modes. When using the USB connection, power must be supplied to the NV11 using the red and black power leads on the CN392 cable. The NV11 validator must be powered up for the interface to be recognised by Windows. If the validator is not in the host machine, you will need to provide power to the 16 way interface connector first. The connection information and pin numbering is as follows: Pin 1 5 11 12 13 15 16 Description Serial Data Out (Tx) Serial Data In (Rx) USB Data + USB Data USB Power (+5V) +V 0V / Ground Connection Before connecting the USB cable to the computer, make sure that the CN392 cable is connected to the validator and that the unit is powered up. Once you have carried out these steps, plug the USB cable into the computer. After connecting the USB cable, Windows should then detect the NV11 validator interface – a ‘Found New Hardware’ bubble or dialog box should appear. A ‘Found New Hardware’ wizard should then start to guide you through the installation process (this first screen is not always shown on some computers): Copyright © Innovative Technology Ltd 2012 GA963-2 NV11 Manual Set – Section 3 12 Select this option as you already have the drivers Information Only use V2 drivers Please make sure that you are using the V2 drivers for the installation. Select this option as we have saved the drivers to a known location Copyright © Innovative Technology Ltd 2012 GA963-2 NV11 Manual Set – Section 3 13 The next dialog box will ask you where to search for the drivers: Click the ‘Browse’ button to find the driver files (in this example C:\Drivers) Copyright © Innovative Technology Ltd 2012 GA963-2 NV11 Manual Set – Section 3 14 Uncheck this option to speed up the installation Click the ‘Next’ button to install the drivers Copyright © Innovative Technology Ltd 2012 GA963-2 NV11 Manual Set – Section 3 15 You may see a warning dialog saying that the drivers have not passed Windows logo testing – you can ignore this warning. Just click the ‘Continue Anyway’ button. Copyright © Innovative Technology Ltd 2012 GA963-2 NV11 Manual Set – Section 3 16 Click the ‘Finish’ button to complete the installation Copyright © Innovative Technology Ltd 2012 GA963-2 NV11 Manual Set – Section 3 17 After completing the driver installation you can check that the communications port has been installed correctly. Open Windows Device Manager, and click on the Plus symbol (+) next to the ‘Ports’ entry. This will expand the list of installed communications ports. You should see an entry for an ‘ITL BV Serial V2’ port as shown here: The actual communications port number (in our example COM5) may vary depending on your particular computer configuration. Now the drivers have been correctly installed you can install the Validator Manager software – this is covered next. Copyright © Innovative Technology Ltd 2012 GA963-2 NV11 Manual Set – Section 3 18 3.1.4 Installing the PiPS Software Installing the PiPS software is very straightforward. Find the PiPS installation file you downloaded earlier, extract the installation file from the zipped file and double click the file (it has an .msi extension) – this will start the installation process: Copyright © Innovative Technology Ltd 2012 GA963-2 NV11 Manual Set – Section 3 19 You can choose where you would like to install the software, or just accept the default location (as shown above). Clicking on the ‘Next’ button will then ask you to confirm the installation: Copyright © Innovative Technology Ltd 2012 GA963-2 NV11 Manual Set – Section 3 20 Once the installation is complete, you will have a new program group called ‘ITL Smart Tools’ in the Windows Start Menu, similar to the one shown here: You can run the PiPS software by clicking the ‘Pay-in Pay-Out system’ menu entry; however, before you can use the PiPS software with an NV11 you will need to make sure that you have installed the BV interface drivers (as described earlier). Copyright © Innovative Technology Ltd 2012 GA963-2 NV11 Manual Set – Section 3 21 3.1.5 Starting the PiPS Software The PiPS software is launched by clicking the ‘Pay-in Pay-out system’ entry in the ‘ITL Smart Tools’ menu group. The initial program screen looks like this: Make sure that the NV11 is powered up and the USB cable is connected before going any further. Copyright © Innovative Technology Ltd 2012 GA963-2 NV11 Manual Set – Section 3 22 Once the NV11 is connected, there are two ways to start the program operation: Click the ‘Start-up’ icon Click ‘Utilities’, then ‘Run PIPS System’ The PiPS software will then start to connect to the NV11. Depending on the number and types of communications ports on your computer, you may get an error message similar to the one shown on the right saying ‘Unable to open this port’ – this isn’t a problem, just click the ‘OK’ button. You will see some text in the PiPS program window as the software checks the communications ports for the NV11 (similar to what is shown here) – this text may vary depending on your particular computer configuration. Copyright © Innovative Technology Ltd 2012 GA963-2 NV11 Manual Set – Section 3 23 Once the NV11 unit has been found, two windows will appear on the screen: This window shows the installed currency, level and programming information for the connected NV11. This window will display all the communications events More details of the program options and operations that can be carried out will be covered in the next subsection. Copyright © Innovative Technology Ltd 2012 GA963-2 NV11 Manual Set – Section 3 24 3.1.6 Preferences, Settings and Options The preferences for the PiPS software are accessible from the Utilities menu (as shown). Click the ‘Options’ entry to open a new dialog box: This option sets the protocol version used for communications – contact ITL Technical Support for the current configuration details. This option allows the user to display bank note by value or channel Check this option to allow detailed protocol logging This option is not applicable for the NV11 Normally, these preferences should not need changing. The settings and options for the NV11 vary depending whether the system is in the 'Run' or the 'Halt' state – generally the system will need to be halted before any changes to setup options can be made. Pay in/pay out operations are only available when in ‘Run’ state. Halt State If the system is in ‘Halt’ state, the user will either have just started the PiPS software, or clicked on the ‘Halt’ button. The menu bar will look like this: Copyright © Innovative Technology Ltd 2012 GA963-2 NV11 Manual Set – Section 3 25 The main screen should look something like this: The various settings and options can be accessed from a right click when the mouse cursor is over any of the system device entries: Copyright © Innovative Technology Ltd 2012 GA963-2 NV11 Manual Set – Section 3 Copyright © Innovative Technology Ltd 2012 26 GA963-2 NV11 Manual Set – Section 3 27 Halt State Options Set Route To set the pay in route for inserted bank notes to either Cashbox or Note Float module, select the desired denomination(s) and click the required route. The system will send the commands to the device and store these preferences so that they will be set again on the next start-up. Set Options Using this dialog, the user can setup the device SSP address and eSSP keys by double clicking on the required option. Get Error Status This option displays any device error messages in the ‘System Events’ window. Download Update This option allows the user to download an ITL update file to File the connected device. Send SSP Command This option brings up the SSP communications dialog which allows the user to send individual commands to the connected device. CAUTION! Take care when changing eSSP key Exercise care when changing the device eSSP key. The user must make a note of the new key and change the host key to match. If the key is not known then device must be returned to ITL for key reset. Copyright © Innovative Technology Ltd 2012 GA963-2 NV11 Manual Set – Section 3 28 Run State If the system is in ‘Run’ state, the user will have clicked on the ‘Run’ button and the menu bar will look like this: Run State Options Set Route To set the pay in route for inserted bank notes to either Cashbox or Note Float module, select the desired domination(s) and click the required route. The system will send the commands to the device and store these preferences so that they will be set again on the next start-up. Empty This command will empty all the stored notes in the connected Note Float module into the device cashbox. After emptying the notes, counters on the device will be reset to zero. Reset This command will reset the connected payout device. After reset, the system will re-initialise the device for use. Copyright © Innovative Technology Ltd 2012 GA963-2 NV11 Manual Set – Section 3 3.2 29 Updating Firmware and Datasets CAUTION! Do not power off Powering off the NV11 when updating the firmware or dataset can cause the validator to stop working. The NV11 validator firmware and dataset can be updated very easily using the PiPS software. The process uses NV9USB dataset files which can be downloaded from the Innovative Technology Ltd website: Information Combined data files The firmware and dataset files for the NV11 validator are combined into a single file, so both will be updated when you carry out the update. Copyright © Innovative Technology Ltd 2012 GA963-2 NV11 Manual Set – Section 3 Copyright © Innovative Technology Ltd 2012 30 GA963-2 NV11 Manual Set – Section 3 31 After selecting the dataset, a dialog will prompt you to save or open the file: select the Save option You can then choose where to save the file – choose a location that is convenient for you: Copyright © Innovative Technology Ltd 2012 GA963-2 NV11 Manual Set – Section 3 32 Once the dataset file is saved, unzip the file and you can then start the process to update the NV11 validator by connecting the USB cable and starting the PiPS software as described previously. With the PiPS software in ‘Halt’ mode, right click on one of the currency entries and select ‘Download Update File’ from the dialog as shown here: You will then be prompted to select the dataset file you downloaded and unzipped earlier – select the file and click the ‘Open’ button: Copyright © Innovative Technology Ltd 2012 GA963-2 NV11 Manual Set – Section 3 33 The PiPS software will then ask you to confirm that this is file you want to use to update the NV11 unit with – click the ‘Yes’ button to continue: A new dialog will then appear showing the update status: After the reset is complete, the NV11 validator will then be ready for use with the new currency. Copyright © Innovative Technology Ltd 2012 GA963-2 NV11 Manual Set – Section 3 3.3 34 Tools 3.3.1 Diagnostics There is a dedicated software diagnostics tool for use with the NV11 validator called ‘Bank Note Validator Diagnostics Tools’, and this software can be downloaded from the Innovative Technology Ltd website: When the file download dialog box appears, click the ‘Save’ button and select a suitable location to save the file in: Installing the Diagnostics tools software is done in the same way as the PiPS software - Find the ITLDiagnosticsTools zipped file you just downloaded, extract the installation file from the zipped file and double click the extracted file (it has an .msi extension) – this will start the installation process. Copyright © Innovative Technology Ltd 2012 GA963-2 NV11 Manual Set – Section 3 35 After installing the software, you can run the diagnostics software by selecting the ‘Shortcut to ITL Diagnostics.exe’ item near the top of the Windows Start menu. Make sure that the NV11 Validator is powered up and the USB cable is connected before starting the program. The main screen of the diagnostics tools software looks like this: When running the software for the first time, you need to set a few options. These are accessed from the ‘Options’ menu: Copyright © Innovative Technology Ltd 2012 GA963-2 NV11 Manual Set – Section 3 36 By selecting the ‘Serial Port’ item from the ‘Options’ menu you can define which serial port is being used to connect to the NV11 validator. After selecting this option, a new dialog box will open allowing you to choose the correct serial port. Select the required port from the dropdown list, and then click the ‘OK’ button to confirm your selection. This will close the dialog box and allow you to select another option from the menu. You shouldn’t normally need to change the language setting, as this is determined by the Windows locale settings. You can if you wish select one of four specific languages if needed, as shown below: Copyright © Innovative Technology Ltd 2012 GA963-2 NV11 Manual Set – Section 3 37 Select the ‘Diagnostics’ item from the ‘Utilities’ menu to start the diagnostics process (you can also start the diagnostics by clicking on the left hand icon below the menu bar) - this will open the Diagnostics screen: Click the ‘Start Diagnostic’ button to start the diagnostic process. The software will then prompt you to insert a special piece of green diagnostics paper (ITL part number LB149). Insert the paper in the same way you would with a bank note – at the end of the diagnostics test the paper will be ejected. Copyright © Innovative Technology Ltd 2012 GA963-2 NV11 Manual Set – Section 3 38 Diagnostics Pass: A summary of the validator type and related information is displayed here. Motor test results are shown in this window. The overall test result is displayed here. Sensor test results are shown in this window. Copyright © Innovative Technology Ltd 2012 GA963-2 NV11 Manual Set – Section 3 39 Diagnostics Fail: A summary of the validator type and related information is displayed here. Motor test results are shown in this window – in this example all the motors have passed testing. The overall test result is displayed here. Sensor test results are shown in this window – in this example, several sensors have failed during the diagnostics test. Further details on how to use the diagnostics tools and interpret the results can be found in the program help file. Copyright © Innovative Technology Ltd 2012 GA963-2 NV11 Manual Set – Section 3 40 3.3.2 Connections The NV11 validator has a single connector that is used to allow interfacing and programming. Information Power always required regardless of connection type. Power is always required on pins 15 and 16 of the 16 way connector. The connector is a 16 pin socket used to interface the NV11 to the host machine. The pin numbering of the socket is shown below, as well as an overview of the socket connections: Pin 1 5 11 12 13 15 16 Description Serial Data Out (Tx) Serial Data In (Rx) USB Data + USB Data USB Power (+5V) +V 0V / Ground Connection To use a USB connection with the NV11, a USB cable fitted with a 16 way connector on one end (ITL Part Number CN392) should be used. The CN392 cable fits into the 16 way connector and allows high speed programming and serial communications when used in SSP and ccTalk modes. When using the USB connection, power must be supplied to the NV11 using the red and black power leads on the CN392 cable. The socket connections for the natively supported protocols are shown in the tables below, as is a summary of the interface units needed for other types of operation: WARNING! Risk of unit damage Do not make any connections to the interface socket pins marked ‘Do not connect’ – making connections to these pins could cause severe damage to the unit. Copyright © Innovative Technology Ltd 2012 GA963-2 NV11 Manual Set – Section 3 41 NV11 SSP Interface: Pin 1 2 3 4 5 6 7 8 9 10 11 12 13 14 15 16 Name TxD Type Output Factory use only RxD Do not connect Input Factory use only USB D+ USB DUSB Vcc Factory use only V In GND Description Serial data out (Tx) Serial data in (Rx) Do not connect Data Data Power Power Ground USB Data + USB Data USB +V (+5V) Do not connect +V GND NV11 ccTalk Interface: Pin Name 1 TxD 2 3 4 Factory use only 5 RxD 6 7 8 9 10 11 12 13 14 15 16 Type Output Do not connect Input Factory use only USB D+ USB DUSB Vcc Factory use only V In GND Description ccTalk data – must also be connected to pin 5 ccTalk data – must also be connected to pin 1 Do not connect Data Data Power Power Ground Copyright © Innovative Technology Ltd 2012 USB Data + USB Data USB +V (+5V) Do not connect +V GND GA963-2 NV11 Manual Set – Section 3 3.4 42 Frequently Asked Questions a. Why are there no DIP switches on the unit? The NV11 has no dipswitches. Configuring the unit is carried out using a configuration button mounted on the front of the Note Float module – see Section 1, subsection 1.5 of this manual set for more information. b. Are 64 bit drivers available? Both 32 and 64 bit drivers can be downloaded from the ‘Support’ section of the ITL website – please make sure that you are using the correct type of driver for your Operating System. c. Some or all notes are not accepted Check that no inhibits are set in the PiPS software. If the problem persists, contact ITL Support for further assistance. Copyright © Innovative Technology Ltd 2012 GA963-2 NV11 Manual Set MAIN HEADQUARTERS Innovative Technology Ltd Derker Street – Oldham – England - OL1 4EQ Tel: +44 161 626 9999 Fax: +44 161 620 2090 E-mail: [email protected] Web site: www.innovative-technology.co.uk BRAZIL [email protected] CHINA [email protected] GERMANY [email protected] SPAIN [email protected] UNITED KINGDOM [email protected] UNITED STATES OF AMERICA [email protected] REST OF THE WORLD [email protected] Copyright © Innovative Technology Ltd 2012 GA963-2 SECTION 4 NV11 MANUAL SET MECHANICAL AND ELECTRICAL MANUAL NV11 Manual Set – Section 4 2 NV11 MANUAL SET – SECTION 4 4. MECHANICAL AND ELECTRICAL MANUAL 3 4.1 Introduction 3 4.2 Assembly and Fitting Instructions 5 4.3 Bezel Removal and Refitting 8 4.4 Technical Specifications 9 4.5 Cable Specifications 10 4.6 Electrical Interfaces 11 4.7 Configuration Button 14 4.8 Programming 15 4.9 Basic Operation 16 4.10 Spare Parts 18 4.11 Guidance Notes 27 Cleaning 27 Manual Note Removal 35 Re-Initialisation 38 4.12 Drawings and Schematics Copyright © Innovative Technology Ltd 2012 39 GA963-2 NV11 Manual Set – Section 4 4. 3 MECHANICAL AND ELECTRICAL MANUAL This section is one part of a complete manual set: Design Engineers who are designing a host machine cabinet, or looking to integrate the NV11 validator into an existing cabinet would need to read this section. This section contains the all the mechanical and electrical information a designer needs to effectively integrate the NV11 validator into a host machine. 4.1 Introduction The NV11 validator is made up of four basic components: an NV9USB validator head, Note Float module, removable bezel and a cashbox (as shown below): Note Float module Removable bezel NV9USB validator head Cashbox The NV11 is a device that can accept, validate and store 300 or 600 bank notes of mixed denominations, and also has the capability of storing a further 30 notes in the Note Float module for future payout. Up to 16 different denominations of bank note can be accepted and stacked, and the Note Float module can be programmed to store and dispense 30 single denomination notes. Copyright © Innovative Technology Ltd 2012 GA963-2 NV11 Manual Set – Section 4 4 The NV11 is a LIFO (Last In First Out) system. This means that only the last note in the Note Float module is available to be paid out or moved to the stacker. Any value note can be routed into the Note Float module using the ‘Set Routing’ command. It is recommended that only one denomination of the chosen currency is stored in the Note Float module. NV11 Rear View Information Validator compatibility. NV11 Side View NV11 Front View The NV11 validator is pin for pin compatible with the NV7 / NV8 / NV9 / NV10 series of validators, but NOT with earlier versions of the product (NV2 – NV5). The NV11 validator leaves the factory preset to at least one currency and dataset so that it is ready for immediate installation. The NV11 validator works with any NV9USB currency dataset created by Innovative Technology Ltd - datasets can be downloaded from the Support section of the ITL website. Copyright © Innovative Technology Ltd 2012 GA963-2 NV11 Manual Set – Section 4 4.2 5 Assembly and Fitting Instructions Installing the NV11 is a simple operation, but note that the validator can only be installed horizontally: Information Validator compatibility. 1. 2. If the validator head has a blanking plate fitted, you will need to remove this BEFORE attempting to fit the Note Float module. If the Note Float module is already fitted, please go to step 6 The NV11 validator is pin for pin compatible with the NV7 / NV8 / NV9 / NV10 series of validators, but NOT with earlier versions of the product (NV2 – NV5). Blanking plate Validator head Open the validator head by sliding the red release catch on the front of the validator to the left (as indicated in the picture) Release catch Caution! Validator head MUST be opened. Always make sure the validator head has been opened BEFORE trying to remove the blanking plate – trying to remove the blanking plate with the validator head closed will cause unit damage. Copyright © Innovative Technology Ltd 2012 GA963-2 NV11 Manual Set – Section 4 3. Remove the blanking plate by disengaging the two side clips and lifting the blanking plate upwards 4. Close the validator head and then carefully fit the Note Float module onto the validator head, making sure the rear cover is securely closed and the latches are lined up correctly 6 Side clips Rear cover Latch 5. Make sure both latches are engaged and closed Copyright © Innovative Technology Ltd 2012 GA963-2 NV11 Manual Set – Section 4 6. The validator can be fitted with a standard or slide-on cashbox of 300 or 600 note capacity 7. If not already attached, the validator can be fitted with a horizontal bezel of your choice. 8. The cashbox is attached to the validator by locating and sliding until the cashbox is clipped securely and secured in the host machine using the studs on the bottom of the cashbox 7 Note Float module Bezel Validator head Cashbox Copyright © Innovative Technology Ltd 2012 Mounting studs GA963-2 NV11 Manual Set – Section 4 Information Check website for options. 4.3 8 There are many variants of bezel and cashbox type available for the NV11 validator. Please check the ITL website (www.innovative-technology.co.uk) for up to date information on the options available. Bezel Removal and Refitting The bezel is removed by pushing the red locking arms on both sides of the validator upwards, and sliding the bezel away from the locking arms b. Slide bezel away from locking arms a. Push locking arms upwards Lift the bezel off once the bezel has been slid fully across and is clear of the locating pins Lift upwards to remove Locating pins The bezel is refitted by pushing the bezel back onto the locating pins and sliding backwards until all six pins are engaged in the slots. The locking arms will then spring back and locate into the bezel. Copyright © Innovative Technology Ltd 2012 GA963-2 NV11 Manual Set – Section 4 9 Always make sure that BOTH locking arms are fully located in the bezel – trying to operate the validator if they are not correctly located can cause unit damage. Caution! Check locking arms. The technical drawings which can be found at the end of this section show all the dimensional information needed to mount the unit. 4.4 Technical Specifications The full technical specifications for the NV11 validator can be found in Section 6, Appendix B of this manual set. A brief summary is given here: DC Voltage Absolute limits Supply ripple voltage Minimum 10.8 V 0V Nominal 12 V 0V Maximum 13.2 V 0.25 V @ 100 Hz Supply Current Standby Running Peak (motor stall) 350 mA 3A 3.5 A Interface Logic Levels Logic Low Logic High Inputs Outputs (2.2 kΩ pull-up) 0 V to +0.5 V +0.6 V +3.7 V to +12 V Pull-up voltage of host interface 50 mA per output Maximum current sink WARNING! Use suitable power supply Ensure that the supply voltage to the NV11 is not lower than 10.8 V and that the power supply can provide sufficient current to avoid incorrect operation and excessive note rejects. We recommend that your power supply is capable of supplying 12V DC at 4 A. For 12V operation, use TDK Lambda model SWS50-12. This power supply is available from a variety of suppliers including Farnell (stock code 1184645) and RS (stock code 466-5869). Copyright © Innovative Technology Ltd 2012 GA963-2 NV11 Manual Set – Section 4 4.5 10 Cable Specifications The minimum specification for wire used in power cables for the NV11 validator is given here: Minimum AWG 26 Nominal current rating 3.0 A Peak current rating 3.5 A Cable rating 4A Insulation rating 80 °C Do not use wire of an inferior specification, as this can cause operating problems with the validator. Copyright © Innovative Technology Ltd 2012 GA963-2 NV11 Manual Set – Section 4 4.6 11 Electrical Interfaces Interface Connector The connector needed to set up and interface the NV11 validator is easily accessible on the side of the unit: Copyright © Innovative Technology Ltd 2012 GA963-2 NV11 Manual Set – Section 4 Information Power always required regardless of connection type. 12 Power is always required on pins 15 and 16 of the 16 way connector. The connector is a 16 pin socket used to interface the NV11 to the host machine. The pin numbering of the socket is shown below, as well as an overview of the socket connections: Pin 1 5 11 12 13 15 16 Description Serial Data Out (Tx) Serial Data In (Rx) USB Data + USB Data USB Power (+5V) +V 0V / Ground Connection To use a USB connection with the NV11, a USB cable fitted with a 16 way connector on one end (ITL Part Number CN392) should be used. The CN392 cable fits into the 16 way connector and allows high speed programming and serial communications when used in SSP and ccTalk modes. When using the USB connection, power must be supplied to the NV11 using the CN392 cable. The socket connections for the natively supported protocols are shown in the tables below: WARNING! Risk of unit damage Do not make any connections to the interface socket pins marked ‘Do not connect’ – making connections to these pins could cause severe damage to the unit. Copyright © Innovative Technology Ltd 2012 GA963-2 NV11 Manual Set – Section 4 13 NV11 SSP Interface: Pin 1 2 3 4 5 6 7 8 9 10 11 12 13 14 15 16 Name TxD Type Output Factory use only RxD Do not connect Input Factory use only USB D+ USB DUSB Vcc Factory use only V In GND Description Serial data out (Tx) Serial data in (Rx) Do not connect Data Data Power Power Ground USB Data + USB Data USB +V (+5V) Do not connect +V GND NV11 ccTalk Interface: Pin Name 1 TxD 2 3 4 Factory use only 5 RxD 6 7 8 9 10 11 12 13 14 15 16 Type Output Do not connect Input Factory use only USB D+ USB DUSB Vcc Factory use only V In GND Description ccTalk data – must also be connected to pin 5 ccTalk data – must also be connected to pin 1 Do not connect Data Data Power Power Ground Copyright © Innovative Technology Ltd 2012 USB Data + USB Data USB +V (+5V) Do not connect +V GND GA963-2 NV11 Manual Set – Section 4 4.7 14 Configuration Button The NV11 does not use DIP switches to configure the unit – configuration and setting is carried out by using a Configuration Button mounted on the front of the Note Float module: Note Float module Configuration Button Status LED There are several functions available when using the Configuration Button, and these are listed in this table: Copyright © Innovative Technology Ltd 2012 GA963-2 NV11 Manual Set – Section 4 Action Press and hold (more than 2 seconds) until the bezel illuminates, then release Press twice (within half a second) Press once when Note Float module status LED is flashing (transport error) Flash Count 1 6 6,1 6,1,2 Power Status Function Powered ON Sets validator to Programming mode (SSP) Powered ON Powered ON Interface SSP ccTalk ccTalk plain (16 bit) ccTalk (8 bit) WARNING! Risk of unit damage 4.8 15 Shows current interface type (see flash count table below) Acknowledges that a note blockage has been cleared The NV11 validator leaves the factory preset to at least one currency and one firmware interface so that it is ready for immediate installation. When in programming mode, do not turn off the power before the operation is complete as this will make the unit unusable. Programming Full details on programming the NV11 validator using software can be found in Section 3 of this manual set (ITL Software Support Guide). It is not possible to program the NV11 by the use of a configuration card as this method of programming is not yet implemented. Copyright © Innovative Technology Ltd 2012 GA963-2 NV11 Manual Set – Section 4 4.9 16 Basic Operation The NV11 validator is a device that can accept, validate and store 300 or 600 bank notes of mixed denominations, and works with any NV9USB currency dataset created by Innovative Technology Ltd. Validated bank notes are stored in the NV11’s cashbox, and bank notes accepted by the validator are not visible once inside the unit and can only be taken out of the cashbox manually. The NV11 validator has inbuilt fault detection facilities. If there is a configuration or other error either the Note Float module status LED, or the NV9USB validator head front bezel will flash in a particular sequence; a summary of the Flash Codes for both units is shown below: NV9USB Bezel Flash Codes: Flashes Long Short 0 0 2 1 3 2 2 1 2 3 3 4 5 1 4 2 Indicated Error Comments None Remove obstruction and follow the cleaning Note path obstructed procedure in Section 2 of this manual set Contact ITL technical Unit not initialised support Check that the cash box note plate is free to move Cash box problem and the stacker mechanism is in the home position Firmware checksum error Interface checksum error or unable to set programmed Download new firmware interface EEPROM checksum error Dataset checksum error Check the validator Incompatible firmware is compatible with firmware the Note Float module Power supply too low Check power supply Power supply too high Copyright © Innovative Technology Ltd 2012 GA963-2 NV11 Manual Set – Section 4 17 Note Float Module Flash Codes: Flashes 0 Constant flash (1 every second) Indicated Error None Note transport error 2 Software error 3 Calibration error 4 Diverter error 5 Motor timeout Copyright © Innovative Technology Ltd 2012 Comments Remove trapped note from the Note Float module and press the configuration button once Download new dataset / firmware Return to service centre for repair Check for trapped notes stopping the diverter returning to the home position Check for trapped notes stopping the Note Float module tape from moving GA963-2 NV11 Manual Set – Section 4 18 4.10 Spare Parts ITL Part Number Description Details CN215 Ribbon interface cable Provides connection between DA2 and NV11 Comments: Please consult the tables on the next page for pin out and connector information. Copyright © Innovative Technology Ltd 2012 GA963-2 NV11 Manual Set – Section 4 19 CN215 Parts List Qty 2 8 2 1 Description 8 way 2 row 2.54mm pitch friction lock housing Tin plated crimp socket 22-24 AWG Black heat shrink sleeving 22 AWG stranded 4 core cable, PVC insulated Supplier Leotronics 2652-2161 Leotronics 2653-2000 ----- Alternative Molex 90142-0016 Molex 90119-0110 ----- CN215 Connectivity CON1 CON2 Gauge Colour Comments 24 24 24 24 Orange Brown Red Black V IN GND Pin 1 5 15 16 1 5 15 16 AWG AWG AWG AWG Notes: Pins 3, 4, 7, 8, 9, 10, 13 and 14 have no crimps fitted Pins 2, 6, 11 and 12 have crimps fitted but these are not connected. WARNING! Use correct wire gauges If you choose to make your own cables, you must make sure that the wire gauges are suitable for use with the validator. The minimum wire gauge for the CN292 cable is 24 AWG, with 22 AWG being recommended. Copyright © Innovative Technology Ltd 2012 GA963-2 NV11 Manual Set – Section 4 20 ITL Part Number Description Details CN292 Interface cable Provides connection between DA2 and NV11 Comments: Please consult the tables on the next page for pin out and connector information. Copyright © Innovative Technology Ltd 2012 GA963-2 NV11 Manual Set – Section 4 21 CN292 Parts List Qty 2 8 2 1 Description 8 way 2 row 2.54mm pitch friction lock housing Tin plated crimp socket 22-24 AWG Black heat shrink sleeving 22 AWG stranded 4 core cable, PVC insulated Supplier Leotronics 2652-2161 Leotronics 2653-2000 ----- Alternative Molex 90142-0016 Molex 90119-0110 ----- CN292 Connectivity CON1 CON2 Gauge Colour Comments 24 24 24 24 Orange Brown Red Black V IN GND Pin 1 5 15 16 1 5 15 16 AWG AWG AWG AWG Notes: Pins 3, 4, 7, 8, 9, 10, 13 and 14 have no crimps fitted Pins 2, 6, 11 and 12 have crimps fitted but these are not connected. WARNING! Use correct wire gauges If you choose to make your own cables, you must make sure that the wire gauges are suitable for use with the validator. The minimum wire gauge for the CN292 cable is 24 AWG, with 22 AWG being recommended. Copyright © Innovative Technology Ltd 2012 GA963-2 NV11 Manual Set – Section 4 22 ITL Part Number Description Details CN392 Power and USB Communication Cable USB 2.0 Compliant Type A to 16 way header cable Comments: Please consult the tables on the next page for pin out and connector information. Copyright © Innovative Technology Ltd 2012 GA963-2 NV11 Manual Set – Section 4 23 CN392 Parts List Qty 1 2 9 2 2 Description USB 2.0 lead with type A plug 8 way 2 row 2.54mm pitch friction lock housing Gold plated crimp socket 22-24 AWG Black heat shrink sleeving 26 AWG stranded single core cable, PVC insulated Supplier Molex 88728-3400 Molex 90142-0016 Molex 90119-2110 ----- Alternative RS 324-8362 Leotronics 2652-2161 Leotronics 2653-2000 ----- CN392 Connectivity CON1 CON2 Gauge Colour Comments Pin 1 13 Red USB +V (+5V) 2 12 White USB Data – (twist together with Data +) 3 11 Green USB Data + (twist together with Data -) 4 16 Black USB GND - see figure 1 for connection detail Screen 16 Black See figure 1 for connection detail --16 26 AWG Black 0V - see figure 1 for connection detail --15 26 AWG Red +12V - see figure 1 for connection detail Notes: CON2 pins 1 - 4 have crimps fitted but these are not connected. CON2 pins 5 -10 and 14 have no crimps fitted WARNING! Use correct wire gauges If you choose to make your own cables, you must make sure that the wire gauges are suitable for use with the validator. The minimum wire gauge for the CN392 cable is 26 AWG, with 24 AWG being recommended. Copyright © Innovative Technology Ltd 2012 GA963-2 NV11 Manual Set – Section 4 24 Bezels ITL Part Number Description PA189 Horizontal Bezel Assembly PA268 69mm Fixed Width Horizontal Bezel PA896 Horizontal Bezel Assembly Copyright © Innovative Technology Ltd 2012 No image available GA963-2 NV11 Manual Set – Section 4 25 Cashboxes PA186 Locking Cashbox Assembly (300L) PA192 Slide-on Cashbox Assembly (300S) PA898 Standard Cashbox Assembly Copyright © Innovative Technology Ltd 2012 GA963-2 NV11 Manual Set – Section 4 Information Check website for options. 26 There are many variants of bezel and cashbox type available for the NV11 validator. Please check the ITL website (www.innovative-technology.co.uk) for up to date information on the options available. Drive Belts FD106 NV9USB Red Drive Belt Copyright © Innovative Technology Ltd 2012 GA963-2 NV11 Manual Set – Section 4 27 4.11 Guidance Notes Cleaning The NV11 validator has been designed in a way to prevent damage and airborne contamination reaching the optical sensors; however, depending upon the environment the NV11 may require occasional cleaning or belt changing. Caution! Do not use solvent based cleaners on any part of the NV11 unit. Do not use solvent based cleaners such as alcohol, petrol, methylated spirits, white spirit or PCB cleaner. Using these solvents can cause permanent damage to the unit; only use a mild detergent solution as directed below. To clean the NV11, open the note path by sliding the red release catch on the front of the validator to the left (as indicated in the picture) - this will allow access to the lozenge and note path Release catch Copyright © Innovative Technology Ltd 2012 GA963-2 NV11 Manual Set – Section 4 28 Note path Lozenge release catch Lozenge Drive belts Note stacker Cash box spring plate Note Float module Cashbox WARNING! Disconnect power BEFORE any cleaning operation Unless stated otherwise, you should disconnect the power BEFORE carrying out any cleaning operations to avoid the risk of causing damage to the validator. Copyright © Innovative Technology Ltd 2012 GA963-2 NV11 Manual Set – Section 4 29 Ideally, you should also remove the Note Float module prior to cleaning the sensors removal is a very straightforward task: WARNING! Do not try to disassemble Do not attempt to disassemble the Note Float module – there are no user serviceable parts inside and trying to disassemble the module could cause personal injury and will also damage the unit beyond repair. 1. Open both the Note Float side latches as shown 2. Carefully lift the Note Float module upwards and clear of the validator head 3. To refit the Note Float module, reverse the procedure – make sure that the electrical connectors and latches are lined up correctly Electrical connector Copyright © Innovative Technology Ltd 2012 GA963-2 NV11 Manual Set – Section 4 Copyright © Innovative Technology Ltd 2012 30 GA963-2 NV11 Manual Set – Section 4 31 Front sensors Optical sensor Start sensor Rear sensor Optical sensor Examine the note paths, lozenge and note stacker for any dirt or debris, and carefully clear and wipe the surfaces of the note paths and lozenge with a soft lint free cloth that has been dampened with a water and mild detergent solution (i.e. household washing up liquid.) - be very careful when cleaning around the sensor lenses and make sure they are clean and dry before closing the cover and restarting the unit. Do not try to polish the sensor lenses – if a lens is badly scratched, contact ITL technical support for advice. Also check that the note stacker and cash box spring plate are not jammed. Copyright © Innovative Technology Ltd 2012 GA963-2 NV11 Manual Set – Section 4 Caution! Be careful cleaning sensors. 32 When cleaning the recessed front sensor, use a small soft brush or cotton bud – do not use anything sharp or abrasive. Cleaning the belts is a simple operation. Ensure the validator is enabled (i.e. bezel lights are illuminated), then remove the bezel: The bezel is removed by pushing the red locking arms on both sides of the validator upwards, and sliding the bezel away from the locking arms b. Slide bezel away from locking arms a. Push locking arms upwards Lift the bezel off once the bezel has been slid fully across and is clear of the locating pins Lift upwards to remove Locating pins Copyright © Innovative Technology Ltd 2012 GA963-2 NV11 Manual Set – Section 4 33 Insert a piece of paper (which is narrower than the width between the two belts) in the centre of the note path to activate the drive motor Use a lint free cloth dampened with water and containing a mild detergent (such as dish detergent) and hold against each drive belt as is turns. Insert paper here Repeat this procedure until all dust and debris has been removed from both belts. Finally, use a DRY lint free cloth to remove any excess moisture and refit the bezel. The bezel is refitted by pushing the bezel back onto the locating pins and sliding backwards until all six pins are engaged in the slots. The locking arms will then spring back and locate into the bezel. Caution! Check locking arms. Caution! Do not use any lubricants. Always make sure that BOTH locking arms are fully located in the bezel – trying to operate the validator if they are not correctly located can cause unit damage. Do not lubricate any of the note transport mechanism, belts or any part of the note path, as this can affect the operation of the validator. Copyright © Innovative Technology Ltd 2012 GA963-2 NV11 Manual Set – Section 4 34 If the belts are worn or damaged, they should be replaced. This is a simple procedure, and is carried out as follows: WARNING! Do not try to disassemble Do not attempt to disassemble the validator head or Note Float module – trying to do this could cause personal injury and will damage the unit beyond repair. Open the top of the unit using the Release catch Release catch Lozenge release catch Release the lozenge by gently pressing the Lozenge release catch Remove and place the lozenge on a clean dry surface Press in the large wheels to release the belt tension and then remove the belts, sliding them off the smallest wheels first Lozenge Drive belts Replace the belts by fitting them over the lozenge, largest wheels first Reassemble and close the unit Copyright © Innovative Technology Ltd 2012 GA963-2 NV11 Manual Set – Section 4 35 Manual Note Removal It is unlikely that you will need to manually remove notes from the Note Float module, but there may be occasions where this needs to be done. Depending on the situation, there are two methods that can be used. Transport Error: If the Note Float module status LED is flashing once every second, this indicates a note transport error. To correct the problem, follow the following steps. Caution! Risk of damage If you need to follow this procedure, the NV11 should be powered off and the Note Float module removed from the validator. The rear cover of the Note Float module is mechanically interlocked with the validator head – if you try to force the cover open the module and validator could be damaged beyond repair. 1. Remove the Note Float module from the validator head by opening the two side latches and lifting the module upwards 2. Open the Note Float module rear cover by pressing in the two red buttons, then lift the cover Copyright © Innovative Technology Ltd 2012 GA963-2 NV11 Manual Set – Section 4 36 3. Carefully remove the bank note, then close the cover firmly and refit the module onto the validator head Press the Configuration Button once after powering up the NV11 to decrease the note count by 1 Manual Emptying: In the unlikely event that you need to remove all the bank notes from the Note Float module, this can be done following the steps below (after removing the Note Float module from the validator head as detailed previously). There is a special cross point tool (ITL part number PM979) used to manually operate the module’s transport mechanism – please do not use any other tool as you may damage the mechanism. Caution! Risk of serious damage to Note Float module internal mechanism If you need to follow this procedure, only use the PM979 cross point tool and take great care not to over wind the mechanism or force past the dead stops – if you do the module will be damaged beyond repair. 1. Remove the PM979 cross point tool from the stowage location on the side of the Note Float module by pulling the tool away from the module PM979 cross point tool Copyright © Innovative Technology Ltd 2012 GA963-2 NV11 Manual Set – Section 4 37 2. Open the Note Float module rear cover by pressing in the two red buttons, then lift the cover 3. Insert the cross head tool into the top drive roller as shown here 4. Turn the roller with the cross point tool ANTICLOCKWISE (as indicated by the arrow) until all the bank notes have been removed After removing all the bank notes, close the rear cover firmly, place the cross point tool back in the stowage position and refit the module onto the validator. WARNING! Do not attempt disassembly Do not attempt to disassemble the Note Float module or remove the side covers to try and remove any notes inside, as the module will be damaged beyond repair. Always follow the procedure given above. After removing bank notes manually, an ‘EMPTY’ command should be run when the unit is powered back up. Copyright © Innovative Technology Ltd 2012 GA963-2 NV11 Manual Set – Section 4 38 Re-Initialisation The NV11 validator has an in-built self-calibration system that keeps the optical sensors in optimum operating condition. However if the NV11 is disassembled for any reason it also will need to be re-initialised - re-initialisation can only be carried out by ITL’s technical support team. Copyright © Innovative Technology Ltd 2012 GA963-2 NV11 Manual Set – Section 4 39 4.12 Drawings and Schematics NOTE: If required, IGES 3D models are available on request from ITL technical support. NV11: Copyright © Innovative Technology Ltd 2012 GA963-2 NV11 Manual Set – Section 4 40 Cashbox Options: Copyright © Innovative Technology Ltd 2012 GA963-2 NV11 Manual Set – Section 4 41 Standard Cashbox: Assembly instructions: 1. Clip two springs (SP120) to the cash plate (MC161), then slide the assembly into the cash box (MC310) making sure the cash plate is above the cash box slot 4. Fit the cash box door (PA899) to the cash box by pushing the door shaft flush to the door edge at one end and inserting the extended part of the shaft into the pivot hole in the cash box (see View ‘B’) 2. Secure the springs to the cash box floor using 5. Twist the cash box door so the free end of the 6 tabs in the base of the cash box the shaft slides into the other cash box pivot hole (see View ‘B’) 3. Twist the cash plate and insert the end tab into 6. Push the cash box door closed (see View ‘C’) the cash box slot (see View ‘A’), then push the plate fully into the cash box (see View ‘C’) Copyright © Innovative Technology Ltd 2012 GA963-2 NV11 Manual Set MAIN HEADQUARTERS Innovative Technology Ltd Derker Street – Oldham – England - OL1 4EQ Tel: +44 161 626 9999 Fax: +44 161 620 2090 E-mail: [email protected] Web site: www.innovative-technology.co.uk BRAZIL [email protected] CHINA [email protected] GERMANY [email protected] SPAIN [email protected] UNITED KINGDOM [email protected] UNITED STATES OF AMERICA [email protected] REST OF THE WORLD [email protected] Copyright © Innovative Technology Ltd 2012 SECTION 5 NV11 MANUAL SET SOFTWARE IMPLEMENTATION GUIDE NV11 Manual Set – Section 5 2 NV11 MANUAL SET – SECTION 5 5. SOFTWARE IMPLEMENTATION GUIDE 3 5.1 Communication Protocols 3 5.2 Configuration Card Programming 5 5.3 SSP and eSSP 5 5.4 ccTalk 16 5.5 SSP Escrow Function 20 5.6 Connection Options 21 Copyright © Innovative Technology Ltd 2012 GA963-2 NV11 Manual Set – Section 5 3 5. SOFTWARE IMPLEMENTATION GUIDE 5.1 Communication Protocols The NV11 validator can use two different communication protocols - SSP/eSSP and ccTalk. Smiley® Secure Protocol (SSP) is a secure serial interface specifically designed to address the problems experienced by cash systems in gaming machines. Problems such as acceptor swapping, reprogramming acceptors and line tapping are all addressed. Encrypted Smiley® Secure Protocol (eSSP) is an enhancement of SSP. eSSP uses the same 16 bit CRC checksums on all packets as SSP, but also uses a Diffie-Hellman key exchange to allow the host machine and validator to jointly establish a shared secret key over an insecure communications channel. The encryption algorithm used is AES with a 128-bit key; this provides a very high level of security. The recommended communication protocol for the NV11 validator is eSSP, as this provides the highest level of data transfer security. A ccTalk interface protocol is also available. For detailed information and the full protocol specifications please read the following documents, which can be downloaded from the Innovative Technology Ltd website (www.innovative-technology.co.uk): SSP Interface Specification (ITL Document number GA138) ccTalk Communications Protocol Specification [additional commands] (ITL Document number GA964) ITL Bank Note Reader ccTalk Specification (ITL Document number GA966) Summaries of the NV11 validator socket connections for the supported interfaces are shown below: WARNING! Risk of unit damage Information Encryption of data strongly recommended Do not make any connections to the interface socket pins marked ‘Do not connect’ – making connections to these pins could cause severe damage to the unit. It is recommended that all transactions with the NV11 validator be encrypted to prevent commands being recorded and replayed by an external device. If this is not possible, then other (mechanical) measures should be used to prevent physical bus tapping. Copyright © Innovative Technology Ltd 2012 GA963-2 NV11 Manual Set – Section 5 4 NV11 SSP Interface: Pin 1 2 3 4 5 6 7 8 9 10 11 12 13 14 15 16 Name TxD Type Output Factory use only RxD Do not connect Input Factory use only USB D+ USB DUSB Vcc Factory use only V In GND Description Serial data out (Tx) Serial data in (Rx) Do not connect Data Data Power Power Ground USB Data + USB Data USB +V (+5V) Do not connect +V GND NV11 ccTalk Interface: Pin Name 1 TxD 2 3 4 Factory use only 5 RxD 6 7 8 9 10 11 12 13 14 15 16 Type Output Do not connect Input Factory use only USB D+ USB DUSB Vcc Factory use only V In GND Description ccTalk data – must also be connected to pin 5 ccTalk data – must also be connected to pin 1 Do not connect Data Data Power Power Ground Copyright © Innovative Technology Ltd 2012 USB Data + USB Data USB +V (+5V) Do not connect +V GND GA963-2 NV11 Manual Set – Section 5 5.2 5 Configuration Card Programming It is not possible to program the NV11 by the use of a configuration card as this method of programming is not yet implemented. Full details on programming the NV11 validator using software can be found in Section 3 of this manual set (ITL Software Support Guide). 5.3 SSP and eSSP Smiley® Secure Protocol (SSP) is a secure serial interface specifically designed to address the problems experienced by cash systems in gaming machines. Problems such as acceptor swapping, reprogramming acceptors and line tapping are all addressed. Encrypted Smiley® Secure Protocol (eSSP) is an enhancement of SSP. eSSP uses the same 16 bit CRC checksums on all packets as SSP, but also uses a Diffie-Hellman key exchange to allow the host machine and validator to jointly establish a shared secret key over an insecure communications channel. The encryption algorithm used is AES with a 128-bit key; this provides a very high level of security. The encryption of the SSP protocol ensures superior protection and reliability of the data, which is transferred between validator and host machine. The encryption key is divided into two parts: The lower 64 bits are fixed and specified by the machine manufacturer allowing control of which devices are used in their machines. The higher 64 bits are securely negotiated by the slave and host at power up, ensuring each machine and each session are using different keys. The interface uses a master-slave model; the host machine is the master and the peripherals (note acceptor, coin acceptor or coin hopper) are the slaves. Data transfer is over a multi-drop bus using clock asynchronous serial transmission with simple open collector drivers. Each SSP device of a particular type has a unique serial number; this number is used to validate each device in the direction of credit transfer before transactions can take place. Information 200 ms command spacing When communicating with the NV11 validator, poll commands should be sent at least 200 ms apart. Copyright © Innovative Technology Ltd 2012 GA963-2 NV11 Manual Set – Section 5 6 SSP Commands and Responses a. Commands Action Command Code (Hex) Reset 0x01 Host Protocol Version 0x06 Poll 0x07 Get Serial Number 0x0C Synchronisation command 0x11 Disable 0x09 Enable 0x0A Program Firmware / currency 0x0B (Programming Type) Manufacturers Extension 0x30 (Command, Data) Set inhibits 0x02 Display On 0x03 Display Off 0x04 Set-up Request 0x05 Reject 0x08 Unit data 0x0D Channel Value data 0x0E Channel Security data 0x0F Channel Re-teach data 0x10 Last Reject Code 0x17 Hold 0x18 Copyright © Innovative Technology Ltd 2012 Command Set Generic Validator GA963-2 NV11 Manual Set – Section 5 7 Action Command Code (Hex) Enable Protocol Version Events 0x19 (made obsolete in protocol version 6) Get Bar Code Reader Configuration 0x23 Set Bar Code Reader Configuration 0x24 Get Bar Code Inhibit 0x25 Set Bar Code Inhibit 0x26 Get Bar Code Data 0x27 Enable Payout Device * 0x5C, Options Disable Payout Device 0x5B Set Routing * 0x3B (route, value/channel (Country code)) Get Routing * 0x3C (value/channel (Country code)) Empty 0x3F Get Note Positions * 0x41 Payout Note 0x42 Stack Note 0x43 Set Value Reporting Type * 0x45 (type) SMART empty 0x52 Cashbox Payout Operation Data 0x53 Command Set Validator Note Float The commands marked with * will respond with the generic response ‘Command cannot be processed’ and an error code of ‘Invalid Currency’ if there are notes inside the Note Float module that do not match the dataset that is installed in the validator. Copyright © Innovative Technology Ltd 2012 GA963-2 NV11 Manual Set – Section 5 8 Notes: Action Comments Reset: Single byte command, causes the slave to reset Host Protocol Version: Dual byte command, the first byte is the command; the second byte is the version of the protocol that is implemented on the host. Poll: Single byte command, no action taken except to report latest events. Get Serial Number: Single byte command, used to request the slave serial number. Returns 4-byte long integer. Sync: Single byte command, which will reset the validator to expect the next sequence ID to be 0. Disable: Single byte command, the peripheral will switch to its disabled state, it will not execute any more commands or perform any actions until enabled, any poll commands will report disabled. Enable: Single byte command, the peripheral will return to service. Manufacturers Extension: This command allows the manufacturer of a peripheral to send commands specific to their unit Enable Payout Device: Two-byte command, the first byte is the command and the second enables several different options. Unused bits should be 0. Disable Payout Device: Single-byte command. All accepted notes will be routed to the stacker and payout commands will not be accepted. Set Routing: The first byte is the command. The second byte is the selected route, and the remaining bytes are the fourbyte value or single byte channel number (depending on the reporting type selected) of the note that the route should be applied to. By default all note values are stacked. For protocol version 6, three extra country code bytes are sent Empty: Single byte command, this will cause all notes to be sent to the stacker for removal. Get Note Positions: Single byte command, this will return the number of notes in the Note Float module and the value in each position. The first note in the table is the first note that was paid into the Note Float module - the Note Float module is a LIFO system, so the note that is last in the table is the only one that is available to be paid out or moved into the stacker. Copyright © Innovative Technology Ltd 2012 GA963-2 NV11 Manual Set – Section 5 9 Action Comments Payout Note: This is a single byte command. The Note Float module will pay out the last note that was stored. This is the note that is in the highest position in the table returned by the Get Note Positions Command. If the payout is possible the Note Float will reply with the generic response ‘OK’. Stack Note: This is a single byte command. The Note Float module will stack the last note that was stored. This is the note that is in the highest position in the table returned by the Get Note Positions Command. If the stack operation is possible the Note Float will reply with the generic response ‘OK’. Set Value Reporting Type: Two-byte command. This will set the method of reporting values of notes. There are two options, by a four-byte value of the note or by the channel number of the value from the banknote validator. If the channel number is used then the actual value must be determined using the data from the Validator command Unit Data. The default operation is by 4-byte value. SMART empty: Empties the Note Float module of notes, maintaining a count of value emptied. The note counters will be set to 0 after running this command. Use ‘cashbox payout operation data’ command to retrieve a breakdown of the denominations routed to the cashbox through this operation. Cashbox Payout Operation Data: This command can be sent at the end of a SMART Empty, float or dispense operation. Returns the amount emptied to cashbox from the Note Float in the last dispense, float or empty command. The quantity of denominations in the response is sent as a 2 byte little endian array; the note values as 4-byte little endian array and the country code as a 3-byte ASCII array. Each denomination in the dataset will be reported, even if 0 notes of that denomination are emptied. Copyright © Innovative Technology Ltd 2012 GA963-2 NV11 Manual Set – Section 5 10 b. Responses Action Command Code (Hex) OK 0xF0 Command not known 0xF2 Wrong number of parameters 0xF3 Parameter out of range 0xF4 Command cannot be processed 0xF5 Software Error 0xF6 FAIL 0xF8 Key Not Set 0xFA Slave Reset 0xF1 Read, n 0xEF, Channel Number Credit, n 0xEE, Channel Number Rejecting 0xED Rejected 0xEC Stacking 0xCC Stacked 0xEB Safe Jam 0xEA Unsafe Jam 0xE9 Disabled 0xE8 Fraud Attempt, n 0xE6, Channel Number Stacker Full 0xE7 Note cleared from front at reset 0xE1, Channel Number Copyright © Innovative Technology Ltd 2012 Command Set Generic Validator GA963-2 NV11 Manual Set – Section 5 11 Action Command Code (Hex) Note cleared into cash box at reset 0xE2, Channel Number Cash Box Removed 0xE3 Cash Box Replaced 0xE4 Bar Code Ticket Validated 0xE5 Bar Code Ticket Acknowledge 0xD1 Note Path Open 0xE0 Channel Disable 0xB5 Dispensing 0xDA, value/channel dispensing Dispensed 0xD2, value/channel dispensed Jammed 0xD5, value/channel dispensing Halted 0xD6 Incomplete Payout 0xDD, value/channel dispensed, value/channel requested Emptying 0xC2 Empty 0xC3 Note Stored in Payout * 0xDB, value/channel of note Note Transferred to Stacker 0xC9, value/channel of note Payout Out of Service 0xC6 Note Paid into Stacker at Power Up 0xCA, value/channel of note Note Paid into Store at Power Up 0xCB, value/channel of note Copyright © Innovative Technology Ltd 2012 Command Set Validator Note Float GA963-2 NV11 Manual Set – Section 5 12 Action Command Code (Hex) Note Dispensed at Power Up 0xCD, value/channel of note Note Float Removed 0xC7 Note Float Attached 0xC8 Note in Bezel Hold 0xCE, value/channel of note Device Full 0xCF SMART Emptying 0xB3 SMART Emptied 0xB4 Channel Disable 0xB5 Command Set Note Float * When enabled using option flag. Notes: Action Comments Command Not Known: Returned when an invalid command is received by a peripheral. Wrong Number Of Parameters: A command was received by a peripheral, but an incorrect number of parameters were received. Parameter Out Of Range: One of the parameters sent with a command is out of range. Command Cannot Be Processed: A command sent could not be processed at that time. Software Error: Reported for errors in the execution of software e.g. Divide by zero. This may also be reported if there is a problem resulting from a failed remote firmware upgrade, in this case the firmware upgrade should be redone Key Not Set: The slave is in encrypted communication mode but the encryption keys have not been negotiated Jammed: Five-byte response that indicates that the validator is jammed; this is reported until it is un-jammed or reset. It will also become disabled. Copyright © Innovative Technology Ltd 2012 GA963-2 NV11 Manual Set – Section 5 13 Action Comments Dispensing: Single-byte response indicating that a dispense operation is in progress. The four-byte value of the note or the single byte channel number is reported, depending on the reporting type set. This value will be 0 until the note has passed out of the Note Float module and into a payable position in the validator. Dispensed: Response that indicates when the payout has finished a dispense operation; The four-byte value of the note or the single byte channel number is reported, depending on the reporting type set. Jammed: Five byte response that indicates that the payout is jammed; this is reported until it is un-jammed or reset. It will also become disabled. The value or channel number of the note being dispensed is also reported. Incomplete Payout: This event is given when the payout starts up if a payout or float operation was in progress when the power was removed. The first four bytes after the event code are the value that was dispensed; the next four are the value that was originally requested. Emptying: This event is given while the payout is being emptied of notes into the cashbox by the EMPTY command. Empty: This event is given at the end of the empty process. Note Stored in Payout: This event is given when notes paid in to the payout system are routed to the payout store. For compatibility with the SMART Payout the value of the note is not reported. However if the Note Float is enabled with the option flag VALUE_ON_STORED set, then the value of the note will be reported (see enable payout device command). Note Transferred to Stacker: This event is given when a note has successfully been moved from the Note Float and stacked in the cash box. During the process the Stacking event will be given. Note Float Removed: This event is reported when the Note Float module is physically disconnected from the validator while the power is on. Note Float Attached: This event is reported when the Note Float module is physically attached to the validator while the power is on. The validator and Note Float module will then reset. Note In Bezel Hold: This event is reported when the Dispensing note is held in the bezel waiting for the user to remove it. Copyright © Innovative Technology Ltd 2012 GA963-2 NV11 Manual Set – Section 5 14 Action Comments Device Full: This event is reported when the Note Float has reached its limit of stored notes. This event will be reported until a note is paid out or stacked. Channel Disable: Indicates all note channels have been inhibited and as such, the unit is disabled. Only reported if using protocol version 7 and above. Copyright © Innovative Technology Ltd 2012 GA963-2 NV11 Manual Set – Section 5 15 Example SSP Communications Here is an example of the communication between host and slave. Both the typical commands from the host and responses from the validator are detailed. Host > SYNC > SET_GENERATOR, [64 bit Slave < OK < OK > SET_MODULUS, [64 bit prime < OK > REQUEST_KEY_EXCHANGE < OK, [64bit slave > GET_SERIAL < OK < [SERIAL NUMBER] < OK < [SETUP INFORMATION] < OK prime number] number] [64 bit host intermediate key] > SETUP_REQUEST > SET_ROUTING, 01 14 00 00 00 > SET_INHIBIT > 07 > 00 > ENABLE > POLL > POLL > POLL > POLL > HOLD > POLL > POLL > POLL intermediate key] < OK < OK < OK < DISABLED < OK < OK < NOTE READ < 00 < OK < NOTE READ < 03 < OK < OK < STACKING < OK < CREDIT < 03 < STACKING < STACKED < OK Comments Synchronisation command Set the encryption key generator Set the encryption key modulus Host sends the host intermediate key, slave responds with the slave intermediate key. The encryption key is then calculated independently by both host and slave. NV11 Serial Number NV11 Setup Route notes of value 0020 to the NV11 Cashbox Enable channels 1,2 and 3 Enable NV11 NV11 currently reading a note Note has been recognised as channel 3 (€20) Hold the note in escrow Stack the note Credit given for channel 3 (€20), note stacked Full support is available from ITL and local support offices for implementing eSSP this support includes libraries and example applications. When requesting this information, please specify your preferred language(s) and operating system. Copyright © Innovative Technology Ltd 2012 GA963-2 NV11 Manual Set – Section 5 5.4 16 ccTalk This section should be read in conjunction with the full ccTalk specification, which can be downloaded from the internet (www.cctalk.org). ccTalk is a serial communications protocol in widespread use throughout the money transaction industry. Peripherals such as coin acceptors, note validators and hoppers found in a diverse range of automatic payment equipment use ccTalk to communicate with the host controller. The protocol uses an asynchronous transfer of character frames in a similar manner to RS232. The main difference is that it uses a single two-way communication data line for half-duplex communication rather than separate transmit and receives lines. It operates at TTL voltages and is ‘multi-drop’ (peripherals can be connected to a common bus and are logically separated by a device address) - each peripheral on the ccTalk bus must have a unique address. Each communication sequence (a command or request for information) consists of 2 message packets structured in one of the formats detailed below. The first packet will go from the master device to the slave device and then a reply will be sent from the slave device to the master device. Commands can have 3 primary formats: 8 Bit Checksum – No Encryption 16 Bit CRC – No Encryption 16 Bit CRC – BNV Encryption As it is possible to use the ccTalk protocol without encryption, suitable physical security should be employed to protect the ccTalk bus. Information 200 ms command spacing When communicating with the NV11 validator, Read Buffered Bill events (command 159) should be sent at least 200 ms apart. Copyright © Innovative Technology Ltd 2012 GA963-2 NV11 Manual Set – Section 5 17 ccTalk Command Summary Command Header Parameters Example Reset Device Request Comms Revision Force Empty NV11 Store to Cash Box Request Expanded NV11 status 001 004 None None ACK X.Y 019 SEL EVENT 020 SEL Clear Total Count Pump RNG Request Cipher Key Request Variable Set Modify Variable Set Request Total Count Enable Payout Dispense NV11 Notes Request NV11 Status 021 022 023 024 SEL R1-R8 None SEL FLAG, EVENT, REMAIN, PAID, UNPAID, STORED, STORE, FLAG2 ACK / NAK ACK KEY1 – KEY8 KEY, MC 025 026 SEL, KEY SEL 027 028 029 KEY SEL, SEC1-SEC8, BILL CNT SEL Emergency Stop Empty NV11 Store to Cash Box Modify Variable MC Set Request RC Version Request RC Count Modify RC Count Request Current Count Read Barcode Data Store Encryption Code Switch Encryption Code Request Currency Revision Operate Bidirectional Motors Stacker Cycle Request Bill Operating Mode 030 031 SEL, FUNC SEL FLAG, EVENT, REMAIN, PAID, UNPAID, STORED, STORE REMAIN EVENT 032 SEL, MC ACK / NAK 033 034 035 036 SEL SEL SEL, COUNT SEL VERSION COUNT ACK / NAK COUNT 129 136 None None ACK ACK 137 ACK 146 3 bytes Encryption key None or Country Code (2 digit) None 147 152 None None ACK 3 145 Copyright © Innovative Technology Ltd 2012 ACK IN1-IN3, OUT1OUT3, STR1-STR3 ACK / NAK EVENT / NAK ‘GBP02113’ ACK GA963-2 NV11 Manual Set – Section 5 Command Header 18 Parameters Example Escrow & Stacker ACK ACK/254 00000111 00000000 157 159 0/1 Country Code (2 digit) Country Code (2 digit) None None 169 None 1 170 192 195 None None None 2006 161209 00 197 None 4 byte checksum 213 None 3 (stacker & escrow) 216 None 00000 218 ACK Modify Bill 153 Operating Table Route Bill 154 Request Bill Position 155 Request Country Scaling Request Bill ID Read Buffered Bill Events Request Address Mode Request Base Year Request Build Code Request Last Mod Date Calculate ROM Checksum Request Option Flags Request Data Storage Av. Enter Pin 156 Enter New Pin 219 Request Accept Count Request Insertion Count Request Master Inhibit Set Master Inhibit Request Inhibits 225 Pin1, Pin2, Pin3, Pin4 Pin1, Pin2, Pin3, Pin4 None 226 None 7 227 None 1 228 230 Bit Mask None Set Inhibits Perform Self Check Request Software Version Request Serial Number Request Product Code Request Equipment Category 231 232 241 Channels None None ACK Inhibit Low, Inhibit High ACK 0 XX.YY 242 None 3 byte serial number 244 None ‘NV11’ 245 None ‘Bill Validator’ Copyright © Innovative Technology Ltd 2012 100 ‘GB0010A’ 10000000000 ACK 3 GA963-2 NV11 Manual Set – Section 5 19 Command Header Parameters Example Request manufacturer ID Request Polling Priority Simple Poll 246 None ‘ITL’ 249 None 200 254 None ACK Monetary Values Values are represented as 32 bit unsigned integers (4 bytes) and in the lowest value of currency. For example: €50.00 would be 0x00001388 When sending or receiving a value the least significant byte is sent first. So in this example [0x88] [0x13] [0x00] [0x00] will be sent. Each type of note is identified by its value and represented using the standard format outlined above. As an example, the values for Euro notes are: Note (€) 5.00 10.00 20.00 50.00 100.00 200.00 500.00 Hex value Data to Send 0x000001F4 0x000003E8 0x000007D0 0x00001388 0x00002710 0x00004E20 0x0000C350 [0xF4] [0x01] [0x00] [0x00] [0xE8] [0x03] [0x00] [0x00] [0xD0] [0x07] [0x00] [0x00] [0x88] [0x13] [0x00] [0x00] [0x10] [0x27] [0x00] [0x00] [0x20] [0x4E] [0x00] [0x00] [0x50] [0xC3] [0x00] [0x00] Communications Format ccTalk communication is carried out using the following settings: Baud rate= 9600bps, Data= 8 bit, No parity, Stop bit= 1bit Command Format from Host to NV11 [Dst] [Len] [CRC (LSB)] [Header] [Data1] … [DataN] [CRC (MSB)] Field Description Dst Len Header Data CRC Destination Address (for a note validator, 40 [0x28]) Number of data bytes in the message Command Data attached to Header, specified by Len (1-N) [Dst] + [Len] + [Header] + [Data1] + … + calculated value of CRC16 against Data N Copyright © Innovative Technology Ltd 2012 GA963-2 NV11 Manual Set – Section 5 20 Response Format from the NV11 to Host ACK message: [Dst] [00] [CRC (LSB)] [00] [CRC (MSB)] NAK message: [Dst] [00] [CRC (LSB)] [05] [CRC (MSB)] BUSY message: [Dst] [00] [CRC (LSB)] [06] [CRC (MSB)] Response: [Dst] [Len] [CRC (LSB)] [00] [Data1] … [DataN] [CRC (MSB)] Field Description Dst Len Header Data CRC Destination Address (for a note validator, 40 [0x28]) Number of data bytes in the message Reply message [00] Data attached to Header, specified by Len (1-N) [Dst] + [Len] + [Header] + [Data1] + … + calculated value of CRC16 against Data N. If encryption setting is enabled, encryption is carried out against: [CRC (LSB)] + [Header] + [Data1] + … + [DataN] + [CRC (MSB)] 5.5 SSP Escrow Function To hold a note in the escrow position when using SSP, the POLL command should be replaced with the HOLD command after NOTE READ > 0 for as long as the note is to be held in escrow. A POLL command will then accept the note; the REJECT command will return the note to the customer Copyright © Innovative Technology Ltd 2012 GA963-2 NV11 Manual Set – Section 5 5.6 21 Connection Options The NV11 validator has a single connector that is used to allow interfacing and programming: Interface Connector Copyright © Innovative Technology Ltd 2012 GA963-2 NV11 Manual Set – Section 5 Information Power always required regardless of connection type. 22 Power is always required on pins 15 and 16 of the 16 way connector. The connector is a 16 pin socket used to interface the NV11 to the host machine. The pin numbering of the socket is shown below, as well as an overview of the socket connections: Pin 1 5 11 12 13 15 16 Description Serial Data Out (Tx) Serial Data In (Rx) USB Data + USB Data USB Power (+5V) +V 0V / Ground Connection To use a USB connection with the NV11, a USB cable fitted with a 16 way connector on one end (ITL Part Number CN392) should be used. The CN392 cable fits into the 16 way connector and allows high speed programming and serial communications when used in SSP and ccTalk modes. Further details of the cable needed to interface and program the NV11 validator can be found in Section 4 of this manual set (subsection 4.9). When using the USB connection, power must be supplied to the NV11 using the CN392 cable. Copyright © Innovative Technology Ltd 2012 GA963-2 NV11 Manual Set MAIN HEADQUARTERS Innovative Technology Ltd Derker Street – Oldham – England - OL1 4EQ Tel: +44 161 626 9999 Fax: +44 161 620 2090 E-mail: [email protected] Web site: www.innovative-technology.co.uk BRAZIL [email protected] CHINA [email protected] GERMANY [email protected] SPAIN [email protected] UNITED KINGDOM [email protected] UNITED STATES OF AMERICA [email protected] REST OF THE WORLD [email protected] Copyright © Innovative Technology Ltd 2012 SECTION 6 NV11 MANUAL SET TECHNICAL APPENDICES NV11 Manual Set – Section 6 2 NV11 MANUAL SET – SECTION 6 6. TECHNICAL APPENDICES 3 APPENDIX A – PRODUCT APPROVALS 3 APPENDIX B – TECHNICAL SPECIFICATIONS 5 APPENDIX C – GLOSSARY OF TERMS 7 APPENDIX D – ORDERING INFORMATION Copyright © Innovative Technology Ltd 2012 10 GA963-2 NV11 Manual Set – Section 6 6. 3 TECHNICAL APPENDICES APPENDIX A – PRODUCT APPROVALS CE Marking The NV11 unit described in this manual set has been designed to comply with the relevant sections of the following Harmonised European Standards: EN60950-1:2001 EN60335-1:2002 EN60335-2-82:2003 The unit complies with all the applicable essential requirements of the Standards. RoHS The following products, identified by the part numbers listed in the table below, are compliant with the European Union Directive 2002/95/EC of the Restriction of the use of certain Hazardous Substances (RoHS) in Electrical and Electronic Equipment. Product Description Lead free date NV11 Bank Note Acceptor Assembly All NV11 We hereby declare that lead (Pb), mercury (Hg), cadmium (Cd), hexavalent chromium (Cr4-6), polybrominated biphenyls (PBB) and polybrominated diphenyl ethers (PBDE), are not intentionally added to our products in amounts exceeding the maximum concentration values as defined by RoHS regulations (except where the application of any of those substances comes within the scope of the RoHS regulations exempted applications). All compliant products are clearly marked on the product and/or packaging. All the information provided in this statement of compliance is accurate to the best of our knowledge, as of the date of this publication being issued. Copyright © Innovative Technology Ltd 2012 GA963-2 NV11 Manual Set – Section 6 4 WEEE The European Union’s directive 2002/96/EC on Waste Electrical and Electronic Equipment (WEEE) was adopted by the European Council and Parliament in 2003 with a view to improving the collection and recycling of Waste Electrical and Electronic Equipment throughout the EU, and to reduce the level of non-recycled waste. The directive was implemented into law by many EU member states during 2005 and 2006. Products and packaging that display the symbol (shown left) indicates that this product must NOT be disposed of with other waste. Instead it is the user’s responsibility to dispose of their Waste Electrical and Electronic Equipment by handing it over to an approved reprocessor, or by returning it to the original equipment manufacturer for reprocessing. Copyright © Innovative Technology Ltd 2012 GA963-2 NV11 Manual Set – Section 6 5 APPENDIX B – TECHNICAL SPECIFICATIONS The information contained here does not form part of a contract and is subject to change without notice. Innovative Technology Ltd operates a policy of continual product development; as such specifications may change from time to time. Environment: Temperature Humidity Minimum Maximum +3 °C 5% +50 °C 95 % non condensing Power Requirements: DC Voltage Absolute limits Supply ripple voltage Minimum 10.8 V 0V Nominal 12 V 0V Maximum 13.2 V 0.25 V @ 100 Hz Supply Current Standby Running Peak (motor stall) WARNING! Use suitable power supply 350 mA 3A 3.5 A Ensure that the supply voltage to the NV11 is not lower than 10.8 V and that the power supply can provide sufficient current to avoid incorrect operation and excessive note rejects. We recommend that your power supply is capable of supplying 12V DC at 4 A. For 12V operation, use TDK Lambda model SWS50-12. This power supply is available from a variety of suppliers including Farnell (stock code 1184645) and RS (stock code 466-5869). Logic Levels: Interface Logic Levels Logic Low Logic High Inputs Outputs (2.2 kΩ pull-up) 0 V to +0.5 V +0.6 V +3.7 V to +12 V Pull-up voltage of host interface 50 mA per output Maximum current sink Copyright © Innovative Technology Ltd 2012 GA963-2 NV11 Manual Set – Section 6 6 General Specifications: Note Sizes Minimum Maximum Width 60 mm Length 115 mm 82 mm in cashbox 80mm in Note Float module 150 mm Capacity Storage Note Float module 300 or 600 notes 30 notes Weight NV11 2.2 kg Interface Protocol eSSP; ccTalk (CC1, CC4) Copyright © Innovative Technology Ltd 2012 GA963-2 NV11 Manual Set – Section 6 7 APPENDIX C – GLOSSARY OF TERMS Term Meaning A Ampere AC Alternating Current ACK Acknowledge AES Advanced Encryption Standard ASSY Assembly AV Average AWG American Wire Gauge AWP Amusement With Prizes BNV Bank Note Validator ccTalk Coin Controls Talk COMMS Communications CRC Cyclic Redundancy Check DC Direct Current DIA Diameter DIP Dual Inline Package ECB Electronic Code Book EEPROM Electrically Erasable Programmable Read Only Memory eSSP Encrypted Smiley® Secure Protocol FAQ Frequently Asked Questions FIFO First In, First Out GA General Assembly GND Ground Hz Hertz Copyright © Innovative Technology Ltd 2012 GA963-2 NV11 Manual Set – Section 6 8 Term Meaning IF Interface ITL Innovative Technology Ltd LED Light Emitting Diode LIFO Last In, First Out mA milliampere max maximum MDB Multi Drop Bus min minimum mm millimetre ms millisecond MOD Modified (or Modification) NV Note Validator PCB Printed Circuit Board PDF Portable Document Format PiPS Pay-in Pay-out System PROM Programmable Read Only Memory PSU Power Supply Unit QTY Quantity RAM Random Access Memory ROM Read Only Memory Rx Receive RoHS Restriction of the use of certain Hazardous Substances SIO Serial Input Output SSP Smiley® Secure Protocol SWG Standard Wire Gauge Copyright © Innovative Technology Ltd 2012 GA963-2 NV11 Manual Set – Section 6 9 Term Meaning SWP Skill With Prizes SYNC Synchronize TTL Transistor Transistor Logic Tx Transmit USB Universal Serial Bus V Volt V_In Voltage In WEEE Waste Electrical and Electronic Equipment Copyright © Innovative Technology Ltd 2012 GA963-2 NV11 Manual Set – Section 6 10 APPENDIX D – ORDERING INFORMATION The following information is required to order an NV11 validator: Product NV11 Consists of NV9USB validator, Note Float module, bezel and cash box Dataset Country code and variant Alternatively supply details of the currency and note types you wish to use Bezel Size 66 - 85 mm Please check the NV11 product page on the ITL website for details of the bezels available Cash Box 300 or 600 note capacity Please check the NV11 product page on the ITL website for details of the range of available cashboxes Interface eSSP; ccTalk The NV11 can be used with CC1 or CC4 variants of ccTalk Copyright © Innovative Technology Ltd 2012 GA963-2 NV11 Manual Set MAIN HEADQUARTERS Innovative Technology Ltd Derker Street – Oldham – England - OL1 4EQ Tel: +44 161 626 9999 Fax: +44 161 620 2090 E-mail: [email protected] Web site: www.innovative-technology.co.uk BRAZIL [email protected] CHINA [email protected] GERMANY [email protected] SPAIN [email protected] UNITED KINGDOM [email protected] UNITED STATES OF AMERICA [email protected] REST OF THE WORLD [email protected] Copyright © Innovative Technology Ltd 2012 GA963-2


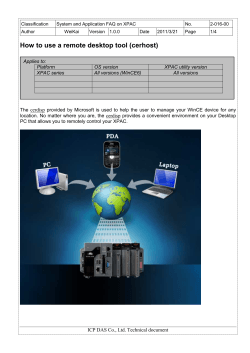


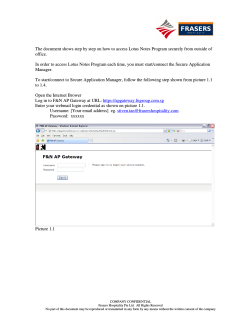
© Copyright 2026