
NOW AVAILABLE on CD ROM! © Canberra Corporation 1994
NOW AVAILABLE
on CD ROM!
© Canberra Corporation 1994
Revised 1996, 1998, 2000, 2001
Industrial Science Seminar
Distributor's Module
Table of Contents
Graph
Distributor Sales by Market
Chemical Sales By Product Group
Account Opportunity Listing
Personnel Listing
Facility Overview
Important Issues
A – The History of Industrial Solvents
B – Solvent Cross-Reference Chart of Uses, Advantages, Disadvantages and Regulatory Impact
C – Solvent Cross-Reference Chart of Regulatory Impact
D – Government Legislation Affecting Industry
E – Engineering & Manufacturing Issues Resulting From the Changeover to Waterbased Degreaser
F – Popular Degreasing Methods
Product Listing
Chemicals & Related Product Listing
Product Listing By Department
Table Top Demonstrations
Industrial Questions & Answers
Procedures
Floor Care Methodization: Industrial
Restrooms/Locker Rooms/Showers
Milling Machines, Lathes & Drill Presses
Surface Plates
Conveyors
Offices
Shipping & Receiving Docks
Bradley Fountain Sinks
Dip Tanks & Parts Washers
© Canberra Corporation 1994
College of Knowledge
Industrial Science Seminar
Distributor's Module
Table of Contents (continued)
Procedures (continued)
Cafeteria
Lobbies
Infirmary
Wall Washing
Hand Washing
Maintenance, Carts, Closets, Equipment & Supplies
Glossary of Terms
Appendix
Liquid Life Form Bio Augmentation Digestive Cycle
*All information in this seminar is available on CD ROM.
College of Knowledge
Industrial Science Seminar
2002
Distributor Sales By Market
Professional
Hotel/Motel
Services
2.8% Religious
1%
1.4%
Recreation
3%
Transportation
4.7%
Industrial
21.7%
Govt.
5.2%
Retail
6%
Commercial
11.4%
Residential
6.8%
Restaurants/
Clubs
6.5%
Educational
11%
Contract
Cleaners
8.9%
Health Care
9.6%
College of Knowledge
Industrial Science Seminar
2004
Distributor Sales By Market
Religious
1.8%
Recreation
2.0%
Transportation
2.8%
Hotel/Motel
7.5%
Industrial
12.3%
Govt.
7.2%
Commercial
10.3%
Retail
8.2%
Residential
1.5%
Restaurants/
Clubs
7.2%
Educational
14%
Contract
Cleaners
13.7%
Health Care
11.5%
College of Knowledge
Industrial Science Seminar
2002
Chemical Sales By Product Group
(Volume in dollars)
2.8%
Insecticides/
Herbicides/Pesticides
(1260-1280)*
$171,848,040
9.9%
8.9%
Specialty Cleaners,
Deodorants, Blocks & Gels
(400-430)* (600-603)
$607,605,570
Carpet Care
(1100-1170)*
$523,944,000
28.4%
General Purpose Cleaners,
Degreasers, Bonnet &
Industrial
Products
(900-905)*
$1,743,030,120
10.7%
Cleaners/Sanitizers/
Disinfectants
(300-330, 800-820)*
$656,705,010
17.8%
10.7%
Other
10.8%
Hand Cleaners
(500-560)
(5000-5970)*
$662,842,440
Sealer/Strippers/Restorers
Finishes
(1000-1040)*
$1,097,462,540
Total Sales = $6,137,430,000
* Product numbers
College of Knowledge
Industrial Science Seminar
2004
Chemical Sales By Product Group
(Volume in dollars)
.8%
Insecticides/
Herbicides/Pesticides
(1260-1280)*
$171,848,040
8.0%
Specialty Cleaners,
Deodorants, Blocks & Gels
(400-430)* (600-603)
$607,605,570
7.0%
Carpet Care
(1100-1170)*
$523,944,000
19.1%
General Purpose Cleaners,
Degreasers, Bonnet &
Industrial
Products
(900-905)*
$1,743,030,120
10.8%
Cleaners/Sanitizers/
Disinfectants
(300-330, 800-820)*
$656,705,010
27.7%
3.2%
Sealer/Strippers/Restorers
Finishes
(1000-1040)*
$1,097,462,540
Ware Wash
3.9%
Laundry
8.2%
Other
11.3%
Hand Cleaners
(500-560)
(5000-5970)*
$662,842,440
Total Sales = $7,896,800,000
* Product numbers
College of Knowledge
Industrial Science Seminar
Account Opportunities
College of Knowledge
Industrial Science Seminar
List of Personnel & Their Responsibilities
Position
Responsibility
Receptionist
Screen-out salesmen, can also be source of important information
Purchasing Agent
Owner
Plant Manager/Superintendent
Facility Administrator
Achieve greatest results - (service, quality, delivery) at lowest
possible cost. (Note: Cost = Labor expense + product expense)
Executive House Keeper
Manager Buildings & Grounds
Production Manager
Manager of Environmental Services
Must balance the happiness of his/her customers with
employees needs (OSHA, EPA etc...) while maintaining a positive
posture
Plant Engineer
Quality Assurance Manager
Safety Manager
Involved heavily in all plant/facility concerns with emphasis on
safety, quality and productivity
Maintenance Supervisor
Involvement Teams (all areas)
Department Supervisor
Athletic Director
Tennis/Racquet Ball Program
Office Manager
Chief Mechanic/Plants Manager
Responsible for specific areas. Limited number of people and
square footage under their control. Expected to achieve all safety,
quality, productivity goals set forth by above positions
Janitors
Cleaning Technicians
Housekeeper
Floor Crew/Night Crew
Maids
Get done what above demands with normally less people and
time than required
College of Knowledge
C
u
s
t
o
d
i
a
n
F
o
r
e
m
a
n
Assembly Area
Shipping Area
Lunch Room
Parts Manager
Tool Crib
T
eM
ra
mn
ia
ng
ae
r
l
Typical Industrial Facility
S
u
p
e
r.
Planer
Drill
Cut-Off
Forge
Press
Production
Floor
Typical Industrial Facility
Chief
Restrooms Mechanic
M
a
i
n
t
Mill
Grinder
Lathe
General
Manager
Service
Manager
Office
Manager
Chief
Engineer
P
l
a
n
t
I
n
f
i
r
m
a
r
y
S
u
p
e
r.
N
u
r
s
e
P
L
T
Safety Dir.
Conf. Room
Main Office
Tank Farm
Storage
PA/
Buyer
Owner
Pres.
Show
Room/
Lobby
College of Knowledge
Industrial Science Seminar
Industrial Science Seminar
Important Issues
A. The History of Industrial Solvents
1) Chlorinated solvents
a. Introduced in the last 40-50 years
b. Ethylene or ethane modified with chlorine
2) Aliphatic petroleum napthas
a. Group of solvents characterized by the distributed range and mole configuration of
the carbon chain back bone.
Examples: Stoddard solvent, mineral seal oil, mineral spirits
3) Butyls
a. Refer to a class of glycol ethers
Example of Butyls: butyl cellosolve
4) Glycol ethers
a. Chemical compounds characterized by an ether link
Examples of glycol ether
aa. DM
Diethylene glycol methyl ether
bb. DPM Dipropylene glycol methyl ether
cc. DB
Diethylene glycol butyl ether
5) Aromatic hydrocarbons
a. Special class of solvents characterized by a ring structure which allows for a sharing of
electrons (Double bond.)
Examples of Aromatic Hydrocarbons
aa. Toluene
bb. Xylene
6) Alkaline builders
a. Anionic surfactants work progressively better as the pH increases. To boost the pH
level to a higher reading, alkaline builders are added to the formula.
b. Examples of alkaline builders are:
aa. Sodium metasilicate
bb. Sodium hydroxide (Soda Ash) (Caustic Soda)
cc. Potassium hydroxide (Potash)
College of Knowledge
Industrial Science Seminar
Important Issues (continued)
B. Solvent Cross-Reference Chart of Uses, Advantages, and Disadvantages 1
Solvent
Solvent Family
Typical Uses
Advantages
Disadvantages
1,1,1 - trichloroethane
Chlorinated Solvents
Dip tank cleaning
Electrical contact cleaning
Vapor cleaning
Non-flammable, high
dielectrical constant,
Dries (flashes) very quickly
Ozone depleting chemical
moderately toxic, CAA will
phase out its use by 1996
Trichloroethylene
Chlorinated Solvents
Dip tank cleaning
Electrical contact cleaning
Vapor cleaning
Non flammable, high
dielectrical constant,
Dries (flashes) very quickly
2.5 to 10 times more toxic
as 1,1,1 when inhaled.
Highly toxic, is a VOC in
most states. Moderately toxic
by ingestion. Mutagenic.
Experimental carcinogen,
tumorigen, causes narcosis &
anaesthesia, causes
headaches and nausea
Damage to liver and other
organs from chronic
exposure. Combustible. When
heated...emits toxic fumes. 1
Perchloroethylene
Chlorinated Solvents
Dry cleaning
Aerosols - Lubricants
Penetrants
Non flammable, high
dielectrical constant,
Dries (flashes) very quickly
& non-staining
No flash point
2.5 to 10 times more toxic
as 1,1,1 when inhaled,
Highly toxic, is a VOC in
most states. Poison by
intravenous route.
Moderately toxic by inhalation, ingestion, skin contact.
Can cause dermatitis.
Experimental carcinogen.
Mutagenic. When heated
emits toxic fumes. 1
Methylene
Chloride
Chlorinated Solvents
Paint strippers,
Seal strippers
Non flammable, & very
effective in stripping,
Expensive as compared to
Aliphatic & Aromatics
2.5 to 10 times more toxic
as 1,1,1 when inhaled,
Highly toxic, is a VOC in
most states. Moderately toxic.
Poison by inhalation.
Blood & central nervous
system effects by inhalation.
Mutagenic. Strong narcotic.
Can yield toxic fumes. 1
Methyl Ethyl
Ketone (MEK)
Ketones
Plastic resins - Lube oils
Adhesives
Dries quickly, emulsifies
plastics & activates some
adhesives
A VOC in most states,
heavy odor, may cause
headaches, dizziness &
nausea, must use in wellventilated area with PPE
Freon
Fluorocarbon solvents
Chlorinated solvents
Air-conditioning
Drying agent
Parts cleaning
Chewing gum remover
Fast drying, no flash point
Excellent cleaner
Ozone-depleting chemical
Very expensive, seal
handling, Requirements CAA to phase out freons
completely
1 Hazardous Chemicals Desk Reference, Sax and Lewis
College of Knowledge
Industrial Science Seminar
Important Issues (continued)
B. Solvent Cross-Reference Chart of Uses, Advantages, and Disadvantages 1
Solvent
Solvent Family
Typical Uses
Advantages
Disadvantages
Attack aluminum,
noticeable odor, more toxic
than other glycol ethers,
included on SARA Title 3 list
for toxic release
Butyl DE, EB
Glycol ethers
Waterbased cleaners of
all types
Inexpensive, very effective
cleaner - diverse
Water soluble
Non-Flammable
DPM, DM, DB
Glycol Ethers
Waterbased cleaners of
all types
Very effective cleaners
diverse in application, will
attack aluminum,
lower odor, Water soluble
Non-Flammable
Acetone
Ketone
Fingernail polish remover
Parts cleaning, Degreasing
Inexpensive
Toluene
Aromatic Hydrocarbon
For solubilization of acrylics,
& lacquers that aliphatics
don't solubilize
Xylene
Aromatic Hydrocarbons
Solvent for plastics,
acrylics, paints
Outstanding solvent
qualities
Flammable
Benzene derivative
Mineral Seal Oil
Mineral Spirits
Stoddard Solvent
Naptha
Kerosene
Straight chain aliphatic
Aliphatic petroleum napthas
Degreasing, parts cleaning,
Fuel, dust mop treatment
where water base systems
are inappropriate
Inexpensive, usually
effective, high dielectrical
constants, availability,
solvency is better than
water
VOC in most states, insoluble
in water, leaves residue,
combustible, odor, solvency
not as high as chlorinated
solvents, slower to dry,
greater toxicity than waterbased solvents
d-Limonene
Terpenes
Cleaning, degreasing &
deodorizing
Natural, organic, good
cleaner, non hazardous,
good solvent, may be
waterbase or in emulsion
with mineral spirits
Low flash point, leaves
residue, may cause
headaches & nausea, very
expensive
1 Hazardous Chemicals Desk Reference, Sax and Lewis
Extremely flammable,
is a VOC in most states
Flammable, VOC in most
states
College of Knowledge
Industrial Science Seminar
Important Issues (continued)
C. Solvent Cross-Reference Chart of Regulatory Impact
Solvent
VOC
(most states)
Ozone
Depletor
Acetone
Yes
No
Methylene
Chloride
No
No
Perchloroethylene
(PCE)
Yes
No
Toluene
Yes
No
1,1,1Trichloroethane
No
Yes/0.1
Trichlorethylene
(TCE)
Yes
No
Xylene (mixed
isomers)
Yes
No
1
Estimate Clean Air Act
SARA
Atmosphere Hazardous
313
Life/Days Substance
Substance
8-hr.
TWA
(PPM)
Flash
Pt. 0F
(TCC)
No
No
750
0
131
Yes
Yes
500
None
115
Yes
Yes
25
None
Yes
Yes
100
40-45
5.7 years
Yes
Yes
350
None
5
Yes
Yes
50
None
Yes
Yes
100
85
D. Government legislation affecting industry
1) Clean Air Act - plant emissions
2) Montreal Protocol - Part of Clean Air Act – Plant Emissions /ODC (Ozone Depleting Chemical)
3) SARA Title 3 - User of compounds covered under SARA Title 3 must provide toxic release information to
EPA every July 1st.
4) CERCLA - Cleaning disposal sites
5) Prop 65 - California only – Label must provide if prop 65 chemicals are contained therein. Warns against
reproductive complications and carcinogens.
E. Engineering & manufacturing issues resulting from the changeover from chlorinated solvents to
water-based
1) Dry time
2) Vapor/heat
3) Residue
a. Welding
b. Painting
4) Flash rust
College of Knowledge
1 Hazardous Chemicals Desk Reference, Sax and Lewis
Industrial Science Seminar
Important Issues (continued)
E. Engineering & manufacturing issues resulting from the changeover from chlorinated
solvents to water-based (continued)
5) Dielectrical constants
6) Economy - ability to be diluted
7) Disposal
8) Cooling towers
9) Safety
10) Reclamation
F.
Popular Degreasing Methods
1) Spray & wipe
2) Pressure wash
a. With heat
b. Without heat
3) Dip tank
a. With agitation
aa. Mechanized
bb. Air/bubbles
b. Vapor/steam
4) Bucket and rag/brush
5) Parts cleaner tank and brush
6) Automatic scrubber
7) Mop and bucket
College of Knowledge
Industrial Science Seminar
Chemicals & Related Product Listing
Department
Chemical
Related Product
Administration
Area
Production
Assembly Area
Restroom/
Showerroom
Storage
Area
Lunchroom
Area
Loading
Dock
Other/
Infirmary
College of Knowledge
Industrial Science Seminar
Product Listing by Department
Product
USDA
Admin.
Area
Production
Area
Assembly
Area
Storage
Area
Restroom/
Lunchroom
302 D/T
Bowl Cleaner
C2
Inside urinal &
toilet bowl.
305 T/C
Bowl/Tile/
Porcelain Cleaner
C2
Use in in-plant
shower facility,
toilets, urinals,
tile, etc.
3410 Tile, Grout, & C2
Bathroom Cleaner Equ.
Deodorizer
Use in in-plant
shower facility,
toilets, urinals,
tile, etc.
315 Mid Acid
Bowl Cleaner
C2
Inside urinal &
toilet bowl.
325 T/N/A Bowl &
Bathroom Cleaner
C2
For cleaning or
disinfection of
tubs, tile,
porcelain, grout
& fiberglass.
400 Bacterial
Digestant
Deodorant
C1
420 Glass, Plastic
& CRT Cleaner RTU
421 Glass, Plastic &
CRT Cleaner
Concentrate
3421 Glass, Plastic
& CRT Cleaner
1220 Glass, Plastic
& CRT Cleaner
A1 Use on
windows,
C1 computer
Equ. screens,
metal frames,
A1 formica, etc.
Equ.
C1
Equ.
Use in sumps on Use in floor
laths, grinders, drains.
planners, presses
as well as floor
drains.
Use as drain
maintainer, for
storage tanks or
holding ponds.
Treatment of
floor drains,
grease traps
(Daily), slop
sinks. (Twice
weekly)
Cleaning &
static control of
CRT screens,
equipment key
pads, fragile
plastics &
windows.
Cleaning &
static control of
CRT screens,
equipment key
pads, fragile
plastics &
windows.
Vending
machines
mirrors,
windows,
signs.
Cleaning &
static control of
CRT screens,
equipment key
pads, fragile
plastics &
windows.
Loading
Dock
Floor drains.
Other/
Infirmary
For proper
control of
foul odors.
430 Creme
Cleanser
A6
703 Low Suds
Automatic
Scrubber
Floor Cleaner
A4
704 Rinse Free
Floor Stripper
A4 Stripping finished Stripping finished Stripping finished Stripping finished Stripping finished Stripping finished Stripping finished
Equ. floors. (Interim floors. (Interim floors. (Interim floors. (Interim floors. (Interim floors. (Interim floors. (Interim
maintenance)
maintenance)
maintenance)
maintenance)
maintenance)
maintenance) maintenance)
706 Butyl Free,
Low Odor
UHS Floor
Stripper
A4 For low odor
Equ. removal of heavy
build-up of finish
on floors & baseboards. (Interim
maintenance)
Use in bradley
fountain sinks
where mineral
deposits exist.
Auto-scrubber
will remove
tough grease &
dirt, not floor
seal.
For low odor
removal of heavy
build-up of finish
on floors & baseboards. (Interim
maintenance)
Auto-scrubber
will remove
tough grease &
dirt, not floor
seal.
For low odor
removal of heavy
build-up of finish
on floors & baseboards. (Interim
maintenance)
Auto-scrubber
will remove
tough grease &
dirt, not floor
seal.
For low odor
removal of heavy
build-up of finish
on floors & baseboards. (Interim
maintenance)
For low odor
removal of heavy
build-up of finish
on floors & baseboards. (Interim
maintenance)
For low odor
For low odor
removal of heavy removal of heavy
build-up of finish build-up of finish
on floors & base- on floors & baseboards. (Interim boards. (Interim
maintenance) maintenance)
College of Knowledge
5/04
Industrial Science Seminar
Product Listing by Department (continued)
Admin.
Production
Assembly
Storage
Product
USDA
Area
Area
Area
Area
707 Super
A4 Stripping finished Stripping finished Stripping finished Stripping finished
Charged Rinse
Equ. floors. (Interim floors. (Interim floors. (Interim floors. (Interim
Free Floor Stripper
maintenance)
maintenance)
maintenance)
maintenance)
Restroom/
Loading
Other/
Lunchroom
Dock
Infirmary
Stripping finished Stripping finished Stripping finished
floors. (Interim floors. (Interim floors. (Interim
maintenance)
maintenance) maintenance)
725 Water Based
Dust Mop
Treatment
NA For daily dust
mopping of
most hard
floors & surfaces.
For daily dust
mopping of
most hard
floors & surfaces.
800 N/D Germicidal
Cleaner
805 Neutral
Disinfectant Cleaner
3805 Germicidal
Cleaner
806 Neutral Hospital
Disinfectant
3806 Neutral
Disinfectant Damp
Mop
D1
For daily dust
mopping of
most hard
floors & surfaces.
For daily dust
mopping of
most hard
floors & surfaces.
For daily dust
mopping of
most hard
floors & surfaces.
}
D1
Equ.
D1
Equ.
For daily dust
mopping of
most hard
floors & surfaces.
Use
on
walls,
floors,
tables,
chairs,
vending
machines
& sinks.
Use
on
walls,
floors,
tables,
chairs,
vending
machines
& sinks.
803 S/V
Disinfectant
D2
Utilize as
sump clean
out.
Utilize as
sump clean
out.
General disnf.
for proper
control of
foul odors.
General disnf.
for proper
control of
foul odors.
804 G/P Non-Acid
Disinfectant
Cleaner
C2 Use on walls,
floors, tables,
chairs, vending
machines & sinks.
Utilize as
Bactericide.
Bacteriostat in
sumps.
Utilize as
Bactericide.
Bacteriostat in
sumps.
Use on walls,
floors, tables,
chairs, vending
machines & sinks.
Use on walls,
floors, tables,
chairs, vending
machines & sinks.
810 T/B Conc.
NA
Hospital Disnf. Clr.
814 Q/T Tuberculo- C1
cidal Spray Disnf. Clr.
815 Ultra Spray
Disinfectant
}
900 Industrial
A4
Strength Degreaser Equ.
700 Multi-Purpose A4
Synthetic Detergent Equ.
Complex
3700 Deep Scrub
A4
Multi-Purpose Clnr. Equ.
}
901 Solvent Based A4
Industrial Cleaner/ A8
Degreaser
Use as dip tank
degreaser, pressure washer,
steam cleaner, &
automatic scrubber machines.
902 Non-Butyl
Industrial
Detergent
Complex
For removal of
light to heavy
grease, oil &
organic soils.
A4
Equ.
904 Citrus Foaming A1 Use for wall
Spray & Wipe
Equ. spotting &
Cleaner
counter tops.
For manual
machine
cleaning
& workstation
clean-up.
Use in
infirmary
for
body
fluid
clean-up
For manual
machine
cleaning & workstation clean-up.
For manual
machine
cleaning &
work-station
clean-up.
Remove cutting
oils from production parts before
packing & Shipping
Re-emulsify
spilled & dried
production
chemicals.
For quick
removal of
black tow motor
marks.
Use with daily
maintenance
program.
College of Knowledge
5/04
Industrial Science Seminar
Product Listing by Department (continued)
Production
Area
Assembly
Area
Storage
Area
905 Enviro-Care
C1
Natural All
Purpose Degreaser
906 O/O RTU Multi- C1
Purpose Clnr. & Dgr. Equ.
907 O/O Conc.
C1
Multi-Purpose
Equ.
Cleaner & Degreaser
Use on all hard
non-electrical
surfaces for fast
grease release.
A superb shop
replacement for
1-1-1
trichloroethane.
Use on all hard
non-electrical
surfaces for fast
grease release.
A superb shop
replacement for
1-1-1
trichloroethane.
Re-emulsify
spilled & dried
production
chemicals.
Use with
daily
maintenance
program.
For quick
removal of
black tow motor
marks.
910 Industrial
C1 For heavy duty
Strength Spray
degreaser
& Wipe Cleaner
spray & wipe
Degreaser
application
3910 Multi-Purpose C1 permanent ink
Degreaser
Equ. remover.
For heavy duty
degreaser
spray & wipe
application
permanent ink
remover.
For heavy duty
degreaser
spray & wipe
application
permanent ink
remover.
For heavy duty
degreaser
spray & wipe
application
permanent ink
remover.
For heavy duty
degreaser
spray & wipe
application
permanent ink
remover.
For heavy duty
degreaser
spray & wipe
application
permanent ink
remover.
911 NonChlorinated
Industrial Solvent
Use as dip tank
degreaser in
pressure washer,
steam cleaners, &
automatic scubber machines.
Use on all hard
non-electrical
surfaces for fast
grease release.
A superb shop
replacement for
1-1-1
trichloroethane.
Remove cutting
oils from
production
parts before
packing &
shipping.
Re-emulsify
spilled & dried
production
chemicals.
Product
Admin.
Area
USDA
A1
1000 Semi-Perma- NA For entrance
Use on producnent Resilient Floor
floor material
tion floors to
& Concrete Sealer
such as slate,
stop concrete
1001 Versatile
NA terrazzo, quarry dusting, facilitate
Premium
tile, resilient tile. grease & oil spill
Floor Sealer
clean ups.
1018 High
Gloss Economy
Floor Finish
NA For entrance
floor material
such as slate,
terrazzo, quarry
tile, resilient tile.
1020 High Gloss
NA
Premium Floor
Finish
1022 Ultra Versatile NA
Premium Floor Fin.
1025 High Perfor- NA
mance Floor Finish
*1200 Furniture
Polish
}
For entrance
floor material
such as slate,
terrazzo,
quarry
tile,
resilient tile.
Seal resilient
tile prior to
floor finish
application.
Restroom/
Lunchroom
Loading
Dock
Other/
Infirmary
For heavy duty
degreaser
spray & wipe
application
permanent ink
remover.
For quick
removal of
black tow motor
marks.
Seal resilient
tile prior to
floor finish
application.
Stops concrete
dusting & aids
in routine
maintenance
clean-up.
Seal resilient
tile prior to
floor finish
application.
Use on production floors to
stop concrete
dusting, facilitate
grease & oil spill
clean ups.
Protective
top coat for
resilient tile.
Stops concrete
dusting & aids
in routine
maintenance
clean-up.
Protective top
coat for
resilient tile.
Use on production floors to
stop concrete
dusting, facilitate
grease & oil spill
clean ups.
Protective
top coat for
resilient tile.
Stops concrete
dusting & aids
in routine
maintenance
clean-up.
Protective top
coat for
resilient tile.
NA For daily/weekly For daily/weekly For daily/weekly For daily/weekly
For daily/weekly
application to
application to
application to
application to
wooden surfaces. wooden surfaces. wooden surfaces. wooden surfaces.
application to
wooden surfaces.
College of Knowledge
5/04
Industrial Science Seminar
Product Listing by Department (continued)
Product
Admin.
Area
USDA
Production
Area
C1 Utilized to
Equi. eradicate
Assembly
Area
Storage
Area
Restroom/
Lunchroom
Loading
Dock
Utilized to
eradicate
unwanted odors
from carpets,
upholstery,
defined spaces.
Utilized to
eradicate
unwanted odors
from carpets,
upholstery,
defined spaces.
Utilized to
eradicate
unwanted odors
from carpets,
upholstery,
defined spaces.
Utilized to
eradicate
unwanted odors
from carpets,
upholstery,
defined spaces.
Other/
Infirmary
*1201 Sweet Tropic
Mist Air Freshener
& Neutralizer
*1202 Baby Fresh
Scent Air Freshener
& Neutralizer
Utilized to
eradicate
unwanted odors unwanted odors
C1 from carpets,
from carpets,
Equi. upholstery,
upholstery,
defined spaces. defined spaces.
*1205 Dust Mop
Treatment
C1 For regular appli- For regular appli- For regular appli- For regular appli- For regular appli- For regular appli- For regular appliEqui. cation to dust
cation to dust
cation to dust
cation to dust
cation to dust
cation to dust
cation to dust
mops & dusting mops & dusting
& dusting tools to & dusting tools to
tools to enhance tools to enhance
the ability to
the ability to
attract & hold dust. attract & hold dust.
*1207 Gelled
Baseboard
Stripper
C1 For quick removal For quick removal
Equi. of floor finish & of floor finish &
*1210 Stainless
Steel Clnr. Polish
A7 For use when
Equi. polishing stainC1 less steel dispenEqui. sers sinks &
decor.
*1211 Stainless
Steel Clnr. Polish
mops & dusting
& dusting tools to
tools to enhance
the ability to
attract & hold dust.
mops & dusting
& dusting tools to
tools to enhance
the ability to
attract & hold dust.
mops & dusting
& dusting tools to
tools to enhance
the ability to
attract & hold dust.
mops & dusting mops & dusting
& dusting tools to & dusting tools to
tools to enhance tools to enhance
the ability to
the ability to
attract & hold dust. attract & hold dust.
For quick removal
of floor finish &
dirt from baseboards & hard to
reach areas.
dirt from base- dirt from baseboards & hard to boards & hard to
reach areas.
reach areas.
*1220 Glass, Plastic C1 For cleaning of
& CRT Cleaner
Equi. mirrors, glass,
walls, doors &
signs.
For use when
polishing stainless steel dispensers sinks &
decor.
For cleaning of
mirrors, glass,
walls, doors &
signs.
Utilized to
eradicate
unwanted odors
from carpets,
upholstery,
defined spaces.
For cleaning of
mirrors, glass,
walls, doors &
signs.
For use when
polishing stainless steel dispensers sinks &
decor.
For use when
polishing stainless steel dispensers sinks &
decor.
For cleaning of
mirrors, glass,
walls, doors &
signs.
For cleaning of
mirrors, glass,
walls, doors &
signs.
*1230 Disinfectant C1 Daily spray disn. Daily spray disn. Daily spray disn. Daily spray disn. Daily spray disn.
Deodorant
Equi. of all hard non- of all hard non- of all hard non- of all hard non- of all hard nonporous surfaces. porous surfaces. porous surfaces. porous surfaces. porous surfaces.
*1240 Foaming
Disinfectant
Cleaner
*1250 Chewing
Gum Remover
*1260 Flying
Insectacide
*1270 Residual
Insecticide
*1280 Wasp &
Hornet Insecticide
C1
Equi.
Daily cleaning &
disn.of all hard
nonporous
surfaces.
Daily cleaning &
disn. of all hard
nonporous
surfaces.
Daily cleaning &
disn. of all hard
nonporous
surfaces.
Daily cleaning &
disn. of all hard
nonporous
surfaces.
Daily cleaning &
disn. of all hard
nonporous
surfaces.
NA Removal of
chewing gum
from fabrics,
upholstery &
carpets.
F1
Equ.
F2
Equ.
F2
Equi.
}
For the
eradication
of
crawling
& flying
insects.
For the
eradication
of
crawling
& flying
insects.
5/04
Industrial Science Seminar
Product Listing by Department (continued)
Product
Antimicrobial/ Aloe
VRE MRSA Antiseptic Vera
Petroleum
Dist.
USDA
Auth.
Uses
500 Lotion Hand
Cleaner
–
–
–
Y
N
E-4
Equiv.
Regular hand washings not requiring antibacterial claims.
501 Premium
Hand Wash
N
N
N
Y
N
E-4
Equiv.
Luxury hand washing - not requiring antibacterial claims
505 Antiseptic
Lotion Cleanser
Y
Y
Y
Y
N
E-4
Equiv.
Regular hand washings requiring antibacterial, antimicrobial or antiseptic
claims.
510 Antimicrobial
Food Service
Hand Wash
Y
Y
Y
Y
N
E-2
Regular hand washings requiring antibacterial, antimicrobial or antiseptic
claims.
515 Instant Hand
Sanitizer (gel-type)
Y
Y
SKIN
Y
N
E-4
Equiv.
Utilized when multiple hand washings are required or running water and/or
towels are not accessible.
520 Gentle Hair
and Body Wash
N
N
N
Y
N
E-4
Equiv.
Hair and body wash or utilize as a luxury hand soap.
525 Hand & Body
Lotion
N
N
N
Y
N
E-4
Equiv.
Utilized when a hand and body lotion is required due to frequent hand
washings or dry conditions. Also used heavily by those individuals required to
wear latex gloves and when glove integrity is of absolute importance.
540 Water Lotion
Grit Cleanser
N
N
N
Y
Y
E-4
Equiv.
Utilized for grease, oil and heavy soil removal from hands when a water
source is not accessible.
545 Waterless Paste
Hand Cleaner
N
N
N
Y
Y
E-4
Equiv.
Utilized for grease, oil and heavy soil removal from hands when a water
source is not accessible.
550 Waterless Paste
Hand Cleaner
(grit-type)
N
N
N
Y
Y
E-4
Equiv.
Utilized for grease, oil and heavy soil removal from hands when a water
source is not accessible.
560 Citrus Solvent
Waterless Grit
Cleanser
N
N
N
Y
N
E-4
Equiv.
Utilized for removing inks, paints, oils and soils. Typically chosen by users
requiring non-petroleum, solvent based hand cleaners, with grit.
Product
sanitizer
Dilu.
All Departments Requiring Deodorization
600 Liquid Malodor
Counteractant
(Lemon)
1 oz./gal.
12 oz./gal.
*RTU
Utilized to eradicate unwanted odors from carpets, upholstery, defined spaces.
601 Liquid Malodor
Counteractant
(Vanilla)
1 oz./gal.
12 oz./gal.
*RTU
Utilized to eradicate unwanted odors from carpets, upholstery, defined spaces.
602 Liquid Malodor
Counteractant
(Peach Kiwi)
1 oz./gal.
12 oz./gal.
*RTU
Utilized to eradicate unwanted odors from carpets, upholstery, defined spaces.
603 Liquid Malodor
Counteractant
(Harmony)
1 oz./gal.
12 oz./gal.
*RTU
Utilized to eradicate unwanted odors from carpets, upholstery, defined spaces.
1:88
cartridge
Utilized to eradicate unwanted odors from carpets, upholstery, defined spaces.
3604 Liquid Malodor
Counteractant
*RTU = Ready to use
College of Knowledge
5/04
NOW AVAILABLE
on CD ROM!
© Canberra Corporation 1994
Revised 1996, 1998, 2000, 2001
Table Top Demo's
Industrial Science Demonstrations
Table Top Demo for “All Purpose Cleaner” & “Butyl Cleaner”
Tools & Materials Needed:
1. Green grease (Crisco with food coloring)
2. Small mirror
3. Product with sprayer
4. Cloth or wipe
Demo Techniques:
Spread grease onto mirror surface with finger. Apply ready-to-use All Purpose Cleaner only above the
grease line on mirror to allow the cleaner via gravity to move down through the grease. You will
immediately note the emulsification (whitening) of the soil mass. The grease and soil will lift, suspend
and begin running down glass. By wiping the surface, you will completely remove grease. No rinsing
required to remove all residue.
Table Top Demo for “Bacterial Digestant/Deodorant”
Tools & Materials Needed:
1. Empty plastic cups
2. Green grease (Crisco with food coloring)
3. Liquid Life Forms
Demo Techniques:
With your finger, apply the green grease uniformly to the inside surface of the cup (coat medium
thickness). Pour 1 to 2 ounces of Liquid Life Forms into cup and allow to remain 5 minutes (set
aside and continue discussing benefits of product). Leave some of the green grease untouched by
Liquid Life Forms. Rinse cup with water.
The green grease below its waterline will liquify, illustrating the Liquid Life Form's ability to break
down and digest grease.
College of Knowledge
Table Top Demo's
Industrial Science Demonstrations (continued)
Table Top Demo for “Germicidal Cleaner”
Tools and Materials Needed:
1. Clear vial with cap
2. Small squeeze bottle with motor oil
3. Germicidal Cleaner at use dilution status
Demo Techniques:
Place product at use dilution in the vial/container. Add drop of grease into vial and shake. You will
immediately notice the grease being dispersed throughout, showing complete emulsification and
solubilization of the grease and oil, thus proving our Germicidal Cleaner breaks through the oil barriers
so that the “quats” can do their job in killing bacteria.
Table Top Demo for Dip Tank Degreasing
Tools and Materials Needed:
1. Small 1 qt. rubbermaid square container (clean)
2. Lid for above
3. Small metal parts
4. Tramp oil
5. Water
6. N/C Industrial Solvent
7. Compressed air aerosal
Demo Techniques:
Mix degreaser with water at 1:8. Cover metal parts with thin layer of tramp oil. Soak parts for 90
seconds. Brush or agitate. Tap excess solution from part. Wipe or blow part dry and allow customer to
examine part.
College of Knowledge
Industrial Science Seminar
Questions & Answers
Question
Who would I see for heavy-duty cleaning materials in the greater majority of industrial
plants?
Answer
It could be the Plant Manager, Superintendent of Maintenance, the Plant Engineer, or
Safety Director.
Question
How often does an industrial account clean their floors?
Answer
Daily to weekly. It is important that all grease and loose oils be removed from floors for
safety reasons. (Slip reduction)
Question
Would stiff brushes on the automatic scrubber do a better job of cleaning?
Answer
Yes. Pads fill up quickly with grease and oils. (Be sure to check floor coating type)
Question
Can you use steel wire brushes for scrubbing?
Answer
Yes, if the floor is not sealed or painted.
Question
Should the floor be neutralized before sealing?
Answer
Yes. Use Neutralizer and Conditioner.
Question
What would be the easiest way to clean machinery in a tool and die shop?
Answer
Mix the cleaning solution according to directions in a pump-up sprayer. Spray on, let set,
and wipe off using clean rags and warm water.
Question
What is the best way to clean the sump in a tool and die shop?
Answer
Drain the sump with a wet vac. Make sure all chips and fine shavings are removed.
Mix your cleaner according to the directions. Pour in the desired amount of solution,
turn on machine for five minutes and again vacuum all material from sump.
The sump is now ready to be recharged with cutting fluid.
Question
Can an odor counteractant be added to a sump?
Answer
Yes. Adding liquid life forms will digest odors and prevent build-up.
Question
Some industrial manufacturing plants have showers. What would be a fast way to clean
and disinfect the shower walls and floors?
Answer
Use a foamer. Foam on the material, let set, and agitate with stiff brush and rinse. To keep
drains open, use Liquid Life Forms after cleaning.
Question
Could I use a non-acid bowl cleaner for cleaning the toilets and urinals?
Answer
Yes, use non-acid bowl cleaner once a day.
College of Knowledge
Industrial Science Seminar
Questions & Answers (continued)
Question
Many industrial accounts have hundreds of light fixtures in the ceiling. What product
would we use for cleaning?
Answer
Lighting efficiency will improve when cleaned with a non-butyl cleaner.
Question
Which product would best perform when removing fork-lift tire transfer marks from
the plant floor?
Answer
Use a concentrated d-Limonlene as a pre-spray and automatic scrubber with solvent -based
Industrial Degreaser.
College of Knowledge
Industrial Science Seminar
Floor Care Methodization: Industrial
Equipment Maintenance
A. Automatic Scrubbers
1) Battery-operated power equipment, like an automatic floor scrubber, needs special care and
maintenance. See owners manual before proceeding.
2) These units compare in price to that of compact automobiles. Because of that, they should be
treated with utmost care and according to manufacturer's instructions.
3) It is advisable to grease the casters once every week. Oil all moving parts, such as the control
bars, squeegee control rods, pressure points and hinges once every month.
4) Make sure that each drive wheel tire is inflated to the recommended tire pressure. Unequal tire
pressures can adversely affect the total operation of the machine.
5) Drive brushes should be removed and cleaned after each use. The drive brush mechanism
needs to be adjusted and lubricated according to the manufacturer's instructions.
6) The squeegee assembly should be adjusted and lubricated. The reversible squeegee blades also
need regular cleaning and adjusting.
7) An automatic scrubber has a solution tank, a recovery tank, and filters that should be flushed
and cleaned on a regular schedule.
Battery Maintenance
1) When working with batteries, leave the battery compartment covered up and work in a wellventilated area. Do not wear rings, because they can become welded to metal wrenches if a live
terminal is accidentally touched.
2) Check the fluid level in the battery cells at least weekly. The battery caps are easily removed by
pressing the ends of the white plastic extensions.
3) Check the electrolyte status of each battery cell with a hydrometer every 15 operating hours.
4) Periodically, check all battery cable and wiring for signs of damage or wear. Replace as
needed. Once a month, remove all batteries from your machine. Clean all batteries, battery
tray, and battery compartment with a solution of baking soda and water.
5) On the bottom of the battery compartment cover is a battery wiring diagram. Follow this
diagram when you put the battery wires on the terminals. To prevent corrosion, apply a film of
grease or Vaseline to battery lugs and bolt studs. Do not reverse connections when servicing or
replacing the batteries.
Battery Charger
1) When actively using an automatic scrubber, you will use a battery charger to re-charge the
batteries. With the charger unplugged from the electrical wall outlet, find the main connector
that is marked “Connect To Charger.” Firmly push the two connectors together. When laying
the charging cables across the batteries, be careful not to allow the metal parts of the
connectors touch any battery terminals. Set the battery charger control according to the rate of
current desired. After charging, remove the charger plug from the wall outlet and disconnect
the charging cable. Reconnect main battery terminals.
College of Knowledge
Industrial Science Seminar
Floor Care Methodization: Industrial
✓
✓
✓
Dust Mop Procedures
A. Materials Requirement Planning (MRP)
a. Dust mop, frame & handle
b. Dust mop treatment
c. Putty knife
d. Brush
e. Plastic liner
B. Plant Floor Dust Mop Procedures
1) Acquire dust mop of choice
a. Choose appropriate size
1. Handle size and diameter
2. Dust mop length should be small enough to maneuver, yet large enough to
allow for labor-saving operation
b. Ensure that dust mop is clean
2) Choose start/stop points to allow for completion of the task nearest the exit or trash
receptacle
3) Treat dust mop with a water-based dust mop treatment
a. Use approximately 1 oz. of treatment per 6" of dust mop length
4) Hold dust mop handle at approximately a 450 angle
5) Push or “plow” straight ahead from one end of the area to the next
a. Do not allow mop head to leave the floor
6) Pivot mop at appropriate turning point
a. Avoid changing the leading edge of dust mop
b. Overlap last pass by at least 6-10 inches
7) Utilize a dust pan and brush to dispose of corruption not held by the mop yarns
a. Remove gum/tar from floor with a putty knife
b. Utilize brush to remove dust from corners
8) Remove dust mop frame and head from handle, and shake or brush loose dirt from mop
head into a plastic liner
a. Place in storage area
b. Launder when brushing is no longer effective
College of Knowledge
Industrial Science Seminar
Floor Care Methodization: Industrial
✓
✓
✓
Damp Mop Procedures
A. Materials Requirement Planning (MRP)
a. Wet mop, handle
b. Mop bucket and wringer
c. Degreaser/cleaner concentrate
B. Plant Floor Mopping Procedures
1) Dust mop area
2) Choose appropriate wet mop size and type
3) Fill mop bucket to desired level with water
4) Add chemical to water at proper dilution
a. Utilize a neutral pH cleaner for light soils, higher pH degreaser for heavy soils and
grease
b. A second bucket for rinsing may be required for double bucket mopping
5) Submerse mop into bucket
CAUTION
WET
FLOOR
!
▲
6) Wring out mop to desired dampness
a. Use legs, not your back, to apply wringer pressure
7) Confirm that all safety signs and apparel are properly located
8) Begin mopping at farthest point from door
a. Outline or “picture frame” area
b. Mop in a figure 8 motion
9) Change water when needed to avoid redepositing dirt on floor
10) Repeat steps 1 - 9 as necessary
College of Knowledge
Industrial Science Seminar
Floor Care Methodization: Industrial
✓
✓
✓
Plant Floor Cleaning
A. Materials Requirement Planning (MRP)
a. Auto scrubber
b. Degreaser/cleaner
c. Brushes/pads
d. Detail mop/wet mop
e. Squeegee
f. Scrap rags
g. Defoamer (if required)
CAUTION
WET
FLOOR
B. Plant Floor Cleaning - Semi-Automated
1) Choose appropriate pad or brush for autoscrubber
2) Properly mix automatic scrubber solution tank with scrubbing solution
When pouring out of a 5 gal. pail, pour with bung at top of pail
3) Scrub 200 square foot area with automatic scrubber equipped with blue scrubbing pads
a. Pads down
b. Solution control on; disperse properly diluted scrubbing solution
c. Squeegee up, vac off
4) Overlap each pass until 200 square foot area is scrubbed completely
5) Make second pass with automatic scrubber and pick up scrubbing solution
a. Pads down
b. Solution control off
c. Squeegee down, vac on
6) Utilize a detail mop to absorb scrubbing solution from corners, baseboards and all
squeegee trails
7) Repeat 3 - 6 as required to complete job
8) Wipe down all baseboards if needed
College of Knowledge
Industrial Science Seminar
Floor Care Methodization: Industrial
Performing Preventative, Interim or Restorative Cleaning Tasks
Floor Care Materials Requirement Planning (MRP)
✓
✓
✓
System 1 - Restorative maintenance (strip, seal, refinish)
1) Strip
a. Mop buckets and wringers
b. Cotton wet mops & handles
c. Scrubbing machine
d. Strip pack & machine pad holder
e. Dust mop & dust pan
f. Putty knife or scraper
g. Dust mop treatment H20 (water based)
h. Wet/Dry vacuum
i. Extension cords
j. Clean rags
k. Stripper slippers
l. Gloves
m. Clean rinsed cotton mop & handle
n. Trigger sprayer
o. “Wet Floor” signs
p. Measuring cup
q. Stripper
r. Neutralizer
s. Towels & tape
t. Squeegee
2) Seal
a.
b.
c.
d.
e.
Mop buckets with wringer
Plastic liners to fit bucket
Rayon mops & handles (looped)
Floor sealer
“Wet Floor” signs
3) Refinish
a. Mop bucket & wringer
b. New plastic liner to fit bucket
c. New or clean rayon mops (looped)
d. Mop handles
e. “Wet Floor” signs
f. Floor finish
College of Knowledge
Industrial Science Seminar
Floor Care Methodization: Industrial
Performing Preventative, Interim or Restorative Cleaning Tasks
✓
✓
✓
Floor Care Materials Requirement Planning (MRP)
System 2 - Clean & Restore
1) Clean & Restore
a. Mop buckets with wringers
b. Cotton mop & handle
c. Neutral cleaner
d. Dust mop & dust pan
e. Dust mop treatment
f. Measuring cup
g. “Wet Floor” signs
h. Spray buff in trigger sprayer
i. Floor restorer
j. Rayon mop & handle
k. Liner for restorer
l. Putty knife
m. Burnisher with red pad
System 3 - Deep Scrub & Recoat
1) Deep Scrub & Recoat
a. Dust mop & dust pan
b. Dust mop treatment
c. Pads - blue or brown
d. Automatic or hand-held floor scrubber
e. All purpose cleaner (low suds)
f. Mop bucket & wringer
g. Cotton mop & handle
h. Floor finish
i. Mop bucket & wringer with liner
j. Putty knife
k. Rayon mop
l. Neutralizer
m. Stripper slippers
n. “Wet Floor” signs
College of Knowledge
Industrial Science Seminar
Floor Care Methodization: Industrial
Performing Preventative, Interim or Restorative Cleaning Tasks
Floor Care Procedures
System 1 – Strip Seal & Refinish
1) Stripping – Semi-Manual
a. Choose appropriate mop handle
b. Properly mix mop bucket of stripping solution
When pouring out of a 5 gal. pail, pour with bung at the top of the pail
c. Apply stripper liberally with mop to a 200 square foot area of floor as well as baseboards
d. Let stand for 5 minutes
e. Agitate floor with 17" floor machine and black pad. Agitate baseboard and corners
with baseboard tool and bladed scrapers
1. Stay away from walls to avoid splashing
2. Overlap passes by at least ten inches while stripping
f. Pick up emulsified floor finish solution via wet/dry vacuum
g. Utilize a detail mop to absorb stripper from corners, baseboards and all squeegee trails
h. If a non-rinse-free stripper is being utilized, rinsing with a floor
neutralizer is required to assure an alkaline-free floor
i. Repeat c - h as required to complete job
j. Wipe down all baseboards if needed
2) Stripping – Semi-Automated
a. Choose appropriate mop and handle
b. Properly mix mop bucket of stripping solution
When pouring out of a 5 gal. pail, pour with bung at the top of the pail
c. Apply stripper liberally with mop to a 200 square foot area of floor as well as baseboards
d. Let stand for 5 minutes
e. Agitate baseboards
f. Scrub aforementioned area with automatic scrubber equipped with black
stripping pads
1. Pads down
2. Solution control on; disperse properly diluted stripping solution
3. Squeegee up, vac off
g. Overlap each pass until 200 square feet of area is scrubbed completely
h. Make second pass with automatic scrubber and pick up emulsified stripping solution
1. Pads down
2. Solution control off
3. Squeegee down, vac on
i. Utilize a detail mop to absorb stripper from corners, baseboards and all
squeegee trails
j. If a non-rinse-free stripper is being utilized, rinsing with a floor
neutralizer is required to assure an alkaline-free floor
k. Repeat c - j as required to complete job
l. Wipe down all baseboards if needed
College of Knowledge
Industrial Science Seminar
Floor Care Methodization: Industrial
Performing Preventative, Interim or Restorative Cleaning Tasks
Floor Care Procedures
System 1 – Strip Seal & Refinish (continued)
3) Seal/Refinish Method (with mop)
a. Establish start/stop points
Choose start location as the furthest point from the door/water source
b. Place plastic liner in seal/finish bucket
c. Utilize rayon mop with looped ends and sewn tailband
1. Shake mop out in a plastic liner to prevent manufacturing lint (off mop) from
adhering to the floor
2. Use separate mop for sealing and finishing
d. Dip mop in sealer/finish bucket; remove excess sealer/finish by pressing mop with a
one quarter turn into wringer
e. Apply sealer/finish
1. Outline or “picture frame” area on first coat and last coat
2. Stay 6 inches away from wall on all subsequent coats
3. All coats should be thin and without dry streaks
f. See sealer/finish application guide for correct number of coats of the finish you are
utilizing
1. Allow at least 25-35 minutes to dry between coats
2. Allow 1 hour or more dry time between coats on very humid days
System 2 – Clean & Restore
1) Spray buffing
a. Choose appropriate product
b. Properly prepare spray buff to recommended dilution
c. Spray solution lightly ahead of buffing machine
1. Overspraying will result in excessive pad buildup and poor gloss
2. Turn/replace pad as required
d. Dust mop with a water-based dust mop treatment if necessary
e. For a higher gloss, repeat letters c and d with a lighter-colored pad
2) Mop on restorer
a. Choose appropriate pad and mount to machine
Utilize a high speed (1000 - 1500 RPM) or ultra high speed buffer
b. Prepare a mop bucket and wringer equipped with a plastic liner
c. Apply a thin, level coat of restorer to floor, utilizing a looped-end rayon mop
Allow to dry to a light haze
d. Buff floor with previously prepared machine
e. Dust mop
Utilize water-based dust mop treatment
f. For a higher gloss, repeat letters a - e with a lighter-colored pad
College of Knowledge
Industrial Science Seminar
Floor Care Methodization: Industrial
Performing Preventative, Interim or Restorative Cleaning Tasks
Floor Care Procedures
System 3 – Deep Scrub & Recoat
1) Scrub Method – Semi-Manual
a. Choose appropriate mop handle
b. Properly mix mop bucket of neutral cleaner solution
1. When pouring out of a 5 gal. pail, pour with bung at top of pail
c. Apply neutral cleaner liberally with mop to a 200 square foot area of floor
d. Let stand for 5 minutes
e. Agitate floor with 17" floor machine and blue pad
1. Stay away from walls to avoid splashing
2. Overlap passes by at least ten inches while scrubbing
f. Pick up scrubbing solution via wet/dry vacuum
g. Utilize a detail mop to absorb scrubbing solution from corners, baseboards and all
squeegee trails
h. Repeat c - g as required to complete job
i. Wipe down all baseboards if needed
2) Scrub Method – Semi-Automated
a. Choose appropriate mop and handle
b. Properly mix automatic scrubber solution tank with scrubbing solution
When pouring out of a 5 gal. pail, pour with bung at top of pail
c. Scrub 200 square foot area with automatic scrubber equipped with blue scrubbing pads
1. Pads down
2. Solution control on; disperse properly diluted scrubbing solution
3. Squeegee up, vac off
d. Overlap each pass until 200 square foot area is scrubbed completely
e. Make second pass with automatic scrubber and pick up scrubbing solution
1. Pads down
2. Solution control off
3. Squeegee down, vac on
f. Utilize a detail mop to absorb scrubbing solution from corners, baseboards and all
squeegee trails
g. Repeat c - f as required to complete job
h. Wipe down all baseboards if needed
3) Recoat Method (with mop)
a. Establish start/stop points
Choose start location as the furthest point from the door/water source
b. Place plastic liner in seal/finish bucket
c. Utilize rayon mop with looped ends and tailband
1. Shake mop out in a plastic liner to prevent manufacturing lint (off mop) from
adhering to the floor
d. Dip mop in finish bucket, remove excess finish by pressing mop with a 1/4 turn
into wringer
College of Knowledge
Industrial Science Seminar
Floor Care Methodization: Industrial
Performing Preventative, Interim or Restorative Cleaning Tasks
Floor Care Procedures
System 3 – Deep Scrub & Recoat (continued)
3) Recoat Method (with mop)
e. Apply finish
1. Outline or “picture frame” area on first coat and/or last coat
2. All coats should be thin and without dry streaks
3. Allow at least 25-35 minutes to dry between coats
4. Allow 1 hour dry time or more between coats on very humid days
College of Knowledge
Industrial Science Seminar
Restrooms
Restrooms Materials Requirement Planning (MRP)
✓
✓
✓
A. Materials Requirement Planning
a. Clean rags
b. Mop buckets and wringers
c. Cotton wet mops and handles
d. Dust mop and dustpan
e. “Wet Floor” signs
f. Trigger spray bottles
g. Toilet bowl swabs
h. Waste receptacle liners
i. Gloves, goggles and appropriate shoes
j. Products
1) Disinfectant cleaner
2) Toilet bowl cleaner
3) Hand soap
4) Creme cleanser
5) Glass cleaner
6) Paper towels and tissue paper
7) Drain maintainer
College of Knowledge
Industrial Science Seminar
Industrial Cleaning Procedures
Restrooms
✓
✓
✓
CAUTION
WET
FLOOR
A. Obtain Supplies
1) Prepare all equipment and supplies required
2) Proceed to cleaning destination.
B. Prepare area properly
1) Knock on door and announce your intention to enter. If restroom is occupied, wait until it is
empty. When empty, enter.
2) Immediately post “Restroom Closed” sign.
3) Wear proper clothing.
C. Toilet bowls and urinals
1) Remove all urinal screens and blocks from respective receptacles and flush before cleaning.
2) Evacuate water from bowl. Using a bowl mop, press water over the trap.
3) Apply toilet bowl cleaner and disinfectant to toilet and urinal interiors only. Allow disinfectant
cleaner to stand while other cleaning tasks are completed.
D. Dust all areas – high to low
1) Clean all dust from ceiling fans and vents, utilizing appropriate dusting tool.
2) Dust tops of doors and stall partitions.
3) Sweep floor, remove all loose trash, and empty into waste receptacles.
4) Use a putty knife to remove gum from floors and partitions.
E. Wet cleaning
1) Clean all light fixtures, mirrors, and glass surfaces with glass cleaner.
2) Wipe all partitions, tops and bottoms of doors, doorknobs, receptacles, and dispensers with
disinfectant solution.
3) Spot clean all other above-ground surfaces with disinfectant solution.
F.
Clean wash basins
1) For most effective cleaning, use creme cleanser, mild phosphoric acid solution or disinfectant
solution.
2) Clean interior of sink, allowing disinfectant solution a full ten minutes of contact time for
efficacy.
HINT: High foaming cleaners will make cleaning and contact time easier.
3) Spot clean exterior surfaces, faucets, pipes and under basins. Wipe all metal surfaces dry.
4) Check operation of faucets and drains.
5) Treat drains with bacterial digestant/deodorant.
G. Clean toilet bowls and urinals – inside
1) If required, add an additional ounce of toilet bowl cleaner and disinfectant to bowl mop prior
to cleaning.
2) Clean the rim and waterline areas carefully and move into the exposed trap area.
3) Check under rim for missed mineral deposits and rust stains with lip light.
4) HINT: Acid bowl cleaners are required for mineral deposits and rust. Routine cleaning can
include non-acid cleaners.
College of Knowledge
Industrial Science Seminar
Industrial Cleaning Procedures
Restrooms (continued)
H. Clean toilet bowls and urinals – outside
1) Spray outside and bottom surfaces with non-acid solution and wipe.
2) Wipe toilet seat with non-acid disinfectant solution.
I.
Clean and empty all waste receptacles
1) Remove can liners from receptacles, wash the interiors and exteriors with disinfectant
solution, and replace can liner.
2) Empty and clean sanitary napkin receptacles with disinfectant solution. Replace liner to
comply with OSHA Bloodborne Pathogen Standards.
3) Never use your hand to press trash overflow down and into the waste receptacle.
J.
Replenish all supplies
1) Refill hand soaps, toilet tissue, towels, deodorizers, and sanitary napkin dispensers.
2) If restroom has condom dispensers or other ancillary dispensers, make sure that these are
refilled.
3) Check operation of all dispensers and report malfunctions properly.
4) Check urinal screens, deodorant blocks, and gel/mist deodorants.
K. Damp mop
1) Clear area of supply cart and equipment.
2) Start in the area farthest from the door and work towards the door.
a. Make sure to mop with fresh, clean mop water.
b. HINT: Using the Neutral pH Disinfectant Cleaner can provide effective bacteria
elimination with odor counteraction.
c. A mild acidulous tile cleaner may be required for grout lines on quarry tile floors.
3) Place mop in solution and wring out, leaving mop damp. When mopping floor area around
toilets and urinals, mop thoroughly and wring out often. Change solution when necessary.
L.
Odor counteraction
1) Spray bacteria-based odor counteractants liberally around toilets and urinals and let air dry.
2) Pour four ounces into each floor drain before leaving the area.
3) HINT: Saturating a paper towel with bacterial digestant deodorant and placing into waste
receptacle will aid in counteracting odors long after you have left the restroom.
College of Knowledge
Industrial Science Seminar
Industrial Cleaning Procedures
Locker Rooms/Showers
✓
✓
✓
2
A. Materials Requirement Planning (MRP)
a. 50 ft. hose with proper connection
b. Foam gun nozzle
c. All angle scrub brush/extension handle
d. Squeegee scrubber sponges and/or hand pads
e. Putty knife
f. Clean rags
g. Boots/treads/overshoes
h. Safety goggles
i. Gloves
j. "Wet Floor" sign
k. Clean towel
l. Utility suit
m. Multi acid disinfectant cleaner concentrate
B. Steps to cleaning locker rooms/showers
1) Fill any soap dispensers.
2) Remove any disposable materials.
3) Spot clean any heavily soiled areas.
4) Fill foam gun reservoir with high foaming, multi-acid shower room disinfectant cleaner.
5) Apply or insert appropriate dilution control mechanism.
6) Attach foam gun to hose and hose to nearest water source.
* Before beginning, please refer to product's personnel protective equipment instructions and
wear equipment as needed before mixing chemicals.
7) Spray section of wall no more than one arm span's width. Begin at the floor and move
upward until you reach the ceiling. Move to next section.
8) After spraying walls, spray ceiling in a similar manner, making sure the entire ceiling has
been sprayed with disinfectant solution.
9) Spray entire floor with disinfectant solution.
10) Using an all angle scrub brush, start at the first area that was sprayed with the disinfectant
and scrub all contact surfaces. Wash from bottom up.
11) Dismantle foam gun from hose and replace with standard spray nozzle. Starting with the
ceiling and working down the walls, rinse thoroughly with water, paying special attention
to any metal fixtures. Rinse from top down.
12) Rinse off non-slip boots.
13) Disconnect hose from water source and roll up.
14) Return all cleaning equipment to proper storage area.
2 Information taken from ISSA Hospital Housekeeping Procedures
College of Knowledge
Industrial Science Seminar
Industrial Cleaning Procedures
✓
✓
✓
Milling Machine, Lathes & Drill Press
A. Materials Requirement Planning (MRP)
a. Industrial Strength Degreaser
b. Glass, Plastic and CRT Cleaner
c. Soft cloth
d. Soft paint brush
e. Cleaning rags/Shop towel
f. Vacuum (electric or air operated shop vac)
g. Thin lubricant/Surface oil and rag
Milling Machine, Lathes & Drill Presses Cleaning & Sanitation
B. Preparation: Always wear proper protective gear
1) Clear machine of all work and remove tools
2) Brush or vacuum off ways, chucks, travel arms, and related surfaces of any metal chips or
debris.
3) Utilize industrial strength degreaser to remove greases and oils from painted surfaces.
4) Never spray (industrial degreaser) directly to unpainted surfaces without consulting
!
owner’s manual first. (i.e.: ways, chucks, travel arms)
5) Apply Glass, Plastic and CRT Cleaner to safety guards.
6) Never use ammoniated glass cleaners on safety guards or CNC control panels as it will pit,
!
haze and fog the surface.
7) Apply glass, plastic and CRT Cleaner to the CNC control panel and screens, wipe dry with
soft cloth.
8) Apply a thin film of oil to ways upon completion of cleaning.
▲
▲
✓
✓
✓
Surface Plates
A. Materials Requirement Planning (MRP)
a. Glass, Plastic and CRT Cleaner
b. Soft cloth
c. Soft paint brush
;;;;
;;
;;
Granite Surface Plate
Surface Plates
B. Preparation
1) Clear surface plate of all instruments.
2) Utilize soft cloth or brush to remove any large debris.
3) Apply glass, plastic and CRT Cleaner to surface plate.
4) Wipe dry with a soft cloth.
College of Knowledge
Industrial Science Seminar
Industrial Cleaning Procedures
✓
✓
✓
Conveyor Cleaning
A. Materials Requirement Planning (MRP)
a. Vacuum
b. Blower
c. Brush
d. Broom/Dust Pan
e. Cloth
f. Lubricant
g. Degreaser
Conveyor Cleaning - always wear proper personal protective equipment
B. Preparation
1) Lock-out all power to conveyor.
2) Remove all work from conveyor.
3) Block movement of any new work from entering to this section of conveyor.
4) Blow, vacuum, or brush, all loose debris from conveyor.
5) Sweep, blow, or vacuum, loose debris from floor under conveyor-collect and discard.
6) Wipe down conveyor with Industrial Strength Degreaser or solvent, when necessary
(i.e.: glue, paint, ink removal).
7) Lubricate bearings, etc.
8) Lubricate guards, corners, etc., with an approved spray-on lubricant. (Hint: often times a
water-based defoaming agent is appropriate for this application).
Offices - always wear proper personal protective equipment
A. Preparation
1) Clean from dry to wet, top-down and farthest point from the door towards the door.
2) Perform dusting procedures.
3) Empty trash containers.
4) Vacuum/dust mop (see: Vacuum/dust mop floor care procedures and MRP).
5) Clean restroom(s) (see: Restroom procedures and MRP).
6) Damp mop. (See: Damp mopping procedures and MRP).
7) Utilize glass, plastic, and CRT Cleaner to clean computer monitor(s).
8) Utilize glass, plastic, and CRT Cleaner or disinfectant cleaner on all other hard surfaces
EXCEPT WOOD!
9) Utilize furniture polish on true wood surfaces.
College of Knowledge
Industrial Science Seminar
Industrial Cleaning Procedures
Shipping & Receiving Docks
A. Materials Requirement Planning (MRP)
a. Dust mop
b. Wall wash
c. Cloth
d. Degreaser
e. Glass, plastic & CRT cleaner
✓
✓
✓
Shipping & Receiving Docks - always wear proper personal protective equipment
B. Preparation
1) Sweep, vacuum, or dust mop area.
2) Degrease walls (See: Wall washing procedures).
3) Degrease Floors (See: floor care methodization; Industrial).
4) Spot clean & degrease dock plates & doors with Industrial Strength Degreaser.
5) Use glass, plastic, & CRT Cleaner on door, windows, and mirrors.
✓
✓
✓
soap
Bradley Fountain Sinks
A. Materials Requirement Planning (MRP)
a. Acidic Disinfectant Creme Cleanser
b. Clean cloth/towels
c. RTU or Concentrate Disinfectant Cleaner
d. Supply stock
Bradley Fountain Sinks - always wear proper personal protective equipment
B. Preparation
1) Apply Disinfectant Creme Cleanser to interior surface and agitate with brush, rag, or
scrubbing pad.
2) Rinse with clear water.
3) Apply disinfectant cleaner to all surfaces both interior and exterior including soap
dispensers, knobs, etc. wipe and rinse, if necessary.
4) Re-stock paper towels and hand soap.
5) Be sure to leave floor surrounding sink clean and dry.
College of Knowledge
Industrial Science Seminar
Industrial Cleaning Procedures
✓
✓
✓
Dip Tanks and Parts Washers
A. Materials Requirement Planning (MRP) – See: Equipment Manual
Dip Tanks and Parts Washers - always wear proper personal protective equipment
B. Procedure
1) Consult your Equipment Manual, Supervisor and Plant Safety Director before proceeding.
! 2) Place all “Caution Signs” as required - NEVER perform cleaning tasks on a running,
moving, or electrified unit.
3) Utilize Industrial Strength Degreaser to clean exterior of unit and floor surrounding it.
4) Change Dip Tank Cleaning fluid as required.
5) Clean all interior surfaces including skim bar, agitator, material handling units, jets and
brushes with appropriate cleaner/degreaser.
6) Replace all components to their original positions and settings.
7) Dispose of old fluid in accordance with Federal and Local Government Guidelines.
▲
College of Knowledge
Industrial Science Seminar
Industrial Cleaning Procedures
Cafeteria
A. Remove Scraps
Remove products, wrapping paper and all packaging material from areas to be
cleaned. Sweep floor with appropriate broom.
B. Cover Electrical Equipment
Cover and unplug all wrapping or weighing equipment, as they may be water sensitive.
C. Collect Hand Tools
Put all scrapers, knives, trays, hand saws, grinding parts, etc., in sink for manual washing.
1) Utilize USDA A-1 pot & pan wash in first compartment of 3-stage sink.
2) Utilize USDA D-2 Sanitizer in the 3rd compartment of 3-stage sink.
CAUTION
WET
FLOOR
D. Cleaning Procedure
1) Use Foaming Degreaser USDA A-1.
2) Mix 1:20 with warm water.
3) Apply with foam gun, pressure sprayer or deck brush to all surfaces to be cleaned,
such as walls, tables, counters, saws, etc.
a. Walls – Clean from bottom to top.
b. Floors – Agitate, let stand, squeegee to drain, or pick up with wet dry vac. Rinse,
squeegee or wet dry vac.
4) Allow foaming degreaser to remain on the surfaces for five minutes to loosen fats, oils,
grease and other hard-to-remove soils.
5) Agitate if necessary.
6) Thoroughly rinse all surfaces being cleaned with the warmest water available. Rinse
walls from top to bottom.
7) Squeegee excess water into drains.
E. Sanitizing Procedure
1) Use Sanitizer/Virucidal Disinfectant USDA D-2.
2) Mix 1:500 with water (1 oz. to 4 gallons water).
3) Apply with sanitizing gun or pump-up sprayer to all surfaces previously cleaned.
4) Allow all food contact surfaces to air dry – no potable water rinse required.
F.
Add Drain Maintainer
1) Use Liquid Life Forms Bacterial Digestant/Deodorant.
2) Pour 4 oz. of Drain Maintainer twice weekly in each drain.
3) Pour 4 oz. daily into grease traps.
Display Cases
A. Remove all Product from Display Case
B. Remove all Shelving, Storage Pans, and Stage to 3-Sink Area
College of Knowledge
Industrial Science Seminar
Industrial Cleaning Procedures
Cafeteria (continued)
C. Cleaning Procedure
1) Use Foaming Degreaser USDA A-1.
2) Mix 1:20 with warm water.
3) Apply with foam gun, pump-up sprayer or spray bottle to all surfaces to be cleaned.
Clean from bottom to top.
4) Allow foam degreaser to remain on the surfaces for five minutes to loosen fats, oils,
grease and other hard-to-remove soils.
5) Agitate if necessary.
6) Thoroughly rinse all surfaces being cleaned with the warmest water available,
from top to bottom.
D. Sanitizing Procedure
1) Use Sanitizer/Virucidal Disinfectant USDA D-2.
2) Mix 1:500 with water (1 oz. to 4 gallons water).
3) Apply with sanitizing gun or pump-up sprayer to all surfaces previously cleaned.
4) Allow all food contact surfaces to air dry – no potable water rinse required.
5) Clean any glass with Film Free Glass Cleaner.
CAUTION
WET
FLOOR
E. Return all caution sign's and equipment to appropriate storage locations
1) Ensure that all chemicals are re-filled.
2) Ensure that all equipment is cleaned and rinsed out.
2 Information taken from ISSA Hospital Housekeeping Procedures
College of Knowledge
Industrial Science Seminar
Industrial Cleaning Procedures
✓
✓
✓
Lobby
A. Materials Requirement Planning (MRP)
a. Mop bucket with wringer
b. Wet mop handle with 20 oz. looped-end banded mop
c. Set of “Wet Floor” signs
d. Putty knife
e. Dust mop
f. Dustpan and brush
g. Hand pail
h. Clean cloths
i. Spray window cleaner
j. Spray polish
k. Approved germicidal detergent solution
l. Vacuum equipment
B. Steps to cleaning the lobby
1) Empty ashtrays and wastebaskets - Clean all receptacles. Remove dated
newspapers and damaged magazines.
2) Dust furniture - dust tables, legs of chairs, lamps, etc. Damp-wipe plastic-covered furniture.
Vacuum cloth upholstery.
3) Dust window sills and light fixtures.
4) Dust mop floor - Use dust mop of an appropriate size. Treat with a water-base treatment when
working in heavier soil load area. Start at one end of area. Hold mop handle at an
approximately 45 degree angle. Push mop straight ahead. Avoid lifting mop from floor or
moving it backwards. Remove gum with putty knife. Pivot at end of area and mop in opposite
direction. Overlap about ten inches.
5) Clean floor - Either damp mop using damp mop procedure or vacuum using vacuuming
procedure.
6) Polish - Polish metals and furniture. Use appropriate polish and clean cloths.
7) Spot clean soiled areas - Check walls and doors. Spot clean only areas that are no larger than
your hand. Notify supervisor if complete wall washing is necessary. Clean windows.
Clean telephone.
8) Straighten furniture - Arrangement should conform to established pattern.
2 Information taken from ISSA Hospital Housekeeping Procedures
College of Knowledge
Industrial Science Seminar
Industrial Cleaning Procedures
✓
✓
✓
Infirmary
A. Materials Requirement Planning (MRP)
a. Supply of clean cloths
b. Hand pads
c. Wet/dry vacuum
d. Mop bucket with double wringer
e. Disposable glove
f. Hand pail (3 gallon)
g. Approved germicidal detergent solution appropriate to the area
h. All-purpose spray cleaner solution
i. Plastic liner
j. Wet mop handle and looped-end banded wet mop
k. Door stop
l. Germicidal spray solution
m. Rinse water
n. Antimicrobial hand soap and Instant hand sanitizer
o. "Wet Floor" signs
p. Step ladder
2 Information taken from ISSA Hospital Housekeeping Procedures
College of Knowledge
Industrial Science Seminar
Industrial Cleaning Procedures
Infirmary
Infirmary cleaning steps
A. Remove soiled linen from infirmary
B. Remove trash and debris
C. Clean overhead lights (if applicable)
D. Clean exam table
E. Clean room furnishings
F. Clean walls
G. Clean infirmary room floors
H. Arrange furnishings
I. Inspect for cleaning errors
CAUTION
WET
FLOOR
You should clean every room using a pattern. Moving clockwise around the room from high places to
low places is usually best to ensure that nothing is overlooked. “This also ensures that each area is not
re-contaminated” and that cleaning one area does not re-contaminate another area.
Put on rubber gloves to protect your hands from coming in direct contact with
blood, body substances, contaminated linen, and debris.
A. Step 1 - Remove soiled linen from Infirmary
1) Gather the soiled linen from the infirmary and place in a plastic bag for laundering.
2) Take plastic liners with soiled linen to the laundry hamper.
B. Step 2 - Remove trash and debris
1) Place in double red bio-hazard plastic liners, and tie the top of the outer red bag of waste.
2) Lift the bag and carry it out of the infirmary to the pick-up point for this trash.
C. Step 3 - Clean overhead lights (if applicable)
1) Get a ladder and set it up under the lights.
2) Place your pail of detergent-germicide on the ladder utility platform.
3) Clean the overhead lights, starting at the top part of the ceiling attachment. Clean the
stem, all surfaces of the piping, and all surfaces of the light housing.
4) Rotate the lights, and clean the light fixture lenses. It is not unusual to find blood stains on the
light fixture. Wipe all lens surfaces clean and then clean the second overhead light in the room.
D. Step 4 - Clean the exam table
1) Start by cleaning the table pad with your cleaning cloth dipped and squeezed in the
five-quart pail containing detergent-germicide solution.
2) Clean the table pads on all sides, being careful not to miss any stains.
3) Clean the exam table attachments, wiping all sides and ends clean.
2 Information taken from ISSA Hospital Housekeeping Procedures
College of Knowledge
Industrial Science Seminar
Industrial Cleaning Procedures
Infirmary (continued)
D. Step 4 - Clean the exam table (continued)
4) Store attachments back on the table in the proper location.
5) Wipe the metal surfaces under the pads, being careful to wipe all contours of the metal surfaces.
6) Notice that you can re-assemble the parts of the exam table as you clean them.
7) After the table has been wiped clean, replace the table pad on the table.
8) Be sure to rinse and wring the cleaning cloth often in the detergent-germicide solution as you
wipe the outer surfaces and base sections of the table. The exam table is one of the
most critical items in cleaning the infirmary. Therefore, take the time to do a good job.
E. Step 5 - Clean room furnishings
1) Clean the stainless steel tables and trays with your cloth dipped and wrung in the
detergent-germicide solution.
2) Be careful to do a thorough job, including wiping the legs.
3) Clean the stainless steel back-up table and do not forget to clean the shelf.
4) Clean the instrument stands, which contain the trays that doctors or nurses use to lay out their
instruments. Wipe both sides of the trays, as well as the entire unit.
5) Be sure to rinse and hand-wring your cleaning cloth often in the detergent-germicide solution.
6) Clean all parts and surfaces of the waste liner stands, including the lower parts of the stand.
7) Change the solution in your five-quart pail when you see the liquid getting contaminated as you
rinse your cleaning cloth.
8) When cleaning items like a portable stand, be sure to lift and clean under items stored there.
9) Clean the stools from top to bottom. Some of these are very close to the actual examination
and can be sprayed with blood.
10) Clean the chairs found in the infirmary. Wipe all surfaces clean, including the bottom
chair supports.
11) Clean cabinets with your detergent-germicide.
F.
Step 6 - Clean walls
1) Walls should be cleaned if there is visible contamination.
2) They should be cleaned on a regular schedule and not less than once a week.
3) Rinse and wring your mop head in a bucket of detergent-germicide solution.
4) Walls should be cleaned in an even pattern using four-foot strokes. It will take practice not to
miss any areas.
5) Wash from the bottom up and rinse from the top down.
2 Information taken from ISSA Hospital Housekeeping Procedures
College of Knowledge
Industrial Science Seminar
Industrial Cleaning Procedures
Infirmary (continued)
G. Step 7 - Clean Infirmary floor
1) Start by clearing half of the emergency room of all furnishings and post wet floor signs.
2) Since all these items are mounted on casters, the job of moving things can be done in
minutes. Remember the original placement of all the items you have moved.
3) Dip the wet mop head into the detergent-germicide solution, and wring out the excess solution.
Go to the far corner of the floor and begin mopping.
4) Mop in a pattern that will ensure that all parts of the floor are thoroughly mopped.
5) Dip and wring the mop head in the bucket often to keep your mop head as clean as possible.
6) Use a “figure eight” pattern when mopping a floor. This ensures better coverage of the
mopping solution.
7) If you see blood stains, they can easily be removed by your mopping action. Once you have
covered the entire area with your mopping solution, let the solution stand for ten minutes. This
will ensure that the cleaning chemical will have time to kill all germs present on the floor.
8) The best method available to remove the floor cleaning solution is with a wet vacuum cleaner.
These machines save time and eliminate the possibility of re-contamination. Use the wet-vac
wand to pick up all of the solution on the floor, moving the wand forward to the wall, and then
pulling back toward your feet to remove the solution from the floor.
9) If you do not have a wet-vac, use two freshly laundered mops and a two-bucket system:
one bucket will contain the cleaning solution and the other bucket will contain clear rinse
water. Use a separate mop for each bucket.
10) When you are through with that side of the floor, move all infirmary furnishings back on the
cleaned area of the floor in preparation for clearing the other half of the floor.
11) Mop around furniture legs, if necessary, to clean the entire floor.
12) Rinse and wring your mop head often and continue the mopping until the entire
infirmary floor has been disinfected.
13) Again, you will use the wet-vac to pick up the solution off the floor.
14) When you are through, move your mop and bucket out the door.
H. Step 8 - Arrange furnishings
1) You should put infirmary equipment back in their “start positions”.
2) If you have any doubts as to where things should be placed, ask your supervisor
who will instruct you on the proper arrangement of all furnishings.
3) Next, put a clean sheet on the exam table and place a second sheet over the center
of the table. Check with your supervisor if you have any questions about your duties in the
infirmary.
4) Put a clear liner in the trash stand, along with a second bag to ensure double thickness plastic
bags in each stand.
5) Do the same with the red liner in the trash stand, and again, place a second liner in the first to
ensure the double bagging of all infectious waste.
2 Information taken from ISSA Hospital Housekeeping Procedures
College of Knowledge
Industrial Science Seminar
Industrial Cleaning Procedures
Infirmary (continued)
I.
✓
✓
✓
Step 9 - Inspect for cleaning errors
1) Always take the time to look around the infirmary you have just cleaned to make sure
nothing was missed. Look at the overhead lights, the walls, etc. If you see
something that still needs to be cleaned, clean it before you leave.
2) When you do leave, you should have the confidence that you have provided a sanitary
environment for the next exam.
3) Take off your rubber gloves and throw them away in the assigned container.
4) Remove wet floor signs, if the floor is dry.
5) Wash your hands in the prescribed manner.
2 Information taken from ISSA Hospital Housekeeping Procedures
College of Knowledge
Industrial Science Seminar
Industrial Cleaning Procedures
✓
✓
✓
CAUTION
WET
FLOOR
Wall Washing
A. Materials Requirement Planning (MRP)
a. Wall wash tool
b. Wall wash head
c. Mop bucket & wringer
d. Wall wash cleaning solution
e. Rinse water
f. Personal protective equipment
g. Safety signs
B. Steps to Wall Washing
1) Obtain proper equipment. Include proper safety PPE as standard equipment
2) Prepare approved cleaner to appropriate dilution while wearing personal protective
equipment (PPE).
3) Post “Caution” signs
4) Clear area to be cleaned of furniture, equipment and wall hangings (Do not spray towards
!
electrical boxes, outlets or equipment.)
5) Grossly soiled areas may require a stronger spot-type cleaner prior to wall washing
6) Immerse wall washing tool into cleaner bucket
7) Wring wall washing tool into cleaner wringer
8) Clean an area not wider than your arm-span (including tool) beginning at the bottom of the
wall, overlapping previous pass
a. Change to fresh solution at least once per room
b. Change wall wash head at least once per room
c. If rinsing is required, rinse from the top down
9) Replace all furnishings to original positions
10) Replace all chemicals and equipment to appropriate storage areas
a. Refill any chemicals required
b. Clean all equipment
▲
College of Knowledge
Wet your hands and wrists
with warm water.
Procedures
Hand Washing Wall Chart
Apply cleaner to hands and
wrists (2" above exposed area)
and lather at least 15 seconds.
Include back of hands,
between fingers and around
nails and cuticles.
Rinse
Rinse thoroughly
thoroughly with
with
comfortably
comfortably hot
hot water
water for
for at
at
least
least 15
15 seconds.
seconds. Rinse
Rinse from
from
wrists
wrists toward
toward the
the finger
finger tips.
tips.
College of Knowledge
Dry hands with a single-use
towel or air dryer. Use
towel to turn off water and
open exit door to protect
your hands from resoiling.
Industrial Science Seminar
Industrial Science Seminar
Industrial Cleaning Procedures
Handwashing
3
(continued)
Handwashing is the single most important procedure for preventing nosocomial infections. Handwashing is
defined as “a vigorous, brief rubbing together of all surfaces of lathered hands, followed by rinsing under a
stream of water.” Although various products are available, handwashing can be classified simply by
whether plain soap and/or detergents or antimicrobial-containing products are used. Handwashing with
plain soaps or detergents (in bar, granule, leaflet, or liquid form) suspends microorganisms and allows them
to be rinsed off. This process is often referred to as mechanical removal of microorganisms. Handwashing
with antimicrobial-containing products kills or inhibits the growth of microorganisms. This process is often
referred to as chemical removal of microorganisms.
When gloves are worn, handwashing is still recommended because gloves may become perforated
during use and because bacteria can multiply rapidly on gloved hands.
Recommendations from the Center for Disease Control (C.D.C.)
A. Handwashing indications
1) In the absence of a true emergency, personnel should always wash their hands:
a. Before performing invasive procedures. (Category 1) *
b. Before taking care of particularly susceptible patients, such as those who are severely
immunocompromised and newborns. (Category 1)
c. Before and after touching wounds, whether surgical, traumatic, or associated with an
invasive device. (Category 1)
d. After situations during which microbial contamination of hands is likely to occur,
especially those involving contact with mucous membranes, blood or body fluids,
secretions, or excretions. (Category 1)
e. After touching inanimate sources that are likely to be contaminated with virulent or
epidemiologically important microorganisms. These sources include urine-measuring
devices or secretion-collection apparatuses. (Category 1)
f. After taking care of an infected patient or one who is likely to be colonized with
microorganisms of special clinical or epidemiologic significance; e.g., multiple-resistant
bacteria. (Category 1)
g. Between contact with different patients in high-risk units. (Category 1)
2) Most routine, brief patient-care activities involving direct patient contact other than that
discussed in A.1 above do not require handwashing; e.g., taking blood pressure. (Category 2)
3) Most routine hospital activities involving indirect patient contact do not require handwashing;
e.g., handing a patient medications, food, or other objects. (Category 1)
B. Handwashing technique
For routine handwashing, a vigorous rubbing together of all surfaces of lathered hands for at least
10 seconds, 15 seconds preferred, followed by thorough rinsing under a stream of water.
(Category 1)
* See definitions of categories on following page
3 Information taken from Guideline for Handwashing and Hospital Environmental Control
U.S. Dept. of Health and Human Services - Center for Disease Control
College of Knowledge
Industrial Science Seminar
Industrial Cleaning Procedures
Handwashing
3
(continued)
C. Handwashing with plain soap
1) Plain soap should be used for handwashing unless otherwise indicated. (Category 2)
2) If bar soap is used, it should be kept on racks that allow drainage of water. (Category 2)
3) If liquid soap is used, the dispenser should be replaced or cleaned and filled with fresh product
when empty. Liquids should not be added to a partially full dispenser. (Category 2)
D. Handwashing with antimicrobial-containing products (Health-Care Personnel Handwashes)
1) Antimicrobial handwashing products should be used for handwashing before personal care
for newborns and when otherwise indicated during their care, between patients in high-risk
units, and before care of severely immunocompromised patients. (Category 3)
Ranking Scheme for Recommendations of the C.D.C.
Category 1 Measures in Category 1 are strongly supported by well-designed and controlled clinical studies
that show their effectiveness in reducing the risk of nosocomial infections, or are viewed as
effective by a majority of expert reviewers. Measures in this category are viewed as applicable
for most hospitals – regardless of size, patient population, or endemic nosocomial
infection rates.
Category 2 Measures in Category 2 are supported by highly suggestive clinical studies in general hospitals
or by definitive studies in specialty hospitals that might not be representative of general
hospitals. Measures that have not been adequately studied but have a logical or strong
theoretical rationale indicating probable effectiveness are included in this category. Category 2
recommendations are viewed as practical to implement in most hospitals.
Category 3 Measures in Category 3 have been proposed by some investigators, authorities, or
organizations, but, to date, lack supporting data, a strong theoretical rationale, or an indication
that the benefits expected from them are cost-effective. Thus, they are considered important
issues to be studied. They might be considered by some hospitals for implementation,
especially if the hospitals have specific nosocomial infection problems, but they are not
generally recommended for widespread adoption.
3 Information taken from Guideline for Handwashing and Hospital Environmental Control
U.S. Dept. of Health and Human Services - Center for Disease Control
College of Knowledge
Industrial Science Seminar
Industrial Cleaning Procedures
✓
✓
✓
Maintenance, Carts, Closets, Equipment & Supplies
A. Materials Requirement Planning (MRP)
a. Supply closets
b. Cleaning equipment
c. Chemical supplies
d. Supply item care
e. Dust mops
f. Wet mops
g. Buckets and wringers
h. Housekeeping carts
i. Power equipment
j. Floor machines
k. Vacuum cleaners
l. Auto-scrubbers
1
B. Step 1- Supply closets
1) It is the responsibility of the housekeeper to keep an adequate amount of supplies properly
stored in the housekeeping supply closet and also to care for, clean and store the various
items of equipment that are used in your daily housekeeping work.
2) Keep a list in your storage area of supplies needed.
3) Schedule weekly checks of your housekeeping supply closet in order to make sure that you
will always have adequate supplies on hand.
4) Keep a list in your storage area of what you need.
5) Allow for some “lead time” when ordering additional supplies from your supervisor.
6) Stock your supplies in a neat and orderly fashion with the items most frequently used
nearest at hand.
7) When you enter your storage area or closet, you should know exactly where everything is
located to prevent searching for supplies.
8) Supplies should be used efficiently and economically. Avoid wasting liners, paper towels,
toilet paper, stripping chemicals and finish, other cleaning chemicals, and so on. Treat the
supplies as though you had personally purchased them.
9) You should not skimp on using supplies, but always use only the proper amount as indicated.
10) Always wear safety goggles (glasses) and gloves when mixing chemicals. Your care
will pay off in years of accident-free employment.
C. Step 2 - Cleaning equipment
1) Proper storing of your equipment is your responsibility.
2) A large amount of money has been invested in labor-saving cleaning devices which your
hospital requires to ensure that the hospital environment is aseptically and esthetically
clean, safe, and sanitary.
3) To store and protect the large investment of cleaning supplies and equipment, your hospital
has cleaning closets equipped with hooks, racks, shelves, sinks, and other items located in
each department or on each floor.
1 Information taken from ISSA Hospital Housekeeping Training Manual
College of Knowledge
Industrial Science Seminar
Industrial Cleaning Procedures
Maintenance, Carts, Closets, Equipment & Supplies 1 (continued)
C. Step 2 - Cleaning equipment (continued)
4) Your hospital may also have a central equipment room, perhaps in the housekeeping
supervisor's area. Equipment is brought to this area at the end of each shift.
5) Storage areas should be cleaned regularly and should be set up with a special place for every
cleaning item. This includes regular space for hanging brooms and mops, shelves for cleaning
agents and brushes, areas for power-operated equipment and attachments, and facilities for
washing and cleaning these items.
D. Step 3 - Chemical supplies
1) Periodically, plastic spray bottles will need your attention. Clean the exterior with a damp rag.
2) A trigger-type spray bottle must be taken apart regularly and cleaned to avoid clogging.
3) The contents of these bottles and all cleaning chemical containers should always be labeled
clearly.
4) Store these bottles in a clean, dry place.
E. Step 4 - Supply item care
1) Caution signs should be cleaned at least daily, and they should not receive any rough treatment
in their use.
2) Never have dirty cloths lying around, as they are a disease and safety hazard.
3) Discard greasy or oily rags promptly.
4) Be careful of the dustpan edges. Careless handling or laying heavy objects on the pan can cause
the edges to become bent or ragged.
5) The dustpan should be cleaned with detergent-germicide solution to ensure disinfection.
6) Small items such as a putty knife should always be wiped clean of moisture and debris after
each day's use.
F.
Step 5 - Dust mops
1) Dust mops should not be used to pick up liquids.
2) Remove loose dust and debris from the mop head with a vacuum, or comb the mop head with a
dust pan brush over the trash container on your cart.
3) Do not shake a dust mop head on any floor in hospital rooms or corridors.
4) Dust mop heads should be placed in plastic bags and sent to the hospital laundry when they
become very dirty or after each shift.
G. Step 6 - Wet mops
1) Wet mop heads need some special attention. Soak new mop heads in a bucket of warm, clear
water for several minutes to remove fabric sizing and to toughen the mop head fibers.
2) When using a wet mop head, never allow it to remain in the bucket of solution except when
being used. This will prevent rotting of strands or “souring.”
3) When you have finished using a wet mop head, wring it out as dry as you can, and then place
it into a plastic liner and send it to the laundry for a thorough cleaning.
1 Information taken from ISSA Hospital Housekeeping Training Manual
College of Knowledge
Industrial Science Seminar
Industrial Cleaning Procedures
Maintenance, Carts, Closets, Equipment & Supplies 1 (continued)
H. Step 7 - Buckets and wringers
1) Keep buckets and wringers in good repair. Use a bucket and wringer of the proper size for the
mop head.
2) Remove any loose mop head yarn, string or foreign matter that may have become tangled in the
wringer.
3) Empty all buckets of their contents after each use, and avoid storing buckets with water or
cleaning solution in them.
4) Wash and scrub all surfaces of the bucket and wringer; rinse with warm water and wipe dry.
5) Keep parts of the bucket casters oiled so they rotate freely. A drop of oil on the wringer
mechanism will also keep the wringer in good shape.
6) Store the wringer in the “release” position only. Report any defects in the wringer to your
supervisor.
I.
Step 8 - Housekeeping carts
1) Wipe shelves at least once a week in order to keep them clean.
2) See that the entire cart is cleaned with disinfectant-detergent solution at least once a week.
3) Keep the casters running freely by applying a drop of oil to each caster.
4) Keep the cart neatly stocked with all supplies and equipment for the next shift.
J.
Step 9 - Power equipment
1) Power-driven equipment must be given the same care and attention as your automobile. Keep
your cleaning equipment clean and free of dirt; keep it oiled; keep screws and nuts tight.
2) Operate the equipment so as not to dent the metal housing, and check the power cords for
defects and wear. Never abuse your cleaning equipment.
3) Always follow manufacturer's instructions for operation and maintenance.
4) If you are ever in doubt as to how to use a piece of powered cleaning equipment, ask your
housekeeping supervisors for technical advice.
! Do Not Use Faulty Equipment!
▲
K. Step 10 - Floor machines
1) Floor machines, also referred to as “buffers,” should receive regular cleaning and routine
maintenance.
2) Always disconnect the power machine from the wall socket while performing any routine
maintenance.
3) Always remove brushes and pads from the drive chuck after each use.
4) Clean the floor pads in your deep sink with warm running water and then hang to dry for the
next shift's use.
5) Rinse out all drive blocks and brushes in a similar manner and store them in a dry place.
6) Tilt the floor machine back on its handle. Using a cloth dipped in a disinfectant-detergent
solution, wipe the inside housing and the entire exterior clean.
1 Information taken from ISSA Hospital Housekeeping Training Manual
College of Knowledge
Industrial Science Seminar
Industrial Cleaning Procedures
Maintenance, Carts, Closets, Equipment & Supplies
1
(continued)
K. Step 10 - Floor machines (continued)
7) Remove any strands or debris from the wheels and wipe clean.
8) At least once a week, put a drop of oil on each wheel bearing to keep the wheel running
freely. If you ignore this, wheels can lock over time from foreign matter collecting on the shaft.
9) Use your cloth to wipe the entire length of power cord free of any dried floor stripper and dirty
water spots.
10) Store the floor machine upright with its power cord neatly wrapped around the storage
brackets on the handle.
L.
Step 11 - Vacuum cleaners
1) To replace a belt, unplug the unit from the wall socket and turn the unit over to expose the
bottom housing of the vacuum.
2) Push the two retaining clips to free the belt cover.
3) Pull up the drive beater brush and remove it from the housing; remove dirt, lint and debris
found in this area.
4) Use your cleaning cloth dipped in disinfectant-detergent to wipe out the inside of the
housing.
5) Take the new belt and insert the drive brush in the loop, or center of the belt.
6) Replace the drive beater brush, ringed with the new belt, and push it back into the retainers.
7) Pull the belt back and wrap it around the drive shaft of the motor.
8) Make sure the lower portion of the belt follows the arrow on the housing.
9) Be careful not to put this belt on backwards – doing so would cause the beater bar to rotate
backwards.
10) To finish, place the cover back on the housing and push the clips back in place.
11) Turn the unit over and plug it in to be sure it operates properly.
12) Disposable vacuum bags should be emptied after each shift in order for the vacuum cleaners to
operate at peak efficiency.
13) Check the power cord plug and wire for cracks and defects. Report any noticeable damage to
your supervisor.
14) Once a week, wipe the entire length of power cord clean with your disinfectant-detergent, and
neatly wrap the cord on the storage brackets of the vacuum.
15) Wipe all outer metal surfaces of the vacuum cleaner with your cloth dipped in disinfectantdetergent.
16) Lastly, put a drop of oil on the vacuum wheels to keep them running freely, and wipe the
wheels clean with your cloth.
1 Information taken from ISSA Hospital Housekeeping Training Manual
College of Knowledge
Industrial Science Seminar
Industrial Cleaning Procedures
Maintenance, Carts, Closets, Equipment & Supplies
1
(continued)
M. Step 12 - Automatic scrubbers
1) Battery-operated power equipment, like an automatic floor scrubber, needs special care and
maintenance. See owners manual before proceeding.
2) These units compare in price to that of compact automobiles. Because of that, they should be
treated with utmost care and according to manufacturer's instructions.
3) It is advisable to grease the casters once every week. Oil all moving parts, such as the control
bars, squeegee control rods, pressure points and hinges once every month.
4) Make sure that each drive wheel tire is inflated to the recommended tire pressure. Unequal tire
pressures can adversely effect the total operation of the machine.
5) Drive brushes should be removed and cleaned after each use. The drive brush mechanism
needs to be adjusted and lubricated according to the manufacturer's instructions.
6) The squeegee assembly should be adjusted and lubricated. The reversible squeegee blades also
need regular cleaning and adjusting.
7) An automatic scrubber has a solution tank, a recovery tank, and filters that should be flushed
and cleaned on a regular schedule.
Battery maintenance
1) When working with batteries, leave the battery compartment covered up and work in a wellventilated area. Do not wear rings, because they can become welded to metal wrenches if a live
terminal is accidentally touched.
2) Check the fluid level in the battery cells at least weekly. The battery caps are easily removed by
pressing the ends of the white plastic extensions.
3) Check the electrolyte status of each battery cell with a hydrometer every 15 operating hours.
4) Periodically, check all battery cable and wiring for signs of damage or wear. Replace as
needed. Once a month, remove all batteries from your machine. Clean all batteries, battery
tray, and battery compartment with a solution of baking soda and water.
5) On the bottom of the battery compartment cover is a battery wiring diagram. Follow this
diagram when you put the battery wires on the terminals. To prevent corrosion, apply a film of
grease or Vaseline to battery lugs and bolt studs. Do not reverse connections when servicing or
replacing the batteries.
Battery Charger
1) When actively using an automatic scrubber, you will use a battery charger to re-charge the
batteries. With the charger unplugged from the electrical wall outlet, find the main connector
that is marked “Connect To Charger.” Firmly push the two connectors together. When laying
the charging cables across the batteries, be careful not to allow the metal parts of the
connectors touch any battery terminals. Set the battery charger control according to the rate of
current desired. After charging, remove the charger plug from the wall outlet and disconnect
the charging cable. Reconnect main battery terminals.
1 Information taken from ISSA Hospital Housekeeping Training Manual
College of Knowledge
Industrial Science Seminar
Glossary of Terms
Abrasive
A substance used to scour, scrub, smooth or polish a surface.
Absorbent
Able to take in and make part of an existent whole.
Acid
A water-soluble substance with a pH less than 7.
Alkali
A chemical with a pH greater than 7.
Auto Ignition
Temperature
The lowest temperature in which a gas will spontaneously ignite without a spark or
flame.
Boiling Point
The lowest temperature (at standard pressure) at which a liquid becomes a vapor.
Bradley Fountain
Circular granite hand-washing sink utilized in industrial plants to accommodate
multiple personnel.
Bridgeport Machine Metal fabrication machine which requires regular maintenance.
Catalyst
A substance which influences a chemical reaction.
Caustic
Strong alkaline substance which irritates the skin.
“Cide”
Agents with the ability to kill micro-organisms.
Degreaser
A product specifically formulated to remove grease, oil and soil.
Dip Tank
Refers generally to degreaser (water/solvent based) utilized in semi-automated parts
washing processes.
Emulsification
The action of breaking up greases into small particles which are suspended in solution.
Flammability
The capacity of a material to ignite easily and burn rapidly.
Flash Point
The lowest temperature in which the vapor from a product will ignite.
Fungicide
A chemical agent that destroys fungi.
Inorganic
A substance not made of the combination of carbon and hydrogen.
JIT
Acronym: Just In Time
MBO
Management by objectives - A formal “grade card” for industrial management
personnel which largely includes quality, safety, productivity and housekeeping. A
management theory whereby employees set their objectives with help of management.
MRO Area
An area, sometimes referred to as “stores”, whereby janitor's supplies and other
non-production commodities are stored and requisitioned.
College of Knowledge
Industrial Science Seminar
Glossary of Terms (continued)
OSHA
The Occupational Safety Health Administration which establishes and enforces laws
related to worker safety.
Oxidation
To combine with oxygen; typified by the rusting of a metal.
pH
A simple chemical scale which expresses the degree of acidity or alkalinity of a
solution (0-14).
Reactivity
Refers to a chemical's stability and its potential to react violently with water.
Solubility
The tendency of the material to dissolve into another.
Surface Plate
Highly polished and critical quality control surface from which gauges are measured.
Surfactant
A surface active agent which increases the emulsifying, foaming, dispersing, and
wetting properties of a product.
VOC
(Volatile Organic Compounds) The components within a formulation that contribute
to ozone formation, which is a pollutant and causes smog, etc., in metropolitan areas.
Viscosity
The thickness of a liquid.
Volatile
The part of a product which evaporates during drying.
Water Hardness
A measure of the amount of metallic salts found in water.
Wetting Agent
A chemical which reduces the surface tension of water.
College of Knowledge
College
of
Knowledge
© Canberra Corporation 1994
Appendix
College
of
Knowledge
Liquid Life Form Bio Augmentation Digestive Cycle
Ejected Matter CO2 & H2O
Conversion Completed
Extracellular Wall
Intracellular
Structure
Cell-Bound
Enzymes
Insoluble Organic
Matter
Digestion
Conversion
En
Extr zyme
ace s E
llu xi
lar
ia
t v all
W
er R e d u
ce
Second Stage
Intracellular
Absorption
lly
ica Matt
m
h e te
es Cticula
m
y
En z Par
First stage
Extracellular Absorption
BINARY FISSION
Particulate Reduced
to Soluble Substance
College of Knowledge
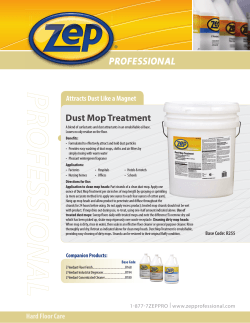

© Copyright 2026