
LESSON 4 – COPY SAMPLE ASSIGNMENTS
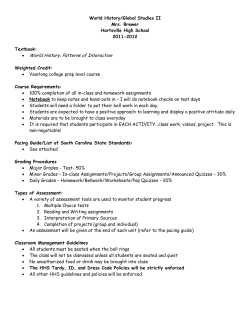
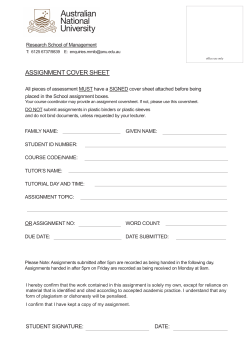
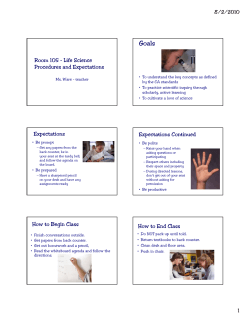
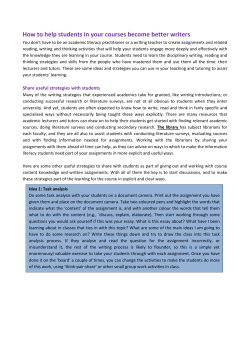
LESSON 4 – COPY SAMPLE ASSIGNMENTS Every MyMathLab course contains a set of sample homework assignments for each section of the textbook, and sample quizzes and tests for each chapter. Each sample assignment includes a selection of questions available for that section or chapter. To edit or assign a sample assignment, you must first make a copy of the assignment. Copy a sample homework assignment 1. Open the Homework/Test Manager. In the course menu, click the arrow to the left of Course Tools to expand that item. Then click on Assignment Manager. Note: You can also navigate to the Homework/Test Manager by clicking on Homework in the course menu, clicking modify at the top right of the page, and selecting Manage Homework. 2. Filter the list of assignments. In the Homework/Test Manager, click the Homework button to show only homework assignments. The list of Sample Homework assignments is displayed at the bottom of the page. Select Chapter 1 from the Sample Homework dropdown list. You will see one sample homework assignment for each section in this chapter. 3. Preview a sample homework assignment. Select Preview from the Actions dropdown list to the right of one of the sample assignments. Click Go to preview the assignment from a student viewpoint. Close the Preview window when done, and click OK in the popup warning box. To view a list of questions in the assignment, select List Questions in the Actions dropdown list and click Go. Close the View Question Details window when done. 4. Copy a sample homework assignment. Select Copy from the Actions dropdown list to the right of one of the sample assignments and click Go. The Copy Homework wizard has three steps to help you copy your homework assignment. Pearson Education, 2011 (7/28/2011) Page 16 5. Enter the homework name. In Step 1, type the name of the homework assignment in the Homework Name box. You should use a descriptive name, like “1.2 Homework”, so that your students can easily identify the assignment. Click Next to go to the Add/Remove Content step. 6. Review the question list for the assignment. In the Add/Remove Content page, the table on the bottom left shows you the list of Available Questions for the section you selected. The table on the bottom right shows the list of questions pre-selected for this sample assignment. For this lesson, accept the list of pre-selected questions. Note: Refer to Lesson 5 – Create Homework Assignments to learn how to edit the list of questions in the assignment, and how to customize questions by adding instructor tips and changing scoring options. 7. Change point values for each question. By default, each question is worth 1 point. You can change the question point value to any whole number from 1 to 99. For this lesson, change the point values for a few questions. Notice that the total number of points for the assignment is automatically updated. 8. Preview the homework assignment. Click the View student homework button to preview the homework assignment from a student viewpoint. You can work the questions as a student and view any learning aids in this window. Close the Preview window when done, and click OK in the popup warning box. Click Next to go to the Choose Settings step. Pearson Education, 2011 (7/28/2011) Page 17 9. Review the assignment settings. The Choose Settings page allows you to customize the assignment settings, such as start and end dates. A brief description of the homework assignment settings is given below. For more details, click the question mark icon at the top right of the Choose Settings page. Availability Options Scoring Options Access Controls Presentation Options Other Pearson Education, 2011 Determine when students can access the assignment. Determine which chapter(s) the assignment is displayed with. Determine if and when late assignments can be submitted, and how late assignments are scored. Allow partial credit on questions with multiple parts. Allow students conditional access to the assignment. Determine the number of times a student can regenerate each question. Determine how questions and answers are displayed to the student. Determine which learning aids are available to students. Determine if the assignment results are used to update the Study Plan. Allow other instructors to import the assignment. (7/28/2011) Page 18 For this lesson, you will learn how to customize basic settings for the assignment. You will learn about other settings in later lessons and in MyMathLab – Intermediate. 10. Choose the Availability Options. In the Availability Options section, leave the available date at today’s date. Enter a due date one week from today. You can type the date in the box, or click the calendar icon to open a pop-up calendar and select the date. 11. Choose the Scoring Options. In the Scoring Options section, leave the Allow partial credit on questions with multiple parts box checked. To avoid fractional scores, you may need to go back to the Add/Review Content page to change the point value for multi-input questions to a multiple of the number of parts in the question. Note: You also have the option to award partial credit for answers that are equivalent to the correct answer but not in the specified form. For details, see Lesson 5 – Create Homework Assignments. 12. Choose the Presentation Options. In the Presentation Options section, leave the Save question values and student answers box checked. This means that question values in the homework assignment will be preserved unless the student completes the question and chooses to regenerate a similar question. You will also be able to review your student’s work and view the exact question that the student worked on. Leave the Allow students to print this homework assignment box checked to allow students to print the assignment. Tip: Checking both of these boxes will allow students to print the assignment, work on the questions offline, and enter their answers online at a later time. 13. Save the assignment. Click the Save & Assign button to save the assignment and make it available for students to work on. Your homework assignment is now listed in the Homework/Test Manager. You can edit the assignment by choosing the appropriate action from the Actions dropdown list to the right of the assignment name. You can Assign/Unassign the assignment, Edit, Copy, or Delete the assignment. In addition, you can change the Settings for Class, or change the Settings per Student for the assignment. You can also Preview the assignment, view the list of questions in the assignment, or Print the assignment. Select the desired action, and click the Go button. Note: If you or one of your students has opened up the assignment, you will no longer be able to edit the content of the assignment, unless you delete all student results for that assignment. Pearson Education, 2011 (7/28/2011) Page 19 Copy a sample test 1. Filter the list of assignments. In the Homework/Test Manager, click the Quizzes & Tests button to show only quizzes and tests. The list of Sample Tests and Quizzes is displayed at the bottom of the page. You will see at least one sample test for each chapter. Note: Sample tests are available to your students by default, but you can click Set Availability to set the availability of sample tests for your students. 2. Preview a sample test. Select Preview from the Actions dropdown list for a sample test to preview the test from a student viewpoint. Select List Questions from the Actions dropdown list to view the list of questions in the sample test. 3. Copy a sample test. Select Copy from the Actions dropdown list for a sample test and click Go. The Copy Test wizard has three steps to help you copy your test. 4. Select the Gradebook Category. In Step 1, you can choose to place the assignment in the Quiz or Test Gradebook category. This only affects Gradebook weighting and has no impact on how the student takes the test. For this lesson, leave the test in the Test category. 5. Enter the test name. Type the name of the test in the Test Name box. You should use a descriptive name, like “Chapter 1 Test”, so that students can easily identify the test. Click Next to go to the Add/Remove Content step. 6. Review the question list for the test. The Add/Remove Content page is similar to what you saw when you copied the sample homework assignment earlier in this lesson. For this lesson, accept the list of pre-selected questions. You can preview the test and change point values if desired. Click Next to go to the Choose Settings step. Pearson Education, 2011 (7/28/2011) Page 20 7. Review the test settings. The Choose Settings page has similar options to what you saw with the sample homework assignment. In addition, there are settings that are unique to quizzes and tests. A brief description of the test assignment settings is given below. For more details, click the question mark icon at the top right of the Choose Settings page. Availability Options Scoring Options Access Controls Presentation Options Review Options Other Pearson Education, 2011 Determine when students can access the test. Determine which chapter(s) the test is displayed with. Allow partial credit on questions with multiple parts. Allow students conditional access to the test. Determine the number of attempts a student has to take the test. Determine how incomplete attempts are handled. Determine the time limit for the test. Determine how questions are displayed to the student. Determine which learning aids are available to students. Determine how results are displayed after the test is submitted. Determine when students can review the test. Determine if the test results are used to update the Study Plan. Allow other instructors to import the test. (7/28/2011) Page 21 For this lesson, you will learn how to customize basic settings for the test. You will learn about other settings in later lessons and in MyMathLab – Intermediate. 8. Choose the Availability Options. In the Availability Options section, leave the available date at today’s date. Enter a due date one week from today. Note: Unlike homework, you do not have the option to allow students to continue working on a test after the due date. If you want students to make up tests after the due date, you have to change the due date. You can change the due date for the test, or use the individual settings option to change the due date for selected students. 9. Choose the Access Controls. In the Access Controls section, check the Required password box and enter a password in the text box. With this setting, students will be required to enter the password before they can begin the test. Click the Change link to the right of Prerequisites. In the Add Prerequisites window, select the homework assignment you created earlier in this lesson as the prerequisite for this test. Enter a minimum score of 80%, for all attempts. With this setting, students will be required to score at least 80% on the homework assignment before they can open up the test. Tip: Use prerequisites to ensure mastery of prerequisite concepts. Check the Limit number of attempts to box and enter the number 3 in the text box. This will allow students to take the test up to 3 times. Note: Unlike homework, students do not receive feedback while they are taking the test. Answers can be changed for any question, and the test is not graded until the student submits the test. Submission of the test for grading counts as one attempt. 10. Choose the Presentation Options. In the Presentation Options section, check the Test time allowed (minutes) box, and enter 60 in the text box. Check the box to Show time remaining during test. With these settings, students will have 60 minutes from the time they start the test to submit the test for grading. A countdown timer will be displayed on the test page. A warning box will pop up to warn students when the time limit is approaching, and the test will be submitted automatically when the time limit is reached. Check the box to Scramble question order for each student. The program will randomly scramble the question order each time a student opens up the test. Click the Change… link to the right of Learning Aids to open a popup window where you can select the Learning Aids that you want to make available on the test. For this lesson, check all the boxes and click OK to close the popup window. Check the Show in Review mode only box. When the student is taking the test, none of the learning aids will be displayed. After the test is submitted, the learning aids will be displayed when the student reviews the test. 11. Save the test. Click the Save and Assign button to save the test and make it available to students. Your test is now listed in the Homework/Test Manager. You can edit the test by choosing the appropriate action from the Actions dropdown list to the right of the test name. Pearson Education, 2011 (7/28/2011) Page 22 Copy and assign multiple sample assignments Sample assignments can be copied in batch mode instead of one at a time. This allows you to quickly set up your homework assignments and tests with minimal preparation time. You can also specify a date range within which the assignments are made available to students. 1. Copy the sample assignments. In the Homework/Test Manager, click Create Assignment and select Copy and Assign Sample Assignments from the dropdown list. The Copy and Assign Sample Assignments wizard has four steps to help you set up your assignments. 2. Auto-assign due dates. In Step 1, select Yes to auto-assign due dates to your copied assignments. You will specify the date range and frequency in a later step. Click Next to select the assignments. 3. Select the assignments you wish to copy. In Step 2, filter the list of assignments by clicking the Homework, Quizzes, or Tests button. Check the boxes in the Copy column for the assignments you wish to copy. If you would like to copy all of the assignments, check the box at the top of the Copy column. Click Next to assign due dates. 4. Assign due dates. Enter the due date for the first assignment and the last assignment. Next, specify the days of the week when your assignments are due. For this lesson, check the boxes for Monday, Wednesday, and Friday. Your assignment due dates will occur on Mondays, Wednesdays, and Fridays across the date range you specified. Click Next to confirm your choices. Pearson Education, 2011 (7/28/2011) Page 23 5. Customize the assignment settings. On the Confirmation page, check the boxes in the Assign column for the assignments you wish to assign to your students. Assignments that are not checked will be saved in your Homework/Test Manager but will not be accessible by your students until you assign them. Each assignment is given the default name from the sample assignment. If desired, edit the assignment names. In the Start column, notice that the program automatically sets the start date as today’s date. The due dates are evenly spread out per your previous specifications. Notice that there may be more than one assignment due on a particular date, due to the algorithm used to calculate the due dates. You can change the start and due dates for each assignment on this page, or you can change the dates for multiple assignments from the Homework/Test Manager. Refer to the lessons in MyMathLab – Intermediate for more details on changing dates for multiple assignments. 6. Save the assignments. Click the Copy button to copy the assignments. Your assignments are listed in the Homework/Test Manager. You can edit individual assignments by choosing the appropriate action from the Actions dropdown list to the right of the assignment name. Pearson Education, 2011 (7/28/2011) Page 24


© Copyright 2026