
Volume 1 Table of Contents
Paths of Progress - Volume 1
Table of Contents
Preface
Overview of the Trail Guide to Learning Series ................................. xi
Introduction to the Trail Guide to Learning Series
Why did we write the Trail Guide to Learning Series? ..................... xiii
What should you know about the third level of the Trail Guide to
Learning Series? .......................................................................... xiv
Here are some notes to make using the curriculum easier:............... xiv
How would your school week look with the third level of the Trail
Guide to Learning Series?.............................................................. xv
Who can use this curriculum?.......................................................... xv
How can you adjust this curriculum to accommodate middle school
students? ........................................................................................ xvi
Lesson Contents............................................................................. xvii
Copywork & Dictation............................................................ xvii
Reader..................................................................................... xviii
Read-Aloud and Discussion, Narration & Reflective Writing....... xviii
Word Study............................................................................... xix
Geography, Science, History & Economics.......................... xx
Writing, Editing & Spelling...................................................... xxi
Music, Doing & Art................................................................. xxii
Independent Reading & Record Keeping................................. xxii
Supportive Resources...................................................................... xxii
Student Notebook.................................................................... xxii
Assessments............................................................................. xxiii
Light for the Trail Bible Curriculum......................................... xxiii
Lapbooks ................................................................................xxiv
Parent Planner..........................................................................xxiv
Student Planner ......................................................................xxiv
Middle School Supplement......................................................xxiv
Required Resource List...................................................................xxiv
Optional Supportive Resources.......................................................xxv
Trail Guide to Learning
Great Leaps Unit
Lesson 1, Part 1..................................................................................1
Lesson 2, Part 1................................................................................23
Lesson 3, Part 1................................................................................41
Lesson 4, Part 1................................................................................57
Lesson 5, Part 1................................................................................73
Lesson 6, Part 1................................................................................91
Making Connections Unit
Lesson 1, Part 1..............................................................................103
Lesson 2, Part 1..............................................................................121
Lesson 3, Part 1..............................................................................139
Lesson 4, Part 1..............................................................................155
Lesson 5, Part 1..............................................................................171
Lesson 6, Part 1..............................................................................187
Perseverance Pays Off Unit
Lesson 1, Part 1..............................................................................199
Lesson 2, Part 1..............................................................................215
Lesson 3, Part 1..............................................................................229
Lesson 4, Part 1..............................................................................243
Lesson 5, Part 1..............................................................................259
Lesson 6, Part 1..............................................................................275
Appendix A
Lesson At A Glance
Great Leaps....................................................................................291
Making Connections......................................................................297
Perseverance Pays Off.....................................................................303
Skills Chart
Great Leaps....................................................................................309
Making Connections......................................................................311
Perseverance Pays Off.....................................................................313
Paths of Progress - Volume 1
Challenge Spelling List.......................................................................315
Presentation Feedback Sheet..............................................................318
Game Answer Key...............................................................................320
Appendix B
Student Pages
Word Search...................................................................................331
Word Scramble...............................................................................334
Crossword......................................................................................337
Reference
Personal Income By State...............................................................340
George Washington's 1789 Thanksgiving Proclamation.................341
Abraham Lincoln’s Thanksgiving Proclamation..............................342
Instructions
Game Instructions..........................................................................343
Lots of Science Library Book..........................................................346
Question Quest Game Board.........................................................347
Bingo
Inventon Bingo..............................................................................349
Great Leaps Bingo..........................................................................367
Making Connections Bingo............................................................379
Perseverance Pays Off Bingo...........................................................391
Paths of Progress - Volume 1
Preface
Preface
Overview of the Trail Guide to Learning Series
What is the big picture of the Trail Guide to Learning Series, and why is it important to know? Just like the themes of this book, the answer to this question
puts the pieces together in a way that you can use them. The two themes of
this book are tools for thinking and the way systems and people work together.
How does this information fit with the big picture of the series?
The first level, Paths of Exploration, shows the role that explorers played in the
opening of America. It also models the way thoughts begin. When you begin
thinking about something, you may only have questions. When the explorers
came to our land, they had more questions than answers. Then they began exploring, and discovered much new information, just as you do when you start
to think about a question. They opened the way for the rest of us to follow by
showing us how to ask questions. They observed their surroundings and recorded what they saw, which in turn brought up new questions as well as new
understanding. For the explorers, as well as us, there were always questions to
ask and answer, but the beginning of skilled observation, recording, and learning was set and a path blazed for those who would come next.
The second level, Paths of Settlement, introduces those who did come next,
the builders and settlers. These citizens and leaders came to pursue the dream
of freedom and began to build homes, communities, towns, and states that
would give that opportunity to all who followed. Men and women devoted
their lives to providing the structure of good government, good citizenship,
and good examples for others to follow, so that they too could receive the
blessings of freedom. As with our learning process, certain standards help us
understand what works and what to do next. This level shows the laws of government and science that provide order to our thinking and the way we live.
As they brought into being the rule of law that would govern us and secure the
opportunity for freedom, our Founders knew that these laws would be tested
with the struggles that all groups of people, both small and large, have to face.
The third level, Paths of Progress, talks about those who came along to help solve
the many problems and difficulties we encountered, as people and as a nation.
The focus in this level is on the scientists and inventors who devoted their time,
understanding, and hopes to finding answers for the struggles and boundaries we
faced. The nature of these determined people teach us much about the thinking
process, and how to share answers that others can understand. Inventors and scientists work together, building on each other's work to further the help that they
give to others. The various topics studied in this level show the problem-solving
process, the resulting improvements, and the way systems, such as systems in the
body, work together to create success for the whole.
As the third level in the Trail Guide to Learning Series, Paths of Progress completes the process of preparation for the next step of thinking and learning in
xi
Preface
Trail Guide to Learning
our look at Ancient and World History. At the middle school level, students
are ready in their maturity and thinking ability to look at civilizations of
ancient history and compare them to their understanding of what a good
citizen, government, and nation look like. Now they have a standard by
which to compare other nations, events, and leaders effectively and to see
principles in action.
xii
Paths of Progress - Volume 1
Instructions
Introduction to the
Trail Guide to Learning Series
Why did we write the Trail Guide to Learning Series?
• We wanted to create curriculum that was easy to use, yet able to
lead students to develop higher thinking skills.
• We wanted the things learned to come from real books, discussion,
and a variety of activities so that students would enjoy the process.
• We wanted information from different subject areas taught together in relationship to geography, as it occurs in real life.
• We wanted students to become better communicators by learning
and practicing language skills along with what they were learning,
instead of through separate drill and practice. That way their drawing, writing, and speaking would be a natural response to their
thinking and learning.
• We wanted this book itself to be more than just a teacher's guide.
We wrote it as a source of information for your student and a
teacher's education course for you, giving you bite-sized and timely
explanations of what we suggest you do, and why.
• Lastly, we wanted to provide a way to support your family's
worldview.
It has taken years of labor and a team of workers, but we are excited to have
met these goals in the third of the series, Paths of Progress.
It is important for you to know who helped produce this level, because that
helps explain why it is different from other curricula, and why you can have
confidence when using it. The team of people who designed, wrote, read,
edited, and supported this effort is impressive. It includes veteran home
educators Greg and Debbie Strayer, Coke and Linda Fowler, Josh and Cindy
Wiggers, as well as young adults who were home educated, Ashley (Strayer)
and Alex Wiggers. Renowned home education author, Dr. Ruth Beechick,
remains Debbie's mentor and continues to influence her thoughts and works
through personal input. We also highly value the assistance of the families
who are using the first two levels of the Trail Guide to Learning Series, Paths
of Exploration and Paths of Settlement, with their children and continue to
give us helpful feedback.
Why does all this matter? As we say in our Steps for Thinking, "The key to
understanding the actions of others is to understand their thoughts." If you
know what our goals were, you will have a good starting point to use this
curriculum to fit your own goals for your students. Now look at the parts of
the book and see how easy it is to make your goals a reality.
xiii
Instructions
Trail Guide to Learning
What should you know about the third level of the Trail Guide to
Learning Series?
New in this Level: You will find several new sources of encouragement
and information in Paths of Progress. Thinking Skills Reminders are placed
throughout the text, helping you connect assignments and activities
to the thinking skills they require. A Parent Planner provides a handy
place to maintain all record-keeping information such as Lessons At A
Glance, Assessment Information, and forms used with the program such
as the Presentation Feedback. The Parent Planner also provides Teacher
Connections—linking you to the expert advice found in You Can Teach Your
Child Successfully by Dr. Ruth Beechick. Continuous learning is an important part of education. Make sure and read the Teacher Connection note
found in the Parent Planner for each lesson. Don't miss out on this important part of your homeschooling! Of course, we continue to provide support
through the placement of Teaching Tips and Connecting Learning to Life
margin notes throughout the curriculum.
* Support is just a click away! Our Yahoo user group gives you an opportunity to be a part of the community of those who are traveling the Trail! Post
questions, share experiences, and read the thoughts of others who are using
our materials with their families. You can find the group at:
http://tech.groups.yahoo.com/group/LearningSeries.
Here are some notes to make using the curriculum easier:
* Because various editions of the same book often have different page numbers, the reading assignments in Paths of Progress include the first words of
each passage. You may find it helpful to mark reading assignments ahead of
time so that the flow of your school is not interrupted with finding beginning and ending points.
* A standard materials list is included below. Most lessons require the use of
these items:
crayons, markers, or colored pencils highlighters
scissors, glue, tape
index cards
dictionary, thesaurus
CD player
Student Notebook
Included at the beginning of each lesson is a list of books and anything else
needed for that lesson that is not part of the standard materials list.
* This curriculum continues to direct students to use research as an important part of gaining information. We believe parents are the best supervisors of their children's use of computers. Since online resources may be the
source of information, we expect students to follow their parents' guidelines
whenever they use the computer. Webpage descriptions can be misleading,
and information locations can change, so we encourage parents to maintain
supervision of all student computer use.
xiv
Paths of Progress - Volume 1
Instructions
How would your school week look with the third level of the Trail
Guide to Learning Series?
Paths of Progress consists of six units: Great Leaps, Making Connections,
Perseverance Pays Off, Cultivating Greatness, Success Takes Flight, and
Reach for the Stars. The first three are found in Volume 1, and the second
three in Volume 2.
• Each unit contains six lessons with five parts, and is designed to
take about a week —but you retain the freedom to make the curriculum’s schedule fit the needs of your students.
• Because of this, even though one part can take one day, this curriculum is your servant, not your master.
• Flexibility is built in, since every Lesson 6 completes the assignments for the unit and provides a time of review and assessment.
• In addition, large parts of the lessons in Unit 6, Reach for the
Stars, are devoted to review of the other units studied throughout the year. This review is an important part of making learning
permanent.
Who can use this curriculum?
This curriculum targets grades 5, 6, and 7, but can be easily adapted for
4th grade abilities by reducing reading assignments, increasing the amount
the teacher reads aloud, and substituting oral responses for written work.
Younger students can easily fit into the activities, discussions, and presentations. Lapbooks are available that coordinate with many parts of the lessons.
These are a great way to include younger students in curriculum lessons,
while they have their own age appropriate activities to complete. The tactile
and visual reinforcements of the graphic organizers used can increase learning and retention for many students. Older students may also take the opportunity to "be the teacher" to younger siblings, through the use of the lapbook activities. (See more about our lapbooks in the Supportive Resources
section of this introduction.)
In most assignments, the recommended activity levels are noted with icons:
for the lowest, for higher, and for highest. If there is no icon present, the activity is to be completed by all levels. Before beginning a lesson,
look at the Materials List in Part 1 to be sure you have the books and other
items needed to complete the activities, in addition to the list of supplies
used regularly. Also, most Part 5s contain additional resources and suggestions for Enrichment Activities. Enrichment Activities are available for your
older students (8th grade and up) who are completing the curriculum with
you, or for younger students who complete the lessons quickly, or who just
enjoy learning on a more in-depth level.
Grade level markings for assignments
throughout the curriculum represent:
5th grade
6th grade
7th grade
Enrichment Activities:
• 8th grade and up
• Advanced students
• All students wanting to learn more
xv
Instructions
Trail Guide to Learning
How can you adjust this curriculum to accommodate middle
school students?
The upper level reading, thinking, presentation, and discussion activities are
appropriate for this age. The Enrichment Activities provide an opportunity
for more in-depth study, which is the best way to extend learning to a deeper
level. Assign additional literature to read from the Enrichment Section, and
then follow the format in the language skills sections (choose a passage to
write from dictation, define unknown vocabulary, identify usage and mechanics activities in the literature read, etc.) In writing, extend the activities
to include greater length, or greater frequency. In the science and history
activities, ask your middle school students to learn more about the topics to
share with you or other students. Challenge them to vary their presentation
styles to include multi-media presentations, plays, games, etc. This is a perfect time to increase responsibility for learning and sharing what they know.
Middle School Supplements are available for each level of the Trail Guide
to Learning Series to provide more challenging assignments for older students, while maintaining the focus on similar content for multi-age teaching. These are available as downloads from Geography Matters.
A typical lesson should begin with an introduction of the Steps for
Thinking. These are the big ideas demonstrated through the reading, discussion, and other activities of the lesson. Explain each step to your children
and talk with them about any questions or ideas they have about it. You will
revisit the Steps for Thinking at the end of the lesson, so don't require your
students to understand them thoroughly at the beginning. By the end of
the lesson, they will have more experience with the concepts and be able to
discuss them more thoroughly.
Answers to the questions asked in the text and the Student Notebook are
located either on the last page of each lesson or in one of that volume’s appendices. In Volume 1, Appendix A contains teacher aides. These include
At A Glance guides for each unit in the volume, skills and topics lists, answer keys, and Challenge Spelling lists. These spelling lists are comprised of
words from the literature selections, and are an excellent resource when you
feel your students are ready for increased difficulty in their spelling practice. Appendix B includes charts and references helpful to the lessons, and
instructions for various games and activities assigned in the text. In Volume
2, Appendices C and D correspond to the same descriptions.
The Student Resource CD which accompanies the text contains Student
Notebook pages for all three levels, game components, and other resources
helpful in completing various activities. In addition, there is a section
for the teacher that includes record-keeping and instructional tools from
Appendices A and C.
R
xvi
Paths of Progress - Volume 1
Instructions
Lesson Contents
Here is an in-depth description of each section in a typical lesson, and how to
use it. After you read this and begin using the curriculum, you will find many
margin notes in the text to remind you of the important points contained here.
A.
Copywork & Dictation
Copywork & Dictation provides a consistent method for students to see,
hear, and write language correctly. It is the first step in learning language
skills. Start your student with copying the passage. After copying, he should
match what he has written word for word to the text, and correct anything
that is not the same. This level is appropriate for many fourth and fifth graders throughout the year. It may also be appropriate for older students, and
needs to continue for as long as your student seems sufficiently challenged.
From time to time, you may want to attempt a bit of dictation by asking
your child to choose a sentence himself to write from dictation. Allow him
to choose a sentence or passage that he has already worked with, to build
confidence. Don't worry, this isn't cheating. Your goal is to build the ability to read and write language, and teaching means providing the support
needed to be successful. Assessment should come later.
If your student is a sixth or seventh grader, evaluate his level when he has
copied the passages a few times and decide whether this activity seems too
easy for him. If so, try dictating, or speaking, the first few words of a sentence slowly, and ask your student to write down what he hears. If he can
write down at least a portion of the words correctly, then he is ready for
dictation. The ability to write from dictation is a skill that must learned. It
may be difficult at first, so give your student the help he needs. Allow him
to become familiar with the sentence, or sentences, you dictate at first. You
may even want to let him choose the sentence. After he is very successful at
writing from dictation using this method, gradually start adding a few words
of your choice. Remember that success is your goal, not quickly moving to
more difficult dictation passages. Going through the process too quickly,
without allowing your student the time to become successful and confident,
may create resistance toward this type of language learning.
Another common problem, especially for younger students, is the struggle
with handwriting. Before beginning the Copywork & Dictation process,
decide whether manuscript or cursive handwriting is more easily used by your
student. If handwriting is very frustrating and difficult for him, try different
writing tools and surfaces. If he continues to experience difficulty, it is perfectly
acceptable to allow your child to type the passages. The goal is for your student
to see the words, hear the words, and write the words. Remember that it is
more important for him to learn the spelling mechanics and reading skills that
result from dictation and copying than it is to handwrite the passage.
xvii
Instructions
Trail Guide to Learning
B. Reader
The natural method of learning continues in this section, the Reader assignments. These assignments occur in real literature, and there are several reasons why this is important. Real literature is more interesting. The language
used is more natural. A willingness to read builds as your student experiences the success of reading a real book.
Struggling readers are to read their assignments aloud. The purpose for this
is to build reading fluency. Fluency, or the ability to read something effortlessly, is also an important part of comprehension. If a student can read a
passage aloud with expression, correct phrasing, and attention to punctuation, it is much more likely that he will also understand the meaning of the
passage. To practice fluency at all levels, use passages that your student can
read without constant decoding. In other words, start with a few sentences
that seem easy for the student to read. Often, you can have him choose the
passages for fluency practice, and sometimes you can select them in order to
gauge his growth. To do this, find a passage that is a sentence or two longer
than the last one he read, or one that contains structures requiring attention to punctuation, such as dialogue. Real books are perfect for this fluency
practice. Artificial fluency practice is unnecessary when literature provides
such an abundant source of reading materials.
Each reader is coordinated with the unit, and provides a ready-made history or science lesson. The lives of real people become linked to places and
events. In turn, this connection brings character and convictions to light,
as well as great adventures and drama. From the wellspring of literature,
examples of mechanics and word usage come, as well as phonics principles,
spelling patterns, and vocabulary.
Every student is to read or listen to all literature selections for the unit.
Reading or hearing the various perspectives adds richness to the stories and
depth to the understanding of the events and circumstances of the times.
Critical thinking skills build as the related stories allow students to compare and contrast to find similarities and differences. An artist's illustrations
contribute to learning about context clues, and the divisions of chapters and
paragraphs help students recognize important main ideas and details that
support the bigger ideas. All of these lessons come naturally from real books.
C. Read-Aloud and Discussion, Narration & Reflective Writing
Most parents agree that it is good to read aloud to young children to develop
pre-reading skills. However, the benefits don't stop there. Reading aloud to
children of all ages is one of the easiest, most enjoyable and effective ways to
share ideas and begin thoughtful conversations. Since your child does not
have to worry about decoding during read-aloud time, he can focus totally
on the meaning of what he is hearing. This allows him the opportunity to
think about the ideas and information being presented, and to formulate
xviii
Paths of Progress - Volume 1
Instructions
his own thoughts. It prepares your child to respond to what he has heard
through discussion, retelling, or reflective writing.
Read-Aloud: As you read aloud, you also model fluency, expression, and comprehension. When your voice reflects punctuation, your child can see its purpose and the way it makes the passage more understandable. As he listens and
sometimes follows along with his eyes, your child sees the language and hears
it read correctly, which provides an excellent example for his reading. Because
of this, Read-Aloud assignments are an important part of each lesson.
Narration and Discussion: Read-Aloud assignments also provide the basis
for student responses. As they listen, it is natural for them to respond by
speaking, which is a good first step toward meaningful discussion. In the
give-and-take of discussion, you can listen to your children's understanding
of the passage, ask questions, and share your thoughts. All of these combine to expand their thinking on the topic. It also lends itself to the natural
memory practice of narration, or retelling. As students become familiar with
the process of retelling, their ability to recall main ideas and details develops.
Narration can take many forms, such as predicting outcomes, asking and answering questions, as well as retelling from the point of view of a particular
character. All of these activities build the ability to narrate or retell what they
have heard. The last step in the process of response is that of writing.
Some units may include reflective writing, which involves responding to a
passage your children have heard by writing their thoughts about it. This is
one of the most complex ways for your children to respond. It is also a very
concrete way to use writing to answer questions. The answers given are correct
because they come from your children's thoughts and understanding of what
they heard. Discussion, narration, and reflective writing are good, natural ways
for a teacher to see what her students understood from what they heard.
D. Word Study
This section exists to equip your child with strategies to gain meaning from
unknown or unfamiliar words. This information must be connected to other
learning in order to remain with your child on a long term basis. So the best
time to teach him about phonics, word usage, mechanics, vocabulary, spelling, and grammar is when he reads a word, phrase, or sentence or hears it used
in a story. Study of a sound or word form is natural and makes sense to your
child when he sees a need to read, understand, and use that word. Word Study
activities occur in every lesson, taking advantage of the opportunities presented
in the literature to connect meaning and structure for your student.
Vocabulary is a focus of this curriculum as students make and collect cards
with words and meanings listed. The purpose of this activity is not memorization or dictionary skills, but understanding. By building an awareness of
new or unusual words, you are teaching your student an important strategy
for understanding what he has read or heard. New vocabulary words appear
xix
Instructions
Trail Guide to Learning
in the context of a lesson or story, which helps your child recognize that the
way a word is used is closely connected to its meaning. This is an important
reading strategy called using context clues. As your child completes the vocabulary activities in this curriculum, he sees the importance of learning and
using new words as he reads, writes, discusses, and retells.
Word Building is introduced in this level, with a focus on Latin and Greek
word parts and the many ways they are used today. This section builds an
awareness of these word parts, an understanding of their meanings, and then
uses the Rummy Roots game for fun practice. Students get the best of the
study of word origins with a meaningful and easy-to-apply approach.
E.Geography, Science, History & Economics
The studies of Geography, History, Economics, and Science are connected.
The knowledge of one area contributes to knowledge in the other areas.
By considering the linkage of subjects in real life, connections occur naturally for your students. This helps them add to what they know when they
encounter new information. It also helps students remember what they have
learned. Connections are an important part of this curriculum.
Geography is the umbrella from which the other studies connect.
Geography includes the study of places. If you learn about places, you learn
about the impact those places have on people. If you learn about people,
you learn about cultures and worldviews, and the impact those people have
on places. So in the study of geography, you naturally learn about people,
places, and all the ways they affect each other. All culture, history, and science connect to concepts of geography, so we study Science and History
in the light of their connection to the people and places encountered by the
inventors, scientists, and problem-solvers found in this level.
Science is naturally enjoyable to children when they can begin to connect
its principles to their own lives. In Volume 1 your student will explore the
building blocks of progress through the hands-on approach of The World of
Tools and Technology. While the word technology does not actually describe a
specific area of science, it does refer to an end-result of research and experimentation done by scientists, and applied by inventors through the use of
basic tools. This study is therefore a perfect connection and complement to
your student’s literature about inventors and scientists. Volume 2 provides
an activity-based exploration of the structures and systems that make up the
most astounding “machine” ever designed and created—the human body.
In addition, this curriculum encourages research and reading as a means of
obtaining more information about topics of interest. Engaging students this
way is often as valuable in learning science as doing activities.
History is a daily part of the curriculum through literature readings, discussions, and activities. The study of history that focuses on dates and facts alone
can be dry and hard to remember. When events in history are associated
xx
Paths of Progress - Volume 1
Instructions
through the literature, the geography, and the relevant science concepts, it
connects the learning and is much more likely to be retained. Great stories and
biographies help students connect to the struggles and triumphs of the times.
Literature provides a basis for discussion and evaluation of the decisions made
and the results that occurred. Since some of the events covered in this volume
include the injustices of life and some episodes of suffering, please preview literature assignments to make sure they are appropriate for all participating students. Books read by the students, and read aloud by the teacher, provide the
thread that ties the events, struggles, and decisions of the inventors, scientists,
and problem-solvers together. Learning History could not be more natural.
Another natural connection to the study of history is the study of Economics.
In this level, students learn the basics of economics and how they apply to the
real-life situations of inventors, scientists, and their own families. The study of
information from maps, graphs, and charts also gives students experience in
reading and interpreting this information as it relates to economics.
F.Writing, Editing & Spelling
Learning new things should inspire a response. Since you are not limited
to conventional school-type methods, you can employ an array of effective
and enjoyable ways of gaining and responding to information. Writing is
an integrated part of this curriculum. It is not a separate subject, but rather
a set of skills with which to become familiar. Writing ability improves with
practice and time, both of which come in the context of literature, history,
science, and geography learning. Writing is best when it is a response to
thinking about content learned, new ideas, or activities completed. Since
writing begins with thinking, once your children engage in assigned thinking activities, the way is naturally prepared. As you use this approach, your
students will begin to see themselves as writers, which is the first and most
important step to becoming a writer.
Rather than relying on artificial exercises and work sheets, the Editing sections help build your children’s awareness and recognition of punctuation,
parts of speech, and correct usage in the context of their literature. Abstract
grammar ideas and often-confusing rules become meaningful when illustrated and identified in this concrete way. In turn, when a concept has meaning,
your student can apply it naturally in his writing.
Spelling is a skill that has several components, such as perceptual ability and
memory. Some of us are naturally good at spelling, and some are not. The goal
of the spelling assignments is to improve your child's ability to spell by helping
him make connections to meaning, phonics, and word patterns. Memorizing a
list is not as valuable to your child as increasing his ability to comfortably write
words that express his understanding and opinions. The goal then, is to increase your child’s ability to recognize and spell more words correctly—not just
to be able to spell a new word correctly for a week or two and then forget it.
xxi
Instructions
Trail Guide to Learning
G. Music, Doing & Art
In this curriculum your child will learn about many people, inventions, and
innovations that have changed and advanced industry and the sciences. The
Music sections expand that concept by demonstrating that a very similar
progression has also occurred in the composition and performance of classical music. Your student will learn about different periods of musical styles,
some famous composers who contributed to those periods, and the development of the orchestra. In addition, since the process of doing something is
such a powerful teacher and motivator, your child will have an opportunity
to explore his own style by learning to read music and play a recorder.
New inventions very often begin with an idea, which over time may become
a sketch, which eventually becomes a model, which finally becomes a design.
Since clay sculpting allows almost unlimited flexibility, it is the perfect medium for your child to experiment with design. In the Art sections he will
be encouraged to practice simple techniques, and then use them to express
his own unique ideas. This natural process stimulates creativity and nurtures
attention to detail, which in turn equips your student to communicate his
thoughts more effectively.
H. Independent Reading & Record Keeping
This is an important part of each student's daily schedule. It provides regular practice for word study and reading skills, as well as time for practice of
thinking skills. Quiet time to consider ideas and tie new information with
old is essential in building new understandings. Though you may be tempted to skip this activity to save time, please don't!
Something new in this level is a student copy of each lesson’s At A Glance
chart in the Student Notebook. Personally recording his accomplishments
on this chart, as well as on his Reading Log, will help your child achieve a
sense of responsibility and ownership for his assignments. It is also a step
in developing student responsibility and independence, since these types of
records are important additions to any portfolio.
R
Supportive Resources
Student Notebook
The Student Notebook is not only a vital part of this curriculum, but it
also provides a portfolio of your student's work. Games, graphics, charts,
and other activities assigned in the text are included in an easy, ready-to-use
format for your student.
xxii
Paths of Progress - Volume 1
Instructions
How can you begin to transfer the responsibility for completing assignments
from yourself to your student? Reading Logs and Lesson At A Glance charts
are included in the Student Notebook to facilitate this process. The student
has a ready-made task list to guide and direct his efforts, and the teacher can
tell at a glance what needs to be done. This checklist system encourages your
student to take responsibility for his daily work, and allows him to be easily
accountable for assignments.
A portfolio is often the best possible written measure of student achievement. Completion of the Student Notebook creates an excellent, consecutive record of student work in reading, writing, geography, history, science,
and art. The Student Notebook gives teacher, student, and evaluator a clear
picture of sequential progress in each subject area, samples of student work,
and examples of creative projects. It includes dates that assignments were
completed, assisting with the documentation process. This helps teachers to
see the amount of time spent on each unit, as well as giving your student a
sense of accomplishment as he looks over the finished product.
Assessments
For those who prefer not to use the portfolio method of evaluation, or who
want to supplement their child’s portfolio, assessments for each level of
the first five units are available on a separate CD. The assessments for this
level include both objective assessments on the content presented, as well as
performance assessments in writing. Guidance is included for administering
the assessments, evaluating the results, conferencing with your student, and
planning for future improvements. These, coupled with your daily observations and interactive discussions and games, provide ample material upon
which to base an accurate evaluation. There is no assessment for Unit 6,
Reach for the Stars, since this unit is largely devoted to review of the previous five. The review activities serve as evaluation tools themselves, and can be
assigned point values if you choose.
Light for the Trail Bible Curriculum
This optional Bible curriculum helps your student make the most important connection of all—the one between his faith and his view of the world
around him. This easy-to-use guide provides daily assignments, which include
Memory Verses for the lesson, discussion topics, writing assignments, suggestions for in-depth study and longer-term Memory Projects. These elements
blend with Prayer Times, Worship Times, and Blazing the Trail (teacher sharing) to enable students to make real-life connections between the content of
the curriculum and the lessons of Scripture. New to this supplement is a more
in-depth level of Scripture study using the inductive method. This gives your
children a chance to connect Scriptures and their application in both the past
and present to the history and context of the passages themselves.
xxiii
Instructions
Trail Guide to Learning
Lapbooks
These resources are available to accompany each level of the Trail Guide to
Learning series. Created to build and review the concepts and content taught
by the curriculum, with hands-on reinforcement. Graphic organizers can
make learning memorable for all ages.
Parent Planner
This is a new tool to help parents organize their record-keeping information.
It also contains the Teacher Connections, which offer continuous teacher
training. This wonderful resource refers teaching parents to You Can Teach
Your Child Successfully, by Dr. Ruth Beechick. This book provides timely
information that help you understand teaching strategies that work, and why.
Student Planner
This is another new tool to help your children begin to assist with the
processes of record-keeping needed as you homeschool. Not only that, but
it also is a source of encouragement as students see the overall plan of the
curriculum for themselves as they track assignment completion and maintain reading logs. This is an easy-to-use and enjoyable way to continue the
transfer of responsibility for learning from teaching parent to child.
Middle School Supplement
The Middle School Supplement enables older members of the family to
learn together with their siblings, while tying subjects together in a meaningful way. It covers the same content with more challenging assignments.
At the time of this printing the supplement is available only in CD-ROM
and downloadable ebook format.
R
Required Resource List
The following materials are required for use with Paths of Progress. For ordering information see Resources at the back of the book.
Volume 1
Samuel F. B. Morse by John Hudson Tiner
Munford Meets Robert Fulton by Jamie Aramini
Ben and Me by Robert Lawson
Michael Faraday by Charles Ludwig
Caddie Woodlawn by Carol Ryrie Brink
Thomas Edison by Janet and Geoff Benge
xxiv
Paths of Progress - Volume 1
Instructions
The New Way Things Work by David Macaulay
The World of Tools and Technology by Dinah Zike and Susan Simpson
Volume 2
George Washington Carver by David Collins
Strawberry Girl by Lois Lenski
The Wright Brothers by Charles Ludwig
Homer Price, by Robert McCloskey
Alan Shepard by Janet and Geoff Benge
Miracles on Maple Hill by Virginia Sorensen
Human Body Basics by Libby Lim & Linda Fowler
Core (for Volumes 1 and 2)
The Story of Inventions by Frank P. Bachman
The Story of Inventions Answer Key
The Story of the Orchestra (Book & CD) by Robert Levine
Basix Recorder Method (Book, CD) by Morty Manus
Create Anything With Clay by Sherri Haab and Laura Torres
Profiles from History, Volume 3 by Ashley Wiggers
You Can Teach Your Child Successfully by Dr. Ruth Beechick
Classroom Atlas of the United States
Soprano Recorder
Rummy Roots cards
Student Notebook pages (Print from CD included with curriculum or use
preprinted pages available separately.)
Optional Supportive Resources
Paths of Progress Assessments (CD-ROM)
POP Light for the Trail Bible Supplement (CD-ROM)
Middle School Supplement (downloadable)
Paths of Progress Lapbook Set Volume 1
Paths of Progress Lapbook Set Volume 2
Paths of Progress Student Notebook pages printed & three-hole punched
available by grade level for each volume
Parent Planner
Student Planner
xxv
Trail Guide to Learning
Great Leaps Unit
Unit 1 – Great Leaps
Lesson 1, Part 1
Lesson 1, Part 1
K Steps for Thinking L
1. Many young inventors and scientists focused intensely on learning about things of interest to them,
making them different from others their age.
2. A first kind of thinking involves knowing basic
facts about something and sharing those facts
with others.
3. A first step in thinking like a scientist is to
find out about something through research or
observation.
You will notice that there is an “At A
Glance” chart in your child’s Student
Notebook at the beginning of each lesson. Personally keeping this record of
accomplishments will help your child develop a sense of responsibility and ownership for his assignments.
Ask your student to write the date that
the lesson is begun at the top of the chart,
and to check off each item as it is completed. When he or she finishes a page in
the Student Notebook, be sure that the
date is recorded on that page as well.This
makes record keeping easier. The At A
Glance is a good way to tell if there is unfinished work, so your child can go back
and complete it when time allows.
4. The way goods and services are created, distributed, and consumed affects history.
A.Copywork & Dictation
Materialsj
i
Language Skillss
Look carefully at your assigned passage below, and read it silently. Show
your teacher any words you don’t know, and practice saying them aloud.
Now read the passage aloud, or ask your teacher to read it to you.
When you are finished copying or writing from dictation, compare
your copy to the text and make any needed corrections.
Copy or write as your teacher dictates from The Story of Inventions,
page 185, paragraph 2 (“In my early boyish. . .”).
Write as your teacher dictates from The Story of Inventions, page 185,
paragraphs 2 and 3 (“In my early boyish. . .”).
B.Reader
Language Skills, History
Munford Meets Robert Fulton: page 7 (Chapter 1) through page 15
The Story of Inventions: page 3 (Chapter 1) to page 6 (“Captured
by Steam”)
Follow the directions below to read or listen to the above passages.
When you are finished, find the Comprehension Questions at the
end of Chapter 1 in The Story of Inventions, and tell your teacher the
answers to numbers 1 and 2.1
• Samuel F. B. Morse
• Munford Meets Robert Fulton
• The Story of Inventions
• The World of Tools and Technology
• Profiles from History,Volume 3
• The Story of the Orchestra book & CD
• Create Anything With Clay
• Basix Recorder Method
• Recorder
• Polymer clay
• Activity (Part 2):
Candle
Straw
• Labs (Part 3):
Cornmeal
Hand lotion
• Activity (Part 3):
Piece of wood (about 3” x 10”)
Rubber band, String (12”)
Tack, (2) U-shaped nails,
Bead, Hammer, Paper clip
Metric ruler
• Activity (Part 4):
8 small zip-lock bags
Read the above assignment from Munford Meets Robert Fulton
aloud, and then follow along as someone else reads the assignment from The Story of Inventions.
1
Lesson 1, Part 1
Unit 1 – Great Leaps
Read the above assignment from Munford Meets Robert Fulton silently,
and then read the assignment from The Story of Inventions aloud.
Read the above assignments from Munford Meets Robert Fulton and
The Story of Inventions silently.
C.Read-Aloud & Discussion
History, Language Skills, Thinking Skills
Samuel F. B. Morse: page 1 (Chapter 1) through page 7, paragraph 6
Follow the directions below to read or listen to the above passage.
Then, in your own words, tell what happened in the portion you are
assigned. Try to remember as many details as possible. If necessary you
may reread, or listen as your teacher rereads, the part you are to retell.
Listen carefully as your teacher reads the above assignment aloud.
Choose one page to retell.
Listen carefully as your teacher reads the above assignment aloud.
Choose two pages to retell.
Read the assignment aloud, and then retell the entire passage.
D.Vocabulary
Language Skills, Thinking Skills
Write each vocabulary word on an index card. Tell your teacher what
you think the word means, based on the context in which you have
read it. If you are not sure of its meaning, use a dictionary to look it
up. You may have to remove any endings that have been added, such
as an s or ed, to find that word in a dictionary. Then on the back of
each index card, draw a picture or write a clue so you remember the
way the word was used in the story.
E. We are very grateful to Dinah Zike
and Susan Simpson for allowing us to
reprint graphics from The World of Tools
and Technology for the convenience of
families using Paths of Progress. The World
of Tools and Technology is part of the
“Great Science Adventures” series, available through Common Sense Press.
inclement
plummeting
patent
contraption
quicksilver
prominent
dejected
scholar
dismay
flamboyant
E.Science
Thinking Skills
In Volume 1 of the Paths of Progress, you will be guided step by step
through The World of Tools and Technology. This book introduces
concepts and devices that have formed the basis for inventions and
progress throughout history. To get an idea of what you’ll be doing,
read the introduction to The World of Tools and Technology on page i
with your teacher. Then follow the directions below.
The World of Tools and Technology, Lesson 1,“What is work?”
Tool Concepts:
2
Read and discuss the concepts with your teacher.
Unit 1 – Great Leaps
Lesson 1, Part 1
Vocabulary Words:
With your teacher’s assistance, choose the
number of terms assigned below, and make vocabulary cards for
them. Add them to your other vocabulary words.
three words
five words
all the words
Read:
Locate the parts of the
Lots of Science Library Book #1
on your Student Resource CD.
Cut them out and, with your
teacher’s assistance (if necessary),
follow the directions in Appendix
B to assemble them. When you
are finished, read and discuss the
information in the booklet with
your teacher.
Work—Graphic Organizer:
Follow the directions on page 2
to make a “Hot Dog, 3-Tab Book.” Use crayons, markers, or colored
pencils to color the pictures that describe the work formula. Then
complete the following activities:
Level 1
Level 2
Level 3
Experiences, Investigations, and Research:
Complete Activities
1 and 2 on the pages provided in your Student Notebook.
Use the library or Internet to complete Activity 3. Write one or
two paragraphs in your Student Notebook that summarize your
research.
F.Writing
Language Skills, Thinking Skills
When you are asked to answer a question using a complete sentence,
the best way to start is by rewording the question. This will help keep
you from answering the question with a sentence fragment, which
is an incomplete sentence or thought. A complete sentence includes
a subject, or focus, and a second part that tells about the subject
or focus, or tells what happened to it. The subject can come at the
beginning of the sentence, or at the end.
Rather than just looking for the pieces of a sentence, read it and
see if you understand its focus, and what is said about that focus.
Use the meaning approach to check and see if your sentences, or
thoughts, are complete.
F. Each word in bold letters is considered a vocabulary word. It is a word that
may or may not be new to your children.
You can write these vocabulary words
on index cards and use them for occasional review, but not for memorizing.
Give your children the meaning of the
words if they don’t remember.Try to use
the new vocabulary words during conversation, and encourage your students
to do the same.
Each time your students make a vocabulary card for this unit, have them write GL
(for Great Leaps) in the upper left corner.
This will make it possible to review vocabulary by unit at the end of the year.
3
Lesson 1, Part 1
Unit 1 – Great Leaps
Here is an example:
Question: What is your favorite food?
Incomplete Answer: pizza
Complete Answer: My favorite food is pizza.
Review the reading assignment in Section B for Chapter 1 in The Story
of Inventions. Then, in your Student Notebook write the answer to the
first part of Comprehension Question 1 with a complete sentence.
When a question asks you to give one example, you do so by rewording the question and then adding your answer. However, when
it asks you to give more than one example, adding only one answer
is not correct. It is good to start your examples with the words, "For
example. . ." This is a good way to alert your reader that an example
is coming next.
Question: Why are inventions important? Give
examples.
Incomplete Answer: wheels helped people move, guns helped
people hunt
Complete Answer: Inventions are important because they
change the way we do things. For example, the invention of the wheel helped
people move faster. The invention of the
gun is another example because it made
hunting easier for the early pioneers.
Answer the second part of Comprehension Question 1 in your
Student Notebook by giving some examples.
When a question asks you to give a particular kind of information,
you often need to tell why your response answers the question. You
can use the word because to do this.
Question: What was the happiest day of your life?
Incomplete Answer: my birthday
Complete Answer: My birthday was the happiest day of my
life because my whole family came to
my party.
Write the answer to Comprehension Question 2 in your Student
Notebook by telling what James Watt's most significant invention
was, and why. Tell your teacher what you think significant means. If
you don't know, you can't answer this question, so look it up in the
dictionary or ask your teacher.
Make up a question about the passage from The Story of Inventions
that you read in Section B and write it in your Student Notebook.
Then answer it.
4
Unit 1 – Great Leaps
Lesson 1, Part 2
Make up two questions about the passage from The Story of
Inventions that you read in Section B, and answer them. One of your
questions should ask for examples.
G.Music
History, Thinking Skills
Just as innovations, or doing things in new ways, have changed and
advanced industry and the sciences, the same type of progression
has occurred in the arts—particularly in music. This year you will
begin learning about different periods of musical styles, some famous
composers who contributed to those periods, and the development
of the orchestra.
Begin your study by reading and discussing pages 7-9 in The Story of
the Orchestra with your teacher.
When you are finished, listen to Wagner’s “Ride of the Valkyries” on
Track 1 of the CD. There’s a short description of what this music was
intended to portray on page 7 of your book. Do you think it does
a good job of helping listeners to picture the action going on in the
opera? Listen carefully to Track 1 again, and see if you can count the
different instrument sounds you hear.2 Then, on the page provided
in your Student Notebook, draw and color a picture of the image
this music brings to your mind.
H.Independent Reading & Record Keeping
Thinking Skills
Check the Lesson 1 At A Glance chart in your Student Notebook
to see if all the work you’ve done in this part has been checked off.
Also, make sure the Student Notebook pages you worked on are
dated and complete.
When you are finished, choose something to read that you will enjoy. Then find a quiet, comfortable place and read for the following
length of time:
30 minutes
35 minutes
Be sure to write down what you read today on the Reading Log in
your Student Notebook.
R
Lesson 1, Part 2
A.Copywork & Dictation
Language Skills
Look carefully at the Steps for Thinking for this lesson and read them
silently. Show your teacher any words you don’t know, and practice
saying them aloud. Then, copy or write them from dictation into
your Student Notebook.
j Teacher Connection i
Continuous learning is an important part
of education. Be sure to read the Teacher
Connection note in your Parent Planner.
Don't miss out on this important part of
your homeschooling!
5
Lesson 1, Part 2
Unit 1 – Great Leaps
When you are finished, compare your copy to the text and make any
needed corrections.
Copy the Steps for Thinking, and tell your teacher an example of
each Step from your reading or your life.
Write the Steps for Thinking as your teacher dictates them. Then, in
your Student Notebook write one example of each Step from your
reading or your life. Be sure to use complete sentences.
Write the Steps for Thinking as your teacher dictates them. Then, in
your Student Notebook write two examples of each Step from your
reading or your life. Be sure to use complete sentences.
B.Reader
Language Skills, History
Munford Meets Robert Fulton: page 17 (Chapter 2) through page 27,
paragraph 2
The Story of Inventions: page 6 (“Captured by Steam”) to page 11
(“Beelzebub, the Trial Engine”)
Read the above assignment from Munford Meets Robert Fulton aloud,
and then follow along as someone else reads the assignment from The
Story of Inventions.
Read the above assignment from Munford Meets Robert Fulton silently,
and then read the assignment from The Story of Inventions aloud.
Read the above assignments from Munford Meets Robert Fulton and
The Story of Inventions silently.
C.Read-Aloud & Discussion
History, Language Skills, Thinking Skills
Samuel F. B. Morse: page 7, paragraph 7 (“Outside the house. . .”)
through page 13
Follow the directions below to read or listen to the above assignment. Then make up questions about the part of the story you just
read or heard. Write your questions in your Student Notebook and
ask your teacher to answer them. After discussing her thoughts, write
down the best possible answer on the lines provided. Be sure to use
complete sentences.
Listen carefully as your teacher reads the above assignment aloud.
Make up two questions.
Listen carefully as your teacher reads the above assignment aloud.
Make up three questions.
Read the above assignment aloud, then make up four questions.
D.Word Building
Language Skills, Thinking Skillss
This section is called Word Building because the English language
comes from parts of many other languages. Many words you know
6
Unit 1 – Great Leaps
Lesson 1, Part 2
and use often come from languages such as Greek (the language
spoken in Greece) and Latin (the language spoken in Ancient Rome,
but no longer used in everyday life). You will learn about word parts
and what they mean. In later units, you will learn how to recognize
the combinations of word parts to make new words.
Today's word part is geo-, which is a Greek word that means earth.
Look up the following words in the dictionary, and write each
definition in your Student Notebook. Then underline the word part
geo- in each word. Think and be ready to tell your teacher how each
definition relates to the meaning of the Greek word.
geography
geology
geometry
geothermal
geophone
geocentric
geochemistry
geodesy
geomagetism
E.Economics & History
Thinking Skills
Economics: History and money are connected. Economics is the study
of the way we produce, distribute, and consume, or use up, goods
and services. Many times, economic issues influence events in history,
such as wars. The taxes that England forced the American colonies to
pay had much to do with moving the Revolutionary War forward.
When one government, or leader, wants what belongs to other people,
economics are involved. To understand the changes that took place in
America and the world because of the work of scientists and inventors,
you must understand their connection to economics.
When you learn about economics, you will learn about three
connections:
Connect Learning to Life
“Why should I learn this?” What
homeschooling parent hasn't heard that
question! A good answer is, “Because it
will help you learn about other things.”
The connection between science, history
and geography is such a natural one.
Each teaches important ideas that build
understanding in the other. The soldiers
transporting the guns in the winter,
connected to the terrain, connected
to the seasons. Each one informs your
children about the other and their place
in real life.
1. How economics shaped history, and how history shaped
economics.
2. How economic principles affect a country.
3. How economic principles affect you.
You are a consumer. That means you eat, drink, or use up goods, or
things that your family purchases or makes. Everyone is a consumer.
Some people consume, or use up more goods than others. Most
families regularly consume goods like bread, milk, eggs, and coffee.
7
Lesson 1, Part 2
Unit 1 – Great Leaps
They use up paper towels and napkins, washing detergent, and gas
for their cars. Many try not to consume too much chocolate and
things made with sugar, but sometimes people are not very good at
that! They have to replace clothing from time to time, and get a new
tool for the house or yard. They use shampoo, toothpaste, and sweetsmelling perfume. They take vitamins and sometimes have to get
medicine. These are just some of the things most families consume,
or use up, on a regular basis.
Where do all these things come from? Producers are the ones who
make the goods that people use. People or machines produce some
goods, like bread or clothing. Materials found in nature are natural
resources, and can be goods such as apples, wood, or fish. Though
they are not made by people, they still must be gathered and then
made available to the people who need them.
Talk with your teacher about what you and your family consume
regularly. Then, in your Student Notebook create a list of at least ten
goods that you consume, or use up, each week.
Before James Watt made steam power a useful tool for getting work
done, most goods were produced by the strength of a person or an
animal. This meant that most work, such as preparing food, took
a great deal of time. If you had a great deal of wealth, or money or
possessions, you could pay others to make the things you needed to
live, like food and clothing. If you did not have large amounts of
money, you had to do it yourself. That is why many people farmed
and kept animals for milk, eggs, or meat.
Another way to get the goods you needed was to barter. Bartering
means that you trade something you have for something you need.
Even though the people in many areas of the world did not have
great wealth, they were able to meet their needs by bartering with
others in their communities. This was a common way of getting
what they needed to live without using money. Also, since it took so
long to make some things, they would not have time to do everything themselves. This is one reason why the pioneers' lives were
so hard. They were without others around with whom they could
barter, or share the work to get needed goods.
Distribution, or the sharing or delivery of goods, is the last step in
getting things to those who need them. In the past, goods were distributed by carrying them in baskets, on horseback, in wagons, or on
a ship. If you did not live near the place where something you wanted
was produced, it may have taken a very long time to get that good.
Today trucks, trains, airplanes, and ships quickly distribute goods. If a
store runs out of something you want, you can usually go to another
store, or order it. If you have to order something, the time you wait is
usually much shorter than people had to wait in the past.
8
Unit 1 – Great Leaps
Lesson 1, Part 2
Look at the list of goods your family consumes that you wrote in your
Student Notebook. Then, choose one or more items from it that are
now made by machines. Learn more about the production of the
item(s) today, and fill in a chart for each one with at least four steps
needed for its production or distribution. In the fifth box, tell how you
think the good was produced before machinery was available.
one item
two items
three items
A Day in the Life... You are beginning the "A Day in the Life"
section in Paths of Progress with the year that our country became a
new nation. In 1789, America had just won a fierce war for independence. It became the first country in the world to govern through
the process of democracy, or the free and equal right of every citizen
to participate in government. George Washington became the first
elected President of this new republic, or form of government where
citizens elect representatives to govern for them. Suddenly America
became a beacon of hope for the oppressed around the world. In
many other places, kings and queens ruled over the common people, or those not born to nobility, with unjust power. Commoners
paid for the lavish lives of the royals.
The knowledge that a revolution against the King of England was
successful in America gave these people hope that maybe they, too,
could become free one day. They hoped and prayed that someday
the small amount of money they earned through hard labor could go
towards their own families and needs.
Those who could afford it came from all over the world to the only
place where it didn’t matter who your parents were, or how much
money you had. You weren’t restricted to one “type” of life—your
destiny was your own. The only requirement to vote was that you
had to own land. Imagine becoming a citizen here during this time.
If you set out to do something, and worked hard and long enough
for it, your options were limitless. You can see why America's reputation became “the land of the free." This country set the stage for
democracy to spread through the rest of the world.
George Washington, being the very first President of the United
States, had no one to look to who had been in his circumstances
9
Lesson 1, Part 2
Unit 1 – Great Leaps
before. He had plenty of opportunities to abuse his authority and to
follow a path that would have corrupted the nation’s future. Instead,
he set the standard for what it would mean to be the leader of
America. Read more about the life of George Washington in Profiles
from History, Volume 3. Following the profile, answer the discussion
questions and complete the activities.
F.Editing
Language Skills, Thinking Skills
Edit the sentences in your Student Notebook by correcting all the
errors you see.3 The number of errors in each one is shown in parentheses after the sentence. To show that something needs to be
capitalized, make three lines ( ) underneath its beginning letter.
Add the types of punctuation needed. Review the following rules if
you are unsure how to edit these sentences:
Capitalize the first word in every sentence.
Capitalize names when they mean particular people, places,
and things.
Every sentence ends with a punctuation mark, such as a period
for a sentence that tells you something or a question mark
for a sentence that asks a question.
When you are finished, discuss the corrected sentences with your
teacher and explain the changes you made.
G.Music
Thinking Skills
No study of musical history and composers is complete without an
opportunity to learn how to read music yourself! Once you can play
an instrument, you gain new insight and appreciation for the creativity of many different types of songwriters—and perhaps someday
you can even invent a new musical style all your own!
One of the easier musical instruments to play is a recorder, or English
flute. But even though it’s simple, it is very important to remember
that your recorder is not a toy—it is a serious musical instrument. In
Paths of Progress, you will learn how to produce different notes on
this instrument, how to read music, and how to play various songs.
Begin by reading and discussing pages 3 through 5 in the Basix
Recorder Method with your teacher. When you are finished, practice
the steps below until you feel comfortable with them:
1. With your parent’s permission, light a candle and place it on a
table so that it is lower than the level of your mouth. Hold one end
10
Unit 1 – Great Leaps
Lesson 1, Part 3
of a straw between your lips, and move the candle about four or five
inches beyond the outer end of the straw. Breathe in through your
nose, and exhale gently through the straw so that the candle flame
is steadily bent over, but not blown out. Try to hold the flame in its
bent-over position for at least ten seconds at a time.
2. Practice holding your recorder properly, and placing your fingers
over the correct holes as shown in the book. Try making different
tones by lifting one or more fingers at a time. Pay attention to the
quality of the sound. If the tone breaks up, you are blowing too
hard—try to remember the steady flow of air you used with the
candle flame.
If it sounds squeaky, that is because the recorder holes are not firmly
covered. A good way to tell if you are applying enough pressure to
the holes is to check the pads of your fingertips. There should be
little round indentations in the pads if you are pressing hard enough.
It may take practice to get used to covering all the holes properly.
3. Use your tongue to start each note. This is explained on page 5 in
your book, in the section entitled “Producing a Tone.” Practice until
you feel familiar with this exercise, called tonguing.
H.Independent Reading & Record Keeping
Thinking Skills
Check the Lesson 1 At A Glance chart in your Student Notebook
to see if all the work you’ve done in this part has been checked off.
Also, make sure the Student Notebook pages you worked on are
dated and complete.
When you are finished, choose something to read that you will enjoy. Then find a quiet, comfortable place and read for the following
length of time:
30 minutes
35 minutes
Be sure to write down what you read today on the Reading Log in
your Student Notebook.
R
Lesson 1, Part 3
A.Copywork & Dictation
Language Skills
Look carefully at your assigned passage below, and read it silently. Show
your teacher any words you don’t know, and practice saying them aloud.
Now read the passage aloud, or ask your teacher to read it to you.
11
Lesson 1, Part 3
Unit 1 – Great Leaps
When you are finished copying or writing from dictation, compare
your copy to the text and make any needed corrections.
Copy or write as your teacher dictates from The Story of Inventions,
page 7, paragraphs 1 and 2 (“Watt first heard. . .”).
Write as your teacher dictates from The Story of Inventions, page 7,
paragraphs 1 and 2 (“Watt first heard. . .”), and page 8, paragraph 2
(“Watt had been thinking. . .”).
The small superscript numbers that
appear after some of the directions in
this book refer to answers found in the
Answer Key, which is located immediately after Part 5.
B.Reader
Language Skills, History
Munford Meets Robert Fulton: page 27, paragraph 3 (“Later that
evening . . .”) through page 38
The Story of Inventions: page 11 (“Beelzebub, the Trial Engine”) to
page 14 (“Making the Business Pay”)
Follow the directions below to read or listen to the above passages.
When you are finished, find the Comprehension Questions at the
end of Chapter 1 in The Story of Inventions, and write the answers
to numbers 3 and 4 in your Student Notebook. Be sure to use
complete sentences.
Read the above assignment from Munford Meets Robert Fulton aloud,
and then follow along as someone else reads the assignment from The
Story of Inventions.
Read the above assignment from Munford Meets Robert Fulton silently,
and then read the assignment from The Story of Inventions aloud.
Read the above assignments from Munford Meets Robert Fulton and
The Story of Inventions silently.
C.Read-Aloud & Narration
History, Language Skills, Thinking Skills
Samuel F. B. Morse: page 14 (Chapter 2) to the bottom of page 19
Follow the instructions below for your level. Then, in your own
words, tell what happened in the story from Samuel’s point of view,
or pretend you are Samuel and tell what you think happened. Try
to remember as many details as possible. Tell what you think is the
most important event in the passage.
Listen carefully to the assigned passage.
Read the assigned passage aloud.
D.Vocabulary Language Skills, Thinking Skills
Give your teacher your stack of vocabulary cards for the lesson. As
she shows you each word, tell her what it means and how it was used
in the story.
12
Unit 1 – Great Leaps
E.Science
Lesson 1, Part 3
Vocabulary Words:
E. Directions for making the various
Graphic Organizers are on pages 1-5
in The World of Tools and Technology. Your
student can either draw his own pictures
for the organizers, or use the graphics
printed in his Student Notebook.
Then, with your teacher’s assistance, choose the number of
terms assigned below from the Vocabulary Words, and make
cards for them as well. Add all of your new cards to your other
vocabulary words.
Although the reading level of the Lots of
Science Library Books may be far lower
than your student’s, encourage him or
her to construct, read, and discuss the
books anyway. They present and illustrate science concepts in the simplest
terms possible, and the examples will
help your child connect principles to real
life situations.
Thinking Skills
The World of Tools and Technology, Lesson 2, “What is friction?”
Tool Concepts:
Read and discuss the concepts with your teacher.
First, read definitions for the following
words at the top of page vii in The World of Tools and Technology:
qualitative and quantitative. These words will be used often as you
progress through this book, so it is important to know what they
mean. Make vocabulary cards for them.
three words
five words
all the words
Read:
Locate the parts of the Lots of
Science Library Book #2 on your Student
Resource CD. Cut them out and, with
your teacher’s assistance (if necessary),
follow the directions in Appendix B
to assemble them. When you are
finished, read and discuss the
information in the booklet with
your teacher.
Friction—Graphic Organizer:
Follow the directions on page
2 to make a “Small Question and Answer Book.” Use crayons, markers, or colored pencils to color the graphics that describe friction.
(All science graphics are located on your Student Resource CD.)
Then complete the activities for Levels 1 and 2.
Complete Level 3.
Investigative Loops 1 and 2:
Complete both of these labs.
Find the copy of an Investigative Loop in your Student Notebook.
Then, with your teacher, read the explanation of this special lab
tool on pages v and vi toward the front of The World of Tools and
Technology. As you follow the directions for the labs in Lesson 2,
discuss each step with your teacher as you do it. If the step relates
to one of the Investigative Loops, outline that loop in your Student
Notebook with a color of your choice for the first lab, and shade it in
completely for the second lab.
Force Meter:
Complete the Force Meter project.
Do not work on the “Tools in Time – Timeline Book” in this part.
Experiences, Investigations, and Research:
Choose activities from this section and complete them. Date and add your work
13
Lesson 1, Part 3
Unit 1 – Great Leaps
to your Student Notebook. Then write one or two paragraphs that
summarize each activity you chose.
one activity
two activities
F.Writing
Language Skills, Thinking Skills
For this section, write Lab Reports for the two Investigative Loops
you completed in this lesson. Look over the notes you made for your
Lab Books, and then follow the directions below to complete the
Lab Reports in your Student Notebook:
Title: This is the name of the Investigative Loop about which
you are writing.
Purpose: Write a complete sentence telling why you did the lab, or
what you hoped to learn from it. It can be the question or concept stated in the Investigative Loop, or it can be a hypothesis.
A hypothesis is a statement that describes a science problem or
observation, and what you expect to happen in the lab.
Materials: List all the items you used in the lab.
Procedure: Write one or two paragraphs that describe all the
steps, in order, that you took to complete the Investigative
Loop. It should be detailed enough that anyone reading it
could go through the steps themselves and complete the lab.
You might want to write the steps on scrap paper first, and
put them in order. Then think about how you would like
your paragraph(s) to read. Be sure to use words like first,
then, next, and finally to connect your sentences and make
the order more clear.
Conclusions: Write at least one paragraph telling what happened in
the lab, and what you learned from it. Be sure to include the
answer to your question, or whether your hypothesis was right
or wrong. You can also tell about other questions the activity
brought up that might need to be explored at another time.
Pictures, Diagrams, or Charts: This part may not always be used, but
it can include drawings of special equipment used in the lab, or
a “picture” of your results (in the form of a chart or diagram).
Observations/Data: Use complete sentences to write about the
things you measured, saw, heard, touched, or smelled during the Investigative Loop. Remember, this section should
include both quantitative (things you measured) and qualitative (things you observed with your senses) information.
Analysis of Data: Write one or two sentences that explain how
the things you measured or observed relate to each other,
and how they affected the outcome of the lab.
14
Unit 1 – Great Leaps
G.Music
Lesson 1, Part 4
History, Thinking Skills
In Part 1 of this lesson you listened to the “Ride of the Valkyries”
on your Story of the Orchestra CD. Richard Wagner is the famous
composer who wrote this music in the mid-1800s, and you will learn
more about him later. Before his time, however, a different style of
music was popular.
With your teacher, read and discuss page 13, “The Baroque Period,”
in your music book. When you are finished, see if you can find any
more information about this period of musical history at the library
or on the Internet. Always take notes while you are doing research so
you won’t forget important facts.
When you are finished, follow the directions in Appendix B to
make Orchestra Story question and answer cards about the Baroque
period. You can use The Story of the Orchestra book, as well as notes
from your research. Put a small letter B (for Baroque) in the upper
left corner of each answer card. Do not put the small letter on the
question cards, and remember to write the questions in your Student
Notebook in the correct order. Then set the cards aside—you will use
them later in this lesson for review and to play a game.
H.Independent Reading & Record Keeping
Thinking Skills
Check the Lesson 1 At A Glance chart in your Student Notebook
to see if all the work you’ve done in this part has been checked off.
Also, make sure the Student Notebook pages you worked on are
dated and complete.
When you are finished, choose something to read that you will enjoy. Then find a quiet, comfortable place and read for the following
length of time:
30 minutes
35 minutes
Be sure to write down what you read today on the Reading Log in
your Student Notebook.
R
Lesson 1, Part 4
A.Copywork & Dictation Language Skills
Look carefully at your assigned passage below, and read it silently. Show
your teacher any words you don’t know, and practice saying them aloud.
Now read the passage aloud, or ask your teacher to read it to you.
When you are finished copying or writing from dictation, compare
your copy to the text and make any needed corrections.
15
Lesson 1, Part 4
Unit 1 – Great Leaps
Copy or write as your teacher dictates from Munford Meets Robert
Fulton, the bottom of page 43 (“Of course, it was all . . .”) through
page 44, paragraph 1.
Write as your teacher dictates from Samuel F. B. Morse, page 15, paragraph 12 (“But Samuel Morse. . .”) through page 16, paragraph 1.
Write as your teacher dictates from Samuel F. B. Morse, page 16,
paragraph 3 (‘Professor Jeremiah Day. . .”).
B.Reader
Language Skills, History
Munford Meets Robert Fulton: page 39 (Chapter 5) through the top of
page 48
The Story of Inventions: page 14 (“Making the Business Pay”) through
page 18
Follow the directions below to read or listen to the above passages.
When you are finished, find the Comprehension Questions at the
end of Chapter 1 in The Story of Inventions, and tell your teacher the
answers to numbers 5 and 6.
Read the above assignment from Munford Meets Robert Fulton aloud,
and then follow along as someone else reads the assignment from The
Story of Inventions.
Read the above assignment from Munford Meets Robert Fulton silently,
and then read the assignment from The Story of Inventions aloud.
Read the above assignments from Munford Meets Robert Fulton and
The Story of Inventions silently.
Teaching Tip
The skill of predicting what will happen
in the story is an important one. It requires your child to remember what has
already happened, consider the characters
and events, and then come up with a reasonable idea of what may happen in the
future. This process involves using critical
thinking skills and can be a natural part of
any reading your child is doing. Just ask,
"What do you think will happen next?"
C.Read-Aloud & Discussion Language Skills, History,Thinking Skills
Samuel F. B. Morse: page 19, last paragraph (“Benjamin Silliman
did. . .”) through page 28, paragraph 6
After reading or listening to the read-aloud assignment, talk with your
teacher and try to predict what will happen in the future based on
what you know of the characters and events. Write your predictions in
your Student Notebook. Later you will look back and see if they were
accurate. Try not to peek ahead!
Listen carefully as your teacher reads the assigned passage. Write
down two predictions.
Listen carefully as your teacher reads the assigned passage. Write
down three predictions.
Read the assigned passage aloud; then write down at least four
predictions.
16
Unit 1 – Great Leaps
D.Word Building
Lesson 1, Part 4
Language Skills, Thinking Skills
Earlier in this lesson you learned about the Greek word part geo-.
Read over the words you defined in Part 2, and tell your teacher
what each one means.
Now add to your ability to use geo- by finding more words in the
dictionary that begin with it, and that relate to its meaning. Write
them in your Student Notebook. Be sure not to repeat any of the
words you have already defined. When you are finished, pick one of
your words and write a sentence that uses it correctly.
at least three words
at least six words
at least nine words
E.Economics
Thinking Skills
Another way people consume is by using services. Services are
things done for you by another person, often someone with a
special skill. Many people use the services of a doctor or dentist
because of his or her special training and experience. You might
also pay or barter for the services of a repairman for your roof or
your car, if you don't know how to do it yourself. When someone
provides a service, he or she becomes a resource to the community. Other examples of services that your family uses are those of
the policemen and firemen who protect your community, or the
cooks and waitresses or waiters at a restaurant where you might
go to eat. Many people use the services of a librarian and banker.
Some may go to a church where a pastor serves by teaching them
about the Bible.
When your family uses a service, often the price, or amount you
pay, depends on all the steps that go into making that service available. For example, a restaurant that only takes minutes and uses a
few ingredients to make your food will cost less than one that uses a
highly trained chef and many special ingredients. Another factor in
the price of this service is the type of place provided for you to eat
your meal. If you have to eat the food in your car, no extra expense is
added to cover the cost of a lovely dining room with beautiful dishes
and quiet music. If you go to a place with beautiful dishes and quiet
music, you will probably pay more for your food than if you get it at
a drive-through window.
Sometimes a service may involve
many steps, such as a car repair. First
the repairman must find out what is
wrong, then get the correct parts to
fix the problems, then take the time
to fix them, and then test it out to
see if the car is now working cor-
17
Lesson 1, Part 4
Unit 1 – Great Leaps
rectly. The more steps the person must take to provide the service, the
more you may have to pay for it.
Talk with your teacher about services you and your family use regularly.
Then, in your Student Notebook create a list of at least ten services that
you use each week.
In the past, the services important to the community might have
been far different, and more basic. Perhaps the baker in the community made much of the bread that was eaten, or the butcher in town
prepared meat for each family. There was usually a gunsmith in town
to make or repair guns, and a blacksmith to make tools out of iron
or shoe horses. There was a great variety of services, depending on
the size of the town. Usually those who provided a service were paid
for it. Sometimes they were paid with money, and sometimes they
were paid with goods that they needed. For example, if the town's
baker needed eggs to make his bread, he might trade loaves of bread
with someone who could provide eggs. This is an example of bartering for goods. If a farming family needed the services of the town's
doctor and they did not have money to pay, he might accept some
product from the farm as payment, like vegetables, milk, or grain.
This is an example of bartering for services.
The smaller the town, the more scarce, or limited, the services would
be. The larger the town, the more available services would be. To some
degree, that is still true today. Any time goods or services are scarce, or
limited, they tend to be more costly, or expensive. An example of this
would be the services of a diamond cutter. There are a limited number
of diamond cutters because it takes a great deal of skill and training
to do the job well. Because of this, they are paid well for their work.
Another example would be a surgeon. A surgeon is paid well for his
work because he must have many years of training to do his job well,
so there are a limited number of people providing this service
Look at the list of services your family uses regularly, that you wrote in
your Student Notebook. Choose one or more items from the list and
learn more about how those services are provided. Then fill in a chart
for each one you chose, telling at least four steps needed for that service to be available. In the fifth box, tell whether you think the service
is limited or scarce and therefore more expensive, and why.
one service
F.Spelling two services
three services
Language Skills, Thinking Skills
To increase your ability to use the words you have studied in this lesson when you write, review your vocabulary and word building lists.
After choosing the number of words assigned below from these lists,
you and your teacher may choose words from the Challenge Spelling
List in Appendix A to work on as well. You may also want to add
18
Unit 1 – Great Leaps
Lesson 1, Part 4
two or three words from your own writing that you have difficulty
spelling correctly. Make your spelling list on the page provided in
your Student Notebook.
When you are finished, write the words you have chosen as your
teacher dictates them. Then study any that you are unable to spell
correctly in preparation for writing in the next lessons. Add those
words to the Ongoing Spelling List in your Student Notebook. Once
you can spell a word correctly in dictation, then you can cross it off.
If you misspell words in your everyday writing, be sure to add them
to your list. Throughout the year, you should have an ongoing list of
words you are practicing.
Tips for Studying Spelling Words:
1. Read the words over. Spell each one quietly to yourself, and
then check to see if you were correct.
2. Use a dry-erase board or other non-permanent surface to
practice writing the words. Do this quickly until you feel
more confident about their spelling.
3. When the words are called out to you, practice spelling them
aloud. Picture the word in your mind as you spell it.
4. Look for any meanings or letter patterns that stand out to you.
Remind yourself of these patterns or meanings as you study.
5. Remember that the most important spelling skill is to develop
a sense, when you look at your spelling of a word, that it may
not be spelled correctly. It is this sense that prompts a writer
to look words up in a dictionary, and repeated exposure to a
word will help you remember how to spell it.
Choose eight words from the vocabulary and word building lists, and
two to four Challenge Spelling words (if you and your teacher want).
Choose ten words from the vocabulary and word building lists, and
three to five Challenge Spelling words (if you and your teacher want).
Choose twelve words from your vocabulary or word building lists, and
four to six Challenge Spelling words (if you and your teacher want).
G.Art Thinking Skills
In Paths of Progress you will use the Klutz book, Create Anything With
Clay to try your hand at sculpting. As you begin shaping figures or designs with the clay, relax and use your imagination. In fact, even though
the book might suggest specific ways to do something, use those suggestions as a starting point for your own unique creations. Remember, you
don’t have to bake and keep everything you make—sometimes inventors
try many times before they come up with the right design!
19
Lesson 1, Part 5
Unit 1 – Great Leaps
First, separate the colors in the clay bar that came with your Klutz book,
and put them each in a zip-lock bag so they won’t dry out as quickly.
When you are finished, start the book by reading pages 4 through 6,
entitled “Basics” and “Stuff and Tools.” Then read “Color Mixing”
on page 7, and experiment a little with tiny pieces of your clay. You
don’t want to practice too much though, because you can’t “un-mix”
the clays once you blend them together.
Don’t forget to put any left-over clay back in its zip-lock bag.
H.Independent Reading & Record Keeping
Thinking Skills
Check the Lesson 1 At A Glance chart in your Student Notebook
to see if all the work you’ve done in this part has been checked off.
Also, make sure the Student Notebook pages you worked on are
dated and complete.
When you are finished, choose something to read that you will enjoy. Then find a quiet, comfortable place and read for the following
length of time:
30 minutes
35 minutes
Be sure to write down what you read today on the Reading Log in
your Student Notebook.
R
Lesson 1, Part 5
This part is set aside for completion of any work left undone from
the lesson, and review of concepts and content. It is also a time to
expand the work of the lesson with a timeline activity and games.
• Review this lesson’s Steps for Thinking, found in Part 1.
• Give your teacher your stack of vocabulary cards for the lesson.
Ask her to show you each word, and then tell her its meaning and
how it was used in the story.
• Listen as your teacher reads the spelling words that you studied
from Part 4, especially the ones on your Ongoing Spelling List.
Write each word in your Student Notebook as she dictates it.
When you are finished, look at your word list and make corrections as needed. Show your teacher how you did.
• Follow the directions in Lesson 1 of The World of Tools and
Technology to make a "Tools in Time – Timeline Book." You will
find the graphics you need in your Student Notebook.
20
Unit 1 – Great Leaps
Lesson 1, Part 5
• Read and discuss pages 6 and 7 in the Basix Recorder Method with
your teacher. Try to memorize the sayings in the middle of page
7 that can help you identify the notes, because they will come in
handy! Be sure to name the notes at the bottom of page 7. Answers
are at the back of the book—so check your work and show your
teacher how you did.
I f you feel you could use the review, practice the three basic techniques you learned in Part 2 of this lesson: blowing a steady, gentle
flow of air, firmly covering all the recorder holes, and tonguing.
• Check the Lesson 1 At A Glance chart in your Student Notebook
to see if all the work you’ve done in this part has been checked
off. If you did an Enrichment activity or other extra work in this
lesson, be sure to write it on the lines next to the chart in your
Student Notebook.
• Complete the Great Leaps Word Search located in your Student
Notebook.4
Enrichment Activities
1. Use the library or Internet to complete Activity 4 in Lesson 1
of The World of Tools and Technology. When you have finished
researching James Prescott Joule and recorded things you learned
in the 4 Door Book, glue it onto a piece of paper and add it to
your Student Notebook.
Enrichment activities are suggestions for
ways your child can learn more about a
topic of interest, dig deeper into a subject, or gain research skills. Please feel
free to use these activities as guides for
your child to complete as directed, or
amended to better fit his particular abilities, needs, or interests.
2. Learn more about steam. Are there any appliances in your home
that use steam? With your parent’s supervision, make steam by
boiling water. What do you observe about it? What benefits
could you see to using steam, and what problems could you
imagine? Talk with your family, especially older family members,
about the uses of steam during their lifetimes. Would you want
to use steam in the future? Why or why not?
Additional Resources:
Swiss Family Robinson by Johann Wyss, or
Great Illustrated Classics version, adapted by Eliza Warren
Robert Boyle, Trailblazer of Science by John Hudson Tiner
R
21
Lesson 1, Answers
Unit 1 – Great Leaps
Answers
1. Answers to all Comprehension Questions are in The Story of Inventions Answer Key.
2. Answers will vary.
3.
1. James Watt was born in Greenock, Scotland. (5)
2. Watt moved to Glasgow and worked as a mechanic. (3)
3. Do you think Watt enjoyed the long hours in the London shop where he
worked? (4)
4. Mr. Watt wanted James to choose a trade in Glasgow that was in demand so
that he would be assured of making profitable wages. (5)
5. Watt later read about a steam engine invented by GIovanni Branca. (4)
6. Watt learned Italian and German so he could learn more about engines. (4)
7. Did Matthew Boulton became Watt's partner in 1774? (5)
8. Did a friend who was a teacher at the University of Glasgow help James make a
start? (5)
9. In 1767, Watt built a trial engine nicknamed Beelzebub. (4)
10. Matthew Boulton employed the best mechanics in Europe and owned a large
hardware factory in England. (5)
11. Did Watt have a new idea come into his mind during a Sunday afternoon walk
in Glasgow? (5)
12. E ager to learn more, Watt read about Papin's engine in a German book. (5)
4. Answer key is in Appendix A.Lesson 1, Part 5
22
Lesson at a Glance
Great Leaps
Materials
Review
H. Independent Reading
G. Music & Art
Spelling
F. Writing, Editing &
Science
E. Economics, History &
Word Building
D. Vocabulary &
C. Read Aloud
B. Reader
Dictation
A. Copywork &
RF: The bottom of page 43-page 44, paragraph 1
Part 3
Part 4
Page 39 (Chapter 5)-the top of page 48
Part 4
Page 14-bottom of page 19
Page 19, last paragraph-page 28, paragraph 6
5 vocabulary cards
"-geo" words
Vocabulary review
3 "-geo" words
Part 3
Part 4
Part 1
Part 2
Part 3
Part 4
Writing answers
Correct 6 sentences
Lab Reports
Choose 8-12 words
Part 1
Part 2
Part 3
Part 4
Organizer
Spell
Chart
Labs
Spelling review
Activity
One example
30 minutes daily
Study
Spell
Choose 12-18 words
Correct 12 sentences
Make up 2 questions
Research 3 services
Additional activity
Research 3 products
Additional activity
9 "-geo" words
Additional "-geo" words
Additional predictions
Additional questions
Word Search
Study
Charts
Summary
Charts
Spell
Summary of research
Write sentence
Page 19, last paragraph-page 28, paragraph 6
Page 14-bottom of page 19
Page 7, paragraph 7-page 13
Page 1-page 7, paragraph 6
Samuel F. B. Morse
SFBM: Page 15, paragraph 12-page 16, paragraphs 1 & 3
35 minutes daily
Basix Recorder Method, pages 6 & 7
Charts
Charts
Write sentence
Predictions
Point of view
Make up questions
Retelling
Tell answers (2 questions)
Write answers (2 questions)
Tell answers (2 questions)
Two examples
SOI: Page 7, paragraphs 1 & 2, page 8, paragraph 2
Steps for Thinking
SOI: Page 185, paragraphs 2 & 3
zip-lock bags
3” x 10”), Rubber band, String (12”), Tack, (2) U-shaped nails, Bead, Hammer, Paper clip. Metric ruler; Activity (Part 4): 8 small
Recorder, Polymer clay; Activity (Part 2): Candle, Straw; Labs (Part 3): Cornmeal, Hand lotion; Activity (Part 3): Piece of wood (about
Timeline
Choose 10-15 words
Correct 9 sentences
Make up question
Research 2 services
Research 2 products
6 "-geo" words
Additional "-geo" words
10 vocabulary cards
Discussion
Narration
Discussion
Narration
Pages 14-18
Pages 11-14
Pages 6-11
Pages 3-6
The Story of Inventions
SFBM: Page 15, paragraph 12-page 16, paragraph 1
SOI: Page 7, paragraphs 1 & 2
Steps for Thinking
SOI: Page 185, paragraph 2
Vocabulary review
Sum.
Samuel F. B. Morse
Munford Meets Robert Fulton
The Story of Inventions
Profiles from History, Vol. 3
Basix Recorder Method
Create Anything With Clay
The World of Tools and Technology
The Story of the Orchestra book & CD
Steps for Thinking review
30 minutes daily
Create Anything With Clay: clay Sculpture
Part 4
Orchestra Story cards
Baroque period
Part 3
Part 5
Meter
"Ride of the Valkyries"
Basix Recorder Method: Pages 3-5
Introduction
2 Activities
Washington profile
Organizer
The Story of the Orchestra
Study
Research 1 service
Book
Chart
Book
Part 2
Part 1
Services
Part 4
Vocab
Concepts
Part 3
Vocab
Products
Part 2
Research 1
Concepts
Part 1
The World of Tools and Technology
Write sentence
Page 7, paragraph 7-page 13
Page 1-page 7, paragraph 6
Part 2
Part 1
Page 27, paragraph 3-page 38
Samuel F. B. Morse
Page 17 (Chapter 2)-page 27, paragraph 2
Part 3
Page 7 (Chapter 1)-page 15
Munford Meets Robert Fulton
Part 2
Part 1
SOI: Page 7, paragraphs 1 & 2
Part 2
One example
SOI: Page 185, paragraph 2
Steps for Thinking
Part 1
Great Leaps Unit – Lesson 1 At A Glance
Appendix A
Lesson At-A-Glance
291


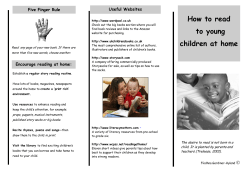


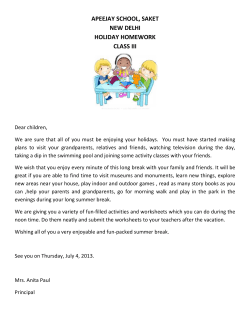


© Copyright 2026