
Document 301026
SHOC User Manual Sparse Hydrodynamic Ocean Code V4917 User Manual M. Herzfeld and J. R. Waring CSIRO Marine Research GPO Box 1538, Hobart 7001 27 August 2014 16/09/2014 Page 1 of 177 Version: 1.00 SHOC User Manual 1 Introduction ______________________________________________ 6 2 Installation and operation ___________________________________ 7 3 2.1 Getting the model source code ________________________________ 7 2.2 Building and installing the model executable file _________________ 7 2.3 Running the model __________________________________________ 8 Model setup _____________________________________________ 11 3.1 4 Setting up a model application _______________________________ 11 The parameter file ________________________________________ 12 4.1 Parameter header __________________________________________ 12 4.2 Windows _________________________________________________ 13 4.3 Time _____________________________________________________ 15 4.4 Computational settings and flags _____________________________ 16 4.5 Horizontal coordinate system ________________________________ 19 4.5.1 4.5.2 4.5.3 4.6 Defining a Cartesian coordinate system ______________________________ 20 Defining a latitude/longitude coordinate system ________________________ 20 Defining a map projected coordinate system __________________________ 20 Horizontal grid geometry ____________________________________ 24 4.6.1 4.6.2 4.6.3 4.6.4 Rectangular grid ________________________________________________ 24 Polar grid ______________________________________________________ 25 Numerical grid __________________________________________________ 25 Geographic rectangular grid _______________________________________ 26 4.7 Vertical grid geometry ______________________________________ 27 4.8 Bathymetry _______________________________________________ 28 4.9 Tracers (salinity, temperature, and others) _____________________ 31 4.9.1 4.9.2 4.9.3 4.9.4 4.9.5 4.9.6 4.10 Tracer initialisation ______________________________________________ 34 Relaxation _____________________________________________________ 34 Resetting ______________________________________________________ 37 Tracer Increments for State Variables _______________________________ 37 Scaling _______________________________________________________ 37 Surface fluxes __________________________________________________ 39 Open boundaries __________________________________________ 41 4.10.1 4.10.2 4.10.3 4.10.4 4.10.5 4.10.6 4.10.7 4.10.8 4.10.9 4.10.10 4.10.11 4.10.12 4.10.13 4.10.14 4.10.15 4.10.16 16/09/2014 Boundary condition types _______________________________________ 42 Boundary Implementation (stagger) _______________________________ 43 Forcing Data _________________________________________________ 43 Flather Radiation _____________________________________________ 44 Custom Routines _____________________________________________ 45 River Flow Custom Routines ____________________________________ 45 Forcing with Velocity___________________________________________ 46 Tracer Equation OBCs _________________________________________ 48 Relaxation to Forced Data ______________________________________ 49 Elevation Boundary Relaxation __________________________________ 49 Phase Speed Smoothing _______________________________________ 50 Flow Relaxation Scheme _______________________________________ 50 Linear Conditions _____________________________________________ 51 No Action Taken : NOTHIN _____________________________________ 51 Sponge Layers _______________________________________________ 51 Atmospheric Pressure _________________________________________ 52 Page 2 of 177 Version: 1.00 SHOC User Manual 4.10.17 4.10.18 4.10.19 4.10.20 4.10.21 4.10.22 4.10.23 4.10.24 4.10.25 4.10.26 4.10.27 Advection / flux conditions for tracers ______________________________ 52 Profile Methods for Tracers _____________________________________ 54 Tidal Synthesis for Elevation ____________________________________ 54 Global Tidal Model ____________________________________________ 55 Custom Tidal Constituents ______________________________________ 56 Mixing coefficient boundary conditions _____________________________ 57 Split conditions for tracers ______________________________________ 58 Constant boundary bathymetry __________________________________ 58 Scaling _____________________________________________________ 58 Boundary geographic location ___________________________________ 59 Standard boundary conditions ___________________________________ 60 4.11 Advection Schemes ________________________________________ 62 4.12 Surface elevation __________________________________________ 63 4.12.1 4.13 Elevation (and velocity) relaxation ________________________________ 64 Wind_____________________________________________________ 65 4.13.1 Generic Storm Systems ________________________________________ 67 4.14 Atmospheric pressure ______________________________________ 68 4.15 Rainfall __________________________________________________ 68 4.16 Evaporation _______________________________________________ 69 4.17 Surface heat flux __________________________________________ 69 4.18 Surface salt flux ___________________________________________ 74 4.19 Bottom friction ____________________________________________ 74 4.20 Waves ___________________________________________________ 75 4.21 Vertical mixing ____________________________________________ 77 4.21.1 4.21.2 4.21.3 4.21.4 4.21.5 4.21.6 4.21.7 4.21.8 4.21.9 4.21.10 Constant ____________________________________________________ 77 Csanady ____________________________________________________ 77 Mellor-Yamada 2.0 ____________________________________________ 78 Mellor-Yamada 2.0 Estuarine ____________________________________ 78 Mellor-Yamada 2.5 ____________________________________________ 79 k-ε _________________________________________________________ 80 k-ω ________________________________________________________ 80 W88 _______________________________________________________ 81 Stability functions. _____________________________________________ 81 Waves ______________________________________________________ 81 4.22 Horizontal mixing __________________________________________ 82 4.23 Point sources/sinks ________________________________________ 83 4.23.1 Steady State Approximation _____________________________________ 85 4.24 2D Mode _________________________________________________ 86 4.25 Sigma vertical coordinates __________________________________ 86 4.26 Stability sub-stepping ______________________________________ 87 4.27 Thin layers _______________________________________________ 87 4.28 Particle tracking ___________________________________________ 88 4.28.1 4.28.2 4.28.3 4.28.4 4.28.5 4.28.6 4.28.7 16/09/2014 Particle Status _______________________________________________ 89 Source Colour ________________________________________________ 89 Age ________________________________________________________ 89 Size ________________________________________________________ 90 Settling _____________________________________________________ 90 Swimming ___________________________________________________ 92 Mortality ____________________________________________________ 92 Page 3 of 177 Version: 1.00 SHOC User Manual 4.29 Grid Refinement ___________________________________________ 92 4.30 Tracer diagnostics _________________________________________ 96 4.30.1 4.30.2 4.30.3 4.30.4 4.30.5 4.30.6 4.30.7 4.30.8 4.30.9 4.30.10 4.30.11 4.30.12 4.30.13 4.30.14 4.30.15 4.30.16 4.30.17 4.31 Data variables and input time-series files _____________________ 114 4.31.1 4.31.2 4.31.3 4.31.4 4.31.5 4.31.6 4.31.7 4.31.8 4.31.9 4.31.10 4.32 Variable substitution __________________________________________ 114 Multiple datafiles _____________________________________________ 115 Model variable initialisation_____________________________________ 115 Model variable output _________________________________________ 115 ASCII time-series ____________________________________________ 115 NetCDF dump files ___________________________________________ 116 Multi-dumpfiles ______________________________________________ 119 Customised parameters _______________________________________ 120 Coastlines __________________________________________________ 120 Bathymetric data _____________________________________________ 120 Diagnostic files ___________________________________________ 121 4.32.1 4.33 Tracer Fluxes ________________________________________________ 96 Means ______________________________________________________ 97 Mixed Layer Depth ____________________________________________ 98 Flushing Time ________________________________________________ 98 Steric Height _________________________________________________ 99 Vorticity ____________________________________________________ 100 Mixing Length Scale __________________________________________ 101 CFL Time-steps _____________________________________________ 101 Momentum Balance Tendencies ________________________________ 102 Tracer Tendencies ___________________________________________ 103 Selective Momentum Calculations _______________________________ 103 Diagnostic numbers __________________________________________ 103 Tracer percentiles ____________________________________________ 106 Alerts ______________________________________________________ 106 Total mass, volume, heat and salt _______________________________ 108 Mass Budgets _______________________________________________ 109 Diagnostic tracer names _______________________________________ 112 Run regulation ______________________________________________ 123 Explicit mapping __________________________________________ 124 5 Automatic setup (-a option) _______________________________ 127 6 Restarts _______________________________________________ 131 6.1 Basic restarts ____________________________________________ 131 6.2 Restarts using restart file (-restart option) ____________________ 131 6.3 Near real-time restarts (-nrt option) __________________________ 131 6.4 Crash recovery (-cr option) _________________________________ 132 7 ROAM (-r option) ________________________________________ 133 8 Input file generation (-g option) ____________________________ 136 9 Transport mode (-t option) ________________________________ 137 9.1 Multiple grids ____________________________________________ 140 9.2 STREAMLINE mode _______________________________________ 141 9.3 Conservation ____________________________________________ 141 10 Percentile computations (-ps option) _______________________ 143 11 File formats ____________________________________________ 144 11.1 16/09/2014 ASCII time series _________________________________________ 144 Page 4 of 177 Version: 1.00 SHOC User Manual 11.1.1 11.1.2 11.2 Units ______________________________________________________ 144 Utilities ____________________________________________________ 145 NetCDF time series _______________________________________ 145 11.2.1 Units ______________________________________________________ 145 12 Tests __________________________________________________ 150 12.1 No forcing _______________________________________________ 150 12.2 Ekman Spiral_____________________________________________ 150 12.3 Constant wind stress – closed basin _________________________ 151 12.4 Constant wind stress – alongshore open channel ______________ 151 12.5 Constant wind stress – cross-shore open domain ______________ 152 12.6 Propagation of a bore _____________________________________ 153 12.7 Wind stress curl – closed basin _____________________________ 153 13 Tracer Statistics _________________________________________ 154 14 Getting Started __________________________________________ 160 14.1 Compile SHOC ___________________________________________ 160 14.2 Run a test case ___________________________________________ 160 14.3 Generate a custom grid ____________________________________ 160 15 Sediment Transport ______________________________________ 167 16 Ecology ________________________________________________ 169 17 Troubleshooting ________________________________________ 172 18 References _____________________________________________ 173 19 Index __________________________________________________ 175 The latest SHOC User Manual may be downloaded from: http://www.emg.cmar.csiro.au/www/en/emg/software/EMS/hydrodynamics.html Revision history is available at the same address. 16/09/2014 Page 5 of 177 Version: 1.00 SHOC User Manual 1 Introduction SHOC (Sparse Hydrodynamic Ocean Code) is a finite difference hydrodynamic model developed by the Environmental Modelling group at CSIRO (Commonwealth Scientific and Industrial Research Organization) Division of Marine Research (Herzfeld, 2006). This model is intended to be a general purpose model applicable to scales ranging from estuaries to regional ocean domains. Outputs from the model include three dimensional distributions of velocity, temperature, salinity, density, passive tracers, mixing coefficients and sea level. Inputs required by the model include forcing due to wind, atmospheric pressure gradients, surface heat and water fluxes and open boundary conditions (e.g. tides). SHOC is based on the three dimensional equations of momentum, continuity and conservation of heat and salt, employing the hydrostatic and Boussinesq assumptions. The equations of motion are discretized on a finite difference stencil corresponding to the Arakawa C grid. The model uses a curvilinear orthogonal grid in the horizontal and fixed ‘z’ coordinates in the vertical. The ‘z’ vertical system allows for wetting and drying of surface cells, useful for modelling regions such as tidal flats where large areas are periodically dry. SHOC has a free surface and uses mode splitting to separate the two dimensional (2D) mode from the three dimensional (3D) mode. This allows fast moving gravity waves to be solved independently from the slower moving internal waves allowing the 2D and 3D modes to operate on different time-steps, resulting in a considerable contribution to computational efficiency. The model uses explicit time-stepping throughout except for the vertical diffusion scheme which is implicit. The implicit scheme guarantees unconditional stability in regions of high vertical resolution. A Laplacian diffusion scheme is employed in the horizontal on geopotential surfaces. SHOC can invoke several turbulence closure schemes, including k-ε, k-ω, MellorYamada 2.5, Mellor-Yamada 2.0 and Csanady type parameterisations. Input and output is handled through netCDF data formatted files, with the option of submitting ascii text files for simple time-series forcing. The netCDF format allows input of spatially and temporally varying forcing and initialization data in a grid and time-step independent manner. SHOC is capable of performing particle tracking and may be coupled to ecological and sediment transport models. SHOC uses a sparse coordinate system which maps all cells in the grid into a 1-dimensional vector. This process effectively eliminates all land from the domain representation in computer memory. Arbitrary domain composition can be efficiently performed, allowing SHOC to operate in a true distributed processing environment. The sparse representation leads to increases in speed and simplified housekeeping, allowing techniques such as distributed process, 2-way nesting and hybrid physics to be performed with no overhead. SHOC is written in C and evolved during 2002 from the MECO model, with subsequent improvements post 2002. This document is designed to assist the user in operating SHOC. For a description of the theory the model is based on refer to Herzfeld et al (2002). 16/09/2014 Page 6 of 177 Version: 1.00 SHOC User Manual 2 Installation and operation This section describes how to acquire, compile, and install SHOC. At present, SHOC is designed to run under the UNIX operating system. It has successfully been installed on SUN workstations, Silicon Graphics workstations, and Intel Linux which is the current development platform. 2.1 Getting the model source code The source code to SHOC and associated libraries and utilities is available from CSIRO Marine Research, subject to approval and acceptance of a license agreement. If you wish obtain the source code, or require further information please contact [email protected]. 2.2 Building and installing the model executable file This section provides a brief description of how to compile and install SHOC and the supporting libraries, ecology, sediments and tracerstats as provided with the SHOC source distribution. Additional compilation and installation instructions are provided with each package (see the INSTALL file). Note that all packages depend on the udunits and netCDF packages. Please ensure that udunits and netCDF have been installed before attempting to compile or install either SHOC or the libraries. netCDF and udunits are available from Unidata http://www.unidata.ucar.edu/. SHOC resides in a directory structure called the Environmental Modelling Suite (ems), which also contains source code for various supporting libraries and the sediment transport and ecology models. Once ems is installed on the computer it must be configured. During this step a script checks for the presence of external and internal libraries, searches for compilers, linkers, and other utilities required to compile the source code. If configure was successful, it will generate a makefile which can be used to build the model and related utilities. The configure script is run as follows: ./conf/configure By default the configure script searches for all architecture independent files (e.g. netCDF libraries) in the directory /usr/local. If an alternate path is required use: ./conf/configure –prefix=PATH For a full list of configure's command line options, enter configure --help. Once ems is configured, all source code is compiled using: make The libraries and executables are installed using the make install command. The directories are cleared of object files and executables by using make clean command. Additionally, make distclean removes any files created by configure, as well as all object files, etc. If make distclean is used, it will be necessary to re-run ./conf/configure in order to re-build the model. The ems packing is stand-alone in the sense that once it is installed the user is free to modify any of the libraries or core code without being dependent on external libraries or code. Individual components of ems can be compiled by using the makefile in the subdirectories of ems (the directory structure of ems is illustrated in Figure 2.1). For example to re-make SHOC if it has been modified, go to /ems/model/hd and type make. 16/09/2014 Page 7 of 177 Version: 1.00 SHOC User Manual Figure 2.1 : ems directory structure EMS Model hd Lib lib geom closure control ecology geodesy debug density sediments io diagnostic docs waves math ecology forcings tracerstats misc ginterface inputs master misc momentum outputs particles sediments slaves tracers 2.3 tests Running the model To set-up and run SHOC, it is necessary to provide a parameter file containing information about the model geometry, run parameters and forcing inputs. A specially formatted netCDF file is also required that contains the initial values for the model variables over the model grid. The netCDF file may be the result of a previous model run, or may be generated from the parameter file using the –g option (see section 8). The parameter file contains essentially all the information needed to describe a particular model implementation, and its contents are described in detail in the Model setup section. The model may be run in one of two modes. The auto-configuration mode is invoked via: shoc -a prmname where prmname is the name of the model auto-config file (see section 5). These files are vastly simplified versions of the full parameter file. In this mode SHOC will internally generate all parameters required for the run, write this information to a parameter file, generate a netCDF input file and commence the run. If the –ag option is used then SHOC will not commence the run but will terminate once all input files are created and written. In the auto 16/09/2014 Page 8 of 177 Version: 1.00 SHOC User Manual mode model parameters are set to fixed default values or are calculated from the bathymetry and grid geometry. Alternatively, a run may be initiated using an existing complete parameter file and input netCDF file using: shoc -p prmname where prmname is the name of the model parameter file. Model parameters used for the run in this mode are those specified in the parameter file. Various diagnostic information about the internal status of SHOC can be obtained using the -debug or –l command line option. This option is followed by a sequence of diagnostics types separated by commas e.g. –debug time,dump, where each type defines a desired diagnostic output. By default the output is written to the C standard error. Depending on the type requested, the diagnostic output may be quite voluminous. Some diagnostic types depend on the presence of others. SHOC will automatically enable any dependent diagnostics. To display the command line arguments and a list of all diagnostic types SHOC should be run with the -help option. Following is an example output: % shoc –help Version: Run start: SHOC: Sparse Hydrodynamic Ocean Code v0.00 (beta) rev000 Thu Jun 24 14:31:51 2004 Usage: shoc -p prmfile <options> Run SHOC using standard parameter file. prmfile Standard parameter file shoc -g prmfile dumpfile <options> Generate initial dump using standard parameter file. prmfile Standard parameter file dumpfile Initialisation dump file shoc -a prmfile <options> Run SHOC using autostart parameter file. prmfile Autostart parameter file shoc -ag prmfile <options> Generate initial dump using autostart parameter file. prmfile Autostart parameter file shoc –t tranfile <options> Run SHOC in transport mode. tranfile Transport input file shoc –ps prmfile Compute percentile statistics. prmfile Parameter file. shoc –v Print shoc version information. 16/09/2014 Page 9 of 177 Version: 1.00 SHOC User Manual options: -diag_log <file>|off Enable/disable diagnostic log (default: ‘diag.txt’). -setup_log <file>|off Enable/disable setup log (default: ‘setup.txt’). -window_log on|off -l tag,tag... - main info warn debug trace metric Enable/disable window log (default: off). A text file listing all master-slave mappings is stored in ‘window_map.txt’ and the spatial distribution of all windows in ‘window_geom.txt’. Set library log level. The more tags listed, the more messages are printed. All messages are printed to file ‘runlog’. In order of output detail, supported tags are: # print information on major general events # print information on minor general events # non-fatal warning information # print high level debug information # print low level debug information # information on time spent in routines, # (for development only). -debug tag,tag,... Set - all - conversions - time - dump [ time ] - particles [ time ] - init_m - init_w - ecology - sediments debug level. Supported debug tags are: # print all debug information # list time unit conversions # list model time # list next dump # list particle resets # master initialisation info # slave initialisation info # ecology info # sediment info Examples : shoc –g input.prm in.nc –debug init_m,init_w shoc –p input.prm –l main,info,warn –window_log on It is often useful to run the model as a background process with the output captured into a file. How this is done, depends on the UNIX shell being used. For a csh the following command is sufficient: shoc -p prmname >&! logfile & 16/09/2014 Page 10 of 177 Version: 1.00 SHOC User Manual 3 Model setup 3.1 Setting up a model application There are many steps required to successfully configure SHOC. Following are some of the major steps: • • • • • • Installation of the model software. This is described in section 2. Definition of the horizontal and vertical geometry of the model grid. This may require the use of an interactive grid generation program with the ability to plot coastlines, etc, or may be a simple specification of a test area such as a ‘swimming pool'. Construction of the model parameter file. This step incorporates the grid geometry obtained above along with information about bathymetry and the location and types of boundary points. As well, forcing data sets are specified, and the physical parameters (mixing, friction, etc) are chosen. With the auto-config mode this file is automatically generated. Creation of the model variable initialisation netCDF file, either from the parameter file by using the –g option, described in section 8, or by using output from a previous model run. Running the model. Commands needed to do this are described in section 4. Examination of the results. This is done either by using an interactive viewer (jvismeco, olive), or by producing plots with various scripts or tools such as gnuplot. To set up the model for a particular area or application, it is necessary to gather together a diverse set of parameter specifications and input data. These are all defined in the model parameter file, an easily edited ASCII file which completely defines the model for a particular application and run. Amongst other things, the parameter file describes the model geometry, forcing data, run period and where and how to write results. This section describes the various datasets that are needed to create a model parameter file, and the elements of the parameter file itself. 16/09/2014 Page 11 of 177 Version: 1.00 SHOC User Manual 4 The parameter file The parameter file is an ASCII text file containing comments, keywords and values. Its contents completely describe a particular model implementation and run parameters (apart, possibly, from initial values for model variables). All lines starting with a # character are considered as comment lines. Comment lines are valuable for documenting certain choices of parameter values, or for reminders of the significance of certain infrequently used parameters. Comment lines and blank lines are generally ignored by the model itself, but may not appear in certain positions described below. Other lines typically contain a keyword (the parameter name) and a value. Parameter values may be strings, integers, floating point values, arrays of floating point values or more complex lists (such as boundary point lists, or time series point lists). The order in which parameters appear in the file is largely unimportant. Examples of string parameters are: PARAMETERHEADER file0.name River model out Examples of boolean parameters (and comment lines) are: # All boolean parameters may be set with either {TRUE|FALSE}, # {YES|NO}, {1|0}, {INCLUDE|EXCLUDE}. Case is not important. NONLINEAR TRUE CALCDENS no Examples of integer and floating point parameters are: NCE1 G 20 9.81 Arrays are entered by giving the keyword and the number of values in the array on the same line, followed on the next lines by the array values separated by spaces, tabs or new lines. Comment lines may not appear in the middle of the list of array values. Following are two examples: # Fills the bathymetry array with four values. BATHY 4 0.002 0.0025 0.0026 0.0027 # If insufficient data is provided, then the last value # is used to pad out the array BATHY 4 0.002 Having described the general syntax of the parameters, the following sections describe the wide range of parameters needed to specify a particular model application. 4.1 Parameter header Most parameter files begin with some comment lines which describe the model application, and mandatory parameters which specify the SHOC code version to be used, and descriptive string for this run. The format is as shown below: 16/09/2014 Page 12 of 177 Version: 1.00 SHOC User Manual # This is the parameter file header. It usually describes the # model application. # # The code header must be identical to the 'Version' string # specified when SHOC is compiled (in version.c). This provides # a check that the intended version of the model code is being # used at run time. CODEHEADER SHOC default version # A single line description of the model run. This string is # written into all output files. PARAMETERHEADER NWS 20km rectangular grid, Run 1 4.2 Windows SHOC is designed to operate in a distributed processing environment, where domain decomposition is performed on the grid to divide it into a number of partitions or ‘windows’, which are solved on different processors. The number of windows used is set via: # Indicates the number of windows in the model domain. WINDOWS 2 Generally the number of windows is equal to the number of processors available. If SHOC is to operate on a single processor, the WINDOWS = 1. The domain decomposition be a striping or blocking method, or may be any arbitrary congregation of grid points. This allows total flexibility when decomposing geographically complex domains. The distributed processing procedure requires common information to be transferred between windows, hence by minimising the size of boundaries between windows (e.g. by utilizing the geography and placing window boundaries across narrow regions) the amount of data transferred is minimised and execution speed increases. The window partitioning method is specified using the WINDOW_TYPE, where: WINDOW_TYPE WINDOW_TYPE WINDOW_TYPE STRIPE_E1 STRIPE_E2 BLOCK_E1 n WINDOW_TYPE BLOCK_E2 n WINDOW_TYPE EXPLICIT # # # # # # # # # # Stripe in the e1 direction (default). Stripe in the e2 direction. Blocking. n is an optional integer; when present the block is made rectangular in the e1 direction by n cells. Same as BLOCK_E1, but rectangles are in the E2 direction. The user supplies the partitioning, see below. The striping methods divides the wet domain into the number of specified windows, hence all 2D partitions contain the same number of cells (the last window may not if the total number of wet cells is not divisible by the number of windows). The blocking methods divide the total grid size into blocks of size sqrt(nce1 x nce2). A block must contain at least 1 wet cell for it to be valid (i.e. blocks that contain all dry cells are ignored). This results in blocks containing quite different numbers of cells, depending on how many wet cells are encountered in each block. Consequently load balance may be poor. However, for large numbers of windows, it may be preferable, since the amount of information exchanged between windows decreases as windows increase with blocking, and the model load balance will be determined by blocks containing all wet cells (which will be more numerous as the number of windows increases). For STRIPE_E1 and STRIPE_E2, The window sizes may be set using the command: 16/09/2014 Page 13 of 177 Version: 1.00 SHOC User Manual # Sets the window sizes for n windows WINDOW_SIZE a1 a2. . . . an or WINDOW_SIZE default Where a1 to an are fractions whose sum adds up to 1.0, or for default, a1 to an = 1 / WINDOWS. The surface of the domain is then partitioned into windows according to the specified fractions, e.g. if two windows are specified with sizes 0.5 and 0.5, then the surface is split into two equal windows. Note that the number of cells in a windows may not be equal if the surface is split into equal sizes, since windows with deeper water will contain more cells than windows with shallow water. When this option is used, the ‘diag.txt’ diagnostic file (section 4.31) will contain the amount of CPU time spent in each window. Also shown is the actual load balance used (i.e. the prescribed window sizes) and the predicted window sizes that are required to achieve equal amounts of CPU time in each window (i.e. an even load balance). This load balancing may be automated using: # Resets window sizes to balance the CPU WINDOW_RESET m Where every m time steps the windows are automatically re-generated with sizes that attempt to balance the CPU load. The window partitions may be explicitly defined for WINDOWS – 1 windows using WINDOW<n>_POINTS where <n> is the window number. The number of points in the list should be specified, followed by a list of the (i,j) locations of the window cells, e.g: # Define the first window to contain 2 cells WINDOW1_POINTS 2 2 1 2 2 Note the ‘Marked’ facility in jvismeco is a useful tool for extracting (i,j) locations from a domain. The last window is created to consist of all cells not included in a list. The window partitioning can be written to the output file using: SHOW_WINDOWS YES # Creates a tracer ‘window_partitions’ # containing window configuration. This facility is switched off by default. The window map may be written to netCDF file using: DUMP_WIN_MAP <mapfile.nc> Where <mapfile.nc> is the name of the file the map is written to. This may then be subsequently read at runtime (rather than computed) using: READ_WIN_MAP <mapfile.nc> Note that computing the sparse map for many windows on very large grids can take several hours; reading the window map from file provides a means of rapidly starting a simulation. DUMP_WIN_MAP will operate in the –p and –g modes, and READ_WIN_MAP operates in the –p mode. When using multiple windows, the message passing library must also be specified, e.g. DP_MODE 16/09/2014 openmp pthreads # Use the openMP libraries # Use the pthreads library Page 14 of 177 Version: 1.00 SHOC User Manual Comparisons using 1 or multiple windows have shown identical results in simple test domains and a complicated real case study. However, not all functionality (advection schemes, mixing schemes, open boundaries etc) or combinations of bathymetry, geography and window partitions have been tested, hence it is possible that some combinations of the above do not result in identical solutions using 1 and multiple windows. It is known that if the model is subjected to SUB-STEP (Section 4.27) then at window boundaries values from different time levels are used resulting in solutions that differ. To avoid sub-stepping, the time-step should be reduced. When invoking extended functionality with multiple windows it is prudent to check results against a single window. 4.3 Time Internally, the model represents time in seconds since some epoch date/time. These parameters allow the specification of that epoch, the period of the simulation, the ramp-up period for external forcing, and the model’s internal (3-d) and external (2-d) time steps for integration. # Defines the epoch for all time related parameters, as well as # for all output files generated by the model. Currently, the # units must be 'seconds since ...', but this may change in future # versions. The epoch is specified in standard ISO date/time # format, including a possible timezone specification. The # timezone here is 8 hours ahead of UTC. TIMEUNIT seconds since 1990-01-01 00:00:00 +08 # Defines the base time unit that will be used for all # timeseries and netCDF output files. OUTPUT_TIMEUNIT days since 1990-01-01 00:00:00 +08 # Define length units - this parameter is redundant and must # always be metre! LENUNIT metre # Defines the start and stop time of the model simulation period, # relative to the epoch defined above. Relative time # specifications here and elsewhere in the parameter file can be # specified in seconds, minutes, hours, or days. Here, the start # time corresponds to 1995-02-10 00:00:00 +8, and the end time to # 1995-03-13 00:00:00 +8 START_TIME 1866 days STOP_TIME 1897 days # Defines the period during which external forcing variables # (wind, open boundary elevations and/or velocities) are smoothly # ramped from 0 to their normally prescribed values. This # mechanism allows the suppression of start-up transients and # shocks in the simulation. # Prior to RAMPSTART, forcing is set to zero. After RAMPEND, # forcing is applied normally. In between, forcing values are # scaled by a raised cosine ramp. RAMPSTART 1866 days RAMPEND 1866.5 days # # # # # Defines which variables are ramped in. Suppression of wind and boundary forcing (global tide, file or custom specification) are invoked by listing the processes subject to the ramp. All processes are suppressed by default. E.g. all processes are suppressed via; 16/09/2014 Page 15 of 177 Version: 1.00 SHOC User Manual RAMPVARS WIND # TIDALH # TIDALC # TIDEBC # FILEIN # CUSTOM # INV_BARO # ETA_RELAX # FLUX_ADJUST Ramp the wind Tidal OBC η computed using TIDALH Tidal OBC η using custom constituents Tidal OBC η using tidal synthesis OBC η using FILEIN input OBC velocity using CUSTOM OBC inverse barometer contribution Relaxation to eta # OBC local flux adjustment # Specifies the internal (3-d) time-step, and the number of times # the external (2-d) code will be run per 3-d time-step. # The external (2_d) time-step is thus DT divided by IRATIO. DT 120 seconds IRATIO 5 4.4 Computational settings and flags A number of parameters change the way in which calculations are performed, as follows: # A flag which includes or excludes the non-linear terms in # both the momentum equations and the surface elevation. NONLINEAR YES # A flag which enables the calculation of density at each time # step from the salinity and temperature of the water. If this # flag is turned on, then the model must include tracers called # salt and temp. If it is turned off, the density field used by # the model is as read from the input netCDF file, and doesn't # change over time, regardless of the behaviour of any tracers # in the model. If a valid tracer name is input for CALCDENS, # then the density used in the model is the distribution # represented by that tracer. CALCDENS YES or CALCDENS density_tracer # The minimum layer thickness (m) value to be used when dividing # by the layer thickness in any of the momentum equations. # This prevents numerical problems, particularly in areas which # are drying. Usually set to ~7% of the surface layer. HMIN 0.01 # Specification of the slip condition at solid horizontal # boundaries. This effectively specifies the tangential velocity # value at the land (or at any solid vertical face) used by the # horizontal momentum equations. Valid values are: # 1.0 Full slip condition - most commonly used # 0.0 Half-slip condition # -1.0 No slip condition # Other values may be accepted by the model, but may give # unexpected or erroneous results. SLIP 1.0 # # # # Specification of what constitutes a simulation fatality. If ETA is specified the model will exit if absolute sea level is greater than ETAMAX. If VEL3D is specified exits occur if absolute 3D velocity is greater than VELMAX. If VEL2D is 16/09/2014 Page 16 of 177 Version: 1.00 SHOC User Manual # specified exits occur if 2D velocity is greater than VELMAX_2D. # If T/S is present, temp. and salinity are checked for NaN. # If NAN is present, exits occur if ETA, VEL3D or VEL2D assume # the NaN value. The default is ETA NAN with ETAMAX = 10. FATAL ETA VEL3D VEL2D ETAMAX 10 VELMAX 5 VELMAX_2D 3 # Specifies the quantity of messages / information written to the # file ‘runlog’. Same as –l option (see Section 2.3). The levels # supported may be a subset of the following: log_levels main,warn,info,debug,trace - main info warn debug trace metric # # # # # # # print information on major general events print information on minor general events non-fatal warning information print high level debug information print low level debug information information on time spent in routines, (for development only). # Allows smoothing of various fields at initialisation. Currently # valid fields are: CD # Bottom roughness U1VH # Horizontal viscosity in the e1 direction U2VH # Horizontal viscosity in the e2 direction U1KH # Horizontal diffusivity in the e1 direction U1KH # Horizontal diffusivity in the e2 direction # The form of smoothing is: SMOOTH_VARS <name>:n # where <name> is one of the names above, and n is the number of # smoothing passes, e.g; SMOOTH_VARS CD:2 U2VH:1 # will perform 2 smoothing passes on bottom drag, and one pass on # e2 horizontal viscosity. # Allows scaling of various fields at initialisation. Valid # fields are the same as for SMOOTH_VARS. The form of scaling is: SCALE_VARS <name>:s # where <name> is one of the names above, and s is a scaling # fraction, e.g; SCALE_VARS CD:1.2 U2VH:0.9 # will scale bottom drag by 1.2, and e2 horizontal viscosity by # 0.9. # Records a sequence of runs in the file ‘setup.txt’ and netCDF # output files. The sequence is invoked via: SEQUENCE n # The following field is then printed in the file setup.txt and # as a global attribute in all output netCDF file: Run # n # If a setup.txt file is entered as the input to SEQUENCE, and # the file contains ‘Run # n’, then the run identifier recorded # in the setup.txt for the current run is: Run # n+1 # Sets a unique identifier that is tagged in output. <n> is a # floating point number (e.g. 1.1). ID_NUMBER <n> 16/09/2014 Page 17 of 177 Version: 1.00 SHOC User Manual # Applies a Shapiro filter to selected tendencies. FILTERING ADVECT # 1st order Shapiro filter applied to # momentum advection tendencies. # Sets the model configuration to be V1562 with previous # versions of SHOC. Backwards incompatibility may be due to # bugfixes in the code, or implementation of improved numerics. # The backwards compatibility is currently defines as: COMPATIBLE V1246 # Pre v1246: global boundary cells include # R_EDGE and F_EDGE OUTSIDE cells. V1283 # Pre v1283: Numerous bugfixes for multiple # windows are not included. Refer to Revision # History Nov 16 2009, v1283-1331. V1562 # Pre v1562: swr added explicitly to the water # column. V1598 # Pre v1598: wtop uses 2D detadt and low order # approximations. U1 and u2 = 0 above the free # surface for horizontal fluxes. V4201 # Run with 32 bit netCDF output (default is # 64 bit). # Exclude certain points in the # statistic, sediment transport EXCLUDE_PROCESS_POINTS <n> i1 j1 CODE1 i2 j2 CODE2 . . in jn CODEn MOM_CONVERT ROMS_CONVERT 16/09/2014 momgrid romsgrid model domain from wave, tracer or biogeochemical computations. # Number of points to exclude # i1 j1 are (i,j) locations of # the cell to exclude. # CODE is a list of keywords: # EX_WAVE to exclude waves # EX_TRST for tracer statistics # EX_SED for sediment transport # EX_BGC for biogeochemistry # Convert the input file to a # MOM4 compatible grid_spec.nc # Output file is momgrid_spec.nc. # Convert the input file to a # ROMS compatible file. Output # file is romsgrid_roms.nc. Page 18 of 177 Version: 1.00 SHOC User Manual Physical constants Values must be provided for a number of physical constants. Most are rarely changed far from the values shown below. An exception is the Coriolis parameter, which is latitude dependent. # Acceleration due to gravity (m s-2) G 9.81 # Air density - note that it might be better to calculate this # internally in the model code, based on the air temperature. # For the moment, however, it is specified in the parameter file # as a constant value (kg m-3). AIRDENS 1.225 # Specific heat of water. Again, the model could calculate this # based on salinity, temperature, etc. For now, however, this # is specified as a constant (J C-1 kg-1) - FIX - CHECK THIS SPECHEAT 3990 # The Coriolis parameter value for the area of interest. # This is an NCE1*NCE2 floating point array, so that it is # possible to set a different value in every grid cell. However, # for most applications where the grid geographical extent is not # large, a uniform value can be used, as shown here, for a # hypothetical 40*50. # The CORIOLIS parameter will be automatically computed if not # supplied, but the PROJECTION parameter is. CORIOLIS 2000 -0.000019 4.5 Horizontal coordinate system SHOC uses a sparse, or compressed, array configuration (Herzfeld, 2006) which represents a three dimensional region as a one dimensional vector in computer memory. One of the advantages of this approach is that all non-wet land cells may be omitted from the grid in memory. This means that when constructing a grid there is no computational penalty when large amounts of land are included in the grid. This approach requires, however, that at least one land cell must be adjacent to wet cells at coastal boundaries (i.e. a solid boundary is not allowed to be adjacent to a cell containing water; land cells only must be adjacent to wet cells). A unique feature of SHOC is not only its ability to support a myriad of different horizontal grid geometries, but also its ability to handle different coordinate systems. Currently SHOC supports three coordinate systems: • • • Arbitrary Cartesian Geographic - Latitude/Longitude Geographic - Map projected The Cartesian system defines the coordinates on a rectangular plane with no physical association to real locations on the Earth. The geographic based coordinate systems however, map directly to real-world locations. For a Latitude/Longitude coordinate system all grid metrics are computed on the spheroid, while for the map projected coordinate system the metrics are computed on the projected plane. The coordinate system is defined using the PROJECTION parameter and applies to ALL windows. 16/09/2014 Page 19 of 177 Version: 1.00 SHOC User Manual 4.5.1 Defining a Cartesian coordinate system An arbitrary Cartesian coordinate system can be specified by either leaving the PROJECTION blank, or by not specifying the parameter at all. Please note, it is assumed that the XY units are in metres, even though they have no real-world significance. 4.5.2 Defining a latitude/longitude coordinate system The Latitude/Longitude coordinate system is specified as follows: # The ‘geographic’ projections implies that all coordinates # should be provided as decimal longitude and latitude. PROJECTION geographic Unfortunately at this time no mechanism is provided to specify the ellipsoid parameters, instead it is hard-coded as a sphere with a radius of 6370997.0m. It is hoped this restriction will be relaxed in a later version of SHOC. 4.5.3 Defining a map projected coordinate system Of the three coordinate systems supported, defining the map projection is by far the most complicated, with a variety of map projections each with their own arguments. The basic syntax is as follows: PROJECTION proj=<projection-name> [<proj-param0>=<arg> […]] Standard projections SHOC supports six standard projections. A description of each projection and their arguments are described below: Transverse Mercator (Transverse Central Cylindrical) The Transverse Mercator is a conformal cylindrical projection where the cylinder is rotated horizontally (transverse) across the ellipsoid. proj=tcc lon_0=<long> k_0=<number> lon_0 Central meridian. k_0 Scale factor. 16/09/2014 Page 20 of 177 Version: 1.00 SHOC User Manual Universal Transverse Mercator (UTM) The Universal Transverse Mercator (UTM) projection is based on the Transverse Mercator projection described above. However, the scale factor is fixed to 0.9996, and the central merdian is parameterised by zone. Each zone defines a 6 degree window in longitude around the Earth, making a total of 60 zones. Zone 1 is located at a 180W, with the zone number increasing in an easterly direction. The default ellipsoid is clark66, and false eastings and northings are (500000E,10000000N) for the southern hemisphere and (500000E, 0N) for the northern hemisphere. proj=utm zone=<number> [south|north] Defined by zone UTM zone (1-60). south Enabled if for southern hemisphere. north Enabled if for northern hemisphere (default). Australian Map Grid A projection for the Australian region, based on the UTM projection, but using the gda66 ellipsoid. proj=amg zone=<number> Defined by zone UTM zone (1-60). Map Grid of Australia A more recent projection for the Australian region, based on the UTM projection, but using the gda94 ellipsoid. This is the current Australian Standard Projection. proj=mga zone=<number> Defined by zone UTM zone (1-60). Lambert Conformal Conic A conformal, conic projection, where parallels are unequally spaced arcs of concentric circles. Merdians are equally spaced radii of the same circles. The scale is true along two standard parallels. The default ellipsoid is wgs84, and false eastings and northings are (0E, 0N). proj=lcc lon_0=< long> lat_0=<lat> lat_1=<lat> [lat_2=<lat>] Defined by lon_0 Central meridian. lat_0 Central latitude. lat_1 First standard parallel latitude. lat_2 Second standard parallel latitude. 16/09/2014 Page 21 of 177 Version: 1.00 SHOC User Manual Mercator The Mercator map projection is a cylindrical and conformal map projection, where the cylinder is aligned north/south. It has the properties that all meridians are equally spaced straight lines, parallels are unequally spaced (closer at the equator), and Rhumb lines are down as strait lines. The default ellipsoid is wgs84, and false eastings and northings are (0E, 0N). proj=merc lon_0=<long> Defined by lon_0 Central meridian. Other projections SHOC also supports a number of other projections if compiled and linked with the USGS PROJ 4 projection library. The list of projections supported by PROJ 4 are described below. For a full description of each projection and their arguments please consult the PROJ 4 manual (Evenden, 1995). Projection aea aeqd alsk apian bipc bonne cass cc cea collg eck1 eck2 eck3 eck4 eck5 eck6 eqc eqdc gall gnom gs50 gs48 hataea labrd laea leac Projection lee_os loxim lsat mbtfpp mbtfps mbtfpq mill mill_os moll nicol nsper nzmg ocea 16/09/2014 Description Albers Equal Area Azimuthal equidistant Alaska Mod. Stereographic Apian Globular Bipolar Conic Bonne Cassini Central Cylindrical Cylindrical Equal Area Collignon Eckert I Eckert II Eckert III Eckert IV Eckert V Eckert VI Equidistant Cylindrical Equidistant Conic Gall (Stereographic) Gnomonic 50 State U.S. Mod. Stereographic 48 State U.S. Mod. Stereographic Hatano Asymmetrical Equal Area Laborde Lambert Azimuthal Equal Area Lambert Equal Area Conic Description Lee Oblate Stereographics Pacific Loximuthal LANDSAT Space Oblique Mercator McBryde Thomas Flat Polar Parabolic McBryde Thomas Flat Polar Sinusoidal McBryde Thomas Flat Polar Quartic Miller Miller Oblate Stereographics Euro-Africa Mollweides Nicolosi Globular General Vertical Persepective New Zealand Map Grid Oblique Cylindrical Equal Area Page 22 of 177 Version: 1.00 SHOC User Manual omerc ortho parab poly putp2 putp5 quau robin sinu stere tcea tpers ups vandg wink1 Oblique Mercator Orthographic Caster Parabolic Polyconic (American) Putnins P2' Putnins P5 Quartic Authalic Robinson Sinusoidal Stereographic Transverse Cylindrical Equal Area Tilted perspective Universal Polar Stereographic Van der Grinten Winkel I Global parameters In addition to the projection specific parameters, there are also a number of parameters supported by all projections. Parameter ellps es a b rf x_0 y_0 Description Ellipsoid name (see Ellipsoid table below). Eccentricity. Major ellipsoid axis radius. Minor ellipsoid axis radius. Reverse flattening. False easting (automatically specified for the UTM projection). False northing. Ellipsoids Supported ellipsoid include: Ellipsoid Parameters merit a=6378137.0 rf=298.257 grs80 a=6378137.0 rf=298.257222 iau76 a=6378140.0 rf=298.257 airy a=6377563.396 b=6356256.910 mod_airy a=6377340.189 b=6356036.143 aust_ntl a=6378160.0 rf=298.25 grs67 bessel bess_nam clrk66 clark66 clrk80 everest hough intl krass mercury mod_ever mod_merc new_intl Seasia walbeck wgs66 wgs72 wgs84 16/09/2014 a=6378160.0 rf=247.247167 a=6377397.155 rf=299.1528128 a=6377483.865 rf=299.1528128 a=6378206.4 b=6356583.8 a=6378206.4 b=6356583.8 a=6378249.145 rf=293.4663 a=6377276.3452 b=6356075.4133 a=6378270.0 b=6356794.343479 a=6378388.0 rf=297. a=6378245.0 rf=298.3 a=6378166.0 b=6356784.283666 a=6377304.063 b=6356103.039 a=6378150.0 b=6356768.337303 a=6378157.5 b=6356772.2 a=6378155.0 b=6356773.3205 a=6376896.0 b=6355834.8467 a=6378145.0 b=6356759.769356 a=6378135.0 b=6356750.519915 a=6378137.0 rf=298.257223563 Page 23 of 177 Description MERIT 1983. GRS 1980 (IUGG, 1980). IAU 1976. Airy 1830. Modified Airy. Australian Natl, S. Amer., IAU 64. GRS 67 (IUGG 1967). Bessel 1841. Bessel 1841 (Namibia). Clarke 1866. Clarke 1866. Clarke 1880 mod. Everest 1830. Hough. International 1909 (Hayford). Krassovsky, 1942. Mercury 1960. Modified Everest. Modified Merc 1968. New International 1967. Southeast Asia. Walbeck. WGS 66. WGS 72. WGS 84. Version: 1.00 SHOC User Manual Ellipsoid agd66 agd84 gda94 sphere Parameters a=6378160.0 rf=298.25 a=6378160.0 rf=298.25 a=6378137.0 rf=298.25722101 a=6370997.0 es=0.0 Description Same as aust_ntl. Same as aust_ntl. New Aust. ellip. Sphere of 6370997 m. An example definition of an AMG projection for Port Phillip Bay in Eastern Australia follows: # Port Phillip Bay is located at Zone 55 of the UTM projection PROJECTION proj=amg zone=55 4.6 Horizontal grid geometry SHOC supports five orthogonal horizontal grid geometries - rectangular, polar, geographic_rectangular, elliptic and numeric. All internal grid metrics are stored in units of metres, although the coordinates maybe specified in either x/y or latitude/longitude units depending on how the PROJECTION parameter was specified. All grid definitions share the following two parameters; NCE1 and NCE2. NEC1 and NEC2 define the number of cells in the e1 (or i or x) and e2 (j or y) directions respectively. 4.6.1 Rectangular grid Following is an example file fragment that describes all of the parameters required to define a rectangular grid: # Type of grid GRIDTYPE RECTANGULAR # Number of grid cells in the e1 (i) and e2 (j) directions NCE1 57 NCE2 72 # Real-world coordinates of the lower left hand corner of # the lower left-hand grid cell (i=0, j=0) X00 257300 Y00 5770180 # Grid cell size in e1 (i) and e2 (j) directions DX 1000 DY 1000 # Angle (in degrees) between e1 (i) direction and the real-world # X axis (which is East in most reasonable projections). # This represents a mathematical rotation, so that the value of # 315 degrees would probably make the grid i axis run in a # south-easterly direction. ROTATION 315 The rectangular grid is defined as being 57 by 72 cells, with a 1000m resolution along both axes, rotated at 315 degrees, and an origin (the bottom left corner of cell (i = 0, j = 0)) at Easting 257300, Northing 5770180. If no PROJECTION parameter is specified, then it should the grid should only be used to model 'local' areas where the Earth’s curvature is not 16/09/2014 Page 24 of 177 Version: 1.00 SHOC User Manual considered significant. This also true if a map projection is specified, but it’s appropriateness depend on the region and projection. 4.6.2 Polar grid Polar grids are specified is a similar way to rectangular grids, as shown below: # Type of grid GRIDTYPE POLAR # Number of cells in the e1, i, or azimuthal direction. NCE1 5 # Number of cells in the e2, j, or radial direction. NCE2 10 # Coordinates of polar origin X00 250000 Y00 5770000 # Radial distance from origin to edge of first grid cell # (metres). R0 40 # Angle (in degrees) between e1=0 radial (i=0) direction and the # real-world X axis (which is East in most reasonable # projections). # This represents a mathematical rotation (+ve anticlockwise). ROTATION 20 # Angular extent of grid (degrees), running clockwise from the # e1=0 (i=0) radial. ARC 120 The above describes a polar grid with 5 by 10 cells, with a minimum radius of 40m and covering an angular range of 120°, from 110° to 230 ° with respect to true north. The grid polar origin is located at Easting 250000, Northing 5770000. The polar grids generated for the model have 'square' cells, in the sense that the size of any given cell is approximately equal in the azimuthal and radial directions. A brief analysis shows that this causes the cell size to increase exponentially in the radial direction (as j increases), so that the grid has higher resolution near the origin, and lower resolution further away. The origin itself cannot be part of the grid (ie, R0 must be greater than zero), as the grid becomes singular at that point. Like the rectangular grid, Polar grids are generally suitable for ‘local’ areas only, unless a Latitude/Longiutude PROJECTION is used. 4.6.3 Numerical grid The numeric grid allows the specification of a general orthogonal curvilinear grid using the XCOORDS and YCOORDS parameters. The grid must include not only the cell corners, but also the position of the cell centre and the u1 and u2 positions. In effect the parameters define a grid twice the resolution of that being modelled. At this time there is no simple toolkit available for generating such grids, and grid generation is left to the reader. 16/09/2014 Page 25 of 177 Version: 1.00 SHOC User Manual 4.6.4 Geographic rectangular grid A Geographic rectangular differs from a normal rectangular grid, as it defines a grid that is orthogonal on a spheroid. A geographic rectangular grid can only be specified if the PROJECTION parameter is set to ‘geographic’. SHOC supports three different ways of defining a geographic rectangular grid. Auxiliary pole The first method computes the grid metrics using an auxiliary coordinate system, defined by a false pole. PROJECTION geographic GRIDTYPE GEOGRAPHIC_RECTANGULAR NCE1 10 NCE2 20 DLAMBDA 0.01 # Long. cell interval in aux. coords. # (degrees) DPHI 0.01 # Lat. cell interval in aux. coords. # (degrees) X00 144.3856 # Longitude of origin (degrees) Y00 -38.2030 # Latitude of origin (degrees) POLE_LONGITUDE 0 # Longitude of false pole (degrees). POLE_LATITUDE 90 # Latitude of false pole (degrees). Equally spaced grid in degrees This is almost identical to the auxiliary pole definition, except that a rotation is used, instead on a false pole. The resulting cells are unequally spaced on the sphere, but equally spaced in degree space. PROJECTION geographic GRIDTYPE GEOGRAPHIC_RECTANGULAR NCE1 10 NCE2 20 DLAMBDA 0.01 # Long. cell interval in aux. coords. # (degrees) DPHI 0.01 # Lat. cell interval in aux. coords. # (degrees) X00 144.3856 # Longitude of origin (degrees) Y00 -38.2030 # Latitude of origin (degrees) ROTATION 315 # Grid orientation. Equally spaced grid over sphere The third method requires that the grid cells preserve their distances over the sphere. The lat/long's of the grid are computed by projecting the interval (or multiple there of) along given a direction. This method does not always produce perfectly orthogonal grids, but the error is minimal. PROJECTION geographic GRIDTYPE GEOGRAPHIC_RECTANGULAR NCE1 10 NCE2 20 DX 1000 # 1000m along i axis. DY 1000 # 1000m along j axis. ROTATION 315 # Grid orientation (degrees). # This rotation is on the sphere. X00 144.3856 # Longitude of origin (degrees) Y00 -38.2030 # Latitude of origin (degrees) 16/09/2014 Page 26 of 177 Version: 1.00 SHOC User Manual 4.7 Vertical grid geometry SHOC is a z or σ coordinate model. In the z coordinate system each layer height is the same across the whole grid domain. The layers are specified by giving the z-coordinate of their interfaces, relative to mean sea level. Because the model z-coordinate is positive up, with origin at mean sea level, this means that layer interface z-coordinates are usually negative (below the surface). For example, a model with 5 layers in the vertical, extending from 10m depth to the surface, and with uniform 2m vertical resolution, would be specified as follows: # The z coordinates of the model layer interfaces. LAYERFACES 6 -10.0 -8.0 -6.0 -4.0 -2.0 0.0 Layers need not all have the same thickness, but, for numerical reasons, care should be taken to avoid sudden large changes in layer thickness. The top layer need not be at mean sea-level. An example covering these points is shown below: # A non-uniform vertical grid with 10 layers, covering from # 15m depth to 5m above mean sea-level. LAYERFACES 11 -15.0 -10.0 -6.0 -3.0 -1.0 0.0 1.0 2.0 3.0 4.0 5.0 The model includes drying and wetting algorithms, and the simulated water surface in the model is free to move up and down through the layers. The uppermost layer automatically grows thicker as required, to incorporate increases in surface elevation, up to some maximum height, specified as follows: # Maximum allowable z-coordinate for water surface elevation. # If the water surface ever exceeds this value, the model # run stops and produces an error message. # # This value is also used by the grid generation program # to decide whether the top layer is land or not (land if # bathymetry above ETAMAX) ETAMAX 10.0 The σ coordinate system scales the layer interfaces to the total water depth. This allows the bottom to be well resolved at any depth. If the sigma option is invoked (see section 4.24) then the σ levels are generated by SHOC such that a logarithmic distribution exists at the surface and bottom and a linear distribution in the interior. The user need only specify the number of layers to be used in this case. # The number of σ coordinates for the model layer interfaces. LAYERFACES 6 16/09/2014 Page 27 of 177 Version: 1.00 SHOC User Manual NOTE: The vertical grid geometry described above is not used by the model when a run is initiated using the –p option. Layers are defined when the -g option is invoked (see section 8) to generate the model input netCDF file, which contains model initial values and geometric information. Any alteration to model vertical grid geometry must be accompanied by the creation of a new model input netCDF file, using the –g option. 4.8 Bathymetry When a run is initiated using and existing parameter file and input netCDF file (i.e. using the – p option) the bathymetry used is read from the netCDF file. Any bathymetry data, and bathymetry manipulation options (e.g. bathymetry limits, smoothing etc.) present in the parameter file are ignored. This is because data for all the model variables read from the netCDF file is assumed to correspond to a particular layer configuration over a particular depth range, and changing the layer structure or bathymetry range will result in discrepancies between the data read from file and the assumed model geometry. Using the –a or –g option (see section 5 and 8) the bathymetry of the area to be modelled is specified by providing a depth value for each horizontal grid cell. Thus, there are NCE1 * NCE2 bathymetry values (for each grid). They are specified as an array parameter, as follows. # Example depth values for a 3 by 4 grid BATHY 12 22.2 12.3 7.4 23.5 12.0 6.0 25.8 13.7 5.8 27.6 14.2 4.9 The values run in order from the bottom left corner of the grid (i=0, j=0), with i varying fastest. This means that for a single column bathymetry list (as in the above example) any cell (i,j) is located at position j x NCE1 + i + 1 in the list. Note that the values are depths, rather than zcoordinate values, and hence are usually positive. Beware, as this can easily cause confusion. Negative values are also allowed, and signify that the sea-bed is above mean sea-level. Where the sea-bed is above ETAMAX (see above), the cell is taken to be a land cell. Values which are deeper than the deepest model layer (see section 4.7) signify that the corresponding grid cell is outside the domain of computation of the model (denoted OUTSIDE cells). This mechanism allows open boundaries to be located at arbitrary positions within the grid. Here is the above example again, but this time the right hand column of the model is land, and the top left cell is outside the computational domain: # Example depth values for a 3 by 4 grid BATHY 12 22.2 12.3 -99 23.5 12.0 -99 25.8 13.7 -99 16/09/2014 Page 28 of 177 Version: 1.00 SHOC User Manual 9999 14.2 -99 For convenience, some parameters are provided which allow the specification of minimum and maximum depth values, as follows: # All cells will be at least 20m deep BATHYMIN 20 # No cell will be more than 2000m deep BATHYMAX 2000 The BATHYMIN and BATHYMAX parameters are optional. If present, they override values in the BATHY array where necessary. The bathymetry can be smoothed using a 9 point low pass convolution filter if required. This may be done several times by invoking: # n is the number of smoothing passes performed SMOOTHING n # Alternatively, a maximum gradient threshold may be supplied, and if the local bathymetry gradient becomes greater than this threshold then the bathymetry is locally smoothed until the gradient becomes less than the threshold. This is accomplished by invoking: # x is the gradient threshold, typically 0.07 MAXGRAD x Bathymetry smoothing may be performed over a discrete number of cells (with n smoothing passes) using: SMOOTH_MASK 1 1 2 1 m # m is the number of cells to smooth # List of (i,j) cell locations Note that depth values need not correspond to layer interface positions. In each cell, the model implements a bottom layer which has a thickness which may be less than the full layer thickness, so that bathymetry is well resolved even in vertically coarse or single-layer (depthaveraged) grids. However, very thin bottom layers can cause numerical problems, so one final parameter prevents the creation of very thin layers, as follows: # If the difference between a layer boundary and the bathymetry # for a cell is too small, numerically instabilities can arise # in the model. Specifying a minimum cell thickness ensures that # no cell can get too thin. # The value may be specified as a minimum thickness (in metres) # or as a minimum percentage of the grid layer thickness, as # shown below. MIN_CELL_THICKNESS 15% A sub-section of the bathymetry may be masked to a user defined value using the BATHY_MASK attribute. This consists of a list of (i,j) values whose bathymetry value in the grid is set to the value of BATHY_MASK_VAL, e.g; # Set the bathymetry at points (1,1) and (2,1) equal to 5.0m. BATHY_MASK_VAL 5.0 # Value to set bathymetry to. BATHY_MASK 2 # Number of points in the list. 1 1 2 1 16/09/2014 Page 29 of 177 Version: 1.00 SHOC User Manual or BATHY_MASK_VAL BATHY_MASK (1,1)-(2,1) 5.0 1 # Value to set bathymetry to. # Number of blocksin the list. The points list may be obtained using the ‘Marked’ facility in jvismeco. A linear gradient of bathymetry may also be applied to the masked sub-region in either the e1 or e2 direction (i or j direction) , e.g. to apply a linear bottom slope in the e1 direction from 5m to 10m: # Set a linear bottom slope from 2m to 10m in the e1 direction # from i=1 to i = 4. Any points in the list with i coordinates # between the start and end coordinates are set to a linear # interpolation of the start and end depths. BATHY_MASK_IS 1 # Start i coordinate for gradient BATHY_MASK_IE 4 # End i coordinate for gradient BATHY_MASK_DS 2.0 # Depth at start i coordinate BATHY_MASK_DE 10.0 # Depth at end i coordinate BATHY_MASK 40 # Number of points in the list Similarly this applies to BATHY_MASK_JS and BATHY_MASK_JE for the e2 direction. Multiple blocks may be specified where a single bathymetry value only may be altered (i.e. no gradients of bathymetry) using: BATHY_NBLOCKS BATHY_MASK_VAL0 BATHY_MASK0 (1,1)-(2,1) BATHY_MASK_VAL1 BATHY_MASK1 (10,1)-(20,10) (50,1)-(50,20) 2 5.0 1 # Number of blocks # Block 0 bathymetry value # Block 0 blocks. 2.0 2 # Block 1 bathymetry value # Block 1 blocks. NOTE: The bathymetric parameters described above are not used by the model when a run is initiated using the –p option. They are used when the -g option is invoked (see section 8) to generate the model input netCDF file, which contains model initial values and geometric information. Any alteration to model bathymetry must be accompanied by the creation of a new model input netCDF file, using the –g option. Cells can be changed to OUTSIDE or LAND status at runtime as a series of rectangular blocks e.g; NOUTSIDE 3 (0,3)-(82,69) (184,3)-(248,69) (0,70)-(248,131) # Set a series of rectangular regions to # OUTSIDE. Or NLAND 4 0 1 0 2 0 3 0 4 # Set a list of points to LAND. Bathymetry statistics can be generated using: BATHY_STATS 16/09/2014 <infile> e1i e2i Page 30 of 177 Version: 1.00 SHOC User Manual Here <infile> is a path and filename of a bathymetry database and e1i and e2i are decimations in the e1 and e2 directions respectively. Bathymetry statistics are generated by comparing the database bathymetry at its native resolution (with the decimation applied) with the interpolated bathymetry in a model grid. Statistics generated are: • Maximum depth between the shallowest database depth in a grid cell and the model grid cell depth, stored in bathy_range_min, • Maximum depth between the deepest database depth in a grid cell and the model grid cell depth, stored in bathy_range_max, ( ) +( ) ∂D 2 ∂e1 ∂D 2 ∂e2 • The gradient of the model grid cell; • The maximum gradient difference between the database gradient and the gradient in the grid cell, where the gradient is defined above, stored in bathy_grad_max. 4.9 , stored in bathy_grad, Tracers (salinity, temperature, and others) The model may include salinity and temperature as dynamic tracers which affect the density field via an equation of state. As well, some of the more complex vertical mixing schemes may use variables (like turbulent kinetic energy) which also essentially act as tracers as far as most of the model code is concerned. Finally, the model can include an arbitrary number of passive tracers, which are advected and diffused in the model grid, but which play no dynamic role. The set of tracers included and their physical behaviour are defined as shown in the example below. The number of tracers included is specified using the parameter NTRACERS, and attributes for each tracer are prefixed by TRACER<M>, where <M> corresponds to the tracer number (starting at zero). Tracers can be defined to exist in the water column (3D tracers), the benthos (2D tracers; these tracers may also represent vertically integrated 3D tracers or values at the air-water or water-sediment interfaces) or in the sediment (3D sediment tracers). The following example shows the specification of three tracers - salinity, temperature and a passive dissolved contaminant. Detailed comments are provided for the salinity tracer. NTRACERS 3 # Three tracers in this grid # The following tracer attributes are mandatory, and must # be present for each tracer # # Tracer name (must be 'salt' for dynamic salinity variable) TRACER0.name salt # A more descriptive name. TRACER0.long_name Salinity # Units string TRACER0.units PSU # Standard units # Fill value for use with the –g option if no data is present # (see below). TRACER0.fill_value 35.0 # Range (minimum and maximum) of valid values TRACER0.valid_range 0 40 # 16/09/2014 Page 31 of 177 Version: 1.00 SHOC User Manual # The following tracer attributes are optional # # The type of tracer. Options are WATER, WC3D or WC for 3D water # column tracers, BENTHIC, INTER or WC2D for 2D tracers and # SEDIMENT or SED for sediment tracers. Tracers are assumed to be # 3D water column tracers by default. TRACER0.type WATER # Allow the tracer to be advected (default is 1, or TRUE) TRACER0.advect 1 # Allow the tracer to be diffused (default is 1, or TRUE) TRACER0.diffuse 1 # Decay constant in seconds (default is 0.0, meaning no decay) TRACER0.decay 0.0 # Settling velocity if required (m/s, -ve down) (default is 0.0) TRACER0.svel 0.0 The .data attribute allows the specification of initial values for each tracer. This is of use when the initial values vary in space, or are obtained from observations. # Data to initialize the tracer TRACER0.data <data_field> The tracer data field, <data_field>, may be one of the following: • The size of the grid, nce1 x nce2 x nz , followed by an array of values of size nce1 x nce2 x nz, listed in that order, • a netCDF file on a regular grid, in which case the values will be bilinearly interpolated, • a netCDF file on an irregular grid, in which case interpolation is performed using an inverse distance weighting scheme, • an ascii file in column format with spatial information only (i.e. no time field, lon and lat must be present). In this case the tracer values are interpolated linearly by default, or as specified in the .interp_type field. This is useful for interpolating sparsely collected measurements onto the grid. # Interpolation method for ascii data input TRACER0.interp_type cubic # valid options are cubic, linear, # average, nn_sibson or # nn_non_sibson, where nn # refers to Natural Neighbours. • Tracers may be scaled to a normalized density profile that exists through the water column (i.e. at the deepest point in the domain). This ensures that the gradient of the tracer profile is some constant multiple of the density gradient, and therefore ensures that mixed layer depths are consistent between the tracer and density. This is invoked using: TRACER0.data dens_scale file.nc v1 v2 <code> Where v1 is the depth at which the tracer value is equal to that in file.nc at the same depth and v2 is a scaling factor for the profile (if v2 < 0 the profile is inverted). Below depth v1 the profile in any layer k is determined by adding v2 x (density gradient) to the concentration in the layer k+1. This is iteratively computed down through the water column. Above depth v1 the profile in any layer k is determined by subtracting v2 x (density gradient) to the concentration in the layer k-1. This is iteratively computed up through the water column. If <code> = c then a copy of the values in file.nc is used for the profile below depth v1, and if <code> = t then the profile values are truncated to those in file.nc below the depth v1 if the profile values become greater than those in file.nc. 16/09/2014 Page 32 of 177 Version: 1.00 SHOC User Manual This formulation is the most general for density scaling and is supported by an equivalent scaling at open boundaries (see Section 4.10.18) – other methods may be used that are not supported by equivalent open boundary methods. TRACER0.data dens_scale v1 v2 Here, if v2 > 0 then v1 is the surface tracer concentration, and the profile in any layer k is determined by adding v2 x (density gradient) to the concentration in the layer k+1. This is iteratively computed down through the water column. If v2 < 0 then v1 is the bottom tracer concentration, and the profile in any layer k is determined by subtracting v2 x (density gradient) to the concentration in the layer k-1. This is iteratively computed up through the water column. A file (netCDF or ascii time series) may be used as the surface or bottom value in preference to v1, in this case use; TRACER0.data dens_scale file.nc v2 The tracer profile may be the inverse of the density profile if the following is specified: TRACER0.data TRACER0.data or TRACER0.data TRACER0.data • dens_scale v1 v2 inverse dens_scale file.nc v2 inverse An alternative density scaling is possible where the normalized density profile is stretched between a surface value of v1 and bottom value of v2. This is invoked using: TRACER0.data • dens_scale v1 v2 n dens_scale file.nc v2 n dens_profile v1 v2 Tracer values may be specified in regions using: TRACER0.data region.bnc r1:v1 r2:v2 .... rn:vn Where region.bnc is a region file (see Section 4.29.16). The vales in specified regions r1, r2 .... rn are then assigned the values v1, v2 .... vn respectively. Tracer specification examples are: # Temperature tracer - only mandatory attributes given here. The # rest will assume their default values. TRACER1.name temp TRACER1.long_name Temperature TRACER1.units degrees C TRACER1.fill_value 20.0 TRACER1.valid_range 0 40 # Passive, dissolved contaminant tracer; specifying an # initial distribution from a netCDF time-series file called # profile.nc. Note that the fill_value attribute must still # be present (but isn't used). TRACER2.name contam TRACER2.long_name Contaminant TRACER2.units kg m-3 TRACER2.fill_value 0.0 TRACER2.valid_range 0 2 TRACER2.data profile.nc 16/09/2014 Page 33 of 177 Version: 1.00 SHOC User Manual Note that the valid range attribute is a recommendation only and SHOC takes no action other than supplying a warning if these bounds are violated. The exception is, however, if the minimum range is zero and the model begins to produce negative results. In this case the tracer value is clipped to zero in SHOC to ensure positive-definiteness. 4.9.1 Tracer initialisation When a run is initiated, the initial distribution for each tracer are read from the INPUT_FILE. This file may be generated using the –g option or be an output file from a previous run. If the –g option was used, then the INPUT_FILE will contain tracer distributions that reflect either the .fill_value or .data specified for that tracer (see above). However, if a run is initiated which has tracers in the tracer list that do not have corresponding distributions in the INPUT_FILE (i.e. new tracers are added) then the initial distributions for those tracers will be specified using any .data specified, or if this is absent then the .fill_value. Additionally, a netCDF file may be specified using; # Specify a netCDF file to initialise any new tracers TRACER_DATA <data_file> In this case, if the .data attribute is absent for any new tracers, SHOC will search the file <data_file> for the new tracer, and if found interpolate the initial tracer distribution from that in the file. This is done for 3D, 2D and sediment tracers. 4.9.2 Relaxation Tracer values throughout the model domain can be relaxed towards some specified values (which may themselves vary in space and time). To enable relaxation for a particular tracer, three parameters are required: the relaxation data file (an ASCII or netCDF time-series file – see section 10), how often to perform the relaxation, and the relaxation time constant. # Data file containing prescribed tracer values TRACER0.relaxation_file saltprof.nc # How often to perform relaxation calculation TRACER0.relaxation_input_dt 1 hour # Relaxation time constant TRACER0.relaxation_time_constant 20 days Tracer relaxation may also be specified via a streamlined notation: relax_trname infile.nc dt.ts in units where trname is the name of tracer, infile.nc is the file containing values to relax to, and in units is the input_dt; e.g. to relax salt to saltprof.nc with file input of 1 hour and relaxation constant set in dt.ts, then specify; relax_salt saltprof.nc dt.ts 1 hour This specification is particularly useful with the automated –a or –r options, but will only operate if the relaxation time constant is input via file. The relaxation_time_constant may be time dependent by specifying a netCDF or ascii filename. In this case the units for the time constant in the file must be a time unit, e.g. # Ascii relaxation file where relaxation is 48 hours at day 0 and 2 16/09/2014 Page 34 of 177 Version: 1.00 SHOC User Manual # hours at day 10. Note ‘Time’ is converted to the model units # specified by TIMEUNIT. ## COLUMNS 2 ## ## COLUMN1.name Time ## COLUMN1.long_name Time ## COLUMN1.units days since 1990-01-01 00:00:00 +8 ## COLUMN1.missing_value -999 ## COLUMN1.fill_value 0.0 ## ## COLUMN2.name relaxation_time_constant ## COLUMN2.long_name Relaxation time constant ## COLUMN2.units hours ## COLUMN2.missing_value -999 ## COLUMN2.fill_value 0.0 ## 0 48 10 2 Adaptive relaxation can be invoked by specifying: TRACER0.relaxation_time_constant linear dv1 tc1 units1 dv2 tc2 units2 In this case if the absolute difference between modelled tracer and that read from infile.nc is dv1, then a relaxation constant of tc1 units1 is used and if the absolute difference is dv2, then a relaxation constant of tc2 units2 is used, with linear interpolation for other values of the absolute difference. The relaxation constant will therefore vary spatially and temporally throughout the domain and simulation. For exponential relaxation: TRACER0.relaxation_time_constant exponential dv1 tc1 units1 [ ]−1 In this case the relaxation constant is given by: rate = exp(dv1 log(tc1 ) / d ) where d is the absolute difference in modelled tracer and that read from infile.nc, e.g. for dv1 = 0.5 and tc1 = 5 day; A depth scaled linear relaxation may be specified using: TRACER0.relaxation_time_constant depth dv1 tc1 units1 dv2 tc2 units2 In this case if the depth is dv1, then a relaxation constant of tc1 units1 is used and if the depth is dv2, then a relaxation constant of tc2 units2 is used, with linear interpolation for other values of the depth. The relaxation constant will therefore vary spatially throughout the domain and simulation. Depths are truncated to the limits of dv1 and dv2. Note that all depths should be negative (i.e. dv1 and dv2 < 0.0). An exponential depth dependent rate may be specified using: 16/09/2014 Page 35 of 177 Version: 1.00 SHOC User Manual TRACER0.relaxation_time_constant exp_depth a0 tc1 units1 d1 tc2 units2 The relaxation rate is given by rate = (tc 2 − tc1 ) exp(−depth / a 0 ) + (tc 2 − tc) where tc = tc1 exp(− d1 / a 0 ) . Examples for different depths d1 are shown below. An cosine depth dependent rate may be specified using: TRACER0.relaxation_time_constant cos_depth d0 tc1 units1 d1 tc2 units2 The relaxation rate is given rate = 0.5 * (tc1 − tc 2 ) cos(depth.PI /(d 1 − d 0 ) − d 1 .PI /(d1 − d 0 )) + (tc1 + tc 2 ) . by This formulation assumes d1 > d2. An example is shown below. Relaxation rate linear in time may be specified using: 16/09/2014 Page 36 of 177 Version: 1.00 SHOC User Manual TRACER0.relaxation_time_constant temporal dv1 tc1 units1 dv2 tc2 units2 In this case the relaxation rate is tc1 units1 at dv1 days (relative to the TIMEUNIT), changing linearly to tc2 units2 at dv2 days, then thereafter capped at tc2 units2. 4.9.3 Resetting Tracer values throughout the model domain can be reset to some specified distribution (which may vary in space and time). To enable resetting for a particular tracer, two parameters are required: the reset data file (an ASCII or netCDF time-series file – see section 10) and how often to perform the reset. Using this option allows the user to effectively force the model with supplied distributions of tracer. # Data file containing prescribed tracer values TRACER0.reset_file saltprof.nc # How often to reset the tracer TRACER0.reset_dt 1 hour 4.9.4 Tracer Increments for State Variables The value of a tracer subject to resetting may be added to a state variable. This procedure is an easy way to update state variables if the reset file is created from a data assimilation process offline. The state variable the tracer is added to is specified via: # Add the tracer values to temperature TRACER0.increment TEMP Valid values for state variable increments are: TEMP SALT ETA 4.9.5 # 3D tracer value added to temperature # 3D tracer value added to salinity # 2D tracer value added to surface elevation Scaling The initial conditions specified for any tracer may be scaled by another tracer’s values. This is useful for easily manipulating input data without creating a new initialisation files, for example when scaling is required to convert to the correct units for tracer input. The scaling may either be additive of multiplicative. To scale a given tracer, e.g. tracer1.name = temp, the scaling tracer, e.g. tracer2, must be set up and initialised, e.g; TRACER2.name TRACER2.long_name TRACER2.units TRACER2.scale_s TRACER2.fill_value TRACER2.valid_range TRACER2.advect TRACER2.diffuse TRACER2.diagn TRACER2.data 16/09/2014 scale Scaling tracer degrees C temp # Add tracer2 values to tracer temp 20.0 0 40 0 0 0 scale_profile.nc # Initialisation for tracer2 Page 37 of 177 Version: 1.00 SHOC User Manual In this case the tracer named ‘temp’ is scaled additively by the data contained in the file scale_profile.nc. If the tracer were to be scaled multiplicatively, then use: TRACER2.scale_p temp # Multiply tracer temp by tracer2 values Alternatively, within the tracer attributes for the tracer desired to be scaled (e.g. temp in this case), the following attributes may be set: TRACER1.name temp # Additively scale tracer ‘temp’ by the values in tracer ‘scale’ TRACER1.tag scale_s:scale # Multiplicatively scale tracer ‘temp’ by the values of ‘scale’ TRACER1.tag scale_p:scale # Additively scale tracer ‘temp’ by a constant (2 in this case) TRACER1.tag scale_s:2.0 # Multiplicatively scale tracer ‘temp’ by a constant (0.01) TRACER1.tag scale_p:0.01 Tracer scaling is invoked upon initialisation, and if any tracers are reset (Section 4.9.3). A tracer scaling file may be generated from time series files of moored instrument data, or from profile measurements. To invoke this option set the create_scale attribute to a scaling map file, the format of which is described below, e.g: TRACER2.create_scale moor_temp.map With the file moor_temp.map with the format: VAR_NAME VAR_UNITS OUT_NAME temp Degrees_C scale_temp_s # # # # # # # # # # # # name of the variable to scale Units of the variable Name of the scaling variable as it will appear in the output file. Output file name. The initialisation file for the variable VAR_NAME that requires scaling. May be a multifile. Optional reference value. Optional reference depth (m). Optional bottom value. OUT_FILE FORCING scale_profile.nc profile.nc REF_VALUE REF_DEPTH BOT_VALUE nfiles file0 file1 1 -100 temp_init.nc 2 moor1.ts 147.34 -43.05 -15.0 temp prof1.nc 147.34 -43.05 profile temp In the above example it is assumed that there exist files profile.nc, moor1.ts and prof1.nc that contain the variable temp with units Degrees_C. The file profile.nc is the initialisation file for the variable temp used in the model, and this file is known to contain errors which are required to be corrected by scaling to measured data contained in data files moor1.ts and prof1.nc The geographic (longitude and latitude) locations and depth (depth < 0) for each mooring file are supplied (e.g. file0). Alternatively a profile at a geographic location may be used; in this case use profile instead of a numeric depth value (e.g. file1). The variable name used in the each mooring or profile file must also be supplied. Mooring files generally contain the variable as a function of time (.ts files), and profile files contain the variable at a specific time as a function of depth at a fixed geographic 16/09/2014 Page 38 of 177 Version: 1.00 SHOC User Manual location (.nc files). The scaling routine will compute the difference between the measured data and the FORCING data, and store this as a spatially and temporally varying netCDF file, OUT_FILE (i.e. the sum of OUT_FILE and FORCING will equal the measured data). The scaling function is spatially interpolated over the model grid. Only an additive scaling function is available (i.e. product scaling is not supported). Additionally, an ascii file OUT_NAME.ts containing the raw data (TIME, file#, observed data FORCING data) is produced. This is useful for creating scatter plots of the observed vs FORCING data. Additionally, the bottom value may be explicitly set to a particular value (temperature in this example) using the optional BOT_VALUE. This may be a number or a filename, whose value(s) are used in preference to those contained in the measured data files (moor1.ts and prof1.nc) at the sea bottom. For example, if the BOT_VALUE were the same data as used for the FORCING (i.e. profile.nc) then this would ensure that the scaling function would equal zero at the bottom. The scaling code actually adopts this approach by default for all depths greater than the deepest mooring at a particular geographic location. The optional REF_VALUE and REF_DEPTH operate in a similar manner to the BOT_VALUE, except a particular value (temperature in this example) can be prescribed at the depth REF_DEPTH rather that at the bottom. In the absence of a BOT_VALUE, all values below the REF_DEPTH are set to the REF_VALUE in preference to those contained in the measured data files (moor1.ts and prof1.nc). The reference and bottom options are useful for prescribing the scaling function below depths where no measured data is available but the user has insight into what values are expected at those depths. The scaling tracer may be initialised with the OUT_FILE created using the create_scale option, and if this file is also used as a reset_file then the scaling tracer may be used to scale the open boundary forcing in a time dependent manner (Section 4.11.18). 4.9.6 Surface fluxes A 3D tracer defined in the tracer list may have a surface flux prescribed that acts as the upper boundary condition in the vertical diffusion equation (see Section 2.5, Science Manual). This implies that the tracer is allowed to be vertically diffused The flux tracer is introduced by specifying the name of a valid 2D tracer in the tracer list as follows (e.g. for tracer passive); TRACER2.name TRACER2.long_name TRACER2.units TRACER2.fill_value TRACER2.valid_range TRACER2.advect TRACER2.diffuse TRACER2.diagn TRACER2.tag passive Passive tracer gm-3 0.0 0 100 1 1 0 surf_flux:flux This implies a 2D tracer flux must exist, which may vary in space and time using the reset function. The tracer may also be scaled to achieve the correct units: TRACER3.name TRACER3.long_name TRACER3.units TRACER3.type TRACER3.fill_value TRACER3.valid_range TRACER3.advect TRACER3.diffuse TRACER3.diagn 16/09/2014 flux Surface flux kgs-1 WC2D 0.0 0 100 0 0 0 Page 39 of 177 Version: 1.00 SHOC User Manual TRACER3.tag TRACER3.data TRACER3.reset_file TRACER3.reset_dt scale_p:0.001 flux_data.nc flux_data.nc 1 day Note that a positive flux implies a flux out of the surface layer. 4.9.7 Tracer types The following flags are currently supported by the TRACER.type flag: WATER SEDIM INTER HYDRO SEDIMENT ECOLOGY WAVE TRACERSTAT PROGNOSTIC DIAGNOSTIC PARAMETER FORCING The The The The The The The The The The The The tracer tracer tracer tracer tracer tracer tracer tracer tracer tracer tracer tracer is a 3D water column tracer is a 3D sediment tracer is a 2D tracer is a hydrodynamic tracer is a sediment transport tracer is a biogeochemical tracer is a wave tracer is a tracer statistic tracer is prognostic is diagnostic represents a parameter contains forcing data These flags may be assigned to tracers explicitly in the parameter file, e.g; TRACER1.type WATER HYDRO PROGNOSTIC The above defines a tracer as a 3D hydrodynamic prognostic tracer. For auto-tracers, these flags are set internally. The type flag may be interrogated within the code for various purposes. The list may also be expanded as required. 16/09/2014 Page 40 of 177 Version: 1.00 SHOC User Manual 4.10 Open boundaries Each open boundary (if there are any) is specified as a list of horizontal grid cell locations, together with parameters which define the nature and behaviour of the boundary. The cells in a single open boundary do not necessarily need to be adjacent to one another, but it is usually desirable to group boundary cells that are physically or logically related. For each open boundary it is usually necessary to define data files from which the boundary values (surface elevations, velocities or tracer concentrations) may be read. Constant values, or custom routines returning boundary values may also optionally be specified. Open boundaries may be defined anywhere in the grid, however, if a boundary is defined in the domain interior (as opposed to the limits of the domain) then the boundary must lie adjacent to an ‘OUTSIDE’ cell. Open boundaries require that velocities normal and tangential to the open boundary, elevation and tracer concentrations are specified. Velocities are specified at the outer edge(s) of open boundary cells while elevation and tracers are specified at the cell centers. This formulation allows for a suite of BULK open boundary conditions to be implemented (radiation, extrapolation, relaxation conditions) and facilitates the implementation of higher order advection schemes. These open boundaries are generally called velocity boundaries below. More specifically, they are called u1 boundaries if the left or right hand edge of the cell is open, or u2 boundaries if the back or front edge of the cell is open. The orientation of the u1 or u2 velocity boundaries must be known so that the normal and tangential velocity components may be identified in the SHOC code. Flagging a boundary as u1 or u2 requires the user to make this decision. Alternatively, a boundary may be classified as a velocity boundary in which case SHOC will decompose the boundary cell into u1 and u2 boundaries on left, right, front or back faces. The cell location provided in the POINTS list for u1 and u2 boundaries corresponds to the cell face. This means that the cell locations of u1 boundaries on right faces and u2 boundaries on front faces are incremented by one, in the x and y directions respectively, from the interior cell center adjacent to the boundary. If the boundary is specified as a velocity boundary, then the boundary cell location corresponds to the cell center. When specifying open boundaries in the parameter file, it is first necessary to indicate how many open boundaries the model grid has: # This grid has 3 open boundaries NBOUNDARIES 3 Then, each boundary is described by a number of parameters of the form BOUNDARY<M>.XXXX, where <M> is the boundary index. The parameters specify the boundary type, name, boundary condition type used, cell indices, and forcing data. Specification of a u1 boundary is shown below. BOUNDARY0.TYPE BOUNDARY0.NAME BOUNDARY0.DATA BOUNDARY0.BCOND_NOR BOUNDARY0.BCOND_TAN BOUNDARY0.BCOND_ELE BOUNDARY0.BCOND_TRA_ALL BOUNDARY0.POINTS 4 7 4 8 4 9 16/09/2014 u1 Offshore boundary offshore.nc NOGRAD CLAMPD FILEIN UPSTRM 3 Page 41 of 177 Version: 1.00 SHOC User Manual Alternatively, if the BOUNDARY.POINTS are contiguous (e.g. not interrupted by land) then the BOUNDARY.RANGE specification may be used, e.g; BOUNDARY0.RANGE (4,7)-(4,9) Generally this specification takes the form; BOUNDARY0.RANGE (is,js)-(ie,je) where is and js are the start (i,j) coordinates and ie and je are the end (i,j) coordinates. Note that is=ie for u1 boundaries, and js=je for u2 boundaries. No white space is to be inserted in the syntax for this specification. A specified zone of wet cells may be changed to OUTSIDE cells by specifying: BOUNDARY0.OUTSIDE_ZONE n ! Set n wet cells into the ! interior as OUTSIDE. This must be performed using the both the –g and –p option. New boundary ranges are listed in the runlog file. 4.10.1 Boundary condition types The boundary conditions available are based on a variety of approaches and are listed in Table 3.2.9.1. The name and keyword used as input to SHOC are listed, along with a reference to the original study if this exists. The variables the condition may be applied to are also included, where un = normal velocity, Un = depth averaged normal velocity, ut = tangential velocity, η = surface elevation and T = tracers. Table 3.2.9.1 : SHOC Open Boundary Conditions Condition name Clamped Data prescription from file Custom data prescription Tidal synthesis Global tide model Custom tide constituents 3D vertical integral for 2D No-gradient Linear least squares nd 2 order polynomial Cyclic Linear calculation Gravity wave radiation Orlanski Camerlengo and O’Brien Miller and Thorpe Raymond and Kuo Flather Upstream advection Tracer advection Tracer flux Tracer flux using concentration Statistical prescription Profile scaled to density Idealised profile Density gradient scaled 16/09/2014 Keyword CLAMPD FILEIN CUSTOM TIDEBC TIDALH TIDALC VERTIN NOGRAD LINEXT POLEXT CYCLIC LINEAR GRAVTY ORLANS CAMOBR MILLER RAYMND FLATHR UPSTRM TRCONC TRFLUX TRCONF STATIS DEPROF PROFIL DESCAL Reference Bye (1977) Cartwright and Ray (1990) Sommerfeld (1949) Orlanski (1976) Camerlengo & O’Brien (1980) Miller and Thorpe (1981) Raymond and Kuo (1984) Flather (1976) - Page 42 of 177 Variable un,ut,η,T un,ut,η,T un,ut,η,T η η η un,ut un,ut,η,T un,ut,η,T un,ut,η,T un,ut,η,T un, ut un,ut,η un,ut,η un,ut,η un,ut,η un,ut,η un T T T T T T T T Version: 1.00 SHOC User Manual NOTHIN No condition imposed un,ut,η Implementation of the open boundaries requires that a boundary condition type is assigned to normal and tangential velocity components, elevation and tracers for each open boundary via the use of the following keywords: BCOND_NOR BCOND_TAN BCOND_ELE BCOND_TRAn BCOND_<tr_name> for normal velocity components for tangential velocity components for elevation for tracers where 0 ≤ n < number of tracers, or where <tr_name> is the name of the tracer. e.g. BCOND_temp or BCOND_salt. Different boundary conditions may be optionally set for the 2D components of velocity by defining the keywords: BCOND_NOR2D for 2D normal velocity components BCOND_TAN2D for 2D tangential velocity components If these flags are absent then the 2D velocity components use the same open boundary condition as the 3D components specified by BCOND_NOR and BCOND_TAN. The tracer boundary condition allows different conditions to be specified for each tracer. If all tracers are required to have the same boundary condition, the tracer flag used is: BCOND_TRA_ALL If this condition precedes a condition for individual tracers, then all the tracers are set to BCOND_TRA_ALL except the individually specified tracers. This is useful if only a few tracers out of many need a specific boundary condition. 4.10.2 Boundary Implementation (stagger) The stencil for the open boundary stagger may use the outer face for normal velocity (the default, Fig. 4.1 Science Manual) or an inner stagger for normal velocity (Fig. 4.2 Science Manual). The outer stagger is generally more stable, and may use direct forcing (with or without relaxation to radiation conditions) for elevation forcing. The inner stagger must use a Flather condition if the model is to be forced with elevation. The stagger is imposed via: BOUNDARY1.STAGGER OUTFACE BOUNDARY1.STAGGER INFACE # Outer stagger (default) or # Inner stagger If the STAGGER keyword is absent an outer stagger is assumed. 4.10.3 Forcing Data The open boundary condition example given above describes a u1 boundary spanning 3 grid cells (i=4, j=7,8,9), where surface elevation values and tracer concentration values (if any) are found in the time series file offshore.nc. The surface elevation variable must be called eta, and the tracer variables must match the tracer names specified in the model parameter file (see section 4.9). Unique among the input data forcing, the boundary DATA parameter supports the specification of multiple time-series data files. The files must all be defined on the same parameter line, and separated by white-space (spaces or tabs). 16/09/2014 Page 43 of 177 Version: 1.00 SHOC User Manual BOUNDARY1.DATA eta.ts salt.ts temp.ts SHOC selects the first file that contains the requested variable and for which the current model time is within it’s range. While overlap between files (in time) are permitted, care must be taken to ensure that there are no time gaps between files. The resulting extrapolation would be ill-defined. A path for all files included in the boundary specification (e.g. including custom velocity forcing files) for all boundaries may be specified using: BDRY_PATH <file_path> # e.g. <file_path> = /home/disk/project/model/ 4.10.4 Flather Radiation The Flather condition is most successful when using an inner stagger; STAGGER = INFACE. A uniform bathymetry gradient across the boundary assists stability (BATHY_CON = 1). This radiation condition requires data input for both normal depth averaged velocity and elevation. If depth averaged velocity and elevation are input as zero then the condition behaves in a passive manner. This scheme is invoked via: BOUNDARY0.BCOND_NOR2D BOUNDARY0.BCOND_ELE FLATHR|<datain> FLATHR|<datain>|<radiation> Where <datain> is FILEIN if 2D velocity or elevation data is read from file, or CUSTOM if 2D velocity or elevation data is supplied by custom routines. <datain> = TIDALH or TIDALC may be used for elevation. For elevation, <datain> is the condition used to specify eta for the Flather OBC, and <radiation> may be any radiation condition, used to set the elevation OBC. A common specification is: BOUNDARY0.BCOND_NOR2D BOUNDARY0.CUSTOM.u1av BOUNDARY0.BCOND_ELE BOUNDARY0.DATA FLATHR|CUSTOM uv_to_u1av 3D_velocity_data.nc FLATHR|FILEIN|GRAVTY eta_data.nc With additional conditions typically as: BCOND_NOR BCOND_TAN NOGRAD GRAVTY or NOGRAD If normal depth averaged velocity and elevation data are unavailable, then a local solution (e.g. Palma and Matano (1998), p1340) may be used for velocity and elevation: BOUNDARY0.BCOND_NOR2D BOUNDARY0.BCOND_ELE BOUNDARY0.BCOND_TAN FLATHR|LOCALN FLATHR|LOCALE LOCALT This condition may be improved by using a radiation condition on elevation rather than the solution to the 1-dimensional continuity equation, e.g. BOUNDARY0.BCOND_NOR2D BOUNDARY0.BCOND_ELE BOUNDARY0.BCOND_TAN FLATHR|LOCALN FLATHR|GRAVTY LOCALT If elevation data only is available, a linearized local solution may be used, retaining the elevation forcing; e.g. BOUNDARY0.BCOND_NOR BOUNDARY0.BCOND_NOR2D BOUNDARY0.BCOND_ELE BOUNDARY0.DATA 16/09/2014 LINEAR FLATHR|LINEAR FLATHR|FILEIN eta_data.nc Page 44 of 177 Version: 1.00 SHOC User Manual If the velocity and elevation data are required to be zero, then this may be accomplished by creating a file with zero values and using the FILEIN specification above, or using the CLAMPD condition: BOUNDARY0.BCOND_NOR2D BOUNDARY0.BCOND_ELE FLATHR|CLAMPD FLATHR|CLAMPD In this case elevation will use a zero value in the Flather computation for normal velocity, and a zero value for the elevation condition. Generally, radiation conditions may be used to approximate the elevation and velocity data <datain>, e.g: BOUNDARY0.BCOND_NOR2D BOUNDARY0.BCOND_ELE FLATHR|NOGRAD FLATHR|MILLER 4.10.5 Custom Routines Another mechanism for associating data with an open boundary is the CUSTOM parameter. A CUSTOM parameter may be defined for any variable by appending the variable name to the keyword with a fullstop (see below). Following the parameter, on the same line, are a sequence of space separated arguments. If the first argument is a numeric value or the string default, then the variable will be set to that fixed value on the boundary (default corresponding to the fill value for a tracer, or zero for u1, or u2). If the first argument is the name of a standard or custom function supported by the SHOC code, then the responsibility for evaluating the variable boundary value will be passed on to that function, along with the remaining arguments. These parameters are optional, and additional to the DATA parameter described above. If present, they override the DATA parameter for the variable concerned. For example: # Set salinity to a constant value of 35.5 on this boundary BOUNDARY0.CUSTOM.salt 35.5 # Set the tracer called contam to its default value BOUNDARY0.CUSTOM.contam default # Set surface elevation by calling the etabdry routine, and # passing it the argument string "data.ts 280000 5700000" BOUNDARY0.CUSTOM.eta etabdry data.ts 280000 5700000 For a given open boundary, it is not necessary to specify a DATA parameter if a CUSTOM parameter has been specified for every tracer and the appropriate dynamic variable (u1, or u2). The CUSTOM mechanism allows a high degree of flexibility in boundary specification, particularly when combined with custom subroutines. 4.10.6 River Flow Custom Routines There exist several standard custom routines that allow a parabolic velocity profile to be imposed as the normal open boundary condition. This type of boundary forcing is designed to emulate a river inflow. Velocities decrease in a parabolic fashion from a maximum value at the surface to zero at a pre-defined depth such that the flow rate over the entire open 3 -1 boundary corresponds to a user specified rate (given in cumecs : m s ). The syntax for this type of open boundary for a u1 boundary is as follows: BOUNDARY0.BCOND_NOR BOUNDARY0.CUSTOM.u1 BOUNDARY0.U1_HC BOUNDARY0.U1_FLOW 16/09/2014 CUSTOM u1flowbdry -5.0 <flowfile.ts> or flow_value Page 45 of 177 Version: 1.00 SHOC User Manual In this case a river flow boundary is set as the normal velocity condition on boundary0 and the parabolic profile exists from the surface to 5m depth. The flow rate can either be imposed in a time varying manner by specifying a time series file <flowfile.ts>, or can be set to a constant value by specifying the constant flow_value. The flow rate should always be positive regardless of the orientation of the open boundary. Similarly, a river flow for a u2 boundary is specified via; BOUNDARY0.BCOND_NOR BOUNDARY0.CUSTOM.u2 BOUNDARY0.U2_HC BOUNDARY0.U2_FLOW CUSTOM u2flowbdry -5.0 <flowfile.ts> or flow_value A simplified specification for rivers is input as follows: BOUNDARY0.NAME River1 BOUNDARY0.TYPE u1 BOUNDARY0.BCOND0 RIVER flowfile.ts data_1.ts data_2.ts .... data_n.ts where; data_<n>.ts = file containing temperature at the cell centre. Other tracer data is also required if the tracer OBC is active. There must be at least one of these files listed. flowfile.ts = file containing river flow. In this case the depth over which the flow profile is distributed is the mean depth of the boundary, and salinity is input with a value of zero. The halocline depth generally has to be set a priori, and is typically used as a tuneable parameter. This may not be desirable if many rivers exist. A dynamic pycnocline depth may be prescribed using: BOUNDARY0.bcond_salt BOUNDARY0.CUSTOM.salt BOUNDARY0.OPTIONS TRCONC|CUSTOM 0.0 DYNAMIC_HC NO_HDIFF This can be further enhanced by computing the baroclinic landward flow in the salt wedge, and adjusting boundary ‘ghost’ cells using an upstream advection algorithm accordingly. BOUNDARY0.OPTIONS DYNAMIC_HC NO_HDIFF GEOSTR UPSTRM Note that the dynamic halocline depth is referenced to the free surface, and the absolute value will therefore change with the tide. Additional options are as follows: NO_SALT : Do not adjust input ‘ghost’ cell salinity using a salt mass balance. FULL_DEPTH : Use water depth rather than halocline to compute mean inflow velocity. FRESH_FLOW : Surface density of 1000 is used in the internal wave speed calculation rather than actual surface density. TRUNC_LAYER : Truncate halocline depth to next deepest layer. SCALE_MULT : Use multiplicative scaling to inflow rather than additive scaling. YANKOVSKY : Method of Yankovsky, A.E. (2000) The cyclonic turning and propagation of buoyant coastal discharge along the sheff. J. Mar. Res. 58, 585-607. 4.10.7 Forcing with Velocity The standard custom routines may be used to force the open boundary with velocity profiles; e.g. saved from a coarser resolution simulation. Since this nesting approach usually uses large scale and fine scale grids having different orientation, any velocities saved on the coarse grid for nesting must first be rotated into east and north components (u & v). The point array (parray) netCDF output option will automatically do this. These east and north velocity 16/09/2014 Page 46 of 177 Version: 1.00 SHOC User Manual components must be saved on both normal and tangential open boundary faces on the fine scale grid. The latitude and longitude of these faces must be supplied in the parray specification, and may be retrieved from utilities such as jvismeco or plum (matlab package). Once the normal and tangential (u,v) components are saved to file from the coarse scale grid, they may be re-read and rotated onto the fine scale boundaries using the custom routines, e.g. for a u1 boundary; BOUNDARY0.NAME BOUNDARY0.TYPE BOUNDARY0.BCOND_NOR BOUNDARY0.CUSTOM.u1 BOUNDARY0.BCOND_TAN BOUNDARY0.CUSTOM.u2 BOUNDARY0.ETA Offshore u1 CUSTOM uv_to_u1 CUSTOM uv_to_u2 NOTHIN bdry_uv_nor.nc bdry_uv_tan.nc Forcing with velocity is often prone to boundary over-specification issues which may lead to instability. These are harder to control than when forcing with elevation, where partially passive conditions may be used (see Section 4.11.8). Also, when using velocities interpolated from a coarse grid to a fine grid, there is no guarantee that the flux through the open boundary in the coarse and fine grid are identical (e.g. due to differences in bathymetry resolution, hence cross sectional area of the open boundary). This may lead to a gradual filling or emptying of the domain over time. To avoid this, the flux prescribed at the normal boundary face that is required to achieve a target elevation via the flux divergence may be inversely computed and added to the normal boundary velocity. In practice normal velocities are relaxed to this value over a timescale. This flux adjustment is invoked by specifying an elevation value in the .DATA boundary specification (e.g. derived from a coarse scale model) in conjunction with the FILEIN attribute, and the time-scale of the adjustment in the boundary list, e.g: BOUNDARY0.ETA BOUNDARY0.ADJUST_FLUX BOUNDARY0.DATA NOTHIN|FILEIN 60 seconds data_ets.nc A ‘default’ timescale mat be specified by setting ADJUST_FLUX < 0; this default time-scale is given by (see Herzfeld and Andrewartha, 2011): τf = h1 gDB A dual time-scale may be implemented, where the tidal component is relaxed toward using a short time-scale, and the low frequency component using a longer time-scale. This is invoked using: BOUNDARY0.ADJUST_FLUX BOUNDARY0.ADJUST_TIDE 60 seconds 2 seconds # Long time-scale # Short time-scale Often the short time-scale is that of the barotropic time-step, and the long time-scale is the default time-scale. The velocity forced boundary conditions may specified in a simplified format; BOUNDARY0.NAME Offshore BOUNDARY0.TYPE u1 BOUNDARY0.BCOND0 NEST1WAY data_1.nc data_2.nc .... data_n.nc bdry_uv_nor.nc bdry_uv_tan.nc Where; 16/09/2014 Page 47 of 177 Version: 1.00 SHOC User Manual data_<n>.nc = file containing elevation, temperature and salinity data at the cell centre. Other tracer data is also required if the tracer OBC is active. There must be at least one of these files listed. bdry_uv_nor.nc = file containing east and northward velocity components (u,v) at the normal velocity boundary face. bdry_uv_tan.nc = file containing east and northward velocity components (u,v) at the tangential velocity boundary face. In this case the ‘default’ flux adjustment is used, and the boundary condition for temperature and salinity is TRCONC (Section 4.10.17). Any other tracers must be individually specified. Versions prior to v1670 input the elevation via the eta relaxation file. This input method is backwards compatible using: eta_relaxation_file bdry_eta.nc eta_relaxation_input_dt 20 minutes COMPATIBLE V1670 Note that the time scaling applied to the velocity increment is dt2d / dtr, where dt2d is the 2D time step, and dtr is the relaxation time-scale above. Therefore, if it is required that the flux be adjusted so that at every 3D time-step the boundary elevation becomes that in the eta_relaxation_file, then set dtr = dt, where here dt is the 3D time-step (note that the adjustment is done on the 2D time-step and dt = IRATIO x dt2d). If FLUX_ADJUST is specified in RAMPVARS, then the time scaling decreases from 1 year at the start of the ramp to the ADJUST_FLUX value at the end of the ramp. If SCALE_ETA is specified for the boundary, (Section 4.11.24) then the relaxation value is adjusted by the scale value before the inverse calculation. Note that if FILEIN is included in RAMPVARS and the initial condition for sea level is non-zero, then the sea level for flux adjustment will start from zero over the ramp which may cause instability. The RAMPVARS for this forcing is generally: RAMPVARS WIND CUSTOM TIDALH Using forcing with velocity can lead to discontinuities in elevation (and tracers) on corners where there is boundary overlap, and elevation is solely determined by the forcing velocity data with no option for self-adjustment via interior velocities. In some cases this can lead to a constant drift in sea level, ultimately causing instability. Hard relaxation is imposed at these locations to attempt to mitigate this, however, if this fails then elevation and tracers may be over-ridden with a corner mean value using: BOUNDARY0.OPTIONS CORNER_MEANS 4.10.8 Tracer Equation OBCs The standard custom routine use_eqn may be used to create an open boundary value for a particular tracer from an equation that has valid tracers as arguments, e.g; BOUNDARY0.BCOND_NO3 BOUNDARY0.CUSTOM.NO3 (4.0403*salt))' CUSTOM use_eqn '14.01*(neg(127.8562) - (0.8621*temp) + Where neg is the unary negative operator and temp and salt are valid model tracers. There is no binary operator precedence so parentheses must be used to enforce this, otherwise the equation is evaluated left to right. The current list of operators is: * + ^ exp neg 16/09/2014 Multiply Addition Subtraction Power Exponential (unary) Negative (unary) Page 48 of 177 Version: 1.00 SHOC User Manual The unary operators must be enclosed by parenthesis (as in the above example) and spaces are allowed anywhere in the equation. Division is not supported as yet (use multiplication of the reciprocal). Any keywords in the equation that are not valid unary operators will be considered as a model tracer. An error will occur if any specified tracers are not found in the model. 4.10.9 Relaxation to Forced Data Boundary data specified from a file may be combined with a radiation condition so that the transient response of the domain is transmitted through the boundary while allowing the boundary to respond to the prescribed forcing. This is accomplished by or-ing an active data forcing condition (FILEIN or CUSTOM) with a passive boundary condition. The time scale of relaxation is input via the keyword RELAX_TIME, and must be supplied for the following boundary conditions: ORLANS|FILEIN CAMOBR|FILEIN MILLER|FILEIN GRAVTY|FILEIN NOGRAD|FILEIN CLAMPD|FILEIN LINEXT|FILEIN POLEXT|FILEIN Specifying RELAX_TIME assumes that incoming and outgoing waves are relaxed equally. Alternatively, relaxation may differ for incoming and outgoing waves by specifying: BOUNDARY0.RELAX_IN BOUNDARY0.RELAX_OUT 1 hour 30 days Long relaxation times are typically associated with outgoing waves so that the OBC behaves like a radiation condition, and short relaxation times are associated with incoming waves so that the OBC converges to the forcing data. A boundary condition for relaxing surface elevation to observed data may appear as: BOUNDARY0.TYPE u1 BOUNDARY0.NAME Offshore BOUNDARY0.BCOND_NOR BOUNDARY0.BCOND_TAN BOUNDARY0.BCOND_ELE BOUNDARY0.RELAX_TIME BOUNDARY0.BCOND_TRA0 BOUNDARY0.BCOND_TRA1 BOUNDARY0.DATA BOUNDARY0.RANGE NOGRAD GRAVTY ORLANS|FILEIN 1 hour UPSTRM CLAMPD offshore.nc (4,7)-(4,9) 4.10.10 Boundary Relaxation Elevation bay be relaxed throughout a user defined zone with differing relaxation times on the inner and outer limits of the zone. Elevation relaxation is invoked via: BOUNDARY0.RELAX_ELE r_width ts_b ts_i where r_width is the number of cells into the interior the relaxation zone extends, ts_b is the relaxation time-scale on the boundary and ts_i is the relaxation time-scale at the interior 16/09/2014 Page 49 of 177 Version: 1.00 SHOC User Manual limit of the zone. It is permissible for ts_b = ts_i. The values of ts_b and ts_i are relative to the 2D time-step; i.e. the actual time-scale used for relaxation is ts_b x ∆t2D and ts_i x ∆t2D, where ∆t2D is the 2D time-step. For example, if the 2D time-step is 60 seconds, and the relaxation zone is defined as: BOUNDARY0.RELAX_ELE 8 1 100 then a relaxation zone for elevation is created 8 cells into the interior, with a relaxation timescale of 60 seconds on the boundary and 6000 seconds at the inner limit of the zone. Note that this option also requires an accompanying relaxation file to be specified, e.g; eta_relaxation_file eta_relaxation_input_dt bdry_eta.nc 20 minutes 4.10.11 Phase Speed Smoothing The phase speed computed by the radiation schemes for elevation may be temporally smoothed using: c~ t +1 = Fc~ t + (1 − F )c t +1 A typical value of F = 0.7. This smoothing assists in reducing numerical noise (e.g. MOM Users Guide). This smoothing is invoked using: BOUNDARY0.SMOOTH_PHASE 0.7 4.10.12 Flow Relaxation Scheme The flow relaxation scheme of Martinsen and Engedahl (1987) has been included to relax boundary data to interior data. This is accomplished over a region NN cells wide. The value of the prognostic values on the boundary (η, u1, u2 or tracers) are given by any of the conditions outlined in Table 3.2.9.1; whatever is specified on the boundary is relaxed to the model integrated values over NN cells. If the prognostic variable at the boundary is equal to zero then this flow relaxation scheme acts as a sponge type condition. This condition is invoked by adding the following flags for normal velocities, tangential velocities and elevation respectively, where NN is the number of cells the relaxation method is to act over (typically NN=10): BOUNDARY0.RELAX_ZONE_NOR BOUNDARY0.RELAX_ZONE_TAN BOUNDARY0.RELAX_ZONE_ELE NN NN NN For all tracers to have the same relaxation zone, include: BOUNDARY0.RELAX_ZONE_ALL NN For individual tracers use: BOUNDARY0.RELAX_ZONE_TRAn BOUNDARY0.RELAX_ZONE_name NN NN where n is the tracer number and name is the tracer name. 16/09/2014 Page 50 of 177 Version: 1.00 SHOC User Manual 4.10.13 Linear Conditions The advective and horizontal diffusive terms on the boundary may be omitted thus linearizing the boundary momentum balance. This is invoked via: BOUNDARY0.BCOND_NOR LINEAR # Linear normal boundary velocity BOUNDARY0.BCOND_TAN LINEAR # Linear tangential boundary velocity For normal velocities on southern or western boundaries this is not particularly successful (see SHOC Science Manual, Section 4.5.6). A more successful linear strategy is to shift the stagger for normal velocities one cell into the interior and linearize the normal velocity at this location. This may be accomplished via: BOUNDARY0.BCOND_NOR BOUNDARY0.LINEAR_ZONE_NOR NOGRAD 1 The linear zone make the momentum balance linear one cell into the interior of the model. This can be extended to any number of cells interior to the boundary, and may be applied to tangential components also; BOUNDARY0.LINEAR_ZONE_NOR n BOUNDARY0.LINEAR_ZONE_TAN n # # # # # Linearize normal velocity n cells into the model interior. Typically n = 3. Linearize tangential velocity n cells into the model interior. 4.10.14 No Action Taken : NOTHIN The boundary condition NOTHIN will not alter the value of the prognostic value on the boundary. For example, if BCOND_ELE = NOTHIN the boundary value will assume that resulting from the solution to the continuity equation. This is useful if boundaries are forced with normal and tangential components of velocity, or the custom river OBC is imposed. The NOTHIN boundary condition may be combined with a radiation condition (e.g. BCOND_ELE = NOTHIN|GRAVTY), in which case the prognostic value on the boundary is relaxed to a radiation condition using the RELAX_TIME timescale. Alternatively, the prognostic value may be relaxed to data (NOTHIN|FILEIN) using the RELAX_TIME timescale. 4.10.15 Sponge Layers As a simple way of damping high frequency noise in the model (and sometimes to aid numerical stability), it is possible to apply a region of greatly increased horizontal viscosity just inside any type of open boundary. This is done by defining the parameter NSPONGE_HORZ, followed by the number of cells in from the boundary that the sponge will occupy. # Specifies that viscosity is greatly increased for 4 cells # inside this open boundary. BOUNDARY0.NSPONGE_HORZ 4 Within each sponge cell the horizontal viscosity is set near to the maximum numerically stable value for the particular grid and integration time step (default), or a multiple of the viscosity value at the boundary using, e.g; # Set the maximum value of the sponge zone equal to 5 times the boundary value. BOUNDARY0.SPONGE_FACT 5 The alternate sponge formulation of Israeli and Orszag (1981) may be implemented where the coefficient of bottom friction is increased linearly to 4 times the interior value over a region 16/09/2014 Page 51 of 177 Version: 1.00 SHOC User Manual NN cells wide. This sponge condition acts on 2D and 3D normal and tangential velocity components and is invoked by setting the following keyword for boundaries requiring a sponge: BOUNDARY0.NSPONGE_VERT NN Where NN is the width of the sponge zone (typically NN=10). The sponges are applied to only the normal component of velocity. To generate sponge zones for normal and tangential components use; BOUNDARY0.options ISO_SPONGE 4.10.16 Atmospheric Pressure If atmospheric pressure is specified as a model forcing input (see section 4.13), then, by default, elevation boundary conditions include an additional increment for the eta variable which is proportional to the difference between the specified pressure and a background ambient atmospheric pressure (the inverse barometer effect). This behaviour can be turned off for a particular boundary as follows: # Turn of the inverse barometer boundary calculation. # This is necessary where the specified eta values # on the boundary already incorporate the effects of # atmospheric pressure differences (nested grids can # be an example of this). BOUNDARY0.INVERSE_BAROMETER FALSE or BOUNDARY0.INV_BAR FALSE 4.10.17 Advection / flux conditions for tracers A simple boundary condition for tracers is the upstream advection condition, UPSTRM. This condition is a 1-dimensional implementation of the upwind scheme discretized in advective form, and suffers the errors associated with this type of implementation, i.e. it is diffusive and non-conservative. Since the advective form only computes concentrations (as opposed to fluxes), it is uncertain as to what the actual flux of tracer entering the domain is when this condition is used. It is, however, easily implemented. The UPSTRM condition must be used in conjunction with another viable condition, e.g: UPSTRM|CLAMPD UPSTRM|NOGRAD UPSTRM|LINEXT UPSTRM|POLEXT UPSTRM|CYCLIC UPSTRM|FILEIN UPSTRM|CUSTOM In this case the value derived from the additional boundary condition is used in the upstream equation as the boundary value when flow is into the domain. The UPSTRM|FILEIN condition is used as the default if no additional boundary condition is specified (e.g. BCOND_TRA_ALL=UPSTRM), and this requires the user to supply a data file containing boundary values. Note that the UPSTRM|CLAMPD condition sets the boundary value to the water column fill value specified for that tracer when flow is into the domain. The UPSTRM method effectively solves a one dimensional advection equation (Eqn. 4.8.1 Science Manual) and the location in the grid of the velocity used in this equation may 16/09/2014 Page 52 of 177 Version: 1.00 SHOC User Manual influence the results depending on the type of forcing in effect. For example if low river flow is used as a boundary condition in conjunction with large tides in the model interior, then using a velocity located at one cell into the interior to the boundary in the UPSTRM condition will drag tracer into the domain whenever the tide flows in an outward direction from the boundary. The result is that too much tracer enters the model domain. If the velocity at the boundary cell is used then (river) velocity is always directed into the domain and the tracer in the boundary cell will converge to the data forced value, thus will not be influenced by flow into the cell from the model interior due to the tide. Again too much tracer enters the domain. Clearly neither of these scenarios are optimum and ideally a combination (adaptive method) of the two would yield the best result. The user has the ability to choose which velocity location is used in the equation to best suit the forcing conditions via: UPSTRM_METHOD FACE # # INTERIOR # # CENTER # # ADAPTIVE # # # # # Use the face centered velocity at the boundary location. Use the velocity one cell into the interior of the boundary. Use the mean of the boundary and interior velocities. Use the FACE velocity if the CENTER velocity is away (outward) from the boundary, and the INTERIOR velocity if the CENTER velocity is toward the boundary. The default is INTERIOR. A better method of implementing the tracer OBC is to use the advection scheme nominated by the user (e.g. VANLEER, QUICKEST etc; see Section 4.12) to solve the advection equation on the boundary. Using these higher order schemes ensures diffusion and dispersion errors are minimised, and since the flux form of the equation is solved the solution is conservative. This method is denoted TRCONC, and similar to the UPSTRM scheme, an additional boundary condition must be used to specify the value in this cell (see above). The default is TRCONC|FILEIN, where the user must supply a data file containing boundary values. If no data are available, passive conditions may be specified using e.g. TRCONC|NOGRAD. Note that conservation is only achieved, and reasonable values computed, if the volume is conserved in the boundary cell. This requires the velocity forced OBCs to be used (Section 4.10.7). If the total flux of tracer entering the domain at the open boundary is precisely known, then this may be specified using the TRFLUX condition. Here the prescribed flux is used directly on the boundary face in the solution of the advection equation, and all other faces use the nominated advection scheme. The specified flux is uniformly distributed over all boundary cells. This approach may not be appropriate if the boundary cell becomes dominated by interior processes (i.e. the boundary cell must behave in a passive manner). Again an additional boundary condition must be used to specify the boundary flux and the default condition is TRFLUX|FILEIN, where the user must supply a data file containing boundary fluxes. Note that a positive specified flux implies tracer import, regardless of the edge the open boundary occupies. If a concentration is known, then the flux and input method analogous to TRFLUX may be specified using TRCONF. In this case the supplied concentration is multiplied by the volume flux to get the tracer flux that is applied to the face. This may be useful for river inputs, if the river flow and inflow concentration of a tracer are known. The result will be identical to that using TRFLUX with the flux = concentration x flow, and is provided as an option for convenience. 16/09/2014 Page 53 of 177 Version: 1.00 SHOC User Manual 4.10.18 Profile Methods for Tracers The profile methods for tracers allow a depth dependent profile to be constructed given a surface and bottom measurement. The surface measurement may be spatially variable, and the bottom measurement should correspond to the deepest location on the boundary. The DEPROF method scales these measurements to the actual density profile predicted by the model a certain number of cells into the model interior (currently hardwired to 5 cells), whereas the PROFIL method constructs a synthetic profile consisting of surface mixed layer, pycnocline and bottom mixed layer. This synthetic profile is made by matching two exponential profiles at an inflection corresponding to the mixed layer depth. The PROFIL method therefore requires MIX_LAYER = DENS_MIX to be set so that a mixed layer depth is available. These methods are useful for forcing the model with surface and bottom data collected using moored instruments. Both these methods require a netCDF file to be provided to SHOC containing the measured data. The data must be input at the exact geographic coordinates of the cell centers of the open boundaries. The surface measurements (which may vary spatially across the boundary) must be input at the surface (i.e. 0m) and the bottom measurement must be input at the layer in which the bottom is located for each cell comprising the boundary (i.e. the layer in which the bottom lies must be found for each cell and the same bottom measurement must be written to the netCDF file for that layer and geographic coordinates corresponding to that cell). This arrangement of the netCDF input file is necessary so that the profile method knows where to find surface and bottom measurements for each boundary cell. This means that netCDF files used for the profile methods are layer configuration and boundary location dependent (i.e. if the layer configuration or location of the boundary changes a new file must be created). Profile methods are specified using: BOUNDARY0.BCOND_TRA<n> UPSTRM|FILEIN|PROFIL BOUNDARY0.BCOND_TRA<n> UPSTRM|FILEIN|DEPROF BOUNDARY0.DATA input_file.nc # # # # # # # Synthetic profile for tracer <n>. Density profile for tracer <n>. netCDF input file containing measured data for tracer <n>. Tracers may also be scaled to a normalized density profile that exists through the water column (i.e. at the deepest point in the domain). This ensures that the gradient of the tracer profile is some constant multiple of the density gradient, and therefore ensures that mixed layer depths are consistent between the tracer and density. This is invoked using: BOUNDARY0.BCOND_TRA<n> FILEIN|DESCAL v1 v2 <code> Where v1 is the depth at which the tracer value is equal to that in input_file.nc at the same depth and v2 is a scaling factor for the profile (if v2 < 0 the profile is inverted). Below depth v1 the profile in any layer k is determined by adding v2 x (density gradient) to the concentration in the layer k+1. This is iteratively computed down through the water column. Above depth v1 the profile in any layer k is determined by subtracting v2 x (density gradient) to the concentration in the layer k-1. This is iteratively computed up through the water column. If <code> = c then a copy of the values in file.nc is used for the profile below depth v1, and if <code> = t then the profile values are truncated to those in file.nc below the depth v1 if the profile values become greater than those in file.nc. 4.10.19 Tidal Synthesis for Elevation The boundary condition TIDEBC will calculate the elevation on open boundaries from tidal constituent data supplied by the user. Data required are: 16/09/2014 Page 54 of 177 Version: 1.00 SHOC User Manual T_CONSTITUENTS T_NAME T_XLOCATION T_YLOCATION T_AMP T_PERIOD T_MOD_AMP T_DIR_AMP T_MOD_PSE T_DIR_PSE Number of tidal constituents to include Name of the tidal constituent ic : the x location of the supplied tidal amplitude and period (m) jc : the y location of the supplied tidal amplitude and period (m) A : the tidal amplitude at location (ic,jc) (m) P : the tidal period at location (ic,jc) (hours) α : the rate of modulation of tidal amplitude (cm/km) θ : the direction towards which the tidal amplitude is progressing (i.e. direction of increasing α) (degrees T) β : the rate of modulation of tidal phase (degrees/km) φ : the direction towards which the tidal phase is progressing (i.e. direction of increasing β) (degrees T) These data must be included for each tidal constituent on each boundary with the TIDEBC specification. An example of the domain forced with an M2 tide of amplitude 0.2m and an S1 tide of amplitude 0.1m is given below. BOUNDARY0.T_CONSTITUENTS BOUNDARY0.T_NAME BOUNDARY0.T_XLOCATION BOUNDARY0.T_YLOCATION BOUNDARY0.T_AMPLITUDE BOUNDARY0.T_PERIOD BOUNDARY0.T_MOD_AMP BOUNDARY0.T_DIR_AMP BOUNDARY0.T_MOD_PSE BOUNDARY0.T_DIR_PSE 2 M2 641300 341707 0.2 12.0 0.0 0.0 0.0 0.0 BOUNDARY0.T_NAME BOUNDARY0.T_XLOCATION BOUNDARY0.T_YLOCATION BOUNDARY0.T_AMPLITUDE BOUNDARY0.T_PERIOD BOUNDARY0.T_MOD_AMP BOUNDARY0.T_DIR_AMP BOUNDARY0.T_MOD_PSE BOUNDARY0.T_DIR_PSE S1 652000 341500 0.1 24.0 0.1 350.0 0.17 55.0 4.10.20 Global Tidal Model The global tide model of Cartwright and Ray (1990) may be applied to the open boundaries using: BOUNDARY0.BCOND_ELE TIDALH This condition is described in Section 4.11 of the Science Manual. The tide may be directly imposed on the boundary as above, or may be superimposed on some low frequency sea level signal using: BOUNDARY0.BCOND_ELE BOUNDARY0.DATA FILEIN|TIDALH low_frequency.nc # netCDF file containing # low frequency sea level # data. The global tide model requires paths to the orthotide functions and nodal corrections to be present, e.g: 16/09/2014 Page 55 of 177 Version: 1.00 SHOC User Manual TIDE_CSR_CON_DIR TIDE_CSR_ORTHOWEIGHTS /tide/nodal # Path to nodal # correction directory. /tide/ortho_csr_4.0 # Orthotide functions. 4.10.21 Custom Tidal Constituents Tidal constituents’ amplitude and phase may be specified via file input. This allows the model to be boundary forced with spatially variable tidal phases and amplitudes of the user’s choice. File formats may be netCDF for spatially variable, or ascii time series for non-spatially variable constituents. The custom tidal constituent prescription is specified using: BOUNDARY0.BCOND_ELE BOUNDARY0.T_CONSTITUENTS TIDALC M2 S2 K1 O1 # List of constituents The tide may be directly imposed on the boundary as above, or may be superimposed on some low frequency sea level signal using: BOUNDARY0.BCOND_ELE FILEIN|TIDALC BOUNDARY0.T_CONSTITUENTS M2 S2 K1 O1 BOUNDARY0.DATA low_frequency.nc # # # # List of constituents netCDF file containing low frequency sea level data. The global tide model requires paths to the file specifying constituent phases and amplitudes and the nodal correction directory to be present, e.g: TIDE_CSR_CON_DIR /tide/nodal TIDE_CONSTITUENTS tide.nc # Path to nodal # correction directory. # Constituent file. If any of the constituents listed in the BOUNDARY0.T_CONSTITUENTS list cannot be found in the TIDE_CONSTITUENTS file, SHOC will terminate with an error. The list of constituents should be a subset of the following: if a constituent is not found in this subset it will be omitted from the forcing with an accompanying error. Constituent Doodson Name Number long period LP 55.565 Sa 56.554 Ssa 57.555 TERa 58.554 Mm 65.455 Mf 75.555 TERm 85.455 93a 93.555 diurnal 2Q1 125.755 Q1 135.655 O1 145.555 M1 155.655 P1 163.555 S1 164.556 16/09/2014 Page 56 of 177 Version: 1.00 SHOC User Manual K1 165.555 PHI1 167.555 J1 175.455 OO1 185.555 NU1 195.455 semi-diurnal 227 227.655 2N2 235.755 MU2 237.555 N2 245.655 NU2 247.455 M2 255.555 L2 265.455 T2 272.556 S2 273.555 K2 275.555 285 285.455 Each constituent in the constituent file must be represented by an amplitude in ‘metre’ with ‘_amp’ appended to the constituent name from the table above, and a phase in ‘degrees’ with ‘_phase’ appended to the constituent name. A time stamp must also exist in the file for compatibility with the time-series file reading libraries, although this time value may be anything since it is not used in computations (however, this does allow time dependent amplitudes and phases if required). However, the amplitudes and phases must be relative to the local time zone, not GMT. Note that the spatial extent of the tidal netCDF file must completely encompass the region defined by all cell centres of the model grid. An example of a netCDF header for the M2 constituent is given below: netcdf tide { dimensions: t = UNLIMITED ; // (1 currently) i_centre = 20 ; j_centre = 20 ; variables: double t(t) ; t:units = "seconds since 2000-01-01 00:00:00 +08" ; t:coordinate_type = "time" ; double x_centre(j_centre, i_centre) ; x_centre:long_name = "Longitude at cell centre" ; x_centre:coordinate_type = "longitude" ; x_centre:units = "degrees_east" ; x_centre:projection = "geographic" ; double y_centre(j_centre, i_centre) ; y_centre:long_name = "Latitude at cell centre" ; y_centre:coordinate_type = "latitude" ; y_centre:units = "degrees_north" ; y_centre:projection = "geographic" ; } 4.10.22 Mixing coefficient boundary conditions Open boundary conditions can be imposed on the vertical mixing coefficients Vz and Kz. The same boundary conditions applicable to tracers may also be applied to Vz and Kz with the 16/09/2014 Page 57 of 177 Version: 1.00 SHOC User Manual exception of FILEIN and CUSTOM. If the boundary condition type for mixing coefficients is unspecified then the default condition of NOTHIN is imposed, which assigns the mixing values on the open boundaries via selected mixing scheme computations. Since these computations usually involve vertical velocity shear and density gradients on the open boundary, all of which use values derived from other open boundary conditions, it is possible that error is introduced into vertical mixing coefficients on the open boundary in this case. The velocity computations interior to the open boundary use the vertical viscosity on the open boundary hence it is possible for this error to propagate into the domain. Under these circumstances it is preferable to specify the mixing coefficients on the boundary via an open boundary condition. 4.10.23 Split conditions for tracers A NOGRAD boundary condition may be applied above a certain depth for tracers and a FILEIN or CUSTOM condition below this depth. This is invoked by setting: BOUNDARY0.BCOND_TRA<n> BOUNDARY0.TRPC_TRA<n> FILEIN|NOGRAD -50 (or CUSTOM|NOGRAD) Where <n> is the tracer number and in this case the depth above which the NOGRAD condition is applied is 50m. The depths should always be entered as a negative number. 4.10.24 Constant boundary bathymetry Bathymetry may be specified as constant adjacent to an open boundary via; BOUNDARY0.BATHY_CON n # Specify bathymetry constant for n cells # into the model interior. This is performed by finding the bathymetry n cells into the interior and setting the bathymetry th th at all cells between the boundary and this n cell equal to this n cell bathymetry value. Note that the input file must be re-created when the bathymetry is altered using this option. Additionally, the boundary zone may be smoothed using: BOUNDARY0.BATHY_SMOOTH n # Specify bathymetry smoothing for n cells # into the model interior. 4.10.25 Scaling The values of the tracer values computed on the boundaries may be scaled by adding a constant or multiplying by a constant. Elevation values on the boundary may be scaled by adding a constant. This is useful for easily manipulating input data without creating a new input forcing file, for example when scaling is required to convert to the correct units for tracer input. The scaling may be either a constant specified value, or may be scaled by the value of a tracer existing in the tracer list. In the latter case the scaling may be temporally and spatially variable. To scale by a constant use: # Add the value of one to the boundary value of eta BOUNDARY0.SCALE_ETA 1 Multiplicative scaling on eta can be invoked using ‘*’, e.g, multiply by 1.5; BOUNDARY0.SCALE_ETA * 1.5 # Add the value of one to the boundary value of tracer with name <trname> 16/09/2014 Page 58 of 177 Version: 1.00 SHOC User Manual BOUNDARY0.SCALE_S.<trname> 1 # Multiply the boundary value of tracer with name <trname> by 0.9 BOUNDARY0.SCALE_P.<trname> 0.9 o For example, to add 1 C to the temperature boundary value, use: BOUNDARY0.SCALE_S.temp 1 A tracer may be set up where its value is updated using the reset function (Section 4.10.2). The tracer should not be advected, diffused and should not be a diagnostic. This tracers value will therefore be updated with data from a specified file at a specified time interval. The values of this tracer on the open boundary can then be used to scale elevation or a different tracer’s boundary values. First define the scaling tracer in the tracer list, e.g; TRACER2.name TRACER2.long_name TRACER2.units TRACER2.fill_value TRACER2.valid_range TRACER2.advect TRACER.diffuse TRACER2.diagn TRACER2.reset_file TRACER2.reset_dt scale_p Scaling tracer product fraction 0.0 0 10 0 0 0 scale.nc 1 hour The values of this tracer will assume spatially interpolated values from the file ‘scale.nc’ at 1 hour intervals. The reset_file may be a netCDF or time-series file. Next, define different tracers to be scaled on each boundary by referencing to this tracer: # Add the boundary values in tracer scale_p to the boundary value of eta BOUNDARY0.SCALE_ETA scale_p # Add the boundary values in tracer scale_p to the boundary value of tracer with name # <trname>. BOUNDARY0.SCALE_S.<trname> scale_p # Multiply the boundary value of tracer with name <trname> by the boundary values in tracer # scale_p, BOUNDARY0.SCALE_P.<trname> scale_p For example, to add the boundary values in scale_p to the temperature boundary value, use: BOUNDARY0.SCALE_S.temp scale_p 4.10.26 Boundary geographic location The latitude and longitude of the cell and face centres may be output to file using: WRITE_BDRY <bdry_file> where <bdry_file> is the name of the file the information is written to. This file will contain the latitude and longitude of cell centres (for tracer / elevation), normal velocity face centres and tangential velocity face centres for every boundary present. The information is written in the point array output file format (Section 4.32.6), and may be directly pasted into a parameter 16/09/2014 Page 59 of 177 Version: 1.00 SHOC User Manual file when outputting point array data for nested grids. The WRITE_BDRY option will only function when running the model under the –p or –g options. 4.10.27 Standard boundary conditions A simplified format may be used to specify certain open boundary conditions. A list of these standard boundaries may be specified (currently the list size is 2) where boundaries may be re-configured to any in the list using run regulation (Section 4.31.1). The standard boundaries are specified using: BCOND<n> type <data_1>....<data_n> Where n is the list number (0 to 1), type is the type of the condition and <data> is a list of data required for the type. The type may be: 1. 1-way nesting (Section 4.10.7): BOUNDARY0.BCOND0 NEST2WAY data_1.nc data_2.nc .... data_n.nc bdry_uv_nor.nc bdry_uv_tan.nc where data_<n>.nc = file containing elevation, temperature and salinity data at the cell centre. Other tracer data is also required if the tracer OBC is active. There must be at least one of these files listed. bdry_uv_nor.nc = file containing east and northward velocity components (u,v) at the normal velocity boundary face. bdry_uv_tan.nc = file containing east and northward velocity components (u,v) at the tangential velocity boundary face. In this case the ‘default’ flux adjustment is used, and the boundary condition for temperature and salinity is TRCONC (Section 4.10.17). Any other tracers must be individually specified. 2. 2-way nesting: BOUNDARY0.BCOND0 NEST1WAY data_1.mpk data_2.mpk .... data_n.mpk bdry_uv_nor.mpk bdry_uv_tan.mpk where the format is the same as for 1-way nesting, except forcing files are memory packets. 3. River boundaries (Section 4.10.6): BOUNDARY0.BCOND0 RIVER flowfile.ts data_1.ts data_2.ts .... data_n.ts Where data_<n>.ts = file containing temperature at the cell centre. Other tracer data is also required if the tracer OBC is active. There must be at least one of these files listed. flowfile.ts = file containing river flow. In this case the depth over which the flow profile is distributed is the mean depth of the boundary, and salinity is input with a value of zero. 4. No action taken: BOUNDARY0.BCOND0 NOTHIN Velocity, tracer and sea level open boundaries are set to NOTHIN (Section 4.10.14). 5. Emulate a solid wall: BOUNDARY0.BCOND0 SOLID 16/09/2014 Page 60 of 177 Version: 1.00 SHOC User Manual This OBC is the same as No action taken, except normal velocities are clamped to zero such that a zero flux condition exists. 6. Flather radiation: This OBC sets up a Flather radiation open boundary condition, and is invoked using: BOUNDARY0.BCOND0 NEST_FLA ts.nc eta.nc uvav_nor.nc uvav_tan.nc Where ts.nc is a file containing temperature and salinity data, eta.ts is a file containing sea level data, uvav_nor.nc is a file containing normal depth averaged velocity data and uvav_tan.nc is a file containing tangential depth averaged velocity data. The Flather OBC conforms to the following specification: BOUNDARY0.BCOND_ELE BOUNDARY0.BCOND_NOR BOUNDARY0.BCOND_NOR2D BOUNDARY0.BCOND_TAN BOUNDARY0.salt BOUNDARY0.temp BOUNDARY0.STAGGER BOUNDARY0.custom.u1 BOUNDARY0.DATA FLATHR|FILEIN|GRAVTY NOGRAD FLATHR|CUSTOM GRAVTY FILEIN FILEIN INFACE uvav_to_u1av uvav_nor.nc # or .u2 ts.nc eta.nc A standard open boundary configuration may appear as: BOUNDARY0.NAME BOUNDARY0.TYPE BOUNDARY0.BCOND0 BOUNDARY0.BCOND1 Offshore u1 NEST1WAY data_1.nc bdry_uv_nor.nc bdry_uv_tan.nc RIVER flowfile.ts data.ts Any additional boundary specification (e.g. INVERSE_BAROMETER, NSPONGE_HORZ) is also applied to the standard boundary. 16/09/2014 Page 61 of 177 Version: 1.00 SHOC User Manual Advection Schemes The specification of the advection scheme for tracers is set via the flag TRA_SCHEME in the parameter file. Current options are: ORDER1 VANLEER ORDER2 ORDER2_UW ORDER4 QUICKEST QUICKEST_AD QUICKEST_CO LAGRANGE # # # # # # # # # 1st order upwind flux form Van Leer’s scheme 2nd order flux form 2nd order upwind flux form (stable for Courant < 2) 4th order flux form QUICKEST, flux form, variable grid QUICKEST scheme, advective form QUICKEST, flux form, constant grid formulation Semi-Lagrange scheme For details of these advection schemes see section 5, Herzfeld (2002). The ULTIMATE limiter (Leonard, 1991) is invoked on the chosen scheme by setting the flag UTLIMATE in the parameter file. This limiter eliminates non-monotonic behaviour in the nd th solutions and is generally only successful on the higher order advection schemes (i.e. 2 , 4 order and QUICKEST). The ULTIMATE limiter is not invoked by default. e.g. ULTIMATE ULTIMATE YES NO # invoke the ultimate limiter # no ultimate limiting A choice of advection scheme is also available for momentum. This is set via the flag MOM_SCHEME in the parameter file and the current options are: ORDER1 ORDER2 VANLEER ANGULAR ANGULAR3D LAGRANGE # # # # # # 1st order upwind scheme 2nd order scheme Van Leer’s scheme 2nd order flux form angular scheme for momentum As for ANGULAR but applied to 3D momentum only Semi-Lagrange scheme Several additional options may be appended to the MOM_SCHEME definition: WIMPLICIT ADVECT_FORM WTOP_O2 WTOP_O4 ZERO_DRYK SHAPIRO # # # # # # Implicit vertical advection Horizontal advection solved in the advection form 2nd order approximation for surface vertical velocity 4th order approximation for surface vertical velocity Velocity=0 for horizontal terms above free surface Use 1st order Shapiro filter on advection tendencies th The default approximation for surface vertical velocity is 4 order. Velocities used in the horizontal fluxes are set to zero above the free surface using ZERO_DRYK, then set to a nogradient for the vertical fluxes. The default is a no-gradient condition for horizontal and vertical fluxes. An example using these options may be: MOM_SCHEME ORDER2 ADVECT_FORM ZERO_DRYK st th The semi-Lagrangian scheme can be used with 1 to 4 order interpolations using: ORDER_SL n # Order of scheme; n = 1, 2, 3 or 4. The default is first order using a tri-linear interpolation. The scheme is also unconditionally stable and can therefore be used with any time-step. However, this scheme is only suitable to use with multiple windows if the CFL condition is satisfied (in practice the stencil of the higher order schemes (n > 1) mean that insufficient partition transfers are available to provide an 16/09/2014 Page 62 of 177 Version: 1.00 SHOC User Manual accurate solution). This allows the possibility to operate the tracers on a longer time-step than momentum, which is achieved by setting the flag; TRATIO n where n is the multiple of the 3D time-step the tracers are to operate on, e.g. if n=4 and dt=50 seconds then the tracers are updated every fourth 3D time step (every 200 seconds). Note that the Semi-Lagrangian scheme has conservation and numerical diffusion characteristics inferior to some of the other schemes available (semi-Lagrange characteristics improve with increasing Courant number), but if many tracers exist and speed is a priority, then this scheme may be attractive. Note that the effective upper limit of TRATIO may be determined by other events in the time scheduler’s control, i.e. the routine cgrid_step() may be called with a stop time less than the tracer time-step. For this reason ideally the TRATIO time-step must be less than any other time IO interval used for output dumps, output timeseries or forcing data input. Due to the undesirable characteristics of the LAGRANGE scheme, it is possible to advect tracers temp and sal with a higher order scheme (VANLEER) and all remaining tracers with LAGRANGE using: TRA_SCHEME LAGRANGE|VANLEER # T/S = VANLEER, # other tracers = LAGRANGE The TRATIO facility may be used in conjunction with these split schemes. 4.11 Surface elevation and velocity The initial condition for the surface elevation may be specified by input from file (netCDF or timeseries) or by direct input in the parameter file. The latter consists of specifying an NCE1*NCE2 floating point array, so that it is possible to set a different value in every grid cell. However, for most applications where the grid geographical extent is not large, a uniform value can be used. Examples of surface initialisation are given below: SURFACE surface.nc # Input eta from netCDF or timeseries file. SURFACE 1.0 2000 # Elevation set uniformly to 1m for a # hypothetical domain of size 40*50. SURFACE 0.1 0.2 0.2 0.3 4 # Elevation set at each cell for a domain of # size 2*2. If file input is used for surface initialisation and this file doesn’t contain an elevation dump at the time corresponding to the model start time, then linear interpolation of elevation to the start time is performed. Surface elevation initialisation using the above methods generates a surface field that is written to the input netCDF file, hence if any changes are made to the surface initialisation then a new input netCDF file must be generated using the –g option (see section 8). Changes to surface initialisation have no effect when running the model using the –p option. The surface elevation may be explicitly overwritten at a number of arbitrary cells using the SURACE_POINTS list. This option is useful for quickly initialising barotropic relaxation experiments (e.g. tsunami modelling). The format is as follows: SURFACE_POINTS n i1 j1 val1 i2 j2 val2 . . 16/09/2014 # n = number of points in the list # (i,j) location and value for point 1 # (i,j) location and value for point 2 Page 63 of 177 Version: 1.00 SHOC User Manual in jn valn Similarly, the surface velocity initial condition may be specified using: VELOCITY velocity.nc # Input velocity from netCDF file. The initial velocity field can be set to the geostrophic flow using: VELOCITY GEOSTROPHIC 4.11.1 Elevation (and velocity) relaxation Surface elevation may be relaxed to a surface field supplied via a time series or netCDF file using: eta_relaxation file eta_relaxation_input_dt eta_relaxation_time_constant infile.nc # η field to relax towards 1 hour # Time interval elevation is # read from file. # elevation relaxation time # constant. The elevation to relax towards is read from the file infile.nc at the time interval eta_relaxation_input_dt. Every 2D time-step the actual elevation is relaxed towards this value using a relaxation time constant of eta_relaxation_time_constant. The relaxation time constant is the time it takes for the elevation to converge to the elevation field in infile.nc, i.e. if the time constant is equivalent to the 2D time-step then elevation is reset to that found in infile.nc every 2D step. If the eta_relaxation_time_constant is the name of a file (netCDF or ascii) then the units for the time constant in the file must be a date unit, e.g. # Ascii relaxation file where relaxation is 48 hours at day 0 and 2 # hours at day 10. Note ‘Time’ is converted to the model units # specified by TIMEUNIT. ## COLUMNS 2 ## ## COLUMN1.name Time ## COLUMN2.long_name Time ## COLUMN1.units days since 1990-01-01 00:00:00 +8 ## COLUMN1.missing_value -999 ## COLUMN1.fill_value 0.0 ## ## COLUMN1.name eta_relaxation_time_constant ## COLUMN2.long_name Eta relaxation time constant ## COLUMN1.units hours ## COLUMN1.missing_value -999 ## COLUMN1.fill_value 0.0 ## 0 48 10 2 Adaptive relaxation can be invoked by specifying: eta_relaxation_time_constant linear dv1 tc1 units1 dv2 tc2 units2 eta_relaxation_time_constant exponential dv1 tc1 units1 In the linear case, if the absolute difference between modelled eta and that read from infile.nc is dv1, then a relaxation constant of tc1 units1 is used and if the absolute difference is dv2, then a relaxation constant of tc2 units2 is used, with linear interpolation 16/09/2014 Page 64 of 177 Version: 1.00 SHOC User Manual for other values of the absolute difference. For the exponential case, a function rate = exp(α / | dv |) is used where dv is the difference between modelled eta and that read from infile.nc and α = dv1 ln(tc1 ) . The relaxation constant will therefore vary spatially and temporally throughout the domain and simulation. An example is included below, where dv1=0.5 m and tc1 = 5 days. A relaxation rate linear in time may be specified using: eta_relaxation_time_constant temporal dv1 tc1 units1 dv2 tc2 units2 In this case the relaxation rate is tc1 units1 at dv1 days (relative to the TIMEUNIT), changing linearly to tc2 units2 at dv2 days, then thereafter capped at tc2 units2. Depth based relaxation methods analogous to tracer relaxation (see Section 4.9.2) are also available. In these cases the sea level increment is saved to a 2D tracer eta_inc. These methods are invoked using: eta_relaxation_time_constant depth dv1 tc1 units1 dv2 tc2 units2 eta_relaxation_time_constant exp_depth a0 tc1 units1 d1 tc2 units2 : eta_relaxation_time_constant cos_depth d0 tc1 units1 d1 tc2 units2 Often the relaxation elevation does not contain tidal variation. If the model includes tidal forcing, this must be removed before relaxation can occur. This may be invoked using: TIDAL_REMOVAL CSR MEAN # # # # # # # Removal using tide computed from the CSR tide model. Use the long term eta mean as an approximation to the relaxation elevation. ETA must be included as a MEAN diagnostic (see Section 4.30.2) for this to operate, with a MEAN_DT equal to the length of the run. Velocity relaxation may be achieved with the same functionality as for elevation. In this case any ‘eta_’ is replaced with ‘vel_’ in the relaxation specification. Relaxation is performed every 3D time-step for the 3D mode, and 2D time-step for the 2D mode. 4.12 Wind Wind forcing is specified by number of parameters which define an input time series of wind velocity components, and drag law coefficients. The model implements a general piece-wise linear surface drag coefficient (see, for example, Large and Pond, 1981). It has the form: 16/09/2014 Page 65 of 177 Version: 1.00 SHOC User Manual Cd 0 (V − V0 ) C d = Cd 0 + (C d 1 − C d 0 ) (V1 − V0 ) Cd 1 where V ≤ V0 V0 < V < V1 V ≥ V1 Cd is the surface drag coefficient, V is the wind speed and C d 0 , Cd 1 , V0 and V1 are r specified parameters (described below). The surface stress r τ top rr = ρ air C dV V where ρ air is the air density (see section 0), and above formulation for τ top is then calculated as follows: r V is the wind velocity vector. Note that the Cd implies that the surface stress varies roughly as the cube of the wind speed for speeds between V0 and V1 . As a result, in some applications the model results can be very sensitive to the wind input data. The drag parameterization may be alternatively specified using the following: WIND_STRESS_FCTN L&P K/W B Ko # # # # Large and Pond (1982) scheme,(Eqn 21) Kitaigorodskii et al (1973) scheme Bunker (1976) scheme Kondo (1975) scheme These alternative schemes also require a reference height in metres to be supplied, corresponding to the height where measurements were made, e.g; WIND_STRESS_REFH 10 # Reference height in (m) For Ko the option exists to use the drag coefficient for neutral conditions: WIND_STRESS_NEUTRAL YES # neutral drag coefficient At the start of a model run, wind forcing may be smoothly ramped up from zero over some specified period (see RAMPSTART and RAMPEND in section 4.3). This may help to avoid shocks or start-up transients in the model. Wind inputs are specified as follows: # A time series file containing wind East and North # velocity components, which must be called 'u'; and 'v' # respectively, and have units of ms-1. WIND_TS cyc_bobby95.nc # How often to read data from the wind file and update # the wind field in the model. WIND_INPUT_DT 10 minutes # Scale factor applied to the wind speed. This makes it # easy to do experiments with different wind strengths # without having to generate a new wind time series file. WIND_SPEED_SCALE 1.0 # Drag law coefficients. Here they are as used by # Large and Pond, (1981). V0 and V1 have units of m/s. DRAG_LAW_V0 10.0 DRAG_LAW_V1 26.0 DRAG_LAW_CD0 0.00114 DRAG_LAW_CD1 0.00218 16/09/2014 Page 66 of 177 Version: 1.00 SHOC User Manual The wind speed components in the north and east directions must bear the names ‘u’ and ‘v’ in the wind input file (see Section 4.29). These wind components are then rotated onto the grid to conform to the grid e1 and e2 directions. If the wind components already conform to the grid orientation they may be directly applied without rotation by specifying the names ‘wind_e1’ and ‘wind_e2’ in the wind input file. Wind stress may be directly applied to the grid by using the WIND_TYPE flag, eg.; # Wind input file contains wind speed (ms-1) (used by default) WIND_TYPE SPEED # Wind input file contains wind stress (Nm-2) WIND_TYPE STRESS If the WIND_TYPE flag is absent the wind input file is assumed to contain wind speeds. 4.12.1 Generic Storm Systems Wind stress may be applied to the domain corresponding to the passage of generic cyclonic or anticyclonic synoptic weather systems. This is useful for performing idealized experiments or prescribing a realistic time and space dependent wind-field in the absence of measured data. These systems are defined by their (i,j) location in the grid relative to the grid origin, maximum pressure gradient, rotation to a latitude circle and eccentricity. Any number of these systems may be defined corresponding to certain times, and SHOC piecewise interpolates the defined systems to produce a wind pattern at any particular time during the simulation. The (i,j) location need not be defined within the dimensions of the domain but may assume any value ( − ∞ < i < ∞ , − ∞ < j < ∞ ). For this reason the locations must be supplied in terms of (i,j) rather than geographic coordinates, since there only exists a map between geographic coordinates and (i,j) locations within the confines of the domain. Generally the user must perform some type of extrapolation if the storm center is to be defined beyond the confines of the domain; this may not be trivial for curvilinear grids and some trial and error may be necessary. The storm systems are defined via: NSTORM STORM_INPUT_DT ST0.stime ST0.stype systems ST0.sp ST0.ss ST0.si ST0.sj ST0.se ST0.sr n ? day ? days HIPR or ? ? i j ? ? # Number of storm systems to define # Interval wind stress is updated # Time this system is defined at LOPR # High pressure or low pressure # # # # # # Maximum pressure gradient (HPa/km) Radius (km) i location of system center j location of system center Eccentricity (0<e<1) Rotation (0<θ<360) An example of a propagating storm system is given below: NSTORM STORM_INPUT_DT ST0.stime ST0.stype ST0.sp ST0.ss ST0.si ST0.sj ST0.se ST0.sr 3 1 day 0 days HIPR 7e-4 3000 -20 20 0 0 ST0.stime 5 days 16/09/2014 Page 67 of 177 Version: 1.00 SHOC User Manual ST0.stype ST0.sp ST0.ss ST0.si ST0.sj ST0.se ST0.sr HIPR 1e-5 2000 20 20 .8 90 ST0.stime ST0.stype ST0.sp ST0.ss ST0.si ST0.sj ST0.se ST0.sr 10 days HIPR 7e-4 3000 40 20 0 180 This system propagates through the domain along the ξ1 axis, centered on ξ2=20. At day 0 it assumes the form of a circular anticyclone, at day 5 it strengthens, contracts in size and becomes elliptic with the major axis aligned in the north-south direction. By day 10 it has weakened and become larger again with a circular shape. The wind stress field is updated according to this progression at daily intervals. If a wind file is specified in conjunction with the storm system specification then the wind and storm components are added to produce the wind stress vector. 4.13 Atmospheric pressure A mandatory parameter sets the background air pressure, as follows: # Background air pressure, in Pa AMBIENT_AIR_PRESSURE 101000 This value sets the air pressure throughout the model domain. Because this value is uniform, it is not dynamically significant unless time and space varying pressure forcing is also specified, as outlined below. Models covering larger domains (or including phenomema such as severe storms) may require such atmospheric pressure inputs. These are specified by the following optional parameters: # A time-series file containing the variable 'pressure' with # units of Pa. PRESSURE cyc_bobby95.nc # How often to read the file and update the pressure # field in the model. PRESSURE_INPUT_DT 10 minutes # Update every 10 minutes. In this case, horizontal gradients in atmospheric pressure are dynamically included in the model, and any difference between the pressure specified in the PRESSURE data file and the AMBIENT_AIR_PRESSURE value may cause an inverse barometer effect at elevation open boundaries (see section 4.10.16). 4.14 Rainfall Rainfall can be included as a model forcing input by using the following optional parameters: 16/09/2014 Page 68 of 177 Version: 1.00 SHOC User Manual # A time-series file containing the variable 'precipitation' # with units mm day-1 (the SI unit would be m s-1, but this # results in ridiculously small values). PRECIPITATION rain.nc # How often to read the precipitation data. PRECIPITATION_INPUT_DT 10 minutes Rainfall is assumed to be fresh (zero salinity), at ambient air temperature (see section 4.16), and have zero concentration of all other tracers. Rainfall increases the volume of water in the model, and so may directly affect the model surface elevation. 4.15 Evaporation Evaporation can be included as a model forcing input by using the following optional parameters: # A time-series file containing the variable 'evaporation' # with units mm day-1. EVAPORATION evap.nc # How often to read the evaporation data. EVAPORATION_INPUT_DT 10 minutes Evaporation removes fresh water from the model. Evaporation can cause numerical problems in the model if the surface layer is very thin, as tracer concentrations can increase without bound as the surface layer evaporates and the thickness approaches zero. This problem will be addressed in future model versions, but can usually be avoided by judicious choice of vertical grid geometry. Note that evaporation rates are specified in an input time series file. This implies that the rates must be obtained by calculation or observation prior to the model run, so that the water temperature simulated by the run itself is not directly used as an input to the estimates of evaporation. 4.16 Surface heat flux SHOC includes a variety of explicit heat flux parameterizations. The options for defining a heat flux are: HEATFLUX HEATFLUX HEATFLUX HEATFLUX HEATFLUX HEATFLUX HEATFLUX NONE # BULK # NET_HEAT # SURF_RELAX # INVERSE # COMP_HEAT # COMP_HEAT_MOM No heat flux included Computed using bulk method Net heat flux supplied via timeseries Surface layer temperature relaxation Heat flux calculated inversely Heat flux from RAMS components # Heat flux from MOM4 components The least complex (and least realistic) surface heat flux mechanism is implemented by relaxation of the surface layer temperature to some prescribed, possibly time varying field using the SURF_RELAX option as follows: # Time-series file specifying surface temperatures, containing # the variable 'heatflux_temp' with units 'Degrees C'. HEATFLUX_TEMP temp.nc HEATFLUX_TEMP_DT 1 day # Relaxation time constant 16/09/2014 Page 69 of 177 Version: 1.00 SHOC User Manual HEATFLUX_TC 20 days This mechanism is similar to the more general tracer relaxation mechanism described in section 4.9, except that it only operates on the surface layer of the model, rather than throughout the model. The BULK heat flux formulation uses a more complex bulk formulation and long wave parameterisation, in addition to calculating the short wave component rather than supplying a time-series file (see Herzfeld et al (2002), section 9.2). A number of input data sets are required, all of which are optional, as described below. Sensible heat flux requires the specification of the air temperature (as well as wind inputs see section 0). Air temperatures are specified as follows: # Time-series file containing the variable 'air_temp' with # units 'Degrees C'. AIRTEMP airtemp.nc How often to read the air temperature file. AIRTEMP_INPUT_DT 10 minutes The sensible heat flux is proportional to the product of the wind speed and the difference between the model surface layer temperature and the air temperature. The latent heat flux requires data to calculate specific humidity: # Time-series file containing the variable 'wet_bulb’ with # units 'Degrees C'. WET_BULB wetbulb.nc WET_BULB_INPUT_DT 10 minutes In the absence of wet bulb measurements, the dew point temperature may be substituted; # Time-series file containing the variable ‘dew_point’ with # units 'degrees C'. WET_BULB dewpoint.nc WET_BULB_INPUT_DT 10 minutes If available, a file containing short wave radiation may be supplied directly as below. # Time-series file containing the variable 'swr' with # units 'W m-2'. RADIATION swr.nc # How often to read the solar radiation data RADIATION_INPUT_DT 10 minutes # Albedo of the surface ALBEDO 0.2 If -1 < ALBEDO < 0 then the albedo is computed as a function of cloud amount and hour angle (sect 9.1.1 Science Manual). In the absence of a CLOUD file, clear skies are assumed. There are five bulk schemes available to specify latent and sensible heat fluxes. These are specified via; # Specify the bulk method BULK_SCHEME L&P # Ko # B # K/W # M # 16/09/2014 Large and Pond (1982) scheme Kondo (1975) scheme Bunker (1976) scheme Kitaigorodskii et al (1973) scheme Masagutov (1981) scheme Page 70 of 177 Version: 1.00 SHOC User Manual These schemes are compared in Blanc (1985). The default is the scheme of Kondo (1975). A ramp may be applied to the heatflux, where zero heatflux is applied before the time specified, e.g. # Do not apply a heatflux before 10 days, relative to the TIMEUNIT HEATFLUX_RAMP 10 days It is possible to distribute the short wave radiation throughout the water column by specifying an attenuation coefficient, SWR_ATTENUATION; if this is absent all short wave radiation is included in the surface boundary condition. It is possible to partition a fraction of the short wave radiation to be input as the surface boundary condition with the remainder distributed throughout the water column according to the attenuation coefficient. This is achieved by specifying a transmission coefficient, SWR_TRANSMISSION; if this is absent it is assumed all short wave radiation is depth distributed.. # Specify short wave radiation attenuation and transmission # parameters. SWR_ATTENUATION 0.2 # Attenuation SWR_TRANSMISSION 0.5 # Fraction for depth distributed swr Attenuation and transmission may be set to standard water classes according to Mellor (1992), e.g; # Set the water type to Type II water WATER_TYPE TYPE_II Attenuation and transmission are set according to the table below: Water Type I IA IB II III Attenuation 0.037 0.042 0.056 0.073 0.127 Transmission 0.32 0.31 0.29 0.26 0.24 Note that SWR_TRANSMISSION = 1 means that all shortwave radiation is depth distributed. Alternatively the dual extinction parameterization may be used where separate extinction coefficients are used for the surface and deeper layers. A fraction determines the partitioning between surface and deep attenuation. # Specify dual short wave radiation attenuation parameters. SWR_ATTENUATION 2.8 # Surface attenuation SWR_ATTENUATION_DEEP 0.04 # Deep attenuation SWR_FRACTION 0.58 # Fraction for surface attenuation Where short wave radiation penetrates to the bottom, it is assumed that all surplus radiation below the sea floor is absorbed into the sea bed with no additional heating of the bottom layer. This may be altered using the SWR_BOT_ABSORB flag, where a (default) value of 1 assumes the above, while a value of 0 assumes all surplus short wave radiation is input into the bottom layer. The reality is that bottom reflectance would supply some heat to the bottom layer and the value SWR_BOT_ABSORB of would be somewhere between 0 and 1. This flag may be used as a tuning parameter, e.g. # Specify fraction of surplus radiation input into bottom layer. SWR_BOT_ABSORB 0.5 # Bottom absorbtion The may be input as a 2-D spatially varying field by supplying a netCDF file as input, e.g. 16/09/2014 Page 71 of 177 Version: 1.00 SHOC User Manual SWR_BOT_ABSORB babs.nc # 2D varying bottom absorbtion Or a list of ascii values in the parameter file, e.g. for a 2 x 2 grid: SWR_BOT_ABSORB 0.9 0.8 0.0 0.5 4 # 2 x 2 = 4 values # List of values. If measurements of shortwave radiation are not available, then this parameter may be calculated. This requires the specification cloud cover as follows: # Time-series file containing the ‘cloud' with units 'oktas'. CLOUD cloudiness.nc CLOUD_INPUT_DT 10 minutes ALBEDO must not be present if short wave radiation is to be computed by the model. Note that if the ecology module is invoked then short wave radiation is input via the LIGHT and ALBEDO_LIGHT parameters which differ from the RADIATION parameters in that the ecology module requires a daily mean short wave radiation, which is inadequate for the heat flux calculation. The bulk parameters are usually specified at a standard height of 10m. If the wet and dry bulb temperatures (and wind) are not measured at this standard height, then the bulk parameters must be scaled from the standard height to the reference height the measurements were taken at. The user should therefore supply the reference height of measurements via: # Reference height of meteorological measurements, units ‘m’. HEATFLUX_REFH 5.0 If the reference height is absent a height of 10m is assumed. A larger reference height results in larger bulk fluxes. The sensible heat flux uses a gradient between the air temperature and SST. The SST used in this calculation is that predicted by the model. The user may submit an alternate file (e.g. of field measured SST) from which the sensible heat is computed. In this case a HEATFLUX_TEMP file (see above) containing sea surface temperature must be supplied. Correcting air temperature and humidity for advection effects (see section 9.3 Herzfeld et al 2002) is invoked via: # Include the correction to air temperature and humidity due to # advective effects. HEATFLUX_ADVECT YES Note that the advection correction uses a calculation of fetch from 8 compass points; if all these directions are not required then the array mask[] in init_fetch() in the module forcings/heatflux.c may be modified (zero values omit the corresponding wind directions in the advection calculation). The NET_HEAT option imposes a net heat flux directly from time-series input as the surface boundary condition for temperature and requires the following: # Time-series file containing the variable 'heatflux' with # units 'W m-2'. HEATFLUX_FILE heatflux.nc HEATFLUX_DT 1 day Note that a positive flux indicates heat input into the ocean. Short wave radiation may be input separately and distributed with depth as per the BULK option above. In this case the net heat flux corresponds to the sum of long wave radiation, sensible and latent heat fluxes. 16/09/2014 Page 72 of 177 Version: 1.00 SHOC User Manual Finally the INVERSE option calculates a heat flux inversely based on a time-series of surface water temperatures (see Herzfeld et al 2002, section 9.4 for details). In the absence of any heat flux information this constitutes a helpful first estimate of heat input. This option requires a timeseries of SST observation, input in the same manner as relaxation to the surface; i.e. # Time-series file specifying surface temperatures, containing # the variable 'heatflux_temp' with units 'Degrees C'. HEATFLUX_TEMP temp.nc # Time constant HEATFLUX_TC 20 days In this case the time constant determines the time-scale over which the SST will change due to the applied heatflux, i.e. the shorter the time constant the larger the estimated fluxes. Generally the time constant should be of the order of the frequency of observations. The heat flux generated with the BULK and INVERSE methods (and heat flux components) are saved as tracers which may be viewed in the model output. If the BULK option is invoked, the heat flux components are written to the time series files. The atmospheric model RAMS (Pielke et. al., 1992) can output heatflux components that may be assembled to generate a net heat flux comprising of sensible, latent and longwave fluxes, and a short wave component that is depth distributed as above. Note that this formulation the longwave radiation is replaced with analytical blackbody outgoing radiation and clear sky longwave input, since this seems to generate heatfluxes that balance (i.e. do not excessively heat or cool the ocean) in the long term, hence producing better results. Also, RAMS may produce latent heat > 0 when it is raining, hence the latent heat imposed using this option has a maximum of zero. This option is invoked, for example, via: # Impose RAMS heat flux components HEATFLUX COMP_HEAT HEATFLUX_FILE RAMS.nc HEATFLUX_DT 30 minutes In this case the file RAMS.nc must contain variables with names swr (short wave radiation), lwr_in (downward long wave radiation), lwr (outward long wave radiation), sensible (sensible heat flux) and latent (latent heat flux). See Section 7 for more detail on COMP_HEAT. Heatflux components used in the global ocean model MOM4 may also be assembled in a similar manner. In this case the short wave radiation is provided as a mean over some fraction of a day defined by HEATFLUX_DT. The daily profile is reconstructed from these means using the methodology of Schiller and Godfrey, 2003. Also, latent heat is provided as -2 -1 -2 an evaporation rate in units of kgm s , which is converted to Wm by multiplication by the 6 latent heat of evaporation (Lv = 2.5x10 ). This option is invoked, for example, via: # Impose MOM4 heat flux components HEATFLUX COMP_HEAT_MOM HEATFLUX_FILE MOM.nc HEATFLUX_DT 30 minutes In this case the file MOM.nc must contain variables with names swr (short wave radiation), lwr (outward long wave radiation), sensible (sensible heat flux) and latent (latent heat flux). These variables usually require the use of variable substitution, since they typically have the following MOM names: swr = sw_flux lwr = lw_flux sensible = t_flux latent = q_flux 16/09/2014 Page 73 of 177 Version: 1.00 SHOC User Manual 4.17 Surface salt flux A surface salt (or freshwater) flux may be included to account for the effect of water fluxes on salinity. This can be specified via the flag: SALTFLUX SALTFLUX SALTFLUX NONE BULK BULK # No salt flux included # BULK salt flux # Salt flux partially determined using bulk # schemes. The BULK method requires PRECIPITATION and EVAPORATION time-series files to be defined (sections 4.14 and 4.15) from which the surface salt flux is calculated and applied as a surface boundary condition for the vertical diffusion of salinity (see Herzfeld et al (2002), section 9.4). Evaporation is difficult to measure over water, and the latent heat of evaporation may be used to estimate this parameter (Herzfeld et al (2002), section 9.4) when the BULK method is invoked. Since this bulk flux is used, the BULK method will only function if the HEATFLUX flag is set to BULK so that latent heat of evaporation is calculated. If a PRECIPITATION time-series file is present then the effect of rain is added to the calculated evaporation. 4.18 Bottom friction Bottom friction in the model is implemented as a combination of a linear and quadratic drag r law. The bottom stress τ bot is calculated as follows: r r (r τ bot = ρC d U max U , U f ) r where ρ is the water density, U is the bottom velocity, and U f is a small background friction velocity, below which the friction law changes from quadratic to linear (with an effective drag coefficient of C d U f . The bottom drag coefficient Cd is calculated using a bottom roughness length zo (which may vary spatially), as follows: 1 z+z 0 , C C d = max ln κ x0 d min Here, κ is the von Karman constant (0.4), and z is the height of the nearest velocity point above the sea bed. C d min is a parameter, typically between 0.002 and 0.003, which places a lower limit on the value of C d when the velocity point is a long way from the bottom. The model parameters associated with the formulations described above are specified as follows: # Minimum bottom drag coefficient. If QBFC < 0, then this value is # used directly for the bottom drag. QBFC 0.0025 # Background friction velocity (ms-1) UF 0.01 # Bottom roughness (values in metres). 16/09/2014 Page 74 of 177 Version: 1.00 SHOC User Manual Z0 4.19 0.001 Waves Waves are primarily used in SHOC in conjunction with sediment transport libraries so that bottom friction may be enhanced by wave action to result in increased resuspension. This requires that wave period, wave amplitude, wave direction and orbital velocity are supplied or computed. These quantities may be supplied via file input using: WAVE_VARS WAVE_VARS_INPUT_DT wave.nc 2 hours # Wave time series file # How often to read the wave data Alternatively, the wave variables may be created by SHOC and provided with values via the wave library (see below) using: WAVE_VARS YES If a WAVE_VARS = YES or a file is specified, then SHOC will automatically create 2D tracers for the wave variables. This is done even if the input file does not contain data for the wave variables (e.g. an empty file). The wave variables created by SHOC are (see Section 4.31.15): Tracer name wave_amp wave_period wave_dir wave_ub ustrcw wave_Fx wave_Fy wave_ste1 wave_ste2 Variable name in input file amplitude period direction ub force_x / force_e1 force_y / force_e2 stokes_x / stokes_e1 stokes_y / stokes_e2 Description wave amplitude (m) wave period (s) wave direction (deg T) -1 bottom orbital velocity (ms ) wave current friction -2 x Radiation stress (Nm ) -2 y Radiation stress (Nm ) -1 x Stokes drift velocity (ms ) -1 y Stokes drift velocity (ms ) The influence of wave action on the hydrodynamics is controlled by the parameter WAVES. Currently, feedback of wave enhanced bottom friction to the hydrodynamics and the influence of waves on currents due to radiation stresses is supported. The wave options are invoked by listing the following: WAVES BOT_STRESS TAN_RADIATION WAVE_FORCING STOKES VERT_MIX NONE # # # # # # # # # # # # Allow feedback of wave bottom friction. Include tangential radiation stresses. Include 2D wave forcing using radiation stresses read from file. Include Stokes drift velocity. Wave amplitude used for surface length scale in vertical mixing. No wave options invoked. The default is NONE. Note that multiple options may be invoked in the list, e.g: # Allow wave enhanced bottom friction and radiation stresses WAVES BOT_STRESS TAN_RADIATION 16/09/2014 Page 75 of 177 Version: 1.00 SHOC User Manual SHOC will automatically create the following 2D tracers if these conditions are invoked: wave_Cd # Wave enhanced bottom drag for BOT_STRESS wave_Sxy # Tangential radiation stresses (m2s-2) for wave_Syx # TAN_RADIATION. wave_Fx, wave_Fy # Radiation stresses (Nm-2) for WAVE_FORCING. wave_ste1, wave_ste2 # Stokes drift velocity (ms-1) for STOKES. If wave enhanced mixing is invoked, several methods are available for the k-ε and k-ω mixing schemes only: MIX_JONES : The method outlined in Jones, N.L. and Monosmith , S.G. (2008). Modelling the influence of wave-enhanced turbulence in a shallow tide- and wind-driven water column. JGR, 113, C03009. This method allows for the constant α to be altered via WAVE_ALPHA (default is 100). MIX_WOM : The wave orbital method, Babanin and Haus, (2009), On the existence of water turbulence induced by non-breaking surface waves JPO, Notes and Correspondence, 39, 2675 – 2679. This method allows for the constant b1 to be altered via WAVE_B1 (default is 0.0014). MIX_BVM : The wave induced mixing coefficient, Bv method for monochromatic waves, Qiao, F., Yuan, Y., Ezer, T., Xia, C., Yang, Y., Lu, X., Song, Z., (2010) A three dimensional surface wave-ocean circulation coupled model and its initial testing, Ocean Dynamics, 60, 1339 – 1355. This method allows for the constant α to be altered via WAVE_ALPHA (default is 100 as per the MIX_JONES method, and should be changed to 1 or 4.). The radiation stresses are applied to the 2D mode following the implementation of Bye -1 (1977a). If the MOM_TEND flag is true, then tangential radiation stress tendencies (ms ) are added to the tracer list. Alternatively, if radiation stresses may be read from file, as provided by a wave model. These variables may be aligned with the grid or east/north, and have units -2 of Nm . In this case the depth averaged velocity is augmented to reflect the forcing due to these radiation stresses. To invoke this forcing, the WAVE_FORCING keyword should be specified. -1 The stokes drift velocity may be aligned with the grid or east/north, and have units of ms . In this case the drift velocity is added to the 3D and 2D Coriolis terms. To invoke this forcing, the STOKES keyword should be specified. A wave library exists which is responsible for the calculation of wave variables (period, amplitude, direction, orbital velocity, bottom stress, enhanced bottom drag and tangential radiation stresses). If this library is to be invoked, then the following parameters are set: DO_WAVES WAVES_DT YES 1 hour # Invoke the waves library # Time interval which waves are invoked The wave variables are computed according to the amount of information supplied in the WAVE_VARS file. If WAVE_VARS = YES, or the WAVE_VARS file doesn’t contain any of the wave variables, then the waves are assumed to be wind waves and are estimated using Eqns. 10.9, 10.11 and 10.14 in the Science Manual. Wave direction is assumed to be the same as the wind direction. Alternatively, Eqns. 10.12 and 10.13 may be used to estimate wave amplitude and period. This choice is controlled by the flag: WIND_WAVE TOBA USAC # Use eqns. 10.9 and 10.11 # Use eqns. 10.12 and 10.13 The fetch is required when estimating wind waves using these methods. This is automatically created by SHOC when using DO_WAVES. The fetch at the limits of the model domain (open boundaries) may be specified via spatially variable netCDF of spatially constant .ts file input: 16/09/2014 Page 76 of 177 Version: 1.00 SHOC User Manual FETCH fetch_OBC.nc # Boundary values for fetch If the wave period only is supplied in the WAVE_VARS file, then wind wave amplitudes are estimated using the simpler formulation of Eqn. 10.8 (Science Manual) which does not use the fetch. If all the wave variables are included in the WAVE_VARS file, then waves are assumed to be swell waves and the values retrieved from file are used for wave amplitude, period and direction. A Grant-Madsen style bottom boundary layer (see Grant and Madsen, 1986 or Madsen,1994) is used to compute wave enhanced bottom friction. In this case, the bottom roughness, Z0, is replaced by a time and space varying apparent bottom roughness, calculated according to specified wave input data. The bottom friction model parameters are still required, with Z0 becoming the bottom roughness value in the absence of waves. 4.20 Vertical mixing SHOC currently supports seven vertical mixing schemes, one of which must be specified for any model run. For more details on these mixing scheme formulations, see section 6, Herzfeld et al (2002). Mixing schemes can be specified by one of the following: # Mixing scheme types MIXING_SCHEME constant MIXING_SCHEME csanady MIXING_SCHEME mellor_yamada_2_0 MIXING_SCHEME mellor_yamada_2_0_estuarine MIXING_SCHEME mellor_yamada_2_5 MIXING_SCHEME k-e MIXING_SCHEME k-w MIXING_SCHEME W88 4.20.1 Constant The first scheme simply specifies constant values for the vertical diffusivities for momentum and mass, as follows: # Use the constant mixing scheme MIXING_SCHEME constant # Vertical eddy diffusivity VZ0 0.001 # Vertical diffusivity for tracers KZ0 0.001 4.20.2 Csanady The vertical momentum diffusion coefficient V z and vertical tracer diffusion coefficient K z are calculated using a formulation along the lines described in Csanady (1982), equation 6.22b, with modification due to stratification as described by Bowden and Hamilton (1975): V z = Vz 0 + αV µ* H (1 + 10 Ri ) − 1 2 K z = K z 0 + α K µ* H (1 + 3.33Ri ) − 16/09/2014 Page 77 of 177 3 2 Version: 1.00 SHOC User Manual where µ* is the maximum of the surface and bottom friction velocities (to account for both tidal and wind mixing), H is the depth of water, V z 0 , K z 0 , αV and α K are constants, and Ri is a Richardson number, dependent on the vertical stratification and vertical velocity shear. The constants V z 0 and K z 0 specify small background mixing values. This scheme is specified as follows: # Use the Csanady mixing scheme MIXING_SCHEME csanady 2 -1 VZ0 0.00001 # Background viscosity (m s ) VZ_ALPHA 0.0625 # Viscosity coefficient 2 -1 KZ0 0.00001 # Background diffusivity (m s ) KZ_ALPHA 0.03 # Diffusivity coefficient Csanady (1982) suggests a value of 1/16 (0.0625) for αV . 4.20.3 Mellor-Yamada 2.0 The Mellor/Yamada level 2 scheme is described (Mellor and Yamada, 1982). This is specified as follows: # Use the Mellor-Yamada level 2 scheme MIXING_SCHEME mellor_yamada_2_0 VZ0 1e-5 # Background viscosity KZ0 1e-5 # Background diffusivity ZS 0.3 # Surface length scale The Richardson number criterion in this scheme can create grid point noise when background mixing coefficients are imposed due to the flux Richardson number being greater than the critical Richardson number. This can create grid point noise in the temperature solution if a heatflux is imposed. A Shuman filter may be applied to the mixing coefficients to remove this noise by setting: # Smooth Vz and Kz using a Shuman filter SMOOTH_VzKz YES 4.20.4 Mellor-Yamada 2.0 Estuarine This scheme uses an alternate mixing length parameterisation for the Mellor-Yamada 2.0 mixing scheme (Burchard et al, 1999; Eifler and Schrimpf, 1992; Demirov et al., 1998). This is based on a three layer system where surface and bottom mixed layers are intersected by a stably stratified interior layer. Required parameters to invoke this mixing scheme are given below. # Use the modified Mellor-Yamada level 2 scheme MIXING_SCHEME mellor_yamada_2_0_estuarine # scheme type ZS 0.6 # surface length offset LMIN 0.01 # Minimum stratified length scale E 1 # Mixed layer tuning parameter VZ0 0.001 # Background viscosity KZ0 0.000001 # Background diffusivity This type of scheme displays better results than Mellor-Yamada-2.0 or k-ε for estuarine applications where a three layer system commonly exists. A large degree of flexibility exists in tuning this mixing model, where changes to ZS, LMIN, E, VZ0, KZ0 and density gradient 16/09/2014 Page 78 of 177 Version: 1.00 SHOC User Manual threshold (hardwired as variable thr in routine mld() in MY2-0.c) may affect the solution. The bottom roughness, Z0, also influences the mixing length scale in the bottom mixed layer (ZS is analogous to Z0 for the surface layer). Solutions may be particularly sensitive to the background viscosity and diffusivity. If the mixed layer interfaces are required to be identified using turbulent kinetic energy rather than the density gradient, then the routine mld() must be changed to mldk() in MY2_VzKz_mod() in mixing/MY2-0.c. The threshold is given by the variable thr in mldk() in the same module. Finally, the mixing length scale may be modified by the local turbulent kinetic energy in the mixed layers (Blackadar, 1962) via the flag lof in the routine get_Lscale() in mixing/MY2-0.c. This option is switch off by default (lof=0) and can be included by hardwiring lof=1. Accounting for local turbulent kinetic energy in the mixed layers generally decreases the mixing length scale in those regions. These hardwire options can generally be left unaltered unless complex tuning of the mixing scheme is required. 4.20.5 Mellor-Yamada 2.5 Finally the Mellor-Yamada 2.5 (or kkl) scheme (Mellor and Yamada, 1982) includes the transport of turbulence kinetic intensity and turbulence length, and requires four additional tracers. Note length scale and turbulence mixing are diagnostic tracers and do not undergo advection and diffusion. # Use the Mellor-Yamada 2.5 scheme MIXING_SCHEME mellor_yamada_2_5 VZ0 1e-5 # Background viscosity KZ0 1e-5 # Background diffusivity ZS 0.3 # Surface length scale MIN_TKE 1e-8 # Optional – minimum TKE MIN_DISS 1e-12 # Optional – minimum dissipation LMIN 0.17 # Optional - minimum length scale This scheme requires four additional tracers corresponding to turbulent kinetic intensity (tki), turbulent kinetic intensity length scale (tki_l), turbulence length scale (lscale) and turbulence diffusion (Kq). These tracers are automatically generated by SHOC when the mellor_yamada_2_5 scheme is chosen, but may be over-ridden by manually specifying the following tracers in the parameter file: # Q2 tracer TRACER2.name TRACER2.long_name TRACER2.units TRACER2.fill_value TRACER2.valid_range tki Turbulent Kinetic Intensity m2s-2 2.0e-8 0 1 # Q2L tracer TRACER3.name TRACER3.long_name TRACER3.units TRACER3.fill_value TRACER3.valid_range tki_l Turbulent Kinetic Intensity Length Scale m2s-1 3.4e-9 0 1 # Length scale tracer TRACER4.name lscale TRACER4.long_name Turbulence length scale TRACER4.units m TRACER4.fill_value 0.17 TRACER4.valid_range 0 1e4 TRACER4.advect 0 TRACER4.diffuse 0 16/09/2014 Page 79 of 177 Version: 1.00 SHOC User Manual TRACER4.diagn 1 # Turbulence mixing TRACER5.name TRACER5.long_name TRACER5.units TRACER5.fill_value TRACER5.valid_range TRACER5.advect TRACER5.diffuse TRACER5.diagn tracer Kq Turbulence Mixing m2s-1 1e-5 0 1 0 0 1 4.20.6 k-ε The k-ε scheme is described by Burchard et al. (1998). The specification for this scheme is shown below. # Use the k-e scheme MIXING_SCHEME VZ0 KZ0 MIN_TKE MIN_DISS WAVE_ALPHA k-e 1e-5 1e-5 7.6e-6 5.0e-10 100 # # # # # # # scheme type Background viscosity Background diffusivity Optional – minimum TKE Optional – minimum dissipation Optional – wave a parameter, Craig & Banner (1994). This scheme requires two additional tracers corresponding to turbulent kinetic energy (tke) and dissipation (diss). These tracers are automatically generated by SHOC when the k-e scheme is chosen, but may be over-ridden by manually specifying the following tracers (e.g. to change fill values or valid ranges) in the parameter file: # tke tracer TRACER2.name TRACER2.long_name TRACER2.units TRACER2.fill_value TRACER2.valid_range tke Turbulent Kinetic Energy m2s-2 7.6e-6 0 1 # diss tracer TRACER3.name TRACER3.long_name TRACER3.units TRACER3.fill_value TRACER3.valid_range diss Dissipation m2s-3 5e-10 0 1 4.20.7 k-ω The k-ω scheme is similar to k-ε except it solves for turbulence frequency rather than dissipation (Umlauf et al 2003). # Use the k-w scheme MIXING_SCHEME VZ0 KZ0 ZS MIN_TKE MIN_DISS 16/09/2014 k-w 1e-5 1e-5 0.3 7.6e-6 7.27e-19 # # # # # Background viscosity Background diffusivity Surface length scale Optional – minimum TKE Optional – minimum dissipation Page 80 of 177 Version: 1.00 SHOC User Manual This scheme requires two additional tracers corresponding to turbulent kinetic energy (tke) and turbulence frequency (omega). These tracers are automatically generated by SHOC when the k-w scheme is chosen, but may be over-ridden by manually specifying the following tracers in the parameter file: # tke tracer TRACER2.name TRACER2.long_name TRACER2.units TRACER2.fill_value TRACER2.valid_range tke Turbulent Kinetic Energy m2s-2 7.6e-6 0 1 # diss tracer TRACER3.name TRACER3.long_name TRACER3.units TRACER3.fill_value TRACER3.valid_range omega Turbulence frequency s-1 1.0e-12 0 1 4.20.8 W88 The W88 model of Wilcox (1988) is the same as the k-ω model, but using # Use the k-w scheme MIXING_SCHEME f c µ = f c ω = 1 .0 . W88 Additional parameters required for the W88 scheme are identical to the k-w scheme. 4.20.9 Stability functions. The stability function used in the turbulence closure schemes for k-ε, k-ω and MY2.5 may be specified using STABILITY_FUNC. The stability functions available are: STABILITY_FUNC STABILITY_FUNC STABILITY_FUNC STABILITY_FUNC STABILITY_FUNC STABILITY_FUNC STABILITY_FUNC STABILITY_FUNC CANUTO_A # Canuto et. al. (2001) model A CANUTO_B # Canuto et. al. (2001) model B GALPERIN # Galperin et. al. (1988) KANTHA&CLAYSON # Kantha and Clayson (1994) POM # Mellor (1992) MUNK&ANDERSON # Munk and Anderson (1948) EIFLER&SCHRIMPF # Eifler and Schrimpf (1992) SCHUMANN&GERZ # Schumann and Gerz (1995) 4.20.10 Waves The effects of waves can be included in the k-ε, k-ω and W88 models. This requires the DO_WAVES flag to be invoked (see Section 4.23) with feedback to vertical mixing, i.e; WAVES VERT_MIX # Wave amplitude used for surface # length scale in vertical The impact of waves on vertical mixing of momentum follows the Craig and Banner (1994) approach, where the constant α and scaling factor for significant wave height are set according to: WAVE_ALPHA 16/09/2014 100 # Wave factor α Page 81 of 177 Version: 1.00 SHOC User Manual WAVE_HEIGHT_FACT 1 # Scaling for significant wave height The default values are those listed above. See Jones and Monosmith (2008) for alternative values. 4.21 Horizontal mixing SHOC includes horizontal mixing of momentum and tracers, by specifying a viscosity and diffusivity value respectively. This term is usually included in the momentum equations for stability reasons. The parameters are specified as follows: # Horizontal viscosities are # and u2 momentum equations, # circumstances, both values # # Horizontal viscosity in u1 U1VH 1.0 specified separately for the u1 but except under special should be the same. equation # Horizontal viscosity in u2 equation U2VH 1.0 Horizontal diffusion for tracers is also included and is invoked by specifying the diffusivities in the x and y directions in the parameter file via: # Horizontal diffusivity in the x direction (m2s-1) U1KH 100 # Horizontal diffusivity in the y direction (m2s-1) U2KH 100 The horizontal mixing coefficients may be scaled according to the grid size at each cell. This allows reasonable values to be specified for curvilinear grids which encompass a large range of resolutions. Scaling of horizontal mixing coefficients is specified by the parameter DIFF_SCALE and may take on the following forms, where ∆x is the grid size and ∆xm is the mean grid size : DIFF_SCALE DIFF_SCALE DIFF_SCALE DIFF_SCALE DIFF_SCALE NONE LINEAR NONLIN AUTO SMAG # # # # # No scaling performed Linear scaling by ∆x / ∆xm 2 2 Non-linear scaling by (∆x) / (∆xm) 2 Grid optimized: mixing = 0.1 ∆x / ∆t Sets smagorinsky = 0.1 (see below) The default scaling is DIFF_SCALE = LINEAR. If scaling is performed, the value set in the parameter file is relative to the mean grid spacing in the e1 and e2 directions (mean grid spacing is output in the file setup.txt). The Smagorinsky diffusion coefficients can be independently invoked on any component of viscosity or diffusivity by setting: SMAGORINSKY c Where c is the value of the constant above (typically c=0.1), and any combination of U1VH, U2VH, U1KH, U2KH is negative. For example, if the y compoment of horizontal diffusivity is to be calculated using Smagorinsky diffusion then set; SMAGORINSKY U2KH 16/09/2014 0.1 -100.0 Page 82 of 177 Version: 1.00 SHOC User Manual If DIFF_SCALE = SMAG then Smagorinsky diffusion is set for all horizontal mixing coefficients using a constant smagorinsky = 0.1. This constant may be over-ridden if the SMAGORINSKY constant is explicitly defined. If Smagorinsky diffusion is to be used, then an extra tracer is required, which stores the value of the diffusion coefficient. This tracers is automatically generated by SHOC when the smagorinsky diffusion is invoked, but may be over-ridden by manually specifying the following in the parameter file: TRACERn.name TRACERn.long_name TRACERn.units TRACERn.diagn TRACERn.advect TRACERn.diffuse TRACERn.decay TRACERn.svel TRACERn.fill_value TRACERn.valid_range smag Smagorinsky m2s-1 1 0 0 0.0 0.0 0.0 0 10000 The Smagorinsky distribution can be smoothed prior to use any number of times, n, using: SMAG_SMOOTH n Note that the horizontal mixing of momentum in SHOC follows the full formulation (Herzfeld et al, 2002, section 2.4). A simple formulation exists (e.g. Apel, 1987, p99, Eqn (3.61)) where metric terms are omitted and incompressibility assumptions are made; these can be controlled by the VISC_METHOD flag: VISC_METHOD NONE LAPLACIAN SIMPLE # No horizontal viscosity # Full formulation (default) # Simple formulation The horizontal viscosity routine executed is controlled by function pointers, allowing relatively straightforward inclusion of biharmonic viscosity if required. 4.22 Point sources/sinks A SHOC implementation can include an arbitrary number of point sources (or sinks) of water and tracers. These allow the representation of minor inputs of fresh water, or perhaps nutrients, for example. Associated with each point source (or sink) is a time series file (see section 11.1) which specifies inputs in one of two ways. If flows of water are associated with 3 -1 the point source, then the file must specify time varying flow rates (m s ), and tracer -3 concentrations (kg m ). If no water is associated with the point source, then the file specifies -1 tracer input rates (i.e loads or fluxes in kg s ) only. The file need not specify concentrations or fluxes for all model tracers. Values for those tracers not mentioned in the file are assumed to be zero; the exception is temperature and salinity which are assumed to be equal to the receiving water values if not specified. Sources of momentum may also be directly input as the source/sink; in this case the u1 or u2 -1 velocity (in ms ) is directly read from file. If flows of water are associated with the point source (i.e. flow rates are specified in the time series file), then the rate of momentum input is: Pt = ρ i Qv / ρV -2 (ms ) where ρ i = density of the inflow (kg m ); if temperature and salinity are associated with the -3 source in the time series file, then the inflow density is computed using the equation of state. If no temperature and salinity are specified, the inflow density is assumed to be equal to the 16/09/2014 Page 83 of 177 Version: 1.00 SHOC User Manual 3 -1 receiving water. Q is the flow rate (m s ) and v is the velocity associated with the inflow (u1 -1 or u2 velocity in ms ), both specified in the time series file. ρ is the density of the receiving water and V is the cell volume, where the vertical depth distribution of the source is used to compute this volume if specified (see below). Point source/sinks are specified as follows: # Number of point source/sinks npointss 2 # Parameters for each point source/sink pss0.name Nasty stuff # pss0.location 447174 5442668 0 # pss.reference surface # pss0.data nasty.ts # Point source/sink name Location (X Y Z) reference level Time-series file pss1.name Nice stuff pss1.location 450477 5446628 -10 pss1.data nice.ts The z location (i.e. depth) of the source/sink input may encompass a depth range, with the deepest limit entered first and depths below the surface entered as negative. The tracer input values are equally distributed over the depth range, e.g. for tracers to be distributed between -5m and -10m; pss0.location 147.31 -43.06 -10 -5 # Source between -10 and -5m The (X Y Z) locations may be entered as a time series file and be allowed to vary with time. In this case pss0.location contains the name of the time series file and the file must contain the variables X (or x), Y (or y), z_low and z_high, e.g: pss0.location input_location.ts # Time dependent input The time series file has variables: ## COLUMNS 5 ## ## COLUMN1.name time ## COLUMN1.long_name Time ## COLUMN1.units days since 1990-01-01 00:00:00 +10 ## COLUMN1.missing_value -99999999 ## ## COLUMN2.name X ## COLUMN2.long_name Longitude ## COLUMN2.units Degrees ## ## COLUMN3.name Y ## COLUMN3.long_name Latitude ## COLUMN3.units Degrees ## ## COLUMN4.name z_low ## COLUMN4.long_name Lower depth range ## COLUMN4.units m ## ## COLUMN5.name z_high ## COLUMN5.long_name Upper depth range ## COLUMN5.units m 4382 147.31 -43.06 -10 -5 4392 147.31 -43.06 -20 -15 16/09/2014 Page 84 of 177 Version: 1.00 SHOC User Manual The source/sink may be distributed over multiple cells horizontally and a depth range using: pss0.location pss.ncells 12 25 (2,5)-(10,11) 24 27 -200 -100 3 # Depth range # Number of entries #1: (i,j) location #2: (i,j) range #3: (i,j) location If a range is given, SHOC will determine only those cells within the range that are wet. Therefore, for example, if a flux were to be input in the bottom layer over the whole domain (approximating a groundwater flux) then (assuming the grid size is 100x100) one would use; pss.reference bottom pss0.location -1 0 pss.ncells 1 (0,0)-(100,100) The flux may be scaled according to: pss0.flag pss0.flag AREA_WEIGHTED VOL_WEIGHTED # Input flux scaled by cell area # Input flux scaled by volume of the # cell mass is delivered into. The reference level is determined by the following (msl by default): pss0.reference pss0.reference pss0.reference surface msl bottom # referenced to the free surface # referenced to mean sea level # referenced to the bottom Major inflows or outflows of water (which carry significant momentum) should not be specified in this way, as the point source/sink code ignores momentum input considerations. Such inputs can be specified at open boundaries (see section 4.9.6). Sometimes the mapping of the point source location from geographic space (lat, long) to index space (i, j) is unsuccessful for the slaves. This is because sometimes custom curvilinear grids have land or outside cells that are not associated with valid coordinate values in the parameter file, and cannot be assigned geographic locations. Also, the precision of the inverse tetragonal bilinear texture map that performs this mapping is sometimes not sufficient to discriminate cell indices for point sources close to cell faces. If the code exits with the warning ‘Mismatch between point sourcesinks on master and slave’ then refer to the runlog to identify the point source that could not be successfully mapped and redefine its geographic location. Placing point source locations at the cell centre, and avoiding open boundary locations will rectify this problem. 4.22.1 Steady State Approximation The steady state concentration resulting from a point source input into a grid cell is dependent on the grid size, and can be approximated via the following. Assume a flux Fin (gs 1 ) is input into a cell with dimensions (∆x,∆y,∆z) in the (e1,e2,z) directions. The e1 direction -1 only is considered, it is assumed that a constant e1 velocity of u (ms ) exists, and the 2 -1 -3 horizontal diffusion is AH (m s ). The concentration of tracer, c (kgm ), at time t+1 can be written in terms of mass as: Vct+1=Vct+(source input)–(mass advected out)+(mass advected in)-(mass diffused out) where V=∆x∆y∆z. Over a time-step ∆t, this is equivalent to: 16/09/2014 Page 85 of 177 Version: 1.00 SHOC User Manual cit +1 − cit−+11 c V = c V + Fin ∆t − c ∆y∆zu∆t + 0.∆y∆zu∆t − ∆y∆zAH ∆t ∆x t +1 t t +1 t It is assumed that the concentration of tracer advected in ( ci −1 ) is zero, and that a zero t t gradient of tracer exists down-current from the source ( ci +1 = ci ). This is simplified to: V c t +1 − c t ∂c ∆y∆z =V = + Fin − c t +1 ∆y∆zu − AH cit +1 ∆t ∂t ∆x At steady state, ∂c / ∂t = 0 , thus steady state concentration, cs, is; Fin = c s ∆y∆zu + ∆y∆z AH c s ∆x or; cs = Fin ∆y∆zu + ∆y∆zAH / ∆x For uniform grid size (∆x=∆y), this reduces to: cs = Fin ∆z (∆yu + AH ) Therefore, as the horizontal grid size decreases, then the steady state concentration will increase to a limit where horizontal diffusive process dominate. 4.23 2D Mode SHOC can be operated in the capacity of a 2D depth integrated model. This is achieved by setting: 2D-MODE YES The default is 2D-MODE=NO. The 3D currents are not calculated in this case, resulting in large increases in execution time. The initial tracer distribution is vertically averaged and tracers are subsequently advected using the 2D current (i.e. the water column is assumed to be well mixed). 4.24 Sigma vertical coordinates SHOC can be configured to use sigma coordinates in the vertical. The formulation follows that of Blumberg and Herring (1987), for curvilinear coordinates. Sigma coordinates are invoked by setting the flag: SIGMA YES The default value is SIGMA = NO. In the sigma case, the value of LAYERFACES is equal to the number of sigma levels the model uses, and the distribution of these layers is generated 16/09/2014 Page 86 of 177 Version: 1.00 SHOC User Manual by SHOC such that a logarithmic distribution exists at the surface and bottom and a linear distribution in the interior. The input netCDF file for sigma coordinates is the same as that used for ‘z’ coordinates. SHOC linearly interpolates the initial condition for tracers onto the sigma grid (then also applies a smoothing filter in the vertical). The bathymetry is checked to ensure no extreme gradients are encountered; if the bottom slope becomes greater than 0.07 then the bathymetry is smoothed (up to a maximum of 5 passes) until the gradient becomes less than 0.07. The bathymetry may be optionally smoothed n times by setting the flag: SMOOTHING n The sigma layers converge at the coast, and this can lead to small vertical grid spacing, which in turn may lead to vertical velocity stability violations. To avoid program termination due to this violation, the sigma system should always be used with STABILITY = SUB-STEP or STABILITY = SUB-STEP-TRACER. Note also that the minimum depth at the coast may need to be increased to maintain stability when using sigma coordinates. It is reccomended to use Smagorinsky diffusivity when using the sigma system so that mixing along sigma surfaces over steep bathymetry does not lead to cross-isobaric exchange in the absence of any motion. 4.25 Stability sub-stepping SHOC can invoke several methods to ensure the model remains stable if there exist local violations of the advection scheme stability criteria (which may occur, for example, if the forcing becomes locally large for a short period of time). The advective terms (for 2D, 3D momentum and tracers) are calculated using a sub-timestep based on the maximum Courant number in the grid, and the remaining terms in the model equations are calculated using the original time-step. Note that the original time-step must still obey the CFL condition so as fast moving gravity and internal waves are adequately resolved. To invoke the sub-time stepping the parameter STABILITY is set in the parameter file as follows; STABILITY STABILITY SUB-STEP SUB-STEP-NOSURF STABILITY STABILITY SUB-STEP-TRACER NONE # # # # # Sub-stepping stability adjustment As for SUB-STEP but excluding the surface layer. Only sub-step for tracers No stability compensation The default option is NONE. If STABILITY = SUB-STEP-NOSURF then the vertical velocity in the surface layer is not included in the maximum sub-step calculation. This is consistent with the original MECO formulation. This option avoids sub-stepping when the surface elevation is only slightly greater than a layer level (the surface layer is thin) and moderately large vertical velocities exist. This condition may occur often and increase the run time ratio due to frequent substepping. However, the model may go unstable in the surface layer in this case, and HMIN may need to be increased to maintain stability in the surface layer. 4.26 Thin layers In order to maintain stability when layers become very thin, an option exists whereby if a layer becomes thinner than the parameter HMIN, then that layer is merged with the layer below prior to the calculation of the advective terms. The velocity of the merged layer is set to the layer weighted mean of the two layers merged. It is assumed that the velocity is uniform throughout the merged layer, and subsequent to the calculation of the advective terms the merged layer is split back to the original thin layer and associated layer beneath and the thin layer is assigned the updated velocity. This option is initiated via the flag; 16/09/2014 Page 87 of 177 Version: 1.00 SHOC User Manual # Invoke thin layer merging MERGE_THIN YES HMIN 0.05 The default is MERGE_THIN = NO. The implementation of the thin layer code effectively decreases the k coordinate of the surface and resets the velocity of the layer to the mean when thin layers are encountered. The optimum value of HMIN generally needs to be derived on a trial and error basis, but generally 2–3% of the surface layer thickness is a good initial estimation. 4.27 Particle tracking Particle tracking is currently supported in SHOC. If an input particle file is specified, then the domain will be seeded with an initial distribution of particles. Particles will be advected and diffused according to parameters defined below. Particles maybe reset to their initial locations periodically if requested. If desired, particles can also display a specific vertical movement prescribed on a time series. The time series file should contain the vertical velocity as a function of time and space. This allows implementing particle ‘swimming behaviour’. Mortality or the loss of a percentage of the remaining particles at every time step can be prescribed with a time series file. Output files will contain the variable ‘ptconc’ if particle tracking is 3 invoked; this variable indicates the concentration of particles (kgm ) for each cell over time. For ptconc to be computed the particle mass has to be given as non-zero. Particle tracking will only occur if an input file is specified. Following is an example particle tracking specification: # Defines the input particle input file. This is a netCDF # time-series containing the variables 't', 'x', 'y' and 'z' # for a specified number of particles ('n'). PT_InputFile pt/pt50000.nc # 50000 particle file. PT_InputRecord 0 # Dump number to use for initial # particle distribution. # The output file where the position of all active particles # will be written. PT_OutputFile pt.nc PT_StartTime PT_StopTime PT_OutputStep PT_TimeStep 1580 days 1612 days 1 hours 10 minutes PT_ResetStep 100 days PT_KH PT_KZ_MULT 1 1 PT_Mass PT_Restart 1 yes # # # # # # # # # # # # # Start time for PT. Stop time. Output interval. Update period for recalc. particle positions. How often to reset particles to the original locations. Horizontal diffusion coeff. Vertical diffusion coeff. multiplier Particle mass (kg). Interpolate particle positions from the InputFile onto the grid. # If true then the particles are not lost when they move # outside the model domain, instead they 'stick' to the # boundary and are released when the current changes direction. PT_StickyBoundary TRUE # A continuous source of particles along a line is specified # by a rate of release and the start/end positions of the line. # These parameters are not mandatory, and multiple sources 16/09/2014 Page 88 of 177 Version: 1.00 SHOC User Manual # are permitted. PT_NSource 1 PT_Source0.Rate PT_Source0.ColourBit 20 2 PT_Source0.StartLocation PT_Source0.EndLocation # # # # 280000 Number of particles/second. The bit to set in the flag array when the particle is seeded. Valid range 2-15. 7000000 -15 # XYZ of start # position. 280000 7020000 -25 # XYZ of start # position. 4.27.1 Particle Status The status of a particle may be active / inactive and unlost / lost. Active, unlost particles are the particles that appear in the domain. If a particle exits through an non-sticky boundary then it becomes lost and returns to the inactive pool of particles available to be released at each source. A particle may become lost by moving through an open boundary, or by failing to reach a solid boundary within a certain number of sub-steps (currently hardwired to 110). The latter case arises if a large velocity, v, is normal to a solid boundary which advects the particle into the boundary. The model will attempt to calculate the particles position at a future time by adding the distance, s, the particle moves over a time interval ∆t where s = v∆t. If v is large then the model successively reduces ∆t to resolve the particles position near the boundary. If the position cannot be resolved after 110 reductions of ∆t it is assumed the particle has moved through the boundary and becomes lost. An example of this may be a particle settling into the sediments. If settling of a particle is invoked and a particle is attempted to be advected through the bottom, then the vertical diffusion is modified to counteract such effect. Consequently these particles are not lost but remain close to the bottom. 4.27.2 Source Colour Individual sources can be identified by the ColourBit parameter, with valid ranges between 2 and 15 (the colourbit values 0 and 1 are used to flag inactive and lost particles). These data are written to the output file making it possible to display particles from multiple sources and identify each individual source by colour. 4.27.3 Age The age of each particle since the release time may be computed. When a particle becomes lost the age is reset to zero. In order to minimise output file size the age of particles are stored as unsigned bytes with values ranging from 0 to 255. The actual age in floating point precision is scaled to this output range via the parameter AgeLimit, e.g: PT_AgeLimit 20 days If the AgeLimit parameter is present then the age is calculated and scaled age is included in the output file. Scaling is performed linearly such that an age of 0 is scaled to zero, and an age of AgeLimit is scaled to 255. Typically AgeLimit is the flushing time of the water body. Particles older than AgeLimit remain scaled to 255. These scaled ages may be plotted as a colour spectrum for all sources. A histogram of the distribution of ages in bin sizes of 1 day can be produced. This is in the form of a time series file named ‘part_hist.ts’, with the histogram output at a specified interval, e.g; PT_Histogram_DT 16/09/2014 1 hour # Output the histogram at 1 Page 89 of 177 Version: 1.00 SHOC User Manual # hour intervals to the file # part_hist.ts. 4.27.4 Size A size of particles released from each source may be prescribed using; PT_Source0.Size 1e-4 # Size in m A growth or decay rate may also be specified for the source and the particle will decay to zero or double in size on this timescale, e.g; PT_Source0.Decay PT_Source0.Growth 10 days 10 days # Size decreases to zero in 10 days # Size doubles in 10 days When a particle becomes lost the size is reset to PT_Source0.Size. A particle threshold -10 size of 10 is hardwired so that if particles decay to sizes less than this threshold they are flagged as lost. In order to minimise output file size the age of particles are stored as unsigned bytes with values ranging from 0 to 255. The actual size in floating point precision is scaled to this output range via the parameter SizeLimit, e.g: PT_SizeLimit 1e-3 If the SizeLimit parameter is present then the size is calculated and scaled size is included in the output file. For decaying particles scaling is performed linearly such that a size of SizeLimit is scaled to 255, and a size of zero is scaled to zero. For growing particles a size of PT_Source0.Size is scaled to zero, and a size of SizeLimit is scaled to 255. These scaled sizes may be plotted as a colour spectrum for all sources. Particle sizes are only invoked if SizeLimit is present, regardless if sizes are set for individual sources. If SizeLimit is present and sizes for individual sources are not, then the particle size for each source defaults to zero. In this case all particles will always be flagged -10 as lost, since the particle size is below the threshold of 10 (see above). 4.27.5 Settling Particles may be prescribed setting velocities as a function of the source, or as a function of position when an initial particle distribution is prescribed (i.e. no sources). For the former, different types of settling behaviour for particles released from each source may be prescribed using: PT_Source0.Stype NONE CONSTANT STOKES DIURNAL FILEIN 16/09/2014 # # # # # # # # # # # No settling imposed Particles from this source settle with a constant settling velocity. The stokes settling formula is used to compute the settling velocity. This is a function of particle size, density and water density. A periodic settling velocity is used where the amplitude and period are prescribed. Velocity is read from file. Page 90 of 177 Version: 1.00 SHOC User Manual For all particles, a negative settling velocity means the particle will sink and a positive velocity will result in a buoyant particle. The CONSTANT settling velocity for particles released from each source may is prescribed using; PT_Source0.Svel 1e-3 # velocity in ms-1 The STOKES settling velocity may be computes using Stokes settling formula: v= g ( ρ w − ρ p )d 2 3.27.1 18µ where g = 9.81 (m s ) is the acceleration due to gravity, ρw (kgm ) is the density of -3 surrounding water, ρp (kgm ) is the density of the particle, d (m) is the particle diameter (size -1 -1 o in this case) and m = 1.4e-3 (kgm s ) is the viscosity of water at 20 C. This settling velocity is calculated and applied to each particle if the particle size is set (see Section 4.27.4) and the particle density is prescribed: 2 -1 PT_Source0.Dens -3 1030 # Density in kgm-3 Hence if a growth rate is also prescribed, then as the particle grows its diameter increases and therefore settles faster. The DIURNAL settling velocity is computed using the formula: v = − svel. cos(2Π (t / sper − floor (t / sper ))) 3.27.2 -1 where svel is the maximum vertical velocity (ms ) at which the particle will move, t is time and sper is the periodicity of the cosine function, e.g. PT_Source0.Svel PT_Source0.Sper 1e-3 1 day # Velocity in ms-1 # Periodicity The FILEIN settling velocity is prescribed using an ASCII or netCDF time series file. PT_Source0.File svel.ts # Time series file containing # variable and ‘wpt’(ms-1). The settling velocity variable in the file must be named ‘wpt’. The settling velocity in the file may be a function of time or space (or both). The spatial coordinates of the source (i.e. StartLocation and EndLocation) are used to interpolate from the file onto the source location if spatial information is contained in the file. Additionally, particles released from an initial distribution (i.e. without sources specified) may undergo settling as a function of their position in time and space as read from file. This is specified using: PT_w_file svel.nc # File containing settling variable ‘wpt’. The settling velocity variable in the file must be named ‘wpt’, and the velocity may be a function of time, space or both. Spatially dependent velocities interpolate the settling velocity onto cell centres of the grid, and all particles within a particular cell will adopt that corresponding settling velocity. NOTE: The differences between invoking PT_Source0.Svel settling velocity type and the PT_w_file are that the former is used for particles released from sources; in which case a continuous source of particles along a line is specified by a rate of release and the start/end positions of the line. Each source must have their own time series file. The second from is 16/09/2014 Page 91 of 177 Version: 1.00 SHOC User Manual used for a release of particles determined with the particle input file, in which case the domain is seeded with an initial distribution of particles. In this case, the settling velocity can vary as a function of time t and space . 4.27.6 Swimming Similar to the settling for particles released from an initial distribution, particles may be assigned horizontal swimming velocities applicable to an initial release. This swimming is read from netCDF file as a function of time and space and is specified via: PT_uv_file vel.nc # # # # File containing settling variable ‘upt’ for swimming in the x (east-west) direction and ‘vpt’ for swimming in the y (north-south) direction. Note that upt and vpt are velocities are relative to the east-west / north-south axis rather than the numerical grid, and must generally undergo rotation (within the particle tracking code) to be transformed onto the grid. 4.27.7 Mortality Mortality, or the loss of particles expressed as a percentage of active, unlost, particles at every time step, can be prescribed with a time series file (note: this input is not spatially dependent), e.g: PT_mortality_file mp.ts # mortality percentage file The mortality percentage variable in the file must be named ‘mpt’. 4.28 Grid Refinement Grid refinement, or two-way nesting, allows a fine resolution grid (FRG) to be embedded within a coarse resolution grid (CRG) so that increased resolution is achievable in a subregion of the whole domain. Although the time-step for the simulation is determined by the smallest grid, savings in computer time is generally achieved by not highly resolving the whole domain. The method used for grid refinement is detailed in Section 14 of the Science Manual. There must exist at least 2 windows for grid refinement to operate. A grid must be constructed where the number of fine grid cells that comprise one coarse grid cell (i.e. the zoom factor, zf) is an odd number so that cell faces and centers in the coarse grid are coincident with fine grid locations at the coarse-fine boundary. The user must therefore choose a zoom factor and provide a list of the (I,j) locations of the centers of the coarse grid. An example of invoking grid refinement is given below. WINDOWS GRID_REFINEMENT ZOOM_FACTOR 2 YES 3 ZOOM_POINTS 17 9 20 9 23 9 26 9 29 9 28 16/09/2014 # # # # # # # At least 2 windows are necessary Turn on grid refinement Use a zoom factor of 3 so that 3 x 3 = 9 fine grids comprise 1 coarse grid. List the (i,j) locations of the cell centers of the coarse grid. There are 28 (i,j) locations in the list. Page 92 of 177 Version: 1.00 SHOC User Manual 32 35 17 20 23 26 29 32 35 17 20 23 26 29 32 35 17 20 23 26 29 32 35 9 9 12 12 12 12 12 12 12 15 15 15 15 15 15 15 18 18 18 18 18 18 18 The resulting grid for a closed basin test domain is illustrated in Figure 4.29.1. Figure 4.29.1 : Grid refinement example A section of the grid can be retained at high resolution, or a coarse resolution section can be created using: ZOOM_HR_ZONE or ZOOM_CR_ZONE (17,9)-(35,18) # Set a high resolution zone (17,9)-(35,18) # Set a coarse resolution zone Grid refinement may be turned off using GRID_REFINEMENT NO. The default is for no grid refinement. Note that the bathymetry is averaged over the coarse grid cells, hence a new netcdf input file must be created when grid refinement is invoked. Anisotropic grid refinement may be invoked using: ZOOM_FACTOR_E1 3 # Use a zoom factor of 3 in the e1 # direction only. 5 # Use a zoom factor of 5 in the e2 # direction only. or ZOOM_FACTOR_E2 16/09/2014 Page 93 of 177 Version: 1.00 SHOC User Manual It is possible to construct a grid which has refinement in one direction, e.g. Figure 4.29.2 has a refinement of factor 3 in the e1 direction. This grid may be reverted to a uniform grid using the PRECONDITIONED grid refinement option; GRID_REFINEMENT ZOOM_FACTOR_E1 YES PRECONDITIONED 3 This option is useful for reverting a portion of the grid to a uniform grid, while increasing the resolution of another part of the grid (e.g. an upstream river section). In the example below the river section that is three cells wide may be retained at this resolution while the remainder reverted to uniform. Note that the ZOOM_POINTS of the cell centres required to be reverted must also be supplied. Figure 4.29.2. Grid example with refinement of factor 3 through the river section in the e1 direction. Usually time-steps are compromised when resolution is increased laterally in a river section of the grid. A grid section where variables are linearly blended can be useful to overcome this. In the case of a river, if variables are blended laterally across the entire width of the river then there will be no transverse flow since the lateral boundary conditions prohibit flow through the solid boundaries. This makes flow along-river only, and the cross-river direction is irrelevant in terms of determining the time-steps for stability. The river effectively consists of a number of independent channels stacked side by side. Tracer exchange between the channels may exist via horizontal mixing. Such a configuration has the benefit of allowing increased resolution of the bathymetric cross section of the river, and aids in constructing river branches. Blending is invoked using: NE1_BLEND E1_BLEND0 1 e1s Or NE2_BLEND 1 16/09/2014 # Number of blend areas in the e1 direction e1e e2s e2e # Start & end e1 coordinates (e1s and # e1e) and start & end e2 coordinates # (e2s and e2e) for blend area 0. # Number of blend areas in the e2 direction Page 94 of 177 Version: 1.00 SHOC User Manual E2_BLEND0 e2s e2e e1s e1e # Start & end e2 coordinates (e2s and # e2e) and start & end e1 coordinates # (e1s and e1e) for blend area 0. Examples may be: NE1_BLEND E1_BLEND0 E1_BLEND1 2 45 47 241 255 45 47 260 298 NE2_BLEND E2_BLEND0 1 18 22 100 110 16/09/2014 Page 95 of 177 Version: 1.00 SHOC User Manual 4.29 Tracer diagnostics There exist several options for SHOC to generate diagnostics of interest which are subsequently saved to 2D or 3D tracers. These tracers then appear in any specified netCDF output files or timeseries files. Currently these diagnostic tracers include mixed layer depth, heat flux (described in section 4.16), steric height, vorticity, mixing length scale, flushing time, CFL time-steps, tracer fluxes, mean velocity or mean tracer flux and tendencies in the momentum balance. Specification of these diagnostics is described below. 4.29.1 Tracer Fluxes The advective and vertical diffusive flux of a specified tracer may be calculated. The flux calculation of a tracer is invoked by specifying a tracer name, e.g; CALC_FLUXES salt # Name of tracer for flux calculation To disable the flux diagnostic, set the flux diagnostic to NONE. This diagnostic requires the specification of tracers representing the advective fluxes in e1, e2 and z directions, and a diffusive flux in the z direction. These tracers are automatically generated by SHOC when the CALC_FLUXES flag is invoked, but may be over-ridden by manually specifying any of the following tracers in the parameter file: TRACER?.name TRACER?.long_name TRACER?.units TRACER?.diagn flux_e1 Advective flux e1 kgs-1 1 TRACER?.name TRACER?.long_name TRACER?.units TRACER?.diagn flux_e2 Advective flux e2 kgs-1 1 TRACER?.name TRACER?.long_name TRACER?.units TRACER?.diagn flux_w Vertical advective flux kgs-1 1 TRACER?.name TRACER?.long_name TRACER?.units TRACER?.diagn flux_kz Vertical diffusive flux kgs-1 1 Fluxes are calculated at each grid cell via: flux _ e1 = u1T∆h2 ∆z flux _ e2 = u2T∆h1∆z flux _ w = wT∆h1∆h2 ∂T flux _ kz = K z ∆h1∆h2 ∂z where u1 and u2 are the velocities in the e1 and e2 directions respectively, T is the tracer concentration at the cell face, ∆h1 and ∆h2 are the grid metrics at the cell faces and ∆z is the layer thickness. 16/09/2014 Page 96 of 177 Version: 1.00 SHOC User Manual 4.29.2 Means The mean of certain variables may be calculated via the flag MEAN. Options are: MEAN MEAN MEAN MEAN MEAN MEAN MEAN MEAN MEAN MEAN MEAN MEAN_DT NONE VEL3D VEL2D ETA KZ WIND VOLFLUX TENDENCY FLUX TIDAL TRANSPORT 1 day # # # # # # # # # # # # No mean velocity calculation Mean 3D velocity calculation Mean 2D velocity calculation Mean sea level calculation Mean vertical diffusivity calculation Mean wind calculation Mean volume flux calculation Mean momentum tendencies Mean tracer flux calculation Means calculated over a tidal cycle Tracers advected with mean velocities Averaging period A MEAN_DT value of SEASONAL or MONTHLY is also supported for seasonal or monthly means respectively. These quantities may be written to file using the SEASONAL or MONTHLY netCDF file output time increments (see Section 4.32.6); here the mean dumped at the start of the season corresponds to the mean computed over the previous season (ditto for months, e.g. output on 1 March corresponds to a mean computed over the previous summer for SEASONAL means and means computed over February for MONTHLY means). Additionally, if SEASONAL or MONTHLY means are written to netCDF file at the same interval as MEAN_DT (e.g. file0.tinc = SEASONAL with MEAN_DT = SEASONAL) then the mean will be cumulative over the season for successive years (e.g. for a multi-year run, the mean dumped to file on 1 March will be that of all previous summers for SEASONAL means and that of all previous Februaries for MONTHLY means). If the mean is not desired to be cumulative in this fashion, then the mean for each season of each year should be saved using MONTHLY dumps for SEASONAL means. The means computed are running means, where the value present in the output file is the mean from the start of the computation period to that point in time. When the MEAN_DT time is reached, the mean values are reset to zero and the running mean begins again. If a restart is performed, the running mean values are correctly populated from the restart file but the time counter for the means is reset to zero. This may result in inaccurate means when restarting, and can be avoided by explicitly setting the time counter to its correct value since the last resetting of the means using: MEANS_OFFSET <time> # e.g. <time> = 10 days is the time # since the last reset occurred. The default is no calculation of mean quantities. If the VEL3D flag is invoked, then three additional tracers corresponding to the mean 3D velocity in the e1, e2 and z directions must exist. These tracers are automatically generated by SHOC when the MEAN flag is invoked, but may be over-ridden by manually specifying any of the following tracers in the parameter file: TRACER?.name TRACER?.long_name TRACER?.units TRACER?.diagn u1mean Mean u1 velocity ms-1 0 TRACER?.name TRACER?.long_name TRACER?.units TRACER?.diagn u2mean Mean u2 velocity ms-1 0 TRACER?.name TRACER?.long_name wmean Mean w velocity 16/09/2014 Page 97 of 177 Version: 1.00 SHOC User Manual TRACER?.units TRACER?.diagn ms-1 0 If the FLUX flag is invoked then the mean values of the tracer fluxes (section 4.29.1) are calculated for the respective flux tracers, hence additional flux tracers must also be specified. If the TENDENCY flag is set then the contributions to the momentum balance are averaged for the respective tendency tracers (see section 4.29.9). The VEL2D and WIND flags generate means of the 2D velocity and wind-field respectively. These averages are stored in 2D tracer arrays which are automatically created by SHOC when these flags are invoked. If the TIDAL flag is present then the mean values are calculated over a tidal period. To do this SHOC attempts to find the maximum sea level in a 24 hour period at each point in the grid, then proceeds to average until the next maximum sea level is encountered at that point. Note that this may result in the exact averaging period differing throughout the grid (e.g. if a modulation of tidal phase exists across the grid). After each output dump event the mean arrays are reset. When invoking this option, the file output interval should be set to around 3 times the dominant tidal period (i.e. 3 days for diurnal tides) since SHOC may require up to 1 tidal period to locate the start of the averaging period, 1 tidal period to calculate the mean and 1 tidal period for safety to avoid any overlap of the tidal averaging into the next cycle. The TRANSPORT flag allows tracers to be advected using the mean 3D velocity field. If the averaging period is set so as to filter out higher frequency oscillation (e.g. the tide) then these velocities represent the residual current field which may be much smaller than the instantaneous current. In these cases the time-step for tracers may be dramatically increased, resulting in an improvement in execution speed. The mean fields appear in the output file and time-series files as an additional tracer. Note that if tracers are set as diagnostic tracers (TRACER?.diagn = 1) then SHOC initializes the tracer to zero every time the tracer is dumped to file. Since mean tracers sum contributions over the averaging period, always set TRACER?.diagn = 0 when manually defining mean tracers. 4.29.3 Mixed Layer Depth The mixed layer depth may be computed using a threshold on the vertical density profile -2 (currently hardwired to –0.01 kgm in the routine mld()) or threshold on the turbulent kinetic -5 -1 energy (hardwired to 10 Wkg in the routine mldk(); see Burchard et al (1999), p26). Obviously the latter will only function if the mixing scheme calculates TKE (e.g. MellorYamada 2.5, k-ε, k-ω). Finally, the mixed layer may be computed as the level where water temperature attains a value of 0.1 x SST. The mixed layer option is invoked by setting the flag: MIX_LAYER MIX_LAYER MIX_LAYER MIX_LAYER NONE DENS_MIX TKE_MIX TEMP_MIX # # # # Default : no mixed layer calculation Density gradient computation TKE threshold computation Temperature (0.1 x SST) computation The default is no mixed layer calculation. If this flag is invoked, then a 2D tracer is automatically created to store the mixed layer depth in units of metres. 4.29.4 Flushing Time The time required to flush a sub-region of the model domain may be calculated using the flushing diagnostic. The flushing time is defined as the time for the total mass in the subregion to decrease by a factor of 1/e (~38%, i.e. the e-folding time). This representation of the flushing time assumes that tracer is well mixed in the sub-region and the total mass is assumed to decrease exponentially according to: 16/09/2014 Page 98 of 177 Version: 1.00 SHOC User Manual M (t ) = M 0 e − t / τ where M0 is the initial mass and τ is the flushing time scale (Tartinville et al, 1997). When M = M0/e then t = τ, hence the flushing time can be recovered. This diagnostic is invoked by specifying the tracer number of a flushing tracer, e.g. FLUSHING_TR FLUSHING_DT FLUSHING_PTS 15 5 16 5 17 6 YES 30 minutes 3 # # # # Invoke flushing diagnostic Output interval. Grid cells defining the flushing region. Invoking the flushing tracer diagnostic will automatically create a tracer named ‘flush’ with the following attributes: TRACER5.name TRACER5.long_name TRACER5.units TRACER5.fill_value TRACER5.valid_range TRACER5.diagn TRACER5.advect TRACER5.diffuse flush Flushing tracer -1 mgL 0.0 0 1 0 1 1 The flushing tracer concentration is automatically initialised to 1.0 within the flushing region and zero elsewhere during startup. The flushing region is defined by listing a series of (i,j) locations, whose total number is FLUSHING_PTS. The (i,j) locations of any sub-region of the domain may be retrieved using the ‘marked’ facility in jvismeco. The total mass in the flushing region is printed to the time-series file ‘flushing.ts’ at the time interval FLUSHING_DT. This time-series file contains the total mass in the flushing region, the normalised mass (i.e. the ratio of total mass : total initial mass) and the flushing time. The flushing (e-folding) time can be calculated from this output, i.e. the time when the normalised mass falls below 1/e. When this occurs the flushing time variable in the time-series file will assume this time value. 4.29.5 Steric Height The steric height within a domain can be calculated by specifying the flag: STERIC_HEIGHT lnm # Level of no motion Where lnm is a number corresponding to the level of no motion used in the steric height calculation. If this flag is set, a 2D tracer is automatically created to store the steric height output with units of metres. Steric height is defined as the geopotential anomaly divided by the acceleration due to gravity (e.g. Godfrey and Ridgeway, 1985). Geopotential anomaly is defined as: p2 ∆Φ = ∫ δdp p1 where p1 > p2 are any pressure levels and δ is the anomaly of specific volume where: δ = α ( S , T , p ) − α (35,0, p ) 16/09/2014 Page 99 of 177 Version: 1.00 SHOC User Manual with α=1/ρ = the specific volume, S=salinity, T=temperature and p=pressure. For the steric height diagnostic the pressure p1 is taken as the pressure at the level of no motion (lnm where it is assumed velocity=0) and p2 is taken as the sea surface. The geostrophic current relative to the level of no motion in the e1 direction is then given by: ug = g ∂sh f ∂e1 where sh is the steric height (m) and f is the Coriolis parameter. The gradient of steric height in the e2 direction gives geostrophic velocity in the e2 direction. If lnm =0 then the steric height diagnostic is not calculated. 4.29.6 Vorticity The vorticity may be calculated and stored in 2-D tracer diagnostic variables by invoking the flag: VORTICITY <string> Where <string> is a string containing ABSOLUTE, RELATIVE, POTENTIAL, TENDENCY or NONE, with; ABSOLUTE RELATIVE POTENTIAL TENDENCY NONE # # # # # -1 absolute vorticity saved to tracer ‘abs_vor’ (s ) -1 relative vorticity saved to tracer ‘rel_vor’ (s ) -1 -1 potential vorticity saved to tracer ‘pot_vor’ (m s ) barotropic tendency terms saved to tracers (see below) no vorticity calculations performed Relative vorticity is defined as: ζ = 1 ∂u2 1 ∂u1 − h1 ∂e1 h2 ∂e2 and absolute vorticity = ζ+f where f is the Coriolis parameter (equivalent to planetary vorticity). Potential vorticity is then defined as (Gill, 1982, p232): Π= f +ζ = cons tan t H +η i.e. potential vorticity is equal to absolute vorticity divided by water depth and is conserved following the flow. Relative vorticity is calculated using the depth averaged velocity to provide a 2-dimensional vorticity diagnostics which are saved to the 2D tracers abs_vor, rel_vor and pot_vor. The 2D relative vorticity equation is described in the SHOC Science Manual. The contributing terms to this balance are automatically generated and saved as 2D tracers if TENDENCY is specified. These tracers have the following attributes: rv_drvdt rv_nonlin rv_beta rv_strch 16/09/2014 Temporal rate of change of relative vorticity (production of relative vorticity) -2 (s ). Nonlinear contribution to relative vorticity. Includes advection, metric terms -2 and diffusion (s ). -2 Transport across contours of constant planetary vorticity (s ). -2 Vortex stretching, i.e. transport across f/H contours (s ). Page 100 of 177 Version: 1.00 SHOC User Manual rv_jebar Joint Effect of Baroclinicity And Relief ; the contribution of the mass field to -2 vorticity production (s ). Production of vorticity due to wind stress curl and the interaction of the wind -2 stress with the gradient of topography (s ). Dissipation of vorticity due to bottom stress curl and the interaction of the -2 bottom stress with the gradient of topography (s ). rv_wsc rv_bsc 4.29.7 Mixing Length Scale The mixing length scale is saved to the diagnostic tracer lscale if this tracer is defined, e.g. if : TRACER?.name TRACER?.long_name TRACER?.units TRACER?.fill_value TRACER?.valid_range TRACER?.diagn TRACER?.advect TRACER?.diffuse lscale Mixing length scale m 0.0 0 100 1 0 0 is defined then this tracer will be populated with the mixing length scale calculated in the Mellor-Yamada 2.0 k-ε or k-ω mixing schemes. 4.29.8 CFL Time-steps The Courant-Friedrichs-Levy stability time-step (see section 2.7 Herzfeld et al, 2002) for barotropic and baroclinic modes may be calculated at every grid point and time-step. The CFL time-steps are saved to 2D diagnostic tracers in units of seconds. This is useful to precisely set the time-steps used by the model. An option exists to include the vertical advection Courant constraint (i.e. w∆t/∆z < 1) The minimum time-step for the simulation is printed to the diagnostic file ‘diag.txt’ (section 4.31). Options exist to adaptively alter the time-step used by the model to the CFL condition. This process is performed for a user defined time period. The CFL diagnostics are invoked via: CFL PASSIVE # CFL calculated and output to tracers ACTIVE CFL_DT <x> days # 2D and 3D time-steps are set to the minimum # CFL time-steps at x days ACTIVE3D CFL_DT <x> days # # # # # # # # |WVEL 3D time-step is set to CFL step whenever the CFL step becomes less than the 3D step and the simulation time is less than x days. By or-ing WVEL to the above flags the vertical advection stability constraint (i.e. Courant number < 1) is included in the stability calculation. An example of the CFL stability diagnostic is: CFL CFL_DT AVTIVE3D|WVEL 20 days The 2D and 3D CFL time-steps are included in the output files as the variables ‘cfl2d’ and ‘cfl3d’ respectively. 16/09/2014 Page 101 of 177 Version: 1.00 SHOC User Manual 4.29.8.1 Heat Flux Diagnostics If the heat flux is calculated (see section 4.16) then the components of the heat flux are automatically written to 2D diagnostic tracers. The attributes of these tracers are listed below. Heat Flux Diagnostic Attributes Description Short wave radiation Long wave radiation Sensible heat flux Latent heat flux Net heat flux 2D Tracer Name swr lwr shf lhf nhf Units -2 Wm -2 Wm -2 Wm -2 Wm -2 Wm 4.29.9 Momentum Balance Tendencies The contribution to each of the terms in the 3D momentum balance may be saved to 3D diagnostic tracers. These variables will then appear in any specified output netCDF and timeseries files. These diagnostics are invoked by invoking the flag: MOM_TEND YES -1 This diagnostic automatically generates the following tracers (with units ms ) representing the momentum tendencies when the MOM_TEND flag is invoked u1_adv u1_hdif u1_vdif u1_btp u1_bcp u1_cor u1 u1 u1 u1 u1 u1 advective tendency horizontal diffusion tendency vertical diffusion tendency barotropic pressure gradient tendency baroclinic pressure gradient tendency Coriolis tendency u2_adv u2_hdif u2_vdif u2_btp u2_bcp u2_cor u2 u2 u2 u2 u2 u2 advective tendency horizontal diffusion tendency vertical diffusion tendency barotropic pressure gradient tendency baroclinic pressure gradient tendency Coriolis tendency mom_balance A code representing the balance, where the code: 1 = advection 2 = horizontal diffusion 4 = vertical diffusion 8 = Coriolis 16 = barotropic pressure 32 = baroclinic pressure maximum term in the momentum The sum of the momentum diagnostic tracers for u1 or u2 velocity is equal to the total change in velocity over the time-step. If the MOM_TEND flag is set to NO but any of the above tracers are included in the parameter file, then the momentum tendency corresponding to just that tracer will be calculated. This diagnostic will not work in the 2D mode. 16/09/2014 Page 102 of 177 Version: 1.00 SHOC User Manual 4.29.10 Tracer Tendencies Tracer tendencies can be saved to 3D diagnostic tracers using: TRA_TEND <tr_name> where <tr_name> is the name of a tracer in the tracer list for which the tendencies are to be computed. The units of the tendencies are the same as that of the nominated tracer, and the following diagnostic tracers are automatically generated; <tr_name>_adv <tr_name>_vdif <tr_name>_ncon advective and horizontal diffusive tendency vertical diffusive tendency non-conservative tendency 4.29.11 Selective Momentum Calculations The terms in the 2D and 3D momentum balance (i.e. advection, horizontal diffusion, vertical diffusion, barotropic pressure gradients, baroclinic pressure gradients and Coriolis) may be selectively omitted from the momentum calculation via the flags: U1_OMIT U2_OMIT U1AV_OMIT U2AV_OMIT <string> <string> <string> <string> Where <string> is a string containing ADVECT, HDIFF, VDIFF, PRESS_BT, PRESS_BC or CORIOLIS. This facility is useful for diagnosing the source of instability in the model. The baroclinic contribution is only omitted from the 2D mode if it is also omitted from the 3D mode. 4.29.12 Diagnostic numbers A variety of diagnostic numbers can be computed at every time-step. These are invoked via the NUMBERS diagnostic as follows: NUMBERS <string> Where <string> is a string containing BRUNT, INT_WAVE, RICHARDSON_GR, RICHARDSON_FL, REYNOLDS, FROUDE, ROSSBY_IN, ROSSBY_EX, SOUND, SHEAR_V, BUOY_PROD, SHEAR_PROD, SPEED_2D, SPEED_3D, SPEED_SQ, SIGMA_T or ALL_NUMBERS. These diagnostics are computed as follows: -1 BRUNT : Brunt-Vaisala (buoyancy) frequency (s ), N, where; N2 = − g ∂ρ o ρ o ∂z (Gill, 1982, eqn 6.4.9). -1 th INT_WAVE : Internal wave speed (ms ). For constant N the n mode long wave phase speed is approximated by: cn = NH nπ (Gill, 1982, eqn 6.11.1) where H is the water depth. Mode 1 internal waves are produced as this diagnostic. RICHARDSON_GR : Gradient Richardson number (dimensionless), where; Ri = 16/09/2014 N2 (∂u / ∂z )2 (Dyer, 1997, eqn 4.2) Page 103 of 177 Version: 1.00 SHOC User Manual If Ri > 0 flow is stable Ri = 0 flow is neutral Ri < 0 flow is unstable RICHARDSON_FL : Flux Richardson number (dimensionless), where; K z Ri Vz Rf = (Dyer, 1997, p54) REYNOLDS : Reynolds number (dimensionless), where; Re = uD (Dyer, 1997, eqn 4.1) υ The diagnostic produced uses layer thickness for D and vertical eddy viscosity, Vz, for the kinematic viscosity, υ. FROUDE : Interfacial Froude number (dimensionless) where; Fr 2 = u2 cn2 (Dyer, 1997, p42) The internal wave speed used is that from the INT_WAVE diagnostic. If Fr < 1 flow is sub-critical Fr = 1 flow is critical Fr > 1 flow is super-critical. Note, Dyer (1997, p43) states critical flow occurs at Fr = 0.33 for continuous stratification. ROSSBY_IN : Internal Rossby radius (m), where: Roi = cn f n = 1,2,3… (Gill, 1982, eqn 7.5.4) The mode 1 internal Rossby radius is supplied as the diagnostic. ROSSBY_EX : External Rossby radius (m), where: Roi = gH f (Gill, 1982, p 207) SOUND : Speed of sound given by: c = c( S , T , Z ) = co + α o (T − 10) + β o (T − 10) 2 + γ o (T − 18) 2 + δ o ( S − 35) + ε o (T − 18)( S − 35) + ζ o z (Apel, 1887, eqn 7.19) where co=1493.0, αo=3.0, βo=-0.006, γo=-0.04, δo=1.2, εo=-0.01 and ζo=0.0164. This equation -1 is believed to be accurate to within ± 0.2 ms . Sound channels are defined as the depth where a change of sign in the sound speed gradient occurs, i.e. where the curvature of the sound profile is equal to zero. The vertical representation of all variables in SHOC occupies discrete vertical layers arranged at variable depths, usually with higher resolution at the surface (and being dependent on maximum water depth). Therefore, the speed of sound is also only provided at discrete depths. In SHOC the sound channels are simply computed from a linear interpolation between two layers where the gradient of sound speed changes. The th gradient of sound speed is computed with a 4 order approximation: 16/09/2014 Page 104 of 177 Version: 1.00 SHOC User Manual ∂c 4 c kt +1 − c kt −1 1 c kt + 2 − c kt − 2 ~ dcdk k = − ∂t 3 2h 3 4h Where C is the sound speed, k is the vertical index and h is the layer thickness. Layers k and k-1 are identified where dcdk k / dcdk k −1 < 0 , and the sound channel depth, Dk, is then given by: Dk = d k − dcdk k (d k −1 − d k ) /(dcdk k −1 − dcdk k ) where dk is the depth of layer k. Sonic depth and sound channel depths are provided along with the speed of sound when this diagnostic is invoked. -1 SHEAR_V : The vertical velocity shear magnitude (s ), defined by: v ∂v = (∂u1 / ∂z ) 2 + (∂u 2 / ∂z ) 2 ∂z BUOY_PROD and SHEAR_PROD : These diagnostics are assigned from the closure scheme 2 2 2 2 used, where buoyancy production, B (m s- ), and shear production, P (m s- ), are defined by (e.g. Burchard et al, 1998, eqn. 9): [ P = V z (∂u1 / ∂z ) 2 + (∂u 2 / ∂z ) 2 ] B = KzN 2 2 where N is the Brunt-Vaisala frequency (see above). Note that these diagnostics are extracted directly from the mixing scheme used, and may differ for different schemes (e.g. some schemes add a correction for internal wave shear to P). -1 SPEED_2D : Depth averaged current speed (ms ) , given by: | U |= U 1 * U 1 + U 2 * U 2 -1 SPEED_3D : Three dimensional current speed (ms ) , given by: | u |= u1 * u1 + v 2 * v 2 2 -2 SPEED_SQ : Three dimensional current speed squared (m s ) , given by: u 2 = u1 * u1 + v 2 * v 2 WIND_CD : The momentum drag coefficient given by the function in Section 4.14. OBC_PHASE : Open boundary phase speed for elevation, as given by radiation conditions in Science Manual Section 4.6. The phase speed is bounded by the CFL condition ( 0 ≤ phase ≤ 1 ); if waves are incoming then the phase is negative, hence bounded to zero. Out-going waves have the phase > 0. SIGMA_T : σT (kgm ) is output as dens_0 – 1000. -3 -3 ENERGY : Mechanical energy (Jm ) given by (Kowalik and Murty (1993), eqn. 1.24): 16/09/2014 Page 105 of 177 Version: 1.00 SHOC User Manual ET = E k + E p = 12 ρ (u12 + u 22 + w 2 ) + ρgη -3 KINETIC : Kinetic energy (Jm ) given by (Kowalik and Murty (1993), eqn. 1.24): E k = 12 ρ (u12 + u 22 + w 2 ) SLOPE : Computes the surface slope in the e1 and e2 directions, stored in surf_slope_x and surf_slope_y respectively. SURF_LAYER : The k index of the surface layer is stored in the 2d array surf_layer. BOTSTRESS : Bottom stress in e1 and e2 directions, and bottom stress magnitude. WET_CELLS : A diagnostic to show wet and dry cells. Water columns are assigned the percentage of water they contain relative to being dry; i.e. a dry water columns is assigned 100%, cell with sea level at msl is assigned 0 and when sea level rises the percent dry is negative. If sea level falls to half the water depth, the cell is 50% dry. Note that a cell is considered dry when the water falls below DRY_FRAC * HMIN, where DRY_FRAC is currently hardwired to 0.05 and HMIN is defined in Section 4.4; e.g. if HMIN = 0.07 m, then cells dry when the sea level gets within 3.5 mm of the bottom. DUMMIES : Three generic 3D dummy variables (dum1, dum2 and dum3) are created for hardwiring debugging diagnostics internally in the code. ALL_NUMBERS Invokes all the diagnostic numbers. 4.29.13 Tracer percentiles The tracer percentile diagnostic calculates the spatial distributions of percentiles of a snapshot of a given tracer distribution, i.e. it shows the spatial position of the percentile values of a given tracer at a particular time. This diagnostic is useful for determining the position in a domain where e.g. a median, 95 %ile or 5%ile tracer concentration may be found. This diagnostic is time dependent, but if a mean is created using the tracerstats library, then the position in the domain where the average of a particular percentile (e.g. average median over a simulation) may be determined. The percentile calculation of tracer is invoked by specifying a tracer name, e.g; CALC_PERCS salt # Name of tracer for percentile calculation A 3D tracer containing the specified tracer percentiles is automatically created with the tracer name appended to ‘percentile_’ e.g. in this case ‘percentile_salt’. 4.29.14 Alerts The alert diagnostic attempts to detect early signs of instability by monitoring maximum absolute velocities, divergences and, if invoked, maximum absolute momentum tendencies. These maximums are written to an alert diagnostic file every time-step, along with the maximums encountered during the whole simulation. A time series file containing the history of the maximum values is also created. To invoke alert tracking in passive mode: ALERT ALERT_DT 16/09/2014 PASSIVE <alert_file> 1 hour Page 106 of 177 Version: 1.00 SHOC User Manual Where <alert_file> is an optional filename to write the maximum value information to. This file name is appended with ‘.txt’. If <alert_file> is absent then output is written to the file ‘alert.txt’ by default. If ALERT_DT is present then a time series file is created with the alert filename appended with ‘.ts’, and maximum values are output at the specified time interval. The maximum values printed to file are absolute maximum values. Note that maximum tendencies are only printed if the MOM_TEND flag is invoked. The mechanical energy, excess mass (mean sea level) and boundary energy flux are defined according to Palma and Matano (1998) and are useful for diagnosing the stability of a domain; Mechanical Energy = 1 2 2 2 ∫ ρgη dA + ∫ 0.5ρD(U 1 + U 2 )dA A A A 1 ηdA (m) A ∫A 1 DU 1 ( gη + 0.5U 22 )∆y OBC Energy Flux = W W∫ Excess Mass -2 (Jm ) = 4 -3 (m s ) Where A = domain area, W = OBC width (the energy flux is for a u1 boundary in this case, -1 see Section 3.11). Note that ρ(OBC Energy Flux) has units Wm . Alert tracking may be made active using the following: ALERT ACTIVE <alert_file> Using the ACTIVE alert mode, when a maximum value exceeds defined thresholds then specific action is taken. This action falls into three categories: LEVEL1 : 2D or 3D velocities exceed the VELMAX parameter. Horizontal diffusion is increased 2 to the value ∆x /4∆t which most effectively damps the shortest waves possible in the grid (Kowalik and Murty, 1993, eqn. 3.141). Velocity thresholds may be defined using the following parameters: VELMAX 2 # Maximum horizontal velocity (ms-1) WMAX 1e-3 # Maximum vertical velocity (ms-1) LEVEL2 : 2D divergence = ∂η / ∂t , or 3D divergence = ∂w / ∂z exceed a (hardwired) threshold. The Shapiro (1970) smoothing filter is applied to the relevant velocity field (Kowalik and Murty, 1993, eqn. 3.136) LEVEL3 : momentum tendencies exceed (hardwired) thresholds. The relevant process is omitted during the next time-step. Alert information written to file has the following format (note: indexes in brackets are in Cartesian coordinates, outside the brackets are sparse coordinates); Simulation time = 10.000000 (days) Maximum absolute sea level : elevation : 0.248644 at 26 (25 1 22) Maximum absolute velocity : u1 3D : 0.203112 at 1226 (1 25 22) u1 2D : 0.093261 at 1066 (45 21 22) u2 3D : 0.093234 at 1225 (0 25 22) u2 2D : 0.001336 at 1023 (2 21 22) w : 0.000044 at 12290 (49 25 14) Div 3D : 0.000004 at 1249 (24 25 22) Div 2D : 0.000000 at 767 (1 16 22) 16/09/2014 Page 107 of 177 Version: 1.00 SHOC User Manual Maximum absolute tendencies : u1 velocity u2 velocity Area averaged energy : Mechanical energy : 231.513328 (J/m2) Excess mass : -0.003424 (m) Energy flux (W/m2) : Boundary 0 (West) : 2.276448 Boundary 1 (East) : 2.272259 --------------------------------------Simulation maximum absolutes eta u1 3D u1 2D u2 3D u2 2D w div 3D div 2D : : : : : : : : 0.248644 0.203115 0.093282 0.121123 0.006932 5.72e-05 5.20e-06 3.60e-06 4.29.15 Total mass, volume, heat and salt The total mass, volume, heat and salt in the domain, useful for diagnosing conservation properties, may be output in time series format. The totals are output to the time-series file ‘totals.ts’ . If OutputPath is set, then the totals file will reside in this directory. To invoke the totals diagnostic use: TOTALS TOTALS_DT YES 1 hour # Invoke totals diagnostic # Interval to print totals. # The default is 1 hour. The default is for no totals to be calculated. The output timeseries file consists of the following: ## ## ## ## ## ## ## ## ## ## ## ## ## ## ## ## ## ## ## ## ## COLUMNS 5 COLUMN1.name Time COLUMN1.long_name Time COLUMN1.units days since 1990-01-01 00:00:00 +10 COLUMN1.missing_value -999 COLUMN2.name Total mass COLUMN2.long_name Total mass COLUMN2.units kg COLUMN2.missing_value 0.000000 COLUMN3.name Total volume COLUMN3.long_name Total volume COLUMN3.units m3 COLUMN3.missing_value 0.000000 COLUMN4.name Total heat COLUMN4.long_name Total heat COLUMN4.units deg C m3 COLUMN4.missing_value 0.000000 16/09/2014 Page 108 of 177 Version: 1.00 SHOC User Manual ## ## ## ## ## ## COLUMN5.name Total salt COLUMN5.long_name Total salt COLUMN5.units psu m3 COLUMN5.missing_value 0.000000 Additional tracer totals may be computed by appending the tracer name to the TOTALS diagnostic, e.g; # Include ‘silt’ and ‘Chla’ in totals diagnostic TOTALS YES silt Chla The additional tracer totals will then appear in the time series. Note that temp and salt are always included. If a tracer included a sediment component, then the total mass is the sum of mass in the water column and the sediment. 3 -1 Finally the volume flux through each open boundary, in m s , is computed. 4.29.16 Mass Budgets The model domain can be arbitrarily divided into a number of regions for which mass and volume budgets can be computed over a predefined period. A netCDF file containing the region partitions (usually appended with ‘.bnc’) must first exist. These files can be created using the ‘BOX CREATION’ option in PLUM. Instructions for creating regions in PLUM are as follows: 1. Enter PLUM in Matlab. 2. Click on GRID CREATION and then Read NETCDF File to read in the Shoc grid information. 3. Click on Draw/Erase Grid to remove the grid line detail, leaving just the bathymetry. 4. Return to Main Menu and click on BOX CREATION, and then Create New Boxes to draw required boxes over the bathymetry. Note that instructions are provided in the matlab window. 5. Click on Edit Boxes to optimize the regions. 6. Click on Partition SHOC to partition all of the water cells into the 2D regions. 7. Click on Assign Box Layers as many times as there are regions that are required to be a function of depth; e.g. enter a vector such as [4 0 -20 -40 100] to create 3 layers in Box 4 with layer faces at 0, -20, -40 and -100m. A maximum of 5 layers can only be assigned to any box. The depth slider can be used to scan layers and observe the different 3D regions. 8. The output is saved to a ‘.bnc’ file. This can be read back via Read netcdf File at a later date to make more changes by repeating the above procedure. Any ‘.bnc’ file that SHOC attempts to read must contain the variable ‘boxnos’, and have the dimensions ‘i_centre’, ‘j_centre’ and ‘k_centre’ to specify the grid size in x,y and z directions respectively. Note: be sure that .bnc files are created for the input file you wish to use. If the variable regionid in the output file shows values of -9999 as region numbers, then this is probably not the case and region exchanges may be incorrect. A warning is only issued if the grid dimensions in the .bnc and input file differ (# wet cells are not compared). To invoke the budgets over the regions, use: REGION path/name.bnc REGION_DT 10 days 16/09/2014 # # # # Path and filename of the .bnc region file. The time interval over which the budgets are computed. Page 109 of 177 Version: 1.00 SHOC User Manual REGION_VARS passive # Tracers for which the budgets are # computed. The variables ‘salt’ and ‘temp’ are always computed by default (i.e. these variables do not need to be specified in REGION_VARS. A volume budget is also created by default. The keywords MONTHLY, SEASONAL and YEARLY may be input as REGION_DT, and ALL, TRACERS_WC and TRACERS_DIAGN_WC may be used for REGION_VARS. Output is created for each region in the ascii file region*.ts where * is the region number. If OutputPath is present, the files will be written to this directory. These files contain the mass at the start of the interval REGION_DT for each variable, mass at the end of the interval, the mean mass and standard deviation over the interval, the mass fluxes through segments connecting regions or through open boundaries (i.e. mass transfers from region to region, or across open boundaries) and the mass budget of the region, where: mass budget = start mass + mass fluxes – end mass Note that the mass fluxes are positive if mass is imported into the region, and negative if mass exits the region. If the budget is not approximately zero, then this means that there has been net import of mass into (positive budget) or export from (negative budget) the region. This may be due to a point-source/sink delivering mass into the region over the interval, fluxes through the surface or sediment or non-conservative processes associated with the tracer. The mean concentration in the region can be computed using mean mass divided by mean volume. The mass fluxes in the hydrodynamic model are computed using the same fluxes as are used to update tracer advection, which are basically the (tracer concentration at a cell face) x (velocity through the face) x (area of the face) x (model time-step). The transport model computes fluxes by multiplying any interpolation weights that lie outside the region by the mass of the destination cell. Both these methods are inaccurate near open boundaries; the hydrodynamic model because conservation is not respected in the boundary cell, and the transport model because a source cell for outflow may be a destination cell beyond the domain grid. These issues can be overcome by effectively migrating the open boundary location into the domain or creating extra ‘boundary’ regions for which it is acknowledged that the mass budget will be inaccurate. To migrate a boundary into the interior, use; REGION_MODE REGION_OBC_ZONE OBC_BDRY 1 # Migrate OBC into the interior # Number of cells to migrate the OBC For the hydrodynamic model it is sufficient to migrate the boundary only 1 cell, and this is recommended (a warning is displayed if this is not the case). To create new regions adjacent to open boundaries, use; REGION_MODE REGION_OBC_ZONE OBC_AREA 5 # Migrate OBC into the interior # Cell width of the OBC regions Regions may be used with multiple windows for the hydrodynamic model, but must be used with one window with the transport model. When REGION is used, the region partitions are written to the variable regionid, which is written to the output files. For the transport model the update rule for tracer concentration cit in destination cell i is: cit = ∑ j a ij c tj−1 where c tj−1 is the tracer concentration in source cell j at time t-1. The mass at time t in destination cell i is citVi t , therefore aij c tj−1Vi t can be regarded as a mass transfer from cell j to cell i. This is the basis of our mass conservation analysis. It follows that aij c tj−1Vi t is also a mass transfer from region rj to ri. If the total mass fluxes between regions is to be computed, 16/09/2014 Page 110 of 177 Version: 1.00 SHOC User Manual then all these mass transfers are required to be cumulated. For the transport model, the mass budget is represented as: start mass + mass fluxes + mass error + global fill = end mass and as above, denoting the budget as: mass budget = start mass + mass fluxes – end mass then: mass budget + mass error + global fill = 0 Here mass error is the mass conservation error for source cells in a region, and global fill is the mass change in the region due to the global filling algorithm. The former errors arise from using the non-conservative semi-Lagrangian advection scheme and an underlying flow field that is non-conservative (see Section 9.3). These errors are rectified globally using the global fill (i.e. mass is conserved over the whole domain), but this manifests as an input or removal of mass within a region, which is represented by global fill. If global filling is not invoked, then this error is zero. If ALL_TRANSFERS is included in REGION_MODE when using the transport model, then mass or volume transfers from all defined regions are reported (as opposed to only those that share common boundaries). The residence time for each region is output in each time-series file, and as a tracer in netCDF output having the name residence. This time is computed over the interval REGION_DT. The residence time in this case is the time it takes for the volume in each region to be turned over (i.e. replaced with water from other regions) due to volume fluxes through the region perimeters or open boundaries. Note that this must be considered in the context of the time and space scales of dynamics in play, and the size and location of the region. For example, a small region in an area of large tidal flow will have a small residence time, which may not be informative for, e.g. the time it takes fresh water deposited in the region to become saline again (since the tidal current may have a large instantaneous flux but a small residual). 16/09/2014 Page 111 of 177 Version: 1.00 SHOC User Manual 4.29.17 Diagnostic tracer names The following table lists the tracer names (2D and 3D) associated with each diagnostic. These names must be used when attempting to output the relevant diagnostic to file. Diagnostic name Purpose Tracer names CALC_FLUXES flux_e1, flux_e2, Tracer flux calculation flux_w, flux_kz -1 u1mean, u2mean, MEAN VEL3D 3D mean velocity (ms ) wmean -1 u1av_mean, u2av_mean MEAN VEL2D 2D mean velocity (ms ) MEAN ETA eta_mean Mean sea level (m) 2 -1 Kzmean MEAN KZ Mean vertical diffusivity (m s ) -2 -1 w1mean, w2mean MEAN WIND Mean wind (Nm or ms ) 3 -1 u1vmean, u2vmean MEAN VOLFLUX 3D mean volume flux (m s ) MIX_LAYER mixed_layer Mixed layer depth (m) FLUSHING_TR flush Flushing tracer STERIC_HEIGHT steric Steric height (m) -1 abs_vor VORTICITY ABSOLUTE Absolute vorticity (s ) -1 rel_vor VORTICITY RELATIVE Relative vorticity (s ) -1 -1 pot_vor VORTICITY POTENTIAL Potential vorticity (m s ) -2 VORTICITY TENDENCY rv_drvdt, rv_nonlin, Vorticity tendencies (s ) rv_beta, rv_strch, rv_jebar, rv_wsc, rv_bsc MIXING_SCHEME lscale Mixing length scale (m) CFL cfl2d, cfl3d CFL stability criterion (s) -1 MOM_TEND u1_adv, u1_hdif, Momentum tendencies (ms ) u1_vdif, u1_btp, u1_bcp, u1_cor u2_adv, u2_hdif, u2_vdif, u2_btp, u2_bcp, u2_cor -2 HEATFLUX swr, lwr, shf, lhf, Heat flux components (Wm ) nhf WAVE_VARS wave_amp, Wave variables wave_period wave_dir, wave_ub, ustrcw WAVES wave_Cd Wave bottom drag wave_Sxy, wave_Syx Wave radiation stress -1 brunt_vaisala BRUNT Brunt-Vaisala frequency (s ) -1 int_wave_speed INT_WAVE Internal wave speed (ms ) RICHARDSON_GR richardson_gr Gradient Richardson number RICHARDSON_FL richardson_fl Flux Richardson number REYNOLDS reynolds Reynolds number FROUDE froude Interfacial Froude number ROSSBY_EX rossby_external External Rossby radius (m) ROSSBY_IN rossby_internal Internal Rossby radius (m) -3 SIGMA_T sigma_t Sigma_t, σt (kgm ) -1 SOUND sound Speed of sound (ms ) sonic Sonic layer depth (m) sound_channel Sound channels (m) -1 SHEAR_V shear_vert Vertical shear (s ) 2 2 BUOY_PROD buoy_prod Buoyancy production (m s- ) 2 2 SHEAR_PROD shear_prod Shear production (m s- ) -1 SPEED_2D current_speed_2d 2D Current Speed (ms ) -3 ENERGY energy Mechanical energy (Jm ) 16/09/2014 Page 112 of 177 Version: 1.00 SHOC User Manual -3 KINETIC SPEED_3D SPEED_SQ WIND_CD OBC_PHASE CALC_PERCS ALERTS Kinetic energy (Jm ) -1 3D Current Speed (ms ) 2 -2 3D Current Squared (m s ) Momentum drag coefficient -1 OBC phase speed (ms ) Tracer percentiles (%) Alert information SHOW_WINDOWS WET_CELLS SHOW_LAYERS BOTSTRESS Window partitions Wet cell diagnostic Layer thickness (m) Bottom stress SURF_LAYER SLOPE k index of surface layer -1 Surface slope (mm ) REGION Particle tracking invoked Region budgets Particle concentration 16/09/2014 Page 113 of 177 kenergy current_speed_3d speed_sq wind_Cd obc_phase percentile_<tr name> alerts_actual alerts_cumulative windows wet_cells layer_thick tau_be1, tau_be2, tau_bm surf_layer surf_slope_x, surf_slope_y regionid ptconc Version: 1.00 SHOC User Manual 4.30 Data variables and input time-series files There are a variety of parameters in SHOC for specifying input time-series datafiles (e.g. WIND_TS [email protected], BOUNDARY?.DATA). It is expected that: • • • The datafile specified be either a NetCDF or ASCII time-series datafiles The files conform to the coordinate conventions described in section 10. The files contain the necessary variables name(s) for the parameter. Following is a list of the parameters names and the variables that each parameter expects to find in the datafile: Parameter name AIRTEMP BOUNDARY?.DATA (elevation) BOUNDARY?.DATA (u1) BOUNDARY?.DATA (u2) BOUNDARY?.DATA (tracers) CLOUD ETA_RELAXATION_FILE EVAPORATION HUMIDITY ORBITAL_VEL WAVE AMPLITUDE WAVE PERIOD WAVE DIRECTION PRESSURE PRECIPITATION WET_BULB RADIATION TRACER?.RELAXATION_FILE TRACER?.DATA WIND_TS Expected variable names in datafile air_temp eta u1 or u and v u2 or u and v tracer-name cloud eta evaporation humidity ub amplitude period direction pressure precipitation wet_bulb swr tracer-name tracer-name u, v Substitution names air_temp eta u1 or u and v u2 or u and v tracer-name cloud eta evaporation humidity ub amplitude period direction pressure precipitation wet_bulb swr tracer-name tracer-name wind_u, wind_v 4.30.1 Variable substitution Since it is not always possible to supply datafiles with exactly the required variables names, SHOC permits the expected variable name to be substituted for an alternate name. This is done by assigning (=) the new variable name to the default expected variable name. Multiple assignments are separated by commas . The assignments are enclosed within parentheses. No whitespace is permitted. For example, for a standard file assignment such as: WIND_TS windfile.ts SHOC would search for the variables u and v within windfile.ts. If these variables were not present then SHOC would quit with an error. If however, there were two variables called wu and wv then the following substitution could be used. WIND_TS windfile.ts(wind_u=wu,wind_v=wv) 16/09/2014 Page 114 of 177 Version: 1.00 SHOC User Manual 4.30.2 Multiple datafiles At this time the specification of multiple datafiles is only permitted when defining boundary inputs, wind files, relation and resetting. Following is an example of how to substitute variable names and specify multiple time-series files for a boundary parameter: BOUNDARY1.DATA t1.nc(salt=salinity) t2.nc(temp=tmp) A list of files may be included in a separate text file, to which the boundary (or wind etc) specification may define, e.g. a multi-file-netcdf text file, boundary.mnc may be generated having the following format: multi-netcdf-version 1.0 nfiles 2 file0.filename t1.nc file1.filename t2.nc Boundary data may then be defined via (with variable substitution included): BOUNDARY1.DATA boundary.mnc(salt=salinity)(temp=tmp) This is a convenient method of specifying a long list of files as input. 4.30.3 Model variable initialisation At the start of a model run, the model variables are initialised for each grid using a netCDF input file which is either generated from the parameter file using the –g option, or obtained from the output of a previous run. This initialisation input file for each grid is specified as follows: INPUT_FILE in.nc The input file may contain more than one record, the record is selected based on the START_TIME parameter for this run. The time in the datafile must match exactly. 4.30.4 Model variable output SHOC provides two mechanisms for recording its results: ASCII time-series of values as computed for particular locations and as an n-dimensional netCDF datafiles. 4.30.5 ASCII time-series ASCII time-series output files contain values for significant model variables at specific locations. A time series file is created for each location in the model domain and records are written at a pre-determined interval. Currently the output variables include time, surface elevation, current components (2D and 3D), and tracers. Non-time dependent geometry information is also provided (cell centre, bottom depth, etc.) in the header. Time series output in SHOC are referenced to the free surface, mean sea level or the bottom. ASCII time-series are convenient for comparisons with point observations (such as tide gauges or current meters). 16/09/2014 Page 115 of 177 Version: 1.00 SHOC User Manual # Number of time-series outputs. TSPOINTS 2 # Parameters for each time-series point. TS0.pname MP1.ts # TS0.location 319672.69 5758871.98 -4 # TS0.dt 1800 seconds # TS0.reference surface # TS0.vars salt temp # TS0.type simple # TS1.pname TS1.location TS1.dt TS0.reference Filename prefix Location (X Y Z) Output interval. reference level Tracer variables output Velocity output type MP2.ts 319672.69 5758871.98 -12.75 0.5 hour bottom The reference level is determined by the following: TS0.reference TS0.reference TS0.reference surface msl bottom # referenced to the free surface # referenced to mean sea level # referenced to the bottom An output type of simple will cell centre the velocity variables and rotate them onto the eastwest / north-south axis. A standard type will print the velocity at the cell face relative to the e1/e2 grid orientation (i.e. as they are used by the model). The simple type is the default. The default value is reference = msl. If the reference level is surface, then output will always occur at the specified depth below the free surface and if the free surface is fluctuating may not always be in the same cell. If the reference level is msl then output will be the specified depth below the undisturbed sea surface and will always be in the same cell if it is wet. Note that the depth below the free surface may change in this case. If the reference level is bottom then output is the specified depth above the bottom. This will always occupy the same cell providing the cell is wet. For the surface and bottom cases, the sign of the depth may be positive or negative. If the vars field is absent then all tracers are included in the time series file. Time series files are ASCII files, with a header containing information about the data in the files, and data in columns. Their format is described in section 11.1. 4.30.6 NetCDF dump files More than one netCDF output dump file maybe specified in the SHOC parameter file. Each output file contains the grid geometry, times and selected model variables. The number of output files are specified by the parameter OutputFiles. The parameters for each output are specified with the prefix file<N> where <N> is the output file number. Four netCDF output conventions are supported by SHOC, the standard dumpfile output (as used when hot-starting a run), a simple format, a point array output or a sparse array output. 1. The standard output contains up to four staggered grid geometries, based on a Arakawa C-Grid. 2. The simple format contains only one grid geometry, with all data variables interpolated on to the cell centre. Velocity components are therefore represented as eastward and northward components, rather than components relative to the grid 16/09/2014 Page 116 of 177 Version: 1.00 SHOC User Manual used (i.e. e1 and e2 directions which may be spatially variable for curvilinear grids). Vector variables can be stored as vector components, or speed and direction. 3. The point array, parray, is essentially a standard output on user defined cells, therefore generally using significantly less disk space than other file formats. This is useful for outputting open boundaries for nesting purposes. Velocities are represented as eastward and northward components. 4. The sparse output contains a dump of the sparse format used internally in SHOC, i.e. a one dimensional vector of only the wet cells in the grid. If a large amount of the model grid contains land, the sparse format can therefore use significantly less disk space than standard formats, and is an extremely useful format to use in conjunction with the transport (-t) mode. Note that the sparse format cannot be sub-sectioned, i.e. the whole array must be dumped for 3D or 2D variables. The exception to this is that the surface only may be dumped if the filename is appended with ‘_surf’. (n.b. The sparse netCDF format does contain geographic information in the file and mappings from sparse position to Cartesian (i,j,k) locations. This information may be used to visualize a sparse format file directly. If a sparse format is to be read back into the model then it must be un-packed using the routine ‘unpack_sparse()’ to scatter the file data to wet cell locations). # Specifying two output files for a grid. OutputFiles 2 # Specify the path for output files. Time series files are also # output to this path. If the SEQUENCE flag is invoked (Section # 4.4) then /run<n> is appended to the path, where <n> is the # run sequence number. OutputPath /home/data/output OutputTransport <tag> # Output transport files. Files are created for each month with # the name tag_trans_mmmyyyy.nc where ‘tag’ is the tag specified # above, mmm is the month (e.g. ‘jan’) and yyyy is the year. # Files are output in ‘sparse’ format. Variables output are: # eta, u1mean, u2mean, wmean, temp, salt, Kzmean # Output file 0 # The tag ALL for the vars parameter means the following # variables are save to the output dump file. # eta, u1, u2, w, u1av, u2av, topz, wtop, wind1, wind2, patm, # dens, dens_0, Kz, Vz, Cd, u1bot, u2bot, u1vh, u2vh, flag # all the tracers and ptconc if particle tracking is enabled. # This is in addition to the coordinate variables. # # The following fields are manadatory. file0.name out.nc # Output prefix. file0.type standard # Standard dumpfile. file0.tstart 0 days # Output start time. file0.tinc 1 day # Output interval. file0.tstop 44 days # Output stop time. file0.bytespervalue 4 # 2 – shorts # 4 - floats. # 8 - doubles file0.vars ALL # ALL variables. # Output file 1 # A spatial subset of the # Notice only a subset of file1.name file0.type file0.tstart file1.tinc 16/09/2014 grid (possible for use in nesting). the variables are being output. nested_smp.nc simple # simple output. 0 days # Output start time. 1 hour # Output interval. Page 117 of 177 Version: 1.00 SHOC User Manual file1.tstop file1.bytespervalue file1.vars 44 days # Output stop time. 2 # Output as shorts. eta salt temp # Limited variables # These fields are optional, if they any are not specified # then the full range is used for that dimension. file1.i_range 60 70 # Cells 60 to 70 along I. file1.j_range 13 18 # Cells 13 to 18 along J. file1.k_range 0 45 # Half water column. If the file name is appended with ‘_surf.nc’, then only the topmost layer of the grid dumped to file (e.g. equivalent to <file?.k_range 20 20> for a 20 layer model). If tstart and tstop are absent, then these values assume the specified START_TIME and STOP_TIME respectively. The following output intervals are also supported: file0.tinc YEARLY # Output occurs on 1 Jan every year file0.tinc SEASONAL # Output occurs on 1 March for summer # 1 June for autumn # 1 September for winter # 1 December for spring file0.tinc MONTHLY # Output occurs on 1st day of the month An option exists to automatically chunk netcdf output DAILY, MONTHLY or YEARLY as follows: file1.name out.nc file1.chunk DAILY # or MONTHLY or YEARLY In the above case there will be multiple output files created with the date stamp as a suffix out_2011-02-01.nc out_2011-02-02.nc ... Note that there may not necessarily be one file per day, it depends on the file increment. The option merely enforces at most one days (months or years) worth in each file. For MONTHLY only the year and month suffix is added and for YEARLY, only the year. This applies to standard, simple, simple_cf, parray and sparse output netcdf formats. A sparse or standard formatted files may have the additional modulo attribute which may take the value year, month, week, day, hour, minute or second, e.g; file0.modulo year # yearly modulo When these sparse formatted files are input via tracer resets or in the transport mode, then the model time is converted relative to the defined modulo. For example, if a year modulo is specified then all model times are converted to times within the range 0 to 365, and an input file of length 1 year may be used to cycle through a simulation of many years length. When dumping, the modulo is relative to the tstart time specified for the output file (e.g. for year modulo, set tstart to be 1 Jan for a particular year). A filling algorithm may be applied to the output variables prior to dumping which re-assigns values over land, e.g; file0.fill_rule default file0.fill_rule file0.fill_rule no_fill zero_fill 16/09/2014 # # # # # eta = 0 and 3D tracers = NaN at land cells. No filling applied eta = 0 and 2D & 3D tracers = 0 at land cells. Page 118 of 177 Version: 1.00 SHOC User Manual file0.fill_rule cascade_search # Land cells filled with the # nearest wet cell for eta, 2D # and 3D tracers. Output may be filtered before being dumped by using: file0.filter avarge3 average5 weighted3 shapiro3 weighted5 shuman3 highpass3 # # # # # # # 9 point convolution smoothing filter 25 point smoothing filter 9 point Shapiro filter 9 point Shapiro filter 25 point weighted filter 9 point Shuman filter 9 point high pass Laplacian filter Filtering is useful for the update of coarse resolution grids when using 2-way nesting. 4.30.7 Multi-dumpfiles Dump files may be specified using a system analogous to the multi-netcdf input specification (Section 4.30.2); in this case a valid text file is specified for OutputFiles with the following format: OutputFiles df.txt # Name of the multi-dumpfile text file With df.txt containing, for example: multi-dumpfile-version 1.0 nfiles 2 file0 standard.txt file1 simple.txt Each of the text files standard.txt and simple.txt then contains a list of output files as described in Section 4.30.6, e.g; In standard.txt: OutputFiles file0.name file0.type file0.tstart file0.tinc file0.tstop file0.bytespervalue file0.vars 2 out.nc standard 0 days 1 day 44 days 4 ALL file1.name file1.type file1.tstart file1.tinc file1.tstop file1.bytespervalue file1.vars out_surf.nc standard 0 days 1 day 44 days 4 eta temp salt u1 u2 In simple.txt: OutputFiles file0.name file0.type file0.tstart file0.tinc file0.tstop 1 out.nc simple 0 days 1 day 44 days 16/09/2014 Page 119 of 177 Version: 1.00 SHOC User Manual file0.bytespervalue file0.vars 4.30.8 4 ALL Customised parameters As discussed in section Error! Reference source not found., SHOC source code may be customised to suit special circumstances that the standard model does not support. The customised source may well define its own parameters and read them from the parameter file. In such cases please consult the code directly. 4.30.9 Coastlines If using the utility jvismeco, you will probably need to specify coastline data (unless you are modelling simple test cases, or a completely open patch of water). These are specified in ASCII files containing 2 columns (x and y). A file may contain more than one coastline section (several islands, for example). It is preferable that each coastline section forms a closed polygon which does not contain any self-intersections. Coastline sections are separated by a blank line (and/or usually one or more comment lines as well). An example coastline file is shown below: # This is an optional comment line. # This is another comment line. 0 0 0 1 1 1 1 0 0 0 # A second coastline section 1 0 1 1 2 1 2 0 1 0 You can have as many coastlines as you like, in as many files as you like, but it is usually convenient to keep all the data in one file. 4.30.10 Bathymetric data In order to define the area to be modelled, you need to specify the bathymetry of the area. To do this, you need an ASCII file containing bathymetric data in 3 columns (x y and depth, free format). An example file is as follows: # This is an optional comment line. # This is another comment line. # The 3 columns are x, y and depth 1000 1000 20 2020.2 1354 10 1520 7322 15 # You can even have comments in the middle of the data 7261 6123 8 8761 7991 5 16/09/2014 Page 120 of 177 Version: 1.00 SHOC User Manual The data does not need to be on any sort of regular grid - they may be randomly scattered in x and y. This data can be read with jvismeco, and the the interpolated model bathymetry saved as a text file, suitable for inclusion in a SHOC parameter file. 4.31 Diagnostic files A summary of the simulation is always printed to the file setup.txt upon execution of SHOC. This file is written to the path specified by OuputPath and the directory SHOC is run from. Typically this summary contains the following information: SHOC Simulation Summary Version : v1.0 Input file = open.prm Open channel test domain Grid description : Coarse open channel (120:1) Simulation start time : Mon Jul 31 16:02:58 2006 Operating in 3D mode 3D time step = 40.000 2D time step = 5.000 Tracer time step = 40.000 Sub-stepping stability compensation; excluding surface layer Thin layer adjustment implemented Exit on fatal eta instabilities when |eta| > 10.00 Exit when above variables = NaN Grid dimension : 212 x 52 x 25 Vertical structure Vertical coordinate system = 'z' -40.0 -30.0 -25.0 -21.0 -18.0 -15.0 -13.0 -11.0 -9.0 -8.0 -7.5 -7.0 6.5 -6.0 -5.5 -5.0 -4.5 -4.0 -3.5 -3.0 -2.5 -2.0 -1.5 -1.0 -0.5 2nd order momentum advection scheme. QUICKEST (flux form : variable grid) tracer advection scheme. Ultimate filter invoked. Free slip condition. Horizontal diffusion Horizontal diffusion Horizontal viscosity Horizontal viscosity Mean horizontal grid (x direction) = (y direction) = (x direction) = (y direction) = spacing : e1 = 2.000 2.000 20.000 20.000 275.01, e2 = 228.49 Vertical mixing scheme : mellor_yamada_2_0 Surface roughness length scale = 0.100 Background diffusivity = 1.000e-07 Background viscosity = 5.000e-07 Bottom roughness length scale = 0.000100 Number of tracers = 2 Tracer #0 : salt [0.00e+00 : 4.00e+01] Tracer #1 : temp [0.00e+00 : 4.00e+01] Number of open boundaries = 2 Boundary #0 : west Normal velocity = NOGRAD 16/09/2014 Page 121 of 177 Version: 1.00 SHOC User Manual Tangential velocity = CLAMPD Elevation = FILEIN|MILLER Tracer #0 (salt) = FILEIN|UPSTRM Tracer #1 (temp) = FILEIN|UPSTRM Relaxation constant = 0.008 (hours) Boundary data file #0 : /home/mgs/dent/c2/west_ets.nc Boundary #1 : east Normal velocity = NOGRAD Tangential velocity = CLAMPD Elevation = FILEIN Tracer #0 (salt) = FILEIN|UPSTRM Tracer #1 (temp) = FILEIN|UPSTRM Boundary data file #0 : /home/mgproja/derwent/st_meco/east_ets.nc Wind forcing from file /home/mgproja/dent/wind/wind_grid.nc Wind speed scale = 1.00 Wind speed threshold #1 = 10.00 Wind speed threshold #2 = 26.00 Surface drag coefficient #1 = 0.00114 Surface drag coefficient #2 = 0.00218 Heat flux calculated Heat flux calculated : bulk formulation Bulk scheme = Kondo (1975) Reference height for air temperature/humidity = 4.00 Air temperature file : /home/mgproja/dent/heat_obs/airport_3hr.ts Wet bulb temperature file : /home/mgproja/dent/heat_obs/airport_3hr.ts Cloud cover file : /home/mgproja/dent/heat_obs/airport_3hr.ts Atmospheric pressure file : /home/mgproja/dent/press_meco/press_grid2.nc No salt flux specified Number of output file dumps = 6 Output file #0 : /home/swirl1/test1/test_all Output file #1 : /home/swirl1/test1/test_sur At every time step the simulation progress is written to file diag.txt which is useful to estimate the time remaining for the simulation. This file contains the following information: Simulation start = Simulation stop = Simulation time = 0.0000 (days) : 1990-01-01 00:00:00 400.0000 (days) : 1991-02-05 00:00:00 400.0000 (days) : 1991-02-05 00:00:00 CPU time used this iteration = 0.000 (sec) Mean CPU time used / iteration = 0.000 (sec) CPU run time ratio = 1236051.502146 Elapsed time = 0 day(s) 00:08:22 Total time ratio = 68844.621514 Time to completion = 0 day(s) 00:00:00 Percent complete = 100.0% Running… Information useful for debugging model crashes may be generated using: 16/09/2014 Page 122 of 177 Version: 1.00 SHOC User Manual DEBUG_LOC i j k where i, j and k are integers specifying the (i,j,k) location in the grid information is desired to be generated at. Note the k index for the surface layer is given by LAYERFACES – 2. At present the debug information relates mostly to the 2D mode, providing velocity values at the debug location after each term in the equations is computed, for each step of the 2D mode. Maximum velocities in the window containing the debug location are listed. Elevation flux divergence details and elevation at the forward time-step are also provided. The debugging information is written to the file ‘debug.txt’ at the current time-step. If a history of debugging information is required, use: DEBUG_LOC i j k append Note that these files can then become quite large. The debugging information may be written after n days (or hours, minutes, seconds etc.) of simulation using: DEBUG_LOC i j k append after 2 days The debugging can print the position in the computational flow of control (i.e. what numerical algorithm the code is currently computing) using: DEBUG_LOC i j k step 4.31.1 Run regulation The user may interactively control various aspects of the simulation using the REGULATE_FILE command. By defining a valid filename with this command, the user can enter commands in real-time to stop, pause, resume and re-configure various aspects of the run. This functionality is invoked via a scheduled function that reads the nominated file at a user defined interval. The run regulation is invoked via: REGULATE_FILE filename.txt REGULATE_DT 1 hour # # # # Name of the file that contains run regulation commands. Time interval that the file is read. Note that the REGULATE_FILE may be the parameter file. Any run regulation commands may begin with the keyword REGULATE. Valid commands are: REGULATE STOP REGULATE REGULATE REGULATE REGULATE REGULATE REGULATE 16/09/2014 # Stop the simulation. Output is dumped prior # to quitting. PAUSE # The run is suspended. RESUME # A paused run is resumed. DUMP_REINIT # A new dump file specification is invoked. # Any existing files are appended. Dump # specification should be listed in the # input parameter file. TS_REINIT # A new ascii time-series file specification # is invoked. Any existing files are # appended. WIN_REINIT # A new window partitioning is invoked. # Window information should be listed in the # input parameter file. OBC_REINIT <obc_name> <obc_type> # A the boundary condition # <obc_type> is applied to open boundary # <obc_name>. Valid types are: NEST1WAY # 1 way nesting (Section 4.10.7) Page 123 of 177 Version: 1.00 SHOC User Manual NEST2WAY RIVER NOTHIN SOLID REGULATE DT_REINIT REGULATE HVISC_REINIT REGULATE PSS_REINIT # # # # # # # # # # # 2 way nesting River OBCs (Section 4.10.6) No OBCs (Section 4.10.14) The OBC emulates a solid boundary. Re-initialises the time-step to that specified in the input parameter file. Horizontal mixing is also adjusted. Re-initialises the horizontal viscosity to a constant value (i.e. non Smagorinsky). Re-initialises the point source/sink specification. The run regulation may be invoked at a specific time, by using @ n days where n is a valid day number relative to the timestamp, e.g: REGULATE OBC_REINIT West NEST1WAY @ 10 days or REGULATE PAUSE @ 0.5 days 4.32 Explicit mapping SHOC operates on a sparse coordinate system internally, where all cell locations are aggregated in a one-dimensional vector and each cell’s position in space is determined by the location in the vector of its neighbours. Ordinarily every cell is mapped to its immediate neighbour in three-dimensional space, but with the sparse system this does not need be the case. Cells can be made to have ‘neighbours’ which are nowhere near the cells geographic position. This explicit mapping method can be useful, for example, for connecting two ends of a channel if the channel cannot be resolved by the models discretization. Furthermore, a range of vertical cells may be specified which are subjected to this explicit mapping. This makes it possible to simulate flow beneath solid structures floating on the surface. Explicit maps can be specified in either the e1 or e2 directions. The (i,j) cell locations listed for the maps must correspond to the cell centers. For the e1 direction, one of the cells must be adjacent to a solid boundary on the left edge, and the other a solid boundary on the right edge. The cell with the right edge will then map through the solid boundary to access water properties in the cell with the solid left edge, and vice versa. For the e2 direction, one of the cells must be adjacent to a solid boundary on the back edge, and the other a solid boundary on the front edge. Explicit maps through the whole water column are specified using the following: MAP_POINTS_E1 2 2 4 : 4 4 2 5 : 4 5 # Maps cell (2,4) to cell (4,4), and cell # (2,5) to (4,5) in the e1 direction. The # reverse maps are also implied. MAP_POINTS_E2 2 9 12 : 9 14 10 12 : 10 14 # Maps cell (9,12) to cell (9,14), and cell # (10,12) to (10,14) in the e2 direction. The # reverse maps are also implied. If the source and destination cells have different depths the mapping is performed through the water column until the bottom of shallower of the cells is reached. A vertical range of the map can be specified by appending the upper and lower k level the maps are operate within after the number of mapping points, e.g. # Map the first cells in the list between layer 22 and layer # 10. The upper-most layer (closest to the surface) is always # listed first. The second cells in the list are mapped through # the whole water column. MAP_POINTS_E1 2 16/09/2014 Page 124 of 177 Version: 1.00 SHOC User Manual 2 4 : 4 4 : 22 10 2 5 : 4 5 The explicit mapping list may contain any combination of cells mapped only between certain layers and cells mapped through the whole water column, i.e. any combination of the formats: is ie : js je is ie : js je : kt kb Using the auxiliary program jvismeco is generally helpful when determining the map lists. An example of a domain using 2 explicit maps in the e1 and e2 directions is illustrated in Figure 4.31.1. The domain is divided into 9 sub-sections separated by land, but the explicit maps make the domain behave as if it were one connected region. The explicit mapping function only works with ‘z’ coordinates. 16/09/2014 Page 125 of 177 Version: 1.00 SHOC User Manual Figure 4.31.1 : (a) Un-partitioned closed basin solution (b) Closed basin solution without explicit maps (b) Closed basin solution with explicit maps across the partitions Note : Fig 4.31.1 (a) and (c) utilize slightly different bathymetry, i.e. Fig 4.31.1 is 2 cells narrower in either direction since the ‘walls’ are not recognized as part of the domain, and bathymetry has a step across these ‘walls’, hence any slight differences in solutions between (a) and (c); the general dynamics are the same however. 16/09/2014 Page 126 of 177 Version: 1.00 SHOC User Manual 5 Automatic setup (-a option) As mentioned in section 3, the parameters outlined in this section may be automatically generated using the –a option in SHOC. In this case the parameter file must contain the following information: # The start and stop time of the model simulation period, # relative to the epoch (01/01/1990 00:00:00+8 by default). # Relative time specifications here and elsewhere in the parameter # file can be specified in seconds, minutes, hours, or days. # Here, the start time corresponds to 1995-02-10 00:00:00 +8 #, and the end time to 1995-03-13 00:00:00 +8. START_TIME 1866 days STOP_TIME 1897 days # The name of the input and parameter output files. The input # netCDF file will have ‘.nc’ appended to this name (i.e. test.nc) # and the input parameter file will have ‘.prm’ appended (i.e. # test.prm). INPUT_FILE test # Grid information (see section 4.6) defining the grid layout is # mandatory. An example is included below: PROJECTION geographic GRIDTYPE GEOGRAPHIC_RECTANGULAR NCE1 10 NCE2 20 DLAMBDA 0.01 # Long. cell interval in aux. coords. # (degrees) DPHI 0.01 # Lat. cell interval in aux. coords. # (degrees) X00 144.3856 # Longitude of origin (degrees) Y00 -38.2030 # Latitude of origin (degrees) POLE_LONGITUDE 0 # Longitude of false pole (degrees). POLE_LATITUDE 90 # Latitude of false pole (degrees). # Bathymetry : example depth values for a 3 by 4 grid BATHY 12 22.2 12.3 7.4 23.5 12.0 6.0 25.8 13.7 5.8 27.6 14.2 4.9 The parameter file may then contain optional fields specifying the forcing and initialization of the model, i.e; # # # # # Information regarding any forcing data to be read (e.g. wind, pressure). A time series file containing wind East and North velocity components, which must be called 'u'; and 'v' respectively, and have units of ms-1. 16/09/2014 Page 127 of 177 Version: 1.00 SHOC User Manual WIND_TS cyc_bobby95.nc # How often to read data from the wind file and update # the wind field in the model. WIND_INPUT_DT 10 minutes # A time-series file containing the variable 'pressure' with # units of Pa. PRESSURE cyc_bobby95.nc # How often to read the file and update the pressure # field in the model. PRESSURE_INPUT_DT 10 minutes # Update every 10 minutes. # Information regarding any initialization data for tracers temp # and salt. TRACER0.data profile.nc TRACER1.data profile.nc The open boundaries are automatically generated by SHOC on the basis that any wet cell at the grid extremes or any cell in the grid interior adjacent to an OUTSIDE flagged cell are set to open boundary cells. The grid is searched for these occurrences in the following order: 1. u1 boundaries on the left hand (i=0 or west) grid extremities 2. u1 boundaries on the right hand (i=NCE1 or east) grid extremities 3. u2 boundaries on the bottom (j=0 or south) grid extremities 4. u2 boundaries on the top (j=NCE2 or north) grid extremities 5. Interior u1 boundaries from i=0 to i= NCE1 6. Interior u2 boundaries from j=0 to j= NCE2 If elevation boundary data is present in the parameter file, the corresponding boundary is set to be elevation forced, otherwise the boundary is set to be passive, e.g; # Set the first BOUNDARY0.DATA BOUNDARY1.DATA BOUNDARY2.DATA 3 boundaries found to be elevation forced eta_west.ts eta_south.ts eta_north.ts River inputs may be specified at a location using; RIVER# <name> <lon> <lat> <flowfile> Where # is the number of the river in a consecutive list, <lon> is the longitude of the river, <lat> is the latitude of the river and <flowfile> is the name of a file containing the river flow. The river will be located at the nearest coastal location in the model grid to <lon>,<lat>. A u1 or u2 custom river open boundary is created for each river specified. If <lon>,<lat> lies outside the footprint of minimum & maximum longitude and latitude for the grid, it is ignored. An example is; RIVER0 river1 137.9 -33.4 flow1.ts RIVER1 river2 137.8 -33.5 flow2.ts Alternatively, a full boundary specification may be included, giving the user exclusive control over the open boundaries. Often this is best performed using a two step approach, where a grid is first created with all boundaries closed, i.e. by specifying; # Set all boundaries closed NBOUNDARIES 0 Then boundaries are defined in jvismeco and pasted back into the parameter file. 16/09/2014 Page 128 of 177 Version: 1.00 SHOC User Manual Various parameters automatically generated by SHOC using the –a option may be overridden by specifying that parameter in the input parameter file. Parameters which fall into this category are: # Open boundaries (see above) # The epoch for all time related parameters, as well as # for all output files generated by the model. Currently, the # units must be 'seconds since ...', but this may change in future # versions. The epoch is specified in standard ISO date/time # format, including a possible timezone specification. The # timezone here is 8 hours ahead of UTC. TIMEUNIT seconds since 1990-01-01 00:00:00 +08 # The base time unit that will be used for all # timeseries and netCDF output files. OUTPUT_TIMEUNIT days since 1990-01-01 00:00:00 +08 # A single line description of the model run. This string is # written into all output files. PARAMETERHEADER NWS 20km rectangular grid, Run 1 # The internal (3-d) time-step, and the number of times # the external (2-d) code will be run per 3-d time-step. # The external (2_d) time-step is thus DT divided by IRATIO. DT 120 seconds IRATIO 5 # Vertical geometry; z coordinates of the model layer interfaces. LAYERFACES 5 -10.0 -8.0 -4.0 -2.0 0.0 # Bathymetry limits # All cells will be at least 20m deep BATHYMIN 20 # No cell will be more than 2000m deep BATHYMAX 2000 # Invoke thin layer merging HMIN 0.05 # Bottom roughness (values in metres). Z0 0.001 # Mixing scheme mellor_yamada_2_0 ZS 0.2 # Horizontal viscosity in u1 equation U1VH 1.0 # Horizontal viscosity in u2 equation U2VH 1.0 # Horizontal diffusivity in the x direction (m2s-1) U1KH 100 16/09/2014 Page 129 of 177 Version: 1.00 SHOC User Manual # Horizontal diffusivity in the y direction (m2s-1) U2KH 100 # Sigma SIGMA YES # Tracer relaxation TRACER0.relaxation_file saltprof.nc # How often to perform relaxation calculation TRACER0.relaxation_input_dt 1 hour # Relaxation time constant TRACER0.relaxation_time_constant 20 days # Full tracer specification NTRACERS 2 TRACER0.name salt TRACER0.long_name Salinity TRACER0.units psu TRACER0.fill_value 35.0 TRACER0.valid_range 0 40 TRACER1.name temp TRACER1.long_name Temperature TRACER1.units degrees C TRACER1.fill_value 20.0 TRACER1.valid_range 0 40 # Output files for a grid. OutputFiles 1 file0.name out.nc file0.gridtype standard file0.tstart 0 days file0.tinc 1 day file0.tstop 44 days file0.bytespervalue 4 file0.vars ALL # # # # # # # # # Output prefix. Standard dumpfile. Output start time. Output interval. Output stop time. 2 – shorts 4 - floats. 8 - doubles ALL variables. Executing SHOC with the –a option will result in the generation of an input netCDF file (having a name of the INPUT_FILE name with ‘.nc’ appended) and an input prm file template (having a name of the INPUT_FILE name with ‘.prm’ appended) which may be subsequently modified and executed using the –p option (see section 2). SHOC will then proceed to run using the automatically generated parameter specification. 16/09/2014 Page 130 of 177 Version: 1.00 SHOC User Manual 6 Restarts 6.1 Basic restarts The model may be restarted using any standard format netCDF output file (see Section 4.31.6) containing ALL variables as the INPUT_FILE. In this case the model START_TIME must correspond to one of the dump times in the netCDF file. A warning is issued if this is not the case. 6.2 Restarts using restart file (-restart option) Alternatively, a restart facility exits to allow the model to be seamlessly hot-started. Firstly, when initially running the model a restart_dt must be specified which defines an output interval that a special restart file, named restart.nc, is dumped at (in standard format, containing ALL variables), e.g; restart_dt 2 days # Create a restart.nc file every 2 days This restart file is overwritten at the interval restart_dt. A path and restart filename may be specified using: restart_name <path>/<name> # Restart path and name, e.g. # <path> = /home/data # <name> = restart_1.nc Once this file is written, the model may be terminated, or may crash, and can be restarted using the restart.nc file, e.g; shoc –p test.prm –restart Using this restart method the model will read the appropriate START_TIME from the restart.nc file, and will append subsequent data generated to existing netCDF and timeseries output files defined in the .prm parameter file (in the above example test.prm). Note that restarts generally do not produce bit-exact solutions if output dumps are saved in floating point precision (bytespervalue = 4). 6.3 Near real-time restarts (-nrt option) A near real-time operation mode may be invoked capitalising on restarts. This allows simulations to be repetitively started daily without having to manually alter the parameter file; this mode is invoked using: shoc –p test.prm –nrt In this case, the START_TIME for the simulation is read from the netCDF file specified as the INPUT_FILE, the stop time for the simulation is this START_TIME + STOP_TIME specified in the parameter file (i.e. the STOP_TIME is an increment rather than an absolute value), both the RAMSTART and RAMPEND are set equal to the START_TIME (i.e. no ramping is performed) and the output file tstart and tstop are set to the start and stop simulation times. This means that the START_TIME, RAMSTART, RAMPEND, tstart and tstop are not required to be set in the parameter file. Furthermore, if a restart file is overwritten to the same location, then this may be used as the INPUT_FILE. Additionally, the SEQUENCE option may be used 16/09/2014 Page 131 of 177 Version: 1.00 SHOC User Manual to store model output in a unique directory, requiring that the only manual tasks to initiate repetitive simulations are the creation of the directory and commencement of the simulation, both of which are easily scripted. A near real-time parameter file for daily simulations may therefore appear as: STOP_TIME INPUT_FILE restart_dt restart_name OutputPath SEQUENCE 1 day /home/data/restart.nc 1 day /home/data/restart.nc /home/data/ setup.txt OutputFiles file0.name file0.filetype file0.tinc file0.bytespervalue file0.vars 1 out.nc standard 1 hour 4 ALL # # # # # # Run length Input file Restart interval Restart file name Path for output Sequence set from file # Output files Then to run: mkdir /home/data/run<n> shoc –p test.prm –nrt 6.4 # <n> is the current run Crash recovery (-cr option) Often when a model fails, the strategy to maintain stability is to reduce the time-step, modify time dependent parameterisations (e.g. horizontal mixing coefficients) and restart the model before the failure occurred. This process can be automated using the ‘-cr’ option, e.g; shoc –p test.prm -cr A restart file (Section 6.2) must be specified for this option to operate. If the model fails when this option is invoked (e.g. due to sea level rising above ETAMAX) then the time-step is progressively reduced (currently by a factor of 5), horizontal mixing is adjusted and the prognostic fields are re-initialised from the last restart file dump. The model then progresses using the smaller time-step to the next restart dump event, whereupon the time-step and mixing are reset to original values. If the model fails during the restart, the time-step is further reduced and the process repeated. Output to netCDF and timeseries files are over-written during the period the time-step is reduced. If the time-step is reduced more than 5 times, then the model will exit, on the assumption that it cannot recover by simply reducing the time-step. In this case, the instability may have to be diagnosed and rectified by other means (e.g. alternative OBCs, better forcing etc). 16/09/2014 Page 132 of 177 Version: 1.00 SHOC User Manual 7 ROAM (-r option) SHOC may be configured to operate in the ROAM (Relocatable Ocean and Atmospheric Model) environment. The ROAM configuration is essentially the same as the –a option configuration with a number of alternative parameterisations. The ROAM configuration is invoked using the ‘-r’ option. The same mandatory information as used in the –a option is requited (start/stop time, grid information, bathymetry). The ROAM option is designed to nest SHOC within a global ocean model and use information from this larger scale model for initial and boundary conditions. It is assumed that global model output exists covering the region of interest containing output dumps at approximately 1 day intervals. Temperature, salinity and sea level are required to be present in this output. Currently the global model is a derivative of the GFDL MOM3 (Modular Ocean Model) model termed OFAM (Ocean Forecasting Australia Model). Using the –r option, these global model data are specified using: OFAM_DATA EAC_200401.nc # OFAM input filename These data will then be used for T, S and η initial and boundary conditions. Whenever an open boundary is located, the information found in the global model file is used to prescribe T, S and η OBC’s. The sea level contained in the OFAM data represents the low frequency component only, and the ROAM configuration will prescribe these values on the open boundary with a tide superimposed using the global tide model of Cartwright and Ray (1990), (see Section 4.11, Science Manual). This model requires paths to the orthotide functions and nodal corrections to be present, e.g: TIDE_CSR_CON_DIR /home/tide/nodal TIDE_CSR_ORTHOWEIGHTS # Path to nodal # correction directory. /home/tide/ortho_csr_4.0 # Orthotide functions Temperature and salinity are prescribed on the open boundary using an upstream advection open boundary condition. Normal velocity uses a no-gradient condition and tangential velocity is clamped to zero. A horizontal sponge zone 8 cells wide is also imposed on the open boundaries. It is possible to prescribe initial conditions for T, S and η which are different to the open boundary data defined in OFAM_DATA by using: INIT_DATA EAC_2004_init.nc # T,S,η Initialisation data file Furthermore, each stream of T, S and h may be defined independently using: TEMP_DATA SALT_DATA ETA_DATA EAC_temp.nc EAC_salt.nc EAC_eta.nc # Input temperature filename # Input salinity filename # Input sea level filename If only these specifications are present, then the data contained in these files is also used for open boundary forcing. However, if OFAM_DATA is present then the data contained in this file is used for T, S and η boundary forcing. The ROAM configuration may be restarted from a previous run using the ‘–rs’ option. In this case a restart file must be supplied: RESTART_FILE run1_all.nc # Restart filename The restart may be configured to commence using the temperature and salinity initial conditions from OFAM using the ‘-rso’ option. The ‘-rg’ option will terminate after the input and parameter files have been created (i.e. the setup is complete but the simulation does not commence). 16/09/2014 Page 133 of 177 Version: 1.00 SHOC User Manual Bathymetry may be specified in the ROAM configuration using a bathymetric database rather than supplying the bathymetry list via BATHY, e.g. by specifying; BATHYFILE /home/bathy/ga2002_tiled.bth the bathymetry will be interpolated onto the grid using the information contained in the bathymetric database ‘ga2002_tiled.bth’. This file has a unique format and lists all the tiled netCDF bathymetry files that comprise the database. ROAM is designed to use surface fluxes from a relocatable atmospheric model (currently RAMS - Relocatable Atmospheric Model). The wind and pressure inputs may be the same as for the –a option. Alternatively, if wind and pressure are present in the same file, then use: RAMS_DATA /home/atmos/EAC_rams.nc # Atmospheric forcing file If the RAMS_DATA file contains heatflux data, e.g. • • • • • incident flux of shortwave radiation (W m-2) incident flux of longwave radiation (W m-2) upward flux of longwave radiation (W m-2) surface sensible heat flux (W m-2) surface latent heat flux (W m-2) then a heat flux may be imposed using: HEATFLUX COMP_HEAT # Create net heatflux from components This formulation of the heatflux will create a net heat flux from the longwave, sensible and latent fluxes, truncating the latent heat flux to zero to omit contributions from condensation. The shortwave flux is depth distributed according to the SWR_TRANSMISSION and SWR_ATTENUATION parameters (note defaults are 0.42 and 0.2 respectively). All atmospheric data are read in with a time interval of 10 minutes. Wind and pressure may have an alternative input time specified. The ROAM configuration was designed for robust simulation (at the expense of accuracy) and therefore various defaults differ in comparison to the –a configuration, vis; • • • • • • • • • • • The Mellor-Yamada 2.0 mixing scheme is used. Smagorinsky horizontal diffusion is used with a constant of 0.1. One bathymetry smoothing pass is performed (SMOOTHING 1) and a maximum bathymetry gradient of 0.05 is specified (MAXGRAD 0.05). Minimum bathymetry is 1m. If maximum bathymetry is > 200m and minimum bathymetry < 4m then minimum bathymetry = 4m. The time-step is far more conservative by at least one half. Relaxation of T and S to OFAM data is performed using a 20 day relaxation time. OFAM temperature and salinity are present as tracers ‘otemp’ and ‘osalt’ respectively, read in on a daily time interval. RAMPVARS WIND TIDALH is used. Active alerts are implemented on 2D & 3D velocity and eta (ALERT ACTIVE). The eta relaxation file is taken to be the global model data; i.e. SHOC sea level is relaxed back to the low frequency sea level if the difference between the mean ROAM sea level (tidally averaged) and OFAM sea level exceeds the prescribed threshold. Thresholds for ACTIVE ALERTS are: -1 o VELMAX = 3.51 ms -1 o VELMAX_2D = 2.40 ms o ETA_DIFF = 0.26 m Mean sea level is computed for the active eta alerts (MEAN ETA). 16/09/2014 Page 134 of 177 Version: 1.00 SHOC User Manual The robustness of ROAM may be altered using the parameter ROBUST which is assigned from 1 (least robust) to 10 (most robust). The ROBUST levels 1 to 5 linearly increase the Smagorinsky coefficient from 0.1 to 0.5. For ROBUST > 2 the horizontal diffusion distribution is smoothed using a 9 point convolution filter, and mixing coefficients have an upper limit corresponding to the computed constant mixing coefficients. For ROBUST > 5 constant mixing coefficients are used and the time-step is linearly decreased from its computed value using ROBUST = 6 to half its computed value with ROBUST = 10. The model starts from an initial velocity distribution at rest for ROBUST > 6. The default value is ROBUST = 6. Note that more robust parameterisations are generally less accurate. These configurations are applicable for the default ROAM version #4 (ROAMv 4). An additional set of configurations can be invoked using ROAM version #5: ROAMv 5 Which sets robustness according to: ROBUST=1: OFAM currents + Smagorinsky = 0.1 ROBUST=2: OFAM currents + Smagorinsky = 0.2 ROBUST=3: Geostrophic currents + Smagorinsky = 0.1 ROBUST=4: Start from rest + hard T/S relaxation + Smagorinsky = 0.1 ROBUST=5: Start from rest + Smagorinsky = 0.1 ROBUST=6: Start from rest + Smagorinsky = 0.2 ROBUST=7: OFAM currents + constant horizontal viscosity ROBUST=8: Geostrophic currents + constant horizontal viscosity ROBUST=9: Start from rest + constant horizontal viscosity ROBUST=10: As for ROBUST=9 with reduced time-step A ROBUST 0 flag has been implemented that will use a more optimized configuration that one may typically use for a case study. While this configuration may have higher accuracy than standard ROAM configurations, it is also more prone to instability. This option is recommended only for more experienced modellers. The configuration is as follows: • • • • • • • The model starts from rest, The k-ω mixing scheme is used, Smagorinsky horizontal diffusion is used with a constant of 0.1, with 2 smoothing passes, The ULTIMATE QUICKEST tracer advection is used, Boundary sponges of 8 cells ramp to 5 times the interior value, No active alerts, Flux adjusted open boundaries using the default timescale. As mentioned, the time-step parameterisation using the –r option is very conservative. Speed may be increased using the SPEED parameter which is assigned from 1 to 10. The speed is controlled by altering the ‘safety factor’ applied to the CFL condition. The ROAM ‘safety factor’ is assigned a value 0.4 (note; 0.8 is used for –a option), and further decreases depending on the maximum depth. If SPEED = 1 then the safety factor is unchanged. For SPEED > 1 the safety factor linearly scales to 0.9 for SPEED = 10. Using SPEED = 10 will generally double the time-step used, and still satisfy the CFL condition. 16/09/2014 Page 135 of 177 Version: 1.00 SHOC User Manual 8 Input file generation (-g option) The input netCDF file containing initial values for the model variables over the model grid and the model geometry / bathymetry required to run SHOC using the –p option may be generated from any parameter file using the –g option, i.e. shoc –g prmname infile.nc where prmname is the name of the model parameter file and infile.nc is the name for the generated input netCDF file. Note that whenever initialization data is changed (e.g. TRACER?.data), model geometry is changed (e.g. number of LAYERFACES) or the bathymetry is changed a new input netCDF file must be generated. 16/09/2014 Page 136 of 177 Version: 1.00 SHOC User Manual 9 Transport mode (-t option) The transport option invokes the tracer transport only in SHOC, using offline velocities and vertical diffusivities read from file. All tracer diagnostics, including sediment transport, biogeochemistry, tracer statistics, source/sinks and particle tracking will function in the transport mode. The advection scheme used in this mode is the unconditionally stable semiLagrangian scheme, allowing increased time-steps (e.g. 1 hour) to be used which dramatically increases run time ratios. This scheme is, however, quite diffusive and does not possess as good conservation characteristics as other schemes available in SHOC, hence some accuracy is forfeited at the expense of speed. The semi-Lagrangian scheme is unconditionally stable because it traces streamlines back in space from the point of origin (e.g. cell centres) using velocity information, then interpolates tracers using the origin location. The concept of using offline velocities to drive a transport model is not new, however, in practice it is rarely used due to the enormous amounts of disk space required to run for extended periods. This problem is circumvented by generating the offline velocity/diffusivity files with a sparse file format (Section 4.31.6) which eliminates land from the dumpfile and can lead to large saving in disk space (savings up to 90% are possible). I/O overhead can be reduced if the sparse format file is read into SHOC without interpolation, i.e. the dumpfile contains information on exactly the same grid as the transport model is using for exactly the times required. The transport option requires a standard input file for initialization, from which model initial conditions, grid, layer structure and bathymetry are defined. A forcing file containing the variables eta, u1, u2, w, Kz must also be supplied. If the grid definition is incompatible with the forcing file the model will terminate with an error. The variables temp, salt may optionally be included in the forcing file if the advect and diffuse attributes are false for these variables in the tracer list. A transport mode is also defined to specify the format of the offline file, which has consequences for the speed at which I/O is performed. To define input and offline data a transport parameter file is created which defines: INPUT_FILE in.nc # Initialisation file TRANS_DATA offline.nc # File containing eta, u1, u2, w and Kz # This may be a multifile using # variable substitution. TRANS_MODE SP_EXACT # # # # # # # # # # # # # # # # # # # # # SP_INTERP XYZ_INTERP NONE 16/09/2014 The TRANS_DATA file is expected to be in sparse format, with time records corresponding exactly to the input intervals required by the model (determined by the start time and time-step). TRANS_DATA is in sparse format (contains information on exactly the same grid as the transport model) but may be at different times to the input interval (interpolation in time is performed which slows I/O). TRANS_DATA is in standard format and may be spatially and temporally different to the grid. Interpolation in space and time is performed on input. The slowest method using the most disk space. No reading of forcing data and no advection is performed. Useful for format conversion using tracer reset Page 137 of 177 Version: 1.00 SHOC User Manual # # # # # # # # # # # # # # # # SP_CHECK TR_CHECK GLOBAL capability in conjunction with different forms of file output. Used to check transport data files for NaN values or values greater than specified limits (etamax & velmax). Set TRANS_DATA to the file required to be checked when using this mode. Checks the input data for NaN and values greater than specified limits, and checks valid source cells & interpolation weights (>0 and <1) are computed. Reads BRAN or OceanMAPS global data and reads eta_t, T/S, u and v into the model variables. Velocities are rotated onto the grid. Monthly transport files in sparse format can be automatically generated using: TRANS_OUTPUT TRANS_DT YES 1 hour # optional dump increment In this case the transport files will be created for each month with the name prmname_trans_mmmyyyy.nc where ‘prmname’ is the name of the parameter file, mmm is the month (e.g. ‘jan’) and yyyy is the year. An alternative to prmname can be generated using OutputTransport (Section 4.31.6). Files are output in ‘sparse’ format. Variables output are eta, u1mean, u2mean, wmean, temp, salt and Kzmean (swr is also output if present). The mean variables required for output are automatically invoked. The default dump increment is 1 hour, unless specified using TRANS_DT. Note that TRANS_OUTPUT may be used in transport mode when wishing to dump multi-grid output (for the STREAMLINE mode; see below). In this case output variables are eta, u1, u2, temp, salt, Kz, origin, p, q and r. Note that if a list of tracers is generated for the transport mode then the tracers must have unique names, e.g. if eta, u1, u2 or w are used as tracer names then these will be in conflict with the prognostic variables of those names, and output may not be correctly generated (u1 and u2 will not output to standard files, u and v will not output to simple files). This is especially relevant when using TRANS_MODE = NONE. Additionally the following attributes are mandatory in the transport parameter file (see Section 4 for a description of these parameters): CODEHEADER PARAMETERHEADER TIMEUNIT OUTPUT_TIMEUNIT LENUNIT START_TIME STOP_TIME DT HMIN Z0 NAME SHOC default version # Code version Transport model # Header text seconds since 1990-01-01 00:00:00 +08 days since 1990-01-01 00:00:00 +08 metre 1866 days 1897 days 1 hour # Transport timestep 0.02 # The minimum layer thickness 0.002 # Bottom roughness – optional : # required for sediment transport only. # Comments (optional) A tracer list (Section 4.10) and the definition of the open boundaries (Section 4.11) is also required. The latter is required so that the open boundary conditions for any additional tracers may be defined. Open boundary conditions for temp and salt are best created offline and 16/09/2014 Page 138 of 177 Version: 1.00 SHOC User Manual stored in a point array file, in conjunction with the FILEIN open boundary condition. The UPSTRM open boundary condition is reconfigured for the transport mode to use the characteristic for outward flowing velocity. Additionally, any diagnostics (e.g. source / sink, particle tracking, mixed layer, diagnostic numbers, flushing times, steric height, conservation diagnostics, tracer statistics) and any surface forcing (e.g. HEATLUX for temp, SALTFLUX for salt : these may require additional atmospheric input) may be specified in the transport parameter file. Additional tracers may exist in the forcing file, and these may be reset in the transport mode by listing the names of these variables using the TRANS_VARS attribute, e.g; TRANS_VARS NO3 Chl_a sand silt A transport parameter file may be generated from a full parameter file when using the –g or – p option by including TRANS_DATA in the parameter file. In this case the transport file will adopt the name specified by the INPUT_FILE appended with .tran, e.g; TRANS_DATA dummy.txt If the time-step does not violate stability criteria, alternative advection schemes may be used. The ULTIMATE and STABILITY options may be used in conjunction with this. Often the velocity fields read into the transport model (snapshots or means) are not conservative in the sense that the divergence of the depth averaged velocity does not always equal the change in elevation over the time-step. This can lead to conservation errors using advection schemes solved using the flux method. Conservation may be forced locally in time by computing the change in elevation over the time-step and vertical velocity from the specified velocity distributions. This maintains conservation for tracers using non semi-Lagrangian advection schemes, and is invoked using: CONSERVATION YES # Force volume conservation The sea level may be re-initialized to that in the transport file or left to evolve over time by using; CONSERVATION RE_INITIALIZE CONSERVATION NO_INITIALIZE # # # # Force volume conservation with eta re-initialization. Force volume conservation with no eta re-initialization. Additionally only vertical velocity or sea level may be forced to conserve by adding W or ETA to the CONSERVATION specification, e.g; CONSERVATION CONSERVATION NO_INITIALIZE ETA RE_INITIALIZE W The default is CONSERVATION = RE_INITIALIZE W ETA. For the FFSL scheme, vertical velocity may be only recomputed in the water columb if the new vertical velocity does not violate the Lipschitz condition using WSTAB instead of W. Note that the semi-Lagrangian scheme is not compatible with multi-processing, hence the transport model will only operate on one window unless an alternate advection scheme is specified. The order of the semi-Lagrange advection scheme may be specified using: ORDER_SL 16/09/2014 0 1 2 3 # # # # Original 1st order 2nd order 3rd order tri-linear formulation. tri-linear (same as ORDER_SL = 1) tri-quadratic tri-cubic Page 139 of 177 Version: 1.00 SHOC User Manual 4 # 4th order tri-quartic The default is ORDER_SL = 0. The higher order schemes are non-monotonic and require a monotonicity constraint to be applied. The higher the order, the slower the scheme. Speed is reduced if IO is excessive, hence any variables read into the model from file should have an INPUT_DT at least as much as the timestep used (e.g. don’t input a variable at INPUT_DT=10 minute intervals, or output data with tinc = 10 minutes if the timestep DT=1 hour). Additionally, if file input or output is less than the time-step, then the model will effectively run using the smaller time-step; this may cause the semi-Lagrangian scheme to become stuck in an infinite loop. The transport model may be used with input fields derived from other models (e.g. MOM). Sometimes these models do not account for leap years in their simulation; to account for this specify: NO_LEAP_YEARS YES # Always use 365 days per year A transport file can be created from a standard .prm file by specifying TRANS_DATA in the .prm file. The name of the transport file in this case is <INPUT_FILE>.tran; e.g. if the input file in the .prm file is ‘infile.nc’, then the transport filename will be ‘infile.tran’. When the transport mode is invoked using semi-Lagrangian advection, a tracer Vi with long 3 name ‘Volume error’ is created which contains the volume conservation error (in m ) for each cell resulting from the use of the semi-Lagrange scheme. 9.1 Multiple grids It is possible to perform transport on a subset of the grid used to save the transport files. In this case, the streamline origin is computed on the source grid, which is defined as the grid on which the TRANS_DATA were created, and the values of tracer variables are interpolated on a different target grid. All output is performed on the target grid. The target grid must lie completely within the source grid, and will conform to one of the following: 1. The target grid may be an exact duplicate of the source grid. This may be for a smaller subset of the source grid. In this case the target grid is defined as having an EXACT relationship to the source grid, and resolution of source and target grids are the same. 2. The target grid may be a decimation of the source grid, i.e. 4, 9, 16 etc. source cells may be grouped to form a target cell, so that the target grid has coarser resolution than the source grid. In this case the target grid is defined as a SUBSET of the source grid. 3. The target grid is completely different to the source grid. An example of this may be a target grid created at higher resolution than the source grid. These grids are defined as a SUPERSET. To perform transport on multiple grids, a SOURCE_GRID must be defined in the parameter file. This is simply an input file containing the grid configuration one wishes to use as the source grid. The TRANS_DATA files must also be created on the source grid. The target grid is assumed to be defined as the grid nominated by the INPUT_FILE in the parameter file. These files must be created using the –g option. An example is as follows: INPUT_FILE SOURCE_GRID in.nc source.nc # Target grid # Source grid The transport model will compare these grids to determine if the relationship is EXACT, SUBSET or INEXACT, and handle them accordingly. From a users perspective, the 16/09/2014 Page 140 of 177 Version: 1.00 SHOC User Manual differences are that EXACT grids operate the fastest and INEXACT the slowest, owing to the amount of interpolation involved between grids. 9.2 STREAMLINE mode An intermediate step may be performed to create transport files that contain information regarding the streamline origin, rather than velocities used to calculate the streamline. This approach may increase execution speed since the streamline origin is no longer required to be calculated. If multiple grids are used, then potentially slow input of velocity information for the source grid may also be avoided. The STREAMLINE data files may be created when running the transport mode normally and dumping the variables origin, p, q, and r to SPARSE formatted files (Section 4.32.6). This file is then used to specify the TRANS_DATA, using the STREAMLINE option. Note that these TRANS_DATA input files to the STREAMLINE option cannot be interpolated in space and time, and must be read in exactly as written, hence the use of the SPARSE data format. Note also that this means that if STREAMLINE data files are created, the user is locked into using the time-step corresponding to that for which the files were created. When using the STREAMLINE option, the input of data from file and transport computation are out of sync, necessitating reading TRANS_DATA information one time-step in advance. For this reason, when creating STREAMLINE data files, the stop time should be at least one timestep longer than the STREAMLINE transport is to run for. Open boundary input is required if global MONOTONIC fills are used, so mass flux through open boundaries can be calculated. This information may be saved to file under normal operation of the transport mode, and re-read using the open boundary specification. Alternatively, complete u1 and u2 velocity fields may be saved to the STREAMLINE data files, which may be used in the global filling. This approach will be automatically invoked if BCOND_NOR = NOTHIN for all open boundaries. Note that when files are read into SHOC interpolation is always performed, even if the input file geometry and model grid are exactly the same; this can lead to slightly different numerical values entering the code compared to the values in the file. SPARSE formats do not suffer this problem, since no interpolation in space occurs when they are read into SHOC. The STREAMLINE mode is invoked via: TRANS_MODE 9.3 STREAMLINE Conservation The transport model is non-conservative for two reasons: 1. The semi-Lagrange scheme is cast in advective form and is non-conservative. 2. Continuity is not achieved when using snapshots or temporal averages of velocity and surface elevation fields. For a snapshot this is obvious; continuity is only achieved if the velocity is constant over the transport time-step. For temporal means, the elevation change over a time-step, ∆η, is not equal to the horizontal divergence of depth averaged mean velocity multiplied by mean total depth, i.e. t2 t2 t2 t1 t1 t1 v ∆η = ∫ηdt ≠ ∇ H ∫ Ddt ∫ u dt hence continuity is also not achieved. The global filling attempts to compensate for these effects, and an option exists to impose a global fill on the tracer solutions to ensure conservation. This method computes the mass 16/09/2014 Page 141 of 177 Version: 1.00 SHOC User Manual before advection, and the mass after advection accounting for input of mass through the open boundaries and due to source/sinks. If the scheme is conservative then mass before and after should equal. If not, then the excess or shortage of mass is distributed over all cells equally. This excess/shortage mass is usually results in very small (multiplicative) adjustments to the concentrations in each cell. Furthermore, the mass adjustment may be computed so that resulting tracer values remain monotonic, i.e. the adjusted concentrations are not greater or less than the local maximum or minimum concentrations. FILL_METHOD NONE GLOBAL MONOTONIC # No conservation adjustment # Global filling # Global filling ensuring monotonicity The default method is FILL_METHOD = MONOTONIC. Continuity dictates that total volume in the whole domain at the end of the time-step is equal to total volume at the start of the time-step plus volume fluxes into the domain. Volume is not subject to errors from 1) above, so ideally (assuming volume fluxes are due to n open boundaries only): V t + ∑ OBC n = V t +1 n Any error from 2) can be compensated by adjusting the boundary fluxes by some factor f; f = V t +1 − V t ∑ OBCn n This factor may then be applied to mass fluxes for tracers in the transport model, so that the global fill factor is adjusted to reflect extra mass that would need to be added (or subtracted) if volume conservation were achieved in the domain. In practice continuity is not achieved in the 3D model at open boundary locations since velocity and elevation are prescribed independently via OBCs, and these OBCs rarely honour continuity (e.g. a radiation condition on elevation is often used with a no-gradient condition on normal velocity and zero tangential flow, leading to zero divergence but non-zero change in elevation). This can corrupt the above computation, therefore f is computed excluding open boundary cells, with boundary fluxes computed at the first interior location to open boundaries. The open boundary adjustment is invoked by including OBC_ADJUST in the FILL_METHOD, e.g. for MONOTONIC filling: FILL_METHOD MONOTONIC OBC_ADJUST If the MONOTONIC transport mode is invoked, then a 2D diagnostic variable vol_cons is written to the output files which contains the volume error of each water column expressed as a percentage of total volume in each water column. This volume error is the difference between the volume at the end of a time-step and the sum of volume at the start of the timestep and volume flux divergence into the water column. If DIAGNOSE is included in the FILL_METHOD, then a time series file containing the mass that must be added (or subtracted) to the domain for each tracer to achieve mass conservation, and the corresponding multiplicative fill factor is created. This also contains the total domain volume error and open boundary scaling factor. 16/09/2014 Page 142 of 177 Version: 1.00 SHOC User Manual 10 Percentile computations (-ps option) SHOC can compute the percentile distributions, i.e. order statistics of temporal records (in increments of 5%-iles), of a time series file using: shoc –ps prmname The keywords required in the parameter file are: P_IFILE or P_OFILE P_VARS P_STIME P_ETIME P_DT # Input file. This10 may be ASCII, netCDF, multi-netcdf # # # # # # # # sparse format (including multiple datafiles (Section 4.32.2) sparse files. Output file. If OutputPath is specified, the file is placed in this directory. Variable names to compute percentiles. Start time of the computations relative to TIMEUNIT End time of the computations relative to TIMEUNIT Processing interval; subsamples the input file. An example is as follows. TIMEUNIT OutputPath seconds since 2000-01-01 00:00:00 +08 /home/work/ P_INFILE P_OFILE P_VARS P_STIME P_ETIME P_DT inut.txt perc.nc temp salt 10 days 20 days 12 hours With input.txt containing: multi-netcdf-version 1.0 nfiles 2 file0.filename t1.nc file0.filename t2.nc the files t1.nc and t2.nc may be sparse formatted files. Every record in the input file is read and included in the computations unless P_DT is specified, when every n record is included where n = (P_DT in seconds) / (output interval of P_IFILE in seconds). 16/09/2014 Page 143 of 177 Version: 1.00 SHOC User Manual 11 File formats SHOC uses two file formats for input and output data exchange. An ASCII time series column format and a multi-dimensional netCDF format. Both of these files support multiple variables, an unlimited number of time records, and the association of geometry with variables. Typically ASCII time series files are used when a time series of multiple variables is required for a specific location, and netCDF files for input/output of time varying grid or multi-point data. 11.1 ASCII time series An ASCII time-series file contains data formatted into columns and a header describing the number of columns, their names, units, missing values, etc. Typically the first column contains the time (which must monotonically increase) and the remaining columns the data and coordinate variables. Following is a schematic represenation of a time series file: # Comments ## COLUMNS n ## ## COLUMN1.name time ## COLUMN1.long_name Time ## COLUMN1.units days since 1990-01-01 00:00:00 +10 ## COLUMN1.missing_value -99999999 ## ## COLUMN2.name XXXX ## COLUMN2.long_name XXXX ## COLUMN2.units XXXX ## COLUMN2.missing_value XXXX ## . . . ## v v v v ... v v v v ... v v v v ... . . . 11.1.1 Units The units for each variables should follow the standard udunits conventions, however at this stage, other than time, no interpretation of the units is made by SHOC. Since SHOC uses SI units internally it is suggested that these units be adopted for all input variables. An ISO date/time format has been adopted in for time units, it has the following syntax: [units since ]yyyy-MM-dd [hh[:mm[:ss[.sss]]][ +|-hh[:ss]]] |---- 1 ----| |-- 2 ---| |----- 3 -----| |-- 4 --| 1 - The scaling units (e.g. days, hours, seconds, ms, us, etc.) 2 - Date (year, month, day_of_month). 3 - Time of day (hours, minutes, seconds, milliseconds). 4 - Time zone relative to UTC (+ or - UTC, hours, seconds). 16/09/2014 Page 144 of 177 Version: 1.00 SHOC User Manual All text enclosed within square brackets is optional. 11.1.2 Utilities The time series format is well suited for use with standard plotting packages such as gnuplot or Matlab. Two Matlab scripts (tsheader and tsread have been installed in the Matlab software repository directory /home/software/matlab). • • 11.2 tsheader reads the header from a time series file and returns a vector of structures each containing the time series file attributes as fields of the structure. tsread reads the header into a structure and returns a column vector of time's, and a matrix of the data records. NetCDF time series The netCDF file format is commonly used by many research organizations for the storage of time varying gridded data in a manner that it is plaform independent. NetCDF also permits the association of attributes with any variable, this feature is extensively used by SHOC to describe the units, missing values, coordinate conventions, etc. The netCDF library was written by Unidata (http://www.unidata.ucar.edu/), and can be download from ftp://ftp.unidata.ucar.edu/pub/netcdf/netcdf.tar.Z. SHOC requires version 3 or higher. All SHOC input/output dumpfiles are stored using netCDF. 11.2.1 Units Units for netCDF variables are handled the same as for ASCII time series files. 11.2.1.1 Coordinate conventions The netCDF library provides a frame work for reading and writing blocks of data, but it does not provide any implicit mechanism by which coordinate information is associated with data variables. This association needs to be explicitly made by the software reading the netCDF file. To assist in automating this association, SHOC has adopted it's own coordinate convention for binding data variables and coordinate variables. The convention requires the specification of special attributes for both data and coordinate variables. Data variables contain a coordinates attribute which defines a list of coordinate variables associated with it. The coordinate variables contain an attribute coordinate_type that describes the spatial coordinate this dimension corresponds to. Following is an example NetCDF CDL snippet: netcdf file { dimensions: nrecord = UNLIMITED; ni = 10; nj = 20; nk = 5; variables: // Time coordinate variable. double t(nrecords); t:units="seconds since 1990-01-01 00:00:00 +10"; t:coordinate_type="TIME"; 16/09/2014 Page 145 of 177 Version: 1.00 SHOC User Manual // X coordinate variable of a 2d rectangular grid. double x(nj, ni); x:units="m"; x:coordinate_type="X"; x:analytic="rectangular 0 0 10 20 0 0 1000 1000 0"; // Y coordinate variable of a 2d rectangular grid. double y(nj, ni); y:units="m"; y:coordinate_type="Y"; y:analytic="rectangular 0 0 10 20 0 0 1000 1000 0"; // Z coordinate variable. double z(nj, ni); z:units="m"; z:coordinate_type="Z"; // Each record, and dimension has a unique T, X, Y and Z // coordinate associated with it. The coordinates are stored // in units of m. double salt(nrecords, nk, nj, ni); salt:units="practical salinity units"; salt:long_name=”Salinity”; salt:coordinates="t, x, y, z"; }; In the above example, the salinity variable represents a four dimensional gridded data object. The coordinates variable associates with this the t, x, y, and z coordinate information. Note that all dimensions used in the salnity variable are collectively found in the coordinate variables, and there are no additional dimensions. The optional analytic attribute should be specified for coordinate systems where a simple analytically defintion is possible (e.g. rectangular grids). The inclusion of an analytic attribute permits faster and more accurate conversion between coordinate and indice space. SHOC currently understands both rotated rectangular and polar grids. The attribute should be associated with each coordinate variable. To define an analytic attribute for a rectangular grid, use the following syntax: var:analytic = "rectangular ioff joff ni nj x0 y0 dx dy rot"; ioff - I offset within the grid 0 is grid edge 0.5 is centre. joff - J offset within the grid 0 is grid edge 0.5 is centre. ni - number of grid points along i dimension (one more than number of cells). nj - number of grid points along j dimension (one more than number of cells). x0 - X coordinate origin. y0 - Y coordinate origin. dx - Width of cell in X direction. dy - Height of cell in Y direction. rot - Mathematically defined angle of rotation of grid. To define an analytic attribute for a polar grid, use the following syntax: var:analytic = "polar ioff ioff - I offset within the joff - J offset within the ni - number of grid points number of cells). nj - number of grid points number of cells). 16/09/2014 joff ni nj x0 y0 rmin arc"; grid 0 is grid edge 0.5 is centre. grid 0 is grid edge 0.5 is centre. along i dimension (one more than along j dimension (one more than Page 146 of 177 Version: 1.00 SHOC User Manual x0 - X coordinate origin. y0 - Y coordinate origin. rmin = Minimum radius. arc = Angular width of cell. This example netCDF CDL snippet defines a geographic grid. If a PROJECTION parameter was specified as the default coordinate system, then SHOC will automatically convert from geographic coordinates to the map projection (if necessary), when reading the data file. netcdf file { dimensions: nrecord = UNLIMITED; ni = 10; nj = 20; nk = 5; variables: // Time coordinate variable. double t(nrecords); t:units="seconds since 1990-01-01 00:00:00 +10"; t:coordinate_type="TIME"; // Latitude coordinate variable of a 2d rectangular grid. double lat(nj, ni); lat:units="degrees_east"; lat:coordinate_type="latitude"; // Longitude coordinate variable of a 2d rectangular grid. double lon(nj, ni); lon:units="degrees_east"; lon:coordinate_type="longitude"; // Z coordinate variable. double z(nj, ni); z:units="m"; z:coordinate_type="Z"; // Each record, and dimension has a unique T, X, Y and Z // coordinate associated with it. The coordinates are stored // in lat/lon units. double salt(nrecords, nk, nj, ni); salt:units="practical salinity units"; salt:long_name=”Salinity”; salt:coordinates="t, lon, lat, z"; }; This a snippet demonstrate how to define a 3d grid with a map projection (Australian Map Grid): netcdf file { dimensions: nrecord = UNLIMITED; ni = 10; nj = 20; nk = 5; variables: // Time coordinate variable. double t(nrecords); t:units="seconds since 1990-01-01 00:00:00 +10"; 16/09/2014 Page 147 of 177 Version: 1.00 SHOC User Manual t:coordinate_type="TIME"; // X coordinate variable of a 2d rectangular grid. double x(nj, ni); x:units="m"; x:coordinate_type="X"; x:projection="proj=amg zone=55”; // Y coordinate variable of a 2d rectangular grid. double y(nj, ni); y:units="m"; y:coordinate_type="Y"; y:projection="proj=amg zone=55”; // Z coordinate variable. double z(nj, ni); z:units="m"; z:coordinate_type="Z"; // Each record, and dimension has a unique T, X, Y and Z // coordinate associated with it. The coordinates are stored // in AMG units. double salt(nrecords, nk, nj, ni); salt:units="practical salinity units"; salt:long_name=”Salinity”; salt:coordinates="t, x, y, z"; }; Finally if the data is not stored on a grid but as a series of discrete points then an evalatuion at an arbitary point will use an inverse weighted interpolation scheme (1/r). Of course this assumes the coordinates and coordinate_type attributes have been specified. netcdf file { dimensions: nrecord = UNLIMITED; np = 1000; variables: // Time coordinate variable. double t(nrecords); t:units="seconds since 1990-01-01 00:00:00 +10"; t:coordinate_type="TIME"; // X coordinate variable of a 2d rectangular grid. double x(np); x:units="m"; x:coordinate_type="X"; // Y coordinate variable of a 2d rectangular grid. double y(np); y:units="m"; y:coordinate_type="Y"; // Z coordinate variable. double z(np); z:units="m"; z:coordinate_type="Z"; // Each record and point has a unique T, X, Y and Z // coordinate associated with it. double salt(nrecords, np); 16/09/2014 Page 148 of 177 Version: 1.00 SHOC User Manual salt:units="practical salinity units"; salt:long_name=”Salinity”; salt:coordinates="t, x, y, z"; }; 11.2.1.2 Utilities The simplest way to view the contents of a netCDF file is to use the standard netCDF utility ncdump. To view the file header, use: ncdump -h filename or to view the entire file, use: ncdump filename This gets impractical for large output files, and doesn't produce graphical output, this is particularly true for model dumpfile. Another way to view the netCDF dumpfiles is to use jvismeco, which can read these files and display the values of most variable. This technique is useful for examining the model in detail, to find the cause of an instability, for example. However, it still doesn't allow you to save any sort of graphical output (yet). Modules to read and write netCDF files have been added to the commercial application Matlab (commonly used in the scientific community). Matlab is a good tool for analysing the model dumpfiles. A number of supplementary Matlab scripts (mecoread2d, mecoread3d and ncinfo) have been installed in the Matlab software repository directory /home/software/matlab for reading SHOC netCDF dumpfiles. • mecoread2d reads a two dimensional variable and associated geometry from a SHOC file. Following is an example of how to use mecoread2d: [xl,yl,u1av] = mecoread2d('out.nc','u1av',10); • mecoread3d reads a three dimensional variable and associated geometry from a SHOC file. The data is returned as a 3d volume unless a specific layer is specified. Following is an example of how to use mecoread3d: [xc,yc,eta] = mecoread3d('out.nc','salt',44); or [xl,yl,u1av] = mecoread3d('out.nc','u1',10, 151); • ncinfo provides summary information bout all variables within a netCDF file, and their dimensions. ncinfo('out.nc'); 16/09/2014 Page 149 of 177 Version: 1.00 SHOC User Manual 12 Tests A suite of tests has been collected for this model. These tests are used to validate the model against analytic solutions or other known, simply understood situations. They are particularly useful to check the correct operation of the model after modifications to the model code. 12.1 No forcing Test 1 is an extremely simple, null case, test, where no forcing is applied to a closed model domain. The purpose is to demonstrate that no model variables deviate from their initial values. A rectangular grid is used with a horizontal grid of 5 by 10 cells, and 5 layers in the vertical having 1m vertical spacing. The bathymetry varies and the water is initially vertically stratified. Vertical diffusion of salt and heat is turned off in this case to avoid diffusive changes. Each run consists of a 1000 second integration with no externally applied forcing. The initial variable values (zero elevation, zero velocity, salinity and temperature) should remain unchanged for the duration of the integration. 12.2 Ekman Spiral A wind of constant stress and direction is blown over a homogeneous open ocean of constant depth. The model uses cyclic open boundaries reflect the open ocean condition, and utilizes constant vertical viscosity and linear bottom friction for simplicity. According to Kowalik and Murty (1993, p27) the linear resistance coefficient is related to the bottom drag coefficient via: r = ρC d v 12.2.1 where Cd is the drag coefficient, v is the bottom current speed and ρ is the density. Given a constant eddy viscosity, the Ekman depth, DE, is given by (Pond and Pickard, 1983, p108): DE = π 2V z / f 12.2.2 where Vz is the eddy viscosity and f is the Coriolis parameter. The surface current speed, Vo, is then given by (Pond and Pickard, 1983, eqn 9.10): Vo = 2πτ s DE ρ f 12.2.3 where τs is the wind stress, and the current speed, Vb, at the Ekman layer depth is (Pond and Pickard, 1983, p108): Vb = Vo exp(−π ) ~ 0.04Vo -2 12.2.4 -4 2 -1 Therefore, using a wind stress of 0.01Nm on and f-plane with f = 1e , and Vz = 0.0507 m s , -3 the Ekman layer depth DE = 100m. Furthermore, using 12.2.3 with ρ = 1025 kgm gives Vo = -3 -1 -4 -1 4.33x10 ms and Vb = 1.87x10 ms . Using the bottom velocity in 12.2.1 and a nominal drag coefficient of Cd = 0.003 gives a resistance coefficient of r = 0.00058. Linear friction is achieved by setting the parameter UF to a large value and Z0 to a low value. The value of Z0 below which bottom drag is set to the parameter QBFC is given by: Z0 < 16/09/2014 0.5∆z bot exp(κ .sqrt (1 / QBFC ) − 1) Page 150 of 177 12.2.5 Version: 1.00 SHOC User Manual -8 Using the value of QBFC quoted above, Z0 < 7.7x10 . Using these values with UF = 1.0 provides linear bottom friction with the required resistance coefficient. Using the above configuration, model results should show an Ekman spiral with velocities rotating clockwise -1 -1 with depth, surface current speed ~ 0.0043 ms and bottom current speed ~ 0.00019 ms . Surface elevation should be equal to zero. 12.3 Constant wind stress – closed basin This test examines the set-up due to a steady wind applied to a 1-layer (depth-averaged) model domain. If a constant wind is applied to a homogeneous closed basin of constant depth then depth averaged velocities are equal to zero in the steady state. For a linear model and constant wind stress in the x direction the surface slope should balance the applied wind stress, and the equations of motion reduce to an expression for the sea level gradient in the x direction: τ ∂η =− s ∂x ρgD 12.3.1 -2 where D is the water depth. If a wind stress of 1Nm is applied to a homogeneous ocean of o -3 temperature 20 C and salinity 35 psu so ρ = 1024.76 kgm , then the slope in a 10m deep -6 basin is equal to 9.958x10 , and the depth averaged velocities should be near zero. 12.4 Constant wind stress – alongshore open channel An analytical solution exists for a linear model of constant wind stress applied in a longshore direction along an infinitely long coast. Assuming cross-shelf transport and alongshore sea level gradient are small, then along shelf transport, U, is given by (Chapman, 1985, eqn 4.5): U= with a steady state velocity ( t Dτ s (1 − exp(−tr / D)) ρr 12.4.1 = ∞ ) given by: U= Dτ s ρr 12.4.2 Note U is the transport, hence velocity u = U/D. The sea surface slope is given by (Chapman, 1985, eqn 4.6): fτ ∂η fU =− = − s (1 − exp(−tr / D) ) ∂y gD ρgr 12.4.3 with steady state sea level given by: η ( y) = − fτ s L ( − y) ρgr 2 12.4.4 where L is the width of the channel and it is assumed η = 0 at y = -L/2. Cyclic open boundaries are used to represent an infinite coastline. Using a wind stress of 0.1 -2 Nm in a channel 500km wide (the dimensions of this domain are the same as the test 16/09/2014 Page 151 of 177 Version: 1.00 SHOC User Manual domain used by Palma and Matano (1998) except the Southern hemisphere is considered) -4 -3 with linear resistance coefficient r = 0.0005, Coriolis = -1.028e and ρ = 1024.76 kgm , the -1 along-shore depth averaged velocity is 0.195 ms , the cross-shore depth averaged velocity is -6 zero and elevation at the coast is 0.49 m (slope of 2.05x10 . Note the first elevation cell center is found at y = 10km). This result assumes a linear depth averaged model is used, and a non-linear 3-D model with quadratic bottom friction is expected to give different results. 12.5 Constant wind stress – cross-shore open domain A wind applied perpendicular to an infinitely long coastline (on the southern boundary in this case) will result in an elevation setup against the coast with zero depth averaged currents everywhere. The on-shore wind stress drives depth averaged flow to the west (east) in the northern (southern) hemisphere, and the sea level gradient resulting from setup at the coast drives this flow to the east (west). In a perfect situation the sea level gradient and wind stress forces balance resulting in no flow. Boundary effects and numerical error may make one of these forces dominate, leading to non-zero flow in the east (west) direction in the northern (southern) hemisphere if the sea level pressure gradient dominates, and vice versa if wind stress dominates. Assuming a linear model with linear bottom friction, the analytical solution for sea level profile is given by (Chapman, 1985, eqn 4.13a): τ ∂D ∂ 2η =− s 2 2 ∂y ρgD ∂y 12.5.1 Using a domain with two cyclic cross-shelf open boundaries and one offshore boundary with elevation clamped to zero, and the linear depth profile used by Chapman (1985, eqn 4.1), then the sea level profile is given by Chapman (1985, eqn 4.14) and shown in Figure 12.5.1 and Table 12.5.1. The boundary conditions of eqn. 12.5.1. for this domain are: τs ∂D ∂η = − Do at y = 0 ∴ = and η = 0 at y = L ∂y ∂y ρgDo 12.5.2 where L is the distance to the offshore boundary. Sea surface elevation (m) Figure 12.5.1 : Sea level profile for onshore wind stress. 0.035 0.03 0.025 0.02 0.015 0.01 0.005 0 0 10 20 30 40 50 60 70 80 90 100 Offshore distance (km) 16/09/2014 Page 152 of 177 Version: 1.00 SHOC User Manual Offshore distance (km) Surface elevation (m) 5 0.0301 15 0.0189 25 0.0137 35 0.0103 45 0.0077 55 0.0057 65 0.0039 75 0.0025 85 0.0012 95 0.0001 Table 12.5.1 : Sea level profile for onshore wind stress. Again, a non-linear 3-D model with quadratic bottom friction is expected to give different results, and bottom friction is generally required to be increased for solutions to match theory. Specifically, adequate solutions were obtained using the CONSTANT mixing scheme with background vertical viscosity VZ0 = 0.0507 (see Test2) and minimum bottom drag coefficient of QBFC = 0.003 (UF = Z0 =1e-8). Horizontal viscosity of U1VH = U2VH = 800 is also required for stability. 12.6 Propagation of a bore This test simulates a wetting bore propagating along an initially dry channel. The model domain represents a channel 2km wide and 100km long with uniform (flat) bathymetry. A -1 constant velocity of 1 ms is applied at one end of the initially dry channel. A bore propagates along the channel, with a parabolic shape (surface elevation profile) determined by a balance between the quadratic bottom friction and surface slope. The length of the bore is related to the depth at the inflow via: L= 12.7 gD 2 2C d U 2 12.6.1 Wind stress curl – closed basin Wind stress possessing curl applied to a closed basin with a gradient of f/D results in the formation of a gyre due to conservation of potential vorticity which is biased to the east if f/D < 0 and biased to the west if f/D > 0 (e.g. Herzfeld and Tomczak, 1999). The gradient of f/D may result from a gradient of f (β effect) or a change in topography. This test consists of a closed basin in the southern hemisphere with constant depth in the east – west direction, 50m depth at the southern coast and 100m depth at the northern coast. Wind stress in the e1 -2 direction is applied, with 0.1 Nm at the southern boundary and 0 at the northern boundary, hence this stress possesses negative curl. The gradient of f/D is positive in this case, thus an anticyclonic gyre biased to the west is expected, generated by topographically induced conservation of potential vorticity. Theory predicts that: • A negative gradient of f/D (i.e. CORIOLIS = 1.0e-4) results in an eastward biased gyre. • A flat bottom (BATHYMAX = 50) results in an unbiased gyre. • Wind stress with positive curl (WIND_SPEED SCALE = -1) results in a cyclonic gyre with unaltered bias. 16/09/2014 Page 153 of 177 Version: 1.00 SHOC User Manual 13 Tracer Statistics A library named tracerstats exists in the directory ems/model/lib (see Figure 2.1) which allows various operations to be performed on existing tracers in the model. This includes sediment transport and ecological tracers if they exist. The tracerstats library offers a convenient way to perform processing on the fly rather than post-processing an output file. The advantage of using processing while the model is running is that statistics are computed at every time-step, rather than at the times data is dumped in an output file. Note that the tracerstats library must be present when the code is configured for the user to access this functionality. The statistics available to be performed on 2D or 3D tracers are: fluxe1 fluxe2 fluxw meanfluxe1 meanfluxe2 meanfluxw mean variance stdev corr cov sum # Flux of 3D tracer in the e1 direction usage: TRACER<n>.tracerstat fluxe1(<3Dtracer>) # Flux of 3D tracer in the e2 direction usage: TRACER<n>.tracerstat fluxe2(<3Dtracer>) # Flux of 3D tracer in the vertical direction usage: TRACER<n>.tracerstat fluxw(<3Dtracer>) # Mean flux of 3D tracer in the e1 direction usage: TRACER<n>.tracerstat meanfluxe1(<3Dtracer>) optional: TRACER<n>.dt <m> days # Mean flux of 3D tracer in the e2 direction usage: TRACER<n>.tracerstat meanfluxe2(<3Dtracer>) optional: TRACER<n>.dt <m> days # Mean flux of 3D tracer in the vertical direction usage: TRACER<n>.tracerstat meanfluxw(<3Dtracer>) optional: TRACER<n>.dt <m> days # Mean of 2D or 3D tracer usage: TRACER<n>.tracerstat mean(<tracer>) optional: TRACER<n>.dt <m> days # Variance of 2D or 3D tracer usage: TRACER<n>.tracerstat variance(<tracer>) # Standard deviation of 2D or 3D tracer usage: TRACER<n>.tracerstat stdev(<tracer>) # Correlation coefficient of two 2D or 3D tracers usage: TRACER<n>.tracerstat corr(<tracer>:<tracer>) # Covariance of two 2D or 3D tracers usage: TRACER<n>.tracerstat cov(<tracer>:<tracer>) # Sum of 2D or 3D tracers usage: TRACER<n>.tracerstat sum(<tr1>,<tr2>... ) diff # Difference of two 2D or 3D tracers usage: TRACER<n>.tracerstat diff(<tracer>:<tracer>) max # Maximum tracer value over a given time period min # Minimum tracer value over a given time period vmax # Maximum water column value of a 3D tracer vmin # Minimum water column value of a 3D tracer vint # Vertical integral of 3D tracer usage: TRACER<n>.tracerstat vint(<3Dtracer>) vmean # Vertical mean of 3D tracer usage: TRACER<n>.tracerstat vmean(<3Dtracer>) vdiff # The ratio of a series of layers of a 3d tracer usage: TRACER<n>.tracerstat vdiff(<3Dtracer>:<toprange>:<botrange>(strict)) copy # Copy of a tracer usage: TRACER<n>.tracerstat copy(<tracer>) sectionflux # integrate the flux over a defined area and time usage: RTSTAT<n>.name section(<3Dtracer>:<direction>) rmse 16/09/2014 # Compute the RMS error between two tracers Page 154 of 177 Version: 1.00 SHOC User Manual usage: TRACER<n>.tracerstat rmse(<tracer1>:<tracer2>) exposure # Exposure time of a tracer above/below a threshold usage: Tracer<n>.tracerstat exposure(<3Dtracer>:<threshold>:<expose_time>) optional: TRACER<n>.dt <m> days optional: TRACER<n>.start <m> days optional: TRACER<n>.scale_factor <m> days where: <3Dtracer> is a 3-dimentional tracer <tracer> is a 3-dimensional or 2-dimensional tracer To initiate a tracerstat operation, an additional attribute TRACER?.tracerstat in the tracer list must be specified. The form of this attribute is of the type operation(tracer_name), where operation is the statistic from the list above, and tracer_name is the name of the tracer to operate on. For example, to specify the flux in the e1 direction of a tracer named temp, and output to a tracer called flux_temp, the following tracer is specified; TRACER?.name TRACER?.long_name TRACER?.tracerstat TRACER?.fill_value_wc TRACER?.valid_range TRACER?.advect TRACER?.diffuse TRACER?.diagn flux_temp Temp flux in e1 direction fluxe1(temp) 0 -1e-10 1e10 0 0 0 Note that these tracers are diagnostic and are not to be advected or diffused. Also, the diagn flag is turned off so that these tracers are not re-initialized to zero at every dump step. If a mean of tracer temp is required at 12 hourly intervals, use; TRACER?.name TRACER?.long_name TRACER?.tracerstat TRACER?.dt TRACER?.fill_value_wc TRACER?.valid_range TRACER?.advect TRACER?.diffuse TRACER?.diagn mean_temp Average temp mean(temp) 12 hours 0 -1e-10 1e10 0 0 0 If the attribute TRACER?.dt is absent the mean for the whole simulation is calculated. For statistics involving multiple tracers, the tracer names are separated by a colon in the tracerstat attribute. For example, to calculate the covariance of tracers passive1 and passive2 use; TRACER?.name TRACER?.long_name TRACER?.tracerstat TRACER?.fill_value_wc TRACER?.valid_range TRACER?.advect TRACER?.diffuse TRACER?.diagn covariance Covariance of passive1 and passive2 cov(passive1:passive2) 0 -1e-10 1e10 0 0 0 The variance, standard deviation and covariance statistics for any tracers also require that that tracer’s mean be specified. The correlation coefficient of two tracers requires that those tracers’ means and standard deviations are specified. The vertical integral, mean or 16/09/2014 Page 155 of 177 Version: 1.00 SHOC User Manual difference of a 3D tracer is placed in a 2D tracer, e.g. to specify the vertical integral of a tracer chl_a use; TRACER?.name TRACER?.long_name TRACER?.type TRACER?.tracerstat TRACER?.fill_value_wc TRACER?.valid_range TRACER?.advect TRACER?.diffuse TRACER?.diagn vint_chla Vertical integral of chl_a WC2D vint(chl_a) 0 -1e-10 1e10 0 0 0 The vertical difference tracer statistic calculates the difference between the sums of various layers, e.g. vdiff = ∑ toprange − ∑ botrange where toprange and botrange are a list of individual layer numbers or layer ranges in the format <from>_<to>, separated by commas, e.g. TRACER?.tracerstat vdiff(salt:2,6,9_12:15_17,20) will result in the sum of salinity concentration in layers 15,16,17 and 20 subtracted from the sum of salinity concentration of layers 2,6,9,10,11 and 12. The variable strict is given as 0 or 1 (with 0 used as the default). If strict = 1 then the difference is given as zero if any of the layers in the toprange or botrange are not present, e.g. if one or more layers happens to lie below the sea bed. The tracer statistics are computed in the order of the operation list provided above, hence it is possible to compute a statistic of a statistic if the order permits this. For example a vertical integral of a mean may be computed, but a mean of a vertical integral will result in operations performed at different time levels. In addition to the tracers in the tracer list, it is possible to compute tracers on the following 2D and 3D hydrodynamic variables; eta Kz Vz u1vh u2vh u1kh u2kh # # # # # # # sea level, 2D Verical diffusivity, 3D Vertical viscosity, 3D Horizontal viscosity in Horizontal viscosity in Horizontal diffusion in Horizontal diffusion in the the the the e1 e1 e1 e1 direction direction direction direction For example, the mean sea level may be calculated using: TRACER?.name TRACER?.long_name TRACER?.type TRACER?.tracerstat TRACER?.dt TRACER?.fill_value_wc TRACER?.valid_range TRACER?.advect TRACER?.diffuse TRACER?.diagn mean_eta Mean sea level WC2D mean(eta) 12 hours 0 -1e-10 1e10 0 0 0 The exposure tracerstat computes the time a nominated tracer’s value is above or below a given threshold. The units of the exposure are the nominated tracer’s units multiplied by days. To change the units, use the scale_factor (e.g. 7 days for units of <tracer units>.< weeks>). This tracerstat is effectively the integral of the tracer when its value is above/below 16/09/2014 Page 156 of 177 Version: 1.00 SHOC User Manual the threshold. The dt provided is a time period that the tracer must be below/above the threshold in order for the exposure time to be reset to zero. The <exposue_time> is the name of a tracer in the list that is used to keep track of how many days in the interval dt the tracer is below/above the threshold. This tracer is required primarily for housekeeping purposes. The start time is the time in model days that the exposure computation begins (the START_TIME is used as the default if this is absent). This allows the exposure tracerstat to operate with restarts. The <threshold> can be either a number or a tracer in the tracer list. The latter option allows a temporally and spatially varying threshold to be supplied. The threshold is the value the nominated tracer must be greater than by default; if this threshold is prefixed with ‘+’ then the tracer must also be greater this threshold, if prefixed with ‘-‘ the tracer must be less than the threshold for the exposure to be incremented. For example, if an exposure is to be set up for salinity where the model salinity is integrated below values of 10 psu starting in summer 1990 (1 Dec 1990) using the tracer salt_ex_time as the exposure time, then use: TRACER?.name TRACER?.long_name TRACER?.units TRACER?.tracerstat TRACER?.dt TRACER?.start TRACER?.fill_value_wc TRACER?.valid_range TRACER?.advect TRACER?.diffuse TRACER?.diagn salt_exposure Salinity exposure psu days exposure(salt:-10:salt_ex_time) 1 day 334 days 0 -1e-10 1e10 0 0 0 TRACER?.name TRACER?.long_name TRACER?.units TRACER?.fill_value_wc TRACER?.valid_range TRACER?.advect TRACER?.diffuse TRACER?.diagn salt_ex_time Salinity exposure time days 0 -1e-10 1e10 0 0 0 In this case the salinity must be greater than 10 psu for 1 day at a location before the salinity exposure is reset to zero at that location. Note that salt_exposure may be integrated for periods greater than 1 day; the dt used only sets a limit for when salt_exposure is reset to zero. The salinity exposure time (salt_ex_time) contains the accumulated time (days) within the period dt that the salinity is actually below 10 psu; i.e. if salinity is below 10 psu for a full day then salt_ex_time will contain 1. If, for example, dt were 1 hour and salinity was below 10 psu for 36 minutes (0.6 hour) then salt_ex_time would contain 0.025 days. Although not the primary array of interest, the exposure time is required by this tracerstat to keep track of the instances when the exposure is reset to zero. The sectionflux statistic is designed to calculate the integral of the flux of a tracer over a defined spatial area and time interval. The spatial area may be a vertical ‘curtain’ in the e1-z or e2-z plane, or a horizontal layer in the e1-e2 plane. The spatial area is defined by a list of (i,j) coordinates input via ascii file, with an optional top and bottom layer included. If the top and bottom layer are not present, the section is integrated over the entire water column. The user must specify in which direction the flux is to be calculated (e.g. u1, u2 or w); it is the users responsibility to ensure this direction is perpendicular to the plane of the section (e.g. a flux in the u1 direction must have a section defined in the vertical e2-z plane, or a flux in the w direction must have a section defined in the horizontal e1-e2 plane ). Note that the section must be defined along constant e1, e2 or z coordinates; if the section is defined across e1, e2 or z planes then the spatial integral will nor be conservative. 16/09/2014 Page 157 of 177 Version: 1.00 SHOC User Manual The file containing a list of <i j> locations (or optionally <i j topk botk>) defining the section is specified using the data attribute. Again, if the direction is u1, then this list should contain constant i coordinates, etc. The section is integrated in time over a timescale defined by the dt attribute, and subsequently output to an ascii file specified by the output attribute. Note that the integrating timescale may not be exactly the specified dt, since if dt is not an integral number of model time-steps output will be written to file at the next larger time-step. The output file contains the time and value of integrated flux over the section and interval dt. A start time may be optionally defined by the startt attribute. The default is the model start time. The default time unit in the output file is that defined by OUTPUT_TIMEUNIT in the parameter file. This may be scaled by supplying optional attributes tscale and tunit, where output time format is OUTPUT_TIMEUNIT / tscale (tunit). Similarly the units of the calculated flux may be optionally scaled using the attributes outscale and outunit, where integrated fluxes are written to the output file in units of (3D tracer unit) / outscale (outunit). This form of tracer statistic computes one number for each section which is written to a time series file, i.e. the result of the calculation is not a 2-D or 3-D field and is therefore not sensible to output to a 2-D or 3-D tracer. The syntax for the specification of sectionfluxes is therefore different. An example is given below, where the prefix RTSTAT refers to ‘run time statistic’. NRTSTAT 1 RTSTAT.name RTSTAT.data RTSTAT.dt RSTAT.startt sectionflux(salt:u1) bay_mouth.sect 6 hours 3182 days RTSTAT.tscale 6 hours RTSTAT.tunit minutes RTSTAT.outscale 1000 RTSTAT.outunit kg # # # # # # # # # # # # type of run time statistic file containing (i,j) list time interval to write output (optional); start time for the section integration. Default is the model start time. (optional) time interval to write output. time interval to write output (optional) scaling factor for output flux. (optional)output flux units. The user may submit any number of individual sections. A step attribute may be specified to compute tracerstats at a particular point in the sequence of computations within a time-step. This is invoked by prescribing: TRACER?.step n Where the computational sequence is: n = 1 : After computation of mixed layer depth, vorticity balance, flushing times, tracer percentiles, steric height and numbers. n = 2 : After tracer decay, relaxation, increments and computation of totals. n = 6 : After the wave library is called. n = 3 : After the sediment library is called. n = 4 : After the biogeochemistry library is called. n = 5 : After the tracerstats library is called (i.e. statistics of statistics can be computed using step = 5). Alternatively, these steps may be invoked via keywords, where: PRE_DECAY PRE_WAVE PRE_SED 16/09/2014 or POST_DIAG corresponds to n=1 or POST_DECAY corresponds to n=2 or POST_WAVE corresponds to n=6 Page 158 of 177 Version: 1.00 SHOC User Manual PRE_ECO or POST_SED corresponds to n=3 PRE_RTSTAT or POST_ECO corresponds to n=4 POST_RTSTAT corresponds to n=5 For example, if tracerstats were to be invoked before the ecology library is called, then set: TRACER?.step PRE_ECO or TRACER?.step POST_SED If no step is specified, the standard tracerstats library call is between step 4 and 5. The tracerstats library may be easily expanded to provide functionality suited to a user’s specific needs. 16/09/2014 Page 159 of 177 Version: 1.00 SHOC User Manual 14 Getting Started The steps required to compile SHOC, run on a simple test case and generate a custom application are detailed below. Note that visualisation and grid generation requires the matlab based software package PLUM. 14.1 Compile SHOC Install the source code depicted by the directory structure Figure 2.1. Configure the code making sure any netCDF library paths are correctly specified (Section 2.2); ./conf/configure Make the executable; make The SHOC executable now resides in ems/src/model/hd. The version number is retrieved using: shoc –v 14.2 Run a test case Test cases are located in; ems/src/model/tests/hd A useful first test case is test 7, where a wind with positive curl is blown over a closed basin with sloping bathymetry (Section 12.7). To run this test: Make an input file (Section 2.3 and 8): shoc –g test7.prm in7.nc Make sure no output files exist: rm out7_z.nc Run the model: shoc –p test7.prm View the output. 14.3 Generate a custom grid The generation of custom grids requires the matlab based package PLUM ([email protected] for details) with the executables gridgen and gridbathy installed. The executable gridbathy is located in ems/utilities/grid/, however gridgen is currently not a member of ems. Refer to the README documentation supplied with PLUM for installation. Note that dedicated bathymetry and coastline databases may be required for custom grid generation of certain areas. Default databases are supplied with PLUM. 1. Invoke matlab and PLUM, for unix/linux; matlab –nodesktop –nosplash -nojvm >> plum 2. Generate a grid, in this case a geographic rectangular grid. This is a spherical grid where the spheroid is rotated so that the equator passes through the centre of the grid (Section 4.6.4). On the main PLUM menu, click on ‘GRID GENERATION’ and the following is displayed; 16/09/2014 Page 160 of 177 Version: 1.00 SHOC User Manual Zoom icon Geographic rectangular grids Mask creation Bathymetry loading options Bathy interpolation Figure 14.3.1. PLUM grid generation menu. Zoom in on the location the grid is to be constructed for using the ‘+’ icon at the top-left of the Plan-View screen. Click on ‘RECT (sphere) Grid’ to generate a spherical geographic rectangular grid. Other options are a non-geographic grid, polar grid or orthogonal curvilinear grid. Follow the instructions in the matlab window (i.e. click on the grid centre, left and right bottom corners). A grid is then created, e.g. Figure 14.3.2. The grid can be rotated, relocated or scaled by clicking and dragging the blue dots. The number of cells in the x-direction is specified by entering ‘x’ followed by the number of cells in the matlab window, and similarly for cells in the y-direction. Right-click the mouse to exit and define the grid, or click ‘RECT (sphere) Grid’ again for further definition of the grid. An example of the final grid is shown in Figure 14.3.3, in this case focussed on the South Australian Gulfs. Note the ‘+’, ‘x’ and ‘-‘ icons in the Plan-View pane can be used to zoom in, centre and zoom out around the image while creating the grid (right click to exit from ‘x’). 3. Create a land mask. Click on the ‘Create Mask’ button (see Figure 14.3.1). The land in the domain is coloured green. Land, water or outside cells (Section 4.8) can be manually reset using the ‘Edit Mask’ button. The resulting masked image is shown in Figure 14.3.4. The number of 2D wet cells is displayed in the matlab window. 4. Load the bathymetry from a database. Bathymetry can be loaded from pre-existing ascii or netCDF databases, or can be loaded from a SHOC output file. In this case bathymetry is loaded from the AGSO 2002 database by clicking ‘Get Ncdf. Bty. Data’ and choosing the appropriate database. Bathymetry is loaded onto the image as depicted in Figure 14.3.5 (a). Return to the ‘GRID CREATION’ menu and click on ‘Get Ncdf. Bty. Data’ again. A decimation value for the bathymetry dataset may be then entered (enter 0 for default), and the bathymetry is truncated to the grid domain size (Figure 14.3.5 (b)). 5. Interpolate the bathymetry onto the grid. Click on ‘Create Bathy’ (Figure 14.3.1); a list of interpolation methods is listed in the matlab window. Enter the interpolation method required. In this case a ‘(7) for weighted area’ is used. It is possible that the interpolation scheme will not fill all the cells in the domain. In this case click on ‘Create Bathy’ again and use ‘(6) for inverse distance (fill-in)’. This may be required to be performed several times. The 16/09/2014 Page 161 of 177 Version: 1.00 SHOC User Manual resulting interpolated bathymetry is displayed in Figure 14.3.6. Sometimes the interpolation scheme may fail, and no cells are interpolated. In this case try another interpolation method. Bathymetry cells may be manually edited by using the ‘Edit Bathy’ button. Figure 14.3.2. Geographic rectangular grid of the Great Australian Bight. Figure 14.3.3. Geographic rectangular grid of the South Australian Gulfs. 16/09/2014 Page 162 of 177 Version: 1.00 SHOC User Manual Figure 14.3.4. Masked image of the South Australian Gulfs. (a) Database loaded (b) Decimated and truncated to grid Figure 14.3.5. Bathymetry loaded onto the South Australian Gulfs. 16/09/2014 Page 163 of 177 Version: 1.00 SHOC User Manual Figure 14.3.6. Bathymetry interpolated onto the South Australian Gulfs. 6. Create a SHOC auto file. Click on ‘Save AUTO file’ to create an auto file (Section 5) suitable for generating a full parameter file and netCDF input file. The auto file will be saved to shoc.auto. This file should be edited before invoking the –a option to modify the START_TIME and STOP_TIME to the start and end times desired, INPUT_FILE should be changed to a unique name and BATHYMIN and MIN_CELL_THICKNESS should be set to desired values. The original shoc.auto is shown in Figure 14.3.7 (a), and the modified file in 14.3.7 (b), now renamed to gulfs.auto. Additionally, any optional parameterisations outlined in Section 5 may be added at this stage, e.g. if the model forcing, initial conditions or boundary data are known, they may be included and will be propagated into the parameter file generated by the –a option. Alternatively, this generated parameter file may be edited to include forcing and initial conditions. The parameter file (gulfs.prm) and input file (gulfs.nc) may then be generated using: shoc –ag gulfs.auto (a) Original file from PLUM (b) Modified file Figure 14.3.6. Parameter files for the South Australian Gulfs. 16/09/2014 Page 164 of 177 Version: 1.00 SHOC User Manual 7. Edit the parameter file gulfs.prm. This generally includes initial condition data for temperature, salinity and surface elevation, surface fluxes (wind, pressure, heatflux and saltflux) and specification of open boundary conditions. For example, if BLUElink data were available where the file jan2011_ets.nc contained the variables temp, salt and eta, the file jan2011_uv.nc contained 3D velocities u and v and ACCESS-A data jan2011_met.nc were available containing variables pressure, u and v, then gulfs.prm may be modified thus: In the tracer list add (see Section 4.9); TRACER0.data and TRACER1.data jan2011_ets.nc jan2011_ets.nc Surface initial condition (see Section 4.12); SURFACE jan2011_ets.nc Wind and pressure forcing (see Section 4.13 & 4.14); WIND_TS WIND_INPUT_DT WIND_SPEED_SCALE DRAG_LAW_V0 DRAG_LAW_V1 DRAG_LAW_CD0 DRAG_LAW_CD1 jan2011_met.nc 10 minutes 1.0 10.0 26.0 0.00114 0.00218 PRESSURE jan2011_met.nc PRESSURE_INPUT_DT 10 minutes Open boundary forcing (see Section 4.10.7 & 4.10.17); NBOUNDARIES 3 BOUNDARY0.NAME BOUNDARY0.TYPE BOUNDARY0.BCOND_NOR BOUNDARY0.CUSTOM.u1 BOUNDARY0.BCOND_TAN BOUNDARY0.CUSTOM.u2 BOUNDARY0.BCOND_ELE BOUNDARY0.BCOND_salt BOUNDARY0.BCOND_temp BOUNDARY0.ADJUST_FLUX BOUNDARY0.DATA BOUNDARY0.RANGE West u1 CUSTOM uv_to_u1 jan2011_uv.nc CUSTOM uv_to_u2 jan2011_uv.nc NOTHIN|FILEIN UPSTRM UPSTRM 200 seconds # ~ 0.2 x DT jan2011_ets.nc (0,0)-(0,14) BOUNDARY1.NAME BOUNDARY1.TYPE BOUNDARY1.BCOND_NOR BOUNDARY1.CUSTOM.u1 BOUNDARY1.BCOND_TAN BOUNDARY1.CUSTOM.u2 BOUNDARY1.BCOND_ELE BOUNDARY1.BCOND_salt BOUNDARY1.BCOND_temp BOUNDARY1.ADJUST_FLUX BOUNDARY1.DATA BOUNDARY1.RANGE East u1 CUSTOM uv_to_u1 jan2011_uv.nc CUSTOM uv_to_u2 jan2011_uv.nc NOTHIN|FILEIN UPSTRM UPSTRM 200 second jan2011_ets.nc (50,0)-(50,23) 16/09/2014 Page 165 of 177 Version: 1.00 SHOC User Manual BOUNDARY2.NAME BOUNDARY2.TYPE BOUNDARY2.BCOND_NOR BOUNDARY2.CUSTOM.u1 BOUNDARY2.BCOND_TAN BOUNDARY2.CUSTOM.u2 BOUNDARY2.BCOND_ELE BOUNDARY2.BCOND_salt BOUNDARY2.BCOND_temp BOUNDARY2.ADJUST_FLUX BOUNDARY2.DATA BOUNDARY2.RANGE Offshore u2 CUSTOM uv_to_u1 jan2011_uv.nc CUSTOM uv_to_u2 jan2011_uv.nc NOTHIN|FILEIN UPSTRM UPSTRM 200 seconds jan2011_ets.nc (0,0)-(49,0) If a tide is required to be included using the CSR tide model, then set TIDE_CSR_CON_DIR to the nodal correction directory, and TIDE_CSR_ORTHOWEIGHTS to the orthoweight database (see Section 4.10.20) and use the elevation boundary condition: BOUNDARY0.BCOND_ELE NOTHIN|FILEIN|TIDALH Numerous other parameters may be edited in the file gulfs.prm to suit the application (e.g. PARAMETERHEADER, DESCRIPTION, NAME, netCDF output files (Section 4.31.6), time series output (Section 4.31.5), WINDOWS (Section 4.2), horizontal friction (Section 4.22), turbulence closure (Section 4.21), HEATFLUX (Section 4.17) or diagnostics (Section 4.30). The example here is the minimum required to set up a simulation, and many alternative parameterisations or options may be invoked as described in this manual. Note that the parameterisation demonstrated here does not guarantee model stability, and parameters or schemes may require alteration to achieve a stable model run. Describing the process of stability analysis is beyond the scope of this manual. Once a satisfactory parameter file is created, the input file must be re-created so that the specified initial conditions are included: rm gulfs.nc shoc –g gulfs.prm gulfs.nc It is good practice to view gulfs.nc graphically to ensure initial conditions and bathymetry are satisfactory. The resolution of this example is ~9.5 x 12.2 km with maximum depth of ~5400 m resolved by 52 layers. 8. Run the simulation; shoc –p gulfs.prm Any warnings encountered during setup are written to the file runlog, model progress is written to diag.txt and the model parameterisation as used internally by the model is listed in setup.txt (see Section 4.32). It is good practice to view the setup.txt file to ensure the model configuration is as expected. Output may be vied using PLUM, or a similar java based application DIVE (see http://www.emg.cmar.csiro.au/www/en/emg/software/Visualization.html). The process of stability analysis, sensitivity analysis and calibration may now commence. 16/09/2014 Page 166 of 177 Version: 1.00 SHOC User Manual 15 Sediment Transport The sediment transport routines may be fully coupled to SHOC by invoking: DO_SEDIMENTS YES or DO_SEDIMENTS DO Additionally, a sediment layer structure must be defined for sediments transport to operate, e.g; NSEDLAYERS 0.005 0.020 0.080 0.320 4 # # # # # The number of sediment layers Depth in the sediment of the 1st Depth in the sediment of the 2nd Depth in the sediment of the 3rd Depth in the sediment of the 4th layer layer layer layer face face face face The tracer list must also include a number of sediment fractions, with corresponding attributes (e.g. particle size, settling velocity etc.) defined. There are also a number of global parameters that must be defined; see the Sediment Transport User Guide for a full explanation. The sediment transport parameters and tracer attributes can be automated, where a set of user defined defaults are used in preference to a fully defined specification in the parameter file. This involves defining the tracer sediment classes that are to be used, the attributes that will be defined for those tracers, and the global parameters used for the sediment transport. The sediment tracer classes are defined using: SED_VARS <class1> <class2> ... <class_n> Where <class_n> is the name of the sediment class the user wishes to be include. These classes are hardwired into the sediment interface module (sediments/sediments.c) and can be expanded as desired. Currently, the classes consist of; Gravel Sand Mud FineSed Dust SHOC will check if the classes defined in SED_VARS are included in the list of hardwired names, and if so then will automatically include that tracer in the tracer list. Additionally, a 3D diagnostic tracer named tss is automatically generated, and 2D tracers named ustrcw_skin and depth_sed. Again, these additional tracers are hardwired into sediments/sediments.c and can be expanded as desired. The sediment tracer attributes associated with these tracer classes are defined using: SED_VARS_ATTS <specification_name> Where <specification_name> is the name of a default set of attributes the tracers will be assigned to. These default attributes are hardwired to the tracers in sediments/sediments.c and can be expanded as desired. Currently the default sets available are: standard estuary 16/09/2014 # standard set of attributes # Attributes applicable to an estuarine environment Page 167 of 177 Version: 1.00 SHOC User Manual If any of the tracer classes are explicitly defined in the tracer list, then any attributes associated with that tracer takes precedence over the defaults defined by SED_VARS_ATTS. Furthermore, and tracer attribute can be defined in the parameter file using: TRACER<m>.attname or <name>.attname Where <m> is the tracer number in the list, attname is the tracer attribute name (see the MecoSed Users Guide for a list of attribute names) and <name> is the name of the tracer, e.g. Mud.svel -0.0001 # Redefine the settling velocity for Mud Various sediment parameters may be spatially varying (e.g. settling velocity). If the settling velocity attribute is the name of a 2D tracer in the tracer list, then the values of that tracer will be used as the settling velocity. In automated mode, if a 2D tracer is found in the tracer list with the name of a sediment tracer class appended with _svel (e.g. Mud_svel, Sand_svel), then that 2D tracer’s values will be used as the settling velocity for that sediment tracer class, e.g. Mud may be spatially variable if a 2D tracer exists with the name Mud_svel, or, for example, if a 2D tracer exists with the name settling_mud and the settling velocity attribute for Mud is redefined as; Mud.svel settling_mud The global sediment transport attributes are defined in automated mode using; SEDFILE <param_filename> Where <param_filename> may be: 1. The name of a file containing the global parameters, 2. A default name for hardwired parameters. Currently the names standard and estuary are accepted. The initialisation of these parameters exists in model/lib/sediments/sed_init.c and may be expanded as desired, 3. auto, where the parameters may be dynamically prescribed in the routine sed_params_auto() in model/lib/sediments/sed_init.c. Currently this routine is empty. 4. If none of the above are specified, the parameters are assumed to be listed in the main parameter file. The sediment specification is written in full in the diagnostic file setup.txt (see Section 4.31). If a transport parameter file is generated from a full parameter file using TRANS_DATA (see Section 9) then the sediment specification is also written to this file. Outputting these sediment specifications may be invoked without running the full sediment transport by using; DO_SEDIMENTS 16/09/2014 WRITE Page 168 of 177 Version: 1.00 SHOC User Manual 16 Ecology The ecology routines may be fully coupled to SHOC by invoking: DO_ECOLOGY YES or DO_ECOLOGY DO Additionally, a sediment layer structure must be defined for ecology to operate, (see Section 15). Ecology also requires a process definition and a parameter specification. These are defined via: processfname <processes> # name of ecology processes The name <process> may be one of the following: <filename> standard estuary auto If <filename> is specified, then the BGC processes are defined in a file bearing that name. If defaults is specified, then the processes are hardwired into the module process_defaults.c in the ecology library. Additional process lists may be included in this module, with associated modifications to the calling routines get_eco_processes() in process_defaults.c and read_process_group_from_defaults() in ecology.c. Additionally, there is scope to define processes dynamically using the (currently empty) routine eco_process_auto() in process_defaults.c. This dynamical specification is invoked if auto is specified for <processes>. The ecological parameters are specified using: biofname <parameters> # name of ecology parameters The name <parameters> may be one of the following: <filename> standard estuary auto If <filename> is specified, then the BGC parameters are defined in a file bearing that name. If default is specified, then the processes are hardwired into the module parameter_defaults.c in the ecology library. Additional parameter lists may be included in this module, with associated modifications to the calling routine get_eco_params() in parameter_info.c. Additionally, there is scope to define processes dynamically using the (currently empty) routine eco_params_auto() in parameter_info.c. This dynamical specification is invoked if auto is specified for <parameters>. Note that the default parameters include hardwiring of the phytoplankton growth rates that have traditionally been specified as netcdf files. It is no longer necessary to supply this netcdf file, just specifying the name '10pplkINP' or '10benINP' is sufficient. 16/09/2014 Page 169 of 177 Version: 1.00 SHOC User Manual If a tracer list of the tracers required for the ecology processes is not explicitly specified, then these tracers will be automatically generated based on the defined processes. The attributes for these tracers are defined using: ECO_VARS_ATTS <attributes> # name of tracer attribute set The name <attributes> may be one of the following: standard estuary If standard is specified, then the attributes for all possible ecology tracers are hardwired into the routine eco_defaults_standard() in /hd/ecology/ecology.c and can be expanded as desired by creating additional attribute routines and adding them to the calling function eco_set_tracer_defaults() in the same module. Note that a list of all possible ecology tracer names and long names (water column/sediment and benthic) must be maintained in the structures ECONAME3D and ECONAME2D in ecology.c in order for tracer automation to operate correctly. If any of the tracer classes are explicitly defined in the tracer list, then any attributes associated with that tracer takes precedence over the defaults defined by ECO_VARS_ATTS. Furthermore, any tracer attribute can be defined in the parameter file using: TRACER<m>.attname or <name>.attname Where <m> is the tracer number in the list, attname is the tracer attribute name and <name> is the name of the tracer, e.g. PhyL_N.svel -4e-6 # Redefine the settling velocity for large # phytoplankton nitrogen. The ecology specification is written in full in the diagnostic file setup.txt (see Section 4.31). If a transport parameter file is generated from a full parameter file using TRANS_DATA (see Section 9) then the ecology specification is also written to this file. Outputting these ecology specifications may be invoked without running the full sediment transport by using; DO_ECOLOGY WRITE Ecology requites a LIGHT variables, which historically was a daily mean but with newer versions of the ecology processes can be a copy of short wave radiation (i.e. diurnally variable). This can be input via file: LIGHT LIGHT_INPUT_DT ALBEDO_LIGHT light.nc 1 hour 0.0 LIGHT can point to a tracer which reads LIGHT via the reset function, e.g. LIGHT LIGHT_INPUT_DT ALBEDO_LIGHT inlight 1 hour 0.0 with TRACER?.name TRACER?.name 16/09/2014 inlight Light input from swr Page 170 of 177 Version: 1.00 SHOC User Manual TRACER?.units TRACER?.type TRACER?.fill_value TRACER?.valid_range TRACER?.reset_file TRACER?.reset_dt W m-2 WC2D 0.0 0.0 2000.0 swr.nc 1 hour If swr is included in the transport files, then LIGHT can be read from this variable along with all other transport variables using; LIGHT 16/09/2014 file Page 171 of 177 Version: 1.00 SHOC User Manual 17 Troubleshooting Bathymetry altered on successive input file generations : The bathymetry written to the input file using the –g option is modified from that read in from the parameter file by the BATHYMIN, BATHYMAX and MIN_CELL_THICKNESS parameters. If the input file bathymetry is to be modified (using jvismeco) and used in a successive parameter file, make sure the abovementioned parameters are set to zero, a very large value and zero respectively. Note also that the SMOOTHING option will also have this effect. Heat flux increasing with time : Using the HEATFLUX = NET_HEAT with a HEATFLUX_FILE_INPUT_DT > DT (3D time-step) in conjunction with a RADIATION file (SWR_ATTENUATION > 0, SWR_TRANSMISSION > 0) will result in the heatflux increased by the surface short wave contribution during the period HEATFLUX_FILE_INPUT_DT. Set HEATFLUX_FILE_INPUT_DT = DT to overcome this effect. Model crashes : Check that momsc = ORDER2. SHOC is a second order model in time and space st and 1 order momentum schemes have proved consistently unsuccessful. Negative variable values inexplicably appear in output : Set bytespervalue in the output file to 4. Using short representation of output may make very large or small values wrap bits and become negative. Use double representation to avoid this. Open boundaries appear as OUTSIDE cells : Each u1 or u2 open boundary should be associated with a FRONT, BACK, LEFT or RIGHT edge. If an open boundary cell location list contains both FRONT and BACK, or LEFT and RIGHT edge cells then they will be masked as OUTSIDE. Output file does not record further dumps : Check that the 2.0 Gb limit for output files has not been exceeded. Reading parameter file difficulties : Check that no white space, tabs or ^M exists after entries in the parameter file. River open boundaries aren’t advecting tracers : Make sure there are at least 3 wet cells in the normal direction to the open boundary, or change the boundary condition for tracers from UPSTRM to FILEIN. The UPSTRM condition uses a velocity one cell into the interior of the domain to reflect dynamics occurring in the interior rather than the prescribed boundary dynamics when solving the 1 dimensional advection equation that constitutes the UPSTRM condition. If this interior cell falls on a solid boundary (i.e. only 2 wet cells exist normal to the boundary) then the velocity will be zero and tracer concentration will not change due to the UPSTRM condition. Segmentation fault using –g option : (a) Open boundaries in the inside of the domain (i.e. open boundaries not on the edges of the grid) must be adjacent to ‘outside’ cells. Check that interior open boundaries are adjacent to outside cells using jvismeco. (b) Solid boundaries on the edge of the grid. SHOC requires a land cell to surround all wet cells, even along the edges of the grid. This is so that there exists a ghost cell location adjacent to each wet cell for setting lateral boundary conditions. When to re-make an input file using the –g option : The input netCDF file must be re-generated if changes are made to the bathymetry list, the number of layers or layer spacings used, data used for tracer initialisation, BATHYMIN, BATHYMAX, MIN_CELL_THICKNESS, SMOOTHING. 16/09/2014 Page 172 of 177 Version: 1.00 SHOC User Manual 18 References Arakawa, A. and Lamb, V.R. (1977) Computational design of the basic dynamical process of the UCLA general circulation model. Methods in Computational Physics, 17. Academic Press, pp. 173-265. Blackadar, A.K. (1962) The vertical distribution of wind and turbulent exchange in neutral atmosphere. J. Geophys. Res., 67, 3095-3102. Blanc, T.V. (1985) Variation of bulk-derived surface flux, stability and roughness results due to the use of different transfer coefficient schemes. J. Phys. Oceanogr., 15, 650-669. Blumberg, A.F. and J. Herring (1987) Circulation modelling using orthogonal curvilinear coordinates, in Three-Dimensional Models of marine and Estuarine Dynamics, Ed. J.C.J. Nihoul and B.M. Jamart, Elsevier. Blumberg, A.F. and G.L. Mellor (1986) A description of a three-dimensional coastal ocean circulation model. In: N. Heaps (Ed), Three-dimensional shelf models, Coastal and Estuarine Sciences, 5, American Geophysical Union. Burchard, H., K., O. Peterson and T.P. Rippeth (1998) Comparing the performance of the Mellor Yamada and the k-ε turbulence models. J. Geophys. Res., 103, 10,543 – 10,554. Bowden, K.F. and P. Hamilton (1975) Some experiments with a numerical model of circulation and mixing in a tidal estuary, Estuarine and Coastal Marine Science, 3, 281-301. Bunker, A. F. (1976) Computations of surface energy flux and annual air-sea interaction cycles of the North Atlantic ocean. Mon. Wea. Rev., 104, 1122-1140. Burchard, H., K., Bolding and M.R. Villarreal (1999) GOTM, a general ocean turbulence model. Theory implementation and test cases. Technical Report EUR 18745EN, European Commission, 103pp. Burchard, H., K., O. Peterson and T.P. Rippeth (1998) Comparing the performance of the Mellor Yamada and the k-ε turbulence models. J. Geophys. Res., 103, 10,543 – 10,554. Bye, J.A.T. (1977) The flow series of Thallasso – models. Selected topics in atmospheric and marine sciences, No 6, Flinders University of South Australia, 59pp. Bye, J.A.T. (1977a) The flow series of Thallasso – models. The FLOWM model, supplement to the FLOWC model. Selected topics in atmospheric and marine sciences, No 6, Flinders University of South Australia. Camerlengo. A.L. and J.J. O’Brien (1980) Open boundary condition in rotating fluids. J. Compt. Physics, 35, 12 – 35. Cartwright, D.E. and R.D. Ray (1990) Oceanic tides from Geosat altimetry. J. Geophys. Res., 95 C3, 3069-3090. Chapman, D.G. (1985) Numerical treatment of cross-shelf open boundaries in a barotropic coastal ocean model, J. Phys. Oceanogr., 15, 1060-1075. Craig, P.D., Banner, M.L. (1994) Modelling wave-enhanced turbulence in the ocean surfacelayer. J. Geophys. Res., 24, 2546-2559. Csanady, G.T. (1982) Circulation in the coastal ocean, D. Reidel Publishing company. Demirov, E., E. Eifler, M. Ouberdous, and N. Hibma (1998) ISPRAMIX – a threedimensional free surface model for coastal ocean simulations and satellite data assimilation on parallel computers. Technical report EUR 18129EN, European Commission, 76pp. Dyer, K.R. (1997) Estuaries, a physical introduction. J. Wiley & Sons, Chichester. Eifler, W. and W. Schrimpf (1992) ISPRAMIX, a hydrodynamic program for computing regional sea circulation patterns and transfer processes. CEC Report EUR 14856 EN. Eringen, A.C. (1962) Nonlinear theory of continuous media. McGraw Hill, New York. Evenden, G.I. (1995) Cartographic Projection Procedures for the UNIX Environment – A User’s Manual, United States Department of the Interior Geological Survey, Open-File Report 90-284. Galperin, B., L.H. Kantha, S. Hassid and A. Rosati (1988) A quasi-equilibrium turbulent energy model for geophysical flows. J. Atoms. Sci., 45, 55 – 62. Gill, A. E. (1982) Atmosphere-Ocean Dynamics. Academic Press Inc. Grant, W.D. and O.S. Madsen (1986) The continental shelf bottom boundary layer, Ann. Rev. Fluid Mech., 18, 265-305. Herzfeld, M. (2006) An alternative coordinate system for solving finite difference ocean models. Ocean Modelling, 14, 174 – 196. Herzfeld, M., Andrewartha, J. (2011) A simple, stable and accurate Dirichlet open boundary condition for ocean model downscaling. Ocean Modelling. In press. 16/09/2014 Page 173 of 177 Version: 1.00 SHOC User Manual Herzfeld, M, J. Waring, J. Parslow, N. Margvelashvili, P. Sakov and J. Andrewartha (2002) SHOC : Model for estuaries and coastal oceans, scientific manual. CSIRO Marine Research. Herzfeld, M. and M. Tomczak (1999) Bottom driven upwelling generated by eastern intensification in closed and semi-closed basins with a sloping bottom. Mar. Freshwater Res., 50 (7), 613 – 627. Israeli, M. and S.A. Orszag (1981) Approzimation of radiation boundary conditions. J. Compt. Physics, 41, 115 – 135. Jones, N.L., Monosmith, S.G. (2008) Modelling the influence of wave-enhanced turbulence in a shallow tide- and wind-driven water column. J. Geophys. Res., 113, C03009, doi:10.1029/2007JC004246. Kitaigorodskii, S.A., O. A. Kuznetsov and G. N. Panin (1973) Coefficients of drag, sensible heat and evaporation in the atmosphere over the surface of the sea. Izv. Acad. Sci. USSR, Atmos. Ocean Phys., 9, 644-647. Kondo, J. (1975) Air-sea bulk transfer coefficients in diabatic conditions. Boundary-Layer Meteorology, 9, 91-112. Kowalik, Z. and T.S. Murty (1993) Numerical modelling of ocean dynamics. BULK series on ocean engineering, Volume 5. World Scientific, Singapore. 481pp. Large, W.G. and S. Pond (1981) Open ocean momentum flux measurements in moderate to strong winds, J. Phys. Oceanogr., 11, 324-336. Large, W.G. and S. Pond (1982) Sensible and latent heat flux measurements over the ocean. J. Phys. Oceanogr., 12, 464-482. Leonard, B.P. (1991) The ULTIMATE conservative difference scheme applied to unsteady one-dimensional advection. Comp. Methods in Appl. Mech. and Eng., 19, 17 – 74. Madsen, O. S. (1994) Spectral wave-current bottom boundary layer flows, in Coastal th engineering 1994 Proceedings, 24 international conference Coastal engineering Research Council/ASCE, pp. 384-398. Masagutov, T. F. (1981) Calculation of vertical turbulent fluxes in the near-water atmospheric layer over the ocean in tropical latitudes. Meteor. Gidrol., 12, 61-68. Martinsen, E.A. and H. Engedahl (1987) Implementation and testing of a lateral boundary scheme as an open boundary condition in a barotropic ocean model. Coastal Eng., 11, 603627. Mellor, G.L. and T. Yamada (1982) development of a turbulence closure model for geophysical fluid problems. Rev. Geophys., 20, 851 – 875. Mesinger F. and A. Arakawa (1976) Numerical methods used in atmospheric models, GARP Publ. Ser. No. 17 WMO-ICSU.Müller, P. (1995) Ertel's potential vorticity theorem in physical oceanography. Reviews of Geophysics, 33, 67-97. Miller, M.J. and A.J. Thorpe (1981) Radiation conditions for the lateral boundaries of limitedarea numerical models. Q. J. R. Meteorol. Soc., 107, 615 - 628. Orlanski, I (1976) A simple boundary condition for unbounded hyperbolic flows. J. Compt. Physics, 21, 251 – 269. Palma, E.D. and R.P. Matano (1998) On the implementation of passive open boundary conditions for a general circulation model: The barotropic mode. J. Geophys. Res., 103(C1), 1319 - 1341. Pielke, R.A., W.R. Cotton, R.L. Walko, C.J. Tremback, W.A. Lyons, L.D. Grasso, M.E. Nicholls, M.D. Moran, D.A. Wesley, T.J. Lee, and J.H. Copeland (1992) A comprehensive meteorological modeling system -- RAMS. Meteorol. Atmos. Phys., 49, 69-91. Schiller, A., Godfrey, J.S. (2003) Indian Ocean intraseasonal variability in an ocean general circulation model. Journal of Climate, 16, 21-39. Simons, T.J. (1974) Verification of numerical models of lake Ontario. Part I, circulation in spring and early summer. Journal of Physical Oceanography, 4, 507 - 523. Shapiro, R. (1970) Smoothing, filtering, and boundary effects. Reviews of Geophys and Space Phys, 8, 359 – 387. Sommerfeld, A. (1949) Partial differential equations, Lect. Theoret. Phys., vol 6, Academic, San Diego. Tartinville, B., E. Deleersnijder and J. Rancher (1997) The water residence time in the Mururoa atoll lagoon: sensitivity analysis of a three-dimensional model. Coral Reefs, 16, 193 – 203. Wilcox, D.C. (1988) Reassessment of the scale-determining equation for BULK turbulence models. AIAA Journal, 26(11), 1299-1310. 16/09/2014 Page 174 of 177 Version: 1.00 SHOC User Manual 19 Index 2 2D-MODE ...............................................74 A –a option .............................. 111, 113, 114 ABSOLUTE...................... See VORTICITY ADVECT ...........................................61, 90 AIRDENS ................................................18 AIRTEMP ........................................59, 101 ALBEDO .................................................60 ALERT ....................................................94 ALERT_DT .............................................94 ALL_NUMBERS .....................................93 AMBIENT_AIR_PRESSURE ............57, 58 ANGULAR ..............................................52 B BATHY ............................... 12, 27, 28, 111 BATHY_CON ..........................................50 BATHY_MASK........................................28 BATHYMAX ....................................28, 113 BATHYMIN .....................................28, 113 BOUNDARY ADJUST_FLUX ..................40, 148, 149 BCOND_ELE ......................................37 BCOND_NOR ..............................37, 38 BCOND_NOR2D ................................37 BCOND_TAN ...............................37, 38 BCOND_TAN2D.................................37 BCOND_TRA_ALL .............................37 BCOND_TRAn ...................................37 CUSTOM ............................................39 u1flowbdry ......................................39 u2flowbdry ......................................40 uv_to_u1 ........................40, 148, 149 uv_to_u2 ........................40, 148, 149 DATA ............................................37, 38 INVERSE_BAROMETER ...................44 NSPONGE_HORZ .............................44 NSPONGE_VERT ..............................44 OUTSIDE_ZONE ...............................36 POINTS ..............................................36 RANGE ...............................................36 REALX_ZONE_TRAn ........................43 RELAX_ELE .......................................42 RELAX_TIME .....................................42 RELAX_ZONE_ALL ...........................43 RELAX_ZONE_ELE ...........................43 RELAX_ZONE_NOR..........................43 RELAX_ZONE_TAN ..........................43 RIVER ..............................................112 SCALE_P ...........................................51 SCALE_S ...........................................51 SMOOTH_PHASE .............................43 STAGGER ..........................................37 16/09/2014 TIDALC .............................................. 48 TIDALH .............................................. 47 TIDEBC.............................................. 47 TRCONC ........................................... 45 TRFLUX ............................................. 46 TRPC_TRAn ...................................... 50 UPSTRM............................................ 45 BRUNT ................................................... 91 C CALC_FLUXES ............................... 84, 94 CALC_PERCS ....................................... 94 CALCDENS ..................................... 12, 16 CFL ............................................ 75, 84, 89 ACTIVE .............................................. 89 ACTIVE3D ......................................... 89 PASSIVE ........................................... 89 WVEL................................................. 89 CFL_DT ................................................. 89 CLOUD .......................................... 61, 101 CODEHEADER ...................................... 13 COMPATIBLE ........................................ 17 CORIOLIS ........................................ 18, 90 D DEBUG_LOC ....................................... 108 DENS_MIX ......................See MIX_LAYER DEW_POINT .......................................... 59 DIFF_SCALE ......................................... 71 DRAG_LAW_CD0.................................. 56 DRAG_LAW_CD1.................................. 56 DRAG_LAW_V0 .................................... 56 DRAG_LAW_V1 .................................... 56 DT ... 15, 56, 57, 58, 59, 60, 61, 62, 63, 64, 85, 86, 87, 112, 113 DUMP_WIN_MAP.................................. 14 E ecology ....................................... 7, 10, 61 eta_relaxation file ................................... 54 ETAMAX .......................................... 26, 27 EVAPORATION ....................... 58, 63, 101 F FATAL .................................................... 16 FILTERING ............................................ 17 FLUSHING_TR ...................................... 86 FROUDE ................................................ 91 G –g option .... 8, 11, 27, 29, 30, 53, 102, 120 GRID_REFINEMENT............................. 80 GRIDTYPE GEOGRAPHIC_RECTANGULAR .... 25, 111 GEOGRAPHIC_RECTANGULAR ..... 25 Page 175 of 177 Version: 1.00 SHOC User Manual NUMERIC ...........................................24 POLAR ...............................................24 RECTANGULAR ................................23 H HDIFF .....................................................90 HEATFLUX .......................... 59, 61, 62, 63 ADVANCED .......................................59 COMP_HEAT .....................................62 COMP_HEAT_MOM ..........................63 NET_HEAT .........................................62 SURF_RELAX ....................................59 HEATFLUX_TEMP .....................59, 61, 62 HMIN .................................. 16, 75, 76, 113 NE2_BLEND .......................................... 83 nhf .......................................................... 89 NONLINEAR .................................... 12, 15 npointss .................................................. 72 –nrt ....................................................... 115 NSTORM ......................................... 56, 57 NTRACERS ................................... 29, 114 NUMBERS ............................................. 91 O ID_NUMBER...........................................17 INT_WAVE .............................................91 IRATIO ............................................15, 113 ORBITAL_VEL ............................... 64, 101 ORDER1 ................................................ 52 ORDER2 ................................................ 52 ORDER4 ................................................ 52 OutputFiles ........................................... 103 OutputPath ........................................... 104 OutputTransport ................................... 104 OUTSIDE ....................................... 35, 112 OUTSIDE cells ....................................... 27 L P LAGRANGE ............................................52 LAYERFACES ................. 26, 75, 113, 120 LENUNIT ........................................14, 122 lhf 89 log_levels ................................................16 lscale ...........................................68, 88, 89 lwr ...........................................................89 –p option .......................... 27, 29, 114, 120 PARAMETERHEADER............ 12, 13, 113 Particle tracking ..................................... 76 POTENTIAL .....................See VORTICITY PRECIPITATION ..................... 58, 63, 101 PRESS_BC ............................................ 90 PRESS_BT ............................................ 90 PRESSURE ........................................... 58 PROJECTION 18, 19, 23, 24, 25, 111, 131 I M MAP_POINTS_E1 ................................109 MAXGRAD ..............................................28 MEAN FLUX ..................................................85 NONE .................................................85 TENDENCY ........................................85 TIDAL .................................................85 TRANSPORT .....................................85 VEL2D ................................................85 VEL3D ................................................85 WIND ..................................................85 MERGE_THIN ........................................76 MIN_CELL_THICKNESS .......................28 MIX_LAYER DENS_MIX .........................................86 NONE .................................................86 TKE_MIX ............................................86 MIXING_SCHEME constant ..............................................66 Csanady .............................................66 k-e.......................................................69 k-w ................................................69, 70 mellor_yamada_2_0 ...........................67 mellor_yamada_2_0_estuarine ..........67 mellor_yamada_2_5 ...........................68 MOM_TEND ...........................................90 N NBOUNDARIES .............................35, 112 NE1_BLEND ...........................................82 16/09/2014 Q QBFC ..................................................... 64 QUICKEST ............................................. 52 R RADIATION ............................. 59, 60, 101 RAMPEND ....................................... 15, 55 RAMPSTART ................................... 15, 55 RAMPVARS ........................................... 15 READ_WIN_MAP .................................. 14 REGION ................................................. 97 RELATIVE ........................See VORTICITY RELAX_ZONE ....................................... 43 –restart ................................................. 115 restart_dt .............................................. 115 restart_name ........................................ 115 REYNOLDS ........................................... 91 RICHARDSON_FL................................. 91 RICHARDSON_GR ............................... 91 ROSSBY_EX ......................................... 92 ROSSBY_IN .......................................... 91 runlog ..................................................... 16 rv_beta ................................................... 88 rv_bsc..................................................... 88 rv_drvdt .................................................. 88 rv_jebar .................................................. 88 rv_nonlin ................................................ 88 rv_strch .................................................. 88 rv_wsc .................................................... 88 Page 176 of 177 Version: 1.00 SHOC User Manual S SALTFLUX..............................................63 SCALE_VARS ........................................17 shf ...........................................................89 SHOW_WINDOWS ................................14 SIGMA ............................................75, 114 SLIP ........................................................16 SMAGORINSKY .....................................71 SMOOTH_MASK ....................................28 SMOOTH_VARS ..............................16, 17 SMOOTH_VzKz......................................67 SMOOTHING....................................28, 75 SOUND ...................................................92 SPECHEAT ............................................18 SPEED_2D .............................................93 SPEED_3D .............................................93 STABILITY ..............................................75 NONE .................................................75 SUB-STEP .........................................75 SUB-STEP-NOSURF .........................75 SUB-STEP-TRACER .........................75 START_TIME ................ 15, 102, 111, 122 STERIC_HEIGHT ...................................87 STOP_TIME ...........................15, 111, 122 SURFACE ...............................................53 swr ..........................................................89 SWR_ATTENUATION ......................60, 61 SWR_BOT_ABSORB .............................61 SWR_TRANSMISSION ....................60, 61 T U u1_adv ................................................... 90 u1_btp .................................................... 90 u1_hdif ................................................... 90 U1_OMMIT ............................................ 90 U1AV_OMMIT ........................................ 90 U1KH.............................................. 71, 113 U1VH.............................................. 71, 113 U2_OMMIT ............................................ 90 U2AV_OMMIT ........................................ 90 U2KH.............................................. 71, 114 U2VH.............................................. 71, 113 UF .......................................................... 64 UPSTRM_METHOD .............................. 45 UTLIMATE ............................................. 52 V VANLEER .............................................. 52 VDIFF ..................................................... 90 VELMAX .......................................... 16, 95 VELMAX_2D .......................................... 16 VORTICITY ............................................ 88 ABSOLUTE ....................................... 88 POTENTIAL ....................................... 88 RELATIVE ......................................... 88 TENDENCY ....................................... 88 W TENDENCY ........ See MEAN, VORTICITY TIMEUNIT ...............................14, 113, 122 TKE_MIX ............... See MIX_LAYER, See MIX_LAYER TOTALS ..................................................96 TRACER ...................................29, 75, 101 advect .................................................30 data...................................................112 decay ..................................................30 diffuse .................................................30 fill_value .............................................30 increment ............................................32 long_name..........................................29 name...................................................29 relaxation ....................................31, 114 reset..............................................32, 51 svel .....................................................30 type .....................................................30 units ....................................................29 16/09/2014 valid_range ........................................ 30 TRANS_OUTPUT ................................ 122 TRATIO .................................................. 53 WATER_TYPE ....................................... 60 WAVES ............................................ 64, 70 WET_BULB .................................... 59, 101 WIMPLICIT ............................................ 52 WIND_TS ............................... 56, 101, 112 WINDOW_RESET ........................... 13, 14 WINDOW_SIZE ..................................... 13 WINDOW<n>_POINTS.......................... 13 WINDOWS ............................................. 13 WMAX .................................................... 95 WRITE_BDRY ....................................... 51 Z Z0 64, 65, 67, 113 ZOOM_FACTOR ................................... 80 ZOOM_FACTOR_E1 ............................. 81 ZOOM_FACTOR_E2 ............................. 81 ZOOM_POINTS ..................................... 80 Page 177 of 177 Version: 1.00


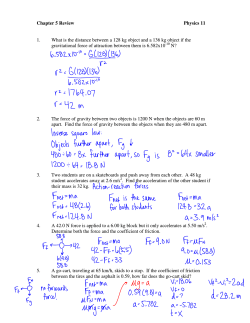


© Copyright 2026