
Operators Manual HK USP Compact Pistol Calibers .45 ACP .40 S&W
Operators Manual
®
Calibers .45 ACP
.40 S&W
.357 SIG
9mm x 19
In a world of compromise, some don’t.
HK USP Compact Pistol
Proof – 21 July 1997
1
1
SAFETY RULES
Please read this operators manual before handling your firearm. The following safety rules are placed in this manual by Heckler & Koch as an important reminder that firearms safety is your responsibility. Firearms can be dangerous and can potentially cause serious injury, damage to property or
death, if handled improperly.
1.
2.
3.
4.
5.
6.
7.
8.
9.
10.
11.
12.
13.
14.
15.
16.
Never point a firearm at anyone, or in any direction other than a SAFE direction, i.e. downrange.
Treat all firearms as if they are always loaded.
Keep your finger off the trigger and outside of the trigger guard until your sights are aligned on the target and you are ready to fire.
Keep your finger off the trigger and outside of the trigger guard while loading or unloading the firearm.
Keep your finger off the trigger and outside of the trigger guard while pulling the firearm out of the holster or while returning it to the
holster.
Be sure of your target and the back stop beyond.
Never give a firearm to or take a firearm from anyone unless the action is open and the magazine and/or chamber are free of any
ammunition or brass.
Be sure that the ammunition you are using is factory loaded, is of the correct caliber for the firearm in which it is to be used, and that
it is not damaged in any way.
Before firing, remove the magazine from the firearm, lock the action open, make sure the chamber is clear of any ammunition or brass,
and check the barrel of the unloaded firearm for any possible obstructions.
Before firing any firearm that is unfamiliar to you, make sure that you understand exactly how it functions. A lack of familiarity with the
firearm can result in serious accidents. Attend a certified training course on any firearm which you intend to use or with which you
are not sufficiently familiar.
Always wear hearing and eye protection when using your firearm.
Keep all body parts, especially the hands and fingers, away from the muzzle to avoid injury or burns.
Be sure that no part of either hand touches or interferes with the slide. The slide is moved backwards by the recoil force of the pistol
during firing and may cause serious injury.
Firearms should be stored separately from ammunition and beyond the reach of children, and/or any untrained individuals.
Avoid the use of any alcoholic beverages or drugs before and during the use of any firearm.
Discharging firearms in poorly ventilated areas, cleaning firearms, or handling ammunition may result in exposure to lead, a substance
known to be associated with birth defects, reproductive harm, and other serious injury. Have adequate ventilation at all times. Wash
hands thoroughly after exposure.
STOP! Know how to clear this pistol before attempting to operate.
Clearing the Pistol The HK USP Compact is not considered “clear” or safe unless:
1. The control lever (if applicable) is on “SAFE” and;
2. The magazine is removed from the pistol and;
3. The slide is locked to the rear and;
4. The chamber is free of brass or ammunition
To Clear the HK USP Compact:
1. Make sure fingers are outside of the trigger guard and the pistol is pointed in a safe direction at all
times!
2. Engage control lever (if applicable) – press the control lever/safety lever upwards until the “S” aligns with the
reference line located on the frame.
3. Remove magazine - depress the magazine release lever and remove the magazine from the pistol.
4. Open and lock slide - while pointing the pistol in a safe direction, lock the slide open by pulling the slide
rearward as you press the slide release upward. Watch for a cartridge or empty case to be ejected from the
pistol.
5. Inspect chamber - inspect chamber for the presence of a cartridge or empty case by:
• Visually viewing chamber through open ejection port and;
• Physically inserting finger into chamber through ejection port to check for the presence of a cartridge or
empty case.
Remove any cartridges or empty cases from the chamber or from within the pistol.
The HK USP Compact is now considered “Clear”.
®
© Heckler & Koch, Inc., 9/96, 8/97, 6/98, 6/99 (revised May 2000)
All rights reserved
21480 Pacific Blvd.
Sterling, Virginia 20166-8903
United States of America
Telephone (703) 450-1900 • FAX (703) 450-8160 • www.hecklerkoch-usa.com
Specifications and models subject to change without notice.
HK USP Compact Operators Manual
Calibers .45 ACP
.40 S&W
.357 SIG
9mm x 19
This manual applies to pistol types USP9 COMPACT (9mm), USP357 COMPACT (.357 SIG), USP40 COMPACT
(.40 S&W), and USP45 COMPACT (.45 ACP). The handling and operation of all three pistols is identical.
The illustrations show the USP40 COMPACT. All USP Pistols comply with NIJ Standard – 0112.00
WARNING
A firearm has the capability of taking your life or the life of someone else! Be extremely careful with your firearm.
An accident can occur at anytime and is almost always the result of not following basic safety rules.
TABLE OF CONTENTS
Section 1
Section 2
Section 3
Section 4
Section 5
Section 6
Section 7
Section 8
Introduction ........................................................................................................................................................7
Nomenclature ..................................................................................................................................................12
Specifications ..................................................................................................................................................13
Function and Operation ..................................................................................................................................14
Clearing ............................................................................................................................................................14
Operating Controls and Components ............................................................................................................16
Sights and Sight Adjustment............................................................................................................................19
Ammunition ......................................................................................................................................................20
Instructions for Use ..........................................................................................................................................22
Clearing ............................................................................................................................................................22
Filling and Emptying the Magazine ................................................................................................................23
Loading ............................................................................................................................................................23
Firing ................................................................................................................................................................26
Unloading ........................................................................................................................................................27
Selection and Use of a Holster ........................................................................................................................28
Storage and Transport ....................................................................................................................................29
Disassembly and Assembly ............................................................................................................................30
Cleaning and Maintenance ............................................................................................................................40
Cleaning ..........................................................................................................................................................40
Inspection ........................................................................................................................................................41
Lubrication ......................................................................................................................................................42
Troubleshooting Problems and Repair ............................................................................................................43
USP Accessories ............................................................................................................................................44
Exploded View (.40 S&W, .357 SIG, 9mm)......................................................................................................46
Parts List (.40 S&W, .357 SIG, 9mm) ..............................................................................................................47
Exploded View (.45 ACP) ................................................................................................................................48
Parts List (.45 ACP) ........................................................................................................................................49
HK Lock-Out Device ........................................................................................................................................50
Firearms Service Record ..............................................................................................................................52
6
SECTION 1 INTRODUCTION
featured on many variants of the USP and USP
Compact allows these pistols to be safely carried
“cocked and locked”.
The HK USP Compact is a small frame pistol capable
of firing the most powerful cartridges in .45 ACP, .40
S&W, .357 SIG, and 9mm x 19; including all +P 9mm
ammunition. Based on the full size HK USP (Universal
Self-loading Pistol), these handy pistols are a
reasonable synthesis of compact size and effective
shooting capabilities. Unlike some subcompact semi-automatic pistols that use a difficult to shoot “two-finger
grip” frame, the HK USP Compact uses a narrow, full
hand grip frame. This makes the pistol easy to shoot
without sacrificing concealability.
Derived from the full size Heckler & Koch USP introduced in 1993, the USP Compact is designed with the
demanding needs of the American shooter in mind.
Features favored by US civilian, law enforcement, and
military users provided the design criteria for the full
size USP and the USP Compact. Controls are uniquely
American, influenced by such famous and successful
designs as the Government Model 1911 pistol. And like
the Model 1911, many variants of the USP and USP
Compact can be safely carried “cocked and locked”.
All variants of the USP Compact have a modified
contoured slide and frame for effective concealability.
Several variants also have a no snag, bobbed hammer.
Using a modified Browning-type action, the USP
Compact is built to take the punishment of high energy
+P loads. But unlike large frame USPs, the Compact
does not use the patented USP recoil reduction system.
To reduce the size of the slide on the USP Compact,
the mechanical recoil reduction system found on large
frame USPs has been eliminated, replaced by a
specially designed flat compression spring contained in
the captive recoil spring assembly by an absorber
bushing made of a high strength polymer.
The frame mounted control lever, a combination safety
and decocking lever, has a slimline profile for compactness but is still quickly accessible, unlike the slide
mounted safeties common on many semiautomatic
pistols.
The USP control lever has a positive stop and returns
to the “fire” position after decocking. The control lever,
7
wide range of flexibility for users. By using a modular
approach to the internal components, the control lever
function of all USPs can be switched from the left to the
right side of the pistol for left-handed shooters. All USPs
can also be converted from one type of trigger/firing
mode to another. This includes combination doubleaction and single-action (DA/SA) modes and double
action only (DA-Only) modes.
The polymer frame of the USP Compact was designed
using technical experience gained by HK engineers in
the development of the world’s first composite material
pistols, the HK VP70Z and P9S. These same highstrength/corrosion free materials are used in the MK 23
.45 ACP handgun produced by HK for the U.S. Special
Operations Command.
Major metal components like the one-piece, machined
steel slide are also corrosion resistant, treated with a
special “HE” (Hostile Environment) protective finish. The
HE finish is an extremely hard, nitro-gas carburized
black oxide coating, and resists even the worst types of
corrosion and wear, including prolonged exposure to
salt water.
Both large frame and Compact USPs are available in
the following trigger/firing mode configurations (see
Figure 10).
NOTE
Trigger/firing mode conversion can only be
made by an HK certified armorer.
Stainless steel models are also available for those who
prefer metallurgical corrosion resistance and the contrasting appearance of these materials.
➊ DA/SA with “safe” position and control lever (manual
safety/decocking lever) on left side of frame
➋ DA/SA with “safe” position and control lever (manual
safety/decocking lever) on right side of frame
The HK USP Compact pistol is presently available in
calibers .45 ACP, .40 S&W, .357 SIG, and 9mm x19.
Large frame USP models are also available in the
same calibers with the exception of .357 SIG.
Variants ➊ and ➋ allow the user to carry the pistol in a
single-action mode (cocked and locked) with the control
lever/manual safety engaged. This same pistol, without
modification, can be carried in double-action mode, with
The design characteristics of all HK USPs provide a
8
and ➏ have a manual safety lever (control lever).
No control lever is provided on variant ➐.
or without the control lever/manual safety engaged.
➌ DA/SA without “safe” position with control lever
(decocking lever) on the left side of frame
➍ DA/SA without “safe” position with control lever
(decocking lever) on the right side of frame
❾ DA/SA with “safe” position and control lever (manual
safety) on the left side of frame
❿ DA/SA with “safe” position and control lever (manual
safety) on the right side of frame
Variants ➌ and ➍ provides the user with a framemounted decocking lever that does not have the “safe”
position. This combination only allows the hammer to be
lowered from SA position to DA position. It does not
provide the “safe” position to prevent the pistol from
firing when the trigger is pulled.
Variants ➒ and ➓ allow the user to carry the pistol in a
single-action mode (cocked and locked) with the manual safety engaged. Unlike variants ➊ and ➋, the control
lever cannot be used to decock the hammer. These
variants are the ideal choice for users who prefer
shooting the pistol in the SA mode with the thumb
placed on top of the control lever/manual safety.
Variants ➒ and ➓ also use a spurred hammer, unlike
other USP Compact variants.
➎ DA-Only with “safe” position and control lever
(manual safety) on the left side of frame
➏ DA-Only with “safe” position and control lever
(manual safety) on the right side of frame
➐ DA-Only without control lever (no safety/decocking lever)
This same pistol, without modification, can be carried in
double-action mode, with or without the control
lever/manual safety engaged, and provides second
primer strike ability to single-action shooters.
For the DA-Only user, variants ➎, ➏, and ➐ of the USP
operate as double action only pistols with the hammer
always returning to the DA position (forward) after each
shot is fired. To fire each shot, the trigger must be
pulled through the smooth DA trigger pull. Variants ➎
Due to this innovative design approach, it is possible to
convert a USP Compact into any one of the listed
variants. Changing the trigger/firing mode of the pistol is
9
thumb or index finger of the firing hand, in most cases
without adjusting the firing grip.
accomplished by installing a different set of components.
This unique design allows the HK Compact Universal
Self-loading Pistol to be configured for a variety of
purposes depending on the requirements of the user,
without having to purchase a new pistol.
Bo
bbe
dH
am
Do
me
uble
r
Acti
Do
on
uble
&S
ing
Acti
le A
Co
on
ntro
ctio
On
l Le
ly
n
ver
Co
ntro
(Le
ft S
l Le
ide
ver
Co
)
ntro
(Rig
l Le
ht S
ver
Co
ide
ntro
(Ma
)
l Le
nua
ver
Co
l Sa
ntro
(De
fety
l Le
coc
)
ver
kin
Ca
g)
libe
(No
rA
De
vail
coc
abil
kin
ity
g)
Low profile 3-dot sights, adjustable for windage and
elevation, are standard on the USP Compact. Optional
tritium sights are also available.
USP COMPACT
FIRE MODES
& CONTROL
FUNCTIONS
(conversion by
HK certified
armorer only)
Variant 1
Variant 2
Variant 3
Variant 4
Variant 5
Variant 6
Variant 7
Variant 9
Variant 10
The USP Compact uses metal magazines to keep grip
size to a minimum. These magazines have a series of
viewing holes on the back side for counting the
cartridges remaining inside.
Two different interchangeable floor plates are available
for the magazines of the USP Compact. A standard flat
floor plate and an extended magazine floor plate with a
finger extension provide a choice of grip options with
each pistol. Magazine floor plates can be easily removed and changed without tools during disassembly.
.45, .40, 9mm, 357 SIG
.45, .40, 9mm, 357 SIG
.45, .40, 9mm, 357 SIG
.45, .40, 9mm, 357 SIG
.45, .40, 9mm, 357 SIG
.45, .40, 9mm, 357 SIG
.45, .40, 9mm, 357 SIG
.45, .40, 9mm, 357 SIG
.45, .40, 9mm, 357 SIG
Figure 10
Fire Modes and Control Functions by Variant
The extended slide release is positioned to allow easy
actuation without adjustment of the grip of the shooting
hand. Another useful feature is the absence of a
magazine lock-out device.
In addition to a wide selection of trigger/firing modes,
all USP Compacts have an ambidextrous magazine
release lever which is shielded from inadvertent
actuation by the flared trigger guard.
The magazine release lever can be pressed with the
10
CAUTION
All USP models will fire if the magazine is removed, a cartridge is in the chamber, and the
trigger is pressed (with the control lever in the
FIRE position if applicable).
NOTE
Improperly designed or installed accessories
may result in damage to the USP mounting
grooves and/or the USP Compact pistol. Such
damage is not covered under the limited
lifetime warranty. Be certain to use only HK Authorized Accessories and follow installation
and precautions carefully.
To reduce barrel wear, all USP Compacts have
polygonal cold hammer-forged barrels. This feature not
only ensures longer barrel life and easier bore cleaning,
but produces a better gas seal behind the bullet for
increased muzzle velocity.
At Heckler & Koch, form follows function. All HK pistols
are designed and manufactured to meet the operational
requirements of demanding users. The Heckler & Koch
USP Compact is no exception. In a world of compromise,
some don’t.
The HK USP Compact, like the large frame USP, is an
extremely safe firearm, with no less than four safety
features, some passive and some active in nature.
Simple to field strip and maintain, the USP Compact is
a reliable and trouble-free pistol.
An abbreviated set of universal mounting grooves for
installing accessories is molded in the polymer frame of
the USP Compact. These grooves allow a variety of
accessories and targeting devices, such as the Mark II
HK Universal Tactical Light and laser aimers to be
mounted on the HK USP Compact without modification
to the pistol.
11
Ejection Port
SECTION 2 NOMENCLATURE
Slide Release
Slide
Figure 12A (below)
Rear Sight
Extractor
Barrel
Locking
Block Serial Number
Bobbed
Hammer
Control
Lever
Front Sight
Ambidextrous
Magazine
Release Lever
Universal Mounting
Grooves
Extended Floor Plate
Reference
Line
Frame
Lanyard
Loop
Slide Release Axle
Trigger
Trigger Guard
Standard Floor Plate
12
Finger Recesses
Figure 12B (above)
Frame
Extension
SPECIFICATIONS
USP45 Compact
USP40 Compact
USP357 Compact
USP9 Compact
_________________________________________________________________________________________________________________
Caliber
.45 ACP
.40 S&W
.357 SIG
9mm x 19
Parabellum
Operating Principle
Short recoil
Action Type
Modified Browning type, linkless
_________________________________________________________________________________________________________________
Sights
Fixed patridge style, adjustable for windage & elevation, standard 3-dot or optional tritium
Total Length
180 mm (7.09 in.)
173 mm (6.81 in.)
173 mm (6.81 in.)
173 mm (6.81 in.)
Barrel Length
96.4 mm (3.80 in.)
91 mm (3.58 in.)
91 mm (3.58 in.)
91 mm (3.58 in.)
Sight Radius
143 mm (5.63 in.)
136 mm (5.35 in.)
136 mm (5.35 in.)
136 mm (5.35 in.)
Twist Length
406 mm (15.98 in.)
378 mm (14.88 in.)
378 mm (14.88 in.)
250 mm (9.84 in.)
_________________________________________________________________________________________________________________
Height (Total)
128.5 mm (5.06 in.)
127mm (5.00 in.)
127 mm (5.00 in.)
127 mm (5.00 in.)
Width of Slide
29 mm (1.14 in.)
29 mm (1.14 in.)
29 mm (1.14 in.)
29 mm (1.14 in.)
Width of Frame (includes safety lever)
34 mm (1.34 in.)
34 mm (1.34 in.)
34 mm (1.34 in.)
34 mm (1.34 in.)
795 grams (28.04 oz.)
780 grams (27.51 oz.)
780 grams (27.51 oz.) 750 grams (26.46
Weight (with empty magazine)
oz.)
Weight of Empty Magazine
87 grams (3.07 oz.)
83 grams (2.92 oz.)
83 grams (2.92 oz.)
83 grams (2.92 oz.)
8.5 kg (18.74 pounds)
8.5 kg (18.74 pounds)
8.5 kg (18.74 pounds) 8.0 kg (17.64
Slide Force (to retract slide)
pounds)
_________________________________________________________________________________________________________________
Trigger Travel (rest to hammer release)
Single-action
5 mm (.20 in.)
5 mm (.20 in.)
5 mm (.20 in.)
5 mm (.20 in.)
Double-action
11.5 mm (.45 in.)
11.5 mm (.45 in.)
11.5 mm (.45 in.)
11.5 mm (.45 in.)
Trigger Reach (center of trigger to back of frame)
Single-action
67.5 mm (2.66 in.)
65 mm (2.56 in.)
65 mm (2.56 in.)
65 mm (2.56 in.)
Double-action
74.5 mm (2.93 in.)
72 mm (2.84 in.)
72 mm (2.84 in.)
72 mm (2.84 in.)
Magazine Capacity (no cartridge in chamber)
8 cartridges
12 cartridges*
12 cartridges*
13 cartridges*
Safety Features
➊Control lever with “safe” position (Variants 1, 2, 5, 6, 9, 10), ➋Double-action mode with hammer
intercept notch,
13
5. Inspect chamber - inspect chamber for the presence of a cartridge or empty case by:
• Visually viewing chamber through open ejection
port and;
• Physically inserting finger into chamber through
ejection port to check for the presence of a cartridge or empty case.
SECTION 3 FUNCTION AND OPERATION
WARNING
Always clear the pistol before handling it.
Clearing the Pistol The HK USP Compact pistol is not
considered “clear” or safe unless:
1. The control lever (if applicable) is on “SAFE” and;
2. The magazine is removed from the pistol and;
3. The slide is locked to the rear and;
4. The chamber is free of brass or ammunition
Remove any cartridges or empty cases from the chamber or from within the pistol.
The HK USP Compact is now considered “Clear”.
To Clear the HK USP Compact:
1. Make sure fingers are outside of the trigger
guard and the pistol is pointed in a safe direction at all times!
2. Engage control lever (if applicable) - press the
safety lever upwards until the “S” aligns with the
reference line located on the frame.
3. Remove magazine - depress the magazine release
lever and remove the magazine from the pistol.
4. Open and lock slide - while pointing the pistol
in a safe direction lock the slide open by pulling
the slide rearward as you press the slide release
upward. Watch for a cartridge or empty case to be
ejected from the pistol.
General - (Refer to page 12 for the location of the features described below)
Heckler & Koch USP and USP Compacts are short
recoil operated. They use a modified Browning style
system, without a link, to lock and unlock the barrel.
Upon firing, the pressure developed by the propellant
gases forces the slide and barrel assembly to the rear.
After moving approximately 3mm, the locking block will
stop the rearward movement of the barrel. The barrel is
pulled downward due to the engagement of the angled
locking surfaces of the locking block with those located
14
on the end of the recoil spring guide rod. The locking
block disengages from the slide and the slide continues
rearward independently from the barrel. The extractor,
located on the right side of the slide extracts the spent
case. The ejector, positioned in the left side of the
frame, rearward of the magazine well then ejects the
fired cartridge case. The rearward moving slide then
cocks the hammer, and compresses the recoil spring.
During the last 3mm of forward movement, the slide
forces the angled surfaces of the barrel locking block
against opposing angled surfaces on the recoil spring
guide rod. This action pivots the locking block on the
barrel up into engagement with the ejection port on the
slide. The breech is now locked closed and the next
shot can be fired.
Once fully to the rear, the compressed recoil spring
pushes the slide forward, stripping the next cartridge
from the magazine into the chamber. If the magazine is
empty, the magazine follower lifts the slide release into
position where it can stop the forward progress of the
slide and holds the slide open. If a cartridge is present
in the magazine, the slide will push the cartridge from
the magazine and into the chamber.
CAUTION
A pair of Universal Mounting Grooves located
on the front of the USP Compact’s frame allows
for a variety of accessories to be used with the
pistol. Improperly designed or installed accessories may result in damage to the mounting
grooves and/or the pistol. Such damage is not
covered under warranty. Be certain to use only
HK authorized accessories and follow installation and precautions carefully.
WARNING
Do not rely on the slide position to determine if
the magazine is empty. Always check visually
and physically ensure the pistol is not loaded.
15
OPERATING CONTROLS & COMPONENTS
the pistol from a single row under the feed lips. The
cartridges are visible through the numbered viewing
holes located in the back of the magazine. For
maintenance and cleaning, USP Compact magazines
can be easily disassembled.
WARNING
The HK USP Compact incorporates single action
and/or double-action modes of operation. Anytime the trigger is pulled with the control lever in
the fire (horizontal) position and a cartridge in
the chamber, the pistol will fire from either the
hammer down or cocked positions.
Control Lever - For Variants 1, 3, 5, & 9, this manually
operated lever is located on the left side of the frame
(for Variants 2, 4, 6, &10 the control lever is positioned
on the right side of the frame) below the rear sight. This
lever is operated with the firing thumb and can perform
both functions of a safety lever and a decocking lever,
depending on the parts installed. Note: Not all variants
have a control lever.
Double/Single-action modes - For Variants 1, 2, 3, 4,
9, & 10 in the double-action mode, pulling the trigger
will cock the hammer and immediately release it firing
the first chambered cartridge. All subsequent cartridges will be fired in the single-action mode because
the slide automatically recocks the hammer after each
shot is fired.
Control lever as a safety lever - On HK USP Compacts with the “SAFE” position (Variants 1, 2, 5, 6, 9, &
10), the front of this lever is fully raised above horizontal
so that the “S” on the lever itself aligns with the
reference line on the frame. (See Figure 17A ) With this
control lever engaged, the release of the hammer is
blocked in the single-action mode of fire. In the doubleaction mode, the hammer will partially cock but will not
release to fire the pistol.
In the double-action only mode, the hammer always
returns to the uncocked (forward) position after each
shot. All shots are fired in the double-action mode.
Magazine - USP Compact magazines are constructed
of metal with polymer floor plates, followers, and locking
plate pieces. Cartridges are positioned within the
magazine in a staggered arrangement but are fed into
16
Control
lever in
SAFE
position
“DECOCKING”
the control
lever with
a downward
sweep
of the
thumb
Figure 17A
To fire the pistol, the front of the control lever is moved
down horizontally into the “FIRE” position. In this position, the “F” on the lever aligns with the reference line
located on the frame. (See Figure 17B) With the control lever set on “F”, the pistol will fire if the trigger is
pulled and a cartridge is present in the chamber.
Figure 17C
Control lever as a decocking lever - On HK USP
Compacts without the “SAFE” position (Variants 3 & 4),
the front of the control lever cannot be raised above horizontal and the pistol will fire anytime the trigger is
pulled with a cartridge in the chamber. The control lever
only functions as a decocking lever to lower the cocked
hammer into the double-action mode. The cocked hammer is lowered when the control lever is fully depressed
by the operator (see Figure 17C). This lever is spring actuated and springs back up into the horizontal (fire)
position when released.
Control
lever in
FIRE
position
Figure 17B
17
Control lever as a safety/decocking lever - On USP
Compact Variants 1 and 2, the control lever can be
placed in the safe, fire, and decocking positions
described earlier. A USP fitted with this control lever can
be carried as a single action or double action pistol, with
or without the safe position. The control lever also allows
the cocked hammer to be decocked when the control
lever is fully depressed. (See Figure 17C).
follower or the operators finger as the slide travels
rearward during recoil or manual manipulation. The
slide release engages in the recess located on the left
side of the slide at it’s midpoint. The slide release is
spring actuated and is held down out of engagement
with the slide until required. The slide release will
automatically hold the slide open when the last shot is
fired. As a disassembly lever, the slide release is
removed from the left side of the frame when the slide
is held partially rearward.
WARNING
The USP Compact should not be carried in the
single action mode without the control lever in
the safe position.
Magazine Release Lever - This ambidextrous, spring
actuated lever holds the magazine in place within the
grip by engaging in the notch found on the front of the
magazine housing.
Extractor - The extractor of the HK USP Compact pistol acts as a loaded chamber indicator. When a
cartridge is in the chamber, the red colored forward
edge of the extractor protrudes approximately 1 mm
from the slide and is visible to the operator.
Depressing this lever downward with the firing index finger or thumb will allow the magazine, regardless of the
number of cartridges inside, to drop free of the frame.
The magazine release lever is shielded from accidental
actuation by the design of the polymer frame and flared
trigger guard surrounding it.
Slide Release - This lever is located on the left side of
the frame directly above the trigger. This lever is used to
lock the slide open, to release the slide, and to
disassemble the pistol.
Frame - All sides of the polymer frame are textured to
ensure a firm grip, even with wet hands or under conditions of rapid fire.
As a slide stop, it is lifted upward by the magazine
18
The trigger guard is slightly recurved and grooved to
provide a firm grip when using two hands or gloves to
fire the pistol. The frame is a one-piece molded
component with metal inserts (locking insert and
guiding part) cast into the frame during production.
The rear sight can be adjusted for windage by drifting
the sight to the left or to the right, depending on the
desired shot placement. Bullet impact on target will
move in the same direction that the rear sight is
moved. Be careful not to damage the slide finish when
adjusting the rear sight.
The slide rides on these metal inserts during operation.
The frame contains mounting grooves for accessory
attachment and finger recesses located to the left and
right of the magazine well for manual extraction of the
magazine, if necessary. The serial number of the pistol
is engraved in the metal insert incorporated into the
front of the frame in front of the trigger guard, on the left
side of the slide, and on the barrel locking block.
Figure 19
Adjustments for elevation are accomplished by exchanging the front sight with a higher or lower sight,
available from HK. The height of the front sight is indicated on the underside. The front sight must be
removed by using a drift punch or an HK USP sight
pusher. The accessory HK sight pusher can be used to
install, remove, and adjust the front and rear sights on
all USP and USP Compact pistols.
Sights - The USP Compact uses the
proven 3-dot sighting arrangement. By
aligning all three dots horizontally on
the target, with the front sight dot
centered between the rear sight dots,
the operator can quickly and easily engage the target with a high degree of
accuracy (Figure 19). With the optional
tritium sights installed, precise and
rapid target engagements are possible
under low light conditions as well.
To raise the bullet impact on target, a shorter front
sight is installed. To lower the bullet impact on target, a
taller front sight is installed. Installing the next higher or
lower front sight will change the point-of-impact 2 inches at 25 meters, depending on the ammunition used.
USP Compacts are function fired and zeroed at the
factory at 25 meters, point-of-aim, point-of-impact. Your
actual zero may vary depending on the ammunition
used and/or your style of shooting.
19
SECTION 4 AMMUNITION
2. Prior to loading the magazine and chamber, carefully
inspect all cartridges for the following abnormalities:
WARNING
Heckler & Koch specifically disclaims any responsibilities for any damage or injury that should occur
because of, or as a result of, the use of faulty,
remanufactured, or reloaded (hand loaded)
ammunition, or of cartridges other than those for
which the pistol was originally chambered for.
• Cracked, split, dirty or corroded cases
• Improperly seated projectiles and/or primers
• Damaged projectiles
3. Do not attempt to fire a cartridge in which the projectile has been forced back into the case. Upon firing, this
condition may result in increased chamber pressure
above safe limits.
The HK USP Compact is designed to fire quality,
factory loaded ammunition loaded to SAAMI specifications for use specifically in handguns. For use with
ammunition with hard primers (i.e. some NATO spec.
cartridges), a special hammer spring is available.
4. Do not fire ammunition through the pistol that:
• Is foreign and/or outdated military surplus
• Is assembled with corrosive primer and/or
propellant
• Is exposed to oil, grease, water, or direct sunlight.
Remove contaminants if possible before use and
cool down ammunition exposed to direct sunlight
or heat. (Exposure to sources of heat could raise
the chamber pressure of the cartridge above safe
limits.)
• Is loaded specifically for use in submachine guns.
The following guidelines should be considered when selecting the correct ammunition for your pistol.
1. Be sure the ammunition you have chosen is
compatible with your pistol – proper caliber, cartridge,
bullet weight, etc. Caliber markings on the USP
Compact appear on the left side of the slide and on the
barrel locking block, visible through the ejection port on
the right side of the slide.
20
WARNING
The use of incorrect ammunition in the pistol
could result in damage to the pistol and /or injury
to the operator or bystanders. Be careful not to
inadvertently mix 9mm and .40 caliber ammunition. 9mm ammunition will slide past the chamber
and into the barrel in a .40 caliber pistol.
NOTE
In compliance with NIJ Standard—0112.00, currently there are no known ammunition types that
meet the general guidelines set forth in this section that are not compatible with the USP
Compact pistols. All USP pistols are approved
for use with +P and +P+ ammunition. The use of
+P and +P+ ammunition accelerates wear and
reduces the service life on the component parts
of any pistol, including the HK USP Compact.
NOTE
There is currently no existing SAAMI specification +P or +P+ ammunition in caliber .40 S&W.
21
SECTION 5
INSTRUCTIONS FOR USE
5. Inspect chamber - inspect chamber for the presence of a cartridge or empty case by:
A. Visually viewing chamber through open ejection
port and;
B. Physically inserting finger into chamber through
ejection port to check for the presence of a cartridge or empty case.
Clearing the Pistol The USP Compact pistol is not considered “clear” or
safe unless:
1. The control lever (if applicable) is on “SAFE” and;
2. The magazine is removed from the pistol and;
3. The slide is locked to the rear and;
4. The chamber is free of brass or ammunition
Remove any cartridges or empty cases from the chamber or from within the pistol.
To Clear the HK USP Compact:
The HK USP Compact is now considered “Clear”.
1. Make sure fingers are outside of the trigger
guard and the pistol is pointed in a safe direction at all times!
2. Engage control lever (if applicable) - press the
control lever upwards until the “S” aligns with the
reference line located on the frame.
3. Remove magazine - depress the magazine release
lever and remove the magazine from the pistol.
4. Open and lock slide - while pointing the pistol
in a safe direction, lock the slide open by pulling
the slide rearward as you press the slide release
upward. Watch for a cartridge or empty case to be
ejected from the pistol.
Filling and Emptying the Magazine NOTE
Do not attempt to load more than the
prescribed number of cartridges into the
magazine. Do not alter the shape of the
magazine housing, follower, or spring. To do so
may cause stoppages or the magazine may not
seat properly in the pistol.
22
5. Repeat steps 1-4 until the magazine is full. The
viewing holes in the back of the magazine allow
the operator to confirm the number of cartridges
present within the magazine.
Filling the Magazine - (See Figure 23 below)
Emptying the Magazine - Exert pressure with a finger
on the base of the cartridge and push each cartridge
forward out of the magazine one at a time until the
magazine is empty.
Figure 23
Loading the Pistol WARNING
Forcefully inserting a loaded magazine into the
USP Compact may cause the pistols slide to
close, chambering a cartridge and making the
USP ready to fire.
1. Hold the magazine in the non-firing hand with the
back side of the magazine resting against the
palm.
2. Using the firing hand, hold a cartridge between
the index finger and thumb with the projectile
facing the palm.
3. Press the rim of the cartridge down against the
forward edge of the magazine follower or on the
top cartridge already in the magazine.
4. Slide the cartridge back into the magazine under
the feed lips.
When inserting a magazine, always be certain
the control lever (if applicable), is in the “SAFE”
position and that the pistol is pointed in a safe
direction with your fingers off the trigger and
outside the trigger guard. Failure to do so could
cause you to unintentionally fire the pistol, resulting in serious injury or death.
23
Administrative Loading - used to initially load the
pistol before it is to be fired.
WARNING
On Variants 1, 2, 3 and 4 the recommended
method of lowering the hammer is as follows:
• be sure the firearm is pointing in a safe direction.
• be sure that your finger is off of the trigger and
outside of the trigger guard.
• push down on the control lever (decocking lever)
moving it into the decock position, this allows the
hammer to fall safely into the half-cock position.
After decocking, release the control lever and it
will return to the fire position.
Slide rearward or forward, chamber empty
1. Make sure fingers are outside of the trigger
guard and the pistol is pointed in a safe direction at all times!
2. On safe - place the control lever in the safe position (if applicable)
3. Insert magazine - insert the magazine firmly into
the frame. Tug on the magazine to insure that it is
fully seated and engaged.
4. Chamber a cartridge - chamber a cartridge by
depressing the slide release or by pulling the slide
fully to the rear and releasing it. Do not ride the
slide forward!
5. Decock/On Safe - depress the control lever to
decock the hammer and/or place the control lever
on “safe”.
6. Top off - remove the magazine and top it off by
inserting one additional cartridge.
7. Replace Magazine - after topping off the magazine, replace it in the pistol and ensure that it is
properly seated and engaged.
Any attempt to lower the hammer manually (with
a round in the chamber), will allow the hammer to
be lowered past the half-cock notch and bypasses
the passive safeties which are built into the USP
and could result in an accidental discharge and
subsequent property damage, injury or loss of
life.
On DA/SA models without the decocking function in the control lever (Variants 9 and 10), it is
unsafe to lower the hammer while there is a
round in the chamber.
24
WARNING (continued)
4. Release the slide by pressing down on the
slide stop.
On Variant 9 and 10 pistols, to lower the hammer
on an empty chamber, the following steps must
be followed with extreme care. remember: lowering the hammer manually on the USP pistol
requires pulling the trigger. The action of pulling
the trigger bypasses the passive safeties which
are built into the USP. If there is a round in the
chamber when the hammer is being lowered
manually, and if the hammer slips, the gun could
discharge causing possible subsequent property
damage, injury or loss of life.
5. Disengage the manual safety by moving the
control lever downward to the “fire” position.
6. Hold the pistol firmly in one hand as if you
were going to discharge the firearm. Using the
thumb of the hand which is not holding the
pistol, draw the hammer slightly to the rear.
Using the index finger of the hand which is
holding the pistol, pull the trigger to the rear.
1. Point the pistol in a safe direction and put the
manual safety in the “on” or “safe” position by
moving the control lever fully upward.
Lower the hammer SLOWLY, while at the same
time releasing the trigger, removing your finger
from the trigger and placing it outside of the
trigger guard. Continue to lower the hammer
SLOWLY until it has come to a complete rest
against the back of the slide.
2. Remove the magazine.
3. While keeping your finger off of the trigger and
outside of the trigger guard draw the slide to the
rear and push the slide stop up to lock the slide in
the open position. Inspect the chamber visually
and manually to ensure that there is no round in
the chamber.
Draw the hammer back slightly until it comes to
rest at the half cock notch position.
25
Firing the Pistol -
CAUTION
Single action mode trigger pull is lighter & shorter than double action mode. Keep your finger off
the trigger & outside the trigger guard except
when firing the pistol.
WARNING
1. Be sure of your target and what’s behind it! A
bullet from a pistol travels as far as a mile. It
can easily penetrate wood or plasterboard walls
or even a car door.
2. Be sure that your hands and all parts of your
body are kept away from the muzzle of your pistol at all times!
3. Always wear eye and ear protection when
firing the pistol.
Double-action mode - (Hammer uncocked)
1. Disengage control lever (if applicable) - disengage
the control lever by pressing it downward with the
firing thumb so that the “F” on the lever aligns with
the reference line located on the frame.
2. Aim - aim at the target.
3. Fire - fire the pistol by pressing the trigger straight
the rear with gradually increasing pressure.
4. Decock or engage control lever - fully depress the
control lever (if applicable) to return to the doubleaction mode or place the control lever on safe to
remain in single-action mode.
Single-action mode - (Hammer cocked)
1. Disengage control lever - disengage the control
lever by pressing it downward with the firing thumb
so that the “F” on the lever aligns with the reference
line located on the frame.
2. Aim - aim at the target.
3. Fire - fire the pistol by pressing the trigger straight to
the rear with gradually increasing pressure.
4. Reengage control lever - reengage control lever in
“safe” position to remain in the single-action mode
once firing is completed.
NOTE
Variant 7, the double-action only model of the HK
USP Compact does not have a control lever. The
hammer of this variant (and variants 5 & 6) will automatically return to the uncocked position each
time the slide returns to its forward position.
26
presence of a cartridge or empty case by:
• Visually viewing chamber through open ejection
port and;
• Physically inserting finger into chamber through
ejection port to check for the presence of a
cartridge or empty case.
Unloading the Pistol To unload the pistol, follow the “Clearing” procedure.
Clearing the Pistol The HK USP Compact is not
considered “clear” or safe unless:
1. The control lever (if applicable) is on “SAFE” and;
2. The magazine is removed from the pistol and;
3. The slide is locked to the rear and;
4. The chamber is free of brass or ammunition.
Remove any cartridges or empty cases from the
chamber or from within the pistol.
The HK USP Compact is now considered “Clear”.
To Clear the HK USP Compact Pistol:
1. Make sure fingers are outside of the trigger
guard and the pistol is pointed in a safe direction at all times!
2. Engage control lever (if applicable). Press the
control lever upwards until the “S” aligns with the
reference line located on the frame.
3. Remove magazine. Depress the magazine
release lever and remove the magazine from the
pistol.
4. Open and lock slide while pointing the pistol in
a safe direction, lock the slide open by pulling the
slide rearward as you press the slide release
upward. Watch for a cartridge or empty case to be
ejected from the pistol.
5. Inspect chamber. Inspect chamber for the
If the pistol fails to fire, clear and disassemble it and
check for:
1. Obstructions in the chamber, bore or frame.
Remove obstructions.
2. Bad ammunition.Try new ammunition.
3. Unserviceable magazine. Replace magazine.
4. Fouling or lack of lubrication. Clean and lubricate
the pistol in accordance with the instructions contained within this manual.
5. Evidence of severely worn or broken parts.
Contact your authorized HK dealer or unit armorer.
27
If your pistol still fails to operate correctly, contact your
unit armorer, authorized HK dealer, or Heckler & Koch’s
Customer Service Department for guidance.
any of the operating controls. This includes the
hammer, slide release, magazine release lever,
and most importantly the control lever and the
trigger. The design of the holster must also not
actuate these controls when the pistol is carried in,
drawn from, or returned to the holster.
2. The holster should not cause the slide to move
(unlock) when the pistol is returned to the holster.
3. Accommodations must be provided in the holster
for any accessories that might be present on the
pistol.
4. Choose a holster designed specifically for the HK
USP Compact pistol.
WARNING
If a cartridge is assembled without powder (a
fault of the manufacturing process), the primer
alone has enough power to propel the bullet
into the bore. A bullet lodged in the bore may
cause damage to the barrel and/or pistol if
another cartridge is fired and could cause
personal injury or even death. This event is
commonly called a “squib load” or “pop and no
kick” and is characterized by a reduced report
and little or no movement of the slide. An alert
operator could notice the occurrence of this
event in time to avoid firing the next cartridge.
Returning the pistol to the holster. The USP
Compact must be made “safe” (or cleared) prior to returning it to the holster. The pistol is considered safe to
return it to the holster when:
Selection and Use of a holster
1. All fingers are off of the trigger and out of the trigger guard and;
2. The pistol is “clear” or;
3. The hammer is in the decocked (down) position
and/or;
4. The control lever is engaged in the safe position
when the hammer is cocked.
Selection. When selecting a carrying holster for the HK
USP Compact, it is important to consider the following
points:
1. The holster must not make contact with or actuate
28
WARNING
The pistol must never be returned to the holster
unless the above procedures have been followed or injury or death could occur.
Storage and Transport 1. Store or transport the pistol and its components
clean and lubricated.
2. Store and transport the pistol without cartridges in
the chamber, magazine, or in the storage container.
3. Store and transport the pistol with the slide forward
and the hammer down (uncocked).
4. Clean and lubricate the pistol and it’s components
at least every twelve (12) months during storage.
5. Store the pistol and it’s components in a clean, dry,
dust-free environment with regulated temperature
controls.
6. Store the pistol and ammunition separately under
lock and key.
29
SECTION 6 DISASSEMBLY AND ASSEMBLY
• Visually viewing chamber through open ejection
port and;
• Physically inserting finger into chamber through
ejection port to check for the presence of a cartridge or empty case.
Clear the Pistol! The HK USP Compact is not
considered “clear” or safe unless:
1. The control lever (if applicable) is on “SAFE” and;
2. The magazine is removed from the pistol and;
3. The slide is locked to the rear and;
4. The chamber is free of brass or ammunition
Remove any cartridges or empty cases from the chamber or from within the pistol.
To Clear the HK USP Compact:
1. Make sure fingers are outside of the trigger
guard and the pistol is pointed in a safe direction at all times!
2. Engage control lever (if applicable). Press the
control lever upwards until the “S” aligns with the
reference line located on the frame.
3. Remove magazine. Depress the magazine
release lever and remove the magazine from the
pistol.
4. Open and lock slide while pointing the pistol in
a safe direction, lock the slide open by pulling the
slide rearward as you press the slide release
upward. Watch for a cartridge or empty case to be
ejected from the pistol.
5. Inspect chamber. Inspect chamber for the
presence of a cartridge or empty case by:
The USP Compact is now considered “Clear”.
Disassembly (Field stripping) Pistol 1. Depress the slide release and allow the slide to
move forward.
2. Using the firing hand, retract and hold the slide to
the rear so that the axle of the slide release is visible through the recess in the left side of the slide
(See Figure 31A).
3. With the non-firing hand, completely remove the
slide release from the left side of the frame by
pressing on the axle of the slide release from the
right side of the frame.
30
4. Remove the slide with barrel and recoil spring
assembly by sliding it forward off of the frame.
(see Figure 31B below)
Slide Release
Axle aligned with
recess in slide
Figure 31A
CAUTION
Hold the recoil assembly in place while removing the slide from the frame. If not, this
assembly could be released under spring tension and could possibly cause injury to
personnel, or become damaged or lost.
Figure 31B
31
5. Carefully remove the recoil spring assembly from
the barrel and slide by lifting up on the rear of the
recoil spring guide rod. The entire assembly can
now be lifted out of the slide (see Figure 32)
6. Remove the recoil spring assembly. The USP
Compact uses a “captive” recoil spring assembly,
disassembly is not recommended.
7. Lift the rear of the barrel by the locking block and
withdraw it from the slide.
NOTE
Disassembly of the pistol is now complete. Only
an HK certified armorer should disassemble the
pistol further.
Pistol Assembly 1. Position the barrel in the slide so that:
• The muzzle of the barrel fits in the hole in the
front of the slide.
• The locking block portion of the barrel fits within
the ejection port and the angled locking surfaces
of the locking block are visible along the bottom
of the slide.
2. Install the recoil spring assembly into the slide so
the front of the recoil spring guide rod engages in
the small hole provided in the front of the slide.
3. Align the opposing angled locking surfaces on the
rear end of the recoil spring guide rod with those
located on the bottom of the barrel locking block.
(See Figures 34A & 34B)
Figure 32
32
Slide
Barrel
Angled Locking Surfaces
Barrel Locking Block
Magazine with
standard floor
plate
Slide Release
Recoil Spring Assembly
Frame
Sear Axle
Locking Insert
Figure 33 USP Compact disassembled (field stripped)
33
Magazine with
extended
floor plate
5. Hold the slide in the non-firing hand with the thumb
holding the rear end of the recoil spring assembly
in place on the slide.
4. Push the rear of the recoil spring assembly forward
enough so that the recoil spring retainer can be
engaged on the shelf provided on the front of the
barrel locking block. (See Figure 34A, B, & C)
Recoil spring retainer
Shelf
Figure 34A (relationship of recoil spring assembly to
barrel locking block inside of slide)
Figure 34C
6. Check the position of the sear axle on the frame.
Ensure that it does not protrude from either side of
the frame. (See Figure 33 on page 33)
Figure 34B (recoil spring assembly and barrel properly
positioned in the slide)
7. Hold the frame in the firing hand. Position the rear
of the slide above the front edge of the frame.
34
8. Slowly draw the slide back onto the frame so that
the metal inserts in the frame fit into the grooves
on the inside of the slide. (See Figure 35)
10. Insert the slide release from left to right into the
frame until it is flush with the side of the frame.
NOTE
Assembly of the pistol is now complete. Clear
the pistol and check it for correct assembly and
operation. Be sure the slide moves freely on the
frame and with the pistol cleared and pointed in
a safe direction, ensure all controls operate correctly. As applicable, check double-action
mode, single-action mode, safety, decock function, slide release, and the magazine release.
NOTE
The recoil springs of the USP9 Compact and
USP40 Compact are different. To prevent confusion during reassembly, the USP9 Compact
recoil spring is colored red to differentiate it
from that of the USP40 Compact.
Figure 35
9. Retract the slide to the point where the recess in
the left side of the slide is positioned over the
hole where the axle of the slide release will go
and hold it there.
35
MAGAZINE DISASSEMBLY
3. Slowly slide the floor plate forward off of the magazine housing.
CAUTION
Beware of the spring tension exerted by the magazine spring while removing and installing the
magazine floor plate. Keep the base of the magazine pointed in a safe direction (away from the
face and eyes) at all times during disassembly.
Different types of USP Compact magazines are in use.
USP Compact 9mm magazines with a 13-round capacity
and USP Compact .40/.357 magazines with a 12-round
capacity are restricted to military/law enforcement use.
USP Compact 9mm and .40 S&W/.357 SIG magazines
with a 10-round capacity are available without restriction.
All USP Compact .45 magazines have an 8-round
capacity and are also available without restriction.
Figure 36
4. Gradually allow the locking plate and magazine
spring to expand out of the magazine housing.
5. Remove the locking plate, magazine spring and
magazine follower from the magazine housing.
Disassembly of 10-round magazines.
Disassembly of law enforcement magazines.
1. Using a blunt pointed instrument depress the
locking insert detente located in the floor plate
and hold it there (see Figure 36).
2. Place a portion of either hand over the base of the
magazine to control the release of the magazine
spring and locking insert.
1. Using a blunt pointed instrument depress the locking detente located in the floor plate and hold it
there (see Figure 36).
2. Place a portion of either hand over the base of the
magazine to control the release of the magazine
spring and locking plate.
36
3. With the locking insert detent still depressed,
squeeze the floor plate locking tabs located on the
right and left sides of the magazine.
magazine follower
magazine housing
magazine spring
locking plate
floor plate
Figure 37B (above) diagram of a law enforcement
magazine and .45 ACP 8-round magazine
Figure 37A
magazine follower
4. Gradually allow the locking insert and magazine
spring to expand out of the magazine housing.
(see Figure 37A)
5. Remove the locking insert, magazine spring and
magazine follower from the magazine housing.
magazine housing
locking tab
recesses
magazine spring
locking insert
locking tabs
floor plate
Figure 37C (above) 10-round magazine
37
MAGAZINE ASSEMBLY
4. Push the locking plate down into the magazine
housing against the pressure of the magazine
spring and hold it there.
5. On 10-round magazines, push the floor plate up
onto the base of the magazine housing until the
locking tabs engage in the sides of the housing.
Check to see if the locking tabs on the floor plate
are securely locked into the housing and the locking detente on the locking plate fits within the hole
in the floor plate.
On high capacity law enforcement & .45 ACP
8-round magazines, push the floor plate over the
base of the magazine housing and the locking
plate from front to rear. Make sure the floor plate is
fully seated on the magazine housing and the
locking detente on the locking plate fits within the
hole in the floor plate.
On all magazines, check the magazine for proper
assembly by insuring that the follower slides up and
down freely within the magazine housing and with
spring tension. Also check that the magazine
follower rises within the magazine housing to be
nearly flush against the bottom of the magazine
feed lips.
Figure 38
1. Place the magazine follower onto the magazine
spring with the end of the spring positioned on the
left of the follower.
2. Insert the follower and magazine spring into the
magazine housing as depicted in Figure 36.
3. Place the locking plate, or locking insert on US civilian magazines, onto the protruding end of the
magazine spring so that the rounded corners face
towards the front of the magazine.
38
magazine follower
magazine
housing
Figure 39
10-round magazine
magazine spring
locking Insert
locking tabs
locking tab
recesses
standard floor plate
extended floor plate
39
Cleaning Intervals - Normal and Major are the two
types of operator cleaning for the USP Compact.
SECTION 7 CLEANING & MAINTENANCE
NOTE
The service life and performance of your HK
USP Compact is dependent upon the correct
handling and proper care by the operator.
Normal Cleaning - Performed after each firing or every
twelve (12) months.
Major Cleaning - Often referred to as “detailed
cleaning”. Performed after the firing of 500 cartridges
or when the pistol is exposed to, or laden throughout
with sand, dust, water (especially salt water), or other
visible contaminants or foreign matter.
Materials Required - At a minimum, we suggest the
following materials to properly clean the USP Compact
• Cleaning rod with handle and patch holder
• Nylon toothbrush
• Bronze bristle bore brush (in the appropriate caliber)
• Cleaning patches (in the appropriate caliber)
• Lint-free wiping rag
• Cleaning solvent/lubricant
• Cotton swabs
Normal Cleaning
CAUTION
Do not use a stainless steel bore brush which can
scratch the polygonal bore and reduce accuracy.
Slide • Gently scrub all internal surfaces of the slide using
the nylon toothbrush moistened with solvent.
• Remove all loose fouling from all surfaces of the slide
using a rag and cotton swabs.
Recoil spring assembly • Remove all visible fouling using solvent, a nylon
toothbrush, a rag and cotton swabs.
CAUTION
Use safety goggles when using solvents and
exercise care if using compressed air.
HK Handgun Cleaning Kits, #701956 (9mm & .357SIG),
#701957 (.40 S&W), and #701958 (.45ACP) are
available from HK for thorough cleaning of the USP
Compact and other firearms.
40
• The magazine is disassembled for cleaning.
• All parts should be rinsed with, or immersed in, solvent and thoroughly scrubbed with a nylon brush.
The parts can then be dried using compressed air or
with a rag and cotton swabs.
Barrel (with locking block) • Moisten a bronze bore brush with solvent and scrub
the bore from chamber to muzzle at least six (6)
passes, back and forth.
• Remove the loose fouling from the bore using cleaning patches.
• Gently scrub the exterior of the barrel and locking block
with the nylon toothbrush moistened with solvent.
• Remove all loose fouling from the exterior of the
barrel using a rag and cotton swabs.
Frame • Gently scrub all internal surfaces where carbon fouling is present using the nylon toothbrush moistened
with solvent. Concentrate on the area normally
covered by the slide.
• Using a rag and cotton swabs, remove all loose fouling from all areas of the frame.
Magazine • Gently scrub the top of the magazine, concentrating
on the follower and feed lips, using the nylon toothbrush moistened with solvent.
• Using a rag and cotton swabs, remove all loose fouling from all surfaces of the magazine.
NOTE
All parts of the USP Compact can be immersed
in any cleaning solvent that it is safe to put your
hands into, including ultrasonic cleaning solution. Use of ultrasonic cleaning can result in
the removal of colored reference markings of
the frame and control lever.
Inspection During and after cleaning visually inspect the pistol and
it’s components for any irregularities that may cause
problems or stoppages during operation. Generally, you
should keep a watchful eye out for the discrepancies
listed below.
Always clear the pistol before conducting your inspection!
Major Cleaning - Major Cleaning is the same as normal cleaning except that:
• Damaged or missing parts
41
•
•
•
•
•
•
•
•
•
Environment (HE) finish. This surface treatment does
not completely reduce the friction between moving parts
and it is recommended that a lubricant be applied to the
pistol to ensure proper functioning. Any type of highquality, medium weight lubricant (oil) specifically
designed for use on firearms will work well on the HK
USP Compact. Do not use lubricants that boast of their
ability to penetrate metal as these substances may
deaden primers.
Improper assembly or function
Absence of free movement, where applicable
Absence of spring tension, where applicable
Unaccustomed looseness
Parts exhibiting signs of cracks, burrs, dents, or
obvious signs of damage or stress
Presence of stops or tactile clicks, where applicable.
General overall cleanliness
Presence of sufficient lubrication
Presence of corrosion or degradation of surface finish
Where and How Much CAUTION
This pistol has been developed by capable and
experienced engineers. Its present design represents an optimization of a combination of safety,
speed of deployment, accuracy, dependability,
and durability. Do not attempt to make this pistol
“better” by altering any of its components. Altering any part of the pistol or magazine may cause
injury or death and will also void any Heckler &
Koch warranty on the product.
No Lube - Surface is dry and not slippery to the touch
• All plastic components
Light Lube - A finger run across the surface yields little or no lube
• Bore, chamber, and exterior of barrel
• All metal parts
• All internal parts in slide and frame
• Magazine spring
• Recoil spring assembly
• Sights
• USP Compact metal magazine housing
Lubrication
Metal surfaces of the USP Compact are treated with
HK’s special corrosion & wear resistant Hostile
42
Troubleshooting Problems and Repair
Medium Lube - A finger run across the surface yields
some lube but lube does not run down surface when it
is held in a vertical position.
The ten inspection areas listed above should be
checked prior to contacting HK if your pistol fails to
function properly. Other common causes of problems
that are often overlooked include:
• Barrel locking block
• Slide rails and grooves
• All operating controls
• Detent plate & slide plate (items 44 & 42, see
pages 46, 47, 48, and 49)
• Locking insert and guiding part in frame
• Extractor
• Fouled or improperly lubricated pistol
• Bad ammunition
• Damaged magazines
• Operator error
If your USP Compact still fails to function, please contact HK Customer Service at (703) 450-1900 for the
name and address of your nearest HK Authorized Repair Facility. Military and law enforcement users, contact your unit armorer or HK Customer Service.
Heavy Lube - Lubrication runs down the surface when
it is held in a vertical position
No heavy lube is required on the HK USP Compact
Reapply lubricant periodically during firing as it burns
off from the heat. Apply lubricant using a clean shaving
brush, cotton swabs, patches, or rag. A spray bottle of
lubricant also works well when using compressed air to
circulate the lubricant into all parts and to remove the
excess from the pistol.
NOTE
If after reviewing this manual you still have
questions, please contact your HK dealer or
telephone the Heckler & Koch Customer Service
Department. Please address any suggested
changes or improvements to this manual to the
HK Creative Services Department.
43
USP ACCESSORIES
NOTE
UTL models manufactured prior to the MKII will
only fit the large frame USP, not the USP Compact.
Heckler & Koch and Insight Technology Inc. have developed a powerful accessory light that attaches to the
HK USP large frame and USP Compact pistol.
The HK UTL can be quickly attached or removed from
the pistol and provides an immediate source of
illumination. With easy to use controls, the HK UTL
ensures law enforcement professionals or home
owners can identify potential threats in critical low light
situations.
Smaller and more powerful than a conventional flashlight, the HK Universal Tactical Light (UTL) adds a dimension of tactical flexibility to the USP absent in other
modern semiautomatic pistols. The UTL MK II fits both
the large frame USP and the USP Compact.
Using a USP fitted with a UTL makes alignment of the
light and pistol easier than using a separate flashlight.
A separate light can be difficult to use and hold while
manipulating a pistol in a life threatening situation. The
UTL can also be detached from the pistol and used in
place of a conventional flashlight.
The UTL is designed and manufactured by Insight Technology Inc. (ITI), the same firm that created the special
flashlight and laser aiming module developed for use on
the .45 caliber HK Mark 23 pistol used by the US
Special Operations Command.
Figure 44
The UTL MK II is a
compact and powerful
accessory light for the
USP and USP Compact.
Available exclusively from Heckler & Koch, Inc., the UTL
44
Mark II fits all variants of the USP pistol and can
be purchased with an optional remote cable
switch, and tactical carrying pouch.
Key features of the HK UTL MKII
• compact and rugged design fits both frame
sizes of the USP
• lamp brightness superior to most flashlights
• focusable beam, spot to flood
• clip-on/clip-off design, can be installed or
removed in seconds
• integral on-off switch prevents inadvertent
operation
• uses easily replaceable standard lithium
batteries
• fingertip on-off operation (toggle switch
pushed to right, intermittent on only, toggle
switch pushed to left, intermittent and
constant on)
• optional remote switch and accessory
pouch available
45
SECTION 8 USP COMPACT EXPLODED VIEW & PARTS LIST
3
5
4
USP COMPACT
(.40 S&W, .357 SIG, & 9mm Models)
7
10
1
2
13
9
12
15
25
18
36
21
27
37
38
26
32
33
24
39
48
17
55
34
35
11
20 19
8
46A
47
22
56
50
28
46B
41 29
23
30
31
59
44
51
53
57
42
52
60
54
43
58
46
USP Compact Parts List (.40 S&W, .357 SIG, and 9mm Models)
Item
1
2
3
4
5
7
8
9
10
11
12
13
14
15
16
17
18
19
20
21
22
23
24
25
26
Description
Identification No.
Extractor spring
214188
215801
Rubber plug, extractor spring
Extractor
215919
Roll pin, ISO 8748 - 3 X 14mm
980838
(extractor)
Front sight* (6.0 mm)
215823
215824
Front sight* (6.2 mm) standard
Front sight* (6.4 mm)
214945
Front sight* (6.6 mm)
214944
Front sight* (6.8 mm)
214943
Front sight* (7.0 mm)
214942
Front sight* (7.2 mm)
214941
Front sight* (7.4 mm)
214940
Rear sight*
214356
Firing pin
215821
Firing pin spring
215822
980838
Roll pin, ISO 3 X 14mm
Firing pin block
215935
Firing pin block spring
214192
Slide (.40 S&W)
215820
Slide (.357 SIG)
contact HK for #
Slide (9mm)
215840
Slide complete (.40 S&W)**
215819
Slide complete (.357 SIG)**
217812
Slide complete (9mm)**
215839
Barrel (.40 S&W)
215799
Barrel (.357 SIG)
217813
Barrel (9mm)
215838
Recoil spring assembly complete
with captive spring (.40 S&W)**
215827
Recoil spring assembly complete
with captive spring (9mm)**
215851
Recoil spring guide rod
215828
Recoil spring (.40 S&W)
215830
Recoil spring (9mm–colored red)
215852
Recoil spring retainer
215831
Spring ring
986788
Absorber bushing
215932
Frame
215810
Slide release
215814
Trigger
215816
Trigger bar
215812
Flat spring
214167
Item
27
28
29
30
31
32
33
34
35
36
37
38
39
40
41
42
43
44
45
46
46A
46B
47
48
49
50
51
52
52A
53
54
Description
Identification No.
Trigger rebound spring
Trigger axle
Magazine release
Magazine release spring
Magazine release axle
Trigger bar detent
Trigger bar detent spring
Disconnector
Sear axle
Catch
Sear, complete
(variant 1-4, 9, 10)**
Sear (variant 1-4, 9, 10)
Sear pin (variant 1-4, 9, 10)
Control latch**
Shaped spring (slide release)
Slide plate (variant 1-6, 9, 10)
Compression spring
Detent plate (variant 1 & 2)
Detent plate** (variant 3 & 4)
Detent plate** (v. 5, 6, 9, & 10)
Tube (variant 5, 6, 7)**
Hammer, bobbed, complete
(variant 1, 2, 3, 4)**
Hammer, bobbed
(variant 1, 2, 3, 4)**
Hammer, bobbed, complete
(variant 5, 6, 7)**
Hammer, bobbed (variant 5, 6, 7)
Hammer, spurred, complete
(variant 9, 10)**
Hammer, spurred (variant 9, 10)
Roll pin, hammer
Hammer axle (v.1-6, 9,10)
Hammer axle DA (variant 7)
Hammer strut
Hammer spring
Lanyard loop insert
Lock-out device (replaces lanyard
loop insert, item 52 above)**
Lanyard loop insert pin
Control lever (variant 1, 5, 9)
Control lever (variant 2, 6, 10)**
47
214164
214154
214818
215929
980838
214165
214166
214840
214101
214773
214179
214180
982785
214817
214171
214105
214104
214949
214254
214255
214413
215692
214693
214744
214745
214825
214687
926066
214774
214258
215809
215694
214341
219455
215829
215818
215855
Item
Description
Identification No.
215858
Control lever (variant 3)**
Control lever (variant 4)**
215872
217756
Ambidextrous control lever (left)**
217758
Ambidextrous control lever (right)**
54B Roll pin 1.5 x 8mm**
982783
215833
55 Magazine housing (.40 cal., 10-rd)**
Magazine housing (.40 cal., 12-rd)**
215661
contact HK
Magazine housing (.357 SIG, 12-rd)**
Magazine housing (.357 SIG, 10-rd.)**
217820
215848
Magazine housing (9mm, 10-rd.)**
Magazine housing (9mm, 13-rd)
215846
56 Magazine spring (.40, .357 SIG, 9mm, 10-rd.)**
214850
Magazine spring (9mm 13-rd,.40 / .3 57 SIG, 12-rd.)
214212
57 Floor plate (.40 cal. / .357 SIG, 10-rd.)**
215834
Floor plate (.40 cal. / .357 SIG, 12-rd.)**
215662
215849
Floor plate (9mm, 10-rd.)**
Floor plate (9mm, 13-rd.)
215843
58 Extended floor plate (.40/.357 SIG, 10-rd.)**
215978
215663
Extended floor plate (.40/.357 SIG, 12-rd.)**
Extended floor plate (9mm, 10-rd.)**
215983
Extended floor plate (9mm, 13-rd.)
215980
215835
59 Locking plate (.40 S&W/ .357 SIG)**
Locking plate (9mm, 10-rd.)**
215850
Locking plate (9mm 13-rd & .40 S&W/ .357 SIG 12-rd) 215844
60 Follower (all .40 caliber, .357 SIG, & 9mm)
215836
61 Magazine complete (10-rd, .40 cal.)**
215832
Magazine complete (10-rd, .40 cal., with
extended floorplate)**
215977
217438
Magazine complete (12-rd, .40 cal.)**
Magazine complete (12-rd, .40 cal., with
extended floorplate)**
217439
Magazine complete (10-rd, .357 SIG)**
contact HK
Magazine complete (10-rd, .357 SIG, with
extended floorplate)**
contact HK
contact HK
Magazine complete (12-rd, .357 SIG)**
Magazine complete (12-rd, .357 SIG, with
extended floorplate)**
contact HK
Magazine complete (10-rd, 9mm)**
215847
Magazine complete (10-rd, 9mm, with
extended floorplate)**
215982
215845
Magazine complete (13-rd, 9mm)**
Magazine complete (13-rd, 9mm, with
215981
extended floorplate)**
**Not pictured in diagram
54A
3
5
7
4
USP COMPACT
(.45 ACP Model)
1
10
2
13
9
12
15
25
18
36
21
27
38
37
26
32
33
24
39
48
17
56
34
35
11
20 19
8
46A
47
55
22
50
28
41 29
23
46B
30
31
59
44
42
57
51
53
52
60
43
54
58
48
USP Compact Parts List (.45 ACP Model)
Item
1
2
3
4
5
7
8
9
10
11
12
13
14
15
16
17
18
19
20
21
22
23
24
Description
Identification No.
Extractor spring
214188
215801
Rubber plug, extractor spring
Extractor .45
215864
Roll pin, ISO 8748 - 3 X 14mm 980838
(extractor)
Front sight* (6.0 mm)
215823
Front sight* (6.2 mm) standard 215824
Front sight* (6.4 mm)
214945
Front sight* (6.6 mm)
214944
Front sight* (6.8 mm)
214943
Front sight* (7.0 mm)
214942
Front sight* (7.2 mm)
214941
Front sight* (7.4 mm)
214940
Rear sight*
214356
Firing pin
215928
Firing pin spring
215822
980838
Roll pin, ISO 3 X 14mm
Firing pin block
215935
Firing pin block spring
214192
Slide (.45 ACP)
215927
Slide complete (.45 ACP)**
215926
Barrel (.45 ACP)
215921
Recoil spring assembly complete
with captive spring (.45 ACP)** 215930
Recoil spring guide rod (.45)
215931
Recoil spring
215830
Recoil spring retainer
215831
Spring ring
986788
Absorber bushing
215932
Frame .45 ACP
215923
Frame (complete) .45 ACP**
215922
Slide release
215814
Trigger
215816
Item
25
26
27
28
29
30
31
32
33
34
35
36
37
38
39
40
41
42
43
44
45
46
46A
46B
Description
Identification No.
Trigger bar .45
Flat spring
Trigger rebound spring
Trigger axle
Magazine release
Magazine release spring
Magazine release axle
Trigger bar detent
Trigger bar detent spring
Disconnector
Sear axle
Catch
Sear, complete
(variant 1-4, 9, 10)**
Sear (variant 1-4, 9, 10)
Sear pin (variant 1-4, 9, 10)
Control latch**
Shaped spring (slide release)
Slide plate (variant 1-6, 9, 10)
Compression spring
Detent plate (variant 1 & 2)
Detent plate** (variant 3 & 4)
Detent plate** (v. 5, 6, 9, & 10)
Tube (variant 5, 6, 7)**
Hammer, bobbed, complete
(variant 1, 2, 3, 4)**
Hammer, bobbed
(variant 1, 2, 3, 4)
Hammer, bobbed, complete
(variant 5, 6, 7)**
Hammer, bobbed (v. 5, 6, 7)**
Hammer, spurred, complete
(variant 9, 10)**
49
215924
214167
214164
214154
214818
215929
980838
214165
214166
214840
214101
214773
214179
214180
982785
214817
214171
214105
214104
214949
214254
214255
214413
215692
214693
214744
214745
214825
Item
47
48
49
50
51
52
52A
53
54
54A
54B
55
56
57
58
59
60
61
Description
Identification No.
Hammer, spurred (variant 9, 10)
Roll pin, hammer
Hammer axle (v.1-6, 9,10)
Hammer axle DA (variant 7)
Hammer strut
Hammer spring
Lanyard loop insert
Lock-out device (replaces
lanyard loop insert, item 52 above)**
Lanyard loop insert pin
Control lever (variant 1, 5, 9)
Control lever (variant 2, 6, 10)**
Control lever (variant 3)**
Control lever (variant 4)**
Ambidextrous control lever
(left)**
Ambidextrous control lever
(right)**
Roll pin 1.5 x 8mm**
Magazine housing (.45 cal., 8-rd)
Magazine spring (.45 cal, 8-rd)
Floor plate (.45 cal., 8-rd.)
Extended floor plate (.45 cal., 8-rd.)
Locking plate (.45 cal., 8-rd.)
Follower (45 cal., 8-rd.)
Magazine complete (.45 cal., 8-rd.)**
Magazine complete (.45 cal., 8-rd.,
with extended floorplate)**
**Not pictured in diagram
214687
926066
214744
214258
214809
215694
214341
219455
215829
215818
215855
215858
215872
217756
217758
982783
215934
214212
215936
215985
215937
215938
215933
215984
LOCK-OUT DEVICE
Many HK pistols are equipped with a patented HK
Lock-Out™ device. This component replaces the
lanyard loop insert in the frame and when engaged
locks the handgun’s action by blocking any movement
of the trigger, the hammer, and the slide. The handgun
is locked and can not fire until unlocked. The Lock-Out
control plate is accessible through the pistol’s magazine
well (see figure 50A).
Figure 50B
Locked position
When the holes on the Lock-Out Device are vertically
positioned the pistol is unlocked and can be fired (see
figure 50C).
Figure 50A
Turn the key clockwise to lock the action
Use the two pronged key supplied with the pistol to lock
or unlock the pistol as desired. When the holes on the
Lock-Out Device are horizontally positioned the pistol is
locked and can not be fired (see figure 50B).
Figure 50C
Unlocked/fire position
50
WARNING
The HK Lock-Out Device is not a substitute
for safe gun handling practices. Never point
the muzzle of the pistol in an unsafe
direction (at yourself or others). When the
Lock-Out Device is placed in the locked
position the slide is locked in the closed
position and can not be moved! Forcing the
slide rearward while the gun is in this locked
position will damage the USP.
For more information contact HK Customer Service at
703-450-1900.
51
Firearm Service Record
Number of
Cumulative Total
Date
Rounds Fired of Rounds Fired
User’s Name
Remarks
____________________________________________________________________________________________
____________________________________________________________________________________________
____________________________________________________________________________________________
____________________________________________________________________________________________
____________________________________________________________________________________________
____________________________________________________________________________________________
____________________________________________________________________________________________
____________________________________________________________________________________________
____________________________________________________________________________________________
____________________________________________________________________________________________
____________________________________________________________________________________________
____________________________________________________________________________________________
____________________________________________________________________________________________
____________________________________________________________________________________________
____________________________________________________________________________________________
____________________________________________________________________________________________
____________________________________________________________________________________________
____________________________________________________________________________________________
____________________________________________________________________________________________
____________________________________________________________________________________________
____________________________________________________________________________________________
____________________________________________________________________________________________
52
Firearm Service Record
Number of
Cumulative Total
Date
Rounds Fired of Rounds Fired
User’s Name
Remarks
____________________________________________________________________________________________
____________________________________________________________________________________________
____________________________________________________________________________________________
____________________________________________________________________________________________
____________________________________________________________________________________________
____________________________________________________________________________________________
____________________________________________________________________________________________
____________________________________________________________________________________________
____________________________________________________________________________________________
____________________________________________________________________________________________
____________________________________________________________________________________________
____________________________________________________________________________________________
____________________________________________________________________________________________
____________________________________________________________________________________________
____________________________________________________________________________________________
____________________________________________________________________________________________
____________________________________________________________________________________________
____________________________________________________________________________________________
____________________________________________________________________________________________
____________________________________________________________________________________________
____________________________________________________________________________________________
____________________________________________________________________________________________
53
54
HK USA 5/00 art. #704011
®
In a world of compromise, some don’t.
Heckler & Koch, Inc.
21480 Pacific Blvd.
Sterling, Virginia 20166-8903
United States of America
Tel. (703) 450-1900
Fax (703) 450-8160
www.hecklerkoch-usa.com
Heckler & Koch GmbH
D-78722 Oberndorf/Neckar
Postfach 1329
Germany
Tel. 011-49-7423/79-0
Fax 011-49-7423/2280
www.heckler-koch.de

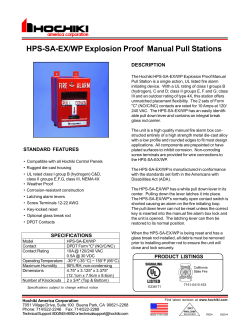


© Copyright 2026