
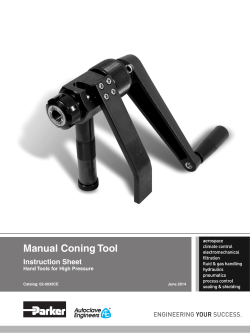
Manual Coning and Threading Tool (IPT Series) User’s Manual
Manual Coning and Threading Tool (IPT Series) User’s Manual 2 Manual Coning and Threading Tool (IPT Series) User’s Manual Contents Safety . . . . . . . . . . . . . . . . . . . . . . . . . . . . . . . . . . . . . . 3 General Information Description . . . . . . . . . . . . . . . . . . . . . . . . . . . . . . . . 4 Coning and Threading Kit Contents . . . . . . . . . . . . 4 Setup Tube Vise . . . . . . . . . . . . . . . . . . . . . . . . . . . . . . . . . . 5 Coning Tool . . . . . . . . . . . . . . . . . . . . . . . . . . . . . . . . 5 Threading Tool . . . . . . . . . . . . . . . . . . . . . . . . . . . . . . 7 Operation Tube Preparation . . . . . . . . . . . . . . . . . . . . . . . . . . . Coning Tool 8 Manual . . . . . . . . . . . . . . . . . . . . . . . . . . . . . . . . 9 Power . . . . . . . . . . . . . . . . . . . . . . . . . . . . . . . . 11 Threading Tool . . . . . . . . . . . . . . . . . . . . . . . . . . . . . 13 Maintenance . . . . . . . . . . . . . . . . . . . . . . . . . . . . . . . . 15 Spare Part Ordering Information . . . . . . . . . . . . . . . . . 15 Manual Coning and Threading Tool (IPT Series) User’s Manual 3 Safety This manual contains important information for the operation of the Manual Coning and Threading Tool (IPT Series). Users should read and understand the contents before operating the coning and threading tools. WARNING Statements that indicate a hazardous situation which, if not avoided, could result in death or serious injury. CAUTION Statements that indicate a hazardous situation which, if not avoided, could result in minor or moderate injury. NOTICEStatements that indicate a hazardous situation which, if not avoided, could result in damage to the equipment or other property. WARNING Danger of eyes being injured by sharp-edged metal chips. Eye protection must be worn while operating or working near the equipment. WARNING Danger of being injured by rotating parts when using coning tool with power drill. Keep hands, loose clothing, jewelry, and long hair away from rotating and moving parts. CAUTION Danger of being injured by sharp cutting edges of coning blade and metal chips. Do not remove chips or tubing from the work area when the tool is still rotating. Remove chips with chip brush. CAUTION Fingers can be injured. Do not place fingers or hands near the coning blade while operating the coning tool. Safety Alert Symbols Used in This Manual Safety alert symbol indicating a potential personal injury hazard. 4 Manual Coning and Threading Tool (IPT Series) User’s Manual General Information Description The manual coning and threading tool is designed to cone and thread 1/4, 3/8, and 9/16 inch Swagelok® IPT series tube in order to make tube nipples. The tools are designed with interchangeable coning blades, bushings and threading dies. CAUTION IPT series medium- or high-pressure tube must be used with the IPT series manual coning and threading tool to ensure proper performance. Coning and Threading Kit Contents Coning tool ■ Driver / blade holder ■ Drive nut ■ Handle ■ Housing ■ Manual coning adapter and fasteners (ships installed in 3/8 in. tube vise) ■ Power adapter Threading tool ■ Housing ■ Handles (2) The following components are provided for 1/4, 3/8, and 9/16 inch tube: ■ Coning gauges (4) ■ Coning tool bushings (3) ■ Threading tool bushings (3) ■ Tube vise (3) General ■ 6 in. ruler ■ Chip brushes (6) ■ Cutting fluid ■ Deburring tools (2) ■ Hex keys (3) ■ Tool case ■ Spare fasteners ■ Storage box ■ User’s manual The following are sold and shipped separately. Refer to Spare Part Ordering Information for additional information. ■ Medium-pressure coning blades ■ High-pressure coning blades ■ Threading dies Report any missing or damaged parts to your authorized Swagelok sales and service representative immediately. Fig. 1 Tool Case Manual Coning and Threading Tool (IPT Series) User’s Manual 5 Setup Tube Vise The manual adapter comes pre-assembled to the 3/8 in. tube vise for coning and threading 3/8 in. IPT series tube. It must be changed when coning and threading tube of a different diameter. Removing the Manual Adapter 1. Remove the manual adapter from the tube vise by loosening the two socket head cap screws using the 1/4 in. hex key. (Fig. 2) Fig. 2 Removing/Attaching the manual adapter Attaching the Manual Adapter 1. Attach the manual adapter to the appropriate tube vise by tightening the two socket head cap screws using the 1/4 in. hex key. (Fig. 2) Coning Tool The proper coning blade for the tube diameter and pressure to be coned must be installed. Refer to Installing a New Coning Blade for the first use. Coning Blade Replacement Fig. 3 Loosening the 1/4 in. set screw (second screw is on opposite side of housing) The coning tool blade must be changed when: Blade holder ■ Coning tube of a different diameter. ■ Coning tube of the same diameter but a different pressure rating (for example, when changing from medium- to highpressure tube). ■ Quality of the coned end or the cone face diameter finish becomes a concern (for example, tearing is visible on the surface of the cone). Housing Removing the Coning Blade Fig. 4 Remove blade holder 1. Loosen the two 1/4 in. set screws using the 1/8 in. hex key. (Fig. 3) 2. Remove the blade holder from the housing. (Fig. 4) Caution Carefully remove chips using the chip brush. 3. Loosen the four #10 set screws using a 3/32 in. hex key. (Fig. 5) Set screws 4. Remove the coning blade from the blade holder. (Fig. 6) Caution Avoid the sharp edges on the coning blade. Fig. 5 Loosening the #10 set screws (two other screws are on opposite side of housing) Fig. 6 Removing the coning blade 6 Manual Coning and Threading Tool (IPT Series) User’s Manual Installing a New Coning Blade Set screw 1. Remove chips from the coning blade pocket in the blade holder using a chip brush. Set screw 2. Install the new coning blade for the tube diameter and pressure to be coned. Check the ordering number marked on the coning blade to ensure the proper coning blade is being installed. Ordering Number Size, in. Medium-Pressure High-Pressure 1/4 BL4M BL4H 3/8 BL6M BL6H 9/16 BL9M BL9H 3. Tighten the two #10 set screws opposite the coning face of the blade first to set the coning insert properly. (Fig. 7) Note: T hese are the screws located under the chip slots in the blade holder. Fig. 7 Tighten these #10 set screws then the second pair on opposite side of housing Countersink Set screw 4. Tighten the other two #10 set screws. 5. Align the blade holder chip slots with the 1/4 in. set screws in the housing. (Fig. 8) 6. Slide the blade holder into the housing. 7. Tighten the two 1/4 in. set screws while making sure they engage with the countersinks in the blade holder. (Fig. 8) Chip slot Fig. 8 Aligning the chip slots with the 1/4 in. set screws (second set screw is on opposite side) Coning Tool Bushing Replacement Set screw A coning tool bushing can be used for both medium- and high- pressure tubing. The coning tool bushing must be changed when a different tube diameter is to be coned. 1. Retract the drive nut onto the housing to expose the two additional 1/4 in. set screws. (Fig. 9) Note: Y ou must push the drive nut past the spring plungers. 2. Loosen the two 1/4 in. set screws using the 1/8 in. hex key. Spring plunger Drive nut Fig. 9 Retracting the drive nut (second screw is on other side of housing) 3. Remove the coning tool bushing. (Fig. 10) 4. Install the appropriate size coning tool bushing into the housing with the marked side facing out and the groove in the coning tool bushing aligned with the set screw. Align the face of the coning tool bushing with the end of the housing. (Fig. 10 and 11) Coning tool bushing 5. Tighten the two 1/4 in. set screws. (Fig. 11) 6. Reset the drive nut by pushing it past the spring plungers until the drive nut extends over the end of the housing. Groove Fig. 10 Removing/Installing the coning tool bushing Housing Drive nut Bushing face Set screw (second set screw is on opposite side) Fig. 11 Installing the coning tool bushing Manual Coning and Threading Tool (IPT Series) User’s Manual Threading Tool The threading tool bushing and threading die for the tube diameter to be used must be installed into the threading tool. Refer to Installing a New Threading Die and Installing a New Guide Bushing for the first use. 7 Threading tool bushing set screw The threading tool bushing and threading die must be changed in order to thread other tube diameters. The threading die should also be changed if thread quality becomes a concern. The threading dies used are fixed to a particular thread size and pitch. All are designed to cut left‑hand threads. Fig. 12 Loosening threading tool bushing set screws (the second screw is on opposite side of housing) Removing the Threading Tool Bushing and Threading Die 1. Loosen the two 1/4 in. threading tool bushing set screws using the 1/8 in. hex key. (Fig. 12) 2. Remove the threading tool bushing from the housing. (Fig. 13) 3. Loosen the two 1/4 in. threading die set screws using a 1/8 in. hex key. (Fig. 14) Threading tool bushing Housing 4. Remove the threading die from the housing. (Fig. 15) Installing a New Threading Die Fig. 13 Removing the threading tool bushing 1. Position the appropriate threading die at the opening on the housing with the marked side facing out. Align the threading die countersinks with the 1/4 in. threading die set screws, and then slide the die into the housing until it bottoms. (Fig. 15) Threading die 2. Tighten the two threading die set screws using the 1/8 in. hex key, making sure they engage the countersinks. Threading die set screw (second is on opposite side) Installing a New Threading Tool Bushing 1. Position the appropriate guide bushing at the opening on the housing with the marked side facing out and then slide it in until the face of the bushing is even with the face of the housing. (Fig. 16) Fig. 14 Loosening the threading die set screws and removing the threading die 2. Tighten the two 1/4 in. guide bushing set screws using the 1/8 in. hex key. (Fig. 16) Threading die set screw (second is on opposite side) Countersink Fig. 15 Aligning threading die countersinks Threading tool bushing set screw (second is on opposite side) Threading tool bushing face Fig. 16 Threading tool bushing face and set screws 8 Manual Coning and Threading Tool (IPT Series) User’s Manual Operation Tube Preparation Tube Cutting The coning blade will cone and face the end of the tube during coning. Add the distance given in the table below to the desired final length of tube to ensure the finished nipple is the needed length. Cut the tube using a Swagelok tube saw guide. Connection Type Medium-Pressure High-Pressure Connection Size in. Approximate Total Face Distance per Tube Nipple in. mm 1/4 1/32 0.8 3/8 1/32 0.8 9/16 1/16 1.6 1/4 1/16 1.6 3/8 1/16 1.6 9/16 3/32 2.4 Example: The cut length for a 3/8 in. high-pressure tube nipple with a final length of 6 1/2 inch (16.5 mm): 6 1/2 inch + 1/16 inch = 6 9/16 inch (16.7 mm) Deburring Deburr the OD of the tube to ensure it will easily pass through the tube vise and bushings. CAUTION IPT series medium- or high-pressure tube must be used with the IPT series coning and threading tool to ensure proper performance. Manual Coning and Threading Tool (IPT Series) User’s Manual 9 Manual Coning Tool The tube vise comes assembled for 3/8 in. tube. Refer to Setup for installing the manual adapter onto a tube vise for a different diameter tube. The correct coning blade and bushing must be installed for the tube size and pressure to be coned. Refer to Setup for the proper procedure. 1. Place the tube vise in a bench vise and tighten slightly. (Fig. 17) 2. Insert the tube into the tube vise, with one end of the tube extending out from the manual adapter approximately 2 in. or 50 mm. The tube should slide freely. If it does not, loosen the bench vise slightly. Fig. 17 Placing the tube vise in a bench vise 3. Slide the drive nut over the spring plungers toward the handle to expose the end of the coning tool. (Fig. 18) Spring plunger 4. Slide the coning tool onto the tube. 5. Place the tip of the appropriate coning gauge between the manual adapter and the end of the coning tool. Slowly slide the coning tool toward the coning gauge, using the coning tool to push the tube. Continue until the face of the coning tool contacts the coning gauge to establish the gap. This distance ensures the tube will extend far enough from the tube vise to be properly set for coning. (Fig. 19) 6. Verify that the tube is in contact with the cutting blade. (Fig. 20) 7. Tighten the bench vise to secure the tube. No tube movement is acceptable at this point. Fig. 18 Exposing the end of the coning tool Gauge 8. Verify the gap with the coning gauge. Reset if required by loosening the bench vise slightly and following steps 5 through 8. 9. Apply cutting fluid to the retaining ring on the housing. (Fig. 21) Fig. 19 Using the coning gauge to establish the gap Gauge Coning blade Tube Fig. 20 Verifying the tube is in contact with coning blade Manual adapter Retaining ring Fig. 21 Applying cutting fluid to retaining ring 10 Manual Coning and Threading Tool (IPT Series) User’s Manual 10.Remove the coning tool from the tube. 11. Reset the drive nut by pushing it past the spring plungers until the drive nut extends over the end of the housing. (Fig. 22) 12.Apply cutting fluid to the tube. 13.Slide the coning tool onto the tube. 14.Apply cutting fluid to the front face and threads of the manual adapter. 15.Slide the coning tool onto the tube and engage the drive nut onto the manual adapter. Advance the drive nut until the coning blade makes contact with the tube. Loosen the drive nut 1/8 turn. Fig. 22 Resetting the drive nut 16.Apply cutting fluid through the chip window to the coning blade and end of the tube. (Fig. 23) Note: C ontinue to apply cutting fluid frequently during the coning process. 17. Turn the coning tool handle clockwise at a constant speed. CAUTION Fingers can be injured. Do not place fingers or Fig. 23 Applying cutting fluid through the chip window hands near the coning blade while operating the coning tool. 18.Cone the end of the tube by continuing to turn the handle and slowly advance the drive nut clockwise until the coning tool bottoms out by contacting the manual adapter. (Fig. 24) Note: P rovide gentle resistance to the drive nut to prevent the coning blade from biting into the tube. 19.Hold the drive nut in place while continuing to turn the handle for several revolutions. Notice This step is critical to achieving the proper surface finish on the cone. Drive nut Fig. 24 Turning the handle and advancing the drive nut 20.While continuing to turn the handle clockwise, slowly loosen the drive nut by turning it counter-clockwise. Stop turning the handle once the coning tool is clear of the cone. (Fig. 25) Note: Loosening the drive nut may be difficult. 21.Remove the coning tool from the tube. 22.Remove chips from the coning tool and end of the tube using a chip brush. Fig. 25 Loosening the drive nut WARNING Danger of being injured by sharp cutting edges of coning blade and metal chips. Do not remove chips or tubing from the work area when the tool is still rotating. Remove chips with chip brush. 23.Deburr the tube ID. (Fig. 26) 24.Inspect the following criteria without removing the tube from the tube vise: ■ Cone surface finish - smooth and burr-free ■ Cone angle - consistent ■ C one face diameter finish - uniform appearance around radius ■ Face - smooth and burr-free Fig. 26 Deburr the tube ID Manual Coning and Threading Tool (IPT Series) User’s Manual 11 Power Coning Tool For increased productivity, the coning tool can be adapted for use with a 1/2 inch. power drill. The coning speed is then controlled by pressure applied to the drill rather than manual advancement. Setting Up the Coning Tool for Power Coning 1. Loosen the 3/8 in. set screw using the 3/16 in. hex key. (Fig. 27) 2. Remove the handle assembly. (Fig. 28) Fig. 27 Loosening the 3/8 in. set screw 3. Remove the drive nut from the driver/blade holder. (Fig. 29) 3. Depress the retention pin on the power adapter and install the adapter into the driver/blade holder. Ensure the retention pin on the adapter engages a retention hole on the driver/blade holder. (Fig. 30) 4. Insert the power adapter into a 1/2 in. variable speed power drill chuck. (Fig. 31) 5. Tighten the chuck. 6. Establish a cutting speed of approximately 250 rpm with the drill running in a clockwise direction. Fig. 28 Removing the handle assembly Fig. 29 Removing the drive nut Retention pin Fig. 30 Installing the power adapter Fig. 31 Inserting the power adapter into drill chuck 12 Manual Coning and Threading Tool (IPT Series) User’s Manual Power Coning Operation The tube vise comes assembled for 3/8 in. tube. Refer to Setup for installing the manual adapter onto a tube vise for a different diameter tube. The correct coning blade and bushing must be installed for the tube size and pressure to be coned. Refer to Setup for the proper procedure. 1. Place the tube vise in a bench vise and tighten slightly. (Fig. 32) 3. Insert the tube into the tube vise, with one end of the tube extending out from the manual adapter approximately 2 in. or 50 mm. The tube should slide freely. If it does not, loosen the bench vise slightly. Fig. 32 Placing the tube vise in a bench vise 4. Apply cutting fluid to the tube and slide the coning tool onto the tube. Gauge 5. Place the tip of the appropriate size coning gauge between the manual adapter and end of the coning tool. Slide the coning tool toward the coning gauge, using the coning tool to push the tube. Continue until the face of the coning tool contacts the coning gauge to establish the gap. This distance ensures the tube will extend far enough from the tube vise to be properly set for coning. (Fig. 33) 6. Verify that the tube is in contact with the coning blade. (Fig. 34) Fig. 33 Using the coning gauge to establish the gap 7. Tighten the bench vise to secure the tube. No tube movement is acceptable at this point. 8. Verify the gap with the coning gauge. Reset if required by loosening the bench vise slightly then following steps 5 through 8. Gauge Coning blade 9. Apply cutting fluid through the chip window to the coning blade, to the end of the tube, and to the front face of the manual adapter. (Fig. 35) 10.Back the coning tool away from the end of the tube approximately 1/8 in. or 3 mm. Tube Fig. 34 Verifying the tube is in contact with coning blade WARNING Danger of being injured by rotating parts when using coning tool with power drill. Keep hands, loose clothing, jewelry, and long hair away from rotating and moving parts. 11.Cone the tube by running the drill at the established cutting speed in a clockwise direction. Slowly advance the coning tool into the tube, applying steady pressure until the coning tool contacts the manual adapter. (Fig. 36) Note: S top frequently to apply additional cutting fluid to the coning blade and the end of the tube. Fig. 35 Applying cutting fluid to coning blade, manual adapter and end of tube 12.While the drill is still running, slowly retract and remove the coning tool from the tube. Stop the drill when the coning tool is clear of the tube. 13.Remove chips from the coning tool and end of the tube using the chip brush. WARNING Danger of being injured by sharp cutting edges of coning blade and metal chips. Do not remove chips or tubing from the work area when the tool is still rotating. Remove chips with chip brush. Contact with the manual adapter Fig. 36 Advancing the coning tool Manual Coning and Threading Tool (IPT Series) User’s Manual 13 14.Deburr the tube ID with the provided deburring tool. (Fig. 37) 15.Inspect the following criteria prior to proceeding without removing the tube from the tube vise: ■ Cone surface finish - smooth and burr-free ■ Cone angle - consistent ■ Cone face diameter finish - uniform appearance around radius ■ Face - smooth and burr-free Threading Tool Fig. 37 Deburr the tube ID The guide bushing and threading die must be assembled into the threading tool for the desired tube diameter. Refer to Setup for proper procedure. Theading die It is not recommended to use the threading tool with the power adapter as it makes counting the number of threads more difficult. 1. Begin with the coned tube in position in the tube vise and: Medium-Pressure and 1/4 in. High-Pressure Connections: Fig. 38 Sliding the threading tool onto the tube ■ Apply cutting fluid to the tube. 3/8 in. and 9/16 in. High-Pressure Connections: ■ Loosen the vise. ■ Move the tube until it extends out from the manual adapter approximately 3/8 in.: 1 7/8 in. or 50 mm 9/16 in.: 2 1/16 in. or 55 mm ■ Tighten the vise. ■ Apply cutting fluid to the tube. Notice Fig. 39 Applying cutting fluid through the chip window I f the tube is not repositioned prior to threading a 3/8 in. or 9/16 in. high-pressure connection, the threading tool may contact the manual adapter during the threading operation which will reduce the thread length. 2. Gently slide the threading tool onto the tube until the threading die makes contact with the end of the tube. (Fig. 38) 3. Turn the handles clockwise until they are parallel to the ground and the groove on the threading die is facing up. This establishes the starting point to begin counting threads. 4. Apply cutting fluid through the chip window to the threading die and end of the tube. (Fig. 39) 5. Begin threading by applying pressure to the threading tool while rotating the handle counter-clockwise until the threading die engages. 6. Advance the threading tool counter-clockwise two full turns, then reverse direction 1/4 to 1/2 turn to break the chips. Use the groove on the threading die as a reference. (Fig. 40) 7. Advance the threading tool counter-clockwise one more full turn, stopping when the handle reaches the 12 o’clock position. Reverse direction 1/4 to 1/2 turn to break the chips, then apply cutting fluid to the tube. Theading die groove Fig. 40 Advancing the threading tool, turning counter-clockwise 14 Manual Coning and Threading Tool (IPT Series) User’s Manual 8. Repeat steps 6 and 7 until the proper thread length is reached (see table below). Connection Size and Type Thread Size Thread Length in. (mm) Approximate Number of Turns 1/4 in. medium-pressure 1/4-28 UNF LH 0.32 (8.1) 7 1/2 3/8 in. medium-pressure 3/8-24 UNF LH 0.42 (10.7) 8 9/16 in. medium-pressure 9/16-18 UNF LH 0.48 (12.2) 7 1/4 in. high-pressure 1/4-28 UNF LH 0.54 (13.7) 13 3/8 in. high-pressure 3/8-24 UNF LH 0.73 (18.5) 15 9/16 in. high-pressure 9/16-18 UNF LH 0.92 (23.4) 13 1/2 9. Remove chips from between the threading die and bushing using a chip brush. 10.Remove the threading tool by rotating it clockwise until the threading die unthreads itself from the tube. Continue to remove chips from the threading die and threads as the threading tool is removed. Fig. 41. Notice hips must be removed prior to removing the tube. C Chips caught between the threads and bushing can damage the threads and make removal of the threading tool difficult. 11. Loosen the bench vise and carefully remove the tube from the tube vise. Fig. 42. Note: A small notch may be formed on the last thread. Align this with the slot in the tube vise if there is difficulty removing the tube. The notch does not affect the function of the threads. (Fig. 43) Fig. 41 Removing the threading tool and chips 12.Clean the ID and OD of the completed nipple with shop air. 13.Visually inspect the threads to verify they are smooth and burr-free. Note: O ptional thread gauges are available. Refer to Spare Part Ordering Information. 14.Thoroughly clean the coning tool and threading tool, removing all burrs and chips, prior to any additional coning and threading operation. Fig. 42 Removing coned/threaded tube from vise Fig. 43 Notch on last thread (not affecting function) Manual Coning and Threading Tool (IPT Series) User’s Manual 15 Maintenance Refer to Setup to replace the coning tool coning blade, coning tool bushing, the threading tool threading die, the threading tool guide bushing, and the tube vise. Spare Part Ordering Information Available Tooling Kits Each kit includes 1 coning blade and 1 threading die. Ordering Number Tubing Size in. Medium-Pressure Kit High-Pressure Kit 1/4 MS-TK-4M MS-TK-4H 3/8 MS-TK-6M MS-TK-6H 9/16 MS-TK-9M MS-TK-9H General Kit Contents Description Ordering Number 6 inch ruler MS-RULER-6IN Chip brush - small MS-CTK-BRUSH-SM Chip brush - large MS-CTK-BRUSH-LG Cutting fluid MS-469CT-LUBE Deburring tool - small MS-44CT-27 Deburring tool - large MS-TDT-24 3/32 in. hex key S-HKL-094-3375-BP 1/8 in. hex key S-HKL-125-3750-BP 3/16 in. hex key S-HKL-188-4500-BP Tool case MS-CTK469-CASE User manual MS-13-224 Optional Thread Gauges Each kit contains 1 truncated thread master, 1 “Go” thread ring gauge, 1 “No-go” thread ring gauge, and gauge certifications. Connection Size in. Ordering Number 1/4 MS-CT-GKIT-4LH 3/8 MS-CT-GKIT-6LH 9/16 MS-CT-GKIT-9LH To replace other parts, refer to Part Drawings. Contact your authorized Swagelok sales and service representative for additional assistance. 16 Manual Coning and Threading Tool (IPT Series) User’s Manual Part Drawings Coning Tool 1 2 4 5 6 3 8 11 7 10 9 4 6 10 12 13 15 10 14 Manual Coning and Threading Tool (IPT Series) User’s Manual Reference No. 1 2 Minimum Order Quantity Description Ordering Number 1/4 in. Coning Tool Bushing BC4 1 3/8 in. Coning Tool Bushing BC6 1 9/16 in. Coning Tool Bushing BC9 1 Carbon Spring Steel Spiral External Retaining Ring CSS-RRSE-1750-062 1 3 Coning Tool Housing MS-CTK-CT-HSG 1 4 SS Set Screw, 1/4-20 × 5/16 in. 188-SSCA-250-20-313 10 1/4 in. Coning Tool Blade, Medium-pressure BL4M 1 1/4 in. Coning Tool Blade, High-pressure BL4H 1 3/8 in. Coning Tool Blade, Medium-pressure BL6M 1 3/8 in. Coning Tool Blade, High-pressure BL6H 1 9/16 in. Coning Tool Blade, Medium-pressure BL9M 1 9/16 in. Coning Tool Blade, High-pressure BL9H 1 5 6 Steel Set Screw, 10-32 × 1/4 in. S-SSCNA-190-32-250-BK 10 7 Coning Tool Driver/Blade Holder IP41629 1 8 Coning Tool Drive Nut IP41633 1 9 Handle Shaft Adapter IP41645 1 10 SS Set Screw, 3/8-24 × 3/8 in. 188-SSCA-375-24-375 10 11 Coning Tool Handle IP41636 1 12 Drive Adapter IP1646 1 13 SS Cap Screw, 1/4-20 × 1.000 in. 188-SCSA-250-20-1000 10 14 15 Manual Adapter IP41625 1 1/4 in. Tube Vise VS4 1 3/8 in. Tube Vise VS6 1 9/16 in. Tube Vise VS9 1 17 18 Manual Coning and Threading Tool (IPT Series) User’s Manual Threading Tool 1 6 3 2 5 3 4 5 6 Manual Coning and Threading Tool (IPT Series) User’s Manual Reference No. 1 Minimum Order Quantity Description Ordering Number 1/4 in. Threading Tool Bushing BT4 1 3/8 in. Threading Tool Bushing BT6 1 9/16 in. Threading Tool Bushing BT9 1 1/4 in. Threading Die MS-DT4 1 3/8 in. Threading Die MS-DT6 1 9/16 in. Threading Die MS-DT9 1 3 SS Set Screw, 1/4-20 × 5/16 in. 188-SSCA-250-20-313 10 4 Threading Tool Housing IP41640 1 5 Threading Tool Handle IP41643 1 6 Handle Grip MS-HNDL-GRIP-500 1 2 19 Warranty Information Swagelok products are backed by The Swagelok Limited Lifetime Warranty. For a copy, visit swagelok.com or contact your authorized Swagelok representative. Caution: Do not mix or interchange parts with those of other manufacturers. Swagelok—TM Swagelok Company © 2014 Swagelok Company Printed in U.S.A. April 2014, R0 MS-13-224


© Copyright 2026