
Open Loop Controller MP Series Reference Manual
Open Loop Controller MP Series Reference Manual MP Series Open Loop Operator’s Manual Table of Contents Chapter 1: Introducing the MP300 Series ....................................................................................... 3 Chapter 2: Machine Configuration ................................................................................................ 26 Chapter 3: Operating Procedure ................................................................................................... 51 Chapter 4: Setting the Customizing Switches................................................................................ 64 Chapter 5: Options ........................................................................................................................ 75 Chapter 6: Troubleshooting .......................................................................................................... 82 Chapter 7: Controller Model Types ............................................................................................... 88 Chapter 8: Specifications ............................................................................................................. 118 Chapter 9: Changes to Software.................................................................................................. 120 2 MP Series Open Loop Operator’s Manual Chapter 1: Introducing the MP300 Series The AMS MP300 SERIES controller is a length control system used on roll formers and cutto-length machines that produce sheet metal parts from coil stock. The MP300 SERIES controller is the most advanced control system available and will greatly enhance the performance and productivity of these machines. Other control systems use general-purpose electronic counters as the length control device. These systems can be difficult to use and offer little added benefit beyond material measurement and piece counting. The AMS controller is a custom designed microcomputer that is designed exclusively for cut-to-length machines, which enables the MP300 SERIES controller to offer many features not available on simple electronic counters. In seeking to design a new generation electronic length control system, AMS Controls had the following goals in mind: • Improve the length accuracy • Improve the machine productivity • Reduce the amount of material waste • Provide in-line punching control (if using punching option) • Easy for the operator to use • Adaptable to a wide variety of machines All of these goals have been achieved with the design of the MP300 SERIES Controller. Accuracy On most cut-to-length machines without servo drives, accuracy depends upon the repeatability of the machine to run at a constant speed and to delay the same amount of time for each operation. With electronic length controllers, accuracy is lost when machine fluctuations occur. The MP300 SERIES controller, however, constantly monitors the performance of the machine and compensates for these variations resulting in improved accuracy. For flying cutoff machines, the exclusive Speed Compensation feature allows accurate punches and cuts at any line speed. For feed-to-stop machines, the Adaptive Slowdown feature and the Overshoot Compensation feature greatly improve machine accuracy. 3 MP Series Open Loop Operator’s Manual Productivity Productivity can be improved with the AMS controller in three ways. First, the improved accuracy with the MP300 SERIES controller allows machines to be run at higher line speeds. Secondly, for feed-to-stop machines, the Adaptive Slowdown feature insures a minimum feed time for any length run and any hole spacing. Thirdly, for all types of machines, the multiple order feature allows many jobs to be programmed at one time (even while other orders are being processed and run), so delays between orders can be eliminated. The AMS Controller eliminates a large amount of material waste by only requiring a single manual cut at the beginning of a new coil. This cut can be made while the machine is stopped, as opposed to a flying crop cut, which further reduces waste. Easy to Use The MP300 SERIES Controller is a sophisticated computer running a very complex program. This does not, however, mean that a computer expert is required to operate it. The controller has a liquid crystal display (LCD) that prompts the operator for information in plain English and with words that are familiar. On the “Status” display, the operator can see the order that is being run, his progress through the order, and the speed of the line. Easy to Install The MP300 SERIES Controller has logic built into it to handle most machine control functions. The user does not need to add Programmable Logic Controllers (PLCs) or relay logic circuits to get the correct machine sequence and safety features. The AMS controller can control a variety of different machines. For each type of machine, a different set of machine parameters must be programmed into the controller. To simplify this procedure, the type of machine is programmed via a set of switches. The controller reads these switches to determine the type of machine it is connected to. It can then limit the list of parameters that must be programmed to only those that apply to this type of machine. 4 MP Series Open Loop Operator’s Manual About this Manual This manual gives detailed information on the installation, operation, and maintenance of the MP300 SERIES Controller. Instructions for installing the AMS Controller on most machine types are included. AMS engineers can help on installation conditions not covered by this manual. Instructions on how to operate the controller are included. This covers how to program orders and run them. It also covers the best way to handle a variety of special circumstances that can come up with most machines of this type. Another section of the manual includes a troubleshooting guide to follow if problems should arise. The Setup sheet in Appendix A of this manual provides a place to record information about your particular installation. Be sure to record this information and keep this manual in a safe place for later referral. If calling AMS for technical assistance, be sure to have this manual in front of you as well as the model number and serial number of the controller and software version number (displayed when the controller is turned on). Note: AMS Controls reserves the right to change the operation and/or directions within the manual without notice or approval. 5 MP Series Open Loop Operator’s Manual System Description An Electronic Length Control System is the controlling mechanism for machines that produce individual parts from a coil of stock material. Block diagrams of some sample systems are shown in Figures 1-1 through 1-2. Many other configurations are also possible. Material Flow Roll Former Shear Encoder Press Controller Figure 1-1. Electronic Length Control System Block Diagram 6 MP Series Open Loop Operator’s Manual Punch Material Flow Roll Former Shear Encoder Press Press Controller Figure 1-2. Control System with a Shear and a Punch The controller performs the following functions: • Controls the material movement through the machine. • Measures the amount of material moving past the cutoff press. • Cycles the punch presses at programmed points. • Cycles the cutoff press at the programmed length. • Stops the machine when the correct number of parts is produced. The measuring device is an optical shaft encoder, also called a pulse generator. A wheel with a known circumference is attached to the encoder and rides on the material. As the material moves through the machine, the wheel rotates and the encoder generates electrical pulses proportional to the amount of material moved. The controller counts these pulses to determine how much material has moved through the machine. When the material reaches a point where a punch is needed, the controller cycles the punch press. When the material past the cutoff press is equal to the length of the part programmed, the controller cycles the shear press and increments the quantity that is DONE. When the quantity DONE is equal to the programmed quantity, the controller stops the machine, unless other items are programmed to run immediately. There are two basic categories of automatic cutoff machines: flying cutoff machines and feed-to-stop machines. With flying cutoff machines, the material does not stop for each cut and the cutoff die moves along with the material during the shearing cycle. With a feed-to7 MP Series Open Loop Operator’s Manual stop machine, the controller stops the material for each cut and the cutoff die remains at a fixed location. The common practice for this type of machine is to shift into a creep speed just before the cutoff point to increase the precision of the cut and reduce the jolt that can occur if the material is abruptly stopped. The controller controls both the speed shift and the stopping action. The MP350P controller provides similar control for an in-line punch press, which eliminates the need for secondary operations on the cut piece. The punch press may operate on the fly, or in a stopping mode, and may or may not be preceded by a shift of speed, independently of the shear configuration. 8 MP Series Open Loop Operator’s Manual MP300 SERIES Hardware Description 7 8 9 SET UP 4 5 6 * 1 2 3 PRG CE 0 . CYCLE RUN ENT HALT MP300 SERIES LENGTH CONTROL SYSTEMS Figure 1-3. MP300 SERIES Front Panel Microcomputer The MP300 SERIES controller is the control element of an advanced length control system. It is equivalent to a personal computer (PC) packaged in a rugged industrial enclosure. Programs are stored in PROM (Programmable Read Only Memory) memory, instead of a disk. These programs were written by AMS to perform the specific task of length control. The PROM is factory programmed. The user does not have to write programs for the controller and only has to enter data on what to produce. This data is stored in RAM (Random Access Memory). In a normal PC, this memory is erased when power to the PC is removed. In the MP300 SERIES controller, a battery maintains this memory when the controller is off and user data does not have to be 9 MP Series Open Loop Operator’s Manual re-entered each time power is removed. RAM is used to store machine setup data and job information data. Operator Interface Replacing the monitor and keyboard of a PC, the MP300 SERIES controller has an LCD (Liquid Crystal Display) screen and a small keypad. The LCD has two lines of display with 24 character positions on each line. The keypad, shown in Figure 1-4, has 16 keys for basic numeric entry. Any non-numeric data required is achieved by scrolling through the available options on the display and selecting the correct one. For example, units of measurement are displayed in inches, centimeters, or millimeters. When selecting this parameter, pressing any number key will cause the display to toggle between “English”, “Metric CM”, and “Metric MM”. Pressing the ENTER key when the correct variable is displayed will select that option. This method keeps the data entry simple and avoids spelling errors. There are three control push button switches on the panel of the controller for CYCLE, RUN, and HALT functions. These are large industrial grade controls that activate machine functions. The CYCLE switch is used to cycle the SHEAR and to zero the length counter. This function is active in the manual mode on all types of installations. In the automatic mode, the CYCLE switch is only active on non-stopping machines to allow for the operator to cut out bad material without stopping the line. The RUN switch is used to put the controller in the automatic mode and to start production. If the controller is configured for REMOTE RUN, the RUN push button will no longer be active (See RUN CIRCUIT in chapter two of this manual). The HALT switch will stop production and place the controller in the manual mode and is active in both REMOTE and LOCAL modes. Controller Keys and Functions To help the operator become familiar with the keys on the controller, a brief description of the function of each key will be given. 10 MP Series Open Loop Operator’s Manual Figure 1-4. MP300 SERIES Keypad Keypad Description SET UP This key is used to select one of 2 or 3 menus to access other items. Among them are: assign the next job to run, increment the quantity of an order to make another part, view the three footage totalizers, adjust the machine setup parameters, perform the Auto Calibrate procedure, perform the Calibrate Trim procedure, enter the Manual Calibrate data, and enter the Input / Output display screen. Asterisk (∗) This key is a STATUS key which allows the operator to view the current job number in progress, the number of parts assigned to a job with the number left to run, and the current position of the material past the shear. PRG (Programming) The PRG key is used to assign a job number and define the quantity and length of parts to be run. If the machine has the punching capabilities, the type of punching option is also defined when programming a part. CE (Clear Entry) This is a “Clear Entry” key, the main use of this key is to correct the entered data when a mistake is made. Pressing this button will clear out the previously entered data so that the data can be entered again from the beginning. It is also used to clear any error messages. 11 MP Series Open Loop Operator’s Manual ENT (Enter) This key can be defined as a “take it” key. The data that is entered into the display is not accepted by the controller until the Enter key is pressed. Inputs The main input into the controller is the group of signals from the encoder. A simplified diagram of this circuit is shown in Figure 1-5. The encoder outputs are differential line drivers that work well in electrically noisy environments. With the twisted pair cable, electrical noise is induced equally on both the normal and the complement signals. The differential line receiver in the MP300 SERIES controller looks at the difference in the two signals only. This causes the noise on the two lines to cancel each other and thus greatly increases the noise immunity of the encoder circuit. Figure 1.5 Simplified Encoder Channel Circuit There are eight discrete inputs into the MP300 SERIES controller. They sense continuity between an input and a common connection. A typical diagram of a sinking input circuit is shown in Figure 1-6. This circuit requires a 24 VDC biasing circuit that is provided either by the user or by the AMS controller, depending on the controller configuration. Note that no voltage source should be connected to any input. Doing so can severely damage the controller. Relay contacts, limit switches, or control switches are the most common inputs used. 12 MP Series Open Loop Operator’s Manual The input may also be the collector of an open collector NPN transistor that has its emitter connected to the common terminal. Current in each input circuit is limited to 15 milliamperes. +24 VDC +5 VDC CONTROLLER Figure 3 -4. Typical Input Circuit Outputs The Standard DC output of the MP300 SERIES controller is a 4-Ampere open collector transistor. This is available in all configurations and for all outputs. A diagram of a sinking output circuit is shown in Figure 1-7. The biasing voltage for the load can be from 12 to 24 volts. If this voltage source comes from outside of the MP300 SERIES, the common of this supply must be connected to the common of the controller. The suppressing diode shown reduces the noise generated by inductive loads when the transistor turns off. The load can be either a DC solenoid or a DC Relay. AC Relay Output The AC RELAY OUTPUT is a 5-ampere dry circuit relay contact. It is available on the first six outputs of the AC Consolette model and on the FORWARD output of the SL Consolette model. +24 VDC +24 VDC Suppressing Diode CONTROLLER Figure 1-7. Standard DC Output 13 MP Series Open Loop Operator’s Manual In both models, normally open contacts are available on all outputs and normally closed contacts are available on the FORWARD output. Solenoid Driver The SL Consolette model has two special solenoid driver circuits for the PUNCH and DIE BOOST outputs. These circuits provide a 60 VDC pulse to a 24 VDC solenoid for a short duration that greatly decreases the response time of the solenoid. On flying die applications, the response time of the valves directly affects the accuracy. This circuit, when directly connected to the valve solenoid, makes the valve more responsive and consistent. The circuit is designed to limit the duration of the high voltage pulse to avoid damage to the solenoid. This output should not be connected to relays that could be damaged by the high voltage. Analog Speed Output If the optional ANALOG SPEED OUTPUT is included, the MP300 SERIES controller will provide an analog voltage signal that will vary between 0 and 10 VDC. This output can drive loads as low as 1000 ohms. The signal produced is proportional to the desired machine speed. This voltage can be connected to an AC inverter, a DC drive system, a proportional hydraulic feed system, or any device that can vary the machine speed in proportion to a voltage level. See Chapter 7 for details on the MP300 Series controller with Analog output. 14 MP Series Open Loop Operator’s Manual Special Features The MP300 SERIES Controller has been designed to offer advanced features for length control that are not available on simple electronic counters. These features offer better accuracy and reduce the amount of waste that can occur. They also eliminate the need for additional control circuits to control the machine. Speed Compensation An electronic counter in an electronic length control system produces an output on an exact interval of material movement by faithfully counting all of the encoder pulses. On an ideal machine, an electronic counter will produce accurate parts. However, an ideal machine does not exist and varying machine conditions will produce varying part lengths. The best example of this would be a phenomenon that occurs on flying die machines. On such a machine, the counter produces a shear pulse at a regular interval of encoder pulses. The material, however, is actually cut at a time after the shear pulse (due to delays in the press). It takes time to energize valves, fill cylinders, and move dies. During this delay, the material moves a distance that is proportional to the speed of the material and the duration of this delay. The actual shearing operation is displaced from the point at which the counter activates the shear. A B C D FLOW Figure 1-8 Typical Sheared Part Layout 15 MP Series Open Loop Operator’s Manual Figure 1-8 shows what actually happens in a typical part sheared with a flying die. The counter activates the shear at an interval of the part length L at points A and B. Due to the press delay, the material is actually cut at points C and D. The resulting part length L' can be calculated as follows: L' = L - T1S1 + T2S2, where L is the programmed part length T1 is the delay time at the leading edge S1 is the line speed at the leading edge T2 is the delay time at the trailing edge S2 is the line speed at the trailing edge If the speed and delay remain constant, then T1S1 will equal T2S2 and L' will equal L. If either parameter changes from one cut to the next then the resulting lengths will also vary. For most pneumatic and hydraulic presses, the delay time is usually constant for constant applied pressure. However, speed variations are common and are a main source of inaccuracy on flying die machines. The MP300 SERIES controller eliminates this problem with its Speed Compensation feature. The controller constantly monitors the line speed and calculates a modified shear target in proportion to the line speed and a known delay time. Figure 1-9 shows an example of how Speed Compensation works with a varying line speed. 16 MP Series Open Loop Operator’s Manual The parts are at intervals of 1000 encoder counts. Instead of the normal shear outputs at 1000, 2000, 3000, etc., the MP300 SERIES calculates targets of 985, 1970, 2985, 3995, etc. in proportion to the changing line speed. If the delay remains constant, then the parts produced should be the correct length. Speed Shear Output Point (with speed compensation) 0 985 1970 2985 3995 4000 1000 2000 3000 0 Shear Output (without speed compensation) Figure 1-9. Speed Versus Shear Target Adaptive Compensation for Stopping Machines Feed-to-stop machines are often used instead of flying die machines because the dies are simpler and the machines are normally more accurate. Higher accuracy is normally achieved by slowing the line speed down to a creep speed just before the target. This is done to minimize the effect of a delay in stopping that occurs when the stop signal is given by the controller. 17 MP Series Open Loop Operator’s Manual Similar to the flying die situation, it takes a finite amount of time for valves to close, brakes to engage, and motors to stop turning. With simple counters, an overshoot past the target always occurs. Shifting into slow speed minimizes the amount of overshoot. If the delay time and slow speed are constant, then lengths are accurate with the exception of the first piece, which is normally longer than the ones that follow. The amount in advance that the machine is set into slow speed is determined by the maximum speed of the machine and how quickly the material can decelerate from high speed to slow speed. The MP300 SERIES controller improves the performance of feed-to-stop machines by compensating for the stopping delay time and automatically setting the slowdown distance. With a technique similar to Speed Compensation, the controller uses the speed to calculate an advanced target to stop the machine so that it coasts into the exact shear point. The AMS controller measures the amount of overshoot or undershoot on each move and adjusts its internal parameters to match the characteristics of the machine. The user can specify a tolerance so that accuracy is assured. The AMS controller also has a feature called Adaptive Slowdown that minimizes the feed time of feed-to-stop machines. Figure 1-10a shows the movement profile of a typical feedto-stop machine. These systems use a fixed length slowdown distance that must be sized for the longest part length run. Short parts then spend a long time in slow speed because the material never reaches full speed when the slow shift point is reached. The controller with Adaptive Slowdown uses the measured line speed and deceleration characteristics of the machine to calculate the optimum point to shift into slow speed. The result, shown in Figure 1-10b, is less time spent in slow speed on short parts which leads to more productivity. The MP300 SERIES controller continuously monitors machine parameters to automatically adjust for machine changes. Distance S P E E D Short Move Slow Length Long Move Slow Length Figure 1-10a. Speed Profile without Adaptive Slowdown 18 MP Series Open Loop Operator’s Manual Distance S P E E D Short Move Slow Length Long Move Slow Length Figure 1-10b. Speed Profile with Adaptive Slowdown 19 MP Series Open Loop Operator’s Manual Built-in Programmable Logic Controller When designing a cut-to-length machine with an electronic counter for the length control device, a Programmable Logic Controller (PLC) or relay logic is normally added to generate the proper sequence of the machine and add standard safety features. AMS has eliminated the need for a PLC by building comprehensive control logic into the MP300 SERIES controller. This logic implements the following features: • Four output configurations for speed control • Run-Halt control from either the front panel or an external contact • Manual cycle of the Presses only in the Halt mode on feed-to-stop machines • Manual crop allowed while running on non-stop machines • Jog in manual only • Motor starter interlock circuit • Automatic Shear or Press operation only in Run mode • Halt on emergency stop or overload The result is that the MP300 SERIES controller can be adapted to most machines with a minimum amount of external electrical components. The only "programming" that a user must do is select the proper TYPE of machine by setting the configuration switches. The controller then implements the proper logic based upon the TYPE. 20 MP Series Open Loop Operator’s Manual Controller Power Depending on the model of the controller, an AMS controller may require 24VDC or 115VAC for input power. All input power should be within the specification limits. Power to the controller should be switched independently of other devices through a separate OFF/ON switch. The emergency stop circuit should not interrupt this power. In an emergency-stop condition, the controller should be able to track any movement of the material, therefore allowing production to resume after the condition is reset without any loss in accuracy. LOCAL In local mode the Remote Start/Stop circuit is not necessary. The RUN and HALT push buttons on the controller’s front panel are used. All other circuitry remains the same and the sequence of events should go as follows: With the E-Stop circuit reset, the operator presses the green “RUN” push button on the controller. The AMS controller detects the input providing the Safety Interlock Input is closed (CR1 at Input 3). If a job is programmed, no errors exist, and all other pertinent items are present, the controller turns on the “Run” output. The controller latches itself in until the red “Halt” push button on the front panel of the controller is pressed. The Run output should also energize lights, buzzers or other safety devices to let personnel know that the machine is now in automatic mode. Motion Outputs The motion outputs available on the model MP300 controllers are Forward, Fast, Slow, and Reverse. Not all outputs are available on all machines (see figures 2.2 and 2.3 for controller types and their outputs). The “Forward” or “Fast” outputs should be used to put the material into motion when the controller is placed in the RUN mode. The “Run” output should be used to latch in the remote run circuit. Using the “Run” output to put the material into motion could cause some problems in the operation of the machine. First, some controllers will continue to shear or punch after a halt has been performed in order to catch targets as the line coasts to a stop. Second, a “Delay after Shear” feature is available to stop the material motion (Forward or Fast) after each cutoff. 21 MP Series Open Loop Operator’s Manual Even though the motion is turned off, in both cases through the “Forward or Fast” output, the “Run” output remains on the entire time. If the “Run” output is used for motion in these cases, the line will not stop at the correct times! Line Movement The “Line Movement” parameter was added to the software to handle the situation where the run output is wired for material movement. If the Run output is wired to control the motion of the material, the setup parameter LINE MOVEMENT should be set to “Run”. With the parameter set to “Run”, the Run output turns off immediately after the Halt button is pressed. If the LINE MOVEMENT parameter is set to “Fast/Fwd”, the Run output remains on while the material coasts to stop as it always has. On two-speed systems, Fwd/Slow or Fast/Slow speed logic, the “Forward” and “Slow” outputs will energize at different times depending on what speed logic is selected. Single speed systems will automatically have the Forward-Slow speed logic. The charts in Table 2.2 and 2.3 show the output logic for each selection. Machine State Run Fast Run Slow Jog Fwd Halt Jog Rev Forward output ON ON ON OFF OFF Slow OFF ON ON ON ON Reverse OFF OFF OFF OFF ON Run ON ON OFF OFF OFF Table 2.2 Status of Outputs in Forward-Slow Machine State Run Fast Run Slow Jog Fwd Halt Jog Rev Fast ON OFF OFF OFF OFF Slow OFF ON ON OFF ON Reverse OFF OFF OFF OFF ON Run ON ON OFF OFF OFF Table 2.3 Status of Outputs in Fast-Slow 22 MP Series Open Loop Operator’s Manual Shear Control Circuit Optimal performance of the shear circuit can be met by customizing the AMS controller to a particular type of press and feed control by the appropriate setting of the “TYPE” setting switches. The controller can be configured to work with flying-cut or feed-to-stop applications. Outputs are available for SHEAR DOWN and SHEAR UP or SHEAR DIE BOOST. AMS controllers are designed to connect directly to 24VDC solenoids for optimal performance. A solenoid-driving device, such as the AMS 3840 power module, can provide more accurate firing of the press. See Figure 2.4 for wiring possibilities. AMS #3840-1 POWER MODULE Shear Valve Shear Input From Controller 8 + IN1 SOLENOID DRIVER - ESR SOL1 (+) SOL1 (-) 24VDC 7 6 Figure 2.4 Typical Power Module Circuit If the solenoid for the shear output is not 24VDC, then an attempt should be made to replace the solenoid one that is. If this is not possible, then a 24VDC relay will have to be installed between the AMS output and the solenoid. AMS controllers have a timed shear output with a switch input override feature. The duration of the SHEAR DWELL or SHEAR DOWN output is programmable from 0 to 9.999 seconds. Please refer to timing diagram - Figure 2.5. If the AMS controller detects a switch closure at the SHEAR COMPLETE input during the dwell time, the shear output will turn off immediately (Figure 2.6). This is especially useful on mechanical presses that will need the shear-complete switch mounted in a location that will return the press to top-dead-center. In some applications, a 0.0-second Shear Dwell Time can be programmed if a SHEAR COMPLETE is used. If a shear complete is not detected within ten seconds, then the run 23 MP Series Open Loop Operator’s Manual output will be turned off. The SHEAR DWELL UP time will time out as programmed regardless of the complete input. Die Hits Metal SHEAR DWELL DOWN OUTPUT .125 SEC. .125 SEC. SHEAR DWELL UP OUTPUT Figure 2.5 Shear Dwell Down and Up Die Hits Metal SHEAR DWELL DOWN OUTPUT .0625 SEC. SHEAR COMPLETE INPUT .125 SEC. SHEAR DWELL UP OUTPUT Figure 2.6 Shear Dwell with Shear Complete 24 MP Series Open Loop Operator’s Manual Press Control Circuit The terms and definitions for the press control parameters are identical to its shear control counterparts. The press parameters will include PRESS DWELL DOWN and PRESS DWELL UP or PRESS DIE BOOST depending on the machine’s configuration. The press outputs can also signal the AMS 3840 power module or isolation relays for higher voltage solenoids. Like the shear output, the PRESS DWELL DOWN can be programmed from .000 to 0.999 seconds. A PRESS COMPLETE input will override the presses timed output and turn off the output immediately upon detection. In some applications, a 0.0-second time can be programmed if a PRESS COMPLETE is used. If a press complete is not detected within ten seconds, the run output will be turned off. The PRESS DWELL UP will time out as programmed regardless of the press complete input. See Figures 2.5 and 2.6. 25 MP Series Open Loop Operator’s Manual Chapter 2: Machine Configuration Initial Power Test Before plugging in the connectors to the controller turn on the power and check for the proper voltage at the connectors. For the panel mount version, be sure that the polarity of the 24 VDC is correct (Terminal 1 is +24 VDC and Terminal 2 is DC common). On the two console models (AC and SL), check for 120 VAC from pin J to both pins K and L. Also check for 0 VAC from pin K to pin L, this will ensure that the unit is properly grounded. With the proper voltage checked at the connectors, turn the power off and plug in the connectors. Reapply power and look for the display to light up after a few second delay. The display should be similar to the one in figure 3-1, below. AMS Controls, Inc. MP350P 6/06/01 Vx.xx Figure 3-1, Initial Display at Power Up. Make a note of the Version Number that is shown in the lower right corner of the display. Write the software version number on the data sheet that is shown in the Appendix of this manual. If you call AMS Controls with problems or questions, you may be asked for this number. Configuration Programming Before the controller is initially powered up, the customization dip switches on the back of the controller must be set. Refer to Chapter 8 for a description of the switches for the model of controller to be installed. If the switches are changed with power on, the power must be cycled so the controller can recognize the new switch positions. Memory will be cleared at this time. If parameters and job data have been entered, record this data for reentry before changing the switches. In addition to setting the customization switches, the user can further customize the MP300 SERIES by programming parameters in the Configuration mode. If the customizing switches have been changed, the MP300 SERIES will erase all memory and go immediately into the Configuration mode. 26 MP Series Open Loop Operator’s Manual The Configuration mode can be entered from the Status Screen by pressing the “SET UP” key until the following screen is displayed, and then by pressing the “4” key. 1= Next Job 3= Footage 2= Inc Qty 4= Configure Figure 3-2. Next Job, Inc Qty, Footage, Configure Screen Some of these parameters are general and apply to all switch settings while others apply only to certain switch settings and certain controllers. In this section, all of the possible setup parameters will be defined. Controller Model Types, in Chapter 8 of this manual, shows the specific parameters for each possible controller so you can see which parameters apply to your particular installation. 27 MP Series Open Loop Operator’s Manual Configuration Parameters When the controller is first energized, the memory has been cleared, or the Configure option is selected, the Configuration Screen will be displayed on the controller. The setup parameters can then be edited and entered into the controller. Configure Type 17 Halt Mode Bundle Halt Figure 3-3. Configuration Screen Any number key will toggle through the parameter selections. Press the “Enter” key to accept your selection and the next parameter will automatically be displayed. The “Setup” key will take you through the list in the other direction. Halt Mode (All Models except MP301 and MP301H) The Halt Mode determines when the controller will execute an automatic line halt. The user has the choice of going from one item to the next without stopping, stopping after the completion of a bundle, or stopping after the completion of an order. The HALT MODE has three options BUNDLE HALT (default) AFTER JOB DON’T HALT In the BUNDLE HALT mode, the controller will not halt the machine at the completion of a job if the next consecutive job number has been programmed with a quantity and a length. This feature can be used to create automatic bundle stops by simply skipping a job number when a bundle stop is required. When the AFTER JOB mode is selected, the controller will halt the machine after each batch is completed. In the DON’T HALT mode, the controller will not halt the machine at the end of a batch as long as there is another batch ready to run. The batches need NOT be programmed with consecutive Job Numbers. The controller will not halt until ALL batches are done. To toggle through the choices, press any number key and when the correct choice is visible, press ENT to record your selection. 28 MP Series Open Loop Operator’s Manual Refresh Done Job? If NO is selected here, when a job is finished its remaining quantity is left at zero; if YES is selected, the remaining quantity is reset to the quantity programmed so that the job can be run again without manually reprogramming it. To select the desired mode of operation, press any number key to toggle the display between NO and YES. When the correct choice is visible, press ENT to record your selection. Batching (MP301 and MP301H only) Batching can be used as a convenience to users who wish to produce parts without ever stopping the line. If the setup parameter is set to “NO” the operator is only asked for a part length whenever he programs a job. There is no need to enter a quantity. On the next valid Run input, the MP301 or MP301H will begin production on the programmed length and continue running until the line is manually halted. Set Batching to “YES” for normal MP301 operation. The controller will prompt for a quantity when programming and will halt automatically after they are completed. Press any number key to toggle the response from “YES” to “NO” then press ENT to record your selection. Halt No Parts to Run (With Punch Only) If YES is selected, the controller will halt when all remaining parts have been loaded into the controller's memory. At this time it is desirable to program more orders so that scrap is not produced. If NO is selected the controller will not halt when all parts are loaded into memory and thus may produce scrap when more orders are run. Shear Dwell Down SHEAR DWELL DOWN is the time it takes for the shear to move from the top of the stroke to the bottom of the stroke. The range of time allowed is 0.000 to 9.999 seconds and can be set to the nearest millisecond. If a SHEAR COMPLETE switch is wired in, the shear dwell time should be long enough for the press to go past the shear complete switch. When the SHEAR COMPLETE switch closes, the SHEAR DWELL time will be overridden and the output will be turned off immediately. Note: The shear dwell can be set to a value of zero as long as a shear complete switch is wired into the circuit. To ensure that a feed-to-stop line is not restarted until the shear complete switch has closed, enter a SHEAR DWELL TIME OF ZERO. The controller will interpret this as “do not restart the line until the complete switch closes.” If the complete input is not made within 10 seconds, then the line is halted. 29 MP Series Open Loop Operator’s Manual A non-stop line with a SHEAR DWELL OF ZERO, will run normally as long as the shear complete is activated after a shear. If the shear complete is not activated the machine will continue to run for ten seconds, stop, and display and error (COMPLETE DETECT FAILURE). Shear Dwell Up SHEAR DWELL UP is the time necessary for the shear to return from the bottom to the top of its stroke. The shear dwell up time and the shear dwell down time sum is the total press cycle time. On Flying Die machines, these parameters are combined into one called, SHEAR DWELL. Boost Dwell (With Shear Boost Only) The BOOST DWELL time is the time after the shear that the die continues its forward velocity to keep from causing damage to the leading edge of the material while the die returns. Refer to figure 3-4 for a visual description of the boost parameters. The range of acceptable values is 0.000 seconds to 9.999 seconds. The total Die Boost output “on” time is the Die Boost Reaction time + Shear Dwell + Die Boost Dwell. With a zero Boost Dwell, the Boost output will still equal the Shear Dwell time. If the leading edge of the part gets caught on the die, the SHEAR BOOST DWELL time should be increased if the die moves too far out causing the material to become misfed, the SHEAR BOOST DWELL time should be decreased. SHEAR DWELL ENCODER COUNT RESET TO ZERO SHEAR OUTPUT DIE BOOST OUTPUT WITH DIE BOOST DWELL DIE BOOST DWELL DIE BOOST OUTPUT WITH DIE BOOST REACTION DIE BOOST REACTION (TARGET COINCIDENCE POINT) Figure 3-4. Die Boost Timing 30 MP Series Open Loop Operator’s Manual Boost Comp (With Shear Boost Only) Boost Compensation is the Length in inches that the die normally travels forward until it engages the metal during a shear cycle while in the run mode. This feature was added specifically for machines that operate with a SHEAR DIE BOOST device. Under normal operation, when a standing crop cut (manual shear) is performed, the shear cycles without the die boost device being activated. Ultimately, this results in the first part produced after a standing cut being short by the distance the die normally travels when the shear cycles under a RUN condition. BOOST COMPENSATION is a parameter designed to correct this problem. Enter the length in inches that the die normally travels during a shear cycle under a RUN condition. This value will automatically be added to the length of the first part produced after a standing crop. The BOOST COMPENSATION (BOOST COMP) parameter has an allowable range of 0.00 to 10.00 inches. Shear Kerf The SHEAR KERF is defined as the amount of material removed when the shear cycles. Some cutoff dies have two cutting edges that blank out a slug of material. Shears that have a cutting action similar to a pair of scissors would use a kerf value of zero. For other types of dies or saws, the SHEAR KERF should be set to the length of the slug removed. This length is added to the length of each part programmed so that the resulting part length will be correct. The maximum SHEAR KERF is 10.0000 inches. Minimum Part The MINIMUM PART defines the length of the shortest piece the MP300 SERIES controller will be allowed to make. For some applications short part lengths may cause problems for the roll former or other tooling. By setting a value for the MINIMUM PART, the user will not be allowed to program any items that make parts shorter than this length. Any value from 0 to 999.999 inches may be entered. Delay After Shear This parameter allows the operator to create a separation between parts. The line remains stopped for this amount of time after the shear has cycled. Increase this time to produce a longer pause between parts up to a maximum of 60.0 seconds. For no pause, enter zero. This parameter is not applicable when the LINE MOVEMENT parameter is set to RUN. Important Notice: The customer is responsible for adequate safety devices as well as visual and audible indicators to prevent personnel from potential hazards. The long time delay that is allowed must not be confused for a machine-off condition. 31 MP Series Open Loop Operator’s Manual Punch Dwell Down (With Punching Only) This sets the time duration of the punch press cycle in seconds. PUNCH DWELL DOWN is the time it takes for the press to go from the top of its stroke to the bottom. The range of time allowed is 0.000 to 9.999 seconds, and can be set to the nearest millisecond. The PUNCH DOWN time will be overridden by the closure of a PRESS COMPLETE switch if used. Punch Dwell Up (With More Than One Press) PUNCH DWELL UP is the time it takes to return from the down position to the up position. On flying die machines these parameters are combined into one called PUNCH DWELL. The PUNCH DWELL time that is entered into the controller is actually the PUNCH DOWN time, and an equal amount of time is then allotted for the up time. Punch Boost Dwell (With Boost Only) The PUNCH BOOST DWELL is the time after the press that the die boost output remains on to further push the die forward. This ensures that the press die is out of the way before the boost returns. The die boost output turns on for the PUNCH BOOST REACTION time before the punch occurs and remains on the entire press cycle time plus the PUNCH BOOST DWELL time. The range of acceptable values is 0.000 seconds to 9.999 seconds. Scrap Length (With Punching Only) When a new coil is loaded with the material threaded through the shear, the MP controller may not be able to immediately produce the next order without incurring some scrap. The next potential part may be past a required punching station and therefore cannot be made. To solve this problem, the AMS controller will insert shear only parts until the next normal part is beyond the first required punch operation. The length of these shear only parts is determined by the SCRAP LENGTH parameter. The user can set this parameter to produce usable parts or lengths that are at least easy to handle. For example, if your SHEAR TO PUNCH DISTANCE is 300” and the SCRAP LENGTH is set to 120”, the MP controller will make 3 pieces that are 120” long, that you may sell without holes. If a SCRAP LENGTH of zero is entered, the controller will produce scrap pieces at the part length of the current order. Shear-Punch (With Punching Only) The SHEAR-PUNCH DISTANCE is the physical length between the shear press and the punch press. This distance can be measured by performing a manual shear and a manual punch, jogging the material forward, and measuring from the cut edge to the center of the punch knockout. The largest acceptable value is 1000.0 inches. Speed Logic (Two Speed Only) The MP300 SERIES has four outputs that control the speed and direction of the machine. To accommodate more than one wiring possibility, the MP300 SERIES may be run with one 32 MP Series Open Loop Operator’s Manual of two different SPEED LOGIC settings: FORWARD-SLOW or FAST-SLOW. The controller outputs are defined differently for each logic setting. The outputs, their definitions, and their states in various conditions are shown in tables 3-1 and 3-2. Any number key toggles between FORWARD/SLOW and FAST/SLOW. Select the appropriate SPEED LOGIC to match your machine-wiring configuration. Machine State Run Fast Run Slow Jog Fwd Halt Jog Rev Output 1 (Forward) ON ON ON OFF OFF Output 2 (Slow) OFF ON ON ON ON Output 3 (Reverse) OFF OFF OFF OFF ON Output 6 (Run) ON ON OFF OFF OFF Table 3-1. Status of Outputs in Forward-Slow Machine State Run Fast Run Slow Jog Fwd Halt Jog Rev Output 1 (Forward) ON OFF OFF OFF OFF Output 2 (Slow) OFF ON ON OFF ON Output 3 (Reverse) OFF OFF OFF OFF ON Output 6 (Run) ON ON OFF OFF OFF Table 3-2. Status of Outputs in Fast-Slow Minimum Slow Distance (Two Speed Only) A minimum amount of slow distance can be manually set by this parameter (if using twospeed logic). The value for this parameter is added to the calculated slow distance to extend the time that the material moves in slow speed (if the DECEL FACTOR is set to AUTO). The MP300 Series controller calculates the distance from the programmed position that the machine should shift into slow speed. This is based on the speed of the material and the deceleration characteristics of the machine. 33 MP Series Open Loop Operator’s Manual Increase this value for a longer slow distance. Decrease this value for a shorter slow distance. A longer slow distance can improve part accuracy but too long a value can slow production. The distance should be set long enough that the material fully reaches the slow speed before stopping. When the DECEL FACTOR AUTO setting is used, it is best to set this parameter to a few inches initially until the system has been calibrated and the controller has had a chance to get accustomed to the behavior of the machine. When the machine is running good parts repeatedly, reduce the MINIMUM SLOW DISTANCE as much as possible to increase the production rate. This value should be set long enough that the material fully reaches the slow speed before stopping. Tolerance (Feed-to-Stop Only) This is the maximum allowable error in the positioning of an operation. You must be careful to set this value within the limits of the machine. TOLERANCE should be set small enough to get acceptable parts but wide enough to avoid production interruptions. On feed-to-stop machines, the MP300 SERIES controller can check for the material to be within a specified tolerance before activating the press. If the material has not stopped within this tolerance, the controller will halt and an error will be displayed. If the tolerance is set at 0.03 inches, the length past the shear must be equal to the programmed length plus or minus 0.03” before the shear will be cycled. The controller allows values from 0.0005 inches to 10.0000 inches. The default value for TOLERANCE is 0.1 inches. Encoder Direction Pressing any number key toggles between CW (Clockwise) and CCW (Counter-Clockwise) for the direction of the encoder. If you run the line forward and the display counts negative, change the ENCODER DIRECTION. Resolution The RESOLUTION parameter defines the length of material movement for each increment of the encoder. It is a function of the circumference of the measuring wheel and the number of counts per revolution of the encoder. The formula for calculating RESOLUTION is as follows: Resolution = Circumference 4 x Encoder Count For an AMS encoder, the encoder count is the model number of the encoder. A Model 256 is a 256 count encoder. A Model 1000Z is a 1000 count encoder. The most common wheel 34 MP Series Open Loop Operator’s Manual used has a circumference of 12 inches. For this size wheel, RESOLUTION would be as follows: Model Resolution 256 (1024 ppr) .01171875 500 (2000 ppr) .006 1000 (4000 ppr) .003 2000 (8000 ppr) .0015 It is not necessary to precisely measure the circumference or calculate the formula to any great precision. Nominal values can be used with precise results achieved during calibration. Values between 0.00004000 inches and 0.04000000 inches are acceptable. Line Movement Used on flying die lines only, the LINE MOVEMENT parameter determines whether the forward output will be used to move the material or if the run output will be used to move the material. Pressing any number key will choose between Fst/Fwd and Run. With the parameter set to “Run”, the Run output turns off immediately after the Halt button is pressed. !!! Warning. Though the run output is turned off with a Halt, presses will continue to fire as the material coast to a stop!!! If the LINE MOVEMENT parameter is set to “Fast/Fwd”, the Run output remains on while the material coasts to stop. During this coast-to-stop period, presses will fire. If the Run output is wired to control the motion of the material, the setup parameter LINE MOVEMENT should be set to “Run”. If the Forward output is wired to control the motion of the material. The setup parameter LINE MOVEMENT should be set to “FST/FWD. Filter Constant The FILTER CONSTANT can be adjusted in order to improve accuracy. A low value should be used on machines with very stable line speeds. A high value (greater than 50 Hz) should be used when rapid fluctuations in line speeds occur. Some trial may be necessary to achieve an accurate value. The default value is 32 Hz, which is considered to be a proper value for stable lines. The MP300 SERIES controller will allow values from 1.0 Hz to 200.0 Hz. 35 MP Series Open Loop Operator’s Manual Units Length measurements can be programmed and displayed as either inches or millimeters. This parameter toggles between either ENGLISH for inches, METRIC mm or METRIC cm. The ENGLISH parameter will also measure in feet and feet/minute while the METRIC parameters will also measure in meters and meters/second. Press any number key to toggle through the choices, and then press ENT to record your selection. 36 MP Series Open Loop Operator’s Manual Initial Machine Tests Manual Shear The shear can be manually activated using the CYCLE switch on the front panel. This causes the SHEAR output to turn on for the SHEAR DWELL time or until the SHEAR COMPLETE input switch closes. Make adjustments to the SHEAR DWELL time or the position of the SHEAR COMPLETE switch until the shear cycles properly. Manual Press (With Punching Only) The punch can be manually activated using the MANUAL PUNCH input. This causes the Punch output to turn on for the PUNCH DWELL time or until the PUNCH COMPLETE input switch closes. Make adjustments to the PRESS DWELL time or to the position of the PRESS COMPLETE switch until the press cycles properly. Jogging If the jogging inputs are used, they can be verified using the I/O screen (Refer to INPUT/OUTPUT STATUS section in this manual). On two-speed machines, jogging is always done in slow speed (Refer to figure 3.1 and 3.2 for speed logic status). Automatic Calibration The MP300 SERIES controller has an AUTOMATIC CALIBRATION mode in which test parts are run and the resulting lengths are entered into the controller. The controller then uses these lengths to determine several machine parameters such as scaling factors and reaction times of the machine. This procedure should be run at the initial installation and whenever accuracy is in doubt. AUTOMATIC CALIBRATION is initiated by pressing the SETUP key until the following screen appears. 1 Auto Cal 3 Trim Cal 2 Manual Calibration Figure 3-5. Auto Cal, Trim Cal, Manual Calibration Screen The controller will then prompt the operator for a calibration length to be run (default length is 120 inches). 37 Enter Length for Calibration: MP Series Open Loop Operator’s Manual 120.000” Figure 3-6. Enter Length Screen The best results are when longer lengths are run. Results also depend upon the accuracy of the device that is used to measure the parts. The MP300 SERIES controller can be no more accurate than the measuring device that you use. If short parts must be used, try to use a vernier caliper for the measurement. If parts longer than 4 feet are run, the only practical measuring device is a steel tape. Verify the accuracy of these devices by comparing several steel tapes measuring the same object. The ends of these tapes can be damaged and give bad readings. If this is questionable, have someone hold the tape carefully on the one-inch mark and subtract one inch from each measurement made. After entering the calibration length, the controller will prompt the operator to load the material and press the CYCLE switch to trim the leading edge. Cycle the Shear to trim leading edge of material Figure 3.7. Cycle the Shear Screen The controller will then prompt for the machine to be placed in the AUTOMATIC mode by pressing the RUN switch (either the front panel switch or the remote run switch). Either one or two parts will be made depending upon the machine type. If two parts are made, be careful to note which is the first piece produced. Enter the lengths of the parts that were run, and the controller will then make the necessary calculations. Manual Calibration Manual Calibration mode can be entered by pressing SETUP, until the screen in figure 3-5 appears, and selecting the number for "Manual Calibrate". This is used to override the values and to review the values calculated by the MP300 SERIES for future reference. Not all of the following parameters that are listed in the Manual Calibrate screens will be used on every machine type. A generic configuration sheet can be found in the back of the manual under SETUP SHEETS, and lists all the manual calibration parameters regardless of whether they apply to your situation or not. When in the Manual Calibration mode press the ENT button to move to the next parameter and SETUP to move back to the previous parameter. 38 MP Series Open Loop Operator’s Manual Shear Reaction Time The SHEAR REACTION time is the time delay between the time that the shear signal occurs and the time that the die contacts the material. This factor is used on flying die machines only and must be set correctly to achieve consistent part lengths. The maximum value is 0.5000 seconds. SHEAR DWELL SHEAR OUTPUT WITHOUT SHEAR REACTION TIME ENCODER COUNT RESET TO ZERO SHEAR OUTPUT WITH SHEAR REACTION TIME (OUTPUT IS SHIFTED) SHEAR REACTION SHEAR DWELL (TARGET COINCIDENCE POINT) Figure 3-8. Shear Reaction Time Calculate the SHEAR REACTION time using the following steps: 1. Set the SHEAR REACTION time to zero. 2. If there is a die boost on the shear die, disable it by disconnecting the wire on the output of the controller. NOTE: If necessary, slow the line speed down to avoids the metal getting jammed up in the shear die. 3. Cycle the shear. 4. Run two parts. 5. Mark the parts "1st Part” and “2nd Part." 6. Use the following formula for the new SHEAR REACTION time: 1st part - 2nd part × 5 Reaction Time = Line Speed in FPM 7. Enter the new SHEAR REACTION TIME into the controller and run two more parts. 8. Measure the two parts and verify their lengths (both parts should be the same length). 39 MP Series Open Loop Operator’s Manual 9. Once the Shear Reaction time is set, rewire in the die boost output. The SHEAR REACTION time will compensate for the time it takes the shear to react to the shear signal. A SHEAR REACTION time will start the shear output prior to the target coincidence point and keep the shear on for the length of time of the SHEAR DWELL. This will effectively shift the shear output forward in time that causes the output to start and end earlier than if no SHEAR REACTION time is entered. A DIE BOOST is sometimes used to move the die head forward during the cutting cycle. As shown in figure 3-9, the DIE BOOST will have an effect on both the beginning and the end of the shear output. The DIE BOOST DWELL will push the die to allow the shear to retract without scraping the part (Refer to BOOST DWELL on page 3-5). Figure 3-9. Die Boost Timing BOOST REACTION TIME The BOOST REACTION TIME is the time at which the DIE BOOST begins prior to the target coincidence. The BOOST REACTION TIME turns the BOOST on early to allow the die to match the speed of the material. Adjust this parameter so that the die speed is matched to the speed of the material at the time of the cut. If the leading edge of the part pushes the die, deforming its shape, the BOOST REACTION TIME should be increased. If the die causes the material to pull or tear apart, the BOOST REACTION TIME should be decreased. 40 MP Series Open Loop Operator’s Manual Figure 3-10. Die Boost Timing with Shear Reaction. When SHEAR REACTION and DIE BOOST are added, this will turn the DIE BOOST output on before the time of the SHEAR REACTION. The DIE BOOST DWELL will still be added to the end of the SHEAR DWELL without the SHEAR REACTION effect. See Figure 3-10. Press Reaction Time The PRESS REACTION time is the time delay between the time that the punch signal occurs and the time that the die contacts the material. This factor is used on flying die machines only. The maximum value is 0.5000 seconds. Note: Prior to using the procedure to calculate the PRESS REACTION, the SHEAR REACTION and CORRECTION FACTOR must be calculated. Calculate the PRESS REACTION time using the following steps: 1. Set the PRESS REACTION time to zero. 2. Program a 130" part with holes at 60" and 120". 3. Cycle the shear and the press. 4. Run the line. 5. After the first part is cut, measure the leading edge to the first hole and the first hole to the second hole. 41 MP Series Open Loop Operator’s Manual 6. Use the following formula for the new PRESS REACTION time: (LE to 1st Hole ) − (1st to 2nd Hole ) Press Reaction = ×5 Line Speed in FPM (LE = Leading Edge of Part) If there is a long distance between the shear and the press and a large amount of scrap would be produced, the following procedure could be used: Calculate the PRESS REACTION time using the following steps: 1. Set the SHEAR-PUNCH DISTANCE and the PRESS REACTION time to zero. 2. Program a 130" part with holes at 60" and 120". 3. Cycle the shear and the punch press. 4. Run the line. 5. After the first part is cut, jog the material out and measure the manually produced hole to the first hole when the line is run; and the first hole to the second hole. 6. Use the following formula for the new PRESS REACTION time: ( MH to 1st Hole) − (1st to 2nd Hole) Press Reaction = ×5 Line Speed (MH = Manually Produced Hole) Stopping Reaction Time On feed-to-stop machines, a STOPPING REACTION time parameter is used. This represents the time delay from when the controller turns off the movement outputs until the material actually stops. A larger reaction time will stop the line earlier, a smaller reaction time stops the line later. The user has a choice of three STOPPING MODES: AUTO, MANUAL, or OFF. AUTO: The MP300 SERIES controller turns off the movement outputs prior to the actual shear or punch point to allow for the momentum and inertia of the machine. A new STOPPING REACTION time is calculated after each stop based on the average stopping time for several cycles. This parameter may be overridden in the Manual Calibration mode but the value will be modified on the next part that is run. The maximum value is 5.000 seconds. MANUAL: The MP300 SERIES controller turns off the movement outputs prior to the actual shear or punch point as above. However, when in MANUAL, the controller does not recalculate a new STOPPING REACTION time after each stop. Whatever value is manually entered remains constant. The maximum value is again 5.000 seconds. 42 MP Series Open Loop Operator’s Manual OFF: A STOPPING REACTION time is not calculated and is not used at all by the MP300 SERIES controller. The movement outputs are turned off when the material past the shear point is equal to the programmed length of the part. This should cause parts to come out long due to the momentum of the machine and material during stopping. Also, when the STOPPING MODE is set to OFF a tolerance test is not performed. The default mode for STOPPING REACTION time is “AUTO” and is the recommended mode of operation. Deceleration Factor On two-speed machines, the MP300 SERIES controller uses a DECELERATION (DECEL) FACTOR when changing from fast to slow speeds. The DECEL FACTOR should be used in conjunction with the MINIMUM SLOW DISTANCE to determine the ideal time to change from fast to slow. The user has the option to select from three DECEL FACTOR MODES: AUTO, MANUAL, or OFF. AUTO: The MP300 SERIES controller automatically maintains A DECEL FACTOR. It is expressed in inches-per-second-per-second (In/Sec2) and is used in the Adaptive Slowdown calculation. The parameter can be overridden but will automatically update on the next movement. MANUAL: A DECEL FACTOR may be manually entered into the controller. The value is used in the Adaptive Slowdown calculation. Some trial and error may be necessary when in the MANUAL mode to find a DECEL FACTOR that works properly. Ideally, the machine should shift from fast to slow at some distance prior to the target (shear or punch point) long enough so that it reaches a constant slow velocity before the movement outputs are turned off. If the machine tends to shift into slow too soon, increase the DECEL FACTOR. If the machine tends to shift into slow too late, decrease the DECEL FACTOR. While in the MANUAL mode, the MP300 SERIES controller will not calculate a new value for the DECEL FACTOR after each stop. OFF: No DECEL FACTOR is used and the controller will not make an Adaptive Slowdown calculation. The machine will shift from fast to slow when the material has reached the MINIMUM SLOW DISTANCE before the target. For example, if the MINIMUM SLOW DISTANCE has been set to four inches, the machine will shift from fast to slow 4 inches before the shear or punch point. This may or may not be enough distance for the machine to decelerate properly. The DECEL FACTOR mode defaults to OFF but may be used in MANUAL or AUTO to increase productivity. 43 MP Series Open Loop Operator’s Manual 44 MP Series Open Loop Operator’s Manual Correction Factor The CORRECTION FACTOR adjusts for errors in the size and tracking of the measuring wheel. It is expressed as a percentage, with 100% being no correction. Increasing the CORRECTION FACTOR causes the parts to become longer and decreasing the value shrinks the parts. Calculate the CORRECTION FACTOR using the following steps: 1. Run ten parts of equal lengths, 120" for example. 2. Measure the ten parts. 3. Find the average length by adding up all ten parts and dividing by ten. 4. Use the following formula for the new CORRECTION FACTOR, using the average of the ten parts for "actual measured length”. Programmed Length New CF = × Old CF Actual Measured Length (CF = Correction Factor) Calibrate Trim The MP300 SERIES’ CALIBRATE TRIM feature automatically computes a new CORRECTION FACTOR which is used in the controller’s length calculations to adjust for errors in the size of the measuring wheel. The CALIBRATE TRIM mode can be entered by pressing SETUP until the screen in figure 3-5 appears and then by selecting the number for “Trim Cal”. Last Part 0.000” Meas Part 0.000” Figure 3-11. Calibrate Trim Screen. The controller remembers the programmed length of the last part cut and prompts the user to enter the actual measured length. The controller then calculates a new CORRECTION FACTOR and asks the user if they would like to update the current value with the new value. CALIBRATE TRIM should be used any time part lengths are incorrect but in a consistent pattern (i.e. all parts 3/16” long, etc.). Input/Output Status 45 MP Series Open Loop Operator’s Manual This mode allows you to view the current status of all the MP300 SERIES’ inputs and outputs. This can be very helpful in troubleshooting the system during and after an installation. To view the I/O screen, press the SETUP key until the screen in figure 3-12 appears, then select the number for Input/Output. 1 = Input/Output 2 = Memory Test Figure 3-12. I/O, Memory Test Screen. The number of the active input and/or output will appear on the display. In: _ _ _ 4 _ _ _ _ Out: _ _ _ _ _ _ _ _ Figure 3-13. Input/Output Status Screen Memory Test This causes the MP300 SERIES to enter a self-test mode in which it verifies all internal memory "chains." If no errors are reported, all memory can be considered good. 46 MP Series Open Loop Operator’s Manual Clearing Controller Memory You can clear all storage in the MP300 SERIES (including Setup and Order data) by following the sequence below. Make sure that the Security switch is unlocked. Turn off power to the controller. Wait five seconds. Press the '5' key while you Turn the controller's power back on. Hold down the '5' key for at least five seconds after you turn the power on. If you are experiencing controller problems, it is not recommended that you clear the memory unless you have made extensive troubleshooting checks (see the section in the back of the controller manual titled “Troubleshooting”). The steps listed include: making sure you have checked the encoder, the shear, the calibration procedure, rechecked setups, used the built-in diagnostic features, checked the incoming power, and cycled power off and on. Do not clear the memory unless you have written down all Setup, and Order information for re-entry. 47 MP Series Open Loop Operator’s Manual Inputs Description The inputs described are the common inputs for all MP 300 Series Controllers. Each control will use a combination of, or all the inputs described. Jog Forward This input is from a momentary switch and is used to jog the material of the line forward. The correct functioning of this input is determined by controller parameters and the connection of the output of the controller to the driving device. Jog Reverse This input is from a momentary switch and is used to jog the material of the line in reverse. The correct functioning of this input is determined by controller parameters and the connection of the output of the controller to the driving device. Interlock/Remote Run This input is normally from a switch or dry contact of a relay. When closed, the controller is placed in the Run mode to make parts. When open, the controller is in the stop mode of operation. To be in the Run mode, other conditions must be met in the controller, such as orders being programmed. If the controller is not programmed, or if an alarm condition exists, the control will not go into the Run mode. Shear Complete The shear complete is an input that will go momentarily closed when the shear is at the bottom of its stroke. This can be from a limit switch, a proximity switch or similar device. The use of the input is optional. Its function is to remove the shear dwell down signal to the solenoid earlier for quicker response and to insure that the shear is not over-driven down. Setup Lockout Input This input will normally be in the form of a security key and will keep the operator from changing critical parameters on the controller. If an operator attempts to change the “Locked out” parameters, the following message will be seen: “Error! The Setup Lockout switch is on. The Setup parameters have been locked out. See maintenance for assistance in programming this item”. The SETUP LOCKOUT input does NOT lock the operator out of the following parameters: Halt After Item Halt No Items to Run Delay After Shear Units of Measure 48 MP Series Open Loop Operator’s Manual Punch Complete If the Controller is setup for Punch Presses, each press being controlled by the Controller will have its respective punch complete input. As with the shear complete, similar devices can be used, a momentary closed will show that the respective punch is at the bottom of its stroke. The use of this inputs is optional, its function is to remove the press dwell down signal to the solenoid earlier for quicker response and to insure that the press is not overdriven down. Hole Detect This input is a normally open photo eye switch. When the material passes between the eyes and a hole is present they “see” each other and the input comes on telling the controller to count the hole. External Manual Shear This is a momentary switch input. This input is used to cycle the shear and manually cut parts when the input is closed. External Manual Punch This is a momentary switch input. This input is used to cycle the press when the input is closed. 49 MP Series Open Loop Operator’s Manual Output Description Fast/Slow/Reverse/Run/Forward These outputs are used to move the material and to give indication that the material is in motion. The outputs to be used will depend upon system design and the selection of the LINE MOVEMENT parameter. Shear/Punch The shear and punch outputs are connected to the solenoids that drive these devices in a downward state. This output is a timed output, programmed into the control. Shear Up/Die Boost The output is selectable by the switch settings of the control. In the Shear Up mode, the solenoid that controls this function will become energized by the output for a preprogrammed amount of time. If the Die Boost mode is selected, the system does not require the Shear Up output and this output can be used to push a die for a pre-selected length of time. Punch Up/Die Boost The output is selectable by the switch settings of the control. In the punch up mode, the solenoid that controls this function will become energized by the output for a preprogrammed amount of time. If the Boost mode is selected, the system does not require the Shear Up output and this output can be used to push a die. 50 MP Series Open Loop Operator’s Manual Chapter 3: Operating Procedure Entering Orders An order consists of a Job Number, a Quantity, a Length, and if a punch is used, a Punch Option. Depending upon the type of controller, one or several orders can be entered into the controller at one time. The ability to program more than one job at a time gives the user the potential to change sizes without stopping the machine. This saves time on short runs. (The MP301 model controller is a single batch controller only. When programming this controller, the only parameters are Quantity and Length.) The efficiency of a multiple batch controller can be lost if the controller is not easy to program and understand. The AMS controller solves this problem with its clear and concise method of programming. Programming the MP300 SERIES controller is a simple matter of keying in data in answer to a flashing prompt. The ENT key is an enter command (or “take it") from the operator to the controller, meaning the currently displayed value is stored into memory when the ENT key is pressed. The ENT key can also be used to move the cursor from one field to another when reviewing data already programmed. Note that you must use the ENT key to enter new or altered data into memory. Changes are made by simply writing over the old value. Pressing the first numeric key causes the old value to be erased and the new numbers to shift in from the right. In case of a mistake during an entry, press the CE (Clear Entry) key to erase the entry and start over. A new correct value can then be keyed in. When the correct value is displayed, press the ENT key to move to the next field. 51 MP Series Open Loop Operator’s Manual Job Number (Except MP301) Enter the Programming Mode by pressing the PRG key. The first data item to enter is the Job Number, indicated by the flashing display. The controller will assume that you wish to program the next job number after the last one that was programmed. If Jobs 1 through 10 have been programmed, the Job Number displayed will be Job 11. This is merely a suggestion by the controller. You may enter any Job Number from 1-999. If you entered Job 1 through 10, you may review and correct jobs previously programmed. Press the ENT key to confirm the present Job Number. The Job Number can be used to create bundle stops. The MP300 SERIES controller can be made to go from one job to the next without halting the line when the Halt Mode is set to Bundle Halt, provided the Job Numbers are consecutive. If you wish to insert bundle stops, skip a job number between bundles. In the following example, bundles have been set up on intervals of 10 jobs, even though there are fewer than 10 jobs per bundle. The machine will halt after completing jobs 5 and 13. Refer to the Setup parameter HALT MODE for more details on setting bundle stops. Job Quantity Length 1 15 144.000 2 10 120.000 3 12 96.000 4 16 72.000 5 20 60.000 11 10 168.000 12 32 156.000 13 9 148.000 52 MP Series Open Loop Operator’s Manual If a punching pattern is used, the punching option will be shown. In the punching example below the machine will halt after completing jobs 23 and 34. Job Quantity Length Option 21 2 180.000 Even 22 3 174.000 Rand 23 42 162.000 No P 31 25 150.000 No P 32 17 90.000 Rand 33 25 122.500 No P 34 50 135.000 Even Quantity After the Job Number is entered, the Quantity will be flashing. Simply key in the desired quantity and press ENT to confirm the number. If you enter a quantity of 0 on a previously programmed job, that job will be erased. The Quantity can be set from 1 to 9999 pieces. If the quantity entered is exactly 9999, when this item is run, the controller will run this length until it is stopped manually, without decrementing quantity. This feature is provided for those who need to simply fill a bin with parts of a fixed length. Length After the Quantity is programmed, the Length field will be flashing. Enter here the finished length of the part to be made (do not count the shear kerf; the controller will automatically add in this amount, if any). Enter the length in whatever Unit format was selected when the MP300 SERIES controller was installed. The longest length the AMS controller will accept is 3500.000". When entering lengths, no leading or trailing zeros are required. The following entries (in English mode) each produce the same 10-inch part: 10 010 10. 10.00 53 MP Series Open Loop Operator’s Manual Punch Option (With MP350P Only) After entering a length, the user is prompted to enter a Punch Option. Pressing any number key toggles between three options: No P - No punches Rand- A random punching pattern Even- Evenly spaced punches No P (No Punches) select this option to make shear only parts when no additional punches are required. Rand (Random Punches) Select Rand to make parts with one or more randomly spaced punches. The display will look similar to the one shown in figure 4-1. Punch Length ∗∗∗∗∗∗∗∗” 1 Figure 4-1. Random Punching Display Leading Edge Distance Punch 1 Punch 3 Punch 2 Punch 4 Material Flow Figure 4-2. Random Punching Pattern. Press ENT to confirm Punch #1 the first punching operation). Now enter the length at which the first punching operation should be made. The lengths, and all punch lengths, are 54 MP Series Open Loop Operator’s Manual measured from the leading edge of the part. For example, when entering the length for Punch #2 (the second punching operation), of 24 inches, the punch will occur 24 inches from the leading edge of the part, not 24 inches from Punch #1. Repeat for as many punches needed (up to 300) for this part length. When all of the punches have been entered, press the asterisk (∗) key to enter more jobs. Even (Evenly Spaced Punches) Select Even to make parts which have evenly spaced punches throughout the part length. The display will look like the one shown in Figure 4-3 First Spacing Limit 12.000” 12.000” 10.000” Figure 4-3 Even Spacing Display While “First” is flashing, enter the length at which the first punching operation should occur. After pressing the ENT key, Spacing will start to flash. Enter the desired center to center punch spacing. For example, if 12 inches is programmed for Spacing, punches will automatically be placed on 12 inch centers. After Spacing is entered, “Limit” will start to flash. Enter the distance from the trailing edge on the part beyond which no punches are desired. For example, if 25 inches is programmed for the “Limit”, no punches will be placed within 25 inches from the end of the part. First Leading Edge Even Space Even Space Even Space Even Space Material Flow 55 Limit MP Series Open Loop Operator’s Manual Figure 4-4. Even Space Punch Pattern See the previous figure for a visual description of “Even Space” and “Limit”. After the Limit is entered press the (∗) key to enter more jobs. Reviewing Programmed Jobs It is possible, at any time, to review the jobs that have been programmed. While in the PROGRAM MODE, PRESS the SETUP key to step through the jobs in descending order, or press the PRG key to step through the jobs in ascending order. Exiting the Program Mode The (∗) key is used to exit the PROGRAM mode and revert to the normal running display. It is also used to exit the SETUP mode. Referencing Controller to the Material The MP300 SERIES controller measures relative movement of the material through the machine and has no way of measuring the absolute amount of material that is past the shear. In order to cut accurate lengths, the controller must know how much material is past the shear at some point in time and then it can make relative measurements thereafter. This is a process called referencing. Referencing is simply loading material into the machine, past the shear, and closing the MANUAL SHEAR input switch. At the bottom of the shear stroke, for shear only parts, the length counter is set to zero and the controller is referenced. If there is a punching operation in the program, the shear must be cycled twice to reference the AMS controller. The controller will remain referenced as long as the encoder stays in contact with the material and the material does not move while the controller is turned off. On some flying die machines, it is not possible to cycle the shear while the material is stopped. Some presses have mechanical "kickers" that push the die forward as the press comes down, refer to figure 4-7. Some mechanical presses push the die forward in addition to pushing down. For these machines, referencing must be done on the fly with a crop cut after the machine has been started. This is also done with the CYCLE switch. 56 MP Series Open Loop Operator’s Manual Figure 4-7. Flying Die with Mechanical Kicker On Feed-To-Stop machines, the MP300 SERIES controller re-references itself to the material on each automatic cut at the bottom of the shear cycle. This is done to improve accuracy. The material can overshoot or undershoot the shear point on each feed. With simple electronic counters, an overshoot on one cut followed by an undershoot on the next cut will cause the second part to be short by the sum of the overshoot plus the undershoot. By re-referencing the controller during each cut, the controller will limit the error to either an undershoot or an overshoot which effectively cuts the error in half. 57 MP Series Open Loop Operator’s Manual Running the Machine Status Display The Status Display will vary, depending upon which model AMS controller that you have. Figure 4-8 shows the display for the MP301. 100 Pcs 128.000” s120 63 Left 22.472” Figure 4-8. Typical MP301 Status Screen The top row shows the programmed quantity of the current order and the length of the part to be made. The bottom row shows the machine speed in feet per minute (or meters per minute), the quantity remaining in the order, and the current length past the shear. Figure 4-9 shows the display for the MP350 and MP350P which have the capability of performing multiple jobs. # 23 30 Pcs 90.000” s 150 3 Left 30.100” Figure 4-9. Typical MP350 and MP350P Status Screen The top row shows the current Job Number, the programmed quantity of the current order and the length of the part to be made. The bottom row shows the machine speed in feet per minute (or meters per minute), the quantity remaining in the order, and the current length past the shear. Setting the Next Job to Run (Except for MP301) If the Job Number shown in the upper left hand corner of the Status Display is not the job that you wish to run next, press SETUP and then select the number for NEXT JOB. The controller will prompt the operator “Set Next Job to Run After Current One”. 58 MP Series Open Loop Operator’s Manual Set Next Job to run after Current one: 1 Figure 4-10. Set Next Job to Run Screen Enter the desired Job Number and press ENT. If the machine is halted when the NEXT JOB function is entered, then the new Job Number that was entered will begin as soon as the machine is placed in RUN. If the machine has the punching option and the original Job Number is still displayed even though a new NEXT JOB number has been entered, one or more parts from the original job have already been stored in the controller’s memory and must be made next to avoid making scrap. After these parts are made, the new NEXT JOB will be ready for production. If the machine has the punching option and the operator desires to halt the current job that is running and immediately begin making parts from a different job, these steps must be followed. Halt the machine. Manually cycle the shear TWICE to eliminate the parts that have already been FILLED. Set the NEXT JOB TO RUN as described above. Press the RUN input switch. Doing this may cause one or more scrap pieces to be generated. If the machine is running at the time, the operator is asked to “Set the Next Job to Run after the Current Job.” If the operator enters a valid Job Number, he/she will then be asked “Change Job Now (YES/NO)”. If NO is selected, the controller will complete the current job and then be ready to run the new NEXT JOB that the operator selected. If YES is selected, the controller will complete the parts from the current job which have already been loaded into the queue and then immediately change to the new NEXT JOB that the operator selected. 59 MP Series Open Loop Operator’s Manual Starting the Machine After the NEXT JOB is set, the machine is placed in the RUN mode by pressing the RUN switch on the front panel or by closing the external RUN contact if the REMOTE RUN option is selected. The MP300 SERIES controller will begin shearing parts to the programmed length and decrement the quantity remaining for each piece cut. When the quantity remaining reaches zero, the controller may or may not begin production on the next consecutive job number, depending upon the HALT MODE parameter setting that was selected while configuring the machine. If the next sequential job is not programmed, the controller will halt the machine. Halting Production At any time, the operator can halt the line by opening the Run contact. Depending upon how the controller is installed, this may take the form of pressing any of a number of HALT buttons located on the machine. The movement outputs will be turned off immediately but the MP300 SERIES controller will remain in the RUN mode until the material has stopped. This allows for an automatic cut to be made as the material decelerates. The controller will remain in the RUN mode until the material has stopped or 5 seconds have elapsed. Normally, the operator would halt the machine just after a shear is made and a cut would not occur during deceleration. If the RUN contact is opened while a press is operating, the movement outputs will remain on until the press has completed its cycle (SHEAR or PRESS DWELL time). 60 MP Series Open Loop Operator’s Manual Monitoring Production The MP300 SERIES controller has three footage totalizers available for monitoring production. The totalizers show the amount of footage that has gone past the shear as well as the total number of parts cut since the last time the totalizer was cleared. To access the footage totalizers from the normal running display press SETUP, until the following display appears: Press CE Key to Clear Tot1 50 Pcs 300Ft Figure 4-11. Next Job, Inc Qty, Footage, Configure Screen. Pressing the number for FOOTAGE will allow the totalizer screens to be viewed and/or cleared. Pressing the ENT key steps the user through the three totalizers. 1 = Next Job 3 = Footage 2 = Inc Qty 4 = Configure Figure 4-12. Totalizer 1 Screen. The three totalizers are independent of each other and can be used for any purpose. One suggestion for their use would be to use one for totalizing footage used on a coil, one for footage used on a customer’s order, and one for the total footage run during a shift. Clearing these totalizers back to zero at the proper time would be the responsibility of the operator. The controller will prompt the user to “Press CE key to Clear” as the totalizers are being displayed. If Metric units are being used instead of English, the totalizers will display the totals in meters. 61 MP Series Open Loop Operator’s Manual Special Procedures Changing Coils The following procedure should be used when changing coils to ensure proper accounting of the material used on a coil and an accurate first part after the new coil is loaded: If the coil has been completely consumed or the material has been cut free of the stock reel, as is the case with most roll formers, feed the material through the shear in the forward direction and dispose of the scrap piece. On a cut-to-length machine with no roll former involved, all of the unused material can be rewound on the mandrel for later use. In this case, back the material out through the entrance end of the shear until it is out from under the encoder. After the machine is empty, press the CYCLE switch on the front panel. These registers all material used to the totalizers. Press SETUP and then the number for FOOTAGE. Press ENT to step though the totalizers used to record the amount of material used. Record the amount of material used. Press CE to clear the totalizer. Thread the next coil into the machine until a clean edge is past the shear and the material is under the encoder. Press the CYCLE switch to reference the new coil. Handling Material Flaws With most roll formers and cut-to-length machines, material problems are common. The MP300 SERIES controller has features that aid the operator when these flaws occur. The best method of handling material flaws depends on when the flaws are detected and the duration of the flaw. If random small flaws occur, they are not likely to be detected until after the controller has cut the part. In this case, the only thing that the operator can do is make another part to replace it. This is easily done with the INCREASE QUANTITY function. While viewing the Status Display, press SETUP and then the number for INC QTY. This will cause the quantity “LEFT” on the Status Display to stay the same (not decrease) when the next part is made. If a small flaw is detected before the shear, the operator may wish to crop the flaw out to minimize the amount of scrap material. On flying die machines, the CYCLE switch is active while the machine is running. The crop starts the production of the part over again and the 62 MP Series Open Loop Operator’s Manual operator can repeat this process until the good material occurs. In the case of feed-to-stop machines, the machine must be halted before the CYCLE switch is active. The operator would most likely jog the material forward until the flaw is past the shear and then press the CYCLE switch twice. There are times when material flaws can be extensive and last for a large portion of a coil. A user may find that this material is easier to handle if it is cut into short lengths rather than relying on the operator to crop repeatedly. There may also be secondary outlets for such material if they can be cut to standard lengths of perhaps 8, 10, and 12 feet. If this is the case, jobs for this purpose can be programmed at high lift numbers, such as 900 through 999 beforehand, and the operator can switch production to these jobs when extensive flaws occur. After the flaw has been cleared, the operator can use the NEXT JOB function to resume normal production. 63 MP Series Open Loop Operator’s Manual Chapter 4: Setting the Customizing Switches The MP300 SERIES controller is a universal device capable of controlling several types of “cut-to-length” machines. In order to do this, some outputs and inputs have different functions depending upon the type of machine on which the controller was installed. Also, each type of machine has its own unique set of machine parameters that must be programmed. Parameters for one type of machine may have no meaning for a different machine. For example, a “Feed-to-Stop” machine needs a MINIMUM SLOW DISTANCE when slowing down for a shear. This parameter would be useless on a single speed “Flying Cutoff” machine, and may confuse the operator. In order to make the MP300 SERIES controller applicable to many types of machines and still be easy to use, a set of customizing switches are included which define the type of machine being controlled. Once the machine type has been determined, the function of the outputs and inputs is fixed and the machine parameters are limited to only those required for that type of machine. Although adding a step to the first part of the installation, this approach simplifies the controller thereafter. Before applying power to the controller, the customizing switches must be set. These switches can be found on the back of a panel mount style controller or by removing the cover of a consolette style controller. The switches are located near the center of the of the printed circuit board. There are seven segments to the switch assembly numbered from 1 through 7 and are set to either the ON or OFF positions to match the requirements of the installation. The chart that follows defines the purpose of each switch for every MP300 model and a description of the switch settings follows the chart. 64 MP Series Open Loop Operator’s Manual Model SW 1 SW 2 SW 3 SW 4 SW 5 SW 6 SW 7 MP301 Speed Control Speed Control Run Mode Machine Type Machine Type Man. Shear N/A Shear Type Shear Boost 1 or 2 Speed Run Mode N/A N/A N/A OFF OFF OFF MP350 Speed Control Speed Control Run Mode Machine Type Machine Type Man. Shear Single Batch MP350H Shear Type Shear Boost 1 or 2 Speed Run Mode N/A N/A N/A OFF OFF OFF MP350P Shear Type Shear Boost 1 or 2 Speed Run Mode Punch Type Punch Boost Punch Speed MP350PH Shear Type Shear Boost 1 or 2 Speed Run Mode Punch Type Punch Boost Punch Speed MP301H 65 OFF MP Series Open Loop Operator’s Manual Speed Control (Switches 1 and 2, MP301, MP301A, MP350, and MP350A) Switches 1 and 2 control the type of speed control that is to be used. The switch settings are as follows: Switch 1 Switch 2 Speed Control Mode OFF OFF Single Speed ON OFF Dual Speed, Forward-Slow Logic OFF ON Dual Speed, Fast-Slow Logic ON ON Invalid Setting Single Speed Mode In the single speed mode, the SLOW output (#2) has no function. Material movement is controlled by the forward and reverse outputs. NOTE: This mode uses Forward-Slow speed logic, which means the slow output is on while halted and while jogging. See below for a more thorough explanation of Forward-Slow logic. Forward-Slow Mode The timing diagram of the Forward-Slow logic is shown in figure 8-1. Stop Move Slow Move Fast ON Forward Output OFF ON Slow Output OFF Figure 8-1. Forward Slow Timing Diagram 66 Stop MP Series Open Loop Operator’s Manual In this mode of operation, the FORWARD output (#1) is ON for any movement in the forward direction (which is the direction used in the RUN mode). The SLOW output (#2) is ON when a feed in slow speed is required and when the machine is halted. An example of a machine that would use this type of logic is a hydraulic system with two valves connected in series, as shown in figure 8-2. Fast Speed Flow Control To Motor Forward Valve From Pump Slow Valve Slow Speed Flow Control Figure 8-2. Forward-Slow Hydraulic System One valve would control the flow of oil between FULL ON and FULL OFF. The FORWARD output would control this valve. The other valve would select between FULL FLOW and LIMITED FLOW. This valve would be controlled by the SLOW output. The FORWARD output would have to be ON for any oil to flow. When the FORWARD output is ON, the SLOW valve selects between FULL SPEED and a SLOWER SPEED. The SLOW output is kept ON when the FORWARD output is OFF. This ensures that all movements start in slow speed. Acceleration ramps can be used on most systems to ensure that a smooth transition to high speed occurs. Fast-Slow Mode Stop Move Fast Move Slow ON Fast Output OFF ON Slow Output OFF Figure 8-3. Fast-Slow Timing Diagram 67 Stop MP Series Open Loop Operator’s Manual In this mode, the FAST output (#1) is ON for any movement in FAST speed and the SLOW output (#2) is ON for any movement in SLOW speed. The outputs are never both ON at the same time and when both outputs are OFF, the machine is stopped. An example of a machine using this type of speed logic would be a hydraulic system as shown in figure 8-4, where the two valves are connected in parallel. Fast Speed Flow Control Fast Valve From Pump To Motor Slow Valve Slow Speed Flow Control Figure 8-4. Fast-Slow Hydraulic System Each valve would have its own flow control and would be set for different speeds. The FAST output would be connected to the valve set for HIGH speed and the SLOW output would be connected to the LOWER speed valve. Shear Type (Switch 1, MP301H, MP350H, MP350P, MP350PA, and MP350PH) Switch 1 should be set to the ON position for shears that operate on the fly (non-stopping). Set Switch 1 to OFF for shears that operate on Feed-to-Stop machines. When the Hole Counter option is used on the MP301H, MP350H, or MP350PH, it must be used on NonStopping lines, so Switch 1 must be ON. If the controller is used without the Hole Counting option, it may be operated on either Non-Stop or Feed-to-Stop lines. OFF Feed-to-Stop Shear ON Non-Stop Shear 68 MP Series Open Loop Operator’s Manual Shear Die Boost (Switch 2, MP301H, MP350H, MP350P, MP350PA, and MP350PH) Machines that do not stop for each shear and have a device to push the die forward as it is being cut would set Switch 2 to the OFF position. Set Switch 2 to ON for machines with Non-Stopping or Feed-to-Stop shearing operations that do not use a Die Boost. With a HUMP TABLE machine, the shear is fixed but the material does not stop for the shear cycle; if forms a hump behind the shear where it clamps. With the MP301H, MP350H, or MP350PH, this machine would require a setting for Flying Die with no Die Boost (both Switch 1 and 2 ON). OFF Shear Die Boost Active ON No Shear Die Boost 69 MP Series Open Loop Operator’s Manual Run Mode (Switch 3, MP301, MP301A, MP350, and MP350A) OFF Front Panel Run With Safety Interlock ON Remote Run Control over how the MP301, MP301A, MP350, or MP350A is placed in the RUN mode is determined by the state of Switch 3 of the customizing switch. In the LOCAL mode, the controllers are placed in the RUN mode by pressing the RUN switch on the front panel of the controller. In the REMOTE mode, the controller is placed in the RUN mode when the REMOTE RUN input (#3) closes and remains closed. Local Mode (Switch 3 OFF) With Switch 3 in the OFF position, the RUN switch on the front panel of the MP300 Series controller is active and will initiate the automatic sequence, if a valid job has been programmed and the material past the shear is no longer than the next size to be cut. Input #3 is defined as the SAFETY INTERLOCK that should be connected to the Emergency Stop circuit of the machine. This input will not start the machine when it closes. It must be closed, however, prior to pressing the RUN switch or closed within one second after pressing the RUN switch. Remote Mode (Switch 3 ON) With Switch 3 in the ON position, the RUN switch on the front panel of the MP300 Series controller is inactive. The automatic sequence is initiated when the REMOTE RUN input (#3) closes and remains closed, conditional on a valid job number specified and the material past the shear not being greater than the specified part length. Single or Dual Speed (Switch 3, MP301H, MP350H, MP350P, MP350PA, and MP350PH) OFF Single Speed Shear ON Two Speed Shear 70 MP Series Open Loop Operator’s Manual Machines that shift into slow speed prior to the shear require Switch 3 to be set to the ON position. Set Switch 3 to OFF for machines that operate at a single speed. Machine Type (Switches 4 and 5, MP301, MP301A, MP350, and MP350A) Switches 4 and 5 determine the basic type of machine that the MP301 or MP350 is being installed on. These types of machines are as follows: Switch 4 Switch 5 Machine Type OFF OFF Flying Die with Die Boost ON OFF Flying Die without Die Boost OFF ON Feed-to-Stop ON ON Not Used Flying Die with Die Boost Machines that do not stop the material for each shear and have a device to push the die forward as it is being cut would be set to this type. In addition to running a non-stop sequence of outputs, parameters relating to the Die Boost will appear in the Configuration program. Flying Die without Die Boost Machines that do not stop the material for each shear and do not have a device to push the die forward for each cut would be set to this type. The non-stop sequence of outputs would be run, and no references to Die Boosts will appear which could confuse the operator. Feed-to-Stop Machines with fixed dies must stop for each shearing operation. The operation of the MP301 or MP350 is considerably different for this type of machine as opposed to the flying die type. The major difference is that since the material does stop, the controller can check the position of the material against a programmed tolerance before activating the shear. If the machine is out of tolerance, the operator can be warned. This ensures that no bad parts will be made. Hump Table Shears 71 MP Series Open Loop Operator’s Manual With a HUMP TABLE machine, the shear is fixed, but the material does not stop for the shear cycle; it forms a hump behind the shear where it clamps. With the MP301 or MP350, this machine should be set as a flying die with no die boost (Switch 4 ON and Switch 5 OFF). Run Mode (Switch 4, MP301H, MP350H, MP350P, MP350PA, and MP350PH) OFF Front Panel Run With Safety Interlock ON Remote Run Switch 4 determines how the controller enters the RUN mode. The position of this switch also determines the definition of the controller’s input #3. Local Mode (Switch 4 OFF) With Switch 4 in the OFF position, the RUN switch on the front panel of the controller is active and will initiate the automatic sequence, if a valid job has been programmed and no punch or shear locations have gone past the appropriate presses. Input #3 is defined as the SAFETY INTERLOCK that should be connected to the Emergency Stop circuit of the machine. This input will not start the machine when it closes. It must be closed, however, prior to pressing the RUN switch. Remote Mode (Switch 4 ON) With Switch 4 in the ON position, the RUN switch on the front panel of the controller is inactive, and input #3 is defined as the REMOTE RUN input. The automatic sequence is initiated when input #3 is closed and remains closed, if a valid job has been programmed. Punch Type (Switch 5, MP350P, MP350PA, and MP350PH) Switch 5 should be set to the ON position for punch presses that operate on the fly (NonStopping). Set Switch 5 to OFF for punch presses that operate on Feed-to-Stop machines. OFF Feed-to-Stop Punch ON Non-Stop Punch 72 MP Series Open Loop Operator’s Manual Manual Shear on Non-Stopping Lines (Switch 6, MP301, MP301A, MP350, and MP350A) Placing Switch 6 in the ON position disables the MP301 or MP350 from making a manual shear while the line is halted and also does not allow the Automatic Calibration function. With Switch 6 in the OFF position, a manual shear is allowed with the line halted. On a manual shear input (Blue CYCLE button), the LENGTH PAST SHEAR will be reset to 0.000 (or –shear kerf value) and the line will be ready to run. OFF Manual Shear Allowed While Machine is Halted ON Manual Shear Not Allowed While Machine is Halted Punch Die Boost (Switch 6, MP350P, MP350PA, and MP350PH) Machines which do not stop the material for each punch and have a device to push the die forward as it is punching require Switch 6 to be set to the OFF position. Set Switch 6 to ON for machines with Non-Stopping or Feed-to-Stop punching operations that do not use a Die Boost. OFF Punch Die Boost Active ON No Punch Die Boost Single or Dual Speed (Switch 7, MP350P, MP350PA, and MP350PH) Machines that shift into a slow speed prior to each punching operation require Switch 7 to be set to the ON position. Set Switch 7 to OFF for single speed machines. OFF Single Speed Punch ON Two Speed Punch Single Batch Operation (Switch 7, MP350 and MP350A) Placing Switch 7 in the ON position disables the multiple-batch capability of the MP350. Only one job at a time may now be programmed. This feature was added to simplify part 73 MP Series Open Loop Operator’s Manual programming for users who continuously make pieces at the same length and have no need to enter multiple jobs. OFF Multiple Batch Mode ON Single Batch Mode 74 MP Series Open Loop Operator’s Manual Chapter 5: Options Hole Counter Option Hole Counters may be added as an option to the MP301, MP350, and MP350P controllers. When this option is added, the controller will take on the new model numbers of MP301H. MP350H, and MP350PH. General Parameters The controllers will all have the same general parameters, as the ones without the Hole Counter option (as listed in Section 3, Machine Configuration, plus the following parameters will also be available to be programmed. Mode MODE describes whether the controller is using the Hole Counter option. Select COUNT HOLE to run the controller as a hole detector or select STANDARD for normal MP300 SERIES operation. In the COUNT HOLE mode, the operator enters a number of holes instead of an actual part length. The MP300 SERIES with Hole Counter detects holes in the material and activates the cutoff press when the programmed number of holes has been counted. In the STANDARD mode, the controller uses a part length (inches or millimeters) to control the cutoff press. It is, however, still counting holes in the material and keeping track of where they are. If necessary, the operator can change from STANDARD mode to COUNT HOLE mode at any time when the line is halted without losing track of holes that have already been counted but not yet cut off. Press any number key to toggle the display between STANDARD and COUNT HOLE. When the correct choice is visible, press ENT to record your selection. Configure Type 34 Mode Count Hole Figure 6-1. Mode Parameter Screen Shear-Detect 75 MP Series Open Loop Operator’s Manual SHEAR-DETECT is the physical distance between the shear press and the hole detector. The detector should be located as close as possible to the shear press to achieve the best accuracy. Although the detector must be close to the shear press, the detector must be far enough away (typically 10" to 15”), to allow the controller time to see the hole and activate the shear press. Units for SHEAR-DETECT are in inches, centimeters, or millimeters. Key in the length and press ENT to record your selection. Minimum Hole Spacing Enter a value slightly smaller than the minimum distance between holes in the material. When the MP300 SERIES with Hole Counter detects a hole in the run mode, the material must move the MINIMUM HOLE SPACING distance forward before another hole can be detected. This prevents the controller from accidentally reading the same hole twice on the leading and trailing edge. Units for MINIMUM HOLE SPACING are in inches, centimeters, or millimeters. Key in the length and press ENT to record your selection. No-Hole Stop This parameter defines the maximum length of material allowed to go beyond the shear press before enough holes are detected to make the current part. Operators may use this parameter to protect machinery in the case of a photo-detector failure. The MP300 SERIES with Hole Counter will halt the line and display an error message if the “Length Past Shear” + “Shear to Detector Distance” is greater than “No-Hole Stop Distance”. This function will be disabled if No-Hole Stop = 0 inches or if the operator chooses the standard operating mode. Key in the length in inches, centimeters, or millimeters and press ENT to confirm. Programming Standard Mode Programming job data in the Standard mode of the MP300 SERIES with Hole Counter is identical to programming an MP300 SERIES controller. Refer to the Operating Procedures section of this manual (Section 4), for Standard Programming. Count Hole Mode Job After pushing the PRG button, the first option will be flashing. If the controller is a multiple batch model (MP350H or MP350PH) the first option is programming the job number. Follow the procedure in the Operating Procedure section of this manual. If the controller is a single batch model (MP301H) the Job option will not be available. 76 MP Series Open Loop Operator’s Manual Job Qty Cnt Length 0 0 1 0.000” Figure 6-2. Count Hole Mode Programming Screen. Quantity To program in a job total, simply key in the desired quantity and press ENT to confirm the quantity. The quantity can be set from 1 to 9998 pieces. The quantity 9999 is treated as a special case by the MP300 SERIES. When an order with a quantity of 9999 pieces is run, the quantity does not decrement when a piece is made. This is done for the convenience of users who produce parts until their storage bins are full and don't wish to count parts. Count Key in the number of holes per each part and press ENT to confirm. The MP300 SERIES with Hole Counter detects holes in the material and cycles the shear press when this number is reached. To cut on every hole detected, program a count of one. The maximum number of holes per part is 500. Length The next item to be programmed for a job is the Offset Length. Key in the number of inches, centimeters, or millimeters and press ENT to confirm. THIS IS NOT THE OVERALL LENGTH OF THE PART. The Offset Length is the distance from the leading edge of the last hole counted to the point where the shear occurs. See figure below. DESIRED CUT POINT OFFSET LENGTH MATERIAL FLOW Figure 6-3. Offset Length 77 MP Series Open Loop Operator’s Manual Exiting (the Program Mode) The STAR (*) key is used to end the PROGRAM mode and revert back to the normal running display. It is also used to exit the SETUP mode. Operation The operation of the MP300 SERIES with Hole Counter in the Standard mode is identical to the operation of the MP300 SERIES. Refer to section 4 of this manual, Operating Procedures. Note: An external manual shear input has been added on input # 8. 21 Pcs 3 Hole s100 8 Left 40.000” Figure 6-4. Status Display A typical status display of the MP300 SERIES with Hole Counter in the Count Hole mode is shown above. The top row shows the programmed quantity of the current order and the number of holes that have gone past the shear. The bottom row shows the machine speed, in feet per minute (or meters per minute), the quantity remaining, and the current length past the shear. Note: The above Status Screen is for the MP301H (a single batch unit), which means that there is no Job Number listed on the first line. Multiple batch units will include the Job Number on the Status Screen. Running the Machine After an order has been entered, the machine is placed in the RUN mode by either pressing the RUN switch on the front panel or closing the external RUN contact if the REMOTE RUN option is selected. The MP300 SERIES with Hole Counter will begin counting holes and shearing parts to the programmed hole count. It will decrement the quantity remaining after each piece is cut and halt the line automatically when the quantity remaining reaches zero. 78 MP Series Open Loop Operator’s Manual Note: The operator cannot manually cycle the shear when the machine is running while the controller is in the “Count Hole Mode”. Clear Holes During jogging operations, the MP300 SERIES with Hole Counter continues to count holes and records their positions in memory. If for any reason, the operator wishes to discard all of the hole locations which are currently in the controller's memory, he may do so by clearing the "Hole Queue." To clear the hole queue, the machine must be halted. Cycle the shear press TWICE by pressing the blue CYCLE push button on the controller's front panel. Any holes, which have been counted but not yet cut off, will be cleared from memory. After the MP300 SERIES with Hole Counter is placed back into the RUN mode, it will begin a new count of holes after the first hole passes the photo-detector. 79 MP Series Open Loop Operator’s Manual Analog Output Option A single ended Analog output may be added as an option to the MP301, MP350, and MP350P controllers. When this option is added, the controller will take on the new model numbers of MP301A. MP350A, and MP350PA. The MP350PAV controller also has analog output, but works differently than the other three analog controllers. It will be discussed at the end of this chapter. General Parameters The controllers will all have the same general parameters as the ones without the Analog output option (as listed in Section 3, Machine Configuration), plus the following parameters will also be available to be programmed. Min Volts The MIN VOLTS parameter is used to set the analog voltage output when the controller is running in slow speed. Max Volts The MAX VOLTS parameter is used to set the analog voltage output when the controller is running in fast speed. Length at Max This parameter is used to keep the machine from going into full fast speed if the current part run is too short to fully achieve it. Any part programmed with a length shorter than the value entered for LENGTH AT MAX will result in the Analog output voltage to be decreased accordingly in order to be able to stop to accurately cut the part. Programming Programming job data in the MP300 SERIES controller with Analog Output is identical to programming an MP300 SERIES controller. Refer to the Operating Procedures section of this manual (Section 4), for Programming. Operation The operation of the MP300 SERIES with Analog Output is identical to the operation of the MP300 SERIES with the following exceptions. Refer to section 4 of this manual, Operating Procedures. 80 MP Series Open Loop Operator’s Manual Jogging Material When jogging the material forward or reverse, the Min Volts parameter is used to determine the speed to jog at. The forward / slow output is also turned on when jogging forward and the reverse output is turned on when jogging in reverse. Running the Machine After an order has been entered, the machine is placed in the RUN mode by either pressing the RUN switch on the front panel or closing the external RUN contact if the REMOTE RUN option is selected. The MP300 SERIES with Analog Output works identical to the standard MP300 SERIES controller with the addition of the analog output. The controller still turns on the forward and slow outputs plus supplies a single-ended 0 to +10 volt output. While the controller is in fast, the MAX VOLTS value is used. While in slow, the MIN VOLTS value is used. If short parts will be run and the machine is unable to reach full fast speed on stopping lines, the LENGTH AT MAX parameter should be used. This length should be the shortest parts run that the machine is able to achieve full fast speed before shifting into slow and finally stopping. If any parts programmed are shorter than this length, the fast speed analog output would decrease according to the length of the part programmed. The output is determined by the following formula: MaxVolts − MinVolts • PartLenth + MinVolts LengthAtMax MP350PAV The MP350PAV controller works exactly like the MP350P controller with one additional feature. The MP350PAV has an analog output that is proportional to the current line velocity. 1 Volt = 100 FPM. At line speeds of 1000 FPM or higher, the analog output will be 10 Volts. The output is active in both jog and run modes and always has a positive output. During power up of the controller (approximately 2 to 4 seconds), the analog output will be undefined (0 to 10 volts). The programming and operation of the MP350PAV is otherwise identical to the MP350P. 81 MP Series Open Loop Operator’s Manual Chapter 6: Troubleshooting The MP300 SERIES is a very reliable product, but things can go wrong. The user can clear most problems, but AMS experts are always ready to help if needed. We have many years of experience with all types of length controls and coil processing equipment. Our experience shows that problems are grouped into: Machine problems (most common) Operator mistakes Incorrect Setup data Corrupted controller memory Cable damage Controller fault (least common) Troubleshooting is just a logical series of steps, which leads to the likely cause of a problem. The only tools you need are an accurate scale or steel tape, and perhaps a multimeter. This guide is a “self help guide” for the user to help troubleshoot the system. Follow these suggestions in the order listed. 82 MP Series Open Loop Operator’s Manual When did the Problem Start? Did the machine work properly at one time? If not, have you done the Calibration procedure? If the machine did work properly at one time, what has changed since then? Did the problem start after routine maintenance, after electrical panel work, after a material change, or after an operator change? Trace backwards in time to find out what's different. Check the Machine Check the Encoder to make sure it tracks the material perfectly. The encoder wheel must be at right angles to the material. The wheel must rotate exactly parallel to the direction of material movement. The wheel must be in firm contact with the material. No slippage is allowed! Re-run the length Calibration procedure after any changes to the encoder mounting. Check the encoder cable connections. They may have worked loose from material movement or vibration. Make sure there are no nicks or cuts in the cable. Check the shear (or punch) press to make sure that it returns fully to its home position after each cycle. The press will make accurate cuts only if it starts from a known position for each cycle. Re-run the length Calibration procedure after any changes to either press. Visually check other parts of the machine for loose fasteners, excessive wear, proper lubrication, proper material feed, and roll former adjustment. Re-run the length Calibration procedure after any changes to the machine. Collect Data Often the problem is that the machine is making out-of-tolerance parts. To deal with this type of problem, carefully measure the parts made and compare these numbers with those that were programmed. Also take note of the order in which the shear cut the parts. Write down these measurements for possible later reference. 83 MP Series Open Loop Operator’s Manual If length and punch placement seem to vary at random, check the encoder mounting very carefully. The encoder must move with the material, and cannot be allowed to slip. If dimensions are off in a consistent pattern, run the Calibration procedure. Re-check Setups Re-check Setup values with originally recorded values. When you installed the MP300 SERIES controller, you should have recorded the Setup values on the form provided in the manual for your machine TYPE. Make sure that none of these values has changed. Run the Calibration mode When you do the Calibration, take great care to make accurate measurements. Be sure that you know how to reduce measuring error as much as possible with the scale or steel tape you use. A loose tip on your steel tape can add a large error into your measurements. Use Built-in Diagnostic features The MP300 SERIES has a display mode Press SETUP until the screen shown below appears. 1= Input/Output 2= Memory Test Figure 5-1. Input Output, Memory Test Screen. Press the number for Input/Output and the screen that is shown in figure 5-2 will appear. In: _ _ _ 4 _ _ _ _ Out: _ _ _ _ _ _ _ _ Figure 5-2. In / Out Screen. This screen will allow you to monitor the controller's inputs and outputs. Watch this display while the machine is running to check for slowdown, stopping, die accelerator, and press actuation points. 84 MP Series Open Loop Operator’s Manual On the main Status display, you can watch line speed and distance past the shear. Compare what you see here to what should be happening as the machine runs. # 23 30 Pcs 90.000” s150 3 Left 30.100” Figure 5-3. MP350 and MP350P Status Screen Check Incoming Power Check incoming power for proper voltage. If you suspect fluctuations, watch the needle indication with an analog meter to see if they show up. More advanced line monitors are available for stubborn cases that you can't see with ordinary meters. Use a recording line monitor to find problems that seldom show up. Your local power company may be able to help with this. Cycle Power Cycle power off and on. Try this if the controller "locks up" (won’t respond to the keyboard). This may restore normal operation after an electrical surge. If not, clear the MP300 Series’ memory. Clear Memory Clearing memory will erase all Setup, Pattern, and Order information in the MP300 Series’ memory. Do not clear the memory unless you have written down all Setup, Pattern, and Order information for re-entry, and you have tried everything else above. You can clear all storage in the MP300 SERIES (including Setup and Order data) by following the sequence below. 1. Make sure that the Security switch is unlocked. 2. Turn off power to the controller. 3. Wait five seconds. 4. Press the '5' key while you 85 MP Series Open Loop Operator’s Manual 5. Turn the controller's power back on. 6. Hold down the '5' key for at least two seconds after you turn the power on. Electrical Noise The MP300 SERIES should not lock up frequently. If it does, you should suspect that electrical noise is present. Noise problems can be very hard to locate. The best way to avoid noise is by using good cable layout and wiring methods. Also, noise suppressor devices such as varistors are needed in some cases. Refer to the AMS Application Note "Noise Suppression Methods” for details. FAX Setup and Parts data to AMS FAX Setup and Parts data to AMS with a full description of the problem. Unless you think your problem is very simple, FAX this information to us before you call. We will ask for it anyway. Always Include the Model, Serial, and Software Version numbers. Be sure to send a copy of the Setup Data Sheet, and all information about the problem. FAX us at 1-314-344-9996. Include your name and phone number so we can call you back. 86 MP Series Open Loop Operator’s Manual AMS INFORMATION COMPANY ADDRESS AMS CONTROLS INC. 12180 PRICHARD FARM ROAD MARYLAND HEIGHTS, MO 63043 TELEPHONE TEL: FAX: 314-344-3144 800-334-5213 314-344-9996 Online www.amscontrols.com 87 MP Series Open Loop Operator’s Manual Chapter 7: Controller Model Types There are many different types of controllers available from AMS controls. The factors that will influence the model selected include whether the machine is a “Feed-To-Stop” line or “Flying Cut”, and if presses that perform punching are to be controlled. Each individual controller will have its own unique set of parameters based upon the type machine used and the number of presses. Many parameters are common to all controllers, while some parameters are used under specific conditions, for example, the Hole Counter option requires certain parameters not used by the other controllers. The following section deals with each individual controller and gives a brief description of each of the open loop controllers, the proper position for the configuration switches, a list of the inputs and outputs, and a list of the machine setup parameters for that model. In the back of the manual there is a generic setup data sheet that includes all possible setup parameters. Please fill in the appropriate data for your individual controller on this sheet, as it will help the AMS Customer Service Department troubleshoot your machine in the event it is not performing at the required standards. The numbers shown are the numbers of the basic controller with and without the Hole Counter and Analog output options. The letter H is used for the hole counter and the letter A is used for the Analog option. MP301 = Has No Options MP301A = Has Analog output option MP301H = Has Hole Counting option MP350 = Has no options MP350A = Has Analog output option MP350H = Has Hole Counting option MP350P = Has no options MP350PA = Has Analog output option MP350PAV = Has Proportional Analog output MP350PH = Has Hole Counting option 88 MP Series Open Loop Operator’s Manual MP301 General Description The MP301 is capable of controlling a single press (cutoff) and it will control machines with stationary or flying dies. The MP301 will continually monitor position, speed, and velocity, while automatically compensating for any changes that occur on the line. This controller is a single batch controller and as such, only one job may be entered at a time. Switch Settings and I/O SW1 SW2 OFF OFF Single Speed ON OFF Dual Speed, Forward-Slow Logic OFF ON Dual Speed, Fast-Slow Logic ON ON Not a valid setting SW3 OFF Local Mode ON Remote Mode SW4 SW5 OFF OFF Flying Die with Die Boost ON OFF Flying Die without Die Boost OFF ON Feed-To-Stop ON ON Not Used SW6 OFF Manual Shear allowed while machine is halted ON Manual Shear not allowed while machine is halted SW7 Not Used 89 MP Series Open Loop Operator’s Manual NO. INPUTS OUTPUT 1 Jog Forward Forward/Fast 2 Jog Reverse Slow 3 Safety Interlock/Remote Run Reverse 4 Shear Complete Shear 5 Setup/Lockout Shear Boost/Shear Up 6 Not Used Run 7 External Manual Shear Batch Complete Shear Up available when Shear Boost is not used. General Parameters The following is a list of the machine setup parameters for the MP301. For detailed description of the parameters see section 3 “Machine Configuration.” • • • • • • • • • • • • • • • • • • • Refresh Done Job Batching Shear Dwell Down Shear Dwell Up Boost Dwell Boost Comp Shear Kerf Minimum Part Delay After Shear Minimum Slow Distance Tolerance Encoder Direction Resolution Filter Constant Units Stopping Mode Stopping Reaction Decel Factor Mode Decel Factor 90 MP Series Open Loop Operator’s Manual • • • Shear Reaction Boost Reaction Correction 91 MP Series Open Loop Operator’s Manual MP301A General Description The MP301A is capable of controlling a single press (cutoff) and it will control machines with stationary or flying dies and uses the Analog output option. This controller is a single batch controller and as such, only one job may be entered at a time. Switch Settings and I/O SW1 SW2 OFF OFF Single Speed ON OFF Dual Speed, Forward-Slow Logic OFF ON Dual Speed, Fast-Slow Logic ON ON Not a valid setting SW3 OFF Local Mode ON Remote Mode SW4 SW5 OFF OFF Flying Die with Die Boost ON OFF Flying Die without Die Boost OFF ON Feed-To-Stop ON ON Not Used SW6 OFF Manual Shear allowed while machine is halted ON Manual Shear not allowed while machine is halted 92 MP Series Open Loop Operator’s Manual SW7 Not Used NO. INPUTS OUTPUT 1 Jog Forward Forward/Fast 2 Jog Reverse Slow 3 Safety Interlock/Remote Run Reverse 4 Shear Complete Shear 5 Setup/Lockout Shear Boost/Shear Up 6 Not Used Run 7 External Manual Shear Batch Complete Shear Up available when Shear Boost is not used. Analog out = 0 to 10 VDC, Analog + = pin 14/Analog - = pin 15 General Parameters The following is a list of the machine setup parameters for the MP301A. For detailed description of the parameters see sections 3 “Machine Configuration” and 7 “Analog Output Option”. • • • • • • • • • • • • • • • Refresh Done Job Batching Shear Dwell Down Shear Dwell Up Boost Dwell Boost Comp Shear Kerf Minimum Part Delay After Shear Minimum Slow Distance Tolerance Encoder Direction Resolution Min Volts Max Volts 93 MP Series Open Loop Operator’s Manual • • • • • • • • • • Length at Max Filter Constant Units Stopping Mode Stopping Reaction Decel Factor Mode Decel Factor Shear Reaction Boost Reaction Correction 94 MP Series Open Loop Operator’s Manual MP301H General Description The MP301H is capable of controlling a single press (cutoff) and it will control machines with flying dies and uses the Hole Detect option. The MP301H will continually monitor position, speed, and velocity, while automatically compensating for any changes that occur on the line. Switch Settings and I/O SW1 SW2 SW3 SW4 OFF Not a valid setting ON Non-Stop Shear OFF Shear Die Boost Active ON No Shear Die Boost OFF Single Speed Shear ON Two Speed Shear OFF Front Panel Run ON Remote Run (Input 3) SW5 Not Used SW6 Not Used SW7 Not Used 95 MP Series Open Loop Operator’s Manual NO. INPUTS OUTPUT 1 Jog Forward Forward/Fast 2 Jog Reverse Slow 3 Safety Interlock/Remote Run Reverse 4 Shear Complete Shear 5 Setup/Lockout Not Used 6 Not Used Run 7 Hole Detector Shear Boost/Shear Up 8 External Manual Shear Not Used Shear Up available when Shear Boost is not used. General Parameters The following is a list of the machine setup parameters for the MP301H. For detailed descriptions of the parameters see section 3 “Machine Configuration.” • • • • • • • • • • • • • • • • • • Refresh Done Job Batching Mode Shear Dwell Down Shear Dwell Up Boost Dwell Shear Kerf Shear-Detect Minimum Hole Spacing No-Hole Stop Minimum Part Delay After Shear Speed Logic Minimum Slow Distance Encoder Direction Resolution Filter Constant Units 96 MP Series Open Loop Operator’s Manual • • • • • Shear Reaction Boost Reaction Decel Factor Mode Decel Factor Correction 97 MP Series Open Loop Operator’s Manual MP350 General Description The MP350 is capable of controlling a single press (cutoff) and it will control machines with stationary or flying dies. The MP350 will continually monitor position, speed, and velocity, while automatically compensating for any changes that occur on the line. Switch Settings and I/O SW1 SW2 OFF OFF Single Speed ON OFF Dual Speed, Forward-Slow Logic OFF ON Dual Speed, Fast-Slow Logic ON ON Not a valid setting SW3 OFF Local Mode ON Remote Mode SW4 SW5 OFF OFF Flying Die with Die Boost ON OFF Flying Die without Die Boost OFF ON Feed-To-Stop ON ON Not Used SW6 OFF Manual Shear allowed while machine is halted ON Manual Shear not allowed while machine is halted 98 MP Series Open Loop Operator’s Manual SW7 NO. OFF Multiple Batch Mode ON Single Batch Mode INPUTS OUTPUT 1 Jog Forward Forward/Fast 2 Jog Reverse Slow 3 Safety Interlock/Remote Run Reverse 4 Shear Complete Shear 5 Setup/Lockout Die Boost/Shear Up 6 Not Used Run 7 External Manual Shear Batch Complete Shear Up available when Die Boost is not used. General Parameters The following is a list of the machine setup parameters for the MP350. For detailed descriptions of the parameters see section 3 “Machine Configuration.” • • • • • • • • • • • • • • • • • Halt Mode Refresh Done Job Shear Dwell Down Shear Dwell Up Boost Dwell Boost Comp Shear Kerf Minimum Part Delay After Shear Minimum Slow Distance Tolerance Encoder Direction Resolution Filter Constant Units Shear Reaction Boost Reaction 99 MP Series Open Loop Operator’s Manual • • • • • Stopping Mode Stopping Reaction Decel Factor Mode Decel Factor Correction 100 MP Series Open Loop Operator’s Manual MP350A General Description The MP350A is capable of controlling a single press (cutoff) and it will control machines with stationary or flying dies and uses the Analog output option. Switch Settings and I/O SW1 SW2 OFF OFF Single Speed ON OFF Dual Speed, Forward-Slow Logic OFF ON Dual Speed, Fast-Slow Logic ON ON Not a valid setting SW3 OFF Local Mode ON Remote Mode SW4 SW5 OFF OFF Flying Die with Die Boost ON OFF Flying Die without Die Boost OFF ON Feed-To-Stop ON ON Not Used SW6 OFF Manual Shear allowed while machine is halted ON Manual Shear not allowed while machine is halted SW7 OFF Multiple Batch Mode ON Single Batch Mode 101 MP Series Open Loop Operator’s Manual NO. INPUTS OUTPUT 1 Jog Forward Forward/Fast 2 Jog Reverse Slow 3 Safety Interlock/Remote Run Reverse 4 Shear Complete Shear 5 Setup/Lockout Die Boost/Shear Up 6 Not Used Run 7 External Manual Shear Batch Complete Shear Up available when Die Boost is not used. Analog out = 0 to 10 VDC, Analog + = pin 14/Analog - = pin 15 General Parameters The following is a list of the machine setup parameters for the MP350A. For detailed description of the parameters see sections 3 “Machine Configuration” and 7 “Analog Output Option”. • • • • • • • • • • • • • • • • • Halt Mode Refresh Done Job Shear Dwell Down Shear Dwell Up Boost Dwell Boost Comp Shear Kerf Minimum Part Delay After Shear Minimum Slow Distance Tolerance Encoder Direction Resolution Min Volts Max Volts Length at Max Filter Constant 102 MP Series Open Loop Operator’s Manual • • • • • • • • Units Shear Reaction Boost Reaction Stopping Mode Stopping Reaction Decel Factor Mode Decel Factor Correction 103 MP Series Open Loop Operator’s Manual MP350H General Description The MP350H is capable of controlling a single press (cutoff) and it will control machines with flying dies and uses the Hole Detect option. The MP350H will continually monitor position, speed, and velocity, while automatically compensating for any changes that occur on the line. Switch Settings and I/O SW1 SW2 SW3 SW4 OFF Not a valid setting ON Non-Stop Shear OFF Shear Die Boost Active ON No Shear Die Boost OFF Single Speed Shear ON Two Speed Shear OFF Front Panel Run ON Remote Run (Input 3) SW5 Not Used SW6 Not Used SW7 Not Used 104 MP Series Open Loop Operator’s Manual NO. INPUTS OUTPUT 1 Jog Forward Forward/Fast 2 Jog Reverse Slow 3 Safety Interlock/Remote Run Reverse 4 Shear Complete Shear 5 Setup/Lockout Not Used 6 Not Used Run 7 Hole Detector Shear Boost/Shear Up 8 External Manual Shear Not Used Shear Up available when Die Boost is not used. General Parameters The following is a list of the machine setup parameters for the MP350H. For detailed descriptions of the parameters see section 3 “Machine Configuration.” • • • • • • • • • • • • • • • • • • • • • • Halt Mode Refresh Done Job Mode Shear Dwell Down Boost Dwell Shear Kerf Shear-Detect Minimum Hole Spacing No-Hole Stop Minimum Part Delay After Shear Speed Logic Minimum Slow Distance Encoder Direction Resolution Filter Constant Units Shear Reaction Boost Reaction Decel Factor Mode Decel Factor Correction 105 MP Series Open Loop Operator’s Manual MP350P General Description The MP350P is capable of controlling a single press (cutoff) and a punch press, and it will control machines with stationary or flying dies. The MP350P will continually monitor position, speed, and velocity, while automatically compensating for any changes that occur on the line. Switch Settings and I/O SW1 SW2 SW3 SW4 SW5 SW6 SW7 OFF Feed-To-Stop Shear ON Non-Stop Shear OFF Shear Die Boost Active ON No Shear Die Boost OFF Single Speed Shear ON Dual Speed Shear OFF Front Panel Run ON Remote Run (Input 3) OFF Feed-To-Stop Punch ON Non-Stop Punch OFF Punch Die Boost Active ON No Punch Die Boost OFF Single Speed Punch ON Dual Speed Punch 106 MP Series Open Loop Operator’s Manual NO. INPUTS OUTPUT 1 Jog Forward Forward/Fast 2 Jog Reverse Slow 3 Safety Interlock/Remote Run Reverse 4 Shear Complete Shear 5 Setup/Lockout Punch 6 Punch Complete Run 7 External Manual Shear Shear Up/Die Boost 8 External Manual Punch Punch Up/Die Boost Shear Up and Punch Up are available when Die Boosts are not used. General Parameters The following is a list of the machine setup parameters for the MP350P. For detailed descriptions of the parameters see section 3 “Machine Configuration.” • • • • • • • • • • • • • • • • • • • • Halt Mode Refresh Done Job Halt No Parts to Run (With Punch Only) Shear Dwell Down Shear Dwell Up Boost Dwell Shear Kerf Minimum Part Delay After Shear Punch Dwell Down Punch Dwell Up Punch Boost Dwell Scrap Length Shear-Punch Speed Logic Minimum Slow Distance Tolerance Encoder Direction Resolution Filter Constant 107 MP Series Open Loop Operator’s Manual • • • • • • • • • • Units Shear Reaction Boost Reaction Punch Reaction Punch Boost Reaction Stopping Mode Stopping Reaction Decel Factor Mode Decel Factor Correction 108 MP Series Open Loop Operator’s Manual MP350PA General Description The MP350PA is capable of controlling a single press (cutoff) and a punch press, and it will control machines with stationary or flying dies and uses the Analog Output Option. Switch Settings and I/O SW1 SW2 SW3 SW4 SW5 SW6 SW7 OFF Feed-To-Stop Shear ON Non-Stop Shear OFF Shear Die Boost Active ON No Shear Die Boost OFF Single Speed Shear ON Dual Speed Shear OFF Front Panel Run ON Remote Run (Input 3) OFF Feed-To-Stop Punch ON Non-Stop Punch OFF Punch Die Boost Active ON No Punch Die Boost OFF Single Speed Punch ON Dual Speed Punch 109 MP Series Open Loop Operator’s Manual NO. INPUTS OUTPUT 1 Jog Forward Forward/Fast 2 Jog Reverse Slow 3 Safety Interlock/Remote Run Reverse 4 Shear Complete Shear 5 Setup/Lockout Punch 6 Punch Complete Run 7 External Manual Shear Shear Up/Die Boost 8 External Manual Punch Punch Up/Die Boost Shear Up/Punch Up are available when Boosts are not used. Analog Out = 0 to 10 VDC, Analog + = pin 14/Analog - = pin 15 General Parameters The following is a list of the machine setup parameters for the MP350PA. For detailed description of the parameters see sections 3 “Machine Configuration” and 7 “Analog Output Option”. • • • • • • • • • • • • • • • Halt Mode Refresh Done Job Halt No Parts to Run (With Punch Only) Shear Dwell Down Shear Dwell Up Boost Dwell Shear Kerf Minimum Part Delay After Shear Punch Dwell Down Punch Dwell Up Punch Boost Dwell Scrap Length Shear-Punch Speed Logic 110 MP Series Open Loop Operator’s Manual • • • • • • • • • • • • • • • • • • Minimum Slow Distance Tolerance Encoder Direction Resolution Min Volts Max Volts Length at Max Filter Constant Units Shear Reaction Boost Reaction Punch Reaction Punch Boost Reaction Stopping Mode Stopping Reaction Decel Factor Mode Decel Factor Correction 111 MP Series Open Loop Operator’s Manual MP350PAV General Description The MP350PAV is capable of controlling a single press (cutoff) and a punch press. It will control machines with stationary or flying dies and uses has an analog output proportional to the current line speed.. Switch Settings and I/O SW1 SW2 SW3 SW4 SW5 SW6 SW7 OFF Feed-To-Stop Shear ON Non-Stop Shear OFF Shear Die Boost Active ON No Shear Die Boost OFF Single Speed Shear ON Dual Speed Shear OFF Front Panel Run ON Remote Run (Input 3) OFF Feed-To-Stop Punch ON Non-Stop Punch OFF Punch Die Boost Active ON No Punch Die Boost OFF Single Speed Punch ON Dual Speed Punch 112 MP Series Open Loop Operator’s Manual NO. INPUTS OUTPUT 1 Jog Forward Forward/Fast 2 Jog Reverse Slow 3 Safety Interlock/Remote Run Reverse 4 Shear Complete Shear 5 Setup/Lockout Punch 6 Punch Complete Run 7 External Manual Shear Shear Up/Die Boost 8 External Manual Punch Punch Up/Die Boost Shear Up/Punch Up are available when Boosts are not used. Analog Out = 0 to 10 VDC, Analog + = pin 14/Analog - = pin 15 General Parameters The following is a list of the machine setup parameters for the MP350PAV. For detailed descriptions of the parameters see section 3 “Machine Configuration.” • • • • • • • • • • • • • • • • • • Halt Mode Refresh Done Job Halt No Parts to Run (With Punch Only) Shear Dwell Down Shear Dwell Up Boost Dwell Shear Kerf Minimum Part Delay After Shear Punch Dwell Down Punch Dwell Up Punch Boost Dwell Scrap Length Shear-Punch Speed Logic Minimum Slow Distance Tolerance Encoder Direction 113 MP Series Open Loop Operator’s Manual • • • • • • • • • • • • • Resolution Line Movement Filter Constant Units Shear Reaction Boost Reaction Punch Reaction Punch Boost Reaction Stopping Mode Stopping Reaction Decel Factor Mode Decel Factor Correction 114 MP Series Open Loop Operator’s Manual MP350PH General Description The MP350PH is capable of controlling a single press (cutoff) and a punch press, and it will control machines with flying dies and uses the Hole Detect option. Switch Settings and I/O SW1 SW2 SW3 SW4 SW5 SW6 SW7 OFF Not a valid setting ON Non-Stop Shear OFF Shear Die Boost Active ON No Shear Die Boost OFF Single Speed Shear ON Dual Speed Shear OFF Front Panel Run ON Remote Run (Input 3) OFF Not a valid setting ON Non-Stop Punch OFF Punch Die Boost Active ON No Punch Die Boost OFF Single Speed Punch ON Dual Speed Punch 115 MP Series Open Loop Operator’s Manual NO. INPUTS OUTPUT 1 Jog Forward Forward/Fast 2 Jog Reverse Slow 3 Safety Interlock/Remote Run Reverse 4 Shear Complete Shear 5 Setup/Lockout Punch 6 Punch Complete Run 7 Hole Detector Shear Up/Die Boost 8 External Manual Punch Punch Up/Die Boost Shear Up and Punch Up are available when Die Boosts are not used. General Parameters The following is a list of the machine setup parameters for the MP350PH. For detailed descriptions of the parameters see section 3 “Machine Configuration.” • • • • • • • • • • • • • • • • • • Halt Mode Refresh Done Job Halt No Parts to Run (With Punch Only) Hole Mode Shear Dwell Down Shear Dwell Up Boost Dwell Shear Kerf Shear-Detect Minimum Hole Spacing No-Hole Stop Minimum Part Delay After Shear Punch Dwell Down Punch Dwell Up Punch Boost Dwell Scrap Length Shear-Punch 116 MP Series Open Loop Operator’s Manual • • • • • • • • • • • • • Speed Logic Minimum Slow Distance Encoder Direction Resolution Filter Constant Units Shear Reaction Boost Reaction Punch Reaction Punch Boost Reaction Decel Factor Mode Decel Factor Correction 117 MP Series Open Loop Operator’s Manual Chapter 8: Specifications Parameter Panel Mount AC Consolette 8"X12.5"X2.25" 7lbs. 8"X12.5"X7.5" 15lbs. Mechanical Size Weight Electrical Input Voltage 24VDC ±5% 115VAC ±10%, 50-60Hz Input Current .5 Amp. 1 Amp. (Note: The following parameters apply equally to all versions.) Output Characteristics Std DC Type Open Collector Transistor Maximum Current 4 ADC Maximum Applied Voltage 35 VDC AC Relay Type Form A Dry Circuit Relay Maximum Current 5 Amp. Maximum Applied Voltage 240VAC Solenoid Driver Type High Voltage Internal Driver Minimum Load Resistance 12 Ohms Maximum Voltage Generated 65 VDC Maximum Actuation Time 0.25 Seconds Encoder Input Type Quadrature with Complements Voltage 5VDC Maximum Encoder Load 200 milliamperes 118 MP Series Open Loop Operator’s Manual Maximum Pulse Rate 6,500 pulses/second Operation Number of Batches 1or 999, depending on model Maximum Part Length 9999.999 inches 25,400 centimeters 254,000 millimeters Maximum Parts/Batch 9999 Units of Measurement inches, centimeters, or millimeters Footage Totalizers 3 Maximum Footage/Totalizer 1,000,000 feet 1,000,000 meters Features Display 48 characters in 2 rows Keys 16 Controls 3 (CYCLE, RUN, HALT) 119 MP Series Open Loop Operator’s Manual Chapter 9: Changes to Software The above chart shows which software versions the listed Software Change Notices take effect on. 120


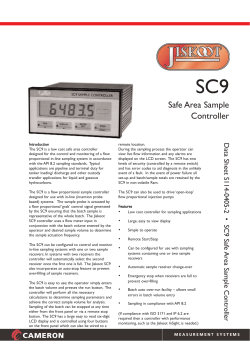


© Copyright 2026