
Project Manual KROGER #GA-631 OPELIKA, AL
Project Manual
KROGER
#GA-631
OPELIKA, AL
RLR #11-151
I-35 and Highway 280
Opelika, Alabama
Prepared for:
The Kroger Co.,
Its Subsidiaries and Affiliates
The Kroger Co.
2175 Parklake Drive, N.E.
Atlanta, Georgia 30345
by:
Robertson Loia Roof, P.C.
3460 Preston Ridge Road, Suite 275
Alpharetta, Georgia 30005
RLR Project Number 11-151
Issue Date: April 12, 2011
KROGER GA-631 MINOR RENOVATION / OPELIKA, AL
R/L/R PROJECT NO. 11-151
00 01 10-1
TABLE OF CONTENTS
SECTION 00 01 10 - TABLE OF CONTENTS
INTRODUCTORY INFORMATION
00 00 00
PROJECT MANUAL COVER
00 01 10
TABLE OF CONTENTS
INSTRUCTIONS FOR PROCUREMENT
00 21 13
INSTRUCTIONS TO BIDDERS
CONDITIONS OF THE CONTRACT
00 72 14.01
GENERAL CONDITIONS - KROGER CONTROLLED
DIVISION 02 - EXISTING CONDITIONS
02 41 19
SELECTIVE STRUCTURE DEMOLITION
DIVISION 03 - CONCRETE
03 35 19
POLISHED DYED CONCRETE FINISHING
DIVISION 05 - METALS
05 50 00
METAL FABRICATIONS
DIVISION 06 - WOOD, PLASTICS, AND COMPOSITES
06 10 53
MISCELLANEOUS CARPENTRY
DIVISION 07 - THERMAL AND MOISTURE PROTECTION
07 01 50
ROOFING DEMOLITION AND REPAIR
07 92 00
JOINT SEALANTS
DIVISION 09 - FINISHES
09 29 00
GYPSUM BOARD
09 65 13
RESILIENT BASE AND ACCESSORIES
09 91 00
PAINTING
DIVISION 22 - PLUMBING
22 05 00
COMMON WORK RESULTS FOR PLUMBING
22 05 80
PLUMBING CONNECTIONS TO VENDOR KIOSK
22 07 00
PLUMBING INSULATION
22 11 00
FACILITY WATER DISTRIBUTION
22 13 00
FACILITY SANITARY SEWERAGE
22 30 00
PLUMBING EQUIPMENT
22 42 00
COMMERCIAL PLUMBING FIXTURES
DIVISION 26 - ELECTRICAL
26 05 00
COMMON WORK RESULTS FOR ELECTRICAL
26 05 19
LOW VOLTAGE ELECTRICAL POWER CONDUCTORS AND CABLES
26 05 26
GROUNDING AND BONDING FOR ELECTRICAL SYSTEMS
26 05 33
RACEWAY AND BOXES FOR ELECTRICAL SYSTEMS
26 05 53
IDENTIFICATION FOR ELECTRICAL SYSTEMS
26 05 80
ELECTRICAL CONNECTIONS TO VENDOR KIOSK
26 11 16
SERVICE ENTRANCE
KROGER GA-631 MINOR RENOVATION / OPELIKA, AL
R/L/R PROJECT NO. 11-151
26 22 00
26 24 13
26 24 16
26 27 26
26 28 00
26 28 16
26 29 00
26 32 13
26 50 00
LOW VOLTAGE TRANSFORMERS
SWITCHBOARDS
PANELBOARDS
WIRING DEVICES
LOW VOLTAGE CIRCUIT PROTECTIVE DEVICES
ENCLOSED SWITCHES AND CIRCUIT BREAKERS
LOW VOLTAGE CONTROLLERS
ENGINE GENERATORS
LIGHTING
DIVISION 28 - ELECTRONIC SAFETY AND SECURITY
28 31 00
FIRE ALARM/SECURITY SYSTEM
END OF SECTION 00 01 10
00 01 10-2
TABLE OF CONTENTS
KROGER GA-631 MINOR RENOVATION / OPELIKA, AL
R/L/R PROJECT NO. 11-151
00 21 13-1
INSTRUCTIONS TO BIDDERS
SECTION 00 21 13 - INSTRUCTIONS TO BIDDERS
PART 1 - GENERAL
1.1
DEFINITIONS
A.
Definitions set forth in Division 00 Section “General Conditions” or in other Contract
Documents are applicable to the Procurement Requirements.
B.
Owner: The Kroger Co.; a subsidiary of the Kroger Co.
C.
Contact Documents: The Contract Documents describe the proposed construction and consist of
the Procurement Requirements, Agreement Between Owner and Contractor, General
Conditions, Jobsite Safety Rules, Drawings, Specifications, and all Addenda to the Contract
Documents issued prior to execution of the Contract and any Change Orders that may be
entered into.
D.
Procurement Requirements: Consist of the Invitation to Bid, Instructions to Bidders, the Trade
Proposal, and other sample bidding and contract forms.
1.2
ANTICIPATED DATE OF COMMENCEMENT AND DATE OF COMPLETION
A.
The anticipated date of commencement of the awarded contractor’s Work is 05/31/2001. The
anticipated date of completion of the contractor’s Work is 6/23/2011. The anticipated duration
of the contractor’s Work is 25 calendar days. If a Notice to Proceed is issued, at the Owner’s
sole discretion, actual dates may vary dependent on date issued.
B.
Liquidated Damages: The Contractor shall be liable to the Owner $ 1,000 as stipulated in the
Agreement Between Owner and Contractor for each day that the Completion Date is exceeded
in the completion of the Project. The sum is fixed and agreed as liquidated damages and not as
a penalty; it being understood that the damages which the Owner will suffer in such an event are
not subject to accurate calculation. The Owner shall be entitled to deduct any liquidated
damages due from the Contract Sum. Should the liquidated damages exceed that portion of the
Contract Sum owed to the Contractor, the Contractor shall promptly pay the Owner the
difference.
1.3
BIDDER’S REPRESENTATIONS
A.
The Bidder by making a Bid represents that:
1.
2.
The Bidder has read and understands the Contract Documents, to the extent that such
documentation relates to the Work for which the Bid is submitted, and for other portions
of the Project, if any, being bid concurrently or presently under construction.
The Bid is made in compliance with the Contract Documents.
KROGER GA-631 MINOR RENOVATION / OPELIKA, AL
R/L/R PROJECT NO. 11-151
3.
4.
The Bidder has visited the site, become familiar with local conditions under which the
Work is to be performed and has correlated the Bidder’s personal observations with the
requirements of the proposed Contract Documents.
The Bid is based on the items and brands of materials, equipment and systems required
by the Contract Documents including all Addenda without exception.
a.
1.4
00 21 13-2
INSTRUCTIONS TO BIDDERS
Where there is a conflict in or between the Drawings and Specifications or any
other discrepancy in the Contract Documents, and no request for information is
submitted or no response is provided by the Architect or Owner, the Bidder shall
be deemed to have estimated on the most expensive way of doing the Work. The
final decision of the conflict or discrepancy shall be determined by the Owner and
will be included in the contractor’s Scope of Work.
CONTRACT DOCUMENTS FOR BIDDING
A.
Copies
1.
2.
B.
Addenda To Contract Documents
1.
2.
C.
During the progress of bidding, Bidders may be furnished Addenda covering additions,
deductions, or alterations to the Contract Documents. Such Addenda shall be included in
the Work covered by the proposal and shall become a part of the Contract Documents.
The last addenda, as required, shall be issued no later than 7 calendar days prior to the
date for receipt of Bids. The last clarification letter for RFIs (Request for Information),
as required, will be issued no later than 3 calendar days prior to the date for receipt of
Bids, but no RFI issued after 7 days prior to date for receipt of Bids will result in an
addenda.
Electronic Forms
1.
1.5
Invited Bidders will be furnished three sets of proposed Contract Documents without
charge. All unsuccessful Bidders shall return these documents within 5 calendar days to
Derrick Woodfield 2175 North Lake after award of the Contract. All copies of drawings
and specifications furnished by the Owner are the property of the Owner and shall not be
used on any other work.
Any Bidder desiring sets of Drawings and/or Specifications may request same from;
Kroger via Sitefolio.
Certain forms required for Bidding shall be completed in electronic format. Those forms
and other forms required after award of contract may be found at the Owner’s Project
Website. See Division 00 Section "Bidders Instructions for Electronic Form Retrieval"
for procedures to download the forms from the Owner’s Project Website.
SUBMISSION OF PROPOSALS (BIDDING PROCEDURES)
A.
All Bids shall be submitted in accordance with the e-mail invitation for the on-line negotiation
process hosted by the Agentrics/ezMarket (GNX) Global Net Xchange on their Internet web site
located at www.agentrics.com. All prices must be submitted through the Agentrics(GNX) online negotiations process. Any additional questions or comments regarding the use of
KROGER GA-631 MINOR RENOVATION / OPELIKA, AL
R/L/R PROJECT NO. 11-151
00 21 13-3
INSTRUCTIONS TO BIDDERS
Agentrics(GNX) may be addressed with those individuals identified in the invitation to bid
issued to each invited Bidder.
1.
Upon completion of the Agentrics (GNX) on-line negotiations process, all Bidders shall
e-mail to the Owner at [email protected], attention Derrick Woodfield,
by the end of the next business day, the completed electronic copy of the Trade Proposal
matching their final project dollar amount on GNX. Bidder’s pricing must remain
consistent with that submitted during the on-line GNX negotiation process.
B.
All columns of the Trade Proposal must be completely filled in including the dollar amount
rounded to the nearest whole dollar, subcontractors names and percent total contract of
MBE/WBE participation. All blanks shall be filled in or the Bid may not be accepted, at
Owner’s sole discretion
C.
The Base Bid must include all items and scope of work indicted in the Contract Documents.
The Owner may disqualify any Base Bid that contains exclusions, substitutions, alternates not
directed by the Owner, or other qualifications to the Bidding Documents. Voluntary
substitutions or value engineering suggestions may be submitted separately from the base bid
amount for the Owner's consideration. Bidders shall submit questions regarding the bidding
documents to the Architect during the specified bidding period, prior to the release of the last
addenda, and prior to submission of their bid.
D.
The Bidder’s proposal shall include permit fees except for the general building permit as
described in Division 00 Section “General Conditions” and the cost of all state or local sales or
use taxes and charges or duties of any nature applicable to the Work incorporated under the
Contract.
1.
E.
The Owner will provide the general building permit.
Direct Buy Wire Bidding Procedure
1.
2.
The sucessful electrical bid shall be determined by the combination of the lowest
electrical bid and lowest cost for electrical wire supplied by the Owner.
Invited Bidders shall have all their proposed electrical subcontractors complete the
Electrical Wire Bid Takeoff Form and submit with their bids.
a.
3.
4.
A hard copy sample of the Wire Bid Takeoff Form is included in Division 00
Section “Direct Buy Wire Bidding.” The Owner will email the electronic form to
each of the Invited Bidders.
Invited Bidders shall submit along with the Trade Proposal the names of their two lowest
proposed electrical subcontractors and proposed associated bid amounts (excluding wire)
to the Owner.
Invited Bidders shall have their two lowest proposed electrical subcontractors complete
the Electrical Wire Bid Takeoff Form and email (be sure to note Electrical Wire Bid
Takeoff and the store number in the email subject line) to the Direct Buy Wire Supplier:
Graybar Electric
[email protected]
KROGER GA-631 MINOR RENOVATION / OPELIKA, AL
R/L/R PROJECT NO. 11-151
5.
6.
F.
The Direct Buy Wire Supplier will apply pricing to the submitted Electrical Wire Bid
Takeoff Forms and calculate the total wire price and email the completed forms back to
the Owner. The Owner will determine the apparent successful electrical subcontractor
based on the lowest dollar amount of both factors and advise the invited Bidder without
disclosing the cost associated with the electrical wire.
The successful Bidder will complete the Electrical Wire (Cuts) Order Form and submit to
the Direct Buy Wire Supplier as specified in Division 26 Sections "Low Voltage
Electrical Power Conductors and Cables" and "Grounding and Bonding for Electrical
Systems."
Direct Buy Refrigeration Copper Pipes Bidding Procedure (If bid is direct with installation
contractor)
1.
2.
The successful refrigeration copper piping bid shall be determined by the combination of
the lowest refrigeration bid and lowest cost for refrigeration copper piping supplied by
the Owner.
Invited Bidders shall complete the Copper Pipe Takeoff Form and submit with their bids.
a.
3.
4.
1.6
00 21 13-4
INSTRUCTIONS TO BIDDERS
A hard copy sample of the Copper Pipe Takeoff Form is included in Division 00
Section “Direct Buy Refrigeration Copper Pipes Bidding.” The Owner will email
the electronic form to each of the Invited Bidders.
Invited Bidders shall complete the Copper Pipe Takeoff Form and email (be sure to note
“Copper Pipe Takeoff” and the store number in the email subject line) to the Owner.
The Direct Buy Copper Pipe Supplier will apply pricing to the submitted Copper Pipe
Bid Takeoff Forms and calculate the total copper pipe price and email completed forms
back to the Owner. The Owner will determine the apparent successful refrigeration
contractor based on the lowest dollar amount of both factors and advise the invited
Bidder without disclosing the cost associated with the copper pipe.
CONSIDERATION OF BIDS
A.
The Owner’s Reservations
1.
B.
The Owner reserves the unrestricted privilege to reject any, part of any, or all of the bids
received and to waive any informality in the bidding. Contracts will be awarded on the
basis of the best value as determined solely by the Owner.
Accelerated Construction Schedule & Planning
1.
It is the intent of the Owner to award a Contract to the lowest qualified Bidder. Early
completion of the Work is of utmost importance, and the Owner will base its decision not
only on the lowest Bid dollar value but also on the duration of the project and may award
the Contract to the Bidder whose Bid, in dollar amount and number of construction days,
is to the Owner’s overall advantage at the Owner’s sole discretion. The Bidder shall
thoroughly investigate all possible methods of scheduling (working the necessary
weekends and/or evenings) and employing work forces to achieve the earliest completion
date.
KROGER GA-631 MINOR RENOVATION / OPELIKA, AL
R/L/R PROJECT NO. 11-151
1.7
PAYMENT PROTECTION
A.
1.8
00 21 13-5
INSTRUCTIONS TO BIDDERS
To cover the faithful performance of their Work and the payment of all legitimate claims arising
thereunder, the Bidder may select the following options to guarantee payment to subcontractors
and material suppliers:
1.
Contractor Financing – Within ten (10) calendar days after notice to award the successful
Bidder shall submit to the Owner financial information to verify successful Bidder is
solvent and can meet the obligations of conducting business during project construction.
Owner reserves the right to require the successful Bidder to obtain a Letter of Credit or
Performance Bond and Labor and Material Payment Bond by accepting the alternate any
time prior to the start of physical start of construction. Successful Bidder is responsible
for submitting unconditional waiver and release forms along with request for payment to
the Owner. Refer to General Conditions, Article 9 “Payments and Completion” for table
outlining conditional and unconditional waiver and release schedule requirements for this
option.
2.
Letter of Credit –If Bidder selects this option when submitting the Trade Proposal, the
successful Bidder has within ten (10) calendar days after notification of award to submit a
Letter of Credit equal to the highest scheduled request for payment of the Project. At the
Owners sole discretion, the value of the Letter of Credit may be amended based on the
progress of the Work. The Letter of Credit shall be submitted to the Owner on the form
entitled “Letter of Credit” which will be supplied by the Owner, a sample of which is
herein included. Successful Bidder may submit a request for payment to the Owner prior
to securing unconditional waiver and release forms. Refer to General Conditions, Article
9 “Payments and Completion” for table outlining conditional and unconditional waiver
and release schedule requirements for this option.
3.
Performance Bond and Labor & Material Payment Bond - If Bidder selects this option
when submitting the Trade Proposal, the successful Bidder has within ten (10) calendar
days after notification of award to submit a Performance Bond and a Labor & Material
Payment Bond each equal to 100 percent of the contract sum. Successful Bidder may
submit a request for payment to the Owner prior to securing unconditional waiver and
release forms. Refer to General Conditions, Article 9 “Payments and Completion” for
table outlining conditional and unconditional waiver and release schedule requirements
for this option.
B.
The surety company providing the Performance Bond and Labor & Material Payment Bond
must be rated A VII or better by AM Best and must be listed in the current U.S. Treasury
Department’s Listing of Approved Sureties (Department Circular 570) with an underwriting
limitation at least equal to the amount of the bond. The Listing of Approved Sureties
(Department Circular 570) can be found at www.fms.treas.gov/c570.
C.
All Bidders shall provide in the Trade Proposal, the cost associated with providing either a
Contractor Financing, Letter of Credit or a Performance Bond and Labor and Material Payment
Bond.
SPECIAL REQUIREMENTS
KROGER GA-631 MINOR RENOVATION / OPELIKA, AL
R/L/R PROJECT NO. 11-151
A.
00 21 13-6
INSTRUCTIONS TO BIDDERS
The Owner encourages the full participation of qualified Minority-Owned Business Enterprises
(MBEs) and Women-Owned Business Enterprises (WBEs) in all aspects of its business. MBEs
and WBEs must meet the same standards as other contractors, sub-contractors, and suppliers of
materials and services. The Owner encourages all business partners to identify, screen and
include qualified MBEs and WBEs in all projects.
PART 2 - PRODUCTS (Not Used)
PART 3 - EXECUTION (Not Used)
END OF SECTION 00 21 13
KROGER GA-631 MINOR RENOVATION / OPELIKA, AL
00 72 14-011
R/L/R PROJECT NO. 11-151
GENERAL CONDITIONS – KROGER CONTROLLED
SECTION 00 72 14 - GENERAL CONDITIONS - KROGER CONTROLLED
ARTICLE 1
1.1
GENERAL PROVISIONS
BASIC DEFINITIONS
1.1.1
Certain terms and words used throughout these Contract Documents shall be defined as
follows:
1.1.1.1
Procurement Requirements: Consist of the Invitation to Bid, Instructions to
Bidders, the Trade Proposal, and other sample bidding and contract forms.
1.1.1.2
Agreement: A legal instrument executed by the Owner and the Contractor
binding the parties to the terms of the Contract. The Agreement defines the
relationships and obligations between the Owner and Contractor.
It
incorporates all other Contract Documents by reference.
1.1.1.3
Contract Documents: Consist of the Procurement Requirements, the
Agreement between Owner and Contractor (hereinafter the Agreement),
General Conditions, Drawings, Specifications, Addenda issued prior to
execution of the Contract, other documents listed in the Agreement, and
Modifications issued after execution of the Contract.
1.1.1.4
Contract: The Contract Documents form the Contract for Construction. The
Contract for Construction or Contract represents the entire and integrated
agreement between the parties hereto and supersedes prior negotiations,
representations or agreements, either written or oral.
1.1.1.5
Project Management Website (PMW): Owner’s project administration,
coordination, and communication website, hosted by Site|folio, for submitting
projects documents and other information for exchange and approval and final
storage.
1.1.1.6
Work: The construction and services required by the Contract Documents,
whether completed or partially completed, and includes all other labor,
materials, equipment and services provided or to be provided by the Contractor
to fulfill the Contractor's obligations. The Work may constitute the whole or a
part of the Project.
1.1.1.7
Project: The total construction of which the Work performed under the
Contract Documents may be the whole or a part and which may include
construction by the Owner or by separate contractors.
1.1.1.8
Drawings: The graphic and pictorial portions of the Contract Documents
showing the design, location and dimensions of the Work, generally including
plans, elevations, sections, details, schedules, and diagrams.
KROGER GA-631 MINOR RENOVATION / OPELIKA, AL
00 72 14-012
R/L/R PROJECT NO. 11-151
GENERAL CONDITIONS – KROGER CONTROLLED
1.1.1.9
Specifications: The portion of the Contract Documents consisting of the
written requirements for materials, equipment, systems, standards and
workmanship for the Work, and performance of related services.
1.1.1.10 Project Manual: The Project Manual is a volume assembled for the Work
which may include the Procurement Requirements, sample forms, Conditions
of the Contract and Specifications.
1.1.1.11 Owner: The person or entity identified as such in the Agreement and is referred
to throughout the Contract Documents as if singular in number. The term
"Owner" means the Owner or the Owner's Project Manager.
1.1.1.12 Contractor: The person or entity identified as such in the Agreement and is
referred to throughout the Contract Documents as if singular in number. The
term "Contractor" means the Contractor or the Contractor's authorized
representative.
1.1.1.13 Major Material Supplier: Material supplier who is to furnish materials for the
Project, the total cost of which is $5,000.00 or more.
1.1.1.14 Architect: The person lawfully licensed to practice architecture or an entity
lawfully practicing architecture identified as such in the Agreement and is
referred to throughout the Contract Documents as if singular in number. The
term "Architect" means the Architect, the Architect’s consultants, or the
Architect's representative.
1.1.1.15 MBE: Minority-Owned Business Enterprise: Fifty-one percent ownership of
business by a minority group member (African Americans, Hispanic
Americans, Asian-Pacific Americans, Asian-Indians, Native Americans). If
publicly owned business, at least 51 percent of the stock is owned by one or
more minority group member; and management and daily operation of the
business are controlled by those minority group members; and business must be
located in the United States or its trust territories; and the minority group
members must be U.S. citizens.
1.1.1.16 WBE: Women-Owned Business Enterprise: Fifty-one percent ownership of
business by a woman or women. If publicly owned business, at least 51 percent
of the stock is owned by one or more women; and management and daily
operation of the business are controlled by women; and business must be
located in the United States or its trust territories; and the female
ownership/management must be U.S. citizens.
1.2
REFERENCES
1.2.1
1.3
Reference to the printed codes, guides, or standard specifications of any Institute, Society
or other organization or to any manufacturer’s installation directions, shall be the latest
edition thereof, unless laws, ordinances, rules or regulations require compliance with a
specific edition, in which case the reference shall be to such edition.
DRAWINGS AND SPECIFICATIONS
KROGER GA-631 MINOR RENOVATION / OPELIKA, AL
00 72 14-013
R/L/R PROJECT NO. 11-151
GENERAL CONDITIONS – KROGER CONTROLLED
1.4
1.5
1.3.1
Drawings and Specifications are complementary and what is called for by one shall be as
binding as if called for by both. Should the drawings, specifications and/or other
instructions be contradictory in any particular, or should there be apparent errors in
either, or should there be any doubt as to the meaning of either, the Contractor shall refer
the matter to the Owner whose decision thereon shall be conclusive.
1.3.2
Figures shall have precedence over scaled measurements and details over general
drawings. Unless otherwise provided in the Contract Documents, the Owner will furnish
to the Contractor, free of charge, three sets of drawings and specifications. All copies of
drawings and specifications furnished by the Owner are the property of the Owner and
shall not be used on any other work. Upon request they shall be returned to the Owner on
completion of the Project.
1.3.3
For convenience of reference, the specifications are separated in sections each bearing a
title. Other sections and titles may appear throughout the Contract Documents. Such
facts shall not be deemed to be nor shall they be the basis for any request that the Owner
make a designation as to the limits of any phase of the Project, or as to what trade shall
perform any part thereof. The Contractor shall keep one copy of all drawings and
specifications at the site, in good order, available to the Owner.
CORRELATION AND INTENT OF THE CONTRACT DOCUMENTS
1.4.1
The intent of the Contract Documents is to provide a complete functioning structure or
installation as indicated.
1.4.2
The transportation, unloading, storing, erection or installation, testing as indicated, and
making operable of all parts of the Project shall be included under this Contract, at times
appropriate thereto.
OWNERSHIP AND USE OF DRAWINGS, SPECIFICATIONS AND OTHER INSTRUMENTS
OF SERVICE
1.5.1
The Drawings, Specifications and other documents, including those in electronic form,
prepared by the Architect and the Architect's consultants are instruments of service
through which the Work to be executed by the Contractor is described. The Contractor
may retain one record set. Neither the Contractor nor any subcontractor, subsubcontractor or material or equipment supplier shall own or claim a copyright in the
Drawings, Specifications and other documents prepared by the Architect or the
Architect's consultants. All copies of instruments of service, except the Contractor's
record set, shall be returned or suitably accounted for to the Owner, on request, upon
completion of the Work. The Drawings, Specifications and other documents prepared by
the Architect and the Architect's consultants, and copies thereof furnished to the
Contractor, are for use solely by the Owner. They are not to be used by the Contractor or
any subcontractor, sub-subcontractor or material or equipment supplier on other projects
or for additions to the Project outside the scope of the Work without the specific written
consent of the Owner. The Owner authorizes the Contractor, subcontractors, subsubcontractors and material or equipment suppliers to use and reproduce applicable
portions of the Drawings, Specifications and other documents prepared by the Architect
and the Architect's consultants appropriate to and for use in the execution of their Work
under the Contract Documents. All copies made under this authorization shall bear the
statutory copyright notice, if any, shown on the Drawings, Specifications and other
KROGER GA-631 MINOR RENOVATION / OPELIKA, AL
00 72 14-014
R/L/R PROJECT NO. 11-151
GENERAL CONDITIONS – KROGER CONTROLLED
documents prepared by the Architect and the Architect's consultants. Submittal or
distribution to meet official regulatory requirements or for other purposes in connection
with the Project is not to be construed as publication in derogation of copyrights or other
reserved rights.
ARTICLE 2
2.1
OWNER’S STORAGE OF MATERIALS OR INSTALLATION OF EQUIPMENT
2.1.1
2.2
ARTICLE 3
3.2
The Owner reserves the right to store materials or install fixtures or equipment in any or
all Project buildings before acceptance of the Project and without implying thereby any
acceptance of the Project.
WAIVERS
2.2.1
3.1
OWNER
The Owner shall be entitled to waive, in writing, any obligation of the Contractor
provided herein; however, any such waiver shall not constitute a future waiver of same or
any other obligation.
CONTRACTOR
SUBSTITUTIONS
3.1.1
No substitutions or variations from the Specifications and Drawings, other than those
which are approved in writing by the Owner from the official substitution sheet and
incorporated into the Agreement, will be permitted after the Agreement is signed. The
Contractor shall have the right, after entering into the Agreement, to request the Owner’s
approval of a substitute material generally considered to be equal to that named in the
Contract Documents. Requests for approval of any substitute must be submitted in
writing to the Owner, together with all necessary supporting data, within 15 days after the
signing of the Agreement. The Owner shall be the sole judge of the suitability,
acceptability and equality of the substitute material and may accept or reject the same.
No material, not accepted by the Owner in writing, may be substituted for a specified
material. If the substitution of any material or equipment increases costs in any way,
these costs shall be borne by the Contractor.
3.1.2
If the individual specification sections state that no substitutions are allowed, the
Contractor shall not propose any substitutions for that product on the Official Substitution
Sheet.
PROJECT MANAGEMENT
3.2.1
Project Management Website (PMW)
3.2.1.1
The Contractor shall use the Owner’s PMW for purposes of managing project
communication and documentation until Final Completion. The PMW will
include the following:
3.2.1.1.1
Project directory.
KROGER GA-631 MINOR RENOVATION / OPELIKA, AL
00 72 14-015
R/L/R PROJECT NO. 11-151
GENERAL CONDITIONS – KROGER CONTROLLED
3.2.1.1.2
Project correspondence.
3.2.1.1.3
Meeting minutes.
3.2.1.1.4
Contract modifications forms and logs.
3.2.1.1.5
RFI forms and logs.
3.2.1.1.6
Task and issue management.
3.2.1.1.7
Photo documentation.
3.2.1.1.8
Schedule and calendar management.
3.2.1.1.9
Submittals, forms, and logs.
3.2.1.1.10 Payment application forms.
3.2.1.1.11 Drawing and specification document hosting, viewing, and
updating.
3.2.1.1.12 Online document collaboration.
3.2.1.1.13 Reminder and tracking functions.
3.2.1.1.14 Archiving functions.
3.2.2
Project Correspondence: All correspondence shall be communicated in the form of RFI’s.
and transmitted via the PMW.
3.2.3
Preconstruction Meeting:
3.2.3.1
3.2.3.2
3.2.4
The Contractor shall schedule a preconstruction meeting before starting
construction no later than 7 days after execution of the Agreement. The meeting
shall be held at Project site or another convenient location. The Contractor
shall conduct the meeting to review responsibilities and personnel assignments.
Attendees: Authorized representatives of the Owner, the Architect, and its
consultants; the Contractor and its superintendent; major subcontractors;
suppliers; and other concerned parties shall attend the conference. All
participants at the conference shall be familiar with the Project and authorized
to conclude matters relating to the Work.
Progress Meetings:
3.2.4.1
3.2.4.2
The Contractor shall conduct progress meetings at weekly intervals and shall
coordinate dates of meetings with preparation of payment requests.
Attendees: In addition to representatives of the Owner, each contractor,
subcontractor, supplier, and other entity concerned with current progress or
involved in planning, coordination, or performance of future activities shall be
represented at these meetings. All participants at the meeting shall be familiar
with the Project and authorized to conclude matters relating to the Work.
KROGER GA-631 MINOR RENOVATION / OPELIKA, AL
00 72 14-016
R/L/R PROJECT NO. 11-151
GENERAL CONDITIONS – KROGER CONTROLLED
3.2.5
Preinstallation Meetings:
3.2.5.1
3.2.5.2
3.2.5.3
3.2.6
Post Construction Meeting:
3.2.6.1
3.2.6.2
3.2.6.3
3.2.7
The Contractor shall conduct a post construction meeting at Project site two
weeks after fixturing begins to discuss any activities remaining and to evaluate
success of the Project.
The Contractor shall submit Record Drawings (red-lined as-built drawings) to
Owner prior to meeting transmitted via the PMW.
Attendees: Authorized representatives of the Owner, the Architect, and their
consultants; the Contractor and its superintendent; major subcontractors;
suppliers; and other concerned parties shall attend the conference. All
participants at the meeting shall be familiar with the Project and authorized to
conclude matters relating to the Work.
Warranty Meeting:
3.2.7.1
3.2.7.2
3.2.7.3
3.2.8
The Contractor shall conduct a preinstallation meeting at Project site before
each construction activity specified to have a preinstallation meeting.
Attendees: Installer and representatives of manufacturers and fabricators
involved in or affected by the installation and its coordination or integration
with other materials and installations that have preceded or will follow, shall
attend the meeting. The Contractor shall advise the Owner of scheduled
meeting dates.
The Contractor shall conduct a preinstallation meeting for the following
construction activities:
3.2.5.3.1 Installation of concrete floor slabs.
3.2.5.3.2 Installation of concrete floor joint fillers.
3.2.5.3.3 Installation of Owner’s fixtures and equipment.
The Contractor shall conduct a warranty meeting at the Project site one year
after completion of the Work including a walk-through to identify and discuss
any issues and problems that arose during the one-year warranty period.
The Contractor shall provide a detailed report of the meeting identifying items
to be corrected, transmitted via the PMW.
Attendees: Authorized representatives of the Owner, the Contractor, and other
concerned parties shall attend the conference. All participants at the conference
shall be familiar with the Project and authorized to conclude matters relating to
the Work.
Requests For Information (RFIs)
3.2.8.1
Immediately on discovery of the need for additional information or
interpretation of the Contract Documents, Contractor shall prepare and submit
an RFI to the Owner, transmitted via the PMW. Submit RFIs in sequential
order. Complete the request portion and include drawings or additional
information as PDF attachments. The “Need Response By” date must be
entered to validate request. A properly executed new RFI will be distributed to
Architect and Owner, and the RFI log will be updated.
KROGER GA-631 MINOR RENOVATION / OPELIKA, AL
00 72 14-017
R/L/R PROJECT NO. 11-151
GENERAL CONDITIONS – KROGER CONTROLLED
3.2.8.1.1
3.2.8.1.2
3.2.8.2
Only the Contractor may submit an RFI. Architect or Owner will
return RFIs submitted by other entities.
The need for an RFI does not necessarily constitute grounds for a
Change Order.
Architect will review each RFI, determine action required, and respond. Allow
72 hours for Architect's response for each RFI. RFIs received by Architect
after 1:00 p.m. will be considered as received the following working day.
3.2.8.2.1
The following types of RFIs are considered unnecessary and will be
returned without action:
3.2.8.2.1.1 Requests for approval of submittals.
3.2.8.2.1.2 Requests for approval of substitutions.
3.2.8.2.1.3 Requests for information already indicated in the
Contract Documents.
3.2.8.2.1.4 Requests for adjustments in the Contract Time or the
Contract Sum.
3.2.8.2.1.5 Requests for interpretation of Architect's actions on
submittals.
3.2.8.2.1.6 Incomplete RFIs or inaccurately prepared RFIs.
3.2.8.2.2
3.2.8.3
Upon receipt of Architect’s and/or Owner's action, immediately distribute the
RFI response to affected parties transmitted via the PMW.
3.2.8.3.1
3.2.8.3.2
3.2.8.3.3
3.3
Architect and Owner may claim compensation for the cost of their
time and materials as a result of unnecessary RFIs. Compensation
will be assessed from the Contractor in accordance with the General
Conditions.
Architect's action may include a request for additional information,
in which case Architect's time for response will date from time of
receipt of additional information.
Notify Architect and Owner within three days if Contractor
disagrees with response.
Notify Architect and Owner within five days if Contractor believes
response in RFI involves additional construction cost or time.
CONSTRUCTION PROGRESS DOCUMENTATION
3.3.1
Construction Progress Schedule: Two days after award of the Contract, the Contractor
shall furnish the Owner with a "Construction Progress Schedule" that indicates the
proposed progress with the total number of days agreeing with the "Time for
Completion" days listed in the Agreement Between Owner and Contractor.
3.3.1.1
3.3.1.2
3.3.1.3
The Construction Progress Schedule shall include delivery and installation
dates for all Owner Direct Buy items.
All dates in the Construction Progress Schedule must be accepted in writing by
both the Owner and the Contractor.
The Contractor shall begin Work within one week after award of the Contract
and progress substantially with the "Construction Progress Schedule" and
KROGER GA-631 MINOR RENOVATION / OPELIKA, AL
00 72 14-018
R/L/R PROJECT NO. 11-151
GENERAL CONDITIONS – KROGER CONTROLLED
complete all Work within the time shown thereon, unless delayed by
jurisdictional or general strikes beyond the control of the Contractor, Act of
God, or national emergency.
3.4
3.3.2
Submittals Schedule: The Contractor shall provide a submittals schedule with the
Construction Progress Schedule arranged in chronological order by dates including time
required for review, resubmittal, ordering, manufacturing, fabrication, and delivery.
3.3.3
Construction Photographs: Contractor shall take a minimum of ten photographs weekly
documenting the construction progress.
3.3.3.1
Upload Construction Photographs to the PMW exactly as originally recorded in
the digital camera, without alteration, manipulation, editing, or modifications
using image-editing software.
3.3.3.2
Include date and time in file name for each image.
LABOR AND MATERIALS
3.4.1
Unless otherwise specified, all materials and equipment items shall be new. When
required by the Owner, the Contractor shall provide certificates of conformance for
materials specified.
3.4.2
The Contractor’s employees, subcontractors and other persons carrying out the work shall
be properly attired and shall not wear any attire that is deemed inappropriate or offensive
to the public or Owner.
3.4.3
Product Delivery, Storage, and Handling: The Contractor shall deliver, store, and handle
products using means and methods that will prevent damage, deterioration, and loss,
including but not limited to theft, and shall comply with manufacturer's written
instructions. The Contractor shall provide a secure location and enclosure at Project site
for storage of materials and equipment by the Owner's construction forces and shall
coordinate location with the Owner.
3.4.4
Product Warranties: Warranties specified in the Contract Documents shall not deprive
Owner of other rights Owner may have under other provisions of the Contract
Documents and shall be in addition to, and run concurrent with, other warranties required
by the Contract Documents. Manufacturer's disclaimers and limitations on product
warranties do not relieve Contractor of any obligations of the Contract Documents.
3.4.5
Product Selection Procedures:
3.4.5.1
Manufacturer:
Where Specifications name a single manufacturer, the
Contractor shall provide a product by the named manufacturer that complies
with requirements. No substitutions are allowed.
3.4.5.2
Product: Where Specifications name a single product, the Contractor shall
provide the named product. No substitutions are allowed.
3.4.5.3
Manufacturers: Where Specifications include a list of manufacturers' names,
the Contractor shall provide a product by one of the manufacturers listed that
KROGER GA-631 MINOR RENOVATION / OPELIKA, AL
00 72 14-019
R/L/R PROJECT NO. 11-151
GENERAL CONDITIONS – KROGER CONTROLLED
complies with requirements or a substitution approved by the Owner that
complies with requirements.
3.4.5.4
Products: Where Specifications include a list of names of both products and
manufacturers, the Contractor shall provide one of the products listed that
complies with requirements or a substitution approved by the Owner that
complies with requirements.
3.4.5.5
Basis-of-Design Product: There are certain "Basis of Design" products listed in
the specifications that the Owner has investigated as an appropriate product for
the Project. Where Specifications name a product as "Basis-of-Design," provide
one of the following:
3.4.5.5.1
3.4.5.5.2
3.4.5.5.3
3.4.5.6
3.5
The specified product
A substitution approved by the Owner of a product comparable to
the specified product of one of the other named manufacturers.
Furnish the proposed product’s actual samples, data sheets, and
certificates of performance along with the “Basis of Design”
product’s actual samples, data sheets, and certificates of
performance as a comparison.
A substitution approved by the Owner of a product comparable to
the specified product of any manufacturer if no other manufacturers
listed. Furnish the proposed product’s actual samples, data sheets,
and certificates of performance along with the “Basis of Design”
product’s actual samples, data sheets, and certificates of
performance as a comparison.
Comply with provisions in Article 3.1 for consideration of an unnamed product
by the other named manufacturers or a product by another manufacturer.
TEMPORARY FACILITIES
3.5.1
The Contractor shall provide, at the Contractor’s expense, all temporary facilities and
utilities (adequate for the Contractor, all subcontractors, and the Owner’s other
contractors) from the commencement of the Project until acceptance by the Owner. The
Owner shall be the sole judge of the adequacy thereof. Specifically, the Contractor shall
provide not less than the following:
3.5.1.1
A temporary building (jobsite trailer), adequately lighted, air conditioned, and
heated, for use as a field office, of sufficient size to hold weekly jobsite
meetings. The jobsite trailer must be equipped with a single meeting room of
reasonable size for seating 15 individuals at table(s) suitable in size to handle
building plans and facilitate group discussion in a constructive manner. The
temporary building shall be complete with tables, chairs, counters and racks for
drawings. Maximum temporary building size shall be 530-sq.ft. (49-sq.m).
3.5.1.2
A telephone in the field office. Long distance calls shall be at the expense of
those making same. All other telephone expenses shall be the responsibility of
the Contractor.
3.5.1.3
A computer in the field office with the following requirements:
KROGER GA-631 MINOR RENOVATION / OPELIKA, AL
00 72 14-0110
R/L/R PROJECT NO. 11-151
GENERAL CONDITIONS – KROGER CONTROLLED
3.5.1.3.1
3.5.1.3.2
3.5.1.3.3
3.5.1.3.4
High-speed internet connection (wired or wireless).
Capability to access the Owner's PMW.
Router (ethernet or wireless) to allow Owner to access the website
while Contractor’s computer is in use.
Printer, copier, scanner, and facsimile machine.
3.5.1.4
Temporary waterproof sheds with raised floors for storing materials.
3.5.1.5
Temporary water service with a minimum 1-inch water line available within 50
feet of the building.
3.5.1.6
Temporary power with a minimum 400 amp, 120/208 volt single phase service
with duplex outlets and ground fault interrupters shall be located throughout the
building to allow complete access with a 100 ft. extension cord. Temporary
lighting throughout the entire building shall be provided and maintained to
perform high quality workmanship of all trades throughout the Project and
ensure the safety of all persons at the Project site. Night lighting for security
purposes of the building and Project site shall be provided.
3.5.1.6.1
Contractor to provide temporary electrical hook up of electrical
cords to Owner’s electrical system for powering concrete floor
polishing equipment when concrete floor polishing work is
indicated in plans and specifications.
3.5.1.6.1.1 For new stores only, Contractor must provide generator
of adequate size if utility power is unavailable.
3.5.1.7
Toilet facilities for all workers at the Project, located where approved by the
Owner and complying with local laws, ordinances, rules and regulations.
3.5.1.8
Minimum temporary heating, cooling, and ventilation and humidity control
required by construction activities and material manufacturers’ instructions for
curing or drying of completed installations, protecting installed construction
from adverse effects of low temperatures, providing protection and comfort for
installers, and delivering high quality workmanship of all trades throughout the
Project. Select equipment that will not have a harmful effect on completed
installations or elements being installed. The Contractor may elect to use
owners heating and cooling equipment for temporary use if approved in writing
by the Owner prior to operating.
3.5.1.9
Runways, ladders, guards, etc. leading from lower level to all upper levels and
the roof, conveniently serving each level and complying with local laws,
ordinances, rules and regulations.
3.5.1.10 Temporary Enclosures: When required, provide temporary enclosures for
protection of construction, in progress and completed, from exposure, foul
weather, other construction operations, and similar activities.
Provide
temporary weathertight enclosure for building exterior.
3.5.1.10.1 Where heating or cooling is needed and permanent enclosure is not
complete, insulate temporary enclosures.
KROGER GA-631 MINOR RENOVATION / OPELIKA, AL
00 72 14-0111
R/L/R PROJECT NO. 11-151
GENERAL CONDITIONS – KROGER CONTROLLED
3.5.1.11 Temporary Partitions: Provide and install where indicated on Drawings or as
indicated by Owner.
3.5.1.11.1 Seal joints and perimeter. Equip partitions with dustproof doors and
security locks.
3.5.1.11.2 Provide walk-off mats at each entrance through temporary partition.
3.5.1.12 Air-Handling Equipment Protection: The Contractor shall be responsible for
protecting the air handling equipment and any associated ductwork from
physical damage and infiltration of dust and dirt into the system. The
Contractor shall also be responsible for replacing dirty air filters during the
course of construction and providing new air filters in units at the time of the
building turnover.
3.5.1.13 Temporary roadways, staging areas, and construction parking with positive
drainage carrying water away from these areas, when the Contractor is
responsible for the sitework. All temporary roadways shall be suitable to
support all construction vehicles, tractor-trailers, and construction equipment
from the public road access to the building, staging area, and construction
personnel parking. The combined area of the building staging area and
personnel parking shall be a minimum of 22,500 square feet.
3.5.1.14 Waste-collection containers (dumpsters) in sizes adequate to handle waste from
construction operations and complying with requirements of authorities having
jurisdiction.
3.5.2
Construction Sign: The Owner may elect to install a construction sign on the Project Site
at the Owner’s option. If the Owner does not elect to install a construction sign on the
Project Site, the Contractor may install a construction sign on the Project Site at the
Contractor’s option meeting the following criteria:
3.5.2.1
3.5.2.2
3.5.2.3
3.5.2.4
3.5.2.5
3.5.2.6
3.5.2.7
3.5.2.8
3.5.2.9
3.5.3
Shall be 4-feet by 8-feet, or size as directed by Owner or local jurisdiction.
Sign graphics shall contain Owner’s name (most prominent), Project name,
General Contractor’s name, Architect’s name and Architect’s consultants’
names.
Constructed of painted plywood or vinyl membrane similar to banner sign
material, and securely fastened to plywood.
Shall be adequately supported and braced as required.
Top of sign shall be eight feet above grade, with the four feet board dimension
vertical or as required by local authority having jurisdiction.
May be reused as long as they appear to be in good condition as determined by
the Owner.
Must be maintained in good condition through the duration of the Project.
Shall be submitted and approved by the Owner and the Architect prior to
ordering.
Shall be constructed and installed at Contractor’s expense.
The Contractor shall pay for all water, power, fuel, etc. used during the execution of the
Project, whether from temporary or permanent facilities. Before acceptance of the
KROGER GA-631 MINOR RENOVATION / OPELIKA, AL
00 72 14-0112
R/L/R PROJECT NO. 11-151
GENERAL CONDITIONS – KROGER CONTROLLED
Project by the Owner, the Contractor shall remove all temporary utilities and restore to
pre-existing conditions any area disturbed by the same.
3.6
3.7
3.5.4
All damage to the building, streets, sidewalks, lawns or other features of the site resulting
from any operation connected with any of the Work shall be repaired by Contractor at its
expense and to the satisfaction of the Owner.
3.5.5
Temporary Elevator Usage: The Contractor shall not use the elevator (if any) for
construction operations unless approved in writing by the Owner.
3.5.6
Environmental Protection: The Contractor shall provide protection, operate temporary
facilities, and conduct construction in ways and by methods that comply with
environmental regulations and that minimize possible air, waterway, and subsoil
contamination or pollution, or other undesirable effects. The Contractor shall avoid using
tools and equipment that produce harmful noise and shall restrict use of noisemaking
tools and equipment to hours that will minimize complaints from persons or firms near
the Project site.
3.5.7
Barricades, Warning Signs, and Lights: The Contractor shall comply with standards and
code requirements for erecting structurally adequate barricades.
3.5.8
Termination and Removal: The Contractor shall remove each temporary facility when
need for its service has ended, when it has been replaced by authorized use of a
permanent facility, or no later than Substantial Completion, and restore to pre-existing
conditions any area disturbed by the same.
LAYOUT AND VERIFYING MEASUREMENTS
3.6.1
Verification: Before proceeding to lay out the Work, the Contractor shall verify layout
information shown on Drawings, in relation to the property survey and existing
benchmarks. If discrepancies are discovered, the Owner shall be notified promptly. The
Contractor shall engage a land surveyor or professional engineer to lay out the Work
using accepted surveying practices.
3.6.2
Field Measurements: The Contractor shall take field measurements as required to fit the
Work properly and shall verify space requirements and dimensions of items shown
diagrammatically on Drawings.
3.6.3
The Contractor shall lay out the exact location of all partitions.
EXECUTION REQUIREMENTS
3.7.1
Existing Conditions:
3.7.1.1
The existence and location of site improvements, utilities, and other
construction indicated as existing are not guaranteed. Before beginning work,
the Contractor shall investigate and verify the existence and location of
mechanical and electrical systems and other construction affecting the Work.
Before construction, the Contractor shall verify the location and points of
connection of utility services.
KROGER GA-631 MINOR RENOVATION / OPELIKA, AL
00 72 14-0113
R/L/R PROJECT NO. 11-151
GENERAL CONDITIONS – KROGER CONTROLLED
3.7.1.2
3.7.2
Examination and Acceptance of Conditions: Before proceeding with each component of
the Work, the Contractor shall examine substrates, areas, and conditions, with installer or
applicator present where indicated, for compliance with requirements for installation
tolerances and other conditions affecting performance. The Contractor shall record
observations and immediately report any condition detrimental to performance of the
Work. The Contractor shall proceed with installation only after unsatisfactory conditions
have been corrected. Proceeding with the Work indicates acceptance of surfaces and
conditions.
3.7.3
Installation: The Contractor shall locate the Work and components of the Work
accurately, in correct alignment and elevation, as indicated.
3.7.3.1
3.8
The Contractor shall not interrupt utilities serving facilities occupied by the
Owner (if any) or adjacent owners unless approved by the Owner and then only
after arranging to provide temporary utility services according to requirements
indicated. The Contractor shall notify the Owner not less than two days in
advance of proposed utility interruptions.
The Contractor shall comply with manufacturer's written instructions and
recommendations for installing products in applications indicated.
3.7.4
Anchors and Fasteners: The Contractor shall provide anchors and fasteners as required to
anchor each component securely in place, accurately located and aligned with other
portions of the Work.
3.7.5
Starting And Adjusting: The Contractor shall start equipment and operating components
to confirm proper operation. Malfunctioning units shall be removed, replaced with new
units, and retested. The Contractor shall adjust operating components for proper
operation without binding and shall adjust equipment for proper operation. Each piece of
equipment shall be tested by the Contractor to verify proper operation including controls
and safeties. The Contractor shall replace damaged and malfunctioning controls and
equipment.
3.7.6
Correction Of The Work: The Contractor shall repair or remove and replace defective
construction and restore damaged substrates and finishes.
WARRANTY
3.8.1
No payments made to the Contractor, nor partial or entire use of the Project by the
Owner, shall be an acceptance of any work not done or made in accordance with the
Agreement. The Contractor shall furnish a written warranty of all work done under the
Agreement for a period of one year or as otherwise provided for longer periods of time.
Such warranty shall be in the form prescribed by the Owner. The Contractor shall also
furnish to the Owner all manufacturers’ warranties for all equipment, appliances and
fixtures specified or required and installed as a part of the Project. The Contractor, at its
sole cost, shall remedy any defects due to faulty materials or workmanship and pay for
any damage to other work resulting from such defects and/or the remedying thereof,
which shall appear within the warranty period. Neither the foregoing nor any other
provision in the Contract Documents, nor the time limit of any special warranty shall
limit the Contractor’s liability for defects or installations resulting from deliberate or
other deviations from the Contract Documents to less than the legal limit of liability
KROGER GA-631 MINOR RENOVATION / OPELIKA, AL
00 72 14-0114
R/L/R PROJECT NO. 11-151
GENERAL CONDITIONS – KROGER CONTROLLED
under the law of the place of building. The Owner shall give notice of observed defects
with reasonable promptness. All warranties and bonds shall be delivered to the Owner
before final payment is made.
3.9
3.10
PERMITS, FEES, LAWS, ORDINANCES, RULES AND REGULATIONS
3.9.1
The Owner shall secure and pay for the Building Permit and any other fees including but
not limited to tap fees, impact fees, or special development fees. The Owner may elect to
have the Contractor secure and pay for these permits and fees, on the Owners behalf, the
cost of which will be passed on to the Owner without Contractor’s mark-up.
3.9.2
The Owner shall secure and pay for permits, fees, licenses, and inspections by
government agencies for work performed by the Owner.
3.9.3
The Contractor shall secure and pay for all other permits, fees, licenses, and inspections
by government agencies necessary for proper execution and completion of the Work
performed by the Contractor or the Contractor’s subcontractors. The Contractor shall also
secure and pay for all certificates of inspection and occupancy in connection with the
Work. The Contractor shall post all bonds, secure and pay for all permits, and pay all fees
for work on or in connection with public property.
3.9.4
The Contractor shall comply with all laws, ordinances, rules and regulations bearing on
the Project. If the Contractor observes that the Contract Documents are at variance
therewith, the Contractor shall promptly notify the Owner in writing. If the Contractor
furnishes any work that is not in conformance with such laws, ordinances, rules and
regulations, and without written notice to the Owner, the Contractor shall bear all costs
arising from the correction thereof.
3.9.5
The Contractor shall maintain physical conditions and employee performance on the
jobsite during the course of construction to conform with all local, state, and federal laws,
rules and regulations including those covered by the Occupational Safety and Health Act
of 1970.
3.9.6
Storm Water Discharge/Pollution Control: The Contractor shall apply for and obtain all
permits and certifications required by federal, state, or local authorities having
jurisdiction over the Project. All required inspections, reports, sampling, and
documentation are the Contractor's responsibility under the laws and regulations of the
governing authorities and in coordination with the Contract Documents and the Owner’s
Storm Water Pollution Prevention Plan (SWPPP). The Contractor acknowledges that
government regulations, at a minimum, will apply to any land disturbance greater than
one acre or part of a larger overall development. Even if the Contractor is not performing
the sitework, the Contractor must comply with all responsibilities under the law and the
Agreement.
ALTERNATES
3.10.1 Prices submitted by the Contractor shall include all alternates specified in the Contract
Documents, as well as expenses, overhead and profit. The Owner may select any or all
of the alternatives shown therein in writing. Upon selection thereof the Contract Sum
shall be adjusted accordingly. The Contractor shall purchase the materials covered by
KROGER GA-631 MINOR RENOVATION / OPELIKA, AL
00 72 14-0115
R/L/R PROJECT NO. 11-151
GENERAL CONDITIONS – KROGER CONTROLLED
such alternates from such suppliers, and shall have the work done by such subcontractors
according to the agreed upon schedule.
3.11
SHOP DRAWINGS, PRODUCT DATA, AND SAMPLES (SUBMITTALS)
3.11.1 The Contractor shall prepare and submit submittals in electronic form required by
individual Specification Sections and as indicated in Article 15, Submittals and submit
via the PMW.
3.11.2 The Contractor shall thoroughly check and approve all shop drawings to ascertain that
they conform to the requirements of the Contract Documents.
3.11.3 Electronic Copies of Architects Drawings: At Contractor's written request, copies of
Architect's CAD files may be provided to Contractor for Contractor's use in connection
with Project. The Contractor shall submit company name, address, contact name, phone,
and fax numbers on company letterhead, along with a written request for specific sheets
required. The Architect will respond with a Waiver of Liability and an invoice for the
requested files, both of which must be completed prior to issuance of the computer files.
The Contractor should allow three days for processing of the initial request and two days
after receipt by Architect of signed waiver and payment for requested files.
3.11.4 The Owner and/or the Architect will review and approve or take other action upon the
Contractor’s submittals, but only for the limited purpose of checking for conformance
with information given and the design concept expressed in the Contract Documents.
Review of such submittals is not conducted for the purpose of determining the accuracy
and completeness of other details such as dimensions and qualities, or for substantiating
instructions for installation or performance of equipment or systems, all of which remain
the responsibility of the Contractor as required by the Contract Documents.
3.12
USE OF SITE
3.12.1 The Contractor shall confine equipment and tools, materials, and the operations of the
workmen to limits by law, ordinances, rules, regulations, or directions of the Owner and
shall not unreasonably occupy the jobsite with equipment, tools or materials. The
Contractor shall abide by and enforce the Owner’s instructions regarding signs,
advertisements, fires and smoking at the jobsite.
3.12.2 The Contractor shall limit use of premises to work in areas indicated. The Contractor
shall not disturb portions of site beyond areas in which the Work is indicated and shall
keep driveways and entrances serving the premises clear and available to emergency
vehicles at all times.
3.12.3 Partial Owner Occupancy: The Owner reserves the right to place and install equipment
in completed areas of building, before Substantial Completion is achieved. Partial
occupancy shall not constitute acceptance of the total Work. The Contractor shall obtain
a Certificate of Occupancy from authorities having jurisdiction before Owner occupancy.
3.13
ROYALTIES, PATENTS AND COPYRIGHTS
3.13.1 Unless otherwise expressly stipulated in the Contract, the Contractor shall pay all
royalties and license fees. The Contractor shall be notified of, and defend with counsel
KROGER GA-631 MINOR RENOVATION / OPELIKA, AL
00 72 14-0116
R/L/R PROJECT NO. 11-151
GENERAL CONDITIONS – KROGER CONTROLLED
acceptable to the Owner, any suit or proceeding brought against the Owner based on the
claim that any thing, or part thereof, or any process or method involved in the Project,
constitutes an infringement on any patent or an unauthorized use of any copyrighted
material. The Contractor shall be given full information and assistance for the defense of
such suit or proceeding. The Contractor shall bear all costs thereof. In case it is held in
such suit or proceeding that an infringement occurred or if an injunction is issued, the
Contractor shall, at the Contractor’s own expense, either:
3.13.1.1 Procure for the Owner the right to continue using said thing, part thereof,
process or method, or
3.13.1.2 Replace or modify same so as to avoid infringement in a manner acceptable to
the Owner and without any expense to the Owner.
3.14
SUPERINTENDENT
3.14.1 The Contractor shall provide effective supervision of the Project through a full-time
resident superintendent and any necessary assistants. The superintendent shall not be
changed during performance of this Agreement without the Owner’s written consent,
unless such superintendent ceases to be in Contractor’s employ. The superintendent shall
represent the Contractor in the Contractor’s absence and all directions given to the
superintendent shall be as binding as if given to the Contractor. No instructions in
conflict with the Contract Documents shall be binding unless confirmed in writing by the
Owner.
3.14.2 The Contractor shall submit daily, a complete Daily Work Report signed by the
superintendent.
3.15
CUTTING AND PATCHING
3.15.1 The Contractor shall do all cutting, fitting and/or patching necessary for the complete
installation of the Work. The Contractor shall not endanger any Work by the
Contractor’s operations. The Contractor shall not cut or alter the Work of any other
contractor without the Owner’s consent.
3.15.2 The Contractor shall not cut and patch any item in a manner that would change its loadcarrying capacity or load-deflection ratio, capacity to perform as intended or that results
in increased maintenance or decreased operational life or safety, or reduce the building's
aesthetic qualities.
3.15.3 The Contractor shall protect existing construction during cutting and patching to prevent
damage and shall provide protection from adverse weather conditions for portions of
Project that might be exposed during cutting and patching operations.
3.16
CLEANING UP
3.16.1 The Contractor shall at all times maintain the Project in an orderly, workmanlike
condition, reasonably clean and free of accumulations of dirt and debris. If the
Contractor fails so to maintain the Project, the Owner shall have the right to engage
others to do so at the Contractor’s expense. The Project shall, in general, be turned over
KROGER GA-631 MINOR RENOVATION / OPELIKA, AL
00 72 14-0117
R/L/R PROJECT NO. 11-151
GENERAL CONDITIONS – KROGER CONTROLLED
to the Owner in a thoroughly clean and workmanlike condition ready for the Owner’s use
in every respect.
3.16.2 Progress Cleaning: The Contractor shall clean the Project site and work areas daily,
including common areas. The Contractor shall dispose of materials lawfully. During
handling and installation, the Contractor shall clean and protect construction in progress
and adjoining materials already in place. Protective covering shall be applied by the
Contractor where required and as specified in the Contract Documents to ensure
protection from damage or deterioration at Substantial Completion.
3.16.3 Waste Disposal: Burying or burning waste materials on-site shall not be permitted.
Washing waste materials down sewers or into waterways shall not be permitted.
Compliance with the Contract Documents and the Owner’s Storm Water Pollution
Prevention Plan shall be strictly enforced by the Owner.
ARTICLE 4
4.1
CLAIMS FOR DAMAGES
4.1.1
ARTICLE 5
5.1
ADMINISTRATION OF THE CONTRACT
Claims by either the Contractor or the Owner for damages caused by any wrongful act or
neglect of the other, shall be made in writing within a reasonable time after the first
knowledge of such damage.
SUBCONTRACTORS
AWARD OF SUBCONTRACTS AND OTHER CONTRACTS FOR PORTIONS OF THE
WORK
5.1.1
The Owner, in the Owner’s sole judgment, shall be entitled to reject any subcontractor
and major material supplier proposed to perform labor or furnish materials in conjunction
with the Project listed in the Trade Proposal. In such an event, the Bid amount may be
adjusted by the difference in cost caused by substitution of a new subcontractor or major
material supplier for the one removed.
5.1.1.1
5.1.2
5.2
The names of subcontractors and major material suppliers proposed to perform
labor or furnish materials in conjunction with the Project are submitted on the
Trade Proposal within the time outlined in the Agentrics (GNX) Invitation To
Bid.
The Contractor may substitute a different subcontractor or major material supplier from
any listed in the Trade Proposal and may adjust the Contract Sum, only if approved, in
writing, by the Owner.
SUBCONTRACTURAL RELATIONS
5.2.1
The Contractor shall be as fully responsible for the acts and omissions of the Contractor’s
subcontractors, and of persons either directly or indirectly employed by them, as the
Contractor is for the acts and omissions of persons employed directly by the Contractor.
Nothing contained in the Contract Documents shall create any direct contractual relation
KROGER GA-631 MINOR RENOVATION / OPELIKA, AL
00 72 14-0118
R/L/R PROJECT NO. 11-151
GENERAL CONDITIONS – KROGER CONTROLLED
between any subcontractor and the Owner. Every subcontract shall include provisions
whereby the subcontractor agrees to be bound by the terms of the Contract Documents as
far as applicable to the subcontractor’s portion of the Project.
ARTICLE 6
6.1
CONSTRUCTION BY OWNER OR BY SEPARATE CONTRACTORS
OWNER’S RIGHT TO PERFORM CONSTRUCTION AND TO AWARD SEPARATE
CONTRACTS
6.1.1
The Owner reserves the right to let other contracts in connection with this Project. The
Contractor shall properly coordinate the Contractor’s work with that of the Owner’s other
contractors. If any part of the Work under this Contract depends, for proper results, upon
the work under any other contracts, the failure of the Contractor to report defects shall
constitute an acceptance of such other work as fit and proper for coordination with the
Work, except as to defects which may develop in such other work after the execution of
the Work under the Contract.
6.1.2
Owner’s Direct Buy Program: Certain material and equipment items are regularly and
usually furnished and/or furnished and installed by the Owner.
6.1.2.1
Owner Responsibilities:
6.1.2.1.1
6.1.2.1.2
6.1.2.2
Contractor Responsibilities for Owner Furnished/Contractor Installed Products:
6.1.2.2.1
6.1.2.2.2
6.1.2.2.3
6.1.2.2.4
6.1.2.2.5
6.1.2.2.6
6.1.2.2.7
6.1.2.2.8
6.1.2.3
Delivery of Shop Drawings, Product Data, and Samples.
Delivery of Owner-furnished products; inspection of delivered
products; replacement of damaged products.
Coordinate delivery dates for all Owner Direct Buy items with the
Construction Progress Schedule.
Coordinate any changes in delivery date with the Direct Buy item
supplier and notify the Owner in writing.
Review and approval of Owner provided Shop Drawings. Return
within two weeks to the Owner via the PMW.
Receive Owner-furnished products, provide inspection, and notify
the Direct Buy item supplier and Owner of missing and/or damaged
materials within 48 hours after delivery (20 days for concealed
damage)
Provide safe harboring, installation, and removal of any salvage
materials.
Provide equipment as necessary for placement of Owner furnished
products.
Resolve warranty claims (prior to store opening) directly with the
Direct Buy item supplier.
Provide first year of labor warranty.
Contractor Responsibilities for Owner Furnished/Owner Installed Products:
6.1.2.3.1
Coordinate delivery dates for all Owner Direct Buy items with the
Construction Progress Schedule.
KROGER GA-631 MINOR RENOVATION / OPELIKA, AL
00 72 14-0119
R/L/R PROJECT NO. 11-151
GENERAL CONDITIONS – KROGER CONTROLLED
6.1.2.3.2
6.1.2.3.3
6.1.2.3.4
6.1.2.3.5
6.1.2.3.6
6.1.2.3.7
6.2
MUTUAL RESPONSIBILITY
6.2.1
ARTICLE 7
7.1
Coordinate any changes in delivery date with the Direct Buy item
supplier and notify the Owner in writing.
Review and approval of Owner provided Shop Drawings. Return
within two weeks to the Owner via the PMW.
Receive Owner-furnished products, provide inspection, and notify
the Direct Buy item supplier and Owner of missing and damaged
materials within 48 hours after delivery (20 days for concealed
damage).
Provide safe harboring, installation, and removal of any salvage
materials.
Before 30 days from the install date, confirm a final date with the
installer. Ensure that the Owner supplied and installed items are not
damaged during the construction process.
Resolve warranty claims (prior to store opening) directly with the
Direct Buy item supplier.
If any of the Owner’s other contractors and/or any subcontractor shall make any claim
against the Owner for any damage alleged to have been caused by the Contractor, the
Contractor agrees to settle such dispute promptly after notice thereof. If such other
contractor and/or subcontractor sues the Owner on account of any damage alleged to
have been so sustained, the Owner shall notify the Contractor who shall defend such
proceedings at the Contractor’s own expense with counsel reasonably acceptable to the
Owner and, if any judgment against the Owner arises there from, the Contractor shall pay
or satisfy it and pay all costs and expenses incurred by the Owner.
CHANGES IN THE WORK
GENERAL
7.1.1
Minor Changes in the Work: The Owner will issue, via the PMW, supplemental
instructions authorizing minor changes in the Work, not involving adjustment to the
Contract Sum or the Contract time.
7.1.2
Change Order Proposal Requests: The Owner may, at any time before completion of the
Project, order additions to, deletions from, or alterations in the Work. All terms and
conditions of the original contract shall become a part of each Change Order.
7.1.2.1
Owner-Initiated Proposal Requests: Before any change is made or work done,
the Owner will issue a detailed written description of proposed changes in the
Work. Proposal requests issued by the Owner are for information only. The
Contractor shall not consider them instructions either to stop Work in progress
or to execute the proposed change. Promptly after receipt of such instructions,
the Contractor shall submit to the Owner within 10 days a proposal with a
detailed estimate showing the cost of the proposed change in the Work,
including a detailed breakdown of costs for the additional work as well as the
credit for the original Work, and a revised schedule showing the extension of
time, if any. The revised schedule showing any time extension shall be
submitted in writing under separate cover and approved by Owner. The Owner
KROGER GA-631 MINOR RENOVATION / OPELIKA, AL
00 72 14-0120
R/L/R PROJECT NO. 11-151
GENERAL CONDITIONS – KROGER CONTROLLED
7.1.2.2
7.1.2.3
7.1.3
7.2
shall promptly notify the Contractor in writing whether the estimate is
acceptable and, if it is, in writing authorize the change to be made or Work to
be done. The Owner reserves the right to reject any such proposal and to have
the work done by others.
Contractor-Initiated Proposals: If latent or unforeseen conditions require
modifications to the Contract, the Contractor shall propose changes by
submitting a request for a change to the Owner. The Contractor shall include a
statement outlining reasons for the change and the effect of the change on the
Work, the effect of the proposed change on the Contract Sum including a
detailed breakdown of costs for the additional work as well as the credit for the
original Work, list of quantities of products required or eliminated and
applicable taxes, delivery charges, equipment rental, and amounts of trade
discounts. The revised schedule showing any time extension must be submitted
in writing under separate cover and approved by Owner. The proposal shall be
submitted to the Owner within 10 days of the discovery for review and
approval.
On Owner's approval of a change order proposal, Owner will issue a Purchase
Order for the Work to be performed.
Construction Change Directive: The Contractor shall proceed with the change in the
Work when indicated in writing by Owner, for subsequent inclusion in a Change Order.
The Contractor shall maintain detailed records on a time and material basis. Upon
completion of the change, the Contractor shall submit within 30 days an itemized invoice
and supporting documentation necessary to substantiate cost and time adjustments to the
Contract. If the change has not been invoiced within 30 days of its completion, the owner
will not be obligated to pay for the charge.
DETERMINATION OF COST OR CREDIT
7.2.1
The cost or credit shall be determined by one of the following methods:
7.2.1.1
7.2.1.2
7.2.1.3
Work Done by Subcontractor:
7.2.1.1.1
For Added Work: The agreed cost noted in the change order
proposal to the subcontractor of such added Work, plus 15 percent
representing the subcontractor’s overhead, plus five 5 percent for
the Contractor’s overhead and profit.
7.2.1.1.2
For Deleted Work: The agreed cost of such omitted Work.
Work Done by Contractor
7.2.1.2.1
For Added Work: The agreed cost to the Contractor of such added
Work, plus 15 percent thereof representing the Contractor’s
overhead and profit.
7.2.1.2.2
For Deleted Work: The agreed cost of such omitted Work.
By Unit Prices
KROGER GA-631 MINOR RENOVATION / OPELIKA, AL
00 72 14-0121
R/L/R PROJECT NO. 11-151
GENERAL CONDITIONS – KROGER CONTROLLED
7.2.1.3.1
7.2.2
7.3
7.3.1
The Contractor shall submit, in such form as the Owner may prescribe, an itemized
accounting together with appropriate supporting data of all costs associated with the
change.
7.3.2
The Contractor’s books, records, correspondence, accounting procedures related to
overhead assessments and any other supporting evidence relating to the Contractor’s
change order costs shall be open to inspection and subject to audit by the Owner. The
audit may include verification that all costs submitted on change orders to the Owner
pertained to subcontractor, material vendor, or Contractor self-performed costs, including
applicable fees, and that credits processed by the Contractor that reduce subcontractor
costs or material vendor costs based on deleted work have been processed as deductive
change orders with the Owner.
TIME
DELAYS
8.1.1
ARTICLE 9
9.1
As used herein "Agreed Cost" shall mean the cost of direct labor, materials, equipment,
incremental bonds, insurance, and taxes required under the General Conditions, as
disclosed by Contractor’s records, which shall be in form satisfactory to the Owner.
Superintendence shall be deemed to be included in "Overhead."
DOCUMENTATION OF COST
ARTICLE 8
8.1
For those items where unit prices have been established in the Trade
Proposal Form or otherwise agreed upon, these unit prices shall be
used.
In the event the Contractor is delayed in the commencement, progress, or completion of
the Work by reasons of: (i) an act or neglect of the Owner or Architect, or of an employee
or consultant of either, or of a separate contractor employed by the Owner; (ii) changes
ordered in the Work; (iii) casualty without the fault or negligence of Contractor, its
agents, subcontractors or major material suppliers, such as labor disputes, fire, or unusual
delay in deliveries; (iv) natural disaster, such as earthquake, tornado, or flood, not
reasonably foreseeable or; (v) civil riot or strike on the Project, the time period provided
in Paragraph 3 of the Agreement shall be extended by the Owner’s approval of the
Contractor’s written request for such a reasonable time as the Owner may determine.
PAYMENT AND COMPLETION
SUBSTANTIAL COMPLETION
9.1.1
Substantial Completion shall mean completion of any condition set forth by the Owner,
and all work required to obtain a temporary Certificate of Occupancy to allow for the
installation of fixtures, and stocking of inventory. The date of Substantial Completion of
the Work or designated portion thereof is the date certified by the Owner when
construction is substantially complete, in accordance with the Contract Documents and
when all required occupancy permits, if any have been issued. Substantial completion of
the Work shall include, without limitation, the following:
KROGER GA-631 MINOR RENOVATION / OPELIKA, AL
00 72 14-0122
R/L/R PROJECT NO. 11-151
GENERAL CONDITIONS – KROGER CONTROLLED
9.2
9.3
9.1.1.1
Completion of paving and striping of pavement and parking areas.
9.1.1.2
Completion of off and on site improvments
9.1.1.3
Completion of electrical and lighting systems both interior and exterior.
9.1.1.4
Completion of building mechanical systems.
9.1.1.5
Issuance of a temporary or permanent certificate of occupancy.
9.1.1.6
Complete and operating building fire suppression system.
9.1.1.7
Complete and operational fire and security alarm systems.
9.1.1.8
Completion of building construction with the exception of punch list items.
Completion of contract work is not considered to be punch list items.
COMPLETION DATES
9.2.1
The Project must be completed in accordance with the Project Phasing Plan and/or
Project Completion Schedule incorporating the Owner’s milestones. It is essential that the
Contractor have all Work substantially complete and all mechanical systems fully
operational with full accessibility. All site improvements must be fully accessible and
substantially complete. The completion of minor punchlist items must be scheduled to be
performed in such a manner as not to hinder deliveries or installation process.
9.2.2
The "Store Fixture Date" is a critical milestone of a new store project and is defined as
the time when the Owner will begin the installation of fixtures and refrigerated
equipment within the building. It is essential that the Contractor have all Work
substantially complete and all mechanical systems fully operational in the sales, dock and
preparation areas with full accessibility as not to hinder the fixturing operation. All site
improvements such as access roadways, dock well, and parking areas must be fully
accessible and substantially complete. The completion of minor punchlist items must be
scheduled to be performed in such a manner as not to hinder the fixturing deliveries or
fixture installation process. The prefabricated mechanical center, refrigeration
compressor units, evaporator and condenser coils and other miscellaneous items shall be
delivered and installed prior to the Store Fixture Date.
9.2.3
Liquidated Damages: The Contractor shall be liable to the Owner for Liquidated
Damages for the sum stipulated in the Agreement Between Owner and Contractor for
each day that the Completion Date is exceeded in the completion of the Project.
OPTION ONE - CONTRACTOR FINANCED
9.3.1
Progress Payment
9.3.1.1
Contractor Requirement: the Contractor shall submit with their progress
payment request, on the forms included in the Contract Documents, the
following:
Monthly Draw
KROGER GA-631 MINOR RENOVATION / OPELIKA, AL
00 72 14-0123
R/L/R PROJECT NO. 11-151
GENERAL CONDITIONS – KROGER CONTROLLED
General Contractor's Progress Affidavit.
Conditional Waiver and Release Upon Progress
Payment (Current Draw)
Unconditional Waiver and Release Upon Progress
Payment for the previous progress payment
9.3.1.2
Draw 1
Ongoing
Progress
Draws
X
X
X
X
Final
Draw
X
Subcontractor or Major Material Supplier Requirement: The Contractor shall
submit with their progress payment request, on the forms included in the
Contract Documents, the following from each subcontractor and major material
supplier:
Monthly Draw
Ongoing
Final
Draw 1 Progress
Draw
Draws
9.3.2
Subcontractor's Progress Affidavit
X
X
Unconditional Waiver and Release Upon Progress
Payment for (Current Draw)
X
X
Final Payment
9.3.2.1
Contractor Requirement: The Contractor shall submit with the request for final
payment, on the forms included in the Contract Documents, the following:
Monthly Draw
Ongoing
Final
Draw 1 Progress
Draw
Draws
General Contractor's Final Affidavit.
Unconditional Waiver and Release Upon Progress
Payment (Previous Draw)
Conditional Waiver and Release Upon Final
payment
Unconditional Waiver and Release Upon Final
Payment (Due within 14 days of receipt of final
payment from the Owner)
9.3.2.2
X
X
X
X
Subcontractor or Major Material Supplier Requirements: The Contractor shall
submit with their request for final payment, on the forms included in the
Contract Documents, the following from each subcontractor and major material
supplier:
Monthly Draw
Ongoing
Final
Draw 1 Progress
Draw
Draws
Subcontractor’s Final Affidavit
X
KROGER GA-631 MINOR RENOVATION / OPELIKA, AL
00 72 14-0124
R/L/R PROJECT NO. 11-151
GENERAL CONDITIONS – KROGER CONTROLLED
Unconditional Waivers and Releases Upon Final
Payment
9.4
X
OPTION TWO - LETTER OF CREDIT
9.4.1
Progress Payment
9.4.1.1
Contractor Requirement: The Contractor shall submit with their progress
payment request, on the forms included in the Contract Documents, the
following:
Monthly Draw
Ongoing
Final
Draw 1 Progress
Draw
Draws
General Contractor's Progress Affidavit.
X
Unconditional Waiver and Release Upon Progress
Payment (previous draw)
9.4.1.2
X
X
Subcontractor or Major Material Supplier Requirement: The Contractor shall
submit with their progress payment request, on the forms included in the
Contract Documents, the following from each subcontractor and major material
supplier:
Monthly Draw
Ongoing
Final
Draw 1 Progress
Draw
Draws
Subcontractor's Progress Affidavit
Unconditional Waiver and Release Upon Progress
Payment (previous draw)
9.4.2
X
X
X
Final Payment
9.4.2.1
Contractor Requirement: The Contractor shall submit with the request for final
payment, on the forms included in the Contract Documents, the following:
Monthly Draw
Ongoing
Final
Draw 1 Progress
Draw
Draws
General Contractor's Final Affidavit.
Unconditional Waiver and Release Upon Progress
Payment (Previous Draw)
Unconditional Waiver and Release Upon Final
Payment (Due within 14 days of receipt of final
payment from the Owner)
9.4.2.2
X
X
X
Subcontractor or Major Material Supplier Requirements: The Contractor shall
submit with their request for final payment, on the forms included in the
KROGER GA-631 MINOR RENOVATION / OPELIKA, AL
00 72 14-0125
R/L/R PROJECT NO. 11-151
GENERAL CONDITIONS – KROGER CONTROLLED
Contract Documents, the following from each subcontractor and major material
supplier:
Monthly Draw
Ongoing
Final
Draw 1 Progress
Draw
Draws
X
Subcontractor’s Final Affidavit
Unconditional Waiver and Releases Upon Progress
Payment (previous draw)
Unconditional Waiver and Releases Upon Final
Payment
9.5
X
X
OPTION THREE - PERFORMANCE BOND & LABOR AND MATERIAL PAYMENT BOND
9.5.1
Progress Payment
9.5.1.1
Contractor Requirement: The Contractor shall submit with their progress
payment request, on the forms included in the Contract Documents, the
following:
Monthly Draw
Ongoing
Final
Draw 1 Progress
Draw
Draws
General Contractor's Progress Affidavit.
X
Unconditional Waiver and Release Upon Progress
Payment (previous draw)
9.5.1.2
X
X
Subcontractor or Major Material Supplier Requirement: The Contractor shall
submit with their progress payment request, on the forms included in the
Contract Documents, the following from each subcontractor and major material
supplier:
Monthly Draw
Ongoing
Final
Draw 1 Progress
Draw
Draws
Subcontractor's Progress Affidavit
Unconditional Waiver and Release Upon Progress
Payment (previous draw)
9.5.2
X
X
X
Final Payment
9.5.2.1
Contractor Requirement: The Contractor shall submit with the request for final
payment, on the forms included in the Contract Documents, the following:
Monthly Draw
Ongoing
Final
Draw 1 Progress
Draw
Draws
KROGER GA-631 MINOR RENOVATION / OPELIKA, AL
00 72 14-0126
R/L/R PROJECT NO. 11-151
GENERAL CONDITIONS – KROGER CONTROLLED
X
General Contractor's Final Affidavit.
Unconditional Waiver and Release Upon Progress
Payment (Previous Draw)
Unconditional Waiver and Release Upon Final
Payment (Due within 14 days of receipt of final
payment from the Owner)
9.5.2.2
X
X
Subcontractor or Major Material Supplier Requirements: The Contractor shall
submit with their request for final payment, on the forms included in the
Contract Documents, the following from each subcontractor and major material
supplier:
Monthly Draw
Ongoing
Final
Draw 1 Progress
Draw
Draws
Subcontractor’s Final Affidavit
Unconditional Waiver and Releases Upon Progress
Payment (previous draw)
Unconditional Waiver and Releases Upon Final
Payment
9.6
X
X
PAYMENTS WITHHELD
9.6.1
9.6.2
9.7
X
The Owner may withhold the whole or any part of any payment to protect against loss on
account of:
9.6.1.1
Defective materials and/or workmanship.
9.6.1.2
Claims filed or evidence reasonably indicating probable filing of claims.
9.6.1.3
Failure of the Contractor to make payments properly to subcontractors or for
material or labor.
9.6.1.4
A reasonable doubt that the Contract can be completed for the balance then
unpaid.
9.6.1.5
Damage to another contractor.
9.6.1.6
Other Contract requirements unfulfilled, including but not limited to those
requirements listed in Article “FINAL COMPLETION.”
Before making any Progress Payments, the Owner may require an updated schedule,
Change Order log, and copies of current SWPPP site inspections and logs.
FINAL COMPLETION/CLOSEOUT PROCEDURES
9.7.1
Before requesting final inspection the Contractor shall submit a final Application for
Payment. In addition to the forms required by the "Payment" paragraphs above, submit
the following:
KROGER GA-631 MINOR RENOVATION / OPELIKA, AL
00 72 14-0127
R/L/R PROJECT NO. 11-151
GENERAL CONDITIONS – KROGER CONTROLLED
9.7.1.1
General: Submit in format as specified in Article 15 "Submittals."
9.7.1.2
Final Statement: Updated final statement, accounting for final additional
changes to the Contract Sum.
9.7.1.3
Insurance Coverage: Evidence of final, continuing insurance coverage
complying with insurance requirements.
9.7.1.4
Warranties: Specific warranties, workmanship bonds, maintenance service
agreements, final certifications, and similar documents.
9.7.1.4.1
The Contractor shall submit written warranties for designated
portions of the Work where commencement of warranties other than
date of Substantial Completion is indicated.
9.7.1.5
Occupancy Releases: Releases permitting the Owner unrestricted use of the
Work and access to services and utilities. Include occupancy permits, operating
certificates, and similar releases.
9.7.1.6
Startup Testing Records: Record of complete startup testing of systems.
9.7.1.7
Test/Adjust/Balance Records: Record of complete testing, adjusting and
balancing of systems.
9.7.1.8
Operation and Maintenance Data: The Contractor shall assemble operation and
maintenance data indicating the operation and maintenance of each system,
subsystem, and piece of equipment not part of a system. The Contractor shall
include operation and maintenance data required in individual specification
sections.
9.7.1.9
Temporary Facilities: Evidence of termination and removal of temporary
facilities from Project site, along with mockups, construction tools, and similar
elements.
9.7.1.10 Transfer of Utilities: Evidence of transfer of payment and transfer of all
utilities.
9.7.1.11 Project Record Documents (As-Builts): The Contractor shall submit to the
Owner one PDF electronic file of scanned red-lined prints of Contract
Drawings and Shop Drawings.
9.7.1.12 Plan Box: The Contractor shall provide a plan box for the storage of drawings
on-site.
9.7.1.13 SWPPP Documents: The Contractor shall submit copies of all SWPPP
documents including but not limited to inspections reports, site logs, and noted
erosion and sediment control plans.
9.7.2
If any subcontractor or major material supplier refuses to furnish the Contractor with an
Unconditional Waiver and Release Upon Final Payment, the Contractor, upon Owner’s
request, shall furnish the Owner a Discharge of Mechanics Lien Bond, satisfactory to the
KROGER GA-631 MINOR RENOVATION / OPELIKA, AL
00 72 14-0128
R/L/R PROJECT NO. 11-151
GENERAL CONDITIONS – KROGER CONTROLLED
Owner, indemnifying the Owner against the claim or any lien, or the Owner, at its option,
may withhold from the progress or final payment a sum equal to 1-1/2 times the amount
of the claim. The Contractor shall purchase the bond without being compensated for the
cost of the bond from the Owner. If a lien is filed against the Project at any time and, if
within fifteen (15) days after notice of the filing has been given by the Owner to the
Contractor, the lien remains unsatisfied or it is not bonded satisfactory to the Owner, the
Owner shall thereafter be entitled, regardless of whether the claim is disputed, to pay the
full amount of the claim secured by the lien and deduct the cost thereof from the Contract
Sum; or if final payment has been made, the Contractor shall promptly reimburse the
Owner for the amount so expended. The Contractor shall indemnify, defend, and hold
the Owner harmless from all losses, damages and expense, including attorney fees,
related to or arising out of the payment claims or liens for work performed or material
supplied to the Project.
9.7.3
The Contractor agrees to furnish the Owner any reasonable documentation, including,
without limitation, payroll records, invoices or canceled checks, which the Owner may
request to confirm payment of all indebtedness related to the Project as a condition
precedent to any progress payment or final payment. In the event that a subcontractor or
material supplier has not been paid for labor performed or materials furnished in
connection with the Project, the Owner, in addition to all remedies available at law or in
equity, may pay the Contract Sum due the Contractor by a check made payable to the
Contractor and such subcontractor or materialman and in an amount for which
subcontractor or major material supplier is due based upon the reasonable judgment of
the Owner. Payment by such a joint check shall constitute payment on the Contract Sum.
9.7.4
Record of the Contractor’s incurred expenses based on self-performed work, and those of
their subcontractors and material vendors, including all fees and direct expenses
pertaining to the Project, shall be maintained on the basis of Generally Accepted
Accounting Principles (GAAP) and shall be available for inspection by the Owner at all
reasonable times and upon reasonable prior notice for a period commencing as of the date
of this Agreement and continuing through one year after completion of the Project.
9.7.5
Transfer of Utilities: The Contractor shall be responsible for the payment of all utilities
during construction, and for providing adequate services as described in the General
Conditions. Regardless of the extent of the Owner’s equipment and fixture installation
process, the transfer of the responsibility for payment of all utilities shall not occur until
the construction of the sales and preparation areas are substantially complete and fully
operational with only minor punchlist items remaining. At the appropriate time, the
Contractor shall submit a request in writing to the Owner requesting the Owner begin the
process of transferring all of the utilities into the Owner’s name.
9.7.6
Demonstration and Training: The Contractor shall instruct the Owner's personnel to
adjust, operate, and maintain systems, subsystems, and equipment not part of a system.
The Contractor shall schedule training with the Owner at least seven days in advance.
9.7.7
Final Cleaning: The Contractor shall conduct final cleaning and waste removal operations
just prior to the Owner's Fixture Date indicated in the Contract Documents to comply
with local laws and ordinances, and federal, state, and local environmental and
antipollution regulations.
KROGER GA-631 MINOR RENOVATION / OPELIKA, AL
00 72 14-0129
R/L/R PROJECT NO. 11-151
GENERAL CONDITIONS – KROGER CONTROLLED
9.7.7.1
Cleaning Agents: The Contractor shall use cleaning materials and agents
recommended by manufacturer or fabricator of the surface to be cleaned. The
Contractor shall not use cleaning agents that are potentially hazardous to health
or property or that might damage finished surfaces.
ARTICLE 10 PROTECTION OF PERSONS AND PROPERTY
10.1
PROTECTION OF WORK AND PROPERTY AND RISK OF LOSS
10.1.1 The Contractor shall protect the Work, auxiliary building, structures, materials, supplies,
and adjacent property from any damage. The Contractor shall provide safeguards,
including but not limited to fire extinguishers and lights, barriers and enclosures around
all pits, excavations, and other places of danger.
10.1.1.1 If damage results, the Contractor shall repair the damage. If the damage was
caused by the Owner, the Owner’s other contractors or the Owner’s operation,
the Owner will pay the Contractor as outlined for additional work in Article 7
of the General Conditions, but if such damage was caused by other persons, the
Contractor shall pay for repair of such damage or cause the correction thereof to
the Owner’s satisfaction.
10.1.2 The Contractor shall not trespass upon or in any way disturb adjacent property without
first obtaining written permission to do so from the owner of such adjacent property. The
Contractor shall restore all disturbed adjacent property to its original condition or such
other condition as may be agreed in writing between Contractor and such adjacent owner.
10.1.2.1 The Contractor shall indemnify, defend and hold harmless from and against any
and all claims, costs losses, causes of action, liabilities, damages, suits,
judgments, and expenses, including without limitation, reasonable attorneys’
fees, resulting from the Contractor’s entry upon and/or work within an adjacent
property.
10.1.3 The Contractor shall maintain and pay for Builder’s Risk Insurance in accordance with
Article 11.
10.2
TESTS AND INSPECTIONS
10.2.1 The Owner shall at all times have access to the Work wherever it is in preparation or
progress, and the Contractor shall provide facilities for observation thereof. If the laws,
ordinances, rules or regulations of any public authority, the Contract Documents, or the
Owner’s instructions require any work to be specially tested or approved, the Contractor
shall give the Owner notice of its readiness in time to permit the Owner to observe such
test or to inspect the same prior to the time for giving such approval.
ARTICLE 11 INSURANCE AND BONDS
11.1
CONTRACTORS’ INSURANCE REQUIREMENTS
KROGER GA-631 MINOR RENOVATION / OPELIKA, AL
00 72 14-0130
R/L/R PROJECT NO. 11-151
GENERAL CONDITIONS – KROGER CONTROLLED
11.1.1 Certificates of insurance acceptable to the Owner for all Contractor required insurance
shall be filed with the Owner prior to commencement of the Work. The Certificate of
Insurance must identify all self-insured retentions and/or deductibles to the current ISO
general liability policy. Contractor must provide a minimum of 20 calendar days
advanced written notice should said insurance be cancelled (voluntarily or otherwise) or
expire. In the event of cancellation or expiration of said insurance during the period of
time insurance coverage is required under this agreement, Contractor must provide proof
of replacement insurance a minimum of 10 calendar days in advance of the effective date
of such cancellation or expiration. Failure to provide such proof if insurance will result in
payments being withheld by Owner until such time as such proof of replacement
insurance is received.
11.1.2 The Owner may require higher insurance coverage limits and/or different coverages for
certain product and service providers.
11.1.3 Insurance shall be underwritten by insurance companies rated A- or higher by A.M. Best
11.1.4 The following must be shown as additional wording on Certificates:
11.1.4.1 “The Kroger Co. and Kroger’s Affiliates and Subsidiaries are Additional
Insureds.”
11.1.5 Certificate Holder Address: The Kroger Co. and Kroger’s affiliates and subsidiaries’
mailing address as shown in Division 00 Section "Agreement Between Owner and
Contractor.
11.1.6 General Liability
Commercial General Liability
$3,000,000
Occurrence Basis
Yes
Product Liability / Completed
$3,000,000
Operations
Each Occurrence
3,000,000
Note: General Liability Certificate (and Excess Liability/Umbrella Certificate if one is
issued to meet limits) must reflect asbestos abatement coverage, if asbestos abatement
is included in scope of work.
11.1.7 Auto Liability
Any Auto
Yes
Combined Single Limit - Bodily
$1,000,000
Injury and Property Damage
Note: As it concerns “Any Auto”, a combination of “All Owned Autos, Hired Autos &
Non-Owned Autos” OR “Scheduled Autos, Hired Autos & Non-Owned Autos” is
acceptable.
11.1.8 Workers Compensation.
Statutory Limits
Yes
Note: Waiver of Subrogation in favor of the Owner must be shown on the Certificate.
11.1.9 Employers Liability
KROGER GA-631 MINOR RENOVATION / OPELIKA, AL
00 72 14-0131
R/L/R PROJECT NO. 11-151
GENERAL CONDITIONS – KROGER CONTROLLED
Each Accident
$500,000
Disease Policy Limit
$500,000
Disease Each Employee
$500,000
Note:
a. Required coverage limits can be achieved through a combination of Primary &
Excess or Umbrella Liability Insurance.
b. In certain instances, “Claims Made” policies may be acceptable, consult Owner to
validate exception.
c. Certificates must be received by Owner prior to the commencement of work;
d. Address of the site must be shown on the Certificate.
11.1.10 Pollution Liability
Each Incident
1,000,000
11.1.11 Contacts
Contact
Name:
Per
Contract
Contact Title / Company:
Appropriate Kroger
Engineering /
Construction Department
Contact Phone:
Contact e-Mail:
See Work Order
Jim
Aalberg
VP Corporate Insurance –
Kroger
1-503-797-5300
[email protected]
Ed Bird
Insurance Analyst –
Kroger
1-503-797-3318
[email protected]
11.1.12 Builder’s Risk Insurance
New Store or Expansion
Within Wall Remodel Project or Fuel
Center
Strip Centers
$2,000,000 coverage limit, deductible
$10,000
$100,000 coverage limit, deductible $5,000
$1,000,000 coverage limit, deductible
$10,000
11.1.12.1 The Contractor shall maintain for a period of at least five days subsequent to
the written acceptance by the Owner of the project and pay for Builder’s Risk
Insurance in a company or companies with AM Best ratings of A- or better
satisfactory to the Owner. The Contractor shall file a certificate of insurance
naming the Owner as additional insured that must be received and retained in
file by the certification of such with Owner. All responsibility for deductibles
and other uninsured loss is the responsibility of the Contractor at full
replacement value to the limits indicated in the above table. The Owner shall be
responsible for claims greater than the limits shown in the above table. The
provisions of this Paragraph shall in no way relieve the Contractor of liability
for any loss for which the Contractor would otherwise be liable.
11.1.12.2 All risk of loss, damage or theft of Contractor’s equipment and tools and any
subcontractor’s equipment and tools and any property of either’s employees
KROGER GA-631 MINOR RENOVATION / OPELIKA, AL
00 72 14-0132
R/L/R PROJECT NO. 11-151
GENERAL CONDITIONS – KROGER CONTROLLED
that will not become part of the Project will be at the risk of the Contractor or
subcontractor owning said property. The Builder’s Risk policy will not cover
Owner’s Direct Buy equipment or fixtures.
11.1.12.3 The Contractor shall bear risk of glass breakage resulting from vandalism and
malicious mischief risks.
11.1.12.4 Deductibles shall be at the sole risk of the Contractor as indicated.
ARTICLE 12 UNCOVERING AND CORRECTION OF WORK
12.1
WORKMANSHIP
12.1.1 The workmanship called for by the Contract Documents shall be of the highest quality in
every respect, as usually recognized in the building construction industry. All surfaces,
members, frames, and units shall be true, even and in alignment. No warped, bent,
dented, or otherwise damaged members or units shall be built into the Project.
Connectors shall be true, tight and neat. Finishes shall be free from chips, dents and
other imperfections. All factory assemblies shall conform to the highest quality standards
of the trades concerned.
12.2
CORRECTION OF WORK
12.2.1 Defective materials and/or workmanship will not be acceptable and if installed shall be
removed and replaced with sound materials and highest quality workmanship or
otherwise corrected to the Owner’s satisfaction. The Contractor shall bear all expense of
replacement or remedial work and repairs to and alterations in the work of other
contractors necessitated by the Contractor’s replacement or remedial work. Should the
Contractor be unable to replace or remedy the defective work, the Contractor shall
promptly remove the entire Work and reimburse the Owner for all money paid therefore.
12.3
DEDUCTIONS FOR UNCORRECTED WORK
12.3.1 If the Owner deems it inexpedient to correct Work damaged or not done in accordance
with the Agreement, or incomplete Work not accomplished by the Contractor (such as
incomplete punch list items), an equitable deduction from the Contract Sum shall be
made, sufficient to pay the cost of later correction thereof.
ARTICLE 13 MISCELLANEOUS PROVISIONS
13.1
SUCCESSORS AND ASSIGNS
13.1.1 The Contractor shall not assign the Contractor’s right, title or interest in or to the Contract
without the prior written consent of the Owner, which may be given or withheld at
Owner’s sole discretion; nor shall the Contractor assign any monies due or to become due
the Contractor hereunder without the prior written consent of the Owner, which may be
given or withheld at Owner’s sole discretion.
13.2
EQUAL OPPORTUNITY
KROGER GA-631 MINOR RENOVATION / OPELIKA, AL
00 72 14-0133
R/L/R PROJECT NO. 11-151
GENERAL CONDITIONS – KROGER CONTROLLED
13.2.1 The Owner encourages the full participation of qualified Minority-Owned Business
Enterprises (MBEs) and Women-Owned Business Enterprises (WBEs) in all aspects of
its business. MBEs and WBEs must meet the same standards as other contractors, subcontractors, and suppliers of materials and services. The Owner encourages all business
partners to identify, screen, and include qualified MBEs and WBEs in all Projects.
13.2.2 The Request for Payment form includes a column for reporting dollars of participation of
M/WBEs in the Project. At the completion of the Project, the Contractor must provide a
list to include M/WBE company names, trade or service provided, identification of
gender/ethnicity of owner of company, amounts paid.
13.3
QUALITY REQUIREMENTS
13.3.1 Quality-control services include inspections, tests, and related actions including reports.
Quality-control services are further specified in other portions of the Contract Documents
and shall be performed by independent testing agencies provided by the Owner, as
specified.
13.3.2 The Contractor is responsible for coordinating and scheduling inspections and tests with
authorities having jurisdiction and the Owner’s testing agencies.
13.3.2.1 Retesting: The Contractor shall pay for all retesting where results of inspections
and tests prove unsatisfactory and indicate noncompliance with requirements.
13.3.2.2 Auxiliary Services: The Contractor shall cooperate with agencies performing
inspections and tests. The Contractor shall provide auxiliary services as
requested. The Contractor shall notify agency in advance of operations
requiring tests or inspections, to permit assignment of personnel.
13.3.2.3 On completion of testing, inspecting, sample taking, and similar services, the
Contractor shall repair damaged construction and restore substrates and
finishes.
ARTICLE 14 TERMINATION OR SUSPENSION OF THE CONTRACT
14.1
CONTRACTOR’S RIGHT TO STOP WORK OR TERMINATE CONTRACT
14.1.1 If the Work should be stopped under an order of any court or other public authority, for a
period of three months, through no act or fault of the Contractor or of anyone employed
by the Contractor, then the Contractor may, upon three days written notice to the Owner,
stop the Work without liability for such delay; or the Contractor may terminate the
Contract and recover from the Owner payment including a reasonable profit for all Work
executed to the time of termination.
14.2
OWNER’S RIGHT TO TERMINATE CONTRACT
14.2.1 The Contractor’s performance of work under this Agreement shall be terminable for
cause upon twenty-four (24) hours’ written notice by Owner to Contractor. For purpose
of this paragraph, “cause” shall be defined as, and shall include but not limited to, the
Contractor: (i) being adjudged a bankrupt, (ii) making a general assignment for the
KROGER GA-631 MINOR RENOVATION / OPELIKA, AL
00 72 14-0134
R/L/R PROJECT NO. 11-151
GENERAL CONDITIONS – KROGER CONTROLLED
benefit of the Contractor’s creditors, (iii) having a receiver appointed on account of the
Contractor’s insolvency, (iv) persistently or repeatedly refusing or failing, except in cases
for which extension of time is provided, to supply enough properly skilled workmen or
proper materials to keep the Project on schedule, (v) failing to make prompt payment to
subcontractors or for materials or labor, (vi) persistently disregarding laws, ordinances,
rules, regulations or orders of any public authority having jurisdiction, or the instructions
of the Owner, (vii) otherwise violating a provision of this Agreement, or (viii) failing to
provide or maintain the insurance required herein. If Owner terminates the employment
of the Contractor, as aforesaid, Owner shall be entitled to take possession of the premises
and all materials, tools and appliances thereon and finish the Project by whatever method
the Owner may deem expedient. In such case, Contractor shall not be entitled to receive
any further payment. If the expense of finishing the Project, including compensation for
the Owner’s additional services, shall exceed such unpaid balance of the contract sum,
then the Contractor shall promptly pay such excess to the Owner. Owner reserves the
right to use the Contract sum to make such payment directly to subcontractors and/or
workmen or other persons who have provided work or materials to the Project, on the
Contractor’s behalf.
ARTICLE 15 SUBMITTALS
15.1
GENERAL
15.1.1 Submittals required for this Project are indicated by a checked box under the “Required
Submittals” column in the Submittals List below. Submittals not indicated with a checked
box are not part of this Project.
15.1.1.1 Contractor shall prepare and submit submittals in electronic data file format on
the Owner’s PMW.
15.2
SUBMITTAL PROCEDURE
15.2.1 Submittal Administrative Requirements: The Contractor shall coordinate preparation and
processing of submittals with performance of construction activities.
15.2.1.1 Coordination: The Contractor shall coordinate each submittal with fabrication,
purchasing, testing, delivery, other submittals, and related activities that require
sequential activity. The Contractor shall submit all submittal items required for
each Specification Section concurrently unless partial submittals for portions of
the Work are indicated on approved submittal schedule. The Contractor shall
coordinate transmittal of different types of submittals for related parts of the
Work so processing will not be delayed because of need to review submittals
concurrently for coordination.
15.2.1.2 Processing Time: The Contractor shall allow 10 days for review of each
submittal or each resubmittal by the Owner and/or Architect beginning at the
time of receipt by the Owner and/or Architect. The Contractor shall allow
additional time if coordination with subsequent submittals is required. Owner
and/or Architect will advise Contractor when a submittal being processed must
be delayed for coordination. No extension of the Contract Time will be
KROGER GA-631 MINOR RENOVATION / OPELIKA, AL
00 72 14-0135
R/L/R PROJECT NO. 11-151
GENERAL CONDITIONS – KROGER CONTROLLED
authorized because of failure to transmit submittals enough in advance of the
Work to permit processing, including resubmittals.
15.2.1.3 Identification and Information: The Contractor shall identify and incorporate
information in each electronic submittal file as follows:
15.2.1.3.1 Assemble complete submittal package into a single indexed file
with links enabling navigation to each item.
15.2.1.3.2 Name file with submittal number or other unique identifier,
including revision identifier.
15.2.1.3.2.1 File name shall use project identifier and Specification
Section number followed by a decimal point and then a
sequential
number
(e.g.,
LNHS-061000.01).
Resubmittals shall include an alphabetic suffix after
another decimal point (e.g., LNHS-061000.01.A).
15.2.1.3.2.2 Provide means for insertion to permanently record
Contractor's review and approval markings and action
taken by Owner and/or Architect.
15.2.2 Direct Buy Submittals: The Owner will provide submittals for Direct Buy Owner
purchased items for the Contractor’s information as indicated in individual specification
sections.
15.2.3 Submittal Procedure Requirements: The Contractor shall prepare and submit submittals
required by individual Specification Sections marked "For Approval." Types of
submittals are indicated in individual Specification Sections.
15.2.3.1 Electronic Submittals: The Contractor shall post electronic submittals as PDF
electronic files directly to Owner’s PMW.
15.2.3.1.1 Owner and/or Architect will return annotated file. The Contractor
shall annotate and retain one copy of file as an electronic Project
record document file.
15.2.4 Contractor's Review: The Contractor shall review each submittal and check for
compliance with the Contract Documents, note corrections and field dimensions, and
mark with approval status before submitting to the Owner and/or Architect.
15.2.5 Owner’s and/or Architect’s Action:
15.2.5.1 General: The Owner and/or Architect will not review submittals that do not
bear Contractor's approval status and will return them without action.
15.2.5.2 The Owner and/or Architect will review each submittal, make marks to indicate
corrections or modifications required, and return it.
15.2.5.3 Incomplete submittals are not acceptable, will be considered nonresponsive,
and will be returned without review.
KROGER GA-631 MINOR RENOVATION / OPELIKA, AL
00 72 14-0136
R/L/R PROJECT NO. 11-151
GENERAL CONDITIONS – KROGER CONTROLLED
15.2.5.4 Submittals not required by the Contract Documents or not identified with
review responsibility in the Submittals List may not be reviewed and may be
discarded.
15.2.5.5 Where items deviating from the Specifications and/or Drawings have been
approved by the Owner, submittals for these substituted items shall be
submitted to the Owner and/or the Architect for approval before fabrication.
15.3
LEGEND
15.3.1 "X" = Contractor to Owner submittals.
15.3.2 "O" = Owner to Contractor submittals (Direct Buy Program).
KROGER GA-631 MINOR RENOVATION / OPELIKA, AL
00 72 14-0137
R/L/R PROJECT NO. 11-151
GENERAL CONDITIONS – KROGER CONTROLLED
X
X
00 72 14 (3.2) Warranty Meeting Report
X
X
00 72 14 (3.2) Request for Information (RFI)
X
X
X
00 72 14 (3.3) Construction Progress Schedule
X
X
X
00 72 14 (3.3) Submittals Schedule
X
X
X
00 72 14 (3.5) Construction Sign
X
X
X
00 72 14 (3.11) Electronic Drawing Request
X
X
X
00 72 14 (3.14) Daily Work Report
X
X
00 72 14 (5.1) Subcontractor Substitution Request
X
X
00 72 14
X
X
00 72 14 (7.1) Request for Change
X
X
X
00 72 14
X
X
X
00 72 14 (7.3) Change Order Costs
X
X
X
00 72 14 (8.1) Request for Time Extension
X
X
00 72 14 (9.0) Progress Payment Request
X
X
00 72 14 (9.0) Final Payment Request
X
X
X
X
X
X
ADMINISTRATIVE SUBMITTALS
(7.1) Estimate for Owner Proposed
Change
(7.1) Invoice for Construction Change
Directive
FINAL COMPLETION/CLOSEOUT SUBMITTALS
00 72 14 9.7
00 72 14 (9.7) Insurance Coverage
00 72 14 (9.7) Warranties
00 72 14 (9.7) Occupancy Releases
Final Statement
X
X
X
X
Civil/Testing Agency
Architect
X
Other
00 72 14 (3.1) Substitution Request
Reports
Samples
Owner PM
O & M Manual
Qualifications
Shop Drawings
Specification Item
Product Data
Required Submittals
Section
Number
Contractor
Review
Responsibility
Submittal Item
KROGER GA-631 MINOR RENOVATION / OPELIKA, AL
00 72 14-0138
R/L/R PROJECT NO. 11-151
GENERAL CONDITIONS – KROGER CONTROLLED
X
X
00 72 14 (9.7) Test/Adjust Balance Records
X
X
X
00 72 14 (9.7) Temporary Facilities
X
X
00 72 14 (9.7) Operation and Maintenance Data
00 72 14 (9.7) Transfer of Utilities
X
X
00 72 14 (9.7) Project Record Documents
X
X
00 72 14 (9.7) SWPPP Documents
X
X
X
Civil/Testing Agency
Architect
X
Other
00 72 14 (9.7) Startup Testing Records
Reports
Samples
Owner PM
O & M Manual
Qualifications
Shop Drawings
Specification Item
Product Data
Required Submittals
Section
Number
Contractor
Review
Responsibility
Submittal Item
X
CONCRETE
03 31 10
Integral colored cast-in place concrete
slabs
END OF SECTION 00 72 14
X
X
X
X
X
Mix Design, Pour
Plan
X
X
X
KROGER GA-631 MINOR RENOVATION / OPELIKA, AL
02 41 19-1
R/L/R PROJECT NO. 11-151
SELECTIVE STRUCTURE DEMOLITION
SECTION 02 41 19 - SELECTIVE STRUCTURE DEMOLITION
PART 1 - GENERAL
1.1
SUMMARY
A.
Section includes:
1.
2.
3.
1.2
Demolition and removal of selected portions of building or structure.
Demolition and removal of selected site elements.
Recycling of ceiling tiles.
QUALITY ASSURANCE
A.
Refrigerant Recovery Technician Qualifications: Certified by an EPA-approved certification
program.
B.
Regulatory Requirements: Comply with governing EPA notification regulations before
beginning selective demolition. Comply with hauling and disposal regulations of authorities
having jurisdiction.
C.
Standards: Comply with ANSI A10.6 and NFPA 241.
1.3
PROJECT CONDITIONS
A.
Owner will occupy portions of building immediately adjacent to selective demolition area.
Conduct selective demolition so Owner's operations will be minimally disrupted.
B.
Conditions existing at time of inspection for bidding purpose will be maintained by Owner as
far as practical.
C.
Notify Architect of discrepancies between existing conditions and Drawings before proceeding
with selective demolition.
D.
Hazardous Materials: It is not expected that hazardous materials will be encountered in the
Work.
1.
If materials suspected of containing hazardous materials are encountered, do not disturb;
immediately notify Owner’s Representative. Owner will remove hazardous materials
under a separate contract.
E.
Storage or sale of removed items or materials on-site is not permitted.
F.
Utility Service: Maintain existing utilities indicated to remain in service and protect them
against damage during selective demolition operations.
1.
Maintain fire-protection facilities in service during selective demolition operations.
KROGER GA-631 MINOR RENOVATION / OPELIKA, AL
02 41 19-2
R/L/R PROJECT NO. 11-151
SELECTIVE STRUCTURE DEMOLITION
1.4
WARRANTY
A.
Existing Warranties: Remove, replace, patch, and repair materials and surfaces cut or damaged
during selective demolition, by methods and with materials so as not to void existing warranties.
PART 2 - PRODUCTS (Not Used)
PART 3 - EXECUTION
3.1
GENERAL
3.2
EXAMINATION
A.
Verify that utilities have been disconnected and capped.
B.
Survey existing conditions and correlate with requirements indicated to determine extent of
selective demolition required.
C.
Inventory and record the condition of items to be removed and reinstalled and items to be
removed and salvaged.
D.
When unanticipated mechanical, electrical, or structural elements that conflict with intended
function or design are encountered, investigate and measure the nature and extent of conflict.
Promptly submit a written report to Architect.
3.3
UTILITY SERVICES AND MECHANICAL/ELECTRICAL SYSTEMS
A.
Existing Services/Systems: Maintain services/systems indicated to remain and protect them
against damage during selective demolition operations.
B.
Service/System Requirements: Locate, identify, disconnect, and seal or cap off indicated utility
services and mechanical/electrical systems serving areas to be selectively demolished.
1.
2.
3.
Owner’s Representative will arrange to shut off indicated services/systems when
requested by Contractor.
If services/systems are required to be removed, relocated, or abandoned, before
proceeding with selective demolition provide temporary services/systems that bypass
area of selective demolition and that maintain continuity of services/systems to other
parts of building.
Cut off pipe or conduit in walls or partitions to be removed. Cap, valve, or plug and seal
remaining portion of pipe or conduit after bypassing.
KROGER GA-631 MINOR RENOVATION / OPELIKA, AL
02 41 19-3
R/L/R PROJECT NO. 11-151
SELECTIVE STRUCTURE DEMOLITION
3.4
PREPARATION
A.
Site Access and Temporary Controls: Conduct selective demolition and debris-removal
operations to ensure minimum interference with roads, streets, walks, walkways, and other
adjacent occupied and used facilities.
B.
Temporary Facilities: Provide temporary barricades and other protection required to prevent
injury to people and damage to adjacent buildings and facilities to remain.
1.
2.
3.
4.
5.
6.
C.
Temporary Shoring: Provide and maintain shoring, bracing, and structural supports as required
to preserve stability and prevent movement, settlement, or collapse of construction and finishes
to remain, and to prevent unexpected or uncontrolled movement or collapse of construction
being demolished.
1.
3.5
Provide protection to ensure safe passage of people around selective demolition area and
to and from occupied portions of building.
Provide temporary weather protection, during interval between selective demolition of
existing construction on exterior surfaces and new construction, to prevent water leakage
and damage to structure and interior areas.
Protect walls, ceilings, floors, and other existing finish work that are to remain or that are
exposed during selective demolition operations.
Cover and protect furniture, furnishings, and equipment that have not been removed.
Temporary Enclosures: Provide temporary enclosures for protection of construction, in
progress and completed, from exposure, foul weather, other construction operations, and
similar activities. Provide temporary enclosures as specified in Division 00 Section
"General Conditions."
Temporary Partitions: Provide floor-to-ceiling dustproof partitions to limit dust and dirt
migration and to separate areas occupied by Owner, tenants and the public from fumes
and noise. Provide temporary partitions as specified in Division 00 Section "General
Conditions."
Strengthen or add new supports when required during progress of selective demolition.
SELECTIVE DEMOLITION, GENERAL
A.
General: Demolish and remove existing construction only to the extent required by new
construction and as indicated. Use methods required to complete the Work within limitations of
governing regulations.
B.
Existing Items to Remain: Protect construction indicated to remain against damage and soiling
during selective demolition. When permitted by Owner’s Representative, items may be
removed to a suitable, protected storage location during selective demolition and reinstalled
after selective demolition operations are complete.
3.6
SELECTIVE DEMOLITION PROCEDURES FOR SPECIFIC MATERIALS
A.
Below-Grade Construction: Demolish foundation walls and other below-grade construction that
are within footprint of new construction and extending 5 feet (1.5 m) outside footprint indicated
for new construction. Abandon below-grade construction outside this area
KROGER GA-631 MINOR RENOVATION / OPELIKA, AL
02 41 19-4
R/L/R PROJECT NO. 11-151
SELECTIVE STRUCTURE DEMOLITION
1.
Remove below-grade construction, including basements, foundation walls, and footings,
to at least 8 inches (203 mm) below top of finished floor slab as required for installation
of HVAC, plumbing, electrical, refrigeration, fire protection piping, and storm piping
systems, and appurtenances associated with those systems.
B.
Existing Utilities: Demolish existing utilities and below-grade utility structures that are within
5 feet (1.5 m) outside footprint indicated for new construction. Abandon utilities outside this
area. Fill abandoned utility structures with satisfactory soil materials according to backfill
requirements in Contract Documents.
C.
Concrete Slabs-on-Grade: Locate and mark concrete where underground utilities and other
items are to be located. Saw-cut into 2 by 2 foot (610 by 610 mm) sections and remove without
jack hammering.
D.
Resilient Floor Coverings:
Remove floor coverings and adhesive according to
recommendations in RFCI-WP and its Addendum.
1.
E.
3.7
Remove residual adhesive and prepare substrate for new floor coverings by one of the
methods recommended by RFCI.
Roofing: Remove no more existing roofing than can be covered in one day by new roofing and
so that building interior remains watertight and weathertight.
DISPOSAL OF DEMOLISHED MATERIALS
A.
General: Except for items or materials indicated to be recycled, reused, salvaged, reinstalled, or
otherwise indicated to remain Owner's property, remove demolished materials from Project site
and legally dispose of them in an EPA-approved landfill.
1.
2.
B.
3.8
Do not allow demolished materials to accumulate on-site.
Remove and transport debris in a manner that will prevent spillage on adjacent surfaces
and areas.
Burning: Do not burn demolished materials.
CLEANING
A.
Clean adjacent structures and improvements of dust, dirt, and debris caused by selective
demolition operations. Return adjacent areas to condition existing before selective demolition
operations began.
END OF SECTION 02 41 19
KROGER GA-631 MINOR RENOVATION / OPELIKA, AL
03 35 19-1
R/L/R PROJECT NO. 11-151
POLISHED DYED CONCRETE FINISHING
SECTION 03 35 19 - POLISHED DYED CONCRETE FINISHING
PART 1 - GENERAL
1.1
SUMMARY
A.
Section includes:
1.
2.
Removal of existing floor tile and floor tile adhesive.
Concrete dye and polished concrete finishing.
a.
The Kroger Company will supply and install the concrete dying and polishing
system including the following:
1)
2)
3)
4)
b.
3.
The Contractor will supply the concrete patching material.
Contractor installed items:
a.
1.2
Comply with requirements in Division 00 Section "General Conditions."
Contractor supplied items: Contractor furnished/Contractor installed.
a.
4.
Removal of existing floor tile, existing floor mastic, and joint filler materials
and pre-polishing cleaning of concrete slab.
Joint filling.
Concrete dye.
Hardener/densifier.
Concrete patching material.
SUBMITTALS
A.
Product Data: For concrete patching material.
B.
The Owner will provide the following submittals for the Contractor’s information upon request:
1.
1.3
Product Data: For dye and hardener/densifier.
QUALITY ASSURANCE
A.
Pre-installation Conference: Two weeks prior to concrete polishing Work, conduct conference
at Project site with Owner’s concrete staining and polishing installer to comply with
requirements in Division 00 Section "General Conditions." The Owner will be in charge of the
meeting. The Contractor shall take minutes of the meeting.
KROGER GA-631 MINOR RENOVATION / OPELIKA, AL
03 35 19-2
R/L/R PROJECT NO. 11-151
POLISHED DYED CONCRETE FINISHING
PART 2 - PRODUCTS
2.1
MATERIALS
A.
Refer to Division 01 Section “Direct Buy Owner-Furnished Products” for information on
concrete stain penetrating hardener/densifier floor treatment.
B.
Concrete Material: High early strength portland cement-based compound as approved by
Owners’ Direct Buy floor polishing contractor.
2.2
REPLACEMENT AND PATCHING MATERIALS
A.
Concrete Slab Replacement Materials (Fast Cure)
1.
2.
3.
Portland Cement: ASTM C 150, Type III, high early strength
Normal-Weight Aggregates: ASTM C 33, graded.
Do not use the following concrete materials in the mix design.
a.
b.
c.
4.
5.
Water: ASTM C 94/C 94M and potable.
Chemical Admixtures:
a.
b.
c.
B.
Provide admixtures certified by manufacturer to be compatible with other
admixtures and that will not contribute water-soluble chloride ions exceeding those
permitted in hardened concrete.
Do not use calcium chloride or admixtures containing calcium chloride.
Maintain consistency of proportions and types of admixtures in all pours.
Concrete Slab Patching Material: Portland cement-based, self-drying, fast setting, trowelable patch.
1.
2.
2.3
Fly ash
Ground granulated blast furnace slag.
Air-entraining admixtures.
Basis of Design Product (For Patches Larger Than 1 inch (25 mm) in Diameter): Ardex
Engineered Cements; Ardex SD-P.
Basis of Design Product (For Patches 1 inch (25 mm) in Diameter and Smaller): Ardex
Engineered Cements; Ardex Feather Finish-Gray.
RELATED MATERIALS
A.
Protective Covering: Provide sufficient quantity to protect concrete in the main traffic aisles &
staging areas.
1.
Products:
a.
b.
Ezform Inc.; EZCover; 866-913-8363
Ram Board Floor Protection; Ram Board; 818-848-0400
KROGER GA-631 MINOR RENOVATION / OPELIKA, AL
03 35 19-3
R/L/R PROJECT NO. 11-151
POLISHED DYED CONCRETE FINISHING
c.
Hardboard: AHA A135.4, Class 4 (Service), Surface S1S; 1/8-inch (3-mm) thick,
4-ft (1219-mm) by 8-ft (2438-mm).
PART 3 - EXECUTION
3.1
PREPARATION
A.
Complete the following requirements prior to integral colored concrete placement.
1.
2.
3.
4.
3.2
Coordinate concrete staining and polishing work with the work of the other trades.
Building must be dried in.
Provide adequate temporary lighting to insure high quality workmanship.
Employ methods to prevent dust and air-born debris from entering building and settling
on slab surface during finishing operations.
CONCRETE SURFACE REPAIRS
A.
Defective Concrete: Repair and patch defective areas when approved by Owner. Remove and
replace concrete that cannot be repaired and patched to Owner’s approval.
B.
Provide test area made of specified materials for Owner’s review and approval.
C.
Place concrete patching material as recommended in writing by manufacturer.
3.3
JOINT FILLING
A.
3.4
Joint filler will be installed by the Owner.
PRE-POLISHING CLEANING
A.
3.5
Pre-polishing cleaning will be performed by the Owner.
CONCRETE FLOOR DYING AND POLISHING SYSTEM
A.
The concrete floor dying and polishing system will be installed by the Owner. This system
includes the penetrating densifier/hardener.
B.
Coordinate and schedule installation with Owner as follows:
1.
2.
3.
Coordinate dying and polishing operations with other associated work and trades.
New concrete slabs shall be cured a minimum of 28 days or at a point polishing
equipment can be put on the slab and does not displace aggregate.
Concrete dying and polishing shall be coordinated with the placement of refrigerated
cases and fixtures.
KROGER GA-631 MINOR RENOVATION / OPELIKA, AL
03 35 19-4
R/L/R PROJECT NO. 11-151
POLISHED DYED CONCRETE FINISHING
4.
5.
3.6
Areas to be polished shall be restricted from other uses for the length of time designated
by the concrete polishing.
Allow inspection by Owner’s concrete polishing installer during the polishing process.
CARE AND PROTECTION OF FLOOR
A.
Until Project is turned over to Owner, clean polished concrete floor as required to prevent
surface residue from forming on the concrete surface and to maintain floor in condition as
approved by Owner at completion of polishing. Clean with an automatic floor scrubber
equipped with soft bristle brushes.
B.
Do not allow loading on concrete surface until concrete has obtained, by test, its design strength
as noted on Drawings, but not sooner than 9 days after placement.
C.
Install protective covering per manufacturer’s instructions where equipment is to be installed or
where construction activities could soil or damage floor or where items are to be stored.
Adequately protect concrete inserts and other embedded items from movement, mechanical
injury, or from damage by elements.
D.
Place skids or shipping containers on protective covering and prevent from coming in direct
contact with the polished concrete floor.
E.
Diaper lifts and equipment used on colored concrete to protect from leaks. Tires on such
equipment to be white or taped to prevent marks. Remove lifts from finish floor at end of each
day.
F.
No battery charging is allowed on completed floor.
G.
Painters must use drop cloths to protect concrete floor from dry fall.
END OF SECTION 03 35 19
KROGER GA-631 MINOR RENOVATION / OPELIKA, AL
R/L/R PROJECT NO. 11-151
05 50 00-1
METAL FABRICATIONS
SECTION 05 50 00 - METAL FABRICATIONS
PART 1 - GENERAL
1.1
SUMMARY
A.
Section includes:
1.
Contractor supplied items.
a.
Fabrications from steel and iron shapes, plates, bars, tubes, and pipe
1)
2)
b.
Fabrications from sheet metal
1)
2.
The Kroger Company will supply the following items.
1)
2)
Prefabricated, powder coated, hammer tone paint finish column covers.
Prefinished sheets of metal powder coated, hammer tone paint finish for
contractor to custom bend for special situations.
Contractor installed items:
a.
b.
c.
1.2
Stainless steel column wraps
KROGER DIRECT BUY PROGRAM: Owner supplied/Contractor installed.
a.
3.
Miscellaneous steel framing and supports.
Miscellaneous steel trim.
Fabrications from steel and iron shapes, plates, bars, tubes, and pipe.
Fabrications from sheet metal.
Owner supplied prefabricated and prefinished column covers and prefinished metal
sheets.
SUBMITTALS
A.
Shop Drawings: Include plans, elevations, sections, and details of metal fabrications and their
connections. Show anchorage and accessory items.
1.
B.
Shop Drawings shall bear the seal of a professional engineer who is registered in the state
the project occurs, and who is providing services as a specialty engineer.
Templates: For anchors and bolts.
KROGER GA-631 MINOR RENOVATION / OPELIKA, AL
R/L/R PROJECT NO. 11-151
05 50 00-2
METAL FABRICATIONS
PART 2 - PRODUCTS
2.1
MATERIALS
A.
Metal Surfaces, General: Provide materials with smooth, flat surfaces without blemishes.
B.
Ferrous Metals:
1.
2.
3.
4.
5.
6.
7.
Steel Plates, Shapes, Bars: ASTM A-36.
Cold Formed Steel Tubing: ASTM A-500, Grade B.
Steel Pipe: ASTM A-53, Type E or S, Grade B.
Structural Cold-Rolled Steel Sheets: ASTM A-611, Class 1, of grade required for design
loading.
Galvanized Structural Steel Sheets: ASTM A-446, Coating Designation G90.
Stainless-Steel Sheet: ASTM A 240/A 240M or ASTM A 666, Type 304 with No. 4
brushed finish.
Slotted Channel Framing: Cold-formed metal box channels (struts) complying with
MFMA-4.
a.
b.
C.
Fasteners
1.
2.
3.
4.
5.
General: Type 304 stainless-steel fasteners for exterior use and zinc-plated fasteners with
coating complying with ASTM B 633, Class Fe/Zn 5, at exterior walls. Provide
stainless-steel fasteners for fastening aluminum. Select fasteners for type, grade, and
class required.
Cast-in-Place Anchors in Concrete: Threaded or wedge type; galvanized ferrous
castings, either ASTM A 47/A 47M malleable iron or ASTM A 27/A 27M cast steel.
Provide bolts, washers, and shims as needed, hot-dip galvanized per
ASTM A 153/A 153M.
Threaded Rods: ASTM A36. Sizes and embedment as indicated on the Drawings.
Concrete Inserts: Malleable iron (ASTM A-47) or cast steel (ASTM A-27) inserts, with
steel bolts, washers and shims; hot dip galvanized.
Expansion Anchors: Size, and embedment indicated on Drawings.
a.
b.
c.
6.
Manufacturer: Hilti, Inc. 800-879-8000.
Masonry Anchors: Sleeve anchors unless otherwise noted.
Concrete Anchors: Kwik Bolt 3 unless otherwise noted.
Epoxy Adhesive Anchors:
a.
D.
Size of Channels: 1-5/8 by 1-5/8 inches (41 by 41 mm).
Material: Galvanized steel, ASTM A 653/A 653M, commercial steel, Type B,
with G90 (Z275) coating; 0.108-inch (2.8-mm) nominal thickness.
Basis of Design Product: ITW Ramset/Redhead; Epcon "Ceramic 6.”
Miscellaneous Materials
KROGER GA-631 MINOR RENOVATION / OPELIKA, AL
R/L/R PROJECT NO. 11-151
1.
2.
3.
4.
Universal Shop Primer: Fast-curing, lead- and chromate-free, universal modified-alkyd
primer complying with MPI #79.
Galvanizing Repair Paint: SSPC-Paint 20, high-zinc-dust-content paint for regalvanizing
welds in steel.
Nonshrink, Nonmetallic Grout:
Factory-packaged, nonstaining, noncorrosive,
nongaseous grout complying with ASTM C 1107.
Concrete fill: ASTM C 94 ready mix or prepackaged concrete. Proportion mix:
a.
b.
Minimum cement content 600 lbs./cu. yd. (356 kg./cu. m).
Maximum aggregate sizes:
1)
2)
3)
2.2
05 50 00-3
METAL FABRICATIONS
Foundation: 1 inch (25.4 mm).
Pipe Fill: 1/2 inch (12.7 mm).
Maximum slump: 6 inches (152.4 mm).
FABRICATION
A.
General:
1.
2.
Do not begin fabrication prior to shop drawing approval.
Use materials of size and thickness shown or, if not shown, of required size, grade and
thickness to produce strength and durability in finished product.
a.
b.
3.
Weld corners and seams continuously; grind exposed welds smooth and flush.
Form exposed connections with hairline, flush joints; use concealed fasteners
where possible.
Inserts and Anchorages: Furnish inserts and anchoring devices to be built into other work
for installation of miscellaneous metal items; coordinate delivery to job site to avoid
delay.
B.
Miscellaneous Framing and Supports: Fabricate of welded construction in as large units as
possible. Drill and tap as required to receive hardware and similar items. Include required
anchors for building into other work; spaced not more than 12 inches (304.8 mm) o.c.
C.
Miscellaneous Steel Trim: Fabricate to shapes and sizes as required for profiles shown and
continuously weld joints and smooth exposed edges. Use concealed field splices wherever
possible. Provide cutouts, fittings, and anchorages; coordinate assembly and installation with
other work.
D.
Column Covers: Stainless steel with #4 finish, as detailed.
2.3
FINISHES
A.
Steel and Iron Finishes:
1.
Hot-dip galvanize items as indicated to comply with ASTM A 123/A 123M or
ASTM A 153/A 153M as applicable.
KROGER GA-631 MINOR RENOVATION / OPELIKA, AL
R/L/R PROJECT NO. 11-151
2.
05 50 00-4
METAL FABRICATIONS
Shop Priming:
a.
b.
Apply shop primer to uncoated surfaces of metal fabrications, except those with
galvanized finishes and those to be embedded in concrete, sprayed-on fireproofing,
or masonry, to comply with SSPC-PA 1, "Paint Application Specification No. 1:
Shop, Field, and Maintenance Painting," for shop painting.
For lintels supporting exterior masonry wythes and members exposed to weather in
finished structures blast steel clean per SSPC-SP6 "Commercial Blast Cleaning"
and paint with zinc rich primer.
1)
Products:
a)
b)
c)
d)
e)
f)
Benjamin Moore & Co.; Epoxy Zinc-Rich Primer CM18/19.
Carboline Company; Carbozinc 621.
ICI Devoe Coatings; Catha-Coat 313.
PPG Architectural Finishes, Inc.; Aquapon Zinc-Rich Primer 97-670.
Sherwin-Williams Company (The); Corothane I GalvaPac Zinc
Primer.
Tnemec Company, Inc.; Tneme-Zinc 90-97.
PART 3 - EXECUTION
3.1
INSTALLATION
A.
General: Perform cutting, drilling, and fitting required for installing metal fabrications. Set
metal fabrications accurately in location, with edges and surfaces level, plumb, and true.
1.
2.
Fit exposed connections accurately together. Weld connections that are not to be left as
exposed joints but cannot be shop welded. Do not weld, cut, or abrade surfaces of
exterior units that have been hot-dip galvanized after fabrication.
Provide anchorage devices and fasteners where metal fabrications are required to be
fastened to in-place construction.
a.
3.
For masonry and concrete, drill holes with a coarse cutting rock chisel using
pneumatic percussion equipment equipped with hollow stem drill rod and
continuous air jet to remove cuttings. Blow out holes with compressed air or
vacuum to remove all dust and chips.
Provide temporary bracing or anchors in formwork for items that are to be built into
concrete, masonry, or similar construction.
B.
Owner Supplied Prefinished Column Covers: Install column covers in accordance with
manufacturer’s instructions.
C.
Touch up surfaces and finishes after erection.
1.
Painted Surfaces: Clean field welds, bolted connections, and abraded areas and touch up
paint with the same material as used for shop painting.
KROGER GA-631 MINOR RENOVATION / OPELIKA, AL
R/L/R PROJECT NO. 11-151
2.
05 50 00-5
METAL FABRICATIONS
Galvanized Surfaces: Clean field welds, bolted connections, and abraded areas and repair
galvanizing to comply with ASTM A 780.
END OF SECTION 05 50 00
KROGER GA-631 MINOR RENOVATION / OPELIKA, AL
R/L/R PROJECT NO. 11-151
06 10 53-1
MISCELLANEOUS CARPENTRY
SECTION 06 10 53 - MISCELLANEOUS CARPENTRY
PART 1 - GENERAL
1.1
SUMMARY
A.
This Section includes the following:
1.
2.
3.
4.
5.
6.
7.
8.
9.
1.2
Wood blocking and nailers.
Wood furring.
Roof sheathing
Miscellaneous wall sheathing
Plywood backing panels.
Plywood wall panels
Interior wood trim.
Solid-surfacing-material countertops.
Quartz-surfacing
SUBMITTALS
A.
Product Data: For fire-retardant treatment from chemical treatment manufacturer and
certification by treating plant that treated materials comply with requirements.
B.
Samples: Solid-surfacing and quartz surfacing materials.
1.3
WARRANTY
A.
Solid-Surfacing-Material and Quartz-Surfacing Material: Provide manufacturers standard
warranty against defects in materials. Warranty shall provide material only to repair or replace
defective materials.
1.
Warranty Period: 10 years from date of Substantial Completion.
PART 2 - PRODUCTS
2.1
WOOD PRODUCTS, GENERAL
A.
Lumber: DOC PS 20 and applicable rules of grading agencies indicated. If no grading agency
is indicated, provide lumber that complies with the applicable rules of any rules-writing agency
certified by the ALSC Board of Review. Provide lumber graded by an agency certified by the
ALSC Board of Review to inspect and grade lumber under the rules indicated. Provide dressed
lumber, S4S, unless otherwise indicated.
KROGER GA-631 MINOR RENOVATION / OPELIKA, AL
R/L/R PROJECT NO. 11-151
2.2
06 10 53-2
MISCELLANEOUS CARPENTRY
TREATED MATERIALS
A.
Application:
1.
2.
B.
Wood-Preservative-Treated Materials
1.
2.
3.
C.
Preservative Treatment by Pressure Process: AWPA C2 with preservative chemicals
acceptable to authorities having jurisdiction and containing no arsenic or chromium.
Kiln-dry lumber after treatment to a maximum moisture content of 19 percent. Do not
use material that is warped or does not comply with requirements for untreated material.
Mark lumber with treatment quality mark of an inspection agency approved by the ALSC
Board of Review.
Fire-Retardant-Treated Materials
1.
2.
3.
4.
5.
6.
2.3
Wood-Preservative-Treated Materials: Wood nailers on top of exterior parapet walls and
other wood materials as indicated.
Fire-Retardant-Treated Materials (FRT): As indicated in this Section and on Drawings.
General: Comply with performance requirements in AWPA C20 (lumber) and
AWPA C27 (plywood).
Type: Exterior.
Flame Spread Rating: 25 or less
Fuel Contributed Rating: 50 or less
Smoke Developed Rating: 50 or less.
Identify fire-retardant-treated wood with UL label and UL rating FR-S.
MISCELLANEOUS LUMBER
A.
General: Provide miscellaneous lumber indicated and lumber for support or attachment of other
construction, including blocking, nailers, rooftop equipment bases and support curbs, and
furring.
B.
For items of dimension lumber size, provide Standard, Stud, or No. 3 grade lumber with 19
percent maximum moisture content of any species.
C.
For concealed boards, provide lumber with 19 percent maximum moisture content.
2.4
SHEATHING
A.
Plywood Roof Sheathing: Exposure 1 sheathing, fire-retardant treated, thickness as indicated
on Drawings.
B.
Miscellaneous Plywood Wall Sheathing: Exposure 1 sheathing, fire-retardant treated, thickness
as indicated on Drawings.
C.
Glass-Mat Gypsum Wall Sheathing:
Drawings.
ASTM C 1177/1177M, thickness as indicated on
KROGER GA-631 MINOR RENOVATION / OPELIKA, AL
R/L/R PROJECT NO. 11-151
1.
Products:
a.
b.
c.
d.
e.
2.
CertainTeed Corporation; GlasRoc.
G-P Gypsum Corporation; Dens-Glass Gold.
National Gypsum Company; e2XP Sheathing.
Temple-Inland; GreenGlass
USG Corporation; Securock.
Sealant for Glass-Mat Gypsum Sheathing: Silicone emulsion sealant complying with
ASTM C 834, compatible with sheathing tape and sheathing and recommended by tape
and sheathing manufacturers for use with glass-fiber sheathing tape and for covering
exposed fasteners.
a.
2.5
06 10 53-3
MISCELLANEOUS CARPENTRY
Sheathing Tape: Self-adhering glass-fiber tape, minimum 2 inches (50 mm) wide,
10 by 10 or 10 by 20 threads/inch (390 by 390 or 390 by 780 threads/m), of type
recommended by sheathing and tape manufacturers for use with silicone emulsion
sealant in sealing joints in glass-mat gypsum sheathing and with a history of
successful in-service use.
INTERIOR WOOD TRIM
A.
General: Provide kiln-dried finished (surfaced) material.
B.
Hardwood Lumber Trim for Transparent (Stain or Clear) Finish: Species as indicated on
drawings.
C.
Lumber Trim for Opaque (Painted) Finish: Either finger-jointed or solid lumber.
2.6
SOLID-SURFACING-MATERIAL
A.
Products:
1.
2.
3.
Formica Corporation; Formica Solid Surfacing; 800-367-6422
E.I. du Pont de Nemours & Co., Inc.; Corian; 800-426-7426
Swan Corporation; Swanstone; 800-325-7008
B.
Solid-Surfacing-Material: Homogeneous solid sheets of filled plastic resin complying with
ISSFA-2.
C.
Solid-Surfacing-Material Countertops
1.
2.
3.
4.
Grade: Custom.
Thickness: As indicated on Drawings or if not indicated as required to meet
manufacturer’s warranty.
Color: As specified in Division 01 Section "Décor Interior Finishes and Colors."
Fabricate tops in one piece, unless otherwise indicated. Comply with solid-surfacingmaterial manufacturer's written recommendations for adhesives, sealers, fabrication, and
finishing.
KROGER GA-631 MINOR RENOVATION / OPELIKA, AL
R/L/R PROJECT NO. 11-151
a.
b.
c.
Fabricate tops with shop-applied edges and integral backsplashes of materials and
configuration indicated.
Form joints between components using manufacturer’s standard joint adhesive
without conspicuous joints.
Reinforce joints and corners with strip of solid polymer material, 2 inches (50 mm)
wide.
1)
d.
5.
6.
2.7
06 10 53-4
MISCELLANEOUS CARPENTRY
Do not use any wood product for reinforcement of joints or corners.
Fabricate tops with loose sidesplashes for field application.
Install integral sink bowls in countertops in shop.
Drill holes in countertops for plumbing fittings in shop.
QUARTZ-SURFACING-MATERIAL
A.
Manufacturers
1.
2.
B.
Material: Homogeneous mixture containing 93 percent pure quartz with additions of high
performance polyester resin, pigments and special effects.
1.
2.
3.
4.
C.
Cambria
E. I. du Pont de Nemours and Company (Zodiaq)
Thickness: 1-inch (3 mm).
Color: As specified in Division 01 Section "Décor Interior Finishes and Colors."
Finish: Smooth.
Exposed Edges and Corners: Smooth.
Accessories
1.
2.
Mounting Adhesive: Structural grade silicone or epoxy adhesive
Quartz Surface Adhesive: Epoxy or polyester adhesive as recommended by
3.
4.
Solvent: Denatured alcohol for cleaning quartz surfacing.
Cleaning Agents: Mild soap and water.
manufacturer.
D.
Fabrication
1.
2.
3.
2.8
Layout and fabricate with ‘hairline’ joints.
Where edges will be exposed in finished work; polish edges.
Laminate layers of quartz surfacing as required to create built up edges.
FASTENERS
A.
General: Where carpentry is exposed to weather, in ground contact, pressure-preservative
treated, or in area of high relative humidity, provide fasteners with hot-dip zinc coating
complying with ASTM A 153/A 153M.
KROGER GA-631 MINOR RENOVATION / OPELIKA, AL
R/L/R PROJECT NO. 11-151
B.
Power-Driven Fasteners: NES NER-272.
C.
Self-Drilling, Self-Tapping Screws:
1.
D.
06 10 53-5
MISCELLANEOUS CARPENTRY
Basis of Design: Titelock No. 6 PL Screws; Milcor
Screws for Fastening to Cold-Formed Metal Framing: ASTM C 954, except with wafer heads
and reamer wings, length as recommended by screw manufacturer for material being fastened.
PART 3 - EXECUTION
3.1
INSTALLATION
A.
Set carpentry to required levels and lines, with members plumb, true to line, cut, and fitted. Fit
carpentry to other construction; scribe and cope as needed for accurate fit. Locate furring,
nailers, blocking, and similar supports to comply with requirements for attaching other
construction.
B.
Comply with AWPA M4 for applying field treatment to cut surfaces of preservative-treated
lumber.
C.
Securely attach carpentry work to substrates and supporting members using fasteners of size
that will not penetrate members where opposite side will be exposed to view or receive finish
materials. Install fasteners without splitting wood; fasten panel products to allow for expansion
at joints, unless otherwise indicated.
D.
Wood Trim Installation: Install with minimum number of joints practical, using full-length
pieces from maximum lengths of lumber available. Cope at returns and miter at corners to
produce tight-fitting joints with full-surface contact throughout length of joint. Use scarf joints
for end-to-end joints.
1.
2.
3.
E.
Match color and grain pattern across joints.
Install trim after gypsum board joint-finishing operations are completed.
Install to tolerance of 1/8 inch in 96 inches (3 mm in 2438 mm) for level and plumb.
Install adjoining finish carpentry with 1/32-inch (0.8-mm) maximum offset for flush
installation and 1/16-inch (1.6-mm) maximum offset for reveal installation.
Solid-Surfacing-Material Installation:
1.
2.
3.
4.
Shop prime and seal concealed work with at least first coat specified in Division 09
Section "Painting." Machine and sand woodwork to comply with requirements of
standards for specified grade.
Scribe and cut work to fit adjoining work. Anchor tops securely to support systems. All
joints should be supported by framing and specified slipsheet. Edges to be joined should
be straight, smooth and clean.
Make joints between adjacent horizontal sheets with manufacturer’s standard adhesive.
Make cutouts with router equipped with sharp 3/8 inch (9.5 mm) minimum diameter
carbide bit. Round corners of cutout and smooth edges top and bottom, all around cutout.
KROGER GA-631 MINOR RENOVATION / OPELIKA, AL
R/L/R PROJECT NO. 11-151
5.
Clearances between joints:
a.
b.
6.
F.
06 10 53-6
MISCELLANEOUS CARPENTRY
Uncaulked joints 1/32 inch (0.79 mm) for every 8 feet (2438 mm) length.
Caulked joints 1/8 inch (3 mm) wide to allow satisfactory sealant penetration and
expansion.
Clean solid-surfacing-material using conventional cleaning techniques; do not use acid
cleaners. Remove stains or cigarette burns with abrasive cleansers that cannot be
removed with soap and water.
Quartz-Surfacing Installation
1.
2.
General: Install materials in accordance with manufacturer’s instructions and approved
shop drawings.
Preliminary Installation:
a.
b.
c.
3.
Position materials to verify the correct size.
If size adjustments, or additional fabrication is necessary, use water cooled tools.
Protect jobsite and surface from dust and water.
Allow gaps for expansion of not less than 1/8 inch (1.5mm) per ten feet when
installed between walls or other fixed structure.
Permanent Installation:
a.
b.
c.
d.
After verification of fit and finish, clean substrate; remove loose and foreign matter
which may interfere with adhesion. Clean quartz surface backside and joints with
denatured alcohol.
Horizontal surface: Apply continuous bead of mounting adhesive around perimeter
of structural substrate and supports.
Install quartz surfacing plumb, level, square and flat to within 1/8 inch in ten feet.
Joints:
1)
2)
3)
Securely join adjacent pieces with two part acrylic adhesive.
Fill joints level to polished surface.
Secure adjacent quartz surfaces with vacuum clamps until adhesive hardens.
END OF SECTION 06 10 53
KROGER GA-631 MINOR RENOVATION / OPELIKA, AL
07 01 50-1
R/L/R PROJECT NO. 11-151
ROOFING DEMOLITION AND REPAIR
SECTION 07 01 50 - ROOFING DEMOLITION AND REPAIR
PART 1 - GENERAL
1.1
SUMMARY
A.
1.2
Section includes
1.
Required minor renovation for reroofing work.
PROJECT COORDINATION
A.
Sequence minor demolition and renovation with work sequence of work being installed.
B.
Coordinate with reroofing work so that all existing items removed in one day can be replaced
along with the new roofing work in the same day.
C.
Coordinate additional renovation work to maintain the facility in a watertight condition.
1.3
WARRANTY
A.
Provide installers warranty on the attached form covering defects in installed materials and
workmanship.
1.
Warranty Period: Two Years from date of Final Acceptance.
PART 2 - PRODUCTS
2.1
MATERIALS
A.
Plywood Sheathing: Fir or Southern Yellow Pine Plywood, C-C plugged, NCX exterior type,
fire retardant treated FR-S U.L. rating, 5/8 inch (16 mm) minimum thickness or match existing.
B.
Wood Nailers and blocking: Preservative treated complying with requirements in Division 06
Section "Miscellaneous Carpentry" and with preservatives that are compatible with the roof
membrane.
C.
Steel Roof Deck: Panels, without top-flange stiffening grooves, complying with "SDI
Specifications and Commentary for Steel Roof Deck," in SDI Publication No. 30, either
galvanized or prime painted to match existing deck and with profile matching existing deck.
D.
Fasteners:
1.
Nails: Non-ferrous, cement coated, or hot dip galvanized.
KROGER GA-631 MINOR RENOVATION / OPELIKA, AL
07 01 50-2
R/L/R PROJECT NO. 11-151
ROOFING DEMOLITION AND REPAIR
2.
3.
E.
Factory Mutual approved, non-corrosive coated, case-hardened steel screw with FM
approved steel plate.
Tapcons or Rawl Spikes.
Miscellaneous Materials: Best grade of quality approved by roofing manufacturer for specific
application.
PART 3 - EXECUTION
3.1
PREPARATION
A.
Verify that required barricades and other protective measures are in place as specified in
Division 01 Section "General Conditions."
B.
As a minimum requirement one layer minimum of 1 inch (25 mm) isocyanurate insulation
covered by 1 layer minimum of 3/4 inch (19 mm) CDX plywood must be utilized for any areas
of traffic, (foot traffic, roof top equipment or any other type traffic), across any roof area.
1.
3.2
The covering must be installed in a manner to withstand applicable wind loads expected
at the site during construction.
MINOR DEMOLITION OPERATIONS:
A.
Perform demolition activities in a careful and orderly manner with the least amount of
disturbance or damage to adjoining surfaces and structures.
B.
Avoid excessive vibrations in demolition procedure that would be transmitted through the
existing structure and finish materials.
C.
Coordinate work with Owner’s operational requirements.
3.3
DISPOSAL
A.
3.4
Materials, equipment and debris resulting from demolition operations shall become property of
the Contractor. Remove and dispose of demolition debris in accordance with requirements of
Division 01 Section "General Conditions."
MINOR RENOVATION WORK:
A.
Nailers:
1.
2.
3.
Replace damaged or deteriorated wood nailers with new nailers and curbs as required.
Install additional nailers as required.
Clean and prepare existing surfaces to receive wood nailers and curbs.
Install nailers and curbs continuously without gaps and level and true with joints flush.
KROGER GA-631 MINOR RENOVATION / OPELIKA, AL
07 01 50-3
R/L/R PROJECT NO. 11-151
ROOFING DEMOLITION AND REPAIR
4.
5.
Securely fasten nailers to structure with expansion fasteners. Use of power-actuated
fasteners is prohibited.
Apply sealant to voids.
B.
Flashings: Raise flashings to 8 inches (203 mm) high minimum.
C.
Plumbing Vents: Extend plumbing vents or modify as necessary to accommodate new flashing
installation; minimum height as required by local code.
D.
Drains, Sleeves and Curbs: Secure and seal drains, sleeves, curbs, ducts and other work which
pass through roof as required to receive new roofing system.
E.
Prevent adhesive from dripping into building.
F.
Existing Metal Decking:
1.
2.
G.
Remove loose rust, bitumen, or foreign material from deck.
Resecure, repair, or replace decking as required to provide suitable substrate for new
roofing insulation. Perform replacement of damaged decking on unit cost basis when
approved by Owner.
New Metal Decking
1.
2.
Install new decking of like type, gauge and dimensions to provide suitable substrate in
areas where penetrations through deck are removed. Extend new decking 18 inches (457
mm) minimum past next nearest bar joist or support member. Include demolition and
related work in Bid.
Coordinate demolition work and removal with reroof project to maintain facility in dry
watertight condition. Promptly dispose of removed equipment and materials at an
authorized disposal site.
END OF SECTION 07 01 50
KROGER GA-631 MINOR RENOVATION / OPELIKA, AL
R/L/R PROJECT NO. 11-151
07 92 00-1
JOINT SEALANTS
SECTION 07 92 00 - JOINT SEALANTS
PART 1 - GENERAL
1.1
SUMMARY
A.
Section includes:
1.
1.2
Joint sealants
SUBMITTALS
1.
2.
1.3
Product Data: For each joint-sealant product indicated.
Samples: For each type and color of joint sealant required.
QUALITY ASSURANCE
A.
1.4
Source Limitations:
manufacturer.
Obtain each type of joint sealant through one source from a single
PROJECT CONDITIONS
A.
Do not proceed with installation of joint sealants under the following conditions:
1.
2.
3.
4.
When ambient and substrate temperature conditions are outside limits permitted by jointsealant manufacturer.
When joint substrates are wet.
Where joint widths are less than those allowed by joint-sealant manufacturer for
applications indicated.
Contaminants capable of interfering with adhesion have not yet been removed from joint
substrates.
PART 2 - PRODUCTS
2.1
MANUFACTURERS
A.
Products: Provide products listed in other Part 2 articles by one of the following manufacturers.
Shortened versions (shown in parentheses) of the manufacturers' names are used in Part 2:
1.
2.
3.
4.
(BASF)
(DOW)
(GE)
(PEC)
BASF Building Systems
Dow Corning Corporation
GE Silicones
Pecora Corporation
KROGER GA-631 MINOR RENOVATION / OPELIKA, AL
R/L/R PROJECT NO. 11-151
5.
6.
2.2
(SIK)
(TRM)
07 92 00-2
JOINT SEALANTS
Sika Corporation, Construction Products Division
Tremco
MATERIALS, GENERAL
A.
Compatibility: Provide joint sealants, backings, and other related materials that are compatible
with one another and with joint substrates under conditions of service and application, as
demonstrated by sealant manufacturer, based on testing and field experience.
B.
Colors of Exposed Joint Sealants: As specified in Division 1 Sections "Exterior Finishes and
Colors" and "Interior Finishes and Colors."
2.3
ELASTOMERIC JOINT SEALANTS
A.
Elastomeric Sealants: Comply with ASTM C 920 and other requirements indicated for each
liquid-applied chemically curing sealant specified, including those referencing ASTM C 920
classifications for type, grade, class, and uses related to exposure and joint substrates.
B.
Suitability for Contact with Food: Where elastomeric sealants are indicated for joints that will
come in repeated contact with food, provide products that comply with 21 CFR 177.2600.
2.4
JOINT SEALANTS
A.
Exterior and interior vertical expansion and control joints in masonry, aluminum or steel to
masonry.
1.
S-1: Urethane, Type M, Grade NS, Class 25, Use NT.
a.
b.
c.
d.
B.
Sonolastic NP 2.
Dynatrol II
Sikaflex-2c
Dymeric 240
Exterior expansion and control joints in EIFS.
1.
C.
BASF
PEC
SIK
TRM
As specified in Division 07 Section "Exterior Insulation and Finish Systems."
Interior joints between plumbing fixtures and adjoining walls, floors, and counters and joints
requiring NSF, USDA and other sanitary code requirements.
1.
S-2: Silicone, Type S, Grade NS, Class 25, Use NT, A or N-Curing, Mildew-Res.
a.
b.
c.
d.
e.
BASF
DOW
GE
PEC
TRM
Omniplus
786 Mildew Resistant.
Sanitary SCS1700.
898
Tremsil 200
KROGER GA-631 MINOR RENOVATION / OPELIKA, AL
R/L/R PROJECT NO. 11-151
D.
07 92 00-3
JOINT SEALANTS
Exterior horizontal surfaces subject to traffic requiring caulking, unless otherwise indicated.
1.
S-3: Urethane, Type M or S, Grade P or NS, Class 25, Use T
a.
Pourable:
1)
Type S
a)
b)
c)
d)
b.
BASF
PEC
SIK
TRM
Sonolastic SL 1
Urexpan NR-201
Sikaflex-1c SL
Vulkem 45
Non-Sag:
1)
Type M
a)
b)
c)
d)
2)
BASF
PEC
SIK
TRM
Sonolastic NP 2
Dynatred
Sikaflex-2c NS
Vulkem 227
Type S
a)
b)
c)
d)
BASF
PEC
SIK
TRM
Sonolastic NP 1
Dynatrol 2 SG
Sikaflex-1a
Vulkem 116
3)
E.
Interior horizontal surfaces in concrete slabs subject to traffic requiring caulking.
1.
F.
As specified in Division 03 Sections.
Perimeter joints between interior wall surfaces and frames of interior doors, windows, and other
interior non-moving joints.
1.
S-4: Latex Sealant. Comply with ASTM C 834, Type O P, Grade NF.
a.
b.
c.
2.5
BASF
PEC
TRM
Sonolac
AC-20+.
Tremflex 834.
JOINT-SEALANT BACKING
A.
General: Provide sealant backings of material and type that are nonstaining; are compatible
with joint substrates, sealants, primers, and other joint fillers; and are approved for applications
indicated by sealant manufacturer based on field experience and laboratory testing.
KROGER GA-631 MINOR RENOVATION / OPELIKA, AL
R/L/R PROJECT NO. 11-151
B.
Cylindrical Sealant Backings: ASTM C 1330, Type C (closed-cell material with a surface
skin), and of size and density to control sealant depth and otherwise contribute to producing
optimum sealant performance:
1.
Products:
a.
b.
2.
C.
2.6
07 92 00-4
JOINT SEALANTS
Degussa Building Systems, Sonneborn Div.; Sonolastic Closed Cell Baker Rod;
800-496-6067
Williams Products, Inc.; Everlastic Expand-O-Foam 1380 Series; 800-521-9594.
Rod Diameter: 1.5 times opening width.
Bond-Breaker Tape: Polyethylene tape or other plastic tape recommended by sealant
manufacturer for preventing sealant from adhering to rigid, inflexible joint-filler materials or
joint surfaces at back of joint where such adhesion would result in sealant failure. Provide selfadhesive tape where applicable.
MISCELLANEOUS MATERIALS
A.
Primer: Material recommended by joint-sealant manufacturer where required for adhesion of
sealant to joint substrates indicated.
B.
Cleaners for Nonporous Surfaces: Chemical cleaners acceptable to manufacturers of sealants
and sealant backing materials, free of oily residues or other substances capable of staining or
harming joint substrates and adjacent nonporous surfaces in any way, and formulated to
promote optimum adhesion of sealants to joint substrates.
C.
Masking Tape: Nonstaining, nonabsorbent material compatible with joint sealants and surfaces
adjacent to joints.
PART 3 - EXECUTION
3.1
PREPARATION
A.
Surface Cleaning of Joints: Clean out joints immediately before installing joint sealants to
comply with joint-sealant manufacturer's written instructions.
B.
Joint Priming: Prime joint substrates, where recommended in writing by joint-sealant
manufacturer. Apply primer to comply with joint-sealant manufacturer's written instructions.
Confine primers to areas of joint-sealant bond; do not allow spillage or migration onto adjoining
surfaces.
C.
Masking Tape: Use masking tape where required to prevent contact of sealant with adjoining
surfaces that otherwise would be permanently stained or damaged by such contact or by
cleaning methods required to remove sealant smears. Remove tape immediately after tooling
without disturbing joint seal.
KROGER GA-631 MINOR RENOVATION / OPELIKA, AL
R/L/R PROJECT NO. 11-151
3.2
07 92 00-5
JOINT SEALANTS
INSTALLATION OF JOINT SEALANTS
A.
General: Comply with joint-sealant manufacturer's written installation instructions for products
and applications indicated, unless more stringent requirements apply.
B.
Sealant Installation Standard: Comply with recommendations in ASTM C 1193 for use of joint
sealants as applicable to materials, applications, and conditions indicated.
C.
Install sealant backings to support sealants during application and at position required to
produce cross-sectional shapes and depths of installed sealants relative to joint widths that allow
optimum sealant movement capability.
D.
Install bond-breaker tape behind sealants where sealant backings are not used between sealants
and backs of joints.
E.
Install sealants using proven techniques that comply with the following and at the same time
backings are installed:
1.
2.
3.
F.
Tooling of Nonsag Sealants: Immediately after sealant application and before skinning or
curing begins, tool sealants according to requirements specified below to form smooth, uniform
beads of configuration indicated; to eliminate air pockets; and to ensure contact and adhesion of
sealant with sides of joint.
1.
2.
3.
3.3
Place sealants so they directly contact and fully wet joint substrates.
Completely fill recesses in each joint configuration.
Produce uniform, cross-sectional shapes and depths relative to joint widths that allow
optimum sealant movement capability.
Remove excess sealant from surfaces adjacent to joints.
Use tooling agents that are approved in writing by sealant manufacturer and that do not
discolor sealants or adjacent surfaces.
Provide concave joint configuration per Figure 5A in ASTM C 1193, unless otherwise
indicated. Use masking tape to protect surfaces adjacent to recessed tooled joints.
JOINT SIZES
A.
Pavement/Sidewalk Traffic Joints: Depth equal to 75 percent of normal joint width, but not
more than 5/8 inch (16 mm) and not less than 3/8 inch (9.5 mm).
B.
Elastomeric Sealants, Non-Traffic Joints: Depth equal to 50 percent of normal joint width, but
not more than 1/2 inch (12.7 mm) and not less than 1/4 inch (6.4 mm).
C.
Non-Elastomeric Sealants, Non-Traffic Joints: Depth in range of 75 percent to 125 percent of
normal joint width.
KROGER GA-631 MINOR RENOVATION / OPELIKA, AL
R/L/R PROJECT NO. 11-151
3.4
07 92 00-6
JOINT SEALANTS
CLEANING
A.
3.5
Clean off excess sealant or sealant smears adjacent to joints as the Work progresses by methods
and with cleaning materials approved in writing by manufacturers of joint sealants and of
products in which joints occur.
PROTECTION
A.
Protect joint sealants during and after curing period from contact with contaminating substances
and from damage resulting from construction operations or other causes so sealants are without
deterioration or damage at time of Substantial Completion. If, despite such protection, damage
or deterioration occurs, cut out and remove damaged or deteriorated joint sealants immediately
so installations with repaired areas are indistinguishable from original work.
END OF SECTION 07 92 00
KROGER GA-631 MINOR RENOVATION / OPELIKA, AL
R/L/R PROJECT NO. 11-151
09 29 00-1
GYPSUM BOARD
SECTION 09 29 00 - GYPSUM BOARD
PART 1 - GENERAL
1.1
SUMMARY
A.
Section includes:
1.
2.
1.2
Interior gypsum board.
Tile backing panels.
QUALITY ASSURANCE
A.
Fire-Resistance-Rated Assemblies: For fire-resistance-rated assemblies, provide materials and
construction identical to those tested in assembly indicated according to ASTM E 119 by an
independent testing agency.
PART 2 - PRODUCTS
2.1
INTERIOR GYPSUM BOARD
A.
Manufacturers:
1.
2.
3.
4.
5.
Certainteed Corp.
G-P Gypsum Corporation.
National Gypsum Company.
Temple-Inland
USG Corporation.
B.
General: Complying with ASTM C 36/C 36M or ASTM C 1396/C 1396M, as applicable to
type of gypsum board indicated and whichever is more stringent.
C.
Regular Type: 1/2 inch (12.7 mm), tapered, unless noted otherwise.
D.
Type X: 5/8 inch (15.9 mm), tapered.
E.
Water-Resistant Gypsum Backing Board: ASTM C 630/C 630M or ASTM C 1396/C 1396M,
1/2 inch (12.7 mm), Type X, tapered.
2.2
TILE BACKING PANELS
A.
Cementitious Backer Units: ANSI A118.9, 1/2 inch (12.7 mm).
1.
Products:
KROGER GA-631 MINOR RENOVATION / OPELIKA, AL
R/L/R PROJECT NO. 11-151
a.
b.
c.
d.
e.
2.3
09 29 00-2
GYPSUM BOARD
Certainteed Corp.; FiberCement Backerboard
Custom Building Products; Wonderboard.
FinPan, Inc.; Util-A-Crete Concrete Backer Board.
National Gypsum Company; PermaBase Cement Board.
USG Corporation; DUROCK Cement Board.
TRIM ACCESSORIES
A.
Trim Accessories: ASTM C 1047, manufacturer's standard metal trim accessories, of the beaded
type, with face flanges for concealment in joint compound, except where semi-finishing or
exposed type is indicated. Provide corner beads, L-type edge trim beads, U-type trim beads,
special L-kerf-type edge trim beads, and one-piece control joint beads.
1.
2.
2.4
Interior Trim: Galvanized or aluminum-coated steel sheet or rolled zinc
Exterior Trim: Hot-dip galvanized steel.
JOINT TREATMENT MATERIALS
A.
General: Comply with ASTM C 475/C 475M.
B.
Joint Tape:
1.
2.
3.
4.
C.
Joint Compound for Interior Gypsum Wallboard: For each coat use formulation that is
compatible with other compounds applied on previous or for successive coats.
1.
2.
3.
2.5
Interior Gypsum Wallboard: Paper.
Exterior Gypsum Soffit Board: Paper.
Glass-Mat Gypsum Sheathing Board: 10-by-10 glass mesh.
Tile Backing Panels: As recommended by panel manufacturer.
Provide chemical-hardening type for tape bedding, and ready-mixed vinyl-type for
topping, on interior work.
Provide water-resistant type manufactured by United States Gypsum Co. for use with
water-resistant (MR) gypsum board.
Provide chemical-hardening type for exterior work.
AUXILIARY MATERIALS
A.
General: Provide auxiliary materials that comply with referenced installation standards and
manufacturer's written recommendations.
B.
Steel Drill Screws: ASTM C 1002, unless otherwise indicated.
1.
2.
Use screws complying with ASTM C 954 for fastening panels to steel members from
0.033 to 0.112 inch (0.84 to 2.84 mm) thick.
For fastening cementitious backer units, use screws of type and size recommended by
panel manufacturer.
KROGER GA-631 MINOR RENOVATION / OPELIKA, AL
R/L/R PROJECT NO. 11-151
C.
09 29 00-3
GYPSUM BOARD
Sound Attenuation Blankets: ASTM C 665, Type I (blankets without membrane facing)
produced by combining thermosetting resins with mineral fibers manufactured from glass, slag
wool, or rock wool.
1.
Fire-Resistance-Rated Assemblies:
assembly.
Comply with mineral-fiber requirements of
PART 3 - EXECUTION
3.1
APPLYING AND FINISHING PANELS, GENERAL
A.
Comply with ASTM C 840.
B.
Examine panels before installation. Reject panels that are wet, moisture damaged, and mold
damaged.
C.
Isolate perimeter of gypsum board applied to non-load-bearing partitions at structural
abutments, except floors. Provide 1/4- to 1/2-inch- (6.4- to 12.7-mm-) wide spaces at these
locations, and trim edges with edge trim where edges of panels are exposed. Seal joints
between edges and abutting structural surfaces with acoustical sealant.
D.
Install sound attenuation blankets before installing gypsum panels, unless blankets are readily
installed after panels have been installed on one side.
3.2
APPLYING GYPSUM BOARD
A.
Install gypsum board in the following locations:
1.
2.
3.
4.
5.
Cementitious backer board: Provide in food preparation areas and restrooms from floor
up to 4-feet (1.22-m) AFF.
Moisture resistant gypsum board: Provide in all food preparation areas and restrooms
from 4-feet (1.22-m) to ceiling.
Provide gypsum board on partitions from floor to ceiling, unless otherwise indicated.
Provide drywall at vertical transition between ceilings of different height.
Provide cementitious backer board for back-up behind ceramic tile as noted on drawings.
a.
6.
3.3
Cementitious backer board is not required for "decorative bands" of ceramic tile as
indicated in room finish schedule on Drawings.
Do not apply drywall to exterior walls behind refrigerated cases and shelving.
INSTALLING TRIM ACCESSORIES
A.
General: For trim with back flanges intended for fasteners, attach to framing with same
fasteners used for panels. Otherwise, attach trim according to manufacturer's written
instructions.
KROGER GA-631 MINOR RENOVATION / OPELIKA, AL
R/L/R PROJECT NO. 11-151
B.
Control Joints: Install control joints at locations indicated on Drawings or if not indicated
according to ASTM C 840.
1.
Do not bridge building expansion joints.
a.
b.
2.
3.
3.4
09 29 00-4
GYPSUM BOARD
Frame both sides of joints with furring and other supports, as indicated.
Leave space of the width indicated between boards, and install one-piece metal
control joint.
Place control joints, using a standard “V” joint. Coordinate joint locations with masonry
wall control joints.
Isolate drywall work from abutting structural and masonry work; provide edge trim and
acoustical sealant as recommended by manufacturer.
FINISHING GYPSUM BOARD
A.
General: Treat gypsum board joints, interior angles, edge trim, control joints, penetrations,
fastener heads, surface defects, and elsewhere as required to prepare gypsum board surfaces for
decoration. Promptly remove residual joint compound from adjacent surfaces.
B.
Prefill open joints and damaged surface areas.
C.
Apply joint tape over gypsum board joints, except those with trim having flanges not intended
for tape.
D.
Gypsum Board Finish Levels: Finish panels to levels indicated below and according to ASTM
C 840:
1.
Level 2: HVAC return air plenums, return airshafts and air-cooled compressor rooms to
ensure airtight and surfaces to receive additional finishes such as FRP or ceramic tile.
a.
2.
Level 4: Surfaces to receive painting or wall covering.
a.
E.
At joints and interior angles, embed the tape in the joint compound and
immediately apply the joint compound over the tape. Apply one coat of the joint
compound on fastener heads, and flanges of trim accessories. Panel surfaces must
be free of excess joint compound, but tool marks and ridges are acceptable.
At joints and interior angles, embed the tape in the joint compound and
immediately apply the joint compound over the tape. Apply two additional
separate coats of the joint compound over flat joints. Apply one additional coat of
the joint compound over interior angles. Apply three separate coats of the joint
compound over fastener heads and flanges of trim accessories. Panel surfaces and
the joint compound must be smooth and free of tool marks and ridges. "Drywall
primer" must be applied to surfaces before applying final decoration.
Glass-Mat Gypsum Sheathing Board: Finish according to manufacturer's written instructions
for use as exposed ceiling or soffit board.
KROGER GA-631 MINOR RENOVATION / OPELIKA, AL
R/L/R PROJECT NO. 11-151
09 29 00-5
GYPSUM BOARD
F.
Glass-Mat, Water-Resistant Backing Panels:
instructions.
G.
Cementitious Backer Units: Finish according to manufacturer's written instructions.
END OF SECTION 09 29 00
Finish according to manufacturer's written
KROGER GA-631 MINOR RENOVATION / OPELIKA, AL
09 65 13-1
R/L/R PROJECT NO. 11-151
RESILIENT BASE AND ACCESSORIES
SECTION 09 65 13 - RESILIENT BASE AND ACCESSORIES
PART 1 - GENERAL
1.1
SUMMARY
A.
Section includes:
1.
2.
1.2
Wall base.
Molding accessories.
SUBMITTALS
A.
Product Data: For each product indicated.
B.
Samples: For each type of product indicated, in manufacturer's standard-size Samples of each
resilient product color, texture, and pattern required.
1.3
PROJECT CONDITIONS
A.
Maintain temperatures within range recommended by manufacturer, but not less than 70 deg F
(21 deg C) or more than 95 deg F (35 deg C), in spaces to receive floor tile during the following
time periods:
1.
2.
3.
48 hours before installation.
During installation.
48 hours after installation.
B.
After postinstallation period, maintain temperatures within range recommended by
manufacturer, but not less than 55 deg F (13 deg C) or more than 95 deg F (35 deg C).
C.
Install resilient products after other finishing operations, including painting, have been
completed.
1.4
EXTRA MATERIALS
A.
Furnish one unopened box of each type, color, and pattern of resilient base and accessory
installed that are packaged with protective covering for storage and identified with labels
describing contents.
KROGER GA-631 MINOR RENOVATION / OPELIKA, AL
09 65 13-2
R/L/R PROJECT NO. 11-151
RESILIENT BASE AND ACCESSORIES
PART 2 - PRODUCTS
2.1
RESILIENT BASE
A.
Wall Base: ASTM F 1861
B.
Manufacturers
1.
2.
3.
4.
5.
6.
Armstrong World Industries, Inc.
Azrock Commercial Flooring, DOMCO.
Johnsonite.
Marley Flexco (USA), Inc.
Roppe Corporation.
VPI, LLC, Floor Products Division
C.
Colors and Patterns: As specified in Division 01 Section "General Interior Finishes and Colors"
and "Décor Interior Finishes and Colors."
D.
Type (Material Requirement): TV (vinyl).
E.
Group (Manufacturing Method): I (solid).
F.
Style: Cove (with top-set toe).
G.
Minimum Thickness: 0.080 inch (2.0 mm).
H.
Height: 4 inches (102 mm).
I.
Lengths: Cut lengths, 48 inches (1219 mm) long.
J.
Outside and Inside Corners: Premolded.
K.
Surface: Smooth.
2.2
RESILIENT MOLDING ACCESSORY
A.
Description: Edging Strip: 1/8-inch (3-mm) by 1-inch (25.4-mm), beveled vinyl as indicated on
Drawings.
1.
2.
2.3
Wherever the level change exceeds 1/4-inch (6-mm), edge trim shall have a beveled edge
with a slope no greater than 1:2.
Color: Match adjacent surface.
INSTALLATION MATERIALS
A.
Trowelable Leveling and Patching Compounds: Latex-modified, portland cement based or
blended hydraulic cement based formulation provided or approved by resilient product
manufacturers for applications indicated.
KROGER GA-631 MINOR RENOVATION / OPELIKA, AL
09 65 13-3
R/L/R PROJECT NO. 11-151
RESILIENT BASE AND ACCESSORIES
B.
Adhesives: Water-resistant type recommended by manufacturer to suit resilient products and
substrate conditions indicated.
1.
Use adhesives that comply with the following limits for VOC content when calculated
according to 40 CFR 59, Subpart D (EPA Method 24):
a.
b.
Cove Base Adhesives: 50 g/L.
Rubber Floor Adhesives: 60 g/L.
PART 3 - EXECUTION
3.1
PREPARATION
A.
Prepare substrates according to manufacturer's written recommendations to ensure adhesion of
resilient products.
B.
Concrete Substrates for Stair Accessories: Prepare according to ASTM F 710.
1.
2.
3.
Verify that substrates are dry and free of curing compounds, sealers, and hardeners.
Alkalinity and Adhesion Testing: Perform tests recommended by manufacturer. Proceed
with installation only after substrates pass testing.
Moisture Testing:
a.
b.
Perform anhydrous calcium chloride test, ASTM F 1869. Proceed with installation
only after substrates have maximum moisture-vapor-emission rate of 3 lb of
water/1000 sq. ft. (1.36 kg of water/92.9 sq. m) in 24 hours.
Perform tests recommended by manufacturer. Proceed with installation only after
substrates pass testing.
C.
Remove substrate coatings and other substances that are incompatible with adhesives and that
contain soap, wax, oil, or silicone, using mechanical methods recommended by manufacturer.
Do not use solvents.
D.
Use trowelable leveling and patching compound to fill cracks, holes, and depressions in
substrates.
E.
Move resilient products and installation materials into spaces where they will be installed at
least 48 hours in advance of installation.
1.
F.
Do not install resilient products until they are the same temperature as the space where
they are to be installed.
Sweep and vacuum clean substrates to be covered by resilient products immediately before
installation. After cleaning, examine substrates for moisture, alkaline salts, carbonation, and
dust. Proceed with installation only after unsatisfactory conditions have been corrected.
KROGER GA-631 MINOR RENOVATION / OPELIKA, AL
09 65 13-4
R/L/R PROJECT NO. 11-151
RESILIENT BASE AND ACCESSORIES
3.2
RESILIENT WALL BASE INSTALLATION
A.
Install wall base in lengths as long as practicable without gaps at seams and with tops of
adjacent pieces aligned.
B.
Tightly adhere wall base to substrate throughout length of each piece, with base in continuous
contact with horizontal and vertical substrates.
C.
Do not stretch wall base during installation.
D.
On masonry surfaces or other similar irregular substrates, fill voids along top edge of wall base
with manufacturer's recommended adhesive filler material.
E.
Install premolded corners before installing straight pieces.
3.3
RESILIENT ACCESSORY INSTALLATION
A.
3.4
Resilient Molding Accessories: Butt to adjacent materials and tightly adhere to substrates
throughout length of each piece. Install reducer strips at edges of floor coverings that would
otherwise be exposed.
CLEANING AND PROTECTION
A.
Perform the following operations immediately after completing resilient product installation:
1.
2.
3.
Remove adhesive and other blemishes from exposed surfaces.
Sweep and vacuum surfaces thoroughly.
Damp-mop surfaces to remove marks and soil.
a.
B.
Do not wash surfaces until after time period recommended by manufacturer.
Protect resilient products from mars, marks, indentations, and other damage from construction
operations and placement of equipment and fixtures during remainder of construction period.
Use protection methods recommended in writing by manufacturer.
END OF SECTION 09 65 13
KROGER GA-631 MINOR RENOVATION / OPELIKA, AL
R/L/R PROJECT NO. 11-151
09 91 00-1
PAINTING
SECTION 09 91 00 - PAINTING
PART 1 - GENERAL
1.1
SUMMARY
A.
Section includes:
1.
1.2
Surface preparation and the application of paint systems.
SUBMITTALS
A.
Product Data: For each type of product indicated.
B.
Samples: Three factory color chips 3/4-inch by 2-inches (19-mm by 51-mm) minimum with
color name and product number for each finish and for each color and texture required.
1.3
QUALITY ASSURANCE
A.
Only those brands and qualities of paint listed in Part 2 shall be used. Materials must be top line
as specified. “Professional” or “Economy” lines will not be acceptable.
B.
The same manufacturer to be used for the finish coat as was used for the prime coat for any one
(1) area. Prime coat to be tinted to the approximate shade of the finish coat. All coats must be
thoroughly dry before applying succeeding coats. When items to be painted have received a
shop coat of paint, the prime coat and finish coat called for are in addition to the shop coat.
C.
Exposed Structure Ceiling Test Sample: Apply sample of specified paint system indicated to
verify compatibility of specified system with substrates and atmospheric conditions, to verify
paint thickness, and to set quality standards for materials and execution.
1.
2.
3.
4.
1.4
Provide test sample of at least 100 sq. ft. (9 sq. m).
Apply test sample to area approved by Owner that includes metal deck, joists, structural
steel, ductwork, piping, and conduit.
Apply test sample at least one week prior to installation of paint system.
If test sample is not approved or shows signs of delamination or flash rusting, correct
conditions and apply additional test samples at no added cost to Owner until sample is
approved.
PROJECT CONDITIONS
A.
Apply paints only when temperature of surfaces to be painted and ambient air temperatures are
between 50 and 95 deg F (10 and 35 deg C).
B.
Do not apply paints when relative humidity exceeds 85 percent; at temperatures less than 5
deg F (3 deg C) above the dew point; or to damp or wet surfaces.
KROGER GA-631 MINOR RENOVATION / OPELIKA, AL
R/L/R PROJECT NO. 11-151
09 91 00-2
PAINTING
PART 2 - PRODUCTS
2.1
PAINT, GENERAL
A.
Manufacturers
1.
2.
3.
4.
B.
ICI Paints
Benjamin Moore and Co.
Pittsburgh Paints
The Sherwin Williams Co.
800-984-5444
800-826-2623
800-441-9695
800-743-7946
Basis of Design: The Sherwin Williams Co.
1.
C.
ICI
MOR
PPG
SWC
Paints and coatings in this specification are based on the products of the Sherwin
Williams Company. If products are provided by one of the other approved manufacturers
above, submittals must be accompanied by a product comparison chart and color
comparison board showing proof of equality with the Sherwin Williams products.
Material Compatibility:
1.
2.
Provide materials for use within each paint system that are compatible with one another
and substrates indicated, under conditions of service and application as demonstrated by
manufacturer, based on testing and field experience.
For each coat in a paint system, provide products recommended in writing by
manufacturers of topcoat for use in paint system and on substrate indicated.
D.
Colors: As specified in Division 01 Sections “General Interior Finishes and Colors” and “Décor
Interior Finishes and Colors”
E.
Sheen: Provide sheen indicated.
2.2
PRIMERS
A.
PP-1:
1.
B.
SWC
PP-3
1.
2.3
Acrylic Enamel (Flat)
DTM Acrylic Primer/Finish,
#B66W1
Acrylic Primer (Interior)
SWC
PrepRite 200 Primer
B28W101
FINISH PAINTS
A.
P-1:
1.
B.
P-2:
Acrylic Enamel (Semi-gloss)
SWC
DTM Acrylic Primer/Finish,
VOC: <150g/L
Acrylic (Satin)
B66 Series
KROGER GA-631 MINOR RENOVATION / OPELIKA, AL
R/L/R PROJECT NO. 11-151
1.
C.
F.
I.
Promar 200 EgShel
SWC
Promar 200 Semi-Gloss
#B31W2200
Acrylic Traffic Paint
SWC
Promar Traffic Marking Paint
B29 Series
Water-based Catalyzed Epoxy (Semi-gloss)
SWC
Water-based Catalyzed Epoxy Semi-Gloss
#B70W200
WaterBorne Acrylic Dryfall (Egg Shell)
Waterborne Acrylic Dryfall (Egg Shell)
SWC:
#B42W2
Elastomeric High-Build Coating, 27-32 mils, wet
SWC
ConFlex XL
P-11:
1.
B20W2200
Acrylic (Semi-Gloss)
P-10:
1.
J.
SWC
P-9:
1.
#B30W200
Acrylic (Eggshell)
P-7:
1.
H.
Promar 200 Flat
P-6:
1.
G.
SWC
P-5:
1.
A89 Series
Acrylic (Flat)
P-4:
1.
E.
Superpaint, Satin
P-3:
1.
D.
SWC
09 91 00-3
PAINTING
A5-400 Series
Water-Based Latex Enamel Exterior Pipe Insulation Paint (Insulation paint
and pipe insulation shall be of same manufacturer).
Products
a.
b.
Armacell; WB Armaflex Finish; 919-304-3846
RBX Industries, Inc.; RBX 374; 800-765-6475
PART 3 - EXECUTION
3.1
EXAMINATION
A.
Examine substrates and conditions, with Applicator present, for compliance with requirements
for maximum moisture content and other conditions affecting performance of work.
1.
B.
Where interior traffic paint is indicated for sealed concrete, apply traffic paint prior to
application of sealer.
Maximum Moisture Content of Substrates: When measured with an electronic moisture meter
as follows:
KROGER GA-631 MINOR RENOVATION / OPELIKA, AL
R/L/R PROJECT NO. 11-151
1.
2.
3.
4.
09 91 00-4
PAINTING
Concrete: 12 percent.
Masonry (Clay and CMU): 12 percent.
Wood: 15 percent.
Gypsum Board: 12 percent.
C.
Verify suitability of substrates, including surface conditions and compatibility with existing
finishes and primers.
D.
Begin coating application only after unsatisfactory conditions have been corrected and surfaces
are dry.
1.
3.2
Beginning coating application constitutes Contractor's acceptance of substrates and
conditions.
PREPARATION
A.
Comply with manufacturer's written instructions applicable to substrates and paint systems
indicated.
B.
Remove plates, machined surfaces, and similar items already in place that are not to be painted.
If removal is impractical or impossible because of size or weight of item, provide surfaceapplied protection before surface preparation and painting.
1.
2.
C.
Prior to painting, protect sprinkler heads and fire alarm and data cables from paint
overspray.
After completing painting operations, use workers skilled in the trades involved to
reinstall items that were removed. Remove surface-applied protection if any.
Clean substrates of substances that could impair bond of paints, including dirt, oil, grease, and
incompatible paints and encapsulants.
1.
2.
Remove incompatible primers and reprime substrate with compatible primers as required
to produce paint systems indicated.
Verify that metal decks have been provided “paintable” with surface films and other
agents removed that may impede adhesion of paint.
D.
Concrete Substrates: Remove release agents, curing compounds, efflorescence, and chalk. Do
not paint surfaces if moisture content or alkalinity of surfaces to be painted exceeds that
permitted in manufacturer's written instructions.
E.
Concrete Masonry Substrates: Remove efflorescence and chalk. Do not paint surfaces if
moisture content or alkalinity of surfaces to be painted exceeds that permitted in manufacturer's
written instructions.
F.
Steel Substrates: Remove rust and loose mill scale. Clean using methods recommended in
writing by paint manufacturer.
G.
Galvanized-Metal Substrates: Remove grease and oil residue from galvanized sheet metal
fabricated from coil stock by mechanical methods to produce clean, lightly etched surfaces that
promote adhesion of subsequently applied paints.
KROGER GA-631 MINOR RENOVATION / OPELIKA, AL
R/L/R PROJECT NO. 11-151
H.
09 91 00-5
PAINTING
Wood Substrates:
1.
2.
3.
4.
Scrape and clean knots, and apply coat of knot sealer before applying primer.
Sand surfaces that will be exposed to view, and dust off.
Prime edges, ends, faces, undersides, and backsides of wood.
After priming, fill holes and imperfections in the finish surfaces with putty or plastic
wood filler. Sand smooth when dried.
I.
Gypsum Board Substrates: Do not begin paint application until finishing compound is dry and
sanded smooth.
J.
Cotton or Canvas Insulation Covering Substrates: Remove dust, dirt, and other foreign material
that might impair bond of paints to substrates.
K.
Existing Painted Surfaces:
1.
2.
In accordance with paint manufacturer’s recommendations, all surfaces and absorbed
contaminants (i.e., dirt, dust, grease, oil, mildew, moisture, chemical fall-out, etc.) shall
be removed prior to applying any new coat of paint.
Removal of old painting system prior to the application of a new coat of paint shall not be
required unless adhesion problems between the existing coating and the new proposed
coating cannot be eliminated.
a.
b.
c.
New coating shall be compatible with existing coating based on previous testing of
coating products for adhesion by manufacturer and installer’s field experience.
A test patch shall be used when previous testing does not exist or is unacceptable
to the Owner.
The preparation of substrates does not apply to previously coated surfaces that
contain lead. These surfaces require special preparation. Refer to the
recommendations of the paint manufacturer for preparation requirements.
1)
3.
High pressure water clean exterior surfaces prior to repainting using pressures indicated
below to ensure complete removal of loose paint, stains, dirt and other foreign matter,
with such work to be carried out only by qualified tradesmen experienced in high
pressure water cleaning. The use of spray equipment such as water hose cleaning will not
be considered satisfactory. Allow sufficient drying time and test surfaces using an
electronic moisture meter before commencing work.
a.
b.
c.
3.3
Any previously coated surfaces containing lead should be brought to the
attention of the Owner immediately.
EIFS: 300 to 500 psi @ 6 inches
Wood Soffits: 600 to 1,500 psi @ 6 inches
Firm Masonry, Concrete: 1,500 to 4,000 psi @ 6 to 12 inches
APPLICATION
A.
Apply paints to produce surface films without cloudiness, spotting, holidays, laps, brush marks,
roller tracking, runs, sags, ropiness, or other surface imperfections. Cut in sharp lines and color
breaks.
KROGER GA-631 MINOR RENOVATION / OPELIKA, AL
R/L/R PROJECT NO. 11-151
1.
2.
3.
4.
B.
09 91 00-6
PAINTING
Use applicators and techniques suited for paint and substrate indicated.
Paint surfaces behind movable equipment and furniture same as similar exposed surfaces.
Before final installation, paint surfaces behind permanently fixed equipment or furniture
with prime coat only.
Paint front and backsides of access panels, removable or hinged covers, and similar
hinged items to match exposed surfaces.
Paint vents, electrical panels, doors and frames to match adjacent wall finish unless noted
otherwise.
If undercoats or other conditions show through topcoat, apply additional coats until cured film
has a uniform paint finish, color, and appearance.
1.
2.
Omit primer over metal surfaces that have been shop primed and touchup painted.
Omit primer over previously painted surfaces except as required to provide compatibility
between existing coating and finish coat and as required to cover bare substrate.
C.
If exposed structure painted ceiling system (metal deck, joists, metal duct, piping and conduit)
is left exposed to the exterior environment 90 days prior to painting, the entire ceiling system
must be reprimed as specified.
D.
Painting Mechanical and Electrical Work: Paint exposed plumbing, heating, and electrical
material to match the walls and ceilings of that area unless noted otherwise. This includes, but
is not limited to, pipes, insulation, conduit ducts, access panels, grilles, diffusers, whether the
adjacent surfaces receive paint or not. Include dampers or baffles behind grilles.
E.
Surfaces and Items Not to be Painted:
1.
2.
3.
Do not paint prefinished items, concealed surfaces, finished metal surfaces, and operating
parts unless noted otherwise.
Do not paint over labels of independent testing agencies or equipment name,
identification, performance rating, or nomenclature plates.
Do not paint low voltage wiring and cabling.
F.
Terminate finishes 6-inches (152-mm) behind line of sight at permanent fixtures or casework.
G.
Paint to wrap returns and terminate accordingly unless noted otherwise.
H.
Protect work of other trades against damage from paint application. Correct damage to work of
other trades by cleaning, repairing, replacing, and refinishing, as approved by Architect, and
leave in an undamaged condition.
I.
At completion of construction activities of other trades, touch up and restore damaged or
defaced painted surfaces.
(Painting Schedules follow on next page)
KROGER GA-631 MINOR RENOVATION / OPELIKA, AL
R/L/R PROJECT NO. 11-151
3.4
09 91 00-7
PAINTING
EXTERIOR PAINTING SCHEDULE
Prime
Coat
(1 Coat)
Finish
Coat
(1 Coat)
PP-4
P-10
(1 coat)
DO NOT
PAINT
DO NOT
PAINT
PP-1
P-1
PP-1
P-1
PP-1
P-1
PP-1
P-1
(2 coats)
Aluminum storefront, including doors, structure and flashing, other prefinished aluminum.
DO NOT
PAINT
DO NOT
PAINT
Prefinished aluminum vents and flues above roof
DO NOT
PAINT
DO NOT
PAINT
Area
Masonry: Acrylic
Concrete masonry unit walls
Clay brick, decorative concrete brick, decorative concrete block, cast stone
Plastic: PVC
PVC plastic piping
Steel:
Miscellaneous steel including ladders, railings, lintels, structural steel door frames, canopy
steel, equipment supports, pipe supports, and any other exterior non-galvanized metal.
(Spot prime shop primed surfaces as required)
Miscellaneous galvanized steel items as indicated on drawings including miscellaneous
flashings, sheet metal vents, flues & ductwork above roof. (Spot prime shop primed surfaces as required)
Exposed steel and iron piping and other bare metal. (Spot prime shop primed surfaces as
required)
Aluminum
KROGER GA-631 MINOR RENOVATION / OPELIKA, AL
R/L/R PROJECT NO. 11-151
3.5
09 91 00-8
PAINTING
INTERIOR PAINTING SCHEDULE
Prime
Coat
(1 Coat)
Finish
Coat
(1 Coat)
DO NOT
PAINT
DO NOT
PAINT
PP-1
P-1
DO NOT
PAINT
DO NOT
PAINT
-
P-1
(2 coats)
Remodels: Exposed structure ceiling structural steel, joists, and deck and piping and
ductwork in ceiling area.
P-9
P-9
Repriming of rusty exposed structure ceiling structural steel, joists, and deck in ceiling
area.
PP-1
-
DO NOT
PAINT
DO NOT
PAINT
Prefinished
P-5
PP-3
P-5
DO NOT
PAINT
DO NOT
PAINT
PP-3
P-4
(1 coat)
-
P-3
(2 coats)
Aluminum interior window frames
DO NOT
PAINT
DO NOT
PAINT
Cooler and freezer walls and doors
DO NOT
PAINT
DO NOT
PAINT
Area
Metal:
Concealed structural steel, metal deck, piping, ductwork, etc.
Exposed steel columns, piping, other exposed miscellaneous steel not part of ceiling system. (Spot prime shop primed surfaces as required)
Exposed galvanized metal
Vents, electrical panels, factory primed
Metal, Exposed Structure Ceiling Area
Aluminum
Aluminum or vinyl clad storefront system
Wood, Semi-Gloss
Wood décor trim
Misc. Trim, unfinished
Plywood walls
Gypsum board walls
Exposed gypsum board walls, unless otherwise indicated
Décor stenciling on exposed gypsum board walls,
Other
END OF SECTION 09 91 00
KROGER GA-631 MINOR RENOVATION / OPELIKA, AL
22 05 00-1
R/L/R PROJECT NO. 11-151
COMMON WORK RESULTS FOR PLUMBING
SECTION 22 05 00 - COMMON WORK RESULTS FOR PLUMBING
PART 1 - GENERAL
1.1
SUMMARY
A.
Section includes:
1.
2.
1.2
Piping materials and installation instructions common to most piping systems.
Excavating and backfilling associated with piping systems.
DEFINITIONS
A.
KROGER DIRECT BUY PROGRAM: Owner supplied/Contractor installed.
1.
2.
The Kroger Company has in place to purchase many plumbing related items directly
from the manufacturer. The Owner will provide equipment and the Contractor will
install.
Comply with requirements in Division 00 Section “General Conditions.”
B.
Finished Spaces: Spaces other than mechanical and electrical equipment rooms, furred spaces,
pipe and duct shafts, unheated spaces immediately below roof, spaces above ceilings,
unexcavated spaces, crawlspaces, and tunnels.
C.
Exposed, Interior Installations: Exposed to view indoors. Examples include finished occupied
spaces and mechanical equipment rooms.
D.
Exposed, Exterior Installations: Exposed to view outdoors or subject to outdoor ambient
temperatures and weather conditions. Examples include rooftop locations.
E.
Concealed, Interior Installations: Concealed from view and protected from physical contact by
building occupants. Examples include above ceilings and in duct shafts.
F.
Concealed, Exterior Installations: Concealed from view and protected from weather conditions
and physical contact by building occupants but subject to outdoor ambient temperatures.
Examples include installations within unheated shelters.
1.3
SUBMITTALS
Unless otherwise specified and in addition to provisions of Division 00 Section "General Conditions,"
submit drawings having each sheet, and each page of a brochure, marked with identification and
containing information described below. Submittals are to be complete, partial submittals will not be
accepted.
A.
Identification:
KROGER GA-631 MINOR RENOVATION / OPELIKA, AL
22 05 00-2
R/L/R PROJECT NO. 11-151
COMMON WORK RESULTS FOR PLUMBING
1.
2.
3.
B.
Information:
1.
2.
1.4
Include project name and Architect’s job number. If pages are securely bound in
brochure, this is needed on cover only.
Identification by specification section and article under which equipment or material is
described, and by name, number and intended use as designated by contract drawings and
specifications.
When more than one item of equipment is covered by a single drawing or catalog cut,
each project equipment item must be separately identified thereon with clear delineation
as to which model or catalog number or performance data applies to each project item.
Include manufacturer’s model number or catalog number, size and other data as
requested.
Maintenance Manuals: Organize each maintenance manual with index and thumb-tab
marker for each section of information; bind in 2-inch (51-mm) 3-ring, vinyl-covered
binder, with pockets for folded sheets, properly labeled on spine and face of binder.
QUALITY ASSURANCE
A.
Application: Comply with applicable requirements and recommendations of standards
published by listed agencies and trade associations, except to extent more detailed and stringent
requirements are indicated or required by governing regulations.
B.
Listing of Associations, Standards and Abbreviations Specific to Plumbing Work (in addition to
standards specified in individual work sections), conform to following applicable standards:
1.
2.
3.
4.
5.
6.
7.
8.
9.
10.
11.
12.
13.
14.
15.
16.
17.
18.
19.
20.
21.
22.
23.
AABA
AGA
AMCA
ARI
ASC
ASHRAE
ASME
ASPE
ASSE
AWS
AWWA
AAGI
CISPS
EPA
FM
MCA
NIST
(NBS)
NEC
NEMA
NFPA
NSF
OSHA
- Associates Air Balance Council
- American Gas Association
- Air Movement & Control Association
- Air/Conditioning and Refrigeration Institute
- Adhesive and Sealant Council
- American Society of Heating, Refrigeration & Air Conditioning Engineers
- American Society of Mechanical Engineers
- American Society of Plumbing Engineers
- American Society of Sanitary Engineering
- American Welding Society, Inc.
- American Water Works Association, Inc.
- Compressed Air and Gas Institute
- Cast Iron soil Pipe Institute
- Environmental Protection Agency
- Factory Mutual System
- Mechanical Contractor’s Association of America
- National Institute for Standards and Technology
(formerly National Bureau of Standards)
- National Electrical Code by NFPA
- National Electrical Manufacturer’s Association
- National Fire Protection Association
- National Sanitation Foundation
- Occupational Safety and Health Administration (U.S. Department of Labor)
KROGER GA-631 MINOR RENOVATION / OPELIKA, AL
22 05 00-3
R/L/R PROJECT NO. 11-151
COMMON WORK RESULTS FOR PLUMBING
24.
25.
26.
27.
PDI
SMACNA
TIMA
UL
- Plumbing and Drainage Institute
- Sheet Metal & Air Conditioning Contractors National Associations, Inc.
- Thermal Insulation Manufacturers Association
- Underwriter’s Laboratories, Inc.
C.
Symbols: Except as otherwise indicated in drawing legends, refer to “ASHRAE Handbook of
fundamentals” for definitions of symbols used on the drawings to show plumbing work.
D.
Manufacturers: Firms regularly engaged in the manufacture of products of quality, types and
sizes required; and which have been in satisfactory use of not less than four years in similar
service, except as otherwise noted in specific sections of this division.
E.
Installer’s Qualifications: Firm with at least three years of successful installation experience on
projects with work similar to this project and meet applicable regulatory agencies requirements.
F.
Compatibility: Provide products which are compatible with other products of the plumbing
work, and with other work requiring interface with the plumbing work. Provide products with
the proper or correct power characteristics, fuel-burning characteristics and similar adaptations
for this project. Coordinate the selections from among options (if any) for compatibility of
products.
G.
Welding: Qualify procedures and personnel according to ASME Boiler and Pressure Vessel
Code: Section IX.
H.
Steel Support Welding: Qualify processes and operators according to AWS D1.1, "Structural
Welding Code--Steel."
I.
Steel Pipe Welding: Qualify processes and operators according to ASME Boiler and Pressure
Vessel Code: Section IX, "Welding and Brazing Qualifications."
1.
2.
J.
1.5
Comply with provisions in ASME B31 Series, "Code for Pressure Piping."
Certify that each welder has passed AWS qualification tests for welding processes
involved and that certification is current.
Electrical Characteristics for Plumbing Equipment:
Equipment of higher electrical
characteristics may be furnished provided such proposed equipment is approved in writing and
connecting electrical services, circuit breakers, and conduit sizes are appropriately modified. If
minimum energy ratings or efficiencies are specified, equipment shall comply with
requirements.
DESCRIPTIONS
A.
“Kroger Purchased” and “Contractor Purchased” equipment is described in Division 00 Section
General Conditions.” Unless the Drawings indicate that it Kroger purchased, the Contractor is
responsible for purchasing the equipment as shown on Drawings.
B.
Section specifies provisions for plumbing work, including:
KROGER GA-631 MINOR RENOVATION / OPELIKA, AL
22 05 00-4
R/L/R PROJECT NO. 11-151
COMMON WORK RESULTS FOR PLUMBING
1.
2.
3.
Certain adaptive expansions of requirements specified in Division 00 Section General
Conditions”, uniquely applicable to plumbing work.
General performance requirements within plumbing work (all Division 22 Sections) as a
whole.
General work to be performed as plumbing work, because of its close association with
plumbing work.
C.
Examine all Drawings, and available soil reports. Visit site and become acquainted with all
conditions which may affect execution of work.
D.
Provide work in accordance with state and local codes, regulations and/or ordinances, and meet
approval of authorities having jurisdiction. Provide only new material and as specified.
E.
Furnish to Kroger Representative, a Certificate of Final Approval from governing authority
prior to Kroger Representative’s final acceptance, where applicable.
F.
Comply with all requirements for permits and licenses, and pay all associated costs.
1.6
PERFORMANCE REQUIREMENTS
A.
General Outline: The facilities and systems of the plumbing work include all Division 22
Sections.
B.
Design supports for multiple pipes capable of supporting combined weight of supported
systems, system contents, and test water.
C.
Design equipment supports capable of supporting combined operating weight of supported
equipment and connected systems and components.
D.
Design seismic-restraint hangers and supports for piping and equipment and obtain approval
from authorities having jurisdiction.
1.7
COORDINATION OF PLUMBING WORK
A.
Refer to Division 00 Section "General Conditions" for general coordination requirements
applicable to entire work. The contract documents are diagrammatic in showing certain
physical relationships which must be established within plumbing work, and in its interface with
other work, including utilities, control and electrical work, and that such establishment is
Contractor’s exclusive responsibility.
B.
Arrange plumbing work in a neat, well organized manner, with piping and similar services
running parallel with primary lines of the building.
C.
Give right-of-way to piping which may slope for drainage.
D.
Locate operating and control equipment properly to provide easy access, and arrange entire
plumbing work with adequate access for operation and maintenance.
KROGER GA-631 MINOR RENOVATION / OPELIKA, AL
22 05 00-5
R/L/R PROJECT NO. 11-151
COMMON WORK RESULTS FOR PLUMBING
E.
Advise other trades of openings required in their work for the subsequent move-in of large units
of plumbing work (equipment).
F.
Strictly adhere to invert elevations for all underground piping. Pitch piping evenly between
pipe junctions and where indicated on the drawings. Piping, not installed at invert elevations
indicated on the drawings, shall be removed and re-laid at Contractor’s expense.
G.
Coordination of Drawings: For locations where elements of plumbing (or combined plumbing
and electrical) work must be sequenced and positioned with precision in order to fit into the
available space, provide coordination drawings (shop drawings) showing the actual physical
dimensions (at accurate scale) required for the installation. Prepare coordination drawings prior
to purchase/fabrication/installation of any of the elements involved in the coordination.
Submittals are not required by the Kroger Representative or the Architect, unless otherwise
noted.
PART 2 - PRODUCTS
2.1
Compatibility: Provide products which are compatible with other products of the plumbing
work, and with other work requiring interface with the plumbing work. Provide products with
the proper or correct power characteristics, fuel-burning characteristics and similar adaptations
for this project. Coordinate the selections from among options (if any) for compatibility of
products.
2.2
PRODUCT DELIVERY, STORAGE AND HANDLING
A.
Protect products against dirt, water, chemical and mechanical damage. do not install damaged
products.
B.
Deliver products to site in factory fabricated containers, with the manufacturer’s label clearly
visible. Handle carefully to avoid damage to components, enclosure and finish, and in strict
accordance with manufacturer’s instructions.
C.
Store products in clean dry place in original containers, protected from weather and construction
traffic.
2.3
JOINING MATERIALS
A.
Refer to individual Division 22 Sections for special joining materials not listed below.
B.
Pipe-Flange Gasket Materials: ASME B16.21, nonmetallic, flat, asbestos-free, 1/8-inch (3.2mm) maximum thickness unless thickness or specific material is indicated.
C.
Plastic, Pipe-Flange Gasket, Bolts, and Nuts: Type and material recommended by piping
system manufacturer, unless otherwise indicated.
KROGER GA-631 MINOR RENOVATION / OPELIKA, AL
22 05 00-6
R/L/R PROJECT NO. 11-151
COMMON WORK RESULTS FOR PLUMBING
D.
Solder Filler Metals: ASTM B 32, lead-free alloys. Include water-flushable flux according to
ASTM B 813.
E.
Brazing Filler Metals: AWS A5.8, BCuP Series or BAg1, unless otherwise indicated.
F.
Welding Filler Metals: Comply with AWS D10.12.
G.
Solvent Cements for Joining Plastic Piping:
1.
2.
3.
4.
2.4
ABS Piping: ASTM D 2235.
CPVC Piping: ASTM F 493.
PVC Piping: ASTM D 2564. Include primer according to ASTM F 656.
PVC to ABS Piping Transition: ASTM D 3138.
DIELECTRIC FITTINGS
A.
Description: Combination fitting of copper alloy and ferrous materials with threaded, solderjoint, plain, or weld-neck end connections that match piping system materials.
B.
Insulating Material: Suitable for system fluid, pressure, and temperature.
C.
Dielectric Unions: Factory-fabricated, union assembly, for 250-psig minimum working
pressure at 180 deg F.
D.
Dielectric Flanges: Factory-fabricated, companion-flange assembly, for 300-psig minimum
working pressure as required to suit system pressures.
E.
Dielectric Couplings: Galvanized-steel coupling with inert and noncorrosive, thermoplastic
lining; threaded ends; and 300-psig minimum working pressure at 225 deg F.
F.
Dielectric Nipples: Electroplated steel nipple with inert and noncorrosive, thermoplastic lining;
plain, threaded, or grooved ends; and 300-psig minimum working pressure at 225 deg F.
2.5
PLUMBING SLEEVE SEALS
A.
Description: Modular sealing element unit, designed for field assembly, to fill annular space
between pipe and sleeve.
B.
Sealing Elements: EPDM interlocking links shaped to fit surface of pipe. Include type and
number required for pipe material and size of pipe.
C.
Pressure Plates: Carbon steel. Include two for each sealing element.
D.
Connecting Bolts and Nuts: Carbon steel with corrosion-resistant coating of length required to
secure pressure plates to sealing elements. Include one for each sealing element.
KROGER GA-631 MINOR RENOVATION / OPELIKA, AL
22 05 00-7
R/L/R PROJECT NO. 11-151
COMMON WORK RESULTS FOR PLUMBING
2.6
SLEEVES
A.
Galvanized-Steel Sheet:
longitudinal joint.
B.
Steel Pipe: ASTM A 53, Type E, Grade B, Schedule 40, galvanized, plain ends.
C.
Cast Iron: Cast or fabricated "wall pipe" equivalent to ductile-iron pressure pipe, with plain
ends and integral waterstop, unless otherwise indicated.
D.
Stack Sleeve Fittings: Manufactured, cast-iron sleeve with integral clamping flange. Include
clamping ring and bolts and nuts for membrane flashing.
1.
2.7
0.0239-inch minimum thickness; round tube closed with welded
Underdeck Clamp: Clamping ring with set screws..
ESCUTCHEONS
A.
Description: Manufactured wall and ceiling escutcheons and floor plates, with an ID to closely
fit around pipe, tube, and insulation of insulated piping and an OD that completely covers
opening.
B.
One-Piece, Deep-Pattern Type: Deep-drawn, box-shaped brass with polished chrome-plated
finish.
C.
One-Piece, Cast-Brass Type: Polished chrome-plated with set screw.
D.
Split-Casting, Cast-Brass Type: Polished chrome-plated with concealed hinge and set screw.
2.8
GROUT
A.
Description: ASTM C 1107, Grade B, nonshrink and nonmetallic, dry hydraulic-cement grout.
1.
2.
3.
2.9
Characteristics: Post-hardening, volume-adjusting, nonstaining,
nongaseous, and recommended for interior and exterior applications.
Design Mix: 5000-psi, 28-day compressive strength.
Packaging: Premixed and factory packaged.
noncorrosive,
PLUMBING SYSTEM IDENTIFICATION:
A.
Signs:
1.
2.
3.
Stencil-Painted Identification: Lettering size not less than 1-1/2-inches (38-mm).
Engraved Plastic-Laminate Signs: Sufficient size to convey adequate information at each
location. Comply with recognized industry standards for color and design.
Operational Tags: Plasticized card stock, with pre-painted or hand printed, to convey the
message; example: “DO NOT CLOSE THIS VALVE EXCEPT WHEN BURNER IS
OFF”. Provide proper and adequate information on operation and maintenance of
plumbing systems.
KROGER GA-631 MINOR RENOVATION / OPELIKA, AL
22 05 00-8
R/L/R PROJECT NO. 11-151
COMMON WORK RESULTS FOR PLUMBING
PART 3 - EXECUTION
3.1
PLUMBING DEMOLITION
A.
Refer to Division 00 Section "General Conditions" for general demolition requirements and
procedures.
B.
Disconnect, demolish, and remove plumbing systems, equipment, and components indicated to
be removed.
1.
2.
3.
4.
5.
6.
3.2
Piping to Be Removed: Remove portion of piping indicated to be removed and cap or
plug remaining piping with same or compatible piping material.
Piping to Be Abandoned in Place: Drain piping and cap or plug piping with same or
compatible piping material.
Equipment to Be Removed: Disconnect and cap services and remove equipment.
Equipment to Be Removed and Reinstalled: Disconnect and cap services and remove,
clean, and store equipment; when appropriate, reinstall, reconnect, and make equipment
operational.
Equipment to Be Removed and Salvaged: Disconnect and cap services and remove
equipment and deliver to Owner.
If pipe, insulation, or equipment to remain is damaged in appearance or is unserviceable,
remove damaged or unserviceable portions and replace with new products of equal
capacity and quality.
EXCAVATING AND BACKFILLING FOR PIPING SYSTEMS
A.
See Division 31 Section "Earth Moving" for excavation and backfilling for exterior
underground piping installations and Division 33 Sections for site utilities.
B.
Excavate and backfill utility trenches for piping systems as specified in Division 31 Section
"Earth Moving" and as follows:
1.
2.
3.
4.
5.
6.
Perform all excavation and backfilling required for installation of piping systems.
Consult with utilities prior to beginning excavation.
Comply with codes of authorities having jurisdiction. Provide slope sides, shore and
brace as required for stability.
Remove all materials encountered in obtaining indicated lines and grades as shown on
Drawings. No extras will be allowed due to variations of proportion and the variation of
materials.
Lay piping on a bed of sand 6 inches (152 mm) deep well tamped into place and properly
graded to permit the pipe to have an even bearing throughout its entire length. Install
sand around the piping and to a point 6 inches (152 mm) above the piping.
Install flowable fill or bankrun gravel with clay compaction for backfilling above piping
to the subbase.
Perform compaction in 12 inch (305 mm) lifts and spread evenly.
KROGER GA-631 MINOR RENOVATION / OPELIKA, AL
22 05 00-9
R/L/R PROJECT NO. 11-151
COMMON WORK RESULTS FOR PLUMBING
3.3
PIPING SYSTEMS - COMMON REQUIREMENTS
A.
Install piping according to the following requirements and Division 22 Sections specifying
piping systems:
1.
2.
3.
4.
5.
6.
7.
8.
9.
10.
11.
12.
13.
Drawing plans, schematics, and diagrams indicate general location and arrangement of
piping systems. Indicated locations and arrangements were used to size pipe and
calculate friction loss, expansion, pump sizing, and other design considerations. Install
piping as indicated unless deviations to layout are approved on Coordination Drawings.
Install piping in concealed locations, unless otherwise indicated and except in equipment
rooms and service areas.
Install piping indicated to be exposed and piping in equipment rooms and service areas at
right angles or parallel to building walls. Diagonal runs are prohibited unless specifically
indicated otherwise.
Install piping above accessible ceilings to allow sufficient space for ceiling panel
removal.
Install piping to permit valve servicing.
Install piping at indicated slopes.
Install piping free of sags and bends.
Install fittings for changes in direction and branch connections.
Install piping to allow application of insulation.
Select system components with pressure rating equal to or greater than system operating
pressure.
Install escutcheons for penetrations of walls, ceilings, and floors.
Install sleeves for pipes passing through concrete and masonry walls, gypsum-board
partitions, and concrete floor and roof slabs.
Aboveground, Exterior-Wall Pipe Penetrations: Seal penetrations using sleeves and
plumbing sleeve seals. Select sleeve size to allow for 1-inch annular clear space between
pipe and sleeve for installing plumbing sleeve seals.
a.
b.
c.
14.
Install steel pipe for sleeves smaller than 6 inches in diameter.
Install cast-iron "wall pipes" for sleeves 6 inches and larger in diameter.
Plumbing Sleeve Seal Installation: Select type and number of sealing elements
required for pipe material and size. Position pipe in center of sleeve. Assemble
plumbing sleeve seals and install in annular space between pipe and sleeve.
Tighten bolts against pressure plates that cause sealing elements to expand and
make watertight seal.
Underground, Exterior-Wall Pipe Penetrations: Install cast-iron "wall pipes" for sleeves.
Seal pipe penetrations using plumbing sleeve seals. Select sleeve size to allow for 1-inch
annular clear space between pipe and sleeve for installing plumbing sleeve seals.
a.
Plumbing Sleeve Seal Installation: Select type and number of sealing elements
required for pipe material and size. Position pipe in center of sleeve. Assemble
plumbing sleeve seals and install in annular space between pipe and sleeve.
Tighten bolts against pressure plates that cause sealing elements to expand and
make watertight seal.
KROGER GA-631 MINOR RENOVATION / OPELIKA, AL
22 05 00-10
R/L/R PROJECT NO. 11-151
COMMON WORK RESULTS FOR PLUMBING
3.4
PIPING JOINT CONSTRUCTION
A.
Join pipe and fittings according to the following requirements and Division 22 Sections
specifying piping systems.
B.
Ream ends of pipes and tubes and remove burrs. Bevel plain ends of steel pipe.
C.
Remove scale, slag, dirt, and debris from inside and outside of pipe and fittings before
assembly.
D.
Soldered Joints: Apply ASTM B 813, water-flushable flux, unless otherwise indicated, to tube
end. Construct joints according to ASTM B 828 or CDA's "Copper Tube Handbook," using
lead-free solder alloy complying with ASTM B 32.
E.
Brazed Joints: Construct joints according to AWS's "Brazing Handbook," "Pipe and Tube"
Chapter, using copper-phosphorus brazing filler metal complying with AWS A5.8.
F.
Threaded Joints: Thread pipe with tapered pipe threads according to ASME B1.20.1. Cut
threads full and clean using sharp dies. Ream threaded pipe ends to remove burrs and restore
full ID. Join pipe fittings and valves as follows:
1.
2.
Apply appropriate tape or thread compound to external pipe threads unless dry seal
threading is specified.
Damaged Threads: Do not use pipe or pipe fittings with threads that are corroded or
damaged. Do not use pipe sections that have cracked or open welds.
G.
Welded Joints: Construct joints according to AWS D10.12, using qualified processes and
welding operators according to Part 1 "Quality Assurance" Article.
H.
Flanged Joints: Select appropriate gasket material, size, type, and thickness for service
application. Install gasket concentrically positioned. Use suitable lubricants on bolt threads.
I.
Plastic Piping Solvent-Cement Joints: Clean and dry joining surfaces. Join pipe and fittings
according to the following:
1.
2.
3.
4.
5.
6.
Comply with ASTM F 402, for safe-handling practice of cleaners, primers, and solvent
cements.
ABS Piping: Join according to ASTM D 2235 and ASTM D 2661 Appendixes.
CPVC Piping: Join according to ASTM D 2846/D 2846M Appendix.
PVC Pressure Piping: Join schedule number ASTM D 1785, PVC pipe and PVC socket
fittings according to ASTM D 2672. Join other-than-schedule-number PVC pipe and
socket fittings according to ASTM D 2855.
PVC Nonpressure Piping: Join according to ASTM D 2855.
PVC to ABS Nonpressure Transition Fittings: Join according to ASTM D 3138
Appendix.
J.
Plastic Pressure Piping Gasketed Joints: Join according to ASTM D 3139.
K.
Plastic Nonpressure Piping Gasketed Joints: Join according to ASTM D 3212.
KROGER GA-631 MINOR RENOVATION / OPELIKA, AL
22 05 00-11
R/L/R PROJECT NO. 11-151
COMMON WORK RESULTS FOR PLUMBING
L.
PE Piping Heat-Fusion Joints: Clean and dry joining surfaces by wiping with clean cloth or
paper towels. Join according to ASTM D 2657.
1.
2.
M.
3.5
Plain-End Pipe and Fittings: Use butt fusion.
Plain-End Pipe and Socket Fittings: Use socket fusion.
Fiberglass Bonded Joints: Prepare pipe ends and fittings, apply adhesive, and join according to
pipe manufacturer's written instructions.
PIPING CONNECTIONS
A.
Make connections according to the following, unless otherwise indicated:
1.
2.
3.6
Install unions, in piping NPS 2 and smaller, adjacent to each valve and at final connection
to each piece of equipment.
Install flanges, in piping NPS 2-1/2 and larger, adjacent to flanged valves and at final
connection to each piece of equipment.
EQUIPMENT INSTALLATION - COMMON REQUIREMENTS
A.
Install equipment to allow maximum possible headroom unless specific mounting heights are
indicated.
B.
Install equipment level and plumb, parallel and perpendicular to other building systems and
components in exposed interior spaces, unless otherwise indicated.
C.
Install plumbing equipment to facilitate service, maintenance, and repair or replacement of
components. Connect equipment for ease of disconnecting, with minimum interference to other
installations. Extend grease fittings to accessible locations. Install equipment to allow right of
way for piping installed at required slope.
3.7
INSTALLATION OF EQUIPMENT AND PIPING
A.
Follow manufacturer’s suggested procedure for protection of equipment which will be idle for
an extended period of time prior to start-up
B.
Mount and align equipment in strict accordance with manufacturer’s recommendations and in
accordance with procedures described below. In case of conflict, these procedures govern.
Where structural or miscellaneous steel is not drilled, drill in field as directed.
C.
Lubricate all equipment as required and in accordance with manufacturer’s recommendations.
Furnish required lubricants.
D.
Neatly cut all openings in roof decks as needed for equipment and pipe penetrations.
E.
Suspended Equipment and Piping:
KROGER GA-631 MINOR RENOVATION / OPELIKA, AL
22 05 00-12
R/L/R PROJECT NO. 11-151
COMMON WORK RESULTS FOR PLUMBING
1.
2.
3.
4.
5.
6.
7.
Provide structural steel and steel rod hangers. Weld (with approval of Architect where
attaching to building steel) structural steel hangers or bolt with hex head machine bolts
and with spring lock washers under nuts.
For suspension from concrete, provide steel or malleable iron inserts in poured concrete
construction, as specified for pipe hangers and supports, and expansion shields, toggle
bolts or lag screws, in other construction. Use electric drill with carbide bit for drilling
concrete blocks.
For suspension from structural steel, use beam or channel clamps with locking clips.
Do not support plumbing components from ceiling grids.
Do not suspend hangers from roof decks.
Suspend from roof trusses and joists/joist girders only at panel points, at top cord only,
unless otherwise indicated.
Provide additional supports wherever needed, and structural steel members attached to
building frame to provide additional points of support where required. Do no drilling or
building structural and miscellaneous steel, except as directed or indicated.
F.
Equipment Set on Structural Steel: For bolting equipment directly to structural steel, provide
machine bolts, lock washers and nuts.
G.
Floor-Mounted Equipment: Set and level equipment on foundation. Grout in place, using nonferrous grout. Provide wedges and shims for leveling.
H.
Accurately align equipment prior to operation.
I.
Refer to Division 00 Section "General Conditions" for general close-out requirements.
Maintain daily log of operational data on plumbing equipment and systems through the closeout period; record hours of operation, assigned personnel, fuel consumption and similar
information; submit copy to Kroger Representative.
1.
3.8
Turn Over of Operation: Upon substantial Completion, turn over prime responsibility for
operation of plumbing equipment and systems to Kroger’s personnel. However, until
time of final acceptance, respond promptly with consultation and services, as required.
Provide one operating engineer, who is completely familiar with the work, to consult
with and continue training Kroger personnel.
CONCRETE BASES
A.
Concrete Bases: Anchor equipment to concrete base according to equipment manufacturer's
written instructions and according to seismic codes at Project.
1.
2.
3.
4.
Construct concrete bases of dimensions indicated, but not less than 4 inches (100 mm)
larger in both directions than supported unit.
Install dowel rods to connect concrete base to concrete floor. Unless otherwise indicated,
install dowel rods on 18-inch (450-mm) centers around the full perimeter of the base.
Install epoxy-coated anchor bolts for supported equipment that extend through concrete
base, and anchor into structural concrete floor.
Place and secure anchorage devices. Use supported equipment manufacturer's setting
drawings, templates, diagrams, instructions, and directions furnished with items to be
embedded.
KROGER GA-631 MINOR RENOVATION / OPELIKA, AL
22 05 00-13
R/L/R PROJECT NO. 11-151
COMMON WORK RESULTS FOR PLUMBING
5.
6.
7.
3.9
Install anchor bolts to elevations required for proper attachment to supported equipment.
Install anchor bolts according to anchor-bolt manufacturer's written instructions.
Use 3000-psi (20.7-MPa), 28-day compressive-strength concrete and reinforcement steel
and/or mesh as specified in Division 03 Section "Cast-In-Place Concrete Slabs."
ERECTION OF METAL SUPPORTS AND ANCHORAGES
A.
Refer to Division 05 Section "Metal Fabrications" for structural steel.
B.
Cut, fit, and place miscellaneous metal supports accurately in location, alignment, and elevation
to support and anchor plumbing materials and equipment.
C.
Field Welding: Comply with AWS D1.1.
3.10
ERECTION OF WOOD SUPPORTS AND ANCHORAGES
A.
Cut, fit, and place wood grounds, nailers, blocking, and anchorages to support, and anchor
plumbing materials and equipment.
B.
Select fastener sizes that will not penetrate members if opposite side will be exposed to view or
will receive finish materials. Tighten connections between members. Install fasteners without
splitting wood members.
C.
Attach to substrates as required to support applied loads.
3.11
PLUMBING SYSTEM IDENTIFICATION
A.
Provide engraved plastic-laminate signs at locations of major equipment units, primary control
devices, emergency equipment, dangerous elements of plumbing work and similar places.
Mount permanently in an appropriate and effective location.
B.
Operational Tags: Provide proper and adequate information on operation and maintenance of
plumbing systems.
3.12
A.
3.13
A.
INSPECTION
Installer must examine areas and conditions under which products are to be installed. Notify
Kroger Representative, in writing, of conditions detrimental to proper completion of work.
Starting of installation constitutes acceptance.
CUTTING AND PATCHING
Comply with Division 00 Section "General Conditions" for cutting and patching of other work,
to accommodate the installation of plumbing work. Except as individually authorized by the
Kroger Representative or the Architect, cutting and patching of plumbing work to accommodate
KROGER GA-631 MINOR RENOVATION / OPELIKA, AL
22 05 00-14
R/L/R PROJECT NO. 11-151
COMMON WORK RESULTS FOR PLUMBING
the installation of other work is not permitted, other than necessary penetrations of plumbing
sheet metal work for electrical conduit and similar purposes.
3.14
A.
3.15
A.
3.16
A.
3.17
A.
3.18
A.
TRIMMING
Inspect pipe supports, in occupied and equipment spaces for sharp angles which protrude into
path of occupants and may cause injury. Trim such protrusions or cover with s suitable spongy
material to prevent such injuries.
TOUCH-UP
Touch-up with zinc dust-zinc oxide primer galvanized or steel equipment which has been
welded or otherwise scarred. Provide additional finished equipment of paint type and color to
match original.
SYSTEM TESTS
Perform all system tests in the presence of Kroger Representative.
Representative of all system’s tests at least 48 hours in advance.
Notify Kroger
SYSTEM INSPECTION
All systems are to be inspected by Kroger Representative before covering, enclosing or
concealing of work. Notify Kroger Representative of all systems which are to be covered,
enclosed or concealed at least 48 hours in advance.
GROUTING
Mix and install grout for plumbing equipment base bearing surfaces, pump and other equipment
base plates, and anchors.
1.
2.
3.
4.
5.
Clean surfaces that will come into contact with grout.
Provide forms as required for placement of grout.
Place grout, completely filling equipment bases.
Place grout on concrete bases and provide smooth bearing surface for equipment.
Place grout around anchors.
END OF SECTION 22 05 00
KROGER GA-631 MINOR RENOVATION / OPELIKA, AL
22 05 80-1
R/L/R PROJECT NO. 11-151
PLUMBING CONNNECTIONS TO VENDOR KIOSK
SECTION 22 05 80 – PLUMBING CONNECTIONS TO VENDOR KIOSK
PART 1 - GENERAL
1.1
SUMMARY
A.
Section Includes
1.
Connections to Owner Furnished and Owner Installed vendor kiosk.
a.
b.
2.
Contractor supplied items:
a.
3.
Necessary materials as required to install final plumbing connections to kiosk as
specified in other Division 22 Sections.
Contractor installed items:
a.
1.2
The Kroger Company will supply and install the vendor kiosk.
Comply with requirements in Division 00 Section “General Conditions” for Owner
furnished products.
Final plumbing connections.
SUBMITTALS
A.
The Owner’s representative will provide the following submittals for the Contractor and
Architect’s review.
1.
1.3
Shop Drawings: Detailing plumbing connection and locations.
COORDINATION
A.
Review the Owner’s Shop Drawings, and compare to Contract Documents.
B.
Notify the Owner’s Representative of any conflicts.
C.
Attend Pre-Installation Conference with Owner’s installer.
D.
All rough-in requirements to be completed prior to kiosk delivery date.
KROGER GA-631 MINOR RENOVATION / OPELIKA, AL
22 05 80-2
R/L/R PROJECT NO. 11-151
PLUMBING CONNNECTIONS TO VENDOR KIOSK
PART 2 - PRODUCTS
2.1
MATERIALS
A.
Refer to other Division 22 Sections for materials required to install final connections to vendor
kiosk.
PART 3 - EXECUTION
3.1
INSTALLATION SCHEDULE
A.
3.2
Coordinate scheduling of connections with fixture installation.
INSTALLATION
A.
The kiosk requires water lines, floor sinks, drains, primer connections to traps, and vents
installed in advance.
B.
Install all final connections from rough-in location.
C.
Water Filter Systems:
1.
2.
3.
Provide rough-in for water filter systems as indicated in the drawings
Connect and/or install filter system provided with kiosk.
Start-up water filter system.
END OF SECTION 22 05 80
KROGER GA-631 MINOR RENOVATION / OPELIKA, AL
R/L/R PROJECT NO. 11-151
22 07 00-1
PLUMBING INSULATION
SECTION 22 07 00 - PLUMBING INSULATION
PART 1 - GENERAL
1.1
SUMMARY
A.
Section Includes:
1.
1.2
Insulation of plumbing piping.
SUBMITTALS
A.
1.3
Product Data: For each type of product indicated.
QUALITY ASSURANCE
A.
Fire-Test-Response Characteristics: Insulation and related materials shall have fire-testresponse characteristics indicated, as determined by testing identical products per ASTM E 84,
by a testing and inspecting agency acceptable to authorities having jurisdiction. Factory label
insulation and jacket materials and adhesive, mastic, tapes, and cement material containers, with
appropriate markings of applicable testing and inspecting agency.
1.
2.
Insulation Installed Indoors: Flame-spread index of 25 or less, and smoke-developed
index of 50 or less.
Insulation Installed Outdoors: Flame-spread index of 75 or less, and smoke-developed
index of 150 or less.
PART 2 - PRODUCTS
2.1
FLEXIBLE ELASTOMERIC INSULATION
A.
Closed-cell, sponge- or expanded-rubber materials. Comply with ASTM C 534, Type I for
tubular materials and Type II for sheet materials.
1.
Products:
a.
b.
B.
Armstrong; Armaflex II
Rubatex; R-180-FS
Insulation shall be listed and labeled per ASTM E 84 for plenum installations employing slip on
techniques.
KROGER GA-631 MINOR RENOVATION / OPELIKA, AL
R/L/R PROJECT NO. 11-151
2.2
22 07 00-2
PLUMBING INSULATION
INSULATION FOR HANDICAP ACCESSIBLE FIXTURES
A.
Handicap Lavatory P-Trap and Angle Stop Assembly Insulation:
1.
2.
2.3
Basis of Design: Brocar; Trap Wrap Protective Kit 500R.
Provide smooth abrasion resistant exterior cover with minimum 1/8-inch (3-mm) wall
over cushioned foam insert. Provide fasteners out of sight.
PIPING INSULATION MATERIALS:
A.
Exposed outside piping: Encase pipe fittings insulation with 1-piece premolded PVC fitting
covers, minimum 10 mil thick. fastened as per manufacturer's recommendations.
1.
2.4
Basis of Design: Johns Manville, Performance Materials Division; "Zeston",
ADHESIVES
A.
Materials shall be compatible with insulation materials, jackets, and substrates and for bonding
insulation to itself and to surfaces to be insulated, unless otherwise indicated.
B.
Flexible Elastomeric and Polyolefin Adhesive: Comply with MIL-A-24179A, Type II, Class I.
C.
Joint Adhesive:
1.
2.
3.
Basis of Design: Armstrong #520 or Rubatex #373 adhesive.
Cover exterior exposed pipe insulation with a vinyl wrap.
Refer to standard Drawings for additional information.
PART 3 - EXECUTION
3.1
PREPARATION AND INSPECTION:
A.
Examine areas and conditions under which mechanical insulation is to be installed. Do not
proceed with work until unsatisfactory conditions have been corrected in manner acceptable to
Installer.
B.
Surface Preparation: Clean and dry surfaces to receive insulation. Remove materials that will
adversely affect insulation application.
C.
Coordinate insulation installation with the trade installing heat tracing.
requirements for heat tracing that apply to insulation.
3.2
Comply with
PLUMBING PIPING SYSTEM INSULATION:
A.
Insulation Omitted: Omit insulation on chrome-plated exposed piping, unions, balance cocks,
flow regulators, fire protection piping within main building only and pre-insulated equipment.
KROGER GA-631 MINOR RENOVATION / OPELIKA, AL
R/L/R PROJECT NO. 11-151
1.
B.
Exception: Handicap lavatory piping to be completely insulated.
Piping:
1.
Application Requirements: Insulate the following piping systems:
a.
b.
c.
d.
e.
3.3
22 07 00-3
PLUMBING INSULATION
Potable Pre-Heat Water Piping (from Water Heater)
Potable Hot Water Piping
Potable Cold Water Piping
Horizontal storm piping, roof drain pans, and vertical piping from roof drain pans
to first horizontal bend.
Waste piping above ceilings that receive condensate.
INSTALLATION OF PIPING INSULATION:
A.
Install insulation products in accordance with manufacturer's written instructions, and in
accordance with recognized industry practices, to ensure that insulation serves its intended
purpose and as follows:
1.
2.
3.
4.
5.
6.
7.
Insulate domestic cold water piping, associated fittings and valves with 1/2-inch (13-mm)
wall thickness insulation only when piping is located above ceilings or in other
unconditioned spaces.
Insulate domestic hot and hot water return piping, associated fittings and valves with 3/4inch (19-mm) wall thickness insulation.
Insulate hot water piping below floor with 3/8-inch (9.5-mm) wall thickness insulation.
Insulate reclaim hot water piping with 3/4-inch (19-mm) wall thickness insulation.
In geographical areas subject to freezing, insulate horizontal above floor storm drain and
roof drain pans with 1/2-inch (13-mm) wall thickness insulation.
Insulate waste piping above ceilings that receive condensate with 1/2-inch (13-mm) wall
thickness insulation.
Insulate waste piping, supply piping, stops, and valves under handicap accessible
plumbing fixtures.
B.
Install insulation on pipe systems subsequent to installation of heat tracing, painting, testing and
acceptance of tests.
C.
Install insulation materials with smooth and even surfaces. Insulate each continuous run of
piping with full-length units of insulation, with single cut piece to complete run. Do not use cut
pieces or scraps abutting each other.
D.
Clean and dry pipe surfaces prior to insulation. Butt insulation joints firmly together to ensure
complete and tight fit over surfaces to be covered.
E.
Cover valves, fittings and similar items in each piping system with equivalent thickness and
composition of insulation, as applied to adjoining pipe run. Install factory molded, precut or job
fabricated units (at Installer's option), except where specific form or type is indicated.
F.
Extend piping insulation, without interruption, through walls, floors and similar piping
penetrations, except where otherwise indicated.
KROGER GA-631 MINOR RENOVATION / OPELIKA, AL
R/L/R PROJECT NO. 11-151
G.
3.4
22 07 00-4
PLUMBING INSULATION
Provide continuous insulation through hangers, straps and all other supporting members.
PROTECTION AND REPLACEMENT:
A.
Replace damaged insulation, which cannot be repaired satisfactorily.
B.
Protection: Provide adequate protection for insulation work during remainder of construction
period, to avoid damage and deterioration.
3.5
PENETRATIONS
A.
Insulation Installation at Interior Wall and Partition Penetrations (That Are Not Fire Rated):
Install insulation continuously through walls and partitions.
B.
Insulation Installation at Fire-Rated Wall and Partition Penetrations:
continuously through penetrations of fire-rated walls and partitions.
C.
Insulation Installation at Floor Penetrations:
1.
2.
3.6
Install insulation
Pipe: Install insulation continuously through floor penetrations.
Seal penetrations through fire-rated assemblies.
FLEXIBLE ELASTOMERIC INSULATION INSTALLATION
A.
Seal longitudinal seams and end joints with manufacturer's recommended adhesive to eliminate
openings in insulation that allow passage of air to surface being insulated.
B.
Insulation Installation on Pipe Flanges:
1.
2.
3.
4.
C.
Insulation Installation on Pipe Fittings and Elbows:
1.
2.
D.
Install pipe insulation to outer diameter of pipe flange.
Make width of insulation section same as overall width of flange and bolts, plus twice the
thickness of pipe insulation.
Fill voids between inner circumference of flange insulation and outer circumference of
adjacent straight pipe segments with cut sections of sheet insulation of same thickness as
pipe insulation.
Secure insulation to flanges and seal seams with manufacturer's recommended adhesive
to eliminate openings in insulation that allow passage of air to surface being insulated.
Install mitered sections of pipe insulation.
Secure insulation materials and seal seams with manufacturer's recommended adhesive to
eliminate openings in insulation that allow passage of air to surface being insulated.
Insulation Installation on Valves and Pipe Specialties:
1.
Install preformed valve covers manufactured of same material as pipe insulation when
available.
KROGER GA-631 MINOR RENOVATION / OPELIKA, AL
R/L/R PROJECT NO. 11-151
2.
3.
4.
22 07 00-5
PLUMBING INSULATION
When preformed valve covers are not available, install cut sections of pipe and sheet
insulation to valve body. Arrange insulation to permit access to packing and to allow
valve operation without disturbing insulation.
Install insulation to flanges as specified for flange insulation application.
Secure insulation to valves and specialties and seal seams with manufacturer's
recommended adhesive to eliminate openings in insulation that allow passage of air to
surface being insulated.
END OF SECTION 22 07 00
KROGER GA-631 MINOR RENOVATION / OPELIKA, AL
R/L/R PROJECT NO. 11-151
22 11 00-1
FACILITY WATER DISTRIBUTION
SECTION 22 11 00 - FACILITY WATER DISTRIBUTION
PART 1 - GENERAL
1.1
SUMMARY
A.
Section Includes:
1.
Potable water system including but not limited to the following:
a.
b.
c.
d.
e.
f.
g.
h.
i.
j.
k.
l.
m.
n.
o.
p.
q.
r.
s.
t.
2.
KROGER DIRECT BUY PROGRAM: Owner supplied/Contractor installed.
a.
b.
1.2
Water meter (Where not provided by local water utility)
Water piping.
Valves.
Hose bibbs.
Backflow preventers.
Flow restrictors.
Immersion temperature sensor.
Thermometers
Expansion tanks.
Water hammer arresters.
Access panels.
Vacuum breakers.
Water pressure-reducing valves.
Balancing valves.
Thermostatic mixing valves
Drain valves.
Trap-seal primer valves.
Flushing, Cleaning and Disinfecting
Testing
Excavation and Backfilling (within building).
The Kroger Company will supply the Immersion temperature sensor
Comply with requirements in Division 00 Section “General Conditions.”
SUBMITTALS
A.
Product Data: For each type of product indicated.
B.
Field quality-control test reports.
C.
Operation and maintenance data.
KROGER GA-631 MINOR RENOVATION / OPELIKA, AL
R/L/R PROJECT NO. 11-151
1.3
22 11 00-2
FACILITY WATER DISTRIBUTION
QUALITY ASSURANCE
A.
NSF Compliance:
1.
2.
Comply with NSF 14, "Plastics Piping Components and Related Materials," for plastic
domestic water piping components.
Comply with NSF 61, "Drinking Water System Components - Health Effects; Sections 1
through 9."
PART 2 - PRODUCTS
2.1
WATER PIPING
A.
Interior Above Floor: Type "L" hard drawn copper tubing, with wrought copper bronze fittings
and 95/5 tin/antimony or 94/6 tin/silver solder.
B.
Interior Under Floor: Type "K" soft copper tubing of one continuous piece, where possible,
with wrought copper fittings and 15 percent silver alloy brazed joints.
C.
Copper, Pressure-Seal Fittings (Contractor Option to Solder-Joint Fittings):
1.
Products:
a.
b.
2.
3.
2.2
Elkhart Products Corporation; Xpress.
Viega, LLC; ProPress.
NPS 2 (DN 50) and Smaller: Wrought-copper fitting with EPDM O-ring seal in each
end.
NPS 2-1/2 to NPS 4 (DN 65 to DN 100): Bronze fitting with stainless-steel grip ring and
EPDM O-ring seal in each end.
WATER METER
A.
2.3
Supply water meter meeting requirements of local water utility if meter is not supplied by local
water utility. Submit Change Order Request for material costs associated with water meter.
VALVES
A.
Manufacturers: Provide the Basis of Design products by the Wm. Powell Co. or comparable
products by one of the following:
1.
2.
B.
Cincinnati Valve Co, Lunkenheimer Valves
Walworth Co.
Basis of Design Product:
1.
2.
Ball: Wm. Powell Co.; Figure 4201T
Check: Wm. Powell Co.; Figure 1825
KROGER GA-631 MINOR RENOVATION / OPELIKA, AL
R/L/R PROJECT NO. 11-151
2.4
22 11 00-3
FACILITY WATER DISTRIBUTION
HOSE BIBBS
A.
Manufacturers: Provide the Basis of Design products by the Woodford Manufacturing Co. or
comparable products by one of the following:
1.
2.
3.
B.
Basis of Design Product:
1.
2.
3.
4.
2.5
Jay R.Smith Co. Division of Smith Industries, Inc.
Tyler Pipe, Wade Division
Zurn Plumbing Products Group
Interior Hose Bibbs (HB): Woodford Manufacturing Co.; Model 24P-CH, chrome-plated
brass.
Yard Hydrants, When Used Inside Building: Woodford Manufacturing Co.; Model Y-95,
key actuated. Provide weep in bottom of box.
Exterior Hose Bibs (WB): Woodford Manufacturing Co.; Model B-65 wall hydrant with
chrome finish on brass casting. Conceal within interior partitions.
Roof Hydrant (RH): Woodford Manufacturing Co.; Model RHY2-MS, complete system
with freezeless roof hydrant, double check valve backflow preventer, and mounting
system.
BACKFLOW PREVENTERS
A.
Manufacturers: Provide the Basis of Design product by the Watts Regulator Co. or a
comparable product by one of the following:
1.
2.
3.
4.
B.
Basis of Design Product:
1.
2.
3.
2.6
Cla-Val Automatic Control Valves
Hershey-Beeco Company
Rockwell International
Zurn Plumbing Products Group
Backflow Preventer for Interior Hose Bibbs Including Prep Room Hose Bibb
Connections: Watts Regulator Co.; #9D.
Backflow Preventer for Coffee Machines, Ice Machines, Seafood Steamer and Water
Machine: Watts Regulator Co.; No. #SD3.
Reduced Pressure Principle Backflow Preventer for carbonators (such as soda fountain)
(ASSE 1013): Watts Regulator Co.; No. 009-QT. Copper shall not be used downstream
from the backflow.
IRRIGATION SYSTEM BACKFLOW PREVENTER
A.
Manufacturers: Provide the Basis of Design product by the Watts Regulator Co. or a
comparable product by one of the following:
1.
2.
3.
Conbraco Industries, Inc.
FEBCO, a Watts Water Technologies Company
Wilkins, a Zurn Company
KROGER GA-631 MINOR RENOVATION / OPELIKA, AL
R/L/R PROJECT NO. 11-151
4.
B.
2.7
22 11 00-4
FACILITY WATER DISTRIBUTION
Zurn Plumbing Products Group
Basis of Design Product: Watts Regulator Co.; Series 009-QT reduced pressure backflow
preventer with quarter-turn, full port, resilient seated ball valves.
FLOW RESTRICTOR
A.
2.8
Basis of Design Product: American Standard; 2591.017, 0.5 gpm flow restrictor/aerator.
IMMERSION TEMPERATURE SENSOR
A.
2.9
Refer to Division 01 Section "Direct Buy Owner Furnished Products" for information on
immersion temperature sensor.
THERMOMETERS
A.
2.10
A.
2.11
A.
Liquid filed with 2-inch scale divisions, 40 to 240 degrees F range, installed in threaded well in
water line.
EXPANSION TANKS
Basis of Design Product: Amtrol, Inc.; AST #12 Extrol Expansion Tank where required by
authority having jurisdiction on water heaters.
WATER HAMMER ARRESTORS (WHA)
Manufacturers: Provide the Basis of Design product by the Sioux Chief Manufacturing
Company, Inc. or a comparable product by one of the following:
1.
2.
3.
4.
B.
2.12
A.
2.13
A.
Jay R.Smith Co. Division of Smith Industries, Inc.
Precision Plumbing Products, Inc.
Tyler Pipe, Wade Division.
Zurn Plumbing Products Group
Basis of Design Product: Sioux Chief Manufacturing Company, Inc.; 650/660 Series Piston
Type, Copper.
ACCESS PANELS
Provide flush metal access panels, where valves occur in inaccessible locations, as specified in
Division 08 “Access Doors and Frames.”
VACUUM BREAKERS
Pipe-Applied, Atmospheric-Type Vacuum Breakers:
KROGER GA-631 MINOR RENOVATION / OPELIKA, AL
R/L/R PROJECT NO. 11-151
1.
Manufacturers:
a.
b.
2.
3.
4.
5.
B.
Watts Industries, Inc.; Water Products Div.
Zurn Plumbing Products Group; Wilkins Div.
Standard: ASSE 1001.
Size: NPS 1/4 to NPS 3, as required to match connected piping.
Body: Bronze.
Inlet and Outlet Connections: Threaded.
Hose-Connection Vacuum Breakers:
1.
Manufacturers:
a.
b.
c.
2.
3.
4.
2.14
22 11 00-5
FACILITY WATER DISTRIBUTION
Watts Industries, Inc.; Water Products Div.
Woodford Manufacturing Company.
Zurn Plumbing Products Group.
Standard: ASSE 1001.
Body: Bronze, nonremovable, with manual drain.
Outlet Connection: Garden-hose threaded complying with ASME B1.20.7.
WATER PRESSURE-REDUCING VALVES
A.
General: Provide water pressure regulators where necessary to limit the incoming water
pressure to 80 psi inside the building.
B.
Pressure Reducing Valves (PRV's) for Water Heaters, Proofers, Ice Machines, and Seafood
Steamers:
1.
C.
Basis of Design Product: Watts No. #U5B.
Water Regulators:
1.
Manufacturers:
a.
b.
c.
2.
3.
2.15
A.
Honeywell Water Controls.
Watts Industries, Inc.
Zurn Plumbing Products Group.
Standard: ASSE 1003.
Pressure Rating: Initial working pressure of 150 psig (1035 kPa).
BALANCING VALVES
Memory-Stop Balancing Valves:
1.
Manufacturers:
a.
Crane Co.; Crane Valve Group.
KROGER GA-631 MINOR RENOVATION / OPELIKA, AL
R/L/R PROJECT NO. 11-151
b.
c.
d.
e.
2.
3.
4.
5.
6.
7.
8.
9.
10.
2.16
A.
Hammond Valve.
Milwaukee Valve Company.
NIBCO INC.
Red-White Valve Corp.
Standard: MSS SP-110 for two-piece, copper-alloy ball valves.
Pressure Rating: 400-psig minimum CWP.
Size: NPS 2 or smaller.
Body: Copper alloy.
Port: Standard or full port.
Ball: Chrome-plated brass.
Seats and Seals: Replaceable.
End Connections: Solder joint or threaded.
Handle: Vinyl-covered steel with memory-setting device.
THERMOSTATIC MIXING VALVES
(TMV) Point of use Water-Temperature Limiting Devices for Public Hand Washing Lavatories:
1.
Manufacturers: Provide the Basis of Design product by Symmons Industries, Inc. or a
comparable product by one of the following:
a.
b.
c.
2.
3.
4.
5.
6.
7.
8.
9.
B.
22 11 00-6
FACILITY WATER DISTRIBUTION
Honeywell Water Controls.
Watts Industries, Inc.; Water Products Div.
Zurn Plumbing Products Group; Wilkins Div.
Basis of Design Product: Symmons Industries, Inc.; 5-210-CK Maxline thermostatic
mixing valve.
Size: 3/8 inch compression inlets/outlet and integral checks.
Body: Brass with dual stainless steel strainers.
Adjustment: Vandal-resistant cap/temperature adjustment handle.
Finish: Rough brass.
Certification: Dual certified to ASSE 1017/1070. (.5 - 5 GPM)
Pressure Rating: 125 psig.
Accessories: Check stops on hot- and cold-water supplies, and adjustable, temperaturecontrol handle.
(MTMV) Master Thermostatic Mixing Valve:
1.
Manufacturers: Provide the Basis of Design product by Powers Controls, a Watts Water
Technologies Company, or a comparable product by one of the following:
a.
b.
c.
2.
3.
4.
Honeywell Water Controls.
Watts Industries, Inc.; Water Products Div.
Zurn Plumbing Products Group; Wilkins Div.
Basis of Design Product: Powers Controls, a Watts Water Technologies Company; Model
MM431.
Material: Bronze body with corrosion-resistant interior components.
Finish: Chrome plated.
KROGER GA-631 MINOR RENOVATION / OPELIKA, AL
R/L/R PROJECT NO. 11-151
5.
6.
7.
8.
9.
10.
2.17
A.
A.
Construction: Paraffin actuation, single-seat design for virtual shut down in the event of
cold-water failure, and triple-duty check stops with screens.
Accessories: Check stops on hot- and cold-water supplies, and adjustable, temperaturecontrol handle.
Flow Rate: Minimum 0.5 gpm (3 gpm to ASSE 1017) to 28 gpm at 20 psi pressure drop.
Certification: ASSE 1017 and certified to CSA B125.
Approach Temperature: 5 degrees F (3 degrees C).
Pressure Rating: 125 psig.
DRAIN VALVES
Ball-Valve-Type, Hose-End Drain Valves:
1.
2.
3.
4.
5.
6.
7.
8.
9.
2.18
22 11 00-7
FACILITY WATER DISTRIBUTION
Standard: MSS SP-110 for standard-port, two-piece ball valves.
Pressure Rating: 400-psig minimum CWP.
Size: NPS 3/4.
Body: Copper alloy.
Ball: Chrome-plated brass.
Seats and Seals: Replaceable.
Handle: Vinyl-covered steel.
Inlet: Threaded or solder joint.
Outlet: Threaded, short nipple with garden-hose thread complying with ASME B1.20.7
and cap with brass chain.
TRAP-SEAL PRIMER VALVES
Manufacturers: Provide the Basis of Design product by Sioux Chief Manufacturing Company,
Inc., or a comparable product by one of the following:
1.
2.
3.
4.
MIFAB, Inc.
PPP Inc.
Smith, Jay R. Mfg. Co.; Division of Smith Industries, Inc.
Watts Industries, Inc.; Water Products Div.
B.
Basis of Design Product: Sioux Chief Manufacturing Company, Inc.; TP 695-01
C.
Standard: ASSE 1018.
D.
Pressure Rating: 125 psig minimum.
E.
Body: Heavy Zamace
F.
Inlet and Outlet Connections: NPS 1/2 threaded, union, or solder joint.
G.
Gravity Drain Outlet Connection: NPS 1/2 threaded or solder joint.
H.
Performance: Trap prime up to eight drains.
KROGER GA-631 MINOR RENOVATION / OPELIKA, AL
R/L/R PROJECT NO. 11-151
22 11 00-8
FACILITY WATER DISTRIBUTION
PART 3 - EXECUTION
3.1
GENERAL
A.
Appropriate compression shutoff valve and ground joint unions shall be used at each fixture and
piece of equipment to facilitate removal of equipment.
B.
Adapters used for screwed valves and any connection to steel shall be insulated to prevent
electrolysis.
C.
Use dielectric unions where dissimilar metals are joined together.
3.2
INSTALLATION
A.
Install backflow preventers in each water supply to mechanical equipment and systems and to
other equipment and water systems that may be sources of contamination. Comply with
authorities having jurisdiction.
1.
2.
3.
Locate backflow preventers in same room as connected equipment or system.
Install drain for backflow preventers with atmospheric-vent drain connection with air-gap
fitting, fixed air-gap fitting, or equivalent positive pipe separation of at least two pipe
diameters in drain piping and pipe to floor drain. Locate air-gap device attached to or
under backflow preventer. Simple air breaks are not acceptable for this application.
Do not install bypass piping around backflow preventers.
B.
Install water regulators with inlet and outlet shutoff valves. Install pressure gages on inlet and
outlet.
C.
Install balancing valves in locations where they can easily be adjusted.
D.
Install Owner supplied immersion temperature sensor for connection to the environmental
control system.
E.
Install temperature-actuated water mixing valves with check stops or shutoff valves on inlets
and with shutoff valve on outlet.
1.
2.
Install thermometers and water regulators if specified.
Install cabinet-type units recessed in or surface mounted on wall as specified.
F.
Install water hammer arresters in water piping according to PDI-WH 201.
G.
Install supply-type, trap-seal primer valves with outlet piping pitched down toward drain trap a
minimum of 1 percent, and connect to floor-drain body, trap, or inlet fitting. Adjust valve for
proper flow.
H.
Piping installation requirements are specified in other Division 22 Sections. Drawings indicate
general arrangement of piping and specialties.
KROGER GA-631 MINOR RENOVATION / OPELIKA, AL
R/L/R PROJECT NO. 11-151
I.
Equipment Nameplates and Signs: Install engraved plastic-laminate equipment nameplate or
sign on or near each of the following:
1.
2.
3.
4.
5.
6.
J.
3.3
22 11 00-9
FACILITY WATER DISTRIBUTION
Intermediate atmospheric-vent backflow preventers.
Reduced-pressure-principle backflow preventers.
Double-check backflow-prevention assemblies.
Water pressure-reducing valves.
Primary, thermostatic, water mixing valves.
Supply-type, trap-seal primer valves.
Distinguish among multiple units, inform operator of operational requirements, indicate safety
and emergency precautions, and warn of hazards and improper operations, in addition to
identifying unit. Nameplates and signs are specified in Division 22 Section "Common Work
Results for Plumbing.”
EXCAVATION
A.
Excavating, trenching, and backfilling are specified in Division 31 Section "Earth Moving."
B.
Remove excavating debris, materials and equipment promptly from the premises upon
completion.
3.4
TESTING
A.
The entire water distribution system shall be tested and proven tight under air or water pressure
of fifty percent more than the maximum pressure of each system but in no case less than 100
pounds.
B.
Combination domestic and sprinkler service piping shall be tested and proven under a water
pressure of 200 psi. for two hours.
C.
Test temperature at sink locations to comply with 110 degrees F (43.3 degrees C) delivered
temperature.
D.
Perform systems tests in the presence of the Plumbing Inspector and Owner. Notify Owner of
systems tests at least 48 hours in advance.
E.
Test each reduced-pressure-principle backflow preventer according to authorities having
jurisdiction and the device's reference standard.
3.5
ADJUSTING
A.
Set field-adjustable pressure set points of water pressure-reducing valves.
B.
Set field-adjustable flow of balancing valves.
C.
Set field-adjustable temperature set points of temperature-actuated water mixing valves.
KROGER GA-631 MINOR RENOVATION / OPELIKA, AL
R/L/R PROJECT NO. 11-151
3.6
22 11 00-10
FACILITY WATER DISTRIBUTION
FLUSHING AND CLEANING
A.
Upon completion of testing, flush all domestic water piping until water shows no discoloration.
Clean all valves, strainers, etc.
B.
After flushing and cleaning, disinfect pipe by the use of chlorine or chlorine compounds in
amounts to produce a concentration of 50 parts per million. At the end of six (6) hours, flush all
piping until chlorine residual is less the two (2) parts per million.
1.
C.
3.7
Provide any additional system cleaning and disinfecting as required by state or local
codes.
Prepare and submit reports of purging and disinfecting activities.
PIPING INSTALLATION
A.
Basic piping installation requirements are specified in Division 22 Section "Common Work
Results for Plumbing."
B.
Install under-building-slab copper tubing according to CDA's "Copper Tube Handbook."
C.
Install cast-iron sleeve with water stop and mechanical sleeve seal at each service pipe
penetration through foundation wall. Select number of interlocking rubber links required to
make installation watertight. Sleeves and mechanical sleeve seals are specified in Division 22
Section "Common Work Results for Plumbing."
D.
Install shutoff valve, hose-end drain valve, strainer, pressure gage, and test tee with valve,
inside the building at each domestic water service entrance.
E.
Install domestic water piping level with 0.25 percent slope downward toward drain and plumb.
3.8
JOINT CONSTRUCTION
A.
Basic piping joint construction requirements are specified in Division 22 Section "Common
Work Results for Plumbing."
B.
Soldered Joints: Use ASTM B 813, water-flushable, lead-free flux; ASTM B 32, lead-freealloy solder; and ASTM B 828 procedure, unless otherwise indicated.
C.
Copper-Tubing, Pressure-Sealed Joints (Contractor Option to Solder-Joint Fittings): Use
proprietary crimping tool and procedure recommended by copper, pressure-seal-fitting
manufacturer. Install per ASTM B16.18 or ASTM B16.22
1.
D.
Mechanically formed tee-drill fittings are only acceptable where new piping is connected
to existing piping.
Extruded-Tee Connections: Form tee in copper tube according to ASTM F 2014. Use tool
designed for copper tube; drill pilot hole, form collar for outlet, dimple tube to form seating
stop, and braze branch tube into collar.
KROGER GA-631 MINOR RENOVATION / OPELIKA, AL
R/L/R PROJECT NO. 11-151
3.9
22 11 00-11
FACILITY WATER DISTRIBUTION
ROUGHING-IN FOR WATER METERS
A.
3.10
Rough-in domestic water piping for water meter installation according to utility company's
requirements.
HANGER AND SUPPORT INSTALLATION
A.
Seismic-restraint devices are specified in Division 20 Section "Vibration and Seismic Controls
for Facility Services."
B.
Pipe hanger and support devices are specified in Division 20 Section "Hangers and Supports for
Facility Services." Install the following:
1.
2.
Vertical Piping: MSS Type 8 or Type 42, clamps.
Individual, Straight, Horizontal Piping Runs: According to the following:
a.
b.
c.
3.
4.
100-feet (30.5-m) and Less: MSS Type 1, adjustable, steel clevis hangers.
Longer Than 100-feet (30.5-m): MSS Type 43, adjustable roller hangers.
Longer Than 100-feet (30.5-m): MSS Type 49, spring cushion rolls, if indicated.
Multiple, Straight, Horizontal Piping Runs 100-feet (30.5-m) or Longer: MSS Type 44,
pipe rolls. Support pipe rolls on trapeze.
Base of Vertical Piping: MSS Type 52, spring hangers.
C.
Install supports according to Division 20 Section "Hangers and Supports for Facility Services."
D.
Support vertical piping and tubing at base and at each floor.
E.
Rod diameter may be reduced 1 size for double-rod hangers, to a minimum of 3/8-inch (9.5mm).
F.
Install hangers for steel piping with the following maximum horizontal spacing and minimum
rod diameters:
1.
2.
3.
4.
5.
6.
7.
NPS 1-1/4 and Smaller: 84 inches (2-m) with 3/8-inch (9.5-mm) rod.
NPS 1-1/2: 108 inches (2.7-m) with 3/8-inch (9.5-mm) rod.
NPS 2: 10-foot (3-m) with 3/8-inch (9.5-mm) rod.
NPS 2-1/2: 11-foot (3.35-m) with 1/2-inch (13-mm) rod.
NPS 3 and NPS 3-1/2: 12-foot (3.7-m) with 1/2-inch (13-mm) rod.
NPS 4 and NPS 5: 12-foot (3.7-m) with 5/8-inch (16-mm) rod.
NPS 6: 12-foot (3.7-m) with 3/4-inch (19-mm) rod.
G.
Install supports for vertical steel piping every 15 feet (4.5-m).
H.
Install hangers for copper tubing with the following maximum horizontal spacing and minimum
rod diameters:
1.
2.
NPS 3/4 and Smaller: 60 inches (1.5-m) with 3/8-inch (9.5-mm) rod.
NPS 1-1/4: 72 inches (1.8-m) with 3/8-inch (9.5-mm) rod.
KROGER GA-631 MINOR RENOVATION / OPELIKA, AL
R/L/R PROJECT NO. 11-151
3.
4.
5.
6.
22 11 00-12
FACILITY WATER DISTRIBUTION
NPS 1-1/2 and NPS 2: 96 inches (2.4-m) with 3/8-inch (9.5-mm) rod.
NPS 2-1/2: 108 inches (2.7-m) with 1/2-inch (13-mm) rod.
NPS 3 to NPS 5: 10-foot (3-m) with 1/2-inch (13-mm) rod.
NPS 6: 10-foot (3-m) with 5/8-inch (16-mm) rod.
I.
Install supports for vertical copper tubing every 10 feet (3-m).
J.
Support piping and tubing not listed above according to MSS SP-69 and manufacturer's written
instructions.
3.11
CONNECTIONS
A.
General: Install piping to all mechanical equipment and all food preparation equipment
requiring water, including equipment supplied by Owner and equipment supplied and installed
by Owner.
B.
Install piping adjacent to equipment and machines to allow service and maintenance.
C.
Connect domestic water piping to exterior water-service piping. Use transition fitting to join
dissimilar piping materials.
D.
Connect domestic water piping to water-service piping with shutoff valve, and extend and
connect to the following:
1.
2.
3.
4.
3.12
A.
Booster Pumps: Cold-water suction and discharge piping.
Water Heaters: Cold-water supply and hot-water outlet piping in sizes indicated, but not
smaller than sizes of water heater connections.
Plumbing Fixtures: Cold- and hot-water supply piping in sizes indicated, but not smaller
than required by plumbing code. Refer to Division 22 Section "Commercial Plumbing
Fixtures."
Equipment: Cold- and hot-water supply piping as indicated, but not smaller than
equipment connections. Provide shutoff valve and union for each connection. Use
flanges instead of unions for NPS 2-1/2 and larger.
FIELD QUALITY CONTROL
Inspect domestic water piping as follows:
1.
2.
Do not enclose, cover, or put piping into operation until it has been inspected and
approved by authorities having jurisdiction.
During installation, notify authorities having jurisdiction at least 24 hours before
inspection must be made. Perform tests specified below in presence of authorities having
jurisdiction:
a.
b.
Roughing-in Inspection: Arrange for inspection of piping before concealing or
closing-in after roughing-in and before setting fixtures.
Final Inspection: Arrange final inspection for authorities having jurisdiction to
observe tests specified below and to ensure compliance with requirements.
KROGER GA-631 MINOR RENOVATION / OPELIKA, AL
R/L/R PROJECT NO. 11-151
3.
4.
B.
22 11 00-13
FACILITY WATER DISTRIBUTION
Reinspection: If authorities having jurisdiction find that piping will not pass test or
inspection, make required corrections and arrange for reinspection.
Reports: Prepare inspection reports and have them signed by authorities having
jurisdiction.
Test domestic water piping as follows:
1.
2.
3.
4.
5.
6.
Fill domestic water piping. Check components to determine that they are not air bound
and that piping is full of water.
Test for leaks and defects in new piping and parts of existing piping that have been
altered, extended, or repaired. If testing is performed in segments, submit separate report
for each test, complete with diagram of portion of piping tested.
Leave new, altered, extended, or replaced domestic water piping uncovered and
unconcealed until it has been tested and approved. Expose work that was covered or
concealed before it was tested.
Cap and subject piping to static water pressure of 50 psig above operating pressure,
without exceeding pressure rating of piping system materials. Isolate test source and
allow to stand for four hours. Leaks and loss in test pressure constitute defects that must
be repaired.
Repair leaks and defects with new materials and retest piping or portion thereof until
satisfactory results are obtained.
Prepare reports for tests and required corrective action.
END OF SECTION 22 11 00
KROGER GA-631 MINOR RENOVATION / OPELIKA, AL
R/L/R PROJECT NO. 11-151
22 13 00-1
FACILITY SANITARY SEWERAGE
SECTION 22 13 00 - FACILITY SANITARY SEWERAGE
PART 1 - GENERAL
1.1
SUMMARY
A.
Section Includes:
1.
Soil and waste systems including connections to sanitary mains as indicated on the
Drawings. Work includes, but is not limited to:
a.
b.
c.
d.
e.
f.
g.
h.
i.
j.
k.
l.
m.
n.
1.2
Providing and paying for permits and taps for facility sanitary sewerage.
Excavation and backfilling as specified in Division 31 Section “Earth Moving”
Sanitary waste, drain and vent piping
Floor drains
Hub drains
Trench drains
Area drain
Cleanouts
Grease interceptor
Plumbing fixture connections
Mechanical equipment connections
Food preparation equipment connections
Utensil and dish washing equipment connections
Testing
PERFORMANCE REQUIREMENTS
A.
1.3
Components and installation shall be capable of withstanding 10-foot head of water (30 kPa)
minimum working pressure, unless otherwise indicated:
SUBMITTALS
A.
Shop Drawings for Grease Interceptor. Submit to local officials having jurisdiction for approval
prior to purchase.
B.
Field quality-control inspection and test reports.
1.4
QUALITY ASSURANCE
A.
Piping materials shall bear label, stamp, or other markings of specified testing agency.
B.
Comply with NSF 14, "Plastics Piping Systems Components and Related Materials," for plastic
piping components. Include marking with "NSF-dwv" for plastic drain, waste, and vent piping;
and "NSF-drain" for plastic drain piping.
KROGER GA-631 MINOR RENOVATION / OPELIKA, AL
R/L/R PROJECT NO. 11-151
22 13 00-2
FACILITY SANITARY SEWERAGE
PART 2 - PRODUCTS
2.1
SANITARY, DRAIN AND VENT PIPING:
A.
Copper Piping:
1.
B.
Drain Connection, Trap and First 20 Feet of Piping Downstream From Fixtures
Discharging 140 Degree F. (60 Degree C.) or Hotter Water: Type “L” hard drawn copper
tubing, with wrought copper bronze fittings and 95/5 tin/antimony or 94/6 tin/silver
solder for drain lines and fittings.
Plastic Piping:
1.
Polyvinyl chloride (PVC), schedule 40 DWV. ASTM D-2665
a.
2.
ABS Pipe: ASTM D 2661, Schedule 40, solid wall.
a.
3.
2.2
PVC Socket Fittings: ASTM D 2665, socket type, made to ASTM D 3311, drain,
waste, and vent patterns.
ABS Socket Fittings: ASTM D 2661, made to ASTM D 3311, drain, waste, and
vent patterns.
Protect plastic piping above slab in stock rooms from damage with guards or concrete
curbs.
DRAINS:
A.
Manufacturers:
1.
2.
3.
4.
5.
6.
7.
8.
B.
FD1-Light Duty Floor Drain: PVC body, with 6-inch (152-mm) round nickel bronze adjustable
strainer.
1.
C.
Canplas Industrial Products
Josam Company
Jay R Smith Mfg. Co., Div. of Smith Industries
Oatey Company
Sioux Chief Manufacturing Company, Inc.
Tyler Pipe; Wade Division
Watts Regulator Company; A Division of Watts Water Technologies, Inc.
Zurn Industries, Inc.
Basis of Design: Sioux Chief Manufacturing Company, Inc.; Finish Line, adjustable
drainage system, 863-44NR.
FD2-Heavy Duty Floor Drain: smooth antimicrobial PVC body, with 8-1/2-inch (216-mm)
round stainless steel ring and grate and stainless steel sediment basket.
KROGER GA-631 MINOR RENOVATION / OPELIKA, AL
R/L/R PROJECT NO. 11-151
1.
D.
Product: Sioux Chief Manufacturing Company, Inc.; 860-4PZ. (No substitutions
allowed).
FD3 and FD3S-Cooler Drains:
1.
Basis of Design:
a.
b.
E.
22 13 00-3
FACILITY SANITARY SEWERAGE
FD3: Outside cooler: Zurn Industries, Inc.; Z-511-V-J with auxiliary drain inlet
and backwater valve.
FD3S: Inside Cooler: Zurn Industries, Inc.; Z-415-90-Y with type “B” strainer.
FD4 - Floor Sink (for case drains use when required by code): Heavy Duty PVC body, with 81/2-inch (216-mm) round PVC half grate strainer and PVC debris basket.
1.
Basis Of Design: Sioux Chief Manufacturing Company, Inc.; 860-4PU2
Select either gray or white color for floor sinks.
2.
Color:
a.
b.
F.
FD5-Light Duty Adjustable Flashing Floor Drain for Mezzanine Installations: PVC body, with
6-1/2-inch (152-mm) round nickel bronze adjustable strainer.
1.
2.3
Floor Sink in areas seen by customer: White.
Floor Sink in back room: White
Basis of Design: Sioux Chief Manufacturing Company, Inc.; Finish Line, adjustable
drainage system, 833-4PNR.
TRENCH DRAINS
A.
Manufacturers
1.
2.
3.
4.
5.
B.
TD1-Trench Drains (Inside Store): See Drawings for sizes.
1.
2.
2.4
ABT Polydrain, Inc.
ACCO Drain, Inc.
Hubbell Polycast
Quartzite Polycast
Zurn Industries, Inc.
Basis of Design: Zurn Industries, Inc.; Z-806, polymer drain with ductile iron grates.
Paint per Division 09 Section “Painting.”
CLEANOUTS (CO)
A.
Manufacturers:
1.
2.
3.
Canplas Industrial Products
Josam Company
Jay R Smith Mfg. Co., Div. of Smith Industries
KROGER GA-631 MINOR RENOVATION / OPELIKA, AL
R/L/R PROJECT NO. 11-151
4.
5.
6.
7.
8.
22 13 00-4
FACILITY SANITARY SEWERAGE
Oatey Company
Sioux Chief Manufacturing Company, Inc.
Tyler Pipe; Wade Division
Watts Regulator Company; A Division of Watts Water Technologies, Inc.
Zurn Industries, Inc.
B.
General: All floor cleanouts, regardless of what size piping they are installed in shall be 4-inch
(102-mm).
C.
Finished Floors: 4-inch (102-mm) adjustable cleanout with nickel-bronze top.
1.
D.
Unfinished Concrete Floor: 4-inch (102-mm) adjustable cleanout with cast iron ring and top.
1.
E.
Basis of Design: Sioux Chief Manufacturing Company, Inc.; 852-4Pi.
Wall Cleanouts:
polished top.
1.
F.
Basis of Design: Sioux Chief Manufacturing Company, Inc.; Finish Line, adjustable
drainage system 852-4PNR.
4-inch (102-mm) cleanout cover kit, with brass plug and stainless steel
Basis of Design: Sioux Chief Manufacturing Company, Inc.; 873 series.
Grade Cleanouts: 4-inch (102-mm) adjustable heavy duty cleanout in concrete pad at grade.
PART 3 - EXECUTION
3.1
PIPING INSTALLATION
A.
General:
1.
2.
3.
4.
Do not run sanitary piping under freezers and avoid running sanitary piping under coolers
if at all possible. Run indirect system vents separately through roof independent from
sanitary system vents.
Do not install exposed vent piping in sales area below 14-feet (4.3-m) or customer vision
areas. Coordinate location to be grouped with other piping and conduit extending to roof.
Collect vent piping where practical so roof will be pierced a minimum number of times
without increasing depth of wall. Vent sizes and heights above roof per governing codes.
Vents piercing roofs flashed per roof manufacturer’s recommended details. Provide wire
basket strainer in top of all vents.
Do not run sanitary vent piping in return air shaft wall. If no other option is available,
cast iron, steel, or copper vent piping may be run in return air shaft wall upon approval of
the Owner.
B.
Install cleanouts at grade and extend to where building sanitary drains connect to building
sanitary sewers.
C.
Install cast-iron sleeve with water stop and mechanical sleeve seal at each service pipe
penetration through foundation wall. Select number of interlocking rubber links required to
KROGER GA-631 MINOR RENOVATION / OPELIKA, AL
R/L/R PROJECT NO. 11-151
22 13 00-5
FACILITY SANITARY SEWERAGE
make installation watertight. Sleeves and mechanical sleeve seals are specified in Division 22
Section "Common Work Results for Plumbing."
D.
Install wall penetration system at each service pipe penetration through foundation wall. Make
installation watertight. Wall penetration systems are specified in Division 22 Section "Common
Work Results for Plumbing."
E.
Make changes in direction for soil and waste drainage and vent piping using appropriate
branches, bends, and long-sweep bends. Sanitary tees and short-sweep 1/4 bends may be used
on vertical stacks if change in direction of flow is from horizontal to vertical. Use long-turn,
double Y-branch and 1/8-bend fittings if 2 fixtures are installed back to back or side by side
with common drain pipe. Straight tees, elbows, and crosses may be used on vent lines. Do not
change direction of flow more than 90 degrees. Use proper size of standard increasers and
reducers if pipes of different sizes are connected. Reducing size of drainage piping in direction
of flow is prohibited.
F.
Lay buried building drainage piping beginning at low point of each system. Install true to
grades and alignment indicated, with unbroken continuity of invert. Place hub ends of piping
upstream. Install required gaskets according to manufacturer's written instructions for use of
lubricants, cements, and other installation requirements. Maintain swab in piping and pull past
each joint as completed.
G.
Install soil and waste drainage and vent piping at the following minimum slopes, unless
otherwise indicated:
1.
2.
3.
Building Sanitary Drain: 2 percent downward in direction of flow for piping NPS 3 and
smaller; 1 percent downward in direction of flow for piping NPS 4 and larger.
Horizontal Sanitary Drainage Piping: 2 percent downward in direction of flow.
Vent Piping: 1 percent down toward vertical fixture vent or toward vent stack.
H.
Install ABS soil and waste drainage and vent piping according to ASTM D 2661.
I.
Install PVC soil and waste drainage and vent piping according to ASTM D 2665.
J.
Install underground PVC soil and waste drainage piping according to ASTM D 2321.
K.
Do not enclose, cover, or put piping into operation until it is inspected and approved by
authorities having jurisdiction.
L.
Install grease interceptor outside, underground as indicated on the on the Drawings.
3.2
JOINT CONSTRUCTION
A.
Basic piping joint construction requirements are specified in Division 22 Section "Common
Work Results for Plumbing."
B.
PVC Nonpressure Piping Joints: Join piping according to ASTM D 2665.
KROGER GA-631 MINOR RENOVATION / OPELIKA, AL
R/L/R PROJECT NO. 11-151
3.3
22 13 00-6
FACILITY SANITARY SEWERAGE
VALVE INSTALLATION
Delete paragraph below if no sewage pump.
A.
Shutoff Valves: Install shutoff valve on each sewage pump discharge.
1.
2.
B.
3.4
Use gate or full-port ball valve for piping NPS 2 and smaller.
Use gate valve for piping NPS 2-1/2 and larger.
Check Valves: Install swing check valve, downstream from shutoff valve, on each sewage
pump discharge.
HANGER AND SUPPORT INSTALLATION
A.
Pipe hangers and supports are specified in Division 23 Section "Hangers and Supports for
Facility Services." Install the following:
1.
2.
Vertical Piping: MSS Type 8 or Type 42, clamps.
Individual, Straight, Horizontal Piping Runs: According to the following:
a.
b.
c.
3.
4.
100-feet (30.5-m) and Less: MSS Type 1, adjustable, steel clevis hangers.
Longer Than 100-feet (30.5-m): MSS Type 43, adjustable roller hangers.
Longer Than 100-feet (30.5-m), if Indicated: MSS Type 49, spring cushion rolls.
Multiple, Straight, Horizontal Piping Runs 100-feet (30.5-m) or Longer: MSS Type 44,
pipe rolls. Support pipe rolls on trapeze.
Base of Vertical Piping: MSS Type 52, spring hangers.
B.
Install supports according to Division 23 Section "Hangers and Supports for Facility Services."
C.
Support vertical piping and tubing at base and at each floor.
D.
Rod diameter may be reduced 1 size for double-rod hangers, with 3/8-inch (9.5-mm) minimum
rods.
E.
Install hangers for PVC piping with the following maximum horizontal spacing and minimum
rod diameters:
1.
2.
3.
4.
NPS 1-1/2 and NPS 2: 48 inches (1.2-m) with 3/8-inch (9.5-mm) rod.
NPS 3: 48 inches (1.2-m) with 1/2-inch (13-mm) rod.
NPS 4 and NPS 5: 48 inches (1.2-m) with 5/8-inch (16-mm) rod.
NPS 6: 48 inches (1.2-m) with 3/4-inch (19-mm) rod.
F.
Install supports for vertical PVC piping every 48 inches (1.2-m).
G.
Support piping and tubing not listed above according to MSS SP-69 and manufacturer's written
instructions.
KROGER GA-631 MINOR RENOVATION / OPELIKA, AL
R/L/R PROJECT NO. 11-151
3.5
22 13 00-7
FACILITY SANITARY SEWERAGE
CONNECTIONS
A.
Connect soil and waste piping to exterior sanitary sewerage piping. Use transition fitting to join
dissimilar piping materials.
B.
Connect drainage and vent piping to the following:
1.
2.
3.
4.
5.
6.
Plumbing Fixtures: Connect drainage piping in sizes indicated, but not smaller than
required by plumbing code.
Plumbing Fixtures and Equipment: Connect atmospheric vent piping in sizes indicated,
but not smaller than required by authorities having jurisdiction.
Plumbing Specialties: Connect drainage and vent piping in sizes indicated, but not
smaller than required by plumbing code.
Mechanical Equipment: Connect drainage piping as indicated. Provide shutoff valve, if
indicated, and union for each connection. Use flanges instead of unions for connections
NPS 2-1/2 and larger.
Food Prep Equipment: Connect drainage piping in sizes indicated, but not smaller than
required by plumbing code, to equipment supplied by Owner and equipment supplied and
installed by Owner.
Utensil and Dishwashing Equipment: Connect drainage piping in sizes indicated, but not
smaller than required by plumbing code to equipment supplied by Owner and equipment
supplied and installed by Owner.
a.
7.
3.6
Provide only Type "L" hard drawn copper tubing, with wrought copper bronze
fittings and 95/5 tin/antimony or 94/6 tin/silver solder for drain lines and fittings
for this equipment due to the higher discharge water temperature.
Refrigerated Equipment: Drain lines from refrigerated equipment to building system shall
be provided under Refrigeration Equipment Installation Specifications.
FIELD QUALITY CONTROL
A.
During installation, notify authorities having jurisdiction at least 24 hours before inspection
must be made. Perform tests specified below in presence of authorities having jurisdiction.
1.
2.
Roughing-in Inspection: Arrange for inspection of piping before concealing or closing-in
after roughing-in and before setting fixtures.
Final Inspection: Arrange for final inspection by authorities having jurisdiction to
observe tests specified below and to ensure compliance with requirements.
B.
Reinspection: If authorities having jurisdiction find that piping will not pass test or inspection,
make required corrections and arrange for reinspection.
C.
Reports: Prepare inspection reports and have them signed by authorities having jurisdiction.
D.
Test sanitary drainage and vent piping according to procedures of authorities having
jurisdiction.
1.
Repair leaks and defects with new materials and retest piping, or portion thereof, until
satisfactory results are obtained.
KROGER GA-631 MINOR RENOVATION / OPELIKA, AL
R/L/R PROJECT NO. 11-151
2.
3.7
22 13 00-8
FACILITY SANITARY SEWERAGE
Prepare reports for tests and required corrective action.
TESTING:
A.
The entire soil, waste and vent system shall be tested per code and to the satisfaction of the
Plumbing Inspector and the Owner. Cover no work until it has been approved. The minimum
requirements shall be as follows:
B.
Water pressure: 10-foot head of water (30 kPa) of water for 15 minutes without loss of water.
C.
Air pressure: 5 psi. for 15 minutes without loss of air.
D.
Entire soil and waste systems to be inspected for debris and flushed prior to pouring of concrete
floor slab.
E.
Perform all systems tests in the presence of an authorized representative of the Owner. Notify
the Owner of all systems tests at least 48 hours in advance.
3.8
CLEANUP:
A.
Clean interior of piping. Remove dirt and debris as work progresses.
B.
Protect drains during remainder of construction period to avoid clogging with dirt and debris
and to prevent damage from traffic and construction work.
C.
Place plugs in ends of uncompleted piping at end of day and when work stops.
END OF SECTION 22 13 00
KROGER GA-631 MINOR RENOVATION / OPELIKA, AL
R/L/R PROJECT NO. 11-151
22 30 00-1
PLUMBING EQUIPMENT
SECTION 22 30 00 - PLUMBING EQUIPMENT
PART 1 - GENERAL
1.1
SUMMARY
A.
Section includes:
1.
KROGER DIRECT BUY PROGRAM: Owner supplied/Contractor installed.
a.
The Kroger Company will supply the following:
1)
2)
b.
2.
Reclaim water heaters including temperature pressure valve.
Domestic water heaters.
Comply with requirements in Division 00 Section “General Conditions.”
Contractor supplied items:
a.
b.
c.
d.
Hot water circulating pumps.
Water heater stand.
Wall mounted water heater restraint system
Fasteners, valves, unions, thermometers, and other items not provided by Owner
necessary for a complete installation.
e.
3.
Contractor installed items:
a.
b.
c.
d.
e.
1.2
Domestic and reclaim water heaters with temperature pressure valve.
Hot water circulating pumps.
Water heater stand
Wall mounted water heater restraint system
Provide installation and final connections.
SUBMITTALS
A.
Reclaim Water Heaters:
B.
The Owner’s representative will provide the following submittals for the Contractor’s
information upon request:
1.
2.
Product Data: For each type and size of water heater indicated. Rated capacities,
operating characteristics, furnished specialties, and accessories will be included.
Operation and maintenance data.
KROGER GA-631 MINOR RENOVATION / OPELIKA, AL
R/L/R PROJECT NO. 11-151
1.3
22 30 00-2
PLUMBING EQUIPMENT
QUALITY ASSURANCE
A.
Electrical Components, Devices, and Accessories: Listed and labeled as defined in NFPA 70,
Article 100, by a testing agency acceptable to authorities having jurisdiction, and marked for
intended use.
B.
ASME Compliance: Where ASME-code construction is indicated, fabricate and label
commercial water heater storage tanks to comply with ASME Boiler and Pressure Vessel Code:
Section VIII, Division 1.
C.
Comply with NSF 61, "Drinking Water System Components - Health Effects; Sections 1
through 9" for all components that will be in contact with potable water.
PART 2 - PRODUCTS
2.1
RECLAIM WATER HEATERS
A.
2.2
Refer to Division 01 Section "Direct Buy Owner Furnished Products" for contact information
on reclaim water heaters provided by Owner.
DOMESTIC WATER HEATERS
A.
2.3
Refer to Division 01 Section "Direct Buy Owner Furnished Products" for contact information
on domestic water heaters provided by Owner.
HOT WATER CIRCULATING PUMP
A.
Main System Pump CP-1
1.
Manufacturers:
a.
b.
c.
2.
B.
Bell and Gossett; A Division of ITT Industries.
Taco, Inc.
Grundfos, USA
Basis of Design: Bell and Gossett; Series 100 BNFI, bronze circulating pump.
Under Sink Instant Hot Water Pump CP-2
1.
Manufacturers:
a.
2.
Laing Thermotech, Inc.
Basis of Design: Laing Thermotech, Inc.; AutoCirc Model ACT-303-BTW circulating
pump.
KROGER GA-631 MINOR RENOVATION / OPELIKA, AL
R/L/R PROJECT NO. 11-151
22 30 00-3
PLUMBING EQUIPMENT
PART 3 - EXECUTION
3.1
CONNECTIONS
A.
3.2
Install piping adjacent to water heaters to allow service and maintenance. Arrange piping for
easy removal of water heaters.
FIELD QUALITY CONTROL
A.
Perform the following field tests and inspections:
1.
Leak Test: After installation, test for gas and water leaks. Repair leaks and retest until
no leaks exist.
a.
2.
3.
B.
3.3
Gas supply pipe fittings inside unit may become loose during shipment. Test gas
supply system fittings inside and outside the unit before startup with a
noncorrosive leak-detecting fluid such as a soap solution.
Operational Test: After electrical circuitry has been energized, confirm proper operation.
Test and adjust controls and safeties. Replace damaged and malfunctioning controls and
equipment.
Remove and replace water heaters that do not pass tests and inspections and retest as specified
above.
DEMONSTRATION
A.
Owner will provide a factory-authorized service representative to train Owner's maintenance
personnel to adjust, operate, and maintain commercial water heaters.
END OF SECTION 22 30 00
KROGER GA-631 MINOR RENOVATION / OPELIKA, AL
22 42 00-1
R/L/R PROJECT NO. 11-151
COMMERICAL PLUMBING FIXTURES
SECTION 22 42 00 - COMMERCIAL PLUMBING FIXTURES
PART 1 - GENERAL
1.1
SUMMARY
A.
Section includes:
1.
KROGER DIRECT BUY PROGRAM: Owner supplied/Contractor installed.
a.
The Kroger Company will supply the following commercial plumbing fixtures
complete with drain and faucet as indicated on Drawings:
1)
2)
3)
4)
5)
6)
7)
8)
9)
10)
b.
2.
b.
Other commercial plumbing fixtures not provided by Owner and as specified in
Part 2.
Fasteners and other items not provided by Owner necessary for a complete
installation.
Contractor installed items:
a.
b.
1.2
Comply with requirements in Division 00 Section “General Conditions.”
Contractor supplied items: Contractor furnished/Contractor installed.
a.
3.
Lavatories: (LOCATED IN FOOD PREPARATION AREAS)
Seafood Sink with Disposer
Deli Dept Product Sink
Pharmacy Sink
Floral Sink
One Hour Photo One-Compartment Sink (where indicated).
Bakery Prep Sink
Produce Prep Product Sink
Three-Compartment Sink (Produce, Meat, Deli, Seafood and Bakery):
Produce Trim Station:
All Commercial plumbing fixtures and accessories.
Provide installation and final connections.
SUBMITTALS
A.
Product Data: For each type of product indicated.
B.
Direct Buy Submittals: The Owner will provide the following submittals for the Contractor’s
information upon request:
a.
Product Data: For each Direct Buy product indicated.
KROGER GA-631 MINOR RENOVATION / OPELIKA, AL
22 42 00-2
R/L/R PROJECT NO. 11-151
COMMERICAL PLUMBING FIXTURES
1.3
QUALITY ASSURANCE
A.
Electrical Components, Devices, and Accessories: Listed and labeled as defined in NFPA 70,
Article 100, by a testing agency acceptable to authorities having jurisdiction, and marked for
intended use.
B.
Regulatory Requirements: "Americans with Disabilities Act" for plumbing fixtures for people
with disabilities.
C.
Regulatory Requirements: Comply with requirements in Public Law 102-486, "Energy Policy
Act," about water flow and consumption rates for plumbing fixtures.
D.
NSF Standard: Comply with NSF 61, "Drinking Water System Components--Health Effects,"
for fixture materials that will be in contact with potable water.
E.
Select combinations of fixtures and trim, faucets, fittings, and other components that are
compatible.
PART 2 - PRODUCTS
2.1
ACCESSIBLE FIXTURES
A.
2.2
Accessible fixtures to conform to local code requirements, where indicated or as required.
Unless local codes require otherwise, use the following fixtures.
DIRECT BUY PLUMBING FIXTURES:
A.
Refer to Division 01 Section "Direct Buy Owner Furnished Products" for contact information
on plumbing fixtures, faucets and accessories provided by Owner.
1.
Provide drains, p-traps with clean outs, and associated fittings and piping for a complete
installation of direct buy owner furnished products.
PART 3 - EXECUTION
3.1
INSTALLATION
A.
Install per manufacturer's instructions and recommendations.
B.
Install off-floor supports, affixed to building substrate, for wall-mounting fixtures.
C.
Install back-outlet, wall-mounting fixtures onto waste fitting seals and attach to supports.
D.
Install floor-mounting fixtures on closet flanges or other attachments to piping or building
substrate.
E.
Install wall-mounting fixtures with tubular waste piping attached to supports.
KROGER GA-631 MINOR RENOVATION / OPELIKA, AL
22 42 00-3
R/L/R PROJECT NO. 11-151
COMMERICAL PLUMBING FIXTURES
F.
Install fixtures level and plumb according to roughing-in drawings.
G.
Install water-supply piping with stop on each supply to each fixture to be connected to water
distribution piping. Attach supplies to supports or substrate within pipe spaces behind fixtures.
Install stops in locations where they can be easily reached for operation.
H.
Install flushometer valves for accessible water closets and urinals with handle mounted on wide
side of compartment. Install other actuators in locations that are easy for people with
disabilities to reach.
I.
Install toilet seats on water closets.
J.
Install faucet-spout fittings with specified flow rates and patterns in faucet spouts if faucets are
not available with required rates and patterns. Include adapters if required.
K.
Install traps on fixture outlets.
1.
2.
Exception: Omit trap on fixtures with integral traps.
Exception: Omit trap on indirect wastes, unless otherwise indicated.
L.
Install escutcheons at piping wall and ceiling penetrations in exposed, finished locations and
within cabinets and millwork. Use deep-pattern escutcheons if required to conceal protruding
fittings.
M.
Seal joints between fixtures and walls, floors, and countertops using sanitary-type, one-part,
mildew-resistant silicone sealant. Match sealant color to fixture color.
3.2
CONNECTIONS
A.
3.3
Connect fixtures with water supplies, stops, and risers, and with traps, soil, waste, and vent
piping. Use size fittings required to match fixtures.
FIELD QUALITY CONTROL
A.
Verify that installed plumbing fixtures are categories and types specified for locations where
installed.
B.
Check that plumbing fixtures are complete with trim, faucets, fittings, and other specified
components.
C.
Inspect installed plumbing fixtures for damage. Replace damaged fixtures and components.
D.
Test installed fixtures after water systems are pressurized for proper operation. Replace
malfunctioning fixtures and components, then retest. Repeat procedure until units operate
properly.
E.
Install fresh batteries in sensor-operated mechanisms.
KROGER GA-631 MINOR RENOVATION / OPELIKA, AL
22 42 00-4
R/L/R PROJECT NO. 11-151
COMMERICAL PLUMBING FIXTURES
3.4
PROTECTION
A.
Provide protective covering for installed fixtures and fittings.
B.
Do not allow use of plumbing fixtures for temporary facilities unless approved in writing by
Owner.
END OF SECTION 22 42 00
KROGER GA-631 MINOR RENOVATION / OPELIKA, AL
26 05 00-1
R/L/R PROJECT NO. 11-151
COMMON WORK RESULTS FOR ELECTRICAL
SECTION 26 05 00 - COMMON WORK RESULTS FOR ELECTRICAL
PART 1 - GENERAL
1.1
SUMMARY
A.
Section Includes:
1.
2.
3.
4.
B.
Types of electrical connections specified in this section include, but are not necessarily limited
to, the following:
1.
2.
3.
4.
5.
6.
7.
8.
9.
10.
11.
12.
13.
14.
15.
16.
C.
Sleeves for raceways and cables.
Sleeve seals.
Grout.
Common electrical installation requirements.
Distribution Equipment
Grounding System
Motors
Motor Starters
Starters for Hood fans
Light Fixtures
Fire Alarm Equipment
Temperature Control Wiring
Emergency Equipment
HVAC Equipment
Water Heaters.
Sprinkler and Fire Alarm System
Disposers
Installation of operator controls for bascart door.
Protocol unit with step down transformer, remote panel and roof mounted condenser.
Kitchen equipment.
Related Work
1.
HVAC work: Provide conduit for wiring for HVAC equipment in accordance with the
drawings and specifications.
a.
b.
2.
Refer to Division 23 Section “Instrumentation and Control Devices for HVAC” for
work performed by HVAC installer.
Refer to Division 26 Section “Low Voltage Electrical Power Conductors and
Cables” for wiring.
Temperature control work to include conduit and wiring for smoke detector. Installation
in ductwork included in Division 23 Sections. Refer to Division 23 Section
“Instrumentation and Control Devices for HVAC” for work performed by HVAC
installer.
KROGER GA-631 MINOR RENOVATION / OPELIKA, AL
26 05 00-2
R/L/R PROJECT NO. 11-151
COMMON WORK RESULTS FOR ELECTRICAL
3.
4.
5.
1.2
Sprinkler alarm system shall be wired complete. Provide a "lock-on" device on the
circuit breaker supplying the alarm system. Identify circuit breaker with a sign reading:
"FIRE ALARM - DO NOT DISCONNECT". Sprinkler/ fire alarm shall be interlocked
with HVAC control system(s) to stop the motors in the event of sprinkler-flow or fire
alarm activation.
Premise Alarms: Provide conduits and outlet boxes for premise alarms indicated on the
drawings or as required. Refer to Drawings.
Other conduit and wiring shown on the Drawings for energy management, refrigeration
and temperature control.
SUBMITTALS
A.
Product Data: For sleeve seals.
PART 2 - PRODUCTS
2.1
SLEEVES FOR RACEWAYS AND CABLES
A.
Steel Pipe Sleeves: ASTM A 53/A 53M, Type E, Grade B, Schedule 40, galvanized steel, plain
ends.
B.
Sleeves for Rectangular Openings: Galvanized sheet steel.
1.
Minimum Metal Thickness:
a.
b.
2.2
For sleeve cross-section rectangle perimeter less than 50 inches (1270 mm) and no
side more than 16 inches (400 mm), thickness shall be 0.052 inch (1.3 mm).
For sleeve cross-section rectangle perimeter equal to, or more than, 50 inches
(1270 mm) and 1 or more sides equal to, or more than, 16 inches (400 mm),
thickness shall be 0.138 inch (3.5 mm).
SLEEVE SEALS
A.
Description: Modular sealing device, designed for field assembly, to fill annular space between
sleeve and raceway or cable.
1.
Basis-of-Design Product: Subject to compliance with requirements, provide product
indicated on Drawings or comparable product by one of the following:
a.
b.
c.
d.
2.
3.
Advance Products & Systems, Inc.; 337-233-6116
Calpico, Inc.; 650-588-2241
Metraflex Co.; 800-621-4347
Pipeline Seal and Insulator, Inc.; 800-423-2410
Sealing Elements: EPDM interlocking links shaped to fit surface of cable or conduit.
Include type and number required for material and size of raceway or cable.
Pressure Plates: Carbon steel or Stainless steel. Include two for each sealing element.
KROGER GA-631 MINOR RENOVATION / OPELIKA, AL
26 05 00-3
R/L/R PROJECT NO. 11-151
COMMON WORK RESULTS FOR ELECTRICAL
4.
2.3
Connecting Bolts and Nuts: Carbon steel with corrosion-resistant coating or Stainless
steel of length required to secure pressure plates to sealing elements. Include one for
each sealing element.
GROUT
A.
2.4
Nonmetallic, Shrinkage-Resistant Grout:
ASTM C 1107, factory-packaged, nonmetallic
aggregate grout, noncorrosive, nonstaining, mixed with water to consistency suitable for
application and a 30-minute working time.
ELECTRICAL CONNECTIONS FOR EQUIPMENT
A.
Manufacturers:
1.
2.
3.
4.
2.5
AMP Products Corp.; 800-468-2023
Burndy Corp.; 800-346-4175
Ideal Industries, Inc. 800-435-0705
Thomas and Betts Corp.; 800-816-7809
MATERIALS AND COMPONENTS FOR CONNECTIONS FOR EQUIPMENT:
A.
For each electrical connection indicated, provide a complete assembly of materials, including
but not necessarily limited to, pressure connectors, terminals (lugs), electrical insulating tape,
cable ties, solderless connectors and other items and accessories as needed to complete splices
and terminations of the type indicated.
B.
Metal Conduit, Tubing and Fittings: Provide metal conduit, tubing and fittings of the type,
grade, size and weight (wall thickness) required for each service.
1.
Raceways to be as specified in Division 26 Section "Raceway and Boxes."
C.
Conductors: Unless otherwise indicated, provide conductors for electrical connections as
specified in Division 26 Section "Low Voltage Electrical Power Conductors and Cables."
D.
Connectors and Terminals: Provide electrical connectors and terminals as recommended by the
connector and terminal manufacturer for the intended application.
E.
Electrical Connections Accessories: Provide electrical insulating tape, connectors and cable ties
as recommended for the type job designated by the accessories manufacturers.
PART 3 - EXECUTION
3.1
COMMON REQUIREMENTS FOR ELECTRICAL INSTALLATION
A.
Fasten electrical components securely to structural support steel. Do not fasten to metal deck.
B.
Comply with NECA 1.
KROGER GA-631 MINOR RENOVATION / OPELIKA, AL
26 05 00-4
R/L/R PROJECT NO. 11-151
COMMON WORK RESULTS FOR ELECTRICAL
C.
Measure indicated mounting heights to bottom of unit for suspended items and to center of unit
for wall-mounting items.
D.
Headroom Maintenance: If mounting heights or other location criteria are not indicated,
arrange and install components and equipment to provide maximum possible headroom
consistent with these requirements.
E.
Equipment: Install to facilitate service, maintenance, and repair or replacement of components
of both electrical equipment and other nearby installations. Connect in such a way as to
facilitate future disconnecting with minimum interference with other items in the vicinity.
F.
Right of Way: Give right of way to piping systems installed at a required slope. Work shall be
coordinated between trades prior to installation.
3.2
SLEEVE INSTALLATION FOR ELECTRICAL PENETRATIONS
A.
Electrical penetrations occur when raceways, cables, wireways, cable trays, or busways
penetrate concrete slabs, concrete or masonry walls, or fire-rated floor and wall assemblies.
B.
Concrete Slabs and Walls: Install sleeves for penetrations unless core-drilled holes or formed
openings are used. Install sleeves during erection of slabs and walls.
C.
Use pipe sleeves unless penetration arrangement requires rectangular sleeved opening.
D.
Fire-Rated Assemblies: Install sleeves for penetrations of fire-rated floor and wall assemblies
unless openings compatible with firestop system used are fabricated during construction of floor
or wall.
E.
Cut sleeves to length for mounting flush with both surfaces of walls.
F.
Extend sleeves installed in floors 2 inches (50 mm) above finished floor level.
G.
Size pipe sleeves to provide 1/4-inch (6.4-mm) annular clear space between sleeve and raceway
or cable, unless indicated otherwise.
H.
Seal space outside of sleeves with grout for penetrations of concrete and masonry
1.
Promptly pack grout solidly between sleeve and wall so no voids remain. Tool exposed
surfaces smooth; protect grout while curing.
I.
Interior Penetrations of Non-Fire-Rated Walls and Floors: Seal annular space between sleeve
and raceway or cable, using joint sealant appropriate for size, depth, and location of joint.
Comply with requirements in Division 07 Section "Joint Sealants."
J.
Fire-Rated-Assembly Penetrations: Maintain indicated fire rating of walls, partitions, ceilings,
and floors at raceway and cable penetrations. Install sleeves and seal raceway and cable
penetration sleeves with firestop materials. Comply with requirements in Division 07 Section
"Penetration Firestopping."
KROGER GA-631 MINOR RENOVATION / OPELIKA, AL
26 05 00-5
R/L/R PROJECT NO. 11-151
COMMON WORK RESULTS FOR ELECTRICAL
K.
Roof-Penetration Sleeves: Seal penetration of individual raceways and cables with flexible
boot-type flashing units applied in coordination with roofing work.
L.
Aboveground, Exterior-Wall Penetrations: Seal penetrations using steel or cast-iron pipe
sleeves and mechanical sleeve seals. Select sleeve size to allow for 1-inch (25-mm) annular
clear space between pipe and sleeve for installing mechanical sleeve seals.
M.
Underground, Exterior-Wall Penetrations: Install cast-iron pipe sleeves. Size sleeves to allow
for 1-inch (25-mm) annular clear space between raceway or cable and sleeve for installing
mechanical sleeve seals.
3.3
SLEEVE-SEAL INSTALLATION
A.
Install to seal exterior wall penetrations.
B.
Use type and number of sealing elements recommended by manufacturer for raceway or cable
material and size. Position raceway or cable in center of sleeve. Assemble mechanical sleeve
seals and install in annular space between raceway or cable and sleeve. Tighten bolts against
pressure plates that cause sealing elements to expand and make watertight seal.
3.4
FIRESTOPPING
A.
Apply firestopping to penetrations of fire-rated floor and wall assemblies for electrical
installations to restore original fire-resistance rating of assembly. Firestopping materials and
installation requirements are specified in Division 07 Section "Penetration Firestopping."
END OF SECTION 26 05 00
KROGER GA-631 MINOR RENOVATION / OPELIKA, AL
26 05 19-1
R/L/R PROJECT NO. 11-151
LOW VOLTAGE ELECTRICAL POWER CONDUCTORS AND CABLES
SECTION 26 05 19 – LOW VOLTAGE ELECTRICAL POWER CONDUCTORS AND CABLES
PART 1 - GENERAL
1.1
SUMMARY
A.
Section includes:
1.
KROGER DIRECT BUY PROGRAM: Owner supplied/Contractor installed.
a.
The Kroger Company will supply the following items:
1)
2)
b.
2.
Comply with requirements in Division 00 Section “General Conditions.”
Contractor supplied items:
a.
b.
c.
3.
Building wires and cables rated 600 V and less.
Building wires and cables rated higher than 600V as identified on Drawings.
Energy management system (EMS) control wiring:
Connectors, splices, and terminations rated 600 V and less.
Sleeves and sleeve seals for cables.
Contractor installed items:
a.
b.
c.
d.
Building wires and cables.
EMS control wiring:
Connectors, splices, and terminations rated 600 V and less.
Sleeves and sleeve seals for cables.
B.
Security wiring is specified in Division 28 Section "Fire Alarm/Security System."
C.
Direct Buy Wiring Quantity Determination:
1.
Complete the Electrical Wire (Cuts) Order Form (See attached sample form at the end of this
Section). Order may be broken down into a maximum of two deliveries, additional deliveries
are at Contractor’s expense. Submit via email to the Direct Buy Wire Supplier:
Graybar Electric
[email protected]
Attention Renee Miller
2.
3.
Include wiring from Division 26 Section "Grounding And Bonding For Electrical Systems."
Report any discrepancies between the Electrical Wire (Cuts) Order Form and actual product
received to the Direct Buy Wire Supplier and copy Kroger within the allotted time frame as
established by the Direct Buy Wire Supplier. Coordinate delivery schedule, cut lengths, colors,
location and date with the Direct Buy Wire Supplier. Upon receipt, the electrical wire becomes
the property of the Contractor.
KROGER GA-631 MINOR RENOVATION / OPELIKA, AL
26 05 19-2
R/L/R PROJECT NO. 11-151
LOW VOLTAGE ELECTRICAL POWER CONDUCTORS AND CABLES
4.
5.
6.
1.2
Notify Direct Buy Wire Supplier of any delivery date change with copies to Kroger’s
Procurement Department and Kroger’s Project Manager. Notification must take place a
minimum of two weeks prior to requested delivery date and change must be a minimum of plus
or minus two weeks.
Adjustments may be made between the Electrical Wire Bid Takeoff Form and the Electrical
Wire (Cuts) Order Form as long as the adjustments do not exceed the value of the total wire
price originally calculated on the Electrical Wire Bid Takeoff Form. Provide at no additional
cost to the Owner, any additional electrical wire; equal in quality to Kroger supplied wiring,
required to complete the project. Kroger will pay for pricing increases in wire due to inflation.
Manage any warranty claims directly with the Direct Buy Wire Supplier and copy Kroger.
SUBMITTALS
A.
The Owner’s representative will provide the following submittals for the Contractor’s information
upon request:
1.
B.
Provide the following submittals for Owner’s and Architect’s review:
1.
2.
3.
1.3
Product Data: For each type of Owner furnished product.
Product Data: For each type of Contractor furnished product.
Field quality-control test reports.
Electrical Wire (Cuts) Order Form: Submit as defined above.
QUALITY ASSURANCE
A.
Electrical Components, Devices, and Accessories: Listed and labeled as defined in NFPA 70,
Article 100, by a testing agency acceptable to authorities having jurisdiction, and marked for intended
use.
B.
Comply with NFPA 70.
PART 2 - PRODUCTS
2.1
CONDUCTORS AND CABLES (OWNER SUPPLIED)
A.
Refer to Division 01 Section "Direct Buy Owner Furnished Products."
1.
2.
Building Wires: Conductors, conductor insulation, and multi-conductor cable to comply with
NEMA WC70. Except where copper conductors are specifically noted on Drawings for 100
ampere and larger feeders, aluminum alloy AA-8000 compact stranded conductors will be
installed.
Metal Clad Cable (Type MC) to comply with National Electrical Code (NEC) and authorities
having jurisdiction.
KROGER GA-631 MINOR RENOVATION / OPELIKA, AL
26 05 19-3
R/L/R PROJECT NO. 11-151
LOW VOLTAGE ELECTRICAL POWER CONDUCTORS AND CABLES
2.2
ENERGY MANAGEMENT SYSTEM (EMS) CONTROL WIRING: (CONTRACTOR SUPPLIED)
A.
Manufacturers:
1.
2.
3.
4.
B.
2.3
Anixter; 800-264-9837
Belden CDT, Inc., 800- 235-3361
Walker; Division of Butler Manufacturing; 816-968-3000
Harvey Hubbel Incorporated; 203-882-4900
Basis of Design: Belden CDT, Inc., 800- 235-3361
CONNECTORS AND SPLICES (CONTRACTOR SUPPLIED)
A.
Manufacturers:
1.
2.
3.
4.
5.
6.
7.
8.
B.
2.4
AMP, Inc.; 800-468-2023
Burndy Corp.; 800-346-4175
Eagle Electric Manufacturing Co., Inc.
Ideal Industries, Inc.; 800-435-0705
Joslyn Manufacturing and Supply Co.; 317-848-5127
OZ/Gedney Co.; 847-268-6000
Pyle National Co.; 804-798-8390
Thomas and Betts Co.; 800-816-7809
Description: Factory-fabricated connectors and splices of size, ampacity rating, material, type, and
class for application and service indicated.
SLEEVES FOR CABLES (CONTRACTOR SUPPLIED)
A.
2.5
Steel Pipe Sleeves: ASTM A 53/A 53M, Type E, Grade B, Schedule 40, galvanized steel, plain ends.
SLEEVE SEALS (CONTRACTOR SUPPLIED)
A.
Basis-of-Design Product: Subject to compliance with requirements, provide the product indicated on
Drawings or a comparable product by one of the following:
1.
2.
3.
4.
B.
Advance Products & Systems, Inc.; 800-315-6009
Calpico, Inc.; 800-255-1032
Metraflex Co.; 800-621-4347
Pipeline Seal and Insulator, Inc.; 713-747-6948
Description: Modular sealing device, designed for field assembly, to fill annular space between
sleeve and cable.
1.
Refer to Division 26 Section “Common Work Results for Electrical” for more information on
sealing materials.
KROGER GA-631 MINOR RENOVATION / OPELIKA, AL
26 05 19-4
R/L/R PROJECT NO. 11-151
LOW VOLTAGE ELECTRICAL POWER CONDUCTORS AND CABLES
2.6
CONNECTIONS: (CONTRACTOR SUPPLIED)
A.
Provide UL type factory fabricated, connectors of sizes, ampacity ratings, materials, types and classes
for applications and for services indicated. Where not indicated, provide proper selection as
determined by Installer to comply with project's installation requirements, NEC and NEMA standards.
Select from following, those type, classes, kinds and styles of connectors to fulfill project
requirements.
1.
Type:
a.
b.
c.
2.
Class:
a.
b.
3.
Insulated
Non-insulated
Kind:
a.
b.
4.
Pressure
Crimp
Threaded
Copper (for copper to copper connection)
AL/CU Dual-Rated for use with aluminum and copper conductors (for copper to
aluminum connection and for aluminum to aluminum connection). Properly wire brush
conductor surface and utilize Listed anti-oxidation joint compound. Wipe away excess
compound. All connection/termination materials shall be UL Listed and Labeled for the
specific application and applied accordingly.
Style:
a.
b.
c.
d.
e.
f.
Butt Connection
Elbow Connection
Combined "T" and Straight Connection
"T" Connection
Parallel Connection
Tap Connection
PART 3 - EXECUTION
3.1
CONDUCTOR MATERIAL APPLICATIONS
A.
Metal-Clad Cable (Type MC): Type MC cable may be used to the extent permitted by the National
Electrical Code (NEC) and by authorities having jurisdiction. Install in strict compliance with NEC
Article 330, including all references therein to other articles and sections of NEC, and in strict
compliance with all other authorities having jurisdiction and the following:
1.
See Division 26 Section "Raceways and Boxes for Electrical Systems" for information related
to flexible metal conduit.
KROGER GA-631 MINOR RENOVATION / OPELIKA, AL
26 05 19-5
R/L/R PROJECT NO. 11-151
LOW VOLTAGE ELECTRICAL POWER CONDUCTORS AND CABLES
2.
3.
4.
Limit installation of branch circuit metal clad (Type MC) cable to 20 feet (6 m) maximum
length from junction boxes installed above the ceiling in a space to connect to devices as
required.
Install only Type MC cable with #12 and #10 cooper conductors, Type THHN insulation
twisted and covered with polyester type.
Conceal type MC cables from view in all applications except in the following conditions where
it may be left exposed:
a.
b.
5.
Install final 120 inches (3048 mm) of cable from outlet/junction boxes to receptacle outlets in a
wall cavity that is easily accessible for future rework of receptacles. Connection of adjacent
devices within an accessible wall is permissible if the following condition applies:
a.
6.
7.
Where cable is not subject to physical damage in "back of house" and unfinished
storage/mechanical type rooms, at least 15 feet (4.6 m) above finished floor.
Where cable is installed in joist space of any room/area without a finished ceiling.
Connection of no more than 3 devices with no more than 240-inches (3048-mm)
maximum horizontal cable run within an additional conduit drop.
MC cable (aluminum alloy) may be installed for feeder applications from switchboard to
panelboards for feeders 100A or larger as sized on the Drawings. See Division 26 Section
"Raceways and Boxes for Electrical Systems" for allowable/limiting lengths. [If remodel
installation requires lengths greater than those allowable, submit specific request to
Owner for acceptance.]
Connect paired lighting units (those sharing ballasts as in a master satellite system) with 240
inch (6100 mm) fixture whips.
B.
Feeder and subfeeder descriptions shown on drawings are based on traditional conduit/wire type
installation; however, the Contractor may, at it’s option, run feeder MC cable (20 feet (6 m) maximum
length) from service entrance switchboard or distributions panels to panelboards rated 100 A or
larger.
C.
Branch circuit MC cable is permitted in limited use conditions only. The rule of thumb distance is 20
feet (6 m) maximum length. Homeruns to departments or areas where a large number of branch
circuits are being installed shall be in conduit. From junction boxes installed above the ceiling in a
space, MC shall be permitted to connect to devices as required.
D.
Feeders: Provide aluminum alloy AA-8000 compact stranded conductors for 100 ampere and larger
feeders unless noted otherwise on the drawings.
E.
Branch Circuits: Copper. Solid for No. 10 AWG and smaller; stranded for No. 8 AWG and larger.
F.
Do not install conductors of sizes less than indicated. Minimum size for branch circuits shall be No.
12 AWG; for #12 and #10 solid conductors are preferred; for Class 1 remote control and signal,
circuits to be No. 14 stranded; for Class 2 low-energy remote control and signal, circuits to be No. 16
AWG stranded conductors.
G.
Metal clad cable (Type MC) shall be only #12 and #10 copper conductors, Type THHN insulation
twisted and covered with polyester tape.
H.
EMS Control Conductors:
KROGER GA-631 MINOR RENOVATION / OPELIKA, AL
26 05 19-6
R/L/R PROJECT NO. 11-151
LOW VOLTAGE ELECTRICAL POWER CONDUCTORS AND CABLES
1.
Provide wiring for CPC Systems applications:
Description
Non-Plenum
WAN Connection
#24-8 Cat-5 Cable
#24-8 Cat-8 Cable
RS-485 Network
1 #22-2 Shielded Cable
#22-2 Shielded Cable
#22-2 Shielded Cable
#22-2 Shielded Cable
#22-2 Shielded Cable
#22-2 Shielded Cable
#22-3 Shielded Cable
#22-3 Shielded Cable
Low Light Sensor
#22-4 Shielded Cable
#22-4 Shielded Cable
Outdoor Temperature
Sensor/Drop Leg Sensor
#22-2 Shielded Cable
#22-2 Shielded Cable
Lighting Control
#14 Twisted Pair per Lighting
Contactor (Plenum Rated)
#14 Twisted Pair per Lighting
Contactor
Refrigeration Solenoid
Valve
#14 Twisted Pair (Plenum Rated)
#14 Twisted Pair
HVAC Staging Control
2-#16-10 Multi-Conductor Cable
(Plenum Rated)
2-#16-10 Multi-Conductor Cable
Unit Heater Control
#14 Twisted Pair (Plenum Rated)
#14 Twisted Pair
Line Voltage in Conduit
Per NEC and Mfr’s Guidelines
Per NEC and Mfr’s Guidelines
Analog/Digital
Temperature
Sensor/Input
Defrost Termination
Sensor
Relative Humidity
Sensor
2.
Wire Type
Plenum
Provide the following wiring for Danfoss System applications:
Description
W.A.N. Connection
Echelon Network
Analog/Digital Temperature Sensor/Input:
Defrost Termination
Thermostat (Dry Contact):
Relative Humidity/Temp
Sensor:
Light Level Sensor:
0 – 10V Signal
Wire Type
Plenum
Belden #1533P #24-8 Category5 Cable or approved equal
Belden #88641 #18-2 Sheilded
Cable or approved equal
Belden #88760 #18-2 Shielded
Cable or approved equal
Non-Plenum
Belden #1533R #24-8 Category5 Cable or approved equal
Belden #8641 #18-2 Sheilded
Cable or approved equal
Belden #8760 #18-2 Shielded
Cable or approved equal
Belden #88760 #18-2 Shielded
Cable or approved equal
Belden #8760 #18-2 Shielded
Cable or approved equal
Belden #83553 #18-3 Shielded
Cable or approved equal
Belden #83553 #18-3 Shielded
Cable or approved equal
Belden #8771 #18-3 Shielded
Cable or approved equal
Belden #8771 #18-3 Shielded
Cable or approved equal
Belden #88760 #18-2 Shielded
Cable or approved equal
Belden #8760 #18-2 Shielded
Cable or approved equal
KROGER GA-631 MINOR RENOVATION / OPELIKA, AL
26 05 19-7
R/L/R PROJECT NO. 11-151
LOW VOLTAGE ELECTRICAL POWER CONDUCTORS AND CABLES
Lighting Control
Refrigeration Solenoid
Valve (208V)
HVAC Staging Control
Unit Heater Control
Line Voltage In Conduit
Drive Healthy
Drive Enable
I.
#14 Twisted Pair Per Lighting
Contactor
Per NEC and Manufacturer's Guidelines
2-#16-10 Multi-Conductor Cable
2-#16-10 Multi-Conductor Cable
(Plenum Rated)
#14 Twisted Pair (Plenum
#14 Twisted Pair
Rated)
Per NEC and Manufacturer's Guidelines
Belden #88641 #18-2 Shielded
Belden #8641 #18-2 Shielded
Cable or approved equal
Cable or approved equal
Belden #83553 #18-3 Shielded
Belden #8771 #18-3 Shielded
Cable or approved equal
Cable or approved equal
Color Coding:
1.
2.
Wire #10 AWG and smaller to be factory color-coded. Where factory color is not available for
sizes larger than #10 AWG, mark conductors on each end with 1-inch (25.4-mm) band of
colored pressure sensitive plastic tape.
Color for each phase and neutral to be consistent throughout the system color code to be as
follows:
208Y/120V System
277/480V System
Phase A
Black
Brown
Phase B
Red
Orange
Phase C
Blue
Yellow
Neutral
White
Gray
Grounding Conductor
Green
Green
Isolated Grounding Conductor Green with Yellow Stripe
a.
3.2
#14 Twisted Pair Per Lighting
Contactor (Plenum Rated)
The same color to be used for each phase throughout system of feeders, subfeeders and
branches.
CONDUCTOR INSULATION AND MULTICONDUCTOR CABLE APPLICATIONS AND
WIRING METHODS
A.
General: Install electrical cables, wires and wiring connectors as indicated in compliance with
applicable requirements of NEC, NEMA, UL and NECA's "Standard of Installation", and in
accordance with recognized industry practices.
B.
Provide circuitry conductors, cable, wire and connectors required on the project for:
1.
2.
3.
4.
5.
6.
7.
Power Distribution
Lighting
Appliances
Equipment
Motor Branches
HVAC Control
EMS wiring
KROGER GA-631 MINOR RENOVATION / OPELIKA, AL
26 05 19-8
R/L/R PROJECT NO. 11-151
LOW VOLTAGE ELECTRICAL POWER CONDUCTORS AND CABLES
C.
Sprinkler/Fire Alarm
D.
Coordinate wire/cable installation work including electrical raceway and equipment installation work,
as necessary to properly interface installation of wires/cables with other work and in accordance with
proper phasing.
E.
Swab out all raceways before any wires are pulled.
F.
Install UL Type XHHW wire for underground service and feeder conductors as well as other exterior
branch circuits.
G.
Install UL Type THHN or THWN wiring in conduit, for feeders and branch circuits in all interior
building areas above grade.
H.
Pull conductors simultaneously where more than one is being installed in same raceway. Use pulling
compound or lubricant, where necessary. Compound used must not deteriorate conductor or
insulation. Use pulling means including, fish tape, cable rope and basket weave wire/cable grips that
will not damage cables or raceway.
I.
Where outlets only are indicated, 12-inch (305-mm) conductor leads to be provided for connection of
Owner's equipment. All conductors to be identified at terminals and junctions with circuit numbers.
J.
Cord Drops and Portable Appliance Connections: Type SO, hard service cord with stainless-steel,
wire-mesh, strain relief device at terminations to suit application.
1.
Color of Cord
a.
b.
White: In areas in view to the customers such as sales and service areas.
Black: For only equipment in rooms not subject to view by customers such as meat and
produce prep areas.
K.
Class 1 Control Circuits: Type THHN-THWN wiring.
L.
Class 2 Control Circuits: Type THHN-THWN wiring.
3.3
SPLICES AND TAPS:
A.
For splice and tap connections for wire sizes #10 AWG and smaller, provide joints in conductors by
twisting the conductors and then connector in sizes and quantity of conductors as catalog rated by
manufacturer. In no case will wire nuts be permitted. Connector to be Scotchlok Type Y, R, G or B.
B.
For splicing wire sizes larger than #10 AWG, provide UL-listed insulated copper compression
connectors. Provide AL/CU-rated connectors only where aluminum conductors are specifically noted
on drawings for feeders rated 100A or greater.. Compression to be either indent or crimp type
hydraulic. Burndy Type YS for splices. Tap connections larger than #8 AWG to be copper
mechanical connectors Burndy Type KVS and Type QPX. Keep conductor splices to a minimum.
C.
Install splices and tapes which possess equivalent, or better, mechanical strength and insulation
ratings than conductors being spliced.
KROGER GA-631 MINOR RENOVATION / OPELIKA, AL
26 05 19-9
R/L/R PROJECT NO. 11-151
LOW VOLTAGE ELECTRICAL POWER CONDUCTORS AND CABLES
3.4
INSTALLATION OF CONDUCTORS AND CABLES
A.
Conceal cables in finished walls, ceilings, and floors, unless otherwise indicated.
B.
Use manufacturer-approved pulling compound or lubricant where necessary; compound used must not
deteriorate conductor or insulation. Do not exceed manufacturer's recommended maximum pulling
tensions and sidewall pressure values.
C.
Use pulling means, including fish tape, cable, rope, and basket-weave wire/cable grips that will not
damage cables or raceway.
D.
Route cables perpendicular and parallel to the building architectural lines/surfaces/structural members,
keeping offsets to a minimum and following surface contours where possible.
1.
2.
3.
4.
E.
Maintain a uniform elevation for cable runs wherever possible.
Support/Anchor cables at maximum 6-foot (1.8 m) intervals and within 12 inches (305 mm) of
box or outlet without sag.
Install cables in a manner that prevents overheating.
Fasten cables directly to the structural steel using factory clamps/clips specifically designed for
the respective cable. Do not attach cables to metal deck.
Install exposed runs of cables down walls to surface mounted panelboards by one of the following
methods:
1.
2.
3.
Within a partition chase wall (constructed by the electrical installer in manner approved by
Architect).
Within appropriately sized steel raceway(s)
Within a custom fabricated heavy-gage painted sheet metal chase approved in advance by the
Owner’s Representative.
F.
Install chases and wireways in a manner that fully conceals and protects cables, prevents any
overheating of cables and is approved by the local authority having jurisdiction.
G.
Type MC Cables shall be concealed from view in all applications except for the following conditions
where it may be exposed
1.
2.
Where not subject to physical damage in “back of house” and unfinished storage/mechanical
type rooms, at least 15 feet above finished floor.
Where installed in joist space of any room/area that has no finished ceiling.
H.
Seismic-restraint devices are specified in Division 20 Section "Vibration and Seismic Controls for
Facility Services."
I.
Support cables according to Division 20 Section "Hangers and Supports for Facility Services" and
Division 20 Section "Vibration and Seismic Controls for Facility Services."
J.
Identify and color-code conductors and cables according to Division 26 Section "Electrical
Identification."
KROGER GA-631 MINOR RENOVATION / OPELIKA, AL
26 05 19-10
R/L/R PROJECT NO. 11-151
LOW VOLTAGE ELECTRICAL POWER CONDUCTORS AND CABLES
K.
Tighten electrical connectors and terminals according to manufacturer's published torque-tightening
values. If manufacturer's torque values are not indicated, use those specified in UL 486A (copper)
and UL 486B (aluminum).
L.
Wiring at Outlets: Install conductor at each outlet, with at least 12 inches (305 mm) of slack.
3.5
SLEEVE-SEAL INSTALLATION
A.
Install to seal underground exterior-wall penetrations.
B.
Use type and number of sealing elements recommended by manufacturer for cable material and size.
Position cable in center of sleeve. Assemble mechanical sleeve seals and install in annular space
between cable and sleeve. Tighten bolts against pressure plates that cause sealing elements to expand
and make watertight seal.
3.6
FIELD QUALITY CONTROL
A.
Perform tests and inspections and prepare test reports.
B.
Tests and Inspections:
C.
1.
After installing conductors and cables and before electrical circuitry has been energized,
test and service entrance and feeder conductors for compliance with requirements.
2.
Perform each visual and mechanical inspection and electrical test stated in NETA Acceptance
Testing Specification. Certify compliance with test parameters.
Test Reports: Prepare a written report to record the following:
1.
2.
3.
D.
3.7
Test procedures used.
Test results that comply with requirements.
Test results that do not comply with requirements and corrective action taken to achieve
compliance with requirements.
Remove and replace malfunctioning units and retest as specified above.
ELECTRICAL WIRE (CUTS) ORDER FORM
A.
Complete the Electrical Wire (Cuts) Order Form (following this page) and submit via email to the
Direct Buy Wire Supplier as specified in Part 1. Kroger will e-mail a copy of the electronic from to
each of the Invited Bidders.
(The Electrical Wire (Cuts) Order Form immediately follows this page)
KROGER GA-631 MINOR RENOVATION / OPELIKA, AL
26 05 19-11
R/L/R PROJECT NO. 11-151
LOW VOLTAGE ELECTRICAL POWER CONDUCTORS AND CABLES
ELECTRICAL WIRE (CUTS) ORDER FORM
Store Information
MEP Engineer
Store #
Company Name
Street
Street/City/Zip
General Contractor
Kroger PM
Company Name
PM Phone
Contact Name
Contact Phone
Takeoff Date
Electrical Subcontractor
Store Type
Gross SF
Company Name
New Store
0
Street
Expansion Remodel - Existing
0
City/State/Zip
Expansion Remodel - New
0
Contact Name
WIW Remodel (With-In-Wall)
0
Contact Phone
Total
Order of Shipment (Priority):
Circuit # (Marked on Each Reel)
Size/Color/Type
Put Up:
Size/Color/Type
Put Up:
Size/Color/Type
Put Up:
Size/Color/Type
Put Up:
Parallel (yes or no)
Parallel with Circuit #
Order of Shipment (Priority):
Circuit # (Marked on Each Reel)
Size/Color/Type
Put Up:
Size/Color/Type
Put Up:
Size/Color/Type
Put Up:
Size/Color/Type
Put Up:
Parallel (yes or no)
Parallel with Circuit #
KROGER GA-631 MINOR RENOVATION / OPELIKA, AL
26 05 19-12
R/L/R PROJECT NO. 11-151
LOW VOLTAGE ELECTRICAL POWER CONDUCTORS AND CABLES
ELECTRICAL WIRE (CUTS) ORDER FORM
Order of Shipment (Priority):
Circuit # (Marked on Each Reel)
Size/Color/Type
Put Up:
Size/Color/Type
Put Up:
Size/Color/Type
Put Up:
Size/Color/Type
Put Up:
Parallel (yes or no)
Parallel with Circuit #
Order of Shipment (Priority):
Circuit # (Marked on Each Reel)
Size/Color/Type
Put Up:
Size/Color/Type
Put Up:
Size/Color/Type
Put Up:
Size/Color/Type
Put Up:
Parallel (yes or no)
Parallel with Circuit #
Order of Shipment (Priority):
Circuit # (Marked on Each Reel)
Size/Color/Type
Put Up:
Size/Color/Type
Put Up:
Size/Color/Type
Put Up:
Size/Color/Type
Put Up:
Parallel (yes or no)
Parallel with Circuit #
Order of Shipment (Priority):
Circuit # (Marked on Each Reel)
Size/Color/Type
Put Up:
Size/Color/Type
Put Up:
Size/Color/Type
Put Up:
Size/Color/Type
Put Up:
Parallel (yes or no)
Parallel with Circuit #
KROGER GA-631 MINOR RENOVATION / OPELIKA, AL
26 05 19-13
R/L/R PROJECT NO. 11-151
LOW VOLTAGE ELECTRICAL POWER CONDUCTORS AND CABLES
ELECTRICAL WIRE (CUTS) ORDER FORM
Order of Shipment (Priority):
Circuit # (Marked on Each Reel)
Size/Color/Type
Put Up:
Size/Color/Type
Put Up:
Size/Color/Type
Put Up:
Size/Color/Type
Put Up:
Parallel (yes or no)
Parallel with Circuit #
Order of Shipment (Priority):
Circuit # (Marked on Each Reel)
Size/Color/Type
Put Up:
Size/Color/Type
Put Up:
Size/Color/Type
Put Up:
Size/Color/Type
Put Up:
Parallel (yes or no)
Parallel with Circuit #
Order of Shipment (Priority):
Circuit # (Marked on Each Reel)
Size/Color/Type
Put Up:
Size/Color/Type
Put Up:
Size/Color/Type
Put Up:
Size/Color/Type
Put Up:
Parallel (yes or no)
Parallel with Circuit #
Order of Shipment (Priority):
Circuit # (Marked on Each Reel)
Size/Color/Type
Put Up:
Size/Color/Type
Put Up:
Size/Color/Type
Put Up:
Size/Color/Type
Put Up:
Parallel (yes or no)
END OF SECTION 26 05 19
Parallel with Circuit #
KROGER GA-631 MINOR RENOVATION / OPELIKA, AL
26 05 26-1
R/L/R PROJECT NO. 11-151
GROUNDING AND BONDING FOR ELECTRICAL SYSTEMS
SECTION 26 05 26 - GROUNDING AND BONDING FOR ELECTRICAL SYSTEMS
PART 1 - GENERAL
1.1
SUMMARY
A.
Section includes:
1.
Methods and materials for grounding systems and equipment.
2.
KROGER DIRECT BUY PROGRAM: Owner supplied/Contractor installed.
a.
The Kroger Company will supply the following items:
1)
b.
3.
Connectors and grounding electrodes.
Other items as required for a complete installation.
Contractor installed items
a.
b.
B.
Comply with requirements in Division 00 Section “General Conditions.”
Contractor supplied items:
a.
b.
4.
Insulated and bare conductors.
Insulated and bare copper conductors.
Connectors and grounding electrodes.
Direct Buy Wiring Quantity Determination:
1.
Complete the Electrical Wire (Cuts) Order Form (in Division 26 Section "Low Voltage Electrical
Power Conductors and Cables"). Order may be broken down into a maximum of two deliveries,
additional deliveries are at contractor’s expense. Submit via email to the Direct Buy Wire
Supplier:
Graybar Electric
[email protected]
Attention Renee Miller
2.
3.
4.
Include with wiring in Division 26 Section "Low Voltage Electrical Power Conductors and
Cables."
Report any discrepancies between the Electrical Wire (Cuts) Order Form and actual product
received to the Direct Buy Wire Supplier and copy Kroger within the allotted time frame as
established by the Direct Buy Wire Supplier. Coordinate delivery schedule, cut lengths, colors,
location and date with the Direct Buy Wire Supplier. Upon receipt, the electrical wire becomes the
property of the Contractor.
Notify Direct Buy Wire Supplier of any delivery date change with copies to Kroger’s Procurement
Department and Kroger’s Project Manager. Notification must take place a minimum of two weeks
prior to requested delivery date and change must be a minimum of plus or minus two weeks.
KROGER GA-631 MINOR RENOVATION / OPELIKA, AL
26 05 26-2
R/L/R PROJECT NO. 11-151
GROUNDING AND BONDING FOR ELECTRICAL SYSTEMS
5.
6.
1.2
Adjustments may be made between the Electrical Wire Bid Takeoff Form and the Electrical Wire
(Cuts) Order Form as long as the adjustments do not exceed the value of the total wire price
originally calculated on the Electrical Wire Bid Takeoff Form. Provide at no additional cost to the
Owner, any additional electrical wire; equal in quality to Kroger supplied wiring, required to
complete the project. Kroger will pay for pricing increases in wire due to inflation.
Manage any warranty claims directly with the Direct Buy Wire Supplier and copy Kroger.
SUBMITTALS
A.
The Owner’s representative will provide the following submittals for the Contractor’s information upon
request:
1.
B.
Provide the following submittals for Owner’s and Architect’s review:
1.
2.
3.
1.3
Product Data: For each type of Owner furnished product.
Product Data: For each type of Contractor furnished product.
Field quality-control test reports.
Electrical Wire Order Form: Submit as defined above.
QUALITY ASSURANCE
A.
Electrical Components, Devices, and Accessories: Listed and labeled as defined in NFPA 70,
Article 100, by a testing agency acceptable to authorities having jurisdiction, and marked for intended
use.
B.
Comply with UL 467 for grounding and bonding materials and equipment.
C.
Coordination Meeting: Between electronic equipment installers, electrical installers and Contractor
before start of Work.
PART 2 - PRODUCTS
2.1
CONDUCTORS (OWNER SUPPLIED)
A.
Refer to Division 01 Section "Direct Buy Owner Furnished Products."
1.
2.
3.
Products will comply with NEC, and established industry standards.
Insulated Conductors: Owner will supply wire or cable insulated for 600 V unless otherwise
required by applicable code or authorities having jurisdiction. Unless otherwise specified, service
entrance conductors, feeder and subfeeders rated 100 ampere and larger will be compact stranded
AA-8000 aluminum alloy.
Bare Copper Conductors: Owner will supply bare copper conductors complying with the
following:
a.
b.
Solid Conductors: ASTM B 3.
Stranded Conductors: ASTM B 8.
KROGER GA-631 MINOR RENOVATION / OPELIKA, AL
26 05 26-3
R/L/R PROJECT NO. 11-151
GROUNDING AND BONDING FOR ELECTRICAL SYSTEMS
c.
d.
e.
f.
2.2
Bonding Cable: 28 kcmil, 14 strands of No. 17 AWG conductor, 1/4 inch (6 mm) in
diameter.
Bonding Conductor: No. 4 or No. 6 AWG, stranded conductor.
Bonding Jumper: Copper tape, braided conductors, terminated with copper ferrules; 1-5/8
inches (41 mm) wide and 1/16 inch (1.6 mm) thick.
Tinned Bonding Jumper: Tinned-copper tape, braided conductors, terminated with copper
ferrules; 1-5/8 inches (41 mm) wide and 1/16 inch (1.6 mm) thick.
CONNECTORS (CONTRACTOR SUPPLIED)
A.
Listed and labeled by a nationally recognized testing laboratory acceptable to authorities having
jurisdiction for applications in which used, and for specific types, sizes, and combinations of conductors
and other items connected.
B.
Bolted Connectors for Conductors and Pipes: Bolted pressure-type, with at least two bolts.
1.
2.
3.
C.
2.3
Bolted Connectors for Copper Conductors: Copper or copper alloy
Bolted Connectors for Aluminum Conductors: Aluminum alloy AA-8000 compact stranded
conductors.
Pipe Connectors: Clamp type, sized for pipe.
Welded Connectors: Exothermic-welding kits of types recommended by kit manufacturer for materials
being joined and installation conditions.
GROUNDING ELECTRODES (CONTRACTOR SUPPLIED)
A.
Ground Rods: Copper-clad steel; 3/4 inch by10 feet (19 mm by 3 m) in diameter.
PART 3 - EXECUTION
3.1
APPLICATIONS
A.
Conductors: Install solid conductor for No. 8 AWG and smaller, and stranded conductors for
No. 6 AWG and larger, unless otherwise indicated.
B.
Underground Grounding Conductors: Install bare copper conductor, No. 2/0 AWG minimum. Bury at
least 24 inches (600 mm) below grade.
C.
Isolated Grounding Conductors: Green-colored insulation with continuous yellow stripe. On feeders
with isolated ground, identify grounding conductor where visible to normal inspection, with alternating
bands of green and yellow tape, with at least three bands of green and two bands of yellow.
D.
Conductor Terminations and Connections:
1.
2.
3.
Pipe and Equipment Grounding Conductor Terminations: Bolted connectors.
Underground Connections: Welded connectors, except at test wells and as otherwise indicated.
Connections to Ground Rods at Test Wells: Bolted connectors.
KROGER GA-631 MINOR RENOVATION / OPELIKA, AL
26 05 26-4
R/L/R PROJECT NO. 11-151
GROUNDING AND BONDING FOR ELECTRICAL SYSTEMS
4.
3.2
Connections to Structural Steel: Welded connectors.
EQUIPMENT GROUNDING
A.
Provide a separate grounding conductor for branch circuits and feeders from the load side terminals of
the device or equipment to the source grounding bar (i.e. at the panelboard or switchboard). Mechanical
grounding (i.e. grounding connecting the device or equipment to the junction box or conduit) will not be
permissible. Other applications in addition to that required by NFPA 70 are listed below:
1.
2.
3.
4.
Flexible raceway runs.
Metal-clad cable runs.
Busway Supply Circuits: Install insulated equipment grounding conductor from grounding bus in
the switchgear, switchboard, or distribution panel to equipment grounding bar terminal on busway.
Computer and Rack-Mounted Electronic Equipment Circuits: Install insulated equipment
grounding conductor in branch-circuit runs from equipment-area power panels and powerdistribution units.
B.
Air-Duct Equipment Circuits: Install insulated equipment grounding conductor to duct-mounted
electrical devices operating at 120 V and more, including air cleaners, heaters, dampers, humidifiers, and
other duct electrical equipment. Bond conductor to each unit and to air duct and connected metallic
piping.
C.
Water Heater, Heat-Tracing, and Antifrost Heating Cables: Install a separate insulated equipment
grounding conductor to each electric water heater and heat-tracing cable. Bond conductor to heater units,
piping, connected equipment, and components.
D.
Isolated Grounding Receptacle Circuits: Install an insulated equipment grounding conductor connected
to the receptacle grounding terminal. Isolate conductor from raceway and from panelboard grounding
terminals. Terminate at equipment grounding conductor terminal of the applicable derived system or
service, unless otherwise indicated.
E.
Isolated Equipment Enclosure Circuits: For designated equipment supplied by a branch circuit or feeder,
isolate equipment enclosure from supply circuit raceway with a nonmetallic raceway fitting listed for the
purpose. Install fitting where raceway enters enclosure, and install a separate insulated equipment
grounding conductor. Isolate conductor from raceway and from panelboard grounding terminals.
Terminate at equipment grounding conductor terminal of the applicable derived system or service, unless
otherwise indicated.
F.
Signal and Communication Equipment: For telephone, alarm, voice and data, and other communication
equipment, provide No. 6 AWG minimum insulated grounding conductor in raceway from grounding
electrode system to each service location, terminal cabinet, wiring cabinet, and central equipment
location.
1.
2.
Service and Central Equipment Locations and Wiring Closets: Terminate grounding conductor on
a 1/4-by-2-by-12-inch (6-by-50-by-300-mm) grounding bus. Coordinate with equipment installers
for locations requiring grounding.
Terminal Cabinets: Terminate grounding conductor on cabinet grounding terminal.
KROGER GA-631 MINOR RENOVATION / OPELIKA, AL
26 05 26-5
R/L/R PROJECT NO. 11-151
GROUNDING AND BONDING FOR ELECTRICAL SYSTEMS
G.
3.3
Metal Poles Supporting Outdoor Lighting Fixtures: Install grounding electrode and a separate insulated
equipment grounding conductor in addition to grounding conductor installed with branch-circuit
conductors.
INSTALLATION
A.
Grounding Conductors: Route along shortest and straightest paths possible, unless otherwise indicated or
required by Code. Avoid obstructing access or placing conductors where they may be subjected to strain,
impact, or damage.
1.
B.
Ground Rods: Drive rods until tops are 2 inches (50 mm) below finished floor or final grade, unless
otherwise indicated.
1.
2.
C.
Interconnect ground rods with grounding electrode conductor below grade and as otherwise
indicated. Make connections without exposing steel or damaging coating, if any.
For grounding electrode system, install at least three rods spaced at least one-rod length from each
other and located at least the same distance from other grounding electrodes, and connect to the
service grounding electrode conductor.
Bonding Straps and Jumpers: Install in locations accessible for inspection and maintenance, except
where routed through short lengths of conduit.
1.
2.
3.
D.
Fasten cables directly to the structural steel using factory clamps/clips specifically designed for the
respective cable. Do not attach cables to metal deck.
Bonding to Structure: Bond straps directly to basic structure, taking care not to penetrate any
adjacent parts.
Bonding to Equipment Mounted on Vibration Isolation Hangers and Supports: Install so vibration
is not transmitted to rigidly mounted equipment.
Use exothermic-welded connectors for outdoor locations, but if a disconnect-type connection is
required, use a bolted clamp.
Grounding and Bonding for Piping:
1.
2.
3.
Metal Water Service Pipe: Install insulated copper grounding conductors, in conduit, from
building's main service equipment, or grounding bus, to main metal water service entrances to
building. Connect grounding conductors to main metal water service pipes, using a bolted clamp
connector or by bolting a lug-type connector to a pipe flange, using one of the lug bolts of the
flange. Where a dielectric main water fitting is installed, connect grounding conductor on street
side of fitting. Bond metal grounding conductor conduit or sleeve to conductor at each end.
Water Meter Piping: Use braided-type bonding jumpers to electrically bypass water meters.
Connect to pipe with a bolted connector.
Bond each aboveground portion of gas piping system downstream from equipment shutoff
valve.Retain and edit paragraph below to exceed NFPA 70 requirements, and comply with
NFPA 70 recommendations for a higher standard of safety or electromagnetic interference
suppression if needed.
KROGER GA-631 MINOR RENOVATION / OPELIKA, AL
26 05 26-6
R/L/R PROJECT NO. 11-151
GROUNDING AND BONDING FOR ELECTRICAL SYSTEMS
3.4
FIELD QUALITY CONTROL
A.
Perform the following tests and inspections and prepare test reports:
1.
2.
After installing grounding system but before permanent electrical circuits have been energized, test
for compliance with requirements.
Test completed grounding system at each location where a maximum ground-resistance level is
specified, at service disconnect enclosure grounding terminal, and at ground test wells.
a.
b.
B.
Report measured ground resistances that exceed the following values:
1.
2.
3.
4.
C.
Measure ground resistance not less than two full days after last trace of precipitation and
without soil being moistened by any means other than natural drainage or seepage and
without chemical treatment or other artificial means of reducing natural ground resistance.
Perform tests by fall-of-potential method according to IEEE 81.
Power and Lighting Equipment or System with Capacity 500 kVA and Less: 10 ohms.
Power and Lighting Equipment or System with Capacity 500 to 1000 kVA: 5 ohms.
Power and Lighting Equipment or System with Capacity More Than 1000 kVA: 3 ohms.
Power Distribution Units or Panelboards Serving Electronic Equipment: 3 ohm(s).
Excessive Ground Resistance: If resistance to ground exceeds specified values, notify Architect
promptly and include recommendations to reduce ground resistance.
1.
Cost to reduce ground resistance shall be at Contractor’s expense.
END OF SECTION 26 05 26
KROGER GA-631 MINOR RENOVATION / OPELIKA, AL
26 05 29-1
R/L/R PROJECT NO. 11-151
HANGERS AND SUPPORTS FOR ELECTRICAL SYSTEMS
SECTION 26 05 29 - HANGERS AND SUPPORTS FOR ELECTRICAL SYSTEMS
PART 1 - GENERAL
1.1
SUMMARY
A.
Section includes:
1.
2.
B.
Provide the following supports and anchors:
1.
2.
3.
4.
5.
6.
7.
8.
9.
10.
1.2
Hangers and supports for electrical equipment and systems.
Construction requirements for concrete bases.
Clevis Hangers
Riser Clamps
C-Clamp
I-Beam Clamps
One-Hole Conduit Straps
Two-Hole Conduit Straps
Conduit Clamps
Round Steel Rods
Toggle Bolts
Structural Steel Angles
PERFORMANCE REQUIREMENTS
A.
Design supports for multiple raceways capable of supporting combined weight of supported
systems and its contents.
B.
Design equipment supports capable of supporting combined operating weight of supported
equipment and connected systems and components.
C.
Rated Strength: Adequate in tension, shear, and pullout force to resist maximum loads
calculated or imposed for this Project, with a minimum structural safety factor of five times the
applied force.
1.3
SUBMITTALS
A.
Product Data: For steel slotted support systems.
B.
Shop Drawings: Show fabrication and installation details and include calculations for the
following:
1.
2.
3.
Trapeze hangers. Include Product Data for components.
Steel slotted channel systems. Include Product Data for components.
Equipment supports.
KROGER GA-631 MINOR RENOVATION / OPELIKA, AL
26 05 29-2
R/L/R PROJECT NO. 11-151
HANGERS AND SUPPORTS FOR ELECTRICAL SYSTEMS
1.4
QUALITY ASSURANCE
A.
Welding: Qualify procedures and personnel according to AWS D1.1/D1.1M, "Structural
Welding Code - Steel."
B.
Comply with NFPA 70.
PART 2 - PRODUCTS
2.1
MANUFACTURER'S SUPPORTING DEVICES:
A.
Provide supporting devices which comply with manufacturer's standard materials, design and
construction, in accordance with published product information and as required for complete
installation; and as herein specified. Where more than one type of supporting device meets
requirements, selection is Contractor's option.
B.
Supports: Provide supporting devices of types, sizes and materials indicated; and having the
following construction features:
C.
Clevis Hangers: For supporting rigid metal conduit; galvanized steel; with 1/2-inch (13-mm)
diameter hole for round steel rod; approximately 54-lbs. (25-kg) per 100 units.
D.
Riser Clamps: For supporting rigid metal conduit; black steel; with two (2) bolts and nuts, and
4-inch (101.6-mm) ears; approximately 510-lbs. (231-kg) per 100 units.
E.
C-Clamps: Malleable iron; 1/2-inch (13-mm) rod size; approximately 70-lbs. (32-kg) per 100
units.
F.
Beam Clamps: Malleable iron, 1-1/4-inch by 3/16-inch (32-mm by 5-mm) stock; 5/16-inch (8mm) cross bolt; approximately 22-lbs. (10-kg) per 100 units for 1-inch (25.4-mm) size.
G.
One-Hole Conduit Straps: For supporting 3/4-inch (19-mm) rigid metal conduit, galvanized
steel; approximately 7-lbs. (3-kg) per 100 units.
H.
Two-Hole Conduit Straps: For supporting 3/4-inch (19-mm) rigid metal conduit, galvanized
steel; 3/4-inch (19-mm) strap width; and 2-1/8-inch (54-mm) between center of screw holes.
I.
Conduit Clamps: For supporting electrical metal tubing or rigid steel conduit; galvanized stamp
steel, with bolt, approximately 7-lbs. (3-kg) per 100 units. Heat-treated spring steel clamps not
permitted.
J.
Hexagon Nuts: For 1/2-inch (13-mm) rod size; galvanized steel; approximately 4 lbs. (2-kg)
per 100 units.
K.
Round Steel Rod: Black steel; 1/2-inch (13-mm) diameter; approximately 67 lbs. (30-kg)
pounds per 100-ft. (30.5-m).
L.
Anchors: Provide anchors of types, sizes and materials indicated, with following construction
features:
KROGER GA-631 MINOR RENOVATION / OPELIKA, AL
26 05 29-3
R/L/R PROJECT NO. 11-151
HANGERS AND SUPPORTS FOR ELECTRICAL SYSTEMS
1.
2.
3.
4.
5.
6.
M.
U-Channel Strut Systems: Provide U-channel strut system for supporting electrical equipment,
12 gage, 0.108-inch (2.743-mm), hot-dip galvanized steel, of types and sizes indicated;
construct with 9/16-inch (14-mm) diameter holes, 8-inches (203-mm) o.c. on top surface, with
standard plated finish and with the following fittings, which mate and match with U-channel:
1.
2.
3.
4.
5.
6.
7.
8.
9.
2.2
Lead Expansion Anchors: 1/2-inch (13-mm); approximately 38 lbs. (17-kg) per 100
units.
Toggle Bolts: Springhead; 3/16-inch by 4-inch (5-mm by 102-mm); approximately 5-lbs
(2-kg) per 100 units.
Wood Screws: Cadmium-plated, with machine or flat heads; size.
Sheet Metal Screws: Cadmium-plated, with machine, pan heads or hex-drive heads; size.
Threaded Studs: Cadmium-plated, set by a power charge, and provided with lock
washers and nuts; size.
Nylon Anchors: Nail-type.
Fixture Hangers
Channel Hangers
End Caps
Beam Clamps
Wiring Studs
Thinwall Conduit Clamps
Rigid Conduit Clamps
Conduit Hangers
U-Bolts
FABRICATED SUPPORTING DEVICES:
A.
Provide required structural steel shapes, complying with Division 05, for added support, where
required.
PART 3 - EXECUTION
3.1
APPLICATION
A.
Comply with NECA 1 and NECA 101 for application of hangers and supports for electrical
equipment and systems except if requirements in this Section are stricter.
B.
Maximum Support Spacing and Minimum Hanger Rod Size for Raceway: Space supports for
EMT, IMC, and RMC as required by NFPA 70. Minimum rod size shall be 1/4 inch (6 mm) in
diameter.
C.
Multiple Raceways or Cables: Install trapeze-type supports fabricated with steel slotted or
other support system, sized so capacity can be increased by at least 25 percent in future without
exceeding specified design load limits.
1.
Secure raceways and cables to these supports with two-bolt conduit clamps.
KROGER GA-631 MINOR RENOVATION / OPELIKA, AL
26 05 29-4
R/L/R PROJECT NO. 11-151
HANGERS AND SUPPORTS FOR ELECTRICAL SYSTEMS
D.
3.2
Spring-steel clamps designed for supporting single conduits without bolts may be used for 11/2-inch (38-mm) and smaller raceways serving branch circuits and communication systems
above suspended ceilings and for fastening raceways to trapeze supports.
SUPPORT INSTALLATION
A.
Coordinate with other electrical work, including raceway and wiring work, as necessary to
interface installation of supporting devices with other work.
B.
Install supporting devices and attachments, in accordance with manufacturer's written
instructions and with recognized industry practices. Comply with requirements of NEC and
NECA for installation of supporting devices. Arrange for grouping of parallel runs of
horizontal conduits to be supported to- gether on trapeze-type hangers, where possible. Install
supports with spacings in compliance with NEC requirements. Wire or perforated metal strap is
not acceptable for hanger supports or securing raceways to supporting devices.
C.
Supports and Anchors: Securely and rigidly fasten equipment in place with pipe hangers, wall
brackets, clamps, approved hangers, threaded C-clamps, with retainers or ceiling trapeze. All
hangers, clamps and support fittings to be malleable iron. Fasten using wood screws or screwtype bolts on concrete or brick; by machine screws, welded threaded studs, steel or malleable
iron clamps on steel work. Nail-type nylon anchors and threaded studs, driven in by powder
charge, and provided with lock washers and nuts, may be used in lieu of expansion bolts or
machine or wood screws. Anchors shall not be welded to steel structures, or attached to roof or
floor deck. Cut holes in reinforced concrete beams or in concrete joists without cutting
reinforcing bars. Holes not used, to be filled.
D.
Install supporting devices securely and rigidly in place.
E.
Conduits supported, using suspended ceiling system, will not be permitted.
3.3
CONCRETE BASES
A.
Refer to Drawings and Division 03 Sections for concrete work.
END OF SECTION 26 05 29
KROGER GA-631 MINOR RENOVATION / OPELIKA, AL
26 05 33-1
R/L/R PROJECT NO. 11-151
RACEWAY AND BOXES FOR ELECTRICAL SYSTEMS
SECTION 26 05 33 - RACEWAY AND BOXES FOR ELECTRICAL SYSTEMS
PART 1 - GENERAL
1.1
SUMMARY
A.
Section includes
1.
B.
Provide electrical raceway work as indicated by drawings and schedules, including:
1.
2.
3.
4.
5.
6.
7.
C.
Raceways, electrical conduits, fittings, boxes, enclosures, power poles, drop reel cords,
and cabinets for electrical wiring.
Electrical Metallic Tubing
Flexible Metal Conduit
Liquid-Tight Flexible Metal Conduit
Intermediate Metal Conduit
Wireway
In Floor Duct System
Rigid Non-Metallic Conduit
KROGER DIRECT BUY PROGRAM: Owner supplied/Contractor installed.
1.
The Kroger Company will supply the following items for the Contractor to install:
a.
1.2
Drop Cord Reels
SUBMITTALS
A.
1.3
Product Data: For surface raceways, wireways and fittings, floor boxes, hinged-cover
enclosures, and cabinets.
QUALITY ASSURANCE
A.
Electrical Components, Devices, and Accessories: Listed and labeled as defined in NFPA 70,
Article 100, by a testing agency acceptable to authorities having jurisdiction, and marked for
intended use.
B.
Comply with NFPA 70.
PART 2 - PRODUCTS
2.1
METAL CONDUIT AND TUBING
A.
Electrical Metallic Tubing (EMT): ANSI C80.3 and UL 797, galvanized or zinc coated steel.
KROGER GA-631 MINOR RENOVATION / OPELIKA, AL
26 05 33-2
R/L/R PROJECT NO. 11-151
RACEWAY AND BOXES FOR ELECTRICAL SYSTEMS
1.
Fittings: Galvanized or zinc coated steel, set-screw type.
a.
B.
Intermediate Metal Conduit (IMC): Heavy wall, full weight, zinc-coated, threaded type
(galvanized after cutting/threading) conforming to ANSI C80.1 and UL 6. Provide zinc coating
fused to inside and outside walls
1.
2.
Threaded Fittings: Galvanized or zinc coated steel.
Provide for the following applications:
a.
b.
c.
2.2
Do not use die-cast fittings.
Conduit installed embedded in concrete or masonry.
Conduits which turn up from below grade or below slab (including the 90 degree
fittings which connect to conduits 24-inches (610-mm) below grade/slab).
Other applications as indicated in Contract Documents or as otherwise required for
special physical protection (nearby vehicular/equipment traffic, site maintenance
equipment, etc.).
RIGID NONMETALLIC CONDUIT AND DUCTS
A.
General:
1.
2.
3.
B.
Underground Plastic Conduits/Ducts: Heavy wall, Schedule 40, PVC, 90 degrees C, conforming
to NEMA TC-2, UL listed and labeled for direct burial or concrete encasement and in
conformity with NEC Article 354.
1.
C.
Kroger will only allow limited use of nonmetallic (PVC-Sch 40) conduit material to
underground installations and in areas that are exposed to moisture (i.e. coolers, freezers).
Transition from PVC to EMT after leaving the cooler/freezer. Provide conduit seal-off at
the transition from PVC to EMT to prevent air transfer; install seal-off no more than 12inches from freezer/cooler exterior wall.
Where underground conduits project out of the concrete slab, change from PVC to IMC
prior to emerging from the slab.
Unless noted otherwise in Contract Documents, provide for all horizontal conduit runs
below grade and for other applications as indicated in Contract Documents.
Basis of Design Product: Carlon Electrical Products; Plus 40, Heavy Wall EPC Type EB35
Nonmetallic Conduit/Duct Accessories
1.
General: Provide conduit/duct accessories of types, sizes, and materials, complying with
manufacturer's published product information, which mate and match conduit and tubing.
2.
Duct Spacers ("Chairs"):
a.
b.
Base Spacers Basis of Design Product: Carlon Electrical Products; #S288*L
series.
Intermediate Spacers Basis of Design Product: Carlon Electrical Products;
#S289*L series
KROGER GA-631 MINOR RENOVATION / OPELIKA, AL
26 05 33-3
R/L/R PROJECT NO. 11-151
RACEWAY AND BOXES FOR ELECTRICAL SYSTEMS
3.
Horizontal Elbows For Service Entrance Conduits:
a.
b.
c.
4.
Other Elbows:
a.
b.
5.
2.3
Bend: Maximum 45 degree,
Radius: Minimum 24-inches (610-mm). Provide larger minimum radius if directed
in field.
Provide multiple units as required to obtain required offset (i.e. provide two 45
degree elbows to obtain a 90 degree offset).
Bend: Maximum 90 degree.
Radius: Minimum 24-inches (610-mm). Provide larger minimum radius if directed
in field.
Provide all other couplers, adapters, "O" rings, sealing, etc. as required. Provide
miscellaneous fittings that have been specifically designed and manufactured for their
particular application.
FLEXIBLE METAL CONDUIT
A.
See Division 26 Section “Low Voltage Electric Power Conductors and Cables” for MC Cable
for low voltage electric power conductors and cables.
B.
General:
1.
2.
3.
4.
5.
6.
7.
Comply with FS WW-C-566 and UL 1
Form from continuous length of spirally wound, interlocked zinc-coated or galvanized
(inside & outside) strip steel.
Conduit Fittings: Threadless hinged clamp type and insulated throats.
Straight Terminal Connectors: One piece body, female end with clamp and deep slotted
machine screw for securing conduit, and male threaded end provided with locknut.
Do not use 45 degree or 90 degree terminal angle connectors for flexible or water-tight
flexible metal conduit in locations which will not be fully accessible after completion of
construction.
Provide full size insulated green ground wire for all applications, regardless of length.
Provide flexible metal conduit for the following applications:
a.
b.
c.
C.
Final 24-inches (610-mm) of connection to motors or control items subject to
movement or vibration.
Conduits within movable partitions.
See Division 26 Section "Low Voltage Electric Power Conductors and Cables" for
fixture whips.
Liquid-Tight Flexible Metal Conduit: Single strip, flexible, continuous, interlocked, and doublewrapped steel; galvanized inside and outside.
1.
Liquid-Tight Jacket: Flexible polyvinyl chloride (PVC). Provide smooth-wall type
jackets (not a corrugated look) for finished area furniture whip (and similar) applications.
KROGER GA-631 MINOR RENOVATION / OPELIKA, AL
26 05 33-4
R/L/R PROJECT NO. 11-151
RACEWAY AND BOXES FOR ELECTRICAL SYSTEMS
2.
3.
4.
5.
6.
7.
2.4
Liquid-Tight Flexible Metal Conduit Fittings: FS W-F-406, Type 1, Class 3, Style G.
Provide cadmium plated, malleable iron fittings with compression type steel ferrule and
neoprene gasket sealing rings, with insulated throat.
Straight Terminal Connectors: One piece body, female end with clamp and deep slotted
machine screw for securing conduit, and male threaded end provided with locknut.
Terminal Angle Connectors (45 degree or 90 degree): Two-piece body construction with
removable upper section, female end with clamp and deep slotted machine screw for
securing conduit, and male threaded end provided with locknut.
Do not use 45 degree or 90 degree terminal angle connectors for flexible or water-tight
flexible metal conduit in locations which will not be fully accessible after completion of
construction.
Provide full size insulated green ground wire for all applications, regardless of length.
Provide liquid-tight flexible metal conduit for final connections to equipment subject to
moisture or corrosive conditions.
RACEWAY ACCESSORIES:
A.
Provide conduit joints with standard conduit couplings, (no running-threads) cadmium plated.
Schedule 40 PVC conduit is also permitted for use in masonry or concrete.
B.
Provide conduit and tubing accessories of types, sizes and materials complying with
manufacturer's published product information which mate and match conduit and tubing.
C.
Conduit Bodies: Provide galvanized cast metal conduit bodies of types, shapes and sizes as
required to fulfill job requirements and NEC requirements. Construct conduit bodies with
threaded conduit entrance ends, removable covers, either cast or of galvanized steel and
corrosion resistant screws.
D.
Conduit Fittings, General:
1.
2.
3.
4.
5.
Construct locknuts for securing conduit to metal enclosure with sharp edge for digging
into metal and ridged outside circumference for proper fastening.
Bushings for terminating conduits smaller than 1-1/4-inch (32-mm) are to have flared
bottom and ribbed sides, with smooth upper edges to prevent injury to cable insulation.
Provide insulated type bushings for terminating threaded conduits. Bushings are to have
flared bottom and ribbed sides. Provide phenolic insulating ring molded into bushing in
upper edge.
Bushing of standard or insulated type to have screw type grounding terminal.
Miscellaneous fittings such as reducers, chase nipples, 3-piece unions, split couplings and
plugs to be specifically designed for their particular application.
E.
Liquid-Tight Flexible Metal Conduit Fittings: Provide cadmium plated, malleable iron fittings
with compression type steel ferrule and neoprene gasket sealing rings, with insulated, or noninsulated throat.
F.
Conduit Seal Compound:
1.
Products
a.
OZ-/Gedney Division; General Signal Co.; Neer #DC
KROGER GA-631 MINOR RENOVATION / OPELIKA, AL
26 05 33-5
R/L/R PROJECT NO. 11-151
RACEWAY AND BOXES FOR ELECTRICAL SYSTEMS
b.
2.5
3M Corp.; Scotchfill Electrical Insulating Putty.
METAL WIREWAYS:
A.
Provide electrical wireways of types, grades, sizes and number of channels for each type of
service as indicated. Provide complete assembly of raceway including, but not limited to,
couplings, offsets, elbows, expansion joints, adapters, holddown straps, end caps and other
components and accessories as required for complete system.
B.
Lay-In Wireways: Construct lay-in wireways with covers, in accordance with UL 870 and with
components UL listed, including lengths, connectors and fittings.
C.
Select units to allow fastening cover closed without use of parts other than standard lengths,
fittings connectors. Construct units to be capable of sealing cover in closed position with
sealing wire. Provide wireways without knockouts.
D.
Connectors: Provide wireway connectors suitable for lay-in conductors, with connector covers
permanently attached which removal is not necessary to utilize lay-in feature.
E.
Finish: Protect sheet metal parts with rust inhibiting coating and baked enamel finish. Plate
finish hardware to prevent corrosion. Protect screws installed toward inside wireway with
spring nuts to prevent wire insulation damage.
F.
Wireways to be square duct of standard lengths factory finished ANSI-49 gray with hinged
cover lengths and removal cover. Metal to be not less than 0.0740-inches (2-mm) thick.
G.
Wireways and all fittings to be UL Listed File No. E6625, provided without knockouts and
complete with all 2-piece universal hangers and connectors.
2.6
IN-FLOOR RACEWAY SYSTEM:
A.
In-Floor Raceway System: (In-floor systems are only used in under shelving units and
sometimes at the checklanes. Refer to drawings for exact locations on use.)
1.
2.
3.
4.
5.
6.
2.7
Basis of Design Product: Walkerduct Systems, Inc. a Wiremold Company; Walkerduct.
Provide with "after-set" type method.
Fabricate raceway with blank sections, size #4/0.
Provide inserts to allow for a minimum 2-1/2-inch to 3-inch (63.5-mm to 76-mm) of
concrete floor over under-floor raceway duct.
Size junction box per Drawings. Boxes shall be selected per anticipated floor finish
conditions.
Provide sealing compound for waterproofing joints
SURFACE RACEWAYS
A.
General: Use surface raceways only where indicated on the Drawings or as approved by Kroger
Representative.
KROGER GA-631 MINOR RENOVATION / OPELIKA, AL
26 05 33-6
R/L/R PROJECT NO. 11-151
RACEWAY AND BOXES FOR ELECTRICAL SYSTEMS
B.
Surface Metal Raceways: Galvanized steel with snap-on covers. Raceway shall be provided
with an ivory finish.
1.
Manufacturers:
a.
b.
2.8
Thomas & Betts Corporation.; 800-816-7809
Wiremold/Legrand, Walker Systems Division 800-621-0049
BOXES, ENCLOSURES, AND CABINETS
A.
Provide electrical boxes and fittings as required by the National Electric Code (NEC) and as
necessary for ease of installation, including
1.
2.
3.
4.
5.
6.
7.
B.
Outlet boxes
Junction boxes
Pull boxes
Conduit bodies
Bushings
Locknuts
Seals
Low Voltage System (Premise Alarm, Telephone, Fire Alarm, Data.): Provide conduits and
outlet boxes for premise alarms indicated on the Drawings or as required.
1.
Provide conduit when alarm wiring is to be installed down a column and unfinished walls
in backroom areas.
C.
Cast-Metal Outlet and Device Boxes: NEMA FB 1, ferrous alloy, Type FD, with gasketed
cover.
D.
Nonmetallic Outlet and Device Boxes: NEMA OS 2.
E.
Metal Floor Boxes: Cast metal, fully adjustable, rectangular.
F.
Nonmetallic Floor Boxes: Nonadjustable, round.
G.
Small Sheet Metal Pull and Junction Boxes: NEMA OS 1.
H.
Cast-Metal Access, Pull, and Junction Boxes: NEMA FB 1, cast aluminum with gasketed
cover.
I.
Hinged-Cover Enclosures: NEMA 250, Type 1, with continuous-hinge cover with flush latch,
unless otherwise indicated.
1.
2.
J.
Metal Enclosures: Steel, finished inside and out with manufacturer's standard enamel.
Nonmetallic Enclosures: Plastic
Cabinets:
KROGER GA-631 MINOR RENOVATION / OPELIKA, AL
26 05 33-7
R/L/R PROJECT NO. 11-151
RACEWAY AND BOXES FOR ELECTRICAL SYSTEMS
1.
2.
3.
4.
5.
K.
Interior Outlet Boxes: Provide galvanized steel interior outlet wiring boxes, of the type, shape
and size, including depth of box, to suit each respective location and installation.
1.
2.
3.
4.
L.
Basis of Design Product: TayMac Corp.; MX3200
Pull and Junction Boxes: Provide necessary junction and pull boxes, whether shown on
drawings or not, which may be required for pulling or splicing cables to make the conduit
system practical.
1.
2.
3.
2.9
Provide with stamped knockouts in back and sides, and with threaded holes with screws
for securing box covers or wiring devices.
Boxes Recessed in Furred Walls: Not less than 4-inches (102-mm) square minimum.
Provide single or double gang plaster cover as required for device.
Interior Outlet Box Accessories: Provide outlet box accessories as required for each
installation, including mounting brackets, wallboard hangers, extension rings, fixture
studs, cable clamps and metal straps for supporting outlet boxes being used and meeting
requirements of individual wiring situations. Choice of accessories is installer's option.
Surface Mounted and Weatherproof Outlet Boxes: Provide corrosion resistant cast metal outlet
wiring boxes, of types, shapes and sizes, including depth of boxes, with threaded conduit ends,
face plates suitably configured for each application, including face plate gaskets and corrosion
resistant fasteners. In wet locations provide an enclosure that is weatherproof whether or not
the plug cap is inserted.
1.
M.
NEMA 250, Type 1, galvanized-steel box with removable interior panel and removable
front, finished inside and out with manufacturer's standard enamel.
Hinged door in front cover with flush latch and concealed hinge.
Key latch to match panelboards.
Metal barriers to separate wiring of different systems and voltage.
Accessory feet where required for freestanding equipment.
Construct boxes of code gage galvanized steel sized to turn or support cables.
Provide covers with brass screws.
Provide hinged covers on boxes larger than 24-inches by 24-inches (609-mm by 609mm).
POWER POLES
A.
Power Poles Other Than Checklanes:
1.
2.
Power and/or data poles shall be provided only where indicated in the construction
documents.
General Use Tele-Power Poles: Multiple service aluminum modular type, small frame
with rounded end panels, number of compartments (2 or 3), etc. as required for each
application.
a.
b.
c.
Basis of Design: Wiremold/Legrand; Vista series
Determine specific configurations and applications in field.
Finish Color: As directed by Owner.
KROGER GA-631 MINOR RENOVATION / OPELIKA, AL
26 05 33-8
R/L/R PROJECT NO. 11-151
RACEWAY AND BOXES FOR ELECTRICAL SYSTEMS
d.
e.
2.10
A.
Provide factory fittings and accessories as required for a complete bonded
installation.
Provide a total of four duplex receptacles as specified under Division 26 Section
“Wiring Devices” or furniture feed for powered systems furniture connection.
Coordinate requirements with furniture vendor.
PROMOTIONAL ISLAND ELECTRICAL FEEDS
Drop Reel Cords: Refer to Division 01 Section “Direct Buy Owner Furnished Products” for
information on Owner supplied drop reel cords.
PART 3 - EXECUTION
3.1
INSTALLATION, GENERAL
A.
In addition to other contract document requirements, the following special requirements shall be
strictly enforced.
1.
2.
3.
Install wiring for systems in conduit sized per NEC, minimum 3/4-inch (19-mm) dia.
unless otherwise indicated.
Install wiring for different power voltages in raceway systems separate from each other .
Install wiring, with the exception of voice and data, for the various electrical systems in
raceway systems separate from each other.
a.
Low Voltage Systems:
1)
2)
3)
4.
5.
6.
7.
8.
B.
In stores with ceilings, run free air above the ceiling unless space above
ceilings is an air plenum in which case plenum rated cable shall be used.
In stores without ceilings, run in structure with j-hooks or other standard
installation methods.
Low voltage systems wiring is required to be in conduit stub ups above
ceiling or to structure in all cases.
Install normal system power feeders and branch circuits in separate raceways from
emergency system power.
Do not install conduits within slabs.
Provide steel conduit and fittings indoors above the slabs.
Provide conduit fittings with insulated throats or plastic bushings for conduits 2-inches
(51-mm) and larger where insulated throats are not readily available.
Provide conduit runs exceeding 100-feet (30.5-m) in length or having in excess of three
90 degree turns with pull boxes.
Don not exceed a conduit fill of 40 percent or per NEC, whichever is less.
KROGER GA-631 MINOR RENOVATION / OPELIKA, AL
26 05 33-9
R/L/R PROJECT NO. 11-151
RACEWAY AND BOXES FOR ELECTRICAL SYSTEMS
3.2
RACEWAY APPLICATION
A.
Seismic-restraint devices are specified in Division 20 Section "Vibration and Seismic Controls
for Facility Services."
B.
Hanger and support devices are specified in Division 20 Section "Hangers and Supports for
Facility Services."
C.
Use liquid-tight flexible conduit for connection of motors and for other electrical equipment
where subject to movement or vibration, and also where subjected to one or more of following
conditions:
1.
2.
3.
4.
5.
Exterior location.
Moist or humid atmosphere where condensate can be expected to accumulate.
Corrosive atmosphere.
Subjected to water supply.
Subjected to dripping oil, grease and/or water.
D.
Cut conduits straight, properly ream and cut threads for heavy wall conduit deep and clean.
E.
Size conduits to meet NEC, except not conduit smaller than 3/4-inch (19-mm) trade size, except
for switch legs or where expressly noted otherwise.
F.
Fasten conduit terminations in sheet metal enclosures by two locknuts and terminate with
bushing. Install locknuts inside and outside enclosure.
G.
Conduits are not to cross pipe shafts or ventilating duct openings.
H.
Keep conduits a minimum distance of 6-inches (152-mm) from parallel runs of flues, hot water
pipes or other sources of heat. Wherever possible, install horizontal raceway runs above water
and steam piping.
I.
Support riser conduit at each floor level with clamp hangers.
J.
Use of running threads at conduit joints and terminations is prohibited. When required, use a 3piece union or split coupling.
K.
Complete electrical raceway installation before starting installing cables/wires within raceways.
L.
Concealed Conduits:
1.
2.
3.
4.
Conceal conduit in sales area or within customer view to a point 14-ft (4.27-m) above
finish floor,above décor height line.
Install concealed raceways parallel with or at right angles to ceilings, walls and structural
members.
Metallic raceways installed underground are to have factory applied epoxy or coal-tar
coating. Field paint conduit threads with corrosion inhibiting compound before couplings
are assembled. Draw up coupling and conduit sufficiently tight to ensure watertightness.
For slabs on grade, install conduits minimum of 3-inches (76-mm) below bottom of
concrete slabs.
KROGER GA-631 MINOR RENOVATION / OPELIKA, AL
26 05 33-10
R/L/R PROJECT NO. 11-151
RACEWAY AND BOXES FOR ELECTRICAL SYSTEMS
5.
6.
M.
Exposed Conduits:
1.
2.
3.
4.
5.
N.
3.3
Install exposed conduits and extensions from concealed conduit systems neatly, parallel
with, or at right angles to walls of building.
Install exposed conduit work as not to interfere with ceiling inserts, lights or ventilation
ducts or outlets.
Support exposed conduits by use of hanger, clamps or clips. Support conduits on each
side of bends within 3-feet (1-m) of connection to junction box, outlet box, cabinet or
fitting, and on spacing not to exceed 10-feet (3-m).
Above requirements for exposed conduits also apply to conduits installed in space above
hung ceilings and in crawl spaces.
Provide minimum intermediate metal conduit (IMC) for exposed conduits in the back
room or dock area below a height of 15-feet (4.6-m).
Non-Metallic Conduits:
1.
2.
O.
Install exterior underground conduits minimum 24-inches (610-mm) below finished
grade.
Conduits in Concrete Slabs: Do not install conduits within concrete slabs.
Install solvent-cemented joints in accordance with recommendations of manufacturer.
Install PVC conduits underground or under floor slab only in accordance with local
utility practices.
Conduit Seals: See manufacturers details for requirements and coordinate with Division 07.
INSTALLATION OF UNDERGROUND CONDUIT
A.
Direct-Buried Conduit:
1.
2.
3.
4.
Excavate trench bottom to provide firm and uniform support for conduit. Prepare trench
bottom as specified in Division 31 Section "Earth Moving" for pipe less than 6 inches
(150 mm) in nominal diameter.
Install backfill as specified in Division 31 Section "Earth Moving."
After installing conduit, backfill and compact. Start at tie-in point, and work toward end
of conduit run, leaving conduit at end of run free to move with expansion and contraction
as temperature changes during this process. Firmly hand tamp backfill around conduit to
provide maximum supporting strength. After placing controlled backfill to within 12
inches (300 mm) of finished grade, make final conduit connection at end of run and
complete backfilling with normal compaction as specified in Division 31 Section "Earth
Moving."
Install manufactured duct elbows for stub-ups at poles and equipment and at building
entrances through the floor, unless otherwise indicated. Encase elbows for stub-up ducts
throughout the length of the elbow.
a.
b.
For stub-ups at equipment mounted on outdoor concrete bases, extend steel conduit
horizontally a minimum of 60 inches (1500 mm) from edge of equipment pad or
foundation. Install insulated grounding bushings on terminations at equipment.
For stub-ups at equipment not mounted outdoors (i.e. branch circuits), transition
from PVC to RMC above grade.
KROGER GA-631 MINOR RENOVATION / OPELIKA, AL
26 05 33-11
R/L/R PROJECT NO. 11-151
RACEWAY AND BOXES FOR ELECTRICAL SYSTEMS
5.
3.4
Warning Planks: Bury warning planks approximately 12 inches (300 mm) above directburied conduits, placing them 24 inches (600 mm) o.c. Align planks along the width and
along the centerline of conduit.
INSTALLATION OF BOXES:
A.
Install raceway junction boxes flush with finished concrete floor.
B.
Install electrical boxes and fittings where indicated complying with manufacturer's written
instructions, applicable requirements of NEC and NECA's "Standard of Installation", and in
compliance with recognized industry practices to ensure that products fulfill requirements.
C.
Coordinate installation of electrical boxes and fittings with wire/cable and raceway installation
work.
D.
Provide weatherproof outlets for interior and exterior locations as indicated on Drawings by
"WP."
E.
Provide weather-resistant outlets for exterior locations as indicated on Drawings by "WR."
F.
Provide cast metal outlet boxes with exposed rigid steel or IMC raceway systems and as
required for surface mounted devices. Seal around entire perimeter with clear silicone sealant
when set on floor slab.
G.
Provide knockout closures to cap unused knockout holes where blanks have been removed.
H.
Install boxes and conduit bodies in those locations to ensure ready accessibility of electrical
wiring.
I.
Install boxes and conduit bodies in accordance with proper work phasing of the work.
J.
Avoid using round boxes where conduit must enter box through side of box, which would result
in difficult and insecure connections where fastened with locknut or bushing on rounded
surface.
K.
Fasten boxes rigidly to substrates or structural surfaces to which attached, or solidly embed
electrical boxes in concrete or masonry. Supports and anchors to be in accordance with
Division 20 Section "Hangers and Supports for Facility Services."
L.
Provide electrical connections for installed boxes.
M.
Provide hangers and brackets for junction and pull boxes, and coordinated properly with conduit
hangers or fastenings to maintain proper alignment and prevent distortion of box. See Division
20 Section "Hangers and Supports for Facility Services" for supports.
N.
The Owner reserves the right to change the location of any outlet a distance of 6-feet (1829mm) in any direction from plan location before the work is actually roughed in at no additional
charge.
KROGER GA-631 MINOR RENOVATION / OPELIKA, AL
26 05 33-12
R/L/R PROJECT NO. 11-151
RACEWAY AND BOXES FOR ELECTRICAL SYSTEMS
3.5
INSTALLATION OF POWER POLES
A.
Install per manufacturer’s instructions.
B.
Mount power poles to structure above with galvanized steel channel and mount to floor or
fixture.
1.
3.6
Provide junction boxes in structure with flexible conduit into pole and down to electronic
equipment as required per the Drawings.
INSTALLATION OF DROP REEL CORDS
A.
3.7
Mount where indicated to bottom of structural steel beam or joist as recommended by drop reel
cord manufacturer.
FIRESTOPPING
A.
Apply firestopping to electrical penetrations of fire-rated floor and wall assemblies to restore
original fire-resistance rating of assembly. Firestopping materials and installation requirements
are specified in Division 07 Section "Through-Penetration Firestop Systems."
END OF SECTION 26 05 33
KROGER GA-631 MINOR RENOVATION / OPELIKA, AL
26 05 53-1
R/L/R PROJECT NO. 11-151
IDENTIFICATION FOR ELECTRICAL SYSTEMS
SECTION 26 05 53 - IDENTIFICATION FOR ELECTRICAL SYSTEMS
PART 1 - GENERAL
1.1
SUMMARY
A.
Section includes:
1.
2.
3.
B.
Provide electrical identification for the following:
1.
2.
3.
4.
5.
1.2
Identification for conductors and communication and control cable.
Warning labels and signs.
Equipment identification labels.
Buried conduit warnings.
Electrical power, control and auxiliary system conductors.
Operational instructions and warnings.
Danger signs.
Equipment and system identification signs.
QUALITY ASSURANCE
A.
1.3
Comply with ANSI A13.1.
COORDINATION
A.
Coordinate identification names, abbreviations, colors, and other features with requirements in
the Contract Documents, Shop Drawings, manufacturer's wiring diagrams, and the Operation
and Maintenance Manual, and with those required by codes, standards, and 29 CFR 1910.145.
Use consistent designations throughout Project.
PART 2 - PRODUCTS
2.1
ACCEPTABLE MANUFACTURERS:
A.
Manufacturers
1.
2.
3.
W. H. Brady Co.; 800-541-1686
Panduit Corp.; 800-777-3300
Ideal Industries, Inc.; 800-435-0705
KROGER GA-631 MINOR RENOVATION / OPELIKA, AL
26 05 53-2
R/L/R PROJECT NO. 11-151
IDENTIFICATION FOR ELECTRICAL SYSTEMS
2.2
CONDUCTOR AND COMMUNICATION- AND CONTROL-CABLE IDENTIFICATION
MATERIALS
A.
2.3
Marker Tape: Vinyl or vinyl -cloth, self-adhesive wraparound type, with circuit identification
legend machine printed by thermal transfer or equivalent process.
WARNING LABELS AND SIGNS
A.
Comply with NFPA 70, 29 CFR 1910.145, and NEC.
B.
Labels: Configured for display on front covers, doors, or other access to electrical service
equipment.
C.
Warning label and sign shall include, but are not limited to, the following legends:
1.
2.
Multiple Power Source Warning: "DANGER - ELECTRICAL SHOCK HAZARD EQUIPMENT HAS MULTIPLE POWER SOURCES."
Workspace Clearance Warning: "WARNING - OSHA REGULATION - AREA IN
FRONT OF ELECTRICAL EQUIPMENT MUST BE KEPT CLEAR FOR 48
INCHES.”
PART 3 - EXECUTION
3.1
APPLICATION
A.
Clearly label branch circuit conduits and boxes with a permanent felt tip marker.
B.
Auxiliary Electrical Systems Conductor and Cable Identification: Use marker tape to identify
field-installed alarm, control, signal, sound, intercommunications, voice, and data wiring
connections.
1.
2.
C.
Identify conductors, cables, and terminals in enclosures and at junctions, terminals, and
cable pull points. Identify by system and circuit designation.
Use system of designations that is uniform and consistent with system used by
manufacturer for factory-installed connections.
Warning Labels for Indoor Cabinets, Boxes, and Enclosures for Power and Lighting: Comply
with 29 CFR 1910.145 and apply self-adhesive warning labels. Identify system voltage with
black letters on an orange background. Apply to exterior of door, cover, or other access.
1.
Equipment with Multiple Power or Control Sources:
equipment including, but not limited to, the following:
a.
b.
Power transfer switches.
Controls with external control power connections.
Apply to door or cover of
KROGER GA-631 MINOR RENOVATION / OPELIKA, AL
26 05 53-3
R/L/R PROJECT NO. 11-151
IDENTIFICATION FOR ELECTRICAL SYSTEMS
2.
D.
Equipment Requiring Workspace Clearance According to NFPA 70: Unless otherwise
indicated, apply to door or cover of equipment but not on flush panelboards and similar
equipment in finished spaces.
Equipment Identification Labels: On each unit of equipment, install unique designation label
that is consistent with wiring diagrams, schedules, and Operation and Maintenance Manual.
Apply labels to disconnect switches and protection equipment, central or master units, control
panels, control stations, terminal cabinets, and racks of each system. Systems include power,
lighting, control, communication, signal, monitoring, and alarm systems unless equipment is
provided with its own identification.
1.
Labeling Instructions:
a.
b.
c.
2.
Equipment to Be Labeled:
a.
b.
c.
d.
e.
f.
g.
h.
i.
j.
k.
l.
m.
3.2
Indoor Equipment: Self-adhesive, engraved, laminated acrylic or melamine label.
Unless otherwise indicated, provide a single line of text with 1/2-inch- (13-mm-)
high letters on 1-1/2-inch- (38-mm-) high label; where 2 lines of text are required,
use labels 2 inches (50 mm) high.
Outdoor Equipment: Engraved, laminated acrylic or melamine label, drilled for
screw attachment.
Elevated Components: Increase sizes of labels and legend to those appropriate for
viewing from the floor.
Panelboards, electrical cabinets, and enclosures.
Electrical switchgear and switchboards.
Transformers.
Motor-control centers.
Disconnect switches.
Enclosed circuit breakers.
Motor starters.
Push-button and pilot lights.
Power transfer equipment.
Contactors.
Energy management system
Panelboards
Premise alarm panels
INSTALLATION
A.
Verify identity of each item before installing identification products.
B.
Location: Install identification materials and devices at locations for most convenient viewing
without interference with operation and maintenance of equipment.
C.
Apply identification devices to surfaces that require finish after completing finish work.
D.
Self-Adhesive Identification Products: Clean surfaces before application, using materials and
methods recommended by manufacturer of identification device.
KROGER GA-631 MINOR RENOVATION / OPELIKA, AL
26 05 53-4
R/L/R PROJECT NO. 11-151
IDENTIFICATION FOR ELECTRICAL SYSTEMS
E.
Attach nonadhesive signs and plastic labels with screws and auxiliary hardware appropriate to
the location and substrate.
F.
Color-Coding for Phase and Voltage Level Identification, 600 V and Less: Use the colors listed
below for ungrounded service, feeder, and branch-circuit conductors.
1.
2.
Color shall be factory applied.
Colors for 208/120-V Circuits:
a.
b.
c.
3.
Phase A: Black.
Phase B: Red.
Phase C: Blue.
Colors for 480/277-V Circuits:
a.
b.
c.
Phase A: Brown.
Phase B: Orange.
Phase C: Yellow.
END OF SECTION 26 05 53
KROGER GA-631 MINOR RENOVATION / OPELIKA, AL
26 05 26-1
R/L/R PROJECT NO. 11-151
ELECTRICAL CONNECTIONS TO VENDOR KIOSK
SECTION 26 05 80 – ELECTRICAL CONNECTIONS TO VENDOR KIOSK
PART 1 - GENERAL
1.1
SUMMARY
A.
Section Includes
1.
Connections to Owner Furnished and Owner Installed vendor kiosk.
a.
b.
2.
Contractor supplied items:
a.
3.
Necessary materials as required to install final electrical connections to kiosk as
specified in other Division 26 Sections.
Contractor installed items:
a.
1.2
The Kroger Company will supply and install the vendor kiosk.
Comply with requirements in Division 00 Section “General Conditions” for Owner
furnished products.
Final electrical connections.
SUBMITTALS
A.
The Owner’s representative will provide the following submittals for the Contractor and
Architect’s review.
1.
1.3
Shop Drawings: Detailing electrical connections and locations.
COORDINATION
A.
Review the Owner’s Shop Drawings, and compare to Contract Documents.
B.
Notify the Owner’s Representative of any conflicts.
C.
Attend Pre-Installation Conference with Owner’s installer.
D.
All rough-in requirements to be completed prior to kiosk delivery date.
KROGER GA-631 MINOR RENOVATION / OPELIKA, AL
26 05 26-2
R/L/R PROJECT NO. 11-151
ELECTRICAL CONNECTIONS TO VENDOR KIOSK
PART 2 - PRODUCTS
2.1
MATERIALS
A.
Refer to other Division 26 Sections for materials required to install final connections to vendor
kiosk.
PART 3 - EXECUTION
3.1
INSTALLATION SCHEDULE
A.
3.2
Coordinate scheduling of connections with fixture installation.
INSTALLATION
A.
The kiosk requires various electrical connections to components installed in kiosk in advance.
B.
Install all final connections from rough-in location.
END OF SECTION 26 05 80
KROGER GA-631 MINOR RENOVATION / OPELIKA, AL
R/L/R PROJECT NO. 11-151
26 22 00-1
LOW VOLTAGE TRANSFORMERS
SECTION 26 22 00 - LOW VOLTAGE TRANSFORMERS
PART 1 - GENERAL
1.1
SUMMARY
A.
Section includes:
1.
KROGER DIRECT BUY PROGRAM: Owner supplied/Contractor installed.
a.
b.
2.
Contractor supplied items:
a.
3.
Accessories as required for a complete installation.
Contractor installed items:
a.
b.
1.2
The Kroger Company will provide dry type low voltage distribution transformers
and oil filled primary transformers (where applicable) as indicated on drawings for
transformers.
Comply with requirements in Division 00 Section “General Conditions.”
Transformers as indicated on drawings.
Equipment pads per the installation requirements in this section. All working
clearances around transformer shall be maintained per factory recommendations.
SUBMITTALS
A.
The Owner’s representative will provide the following submittals for the Contractor’s and
Architect’s review.
1.
2.
1.3
Product Data: For each type of transformer, accessory, and component indicated.
Include dimensions and manufacturers' technical data on features, performance, electrical
characteristics, ratings, and finishes.
Shop Drawings: For each transformer and related equipment.
QUALITY ASSURANCE
A.
Electrical Components Devices and Accessories: Listed and labeled as defined in NFPA 70,
Article 100, by a testing agency acceptable to authorities having jurisdiction and marked for
intended use.
B.
Comply with NFPA 70.
C.
All low voltage distribution transformer insulating rating shall be in accordance with NEMA
ST20 Standards for 220 degree C UL component recognized insulation system. Transformers
shall be manufactured and tested in accordance with ANSI Standards C57.12.01 and C57.12.91.
All transformers shall be UL listed and labeled. Rate for continuous operation at listed KVA.
KROGER GA-631 MINOR RENOVATION / OPELIKA, AL
R/L/R PROJECT NO. 11-151
D.
26 22 00-2
LOW VOLTAGE TRANSFORMERS
All primary transformers shall comply with ANSI Standards C57.12.12 for live front
application and C57.12.26 for separable insulated high voltage connector applications.
Standards C57.12.34 will eventually replace 12 and 26.
PART 2 - PRODUCTS
2.1
TRANSFORMERS
A.
Refer to Division 01 Section “Direct Buy Owner Furnished Products” for information on
transformers.
PART 3 - EXECUTION
3.1
INSTALLATION
A.
Install units on vibration mounts; comply with manufacturer's indicated installation method.
B.
Provide elevated concrete housekeeping pad for each floor-mounted transformer as detailed on
the Drawings and complying with Division 03 Section "Cast-in-Place Concrete Slabs."
C.
Install transformers in strict compliance with NEC Article 450. Transformer locations shown
on Drawings are shown approximately to scale. It is the responsibility of the electrical installer
to provide final coordination between all trades (prior to rough-in) so that code required and
factory recommended ventilation and working clearances around all transformer installations
are maintained.
D.
Install dry type transformers with hangers from building structure. Support by wall wherever
possible.
1.
2.
3.
4.
Install hangers to top cord of joists/joist girder at panel points.
Where hangers do not align with structure install steel angle or U-channel strut, sized to
carry load of light fixture, spanning across a minimum of two structural members resting
on top or bolted to the bottom of the top cord of joists/joist girder at panel points.
Install hangers as indicated on the Drawings or as submitted and approved by the Owner.
Mount transformers on vibration isolating pads suitable for isolating the transformer
noise from the building structure.
E.
Make final connections with an accurate torque wrench and tighten to factory published torque
values. Submit written documentation . Make final connections to primary and secondary taps
as required to fulfill project voltage requirements.
F.
Vacuum and wipe down transformer, enclosure interior and enclosure exterior. From the time
of manufacture, through all shipping/storage phases, the transformers shall be kept dry and free
of condensation and rapid temperature fluctuation. Transformers shall not be stored outdoors.
Transformers shall be maintained at temperatures above ambient while in storage.
KROGER GA-631 MINOR RENOVATION / OPELIKA, AL
R/L/R PROJECT NO. 11-151
3.2
26 22 00-3
LOW VOLTAGE TRANSFORMERS
TESTING
A.
Provide testing, and keep written (dated) log, for the following.
1.
2.
3.
4.
5.
6.
B.
"Megger", at factory at time of shipping.
"Megger", at job site, immediately prior to final connections.
Phase rotation and turns ratio, at factory at time of shipping.
Phase rotation and turns ratio, at job site, immediately prior to final connections.
Secondary voltage under no load, after installation.
Secondary voltage under full load, after installation.
Upon completion of installation of transformers, energize primary circuitry at rated voltage and
frequency from normal power source, and test transformers, including, but not limited to,
audible sound levels, to demonstrate capability and compliance with requirements. Where
possible, correct malfunctioning units at site, then retest to demonstrate compliance; otherwise,
remove and replace with new units or components, and proceed with retesting.
END OF SECTION 26 22 00
KROGER GA-631 MINOR RENOVATION / OPELIKA, AL
R/L/R PROJECT NO. 11-151
26 24 16-1
PANELBOARDS
SECTION 26 24 16 - PANELBOARDS
PART 1 - GENERAL
1.1
SUMMARY
A.
Section includes:
1.
KROGER DIRECT BUY PROGRAM: Owner supplied/Contractor installed.
a.
The Kroger Company will supply distribution panelboards and lighting and
appliance branch-circuit panelboards indicted on drawings for:
1)
2)
b.
2.
1.2
Accessories as required for a complete installation.
Contractor installed items:
a.
4.
5.
Comply with requirements in Division 00 Section “General Conditions.”
Contractor supplied items:
a.
3.
Power Distribution Panelboards
Lighting and Appliance Panelboards
Distribution panelboards and lighting and appliance branch-circuit panelboards.
Panels, accessories and installation as required for a complete system.
Equipment does not have to match existing equipment.
SUBMITTALS
A.
The Owner’s representative will provide the following submittals for the Contractor’s
information upon request:
1.
2.
1.3
Product Data: For each type of panelboard, overcurrent protective device, accessory, and
component indicated. Include dimensions and manufacturers' technical data on features,
performance, electrical characteristics, ratings, and finishes.
Shop Drawings: For each panelboard and related equipment.
QUALITY ASSURANCE
A.
Electrical Components, Devices, and Accessories: Listed and labeled as defined in NFPA 70,
Article 100, by a testing agency acceptable to authorities having jurisdiction, and marked for
intended use.
B.
Comply with NEMA PB 1.
KROGER GA-631 MINOR RENOVATION / OPELIKA, AL
R/L/R PROJECT NO. 11-151
C.
26 24 16-2
PANELBOARDS
Comply with NFPA 70.
PART 2 - PRODUCTS
2.1
PANELBOARDS
A.
Refer to Division 01 Section "Direct Buy Owner Furnished Products" for information on
panelboards.
PART 3 - EXECUTION
3.1
INSTALLATION
A.
Install panelboards and accessories according to NEMA PB 1.1.
B.
Comply with mounting and anchoring requirements specified in Division 20 Section "Vibration
and Seismic Controls for Facility Services."
C.
Mount top of trim 74 inches (1880 mm) above finished floor, unless otherwise indicated.
D.
Mount plumb and rigid without distortion of box. Mount recessed panelboards with fronts
uniformly flush with wall finish.
E.
Install overcurrent protective devices and controllers.
1.
Set field-adjustable switches and circuit-breaker trip ranges.
F.
Install filler plates in unused spaces.
G.
Stub four 1-inch (27-GRC) empty conduits from panelboard into accessible ceiling space or
space designated to be ceiling space in the future. Stub four 1-inch (27-GRC) empty conduits
into raised floor space or below slab not on grade.
H.
Identify field-installed conductors, interconnecting wiring, and components; provide warning
signs as specified in Division 26 Section "Identification for Electrical Systems."
I.
Ground equipment according to Division 26 Section "Grounding and Bonding for Electrical
Systems."
J.
Connect wiring according to Division 26 Section "Low Voltage Electrical Power Conductors
and Cables."
3.2
FIELD QUALITY CONTROL
A.
Prepare for acceptance tests as follows:
KROGER GA-631 MINOR RENOVATION / OPELIKA, AL
R/L/R PROJECT NO. 11-151
1.
2.
B.
26 24 16-3
PANELBOARDS
Test insulation resistance for each panelboard bus, component, connecting supply, feeder,
and control circuit.
Test continuity of each circuit.
Perform the following field tests and inspections and prepare test reports:
1.
2.
3.
Perform each electrical test and visual and mechanical inspection stated in NETA ATS,
Section 7.5 for switches and Section 7.6 for molded-case circuit breakers. Certify
compliance with test parameters.
Correct malfunctioning units on-site, where possible, and retest to demonstrate
compliance; otherwise, replace with new units and retest.
Set field adjustable circuit breaker “trip” ratings in compliance with manufacturer’s
recommendations.
END OF SECTION 26 24 16
KROGER GA-631 MINOR RENOVATION / OPELIKA, AL
R/L/R PROJECT NO. 11-151
26 27 26-1
WIRING DEVICES
SECTION 26 27 26 - WIRING DEVICES
PART 1 - GENERAL
1.1
SUMMARY
A.
Section includes:
1.
2.
3.
4.
B.
Receptacles, receptacles with integral GFCI, and associated device plates.
Switches.
Occupancy sensors.
Plugmold pre wired raceway
KROGER DIRECT BUY PROGRAM: Owner supplied/Contractor installed.
1.
The Kroger Company will supply the following items for the Contractor to install.
a.
b.
c.
d.
2.
3.
4.
1.2
Occupancy sensors
Lighting controller and contactors
Building environmental control
Cooler and Freezer lighting switches
Comply with requirements in Division 00 Section “General Conditions.”
Contractor supplied items: Accessories as required for a complete installation
Contractor installed items: Control devices listed above.
SUBMITTALS
A.
Product Data: For each type of product indicated.
B.
Shop Drawings: List of legends and description of materials and process used for premarking
wall plates.
1.3
QUALITY ASSURANCE
A.
Electrical Components, Devices, and Accessories: Listed and labeled as defined in NFPA 70,
Article 100, by a testing agency acceptable to authorities having jurisdiction, and marked for
intended use.
B.
Comply with NFPA 70.
KROGER GA-631 MINOR RENOVATION / OPELIKA, AL
R/L/R PROJECT NO. 11-151
26 27 26-2
WIRING DEVICES
PART 2 - PRODUCTS
2.1
MANUFACTURERS
A.
Manufacturers' Names:
Shortened versions (shown in parentheses) of the following
manufacturers' names are used in other Part 2 articles:
1.
2.2
Hubbell Incorporated; Wiring Device-Kellems (Hubbell).
RECEPTACLES
A.
Convenience Receptacles, 125 V, 20 A: Comply with NEMA WD 1, NEMA WD 6
configuration 5-20R, and UL 498.
B.
Pre-Wired Raceway: With grounded outlets at 6-inches (152-mm) o.c.
1.
Basis of Design: The Wiremold Company; Series 2000; 800-621-0049.
a.
2.
Color:
a.
b.
C.
Raceway: Ivory.
Outlets: Ivory.
Commercial Grade Blade Receptacles: Provide duplex, straight blade receptacles, 2-pole, 3wire, grounding, with green hexagonal equipment ground screw. 20 amp, 125 volt, with metal
plaster ears; design for side and back wiring with spring loaded, screw activated pressure plate,
with NEMA configuration 5-20R, unless otherwise indicated.
1.
Manufacturers:
a.
b.
c.
d.
D.
Where duplex and GF receptacles are indicated, provide The Wiremold Company;
Series V3000; 800-621-0049.
Hubbell Incorporated Wiring Device-Kellems; (203) 882-4800
Leviton Mfg. Company Inc.; 800-323-0920
Bryant Electric, a Division of Hubbell Incorporated; 800-323-2792
Pass & Seymour/Legrand Wiring Devices & Accessories; 800-611-7277
Color of Receptacles:
1.
2.
3.
Ivory, unless otherwise noted.
Orange: For isolated ground.
Red: For emergency
E.
Locking receptacles other than 20 amp, 120 volt, shall be NEMA configuration of proper size
for loads indicated on plans or as required for equipment served.
F.
Provide outlets with standard plate, blank, receptacle, switch or cord hole, as required by outlet
symbol. Multiple devices mounted on one (1) piece gangplates of appropriate design. No
KROGER GA-631 MINOR RENOVATION / OPELIKA, AL
R/L/R PROJECT NO. 11-151
26 27 26-3
WIRING DEVICES
sectionalized plates permitted. Provide plates throughout building of same manufacturer and
design.
2.3
GFCI RECEPTACLES
A.
General Description: Straight blade, feed-through type. Comply with NEMA WD 1,
NEMA WD 6, UL 498, and UL 943, Class A. Provide with an indicator LED showing that the
unit is working properly when lit, and LED off when tripped.
B.
Duplex GFCI Convenience Receptacles, 125 V, 20 A:
1.
C.
GFCI Convenience Receptacles with Weatherproof Receptacle Covers
1.
2.
D.
Basis of Design Product: Hubbell Incorporated; #GFR5352IA.
Basis of Design Product: Intermatic Incorporated #WP1010MC; (815)-675-7000
Receptacles in Meat Preparation Room, Produce Prep and Salad Bar Prep Room, and
Seafood Department: GFI type with weatherproof “while-in-use” gray die cast metal
covers.
Weather Resistant GFCI Convenience Receptacles with Weatherproof Receptacle Covers
1.
Products:
a.
b.
c.
Hubbell Incorporated; GFTR20I
Legrand North America, Inc.; Pass and Seymour brand, 2095TRWRI
Cooper Industries; TWRVGF20V
E.
Receptacles in Deli, Bakery and Floral Department: GFI type without covers.
F.
Receptacles on Interior Building Columns:
1.
Basis of Design Manufacturer: Hubbell Incorporated; (203) 882-4800.
a.
G.
2.4
1 Gang Aluminum 3 Outlet Box Gray Hubbell #5320-0
Color of Receptacles: Ivory, unless otherwise noted.
WATER TIGHT RECEPTACLES
A.
Watertight receptacles up to, and including, 20 amp (120 volt); coordinate with above:
1.
Basis of Design:
Hubbell Incorporated; (203) 882-4800. For ampacities larger than
the 20 amp, provide Hubbell “Water tight Safety Shroud Twist Lock System” or
equivalent.
a.
b.
Wall Twist Lock Receptacle: Hubbell #HBL2320SW (matching male plug
#HBL2311SW).
Connector Receptacle: Hubbell #HBL2313SW (matching male plug
#HBL2311SW).
KROGER GA-631 MINOR RENOVATION / OPELIKA, AL
R/L/R PROJECT NO. 11-151
2.
2.5
26 27 26-4
WIRING DEVICES
Watertight receptacles: Provide Self-closing covers for wall mounted or interlocking type
receptacles and connector cover type if cord mounted receptacles.
SWITCHES
A.
Comply with NEMA WD 1 and UL 20.
B.
Switches, 120/277 V, 20 A:
1.
2.
Snap: Provide heavy-duty flush quiet toggle switches, 20 amps, 120-277 volts AC, with
mounting yoke insulated from mechanism, equip with plaster ears, switch handle and
back wired clamp pressure plate screw terminals.
Basis of Design: Hubbell Incorporated; (203) 882-4800.
a.
b.
c.
3.
C.
Color: Ivory, unless noted otherwise.
Pilot Light Switches, 20 A:
1.
2.
Pilot Light: Heavy-duty flush toggle switches, 20 amps, 120-277 VAC, with pilot light
handle illuminated when switch is on.
Basis of Design: Hubbell Incorporated; (203) 882-4800.
a.
b.
c.
3.
D.
2.6
Single-Pole: #1221-PL
2-Pole:
#1222-PC
3-Way:
#1223-PL
Color: Ivory, unless noted otherwise.
Single-Pole, Double-Throw, Momentary Contact, Center-Off Switches, 120/277 V, 20 A; for
use with mechanically held lighting contactors.
1.
2.
E.
Standard: #1221
3-Way: #1223
4-Way: #1224.
Basis of Design: Hubbell Incorporated; #HBL1557; (203) 882-4800.
Color: Ivory, unless noted otherwise.
Cooler and Freezer lighting switches: Refer to Division 01 Section “Direct Buy Owner
Furnished Products” for information on occupancy sensors.
OCCUPANCY SENSORS
A.
Refer to Division 01 Section “Direct Buy Owner Furnished Products” for information
occupancy sensors.
KROGER GA-631 MINOR RENOVATION / OPELIKA, AL
R/L/R PROJECT NO. 11-151
2.7
26 27 26-5
WIRING DEVICES
WALL PLATES
A.
Single and combination types to match physical configuration of corresponding wiring devices.
(single hole for simplex, two holes for duplex, etc.).
B.
Wall Plates: Provide standard plate, blank, cord hole, switch and duplex outlet wall plates for
wiring devices, of types, sizes and ganging, and cutouts, as indicated. Construct with stainless
steel screws for securing plates to devices. Provide plates possessing following additional
construction features, unless noted otherwise.
C.
Material and Finish:
1.
2.
3.
D.
2.8
Brush finished, Type 302, stainless steel.
Cast metal gasketed, approved for wet locations, with weather-resistant, while-in-use
gray die cast metal cover.
Stamped steel covers for "FS" and "FD" single gang devices boxes.
Wet-Location, Weatherproof Cover Plates: NEMA 250, complying with NEMA Type 3R
weather-resistant die-cast aluminum with lockable cover.
MISCELLANEOUS
A.
Lighting Controller and Contactors: Refer to Division 01 Section "Direct Buy Owner Furnished
Products" for information on lighting controller and contactors.
B.
Wiring between lighting controller and contactors to be provided and installed by Contractor.
C.
Building Environmental Control: Refer to Division 01 Section "Direct Buy Owner Furnished
Products" for information on building environmental control.
1.
The control will be through contactors which turn the power on/off to the lighting panels
D.
Contactors: Mechanically held of proper capacity, with coil clearing contacts. Wire contactors
with a relay to properly engage and release the contactor based on one channel switching. See
Drawings for proper wiring at the contactor.
E.
Control outside sign and lighting circuits with a photocell control wired through the building
environmental control.
F.
Control lighting circuits as indicated on Drawings.
PART 3 - EXECUTION
3.1
INSTALLATION
A.
Comply with NECA 1, including the mounting heights listed in that standard, unless otherwise
noted.
B.
Coordination with Other Trades:
KROGER GA-631 MINOR RENOVATION / OPELIKA, AL
R/L/R PROJECT NO. 11-151
1.
2.
3.
4.
C.
Take steps to insure that devices and their boxes are protected. Do not place wall finish
materials over device boxes and do not cut holes for boxes with routers that are guided by
riding against outside of the boxes.
Keep outlet boxes free of plaster, drywall joint compound, mortar, cement, concrete, dust,
paint, and other material that may contaminate the raceway system, conductors, and
cables.
Install device boxes in brick or block walls so that the cover plate does not cross a joint
unless the joint is troweled flush with the face of the wall.
Install wiring devices after wall preparation, including painting, is complete.
Conductors:
1.
2.
3.
4.
Do not strip insulation from conductors until just before they are spliced or terminated on
devices.
Strip insulation evenly around the conductor using tools designed for the purpose. Avoid
scoring or nicking of solid wire or cutting strands from stranded wire.
The length of free conductors at outlets for devices shall meet provisions of NFPA 70,
Article 300, without pigtails.
Existing Conductors:
a.
b.
c.
D.
Cut back and pigtail, or replace damaged conductors.
Straighten conductors that remain and remove corrosion and foreign matter.
Pigtailing existing conductors is permitted provided the outlet box is large enough.
Device Installation:
1.
2.
3.
4.
5.
6.
7.
8.
9.
10.
E.
26 27 26-6
WIRING DEVICES
Exterior receptacles to be ground-fault interrupter type.
Install wiring devices, as indicated, in accordance with manufacturer's written
instructions, applicable requirements of NEC and NECA's "Standard of Installation", and
in accordance with recognized industry practices to fulfill project requirements.
Coordinate with other work, including painting, electrical boxes and wiring work, as
necessary to interface installation of wiring devices with other work.
Owner reserves the right to change location of any outlet a distance of 6-feet (1.8-m) in
any direction from plan location, before work is actually roughed-in, at no extra charge.
Install wiring devices only in electrical boxes, which are clean, free from excess building
materials, dirt and debris.
Install brush finish stainless steel wall plates in indoor areas having flush devices, except
where marked "WP".
Install watertight receptacles in areas marked "WP" with continuous “while in use” clear
polycarbonate transparent covers.
Install wiring devices after wiring work is completed.
Install wiring devices per proper work phasing, as described in Division 01.
Tighten connectors and terminals, including screws and bolts, in accordance with
equipment manufacturer's published torque tightening values for wiring devices. Where
manufacturer's torquing requirements are not indicated, tighten connectors and terminals
to comply with tightening torques specified in UL 486A. Use properly scaled torque,
indicating hand tool.
Upon installation of wall plates and receptacles, advise other trades regarding proper and
cautions use of convenience outlets. At time of Substantial Completion, replace those items
which have been damaged, including those burned and scored by faulty plugs.
KROGER GA-631 MINOR RENOVATION / OPELIKA, AL
R/L/R PROJECT NO. 11-151
26 27 26-7
WIRING DEVICES
F.
Receptacle Orientation: Install ground pin of vertically mounted receptacles down, and on
horizontally mounted receptacles to the right.
G.
Device Plates: Do not use oversized or extra-deep plates. Repair wall finishes and remount
outlet boxes when standard device plates do not fit flush or do not cover rough wall opening.
H.
Arrangement of Devices: Unless otherwise indicated, mount flush, with long dimension
vertical. Group adjacent switches under single, multigang wall plates.
3.2
IDENTIFICATION
A.
3.3
Comply with Division 26 Section "Identification for Electrical Systems."
FIELD QUALITY CONTROL
A.
Perform tests and inspections and prepare test reports.
1.
2.
B.
Test Instruments: Use instruments that comply with UL 1436.
Test Instrument for Convenience Receptacles: Digital wiring analyzer with digital
readout or illuminated LED indicators of measurement.
Tests for Convenience Receptacles:
1.
2.
3.
4.
5.
6.
Line Voltage: Acceptable range is 105 to 132 V.
Percent Voltage Drop under 15-A Load: A value of 6 percent or higher is not acceptable.
Ground Impedance: Values of up to 2 ohms are acceptable.
GFCI Trip: Test for tripping values specified in UL 1436 and UL 943.
Using the test plug, verify that the device and its outlet box are securely mounted.
The tests shall be diagnostic, indicating damaged conductors, high resistance at the circuit
breaker, poor connections, inadequate fault current path, defective devices, or similar
problems. Correct circuit conditions, remove malfunctioning units and replace with new,
and retest as specified above.
END OF SECTION 26 27 26
KROGER GA-631 MINOR RENOVATION / OPELIKA, AL
26 28 00-1
R/L/R PROJECT NO. 11-151
LOW VOLTAGE CIRCUIT PROTECTIVE DEVICES
SECTION 26 28 00 – LOW VOLTAGE CIRCUIT PROTECTIVE DEVICES
PART 1 - GENERAL
1.1
SUMMARY
A.
Section Includes:
1.
KROGER DIRECT BUY PROGRAM: Owner supplied/Contractor installed.
a.
The Kroger Company will supply overcurrent protective devices required by
drawings, schedules, and section including:
1)
2)
b.
2.
Accessories, including fuses, as required for a complete installation.
Contractor installed items:
a.
1.2
Comply with requirements in Division 00 Section “General Conditions.”
Contractor supplied items:
a.
3.
Circuit Breakers
Shunt trip breakers
Overcurrent protective devices including fuses,
SUBMITTALS
A.
The Owner’s representative will provide the following submittals for the Contractor’s
information upon request:
1.
2.
B.
1.3
Product Data: For each overcurrent type indicated.
Operation and maintenance data.
Selective Coordination Study And Fuse Curves: Submit if fuse other than specified product is
selected.
QUALITY ASSURANCE
A.
Electrical Components, Devices, and Accessories: Listed and labeled as defined in NFPA 70,
Article 100, by a testing agency acceptable to authorities having jurisdiction, and marked for
intended use.
B.
Comply with NEMA FU 1.
C.
Comply with NFPA 70.
KROGER GA-631 MINOR RENOVATION / OPELIKA, AL
26 28 00-2
R/L/R PROJECT NO. 11-151
LOW VOLTAGE CIRCUIT PROTECTIVE DEVICES
PART 2 - PRODUCTS
2.1
CIRCUIT BREAKERS AND SHUNT TRIP BREAKERS
A.
Refer to Division 01 Section "Direct Buy Owner Furnished Products" for information on circuit
breakers.
B.
Except as otherwise indicated, Owner will provide circuit breakers, shunt trip breakers, and
ancillary components, of types, sizes, ratings and electrical characteristics indicated, which
comply with manufacturer's standard design, materials, components and construction, in
accordance with published product information, and as required for a complete installation.
2.2
FUSES:
A.
General: Provide fuses as specified.
B.
Except as otherwise indicated, provide fuses of same manufacturer and of types, sizes and
ratings, and electrical characteristic indicated, which comply with manufacturer's standard
design, materials, components and construction, in accordance with published product
information, and with industry standards and configurations.
C.
For 601 amps and larger circuits: NEMA Class "L" fuses in current ratings indicated.
1.
2.
3.
D.
Cooper Bussmann, Inc.: KRP-C; 636-394-2877
Ferraz Shawmut, Inc.; A4BY; 800-526-9067
Reliance: LCU
For use with switches rated 600 amps and smaller: Class "R" Fuses: Provide NEMA Class
RK-1, dual-element (low-peak) types 200,000 amp interrupting rating, with time delay of ten
seconds at 500 percent of rating,
1.
2.
3.
Cooper Bussmann, Inc.: LPNRK; 636-394-2877
Ferraz Shawmut, Inc.; A2DR; 800-526-9067
Reliance: LENR or NCLR
PART 3 - EXECUTION
3.1
INSTALLATION OF OVERCURRENT PROTECTIVE DEVICES:
A.
Install overcurrent protective devices, as indicated, in accordance with manufacturer's written
instructions and with recognized industry practices, to ensure that overcurrent protective devices
comply with requirements.
B.
Do not install fuses until equipment is ready to be energized.
C.
Conduct final test and inspections prior to energization of the equipment.
D.
Clean, tighten, and inspect electrical connections and inspect grounding conductors.
KROGER GA-631 MINOR RENOVATION / OPELIKA, AL
26 28 00-3
R/L/R PROJECT NO. 11-151
LOW VOLTAGE CIRCUIT PROTECTIVE DEVICES
END OF SECTION 26 28 00
KROGER GA-631 MINOR RENOVATION / OPELIKA, AL
26 28 16-1
R/L/R PROJECT NO. 11-151
ENCLOSED SWITCHES AND CIRCUIT BREAKERS
SECTION 26 28 16 - ENCLOSED SWITCHES AND CIRCUIT BREAKERS
PART 1 - GENERAL
1.1
SUMMARY
A.
Section includes:
1.
KROGER DIRECT BUY PROGRAM: Owner supplied/Contractor installed.
a.
The Kroger Company will supply the following items for the Contractor to install.
1)
2)
3)
b.
c.
2.
Accessories as required for a complete installation.
Contractor installed items:
a.
b.
c.
1.2
Wiring circuit and motor switches are indicated on Drawings and Schedules, and
as required by National Electrical Code (NEC).
Comply with requirements in Division 00 Section “General Conditions.”
Contractor supplied items:
a.
3.
Equipment Disconnects
Appliance Disconnects
Motor Circuit Disconnects
Equipment Disconnects
Appliance Disconnects
Motor Circuit Disconnects
SUBMITTALS
A.
The Owner’s representative will provide the following submittals for the Contractor’s
information upon request:
1.
2.
1.3
Product Data: For each type of enclosed switch, circuit breaker, accessory, and
component indicated.
Shop Drawings: Diagram power, signal, and control wiring.
QUALITY ASSURANCE
A.
Electrical Components, Devices, and Accessories: Listed and labeled as defined in NFPA 70,
Article 100, by a testing agency acceptable to authorities having jurisdiction, and marked for
intended use.
B.
Comply with NFPA 70.
KROGER GA-631 MINOR RENOVATION / OPELIKA, AL
26 28 16-2
R/L/R PROJECT NO. 11-151
ENCLOSED SWITCHES AND CIRCUIT BREAKERS
PART 2 - PRODUCTS
2.1
WIRING CIRCUIT AND MOTOR SWITCHES
A.
Refer to Division 01 Section "Direct Buy Owner Furnished Products" for information on the
following items:
1.
2.
3.
Prefabricated switches:
Molded-case circuit breakers and switches
Enclosures
PART 3 - EXECUTION
3.1
INSTALLATION
A.
Coordinate circuit and motor disconnect switch installation work with electrical raceway and
cable work, as necessary to interface installation of wiring devices with other work. Interface
installation with required phasing of work.
B.
The Owner will supply the disconnect, or shut off switch for the following items.
Contractor is to make final connections:
1.
2.
3.
4.
5.
6.
7.
8.
9.
10.
C.
3.2
Roof top HVAC units.
Hood fans.
Hood fan starters.
Trash compactors.
Utensil washer(s).
Balers.
Refrigeration condenser fans.
Fluid coolers (protocol).
Pump station (protocol).
Generators.
The Owner will supply the disconnect, or shut off switch for the following contractor supplied
items. The Contractor is to make final connections:
1.
D.
Electric water heaters
Install disconnect switches for use with motor driven appliances, and motors and controllers
within sight of controller position, unless otherwise indicated. Contractor to make final
electrical connections.
FIELD QUALITY CONTROL
A.
The
Prepare for acceptance testing as follows:
1.
Inspect mechanical and electrical connections.
KROGER GA-631 MINOR RENOVATION / OPELIKA, AL
26 28 16-3
R/L/R PROJECT NO. 11-151
ENCLOSED SWITCHES AND CIRCUIT BREAKERS
2.
3.
B.
Verify switch and relay type and labeling verification.
Verify rating of installed fuses.
Perform the following field tests and inspections and prepare test reports:
1.
2.
Perform each electrical test and visual and mechanical inspection stated in NETA ATS,
Section 7.5 for switches and Section 7.6 for molded-case circuit breakers. Certify
compliance with test parameters.
Correct malfunctioning units on-site, where possible, and retest to demonstrate
compliance; otherwise, replace with new units and retest.
END OF SECTION 26 28 16
KROGER GA-631 MINOR RENOVATION / OPELIKA, AL
R/L/R PROJECT NO. 11-151
26 29 00-1
LOW VOLTAGE CONTROLLERS
SECTION 26 29 00 - LOW VOLTAGE CONTROLLERS
PART 1 - GENERAL
1.1
SUMMARY
A.
Section Includes:
1.
KROGER DIRECT BUY PROGRAM: Owner supplied/Contractor installed.
a.
The Kroger Company will supply the following items for the Contractor to install.
1)
2)
3)
2.
Contractor supplied items:
a.
3.
Accessories as required for a complete installation.
Contractor installed items:
a.
b.
c.
1.2
Full voltage non-reversing combination motor starters
Manual motor starters
Exhaust systems motor starters
Full voltage non-reversing combination motor starters
Manual motor starters
Exhaust systems motor starters
SUBMITTALS
A.
The Owner’s representative will provide the following submittals for the Contractor’s
information upon request:
1.
2.
1.3
Product Data: For each type of enclosed switch, circuit breaker, accessory, and
component indicated.
Shop Drawings: Diagram power, signal, and control wiring
QUALITY ASSURANCE
A.
Electrical Components, Devices, and Accessories: Listed and labeled as defined in NFPA 70,
Article 100, by a testing agency acceptable to authorities having jurisdiction, and marked for
intended use.
B.
Comply with NFPA 70.
C.
Motors will be provided with overcurrent protection, motor disconnect and motor overload
protection as required by NEC.
KROGER GA-631 MINOR RENOVATION / OPELIKA, AL
R/L/R PROJECT NO. 11-151
26 29 00-2
LOW VOLTAGE CONTROLLERS
D.
Single-phase motors will be provided with NEMA Type A fusible disconnect, with lockable
handle for circuit protection, except where circuit to motor is already individually protected by
overcurrent protective device and disconnect in panelboard located within sight of and not more
than 50-feet (15.25-m) from motor.
E.
Starters will be in NEMA Type 1 enclosures.
F.
Three-Phase Motors:
1.
2.
3.
Combination circuit breakers or separate disconnect and magnetic starters for 3-phase
motors will be provided in NEMA 1 enclosure.
Combination fused disconnect switch and enclosed magnetic across-the-line starters, as
indicated, will be provided in NEMA 1 enclosure.
Starters will be provided with circuit protection, ambient compensated thermal overload
protection.
PART 2 - PRODUCTS
2.1
MOTOR STARTERS
A.
Refer to Division 01 Section "Direct Buy Owner Furnished Products" for information on the
following items:
1.
2.
3.
Full voltage non-reversing combination motor starters
Manual motor starters
Exhaust system motor starters
PART 3 - EXECUTION
3.1
INSTALLATION OF MOTOR STARTERS:
A.
Coordinate with other work, including motor and electrical wiring/cabling work, as necessary to
interface installation of motor starters with other work.
B.
Install fuses in fusible disconnects.
1.
2.
Refer to Division 26 Section “Low Voltage Circuit Protective Devices” for responsibility
of fuse provisions.
Provide fuse size per drawings; if fuse size is not indicated on drawings, size fuses per
nameplate data, not to exceed 125 percent of motor full load amps for 1.15 service factor
motors, and 115 percent for 1.00 service factor motors. Fuses above 600 amps rating for
motors shall be sized up to 150 percent of motor full load amps. Refer abnormal motor
starting conditions to Owner’s representative.
END OF SECTION 26 29 00
KROGER GA-631 MINOR RENOVATION / OPELIKA, AL
R/L/R PROJECT NO. 11-151
26 50 00-1
LIGHTING
SECTION 26 50 00 - LIGHTING
PART 1 - GENERAL
1.1
SUMMARY
A.
Section Includes
1.
KROGER DIRECT BUY PROGRAM: Owner supplied/Contractor installed.
a.
The Kroger Company will supply the following items:
1)
2)
3)
4)
5)
6)
b.
2.
1.2
Lighting fixture support components, accessories and other items not provided by
Owner necessary for a complete installation.
1)
Do not supply fixture support components for suspended lighting fixtures
over island cases.
2)
Lamp shields.
Contractor installed items:
a.
b.
c.
d.
e.
4.
5.
Comply with requirements in Division 00 Section “General Conditions.”
Contractor supplied items:
a.
3.
Fluorescent Type Fixtures
H.I.D. Type Fixtures
Incandescent Type Fixtures
Exit signs
Emergency lighting
Lamps for lighting fixtures
General Lighting
Outdoor Lighting
Local Lighting
Emergency Lighting
Lamps for lighting fixtures
Contractor removal and disposal of fluorescent lamps.
Contractor removal and disposal of PCB containing lighting ballasts.
SUBMITTALS
A.
The Owner’s representative will provide the following submittals for the Contractor’s
information upon request:
1.
Product Data: For each type of lighting fixture.
KROGER GA-631 MINOR RENOVATION / OPELIKA, AL
R/L/R PROJECT NO. 11-151
B.
1.3
26 50 00-2
LIGHTING
Landfill Records (For Fluorescent Lamp [and Lighting Ballast] Disposal): Indicate receipt and
acceptance of hazardous wastes by a landfill facility with an EPA ID number licensed to accept
hazardous wastes.
PERFORMANCE REQUIREMENTS
A.
Owner provided light fixtures will meet the following requirements:
1.
2.
3.
4.
5.
1.4
H.I.D. Ballasts: All H.I.D. fixtures and ballasts to be suitable for operation in 50 degrees
C. ambient.
Recessed Fixtures: Comply with NEMA LE 4 for ceiling compatibility for recessed
fixtures.
Incandescent Fixtures: Comply with UL 1598. Where LER (Luminaire Efficacy Rating)
is specified, test according to NEMA LE 5A.
Fluorescent Fixtures: Comply with UL 1598. Where LER is specified, test according to
NEMA LE 5 and NEMA LE 5A as applicable.
HID Fixtures: Comply with UL 1598. Where LER is specified, test according to
NEMA LE 5B.
QUALITY ASSURANCE
A.
Electrical Components, Devices, and Accessories: Listed and labeled as defined in NFPA 70,
Article 100, by a testing agency acceptable to authorities having jurisdiction, and marked for
intended use.
B.
Comply with NFPA 70.
C.
Exit Signs: Comply with UL 924; for sign colors, visibility, luminance, and lettering size,
comply with authorities having jurisdiction.
D.
Emergency Lighting Units: Self-contained units complying with UL 924.
PART 2 - PRODUCTS
2.1
INTERIOR LIGHTING
A.
2.2
Refer to Division 01 Section "Direct Buy Owner Furnished Products" for Light Fixture and
Lamp Package.
EXTERIOR LIGHTING
A.
Refer to Division 01 Section "Direct Buy Owner Furnished Products" for Site Lighting
Package.
B.
Wiring: Provide schedule 40 PVC conduit and Type XHHW wire for parking lot lighting
system. Provide sealed conduit to prevent moisture penetration.
KROGER GA-631 MINOR RENOVATION / OPELIKA, AL
R/L/R PROJECT NO. 11-151
1.
2.3
26 50 00-3
LIGHTING
Transition to rigid galvanized steel IMC just prior to emergence through grade.
EXIT SIGNS
A.
2.4
Refer to Division 01 Section "Direct Buy Owner Furnished Products" for Light Fixture and
Lamp Package.
EMERGENCY LIGHTING UNITS
A.
2.5
Refer to Division 01 Section "Owner Furnished Products" for Light Fixture and Lamp Package.
LIGHTING FIXTURE SUPPORT COMPONENTS
A.
Lighting shall not be supported from deck. All supports shall be connected to building steel.
B.
Comply with Division 20 Sections "Hangers and Supports for Facility Services" and "Vibration
and Seismic Control for Facility Services" for channel- and angle-iron supports and nonmetallic
channel and angle supports.
C.
Single-Stem Hangers: 1/2-inch (13-mm) steel tubing with swivel ball fittings and ceiling
canopy. Finish same as fixture.
D.
Wires: ASTM A 641/A 641M, Class 3, soft temper, zinc-coated steel, 12 gage (2.68 mm).
E.
Rod Hangers: 3/16-inch (5-mm) minimum diameter, cadmium-plated, threaded steel rod.
F.
Lay In and Troffer Light Fixture Support Clips: Comply with NEC Article 410-16 “Means of
Support “
1.
2.
G.
Provide for round or rectangular head tee bar.
Basis of Design: ERICO International Corporation; Caddy #515; 800-853-0878.
Comply with all local building codes “Means of Support.”
PART 3 - EXECUTION
3.1
EXAMINATION
A.
3.2
Verify if PCB ballasts exist in light fixtures to be removed. If PCB light fixture ballasts exist,
then follow requirements in PCB ballast handling and disposal requirements below.
INSTALLATION OF LIGHTING FIXTURES:
A.
Coordinate with other electrical work, as appropriate to properly interface installation of interior
lighting fixtures with other work and to properly interface with project work phasing.
KROGER GA-631 MINOR RENOVATION / OPELIKA, AL
R/L/R PROJECT NO. 11-151
26 50 00-4
LIGHTING
B.
Fasten fixtures securely to building structure. Install hangers to top cord of joists/joist girder at
panel points. Do not fasten hangers to metal deck. Where hangers do not align with structure
install steel angle or U-channel strut, sized to carry load of light fixture, spanning across a
minimum of two structural members resting on top or bolted to the bottom of the top cord of
joists/joist girder at panel points. Install fixtures level and plumb.
C.
Install four support clips, one in each corner, to fixtures installed in tee-bar ceilings.
3.3
REUSE OF EXISTING LIGHTING FIXTURES
A.
Clean and relamp all fixtures to be reused.
B.
Repair damaged or inoperable fixtures.
C.
Provide quantities and types of damaged fixtures to Owner’s Representative for replacement.
3.4
GROUNDING FOR EXTERIOR LIGHTING
A.
Ground metal poles and support structures according to Division 26 Section "Grounding and
Bonding for Electrical Systems."
1.
2.
B.
Ground nonmetallic poles and support structures according to Division 26 Section "Grounding
and Bonding for Electrical Systems."
1.
2.
3.
3.5
Install grounding electrode for each pole, unless otherwise indicated.
Install grounding conductor pigtail in the base for connecting luminaire to grounding
system.
Install grounding electrode for each pole.
Install grounding conductor and conductor protector.
Ground metallic components of pole accessories and foundations.
REMOVAL OF FLUORESCENT LAMPS
A.
Fluorescent Lamp Removal: Remove fluorescent lamps in accordance with local or state
regulations and Federal Regulation 40 CFR 273 and as follows:
1.
2.
3.
Do not break mercury containing fluorescent lamps or high intensity discharge lamps.
Contain any lamp in containers or packages that are structurally sound, adequate to
prevent breakage, and compatible with the contents of the lamps. Such containers and
packages must remain closed and must lack evidence of leakage under reasonably
foreseeable conditions.
Immediately clean up and place in a container any lamp that is broken and place in a
container any lamp that shows evidence of breakage, leakage, or damage that could cause
the release of mercury or other hazardous constituents to the environment. Containers
must be closed, structurally sound, compatible with the contents of the lamps and must
lack evidence of leakage, spillage of damage that could cause leakage or releases of
KROGER GA-631 MINOR RENOVATION / OPELIKA, AL
R/L/R PROJECT NO. 11-151
4.
5.
3.6
26 50 00-5
LIGHTING
mercury or other hazardous constituents to the environment under reasonably foreseeable
conditions.
Store lamps in containers or packages that prevent breakage and manage lamps in a way
that prevents the release of any component of the lamp to the environment.
Dispose of fluorescent Lamps off site in accordance with EPA, DOT, and local
regulations at a permitted site.
REMOVAL OF PCB CONTAINING LIGHTING BALLASTS
A.
PCB Ballast Handling And Disposal: Remove PCB containing ballast in accordance with local
or state regulations and Federal Regulation 40 CFR 761 and as follows:
1.
2.
3.
General: High power factor fluorescent light ballasts manufactured before 1978 and some
HID ballasts contain PCB compounds in their capacitors. Inspect ballasts in light fixtures
to be removed and remove from the Project site.
If the PCB content is not stated on the ballast label, the ballast shall be handled as a PCB
ballast.
Before removal, inspect PCB ballasts for leaks. If ballast appears to be leaking
(evidenced by potting compound leaking out or by an oily film on the ballast surface) the
ballast must be handled per EPA and requirements of authorities having jurisdiction.
Remove the ballast from the fixture and placed in an approved drum. Wear protective
gloves, eye protection, and protective clothing as necessary.
a.
4.
5.
6.
7.
8.
9.
3.7
If the fixture has also been contaminated, clean to less than 10 micrograms/100
square centimeters contamination before disposal. Utilize an approved PCB
abatement company for cleaning process.
Do not expose PCBs to open flames or other high temperature sources since toxic
decomposition by-products may be produced.
Place ballasts in US DOT approved type 17C or type 17H drums(barrels).
Place barrels in storage with the cover that came with the barrels, in location as
designated by Owner. Do not place barrels where they are exposed to weather.
Label and mark the PCB storage drums with EPA approved PCB labels and the storage
area with signs, marks and lines to meet the regulations of authorities having jurisdiction.
Provide approved PCB absorbent materials to be stored immediately adjacent to the drum
storage area. Do not place loose absorbent material in the drums.
Dispose of PCB containing light ballasts off site in accordance with EPA, DOT, and local
regulations at a permitted site.
ADJUST AND CLEAN:
A.
Install parabolic fixtures w/ protective film. Remove protective film when building is dust free.
B.
Clean lighting fixtures of dirt and debris upon completion of installation.
C.
Protect installed fixtures from damage during remainder of construction period.
KROGER GA-631 MINOR RENOVATION / OPELIKA, AL
R/L/R PROJECT NO. 11-151
3.8
26 50 00-6
LIGHTING
FIELD QUALITY CONTROL:
A.
At time of Substantial Completion, replace lamps in lighting fixtures which are observed to be
noticeably dimmed or with black ends on tubes after Contractor's use and testing, as judged by
The Owner’s Representative.
END OF SECTION 26 50 00
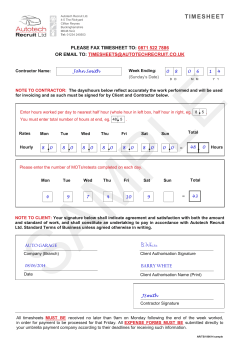
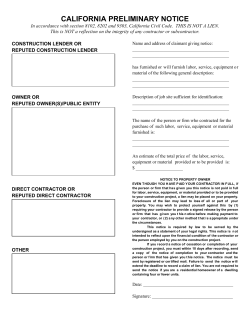
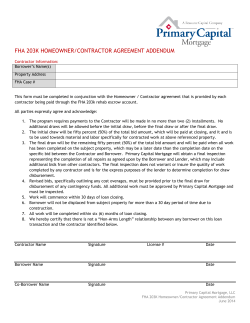

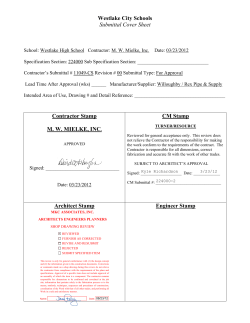
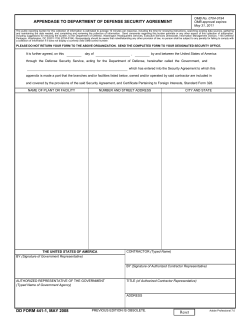
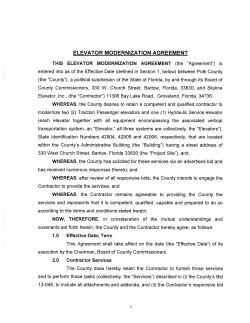

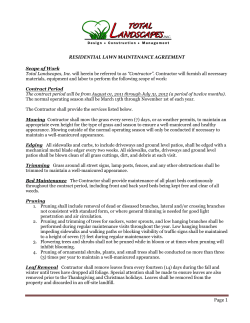

© Copyright 2026