
SURGICAL TECHNIQUE
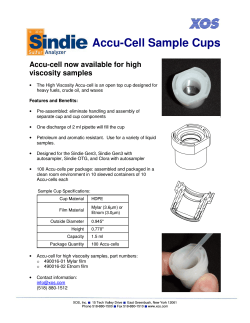
This publication is not intended for distribution in the USA. SURGICAL TECHNIQUE CONTENTS Introduction Device Compatibility Sleeve Offsets Overview of Implant Sizing Cup Positioning 2 2 4 5 Pre-Operative Planning X-ray Templating 6 Surgical Technique Step Step Step Step Step Step Step Step Step Step Step Step 1. Surgical approach 2. Preparing the acetabulum 3. Reaming the acetabulum 4. Acetabular cup trialling and positioning 5. Implanting the definitive cup 6. Assessing cup orientation 7. Removing the impaction cap 8. Preparing the femur 9. Trial reduction 10. Repositioning of the acetabular cup 11. Implanting the definitive femoral stem 12. Attaching the definitive femoral head 8 9 10 11 13 16 17 18 18 19 21 22 Appendices Training and Support Instrument Assembly Instructions 24 25 Ordering Information Implants27 DELTAMOTION® Sizing Chart 28 INTRODUCTION: DEVICE COMPATIBILITY Note DELTAMOTION shell and taper sleeve are manufactured from Titanium Alloy (Ti6AL4V) to eliminate the presence of Cobalt. DELTAMOTION Cups can be used in combination with either DELTAMOTION Modular heads, BIOLOX® delta heads or BIOLOX delta TS heads where an appropriate bore size is available. DELTAMOTION Modular Heads and Modular Sleeves should only be used with approved DePuy Synthes 12/14 ARTICUL/EZE® femoral stems (see product labelling for details). The DELTAMOTION system can be used with DePuy Synthes 12/14 ARTICUL/EZE femoral stems including: CORAIL® Hip System, S-ROM® 12/14, C-STEM™ AMT Triple Taper Stabilised Hip, SUMMIT®, TRI-LOCK® Bone Preservation Stem, DePuy Synthes PROXIMA™ ZTT and SILENT™. 2 Sleeve Offsets DELTAMOTION Sleeves provide neck length offsets in S, M, L & XL. DePuy Synthes BIOLOX delta Heads DELTAMOTION +1.5 S (-3 mm) +5 M (0 mm) +8.5 L (+4 mm) +12 XL (+7 mm) Head Compatibility Head Diameter DELTAMOTION BIOLOX delta BIOLOX delta TS 32 mm ✓ ✓ ✓ 36 mm ✓ ✓ ✓ 40 mm ✓ ✓ 44 mm ✓ ✓ 48 mm ✓ 3 IMPLANT SIZING: RELATIONSHIP BETWEEN TRIAL AND IMPLANT SIZE Note It is recommended to template every patient to ascertain the correct orientation and give an indication of cup size. Cups are labelled with their definitive outer diameter, i.e., a cup size 46 mm has an external diameter of 46 mm. A press-fit of 2 mm will be achieved by using a final reamer 2 mm smaller than the implant selected. Similarly a 1 mm press fit will be achieved by using a reamer 1 mm smaller than the chosen implant. Note DELTAMOTION trials are provided in 2 mm increments (even numbered only). Trials are hemispheres. Trial diameter = Implant diameter - 1 mm Trial diameter = Implant diameter - 1 mm Trial height = Implant height - 0.5 mm Trial height = Implant height - 0.5 mm It is important to understand that all DELTAMOTION Acetabular Cup implants are marked with true dimensions. A single trial is available for each cup size. The height of the trial is less than the height of the implant by 0.5 mm and the diameter is 1 mm smaller than the implant, ie, a 46 mm trial is actually 45 mm in diameter. The graters, cup trials and actual DELTAMOTION Cups are all a full hemisphere of 180˚. Under-reaming of the acetabulum is dependent on bone quality and the size of the acetabular component. Varying degrees of bone quality will require different levels of press-fit. 4 Soft bone will more readily accommodate a greater press-fit of the acetabular component than sclerotic bone. In some patients, line-to-line reaming may be sufficient to achieve stability. Where the acetablum is reamed often determines where the cup will sit, it is important to ream where the final cup is to be positioned. CUP POSITIONING Peer reviewed publications highlight the importance of acetabular component positioning in relation to short and long term outcomes during total hip arthroplasty for all types of bearing materials.1-8 Cup positioning should be varied to optimise fixation, range of motion and dislocation resistance and minimise the likelihood of subluxation, impingement and edge loading. This may be assessed during pre-operative planning, acetabular preparation and cup trialling. Sub-optimal component positioning may lead to edge loading, dislocation, increased wear, elevated metal ion release, ceramic squeaking and polyethylene fracture.1-8 The target cup inclination (as measured on radiographs) should be 40-45° taking into account local soft tissue and anatomic landmarks. The target cup anteversion (as measured on radiographs) should be 15-20° taking into account local soft tissue and anatomic landmarks. An alignment guide is provided to assist with cup positioning; however, cup orientation in the patient depends on patient position. The alignment guide does not allow for variation in patient position with respect to the operating table and it should be noted that patient orientation can vary throughout the procedure. Please Note The DELTAMOTION Cup has a target INTRAOPERATIVE cup inclination of 35°, with the intent of achieving a RADIOGRAPHIC cup position as described above. 5 PRE-OPERATIVE PLANNING X-RAY TEMPLATING The primary goal of total hip arthroplasty is the anatomic reconstruction of the hip joint, resulting in favourable prosthetic joint load and function. Mechanically, the goals are to create a stable articulation with optimised range of motion, restored biomechanics for muscular efficiency and equalised limb lengths.Meeting these goals begins with a thorough analysis of the hip with comparison to the contralateral side in anterior/posterior (A/P) and lateral projections. DELTAMOTION templates are available in 100%, 115% and 120% magnifications. Magnification markers taped to the patient’s leg at the level of the trochanter will assist in determining actual x-ray magnification. For the A/P projection, place both extremities in 15° of internal rotation to position the head and neck parallel to the coronal plane. Centre the beam on the symphysis pubis and ensure the proximal femoral shaft is included in the radiograph. The radiographs should clearly demonstrate the acetabular configuration and the endosteal and periosteal contours of the femoral head, neck and proximal femur. Frequently, the affected hip is fixed in external rotation, which leads one to underestimate the amount of offset present. In this situation it may be helpful to template the normal hip. Take into consideration any anatomical anomaly, dysplasia, previous fracture or leg length discrepancy. Using the A/P radiograph, position the template with the correct magnification 40°-45° to the inter-teardrop or interischial line so that the inferomedial aspect of the cup abuts the teardrop and the superior-lateral cup is not excessively uncovered. Implanting the cup at an intraoperative inclination angle of 35° and an anteversion angle of 15° to 20° is appropriate for most patients. 6 Note It is recommended to template every patient to ascertain the correct orientation and give an indication of cup size. Using the templates provided at the correct magnification, assess the X-ray to approximate the most suitable cup size and position. The landmarks for acetabular component positioning are the medial wall of the acetabulum (radiographic tear drop) and the superolateral rim of the acetabulum. The neck length can be adjusted as required, by moving the head/cup template in relation to the stem template to overlay in one of the four head offset positions. It is important to note that the template is a guide only. The final implant size and position will be determined intra-operatively. Before progressing with surgery, the surgeon can familiarise himself by carrying out the following steps: • Familiarise yourself with the weight of the mallet, as the force can vary dependent on the size and material. • It is helpful to get a ‘feel’ for the strength of the spring in the cup introducer and impactor, prior to clinical usage, as well as the weight of the impactor. The straight and curved introducer have a different ‘feel’ to them. 7 STEP 1: SURGICAL APPROACH All standard approaches that provide adequate access for Total Hip Replacement are acceptable. This document illustrates the patient lying on their contra-lateral side. 8 STEP 2: PREPARING THE ACETABULUM Expose the Acetabulum The approach undertaken to prepare the acetabulum is based on the surgeon’s specific technique and philosophy, but here are some considerations of approach: • Must have good visualisation (not recommended with minimally invasive approaches). • If not already done, excise the labrum and, if necessary, remove extensive osteophytes to visualise the entire acetabular rim. Clear soft tissue and cartilage as required to access other landmarks of the acetabulum, such as the true floor and the transverse acetabular ligament. • Ream carefully to maintain acetabular offset whilst avoiding excessive medialisation. • Start reaming close to the transverse acetabular ligament as this will compensate for the drift superiorly that can occur. • Ream to the teardrop and then expand. • Ream until a circumferential grip is achieved with the reamer (the assessment of the reamed cavity should always be made with the trials, since variation between reamers is too great to use them as a reliable indicator of press-fit). • Ensure no out of axis reaming is performed. • It is recommended to ream to 2 mm under the anticipated size to begin trialling. • Hard (sclerotic) bone is likely to lead to a requirement for ‘line to line’ reaming (please remember there is no additional fixation option available with this device). 9 Note Start by under-reaming by 2 mm, trial and if necessary go to 1 mm Note Use of worn or blunt reamers could cause inaccuracy in reaming STEP 3: REAMING THE ACETABULUM Ream the Acetabulum Use successively sized DELTAMOTION reamers (reaming in 1 mm increments) to ream to the ideal acetabular size, without excessive thinning of the walls. 35˚ Correct assessment of the reamed size can only be made with the sizing trials, which are 1 mm diametrically smaller than the definitive cups. This must be a firm fit when fully seated in the acetabulum. Under normal circumstances initial trialing should be attempted at 2 mm of under reaming, however this is dependent on bone density. Under-reaming of the acetabulum is dependent on bone quality and the size of the acetabular component. UNDER REAM 2 MM TRIAL FIT ACHIEVED? YES IMPLANT CUP YES IMPLANT CUP NO UNDER REAM 1 MM TRIAL FIT ACHIEVED? NO LINE-TO-LINE 10 A 1 mm under-ream is usually sufficient in smaller sockets, while a larger socket may require 1-2 mm under-ream. Likewise, soft bone will more readily accommodate a greater press-fit of the acetabular component than sclerotic bone. In some patients, line-to-line reaming may be sufficient to achieve stability. STEP 4: ACETABULAR CUP TRIALLING AND POSITIONING Note Trial diameter = Implant diameter - 1 mm Trial diameter = Implant diameter - 1 mm Trial height = Implant height - 0.5 mm Trial height = Implant height - 0.5 mm Trialing is essential prior to insertion of the definitive device. The trial is smaller than the definitive cup implant and a good guide for cup positioning, marking the cup depth and the first step to making sure the definitive component will achieve stability. • Whilst trialing deal with osteophytes that could inhibit straight shot entry into the acetabulum (typically on the anterior rim). • The height/depth of the trial in relation to the definitive implant is 0.5 mm smaller and is therefore 1 mm smaller in diameter • Mark position of final cup using diathermy to mark depth, version and abduction to help with definitive cup placement. • To avoid damaging the press fit aperture, attach a slap hammer and remove the trial on the same axis as you plan to introduce the definitive cup. 11 New users should familiarise themselves with the difference in height between the impaction cap and the face of the acetabular implant. This will help identify where acetabular landmarks will sit relative to the overall construct. ACETABULAR CUP TRIALLING AND POSITIONING Note Correct cup alignment is essential in order to benefit from the long-term wear properties possible with BIOLOX delta ceramic bearings.9 As with other large bearings, the increased range of motion (ROM) and stability offered by DELTAMOTION could mask the effect of an imperfectly aligned cup. it is essential that the provided cup alignment instrumentation is used. 35˚ Note Studies have shown that incorrect acetabular component positioning can lead to edge loading and undesireable effects across all bearings, such as dislocation, increased wear, component impingement, ceramic squeaking, elevated metal ion release and polyethylene fractures.1-8 Select either the Straight or Curved Acetabular Trial Handle, screw fully into the selected sizing trial, position carefully and impact into the acetabulum. Check that the trial achieves a stable press-fit. A degree of exposure of the superolateral edge may be considered acceptable, if a stable press-fit is achieved. Visually confirm the trial is fully seated through the holes in the cup trial. 12 Assess the fit by letting go of the sizing trial-handle assembly to see if it holds in the acetabulum. Also try to move the trial (it should be firm whilst fully seated). Remove the trial along the same axis used to insert it, taking care to record the size used; this will be the size of the definitive cup. STEP 5: IMPLANTING THE DEFINITIVE CUP Note Particular attention should be paid to the mechanism through which inserter and cup attach. Backwards Forwards • The Surgeon (not nursing staff) should test the tension of the attachment prior to inserting the device. • Ensure the cup is lined up with attachment lever facing away from the front of the surgeon. • The three fins on the device should then be positioned at 6, 10 and 2 o’clock to engage all three pelvic bones (this may not be achievable in practice, dependent on the patient’s anatomy). Prepare the Cup for Implantation To mount the cup on the Cup Introducer; Note • Open the jaws by pulling the latch and raising the lever away from the Cup Introducer until it is perpendicular to the body of the instrument. • Slide the dovetail section of the Impaction Cap into the open jaws on the Cup Introducer. • Close the jaws by lifting the latch away from the introducer body and pulling the lever back towards the handle until it lies parallel to the instrument body and the latch drops back into the locking recess. • Adjust the rotational position of the three fins as required, before tightening fully. New users should familiarise themselves with the difference in height between the impaction cap and the face of the acetabular implant. This will help identify where acetabular landmarks will sit relative to the overall construct. Warning Do not attempt to remove the preassembled ceramic liner which is locked into the shell’s cavity. 13 IMPLANTING THE DEFINITIVE CUP Note The Straight Cup Introducer (Cat. No. 271-014F) uses an Alignment Aerial which is fixed at 45° and cannot be adjusted. Please ask your rep for the adjustable version if your set only has the fixed version. Cup Alignment Aerial The Cup Alignment Aerial can be used to provide verification of the cup inclination and anteversion. To use: • Assemble the Alignment Aerial Location Clamp and Alignment Aerial Adjustable Arm and attach to the Cup Introducer using a No. 8 Screw and tighten using the Knob Tightener. • Adjust the arm to the required abduction angle (35° is recommended), and tighten the Ratchet Locking Screw using the Knob Tightener. • Insert the Aerial Alignment Rod in the correct hole for either a left or right hip, and for the desired anteversion (15º-20º is recomended) as indicated and secure using a No. 8 Screw HAND TIGHTENING ONLY. 14 35˚ Position and Impact the Cup Position the cup in the acetabulum. When using the Alignment Aerial, with the pelvis orientated in the true lateral position, the Alignment Rod should be horizontal and in line with the trunk. Place the fins in each bone of the pelvis (ilium, ischium and pubis). Impact the cup with several firm hammer blows until fully seated. A change in impact tone should be heard when the cup is fully seated. Check that the implant achieves a stable press-fit. A degree of exposure of the superolateral edge may be considered acceptable, if a stable press-fit is achieved. Test the firmness of the cup fit by trying to gently rock the pelvis with the Cup Introducer. Remove the Cup Introducer Remove the Cup Introducer by once again pulling the latch backwards and raising the lever until it is perpendicular to the body of the instrument. A gentle twisting motion will release the Cup Introducer. It is essential that the cables are not cut until the surgeon is completely satisfied with final abduction and version, as the monobloc design limits adjustment once the impaction cup is detached. Assess orientation by observing the cup face in relation to the acetabular rim. If necessary, re-attach the Cup Introducer to remove and reposition the cup. 15 STEP 6: ASSESSING CUP ORIENTATION AND STABILITY Note Do not separate the cap without first assessing cup orientation. Stability is the most important outcome Assessing Cup Orientation • If the posterior osteophytes do not impinge acetabular access leave them in place to assist as additional bone scaffold. • With increased experience with this device, you may be able to detect an audible pitch change during the definitive cup impaction to help you understand when the cup is fully seated. • Ensure definitive cup is positioned as was observed with the cup trial. • Line up with previously made electrocautery marks made during trialling if carried out. 16 STEP 7: REMOVING THE IMPACTION CAP Assemble the Modular Cap Remover Fit the Modular Cap Remover over the end of the Straight Acetabular Trial Handle and tighten fully. Note Do not separate the cap without first assessing cup orientation. Note Check all cables are fully removed from the cup. 1 35˚ 3 2 Remove Impaction Cap Locate the assembled instrument over the hexagonal nut of the impaction cap. Holding the instrument perpendicular to the implant. Strike the end of the handle with two firm hammer blows to cut the cables. After removal of the impaction cap, thoroughly clean the entire site to ensure the removal of any bone fragments and debris. On occasion, impaction cap wire may be present and obscured by soft tissue. You may wish to perform a digital examination around the cup to confirm removal, or use another suitable method. Check cables are fully cut. Turn the handle clockwise one full turn to withdraw the cables and release the Impaction Cap from the cup (more than one rotation may be needed on large sizes). If the handle will not turn, strike again, to ensure that the cable is cut fully, taking care to release twisting pressure on the handle whilst impacting. Remove the impaction cap . 17 STEP 8: PREPARING THE FEMUR Prepare the femur for the chosen DePuy Synthes femoral stem as described in the relevant surgical technique. Do not implant the final stem but leave the trial stem/rasp in its final position for the trial reduction and cup alignment procedures, described in the following sections. STEP 9: TRIAL REDUCTION Note Insert the Femoral Stem Trial Neck With the stem trial/rasp in its final position in the prepared femur, attach the desired trial neck, if applicable, with reference to the appropriate stem surgical technique manual. Always check for impingment during reduction and reposition the cup where necessary. Assemble the Head Trial components Select the appropriate head trial matching the cup bore size (see sizing chart on page 27) and insert the trial neck length collar fully into the head. Place the assembled Head Trial on the Trial Neck. Trial Reduction Reduce the hip. Assess ROM, stability and leg length. Change the Neck Trial Sleeve if required to achieve correct soft tissue tension and repeat the procedure. Record the offset marked on the final Neck Trial Sleeve used (S, M, L or XL); this will be the offset of the definitive head. 18 STEP 10: REPOSITIONING THE ACETABULAR CUP Should it become necessary to re-align or reposition a cup after the Impaction Cap has been removed the following procedure may be used. If attempting this procedure the clinician should be aware that in some circumstances it may result in loss of fixation and careful re-impaction may be required. Using your hand, manually re-assess cup stability following repositioning. Carefully place the removed Impaction Cap over the face of the implanted cup, ensuring that the hub on the underside of the cap locates in the cup liner and that the cap is fully seated against the cup rim. If necessary use the Modular Cap Remover and Straight Handle to wind the cables further into the cap to prevent cable ends fouling the cup rim. Warning NEVER attempt to reposition the cup without the impaction cap in place. The metal shell must not be directly impacted. This could lead to liner disassociation or damage. Assemble the Impaction Cap Punch Fit the Impaction Cap Punch over the end of the Straight Acetabular Trial Handle and tighten fully. 19 Note Reassess cup stability following repositioning (Step 6). Note Care should be taken not to damage the bearing surface when using the Punch. REPOSITIONING THE ACETABULAR CUP Assemble the Cap Remover Fit the Modular Cap Remover over the end of the Curved Acetabular Trial Handle and tighten fully. Locate the socket of the Cap Remover over the hexagonal nut in the centre of the Impaction Cap and apply light pressure on the Impaction Cap. Position and Impact the Punch Position the spiked end of the Impaction Cap Punch at the selected location on the surface of the plastic Impaction Cap and as close as possible to the cap’s edge. Hold the handle perpendicular to the cup face and impact firmly using a hammer. Assess cup position and fixation and if necessary repeat the procedure, checking before each blow that the Impaction Cap is firmly seated on the cup rim. 20 STEP 10: IMPLANTING THE DEFINITIVE FEMORAL STEM Remove all trial components and implant the definitive stem implant as described in the appropriate operative technique. The DELTAMOTION system can be used with DePuy Synthes 12/14 ARTICUL/EZE femoral stems including: CORAIL Hip System, S-ROM 12/14, C-STEM AMT Triple Taper Stabilised Hip, SUMMIT, TRI-LOCK Bone Preservation Stem, DePuy Synthes PROXIMA ZTT and SILENT. 21 STEP 12: ATTACHING THE DEFINITIVE FEMORAL HEAD Warning Do not handle either the head taper or sleeve prior to assembly and ensure all mating surfaces are kept clean and dry. The presence of foreign material on any mating surface can increase the load on ceramic components resulting in failure or taper lock corrosion. Assemble the DELTAMOTION Modular Head and DELTAMOTION Sleeve Select the correct diameter DELTAMOTION Modular Head and the DELTAMOTION Sleeve with the correct offset matching the last Neck Length Collar used. Remove all outer packaging and assemble the head and sleeve using the plastic tray provided with the component. Check both the outer surface of the sleeve, and inner taper in the head are clean and free from any packaging material or other debris. Carefully place the head over the sleeve and press down firmly until resistance is felt. It is essential that the head is not tilted or placed at an angle on the sleeve to ensure proper seating. 22 Attach the Head Care must be taken when placing the assembled head and sleeve on the femoral stem: Mating surfaces must be thoroughly dry and free of any foreign matter (e.g. blood, bone or other body tissue, metal or cement particles). Place the head and sleeve on the femoral stem taper by twisting lightly whilst applying manual pressure. Without using excessive force, impact the head firmly using the plastic Head Impactor. Final Hip Reduction Flush out the entire joint with saline, cleaning and inspecting the ceramic articulating surfaces. Reduce the hip, taking great care to avoid either scraping the head along the cup rim, or allowing impact between the ceramic components: The plastic Hip Slider provided may be used to ease the head into the ceramic cup liner. Finally re-assess ROM, stability and leg length. 23 APPENDIX A: TRAINING AND SUPPORT Recommended Training and Support Tool considerations prior to utilising the DELTAMOTION system Sales representative support Ensure you have the latest version of the product rationale / surgical technique. Request the attendance of your DePuy Synthes sales representatives who have a detailed understanding of the product and the procedural steps. Professional Education Courses Attend a DELTAMOTION DePuy Synthes Cadaver lab to learn from our core surgeon faculty. Dates are available on request. Surgeon to surgeon instruction Where practical and possible, ask your DePuy Synthes representative to indicate which are the official visitation training sites for DELTAMOTION. Here you will be able to observe cases and will be trained in a KOL’s theatre. Ensure access/visibility to the surgical technique during the first surgical procedures. Ensure you have completed a saw bones session through DePuy Synthes to familiarise yourself with the instruments and their correct order of use (a step by step walk through of the procedure to facilitate your understanding of the insertion locking mechanism and instrumentation). General Guidance Do not change your surgical approach at the same time as trialling this product for the first time. Be comfortable with your preferred approach before introducing a new implant system. 24 APPENDIX B: INSTRUMENT ASSEMBLY INSTRUCTIONS Lift Pull back Unscrew to clean spring inside Pull out then push forward to clean obstructed areas Open for cleaning Cup Latch - LOCKED Cup Latch - UNLOCKED 25 Release Cup INSTRUMENT ASSEMBLY INSTRUCTIONS Note Hand tighten Screw No. 8 where indicated Use Knob Tightener to tighten ALL other screws Screw No. 8 (Hand tighten only) 299-033F Aerial Alignment Rod 271-119F Alignment Aerial Adjustable Arm 271-118F Screw No. 8 (Hand tighten only) 299-033F Alignment Aerial Location Clamp 271-117F Ratchet Locking Screw 299-034F 26 ORDERING INFORMATION: IMPLANTS Pre-assembled Ceramic Bearing Cups Ti and HA Coated Cat. No. 168-102F 168-104F 168-106F 168-108F 168-110F 168-112F 168-114F 168-116F 168-128F 168-130F 168-132F 168-134F 168-136F Description DELTAMOTION DELTAMOTION DELTAMOTION DELTAMOTION DELTAMOTION DELTAMOTION DELTAMOTION DELTAMOTION DELTAMOTION DELTAMOTION DELTAMOTION DELTAMOTION DELTAMOTION Acetabular Acetabular Acetabular Acetabular Acetabular Acetabular Acetabular Acetabular Acetabular Acetabular Acetabular Acetabular Acetabular Cup Cup Cup Cup Cup Cup Cup Cup Cup Cup Cup Cup Cup 42 44 46 48 50 52 54 56 58 60 62 64 66 mm mm mm mm mm mm mm mm mm mm mm mm mm for for for for for for for for for for for for for 32 32 36 36 40 40 44 44 48 48 48 48 48 mm mm mm mm mm mm mm mm mm mm mm mm mm DELTAMOTION Modular Heads Cat. No. 167-132F 167-136F 167-140F 167-144F 167-148F Description DELTAMOTION DELTAMOTION DELTAMOTION DELTAMOTION DELTAMOTION Modular Modular Modular Modular Modular Head Head Head Head Head 32 36 40 44 48 mm mm mm mm mm DELTAMOTION Modular Sleeves Cat. No. Size 167-060FSmall 167-061FMedium 167-062FLarge 167-063FXlarge 27 Head Head Head Head Head Head Head Head Head Head Head Head Head DELTAMOTION SIZING CHART DELTAMOTION Sleeves DELTAMOTION Modular Heads Turquoise Beige DePuy Synthes BIOLOX delta HEADS 32 Head 36 Head DELTAMOTION +1.5 S(-3 mm) +5 M(0 mm) +8.5 L(+4 mm) +12 XL (+7 mm) Pink Purple Dark brown 40 Head 44 Head 48 Head DELTAMOTION Acetabular Cups 42 Cup 44 Cup 46 Cup 48 Cup 50 Cup 52 Cup 54 Cup 56 Cup 58 Cup 60 Cup 62 Cup 64 Cup 66 Cup 28 References 1. Brodner W, Grübl A, Jankovsky R, Meisinger V, Lehr S, Gottsauner-Wolf FJ. Cup inclination and serum concentration of cobalt and chromium after metal-on-metal total hip arthroplasty. J Arthroplasty. 2004;19(8 Suppl 3):66-70. 2. Williams S, Leslie I, Isaac G, Jin Z, Ingham E, Fisher J. Tribology and wear of metal-on-metal hip prostheses: influence of cup angle and head position. J Bone Joint Surg. 2008;90A Suppl 3:111-7. 3. Udomkiat P, Dorr LD, Wan Z. Cementless hemispheric porous-coated sockets implanted with press-fit technique without screws: average ten-year follow-up. J Bone Joint Surg. 2002;84A:1195-1200. 4. Schmalzried TP, Guttmann D, Grecula M, Amstutz H. The relationship between the design, position, and articular wear of acetabular components inserted without cement and the development of pelvic osteolysis. J Bone Joint Surg. 1994;76A:677-688. 5. Kennedy JG, Rogers WB, Soffee KE, et al. Effect of acetabular component orientation on recurrent dislocation, pelvic osteolysis, polyethylene wear and component migration. J Arthroplasty 1998;13:530-534. 6. Willmann G. The evolution of ceramics in total hip replacement. Hip International. 2000;10:193. 7. Prudhommeaux F, Hamadouche M, Nevelos J, et al. Wear of alumina-on-alumina total hip arthroplasty at a mean 11-year follow up. Clin Orthop. 2000; 379:113. 8. Walter WL, O’Toole GC, Walter WK, Ellis A, Zicat BA. Squeaking in ceramic-on‑ceramic hips: the importance of acetabular component orientation. J Arthroplasty. 2007;22:496-503. 9. Kindsfater K, Barrett WP, Dowd JE, et. al. 99.9% midterm survival of the PINNACLE Multiliner Acetabular Cup in a Prospective Multi-centre study. Poster #P077 presented at: AAOS Annual Meeting; February 14-18, 2007; San Diego, CA. DePuy Orthopaedics EMEA is a trading division of DePuy International Limited. Registered Office: St. Anthony’s Road, Leeds LS11 8DT, England Registered in England No. 3319712 DePuy Orthopaedics, Inc. 700 Orthopaedic Drive Warsaw, IN 46581-0988 USA Tel: +1 (800) 366 8143 Fax: +1 (574) 267 7196 DePuy International Ltd St Anthony’s Road Leeds LS11 8DT England Tel: +44 (0)113 387 7800 Fax: +44 (0)113 387 7890 ©DePuy International Ltd. and DePuy Orthopaedics, Inc. 2013. All rights reserved. depuysynthes.com CA#DPEM/ORT/0812/0182a(1) Version 7 Revised: 08/13 0086


© Copyright 2026