
ALBUQUERQUE SCHOOL OF EXCELLENCE SCIENCE DEPARTMENT CHAIR SCIENCE FAIR HANDBOOK
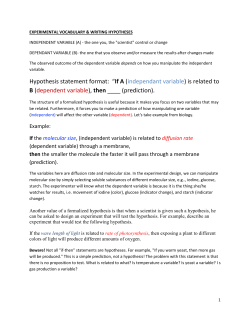
ALBUQUERQUE SCHOOL OF EXCELLENCE SCIENCE DEPARTMENT CHAIR SCIENCE FAIR HANDBOOK **************************************************** THIS BOOKLET BELONGS TO (Print Your Name Here) 1 INTRODUCING SCIENCE PROJECTS Dear Parents, Your child will have the chance to solve his or her own science mystery by doing a science project; a mandatory assignment for your child`s class. Since your child has the chance to pick his or her own science project, from the physics of making the music to the biology of tide pool animals, he or she will have the chance to experience the joy of discovery. When starting a science project, a student chooses a question he or she would like to answer. Then, he or she does targeted library and Web research to gain the background information needed to formulate a hypothesis and design an experimental procedure. After writing a report to summarize this background research, the student performs the experiment, draws conclusions, and communicates the results to teachers and classmates. Through time management and project planning, your child will take on the responsibility of completing a project over at least a ten-week period. Your child will discover his or her creativity by brainstorming science project questions and figuring out how to display the process and results. A science project, through its challenge to ask questions and discover, is truly a real-world experience in innovation, similar to what scientists do in their careers. We will provide your child with sufficient support to succeed so that he or she develops enthusiasm for scientific discovery. First, your child will accomplish each step of the project by doing homework assignments. We will review the assignments at key checkpoints along the way, so that you won`t face helping your child do a project the last night before the fair. Second, we have included a basic guide (enclosed) of how to help without getting too involved. To get started, read through this packet. You will have the opportunity to approve the project your student selects by signing a Science Project Proposal Form #01 and #02, one of the early assignments on the attached guide. (The students are expected to come up with 2 different project ideas and fill out the proposal forms accordingly, one for each. Then your child`s Science Teacher will assign the one which suits the best out of two project ideas to him/her). If you have any questions, please email Fahri Arik at [email protected] Sincerely, Fahri Arik Albuquerque School of Excellence STEM and Science Fair Coordinator 2 SCIENCE FAIR GOALS Science teachers have many reasons why we believe the Science Fair is an invaluable experience for our students. Some of the top reasons or goals that we hope our students achieve are: 1. To stimulate interest, curiosity, and desire to explore the mysteries of the world. 2. To learn, understand, and apply the scientific method. 3. To provide real experiences and methods by which all scientific knowledge has been and is still being gathered. 4. To help develop skills in communicating both verbally and in writing. 5. To help develop skills of interpretation and analysis of data. 6. To learn how to complete long range projects. 7. To acquire skills of research using a variety of resources such as the Internet, interviews, books, magazines, etc. 8. To show a connection between what is learned in the class and what happens in real life. 9. To promote unique opportunities for us (teachers) to work individually with you (the student) in an interdisciplinary project. 10. To foster independence in the student by providing the opportunity for you to take initiative and responsibility in studying a topic for your own learning. FOUR MAJOR COMPONENTS The science fair project can be divided into four major components or parts. 1. The Experiment: Choosing a topic Performing an experiment 2. The Research Paper: Review literature (research) about your topic and closely related topics Summarize the experiment and draw conclusions from the experiment Write a properly formatted and cited research paper 3. The Visual Display Prepare a Display Board that illustrates the complete science project Display equipment and materials needed to explain the project 4. The Oral Presentation Present orally a summary of the project to your teacher, classmates, or judges Share and explain all phases of the project in an open setting 3 TABLE OF CONTENTS TITLE PAGE # INTRODUCING SCIENCE PROJECTS: …………………………………………………………………………………………………2 SCIENCE FAIR GOALS, FOUR MAJOR COMPONENTS: ………………………………………………………………………3 TABLE OF CONTENTS: ……………………………………………………………………………………………………………………..4 SCIENCE FAIR PROJECT PROPOSAL FORM #01: ……………………………………………………………………………….5 SCIENCE FAIR PROJECT PROPOSAL FORM #02: ……………………………………………………………………………….6 SICENCE FAIR STEPS: ………………………………………………………………………………………………………………………7 QUESTION & PURPOSE: ………………………………………………………………………………………………………………….8 HYPOTHESIS: ………………………………………………………………………………………………………………………………….9 VARIABLES: …………………………………………………………………………………………………………………………………….10 MATERIALS LIST: …………………………………………………………………………………………………………………………….11 PROCEDURE: ………………………………………………………………………………………………………………………………….12 CONLUSION: …………………………………………………………………………………………………………………………………..13 DATA ANALYSIS & GRAPHS: …………………………………………………………………………………………………………...14 RESULTS: …………………………………………………………………………………………………………………………………………15 ABSTRACT: …………………………………………………………………………………………………………………………………….16-17 BIBLIOGRAPHY: ……………………………………………………………………………………………………………………………….18 ACKNOWLEDGEMENT: ……………………………………………………………………………………………………………………19 SCIENCE FAIR LAB NOTEBOOK: ……………………………………………………………………………………………………..20-21 FINAL REPORT: ………………………………………………………………………………………………………………………………..22 SCIENCE FAIR DISPLAY BOARD: ……………………………………………………………………………………………………….23 SAMPLE OF SCIENCE FAIR BOARD DESIGN: …..…………………………………………………………………………………24 JUDGING AND PRESENTING YOUR PROJECT: …………………………………………………………………………………..25 ASE SCIENCE FAIR PARENTAL NOTIFICATION FORM: ……………………………………………………………………….26 SCIENCE FAIR PROJECT SAFETY FORM: …………………………………………………………………………………………….27 SCIENCE FAIR PROJECT PROTOCOL FORMS: ………………………………………………………………………..……………28 4 SCIENCE FAIR PROJECT PROPOSAL FORM #01 I propose to investigate the following topic for my project. TITLE _______________(Complete after filling in the rest of the form) QUESTION (What do I want to learn about?): HYPOTHESIS (What I think will happen when I do my experiment): __________________________________________________________ PROCEDURE (How will I carry out my experiment) Materials needed: _________________________________________________________________ Step-by-Step Directions for my experiment (Number each step to help keep it organized): I have selected the project described above for my Science Fair Project. Student’s Name _______ Grade Level Date I will support my child’s Science Fair Project. Parent/Guardian’s Signature ________ Date This proposed project as outlined above meets the preliminary requirements for a Science Fair Project. Teacher’s Signature _______ 5 Date SCIENCE FAIR PROJECT PROPOSAL FORM #02 I propose to investigate the following topic for my project. TITLE _______________(Complete after filling in the rest of the form) QUESTION (What do I want to learn about?): HYPOTHESIS (What I think will happen when I do my experiment): __________________________________________________________ PROCEDURE (How will I carry out my experiment) Materials needed: _________________________________________________________________ Step-by-Step Directions for my experiment (Number each step to help keep it organized): I have selected the project described above for my Science Fair Project. Student’s Name _______ Grade Level Date I will support my child’s Science Fair Project. Parent/Guardian’s Signature ________ Date This proposed project as outlined above meets the preliminary requirements for a Science Fair Project. Teacher’s Signature _______ 6 Date SCIENCE FAIR PROJECT STEPS 1. Choose a topic. Be sure it interests you. Don’t pick one because you think it will be easy. Talk it over with your parents and when you have decided, inform your teacher, and do not ask to change your topic later. Get your Registration form for your teacher signed by your parent and turn it in. 2. State your purpose as a question. What is it that you want to find out by doing this project? 3. Research your problem. Look at any books/websites that might help you, make observations by simply looking at things, talking to people, and finding out as much as possible about your topic. Write down any ideas you have and where you got them from. Also, keep note of all information needed for citing your resources. 4. Form a hypothesis. What do you think is going to happen? Based on what you know or found out from step #3, what do you think the results of your experiments will be? After doing the experiments, it may turn out that your guess was wrong. It is okay if this happens. 5. Plan your project. How will you test your hypothesis? What experiments will you do? How will you measure the results? Where will you keep your information? Be sure to record all observations. 6. Collect all your materials. Find a place to keep things where others won’t bother them. Let other family members know what you are doing so they do not throw your materials away by mistake. 7. Conduct your experiments. Remember, the more times you do an experiment, the more reliable and accurate the results will be. Do each experiment at least three times and get an average of the results for your graph. Use something to measure your experiments: a ruler or yardstick if you are measuring distance, a clock to measure time, etc. Check the measurements to be sure you are correct. 8. Record your data. As you do your experiments, you will want to write down what you saw or found out. Organize this information in an orderly manner. Put the date, time, and any other useful information. Write your measurements clearly. 9. Draw conclusions. What did you learn from your experiments? Have you proved or disproved your hypothesis? You made a guess about what you thought would happen, now tell what happened. You don’t lose points if your guess turned out to be wrong. 10. Prepare your titles, charts, graphs, drawings, and diagrams. Make them large enough to see, neat, and colorful. 11. Construct your science fair display. Get your cardboard display board so you can show all your work and have your hands free to point to sections when you give your presentation. 12. Prepare and practice your presentation. Be able to talk about what you used, what you did in your experiments, and what you found out. Know it well enough that you don’t have to read it from the display. 13. Plan a time line so you don’t leave everything until the last minute. If you need help, tell your parents and your teacher; the earlier the better. 14. Relax and enjoy yourself. You will do a GREAT job! 7 Research Paper Rough Draft QUESTION & PURPOSE Name _____________________________________________________ Due Date _________________ Parent / Guardian Signature ___________________________________ On Time? Yes / No State the Research Question What question are you trying to answer? Ask a question that you can answer through observation or experimentation ___________________________________________________________________________________________ ___________________________________________________________________________________________ State the Purpose What is your reason for asking this question? What are you trying to discover? The statement should clearly explain: 1. The problem that you are trying to solve with your experiment. 2. Why you want to do this experiment. 3. How you think the information gained from the experiment will help other people. Example of a Purpose Statement: The purpose of this experiment was to find out how the density of plant cover affects soil erosion. I became interested in this experiment when the hillside next to our yard began to erode. The information from this experiment will help people to determine how many plants they should plant on their yards hillside. Fill in the blanks below to create a quality Purpose Statement The purpose of this experiment was to ___________________________________________________________ ___________________________________________________________________________________________ ___________________________________________________________________________________________ ___________________________________________________________________________________________ I became interested in this experiment when ______________________________________________________ ___________________________________________________________________________________________ ___________________________________________________________________________________________ ___________________________________________________________________________________________ The information gained from this experiment will help others by ______________________________________ ___________________________________________________________________________________________ ___________________________________________________________________________________________ Teacher Comments / Suggestions: ___________________________________________________________________________________________ ___________________________________________________________________________________________ 8 Research Paper Rough Draft HYPOTHESIS Name _____________________________________________________ Due Date _________________ Parent / Guardian Signature ___________________________________ On Time? Yes / No The Hypothesis is an educated guess that tries to answer a question or solve a problem that you are trying to find more about. The hypothesis is done after you do your research on a specific topic and before you do any experimenting. The Hypothesis should follow these rules: 1. A hypothesis is a question, which has been reworded into a form that can be tested by an experiment. 2. There is usually one hypothesis for each question you have. 3. You must do at least one experiment to test each hypothesis. This is a very important step. Example of a Hypothesis: My hypothesis is that grass will do a better job at preventing soil erosion on the hillside than shrubs. I base my hypothesis on the idea that there are more roots in the grass than the shrubs. Fill in the blanks below to create a quality Hypothesis. My hypothesis is _____________________________________________________________________________ ___________________________________________________________________________________________ ___________________________________________________________________________________________ I base my hypothesis on _______________________________________________________________________ ___________________________________________________________________________________________ ___________________________________________________________________________________________ Teacher Comments / Suggestions: ___________________________________________________________________________________________ ___________________________________________________________________________________________ ___________________________________________________________________________________________ 9 Research Paper Rough Draft VARIABLES Name _____________________________________________________ Due Date _________________ Parent / Guardian Signature ___________________________________ On Time? Yes / No List the variables that you will control, the variable that you will change, and the variables that will be the results of your experiment: My controlled variables are (the stuff that will always stay the same): ___________________________________ ___________________________________________________________________________________________ ___________________________________________________________________________________________ My independent variable is (this is the thing that changes from one experiment to the next; it is what you are testing): ____________________________________________________________________________________ ___________________________________________________________________________________________ ___________________________________________________________________________________________ My responding variable is (what you will be measuring/ observing?) ___________________________________ ___________________________________________________________________________________________ ___________________________________________________________________________________________ ___________________________________________________________________________________________ Control Group is (A set up that independent variable has not involved. The reason having the control group is for the comparison) _____________________________________________________________________________ ___________________________________________________________________________________________ Teacher Comments / Suggestions: ___________________________________________________________________________________________ ___________________________________________________________________________________________ ___________________________________________________________________________________________ 10 Research Paper Rough Draft MATERIALS LIST Name _____________________________________________________ Due Date _________________ Parent / Guardian Signature ___________________________________ On Time? Yes / No The materials list is a complete list of all materials including details and amounts. Be sure to include quantities (how much), length, volume, and mass. List these in metric units. Be specific in your description of the item needed. Include photos or drawings of the materials if it helps the person to identify the material needed in the project. The Material List should follow these rules: 1. Be specific to amount, size and length. 2. Listed in metric units where appropriate. Example of a Material List: Bad Material List: 1. Water 2. Watch 3. Ruler 4. Dirt Good Material List: 1. 20 Liters of Water 2. Stop watch with second hand 3. Metric Ruler with millimeters listed 4. 3 cubic meters of potting soil Fill in the blanks below to create a quality Materials List Quantity: Description of Item: Teacher Comments / Suggestions: ___________________________________________________________________________________________ ___________________________________________________________________________________________ ___________________________________________________________________________________________ 11 Research Paper Rough Draft PROCEDURE Name _____________________________________________________ Due Date _________________ Parent / Guardian Signature ___________________________________ On Time? Yes / No The Procedures should follow these rules: 1. Label each step with a number or letter. 2. Write your procedures in a cookbook format 3. Be very specific with quantities, amounts and the order that things need to be done or completed. Example of Procedures: 1. Prepare three trays by putting an equal amount of potting soil in each tray. If you are using pans or cookie sheets, spread a layer of gravel on the bottom of the pan before adding the soil. This will allow for drainage since you will be watering all three pans while the grass is growing. 2. Set Tray 1 aside. In Tray 2, cover the soil with a layer of leaves and grass clippings. In Tray 3, sprinkle grass seed on the top of the soil. 3. Place the three trays in a place where they are level and have similar light and temperature conditions. (The temperature must be above 50F (10C) for the grass to grow.) 4. Use the sprinkling can to give each tray the same amount of water. Continue watering all three trays approximately every 3 days until the grass in Tray 3 is about .5 inches (1.25 centimeters) tall. This may take one week or longer. You may have to adjust your watering schedule depending on how fast the soil dries. Check the soil daily to see if it looks and feels moist. Fill in the blanks below to create quality Procedures 1)__________________________________________________________________________________________ ___________________________________________________________________________________________ 2)__________________________________________________________________________________________ ___________________________________________________________________________________________ 3)__________________________________________________________________________________________ ___________________________________________________________________________________________ 4)__________________________________________________________________________________________ ___________________________________________________________________________________________ (You may add more papers depending on the length of your procedure) Teacher Comments / Suggestions: ___________________________________________________________________________________________ ___________________________________________________________________________________________ 12 Research Paper Rough Draft CONCLUSION Name _____________________________________________________ Due Date _________________ Parent / Guardian Signature ___________________________________ On Time? Yes / No A conclusion is a reexamination of your original hypothesis in regards to the data you have collected. Your conclusion will describe how your results prove or disprove your hypothesis. Your conclusion will include what questions you have developed in doing the experiment. It also includes how you might change your experiment if you were to continue this topic in order to explore the questions that you developed during the experiment. Example of a conclusion: My hypothesis was that grass would do a better job at preventing soil erosion on the hillside than shrubs. I base my hypothesis on the idea that there are more roots in the grass than the shrubs. The results indicate that this hypothesis should be considered false. The dense amount of shrub cover shielded the underlying dirt better than the grass. Because of the results of this experiment, I wonder if different kinds of shrubs have the same effect on preventing erosion. If I were to conduct this science fair project again I would try both deciduous as well as coniferous shrubs. Fill in the following lines to create a successful Conclusion: My hypothesis was ___________________________________________________________________________ ___________________________________________________________________________________________ The Results indicate that this hypothesis should be considered________________________________________ ___________________________________________________________________________________________ Because of the results of this experiment __________________________________________________________ ___________________________________________________________________________________________ ___________________________________________________________________________________________ If I were to conduct this science fair project again I would ____________________________________________ ___________________________________________________________________________________________ ___________________________________________________________________________________________ Teacher Comments / Suggestions: ___________________________________________________________________________________________ ___________________________________________________________________________________________ ___________________________________________________________________________________________ 13 Research Paper Rough Draft DATA ANALYSIS & GRAPHS Name _____________________________________________________ Due Date _________________ Parent / Guardian Signature ___________________________________ On Time? Yes / No Take some time to carefully review all of the data you have collected from your experiment. Use charts and graphs to help you analyze the data and patterns. Did you get the results you had expected? What did you find out from your experiment? Calculations and Summarizing Data: A spreadsheet program such as Microsoft Excel may be a good way to perform such calculations and can be used to display the results. Be sure to label the rows and columns. Don't forget to include the units of measurement (grams, centimeters, liters, etc.). Graphs: Generally, you should place your independent variable on the x-axis of your graph and the dependent variable on the y-axis. Be sure to label the axes of your graph— don't forget to include the units of measurement (grams, centimeters, liters, etc.). If you have more than one set of data, show each series in a different color or symbol and include a legend with clear labels. Different types of graphs are appropriate for different experiments. These are just a few of the possible types of graphs: A bar graph might be appropriate for comparing different trials or different experimental groups. It also may be a good choice if your independent variable is not numerical. (In Microsoft Excel, generate bar graphs by choosing chart types "Column" or "Bar.") A time-series plot can be used if your dependent variable is numerical and your independent variable is time. (In Microsoft Excel, the "line graph" chart type generates a time series. By default, Excel simply puts a count on the x-axis. To generate a time series plot with your choice of x-axis units, make a separate data column that contains those units next to your dependent variable. Then choose the "XY (scatter)" chart type, with a sub-type that draws a line.) A xy-line graph shows the relationship between your dependent and independent variables when both are numerical and the dependent variable is a function of the independent variable. (In Microsoft Excel, choose the "XY (scatter)" chart type, and then choose a sub-type that does draw a line.) A scatter plot might be the proper graph if you're trying to show how two variables may be related to one another. (In Microsoft Excel, choose the "XY (scatter)" chart type, and then choose a sub-type that does not draw a line.) You may go to the following link in order to draw an easy graph; http://nces.ed.gov/NCESKIDS/createagraph/default.aspx 14 Research Paper Rough Draft RESULTS Name _____________________________________________________ Due Date _________________ Parent / Guardian Signature ___________________________________ On Time? Yes / No Writing the Results will include both text and illustrative materials as known as the tables and charts. Use the text to explain and guide the reader through your key results, i.e., the information that answers the hypothesis you investigated. Use the tables and charts to help strengthen and explain what you are stating in your text. Your results should follow these guidelines: 1. Include what you wanted to accomplish and prove during your experiment. 2. Describe and report what you discovered. Be sure to include any data that might have been collected. It is important to show this data even if it did not support your hypothesis. The process of completing the experiment with true data is what is important. 3. The function of the Results section is to objectively present your key results, without interpretation. Example of how to write the results: The original purpose of this experiment was to see how seeds germination is effected by the time of exposure to running water. The results of the experiment were that the duration of exposure to running water had a great effect on overall seed germination (See chart #1). The seeds exposed to the 48-hour treatment had the highest percentage rate of germination (See chart #2). This was 2 times that of the 12-h group and 5 times that of our control group that was not exposed to the running water treatment. Fill in the blanks below to create a quality Results page. The original purpose of this experiment was to _____________________________________________________ ___________________________________________________________________________________________ ___________________________________________________________________________________________ ___________________________________________________________________________________________ The results of the experiment were ______________________________________________________________ ___________________________________________________________________________________________ ___________________________________________________________________________________________ ___________________________________________________________________________________________ Teacher Comments / Suggestions: ___________________________________________________________________________________________ ___________________________________________________________________________________________ ___________________________________________________________________________________________ 15 Research Paper Rough Draft ABSTRACT Name _____________________________________________________ Due Date _________________ Parent / Guardian Signature ___________________________________ On Time? Yes / No The Abstract is a summary of your science fair project. Your abstract is made up of a brief statement of the essential or most important thoughts about your project. Abstracts should summarize, clearly and simply, the main points of the experiment. Spelling, grammar, punctuation, neatness, and originality are important. It should be 250 to 300 words in length. It is one of the last parts of your science fair project that you will complete. Include the following to create your abstract: 1. 2. 3. 4. 5. 6. 7. Your projects purpose statement. The hypothesis A description of your variables and the control / constants. A description of what variable you are manipulating (changing) in your experiment. How you went about measuring and observing the variables / controls. Your results and data collected from your experiment. Your conclusion statement. Fill in the following lines to create a successful Abstract: The purpose of my science fair project was ________________________________________________________ ___________________________________________________________________________________________ ___________________________________________________________________________________________ My hypothesis for this project was_______________________________________________________________ ___________________________________________________________________________________________ The constants and control in my experiment was___________________________________________________ ___________________________________________________________________________________________ The variable in my experiment was ______________________________________________________________ ___________________________________________________________________________________________ The way that I measured the responding or dependent variable was ____________________________________ ___________________________________________________________________________________________ 16 The results of this experiment were ______________________________________________________________ ___________________________________________________________________________________________ ___________________________________________________________________________________________ ___________________________________________________________________________________________ ___________________________________________________________________________________________ The results show that my hypothesis should be (give brief reason why to accept or not) ____________________ ___________________________________________________________________________________________ If I were going to do this experiment again in the future or expand on this experiment I would _______________ ___________________________________________________________________________________________ ___________________________________________________________________________________________ ___________________________________________________________________________________________ ___________________________________________________________________________________________ ___________________________________________________________________________________________ ___________________________________________________________________________________________ Teacher Comments / Suggestions: ___________________________________________________________________________________________ ___________________________________________________________________________________________ ___________________________________________________________________________________________ 17 Research Paper Rough Draft BIBLIOGRAPHY Name _____________________________________________________ Due Date _________________ Parent / Guardian Signature ___________________________________ On Time? Yes / No The bibliography is an alphabetical list of the sources that you used to research your topic, design the experiment and form the hypothesis. Look at the format that each example is typed. Use this format exactly when you type your bibliography. FOR A BOOK: Author (last name first). Title of the book. City: Publisher, Date of publication. Example: Dahl, Roald. The BFG. New York: Farrar, Straus and Giroux, 1982. Fill in: _______, ____. ________. ______: ______, ______________, ____. FOR AN ENCYCLOPEDIA: Encyclopedia Title, Edition Date. Volume Number, "Article Title," page numbers. Example: The Encyclopedia Britannica, 1997. Volume 7, “Gorillas,” pp. 50-51. Fill in: __________________________, _____. _______, “_________________________”, pp. ___________. MAGAZINE ARTICLE: Author (last name first). "Article title." Name of magazine (type of medium). Volume number, (Date): page numbers. If available: publisher of medium, version, date of issue. Example: Rollins, Fred. “Snowboard Madness.” Sports Stuff (CD-ROM. Number 15, (February 1997): pp.15-19. SIRS, Mac version, Winter 1997. Fill in: ________, ____. “__________________”__________________. ________, ______________: pp._____. _____, _________, __________. WORLD WIDE WEB: URL (Uniform Resource Locator or WWW address). author (or item's name, if mentioned), date. Example: (Boston Globe`s www address) http://www.boston.com. Today`s News, August 1, 2013. Fill in: _________________________________________________. ____________, ______, ____. FOR A PERSON: Full name (last name first). Occupation. Date of interview. Example: Smeckleburg, Sweets. Bus driver. April 1, 2013. Fill in: _____________, ______. ________. _____, _____. Teacher Comments / Suggestions: ___________________________________________________________________________________________ ___________________________________________________________________________________________ ___________________________________________________________________________________________ 18 Research Paper Rough Draft ACKNOWLEDGEMENT Name _____________________________________________________ Due Date _________________ Parent / Guardian Signature ___________________________________ On Time? Yes / No The acknowledgement may go on as; I would like to express my special thanks of gratitude to my teacher_________________________ as well as our principal _________________________who gave me the golden opportunity to do this wonderful project on the topic____________________________________, which also helped me in doing a lot of Research and I came to know about so many new things. I am really thankful to them. Secondly I would also like to thank my parents and friends who helped me a lot in finishing this project within the limited time. I am making this project not only for marks but to also increase my knowledge. Thanks again to all who helped me. (Hint: An acknowledgement must not be quite big and must not contain details about help or other issues) ___________________________________________________________________________________________ ___________________________________________________________________________________________ ___________________________________________________________________________________________ ___________________________________________________________________________________________ ___________________________________________________________________________________________ ___________________________________________________________________________________________ ___________________________________________________________________________________________ ___________________________________________________________________________________________ ___________________________________________________________________________________________ Teacher Comments / Suggestions: ___________________________________________________________________________________________ ___________________________________________________________________________________________ ___________________________________________________________________________________________ 19 SCIENCE FAIR LAB NOTEBOOK Name _____________________________________________________ Due Date _________________ Parent / Guardian Signature ___________________________________ On Time? Yes / No What Makes a Great Science Lab Notebook? Joanne Rebbeck, Ph.D. February 24, 2005 Whether you are a research scientist or a first-time science fair student, a lab notebook is a crucial part of any research project. It is a detailed account of every phase of your project, from the initial brainstorming to the final research report. The lab notebook is proof that certain activities occurred at specific times. Journals and lab notebooks are subject to scrutiny by the scientific community and are acceptable evidence in a court of law. Here are a few pointers that are easy to follow. As a research scientist, I practice these suggestions every day. They should help keep you organized, and certainly will impress any science fair judge. It's a great opportunity to show off all of your hard work! 1. Find a durable hard-bound notebook or black and white composition book, typically a lined journal works great. Do not attempt to use a spiral bound notebook. They won't hold up over the course of your experiment. Papers are too easily removed or torn from them, and before you realize it, important items are missing. Loose papers are a disaster waiting to happen. 2. Label your lab notebook with your name, phone number, email address, and teacher's name in a prominent location. Make lab notebook entries in pen not in pencil. This is a permanent record of all of your activities associated with your project. 3. Number the pages in your lab notebook before using it, unless already numbered for you. 4. Always date every entry, just like a journal. Entries should be brief and concise. Full sentences are not required. 5. Don't worry about neatness. It's a personal record of your work. Do not re-do your lab notebook because it looks sloppy. Think of the lab notebook as your "Dear Diary" for science fair. It's not just for recording data during the experimental phase of your project and it's not just for your teacher. 6. It should be used during all phases of your project, jotting down ideas or thoughts for a project, phone numbers, contacts or sources and prices of supplies, book references, diagrams, graphs, figures, charts, sketches, or calculations. Log entries should include your brainstorming, calculations, library/internet searches, phone calls, interviews, meetings with mentors or advisors, notes from tours of laboratories, research facilities and other related activities. Remember that it's documentation of your work. 7. Use it regularly and write down everything, even if it seems insignificant, it could later be extremely useful. For example, it's the middle of the night and you're frantically preparing that final report but you can't find the title of that crucial reference. Make sure that you describe things completely, so that when you read your notes weeks or months later you will be able to accurately reconstruct your thoughts and your work. 20 8. Glue, staple or tape any loose papers, photocopies of important items. Loose papers or other unsecured items are prohibited as they tend to fall out and can end up missing. 9.Organize your lab notebook. Make a table of contents, index, and create tabs for different sections within your lab notebook. This helps keep you organized for different activities. For example, have a data collection section, a section with contacts, sources, etc. and a section of schedule deadlines. Table of Contents Tab Color Deadline Schedule Red 1 Daily Notes & Reflections White 2 Background Research Library & Internet Information Contacts, Supply sources Experimental Setup Blue 20 Green 26 Yellow 35 Data collection Purple 40 Results (pictures, graphs, summary tables) Reflections Orange 50 Light blue Page # 60 10.Include a reflections section in your lab notebook. For example, what, if anything would I do differently next time? What part of the experiment could be changed to improve the experimental procedure? 11.Always include any changes made to procedures, mishaps, failures, or mistakes. As human beings, all of us make mistakes! 1/4/05 My cat, Sheba scratched the pots of soil, and ate 4 of my 12 plants. I will have to replant everything! I need to protect plants from the silly cat. Maybe i should try putting a screen around the pots or keep cat outside! 2/5/05 Disaster in the lab this morning. Setup manure digoestors last night in incubators, temperature was set at 25°C but came into a real mess, samples heated up too much and caps blew off. I will need to try a lower temperature to avoid this accident from happening again!!!! HUGE MESS TO CLEAN UP..... 12. Include any and all observations made during your experiment. In other words, record ALL data directly in your lab notebook. If that is not possible, then staple photocopies of data in the lab notebook. Remember, keeping up a great lab notebook throughout the entire duration of the science project really pays off later! Not only will a nicely maintained lab notebook impress your teacher and the judges at the fair, it will also help you stay out of trouble later when you need to look back and provide details of what you did. 21 FINAL REPORT The Final Report is a summary of everything that you did to investigate your topic. The Final Report provides others with vital information on what your project is about as well as its effect on your understanding of the topic. Usually the written report is 10-30 pages in length. All information must be included in the Final Report. This report provides you with the opportunity to think about all the aspects of your project and share your ideas with others. Reports should be neatly bounded in an attractive binder. It must be typed. Typed, doubled spaced. One inch margins and 12 pt. Times New Roman Font Remember to put headings/titles on graphs/charts/tables All photographs must have captions explaining their significance Before you hand in your report make sure to reread, revise, and rewrite Recheck your calculations, spelling, and grammar. All Final Report for a science fair project should include: 1. Title Page: The first page in the report should include the title of the project, name and grade of the student, school name and science teacher`s name. 2. Acknowledgment: Here is where you thank everyone who helped to make your project successful (including Mom and Dad.) Everyone that you interviewed, including teachers, scientists, and other experts in the field should be mentioned here. 3. Table of Content: This page provides the reader with a list of the different parts of the project and the page number on which each section can be found. 4. Statement of Purpose: State the purpose of the project in the form of a question. 5. Hypothesis: You must have a hypothesis before you complete the project. A hypothesis is an educated guess about what you think will occur as a result from completing your experiment. 6. Research: This is the part of the report that contains all the background information that you collected about your topic. Any books or articles read from the internet/journal, authorities on the topic that you talked to, or outside materials collected should be summarized in this section. This section should be written in your own words and NOT copied from your resources. 7. Materials: This is a list of all the materials and supplies used in the project. Quantities and amounts of each should also be indicated. 8. Procedure: You will list and describe the steps you took to complete the project. Usually, this is listed in a numbered sequence. This part shows the stages of the project so that another person can carry out the experiment. 9. Observations and Results: In this section, you will tell what you learned from the project. It is also IMPORTANT to include all graphs, charts, or other visual data (pictures) that helps to show your results. 10. Conclusion: This is a brief statement explaining why your project turned out the way it did. You should explain why the events you observed occurred. Using the word “because” is a good way to turn an observation into a conclusion. The conclusion should tell whether the hypothesis was proven or not proven. Also give the reason(s) why you chose to learn more about the subject. 11. Bibliography/Reference Page: The bibliography should list all the printed materials the student used to carry out the project. Items should be listed in alphabetical order in a standard format. 22 SCIENCE FAIR DISPLAY BOARD Name _____________________________________________________ Due Date _________________ Parent / Guardian Signature ___________________________________ On Time? Yes / No When you plan your science fair board, remember this is a case in which you CAN judge a book by its cover. If you do a really good job at completing your display, everyone will stop to look at your project. However, if you do a messy job, no one will take the time to discover all the fascinating research you have done or look at the results of your wonderful experiment or invention. PLAN YOUR BOARD: Make a small sketch of where everything will go. Lay it out before you glue anything down to make sure it looks good. Design what the "center" of your board will be. This is where everyone will look first. Will it be the title or pictures? Everything else should be place around this. When you set up your board, put things together in the order that makes sense. Remember, we read from left to right so don't put stuff you did near the end (like the conclusion) on the right side of the board. COLORS AND TEXT: 1. You can use the labels that come with your board or create your own. Labels created on the computer can be very effective. Try using a different font or color for each of the labels. 2. Use colors that are appealing. They should contrast with your board color. If you have a white board, make your text a bright color(s). Try backing your text with colored paper to make your words alive. 3. The title should be big and easily read from across the room. Choose one that accurately describes your work, but also grabs peoples' attention. 4. Type your text or print it neatly. Use stencils or premade letters if you prefer. Make your lettering large enough for everyone to see. If you print it, use pencil first and draw guidelines to make sure your writing is neat. Go over your writing with permanent marker and make sure you erase your guidelines. 5. Use a font size of at least 16 points for the text on your display board, so that it is easy to read from a few feet away. It's OK to use slightly smaller fonts for captions on picture and tables. ILLUSTRATIONS: Sometimes your results can be shown by photographs or pictures. Photographs and pictures also enhance a display, especially if you don't have the actual experiment because you used something that can't be displayed (i.e. pets, family members). You may also use computer generated graphics or photographs off the internet. Free Stock Photos.com and Net Vet are good sites for pictures of animals and other scientific topics. Check to see if you have permission to use them. A picture speaks a thousand words! Use photos or draw diagrams to present non-numerical data, to propose models that explain your results, or just to show your experimental setup. But, don't put text on top of photographs or images. It can be very difficult to read. CHECK THE RULES FOR YOUR SCIENCE FAIR: Put your name on the back side of your display board. (No name on the front) Pictures of yourself are okay but the other people`s pictures should be covered. Captions that include the source for every picture or image. You can bring your equipment such as your laboratory apparatus or your invention. No liquids, potentially hazardous chemicals or biological agents. 23 24 JUDGING AND PRESENTING YOUR PROJECT Name _____________________________________________________ Due Date _________________ Parent / Guardian Signature ___________________________________ On Time? Yes / No PREPARING FOR SCIENCE FAIR JUDGING (Practice Makes Perfect!) If you can explain your science fair project well, you maximize your chances of winning. Write up a short "speech" (about 2–5 minutes long) summarizing your science fair project. You will give this speech when you first meet the judges. (Remember to talk about the theory behind your science fair project-why your project turns out the way it does.) Organize a list of questions you think the judges will ask you and prepare/practice answers for them. How much help did you receive from others? What does your data tell you? Why is this research important? (Who cares if a rocket flies well?) What do your graphs represent? What does your data tell you? What problems did you run into while doing your experiment and how did you fix them? What are the three most interesting things you learned when doing this science fair project? What further research do you plan on doing, or would do, to this science fair project? (Your future study) Practice explaining your science fair project to others and pretend they are judges. Practice explaining all graphs, tables, your short speech, answers to possible questions judges might ask, etc. Practice explaining the theory behind your science fair project. Theory includes everything from your background research. Videotaping yourself during practice can also be very helpful. Although it can be painful to watch the video, you will see the mistakes you made and be able to fix them the next time you speak. Practice explaining your science fair project in simple terms so anyone can understand it. PRESENTING YOURSELF DURING THE SCIENCE FAIR JUDGING PERIOD (Be Professional!) Always dress nicely for the science fair judging period-NO JEANS! Make good use of your display board. Point to diagrams and graphs when you are discussing them. Always be positive and enthusiastic! Be confident with your answers; do not mumble. If you have no idea what the judge is asking, or do not know the answer to their question, it is okay to say "I do not know." Treat each person who visits you like a judge, even nonscientists. After the science fair, always ask for feedback from the judges to improve your project. http://www.sciencebuddies.org/science-fair-projects/project_judging.shtml 25 ASE Science Fair PARENTAL NOTIFICATION FORM Dear Parents and Students, DATE: _____________ Each year we have a mandatory school-wide Science Fair at Albuquerque School of Excellence. This year Science Fair will be held on Saturday, December 6, 2014. Please check the deadlines of each step of the Science Fair Project carefully. Students are highly encouraged to submit their assignments on time. This way they will have a good chance to make improvements if something is missing or needs fine tuning. Informative Science Fair Meeting for Parents (Science Fair Orientation) is scheduled as following: For 5th and Middle School Parents: 10/16/2014 on Thursday at 5:30-6:30pm For High School Parents: 10/16/2014 on Thursday at 5:30-6:30pm We will try to work with each student individually, but the ultimate responsibility belongs to students. This copy is to be kept in student`s science binder. You will receive another copy of this Parental Notification Form. I ________________________________ and _______________________________ have read (Please print parent`s name) (Please print student`s name) and understand what is expected of each student concerning Science Fair Projects. I am also aware of the specific due dates and adhere to the deadlines which will be assigned by my child`s science teacher. PARENT`S SIGNATURE: ______________________________________ 26 SCIENCE FAIR PROJECT SAFETY FORM Name _____________________________________________________ Due Date _________________ Parent / Guardian Signature ___________________________________ On Time? Yes / No ASE SCIENCE FAIR RULES: If a science project involves vertebrate animals, human subjects (including surveys), controlled substances and pathogens, recombinant DNA, tissues including blood, cell cultures, microorganisms, environmental sampling, or potentially dangerous chemicals or equipment; you need approval from the Science Fair Board. All bacteria, fungi, etc. should be considered potentially pathogenic. Air, water, mud and soil samples may contain pathogens or hazardous materials. Learn about animal safety measures if working with animals. Pet store animals may not be used for any type of research. Surveys should not involve violation of privacy act or potential risk. Consumable alcohol and tobacco products and drugs must be obtained by and used by adult project supervisor. If using equipment that has voltage greater than 220 volts, firearms, radioactive substances and radiation, you need to review the proper safety standards before experimentation. No student can begin until they receive approval from their parents and their science teacher. You should fill out the Protocol Forms before start conducting your experimentation. (See the next page) ****************************************************************************************** Student Acknowledgement: I understand the risks and possible dangers to me of the project I will be working on. I will adhere to all ASE Science Fair Rules when conducting my research and project. ___________________________ (Student’s Printed Name) __________________ (Signature) ________________ (Date) Parent/Guardian Approval: I have read and understand the risks and possible dangers involved in a science fair project. I consent to my child participating in a research project. ____________________________ (Parent/Guardian’s Printed Name) _________________ (Signature) 27 _________________ (Date) SCIENCE FAIR PROJECT PROTOCOL FORMS (All forms can be found at http://stemed.unm.edu/FormsFinder.aspx ) MENDATORY FORMS REQUIRED FOR ALL PROJECTS: Form 1: Checklist for Adult Sponsor Form 1A: Student Checklist Research Plan (Attach Separately) Form 1B: Approval Form Form 1C: Regulated Research Institution (if applicable) Form 7: Continuation/Research Progression Form (if applicable) Remember that any project involving Humans, Vertebrate Animals, Potentially Hazardous Biological Agents, & some other projects require SRC/IRB Review Committee approval BEFORE experimentation can begin AND most likely require additional protocol paperwork as indicated below. HUMAN PARTICIPANTS Form 2: Qualified Scientist Form (2) Form 4: Human Participants Form (4) Human Informed Consent Form VERTEBRATE ANIMALS Form 2: Qualified Scientist Form (2) Form 5: Vertebrate Animal Form (5A and 5B) Form 1C: Regulated Research Institutional / Industrial Setting Form (1C) POTENTIALLY HAZARDOUS BIOLOGICAL AGENTS Form 2: Qualified Scientist Form (2) Form 6A: Potentially Hazardous Biological Agents Form Form 6B: Human and Vertebrate Animal Tissue Form HAZARDOUS CHEMICAL ACTIVITIES OR DEVICES Form 2: Qualified Scientist Form (2) Form 3: Risk Assessment Form (3) THE PROTOCOL FORMS WHICH ARE MENTIONED ABOVE WILL BE GIVEN TO THE STUDENTS BY SCIENCE TEACHER 28


© Copyright 2026