
Single-Event Multilevel Surgery (SEMLS) All About Your
2010 SEM Surgery Manual
8/18/10
3:30 PM
Page 1
All About Your
Single-Event Multilevel Surgery (SEMLS)
2010 SEM Surgery Manual
8/18/10
3:30 PM
Page 2
IMPORTANT GILLETTE PHONE NUMBERS
Main Information Number:
From the Twin Cities
651-291-2848
Outside the Twin Cities
800-719-4040 (toll-free)
Hospital Tours / Scheduling Appointments:
Patient Appointment Services
651-290-8707
Medical Questions:
Your Resource Nurse
(Name)
(Phone)
For Doctor
(Surgeon’s Name)
If your resource nurse isn’t available, call:
Telehealth Nursing 651-229-3890
After hours and on the weekends our nurses from the Postsurgical Nursing Unit
(4-West) might answer your call.
To Report an Illness Before Surgery:
Preoperative Nursing
651-229-3918
Billing Questions:
Patient Accounting
651-325-2177
Insurance Questions:
Prior Authorization
651-325-2148
Information on Disabilities and Other Resources:
Health Resources and Education
651-229-3938
Contact a Gillette Social Worker (Coordinate and Obtain Services)
Contact a Child Life Specialist (Acclimate Patients to Gillette):
Child and Family Services
651-229-3855
Contact a Physical Therapist (Mobility and Movement Issues):
Rehabilitation Therapies
2
Copyright © Gillette Children’s Specialty Healthcare 2010
651-229-3900
2010 SEM Surgery Manual
8/18/10
3:30 PM
Page 3
CONTENTS
2
WELCOME TO GILLETTE CHILDREN’S SPECIALTY HEALTHCARE
3
Frequently Asked Questions
4
PLANNING FOR YOUR HOSPITAL STAY
4
6
9
9
Presurgical Discussion Form
Planning for Your Surgery
A Week Before Surgery
The Day Before Surgery
10
DURING YOUR HOSPITAL STAY
10
11
14
Before Surgery
After Surgery
Preparing to Leave the Hospital
15
CARE AFTER YOUR HOSPITAL STAY
15
17
18
19
20
21
25
Managing Pain
Caring for Incisions
Diet
Bowel Management
Relaxation Techniques
Living With a Body Cast
When to Call Gillette
26
REHABILITATION AND RECOVERY
26
Physical Therapy
28
GLOSSARY
31
CHECKLISTS
31
33
34
Preparing for Your Hospital Stay
Planning for Your Surgery
Preparing to Leave the Hospital
35
LOWER-EXTREMITY SURGERY DESCRIPTIONS
35
46
Bony Procedures
Soft-tissue Procedures
Copyright © Gillette Children’s Specialty Healthcare 2010
ALL ABOUT YOUR SURGERY
2
2010 SEM Surgery Manual
8/18/10
3:30 PM
Page 5
Welcome
2010 SEM Surgery Manual
8/18/10
3:30 PM
Page 6
WELCOME
to Gillette Children’s Specialty Healthcare
Although having lower-extremity surgeries can be a trying
experience, we’re here to help your family through the process.
At Gillette Children’s Specialty Healthcare, we work to provide the
best medical and nursing care for our patients. We also make every
effort to be sensitive to the needs and emotions of our patients and
families. This manual is just one of the ways in which we’ll offer you
information and support.
You and your parents or caregivers will likely have questions as you
prepare for surgery. This guide is intended to answer many of those
questions and direct you to appropriate resources.
Lower-Extremity Surgeries and You
If you’ve been diagnosed with cerebral palsy, spina bifida or another
neurologic condition that affects your brain or spinal cord, you
might be experiencing pain or having difficulty walking. Left
untreated, your condition could result in painful, arthritic joints.
After evaluating your walking ability or joint development, we’ve
determined that you will benefit from having surgeries on your lower
extremities (thighs, legs, feet and/or kneecaps).
These lower-extremity operations are called a single-event multilevel
surgery (SEMLS) because we correct all existing soft tissue and bone
problems during one hospital stay. That should result in fewer
surgery visits and less rehabilitation time. (If we use plates and
screws, however, we’ll need to do another procedure to remove
them.) Multilevel surgery also might lessen the likelihood that a
problem will recur.
Goals of Your Surgery
We’ve evaluated your needs and established a surgical plan that
will reduce the risk of pain as you grow older. Your surgery also
might improve your ability to walk, help you maintain your walking
abilities, or enhance your other mobility skills.
In addition, your treatment could help you walk more efficiently
(decreasing your oxygen consumption, so you tire less easily).
Your surgery also might improve or maintain your ability to move
your joints. And it could prevent issues that stem from misaligned
muscles and bones.
About This Manual
This resource manual is
intended to help patients,
families and caregivers
better understand lowerextremity surgeries.
It contains information
you’ll want to be familiar
with before, during and
after your stay at Gillette.
You can use the Glossary
(see Page 28) to help you
become familiar with the
technical terms you’ll be
reading and hearing
throughout this process.
Keep in mind that this
manual provides only
general guidelines. Your
resource nurse or doctor will
review relevant information
with you before we schedule
the surgery. If you have
specific questions, however,
be sure to ask.
The term you is used in
many parts of this manual
to directly address those
who will be having lowerextremity surgeries. In the
parts addressed to parents
or caregivers, however,
we’ve used your child or
patient.
ALL ABOUT YOUR SURGERY
2
2010 SEM Surgery Manual
8/18/10
3:30 PM
Page 7
Frequently Asked Questions
Here are some questions you might have before, during and after your hospital stay. Although this manual provides
general information about these topics, we encourage you to ask your surgeon or nurses at Gillette about your specific
situation.
Q: How will I get home from the hospital?
A: You might be able to return home the same way you arrived at Gillette. You’ll need a vehicle spacious enough
to accommodate you and any equipment that will go home with you. A social worker can discuss transportation
options. See Pages 8 and 33 for more information.
Q: What adjustments do we need to make at home?
A: If you return home after surgery, you’ll probably need new equipment that might take up living space.
A parent or caregiver might need to sleep nearby to reposition you at night. See Page 34 for more information.
Q: Who will help me manage my pain?
A: Pain-relief options will vary depending on your surgeries, abilities and pain tolerance. Gillette offers medicines
as well as alternative treatments. Information about managing pain is featured throughout this manual, but see Pages
15-16 for specific information.
Q: How will I get in and out of bed?
A: Before you leave the hospital, your parents or caregivers will learn how to transfer you in and out of bed during
your first weeks of recovery.
Q: How am I going to take a bath or shower?
A: You’ll have only sponge baths during the first three weeks after surgery. See Pages 17 and 21 for more
information.
Q: How will I use the bathroom?
A: Before you leave the hospital, your parents or caregivers will learn how to help you use a bed pan, commode
and/or urinal. See Pages 19 and 23 for more information.
Q: What kind of clothing will I need to wear after the surgery?
A: You can wear your own clothes as much as possible. You might need to modify pants, shorts and skirts to fit over
your cast. See Page 23 for more information.
Q: Will I need additional surgeries?
A: Not always. If your surgery required plates and screws, however, you’ll need another procedure to remove them.
Q: What should we know about blood transfusions?
A: You might be able to donate your own blood before surgery, or your family and friends can donate blood
specifically for you. Please discuss any questions with your doctor. See Page 7 for more information.
Q: When can I go back to school?
A: That depends. It will usually be three to six weeks before you can return. See Pages 31 and 34 for more
information.
Q: How long will I have to wear a cast?
A: It depends on what surgeries you have. Patients typically wear a cast for three to six weeks.
3
Copyright © Gillette Children’s Specialty Healthcare 2010
2010 SEM Surgery Manual
8/18/10
3:30 PM
Page 8
Planning for Your
Hospital Stay
2010 SEM Surgery Manual
8/18/10
3:30 PM
Page 9
PLANNING
for Your Hospital Stay
Presurgical Discussion Form
Initial Consultation
Surgeon:
Resource Nurse:
Phone Number:
A preoperative nurse can answer many of your general questions about preparing for surgery.
Call 651-229-3918. If you’re calling from outside the Twin Cities, use Gillette’s toll-free number:
1-800-719-4040.
Planned Procedures (See Pages 35-54 for surgery descriptions and illustrations.)
Bones
Pelvic osteotomy (see Page 35)
Proximal femoral osteotomy (see Page 36)
Distal femoral extension osteotomy (see Page 37)
Tibial tubercle/patellar tendon advancement (see Page 38)
Tibial derotation osteotomy (see Page 39)
Calcaneal lengthening (see Page 40)
Subtalar or talonavicular fusion/arthrodesis (see Page 41)
First metatarsal osteotomy (see Page 42)
Medial cuneiform osteotomy (see Page 43)
First metatarsalphalangeal (MTP) joint fusion (see Page 44)
Dwyer calcaneal osteotomy (see Page 45)
Soft Tissues
Psoas lengthening (see Page 46)
Adductor lengthening (see Page 47)
Hamstring lengthening (see Page 48)
Rectus femoris transfer (see Page 49)
Calf muscle (gastronemius) lengthening/recession (see Page 50)
Achilles tendon Z-lengthening (see Page 51)
Percutaneous tendon lengthening (see Page 51)
Tibialis anterior split transfer (see Page 52)
Posterior tibialis lengthening (see Page 53)
Posterior tibialis split transfer (see Page 53)
Peroneal lengthening (see Page 54)
ALL ABOUT YOUR SURGERY
4
2010 SEM Surgery Manual
8/18/10
3:30 PM
Page 10
Before Your Hospital Stay
Presurgical appointments
Date
Time
Social work
Gait and motion analysis
Preoperative physical
Intrathecal baclofen adjustment(s)
Preoperative rehabilitation therapy
Methicillin-resistant staphylococcus
aureus (MRSA) test
Bloodwork
After Your Hospital Stay
Follow-up appointments
5
Copyright © Gillette Children’s Specialty Healthcare 2010
Date
Time
2010 SEM Surgery Manual
9/1/10
3:08 PM
Page 11
Planning for Your Surgery
You and your family will likely have a number of questions as you
start planning for your surgery and hospital stay. Please call the
numbers listed at the front of this manual for help getting answers.
You might find the following services especially helpful.
Health Resources and Education
Located on the fourth floor, near the Dairy Queen Family Room,
Health Resources and Education is open Monday through Friday
from 7:30 a.m. to 4 p.m. At this location, we can:
• Provide information about disabilities
• Offer a library of print and video titles
• Give you maps and general information about the Twin Cities
• Help you set up a CaringBridge Web site to communicate with
family and friends during your hospital stay
• Offer computers with Internet access for you to do a health
information search or update your CaringBridge site
Contact Health Resources and Education at 651-229-3938 or
[email protected].
Child and Family Services
Our team includes social workers and child life specialists.
We’re available to:
• Give tours that help you and your family become familiar with
Gillette and our medical equipment
• Address concerns you might have about coming to the hospital
• Discuss needs after your hospital stay
• Help you obtain home care, transportation and special equipment
• Show you relaxation techniques
See Page 31 for a checklist to help you prepare for surgery.
See Pages 32-33 for a checklist to help you plan for your hospital
stay.
Preparing Your Body for Surgery
Your overall health can affect the speed and quality of your recovery.
Health and nutrition are keys to successful surgeries and recoveries.
Maintain your regular level of activity and physical therapy before
surgery. If you feel pain, talk with your physical therapist or surgeon.
Eat adequate amounts of food with iron, calcium and vitamins C
and D (fresh colorful fruits and vegetables, dairy foods, and other
products with added iron and calcium). Avoid caffeine, tobacco and
alcohol.
Managing Pain
Pain management involves
reducing pain with medicines
or other pain-relief methods.
You and your family will
discuss your pain-management
plan with your surgeon and a
pediatric anesthesiologist.
Although you’ll have pain after
surgery, the use of medicines
and other techniques can help
a great deal.
To help manage your pain,
we’ll:
• Listen when you tell us you
are in pain
• Manage your pain using
pain-relief practices
• Involve you in pain management
• Respond quickly to your
unrelieved pain
You can help by learning
about pain and by letting your
doctors and nurses know
when you’re feeling pain.
We provide information about
managing your pain throughout this manual. Specific
details about pain relief after
you leave the hospital can be
found on Pages 15-16.
ALL ABOUT YOUR SURGERY
6
2010 SEM Surgery Manual
8/18/10
3:30 PM
Page 12
It’s not unusual to lose 1 to 2 pounds while recovering from surgery. Six weeks before surgery, increase the amount of
protein you eat. Protein is very important for healing. If you use a gastrostomy tube, your parent or caregiver should
tell the doctor who manages your nutrition that you’re having surgery, so appropriate changes can be made.
Donating Blood
Patients undergoing surgery occasionally need blood transfusions during the procedure. Instead of using blood from
the American Red Cross, you might be able to donate your own blood before surgery. Your family and friends also
can donate blood specifically for you. Please discuss any blood-donation questions with your doctor.
Latex Allergy
Although Gillette is latex-free, notify your doctor if you have a latex allergy or if you have had a severe reaction to
latex. If you’d like more information, ask a nurse for a flyer called Natural Rubber Latex Allergy.
Children and Stress
As a parent or caregiver, you need to consider how your child might respond emotionally to stress. If you have
concerns about your child’s fears, behavior or expectations regarding surgery or related issues, Gillette can direct you
to many resources. Contact your child’s primary-care doctor or a Gillette social worker (651-229-3855) for resources.
After Your Hospital Stay
Talk with your surgeon about how your mobility will change after surgery. Our social workers can help you get
any special equipment or services you’ll need at home. You’ll receive written information about your options.
Before leaving the hospital, you’ll receive specific instructions, including guidelines for recovering at home and
scheduling follow-up appointments. A nurse will be available by phone to answer questions after you leave the
hospital.
See Page 34 for a checklist to help you plan to leave the hospital.
7
Copyright © Gillette Children’s Specialty Healthcare 2010
2010 SEM Surgery Manual
8/18/10
3:30 PM
Page 13
Transportation
You might need special accommodations for your trip home.
If needed, Gillette can help you arrange medical transportation.
By Car
Be sure your vehicle has enough room for all equipment,
personal belongings and passengers. For safety reasons, we
strongly encourage that an adult ride in the back seat with you.
Gillette loans some car seats and vests. Age-appropriate car seats
are required. A Spelcast car seat will fit a child who weighs 40
or fewer pounds and is 40 or fewer inches long.
You must fit lengthwise while laying flat on the bench of the
back seat. Gillette can lend you an E-Z-On Vest, which makes
it easier for you to safely ride flat. (A vest fits a patient who is
100 or fewer pounds. A patient must be 2 years or older to use
an E-Z-On Vest.)
Your parents or caregivers can return the E-Z-On Vest or car seat
when you return to Gillette for cast removal, physical therapy and
brace fittings.
By Air
If you’ve flown to the Twin Cities, check on the accommodations
your airline offers. Bulkhead seating (located in the first row,
directly behind first or business class) might offer more room.
Modified car seat
E-Z-On Vest
ALL ABOUT YOUR SURGERY
8
2010 SEM Surgery Manual
8/18/10
3:30 PM
Page 14
A Week Before Surgery
A preoperative nurse will call about a week before your surgery. The nurse will:
• Obtain a health history, including details about your medicines (name, dose, frequency), pharmacy and primarycare doctor
• Discuss what to expect on the day of surgery and during the hospital stay
• Let you know what you’ll need when you leave the hospital
The Day Before Surgery
During your preoperative visit or phone call, we’ll tell your parents or caregivers when you should stop eating,
drinking and taking medicines before surgery. Use the Important Surgery Reminders form (shown below) to write
down the specific dates and times. In general, you can’t eat or drink anything for a number of hours before the
surgery. If you don’t follow these guidelines, your surgery might be delayed or cancelled.
I M P O RTANT SURGERY REMINDERS!
Doctor’s Name:
Surgery Date:
NO food (including gum and mints) after:
Time
a.m./p.m. On (date)
NO formula/tube feeding after:
Time
a.m./p.m. On (date)
Arrival Time:
NO breast milk after:
Time
a.m./p.m. On (date)
NO clear drinks/foods (such as Popsicles or Jell-O) after:
Time
a.m./p.m. On (date)
The times and dates are subject to change. You will be notified of any schedule revisions.
For preoperative questions: call 651-229-3918 or 800-719-4040, ext. 3918.
The day before surgery, you should:
• Try to have a bowel movement. Surgery changes your activity level and diet, so you might have difficulty
maintaining normal bowel routines afterward.
• Take a bath or shower and wash your hair.
• Remove make-up, nail polish, contact lenses and jewelry (including piercings). Notify a preoperative nurse
if your jewelry can’t be removed.
Do NOT shave surgical areas. Shaving at home before surgery, especially with a razor, is associated with an increased
risk of infection.
Your parents or caregivers should be prepared to bring:
• Names, dosages, concentrations, and lists of times at which you usually take your medicines (bring the bottles,
if possible, and My Medicine List, which any Gillette staff member can give you)
• Medical insurance information
• Copies of your medical history form, physical form and lab-test results from your primary-care doctor
9
Copyright © Gillette Children’s Specialty Healthcare 2010
2010 SEM Surgery Manual
8/18/10
3:30 PM
Page 15
During Your Hospital Stay
2010 SEM Surgery Manual
8/18/10
3:30 PM
Page 16
DURING
Your Hospital Stay
Before Surgery
When you and your parents or caregivers arrive in the preoperative area, the perianesthesia staff will greet you. We’ll weigh you
and ask you to change into a hospital gown. We’ll also check your
temperature, pulse and blood pressure.
Then you’ll meet with the surgery team (operating room nurse,
surgeon, nurse anesthetist and anesthesiologist). Bring up any
questions or concerns.
Your parents or caregivers should tell the nurse and anesthesiologist about your experiences with and responses to pain. You
and your parents or caregivers might request medicines and other
techniques to help decrease your anxiety. The anesthesiologist
will explain how we’ll use anesthesia and pain medicines.
(See Rate Your Pain, Page 11.) The preoperative packet that
we’ll send you before your surgery includes detailed information
about anesthesia.
Right before your surgery, the surgeon will mark the places on
your body where he or she will make incisions. After you are
under anesthesia, we’ll place an intravenous (IV) tube so we can
give you medicines and fluids during and after the surgery. Your
parents or caregivers can be present during this process. We’ll also
insert a breathing tube. You’ll receive general anesthesia by
inhaling it through a mask or getting it through an IV. During
surgery, our staff will watch you and track your breathing.
Managing Pain
Learning About Pain
Pain is a feeling of discomfort.
It ranges from dull aches to
sharp stabbing sensations.
Pain is the way your body
responds to surgery or injury.
Here are some interesting facts
about pain:
• All pain is real.
• Everyone feels pain
differently.
• Pain medicine works
differently for everyone.
• Pain medicine works better
if you take it before the pain
gets strong.
• Taking pain medicine
regularly (even at night) is
important.
• Controlling pain helps you get
better more quickly.
Your parents or caregivers will receive a pager so we can update
them on your progress. Staff from the Postsurgical Nursing Unit
will try to meet with your family while you’re in surgery.
ALL ABOUT YOUR SURGERY
10
2010 SEM Surgery Manual
8/18/10
3:30 PM
Page 17
After Surgery
After your surgery, you’ll likely start out at the Postanesthesia Care Unit (PACU), then move to the
Postsurgical Nursing Unit. Some patients might need
to spend time in the Pediatric Intensive Care Unit
(PICU). (See Page 12.)
Postanesthesia Care Unit
Once you wake up, the nurses will ask you if your
pain level is acceptable. You’ll receive medicine to
remain as comfortable as possible. The surgeon will
meet with your family or caregivers to discuss the
surgery and recovery process.
Shortly after surgery, visitors might notice temporary
changes in your appearance. If you were positioned
on your stomach during surgery, your face and hands
might be puffy. Visitors also might notice redness
around your eyes and lips. That’s because we often
place protective tape over your eyes and around your
mouth to keep your breathing tube in place.
Medical Equipment
To help you recover while you are in the hospital,
our staff might use some or all of the equipment
listed here.
• An incentive spirometer is a small bedside breathing aid. Along with deep breathing and coughing
exercises, it helps keep your lungs healthy after
surgery. (We also might use bubbles if you can’t
use an incentive spirometer.)
• An intravenous (IV) pump delivers fluids that
your body needs after surgery. We attach a bag of
IV fluid to a tube that’s inserted into a vein.
• A vital-signs monitor is a machine that keeps track
of your heart rate and breathing. We’ll attach the
monitor to your chest with small sticky patches
and tape a clip to your finger. A red light indicates
that the monitor is working. An alarm will sound
when your heart rate or breathing rate changes
significantly.
• We often use oxygen after surgery to make breathing easier. Sometimes we’ll place an oxygen mask
over your nose and mouth or next to your face.
In other cases, a small tube (nasal cannula) rests
under the nose.
11
Copyright © Gillette Children’s Specialty Healthcare 2010
Managing Pain
Rate Your Pain
We might use a rating scale to measure your
pain. The scale helps determine if you have
enough of the right type of medicine.
The scale shows faces that are numbered from
zero to five. You might be asked to point to the
face that comes closest to your level of pain.
Rate Yourself on the Pain Scale
0
No Hurt
1
Hurts
Little Bit
3
2
Hurts
Hurts
Little More Even More
4
Hurts
Whole Lot
5
Hurts
Worst
Face scale modified from Wong, D.L.: Whaleg and Wong’s Essentials of Pediatric Nursing, 1997, Mosby.
While you’re in the hospital, we might ease
your pain with:
• Epidural anesthesia: We place a small
catheter (tube) into your back and attach it to
a pump. The pump dispenses two types of
medicines for pain relief in the lower body,
legs and feet.
• Patient-controlled analgesia (PCA): A pump
gives a continuous dose of pain medicine
through an IV. You, your caregiver or a nurse
can push a button for extra doses of pain
medicine.
• Pain medicines: A nurse will give you other
types of pain medicine as needed.
• Other medicines: Valium treats muscle
spasms. Tylenol helps with muscle and bone
pain. Medicines can prevent and treat
nausea, vomiting and itching.
• Complementary therapies: We offer music,
interactions with our staff, deep breathing,
and aromatherapy to distract you from your
pain.
2010 SEM Surgery Manual
8/18/10
3:30 PM
Page 18
• A sequential compressing device (also called a PlexiPulse
pump) increases circulation in the legs and helps prevent
blood clots. The machine pumps air into and releases air
from pockets in soft leg or foot wraps.
• Surgical drains are tubes used after surgery to collect
fluids. For example, a Jackson-Pratt drain runs from your
surgical incisions to a plastic container. It collects fluids
and blood from around the incision, and we remove it
when drainage slows down.
• A Foley catheter (small tube, inserted into the bladder)
drains your urine for a few days after surgery. The nurse
will check it often.
• A suction machine helps get rid of excess saliva.
Pediatric Intensive Care Unit (PICU)
Some patients might need to spend a short period of time in
the PICU after surgery. Sometimes surgeons know beforehand if you’ll require care in the PICU, but they might also
make that decision during surgery.
You might go to the PICU if:
• You have difficulties after surgery, including low blood
pressure, high blood pressure or a low hemoglobin count.
• You have a history of bleeding problems.
• You take medicines that increase your risk of abnormal
bleeding.
• Your doctor wants to watch you closely.
• You need equipment (such as a ventilator) that is available only in the PICU.
Because patients in the PICU need a high level of care —
and because the PICU’s special monitors and equipment
need close observation — someone will be at or near your
bedside at all times. You’ll be assigned a PICU nurse and
respiratory therapist. A pediatric intensivist and an
orthopaedic doctor will assist with your care.
Your doctor will decide when you’re ready to move from the
PICU to the Postsurgical Nursing Unit.
Managing Pain
Involve Yourself
You should:
• Tell your nurse when you feel pain,
especially pain that won’t go away.
• Use the pain scale to rate your
pain.
• Expect to take pain medicines
around the clock.
• Ask for — and use — pain-relief
medicine when your pain begins.
• Take pain medicine 30 to 40
minutes before a therapy session
or before doing things that might
cause pain, such as getting up,
walking or changing a dressing.
• Tell your doctor, nurse or caregivers if you’re scared.
Your parents or caregivers should
tell your doctor or nurses if you have
allergies or side effects to certain
medicines. Also, they should tell us
what pain-relief methods and medicines have worked well for you in
the past.
Ask your nurse to teach you about
other ways to manage pain, such as:
• Ice/heat
• Music
• Distraction (such as videos or
games)
• Backrubs or massage
• Changing your position
• Deep breathing and relaxing
Excerpt from Pain Control After Surgery: A Patient’s
Guide, U.S. Department of Health and Human Services,
Public Health Service Agency for Healthcare Policy
Research.
ALL ABOUT YOUR SURGERY
12
2010 SEM Surgery Manual
8/18/10
3:30 PM
Page 19
Postsurgical Nursing Unit
In most cases, patients go to the Postsurgical Nursing Unit after leaving the PACU. Your family or caregivers are
welcome to visit.
During your first hour on the postsurgical unit, a nurse will frequently check your blood pressure, pulse, temperature
and breathing. We’ll also check the circulation and pulse in your arms and legs. A nurse will come in every hour,
and then every two to four hours, for the first 24 hours. A nurse won’t, however, be at your bedside all the time.
Breathing
The nurse will listen to your lungs. We might ask you to do the following exercises:
• Take a deep breath through your nose and hold your breath while counting to five. Then breathe out slowly
and completely through your mouth. Repeat five to 10 times.
• Take a slow, deep breath and fully expand your lungs. Hold your breath for a moment, then cough hard.
• Use an incentive spirometer. (A nurse will explain how to use the device.) Blowing bubbles might also help
improve your breathing.
Digestion
The nurse will place a stethoscope on your stomach to listen for bowel sounds. We won’t allow you to eat or drink
until the nurse detects those sounds. After that, we’ll allow ice chips or small sips of water. We’ll gradually add to
your diet as you can tolerate food.
An IV will provide the fluids your body needs until you resume drinking and eating. As recovery progresses,
we’ll allow clear liquids and then solid foods. Once you can take fluids, solid foods and pain medicines by mouth,
we’ll stop the IV fluids. (We might leave an IV in place to use later, if necessary.)
Pain medicines and lack of activity can cause constipation. You must have a bowel movement before you can leave
the hospital.
Surgical Coverings
We might cover your incisions with a gauze dressing or a clear see-through dressing. Small strips of tape called
Steri-Strips hold the incisions together. Your casts or splints might hide some of your incisions.
Physical Therapy
You probably won’t get out of bed on the day of surgery. We’ll change your position every two hours or so by rolling
you onto your side. Your shoulders, hips and knees will move together.
We’ll typically start physical therapy three to four days after surgery. Your nurses might move you into a wheelchair
for a small amount of time on the second or third day. Refer to the Rehabilitation and Recovery section (see Pages
26-27) for specifics on physical therapy during and after your hospital stay.
13
Copyright © Gillette Children’s Specialty Healthcare 2010
2010 SEM Surgery Manual
8/18/10
3:30 PM
Page 20
Preparing to Leave the Hospital
Your family or caregivers should review the Preparing to Leave the Hospital checklist (see Page 34) to make sure
they have addressed everything you’ll need to leave Gillette. Your medical team — including doctors, nurses,
therapists, social workers and other medical specialists — will discuss your progress and decide when you’re ready
to leave the hospital.
Before you leave the hospital, we’ll give specific guidelines — including instructions for recovering at home and
scheduling follow-up appointments. We’ll also provide details about your diet, incision care, cast care and
equipment. Your physical therapist will discuss activity guidelines. Your physician or nurse will explain how,
when and for how long you should take your pain medicine and what side effects, if any, you should watch for.
We can help you plan for transportation, special equipment, and any services that you’ll need following surgery.
For more information, call Child and Family Services (651-229-3855).
Follow-up Visits
Most patients return for their first clinic visit three to six weeks after surgery. You might need to see several
specialists, so your parents or caregivers should be sure to ask us to coordinate your appointments. You can
make some appointments at the time your surgery is scheduled or before you leave the hospital. Call Patient
Appointment Services (651-290-8707).
At your first follow-up visit, we’ll take X-rays. We also might remove and reapply your casts and make models
for new orthoses. If you live a long distance from us, your Gillette doctor might suggest a postoperative visit
with your primary-care doctor or another specialist who knows you.
Traveling Home
About an hour before leaving the hospital, you should take a full dose of pain-relief medicine.
We’ll show your parents or caregivers how to transfer you into and out of a car. The photos below show a parent
transferring a patient out of a van’s back bench seat into a wheelchair.
Changing positions will help your circulation and improve your comfort level, so stopping often can be helpful
on long drives. Be sure to use seat belts or appropriate car seats. If needed, Gillette will provide you with an
E-Z-On Vest (see Page 8) to use in the car.
ALL ABOUT YOUR SURGERY
14
2010 SEM Surgery Manual
8/18/10
3:30 PM
Page 22
Care After Your Hospital
Stay
2010 SEM Surgery Manual
8/18/10
3:30 PM
Page 23
CARE AFTER
Your Hospital Stay
Managing Pain
You can expect ups and downs with pain relief. It’s common to have
times when pain increases — especially when your activity increases.
Raising your incisions above your heart by a few inches can help reduce
swelling and improve blood circulation. To help manage pain, use:
• Music, stories, books, television, video games and other activities
• Aromatherapy with essential oils (like mandarin and lavender) in
combination with other medical practices
• Massage or a soothing touch on areas of the body that are pain-free
See Relaxation Techniques, Page 20, for more ways to relax your muscles.
Medicines
Depending on your pain tolerance and the type of surgery you had,
you’ll probably need pain-relief medicine for an extended period of
time. Pain-relief medicine works best when taken regularly. Once pain
becomes severe, regaining control of it can be difficult.
Pain might increase during sleep, so it is helpful to have someone wake
you up to take scheduled medicines rather than waiting for pain to wake
you. For minor pain, use mild pain-relief medicine, such as acetaminophen (Tylenol). Some people need stronger medicine, such as Tylenol
with codeine, Valium, or adjustments to their intrathecal baclofen pump
dosage. We might suggest Valium to reduce muscle spasms the first few
days after surgery.
When you leave the hospital, your parents or caregivers should ask your
doctor or nurse which medicines to avoid when you’re taking pain
medicines. Review all of your medicines with a nurse.
• Don’t use nonsteroidal anti-inflammatory medicines after surgery,
because they can affect bone healing. Such medicines include
ibuprofen (Motrin and Advil) and naproxen (Aleve).
• Don’t use acetaminophen (Tylenol) and acetaminophen with codeine
(Tylenol 3) at the same time without first checking with your doctor
or nurse.
• Ask a nurse or doctor before you add pain medicines to your dosage
schedule.
• Because many medicines available without a doctor’s prescription
contain acetaminophen, always read labels to keep from using too much.
Limit doses to six in 24 hours — and use only if your doctor approves.
Managing Pain
Information for
Parents and
Caregivers
Sometimes children and teens
don’t react to pain as adults do.
Children might:
• Cry, scream or moan
• Complain of pain
• Be irritable, whiny, crabby or
negative
• Be unable to be calmed or
distracted
• Show a major change in
behavior (for example, an
active child might become
quiet or withdrawn)
• Sleep restlessly or be unable
to sleep
• Eat or drink very little
• Show changes in muscle tone
(unusual tightness or spasticity)
• Be unable to find a comfortable position
• Hold still, as if guarding
against touch or movement
• Avoid play or favorite
activities
If you think your child is in
pain, you’re probably right.
Once you’re comfortable, gradually change from strong to mild painrelief medicine. One way to do so is to use plain Tylenol during the day.
If that proves sufficient, continue using Tylenol. If discomfort increases
— especially at night — return to stronger pain-relief medicine. In
general, pain should continue to decrease every day after surgery, until
eventually you can stop using even plain Tylenol.
A nurse can review techniques to help you reduce the amount of pain
medicine you take.
ALL ABOUT YOUR SURGERY
15
2010 SEM Surgery Manual
8/18/10
3:30 PM
Page 24
Ice and Heat
Muscle spasms can be common after surgeries. They’re best treated with ice massage. You might find relief by
alternating ice massage with warm heat. For ice massage:
• Freeze water in a Styrofoam cup.
• Peel back one-third of the cup to expose the ice.
• Rub ice on the affected area for 15 to 20 minutes. (Although doing so might be uncomfortable at first, it has
the most lasting effect on pain.)
• You can wrap a cloth around the ice to keep skin from getting too cold.
• Wait 30 minutes between applications.
You also can use Cryogel cold packs, which are available at most pharmacies.
As long as the spasms are easing, you don’t need to call Gillette. But if they are getting worse, call your resource
nurse.
If Your Pain Increases
Swelling, activity, anxiety, infection and poor sleep can increase pain. Leg and back pain might occur during your
recovery. If pain worsens, make sure you aren’t overdoing things. Discomfort often is your body’s way of telling
you that you need to rest, so be sure to increase activities gradually. Anticipate your activity so that you can take
pain-relief medicine an hour before exercising, standing or walking. It’s better to use pain-relief medicine and be
active than to limit activities to avoid pain.
If your pain is worse than usual:
• Take another dose of pain-relief medicine if enough time has passed since the previous dose. (Never take more
medicine than your doctor prescribes.)
• Try stronger pain-relief medicine, such as acetaminophen with codeine. (Take stronger medicine instead of —
not in addition to — milder medicine.) Your parents or caregivers should call your doctor or nurse at Gillette
if pain medicines aren’t effective.
• Continue elevating your legs (as instructed by your nurses). Your circulation will be weaker than normal for
some time after surgery, and raising your legs can help improve it.
16
Copyright © Gillette Children’s Specialty Healthcare 2010
2010 SEM Surgery Manual
8/18/10
3:30 PM
Page 25
Caring for Incisions
Avoid submersing yourself in bathtubs, pools, hot tubs, whirlpools or lakes until the doctor says it’s OK. You might
be allowed to shower after we remove your cast (three to six weeks after surgery). If we don’t apply a cast, it will be
at least 10 to 14 days after your surgery (when the incisions have healed) before you can bathe. If water seeps into
the incisions, it could cause an infection.
We close most incisions with absorbable stitches that gradually break down in the body and don’t need removing.
We’ll cover your incisions with a clear bandage that will peel off in three to six weeks.
Watch for Infection
Check your incisions daily for signs of infection. Your incisions might look pink as they heal, but they shouldn’t
be inflamed or deep red. Symptoms of an infection include:
• Warmth, redness, draining or swelling at the incision site
• Ongoing fever above 100.5˚ F
• Tender, enlarged lymph nodes in the armpit or groin closest to the incision site
• Increasing pain
If a cast covers your incisions, watch for drainage (such as pus or a new stain coming from inside the cast). Never get
the cast wet. Continue with sponge baths until we remove your cast.
Minimizing Scars
Typically, scars remain raised, red and firm for eight weeks. After a year, they usually become softer, whiter and
flatter. To reduce scarring, avoid exposing the incision to sun for a year. Use sunblock to keep scars from
darkening.
It takes about nine months to see how a scar will look when it’s mature. Then, depending on the severity of the scar,
the doctor might consider scar-revision options. Techniques for repairing or improving scars include laser treatment,
dermabrasion and surgical revisions.
ALL ABOUT YOUR SURGERY
17
2010 SEM Surgery Manual
8/18/10
3:30 PM
Page 26
Diet
A good diet helps minimize issues — such as constipation and other intestinal problems — that are sometimes
associated with surgery. For example, regularly eating a high-fiber diet is helpful. To avoid gas and bloating,
increase the amount of fiber in your diet gradually. If you are in a body cast, see Page 23 for specific nutrition
information.
The following foods are good sources of dietary fiber. If you have oral-motor or swallowing problems, avoid foods
that can cause choking.
Cereals
Bran cereals, oatmeal, grits, Shredded Wheat, Chex cereals, Cheerios,
Wheaties, Grape-Nuts, Fiber One, All Bran, Cracklin’ Oat Bran
Breads
Bran muffins and whole-wheat, cracked-wheat, rye, oatmeal or eightgrain breads
Grains, flour and pasta
Unprocessed bran, whole-wheat flour, barley, brown rice, buckwheat,
bulgur, cracked wheat, rolled oats, whole-wheat pasta, wild rice
Legumes
Black beans, chickpeas (garbanzo beans), kidney beans, lentils,
navy beans, pinto beans, turtle beans, white beans
Nuts, seeds and coconut
Almonds, Brazil nuts, coconut, hazelnuts, peanuts, peanut butter,
popcorn, pumpkin seeds, sesame seeds, sunflower seeds, walnuts
Fresh fruit
Apples, berries, pears, nectarines, apricots, peaches, melon, grapes,
oranges, mangoes, papayas, plums, cherries, rhubarb, pineapple, kiwi
Dried fruit
Dates, raisins, apricots, peaches, pears, plums
Canned fruit
Apricots, cherries, mandarin oranges, grapefruit sections, peaches,
pears, plums, pineapple, fruit cocktail
Vegetables
Celery, potatoes, green beans, broccoli, parsnips, peas, spinach,
sweet potatoes, carrots, corn, beets, cabbage, eggplant, onions,
zucchini, asparagus, tomatoes, lettuce (especially dark-leaf lettuce)
Beverages
Be sure to drink at least six to eight glasses of water or other fluids each day. To avoid constipation, limit milk
and dairy products to three or four servings a day.
Fruit juices don’t have fiber, but they can help manage constipation. (Prune, peach, pear, papaya and citrus juices
are good choices.) Drinking plenty of fluids causes the intestine to contract, moving stool through the large
intestine. But limit yourself to 4 to 8 ounces of fruit juice each day.
If you are drinking more than one or two cans (20 ounces total) of soda pop a day, try to cut back.
18
Copyright © Gillette Children’s Specialty Healthcare 2010
2010 SEM Surgery Manual
8/18/10
3:30 PM
Page 27
Bowel Management
Keep in mind that the bowel-management process is different for everyone. The goals of bowel management
include:
• Emptying the lower bowel at regular intervals
• Preventing accidents between regular emptying
• Preventing constipation
• Promoting independence
A satisfactory bowel-management program requires time, patience, and trial and error. Ask your nurse which
methods will work best for you. Be sure to tell the doctor or nurse if a method isn’t working. If you are in a body
cast, see Page 23 for specific toileting and constipation information.
Establishing a Routine
When starting a new bowel-management routine, begin with an empty bowel. For example, you might use a mild
laxative or small enema to clean the bowel. Don’t go more than three days without having a bowel movement.
Positioning
It’s easier to have a bowel movement when sitting, rather than lying down. If your feet don’t touch the floor when
you sit on a toilet, put a box or footstool under them. If you’re in bed and need to use a bedpan, try to elevate the
head of the bed. To prevent skin irritation, clean the skin well after each bowel movement.
Medicines
If you need medicines (such as suppositories or laxatives), your doctor or clinic nurse can help you decide which
ones to use. Stool softeners prevent stools from hardening. They can be used regularly, as directed by your doctor.
A suppository is medicine that’s inserted into the rectum. The medicine stimulates the bowel, causing it to contract
and move stool out of the intestine. Laxatives are also medicines that stimulate the bowel. They come in pills and
liquids. Again, you should use them only with your doctor’s recommendation. Ask about alternative medicines that
don’t require a prescription.
Other Methods
To stimulate the bowel by hand, put on a medical glove and insert a finger one-half to one inch into the rectum.
Use a gentle circular motion for one minute. Doing so relaxes the sphincter (rectal muscle) and allows stool to move
through the intestine.
Enemas are usually one of the last treatment choices. An enema injects liquid into the intestine through the rectum,
stretching and irritating the bowel. The irritation causes the bowel to contract and empty.
ALL ABOUT YOUR SURGERY
19
2010 SEM Surgery Manual
8/18/10
3:30 PM
Page 28
Relaxation Techniques
In addition to the suggestions for managing pain listed on Pages 15-16, you might be able to participate in the
following relaxation techniques. Relaxation techniques can help control anxiety so you can devote your energy
to healing.
Children and Relaxation
Consider the age of your child and his or her developmental level before using the following techniques.
Deep Breathing
If possible, begin by lying on your back with your toes turned out slightly.
• Place one hand on your abdomen and one hand on your chest.
• Inhale slowly and deeply through your nose into your abdomen, pushing against your hands as much as is
comfortable. Only your abdomen should move.
• When you feel at ease, inhale through your nose and then exhale through your mouth, making a quiet,
swooshing sound (like the wind). Relax your tongue, mouth and jaw.
• Take long, slow, deep breaths that raise and lower your abdomen. Focus on the sound and feeling of your
breathing.
Deep breathing should continue for five to 10 minutes, once or twice a day, for a couple of weeks. Then extend
each session to 20 minutes. At the end of each session, notice whether you feel more relaxed than you did before
starting.
Body Awareness
Focusing on different body parts can help you relax. For this exercise, make sure you’re in a comfortable position.
• Close your eyes.
• Let your face muscles totally relax.
• Think of your neck and shoulder muscles, and let them totally relax.
• Continue to relax all of your muscles, moving from your head to your toes.
All body parts should become loose and warm.
Imagery
Focus on pleasing thoughts and images by closing your eyes and picturing a favorite scene. As you relax, imagine
the sights, sounds and smells of the scene.
To maximize relaxation:
• Play soothing music.
• Turn down the lights and close the door.
• Wear loose, comfortable clothing.
• Keep interruptions and noise to a minimum.
20
Copyright © Gillette Children’s Specialty Healthcare 2010
2010 SEM Surgery Manual
8/18/10
3:30 PM
Page 29
Living With a Body Cast
After surgery, you might need a plaster body cast (also called a spica cast). We usually apply casts after surgery,
but before you wake up from anesthesia. A spica cast goes around the trunk of your body and often includes leg
extensions. See photo on Page 30.
Cast Care
The cast won’t be completely dry for 24 to 48 hours. Don’t sign, decorate or cover it until at least two days after it’s
applied. Unless your doctor approves, you shouldn’t stand or walk in the cast.
Inspect your cast and skin with a small flashlight at least twice a day. To prevent irritation that could lead to
infection, check the cast for changes in odor. Report any foul or musty smell to your nurse. Be sure small items —
such as toys, crumbs or coins — don’t fall inside the cast.
Keep the cast clean and dry. Call Gillette if:
• The cast gets wet, causing it to soften or crack and lose its proper position.
• Your skin under the cast remains wet.
• Soiling occurs under the cast.
If the cast becomes dirty, your parents or caregivers can clean the area with a slightly damp cloth. Keep the cleaned
area uncovered until it’s completely dry. (Lightly dabbing white shoe polish on the stained area can make the cast
whiter and cover dirt.) Decrease odor by rubbing a small amount of dry baking soda into the soiled areas of the cast.
Cast Petaling
Because the edges of the cast are rough, we’ll “petal” the cast before you go home by folding strips of adhesive tape
over the cast edges to make them smooth and comfortable. To petal a cast at home:
• Cut adhesive tape into 2 1/2-inch strips.
• Cut rounded edges on one end of the strip to prevent the tape from rolling.
• Tuck the square end inside the cast smoothly.
• Bring the rounded edge over the outside of the cast.
• Overlap the strips at the sides.
• Replace strips when they wrinkle or loosen.
We’ll give you extra materials so you can replace loose petals. Don’t petal the cast until it’s completely dry.
Skin Care
Check your skin at least twice a day for signs of irritation. Pressure sores often form on the heels and near the tailbone.
( Pressure sores are caused when you are in one position for too long.) If there are any reddened areas, change your
position to remove the pressure. If the area stays red for 30 minutes after the pressure is removed, a pressure sore might
be developing. Keep yourself positioned so there is no pressure at all on the area. Your parents or caregivers should call
Gillette if they notice any pressure sores.
When taking a sponge bath, wash all skin the cast doesn’t cover.
• Don’t get the cast wet.
• Use plastic wrap and towels to protect the cast.
• Use witch hazel to clean your toes and skin near the cast edges.
• Don’t use lotion or powder at the cast’s edges — it might cake, making your skin softer, and then cause more irritation.
• Use lotion on your exposed ankles, knees, elbows and heels.
ALL ABOUT YOUR SURGERY
21
2010 SEM Surgery Manual
8/18/10
3:30 PM
Page 30
Even if you have severe itching, don’t place anything into your cast. Doing so might move padding, or scratch
or irritate the skin, which can lead to infection. If itching persists, use a hair dryer on a cool setting to blow air
into the cast.
Equipment
While you are wearing a body cast, your parents and caregivers will need to rent a wheelchair with a reclining
back and extended leg rests. During your hospital stay, a nurse can direct you to someone who can help with
rental. Depending on your size and age, you also might need to rent a hospital bed. If you are old enough, you
might have a hospital bed with a trapeze. The trapeze makes it easier for your parents or caregivers to turn and
transfer you. Pulling up on the trapeze also helps you relieve pressure.
Positioning
Keep the head of your bed raised at all times and make sure your cast is supported. It might be comfortable
to sit in a bean bag chair or reclining wheelchair.
Your parents or caregivers should reposition you every two to four hours during the day, and at least once at
night, to prevent pressure sores. Pillows, blankets or rolled-up towels placed under bony areas (such as knees
and ankles) can provide support and prevent pressure on the skin. You should support your ankle, knee and
hip joints to avoid breaking the cast. You may lie on your back, side or stomach, as long as your head is higher
than your heart and the cast is supported.
The added weight of the cast (6-10 lbs.) and the inflexibility of your body in the cast might make moving and
turning a challenge. We’ll show your parents or caregivers proper lifting and turning techniques during your
hospital stay. They should bend their knees, keep their backs straight, tighten their stomach muscles and let
their legs do most of the lifting.
The weight of your cast might cause you to feel off-balance, so your parents or caregivers need to protect you
from rolling or falling. They should make sure you are secure when lying or sitting on a couch or when using a
bed or car seat. (Child-safety rails can be useful.)
Discomfort
The amount and type of discomfort you feel might be related more to your medical condition than to the cast.
Your doctor might order medicines to help relieve pain or muscle spasms. For more information about managing
pain, see Pages 15-16.
Circulation
Some swelling will occur, so keep your head elevated above your heart. If swelling increases, call Gillette.
Check the cast daily to make sure it’s not too tight. A cast that has become too tight could damage nerves or cut
off the blood supply to your legs. If you experience tightness, pain, tingling, or numbness, or if you’re unable to
move your toes, have someone reposition your legs, raising them for an hour or more. If the symptoms don’t
change, call Gillette.
Your toes should stay pink and feel warm. If you press your toenail bed, it should turn pink again as soon as you
release pressure. You should be able to move your toes freely without numbness, tingling or pain. Your parents or
caregivers should call your nurse if your toes become more swollen or discolored or if you can’t easily move them.
22
Copyright © Gillette Children’s Specialty Healthcare 2010
2010 SEM Surgery Manual
8/18/10
3:30 PM
Page 31
Nutrition
Make sure you eat healthy, well-balanced meals. Eating fresh fruits, vegetables and whole-grain breads, and drinking
plenty of water and juice, will help prevent constipation or urinary tract infections. Small, frequent meals, instead of
three regular meals a day, prevents the tight feeling that results from a full stomach.
While in a body cast, young children shouldn’t drink more than three cups of milk a day, and teenagers shouldn’t
have more than four cups. (Too much protein and calcium might cause calcium stones in people who aren’t active.)
Drinking plenty of other fluids, such as cranberry juice, can help prevent calcium stones. For more information
about diet, see Page 18.
Toileting
Children who are not toilet-trained will need to use disposable diapers while in a body cast. Your parents and caregivers will need to change loose “petals” (see Page 21) and pad the cast with dry, disposable diapers as needed. You
can make padding by cutting the diapers in half and taping the edges. Tuck the edges inside the cast, placing the
plastic side toward the cast and the absorbent side next to the skin.
If you can use a bedpan or urinal, prop your head higher than your feet to drain urine and stool away from the cast.
Use pillows or folded blankets. When using a bedpan, place a disposable diaper around the edges of the cast,
absorbent side out, plastic side against the cast. Remove the diaper immediately after you use the bedpan.
A special type of bedpan, called a fracture bedpan, works best because it has a flattened end that can be placed under
the buttocks. Parents and caregivers should turn you to the side opposite the fractured or surgical side. They should
place the bedpan under your buttocks, and turn you back onto the bedpan.
A urinal for boys is used like a bedpan, but it is a bottle instead of a pan. The urinal is placed between the legs.
Make sure it’s tilted so that the urine doesn’t drain out.
Constipation
Your limited physical activity and the amount of medicines you are taking might mean you’ll have problems with
constipation while you are in a cast. For more information about bowel management, see Page 19.
Clothing
Wear your own clothing as much as possible. The cast is quite warm, so you won’t have to bundle up too much.
Parents or caregivers might dress young children in oversized sleepers with snaps at the crotch and legs. For older
kids, skirts, dresses, large sweat pants, or modified shorts are usually comfortable.
To wear pants or underwear when there is a bar between your legs, you’ll need to open each leg on the sides and sew
Velcro on the seams. Wear underwear a few sizes larger than your usual size over the cast. In cold weather, cover
your toes with a sock that fits over the foot of the cast.
Cast Removal
Before you leave the hospital, we’ll help you plan for your cast removal. When you return to have the cast removed,
bring your shoes, clothes, braces and wheelchair.
You might feel some discomfort when the cast is removed. Ask the nurse if you should take a dose of pain-relief
medicine beforehand. We encourage your family to stay with you during the removal. Although the procedure is
safe, the cast saw is noisy and might be frightening.
ALL ABOUT YOUR SURGERY
23
2010 SEM Surgery Manual
8/18/10
3:30 PM
Page 32
Children and Body Casts
Within the guidelines your doctor sets, your child should take part in as many activities as possible.
Special activities might make wearing a cast easier.
• Take your child outside in a wagon, stroller or reclining wheelchair to get some fresh air.
• Place items such as toys, a TV, food, water, a bell, and a bedpan or urinal within reaching distance.
• Avoid isolation by making sure your child is near family and friends.
• Try to keep your child’s activity schedule as normal as possible.
Here are some suggested activities.
Ages 4-6
• Doing face painting
• Playing with cars, trucks and action figures
• Using a felt board
• Decorating casts with markers/stickers
Ages 7-13
• Steering remote-control cars
• Playing hand-held electronic games
• Making mobiles to decorate the ceiling
• Creating a scrapbook
Age 13 and older
• Telephoning friends
• Keeping a diary, journal or scrapbook
• Watching videos
• Reading books
• Playing electronic games
• Using a laptop computer
Activity
Typically, you’ll start physical therapy at your first follow-up appointment. The physical therapist will discuss
future physical therapy needs at that time. If you live a long distance from Gillette, you might spend the night in
the hospital so you can have a day of therapy after we remove your cast. The hospital stay helps to make sure
that your family and caregivers are comfortable moving you around and are familiar with the types of equipment
you’ll need.
24
Copyright © Gillette Children’s Specialty Healthcare 2010
2010 SEM Surgery Manual
9/1/10
3:09 PM
Page 33
When to Call Gillette
We’ll take your call 24 hours a day. Call Telehealth Nursing (651-229-3890).
After hours and during the weekends our nurses from the Postsurgical Nursing Unit (4-West) might answer your call.
Call your local health provider or urgent-care center if needed.
Be sure to call us right away if the following situations occur.
Incision
• An incision opens in any way.
• You have questions about caring for an incision.
Pain
• Pain is severe and unrelieved with rest, elevation, ice or medicine.
• You develop calf pain, swelling, pain behind the knees, redness or tenderness.
• Your pain requires medicine more than five times a day.
• For no apparent reason, the pain becomes severe after a fairly long period of comfort.
• Pain gets worse, and there is new redness, swelling or thick drainage in the area of surgery.
• The location of pain changes for no apparent reason.
• Pain occurs in an area covered by a cast, but not in the area of surgery.
• Pain becomes severe and isn’t relieved by the methods discussed throughout this manual.
Skin
• Areas of redness don’t go away within an hour of relieving pressure.
• Pressure areas, casting or bracing results in open sores.
• You see signs of infection (redness, tenderness, drainage, and swelling) or feel pain around incisions.
See Page 21 for more information on skin care.
Casts
• Severe pain, numbness or burning (inside or below the cast) isn’t relieved with medicine, elevation or rest.
• Swelling or tightness (under the cast) isn’t relieved by elevation and rest.
• You have difficulty moving your toes and/or you experience extreme pain with small movements.
• Your toes are cold or discolored.
• A new stain is seeping through the cast.
• Your cast has a foul odor.
• Your skin is broken, blistered or irritated around the cast edges.
• Your cast is cracked, broken or loose.
• An object falls inside the cast.
Other Reasons
• Abdominal pain, bloating, vomiting or diarrhea
• Unusual headaches
• An ongoing fever above 100.5° F
• Bowel or bladder problems
• Chest pain or shortness of breath
• Severe throat pain or irritation
• Pain or burning when urinating
• Tingling, weakness or numbness in legs that doesn’t go away after you change positions
ALL ABOUT YOUR SURGERY
25
2010 SEM Surgery Manual
8/18/10
3:30 PM
Page 35
Rehabilitation
2010 SEM Surgery Manual
8/18/10
3:30 PM
Page 36
REHABILITATION
and Recovery
You’ll feel significant weakness after surgery. You and your parents or caregivers must devote approximately one year
to rehabilitation, including significant strengthening and stretching exercises. During that time, you’ll also wear
protective orthotic equipment. On occasion, we might readmit patients to the hospital for rehabilitation so that they
can focus on rehabilitative goals at an increased intensity and consistency. Your surgeon and physical therapist will
discuss this possibility with you.
Moving Around Safely
Because every patient has different abilities and physical limitations, everyone’s rehabilitation process and road to
recovery is unique. Your medical condition — including, but not limited to, the reason for your surgeries — will
play a large role in determining your abilities after surgery. Some people will be able to do all of the activities
discussed in this section. Others will be able to do some of them. It will take three to six months before you
can fully resume your previous level of activity. Talk with your doctor about which activities are right for you.
Physical Therapy
You will depend significantly on your family or caregivers for at least three weeks after surgery. Before you leave
the hospital, a physical therapist will teach your caregivers how to:
• Move you from a bed to a wheelchair
• Roll you safely in your bed
• Use equipment after your hospital stay
• Help you with exercises that prevent stiffness
First Three Weeks After Surgery
During the first three weeks after your surgery, you’ll depend on your family or caregivers for significant support.
Range of Motion
During this time, your goals will be to:
• Maintain or increase the range of motion in your joints
• Prevent stiffness while you’re healing
We’ll teach your parents or caregivers how to use passive range-of-motion exercises to help you move.
Before you leave Gillette, we’ll help make sure your parents or caregivers feel comfortable using the techniques.
If your SEMLS involves one or both knees, you might begin using a continuous passive motion (CPM) exercise
machine (see Glossary, Page 29) while you’re at Gillette. If so, we’ll send the machine home with you.
Transfers
We’ll teach your parents or caregivers how to help you move to and from your bed, a wheelchair and a car.
They might use a sliding board to decrease the strain on their backs.
The specific transfer techniques you use will depend on your restrictions after surgery. Some patients can bear
weight on their legs. Most people are immobilized and unable to move independently for three weeks after surgery.
Activities
We’ll teach your parents or caregivers about appropriate activities for you after you leave the hospital.
It probably won’t be easy for you to go places at first, so we’ll help you prepare for activity restrictions.
We’ll also explain any adjustments you might need to make to your living situation. For example, it might be
easier for you to stay on the main floor of your home, so no one will have to carry you up or down stairs. Your
Gillette social worker will help ease your transition from the hospital.
Pain Control During Physical Therapy
You might feel anxiety or pain during physical therapy sessions, especially the first time you move your legs after
surgery. We recommend that you take pain medicine before each session. Let your therapist know if you’re feeling pain. He or she will work closely with you and your nurses to manage your pain.
ALL ABOUT YOUR SURGERY
26
2010 SEM Surgery Manual
8/18/10
3:30 PM
Page 37
Three to Six Weeks After Surgery
Your doctor usually will lift precautions and encourage activity beginning three to six weeks after your surgery.
Range of Motion
We’ll add active exercises to your range-of-motion training. Your overall goal will be to use the full range of all your
joints.
If you’re using a CPM machine, your therapist might increase the range until you can comfortably move from 0 to 90
degrees. Then we’ll add strengthening exercises. You can gain strength by:
• Doing exercises
• Changing positions (such as moving from lying down to sitting up, kneeling or standing)
• Practicing mobility (rolling and crawling)
You also might start using a three-wheeled or stationary bike.
Weight-Bearing Activities
If your surgery involved your bones, you won’t be able to put weight on your legs for at least three weeks after surgery.
You might begin bearing weight at three weeks if X-rays reveal adequate healing. You also might receive new shortleg casts at that time.
If you had soft-tissue operations (such as muscle lengthening), an ankle-foot orthosis (AFO) can provide ankle
support. Even if you were walking independently before surgery, you’ll initially use a walker or crutches afterward.
Re-educating your muscles and learning new walking patterns takes time. You’ll have to adjust to your new sense of
balance and alignment.
Continuing Physical Therapy
You’ll participate in physical therapy two to three times a week. You’ll also need to do stretching and strengthening
exercises at home. You can receive physical therapy at any Gillette site, or you can work with a provider in your
community. Sessions at your school, however, shouldn’t be your only source of physical therapy.
Six to 12 Weeks After Surgery
You’ll continue strengthening and mobility activities, which will help you return to the level of activity you
experienced before surgery.
Braces and Exercises
If you have a second set of casts, we’ll remove them at six to 10 weeks after surgery. At that point, you might need
braces (orthoses) to help strengthen and use your calf muscles. The amount of time you’ll need to wear a brace, and
the type of brace you’ll need, might change once your walking ability stabilizes. Ask your physical therapist how
often — and for how long — you should wear your braces. You should continue your strengthening exercises two to
three times per week. Add ankle weights as you grow stronger. Neuromuscular electrical stimulation (NMES) might
improve your muscle power, walking patterns and posture. (See Glossary, Page 29.)
Activities
Because you’re no longer wearing casts, your activities can now include swimming, therapeutic horseback riding,
biking without AFOs, and other types of exercise. As your endurance improves, you can increase how far you walk.
The amount of time you’ll use a walker or crutches depends upon how quickly you recover. You might go directly
from using a walker to walking independently. Or you might move from a walker to crutches. You’ll need to use an
assistive device until you’re strong enough to overcome trunk sway (leaning to one side when lifting the opposite leg).
When you achieve the goals your surgeon set (or if you meet activity goals), we might stop your physical therapy.
We typically recommend that you continue regular stretching and periodic strengthening programs. To maintain
fitness, take part in some form of aerobic exercise (such as biking or swimming).
27
Copyright © Gillette Children’s Specialty Healthcare 2010
2010 SEM Surgery Manual
8/18/10
3:30 PM
Page 38
Glossary
2010 SEM Surgery Manual
8/18/10
3:30 PM
Page 39
Glossary
You will hear and read some unfamiliar words before, during and after your surgery. This glossary will help you
better understand these terms.
Abduction wedge – Soft, sponge-like material that goes between the legs after hip surgeries to keep the legs
apart, especially when a patient is in bed.
Ankle-foot orthosis (AFO) – AFOs support the foot and ankle, helping to maintain proper alignment, improve
weight-bearing and mobility, and minimize potential orthopaedic complications.
Bone graft – Surgeons might use bone from the patient or from a donor to place into spaces where a bone has
been cut.
Bony procedures – A surgery which includes any cutting of bone (see Pages 35-45).
Bulky postoperative dressing (also known as Robert Jones
dressing) – Immediately after surgeries, we’ll splint and wrap the
patient’s legs in bulky, soft cotton batting. We then cover the leg
with soft wraps to immobilize the area, yet allow for swelling. The
dressing keeps the surgical site covered and positioned until the
patient receives a cast. (See photos.)
Contracture – Muscle tightness might prevent a joint from moving
through a full arc of motion. The muscle feels “stuck” or shortened
because of prolonged positioning, weakness or spasticity.
Short-leg bulky postoperative dressing
Discharge – When you’re discharged from the hospital, you’ll either
return home or transfer to another facility, such as a rehabilitation or
nursing home. Before we discharge you, we’ll provide the medical
instructions you’ll need to fully recover. Even after discharge, many
SEMLS patients continue receiving outpatient care at Gillette.
Dislocation – Displacement of a bone from its normal position
within a joint.
Drop-out casts – Casts that have space built into them so that we
can insert a wedge. The extra space allows the patient to extend
more while wearing a cast.
Long-leg bulky postoperative dressing
Extension – Straightening a joint.
Flexion – Bending a joint.
Gait – Walking (ambulation).
Home exercise program (HEP) – A physical therapist develops
exercises for patients to do regularly after they leave the hospital.
Knee immobilizer (KI) – A soft, removable cloth brace, held
together by Velcro straps so a patient’s knees are kept straight and
protected. (See photo.)
Knee immobilizer
ALL ABOUT YOUR SURGERY
28
2010 SEM Surgery Manual
8/18/10
3:30 PM
Page 40
Neuromuscular electrical stimulation (NEMS) – NEMS is a process through which an electrical current
stimulates muscle fibers, enhancing a muscle’s ability to contract and increasing both sensory awareness and range
of motion.
Osteotomy – Cutting the bone so that it can be realigned.
Patient-controlled analgesia (PCA) pump – A method that allows a patient (or others) to give pain medicine.
Personal-care attendant (PCA) – A worker who comes into a patient’s home to assist with bathing, toileting,
eating and other daily activities. (Medical Assistance will pay for this service, but private insurers won’t.)
Plate fixation – A stainless steel plate that holds bones together.
Primary-care provider (primary-care doctor) – Primary-care providers are usually doctors, nurse practitioners,
or physician assistants. (Sometimes they’re called family-practice physicians.) They see people for common medical
problems, such as colds, sore throats and routine check-ups. When their patients need in-depth care for specific
conditions, primary-care providers often refer patients to specialists (such as the providers at Gillette).
Prone – Lying face-down on the stomach. Typically patients spend time in a prone position after hip surgeries.
Range-of-motion exercises – Following SEMLS, range-of-motion exercises help joints regain their normal range
of movement (ability to bend and extend). You might use any or all of these types of exercises:
Passive range of motion (PROM): These movements don’t require you to actively move your body.
Your physical therapist or caregiver applies gentle pressure, moving your joints and muscles to prevent stiffness.
We’ll show your caregivers how to do the exercises before you leave the hospital.
Active assisted range of motion: You actively move your body with some help from a physical therapist
or caregiver. Such exercises often begin three weeks after surgery and
continue until you can perform the movements without help.
Active range of motion: You move your muscles through regular
exercises without help from anyone or anything else.
Continuous passive motion (CPM) machine: The CPM machine
fully supports your leg(s), allowing gentle movement of the knee while
you rest in bed. If you had knee surgery, you might use the CPM
machine several times a day for 30 minutes at a time. (See photo.)
Short-leg cast – A cast that doesn’t extend above the knee.
Continuous passive
motion (CPM) machine
Single-event multilevel surgery (SEMLS) – SEMLS corrects two or more
problems with the foot or leg during a single surgery session. Surgeons align
bones and work with muscles and tendons to help patients improve or maintain their abilities. At Gillette, some
people use the term multiple lower-extremity procedure (MLEP) to mean the same thing as SEMLS.
Skilled nursing – A health-care worker who is a licensed practical nurse or registered nurse can care for wounds,
provide health assessments (for example, measure heart rate, blood pressure and temperature), monitor pressure sores,
and give medicines.
Soft-tissue procedures – Surgery that includes muscles or tendons but not bones (see Pages 46-54).
Spasm – An uncontrolled, usually fast, muscle jerk that might or might not be visible to others. Spasms are often
related to increased pain.
29
Copyright © Gillette Children’s Specialty Healthcare 2010
2010 SEM Surgery Manual
8/18/10
3:30 PM
Page 41
Spica cast – A body cast that holds the patient in a stable position
with legs apart. The cast typically runs from mid-chest through the
foot on one or both sides of the body. (See photo.)
Stabilizing or derotation bar (also known as the Dennis Brown bar)
– A removable bar attached to a cast, which holds a patient in an
abducted (legs upright and apart) position. It often connects two
short-leg casts. (See photo.)
Steri-Strips – Clear, small strips placed directly over a surgical
incision to encourage healing.
Sublaxation – A partial dislocation of a bone that might or might
not go back into position on its own.
Spica cast
Supine – Lying face-up, flat on the back.
Tegaderm – A clear, transparent dressing used to cover surgical incisions.
Transfers – Moving from one surface to another (for example, from bed to
wheelchair, wheelchair to car, or wheelchair to commode).
Trapeze – A triangle-shaped bar, attached over a bed, that allows a patient to assist
with transfers.
Weight-bearing ability – To protect and properly heal your bones after surgery,
you must know and follow your weight-bearing limitations. A doctor will
determine your weight-bearing status and change it as your bones and muscles heal.
Nonweight-bearing: You aren’t allowed to put weight on your legs.
Partial or toe-touch weight-bearing: You may put some weight on your legs
while you use a walker or crutches.
Weight-bearing as tolerated: You may put as much weight on your legs as is comfortable.
Stabilizing bar
ALL ABOUT YOUR SURGERY
30
2010 SEM Surgery Manual
8/18/10
3:30 PM
Page 43
Checklists
2010 SEM Surgery Manual
8/18/10
3:30 PM
Page 44
Checklists
Preparing for Your Hospital Stay
Your parents or caregivers need to prepare for your hospital stay, your surgery, and your care after you leave Gillette.
For example, they might need to:
• Get insurance authorizations
• Contact community agencies
• Rent or purchase equipment
• Arrange for home care
• Schedule follow-up appointments
Before your hospital stay, your parents or caregivers should complete the following tasks. A Gillette social worker
can help.
Health Insurance
Tell your primary-care doctor about your surgery. Many insurers require a referral to Gillette.
Check with your insurance company about your health coverage. Find out whether your policy includes homecare benefits after you leave the hospital.
Make sure you’ve obtained the authorizations your insurance company requires.
Give Gillette your current insurance information, to ensure that your billing goes smoothly.
Call Gillette Prior Authorization (651-325-2148) with questions about insurance.
Call Gillette Patient Accounting (651-325-2177) with questions about billing.
Care Facilities
Begin looking into options if you’ll need to spend time in a care facility after your surgery. You might need
to be put on a waiting list months before you have your surgery.
Time Off
Ask your surgeon how much time your parents or caregivers should take off from work after your surgery.
Obtain Family and Medical Leave paperwork from their employers. Send the paperwork to your surgeon’s
secretary or give it to a Gillette nurse on the day of your surgery.
Ask your surgeon how much time you’ll need off from school after the surgery. Explore home-schooling options.
Contact your teacher, an Individualized Education Program case manager, or a Gillette social worker if you have
questions.
Hospital Stay
Consider where to sleep during your hospital stay. One parent or caregiver is allowed to stay overnight in your
room. If family members expect to stay a week or more, they might be more comfortable in a hotel. (If you live
outside the Twin Cities, you’ll receive a lodging list in your preoperative packet.)
Consider health-care documentation options, such as Do Not Resuscitate or Do Not Intubate advance
directives. Discuss them with your doctor.
ALL ABOUT YOUR SURGERY
31
2010 SEM Surgery Manual
8/18/10
3:30 PM
Page 45
Pack personal items that will help make your Gillette stay more comfortable: slippers, shoes, bathrobe, toy,
blanket, comb, brush, etc. (We’ll provide a toothbrush and toothpaste.) Label all of your personal belongings.
Transportation
Contact a Gillette social worker to discuss your transportation options before and after surgery. For example,
a Medi-Van might be suitable. Or you might be able to use your family’s largest vehicle.
Ask Child and Family Services for the paperwork to obtain a temporary permit for accessible parking. Your doctor
must fill out and sign the paperwork. You can mail it to, or drop it off at, your state’s motor vehicle department.
Processing the forms can take a few weeks, so start early.
Gillette offers reduced parking rates for people who visit frequently. You can validate your parking ticket at
Gillette’s registration desk or nursing station.
We Can Help
Call Gillette Child and Family Services at 651-229-3855:
• To talk to a Gillette social worker
• For help getting a disability parking permit
• For answers to questions about parking at Gillette
• For information about local restaurants
• To get information about or help obtaining other services
32
Copyright © Gillette Children’s Specialty Healthcare 2010
2010 SEM Surgery Manual
8/18/10
3:30 PM
Page 46
Planning for Your Surgery
Your parents or caregivers need to complete these steps before your surgery.
Primary-Care Doctor
Call preoperative nursing (651-229-3918) to make sure Gillette has your primary-care doctor’s current
contact information.
Read the preoperative packet we’ll send before your surgery. The packet will include general information about
Gillette, phone numbers to call, and forms to take to your primary-care doctor.
Schedule an appointment with your primary-care doctor no more than seven days before surgery. At the appointment, your doctor will verify your health status and readiness for surgery.
Ask your primary-care doctor to do the lab tests your surgeon requests. We’ll list the tests on the medical
history and physical form in your preoperative packet. Your primary-care doctor should call a preoperative nurse
(651-229-3918) at Gillette with any questions.
Bring the forms from your preoperative packet to the appointment with your primary-care doctor. Your doctor
should fax the completed forms to Gillette at 651-726-2643. Ask for a copy of the materials and bring them on
the day of surgery. If we don’t receive the information promptly, we might have to reschedule your surgery.
Preoperative Guidelines
Help you follow the food and drink restrictions provided in your preoperative packet. A preoperative nurse will
call to discuss these guidelines.
Contact the preoperative nurse (651-229-3918) as soon as possible if you develop a cold, cough, sore throat or
fever, or if you are exposed to chicken pox, measles or flu before surgery.
Review and follow the suggestions on Pages 6-9.
Medicine Precautions
Help you follow the medicine restrictions provided in your preoperative packet. A preoperative nurse will call to
discuss them.
Be prepared to answer specific questions (name, dose, concentration, and time of day taken) regarding your
medicines. Bring your My Medicine List, which any Gillette staff member can give you, on the day of surgery.
Tell your surgeon about other medical conditions you have that might affect bleeding or anesthesia. Your surgeon
might order additional tests or discuss options.
Help you avoid anti-inflammatory medicines and other blood-thinning medicines two weeks before surgery.
Talk to your surgeon or preoperative nurse if you use these medicines:
• Baclofen – You might need to adjust or stop your doses before surgery.
• Depakote or Depakene – You might need lab testing to evaluate whether your dosage affects bleeding.
• Insulin – Ask your primary-care doctor about an insulin management plan.
• Nonsteroidal anti-inflammatory medicines (NSAIDs) – The most common are ibuprofen (Motrin, Advil) and
naproxen (Aleve), but there are more than 20 others, each of which can affect bleeding.
ALL ABOUT YOUR SURGERY
33
2010 SEM Surgery Manual
8/18/10
3:30 PM
Page 47
Preparing to Leave the Hospital
Before you leave the hospital, your parents or caregivers should take care of the following tasks.
Plan transportation home from the hospital. You might need a
specialized car seat, an E-Z-On Vest or airline accommodations.
(See Pages 8 and 14.)
Talk with your surgeon about:
• Physical restrictions
• Necessary equipment or assistance
• Transitional-care needs
• Rehabilitation therapies
Hospital bed
Talk with a Gillette social worker about postsurgery care options:
• Home-care/personal-care attendant
• Family and friends
• Care facility (notify agencies months in advance to be put on
waiting lists)
Ask your social worker and physical therapist about the types
of medical equipment you’ll need, such as:
• A hospital bed (see photo)
• A continuous passive motion (CPM) machine (see Glossary,
Page 29.)
• A reclining wheelchair (see photo)
• Elevating leg rests for a wheelchair (see photo)
• A commode (see photo)
• A Hoyer lift
• Bed trays
• A walker
• Crutches
We’ll help you obtain the equipment from a vendor. Check to see
if your insurance will pay for what you need.
Reclining wheelchair
with elevating leg rests
Measure the doors to your vehicle and the doorways in your home.
Make sure you order equipment of the right size for your needs.
Plan how you will get to clinic appointments.
Commode
Let your school know you’ll be returning to classes in a cast,
or coordinate homeschooling.
Talk with a physical therapist (651-229-3900) about therapy and
rehabilitation needs.
Consider convenient sleeping arrangements. Your parents or
caregivers might need to sleep nearby, because you’ll need to be
repositioned at least once a night.
34
Copyright © Gillette Children’s Specialty Healthcare 2010
2010 SEM Surgery Manual
8/18/10
3:30 PM
Page 48
Surgery Descriptions
2010 SEM Surgery Manual
8/18/10
3:30 PM
Page 49
Lower-Extremity
Surgery Descriptions
This section describes the surgeries that Gillette surgeons perform on the lower body (legs and feet, or “lower
extremities”). The checklist on your Presurgical Discussion Form (see Page 4) shows which procedures your surgeon
has planned for you.
Bony Procedures
Some surgeries cut into your bones to help improve alignment of your legs and feet. Proper alignment enables you
to be in the right position to strengthen your muscles and improve your ability to walk.
Pelvic Osteotomy
Rationale: This procedure corrects instability in the hip caused by a hip socket that is too shallow (acetabular
dysplasia). The surgery improves the hip socket’s ability to cover the head of the thighbone (femur).
Description: The surgeon cuts bone away from the hip socket in the pelvis, then realigns the socket and corrects
its position and/or shape. Typically, we insert new bone (bone grafts) into the section of bone that was cut. Pins
or screws might provide internal support. You might need to wear a cast for external support.
ALL ABOUT YOUR SURGERY
35
2010 SEM Surgery Manual
8/18/10
3:30 PM
Page 50
Proximal Femoral Osteotomy
Rationale: The procedure corrects an abnormal angle or twist (excessive femoral anteversion) in the thighbone (femur), which causes the knees to rotate inward. Without treatment, bones can move out of position
(hip subluxation) and intoeing can occur.
Description: The surgeon will cut the upper thighbone and correct its positioning and alignment. Metal
plates and screws secure the cut bone.
36
Copyright © Gillette Children’s Specialty Healthcare 2010
2010 SEM Surgery Manual
8/18/10
3:30 PM
Page 51
Distal Femoral Extension Osteotomy
Rationale: The procedure addresses the inability to fully extend the knee (fixed knee flexion contracture).
That inability might cause a crouched stance when you walk (crouch gait).
Description: The surgeon cuts the thighbone (femur) just above the knee and removes a wedge of bone to allow
the knee to straighten. We then insert a metal plate and screws to maintain alignment until the bone heals.
ALL ABOUT YOUR SURGERY
37
2010 SEM Surgery Manual
8/18/10
3:30 PM
Page 52
Tibial Tubercle/Patellar Tendon Advancement
Rationale: The procedure corrects the abnormal lengthening of the kneecap (patellar) tendon, which results
in a kneecap position that is higher than normal (patella alta). The abnormality can make it difficult to
extend the knee fully. Walking with a crouched stance (crouch gait) might lead to knee pain and arthritis.
Description: After your bones have matured, a surgeon can move a block of bone (with the patellar tendon
attached) from the upper end of the shinbone (tibia) to a lower point on the tibia. We secure the block of
bone to the new position with metal screws and/or wires.
If your bones haven’t yet matured, a growth plate at the site of the patellar tendon attachment will prevent the
surgeon from removing a bone block. In such cases, we move the tendon without removing a bone block and
secure the tendon to the bone with screws and/or sutures. We might use a wire or suture to attach the kneecap
to the tibia, preventing the tendon advancement from pulling loose.
38
Copyright © Gillette Children’s Specialty Healthcare 2010
2010 SEM Surgery Manual
8/18/10
3:30 PM
Page 53
Tibial Derotation Osteotomy
Rationale: The procedure corrects an abnormal twist or rotation in the shinbone (tibial torsion) that can lead to
intoeing or outoeing. The twist prevents the foot and knee from aligning properly. In addition, it can lessen the
ability of the calf muscles to maintain upright body position and push off with power when walking.
Description: The surgeon makes an incision on the front of the lower leg, just above the ankle. We cut the tibia
and turn the bone to correct the abnormal rotation. Finally, we insert a metal plate and screws to maintain
proper alignment until the bone heals.
ALL ABOUT YOUR SURGERY
39
2010 SEM Surgery Manual
8/18/10
3:30 PM
Page 54
Calcaneal Lengthening
Rationale: This procedure helps correct a flat foot. A significant flat foot can affect your ability to stand
upright. It can contribute to a crouched gait and reduce your ability to push off with power when walking.
It often leads to outward rotation of the foot (outoeing) and can become painful.
Description: The surgeon cuts the heel bone (calcaneus) through an incision on the outer side of the foot
and inserts new bone (a bone graft) to improve alignment.
Occasionally the tendon (peroneus brevis) is too short to allow realignment of the foot with a bone graft.
In that case, the surgeon might lengthen the tendon. Calcaneal lengthening can be done with other
procedures, such as tightening the ligaments in the arch area of the inner foot (talonavicular reefing) or
performing a talonavicular fusion, first metatarsal osteotomy or medial cuneiform (see Pages 41-43.)
40
Copyright © Gillette Children’s Specialty Healthcare 2010
2010 SEM Surgery Manual
8/18/10
3:30 PM
Page 55
Subtalar or Talonavicular Fusion/Arthrodesis
Rationale: In some cases, the muscles in the foot can’t maintain the stability of the foot’s joints. Fusing the joint
might be the only way to maintain proper foot alignment and eliminate joint instability.
Description: The surgeon removes joint surfaces and fuses the ends of the bones. We insert one or two screws to
maintain alignment as the bones heal. Ankle motion (the up-and-down motion of the foot) is maintained, but
the ability to roll the foot in and out decreases.
Subtalar fusion/art h rodesis
Talonavicular fusion/art h rodesis
ALL ABOUT YOUR SURGERY
41
2010 SEM Surgery Manual
8/18/10
3:30 PM
Page 56
First Metatarsal Osteotomy
Rationale: The procedure corrects a forefoot deformity by uniformly distributing weight on the forefoot.
Description: On the inner side of the foot, the surgeon cuts and realigns the first metatarsal (bone in the
arch leading to the big toe). We insert pins to maintain alignment until the bone has healed.
42
Copyright © Gillette Children’s Specialty Healthcare 2010
2010 SEM Surgery Manual
8/18/10
3:30 PM
Page 57
Medial Cuneiform Osteotomy
Rationale: The procedure corrects a forefoot deformity by uniformly distributing weight on the front of the foot
(forefoot).
Description: On the inner side of the foot, the surgeon cuts and realigns the bone in the arch (medial
cuneiform). We might insert pins or staples to maintain alignment until the bone heals.
ALL ABOUT YOUR SURGERY
43
2010 SEM Surgery Manual
8/18/10
3:30 PM
Page 58
First Metatarsalphalangeal (MTP) Joint Fusion
Rationale: The procedure corrects a bunion deformity.
Description: The surgeon removes the joint at the base of the big toe and fuses the ends of the bones.
We insert a screw or pins to maintain alignment until the bone heals.
44
Copyright © Gillette Children’s Specialty Healthcare 2010
2010 SEM Surgery Manual
8/18/10
3:30 PM
Page 59
Dwyer Calcaneal Osteotomy
Rationale: The procedure corrects a situation in which the heel rests in a rigid position, forcing a patient to walk
on the outer side of the foot.
Description: The surgeon removes a wedge of bone through an incision on the outer side of the heel, then
repositions the bone directly beneath and in line with the shinbone. We might use metal staples and screws to
stabilize the osteotomy.
ALL ABOUT YOUR SURGERY
45
2010 SEM Surgery Manual
8/18/10
3:30 PM
Page 60
Soft-Tissue Procedures
Muscles and tendons are called soft tissues. Soft-tissue surgeries adjust imbalances that cause problems in the legs
and feet. (Problems will tend to recur as you grow if the imbalance isn’t corrected.)
Psoas Lengthening
Rationale: If the psoas tendon is short or spastic, the hip can’t extend fully. That can cause you to lean
forward or arch the lower back.
Description: Through an incision in front of the hip joint, the surgeon divides the tendon, allowing it to
lengthen while leaving muscle fibers intact. The lengthening maintains strength and the ability to
generate power.
Psoas tendon
46
Copyright © Gillette Children’s Specialty Healthcare 2010
2010 SEM Surgery Manual
8/18/10
3:30 PM
Page 61
Adductor Lengthening
Rationale: Occasionally, the inner groin muscles restrict
outward movement of the thigh (abduction). That can
cause the socket to form abnormally, and it occasionally
will cause a scissoring gait.
Description: Through a small incision in the groin, the
surgeon divides the adductor muscles. Proper healing
requires positioning and therapy.
Adductor
muscle
ALL ABOUT YOUR SURGERY
47
2010 SEM Surgery Manual
8/18/10
3:30 PM
Page 62
Hamstring Lengthening
Rationale: A short or spastic hamstring can limit the ability to extend the knee. It also can disrupt the
normal curve of the lower back, causing a flat back.
Description: Through an incision just above and behind the knee, the surgeon exposes the hamstring
tendons and muscles. Then we use a variety of methods to lengthen the tendons.
Hamstring muscle
48
Copyright © Gillette Children’s Specialty Healthcare 2010
2010 SEM Surgery Manual
8/18/10
3:30 PM
Page 63
Front view
Rectus Femoris Transfer
Rationale: The rectus femoris is a small,
but long, muscle in the front of the thigh.
When it is spastic or shortened, it can
limit the ability to bend the knee and lead
to a stiff gait. Transferring the muscle from
its insertion on the kneecap to one of the
hamstring tendons allows the knee to flex
more readily.
Description: The surgeon detaches the
tendon through an incision just above the
kneecap. The muscle in the lower thigh
can then pass closer to the inner side of
the lower thigh. We typically secure the
tendon to the gracilis or sartorius muscles.
Rectus femoris
muscle
Front view
Side view
Transfer to
gracilis or
sartorius muscle
ALL ABOUT YOUR SURGERY
49
2010 SEM Surgery Manual
8/18/10
3:30 PM
Page 64
Calf Muscle (Gastrocnemius) Lengthening/Recession
Rationale: Overactivity or shortness of the calf muscle (gastrocnemius) can lead to toe-walking, a lack of
heel strike when walking, dragging of the toes, or a tendency to hyperextend the knee (back-knee).
Description: Through an incision in the middle portion of the calf, the surgeon divides the muscle from its
overlying connective tissue (fascia) and tendon. We might lengthen the connective tissue surrounding the
muscle on the tendon to decrease the angle between the foot and the leg (dorsiflexion) and improve movement.
Fascial lengthening
50
Copyright © Gillette Children’s Specialty Healthcare 2010
2010 SEM Surgery Manual
8/18/10
3:30 PM
Page 65
Achilles Tendon Z-Lengthening or Percutaneous Tendon Lengthening
Rationale: Overactivity or shortness (contracture) of both calf muscles (gastrocnemius and soleus) can cause toe
walking, severe hyperextension of the knee (back-knee), or difficulty positioning the foot in a brace.
Description: The surgeon divides the Achilles tendon in two places through one or two incisions in the lower
part of the calf. The procedure enables the foot to assume a more typical position for walking or bracing. We’ll
reconnect the tendon with a few sutures if needed.
ALL ABOUT YOUR SURGERY
51
2010 SEM Surgery Manual
8/18/10
3:30 PM
Page 66
Tibialis Anterior Split Transfer
Rationale: Overactivity or shortness (contracture) of the shinbone (tibia) tendon can cause the foot to bear
weight abnormally, causing inward rotation (intoeing) or high arch (cavus). Surgery balances the muscles that
control motion in the back and middle of the foot (subtalar joint complex).
Description: The surgeon removes half of the tendon from its attachment to the bone. We split the tendon
upward above the ankle, route the detached half to a new position, and secure it to the bone. In addition, we
might lengthen the tendon by dividing the muscle belly (intramuscularly) or by doing a step-cut within the
tendon (z-lengthening) to gain extra length. A complete transfer involves dividing the attachment of the
tendon in the foot, moving the tendon to a new bone, and resecuring it with a suture or bone anchor.
Anterior
tibial muscle
Tendon transfer
52
Copyright © Gillette Children’s Specialty Healthcare 2010
2010 SEM Surgery Manual
8/18/10
3:30 PM
Page 67
Posterior Tibialis Lengthening and
Posterior Tibialis Split Transfer
Rationale: Overactivity or shortness
(contracture) of the calf tendon (posterior
tibial tendon) can cause the foot to bear
weight abnormally. That causes inward
rotation (intoeing) or high arch (cavus).
Surgery balances the muscles that control
motion in the back and middle of the foot
(subtalar joint complex).
Description: The surgeon might lengthen
the tendon by dividing it within the
muscle belly (intramuscularly) or by doing
a step-cut within the tendon (z-lengthening) to gain extra length. Split transfers
are more common than complete transfers.
We remove half of the tendon from its
attachment to the bone. We split the
tendon upward above the ankle, route the
detached half to a new position and secure
it to the bone. A complete transfer
involves dividing the attachment of the
tendon in the foot, moving the tendon to
a new bone, and resecuring it with a suture
or bone anchor.
Posterior tibialis lengthening
Posterior
tibial tendon
Posterior tibialis split transfer
Transfer
ALL ABOUT YOUR SURGERY
53
2010 SEM Surgery Manual
8/18/10
3:30 PM
Page 68
Peroneal Lengthening
Rationale: Tightness of the tendon on the outer ankle (peroneous brevis) might lead to flat feet. If the tendon
is especially tight, it can limit the surgeon’s ability to correct a flat foot deformity with calcaneal lengthening
(see Page 40). In such cases, the surgeon will lengthen the tendon.
Description: The surgeon makes an incision on the outer part of the ankle. The surgeon might lengthen the
tendon by dividing the muscle belly (intramuscularly) or by doing a step-cut within the tendon (z-lengthening)
to gain extra length.
54
Copyright © Gillette Children’s Specialty Healthcare 2010
2010 SEM Surgery Manual
NOTES
8/18/10
3:30 PM
Page 69
2010 SEM Surgery Manual
NOTES
8/18/10
3:30 PM
Page 70
2010 SEM Surgery Manual
8/18/10
3:30 PM
Page 72
St. Paul (Main) Campus
200 University Ave. East
St. Paul, MN 55101
651-291-2848
800-719-4040 (toll-free)
Burnsville Clinic
305 East Nicollet Blvd.
Burnsville, MN 55337
952-223-3400
866-881-7386 (toll-free)
Duluth Clinic
Lakewalk Center
1420 London Rd.
Duluth, MN 55805
218-728-6160
800-903-7111 (toll-free)
Maple Grove Clinic
9550 Upland Ln. N.
Maple Grove, MN 55369
763-496-6000
888-218-0642 (toll-free)
Minnetonka Clinic
6060 Clearwater Dr.
Minnetonka, MN 55343
952-936-0977
800-277-1250 (toll-free)
Willmar Clinic
Lakeland Health Center
502 2nd St. S.W.
Willmar, MN 56201
651-634-1938
800-578-4266 (toll-free)
Mobile Outreach Clinic
For locations and schedules:
651-634-1938
800-578-4266 (toll-free)
www.gillettechildrens.org
St. Paul – Phalen Clinic
435 Phalen Blvd.
St. Paul, MN 55130
651-636-9443
800-578-4266 (toll-fre e )
www.gillettechildrens.org
©Copyright 2010, Gillette Children’s Specialty Healthcare. All rights re s e r v e d .


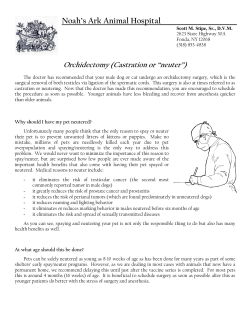


© Copyright 2026