
Child Care Design & Technical Guideline
Child Care Design
& Technical Guideline
prepared by: Levitt Goodman Architects | for: Children’s Services, City of Toronto | 2012
Child Care Design & Technical Guideline
Table of Contents
The Child Care Environment
Index of Figures
7
Introduction
Introduction, About Children's Services
Guide Overview 11
Intended Users 12
How to Use This Guide 12
Glossary of Terms 13
Regulations and Standards
Regulations and Standards
Other Resources 15
Acknowledgements
Authors and Contributors 17
Limit of Liability 17
Online Information 17
Design Checklist 19
Feedback 165
15
9
A. B. C. D. E. F. G. H. I. J. K. L. M. N. O. P. Entry Zone 25
Corridors 31
Supervisor's Office and Secondary Staff Office
Staff Room 39
Stroller Storage 43
Gross Motor Area 47
Play Room 51
Cubbies 59
Infant Sleep Room 63
Infant Washroom and Change Area 67
Play Room Washroom 71
Kitchen 75
Laundry Facilities 79
Waste Management 83
Janitor Room 87
Outdoor Play Area 91
35
Performance Criteria of
Building Components
Q. R. S. T.
U. V. W. X.
Y.
Z.
Outdoor Landscaping 99
Millwork and Fabricated Metals 109
Doors, Windows and Hardware 117
Floor Finishes 123
Wall Finishes 129
Ceiling Finishes 135
Wall-Mounted and Miscellaneous Accessories
Window Treatments and Solar Control 147
Mechanical Items 151
Electrical Items 159
139
6
prepared by Levitt Goodman Architects
Index of Figures
Fig.
Fig.
Fig.
Fig.
Fig.
Fig.
Fig.
Fig.
Fig.
1. 2. 3. 4. 5. 6. 7. 8. 9. Staff Kitchenette 36
Stroller Storage 40
Play Room Storage 47
Play Room Kitchenette 48
Child Height Kitchenette 49
Infant Cubby 52
Typical Cubby 53
Change Table 58
Play Room WC Vanity 63
7
Child Care Design & Technical Guideline
8
prepared by Levitt Goodman Architects
Introduction
Over the last few decades, a deeper understanding of the role
that early education plays in improving a child’s future academic
performance, health and quality of life has emerged. Within
the spectrum of elements that create excellent child care, the
quality of this environment has a profound influence – especially
given that many children spend close to half their waking hours
in a child care setting. Learning from direct experience, children
are attuned to and affected by their surroundings. The child
care is a place where children experience the world and through
which caregivers and the community gain support.
These design guidelines were developed in response to the above
considerations and for people who are involved in planning,
building and renovating space for child care. It is the product of
a collaborative effort by people who are passionate about child
care and recognize the contribution that the environment makes
to good quality child care.
ABOUT CHILDREN’S SERVICES
Mission:
The Children’s Services Division manages Toronto’s child
care system. In partnership with the community, the division
promotes equitable access to high quality care for children
and support for families and caregivers. Children’s Services
are planned, managed and provided in ways that promote early
learning and development, respond to families’ needs and
choices and respect the diversity of Toronto’s many communities.
An integrated approach to providing services to children ensures
public value and benefit to all.
Children’s Services is:
• Committed to children
• Supportive of families
• Building community capacity
Philosophy:
Children’s Services is committed to the promotion and
delivery of quality child care. The maintenance and continued
improvement of quality care demands the recognition of an
9
Child Care Design & Technical Guideline | Introduction
underlying philosophy upon which high standards in curriculum
can be developed. The philosophy espoused by Children’s
Services is reflective of the principles and values adopted by
the Division. Children are seen as active participants in their
environments, and are by nature problem-solvers. Learning is an
active process whereby the opportunity to explore and interact
with the environment are key components in a child’s growth and
development. Underlying this is the fact that a child’s growth
follows a developmental sequence that is universal, but that
within that sequence, each child proceeds at different rates and
in unique ways.
The programming is reflective of the need to provide stimulating
and developmentally appropriate challenges for the individual
child in a warm, secure environment. Staff commitment to
planned programming is a fundamental necessity in ensuring
quality care. The role of the teacher is that of facilitator, to
provide kinds of experiences that promote active learning on
the part of the child. Through the combination of planned
programming, staff commitment and continued training,
Children’s Services can provide consistent, high quality care to
10
prepared by Levitt Goodman Architects
best meet the needs of the active, continually developing child.
Background:
Toronto Children’s Services has a lead role in the infrastructure
planning of services for children in Toronto. The Toronto Child
Care Service Plan 2010-2014, includes a capital strategy that
sets out principles and priorities for allocating capital funds to
develop new child care and renovate existing space with the
purpose of improving environments.
One of the goals in the service plan was to develop universal
design guidelines for child care spaces to support the city’s
recognition of the importance of the physical environment in
the development of children. This supports the improvement
and development of environments based on best practice and
research.
Children’s Services Division has played a significant role in the
development of new child care spaces over several decades that
have enhanced the quality of child care throughout the city.
In addition to the development of new child care programs, the
Division’s Municipal Child Care Services has a portfolio of owned
and leased sites that are maintained and renovated to meet the
Province of Ontario’s licensing requirements, under the Day
Nurseries Act (DNA).
GUIDE OVERVIEW
Intent, Description and Organization:
•
The guideline will ensure that child care spaces are safe,
functional, developmentally appropriate, child-friendly and
accessible for children.
•
This guideline contains design and technical
recommendations. The recommendations are not
mandatory unless otherwise stated. It is intended for use
by those designing or constructing new child care projects
or renewing existing ones. The guideline is intended for
stand-alone facilities as well as centres that are part of
larger facilities. It outlines best practice design choices
with regards to sustainability and the creation of inspired
functional spaces for children and staff.
•
Guide Organization: The main content of the guide is
organized into two parts - design considerations and
technical information. Supplemental drawings illustrate
some of the concepts outlined in each part.
A Document Based on Consultation:
•
The content of this guideline is based in part on a
consultative process that included child care facility
tours and on-site interviews, an intensive consultation
with a wide range of stakeholders that included parents,
Registered Early Childhood Educators, Child Care
Supervisors, the Children’s Services Asset Management
Unit, and Children’s Services District Operations.
A Flexible Document:
•
By using a performance rather than prescriptive approach,
the document is designed to be a flexible tool.
A Document for a Wide Audience:
•
By giving examples of solutions that meet the performance
criteria, the document is intended to be accessible to lay
people as well as professionals.
11
Child Care Design & Technical Guideline | Introduction
A Living Document:
•
This is an evolving document, designed to be changed
based on user feedback and developing concepts in child
care.
INTENDED USERS
This guideline is intended to be used by a wide range of people
including:
•
Architects
•
Consultants
•
City of Toronto Divisions
•
•
•
•
Child Care Owners/Operators
Contractors
Developers
School Boards
12
prepared by Levitt Goodman Architects
HOW TO USE THIS GUIDE
Document Structure:
To fully understand the design and technical intent, both
sections are to be read in concert.
•
The Child Care Environment (Part 1) is organized by room
and outlines issues specific to each room or area. Each
section contains an Intent and Performance guidelines
section.
•
Performance Criteria of Building Components (Part 2)
is similar to an outline specification and is organized by
building component. Each of these sections contains a
General and Materials section.
•
In some cases, a diagram is included to illustrate the
concepts outlined in the sections.
Flexibility of Use:
•
This guideline contains design and technical
recommendations. It sets out performance criteria along
with example solutions. The intent is that the guideline
allow for flexibility in its application to enable users
to effectively address issues specific to their project,
including budget, context, and so on. Users may adopt
the solution in the guideline or explore alternate solutions
that meet or exceed the recommended criteria.
GLOSSARY OF TERMS:
•
Guideline as Living Document:
•
This guide is an evolving document. The City of Toronto
Children’s Services Division intends to update it based on
user feedback and evolving concepts in child care. Please
take a few moments and submit your comments on the
included feedback form to : [email protected], and
mention “Design Guidelines” in the subject line.
Various key terms outlined below will be used consistently
throughout the document.
Best Practice Infant Toddler Preschool Kindergarten and
School Age Indicates the best of various possible options.
A child under 18 months of age.
A child 18 months to 30 months of age.
A child 31 months to 4 years of age.
A child 4+ years to 12 years of age.
13
Child Care Design & Technical Guideline | Introduction
GLOSSARY OF TERMS
14
prepared by Levitt Goodman Architects
Regulations and Standards
This guideline is intended to be used in concert with other
applicable regulations and standards. It is the responsibility
of those developing a child care project to ensure that all
regulations and standards are met.
This guideline recommends the use of Canadian-made and
sourced materials and equipment whenever possible.
REGULATIONS AND STANDARDS
The following is a list of typical regulations and standards that
may be applicable:
•
Day Nurseries Act (DNA) R.R.O. 1990, Regulation 262.
•
Toronto Children’s Services Operating Criteria, City of
Toronto, 2011.
•
Ontario Building Code (OBC).
•
Children’s Playspaces and Equipment, CAN/
CSA-Z614-07, Canadian Standards Association, 2008.
•
Accessibility for Ontarians with Disabilities Act (AODA),
S.O. 2005, Chapter 11.
•
AODA Initial Proposed Accessible Built Environment
Standard (ABE), June 2009. (This document is currently
•
•
•
•
•
•
• under review and is subject to change. Users should refer
to most current issued version.)
City of Toronto Accessibility Design Guidelines, 2004.
Toronto Green Standard, Low-Rise or Non-Residential,
Mid- to High-Rise Development (as applicable), 2010.
City of Toronto: Corporate Identity Program Manual.
http://insideto.toronto.ca/cip/assets/pdf/cip_manual.pdf
City of Toronto Bylaws.
City of Toronto Shade Guidelines, July 2010.
Cabling Standard: City of Toronto Corporate Services Information & Technology, Standards and Procedures, issued by: I.T. Network Services, V.4.2-January 28, 2010. (Users should refer to most current issued version.)
LEED Canada Reference Guide for Green Building Design and Construction, 2009.
OTHER RESOURCES
•
Canadian Partnership for Children’s Health and
Environment, 2010. Advancing Environmental Health
in Child Care Settings: a Checklist for Child Care
Practitioners and Public Health Inspectors. Toronto, ON:
15
Child Care Design & Technical Guideline | Regulations, Standards, Definitions
•
•
•
•
•
CPCHE.
Planning and Design Guidelines for Childcare Centres,
Ministry of Children and Youth Services, Province of
Ontario, 2006.
Moore, Gary T. “The Developmentally Appropriate Design
of Child Care Facilities.” Summary text of a paper
presented at the United Nations Conference on the
Rights of the Child--Stronger Families--Stronger Children.
Victoria, Canada. June 21, 1994.
Olds, Anita Rui. Child Care Design Guide. New York:
McGraw-Hill, 2001.
Pascal, Charles E. “With Our Best Future in Mind.
Implementing Early Learning in Ontario.” Report to the
Premier by the Special Advisor on Early Learning. Queen’s
Printer for Ontario, 2009.
Ruth, Linda Cain. Design Standards for Children’s
Environments. New York: McGraw-Hill, 1999.
16
prepared by Levitt Goodman Architects
Acknowledgements
AUTHORS AND CONTRIBUTORS
•
•
Commissioned and issued by City of Toronto, Children’s
Services Division. Prepared for the City of Toronto by
Levitt Goodman Architects Ltd.
The following also contributed to this guide:
•
City of Toronto, Children’s Services Asset
Management Unit
•
City of Toronto, Children’s Services Municipal Child
Care Services
•
City of Toronto, Children’s Services District
Operations
•
ENSO Systems Inc.
•
Scott Torrance Landscape Architect Inc.
•
DGS Consulting Services Inc.
Day Nursery Act or ensure that licensing will be granted. The
authors and contributors shall not be held liable.
ONLINE INFORMATION
This guide can be found online at:
•
www.toronto.ca/children/childcaredesign.pdf
LIMIT OF LIABILITY
• This document is intended as a guide only. It is the
responsibility of child care designers and operators to ensure
that their project requirements as well as all applicable
regulations and standards are met. Adherence to the
guideline does not necessarily guarantee compliance with the
17
Child Care Design & Technical Guideline | Acknowledgments
18
prepared by Levitt Goodman Architects
Design Checklist
The design checklist works as an agenda for the design process.
It is a reminder of the design issues that should be addressed,
but is by no means a comprehensive list.
1. Review and address the specific needs, values and functional requirements of the centre and community. A design that
is responsive to these issues will give the centre its unique
character.
2. Create connections with the centre’s immediate context.
Establish internal relationships between various parts of the
child care centre where appropriate. This will foster a sense of
interconnectedness.
3. Review goals for sustainable design. Solutions should
encourage child participation and opportunities for learning.
4. Review requirements for accessibility. The space should be
physically accessible, equitable, safe and welcoming for all.
19
Child Care Design & Technical Guideline
20
prepared by Levitt Goodman Architects
The Child Care Environment
The purpose of the Child Care Environment section is to illustrate both the function
and the intent of each area of a child care facility. By referencing design ideas
regarding circulation, spatial organization and room layout, this section provides
guidelines for designing safe, functional and inspiring spaces that support child
development and encourage learning. This section is organized by room and outlines
issues specific to each area. Each section contains an Intent and Performance
guidelines section.
21
Child Care Design & Technical Guideline
22
prepared by Levitt Goodman Architects
EXAMPLE SPACE PLANNING DIAGRAM
OUTDOOR
PLAY
2ND OFFICE
SLEEP
ROOM
I.T.
HUB
PARENT
DROP-OFF
PICK-UP
OUTDOOR
PLAY
OUTDOOR PLAY AREA
WC
TODDLER
PLAY ROOM
INFANT
PLAY ROOM
SUPERVISOR’S
OFFICE
WC
WC
CUBBIES
WC
PRESCHOOL
PLAY ROOM
CUBBIES
SCHOOL-AGE
PLAY ROOM
CUBBIES
CUBBIES
GROSS MOTOR AREA
MAIN ENTRY
ENTRY ZONE
STOLLER
STORAGE /
PARKING
STAFF ROOM
CORRIDOR
BARRIER
FREE
WC
KITCHEN
GARBAGE
WC
LAUNDRY
JANITOR
MECHANICAL
ROOM
23
Child Care Design & Technical Guideline
24
prepared by Levitt Goodman Architects
A. Entry Zone
A.
INTENT
The entry should express the unique characteristics of the centre while providing a welcoming,
safe, secure and accessible main entry sequence. The entry should establish the centre as a
community resource for child and family information.
PERFORMANCE GUIDELINES
Experience:
1. The entry is comprised of the exterior entry, the entry
vestibule and community lobby space.
2. Access to natural light and ventilation is required in this
zone.
3. The entry zone is an opportunity to create an identity for
the centre. Avoid an institutional appearance by installing
public art/interactive art or children’s art in entry. Maintain
a sense of professionalism in the main entry area by
managing clutter and storage.
4. Visual Access: Visitors should be able to see all areas of
the entry. For example, the vestibule should be fully glazed
5.
with low glass for children.
Secure Entry: The entry controls access to the centre. It is
recommended that the vestibule have two sets of double
25
Child Care Design & Technical Guideline
6.
7.
8.
doors, each with one active and one locked leaf. This
allows one visitor through the security system at a time.
Physical Access:
a) In place of a separate dedicated barrier-free access,
i.e. ramp, consider providing a shared, continuous
barrier-free surface without curbs, between parking and
entry and between entry and sidewalk. Consider using
different materials to demarcate zones rather than
employing grade changes.
b) Consider parents, children and stroller dimensions
when designing the vestibule. It should be large
enough to accommodate a triple stroller, one person
and a swinging door. Make sure to consider peak traffic
times.
Community Space: The purpose of the interior and exterior
entry is to engender a sense of community and encourage
socializing. Providing loose and/or fixed furniture
encourages people to mingle and provides a comfortable
space for parents and kids waiting to be picked up.
Community Access: Consider expanding the interior space
just beyond the controlled access zone to encourage
26
prepared by Levitt Goodman Architects
community access. For example, a large and comfortable
vestibule might allow those not directly associated with the
centre to access a Family Support Program.
9. Gross Motor Area: If, to maximize space usage, the child
gross motor area is located in the entry zone, separate
the space from circulation for safety and fire exiting. All
equipment must be stored neatly to avoid the appearance
of clutter. Consider a large closet. Locate gross motor areas
in a separate room. Best Practice
10. Family Support Program: Locate a parent’s resource centre
or niche with an information board in a visible location in
the child care centre proper or in the vestibule. Provide
an opportunity for the centre to disseminate required
and discretionary information to parents and to build
relationships between parents and the centre staff. Locate
so it is visible in path of traffic but isn’t blocked by other
activities. Provide comfortable seating and internet access.
Best Practice
11. Display of Children’s Work: Consider a prominent display
location for children’s artwork.
12. Children’s Furniture: Provide appropriately scaled built-in
A.
and loose furniture, info boards and displays.
Adjacencies:
1. Vestibules should open into interior community lobby
space. Other adjacencies to entry and community lobby
space include: Supervisor’s office, barrier-free WC, main
circulation corridor, dedicated elevator, stroller storage, a
parent resource room or niche, and the outdoor play space
(if possible).
Wayfinding and Signage:
1. Ensure wayfinding system is universal. For example,
consider using graphic rather textual signage. Also
consider digital touch screen information available in
multiple languages and large text. Best Practice
2. All basic signage should appear in braille, text and graphic
form.
3. Ensure a space is provided for posting centre hours,
spaces available and contact information. This signage
should be adjustable.
4. Provide a changeable exterior information sign.
Security and Access:
1. Only one public entry should be provided. Best Practice
2. Access Control: To control access and reduce the chance
that children can open an exterior door unsupervised,
limit entry and exit access via card reader, video phone or
keypad system.
3. Access System: If a buzzer/phone system/video security is
used, connect to the following release button and screen
locations: Supervisor’s office, kitchen, playrooms.
4. Lighting: Entry routes (indoor and outdoor) should be
well lit and visible to the street to provide safety for staff
arriving early and leaving late. Ensure lighting is sensorcontrolled and casts light down to minimize light pollution.
5. Interior Lighting: Ensure two to three light fixtures in the
entry zone/corridors are on a separate circuit that can be
turned on overnight.
6. Barrier-free auto door operator buttons or other door
release buttons should not allow children to leave the
centre unsupervised. Ensure auto operator motor operates
only after keypad or card access is granted.
7. The lockable Canada Post box should be easily accessible.
27
Child Care Design & Technical Guideline | A. Entry Zone
Locate in vestibule if exterior vestibule doors are never
locked.
aluminum pan recessed in floor with removable carpet
tread or recycled rubber insert for dirt and water. Best
Practice
Openings and Visual Connections:
2.
1. Visually open as possible, uncluttered.
2. Provide a clear view to lobby through vestibule from
exterior.
3. Provide passive surveillance through direct visual
connection from Supervisor’s office to entry zone.
4. Views to outdoors from vestibule/entry encouraged.
5. Provide low level glazing in the vestibule/entry for children.
6. Install roller shades in vestibules and lobby/entry zones for
use in a lock-down situation.
Storage:
1. Locate closet or cubby for evacuation materials near exit
door.
Dust / Dirt / Water Control:
1. Staff should provide loose seasonal mats to catch dirt
and water. In the vestibule, provide an appropriately sized
28
prepared by Levitt Goodman Architects
Provide a canopy or covered space in front of the entry
doors to provide protection from weather. There should be
no place for birds to roost in soffits.
A.
29
Child Care Design & Technical Guideline | A. Entry Zone
30
prepared by Levitt Goodman Architects
B. Corridors
B.
INTENT
To promote a sense of interconnection and community throughout the centre by allowing
for accessible circulation, easy navigation and orientation, visual/audible connections where
appropriate, learning opportunities, social gathering and a clear escape route in case of
emergency.
PERFORMANCE GUIDELINES
Experience:
1. Circulation space should remain uncluttered and simple
to navigate. Provide the most direct circulation route
possible.
2. To encourage a lively corridor, consider other multipurpose, flexible uses for circulation space, including
gross motor, cubbies and display space. Different corridor
widths, small gathering spaces and wider entry areas
to rooms promote social interaction between children,
parents and staff.
3. Provide natural lighting as much as possible.
4. Consider wider corridors to comfortably accommodate
parents, children, staff, strollers during peak times.
5. Acoustic and Visual Control: Connections encourage
31
Child Care Design & Technical Guideline
6.
passive learning while separations allow for a variety
of simultaneous uses. Separate or connect corridors to
adjacent space where appropriate.
Information Exchange:
a) Provide areas in corridor outside of play rooms for
program plans, staff bios and diplomas.
b) Consider installing plexiglass coverings to protect low
bulletin boards.
c) Consider opportunities for information exchange. For
example, post children’s art, ECE backgrounds and
photos in this area.
d) Locate the centre schedule near Supervisor’s office.
e) Provide bulletin boards, white boards or display space
that won’t be damaged by adhesives.
f) Discuss requirements for signage/postings with centre
staff. Determine locations and account for signage
opportunities where required.
g) A menu should be located outside of the kitchen in
corridor.
32
prepared by Levitt Goodman Architects
Adjacencies:
1. Locate the universal barrier-free WC off the main corridor
in a visible and easily accessible location.
Visual Connections:
1. Provide visual access to adjacent spaces to enable passive
surveillance.
Security and Access:
1. Lock Down Procedures: The strategy should limit physical
2.
and visual access into play rooms and other areas.
Where blinds are not provided on corridor glazing, provide
a gathering space for children that is not visible from
corridor and/or street.
Wayfinding and Signage:
1. Ensure wayfinding system is universal. For example,
consider using graphic rather than textual signage.
2. Consider using flooring or other elements as orienting
references to facilitate movement.
B.
Storage:
1. Provide storage for gross motor area if adjacent to corridor.
2. Provide lockable storage for centre use. For example,
locate archival storage in corridors where possible by
utilizing space above cubbies or stroller storage. For noncupboard type storage, check if lighting and sprinklers are
required. Storage should be easily accessible for staff and
lockable.
Stairs, Ramps and Elevators:
1.
2.
Stairs:
a) Install a child-height handrail at all stairs.
i. Heights: 510-710mm (20-28”) from line drawn
through stair nosing.
ii. Diameter: 25mm (1”).
b) All stair nosings to be rounded profile.
Ramps:
a) Consider using interior ramps in corridors if there is a
change in elevation.
b) Ramps to have no projections and rounded edges.
c) Install a child-height handrail at all ramps.
3.
i. Heights: 510-710mm (20-28”) from surface of
ramp.
ii. Diameter: 25mm (1”).
Elevators:
a) All child care centres more than one storey must have
an elevator.
b) Select an elevator model that accommodates a
stretcher.
c) Size elevators to accommodate a triple stroller and
the appropriate DNA staff-to-child ratio based on age
group.
33
Child Care Design & Technical Guideline | B. Corridors and WCs
34
prepared by Levitt Goodman Architects
C. Supervisor’s Office and Secondary Staff Office
C.
INTENT
To provide an office that is the administrative centre of the child care. This office should be
accessible and connected with the entry, and it should be a secure and private place to meet with
staff and parents.
PERFORMANCE GUIDELINES
Supervisor’s Office
Experience:
1. In-office Meetings: Size room to accommodate meetings
with two parents or staff. Provide a separate table with
2.
3.
4.
5.
6.
chairs. Best Practice
Information: Locate an area (whiteboard/bulletin board)
outside Supervisor’s office for required and discretionary
information.
Mailbox: Provide in/out box outside office for pick up and
drop off of city documents (8.5“ x 11”).
Resting Alcove: Provide an alcove for a cot in the office for
sick children. Best Practice
Acoustic Separation: Install appropriate acoustic
separation for privacy.
For comfort and acoustics, consider colours and sound-
35
Child Care Design & Technical Guideline
absorbing flooring options.
Adjacencies:
1. Locate directly adjacent to the main entry zone.
Visual Connections:
1. Direct visual connection from Supervisor’s office to entry
and main circulation corridor.
2. Designer should coordinate furniture location so as not to
obstruct passive surveillance.
3. Provide for privacy on exterior. For example, provide roller
shades. Consider privacy shades on interior glazing.
4. If adjacent to second office, provide visual connection
between rooms while allowing for visual and acoustic
privacy.
Security:
1. Passive Surveillance: Ensure all visitors walk by office
upon arrival.
2. Lockable: Supervisor office must be on separate key and
must be equipped with classroom lock set.
36
prepared by Levitt Goodman Architects
3.
Locate a front door release mechanism in Supervisor’s
office.
Storage:
1. Allow sufficient space for day-to-day filing cabinets. Filing
cabinets must be lockable for confidential documents.
2. Provide additional space for archiving files, if required.
3. Consider lockable storage for office supplies. This could be
located in the second office if provided.
4. If a safe is required, locate in Supervisor’s office.
5. Allow for an open book shelf.
6. Hub Room: Size based on I.T. requirements.
Equipment
1. Allow for computer, printer, copier, fax and scanner with
appropriate voice and data connections.
Secondary Staff Office: Best Practice
1. If space and budget allow, provide a flexible space for staff
to use computer or for visiting staff.
2. Locate next to the Supervisor’s office.
C.
3.
4.
Photocopier could be located in second office.
Provide telephone, computer access and internet
connection.
37
Child Care Design & Technical Guideline | C. Supervisor’s Office and Secondary Staff Office
38
prepared by Levitt Goodman Architects
D. Staff Room
D.
INTENT
To provide staff with an area for privacy, relaxation and professional development.
PERFORMANCE GUIDELINES
Experience:
1. Provide facilities for staff to store their belongings, have
breaks and eat lunch.
2. The room should have a comfortable yet professional
atmosphere. Provide space that promotes professional
development. For example, a Resource Centre with desk,
computer or library.
3. Design a flexible space for staff to use computer or
consider providing a hotelling station for visiting staff.
4. The room should be equipped for sharing information.
This includes required postings, professional information
(e-learning, staff presentations, etc.) and day-to-day
communications. For example, provide white boards,
monitors, and so on.
5. Natural Light: The room must have access to natural light.
Light from an exterior window is preferable.
6. Provide a WC with a shower for use by staff. Best Practice
39
Child Care Design & Technical Guideline
2.
3.
4.
5.
6.
7.
Provide energy-efficient dishwasher. Best Practice
Allow for lounge and table seating.
Provide a computer station with voice and data
connections.
TV with VCR/DVD.
Photocopier could be located in Staff professional
development area.
Staff mailboxes.
40
prepared by Levitt Goodman Architects
Fig. 1
ALL METRIC DIMENSIONS
ARE IN MILLIMETERS
SINK AND RELATED COUNTER
AREA TO ALLOW FOR AODA
BARRIER FREE ACCESS.
NON-BARRIER FREE COUNTER
330
UPPER CABINETS WITH
ADJUSTABLE SHELVES
762
Equipment:
1. Provide sink, microwave, countertop, cabinets, full fridge,
kettle and toaster. (See Fig. 1)
STAFF KITCHENETTE
VALENCE LIGHTING
CERAMIC BACKSPLASH
DIM. TO
AODA
DIMENSION TO
AODA STANDARDS
Adjacencies and Connections:
1. Locate so that the room is a private retreat from the active
areas of the centre and where staff can come and go
discretely.
2. Separate area visually and acoustically from the remainder
of the centre.
SINK WITH FAUCET TO
AODA STANDARDS
STANDARD “D” PULL
LOWER CABINETS WITH
ADJUSTABLE SHELF
RECESSED KICK
LEVELLING FEET
D.
Storage:
1. Provide 1/3 size triple tier lockers for bag/personal item
storage.
2. Install open shelving for books and magazines and closed
storage cabinets where required.
3. Provide a small closet for visitor coats.
41
Child Care Design & Technical Guideline | D. Staff Room
42
prepared by Levitt Goodman Architects
E. Stroller Storage
E.
INTENT
To provide orderly and convenient interior areas to store family and centre-owned strollers.
PERFORMANCE GUIDELINES
Experience:
1. Provide stroller storage areas that are accessible and
orderly. (See Fig. 2)
2. Family Strollers: Stroller storage should be located in a
niche off the corridor, with no walls restricting access. If
providing doors, ensure when open they do not block any
of the storage space. Sufficient space should be provided
to store varying sizes and styles of strollers and car seats.
Umbrella strollers can be hung above; other styles folded
on the floor. Best Practice
3. Centre Strollers: Design the space to suit the type. For
example, triple strollers. Confirm anticipated stroller
numbers with staff.
4. For ease of maintenance, strollers should be stored over
flooring rather than millwork bottoms, and the walls should
be protected with durable material.
43
Child Care Design & Technical Guideline
Adjacencies:
1. Locate family stroller storage in discrete niche off corridor
near front entry to minimize dirt infiltration and allow
passive surveillance.
2. Locate centre strollers separately, near infant room.
Security and Access:
1. Passive surveillance of area preferred.
STROLLER STORAGE
Fig. 2
ALL METRIC DIMENSIONS
ARE IN MILLIMETERS
HOOKS FOR UMBRELLA STROLLERS
ENSURE ADEQUATE BLOCKING
LOCKABLE STORAGE
BEYOND
STROLLER NICHE
FULL-HEIGHT
PROTECTIVE WALL
COVERING
DEPTH. TO SUIT
STROLLER LENGTH AND
TYPE
44
prepared by Levitt Goodman Architects
E.
45
Child Care Design & Technical Guideline | E. Stroller Storage
46
prepared by Levitt Goodman Architects
F. Gross Motor Area
F.
INTENT
To provide a clear, flexible and safe area for indoor play that supports gross motor skill
development on days when outdoor play is not possible.
PERFORMANCE GUIDELINES
Experience:
1. The gross motor area is where children can engage in
active physical activities such as climbing, cycle riding,
dramatic play, group games, music and intensive small
group activities such as singing.
2. Provide a space that is flexible for other uses. This area
will be used for gross motor activity only periodically.
3. Space permitting, locate area in a
dedicated multipurpose space. Best Practice
Another option is to locate the area in a flexible entry
lobby.
4. As an alternative, consider using a nearby gym or multi5.
6.
purpose room, outside of the centre, if available.
Consider ways of making the space larger and smaller
depending on the number of children.
In this area, provide a change of atmosphere from the
47
Child Care Design & Technical Guideline
7.
activity rooms. For example, increase the amount of
natural light.
Provide acoustic control for this area. Consider both sound
quality and sound separation.
Adjacencies:
1. The area could open to the outdoors via large doors,
especially if the adjacent outdoor activity space is covered.
This would extend the usable area of the centre during
rainy days or create a flexible space for large child care
community gatherings.
2. If area is located within a circulation route, be sure
circulation is not blocked.
3. Area should be near a washroom.
Storage:
1. Provide storage for large toys and materials, etc.
48
prepared by Levitt Goodman Architects
F.
49
Child Care Design & Technical Guideline | F. Gross Motor Area
50
prepared by Levitt Goodman Architects
G. Play Room
G.
F.
INTENT
To provide the primary space within the centre where children learn about the
world around them and their place in it. This space supports learning in a caring
and comfortable atmosphere, and it encourages exploration and many different
types of play. It is well organized, easily supervised, flexible, healthy and safe while
emphasizing relationships and independence.
PERFORMANCE GUIDELINES
Experience:
1. Provide an easily supervised room layout that includes a
mixture of open shared space, smaller group space and
individual space, and that doesn’t compromise visual
connections. For example, lowered ceilings, material
changes and special windows can all create smaller spaces
within the larger space.
2. The organization of the space will be structured by how
staff set up loose furniture in the space. Design with
flexibility in mind to accommodate a variety of activity
settings.
3. Consider how people move through the space. Children’s
play should not be interrupted by others passing through.
51
Child Care Design & Technical Guideline
4.
5.
6.
Consider making the experience of moving between areas
interesting.
Relationship with Exterior: Provide more natural light and
views than required by the DNA. Best Practice
Connect the interior and exterior activity spaces with direct
access. Best Practice
Consider creating zones including:
a) Entry:
i. A posting area for information and daily records,
allow 8.5” x 11” per child.
ii. Provide a half-wall vestibule just inside the door.
This allows for both a shoe removal area in the
infant room and it allows for the main door to be
propped open while keeping children in the play
room.
b) Quiet:
i. Bench seating at windows, which can double as cot
storage.
ii. Individual spaces such as quiet nooks with lower
ceiling heights.
52
prepared by Levitt Goodman Architects
c) Sensory:
i. Water and sand play zones, arts, crafts and sensory
activities.
ii. Provide easy-to-clean surfaces.
d) Active:
i. Open, flexible space where furniture can be
configured to suit different activities.
7. Provide as much wall space as possible for graphic
material (art work, notices, etc.). Finish wall with a durable
surface that will not peel with tape, or install bulletin
board material. Consider protecting child-height boards
with clear plastic panels.
8. Provide low wall surfaces for toy storage accessible to
children, for views to other rooms or outside, and for wall
decoration.
9. Depending on available space, consider an eating alcove to
minimize mess on main activity area floor. Best Practice
10. Colours should be carefully selected based on
consideration of current research into children and colour,
and the client’s philosophy.
11. Acoustics: Provide appropriate acoustic control to allow for
G.
simultaneous uses. Consider both sound quality and sound
separation.
12. Size: In consultation with staff, provide more space than
required by DNA in order to achieved stated goals. Best
Practice
13. Infant Design Considerations:
a) Infant activity room should be located directly adjacent
to change area for staff supervision.
b) Infant room should be close to laundry room if
possible, as this room generates the most laundry.
c) Infants need broad, open horizontal spaces with
minimal boundaries.
d) Consider various textures, surfaces and finishes for
infant exploration.
e) Infants need spaces to engage in art and sensory play,
dramatic play, manipulative toy play, climbing, crawling
and quiet reading.
f) Consider installing a mirror and bar attached to wall for
walking.
14. Toddler Design Considerations:
a) Toddlers benefit from open space with defined
boundaries to encourage and support independence.
b) Toddlers need space to engage in art, water, sand and
sensory play, reading, dramatic play, blocks/building,
manipulative toy play, gross motor movement and quiet
retreat.
15. Preschool Design Considerations:
a) An area for group socialization is important to promote
independence and self-reliance.
b) Preschool children need room to engage in art, water
play, sand, dramatic play, science, games, manipulative
toy play, blocks/building, gross motor play, reading,
wheeled toys, and quiet retreat.
Adjacencies:
1. Locate rooms adjacent to outdoor play areas with direct
access to encourage a strong indoor/outdoor relationship.
Best Practice
2.
3.
4.
Provide direct access to age-appropriate washroom.
Locate adjacent to children’s cubbies.
Locate adjacent to similar-aged activity rooms. For preschool and older, consider operable elements in dividing
53
Child Care Design & Technical Guideline | G. Play Room
wall for controlled interaction.
Visual & Acoustic Connections:
1. To encourage a connection to the corridor for staff, parents
and other children, provide low glazing in door and wall.
2. Provide option for acoustic connection or separation as
appropriate throughout the day. Dutch doors (split top and
bottom) are discouraged due to safety concerns. As an
alternative to the Dutch door, consider providing a halfwalled vestibule and gate inside the room just clear of the
main door, which can be left open.
3. The room itself should be unobstructed by fixed tall
elements or L-shaped layouts.
4. Provide visual connection to the washroom so that
staff can supervise the washroom and activity room
simultaneously. This allows children to use the washroom
on an as-needed basis rather than at set times. A low halfwall with glazing above, for example, controls access to
the washroom and affords some privacy while allowing for
supervision. Some acoustic connection is beneficial.
5. As staff are in constant communication to ensure staff/
54
prepared by Levitt Goodman Architects
6.
child ratios are maintained, provide visual or direct
connections to adjacent activity rooms (especially with
same-age children). Be careful to acoustically separate the
rooms.
Provide visual connection to the outdoors and allow for
controlled acoustic connections.
Storage & Millwork:
1. The play rooms need adequate storage. Review storage
needs with client. (See Fig. 3)
2. A good deal of the storage will be provided in loose
furniture. Where storage for children’s use is built in, it
should be low, adjustable and open to encourage easy
accessibility and recognition of what is available.
3. Provide storage accessible only to staff. Locate out of
reach of children or install locks if low.
4. Provide a storage room or large closet for large toys and
equipment.
5.
6.
Provide dedicated storage for sleeping cots and bedding in
toddler and preschool rooms. Locate adjacent to cot layout
area. Confirm types of cots to be stored with staff.
Provide storage for items such as creative supplies, large
G.
PLAY ROOM STORAGE
Fig. 3
7.
ALL METRIC DIMENSIONS
ARE IN MILLIMETERS
610
2220
SECURELY FASTEN
STORAGE TO WALL
PREVENT TIPPING
50mm O.C.
FOR HOLES
ADJUSTABLE
SHELF
RECESSED
KICK
LEVELLING
FEET
paper sheets, art racks for holding completed art work,
drawers for pencils, and so on.
If parents and visitors are required to remove their shoes,
provide the required space.
Security and Access:
1. All play room doors to be glazed and lockable from inside
room.
2. All entry doors equipped with classroom locksets.
3. Locate front door intercom access near room entry.
Openings:
1. Exterior Windows: Provide low-level glazing in select areas.
Operable windows must be fitted with screens and be out
of reach of children. Windows and hardware should not
create a hazard when in the open position inside or outside
the room.
2. Window Shading: To reduce heat gain, provide exterior
window shading such as retractable awnings or interior
light shelves to reduce heat gain and reflect diffuse light
deep into rooms. Best Practice
55
Child Care Design & Technical Guideline | G. Play Room
5.
6.
Kitchenette:
1. Provide a kitchenette located within the play room. (See
Fig. 4)
2. Aspects of the kitchenette are potential learning areas and
should be accessible to children. For example, provide a
low sink and storage. (See Fig. 5)
3. If access to the kitchenette is restricted to staff, in order
to allow children to be fed individually, consider separating
it from the play room using a child-height counter. This
4.
enables children to become involved in kitchen activities.
Staff need visual connection to entire activity area from
kitchenette.
56
prepared by Levitt Goodman Architects
PLAY ROOM KITCHENETTE
Fig. 4
ALL METRIC DIMENSIONS
ARE IN MILLIMETERS
330
(1’1”)
762
(2’6”)
4.
Provide interior roll-down fabric shades with chains out of
the reach of children.
Doors: Provide fully glazed with hinge guards. In infant
and toddler rooms, locate door handles as high as possible
so children cannot operate.
Fire-rated Doors: Consider installing hold-open devices so
staff have the option to open room to adjacent spaces.
Sliding Doors: Install bumpers to avoid finger pinching.
UPPER CABINETS WITH
ADJUSTABLE SHELVES
VALENCE LIGHTING
CERAMIC BACKSPLASH
635
(2’1”)
SINK WITH GOOSENECK
FAUCET
RECESSED PULLS OR
MAGNETIC CATCHES.
PROVIDE “TOT LOCKS”.
LOWER CABINETS WITH
ADJUSTABLE SHELF
915
(3’)
3.
RECESSED KICK
LEVELLING FEET
G.
CHILD HEIGHT KITCHENETTE
Fig. 5
5.
6.
ALL METRIC DIMENSIONS
ARE IN MILLIMETERS
7.
If the kitchenette creates hidden area in activity room,
then restrict access to children with gate.
Infant kitchenette requires additional storage and counter
space.
Equipment:
a) Bar refrigerator. Provide full refrigerator with freezer in
infant room only.
b) Microwave.
c) Bottle warmer.
MINIMIZE DIMENSION
LEVELLING FEET
482 (19”)
INFANT
508 (20”)
TODDLER
PRESCHOOL
RECESSED
KICK
100 (4”)
RECESSED PULLS OR
MAGNETIC TOT LOCKS
546 (21.5”)
100 (4”)
MINIMIZE DIMENSION
635
(25”)
57
Child Care Design & Technical Guideline | G. Play Room
58
prepared by Levitt Goodman Architects
H. Cubbies
H.
F.
INTENT
To provide each child with an individual transitional area for dressing and undressing, for storing
belongings and for communication between parents and staff. The area should allow staff or
parents to assist while encouraging children to do things themselves.
PERFORMANCE GUIDELINES
Experience:
1. Each cubby should accommodate a child’s seasonal
clothing, footwear and other belongings.
2. Provide sufficient floor space adjacent to cubbies to
accommodate a group transitioning at the same time.
3. Provide a continuous bench to allow both children and
adults to sit while dressing.
4. Provide a place for staff to label each cubby with the
child’s name and/or photo.
5. Provide cubbies that allow for the exchange of information.
For example, a place for a clipboard where staff can report
on the child’s daily activities.
6.
Infants:
a) A separate cubby area is recommended. A door or half
wall can be used to separate from main area.
59
Child Care Design & Technical Guideline
60
prepared by Levitt Goodman Architects
ALL METRIC DIMENSIONS
ARE IN MILLIMETERS
305
660
FASCIA /
NAMEPLATE
OPEN SHELVES
508
254
(10”)
1950
660
BENCH WITH BOOT
STORAGE BELOW
406
LOCATE HOOKS ON
SIDE GABLES
254
(10”)
CUBBY WIDTH:
406mm
(16”) MINIMUM
102
(4”)
Adjacencies:
1. Locate cubbies in an area adjacent to the corridor, play
room and a door to the outdoor play area. Best Practice
2. The divider between the cubby space and the play room
can be more or less open and should be discussed with
staff. Such a cubby area could be shared with the adjacent
play room, although sound control should be considered.
3. As an alternative, locate the cubbies in corridor adjacent to
the play room leading to an exit to the outdoor play area.
Fig. 6
280
(11”)
8.
INFANT CUBBY
280
(11”)
7.
b) This area is used primarily for parents to store
belongings. Consider larger cubbies for diaper bags.
c) A dressing table is useful for parents that wish to dress
the child themselves.
d) Infant cubbies can be stacked.
Toddlers:
a) To encourage self-dressing, cubbies should be easily
accessible with a bench. Provide generous floor space
in front of cubbies for lying/sitting on floor to dress.
Preschool:
a) Consider slightly wider cubbies to house larger bags.
H.
TYPICAL CUBBY
Fig. 7
ALL METRIC DIMENSIONS
ARE IN MILLIMETERS
(1’1”)
330
CUBBY WIDTH:
305mm (12”) MIN.
OPTIONAL
LOCKABLE STORAGE
152
(6”)
DOCUMENT SHELF
FASCIA / NAMEPLATE
305
OPEN SHELF
305
PRESCHOOL
TODDLER
250
(10”)
TODDLER/
PRESCHOOL
SCHOOL AGE
BENCH
SCHOOL AGE
(8”)
203
LOCATE HOOKS ON
SIDE GABLES
4.
Locate the cubby area directly accessible to either the
corridor entrance or the outdoor play area so muddy and
wet clothing and boots do not enter the play room.
Millwork and Storage:
1. Base number of cubbies on number of children plus some
extra for part-time attendees.
2. Provide bench for adults in infant cubby area. (See Fig. 6)
3. Provide a bench in front of cubby, boot storage beneath
on durable material, clothes hanging space in cubby, two
open shelves above for baskets, etc. (See Fig. 7)
4. Provide a place of identity for child’s name/picture.
For example, provide a fascia element that will not be
damaged by tape.
5. For cleaning, raise cubbies off the ground. Best Practice
6. Flooring under cubbies is preferable to millwork bottoms.
7. Size cubbies to each age group.
8. Provide appropriately sized staff cubbies adjacent to child
cubbies for that room.
9. Consider providing storage above cubbies for the centre’s
use.
61
Child Care Design & Technical Guideline | H. Cubbies
62
prepared by Levitt Goodman Architects
I. Infant Sleep Room
I.F.
INTENT
To provide a separate, safe and quiet sleep area for infants apart from activity area.
PERFORMANCE GUIDELINES
Experience:
1. Carefully consider location of sleep rooms to isolate
from external noises such as street traffic, parking lots,
playgrounds, mechanical equipment, exhaust vents, etc.
2. Provide sound control for both sound quality in room and
sound separation to surrounding noise.
3. The sleeping area should be kept at a comfortable
temperature. Cribs should be arranged away from direct
sunlight and drafts from windows.
4. Allow for easy access by staff. Provide a crib layout more
generous than the DNA. Best Practice
5. If cribs are laid out back to back, provide a clear acrylic
divider.
6. Provide sufficient floor space for an adult rocking chair and
one cot.
63
Child Care Design & Technical Guideline
Adjacencies:
1. The sleep room must have a direct physical and visual
connection with the play room. For example, provide clear
glazing in the dividing wall.
2. The preferred location would be near the change area.
Storage:
1. Provide in-room storage for extra bedding. Storage can be
located under the cribs. A linen closet is recommended.
Best Practice
2.
Provide a high shelf with an electrical outlet at same
height for radio, baby monitor and lamp. Do not locate
shelves above cribs in case of falling objects.
Openings:
1. Provide door to sleep room that is glazed to allow views
into activity area, but that provides acoustic separation.
Provide a passage set on door.
2. Locate windows at clerestory level if possible.
3. Provide blinds on windows. Ensure cords are secured out
of reach of children. If windows are lower, they should
64
prepared by Levitt Goodman Architects
be treated to avoid any direct views into the room from
exterior.
I.
65
Child Care Design & Technical Guideline | I. Infant Sleep Room
66
prepared by Levitt Goodman Architects
J. Infant Washroom and Change Area
J.
F.
INTENT
To provide a clean area that is accessible and safe for both children and staff. It is separate but
visually connected for diapering and toileting of infants.
PERFORMANCE GUIDELINES
Experience:
1. Visual and Acoustic Connections: Provide visual and
acoustic connection to play room so staff can supervise
and communicate.
2. Separate the change/washroom area from play area with
half-height gate and wall so infants can’t access the area
unsupervised.
3. Convenience: Staff cannot leave children unattended on
the change table. Locate everything the caregiver needs to
change the child within easy reach.
4. Older Infants:
a) Provide a child-size toilet in the infant change area.
b) Provide a child-size sink with mirror, in addition to the
staff sink, for older infants to learn hand washing. (See
Fig. 9)
67
Child Care Design & Technical Guideline
2.
68
prepared by Levitt Goodman Architects
Fig. 8
ALL METRIC DIMENSIONS
ARE IN MILLIMETERS
305
OPEN STORAGE WITH
ADJUSTABLE SHELF
SHATTER-PROOF MIRROR
VALENCE LIGHT WITH
PROTECTIVE COVER
CERAMIC BACKSPLASH
546 - 610
584
178 (7”)
four sides slightly higher than foam insert to prevent
children rolling out, but still allowing access. Allow for
the mat liner to be changed. Change tables should be
roomy to allow for larger children. (See Fig. 8)
c) Provide an unbreakable mirror for children to see
themselves when being changed.
d) Backsplash: Durable and easy to clean and should
extend to underside of cabinets above. Backsplash not
required if it restricts views out to play room.
Staff Sink: Locate sink as part of integral counter. Locate
adjacent to but separated from change well.
CHANGE TABLE
940
Millwork and Storage:
1. Change table can be prefabricated unit or custom
millwork.
a) Roller Step: Older infants need rolling steps up to
change table. Steps should have lockable wheels and
be stored under millwork counter or table. Steps should
be held in alignment when inside or outside cabinet.
Consider providing heavy-duty drawer slides.
(See Fig. 8)
b) Change Counter: Easy to clean with edges on all
FORMED INTEGRAL TOP WITH
178mm (7”) DEEP CHANGING
WELL AND INTEGRAL SINK
WITH GOOSENECK FAUCET IN
SEPARATECOMPARTMENT
RECESSED PULLS / MAGNETIC
TOT LOCKS ON BASE CABINETS
ROLL-OUT STEPS ON HEAVYDUTY GLIDES. PROVIDE
OPENING IN CHANGE TABLE
FACE AT TOP OF
STAIR.
J.
3.
4.
Storage:
a) Provide individual open storage spaces above or below
change surface for each child, all within reach of staff
attending child.
b) Provide additional two storage spaces for extra
supplies.
c) Provide storage for paper towels, toilet paper, supplies.
For example, provide lockable vanity storage below
sink.
Waste Management:
a) Provide space for diaper recycle bin and garbage bin
within easy reach of change table.
b) Provide tamper-proof containers if located on floor. For
example, provide tot locks.
69
Child Care Design & Technical Guideline | J. Infant Washroom and Change Area
70
prepared by Levitt Goodman Architects
K. Play Room Washroom
K.
F.
INTENT
To provide a clean area for toileting and diaper changing, accessible and safe for both children
and staff who assist them. The washroom should encourage children’s independence with regard
to toilet training and other washroom activities.
PERFORMANCE GUIDELINES
Experience:
1. The washroom should be connected to the play room in a
way that allows staff to supervise both rooms.
2. The toileting area should be laid out and sized to be
accessible for the specific age group.
3. Each play room washroom shall have one stall and one
sink designed and equipped to OBC and AODA accessible
standards.
4. The atmosphere should be warm and inviting to minimize
anxiety.
5. Privacy and the need for visual connections must be
balanced. The balance is different for each age group.
6.
7.
The washroom routine can be physically demanding for
staff. As such, consider staff ergonomics.
Child-sized fixtures encourage toilet training.
71
Child Care Design & Technical Guideline
8.
9.
Males and female share washrooms for all ages except
school age children.
Try to minimize touch points. For example, use sensor
faucets, dispensers. Provide toilets that will not flush until
wanted. Surprise flushing during toilet use can discourage
toilet use.
Adjacencies, Visual and Acoustic Connections:
1. Children’s WCs should be visually and acoustically
connected to play room. This allows children to be toileted
by staff individually rather than all together. It also
encourages independent toilet use.
2. Privacy: Openings in play room dividing walls should
vary according to age group. Older children require more
privacy. For example, provide half-walls sized according
to age. Partial dividers between toilets are only required
for older preschool children and school age children. For
example, provide one stall that is especially private in a
preschool washroom.
3. WCs can be shared by adjacent rooms, however, consider
acoustic control between the play rooms.
72
prepared by Levitt Goodman Architects
4.
5.
Provide direct access from the change table/toilet area to
the outdoor play area. Provide a vestibule to prevent cold
air entering directly into the toileting area. Best Practice
If possible, provide a dedicated WC with toilet and sink for
the outdoor play area. Best Practice
Millwork and Storage:
1. There should be storage in WCs for cleaning supplies.
Storage should be lockable if in reach of children.
2. Provide storage under or above vanities. For example,
pedestal sinks are not preferred. (See Fig. 9)
3. Provide under-counter garbage and diaper bins. Best
Practice
Equipment:
1. Provide one large toilet stall with an adjustable height
change bench that moves from transfer height to changing
height, or fixed height change bench at changing height,
with rough-in for ceiling lift. Locate in preschool and
school age WC for special needs or children that are not
yet toilet trained.
K.
F.
Fig. 9
PLAY ROOM WC VANITY
ALL METRIC DIMENSIONS
ARE IN MILLIMETERS
2.
Accessories:
a) Locate WC accessories at children’s height.
b) Ensure an easily accessible paper towel dispenser and
cup dispenser for children is located near the sinks.
c) Provide one mirror per sink.
d) Do not provide built-in liquid soap dispenser. Soap will
be provided in a non-mounted store-bought container.
Best Practice
e) Provide recessed WC accessories when possible to
minimize loss of floor space and injuries by bumping
into projecting corners. Best Practice
MINIMIZE DIMENSION
MIRROR
LEVELLING FEET
482 (19”)
INFANT
508 (20”)
TODDLER
546 (21.5”)
RECESSED
KICK
100 (4”)
RECESSED PULLS OR
MAGNETIC TOT LOCKS
PRESCHOOL
100 (4”)
MINIMIZE DIMENSION
635
(25”)
73
Child Care Design & Technical Guideline | K. Play Room Washroom
74
prepared by Levitt Goodman Architects
L. Kitchen
L.
F.
INTENT
To provide a space for preparing healthy food and/or the handling of healthy catered food. The
kitchen should provide an opportunity for children to learn about food and its preparation.
PERFORMANCE GUIDELINES
Experience:
1. Design: The kitchen should be designed in consultation
with staff according to the centre’s type of food program.
2. The kitchen is a safe and effective work environment that
is easily kept clean and where the quality of the food is
maintained.
3. When the kitchen is visible to children from the corridor,
they learn about food and its preparation. For example,
consider providing an open counter between the corridor
and kitchen where children can sit.
4. Provide display space in the corridor outside the kitchen
to post required information, educational information and
information about food production.
75
Child Care Design & Technical Guideline
Adjacencies:
1. Location: Directly accessible to a main circulation route
and preferably near the entry zone. The intent is that:
a) Deliveries and catering drop-off are more convenient.
b) Kitchen staff can provide passive surveillance.
c) Constant learning opportunities are provided for
children.
d) It encourages casual pickup of food for breakfast
programs and so on.
2. Do not provide a direct exterior door.
6.
7.
8.
Rodent-proof storage for dry goods.
Baking: Storage for baking trays.
Provide storage area for rolling carts (one per activity
room). For example, under a standing height counter.
Equipment:
1. High-end electric residential oven/range.
2. Commercial dishwasher on plinth base with fan and
exhaust.
3. Two full-size commercial fridges.
4. Full-height industrial freezer.
5. Microwave: Confirm type and size with client.
6. Locks should be provided for the fridges and freezer.
7. Provide anti-fatigue mats for kitchen staff.
8. Eye wash station to be provided when required.
Millwork and Storage:
1. Provide upper and lower cabinets with ample shelf space
and drawers.
2. Provide a sitting height counter area for staff to work.
3. Provide drawer(s) for utensils.
Openings:
4. Provide a lockable pantry space in the form of a room or
1. Provide views for children into kitchen from corridor. For
cupboard for dry goods, cans, boxes. Lockable food storage
example, providing full-height windows. Locate windows allows the general kitchen space to be more open.
away from door so children are not near a pinching 5. Consideration for storage of catering trays on counter or on
hazard.
carts.
76
prepared by Levitt Goodman Architects
L.
F.
2. Provide half-height glazing in door so adult can see if children are near door.
3. Doors: Provide classroom lockset.
4. Where possible, provide operable windows to exterior.
77
Child Care Design & Technical Guideline | L. Kitchen
78
prepared by Levitt Goodman Architects
M. Laundry Facilities
M.
F.
INTENT
To provide a room with adequate space to allow for the day-to-day washing, drying and folding of
children’s clothes/linens and other miscellaneous items.
PRACTICE GUIDELINES
Adjacencies:
1. Locate close to children’s playrooms, especially the infant
room(s) as infant rooms generate the most laundry.
2. Locate close to kitchen if kitchen staff do the laundry.
3. Locate close enough to an exterior wall to accommodate
the limits of the exhaust duct.
Equipment:
1. Provide space for one stacked washer and dryer. Provide
one additional dryer for outdoor clothing. Provide highefficiency residential equipment.
2. Provide floor area for laundry hampers.
3.
Laundry sink/tub.
Millwork and Storage:
1. Provide counter large enough for sorting and folding of
79
Child Care Design & Technical Guideline
2.
3.
4.
clothes/linens.
Provide open or closed storage for laundry supplies. Keep
out of reach of children.
Provide open or closed storage for linens and extra
clothing.
Shelves and cupboards should be constructed of durable
material. In wet areas consider using stainless steel or
solid surfacing. Ensure plastic laminate is at least 600mm
from wet areas.
Openings:
1. Doors: Provide storage lockset.
2. Consider clear panel in door.
80
prepared by Levitt Goodman Architects
M.
F.
81
Child Care Design & Technical Guideline | M. Laundry Facilities
82
prepared by Levitt Goodman Architects
N. Waste Management
N.
F.
INTENT
Based on the type of pickup intended, provide accessible yet tamper- and pest-proof storage areas
for garbage, recycling and composting. Encourage children to participate, where appropriate, in
the management of waste, especially recycling and composting.
PERFORMANCE GUIDELINES
Interior:
1. Recycling: In addition to garbage containers, if a recycling
program is planned, provide recycling bins suitable for the
materials that can be recycled.
2. Composting: If opportunities exist, incorporate organic
waste composting into the centre’s waste management.
3. Learning Opportunities: Consider opportunities for
teaching children about recycling and composting. For
example, use “expressive” bins or millwork for use by
children.
4. Ensure diaper bins are separate from garbage.
5. If centre is located in an apartment building, centre should
have access to a waste chute or dedicated garbage room.
83
Child Care Design & Technical Guideline
Exterior:
1. Review requirements with representatives depending on
the “pickup” method proposed.
2. Screened-off waste area should be provided if exterior
storage is required. Locate near an exterior door and with
good street access. Do not locate near main entry or play
areas. Ensure door into garbage/recycling area is large
enough. Consider using double doors.
3. If curbside pickup is required, provide paved pad at street.
4. Provide on-site composting area/container if opportunities
exist. Allow for supervised access by children where
appropriate.
Exterior Waste Area:
1. Foundation: Provide concrete curb. Wood should not touch
ground.
2. Ensure enclosure has sufficient space for bins and is
secure.
3. All bins must be rodent-proof and lockable.
4. Provide a floor drain or slope it out to door for drainage.
5. The cladding and finish of the enclosure should
84
prepared by Levitt Goodman Architects
6.
7.
complement the building and surrounding site elements.
For example, wood with detailing and a finish that
complements adjacent elements.
Install hose bib.
Locking: A padlock with latch is preferable.
Equipment:
1. Size area for three large tamper-proof containers for
organic waste, recycling and garbage.
N.
F.
85
Child Care Design & Technical Guideline | N. Waste Management
86
prepared by Levitt Goodman Architects
O. Janitor Room
O.
F.
INTENT
To provide a secure room for cleaning/maintenance functions and supplies.
PERFORMANCE GUIDELINES
Adjacencies:
1. Locate in an accessible but non-prominent location.
2. Provide one janitor room per floor, locked at all times.
Equipment:
1. Chemical Mixing: A chemical mixing unit for janitorial
chemicals is preferred over the sink. Best Practice
2. Eye wash station to be provided when required.
Storage:
1. Provide lockable storage for chemicals. Provide utilitygrade open shelves for other cleaning materials. Secure
to wall. Shelves to be rust-resistant, cleanable, durable
and adjustable. Review quantity of storage with client
representative.
2. Mop and Broom Storage: Install wall-mounted mop and
broom storage with stainless steel finish.
87
Child Care Design & Technical Guideline
3.
Provide area on floor for storage of vacuum and other
cleaning equipment.
Openings:
1. Doors: Hollow metal door and frame.
2. Install high stainless steel kick plates both sides of door.
3. Provide storage room lockset.
88
prepared by Levitt Goodman Architects
O.
F.
89
Child Care Design & Technical Guideline | O. Janitor Room
90
prepared by Levitt Goodman Architects
P. Outdoor Play Area
P.
F.
INTENT
To provide a challenging and safe outdoor environment for children to socialize and learn through
a variety of active play opportunities set in the natural environment.
PERFORMANCE GUIDELINES
Experience:
1. Provide separate play areas for different age groups (infant/
toddler, preschool, school age) that are separated using
low fencing or dividers.
2. If the play space is shared by all age groups, it should be
appropriately designed for all ages.
3. Each outdoor play area should be designed with agespecific physical challenges for the user group.
a) Infant:
i. Infants should be separated from other children
during active play.
ii. Provide cast-in-place rubber surface for crawling.
Best Practice
iii.Include a variety of soft surface textures and
materials for exploration.
iv. Provide sensory boxes that contain various tactile
91
Child Care Design & Technical Guideline
4.
5.
6.
and visual items for children to explore.
v. Avoid materials that can pose an ingestion or
choking hazard.
b) Toddler:
i. Provide a flat track for wheeled toys and tricycles
with only minor variation in grade.
ii. Install play elements or other structure such as a
stage, playhouse, slides or sand boxes to encourage
social play.
c) Preschool
i. Provide increased physical challenges by sloping
portions of the riding track. Introduce rumble strips.
ii. Provide opportunities for group play. Install a stage
or structure to encourage social play.
Play areas should offer a variety of activities in different
zones to encourage the four elements of play (physical,
social, manipulative cognitive and quiet retreat).
Provide appropriate separation between different play
zones (i.e. avoid placing quiet retreat play adjacent to
physical play).
Provide a variety of hard and soft surfaces in the play area.
92
prepared by Levitt Goodman Architects
7.
8.
Provide 40% of playground space as open space.
Trees should be strategically located to provide children
with ample amount of shade during summer months while
promoting sunshine during winter months. In outdoor play
area, provide a minimum 25% shaded area at all times
of day. Avoid locating trees in circulation areas to prevent
accidental run-ins.
9. Provide area for children to practice upper and lower body
gross motor activity including:
a) Play mounds for climbing.
b) Elements at varying heights for climbing.
c) Open surface for ball games, running, rolling.
10. Create a looped hard-surface route for riding toys that does
not interfere with the open play zone. Consider embedding
items into surface of loop to encourage interactive play
and discovery.
11. Provide soft surfaces (such as coarse mulch, granitic sand
or engineered wood fibre) for other types of play.
12. Provide protection from wind and sun with removable
coverings (shade sails, parasols, awnings), permanent
structures and planting. If necessary, provide wind or
P.
F.
13.
14.
15.
16.
17.
18.
19.
shade studies.
Provide balance beam and stepping stones to practice
balance (not for infants).
Ensure children have contact with the natural environment
(i.e. plants, sand, earth, water and sun). Provide
educational opportunities that engage with the natural
world wherever possible.
Provide kit of parts for natural, imaginative play:
a) Consider objects with multiple uses, such as tarps and
columns.
Encourage children to take ownership of the play space
through creative and educational activities (such as
painting murals, planting a vegetable plot).
Provide table with seating (preschool, toddler areas).
a) Minimum Seating: Size area for six children, but
provide seating in small groups of two or three.
b) Seating could be tree stumps (squared off).
Provide enclosures for quiet retreat (landscaped or fenced)
that have openings to facilitate visual supervision by staff.
Provide barrier-free access and space for children with
disabilities to maneuver. Consider sensory boxes.
Adjacencies:
1. Outdoor play area should open directly into indoor play
rooms. Best Practice
a) Provide direct access from indoors to outdoors with
sliding doors or walls that open up. Best Practice
2. Provide a transitional covered area from indoor to outdoor
play areas.
3. Provide a covered area for play during inclement weather.
4. Locate washrooms close to outdoor play area.
a) Provide direct access to washrooms from playground
and, if possible, provide a dedicated single fixture WC
5.
6.
for outdoor play area. Best Practice
Locate outdoor storage so it is easily accessible.
Buffer the play area from traffic and parking with fences or
vegetation.
Zones:
1. Water play.
2. Sand play.
a) Consider a trough (stainless steel) in sand play area for
enhanced water play. Drain towards low point.
93
Child Care Design & Technical Guideline |P. Outdoor Play Area
3.
4.
5.
6.
7.
8.
b) Locate in shade as sand gets extremely hot.
Bike and wheeled toy path.
Open play space.
Climbing and exploring.
Block play.
Natural area.
The quiet zone.
Equipment:
1. Consider installing a water element equipped with
industrial outdoor “sinks” at different levels for water play.
2. A winterized drinking fountain should be provided in
preschool area only. Best Practice
3. Sand Area: Enclose or depress into landscape to control
spread of sand.
4. Consider providing a variety of outdoor art equipment.
Some examples: art easels, chalkboards, plexiglass sheets.
5. Provide musical equipment for outdoor use.
6. Provide play structures such as slides built into landscape
mounds for climbing.
7. Permanent outdoor furniture should be weatherproof.
94
prepared by Levitt Goodman Architects
Best Practice
Openings:
1. Consider providing large openings to play rooms, such as
sliding doors, in order to increase the connection between
indoor and outdoor. Install bumpers on sliders to reduce
risk of fingers getting pinched.
2. Large windows should be installed with views of the
outdoor play area for children inside.
Storage
1. A storage room or shed must be provided for outdoor toys
and bicycles.
2. Storage sheds should be weather-tight, lockable and
vandal proof.
3. Ensure that the storage is easily accessible .
4. Consider building storage into face of building to minimize
space usage on playground.
5. Equip storage room or shed with combination lock or
keypad lock (no key required).
6. Locate first aid supplies for playground in storage area.
P.
F.
Security and Access:
1. Playgrounds to be fenced.
2. Design the play area with unobstructed views so that staff
can monitor the area at all times.
3. Install latchable gates with “S” hook closures. Provide one
main gate that exits from the playground and individual
gates between separate play areas.
4. Size gates for maintenance access. 2100mm (7’0”) for
Bobcats and 1220mm (4’0”) for wheelbarrows.
Materials:
1.
2.
3.
4.
5.
6.
Provide hard surfaces, such as asphalt, for wheeled-toy
track geared to age-specific user group.
Each playground to have minimum 2 different surfaces.
Provide netting covers for sandbox areas to protect against
animals but that let in sunlight.
Avoid use of chemically treated wood in play area.
Consider using a safety surface such as rubber in areas
where children might fall from a raised element.
Consider using lighter coloured materials that will absorb
less heat in peak summer sunshine hours.
95
Child Care Design & Technical Guideline |P. Outdoor Play Area
96
prepared by Levitt Goodman Architects
Performance Criteria of Building Components
The purpose of the Performance Criteria for Building Components is to provide
performance-based technical guidelines, similar to an outline specification, for
components specific to child care facilities. Within each section the information
is outlined in two parts: General: includes quality assurance and environmental
considerations, and Materials: includes information regarding materials and
performance.
97
Child Care Design & Technical Guideline
98
prepared by Levitt Goodman Architects
Q. Outdoor Landscaping
Q.
GENERAL
Quality Assurance:
1. Use materials with proven durability in a playground or
outdoor setting.
a) Warranty: Minimum two years. Warranty planting for
three years. Best Practice
2. Provide two third-party peer design reviews by a
playground consultant who will ultimately be approving
built playground.
a) One review at conceptual design stage.
b) One review at working drawing stage, before issue of
contract documents.
Environmental Considerations:
1. All dimensional lumber and plywood to be Forest
Stewardship Council certified wood or recycled plastic
wood material. Best Practice
2. Adhesives:
a) Use adhesives, sealants and mastics that have low VOC
levels per LEED requirements.
b) Laminating Adhesive: Water-resistant, low VOC content,
99
Child Care Design & Technical Guideline
3.
CSA 0112 Series.
Paints, Stains and Sealants:
a) All paints and primers to be no VOC content.
b) Perform work to MPI requirements for premium
grade. Provide paint products meeting MPI “Green
Performance Standard GPS-1-05”.
MATERIALS
Wellness:
1. No Sharp Edges: Edges rounded to minimum 6mm radius.
2. No protrusions at eye level, including planting.
3. Ensure materials used do not pose ingestion or choking
hazard.
4. Avoid potential head and neck entrapments in any
designed element on playground.
5. Where dissimilar surfaces meet, ensure edge details are
properly coordinated during installation.
6. Avoid using chemically treated lumber in any equipment,
fencing and play structures accessible to children.
Planting:
1. Microclimate:
100
prepared by Levitt Goodman Architects
2.
3.
a) Cluster plantings to provide dividers, screens, shade or
wind shelters.
b) Groups of trees, shrubs or perennials are less likely to
sustain damage from children.
c) Consider fast-growing deciduous trees for shading.
d) Plant deciduous trees on south side of play area to
provide shade in summer and sun in winter.
e) Plant coniferous trees to provide wind protection.
Planting shall be hardy, low-maintenance and pestresistant.
Ensure all plantings are non-toxic, without prickles or
thorns:
a) No berries permitted.
b) Use plants native to the local region. If using
naturalized species, avoid those considered to be
invasive. Best Practice
c) Provide adequate soil volume for planting.
d) Do not use guy wires or T-bars as stakes.
e) Avoid planting dense hedges and screens so
supervising staff can have unobscured view of children
in all play areas.
Q.
4.
5.
Conform to International Code of Nomenclature for
Cultivated Plants for nomenclature of plants and with
recognized scientific name given in latest edition of
Standardized Plant Names.
Collected plants and plant materials that require chemical
treatments as ordered by Canadian Department of
Agriculture are not acceptable.
Perimeter Fencing :
1. Design so as not to facilitate climbing.
2. Round all components. No sharp edges.
3. Open-fencing construction to provide unobstructed view
for supervising adults and so children can see out.
4. Openings in Fences:
a) All openings to dimensions found in CSA standards.
No fully bounded openings that may allow head
entrapment or strangulation.
5. Fence height to be 1200mm above highest grade within
1000mm of either side of fence.
a) Plan for snow piled against fence when considering
heights.
6.
Fence Materials:
a) Aluminum fencing with vertical pickets and top rail.
Aluminum materials to confirm to ASTM B209, ASTM
B211 and ANSI H35.1.
b) Woven mesh welded on edges. Maximum 25mm x
25mm openings.
c) Galvanized decorative metal or steel fencing
conforming to ASTM A653/A653-M.
i. Pickets: 16ga. (1.5mm) thick sheet steel.
ii. Rails and Posts: 14ga. (1.9mm) thick sheet steel.
d) Galvanized double-sided metal fence conforming to
ASTM A653/A653-M.
e) Powder coat finish conforming to AAMA 2603.
f) Tempered glass conforming to CAN/CGSB-12.1-M.
g) Composite lumber products.
h) If wood is used:
i. No chemically treated lumber.
ii. No privacy fencing.
iii.Fence must be sanded to prevent slivers.
iv. Cedar (Eastern White Cedar preferred) fencing with
no seal or non-toxic sealant. Best Practice
101
Child Care Design & Technical Guideline | Q. Outdoor Landscaping
7.
8.
9.
v. Dimensionally stable, smooth.
vi. Conform to requirements of standard grading rule
for Canadian Lumber of National Lumber Grades
Authority (NLGA).
Provide guardrails or protective barriers on elevated
surfaces.
Rooftop or Above-grade Playgrounds:
a) Minimum 1800mm fence height.
b) 2100-2700mm fence height. Best Practice
Gates:
a) Provide perimeter exit gate from play area and interior
gates between children’s play areas.
b) Provide heavy duty type hardware as listed below.
c) Provide unobstructed view through gate. Best Practice
If gate does not provide unobstructed view, it must
open outwards from play area.
d) Install latchable, self-closing gates.
e) Latch Height:
i. Exterior gates: Minimum 1200mm.
ii. Interior gates: As appropriate to height of dividing fences.
102
prepared by Levitt Goodman Architects
f)
g)
h)
i)
Latch Type: Top pull.
Magnetic safety latch. Best Practice
Ensure latches do not create protrusion hazards .
Minimum of two means of egress out of playground.
Best Practice
Surfaces:
1. Recommended Hard Surfaces:
a) Asphalt.
b) Concrete.
2. Soft Surfaces:
a) Engineered wood fibre mulch. Replenish as needed.
b) Small conifer woodchips or coarse conifer mulch.
Replenish as needed.
c) Turf Grass:
i. In low-traffic areas only.
ii. No artificial turf.
3. Rubberized Surfaces:
a) Neutral colours preferred.
b) Rubber Play Mounds: Mound should be one colour and
surrounding area a different colour.
Q.
4.
c) Design rubber play surface in accordance with CAN/
CSA Z614, ASTM F1292, and ASTM F1951 to suit
application.
Play Logs:
a) Hardwood is recommended
b) If softwood is used, provide only Western Red Cedar or
Eastern White Cedar.
i. Logs to be sawn top and bottom (to reduce slippage), free of large cracks, sharp edges and splinters. Remove bark.
ii. Treat logs with a non-toxic oil to protect against rot.
2.
Specific Concerns by Area:
3.
1. Main Entry to Centre:
a) Provide hard paved surface at building entrance.
b) Provide sand storage box (approximately 1m x 1m x
1m) for snowy areas.
c) Provide area for snow storage away from front entrance.
d) Install canopy or covered area at entry doors to
facilitate indoor-outdoor transition.
e) Provide visible, legible signage.
f) Provide weatherproof box to display activities, images
and information about the centre.
g) Provide exterior seating.
h) Provide exterior animal-proof garbage and recycling
containers.
Bicycle Parking:
a) Provide weather-protected, secure bicycle parking for
staff.
b) Provide dedicated entrance to bicycle parking. Best
Practice
c) Provide visible and accessible bicycle parking for
visitors.
Vehicle Drop-off/ Pick-up Zone:
a) Locate as close as possible to main entry.
b) Provide marked crossing areas where needed.
c) Provide two to three spots minimum.
i. A lay-by off the street. Best Practice
ii. A dedicated, clearly signed area at street
(minimum).
d) Provide signage for area with time limits for parking.
103
Child Care Design & Technical Guideline | Q. Outdoor Landscaping
4.
5.
Parking:
a) Locate minimum two to three parking spots as close as
possible to main entry.
Children’s Outdoor Play Area:
a) Plantings:
i. Provide pathways through planting.
ii. For toddlers and preschool children: Provide
interest through dried grasses, pine cones, etc.
iii.Include garden plots or vegetable plots to facilitate
learning.
iv. Include raised beds to facilitate access for children
with disabilities.
b) Surface Materials:
i. Provide a minimum of two types of surfaces within
each play area. If possible, include more than two
different tactile surfaces. Best Practice
ii. Ensure at least one surface is accessible for
disabled children.
c) Walking/Wheeled Toy Surfaces:
i. Provide non-slip surfaces.
ii. Materials: Concrete, asphalt (preschool), synthetic
104
prepared by Levitt Goodman Architects
surface such as rubber (toddler). Asphalt surfaces
to conform to the requirements of applicable OPSS
standards.
iii.Grade changes for toddler track: Maximum +/- 150
mm.
iv. Grade changes for preschool track: Provide small
hills for increased physical challenge.
v. To reduce urban heat island effect at grade, use
high-albedo surfaces. Best Practice
d) Active Play Zone:
i. Consider using grass in low-traffic areas or wood
chips.
ii. Where climbing is encouraged, provide a fall
protection zone to reduce the risk of fall injury.
iii.Provide a fall protection zone of loose fill or unitary
synthetic materials such as sand, engineered wood
fibre or poured rubber.
iv. If no elevated climbing elements exist in protective
surfacing zone, provide surface with minimum
1000mm fall height.
v. If elevated climbing elements exist in protective
Q.
surfacing zone, ensure requirements are met for
critical fall heights.
vi. Once installed, protective synthetic surfaces are
difficult and costly to modify and will likely be in
place a minimum of ten years. Ensure adequate
equipment planning for critical fall heights prior to
installation.
vii.Size fall zone appropriate to equipment.
viii.Maintain protective surfaces regularly through
scheduled inspections and repair/replace as
needed.
ix. Ensure that surfaces have positive drainage. Avoid
areas of ponding.
x. Ensure that surface is universally accessible.
xi. Boulders to be placed either maximum 300mm
apart to facilitate stepping or minimum 1800mm
apart to discourage leaping. Best Practice
e) Sand Play Zone: Provide sand play areas for toddlers
and preschoolers, but not infants.
i. For infant play area, provide removable sensory
boxes in a frame.
ii. Use washed brick sand conforming to CSA A179 or
equivalent (to allow for molding), free from organic
materials or contaminants.
iii.Provide appropriate sand depths per age group.
iv. Install filter cloth at sand boxes.
v. Sand boxes to be permeable to facilitate drainage.
vi. Provide removable, breathable cover to protect from
animals and prevent moisture buildup when not in
use. Canvas mesh is preferable. Best Practice
vii.Size: 2m x 2m for ten children. Best Practice
viii.Provide paved strip near sand box or sand grate at
building entry to prevent sand being tracked into
the facility.
ix. Provide ledge at edge of sand enclosure for seating
and play.
x. Provide access to water where possible.
xi. Provide a variety of shade: Natural, tarps, sails,
parasols or structures.
f) Water Play Zone:
i. Provide one water source per playground.
ii. Water must be constantly moving to reduce risk of
105
Child Care Design & Technical Guideline | Q. Outdoor Landscaping
mosquitoes breeding.
iii.In areas containing water, use pea stone or some
other ballast to reduce effective water depth to
maximum 300mm.
iv. Water source must be near water play area.
v. Provide a variety of water elements to facilitate
creative, social and intellectual development.
g) Art Installations:
i. Ensure no head or neck entrapment and nonclimbable.
ii. Use child-safe materials and coatings.
Drainage and Irrigation:
1. Drainage:
a) Drain surface water away from building and sidewalks.
b) Grates: Provide opening sized to reduce risk of finger
entrapment.
c) All drains in play areas should be equipped with
sediment traps.
d) Provide drainage in sand play area.
e) Slope lawns and sidewalks toward drainage to avoid
106
prepared by Levitt Goodman Architects
2.
ponding.
f) Divert drainage to naturalized portion of site for
overflow purposes.
Irrigation:
a) Provide irrigation at grade and on rooftop play areas.
b) Install high efficiency irrigation.
c) Install rain gauge, which may also provide educational
aspect.
d) Install soil moisture sensor.
e) Install irrigation controller as part of digital dial
controller (DDC) system (no stand alone controller).
f) If no irrigation is installed, provide additional, lockable
hose-bibs at 15m intervals. These can be used to
provide water for water play area.
Storage:
1. Provide lockable storage, located conveniently for staff.
a) Locate storage room inside building and provide
outside access to room from playground. Best Practice
b) Combination or code lock (no key required). Best
Practice
Q.
c) Minimum Size: 9.3 square metres for each playground
(preschool, toddler and infant). Toddler and infant
storage rooms may share space but should have
separate doors that open onto separated playgrounds.
d) Storage must be rodent-proof.
e) Freestanding Storage: Construct of prefab concrete,
composite wood or plastic, or metal. Best Practice
f) Ensure all available surfaces inside and outside storage
room are used: Hang small items and instruments on
interior walls. Hang drawing boards on exterior walls or
provide space for mural painting by children, provide
316 stainless steel type screws and bolts. Use heavy-duty
fasteners for outdoor use.
green roof on top of storage area.
g) Provide hooks on walls and/or storage shelves for
smaller toys above large riding toys.
h) Provide door hold-open to reduce risk of children
becoming trapped inside storage area.
i) Locate storage at grade or with ramp for children riding
bicycles/ tricycles into shed.
Fasteners:
1. All fasteners to be corrosion-resistant, tamper-proof Type
107
Child Care Design & Technical Guideline | Q. Outdoor Landscaping
108
prepared by Levitt Goodman Architects
R. Millwork and Fabricated Metals
R.
GENERAL
Quality Assurance:
1. Standard of finished carpentry and cabinet work in
accordance with the “Millwork Standards” of the
Architectural Woodwork Institute (AWI) to grades as
follows:
a) All exposed hardwood: Premium grade.
b) All exposed plastic laminate surfaces: Custom grade.
2. Warranty: Products and material: Extend for a total of two
years.
Design Requirements:
1. All upper and lower cabinets to have adjustable shelving.
2. All edges must be eased and rounded throughout.
3. Corner joints to be mitred throughout.
4. Provide protection of millwork if it is close to or on the
floor and susceptible to moisture. For example, clad
lower portions with Type 304 stainless steel or baseboard
products.
5. As child care spaces are flexible, consider designing
millwork that can be easily relocated or repurposed.
109
Child Care Design & Technical Guideline
Environmental Considerations:
1. All dimensional lumber and plywood to be Forest
Stewardship Council certified wood. Best Practice
2. Adhesives:
a) Use adhesives, sealants and mastics that have low VOC
levels per LEED requirements.
b) Laminating Adhesive: Water-resistant, low VOC content,
CSA 0112 Series.
3. Paints, Stains and Sealants:
a) All paints and primers to be no VOC content.
b) Perform work to MPI requirements for premium grade.
c) Provide paint products meeting MPI “Green
Performance Standard GPS-1-05”.
MATERIALS
Casework:
1. Substrate:
a) Cabinets, doors, drawer fronts, shelves, cubbies:
19mm plywood at all wet areas including kitchen,
kitchenettes, laundry room, change area, washrooms.
Plywood throughout. Best Practice
110
prepared by Levitt Goodman Architects
2.
3.
b) Cabinets, doors, drawer fronts, shelves, cubbies: Areas
not exposed to moisture: Particle board conforming to
ANSI A208.1, Grade M2. Particleboard to be bound
with waterproof adhesive and have a minimum density
of 705kg/m3.
c) Countertops: 19mm plywood supported @ 760mm oncentre unless otherwise required by the finish.
d) Do not expose edges to moisture. For example, do
not recess accessories into countertop. Back Panels:
12mm plywood. Install on all millwork.
e) Support shelving @ 760mm on-centre unless otherwise
required by loading.
f) Melamine Panels ANSI A208.1, Grade M2
particleboard with melamine thermofused onto the
surface.
g) Do not use MDF as a substrate in kitchen area.
Hardwood Lumber and Veneer:
a) Conform to NHLA and AWS Premium Grade, S4S,
average moisture content 7% +/- 2% at installation.
Stainless Steel:
a) All cabinets and counters in main kitchen to be
R.
4.
stainless steel where possible.
b) 14 gauge, 18/8, Type 304, conforming to ASTM A167.
c) Perform stainless steel work in accordance with
NAAMM, Code of Standard Practice for the Metal
Industry, Workmanship, Class 1.
Finish:
a) Wood Veneer:
i. Hardwood with clear finish in accordance with MPI
requirements.
b) Plastic Laminate:
i. Provide plastic laminates in accordance with ANSI/
NEMA LD 3.
ii. Integral backsplash, curved front lip edge
on horizontal counter surfaces. Best Practice
Non Post-formed Horizontal Surface: 1.2mm thick,
heavy wear-resistant, face sheet.
iii.Vertical Surface: 0.8mm thick face sheet.
iv. Backing sheet to match face sheet thickness.
c) Melamine:
i. Provide melamine conforming to requirements of
ANSI/NEMA LD 3.
5.
ii. High quality melamine may be used for storage
cabinet interiors except under sinks in wet areas.
iii.Paint: Painting of millwork surfaces such as
plywood is not recommended in new construction.
All staining, painting and finishing work to be in
accordance with MPI requirements.
d) Solid Surfacing:
i. 12mm thick with integral sinks and backsplash,
finish exposed edges.
Edging:
a) Adjacent Wood, Veneer:
i. All exposed edges: 6mm solid wood edges to match
species of adjacent veneer.
b) Plastic Laminate/Melamine:
i. Post-formed integral edge. Best Practice
ii. Non-petroleum bio-co-polymer edging.
iii.PVC or ABS edging is minimum standard. Where
PVC edging is used, it is to be done in thin PVC to
match or compliment adjacent colour.
iv. No wood tape or plastic laminate edging.
c) Solid Surfacing:
111
Child Care Design & Technical Guideline | R. Millwork and Fabricated Metals
6.
7.
i. Integral edge.
d) Stainless Steel:
i. Type 304 integral stainless steel edge with drainage
lip, conforming to ASTM A167.
e) All edges and exposed corners must be eased and
rounded to minimum 3mm radius throughout.
2.
f) A 100mm minimum guard edge must be provided at
the change tables.
Base:
a) 100mm Toe Kick: Cover finished millwork kick with
resilient rubber base or stainless steel.
b) Construct wall base and toe kicks on millwork using
marine-grade plywood.
Fascia:
a) Provide and size accordingly to conceal under-counter
lighting on upper cabinets.
Countertops and Backsplashes:
3.
1. Backsplash:
a) Countertops that meet wall provide integral backsplash
100mm in height min. unless otherwise indicated. 112
prepared by Levitt Goodman Architects
Where counter end meets wall on integral plastic
laminate backsplashes, continue post-formed backsplash along side wall.
b) Where no backsplash is indicated, caulk joint at wall
with clear silicone.
Kitchen Counter:
a) All counters located near water sources are to be Type
304 stainless steel or solid surfacing with integral
triple sinks and backsplash. Provide plastic laminate
on exterior grade plywood only where not exposed to
moisture. Low use or counters not located near water
sources could be plastic laminate on plywood substrate
with non-PVC edging.
b) Ensure sufficient support is provided for triple sinks in
kitchen.
c) Counters should be deeper for prep and catering food
trays. Consider a minimum depth of 750mm.
Staff Kitchenette Counter:
a) The sink and surrounding counter to be set to barrierfree counter dimensions. Provide counter space beside
sink large enough for dishes and preparing food/snacks.
R.
4.
5.
6.
b) Counter should be constructed of durable material.
In wet areas, consider using Type 304 stainless steel
or solid surfacing. Ensure plastic laminate is at least
600mm from wet areas.
Laundry Room Counter:
a) Provide counter large enough for sorting and folding
of clothes/linens. Counter should be constructed of
durable material. In wet areas, consider using Type
304 stainless steel or solid surfacing. Ensure plastic
laminate is at least 600mm from wet areas.
b) This counter need not have a backsplash.
Infant Change Area and WC:
a) Provide higher, continuous backsplash (200mm
minimum) in solid surfacing or plastic laminate on
exterior grade plywood, post-formed with bull nose
edge.
Play Room WCs:
a) Counter material should be one continuous millwork
surface with no seams and integral backsplash, and of
water-resistant material such as solid surfacing. Best
Practice
Or counter material could be plastic laminate.
Handrails:
1. Provide additional child-height hardwood handrails (clear
finish) and adequate blocking at all stairs and ramps.
Hardware:
1. Provide commercial grade hardware throughout.
2. Hinges: Heavy-duty 110 degree, concealed, self-closing.
3. Drawer Extensions/Slides: Full-extension model, selfclosing.
a) Select appropriate hardware based on anticipated
loads.
b) Ensure retractable roller stairs are secure when in open
position.
4. Pulls:
a) D-shape, or similar, for easy grasp on upper cabinets.
b) Recessed pulls on lower cabinets in children’s reach.
c) Concealed magnetic catches on lowers. Best Practice
5. Adjustable Shelves: Heavy-duty hole type, flush with
cabinet sides.
113
Child Care Design & Technical Guideline | R. Millwork and Fabricated Metals
6.
7.
Locks:
a) Confirm with staff which millwork items require locks.
b) All millwork locks to be common keyed except kitchen
cabinets/pantry storage.
c) Supervisor’s office and staff cabinets/lockers to be
individually keyed.
d) Confirm any additional locking requirements for each
facility.
e) Install childproof “tot-locks” on all specified cabinets
within reach of children.
Hooks:
a) At cubbies or other child-height areas provide rounded
style hooks. Provide two hooks per cubby. Do not
mount on back panel of cubby.
b) Alternate Option for Cubby: Triple prong hook (2 side,
1 front) mounted on back wall of cubby.
c) Provide break-away style hooks in all children’s areas.
Best Practice
114
prepared by Levitt Goodman Architects
Fasteners:
1. All millwork should be securely anchored to wall or floor to
avoid tipping.
2. Ensure sufficient blocking and anchorage for millwork
items.
3. Use heavy-duty attachments for wall-mount cabinets.
4. Conceal all Fasteners: When screws are used, countersink
in round clean-cut hole and plug with wood plug with
finish to match adjacent finish. Set finishing nails to
receive filler.
5. Do not use staples.
R.
115
Child Care Design & Technical Guideline | R. Millwork and Fabricated Metals
116
prepared by Levitt Goodman Architects
S. Doors, Windows and Hardware
S.
GENERAL
Quality Assurance:
1. Standard of Architectural Woodwork in accordance with
the “Millwork Standards” of the Architectural Woodwork
Manufacturers Association of Canada (AWMAC) - Premium
Grade.
2. Provide windows as per AAMA/WDMA/CSA 101/I.S.2/
A440, Class CW.
3. Provide hardware on fire-rated assemblies as per NFPA-80
and to approval of Ontario Fire Marshall.
4. Metal doors in accordance with ASTM A653/A653M.
Perform work in accordance with requirements by
a member of the Canadian Steel Door and Frame
Manufacturers Association.
5. Wood Doors: Perform Work in accordance with
requirements of AWI, Quality Standards for Architectural
Woodwork, Premium Grade, except as indicated otherwise.
6. Provide fire-rated doors and hardware with ULC labels in
accordance with NFPA 80.
7. Warranty: Products and material: Extend for a total of two
years.
117
Child Care Design & Technical Guideline
8.
Inspection and Testing: Confirm based on project and
client requirements.
Design Requirements:
1. Doors to be standard 45mm thickness throughout.
2. All offices should have acoustic sealant at all interior
doors sidelights and interior windows.
3. Finish all sides of doors and windows.
4. Install operable windows in all areas where possible.
c) Provide paint products meeting MPI “Green
Performance Standard GPS-1-05”.
MATERIALS
Doors and Sidelights:
1. Material:
a) Exterior:
i. Hollow Metal: Standard gauge commercial grade
steel in accordance with ASTM A568/A568M, Class
1, hot dip galvanized to ASTM A653/A653M with
rigid closed cell insulation.
Environmental Considerations:
ii. Aluminum:
1. All dimensional lumber and plywood to be Forest
i. Aluminum Extrusions and Channels: Conforming
Stewardship Council certified wood. Best Practice
to ASTM B211 and ANSI H35.1.
2. Adhesives:
ii. Aluminum Finish: Anodized or pre-painted
a) Use adhesives, sealants and mastics that have low VOC
finish in accordance with AAMA requirements.
levels per LEED requirements.
b) Interior:
b) Laminating Adhesive: Water-resistant, low VOC content,
i. Hollow Metal: Standard gauge commercial grade
CSA 0112 Series.
steel, in accordance with ASTM A568/A568M,
3. Paints, Stains and Sealants:
Class 1, hot dip galvanized to ASTM A653/A653M.
a) All paints and primers to be no VOC content.
i. Locations: Janitor’s room, laundry room, kitchen.
b) Perform work to MPI requirements for premium grade.
118
prepared by Levitt Goodman Architects
S.
2.
ii. Wood:
i. Solid core, 5-ply wood doors, with core
3.
conforming to ANSI A208.1, having a minimum
density 513 kg/m3. Extruded particle board
cores with voids are not permitted. Door Facing:
Paint grade birch.
ii. Locations: Play Rooms, offices, staff room, WCs. 4.
iii.Closet: Standard or Sliding: Hollow core wood,
paint grade birch.
iv. Room Dividers: Hollow core wood sliders.
c) Glass:
i. Consider glass sliders between play rooms and
outdoor play areas.
Finish:
a) Veneer: Hardwood with clear finish.
b) Paint: MPI premium grade.
c) Solid Wood Stain or Sealant: In accordance with MPI
requirements, premium grade. Standard sealants to
conform to ASTM C920 and acoustic sealants to ASTM
C919.
d) Aluminum Finish: Anodized or pre-painted finish in
accordance with AAMA requirements.
Openings in Doors:
a) Glazing:
i. Tempered throughout, conforming to CAN/CGSB12.1-M.
ii. Vestibule: Full height in aluminum framing system.
Hardware:
a) Hinges:
i. Heavy-duty commercial grade Type 304 stainless
steel, ball-bearing style.
ii. Type 304 stainless steel screws.
iii.Do not install piano-style hinges in high use
applications.
b) Hinge Guards: Install to prevent pinching at all play
rooms.
c) Bumpers: Sliding doors to outdoor play should be
equipped with bumpers to prevent finger pinching.
d) Levers: Install lever-style door hardware.
e) Door closers should be slow-release type.
f) Stops: Wall-mounted to prevent tripping.
i. Ensure adequate blocking.
119
Child Care Design & Technical Guideline | S. Doors, Windows, and Hardware
g) Kickplates: Install on both door faces where required.
i. Type 304 stainless steel finish.
ii. Install to height of 200mm (8”).
iii.Install higher kickplates in stroller storage room,
janitor’s room.
iv. Install kickplates on all wood and painted doors.
h) Provide weather stripping on all exterior doors
i) Locks/keying: Confirm requirements with client.
j) Thresholds and Accessories:
i. Exterior thresholds and sliding tracks to be
aluminum or Type 304 stainless steel.
Windows:
1. Install operable sections at appropriate heights to
encourage cross-ventilation. Best Practice
2. Install operable windows and operators out of child’s
reach.
a) Install 100mm restrictors on all operable windows.
b) Utilize concealed hardware where possible.
c) High-level operable windows must be equipped with
automated opener or manual crank at adult height.
120
prepared by Levitt Goodman Architects
3.
4.
5.
6.
7.
Install removable screens in all operable windows
conforming to CAN/CGSB 79.1-M.
Minimum Standard: Double-glazed sealed units. All IGU
units to conform to requirements of CAN/CGSB-12.8.
Consider triple-glazed seal units to offer increased thermal
values. Best Practice
Consider using Low-E coatings on exterior windows.
Install visible dots on glazing for bird protection.
Hardware:
a) Heavy duty Type 304 stainless steel with brushed satin
finish.
b) Ensure levers and/or cranks do not project out into
room.
Frames:
1. All exterior frames and mullions to be thermally-broken.
2. Materials:
a) Hollow Metal: Standard gauge commercial grade steel,
hot dip galvanized.
i. Exterior hollow metal frames to have insulation.
ii. Paint finish in accordance with MPI requirements,
S.
premium grade.
b) Wood: Solid wood, paint or stain finish in accordance
with MPI requirements, premium grade.
c) Aluminum: Anodized or pre-paint finish in accordance
with AAMA requirements.
Fasteners:
1. Type 304 stainless steel.
2. When screws are used, countersink in round, clean-cut
hole and plug with wood plug to match material.
3. Set finishing nails to receive filler.
121
Child Care Design & Technical Guideline | S. Doors, Windows, and Hardware
122
prepared by Levitt Goodman Architects
T. Floor Finishes
T.
GENERAL
Quality Assurance:
1. Warranty: Products and material: Extend for a total of two
years.
Design Requirements:
1. Flooring throughout should not be slippery when wet.
Impermeable flooring with increased slip-resistance to
be provided in janitor’s room, kitchen, laundry room and
washrooms.
2. All selected flooring material shall be durable and easy to
clean and maintain.
3. All selected flooring materials should be compatible with
in-floor heating systems.
4. Provide chemical-resistant flooring in janitor’s room.
5. Consider indoor resilient athletic flooring in play rooms.
Best Practice
6.
7.
8.
Baseboard material to match flooring whenever possible.
Ensure transition strips are installed between different
materials.
For every proposed floor material, review manufacturer’s
123
Child Care Design & Technical Guideline
maintenance program with client rep.
9. At completion of work submit, from same product run,
an extra 5% of gross floor area covered or to nearest full
carton of each colour pattern or type of flooring material
and base for client’s use. Include sufficient amount of
adhesive and finishing material.
10. Floor Drains: When floor drain provided,
slope finish to drain. Best Practice
If floor not sloped, provide threshold at door.
c) Provide paint products meeting MPI “Green Performance Standard GPS-1-05”.
MATERIALS
Finish:
1. Resilient Flooring:
a) All resilient flooring to be non-absorbent, antimicrobial, washable. Linoleum and rubberized cork
materials are preferable to rubber or vinyl.
b) Use matching welding rods for sheet good seams.
Environmental Considerations:
c) Place seams in manner to minimize seams in material.
1. All dimensional lumber and plywood to be Forest
Obtain client approval of seam placement before
Stewardship Council certified wood. Best Practice
installation.
2. Adhesives:
d) Resilient Rubber Base: Provide Resilient Wall Base as
a) Use adhesives, sealants and mastics that have low VOC
per ASTM F1861.
levels per LEED requirements.
i. 100mm high x 3mm thick tapered wedge, including
b) Laminating Adhesive: Water-resistant, low VOC content,
pre-moulded end stops and inner and outer corners.
CSA 0112 Series.
2. Linoleum Composite Tile: Provide linoleum tile flooring as
3. Paints, Stains and Sealants:
per ASTM F2195.
a) All paints and primers to be no VOC content.
a) 2.5mm minimum thickness with polyester backing.
b) Perform work to MPI requirements for premium grade. 3. Linoleum Sheet Goods: Provide linoleum sheet flooring as
124
prepared by Levitt Goodman Architects
T.
4.
5.
6.
7.
8.
per ASTM F2034.
a) 2.5mm minimum thickness with jute backing.
Indoor Resilient Athletic Sheet Flooring:
a) 6mm minimum thickness.
Rubberized Cork Flooring:
a) 4mm minimum thickness.
Vinyl Composite Tile: Provide vinyl tile flooring as per
ASTM F106.
a) 3.0 minimum thickness.
b) Patterned VCT is preferable to solid colours.
Hardwood Engineered Flooring:
a) All engineered hardwood flooring to be compatible with
in-floor heating system if applicable.
Tile: Provide porcelain or ceramic tile as per CAN/CGSB75.1-M.
a) Perform Work of this Section by a company that is
a member in good standing of the Terrazzo Tile and
Marble Association of Canada with proven, acceptable
experience with installations of similar complexity and
scope.
b) All floor tile to be through-body porcelain tile.
c) Keep grout lines to a minimum.
d) Use anti-microbial grout in a mid-tone colour. White is
not acceptable.
e) Seal grout used in flooring applications or use epoxy
grout.
f) Provide tile base with tile flooring. Tile base: Supply
bull-nose, coves, caps and inside/outside corners to
match floor tile. To 100mm min.
9. Natural Stone:
a) Limestone: In accordance with ASTM C568,
Classification III, High Density.
b) Granite: In accordance with ASTM C615.
10. Epoxy:
a) All epoxy flooring to be seamless, “orange-peel”
textured for slip resistance.
b) Provide integral epoxy cove base with epoxy flooring to
height of 100mm minimum.
11. Concrete: Sealed
a) Prepare surface to be dry and free of dust, oil, wax and
other contaminants.
b) Seal concrete surfaces.
125
Child Care Design & Technical Guideline | T. Floor Finishes
12. Concrete: Polished.
a) Provide consistent, non-slip finish.
13. Flooring Trims: Transition strips, reducers, edge strips,
thresholds:
a) Provide appropriate accessories to transition between
different flooring materials.
b) Aluminum accessories. Best Practice
c) Resilient rubber or plasticized vinyl finishing
accessories.
14. Stair Treads:
a) Nosing: Provide rounded profile on all treads.
126
prepared by Levitt Goodman Architects
T.
127
Child Care Design & Technical Guideline | T. Floor Finishes
128
prepared by Levitt Goodman Architects
U. Wall Finishes
U.
GENERAL
Quality Assurance:
1. Masonry Work: Provide masonry work in accordance with
CSA A370, CSA A371, and CSA S304.1.
2. Warranty: Products and Material: Extend for a total of two
years.
Design Requirements:
1. All wall corners must be eased and rounded to prevent
injury.
2. Provide walls in corridors and play rooms that are resistant
to impact, scuffing and peeling from the use of tape to
display graphic material.
3. Select durable materials to a certain height in heavytraffic, stroller storage and play zones. No unprotected
drywall to a height of 1220mm unless impact resistant.
4. Provide wall protection in kitchen between top of counter
and underside of upper cabinet or to 1800mm minimum
above floor.
5. Provide wall protection in laundry room to 1200mm
above finished floor, minimum, and 600mm above sink
129
Child Care Design & Technical Guideline
6.
7.
8.
9.
minimum. Exposed drywall to be moisture resistant.
Provide wall protection in janitor’s room to 1800mm above
finished floor, minimum. Exposed drywall to be moisture
resistant.
For every proposed wall material review manufacturer’s
maintenance program with client rep.
Prepare all substrate surfaces to be dry and free of dust,
oil, wax and other contaminants.
At completion of work submit, from same product run,
an extra 10% of gross wall area covered or to nearest full
carton of each colour paint or type of material for client’s
use. Include sufficient amount of adhesive and finishing
material.
Environmental Considerations:
1. All dimensional lumber and plywood to be Forest
Stewardship Council certified wood. Best Practice
2. Adhesives:
a) Use adhesives, sealants and mastics that have low VOC
levels per LEED requirements.
b) Laminating Adhesive: Water-resistant, low VOC content,
130
prepared by Levitt Goodman Architects
3.
CSA 0112 Series.
Paints, Stains and Sealants:
a) All paints and primers to be no VOC content.
b) Perform work to MPI requirements for premium grade.
c) Provide paint products meeting MPI “Green
Performance Standard GPS-1-05”.
d) Acoustic sealants: To be in accordance with ASTM
C919.
MATERIALS
Substrate:
1. Wet Areas: Install at wet areas including WCs, kitchen,
play room kitchenettes, janitor and laundry rooms.
a) Concrete block conforming to CSA A165 Series-M.
b) Cement board conforming to ASTM C1629 or fiberreinforced gypsum board conforming to ASTM C1278.
2. High-Activity Areas: Such as gross-motor area, corridors.
a) Concrete block conforming to CSA A165 Series-M.
a) Impact-resistant GWB Conforming to ASTM C1629.
U.
Acoustic Insulation:
1. Provide acoustic/fire insulation batts for partitions in
Supervisor’s office and staff room. Best Practice
2.
Acoustic Sealant:
1. Provide acoustic sealant conforming to ASTM C919 for all
acoustically insulated partitions.
2. Provide sealant for use under floor runner tracks, at
partition perimeter both sides and at openings, cutouts and penetrations, concealed from view in the final
installation.
Finish:
1. Paint:
a) Use MPI standard premium grade.
b) Remove, store and reinstall any hardware and
accessories.
c) Use satin finish or semi-gloss. No matte finish.
d) If drywall is used in kitchen use high-gloss paint finish.
e) Consider epoxy paint in high activity areas.
f) Conform to gloss reflectance definitions listed in MPI
3.
4.
Specification Manual.
Tile: Provide ceramic tile as per CAN/CGSB-75.1-M.
a) Perform Work of this Section by a company that is
a member in good standing of the Terrazzo Tile and
Marble Association of Canada with proven, acceptable
experience with installations of similar complexity and
scope.
b) Wall and Backsplash Tile: Ceramic.
i. Provide to a height of 1220mm minimum in
janitor’s room and washrooms.
c) Grout: Anti-microbial and sealed for easy cleaning. Use
epoxy grout in kitchen.
Polyester Resin Panels:
a) Consider providing polyester resin panels to a height
of 915mm in corridors and 1220mm in WCs. Use
countersunk fasteners.
Linoleum Bulletin Board Sheet Material:
a) Linoleum sheet to conform to the requirements of
ASTM F2034.
b) Install in areas that need wall protection and areas for
display, such as corridors, entry zones.
131
Child Care Design & Technical Guideline | U. Wall Finishes
5.
6.
Cork:
a) Consider cork panels in high activity areas for acoustic
properties.
Stainless Steel Sheet:
a) Install in kitchen to underside of upper cabinets.
b) Use 14 ga. Type 304 stainless steel, conforming to
ASTM A167.
c) Seal joints and edges with clear silicone.
d) Perform stainless steel work in accordance with
NAAMM, Code of Standard Practice for the Metal
Industry, Workmanship, Class 1.
Corner Guards & Wall Protection:
1. Corner Guards: Fabricate corner guards from high-impact
rigid vinyl sheet with radiused edges.
a) Install corner guards to a height of 1220mm or to
height of wall protection.
b) Install rounded profile corner guards.
2. Consider clear, removable plexiglass panels to protect wallmounted art work in corridors and play rooms.
132
prepared by Levitt Goodman Architects
Fasteners:
1. Use fasteners suitable to size and nature of components
being installed.
2. Use heavy-duty attachments for wall-mount panels.
3. When screws are used, countersink in round clean-cut hole
and plug to match material.
U.
133
Child Care Design & Technical Guideline | U. Wall Finishes
134
prepared by Levitt Goodman Architects
V. Ceiling Finishes
V.
GENERAL
Quality Assurance:
1. Warranty: Products and material: Extend for a total of two
years.
Design Requirements:
1. Ceilings should provide acoustic absorption and reflect
light.
2. Ceilings in kitchens and WCs to be finished moistureresistant drywall.
3. Consider not finishing the ceiling in laundry room, janitor’s
room and service spaces. If ceiling finished, consider
moisture-resistant drywall.
4. For every proposed ceiling material review manufacturer’s
maintenance program with client representative.
5. Prepare all substrate surfaces to be dry and free of dust,
oil, wax and other contaminants.
Environmental considerations:
1. All dimensional lumber and plywood to be Forest
Stewardship Council certified wood. Best Practice
135
Child Care Design & Technical Guideline
2.
3.
Adhesives:
2.
a) Use adhesives, sealants and mastics that have low VOC
levels per LEED requirements.
b) Laminating Adhesive: Water-resistant, low VOC content,
CSA 0112 Series.
Paints, Stains and Sealants:
a) All paints and primers to be no VOC content.
3.
b) Perform work to MPI requirements for premium grade.
c) Provide paint products meeting MPI “Green
Performance Standard GPS-1-05”.
d) Acoustic Sealants: To be in accordance with ASTM
C919.
MATERIALS
Finish:
1. GWB: Provide gypsum board as per ASTM C1396 and
finished in accordance with ASTM C840.
a) Access hatches should be GWB with reveal. Recess
flush with ceiling. Best Practice
Paint to match.
b) If steel hatches are used, paint to match ceiling.
136
prepared by Levitt Goodman Architects
Paint:
a) Use MPI standard premium grade.
b) Use paint finishes with satin finish for washability.
c) When painting existing space, remove, store and
reinstall any light fixtures, fire protection equipment
and accessories.
Acoustic Ceiling Tile: Provide acoustic ceiling products as
per ASTM E1264.
a) Provide suspension system, acoustic tiles and
accessories in accordance with ASTM C635 with white
finish.
b) Provide an acoustic ceiling tile with a Noise Reduction
Coefficient of >0.50. Provide standard size 610mm x
1220mm (24” x 48”).
c) Provide anti-microbial and stain guard ceiling tiles.
Best Practice
d) Do not install ACT tiles in kitchen, washrooms, laundry
room, janitor’s room.
e) Carefully cut openings in acoustic tiles to
accommodate fixtures, etc.
V.
Mouldings and Accessories:
1. Provide corner caps, edge moulding, hold-over clips, metal
closures and trim in same finish and colour as ceiling tees.
Acoustic Treatments:
1. If walls do not extend to underside of deck, install acoustic
batting over ceilings of Supervisor’s office and meeting
rooms. Consider installing additional acoustic batting at
locations including staff rooms.
2. Consider installing acoustic treatments if walls do not
extend to ceiling in shared spaces such as play rooms.
Fasteners:
1. Use fasteners suitable to size and nature of components
being installed.
2. When screws are used, countersink in round clean-cut hole
and plug to match material.
137
Child Care Design & Technical Guideline | V. Ceiling Finishes
138
prepared by Levitt Goodman Architects
W. Wall-Mounted and Miscellaneous Accessories
W.
GENERAL
Quality Assurance:
1. Ensure adequate blocking to support accessories.
2. Warranty: Products and material: Extend for a total of ten
years.
Design Requirements:
1. Finish to be corrosion-resistant Type 304 stainless steel in
accordance with ASTM A167 where required.
2. All accessories to be commercial grade.
3. Provide locks with keys on accessories where indicated.
4. Ensure washroom accessories are recessed where possible
to avoid injury.
5. Ensure all accessories are easy to clean and sanitize.
6. Minimize touch points, especially in children’s WC.
Environmental Considerations:
1. Adhesives:
a) Use adhesives, sealants and mastics that have low VOC
levels per LEED requirements.
b) Laminating Adhesive: Water-resistant, low VOC content,
139
Child Care Design & Technical Guideline
2.
CSA 0112 Series.
Paints, Stains and Sealants:
a) All paints and primers to be no VOC content.
b) Perform work to MPI requirements for premium grade.
c) Provide paint products meeting MPI “Green
Performance Standard GPS-1-05”.
MATERIALS
1.
2.
3.
Stainless Steel:
a) Sheet Metal: ASTM A167, Type 304.
b) Tubing: ASTM A312, Type 304.
Sheet Steel: ASTM A653M, Z275; Cold-rolled, commercial
quality, surface preparation and pretreatment as required
for applied finish.
Fasteners, Screws and Bolts: Type 304 stainless steel,
tamper-proof.
Washroom Accessories:
1.
Adult and Barrier-free WC:
a) Toilet Tissue Dispenser:
i. Finish: Type 304 stainless steel or white porcelain.
140
prepared by Levitt Goodman Architects
b)
c)
d)
e)
f)
ii. Lockable.
iii.Surface-mounted, 1-roll dispenser.
Soap Dispenser:
i. Finish: To be discussed with client.
ii. Wall-mounted push button dispenser.
iii.Touch-free dispenser. Best Practice
iv. Lockable.
Paper Towel Dispenser and Receptacle:
i. Recessed or semi-recessed Type 304 stainless steel
universal paper towel dispenser.
ii. C-fold or multi-fold paper towel.
iii.Integrated leak-proof receptacle.
Grab Bars:
i. Type 304 stainless steel with textured surface.
Automatic Hand Dryer:
i. Install energy efficient model.
ii. Finish: Type 304 stainless steel or white.
Mirrors: Provide mirrors as per CAN/CGSB 12.5M.
i. WC mirrors: Minimum 6mm thick tempered glass
with Type 304 stainless steel frame.
ii. Barrier-free tilt mirror: Minimum 6mm thick
W.
2.
tempered glass with Type 304 stainless steel frame.
iii.Minimum 6mm thick tempered glass with Type 304
stainless steel frame.
g) Hooks:
i. Locate one hook near toilet.
ii. Locate one hook on back of WC door.
h) Sanitary Napkin Disposal:
i. Self-closing, wall-mounted.
i) Shelves:
i. Folding with automatic spring return when not in
use.
ii. Metal Shelving: Rust-prohibitive undercoat, durable
baked enamel finish.
Children’s WC:
a) Toilet Tissue Dispenser:
i. Finish: Type 304 stainless steel or white porcelain.
ii. Lockable.
iii.Surface-mounted, 1-roll dispenser.
iv. Mounting Heights:
i. Infant: 280mm (11”)
ii. Toddler: 330mm (13”)
iii.Preschool: 380mm (15”)
b) Soap Dispenser:
i. Store-bought bottles on countertop preferred.
c) Mirrors:
i. Minimum 6mm thick tempered glass with Type 304
stainless steel frame.
ii. Provide one mirror per sink.
iii. If child-height sink is provided in infant change
area, locate to accommodate mirror.
iv. Use shatterproof reflective material under upper
cabinets above change table.
d) Paper Towel Dispenser and Receptacle:
i. Recessed to avoid injury. Best Practice
Or semi-recessed Type 304 stainless steel universal
paper towel dispenser.
ii. C-fold or multi-fold paper towel.
iii.Integrated leak-proof receptacle.
iv. Mounting heights:
i. Infant: 710mm (28”)
ii. Toddler: 762mm (30”)
iii. Preschool: 787mm (31”)
141
Child Care Design & Technical Guideline | W. Wall-Mounted and Miscellaneous Accessories
e) Cup Dispenser:
i. Surface-mounted.
ii. Mounting heights:
i. Infant: 710mm (28”)
ii. Toddler: 762mm (30”)
iii.Preschool: 787mm (31”)
f) Grab Bars (barrier-free stalls only):
i. Type 304 stainless steel with textured surface.
ii. Install fold down arm style. Install one bar on
either side of the toilet.
iii.Mounting heights:
i. Toddler: 305-355mm (12-14”)
ii. Preschool: 455-510mm (18-20”)
iii.School age: 510-635mm (20-25”)
g) Adjustable-height Change Bench:
i. Bench should adjust from transfer height to
changing height.
h) Fixed-height Change Bench:
i. Surface-mounted seat of 13mm phenolic.
ii. Mounting Heights:
i. Preschool: 305mm (12”)
142
prepared by Levitt Goodman Architects
iii.Provide rough-in for ceiling lift.
i) Washroom Partitions:
i. Ceiling or wall-mounted is preferred.
i. Install pilaster boot assembly and wall
connections in Type 304 stainless steel.
ii. Mounting Height: Toddler: 762mm (30”)
iii.Mounting Height: Preschool: 965mm (38”)
ii. Hardware:
i. All hardware to be heavy-duty Type 304
stainless steel with satin finish.
ii. Type 304 stainless steel frame.
Play Room and Staff Room Kitchenettes,
Laundry Room and Kitchen Accessories:
1. Paper Towel Dispenser:
a) Type 304 stainless steel finish.
b) C-fold or multi-fold paper towel.
c) Lockable.
d) Wall-mounted style.
2. Soap Dispenser:
a) Finish:
W.
3.
i. Type 304 stainless steel.
b) Wall-mounted push button dispenser.
c) Mount so that spilled soap stays on counter.
Shelf:
a) Wall-mounted, corrosion-resistant shelf. Locate near
sink (Laundry Room only).
Janitor Room Accessories:
1. Janitor shelf with mop/broom holder and hooks:
a) Heavy duty, corrosion-resistant 18 ga. Type 304
stainless steel finish.
2. Chemical dispensing unit:
a) 4-reservoir dispensing system, wall-mounted and
lockable.
b) Mount securely above janitor sink.
Bulletin Boards:
1. Material:
a) Uni-coloured linoleum, natural homogeneous, resilient,
tackable and washable surface conforming to ASTM
F2034.
2.
b) 6mm thick self-healing sheet material with jute
backing.
c) Seamlessly join sheets to avoid division within large
bulletin board surfaces.
d) Consider plexiglass protective covers conforming to
CGSB-12.12 for lower bulletin boards.
e) Cork with aluminum or wood reveal trim.
Frame:
a) Anodized aluminum 3mm (1/8”) reveal framing system
(no overlap frame) preferred. Elite reveal framing
system by Architectural School Products or approved
alternative.
Whiteboards:
1. Material:
a) Consider porcelain-on-steel writing surface, dry
erasable and washable, magnetic. Best Practice
b) Provide High Pressure Laminate writing surface, dry
erasable and washable.
c) Select colour with client representative.
2. Anodized aluminum 3mm (1/8”) reveal framing system
143
Child Care Design & Technical Guideline | W. Wall-Mounted and Miscellaneous Accessories
(no overlap frame) and chalk/pen rail preferred. (Elite
reveal framing system by Architectural School Products or
approved alternative).
Lockers:
1. Staff Room: Lockable, 1/3 size (triple tier) lockers.
2. Confirm number required with staff.
Fasteners:
1. All fasteners to be chrome-plated or stainless steel Type
304, non-ferrous tamperproof type screws and bolts.
2. Ensure sufficient blocking and anchorage for wall-mounted
items.
3. Use heavy-duty attachments for wall-mount accessories.
4. Conceal all Fasteners: When screws are used, countersink
in round clean-cut hole and plug with wood plug with
finish to match adjacent finish. Set finishing nails to
receive filler.
144
prepared by Levitt Goodman Architects
W.
145
Child Care Design & Technical Guideline | W. Wall-Mounted and Miscellaneous Accessories
146
prepared by Levitt Goodman Architects
X. Window Treatments and Solar Control
X.
GENERAL
Quality Assurance:
1. Do not install PVC blinds, vertical or venetian blinds.
2. Ensure no cords are within reach of children when children
are on the floor or furniture, or provide some other child
safety approach with regard to the cord.
3. Ensure adequate blocking to support window treatments
and shading devices.
4. Warranty: Products and material: Extend for a total of ten
years.
Design Requirements:
1. Bring as much natural light into building as possible.
2. Window treatments should be cleanable and durable.
3. Roller shades must be installed at all openings to exterior
for lockdown situations.
4. To support passive heating and cooling, prevent direct
summer daylight from reaching interior surfaces, but
allow direct daylight to warm the interior in the winter.
The above point assumes that the HVAC system zoning is
compatible with this approach.
147
Child Care Design & Technical Guideline
MATERIALS
Fixed Sun Shading:
1. Exterior shading devices and/or extending building
Manual Roller Shades:
overhangs offer the benefits of stopping solar radiation
1. Wall- or ceiling-mount depending on site condition.
from entering the building. This will aid in the energy
2. On exterior openings, mount shades above glazed doors for
efficiency of the building and provide a higher level of
lockdown purposes.
environmental comfort. It also allows for clear views out
3. Best practice is electric switch operation, or manual crank
the window as interior shades do not have to be drawn.
style, wall-mounted at adult height for safety.
Careful consideration must be taken by the designer to
4. Manual chain operation roller shades must be secured at
respond to building aesthetics.
adult height.
5.
Fabric:
a) Sheer woven with 3% openness factor.
b) Fabric shall be certified by an independent laboratory
to pass CAN/ULC-S109 Large Flame Test.
Exterior Awnings:
1. Retractable Awnings: Manual crank operated or electric
controls. Awnings prevent solar radiant energy from
penetrating into the building envelope. Best Practice
2. Locate controls inside rooms at adult height.
148
prepared by Levitt Goodman Architects
Solar Shelf:
1.
Consider installing an interior window shelf to reflect
incoming sunlight toward ceiling.
a) This protects occupants from direct sunlight and
distributes natural sunlight deeper into the room,
allowing blinds to remain open for direct views outside.
X.
149
Child Care Design & Technical Guideline | X. Window Treatments & Solar Control
150
prepared by Levitt Goodman Architects
Y. Mechanical Items
Y.
GENERAL
Quality Assurance:
1. Locate all mechanical equipment in a dedicated room.
2. Locate meters, controls, equipment and fixtures requiring
maintenance in readily accessible areas.
3. Avoid placing exterior mechanical equipment in or
adjacent to the outdoor play space.
Design Requirements:
1. Back flow preventers should be installed as per OBC.
MATERIALS
HVAC:
1. Main System:
a) General: System to be stand alone where possible.
Packaged forced air units are preferred. Where facility
is part of a larger building and will be connected to a
central system, ensure that control is provided locally
to suit child care facility hours.
b) Heating Systems: If baseboard or wall heaters are
installed, protect with shields to prevent children
151
Child Care Design & Technical Guideline
2.
3.
4.
coming into contact with hot surfaces.
c) Provide a heated vestibule. Installation of low profile or
in-wall heaters is preferred over baseboard style.
d) Air Conditioning:
i. Should be zone controlled for children’s comfort.
ii. If central air is not provided, provide through-wall
units as opposed to window units.
Radiant Floor Heating: Required in infant rooms.
Recommended in toddler areas. Best Practice
a) Ensure flooring material is compatible with selected
radiant floor system.
b) Control: Install individual temperature/timer control in
each room.
c) In rooms with radiant flooring, shading devices are
especially important to control.
Duct Silencers:
a) Consider where required to maintain acceptable noise
levels with forced air systems.
Filters:
a) 50mm disposable type.
152
prepared by Levitt Goodman Architects
5.
6.
Zoning and Controls:
a) DDC (direct digital control) with module for internet
access and future control.
b) Provide separate zones for all sleep rooms, play rooms
and gross motor areas.
c) Perimeter areas to be a separate zone. Best Practice
d) Install carbon dioxide sensors for fresh air control in
high occupancy rooms on packaged forced air systems.
Diffuser and Grille Placement:
a) Low level supply and high level return. Ensure that
low level outlets have no sharp edges or holes where
children’s fingers can be lacerated or wedged. Best
Practice
7.
8.
9.
Humidification: Required.
Ceiling Fans:
a) Equip with local speed control switches. Best Practice
Exhaust Systems:
a) Provide exhaust vents (including but not limited to the
kitchen exhaust, laundry dryer vent, washroom and
change area vents and mechanical combustion vents).
Vents should not outlet in the outdoor play area.
Y.
b) Provide higher than Code minimum exhaust rates for
change areas and janitor’s room.
c) Provide means to start exhaust systems serving main
kitchen, children’s change areas and washrooms prior
to staff arrival in the morning.
d) Ensure adequate ventilation and exhaust fan in WC and
change room areas. The fan should be on a separate
switch from lights.
e) Adult washroom exhaust to be connected to room light
switch.
f) Main Kitchen: Provide minimum two-speed residential
type range hood for kitchen where electric stove is
installed.
g) Provide vapour hood over dishwasher in main kitchen
and interlock to dedicated exhaust fan.
h) Hub Room: Provide transfer fan with reverse-acting
thermostat; air conditioning to be reviewed for large
hub rooms (site specific).
i) Locate equipment to minimize duct run.
j) Provide heat recovery. Best Practice
10. Energy Efficiency:
a) Provide high efficiency equipment.
b) If required, coordinate with Building Automation
System (BAS) to control temperatures and equipment
to facility schedule.
c) Programmable sensors to have minor local temperature
adjustment and lockout feature.
d) Control kitchen and children’s washroom and change
area exhaust fans by BAS.
e) Employ night setback features.
f) Employ occupancy controls to allow larger temperature
range in children’s rooms when room is vacant.
Plumbing and Drainage:
1. Water Supply:
a) Separate meter or check meter required.
2. Water Heater:
a) High efficiency (natural gas where possible); consider
gas-fired tankless unit(s).
3. Sanitary Drainage:
a) Provide heat recovery. Best Practice
153
Child Care Design & Technical Guideline | Y. Mechanical Items
4.
5.
6.
7.
Stainless Steel Floor Drains:
a) Required in all washrooms, kitchen, laundry room,
janitor’s room, basement, stroller storage rooms and
outdoor storage. Ensure floor is sloped appropriately.
Hot Water Supply:
a) Provide reduced hot water temperature water supply to
all children’s sinks via a central mixing valve. A local
mixing valve is acceptable for the adult washroom.
b) Provide high temperature water in kitchen, laundry
room and janitor’s sink.
Toilets:
a) Install low-flow fixtures; dual flush toilets. Best Practice
b) Infant and toddler toilets: 10” high bowl, child-size
round bowl (American Standard Baby Devoro or equal)
tank style preferred. Provide toilet seat with hand grips.
c) Preschool toilets: Adult size tank style preferred.
d) Adult toilets: Manual dual flush valve desired. Wallhung style. Best Practice
Sinks :
a) General:
i. There should be no splash at sinks. For example, do
154
prepared by Levitt Goodman Architects
not use shallow sinks with gooseneck faucets.
b) Play Room:
i. Art sink: Minimum 250mm deep stainless steel
single bowl sink.
ii. Install clay/sediment traps on all play room sinks.
iii.Kitchenette sink: Minimum 200mm deep stainless
steel single bowl sink.
iv. Faucet to include spray nozzle on flexible hose for
toy cleaning.
c) Janitor’s Room:
i. Install a floor-mounted mop sink with recirculating
pump type backflow preventer on water supplies.
Equip with swivel faucet and hose.
ii. Provide a separate hand wash sink with eye wash
station.
d) Kitchen:
i. Triple stainless steel sink, integral to counter.
Provide gooseneck kitchen faucet and hand-held
attachment that can reach to all sinks. Ensure
adequate overflow prevention is provided in sink
design.
Y.
e)
f)
g)
h)
ii. Provide a separate single basin hand wash sink
minimum 600mm away. Locate near door. Should
be pedal-operated or automatic controls.
iii. Provide recessed grease interceptor.
Laundry Room:
i. Install a suitably sized single laundry sink or tub
with gooseneck faucet and hand-held attachment
on hose.
Children’s Washrooms:
i. Mount sinks in a vanity at height suitable for
children.
ii. Barrier-free sink to be semi-counter mounted type.
Infant/Toddler Change Area/Washroom:
i. Provide an in-unit stainless steel sink for hand
washing at change table, or - if feasible - one that
is deep enough to wash a child. Provide paddle
handles and a hand-held shower attachment.
ii. A height-appropriate separate child-sink should be
provided for older infants.
Barrier-free Adult Washroom:
i. Wall-mounted sink complete with no-touch faucet.
8.
9.
i) Staff Room:
i. Barrier-free, single basin stainless steel sink with
paddle faucet.
j) Outdoor Play Area:
i. Art Sink: Provide a deep sink (industrial) and
water sources at different levels for varied play
opportunities. Provide running taps. Drain water into
gravel bed underneath sink.
ii. Handwashing: Provide an outdoor sink in play area
for handwashing. Best Practice
iii.Provide heat tracing on outdoor water supplies.
Drains may terminate onto grade but should not
result in ice hazard.
Faucets: Make faucets accessible to children when
intended. For example, mount faucet at side of sink so it is
closer to the child.
a) Use faucets that minimize splash and install
temperature control to avoid scalding.
b) Energy Efficiency: Low-flow aerators on faucets.
Additional Water Connections/Rough-ins to Appliances:
a) Washing machine.
155
Child Care Design & Technical Guideline | Y. Mechanical Items
b) Dishwasher.
10. Outdoor Play Areas:
12. Fire Protection System:
a) Hose Bibs: Provide vandal-proof, non-freeze type
a) Fire Extinguishers: Strategically locate to avoid high
hose bibs complete with backflow preventer to City
activity children areas.
standards in outdoor play area and outdoor garbage
areas .
b) Install water supply to:
i. Water table/play area
ii. Irrigation system
iii. Water fountain.
iv. Hose bib.
c) Site Drainage: Provide catch basins with sediment pit
(to collect sand) in outdoor play area. Basin grate to be
heel-proof or equivalent (smaller perforations to prevent
children from dropping toys into the basin).
d) Supply water fountain in outdoor play area.
e) Potable water must be supplied at all outdoor water
play areas.
11. Natural Gas:
a) Separate meter or check meter required.
156
prepared by Levitt Goodman Architects
Y.
157
Child Care Design & Technical Guideline | Y. Mechanical Items
158
prepared by Levitt Goodman Architects
Z. Electrical Items
Z.
GENERAL
Quality Assurance:
1. Provide a dedicated electrical room.
2. Locate meters, controls, equipment and fixtures requiring
maintenance in readily accessible areas.
3. Avoid placing equipment in or adjacent to the outdoor play
space.
Design Requirements:
1. Lighting should be designed to be bright but calming.
Lighting should not be harsh.
2. Consider installing a variety of fixture types and lighting
levels.
MATERIALS
Lighting:
1. General:
a) Lighting should be easy to maintain and easy to change
bulbs.
b) No light fixtures to have exposed bulbs.
c) Provide indirect lighting. Overhead fluorescents are not
159
Child Care Design & Technical Guideline
2.
preferred.
d) Provide valence lights under all upper cabinets over
counters complete with separate local switch.
Specific Concerns by Area/Rooms:
a) Corridors and Public Areas:
i. Provide appropriate night lighting in main
vestibule, corridors and rooms with street exposure
(strategically located depending on site).
b) Offices:
i. Provide a variety of lighting types including task,
adjustable, indirect overhead.
c) Staff Room:
i. Lighting should be calm—non-fluorescent. Consider
a variety of lighting sources including dimmable pot
lights, floor/table lamps, under-counter lighting at
kitchenette.
d) Play Rooms:
i. Lighting: Provide dimmable fixtures. Best Practice
ii. If dimmable fixtures are not possible, ensure that a
minimum of half of the light fixtures are separately
switched.
160
prepared by Levitt Goodman Architects
e)
f)
g)
h)
iii. Provide variations in lighting types with separate
switching for each type.
iv. Diffuse lighting preferred. For example, fluorescent
fixtures with a large percentage of up-lighting.
Sleep Rooms:
i. Cove lighting preferred in sleep rooms.
ii. Provide calm adjustable lighting. Consider installing
dimmable lights or sconces. Locate fixtures so light
does not shine directly in children’s eyes.
iii.Lighting should be on a separate switch from the
rest of the play room.
Change Area:
i. Fixtures in change area to be shielded for glare.
Activity Room WCs:
i. Consider under-counter lighting in dark WCs for
children. Put on a separate switch.
Storage:
i. Provide lighting in large storage cabinets to be
energized by door switch.
ii. Provide lighting and electrical outlet in outdoor
equipment storage.
Z.
3.
4.
Fixture Types: Lenses required on fixtures in all areas:
a) Fluorescent: 1200mm long T5 desired, 1200mm long
T8 acceptable.
b) LED fixtures: Best Practice
c) Minimize use of incandescent fixtures to improve
energy efficiency.
d) Review colour and temperature quality of light fixture
lamps with client (CRI and K-value).
Controls:
a) Provide master switch to de-energize all fixtures, except
night lights, at staff entrances.
b) Sensors:
i. Dual technology motion sensor switches to be used in adult and barrier-free washrooms, laundry room
and janitor’s room. Review other locations with
client.
ii. Daylight Sensors: Confirm locations with staff.
c) Lighting in perimeter of rooms with glazing to be
switched separately with photocell wired-in series.
Best Practice
d) Allow for multiple light levels in activity rooms and
5.
6.
gross motor area. Best Practice
e) In washrooms provide a separate switch for lights and
exhaust fan.
Emergency Lighting:
a) required in washrooms, office, janitor’s room and
kitchen, corridors.
Exterior and Site Lighting:
a) Required at all entrances, exits, pathways to parking,
outdoor play areas and outdoor storage container.
b) Control of outdoor play area lighting to be by photocell
and motion sensor.
c) All other exterior lighting to be controlled by photocell
(on) and 7-day timer (off).
Power:
1. Metering: Separate or check meter when in shared facility.
2. Provide more electrical outlets than the minimum required
by Ontario Building Code (residential), at various heights
3.
and childproof.
Ensure convenience outlets are located in corridors and
gross motor areas.
161
Child Care Design & Technical Guideline | Z. Electrical Items
4.
Provide above-counter GFI outlets at all wet areas
including janitor’s room, laundry room, kitchen,
kitchenettes.
5. Distribution: Ensure service size includes future airconditioning load for entire facility.
6. Provide weatherproof electrical outlets in outdoor play
areas and outdoor storage sheds.
7. Appliances requiring separate circuits: Microwaves,
fridges, photocopier, stove/oven, dishwasher.
8. Provide three over-counter duplex outlets for each
kitchenette.
9. Heat-trace sloped roofs where snow/ice might fall on
pedestrians.
10. Heat trace barrier-free ramps where not covered.
11. Heat-trace exterior entry zone. Best Practice
12. Provide power and conduit rough-in for all barrier-free
doors.
Fire Alarm System:
1. Strobes: May bring on an epileptic seizure. To the extent
allowed, avoid locating strobes where they will impact
162
prepared by Levitt Goodman Architects
2.
children.
Fire alarm pulls must be equipped with protective, childproof covers.
Information Technology:
1. Cabling: MCCS facilities to follow latest City of Toronto
Standards.
2. Provide Hub Room/Closet. Location should not require
access through other restricted access room – to be
reviewed (site specific).
3. All cabling to be in conduit or raceway system.
4. UPS: Locate in hub room.
5. Voice and Data:
a) Provide voice and data outlets in all offices (including
fax line in main office), play rooms, staff room and
kitchen.
Security System:
1. Main Entry Access Equipment:
a) Provide a video intercom system connected to
Supervisor’s office, all play rooms and main kitchen in
Z.
2.
the centre. Equip in-room intercoms with remote door
release buttons.
b) Keypad/card reader access required at main and
second staff entrance if applicable.
Entry System Sequence:
a) Automatic door operators required at main entrance
and should be connected to the key pad access system.
Audio-visual:
1. Rough-in conduit and power for projectors in meeting and
staff rooms.
163
Child Care Design & Technical Guideline | Z. Electrical Items
164
prepared by Levitt Goodman Architects
Feedback
Please take a few moments to give feedback. Submit your
comments to: [email protected], and mention “Design
Guidelines” in the subject line.
Part A:
General Comments on the Design and Technical Guideline:
Part B:
Suggestions for Revising or Expanding the Current Design and
Technical Guideline. Please include:
• Section including page #:
• Description of Suggested Revision (attach additional material
if necessary):
• Reason for Request:
Contact:
Name:
Company:
Contact Email (for receipt of guide revisions and updates):
165
Child Care Design & Technical Guideline
www.toronto.ca/children/childcaredesign.pdf
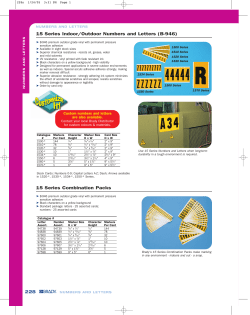


© Copyright 2026