
Building an Amateur Radio Receiver
Building an Amateur Radio Receiver Gene Dorcas, W5DOR Dec 17, 2:23pm, 2014 Here I'm just documenting my thoughts and progress of designing a homebrew receiver. As I proceed with this documentation it keeps looking like a book and much more than I ever intended to write. This is not really intended to be a book for publication but instead, a set of notes that I collect as I develop my receiver. My hope is that someone might find these notes useful. Today I'm adding notes on actually building a receiver. See Chapter 11 . I had this enclosure and some knobs and think my first simple superhet receiver might look something like this. I like a big tuning dial knob and a digital frequency display. Introduction: By using commercially manufactured ham gear from the time you first receive your ham license to the present you are depriving yourself of the complete thrill that a ham receives when operating his/her own designed and built gear. If you have never built a ham receiver, perhaps this is the time for you to gather some parts, heat up your soldering iron and get busy. Ham radio homebrew provides a variety of exciting experiences. Foremost is being able to operate successfully a ham station that has been built on your own workbench. In this book we'll look at the receiver in its simplest form and then progress by adding features to improve its performance. A piece of ham gear built from a kit is not a homebrew rig by definition but if you're hesitant about getting into the homebrewing arena you may want to start off with a kit to get your feet wet with soldering and assembly techniques. Some of the kits on QRPme.com or 4SQRP.com are very good. I've built the 4SQRP SS-40 receiver and the NS-40 transmitter. Both worked very well. I haven't built any QRPme kits but they must be good because they have quite a following. If you decide to use "manhattan" style assembly you'll want to purchase some of the MeSquares and MePads from QRPme.com Observe the use of MeSquares and MePads in the work of Dave, AA7EE . (Scroll down to where Dave begins to add the circuitry. Doesn't he do beautiful work ). Several of Dave's blogs show how to make nice enclosures from pc board material. My lifetime experience as an electrical engineer was 99% in the digital world and when I retired and took up my ham radio hobby again I realized there's lots of analog circuits and designs that I'm not familiar with. This book will be full of published circuits that are tried and true because I want to have some degree of success as soon as possible. In the beginning, back in the 1930's when my dad was a ham, everyone built their own receiver. He and I built a short-wave receiver from scratch when I was a kid. He used some of the coil winding data from his 1936 ARRL handbook. Of course it used vacuum tubes. It had hand-wound coils, band-switching, 3 tubes and was powered by a B+ battery and a C battery. We listened on some old crystal headphones. I didn't know the morse code yet so I listened to foreign broadcast stations and we used that receiver for several years. When I finally got my ham ticket dad bought a surplus BC-342 receiver that worked quite well, or at least from my experience it seemed to work very well. When I got my general ticket a year later we bought a HQ-170 receiver and a Johnson Viking II transmitter. I worked the world on 20meter phone (AM). I still, however, constantly had in the back of my mind the desire to build equipment of my own. With the integrated circuits and the modern day components available today one can build his/her own receiver with performance approaching state-of-the-art commercial equipment.. Most homebrewers building their first receiver will start with a direct-conversion or regenerative receiver because of its simplicity. However, reception can be improved dramatically when moving from the simple DC (Direct-Conversion) receiver to the basic superheterodyne receiver. Some of the most noticeable improvements are much better selectivity, single-signal reception, and elimination of microphonics and common-mode hum. Most superhets will also be able to include AGC (automatic gain control) circuitry and a S-Meter. The most used piece of equipment in the ham shack is the receiver. It facilitates communications with other stations and is also a much needed piece of test bench equipment. The PHSNA Yahoo group is building a test receiver for use on the bench. After reading "Crystal Sets to SSB - K0IYE" by Frank Harris, K0IYE, ARRL Handbook(s), EMRFD, Solid State Design for the Radio Amateur by Wes Hayward W7ZOI and Doug DeMaw W1FB , and Doug DeMaw's books, "Design notebook" and "QRP Notebook", I began to develop a plan to build a ham receiver. I also communicated with Frank Harris, K0IYE, via email. His book is valuable because it goes through the thought processes Frank went through while building his receivers including the errors and problems his receivers had and how he overcame them. His latest version is Rev.13. As I learn about receiver design I believe the best starting point for anyone that wants to learn about receivers is the Receiver Design Basics chapter in the Solid State Design for the Radio Amateur. That publication has been out of print for many years but is still a very good resource for the homebrewer and can usually be found for sale on amazon.com. Since I have a great deal of experience with integrated circuits I will use them to the best advantage in this receiver design. I also plan to use a small microcomputer to make the internal functions easier to use. I think the Arduino Uno or Mega 2650 will work just fine. The Arduino programming is done in a simplified version of "C" and since the Arduino is "open source" there is an vast amount of support. I will have to shield these digital signals well to keep down the noise they might generate in the more sensitive analog receiver circuits. M0XPD shows using the Arduino for oscillators in his projects. Be careful using digital ICs in a receiver !!! They radiate all kinds of noise and have to be treated with special care to be used successfully. Their output has to be filtered well to yield a pure sine wave signal for input to a mixer or detector. You'll have to take special precautions in shielding any circuit carrying digital signals. We'll discuss it in detail later on. Lately I've been reading about using DDS and was thinking I might be able to successfully use two of the inexpensive AD9850 modules available on eBay, one for the LO and one for the BFO. Then I found info on the web about the Silicon Labs SI5351, a DDS unit with multiple outputs each one able to produce a different frequency independently. My electronic experience started at the age of 10 when my dad started teaching me electronics in my pursuit of a ham license. I received my novice ticket in 1955. My brother went through the same process and is now K5DOR. I operated from my home in Ft. Worth, Texas until I became a US Navy radioman in 1961. I had wanted the Navy to train me as an electronic technician but when they found out I knew the Morse Code they sent me straight to radio school. I operated US Navy communications equipment as a CW operator for years aboard the USS Bushnell based in Key West, Florida. I held a speed-key certificate that was required if I wanted to use a bug. I copied code for hours at a time day after day on a mill (mechanical typewriter). One finger was used to type 30 wpm while the other hand was used to drink my coffee and smoke my cigarette. Luckily I stopped smoking the day I was discharged. Since I had originally wanted to be an electronic technician I completed a two year correspondence course in basic electronics while in the Navy. When I was discharged I immediately began to look for an electronics technician job in the Ft. Worth-Dallas area where I was originally from. When I applied at Texas Instruments I was rejected because they said I had no formal training in electronics. I asked if they had a test they could give me to show my skill and to my good fortune they did. I aced the test and became an electronics technician in an integrated circuits development lab. TI was very gracious allowing me to immediately register as a electrical engineering student at the University of Texas at Arlington where the G.I. Bill paid me each month for attending college and TI paid for my tuition and books and allowed me to work whatever schedule fit my school work. During my career I worked for TI, TRW and Lockheed. I frequently thought back to the ham radio days and always wondered what it would be like to be an active ham again. Now I'm retired and have plenty of time to devote to the art of ham radio. I've always wanted to build my own radios and now I can. I remember as a teenager lying across the bed for hours browsing the Allied Electronics catalog wishing I could afford to buy parts to build my own equipment. The other thing I wished for was a Collins 75A-4 receiver, which, back in 1955, was the ultimate in ham receivers. I now have my own 75A-4 that has been restored and has all three mechanical filters. It's still a very sensitive receiver at a MDS (minimal discernible signal) of about -140dB. I've increased its performance outboard with the addition of a DSP DNR module that reduces the noise and a non-ringing 200Hz audio filter. It's still a very nice receiver. My idea of a homebrew receiver includes a DDS (direct digital synthesis)for the local oscillator (LO) for stability, the ability to have a digital readout and easier band switching. The NE602 (or NE612) mixer will serve well as a 1st mixer and product detector. I plan to switch between a couple of crystal filters, one for SSB and one for CW. For AM I will probably use a different type of detector. For extremely narrow bandwidth I'll switch in the 200Hz Hi-Per-Mite filter. DSP DNR (Digital Signal Processing - Digital Noise reduction) will also be used to decrease the atmospheric noise level. The receiver will be band switched and provided with mute circuit(s) for QSK operation. M0XPD has experimented with using two inexpensive eBay DDS modules controlled by an Arduino as both the LO and the BFO. Since we're going to use an Arduino as a digital controller we'll follow his work as closely. Another aid to experimenting with the receiver circuits is to purchase a couple of sets of K8IQY Designer Dream Boards (DD) from 4SQRP group. These are pc boards with a mix of useful circuits laid out for receiver or transmitter designers to use without having to lay out their own boards. The DD board for receivers has separate circuits for LPF, BPF, two LT1253 RF amplifiers, a 4-pole crystal filter, a Colpitts crystal oscillator, a power supply e regulator and conditioning circuit and a couple of bipolar transistor switches. The DD board for transmitters contains a driver and final amplifier circuits. The DD board for receivers uses the highly successful circuits used in the high performance SS-40 receiver. If you're interested in building a QRP transceiver I suggest the version of the SS40TX that will output up to 9watts but can be adjusted for the QRP Full Gallon (5watts). Be aware, however, that you will be confined to the small portion of the band covered by the VXO of the SS-40 receiver. The solution for many has been to connect an outboard variable oscillator for the LO of the receiver and oscillator of the transmitter. I would suggest possibly using the N3ZI DDS 2 Super DDS because it includes a RIT function. An amplifier must be used, however, because the DDS doesn't output enough voltage to drive the input of the diode-ring type mixer of the SS-40. Suggested amplifier circuits are included on the web site for the N3ZI DDS. Table of Contents 1. My Receiver Specifications 2. My lab and "junk box" 3. My current rig(s) 4. Building sequence 5. Receiver Design 6. Stability 7. Sensitivity 8. Selectivity 9. Testing and Measuring 10.Tuning Frequency Accuracy 11. Starting to Actually Build 12.The IF Amplifier 13.Selecting Components 14.Building My Own PC Boards 15.Noise Blanker and Noise Limiter 16.Crystal Filters 17.Using an audio filter 18.Making the Inductors 19.IF Cans 20.The BFO Circuit 21.Switching Bands and Filters 22.Reducing noise in from the DDS 23.The audio amplifier 24.Single-Sideband Operation 25.The Power Supply 26.The Enclosure 27.Painting and labeling 28.Parts Sources 29.Records Keeping 30.Bibliography 1. The Receiver Specifications This receiver should include: Ham bands 160m thru 6m Have careful gain distribution High sensitivity along with high dynamic range Noise blanker along with digital noise reduction High performance IF derived, IF/RF controlled AGC Digital logic control with a versatile microcomputer such as Arduino Intuitive push-button controls along with large tuning knob(s) Relay switched crystal filters Front-end attenuators, 6dB, and 12dB (1 & 2 S-units), relay switched 60Hz filters at power supply input and in audio section RIT with separate knobs Clear sharp audio with plenty of drive for a reasonably large speaker Intuitively located front panel controls Large single line LCD for frequency Smaller 2 x 16 LCD for remainder of displayed info Push-ON, Push-OFF button for display back-light Push buttons for increasing or decreasing frequency A number of frequency memory channels IF shift. Move IF channel through the IF filter bandpass Frequency stability better than +1ppm/hour Frequency steps, 100Hz, 10Hz and 1Hz Sensitivity 0.2uV, Selectivity 2.1KHz SSB, 0.5KHz CW, 0.2KHz CW Audio output >2w Front panel includes a large tuning dial, A & B VFO switch(s), RF Gain, IF Gain, AF Gain, Large LCD freq. display, Smaller 2 x 16 LCD for additional infomration, Mode selection, BFO adjust, Calibrator ON/OFF, Noise Limiter, Noise Blanker ON, AGC Threshold, AGC ON/OFF, IF Shift, DDS function, freq step UP and DOWN pushbuttons, and power ON/OFF. Of course we want the three S's, sensitivity, selectivity and stability. It also has to provide a certain amount of gain - 90 to 110dB. Additionally, we want an accurate digital frequency readout, a large tuning knob with very smooth action (I just like turning that big 'ol knob.), band switching, the ability to handle very strong signals while at the same time being sensitive to very weak signals (dynamic range), ability to select USB, LSB, CW, AM and digital modes, automatic gain control (AGC), Rf Gain, Antenna Tuning, Noise Blanker, Noise Limiter, IF Gain, IF shift, Audio Gain, Band-Pass tuning (BFO control)and a S-meter. Another modern day feature is RIT or Clarifier which allows a CW (or other modes)operator to successfully receive on one frequency while transmitting on another but nearby frequency. If you are a CW DXer this is almost a requirement. I like to hangout on 10m CW in Spring and Fall and the Clarifier in my FT-450D is used more often than not. When that DX station sends "CQ de W5XXX UP " He means for you to call him up from his frequency 1 or 2 KHz. If there's a really big pile-up you may have to call him even higher up. The DDS I am using has the RIT feature built into the software. It includes VFO-A, VFO-B and RIT functions. (N3ZI DDS 2) The goal of this project is to build a receiver that performs well. It won't be better than those that are commercially available but hopefully close. We will, of course, use parts from out junk box if possible but don't plan to sacrifice performance because of cost. but be aware that I can say that because I have a very large "junk box". To have the best sensitivity we need to look at the front-end closely. We also have to make sure other sections of the receiver don't add noise covering up the weak signal we're trying to hear. From the antenna the signal will go through a band-pass-filter (BPF) and into the 1st mixer except on the higher bands, 20m through 10m, where a preamp can also be useful. On the lower bands a preamp doesn't buy us anything because the atmospheric noise is too high and covers up those weak signals. We will use double-tuned circuits (DTC) for the input filters each designed specifically for their band. Ideally the BPF will have only a couple of dB attenuation, will be flat across the band and will attenuate any out-of-band signal significantly. We'll have to design the BPF for each band for the best performance and test it with a scalar network analyzer such as built by the PHSNA yahoo group (PHSNA = Poor Ham's Scalar Network Analyzer). I do, however, own a Rigol DSA815-TG spectrum analyzer that I will use to test and adjust the filters for best performance. The NE602 mixer IC we plan to use may not be able to handle an extremely strong signal, therefore, sometime in the future we may decide to change the 1st mixer to a ring diode type that can best handle the large signal. If we do that we will have to add some gain to make up for the gain in the original NE602. On the higher bands that additional gain can be found in the antenna preamp so a solution may be to use a preamp for all the bands feeding the 1st mixer as a ring diode type. A ring-diode mixer with built-in impedance matching transformers can be had from Mini-Circuits. The ADE-1ASK is the surface mount mixer I have in my junk box and is good from 500 KHz to 500MHz. it is available at a very reasonable price at KitsandParts. Building it this way will allow us to layout a standard front-end pcb that will contain the BPF and preamp. These can be built for each band and then selected by a multiplexer that is in turn controlled by a rotary band switch or by a microcomputer (uC) or both. The preamp will probably be designed around a grounded-gate J310 FET because of its very low noise figure. If you check the JFET transistor data in the ARRL handbook you will see that the J310 is by far the quietest. Each front-end module would look something like this from VE7PBO, Designed by W1FB and found on qrp.pops.net: (I just found out that the QRP.pops.net web has been taken down permanantly. ) It's designed for a 50ohm output so we will have to adjust the number of secondary turns on the output transformer. Of course the frequency dependant components will be different for each module. The whole front-end section would also need to be in its own enclosure to eliminate the sensitive front-end from picking up stray signals from within the receiver or from the outside world. This is especially true if you have digital signals in the same receiver. This receiver should include: Ham bands 160m thru 6m Have careful gain distribution High sensitivity along with high dynamic range Noise blanker along with digital noise reduction High performance IF derived, IF/RF controlled AGC Digital logic control with a versatile microcomputer such as Arduino Intuitive push-button controls along with large tuning knob(s) Relay switched crystal filters Front-end attenuators, 6dB, and 12dB (1 & 2 S-units), relay switched 60Hz filters at power supply input and in audio section RIT with separate knobs Clear sharp audio with plenty of drive for a reasonably large speaker Intuitively located front panel controls Large single line LCD for frequency Smaller 2 x 16 LCD for remainder of displayed info Push-ON, Push-OFF button for display back-light Push buttons for increasing or decreasing frequency A number of frequency memory channels IF shift. Move IF channel through the IF filter bandpass Frequency stability better than +1ppm/hour Frequency steps, 100Hz, 10Hz and 1Hz Sensitivity 0.2uV, Selectivity 2.1KHz SSB, 0.5KHz CW, 0.2KHz CW Audio output >2w Front panel includes a large tuning dial, A & B VFO switch(s), RF Gain, IF Gain, AF Gain, Large LCD freq. display, Smaller 2 x 16 LCD for additional infomration, Mode selection, BFO adjust, Calibrator ON/OFF, Noise Limiter, Noise Blanker ON, AGC Threshold, AGC ON/OFF, IF Shift, DDS function, freq step UP and DOWN pushbuttons, and power ON/OFF. 2. My Lab and "Junk Box" My work bench and adjoining "junk box" have evolved. Seems like I've always had a workbench at home but it's now out of space. I need to add a couple of more tables along with shelves on the back of them to hold my parts bins. I have several collections of parts that require sorting. I use small labeled envelopes for small parts such as ceramic capacitors, NPO ceramic capacitors, molded RF chokes, silver-mica capacitors, . .etc... Here's an example - my collection of NPO ceramic capacitors. I also have ways to test almost all of my parts. Of course I have a digital multimeter that can be used to test resistors. Test capacitors or inductors I highly recommend the AADE LC meter. I also have a PEAK DCA75 which will test almost all of the discrete semiconductor parts. Digital and analog integrated circuits must be tested in a breadboard environment with a seperate setup for each IC. I have my junk box divided into several catagories: Enclosures Passive components Analog Integrated Circuits Digital Integrated Circuits Knobs and tuning apparatus Glues and Lubricants Connectors PC Board Materials There are several places I purchase parts such as: Mouser Electronics MPJA BG Micro Digi-key My lab is in a spare bedroom. When we moved here 7 years ago we were downsizing but still got a 3 bedroom, 2 bath home. We had to have a bedroom to turn into a lab and an extra bedroom and bath for guests. The bedroom is my shack and lab. It has a big closet with double-doors where I keep most of my parts. I have the rig on my desk on the side opposite from the workbench and it's full also. I just have one antenna since we moved in here but we have lots of very tall trees so I plan to erect a double Zepp for 160m and up and maybe just another long wire for a separate receiving antenna for the work bench. Our HOA is very understanding about ham antennas and there's several of us here in this residential area. Even some with large towers and multiple yagi's. My test equipment includes, as you can see above, a stereo microscope, soldering equipment, Tektronix 465B scope, HP8640B signal generator, Rigol DSA815-TG Spectrum Analyzer, B&H freq counter, B&H DVM, Simpson 260 VOM, Velleman pocket DVM, 2 HP lab supplies, and HP 3400 RMS voltmeter, Return-loss bridge, Semiconductor device tester, AADE LC meter, Step- attenuator, Noise generator, Elecraft XG2 signal generator, PHSNA scalar network analyzer, AD8703 power meter, and a collection of test jigs . Notice the three spools of enameled wire on top of the HP 8640B? Well, it's the kind of magnet wire whose insulation melts with the soldering iron heat. Makes soldering in my toroid inductors so much easier. There much more taking up room on the tables in the garage such as my shear for cutting pc boards and other standard tools such as drill press, table saw, sanders. Another table in the garage holds the pc board etching equipment. I locate that near the door so when I etch I can blow the fumes out the door with a fan to keep them from rusting my tools in the garage. I learned that the hard way. It's hard to make out in this picture but my "muppet" pcb equipment is piled up on this end of the 1st table. I have it positioned near the garage door for a reason. When I etch, the acid fumes fill the air and rust any exposed steel tools or other apparatus nearby. So, when etching I place a fan behind the etch tank, open the garage door and blow those nasty fumes out into the driveway area. Another large and important section of my lab is the "junk box". As all old-timers know the proverbial junk box is a very valuable piece of the lab. I have too many parts collected over the years so I have to sort and label like shown below. 3. My Current Rig(s) Below is a picture of my current commercial rig. It's a Yaesu FT-450D and it does about everything you'd want for a very reasonable price. The 1st October I had it, I worked 140 countries on 10m CW. I also have my QRP rig consisting of the 4SQRP receiver and transmitter - SS-40 and NS-40. The SS-40 is very sensitive and the NS-40 puts out a solid 5 watts. It's now Summer and 10m (my favorite band) is dead most of the time. Sometime I'll write about my exploits on 10m CW. The FT-450D works quite well on the other bands also. I only have a 40-6m trap vertical from Diamond. I learned the you don't want to have it too high. A study I read in QEX showed that verticals with artificial counter poise, the higher you raise it the higher the angle of radiation. This is not true of verticals that don't have the built in ground radials. I have it at about 28' and it works extremely well. I worked well at 20' when I first erected it but I couldn't get out to the West because the house was in the way. I could hear Japanese stations sometimes but could never work them. Raising the antenna 8' fixed that. The FT-450D has a built in automatic antenna tuner but the external MFJ tuner works better. The MFJ tuner will tune about any kind of antenna. I joke that it can tune up a coat hanger on the end of a broom stick. I also have an old 75A-4 Collins receiver in good working condition. It's the receiver I dreamed about when i was 1st a ham at the age of 14 back in the mid50's. It's rated at a sensitivity of about -140dBm. I have an external enclosure that I connect to the 75A-4 audio output that adds DSP-DNR and a 200Hz audio filter. 4. Receiver Building Sequence The building sequence numbered below is probably correct but first I will conduct several experiments to build up to this starting point. I want to start with some simple receiver circuits to get comfortable with designing various sections of a receiver. I'll start with a simple DC (direct conversion) receiver in order to experiment with the NE602 (NE612 is the same IC) mixer. I will refer to the DC receiver in chapter one of EMRFD but will make a few simple changes to improve it and to use it as a starting point for explaining how a receiver works. I'll also build it several times using different construction techniques. The mixer, the DTC (double tuned circuit) at the antenna input and the local oscillator (LO) will be constructed several different ways. There are a number of ways to get to the same point and they all involve the use of pc boards except for one. Ugly Construction: This is not a name I've given the process but instead that's really the name used by experienced electronic circuit builders. It is characterised by the arrangment of parts to get them soldered together in the best way possible according to the schematic. It looks like your soldering the components together in seemingly haphazard arrangement. Something must be used to solder components to, keeping them elevated off the pc board or aluminum chassis. There are several types of standoffs that serve as tie points or if you use a solid copper pc board material for the chassis I've seen builders use very high value resistors as standoffs. Here is an example of "Ugly Construction" using pc board material as the chassis. Here note the use of 10Mohm resistors as tie points. If integrated circuits are used they are sometimes glued upside down to the chassis and components and wires just soldered to the IC leads. Because of the upside down IC looking like a bug (the insect) it is sometimes called ugly bug construction or something similar. If you go this route make sure you use plenty of solder because these solder joints have to hold the circuit together physically as well as electrically. This circuit shown is an audio oscillator that I use to test audio circuits. NOTE: If you don't have an audio oscillator for testing your audio amps you can usually just touch the audio amplifier input with your finger and the 60Hz signal picked up by your body will be injected into the amp producing a 60Hz hum from the output. Now for some RF circuits: A Elecraft XG2 signal generator is available in my lab and is designed to be an aide to designing receivers. It is crystal controlled and outputs single frequency signals - on 80m, 40m and 20m. It has two output levels 50uV and 1 uV. I will input the 50uV and then when the circuit is working I'll input the 1uV signal. The circuit will be the NE602 mixer that is used in so many simple receivers. It has some drawbacks but is mostly a great mixer for the homebrewer. About the only fault I hear about is it's inability to handle very large signals. In other words, it doesn't have a very good dynamic range. I'll couple the input signal through a ceramic capacitor to pin 1 or pin 2 NE602 input. Either pin will work and the other input pin I will connect to ground through a ceramic capacitor. The differential inputs of the NE602 are internally biased so we'll always connect to the input(s) through a coupling capacitor so as not to mess up the internal DC biasing. As far as the RF signal is concerned the unused input is connected to ground because the capacitor is chosen to be a very low reactance to the RF signal. And the same situation with the complementary output pins, pins 4 and 5. We will usually connect the outputs through coupling capacitor(s). Pins 3 and 8 are the power supply pins - pins 3 is ground and is connected directly to a closeby ground point. Pin 8 is the positive supply pin and will be supplied with 6 to 8 VDC. I will probably use a 12VDC battery. The receiver will have a 9VDC regulator. Power supply decoupling is very important in a DC receiver so we'll connect the 9VDC through a RF choke and then a current limiting resistor to a 6.2VDC zener diode in parallel with a 0.1/0.01 decoupling capacitor to ground. Why 0.1 and 0.01 uf? - Well, the inductance of the 0.1 starts to show up at 20m and above. The combo will provide good decoupling from 160m through 10m. That leaves pins 6 and 7 which are the local oscillator pins. The NE602 is designed to have it's own local oscillator or can receive an external LO signal. For my experimenting here I'll leave pin 7 open and inject a LO signal for testing from my HP 8640B signal generator through a capacitor to pin 6. The output of the mixer is the product of the two signals. The 1uV input signal on pin 1 and the LO signal on pin 6. The NE602 doesn't require a very large LO signal so we'll inject a LO signal of only a few hundred millivolts. With the input signal and the LO signal applied we'll look for the output signal on pin 5 or pin 4. Since this is a DC receiver test we'll want the difference signal to be in the audio range. To complete the simple DC receiver we need an audio amplifier with lots of gain and enough power to drive our headphones or small speaker. To make matter simple I'll use the Hi-Per-Mite filter from 4SQRP group. It's a high-gain audio amplifier configured as an active filter centered at 700Hz with a bandwidth of 200Hz followed by a LM386 audio power amplifier. This module provides for an external audio gain control. Well use this as a complete audio section for our DC receiver with the added benefit of the 200Hz filter that will render our little receiver as a nice portable CW receiver for the 40m band. When that's all working pretty good I'll replace the HP8640B with a variable LO module and add a band-pass filter (BPF) to the antenna circuit to complete the receiver. The 40m BPF will be wide enough to pass through any 40m CW signal from the antenna while attenuating any unwanted signals above or below the 40m CW band. The completed 40m CW receiver circuit will look like this: Many suggest starting at the back end and build toward the front-end. I will change that sequence for the reasons that follow. The best idea is to build and test each section of the receiver separately. Building a whole receiver and then turning it on and expecting it to work is not realistic. Some folks say to start with the power supply but I'm going to start by using a battery for power so I know my power supply is not introducing much noise into the system. I'm build an AC power supply last and with an optimum performing receiver will then know if the power supply adds any noise. I wanted to do a few experiments with the DDS before starting. I have built the N3ZI DDS to use as the 1st local oscillator (LO). Here's the DDS with the shaft encoder, control switches and LCD display attached and working. I have a DC receiver I built successfully with the QRP-tech group. I'll take that receiver and disconnect the LO and use the DDS in its place. I have the old DC receiver on the bench with antenna, power supply and headphones connected and it's still working fine. Copying CW signals on 40m just fine. Here's the sequence I have chosen for the actual build.. As I go along I may find reasons to change it. a. Audio power amp (able to drive speakers to a reasonable level) b. Audio preamp sensitive enough for a DC receiver. This preamp may be able to be eliminated in the final version. May use my TS922/LM384 design. c. Include a volume control between the preamp and power amp . d. Add the 200Hz audio filter like the 4SQRP Group's Hi-Per-Mite and test its performance with an audio signal generator and then with a simple DC receive front-end. Notice that the Hi-Per-Mite uses a LM386 power amp. I personally prefer an audio amp with a little more power so I might use a TDA1015, a 4watt amp that includes an independent preamp. I can insert a volume control, a 200hz filter, an audio muting FET between the preamp and the power amp. e. I'll test this audio section with a DC receiver front-end which should actually make a very usable portable unit out of a DC (direct-conversion) receiver. f. Build a single 20m band front-end to test my circuit design. I'll add the DDS LO and a BPF to a NE602 to make the front-end of a DC receiver and test it with the audio section already tested. g. Now the bugs are worked out of the front-end design and the LO. So it's time to remove the NE602 mixer and install the ADE-1SDK diode ring mixer. The gain in the front-end preamp should replace the lost gain in the mixer. We should be able to connect this modified front-end again to the tested audio section to yield an improved 20m DC receiver. It may not sound much different but it should be able to handle those really strong signals that overloaded the NE602. h. The next step is a big one because now we convert this nicely performing DC receiver into a superhet. The DDS will have to provide a different LO frequency which will not be a problem. We'll add a post-mixer amp, and skip the next module which would be the crystal filter(s), then a post filter amp into a product detector. Again we can use the NE602 as the detector that will drive the audio preamp. I plan on using a couple of LT1253 video amps in the IF at first. i. This configuration will consist of the 20m front end with the ring-diode mixer into a couple of LT1253 IF amps and then into a NE602 product detector. This should now be a complete superhet receiver even though we haven't added the crystal filters yet. The reason I haven't is because this is not the final IF amp I intend to end up with. The final version will have one LT1253 amp post-mixer driving a crystal filter and a HYCAS IF module that will give us 3 stages of IF amplification, AGC, S-meter, IF gain control ...and .etc... I haven't yet considered a noise limiter or a noise blanker. I'll have to do some research on those types of circuits. J. After that is all working correctly we can then build the front-end modules for the remaining bands along with the band-switching circuits. K. An AC line powered power supply will come last. I'll use batteries up to this point to make sure I'm not introducing noise from a power supply. I just have in mind a LM317 with a common-mode AC line filter in the line and a low-pass filter and common-mode filter in the output. I'll add lots of bypass capacitors and the protection diodes for the LM317 (see the data sheet). Of course it will be shielded and grounded with my heavy duty grounding system here in the shack. The cable to the receiver will be shielded to prevent outside signals from being picked up by that line such as RF from my wireless router and Rf noise from fluorescent lighting. L . Putting the whole thing in an enclosure will be one of the last things to do. Planning the front panel layout a little ahead of time will pay off when it's time to fit it all in a box. I have four Junker HW-32/16 Heathkit enclosures to use. I can use one of them or I have an old 75A-3 enclosure that is essentially a 19" rack enclosure. I can easily purchase a new 19" front panel for it. My present thinking is, however, that the HW-32 enclosure will be more suited because it's much lighter weight. It has a chassis bolted to the front panel that will serve well to mount the various modules on the top and bottom. I'll take some heavy duty cleaning tools to it to make it like new and may even use the old front panel as a stencil to mark and cut out a completely new front panel out of thick aluminum. I'll cut a rectangular hole for the LCD display bezel and make room for a very large tuning knob with a spinner. Well, this is the plan. Sometimes things don't always go as planned. I'm sure things won't always work first time and we'll go through the process of finding my mistakes and fixing them. One of the things I promised myself I would do in this little ebook is to document these thing that don't work and the process of finding out why and then fixing them. That's one thing that I really like about W0IYE, Frank Harris' book, Crystal Sets to SSB. He documents the problems he's had along the way, how he fixed them, and that gives the reader that experience without having to actually go through it. For instance, he mentions several times about the noise that having digital circuits inside the receiver can cause. We live in a digital world nowadays and I plan to investigate ways to overcome the problems associated with mixing digital circuits and sensitive analog circuits. In fact one of the first things I'll be doing is making a simple receiver front-end out of a NE602 mixer and a N3ZI DDS-2 VFO. This will end up being a complete receiver right from the start. We'll connect the antenna to a crude BPF (band-pass filter) that directly feeds the NE602 mixer. The LO (local oscillator) will be the DDS unit connected directly to pin 6 of the NE602. It's convenient that the output level of the DDS is just about perfect for the LO input to the NE602. The N3ZI DDS already has a coupling capacitor at its output. We'll attach a simple LM386 audio amplifier to the NE602 output pin4 or 5 and that will complete out first receiver. From experience I expect the receiver to work fine as far as sensitivity goes but will fall way short on selectivity. The other one of the three "S's" will be taken care of because of the crystal stability of the DDS. I think, because I already have one built, I will add the 4SQRP Hi-per-Mite 200Hz filter to give us the second "S", selectivity. If you wonder about the effectiveness of the 4SQRP filter go to Dave, AA7EE page where he added the HiPer-Mite filter to his little DC receiver. After you scroll down his page, marveling at his really neat construction along the way, find the videos at the bottom that demonstrate how well the little filter works. Another possibility is the use of a phasing DC receiver such as the R2. Refer to your ARRL handbook for a description. You should be able to find "R2" in the index. The main difference is that we use 2 mixers, one with the LO signal and the other with the LO signal changed by 90 degrees. These signals are then summed in such a way as to eliminate one of the sidebands yielding true single signal reception. Then adding active filtering in the audio section wil yield a great little CW/SSB receiver. 5. Receive Design In this chapter I'll attempt to explain my idea of a good homebrew receiver. I won't attempt to use all the SDR (software defined radio) techniques used in modern day transceivers. I will, however, use all the modern day techniques that I can such as DDS (direct digital synthesis) and DSP-DNR (digital signal processing - digital noise reduction). I will also try to use and explain about a direct conversion (DC) receiver with single signal reception by means of a phasing technique. In the audio section after the phasing out of one side-band we'll use an active filter to obtain superior CW selectivity resulting in a very useful, highperformance CW receiver. I will then use that receiver along with a 5W transmitter to yield a high-performance CW single-band transceiver. I have some ideas about an unconventional method for boosting the transmitter output to 5W from the 1.5w level of most transceivers in the NE4040 class. However, please be aware that on the receiving end there's not much difference between what a 5W signal will sound like and a 1.5W signal. A couple of years ago I was in QSO with a CW mobile station and gave him a RST report indicating a very poor tone. He came back with a very nice tone and explained that he had by-passed his final amp and gone from a 25W output to a 1W output. His tone was very nice and I couldn't tell the difference in signal strength of the 25W signal and the 1W signal. Now back to the superhet receiver design. . . . . This receiver will follow the general configuration that most think of when they hear "superheterodyne". It will have a "front-end" that selects the incoming signal from the antenna and feed that signal to the 1st mixer. The 1st mixer will also receive a local oscillator (LO) signal that when mixed with the incoming signal in the 1st mixer will yield an signal at the IF (intermediate frequency). We will filter that IF signal with an IF filter to reject all nearby signals and pass the desired signal on to the product detector. Out of the product detector we'll get the audio signal that represents the signal that the transmitter intended for us to hear. Here's a simplified diagram of a superheterodyne receiver. There are a multitude of approaches to the design of each of these basic sections. Additional modules might involve adding a preamplifier in front of the mixer. Another approach to preamplification of the antenna signal is to use an active antenna. A preamplifier mounted up in the antenna eliminates loss of signal as it travels down the antenna lead to the receiver. An example of a good active antenna is from Clifton Labs. The first section is the 1st mixer or just the "mixer". Sometimes we might design a double-conversion superhet in which case would have 2 mixers. In the case of a double-conversion circuit it's common to have the 1st IF frequency to be very high followed by the 2nd mixer and a much lower frequency IF. Mixers come in many varieties. The one that's probably the most widely used is the NE602. It's easy to use but may not always be the best choice. The NE602 is notorious for not being able to handle a wide range of signal strengths. You may be using a NE602 mixer that works quite well for the normal signal strengths but when a very strong signal comes through it overloads and all kinds of signals might come out of it. A better choice is the ring-diode mixer with an input and output transformer. The downside of the diode-ring is that it has no gain. The loss of gain must be made up somehow, usually with a preamp or more IF amplification. Diode-ring mixers with built-in transformers by Mini-circuits can be purchased from KitsandParts at a very reasonable price. An good example is the SS-40 receiver by 4SQRP. Notice that it includes a preamplifier. The result is a receiver with an exceptionally good sensitivity - as good as or better than most modern day, commercially available transceivers. See the comparisons that Elecraft has put together here keeping in mind that the MDS sensitivity of the SS-40 is -132dBm. (My Collins 75A-4 has a spec'd MDS of-140dBm which is exceptional.) MDS = Minimum Discernible Signal. Be aware that the NE602 is no longer manufactured so purchase the NE612 which is identical. After the 1st mixer comes the IF (intermediate frequency) amplifier(s). Remember we want to spread out the overall amplification of the receiver over a number of sections to prevent chances of unwanted oscillations. One of the first things I learned from reading W1FB's books is that you need to spread the overall gain of the receiver over a number of stages rather than having, for instance, a extremely high-gain IF amplifier. Extremely high-gain amps tend to be unstable. I will start out with half of a LT1253 integrated circuit (IC) as the post-mixer amplifier. The LT1253 is a dual video amplifier whose gain is flat out to 30MHz. There is a single amp version and a quad amp version of this IC. Because typical op amps have a very high input impedance the LT1253 will not load down the mixer. Op amps also typically have a very low output impedance which means it can drive most anything you need it to. In our prototype we'll keep things simple at first and just have a couple of stages of IF amplification with two stages of the LT1253. We'll add an IF filter later. The intention is to keep things as simple as possible until we get a working receiver and then add enhancements later. Using the two Lt1253 amps may be just right for a wide bandpass suitable for AM reception. The next stage will be the detector. For SSB and CW we will use a product detector but for our simple 1st version we'll just use a simple diode detector suitable for AM detection. This will eliminate the need for a BFO that will be explained later. A diode detector is as simple as they come. The waveform coming from the IF is detected, that is, the bottom half of the waveform until all we have is a signal varying at the rate of the original AM waveform is eliminated. Then with some RC (resistor capacitor) filtering we'll smooth the modulation rate. The signal which will be in the audible range will be amplified by the audio preamp then further amplified by an audio power amp to drive a speaker or headphones. Later we'll discuss other types of detectors such as product detectors or the Tayloe detector. The most commonly used these days is the product detector which is used for SSB and CW reception. A produce detector is a mixer where the output is the product of the two input signals. 6. Stability In a nutshell we must have components in our LO (local oscillator)and BFO (beatfrequency oscillator) that don't drift with temperature changes and the voltage from our power supply must remain constant without ripple, noise or changes with temperature. We will be using a DDS for the LO which relies on a crystal oscillator for its time base and is, therefore, stable like a crystal oscillator. Another approach is to use a VXO (variable crystal oscillator) such as used in the 4SQRP SS40 receiver but a VXO doesn't cover a very wide tuning range. If we start with a VXO we can install a DDS later if we want. Be aware that the required signal level for the LO input to a NE602 is quite different than for a diode ring mixer. A few hundred millivolts is all that is required for the NE602 while 3 to 5 volts may be required for the diode ring mixer. Components also have to be physically stable usually to be frequency stable. In your local oscillator (LO) and beat-frequency oscillator (BFO) your components need to be soldered in very solid. Coils and capacitors need to be in solid so they can't move or vibrate because of outside influences. They also have to be stable over a range of temperatures. What is you build a receiver and the signal drifts. You know your LO must be drifting as it warms up but which component is the culprit? I saw this trick on a youtube video where a guy blew through a soda straw aimed at each possible component until he found one where his hot breath on a particular component made the frequency change drastically. He then knew that was the capacitor that was drifting with temperature. toroid I use toroids to make inductors and have a variety of flat fiber or nylon washers that I use with nylon screws to secure the toroid to the chassis or pc board. After I confirm that the toroid has the correct number of windings I remove it from the receiver and coat the windings with Q dope. Q dope is polystyrene dissolved in a solvent and can be purchased for a high price. The way to do it is to make your own. Styrofoam peanuts are made of polystyrene. Just dissolve white peanuts in a solution of toluene or methyl ethyl keystone and you have the same thing. 7. Sensitivity Sensitivity for the most part is built into the front end of the receiver but care must be taken not to introduce noise in any stage that might covers up those weak signals. i refer to the antenna input, band-pass filter and 1st mixer as the "front end". Overall gain of the receiver must be considered. Typically, an overall gain of 90 to 125 db is found in most commercially built receivers. We must realize that there is a limit to how sensitive we need to make out receiver because of the level of atmospheric noise and local manmade noise will over shadow very low sensitivity. to test the receiver you can disconnect the antenna and replace it with a 50ohm resistor and then listen to the noise from the headphones. Then remove the resistor and reconnect the antenna and you should hear a pronounced increase in noise. What that tells me is that to make the receiver any more sensitive wouldn't produce any better results. I plan to use J310 FET preamp on the input pcb for each band. It'll be something like this one from the SS-40 receiver. The basic preamp here comes from EMRFD. I'll start out, however, with a simple BPF (band-pass filter) into a NE602 (mixer). To improve sensitivity we'll also add a DSP DNR (digital signal processing, digital noise reduction) module to the audio section from BHi. This will have a rotary switch to select the level of noise reduction and an ON/OFF switch. This unit will have the following features: Fully adaptive noise cancelling Minimum distortion to audio signal 8 user selectable noise cancelling levels 9 - 35dB Noise cancellation can be preset on PCB or remotely changed Wide audio bandwidth for natural sound Input and output level adjustment Input overload indication LED 5 - 15VDC operation Remote noise cancellation on/off To measure sensitivity we are looking for the specification called MDS (minimum discernible signal). MDS is a signal just barely above the noise level of the receiver. In other words, its the weakest signal that can be heard. Chart showing dBm-power-microvolts for a 50 ohm receiver input dBm power microvolts (rms) -134.9 3.2E-17 0.040 -133.0 5.0E-17 0.050 -131.4 7.2E-17 0.060 -130.1 9.8E-17 0.070 -128.9 1.3E-16 0.080 -127.9 1.6E-16 0.090 -126.2 2.4E-16 0.110 -125.4 2.9E-16 0.120 -124.1 3.9E-16 0.140 -122.9 5.1E-16 0.160 -121.9 6.5E-16 0.180 -121.0 8.0E-16 0.200 -120.1 9.7E-16 0.220 -119.0 1.3E-15 0.250 -118.0 1.6E-15 0.280 -116.9 2.0E-15 0.320 -115.9 2.6E-15 0.360 -114.9 3.2E-15 0.400 -114.1 3.9E-15 0.440 -113.0 5.0E-15 0.500 -112.0 6.3E-15 0.560 -111.0 7.9E-15 0.630 -110.0 1.0E-14 0.710 -109.0 1.2E-14 0.790 -108.0 1.6E-14 0.890 -107.0 2.0E-14 1.000 To test for MDS we will use an oscillator of a given output level in using a step generator decrease the signal until we find that minimum signal we can hear. Another way is to use my HP 8640B signal generator which can be adjusted to a predetermined signal level down to -130dBm. 8. Selectivity Selectivity is the ability to limit what you hear to a particular frequency or range of frequencies, and not hear a load adjacent signals a little off frequency. With a superhet, is accomplished by the use of an IF crystal filter of the required bandwidth normally you would have a different filter for different modes such as AM, SSB, and CW. We also must consider selectivity in the front-end by means of a BPF and possibly some degree of audio filtering. Selectivity is normally accomplished in the IF with filters and is the ability to select the desired signal between two or more signals that are very close together in the IF bandwidth. I plan to have at least two IF filters, one for SSB and one for CW. In another section further along in this book we talk about crystal filters. Here's how I will select which crystal filter I need for each mode with relays. Again this is from ARRL handbook 2005. 9. Testing and Measurements In our lab here were have a HP 8640B signal generator, a frequency counter, a couple of DVMs, a HP 3400A RMS voltmeter, a spectrum analyzer and a few other common pieces of equipment. First we need to be able to measure the amplitude of signals at various points in the receiver circuit as we go along. For 40m signals we're ok because the HP3400A is flat out to 10MHz. It measures RMS so if we need peak voltage we just simply multiply by 1.404 So how are we to measure frequencies higher than 10MHZ. Well, I'm building an RF probe and we'll plot its response along with the HP 3400A to judge it's accuracy and then, for now, we'll assume the RF probe's will be fine to use up to, at least, the top of the HF spectrum but will probably be good to much higher frequencies. I think I like the looks of the KK5NA Accuprobe but I want it to be on a narrower pcb so I can mount it in a small tubular enclosure with a nice long needle point probe. The opamp is in a SMD package and I'll use SMD components to get the size down to what I want. Here's KK5NA's accuprobe. I understand it's a fine instrument and if you want one go to his web at http://www.kk5na.com/kk5na_files/AccupManual.htm . You can find the schematic at the bottom of that web page. So when I finish this RF probe I will test it and assume it will read accurately out to the upper HF region. I'll have the HP3400A to 10MHz and the probe for higher frequencies. I am planning a 11.0592MHz IF and the 3400A will measure that with only a small fraction of error. One procedure I'll do is to test the output of my HP 8640B signal generator and make sure it is flat over the frequency range I intend to use it and outputs the signal level selected. I can then test the meters assuming the output of the signal is constant over frequency. Now, to get started I need to test my test equipment and make sure the different frequency measuring units read the same frequency. Then, I will use them to measure the amplitude of the RF signal over the it's frequency range and make sure that is reasonably accurate. I have the HP 8640B and the Elecraft XG2 that will give me a set amplitude and a set frequency. That will be the first test and the easiest to do. I hope I can trust my HP 8640B to not only be accurate in frequency but also in amplitude. It has an amplitude dial just like a frequency dial where you can just dial in the amplitude as well as the frequency. You can also, of course, choose what kind of waveform you want. We'll want sine wave 99% of the time. 1st test: Measure the amplitude and frequency of the Elecraft XG2 at 7.0xx MHz at 1uV and 50uV and plot it on a Freq vs. Amplitude graph using the HP 3400A since the 3400A is flat to 10MHz. Then I'll take several readings of the HP 8640B from 1 to 10MHz set for the same amplitude. Then we'll look at those signals with the spectrum analyzer and compare readings. I'll also plot the 5VDC voltage standard. It should read 5.0000VDC on the nose. Another piece of simple test equipment is a step attenuator. Here's one from an ARRL handbook. Mine, however, will have three 20dB steps. For conviencence it will have a BNC connector on each end (J1, J2). 10. Tuning Frequency Accuracy Our accuracy will mainly be determined by the DDS used for the local oscillator (LO). The DDS is stable because it's time-base is a crystal oscillator. Sometimes a small trimmer capacitor Is added to the crystal circuit to fine tune the oscillator's frequency. Frequency accuracy can also be tested using WWV or GPS. To start out with I'm going to use my N3ZI DDS-2 and then later on an eBay AD9851 DDS controlled by the Arduino Mega 2560 R3. M0XPD uses it for his communications equipment oscillator(s). When I use digital electronics in my receiver I will have to shield it very well or the signals generated by the square waves will be picked up by the sensitive analog circuits. I'll need to build the digital circuits in a box made of copper clad pcb material soldered into an enclosure with signals coming out on RG316 shielded cable. Another possibility when I use my Arduino to control the internal functions of my receiver is to use a breakout board from Adafruit using the Silicon Labs SI5351 which is an multi-output DDS oscillator. Depending on which one you use you can have up to 8 different output frequencies all controlled by two wires from the Arduino. I can use the smallest of the SI5351 Here's some links: Planet Arduino - SI5351 Using the SI5351 with the Arduino (video) Generate clocks with SI5351 and the ARduino SI5351 Investigations, NT7S 11. Starting to Build the First Receiver We'll need a place to work, tools and must decide which method will be used to construct our circuits. There are several methods of construction including Ugly construction, Dead-bug, Muppet and the conventional pc board. Examples of these methods will be found through-out this book. As stated before we'll start simple and work our way up. A simple 40m DC receiver will consist of a simple tuned circuit input from the antenna into a NE602 mixer and then into a 4SQRP Group's Hi-Per-Mite audio section. We'll make a simple local oscillator (LO) using the oscillator circuit built into the NE602. This should yield an usable 40m CW receiver. So there will be some additional help with this design we'll use most of the circuit from the 1st chapter of EMRFD. ARRL provides chapter one online for free. The DC receiver starts on page 1.7 and the circuit is on page 1.8 . At the bottom of page 1.8 you will find a great example of how the tuning component values are calculated. Use those methods to calculate out tuning components. To eliminate the band-spread capacitor I will use the 8:1 tuning ratio 365pf cap. To bring its value down to the desired capacitance I will put a 100pf capacitor in series with it and then use the same inductance value in the example. I think what I'll do is use a 120pf trimmer series capacitor, put the combo on my trusty AADE LC meter and adjust it for the desired range. Note that in the calculations we will have to allow for the two series 680pf caps of the colpitts NE602 oscillator. So, what we'll have to do is leave the two 680pf caps in the circuit along with the 270pf cap that couples the tuning circuit to the oscillator circuits. The desired range is the 40m CW band from 7.000 to 7.150 MHz. With the inductor as used in EMRFD of 1.16 uH I can calculate with the simple resonate frequency formula the desired capacitance at the low and high end. So using the standard formulas or a online calculator like found at http://www.1728.org/resfreq.htm At 7MHz and 1.16uH we need 446pf then at 7.150MHz we need 427pf. Therefore, the range of capacitance is only 446 minus 427 or 19pf. So we'll have a fixed capacitor of about 427 pf in parallel with the tuning capacitor that will only vary 19pf. Here's the schematic of the EMRFD DC receiver. My circuit will be the same except the Hi-Per-Mite filter will be inserted between the NE602 circuit and the LM386 audio amp. Here's the Hi-Per-Mite from 4SQRP group. This audio CW filter performs very well and does it without the "ringing" so often found in audio filters. Please purchase your Hi-Per-Mite from 4SQRP group. Please note that a 250K ohm pot can replace R11 and R12 for use as a volume control. We'll improve on that design in two ways. Our audio section will use the LM386 like in the schematic but we'll have the active audio filter between the N602 and the LM386 to give us some better selectivity and make it a usable receiver. I'll also simplify the oscillator circuit by using a simple air variable capacitor with an 8:1 gear reduction drive eliminating the need for a band spread capacitor and associated components. The gear reduction air variable capacitor is available from Midnight Science Parts P/N 356-8-1 . We'll use the manhattan construction technique just in case you haven't set up your pc board making equipment yet. The manhattan technique uses simple little pieces of pc board as solder points. See Chuck, k7QO's instructions on this technique. Here's the circuit we'll use: 12. IF Amplifier The purpose of the IF amplifier is to take the desired signal from a mixer and amplify it and filter it. Also automatic gain control (AGC) may be incorporated into the IF section. Usually the AGC circuit also drives an S-meter (signal-strength meter). In this book we'll look at using several types of amplifiers including the MC1350P, the HYCAS (hybrid cascode) and for IF amps with no AGC we may use the LT1253. The famous HYCAS (hybrid cascode) IF amp will ultimately be used. It has 3 hybrid cascode stages of amplification along with AGC and S-meter circuits. I have a design for the crystal filters that I will use. I plan to etch a crystal filter pcb that includes an input and output amplifier. I've picked out the LT1253 video amplifier for the crystal filter input and output. It's very important for proper crystal filter operation for the input and output impedances to be as designed. The LT1253 is typical of an opamp in that it has very high input impedance and low output impedance. That means with at the crystal filter input I can use one of the LT1253 amps with a resistor between the output and crystal filter to match the filter's input impedance. Likewise, at the filter's output, because the LT1253's input impedance is so high we can use another resistor to match the filter's output impedance. The data sheet shows the output impedance at 11MHz to be only about 2 ohms. Notice in the schematic below the RC network with an output labeled 1/2VCC. The LT1253 is not designed for single supply operation (not many opamps are)so we need a voltage halfway between VCC and ground for the input(s) of the amp to they're referenced half-way between the supply voltage like they would be if there was a plus and minus power suppl. I got the idea for this filter circuit from the SS-40 receiver circuit where Jim Kortge, K8IQY, circuit needed 100 ohm input/output impedances for his crystal filter. My 6-crystal filter has an input/output impedance of 150 ohms. Consider the output of the LT1253 to be at ground since it's output impedance is so low. Since it's a video buffer it's output impedance is much lower than a typical opamp. Therefore, the 150 ohm resistor in series with the output is connected to ground level through the LT1253 output and yields an output impedance of 150 ohms. At the output of the filter we have another 150 ohm resistor connected to 1/2VCC which as far as the amp is concerned is ground. Then the filter output is fed into the input of the 2nd amp which with its very high input impedance doesn't affect the output impedance of the filter. I found this schematic on http://users.tpg.com.au/users/ldbutler/LadderFilter.htm after I had already decided on the 6-crystal filter. It's designed for 11.5MHz where mine is 11.0592 MHz and it's designed as a SSB filter with a bandwidth of 2.18KHz. My CW filter will look about the same except the capacitor values will be higher. By the way, these circuits are perfect for using my Designer Dream boards from 4SQRP. The DD boards have place for a 4 crystal filter so I'll start out with that. This is the filter that the DD boards are made for. Jim designed the board with input/output transformers because he knew the importance of presenting the filter with the correct impedance and terminating it with the correct impedance. However, I am going to use the LT1253 as described above. C11 = 150pf c19 = 270pf C21 = 270pf C12 = 150pf C16 = 270pf C20 = 150pf C22 = 270pf C17 = 270pf Notice that these capacitances are much larger than those for a SSB filter. The larger the capacitors the narrower the filter. Of course you cannot just start changing filter capacitors. instead you need to use the filter software to get the proper values. The CW filter above was measured at 588Hz at 6db down. I don't have a nice spectrum analyzer like this. This is from 4SQRP group's info on the SS-40 receiver. I am, however, looking at the Rigol inexpensive spectrum analyzer with tracking generator. EDN magazine compared it favorably to an Agilent costing ten times as much. Sept. 6, 2014 - Well, I now have a Rigol Spectrum Analyzer with a Tracking generator and just learning how to use it. Not having had the luxuray of such a piece of equipment in the past it will take me a little while to learn to use it. I want to be able to measure fundamental freq along with harmonics and also display the bandwidth of BPFs. Crystal filter of the 4SQRP SS-40 IF filter. This circuit is from the SS-40 receiver. I will insert the 6 crystal 500Hz CW filter and change the resistors to 150 ohms. AGC is another consideration in the IF section of the receiver. Basically, AGC (Automatic Gain Control) reduces the gain of the receiver in the prescencs of very strong signals. If read that AGC derived from the audio signals don't work as well as thoe derived from the final IF amplifier. An IF derived AGC does the following: 1. Extracts a sampling of the final IF signal without loading down the IF. That usually means an AGC amp with a relatively high input impedance and enough gain to give us a signal strong enough to process through the AGC signal processing circuits. 2. We need a DC signal that changes with the strength of the incoming signal that in turn controls the gain of the IF amp stages as well as the RF amp in the front end. 3. Then we feed that DC signal into a series of RC networks and amps to give us a DC voltage that changes exactly the way that will control the gain of the IF and RF amps the way we want. 4. We then go through a "threshold" amp that establishes a signal level where the AGC starts to take affect because we really don't want any AGC gain control at all until the incoming signal strength gets up to a certain level. 5. We then feed the signals into the appropriate amps to control their gain. A typical superhet receiver with IF derived AGC controlling gain of IF and RF amps. (source 2005 ARRL handbook) An audio derived AGC system is very similar in operation but not as popular. Audio AGC systems are usually those in more simple designs and for the sake of simplicity and a smaller parts count. 13. Selecting the Proper Components In this section we'll discuss selecting components for temperature stability. For instance, the need to use NPO ceramics in frequency determining circuits. The Spring 2009 QRP Quarterly has an article about choosing capacitors. I don't know where you might get a copy of that article other than by purchasing a copy of The Best of Idea Exchange , a collection from the QRP Quarterly. For choosing a capacitor for a particular circuit here are some "Rules of Thumb". - NPO/COG for all RF frequency determining circuits - XLR next best - Y5U/Y5V - ordinary capacitors, Use for everything else. - For those 20% caps don't use unless they're electrolytic or tantalum in audio and power supply circuits. If you are buying capacitors for RF circuits its best to just purchase all NPO ceramic types. NPO ceramics are usually marked "NPO" or in the case of disc ceramics there is a black mark on the top of the disc. A good rule of thumb is to purchase caps with a voltage rating 4 times that you expect them to experience in the circuit. What if you have an oscillator circuit that drifts badly with warm up? It's probably a capacitor that is the culprit but how do you find out which one it is? With the oscillator operating and listening to its signal in a receiver, blow though a soda straw aimed at each capacitor until you find one that makes the frequency change dramaticlly with its change in temperature. A note about decoupling capacitors: Sometimes the inductance of a 0.1 bypass capacitor begins to show up as the operating frequency is increased so a solution is to parallel each 0.1uf with a 0.01. 14. Noise Blankers and Noise LImiters Noise Blanker Design by N7WS 15. Construction and Building of PC Boards I will use high quality IC sockets for the chips used. Since I've sort of mastered the muppet pcb etching process I'll probably use it on almost all of there boards except the HYCAS IF board which I was able to purchase several of. Another technique I like is the "manhattan" style of construction. Here is a couple of links to explain: K7QO Manhattan Constuction K7QO Advanced Manhattan Construction I you use manhattan style of construction you will want to purchase some MePads and MeSquares from QRPme. I built a simple DC receiver using manhattan construction and you can find the example elsewhere in this book. Sometime its called "Pittsburg Style". See the 4SQRP regen receiver for an example. The example shows it has round pads where mine has square pads but its really the same technique. I already have a couple of N2ZI super DDS2 working so I'll proceed with connecting one of them to a NE602 mixer followed by a Hi-Per-Mite audio section to yield a complete DC receiver. Well, not quite. I will need to add a BPF to the front-end for the band I will be testing it on. (40m to start with) I've recently had a great deal of success with the muppet style of making pc boards and will show that method in detail here. I've recently added to my garage mess a simple setup for making my own printed circuit boards. This process is taken from instructions in the QRP-tech Yahoo group headed by Chuck Adams, K7QO. Following Chuck's instructions I was able to successfully make a small pcb 1st try. I picked out a simple circuit - a noise generator that can be used for receiver testing. The next muppet pcb I have made is for experimenting with a colpitts JFET oscillator with an inductor and capacitor added to "pull" the oscillator frequency a little bit (a VXO - Variable Xtal Oscillator). The QRP-tech Yahoo group is experimenting with using the Fairchild and/or ON Semi J310 N-Channel RF amplifier. The muppet layout below may not appear to scale. If you try to use it to make a pcb make sure it's scaled to the proper size. The width is exactly 3.2" . I purchase SS pcb material in a 4 x 6 inch size and try to make all my muppets half that size. I always make an assembly drawing to use in assembling a pcb but even more important is the placing of components on the assy dwg sometimes catches pcb layout mistakes. An example of finding a layout mistake this way is illustrated below. Notice on the assy dwg the connection between the capacitors and the JFET source is drawn in as a line. That's because I accidentaly left it out. The layout at the left is after I went back and added that connection. I layed out this pcb to accomadate a nice little 10K trimpot. If you were using this circuit in a receiver you would probably want to use a front panel mounted 10K 10turn pot.Notice that the square pads that look odd are actually ground plane connections. Expresspcb allows this kind of pad to thermally isolate the pad from the large ground plane so soldering to it is much easier. Before using this layout also needs to be flipped. I purchase my SS pcb material in 4" x 6" size and cut it in half giving me two 3" x 4" pcb's. Then in the layout with Expresspcb I leave 0.4" all the way around to be etched away to leave a nice looking "frame" around the outside edge of the board. . .so, my 4" wide pcb layout becomes 3.2" wide (2 x 0.4 subtracted on each side.). . .but, I still attach it to the 3" x 4" piece of material. For pcb's that are intended to be installed in some piece of equipment you don't want to have that cute little "frame" around it so that when you drill holes in the corners the metal screw can ground the pcb to the metal enclosure. FOUND ANOTHER MISTAKE If ya use this layout you must add a jumper between the 100K resistor and the gate connection. I got my image to print by printing from Expresspcb to a .pdf file. (If you don't have that capability on your PC you can dowload cutePDF and add that capability.) Then I open that .pdf file in photoshop, flip it and print it. If you don't have photoshop I suggest googling the phrase "free photoshop" and you'll see there are various ways to accomplish it. There are a multitude of free graphics programs plus I believe Adobe will allow you to download and use Photoshop CS2 for free. (One more modification to my layout. I added a few pads so I could add some decoupling components to the drain connection if needed. Since it's such a minor thing I won't show it here.) _____________________ How to really mess up the making of a muppet pcb: January 31, 2014 The first muppet board I made came out perfect. I followed all the instructions perfectly. But on the 2nd I got lazy. Here's the things I did wrong. 1. I chose some old pcb material that was 2oz copper instead of 1oz and it was double-sided. 2. I didn't cover the other side requiring the process to etch many times the amount of copper. 3. I did it in the garage (that's the correct place to do it) but it was 30 F outside and the etchant was cold too. Remember, heat enhances chemical processes so cold slows it down. 4. When I put it in the etchant I started stirring slowly but after a while got tired. After 30min it still wasn't completed but some of the resist had come off so here's the result. It pays to follow instructions exactly, and do it in a warm room. ___________________ Here's another muppet problem I created: Feb 14, 2014 I thought it'd be cool to use blue pcb material instead of that ugly green. Well, as it turns out it creates a problem while you're etching the board. The etch resist is black and the pcb material is dark blue so while you're etching it's difficult to tell the difference. That is, when all the etching is complete the board will appear to be completely black. It's better to use a light colored pcb material so you can see the progress while you're in the etchant. If you really want to use the blue you can use a HIGH-powered LED flashlight up close to monitor your etching progress. It's best to follow Chuck's directions as outlined in his lab notebook. I just finished a muppet pcb for the local Oscillator (LO) for the 40-40 transceiver (xcvr) _____________________ February 15, 2014. More mistakes. See the layout below. Notice in the bottom left there are two ground pads that aren't connected to ground. Now it's fixed. The finished board. You might see a little paper still on the black toner. If you can see that it's NOT on the exposed copper it doesn't hurt anything. If there is a very thin coating of paper on the copper it will be etched away with the copper so don't worry about it. _____________________________ This is the Ugly Weekender VFO board. OOPS! Another mistake that is commonly made is to forget to flip the image so that it comes out right on the final pcb. ___________________________________ Here's another muppet board that I made a mistake with. Notice the toner did not adhere properly in places. Remembering back to the procedure to identify the mistake, I think it was in washing the board to clean the board after scrubbing it with the Scotch Brite. I used a lot of Dawn dishwashing soap and I'm pretty sure the problem came when I didn't rinse the soap off properly. I think next time I won't use soap. I mean, after all, the scrubbing with the Scotch Brite should get all my finger prints off. Notice the pads for the resistors and capacitors are fairly close together. It allows you to use 1206 SMD parts if you want. Here's a correct board. . . .and, here's the final board. Looks good !! I made it on thin, blue copper clad. the blue makes a nice looking pcb. In the etching process you have to use a high intensitiy LED flashlight to watch the process because the unetched areas are black and the pcb material is dark blue and you can't tell when the etching is finished if you don't use the light. BTW, I timed the etching process and it took 5min. I kept on etching 'til 6min was up just to make sure. That was with me stirring the etchant continuously. 14. Crystal Filters In this chapter we'll look a various types of crystal filters, how to design them using readily available software and then provide an actual example of a crystal filter we'll use for a CW receiver IF. In this section I'll show my circuits and methods of selecting crystals for the IF filters. I just purchased a few hundred HC-49 size Fox crystals at 11.0592 MHz. I will pick out about 50 crystals, number them, measure their frequency and enter each's exact frequency in an Excel database. With Excel I can sort by frequency and easily pick out those that are very close, say, within 10Hz. Please see my web page on filters at http://www.w5dor.com/W5DORCrystalFilters.html 17. Using an Audio Filter In this section we'll talk about active audio filters. I used to think audio filters were not much good until I saw the 4SQRP group's Hi-Per-Mite in action. It's not uncommon the have problems such as ringing and other distortion with an audio filter but the filter we will be using will be free of these problems. 18. Constructing the Inductors There are several ways to construct an inductor including using toroid or bifilar cores, winding your own coils with wire and a round insulator and just using of the shelf inductors purchased from a distributor. Purchased inductors may also be modified to meet reuiements. See IF Cans in the next section. Most if not all of my inductors will be simple toroid inductors unless I use some off-the-shelf IF cans. There are several toroid winding tutorials and selection guides on my web at http://www.w5dor.com/W5DOR-Links.html . Scroll down the right column to the section on toroids. 19. IF Transformers I'm thinking of using 11.0592MHz for my IF frequency and if so I might have a reason to use a standard 10.7MHz IF can. 20. The BFO The BFO circuit will probably be a VXO and so arranged to be able to choose USB or LSB. I will have it's frequency adjustable but also have switching to LSB and USB. 21. Switching Various Modules As the receiver evolves I will be adding multiple bands and will have to switch front-end BPFs, LO band and IF filter widths. I plan to use small relays controlled by the Arduino controller. I'm still trying to find the best all-around small relay that doesn't required much current to activate and provides a good switch for small signals. 22. Reducing Noise with DSP There is a DSP DNR module available that I may include to further reduce noise. See the sensitivity section above. 23. The Audio Amplifier I want the audio amplifier to be able to drive any speaker that might be used so I'll try to have just enough power to do so. If you don't need to drive a speaker you can use a TDA7050, a stereo audio amplifier that requires no external components. The TDA1015 might be a very good one to use since it have an independent preamplifier built in and has a hefty 4 watts output. I could use the preamplifier into an audio filer and T/R FET switch and then into the power amplifier section. I have an audio section designed but not built. It uses a TS922 opamp for a preamp and a LM384, 5w amp for the output. (The TS922 is drop-in replacement for the AD822 but with a little better spec's.) This circuit is from the SS-40 receiver. I will insert the 6 crystal 500Hz CW filter and change the resistors to 150 ohms. 24. Single-sideband Operation The BFO section will be switched so that the proper BFO frequency will select the desired side-band coming through the IF. I'll also have a variable BFO frequency adjustment. I have an idea to have both USB and LSB switching of the BFO but also have a position on the BFO switch for variable frequency that will be adjustable with another knob. 25. The Power Supply At first I will use a battery to help eliminate noise coming from the power supply and then when the first receiver is working I'll add a power supply and therefore will be able to tell if it's adding any noise. I have a couple of 7.2VA 12VDC sealed lead-acid batteries I can use. I've also used Mallory 12VDC lantern batteries. For an AC power supply I plan to make it as noise free as possible. I have some line filters for the AC input. I'll use a generous amount of by-pass capacitors, a LM317 or LM 338 regulator and on the output a common-mode inductor. 26. The Enclosure The first version of this receiver will be built in an old HW-32 enclosure. Another possibility is some old 75A-3's that are essentially for parts. 27. Painting and labeling I plan to use the old HW-32 front panel as a template to cut out a thinker aluminum front panel. I want the enclosure to be black with the front panel a dark gray - dark enough to use white labeling. I also have a couple of old 75A-3's that i bought as junkers that are essentially 19" rack enclosures. I can paint the enclosure and purchase a standard panel to replace the front panel if I choose. There are several parts in the old 75A-3's, however, that I plan to keep like the PTO and I'll use the S-meters for sure. I'll save the tubes and offer them to hams engaged in vintage rig restoration. 28. Parts Sources Almost all my parts are in stock in my "junk box" but I still search some of the surplus retailers for bargains that might be useful. I use Mouser when I can. I've been using Mouser since they started many years ago. They are close enough here in Texas so that I can order anything up into the evening and get it the next morning. I've purchased several packages of capacitors and molded chokes on the internet so that I have a complete set of all the values. I do, however, since most came from China, check each with my AADE LC meter before using it. Before I had my AADE LC meter I had a similar priced meter from a well known producer of inexpensive test equipment and I found it to be rather inaccurate. The AADE LC meter is the one to have. I have some narrow boxes with envelopes with the ends cut off and labels writen on them to sort the components. NPO ceramics, non-NPO disc ceramics, silver mica capacitors, molded RF chokes are some that I have sorted. Mouser Electronics Digikey Goldmine Electronics MJPA 29. Keeping records I guess keeping records is what I'm doing writing this book. Accounts of other projects can be found on my web at http://www.w5dor.com . See the contents list at the right. 30. Bibliography Here I'll list my best books and sources of information. (I'll complete it later) EMRFD (ARRL) Stolid State Design for the Radio Amateur (ARRL) QRP Quarterly The Best of Idea Exchange (Like ARRL Hints & Kinks but from QRP Quarterly) W1FB's QRP Notebook (ARRL) W1FB's Design Notebook (ARRL) QRP Classics (ARRL) ARRL Handbooks (ARRL) QRP Power (ARRL) More QRP Power (ARRL) QRP-tech Yahoo Group EMRFD Yahoo Group PHSNA Yahoo Group


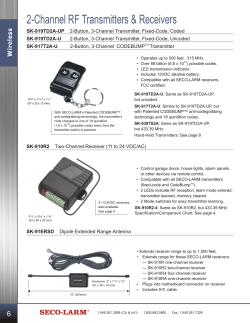


© Copyright 2026