
AEROVEE 2.1 - AeroConversions Products
AEROVEE 2.1
$35.00
ASSEMBLY and INSTALLATION
ACV-R02
Rev Z. 01/14/2015 Applies to AeroVee s/n 0440 and up. Includes top-mounted oil cooler.
Photo for illustration only and does not represent the specific contents of your kit.
A Product Line of Sonex Aircraft LLC
AeroVee 2.1 Rev Z. 01/14/2015
Contents
Your feedback is welcome and encouraged as we continue to
improve this manual. Please send comments to [email protected]. Comments will be reviewed and considered for
inclusion in future revisions of this manual.
Your success is important to us. If you have any questions
while assembling your engine do not hesitate to seek technical
support by emailing [email protected].
Table of Contents.......................................................... 2
IMPORTANT!.................................................................. 4
AeroVee Engine Kit Documentation....................................................4
AeroVee Serial Number........................................................................4
Assembly / Service Resources.................................... 4
Other AeroConversion Resources.........................................................4
AeroConversions' Service Bulletins.....................................................4
Additional Resources............................................................................4
Specifications................................................................ 5
Weights and Dimensions.......................................................................5
Mount Dimensions................................................................................5
Prop Hub Bolt Pattern...........................................................................5
General Specifications..........................................................................6
Cylinder Identification, Engine Orientation, Firing Order....................6
Operating Limitations...........................................................................6
Before You Begin... ..................................................... 7
Crankshaft Assembly.................................................... 8
Cam Assembly............................................................. 10
Connecting Rod Assembly......................................... 11
Crank Case Preparation.............................................. 12
Crank Case Assembly................................................. 16
TABLE of CONTENTS
Trigger Shaft Installation............................................ 34
Spark Plug Installation................................................ 35
Intake Manifold Installation........................................ 36
Alternator Installation................................................. 37
Firewall Preparation.................................................... 38
Voltage Regulator Installation.............................................................38
Secondary Ignition Coil Installation...................................................38
Mounting the Engine................................................... 39
Mount Bushings..................................................................................39
Lifting the Engine...............................................................................39
Mount Pin Detail Drawing and Typical Installation...........................40
Magnatron Ignition Wiring.......................................... 41
Electronic Ignition Wiring........................................... 43
Spark Plug Wires......................................................... 44
Electronic Ignition Timing.......................................... 45
Alternator / Regulator Wiring..................................... 47
Starter Installation / Wiring......................................... 48
Oil Breather Tube......................................................... 49
Oil Cooler Installation Options................................... 50
Oil Cooler - Bottom Mount.................................................... 51
Oil Cooler - Top Mount.......................................................... 52
Oil Cooler Removal / Bypass................................................. 55
Exhaust Installation.................................................... 56
Installing EGT Probes............................................................. 60
Fuel Supply.................................................................. 57
Engine Cooling Baffles............................................... 59
Rocker Shaft Installation............................................ 23
Engine Oil..................................................................... 60
Approved Oils - Break-in Period............................................ 60
Approved Oils - Post Break-in................................................ 60
Priming the Engine and Setting the Oil Level........................ 60
Oil Changes During Break-in Period...................................... 60
Oil Screen Installation................................................. 25
Start-up and Break In.................................................. 61
Oil Pump Installation................................................... 26
Oil Cooler Installation............................................................. 26
Operation Without an Oil Cooler............................................ 26
Maintenance................................................................. 62
Minimum Maintenance Interval............................................. 62
When to Rebuild Your AeroVee.............................................. 62
Torque Values.......................................................................... 62
Piston and Cylinder Assembly................................... 20
Compression Ratio Chart........................................................ 21
Cylinder Head Installation.......................................... 22
Oil Seal Installation..................................................... 27
Prop Drive Lug Installation......................................... 28
Valve Adjustment......................................................... 29
Block-off Plates and Plugs......................................... 30
Flywheel Installation................................................... 31
Flywheel Magnet Orientation Check...................................... 32
Accessory Plate Installation....................................... 33
Sonex Aircraft LLC
© 2014 All Rights Reserved
Troubleshooting.......................................................... 63
Electrical Schematics................................................. 65
APPENDIX A: Sonex Cowl Openings........................ 66
Details the installation of an AeroVee on a Sonex, Waiex, or
Xenos airframe.
Revision Log................................................................ 69
Part Numbers and Packing Lists............................... 70
2
AeroVee 2.1 Rev Z. 01/14/2015
Disclaimer and Limited Warranty
The Experimental AeroVee Engine Kit is
sold “as is”. No Warranty is expressed or
implied!
Sonex Aircraft LLC makes every effort to assure the supplied
components of the AeroVee Engine Kit meet high quality and
durability standards, and warrants to the original purchaser
that these components are free of defects in material and
workmanship for the period of one year from the date of purchase. This warranty does not apply to damage due directly or
indirectly to improper assembly, misuse, abuse, negligence or
accidents, repairs or alteration out side our facilities, or lack of
maintenance. Due to the experimental nature of the AeroVee
Engine Kit, the end user is solely responsible for determining
suitability of application, assembly, installation and operation.
Sonex Aircraft LLC and its agents will in no event be liable
for death, injuries to person or property, or incidental, contingent, special, or consequential damages arising from the use of
our product.
Sonex Aircraft LLC and its agents will not be responsible
for any incidental or consequential damage including direct
or indirect labor, repair, medical, or legal expense in any way
attributable to the use of any AeroConversions, Inc. product
or to the delay or inconvenience caused by the necessity of
replacing or repairing any such item.
Engine Monitoring Instrumentation
Sonex Aircraft LLC requires the use of a the following
cockpit-installed engine monitoring instruments in every
engine installation: oil pressure, oil temperature, cylinder
head temperature (1 minimum), and exhaust gas temperature
(1 minimum). Failure to properly monitor your engine may
result in severe engine damage which is not covered under this
limited warranty.
IMPORTANT!
AeroVee Engine Kit Documentation
This manual is your primary document for the assembly and
operation of your Experimental AeroVee Engine Kit. The included assembly DVD is an additional aide, but when there is
a discrepancy between this manual and the DVD, the information in this manual takes precedence.
The manuals provided with the AeroVee kit are important
documents and should be kept with your aircraft's documents.
Keep Your Packing Lists
The packing list provided with each AeroVee kit lists the
specific parts provided for that specific engine. Please reference your packing list for correct part numbers when ordering
maintenance and repair parts for your particular engine.
In addition to the packing list secured to the outside of the
engine kit boxes, a duplicate packing list has been attached to
the back of the physical manual supplied with that engine.
Copies of (most) packing lists are archived by Sonex Aircraft
and you may request an electronic (PDF) copy. To get a copy,
provide evidence you own the engine for which you are requesting the original packing list as well as the engine's serial
number.
Engine Serial Number
The engine's serial number is stamped on the rear of the accessory plate, above the starter. It is also recorded on your packing list. Record your engine's serial number below.
Engine Serial Number
Stamped on aft side of Accessory Plate, above the starter
Not TSO'd for Certified Aircraft
511 Aviation Road
Oshkosh, WI 54902
Phone (920) 231-8297
fax (920) 426-8333
[email protected]
www.aeroconversions.com
Distributed Worldwide by: Sonex Aircraft, LLC.
www.sonexaircraft.com
© 2013 Sonex Aircraft LLC. All Rights Reserved. The information
disclosed herein is the property of the originator who reserves all patent, design, proprietary, manufacturing, use and sales rights thereto,
except for the rights expressly granted to others. This document shall
not be reproduced nor shall the information contained within be
used by or disclosed to others except as expressly authorized by the
originator.
Sonex Aircraft LLC
© 2014 All Rights Reserved
3
AeroVee 2.1 Rev Z. 01/14/2015
AeroConversions Resources
AeroConversions continually improves and monitors its products. It is in your best interest to stay abreast of these improvements and implement them as needed.
AeroConversions Website
AeroConversions, Inc. maintains a website which is continuously updated. Perhaps the most important part of the website
for an AeroVee builder/operator is the Service Bulletin section. You are encouraged to periodically check for Service
Bulletins which may affect the performance of your AeroVee
engine.
The AeroConversion website is aeroconversions.com
AeroVee Internet Discussion Group
AeroConversions operates an internet discussion group which
is open to all owners and enthusiast of the AeroVee Engine
Kit. Joining this list will get you in touch with other engine
owners and is an additional form of mass-communication
between AeroConversions, Inc. and its customers.
Information on joining this list is located on the
AeroConversions website at aeroconversions.com.
AeroConversions Tech Support
AeroVee owners can receive individual tech support by email
or phone. We encourage you to contact us via email first, as
this allows us the opportunity to formulate a clear, concise
answer to your question.
The email address is [email protected]
AeroConversions' Service Bulletins
AeroConversions, Inc. is committed to providing quality
products. We do this through the constant improvement of
our AeroVee Engine Kit, and also by identifying parts or
procedures which we feel require the attention of the existing
AeroVee Engine Kit fleet.
ASSEMBLY/SERVICE RESOURCES
Optional Service Bulletins
An optional Service Bulletin is issue when we identify an area
which we feel will contribute significantly to the reliability/
longevity of the AeroVee engine. Optional Service Bulletins
need not be complied with but we strongly encourage all
AeroVee owners to implement the suggested change/upgrade.
Upon compliance of the Optional Service Bulletin, an entry
must be made in your engine log book.
Optional Service Bulletins are posted on the AeroConversions
website and announced on the AeroVee Internet Discussion
Group. It is your responsibility to check the AeroConversions
website for Optional Service Bulletins.
Keep Your Packing Lists
The packing list provided with each AeroVee kit lists the
specific parts provided for that specific engine. Please reference your packing list for correct part numbers when ordering
maintenance and repair parts for your particular engine.
In addition to the packing list secured to the outside of the
engine kit boxes, a duplicate packing list has been attached to
the back of the physical manual supplied with that engine.
Copies of (most) packing lists are archived by Sonex Aircraft
and you may request an electronic (PDF) copy. To get a copy,
provide evidence you own the engine for which you are requesting the original packing list as well as the engine's serial
number.
Additional Resources
There are many books, magazines, and videos available for
the assembly, maintenance, and operation of "Type 1"-based
engines. We highly recommend "How to Rebuild Your
Volkswagen Air-Cooled Engine" by Tom Wilson (ISBN 9780-89586-225-9).
When we identify parts or procedures which we feel require
the attention of AeroVee owners, we issue a Service Bulletin.
Required Service Bulletins
A Required Service Bulletin, as the name implies, must be
complied with. It may be a part or a procedure which we feel
must be corrected for the continued use of your engine.
Upon compliance of the Required Service Bulletin, an entry
must be made in your engine log book.
Required Service Bulletins are posted on the AeroConversions
website, announced on the AeroVee Internet Discussion
Group, and mailed to the address of record of each AeroVee
Engine Kit owner. It is your responsibility to keep us informed
of any address or engine ownership changes, and to check the
AeroConversions website for Required Service Bulletins.
Sonex Aircraft LLC
© 2014 All Rights Reserved
4
AeroVee 2.1 Rev Z. 01/14/2015
SPECIFICATIONS
Weights and Dimensions:
Weight (Less Oil and Exhaust):
with Standard Pistons and Barrels..........................160 lbs.
Length...........................................................................24.25”
Width.................................................................................30”
Height.......................................................................20.0625”
4.875"
24.25"
30.00"
18.875"
20.0625"
21.875"
w/ optional
air cleaner
Mount Dimensions (Viewed from behind)
See Page 40 for Motor Mount Pin Detail
4.8"
Prop Hub Bolt Pattern
4.8"
9/16" Dia. Drive Lug Hole - Typical 6 places
5" O.D.
5.55"
5.55"
Drive Lugs Centered on 4" Dia. Bolt Circle
Sonex Aircraft LLC
© 2014 All Rights Reserved
5
AeroVee 2.1 Rev Z. 01/14/2015
General Specifications (Subject to change without notice)
Power and Displacement:
HP @ 3400 RPM...........................................................80 HP
Static RPM @ WOT (with correct propeller)....... 3000 RPM
Bore.............................................................................. 92mm
Stroke........................................................................... 82mm
Displacement............................................................... 2180cc
Compression Ratios (Builder Adjustable):
7.0:1 For use with automotive gasoline with a posted
(R+M)/2 of 90 or greater conforming with ASTM D 4814.
8.0:1 For aviation gasoline 91/98 minimum grade conforming to ASTM D 910
Ignition System:
Firing Order............................................................ See Photo
Spark Plugs......................................... Autolite 4163 or equal
Spark Plug Gap:
Top Plugs.....................................................................018”
Bottom Plugs...............................................................032”
Timing:
Primary Ignition (Magnatrons)............ Fixed @ 28o BTDC
Secondary Ignition (Electronic).......................... 28o BTDC
Ignition Module Gap (Primary Ignition)............... .010-.014”
Cooling and Lubrication:
Primary Cooling ............................................................... Air
Secondary Cooling............................................................ Oil
Oil Capacity........................................................2.75 US Qts.
Oil Type............. See "Engine Oil" section for approved oils.
Fuel System:
Throttle Body..................... AeroInjector, ACV-C07S, 32mm
Approved Fuels:
7.0:1 Compression: Automotive gasoline with a posted
(R+M)/2 of 90 or greater conforming with ASTM D 4814.
8.0:1 Compression: Aviation gasoline 91/98 minimum
grade conforming to ASTM D 910.
SPECIFICATIONS
Cylinder Identification, Engine Orientation,
and Firing Order
Cylinder Identification
For assembly and maintenance, the AeroVee uses the cylinder
identification numbers shown below.
Engine Orientation
When referencing the location / orientation of items on the
engine, "Front", "Back", "Left", and "Right" are used as if the
engine is installed in a tractor configuration and viewed from
behind the engine, as shown below.
Firing Order
The AeroVee has a "wasted spark" ignition system which allows the spark plugs to fire on non-combustion strokes as well
as combustion strokes. The arrows in this diagram illustrate
the order of combustion.
CYLINDER NUMBERING, FIRING ORDER,
and ENGINE ORIENTATION
Front
Right
Left
2
4
1
3
Back
Electrical System:
Battery Required (minimum).......................... 12v @ 20 amp
Starter.......................................................................... Geared
Alternator....................................................................20 amp
Propeller Drive:
Propeller Drive.....................................................Direct (1:1)
Prop Bolt Pattern........... 6 holes, 9/16" dia., on 4" dia. center
Prop Drive Bushings..........................9/16" dia. x 7/16” long
Valve Setting:
Valve Setting (cold)........................................... 006" to .008"
Sonex Aircraft LLC
© 2014 All Rights Reserved
Operating Limitations (Subject to change without notice)
Idle RPM..........................................................700-900 RPM
Cruise RPM.............................................. 3200 +/- 200 RPM
Maximum RPM.................................................... 4,000 RPM
Oil Temp. - Min............................................................160o F
Oil Temp. - Max.......................................................... 230o F
Oil Pressure - Min....................... 10 PSI (hot oil, idle RPM)
Oil Pressure - Max.....................................................100 PSI
Oil Pressure@ Cruise............................................. 40-50 PSI
CHT @ Cruise......................................................350o-375o F
CHT @ Climb (5min.)................................................. 420o F
CHT Max...................................................................... 450o F
EGT Max.................................................................... 1400o F
6
AeroVee 2.1 Rev Z. 01/14/2015
BEFORE YOU BEGIN...
A Successful, Reliable Engine Installation Begins Here.
Protect Yourself
Always wear safety glasses
When using paint and chemicals, work in a well ventilated
room and wear appropriate protective gear (gloves, mask,
etc.).
The use of compressed air to clean parts is not recommended.
Compressed air can send debris flying at great speed and cause
serious injury.
Do not use flammable liquids near open ignition sources such
as water heaters, furnaces, electric motors, etc.
Read, Understand, and Follow
the Instructions
Read through each procedure before performing the individual
steps.
Make sure you have the appropriate tools, parts, and consumables on hand. Some procedures cannot be interrupted while
you track down that forgotten tool.
Photo References in this Manual
Photos in this manual are included to illustrate specific steps
and may not accurately illustrate what an engine looks like
during an actual build-up. Do not add or remove parts based
on the photographs in this manual. The step-by-step instructions are your only guide for adding or removing parts during
engine assembly.
Work Cleanly
Parts must be thoroughly cleaned with Mineral Spirits and in
many cases, lubricated, before assembly. Remove rust-inhibiting coatings from each part.
The engine case and cylinder heads must be carefully cleaned
and inspected to remove any metal chips which may remain
from the machining process.
Sonex Aircraft LLC
© 2014 All Rights Reserved
The use of compressed air to clean parts is not recommended.
Compressed air can send debris flying at great speed and
cause serious injury, as well as drive the debris deeper into
crevasses.
Work Smartly
Parts should never be forced into position. If excess effort
seems to be needed to assemble parts, STOP and investigate
the problem.
NEVER apply concentrated heat (such as with a torch) to
assemble or disassemble parts. Excess heat will damage parts
and result in a potentially dangerous engine installation.
Part Numbers and Packing Lists
The packing list provided with each AeroVee kit lists the
specific parts provided for that specific engine. Please reference your packing list for correct part numbers when ordering
maintenance and repair parts for your particular engine.
In addition to the packing list secured to the outside of the
engine kit boxes, a duplicate packing list has been attached to
the back of the physical manual supplied with that engine.
Copies of (most) packing lists are archived by Sonex Aircraft
and you may request an electronic (PDF) copy. To get a copy,
provide evidence you own the engine for which you are requesting the original packing list as well as the engine's serial
number.
AeroConversions reserves the right to supply compatible,
alternative replacement parts for any part of the core engine or
conversion package. Such parts may appear different than the
part originally provided in the kit or depicted in the manual,
and may bear a different part number, but will be functionally
identical or superior to the original kit-supplied component.
7
AeroVee 2.1 Rev Z. 01/14/2015
Note: If you have the optional pre-assembled crank shaft (part
number ACV-H01-20), skip to Step 10.
CRANKSHAFT ASSEMBLY
Preparation:
__ 1. Inspect the bore of the Crank Timing Gear for burrs. If
necessary, lightly polish it with fine emery cloth.
__ 2. Thoroughly clean all parts with Mineral Spirits.
__ 3. Remove the four (4) hex plugs from the crankshaft and
thoroughly clean the crankshaft with Mineral Spirits.
Re-install the hex plugs with Locktite #242.
__ 4. Test fit the prop hub. The prop hub should NOT slide
onto the crankshaft.
__ 5. Place the cleaned crankshaft in a freezer at least 12
hours prior to assembly.
__ 6. Heat an oven to 450o F. Place the crank timing gear and
prop hub in the oven and heat for 60 minutes.
Tools Required:
__ Oven Heated to 400 degrees F.
__ Heat-proof Gloves
__ White Lithium Grease
__ 1/2” Impact Wrench with 30MM Socket
__ Locktite #242
__ Block of Wood
__ Hammer or Mallet
__ Torque wrench (80 ft. lbs. capacity)
Parts Required:
__ Prop Hub, ACV-H01-16
__ Prop Hub Bushing and Washer, ACV-H01-17
__ Crankshaft, ACV-P01-98
__ Oil Slinger, ACV-P01-101
__ #1 and #2 Bearings from Main Bearing Set, ACV-P01-57
Note: Bearing #1 is the small cylindrical bearing, Bearing #2
is the large cylindrical bearing without flanges.
__ Retaining Ring, ACV-P01-64
__ Forward Woodruff Key, ACV-P01-99
__ Aft Woodruff Key, ACV-P01-104
__ Crank Timing Gear, ACV-P01-62
__ Bolt, ACV-Z01-74
__7. Apply an even coat of white lithium grease to the inside
surface of bearing #1 and bearing #2 from the Main
Bearing Set.
Assembly Instructions:
__ 1. Install the Aft Woodruff
Key into the crankshaft. Make sure it is
fully seated.
1
__ 2. Slide bearing #2 (with
an even coat of white
lithium grease applied
to the inside surface)
onto the crankshaft
with the machined
dot (arrow in photo)
toward the crankshaft's
counter-weight.
2
IMPORTANT. Perform steps 3 through 10 near the oven.
Once the parts are removed from the oven, work quickly
but carefully to assemble the crankshaft. DO NOT
FORCE PARTS ONTO THE CRANKSHAFT.
If a part does not go into place on the crankshaft, STOP.
Do not force it on and do not try to remove it. Contact
Sonex Aircraft LLC before continuing.
Sonex Aircraft LLC
© 2014 All Rights Reserved
8
AeroVee 2.1 Rev Z. 01/14/2015
CRANKSHAFT ASSEMBLY
__ 3. Install the Timing Gear
with the two machined
dots (arrow in photo)
facing away from bearing #2.
3
__9. Align the keyway of the Prop Hub with the forward
woodruff key installed in the crankshaft and tap the
prop hub into place using a mallet and block of wood.
The prop hub must be tight against the oil slinger.
__ 4. Install the Retaining
Ring in the groove in
the crank.
4
Immediately install
Prop Hub Bushing
and Washer and Bolt
(ACV-Z01-74). Use an
impact wrench to tighten the bolt and push the
prop hub against the oil
slinger.
8
__ 5. Enlarge the oil supply
hole in bearing #1 by
updrilling it with a #30
drill bit. Remove any
burrs which may occur
while drilling.
__ 6. Slide bearing #1 (with
an even coat of white
lithium grease applied
to the inside surface)
onto the crankshaft
with the machined dot
(arrow in photo) toward the retaining ring.
__ 7. Slide the Oil Slinger
onto the crankshaft
with the curved
(concave) side of the
slinger facing the end
of the crankshaft.
7
__10.After the prop hub cools to room temperature, remove
the bolt (ACV-Z01-74), apply Locktite 242 to its
threads, and re-install. Torque the bolt to 80 ft.-lbs.
7
6&7
__8. Install the Forward
Woodruff Key into the
crankshaft.
Sonex Aircraft LLC
© 2014 All Rights Reserved
9
AeroVee 2.1 Rev Z. 01/14/2015
Tools Required:
__ Socket Wrench
__ 13mm Socket
__ Torque Wrench (20 ft.-lbs. capacity)
__ "Red" Locktite (High Strength Threadlocker)
Parts Required:
__ Cam Gear, ACV-P01-49
__ Cam Shaft (w/ hardware), ACV-P01-72
CAM ASSEMBLY
__1. Align the machined dot
on the face of the Cam
Gear (arrow in photo)
with the slot in the
Cam Shaft. Apply Red
Locktite to the bolts
and install the bolts and
washers (if provided).
1
__2. Torque the bolts to 20
ft-lbs.
Assembly Instructions:
Note: The Assembly Lube provided with the cam gear will be
used to lubricate the valve lifters in a later operation. Do not
lubricate the cam shaft bolts as instructed on the assembly lube
package included with the cam shaft.
Note: Cam shafts are supplied with varying hardware, all of
which is acceptable. Use the hardware supplied with the cam
to attach the cam gear. This may include either:
Cam Bolts with integral lock washers.
Cam bolts and wavy spring washers.
Cam bolts and tab lock washers.
Note: While not common, slight interference between the cam
and the connecting rods does occasionally occur. One cause of
this interference is a raised edge around the numbers stamped
in the shaft of the cam. Lightly polishing these numbers will
remove the raised edge and eliminate a possible source of
interference.
__3. If tabbed washers were
provided with your cam
shaft, bend the tabs
against the bolt heads
with a flat-blade screwdriver.
3
A raised edge around the stamped numbers on the cam can
sometimes cause interference with the connecting rods.
Sonex Aircraft LLC
© 2014 All Rights Reserved
10
AeroVee 2.1 Rev Z. 01/14/2015
CONNECTING ROD ASSEMBLY
Tools Required:
__ White Lithium Grease
__ Socket Wrench and Socket Set
__ Moly Lube
__ "Red" Locktite (High Strength Threadlocker)
__ Torque Wrench (40 ft-lbs. capacity)
__ Feeler Gauge
__4. The connecting rods
are attached to the
crankshaft, as shown in
the photo below, with
the stamped numbers
facing up. Be sure
to re-assemble the
connecting rods as
matched parts.
Parts Required:
__ Connecting Rods, ACV-P06-33 or ACV-P01-33
__ Rod Bearing Set, ACV-P01-59
__ Crankshaft Assembly
4
4
Assembly Instructions:
Note: Both parts of each connecting rod are stamped with
a unique number, identifying
them as matched parts. The
connecting rods must be reassembled as matched parts,
with the numbers together as
shown in this photograph.
__1. Remove the fastener from each Connecting Rod and
carefully separate the two parts. Do not scratch or score
the machined surface of the connecting rods.
__2. Wipe the mating
surfaces of the connecting rods and bearing
halves so they are free
of oil and dust. Install
the bearing halves by
aligning the tab on
each bearing half with
the notch in each connecting rod and pressing the bearing halves
into place.
2
__5. ACV-P06-33 Rods Only (with starred bolt and nut):
Apply Moly Lube to each rod bolt and install. Torque
each bolt as follows:
Note: The clearance between the rod bearings and rod journals
must be between .002" and .0025". When assembling new
parts, as provided in the AeroVee 2.1 kit, the proper clearance
is often assumed. When rebuilding an engine using remanufactured parts, this clearance must be checked. Detailed instructions for checking this clearance are given in Tom Wilson's
book "How to Rebuild Your Volkswagen Air Cooled Engine".
__3. Apply an even coat of white lithium grease to the exposed surfaces of each bearing half.
Sonex Aircraft LLC
The connecting rods are installed on the crankshaft in the
orientation shown above with the stamped numbers on each
rod facing up.
© 2014 All Rights Reserved
___first to 8 ft.-lbs.
___then to 15 ft.-lbs.
___then 24 ft.-lbs.
___Then the final torque of 38 ft.-lbs.
ACV-P01-33 Rods Only (with hex bolt): Apply "Red"
Locktite (or, if supplied with your rods, ARP UltraTorque) to the threads of each rod bolt and install.
Torque each bolt in four steps:
___first to 8 ft.-lbs.
___then to 15 ft.-lbs.
___then 24 ft.-lbs.
___Then the final torque of 30 ft.-lbs.
__6. Check each connecting rod for freedom of movement
and .005" to .020" side clearance.
11
AeroVee 2.1 Rev Z. 01/14/2015
CRANK CASE PREPARATION
Assembly Instructions:
__1. Install the head studs as shown in the photos below.
Tools Required:
__ Flat Blade Screwdriver
__ Rubber Mallet
__ Fine File
__ White Lithium Grease
Cylinder Head Stud Placement
S = Short Cylinder Head Stud (7-3/8" - 7-1/2" long)
Parts Required:
__ Engine Case
__ 8mm Head Stud Kit, ACV-P01-86
__ Case kit, ACV-P02-12
__ Main Bearing Dowel Pins (Set of 5), ACV-P01-46
__ Valve Lifters, ACV-P01-48
__ Main Bearing Set (split bearings only), ACV-P01-57
__ Cam Bearings, ACV-P01-58
__ Gasket Set, ACV-P02-15
M = Medium Cylinder Head Stud (8" - 8-1/4" long)
L = Long Cylinder Head Stud (9-5/16" - 9-3/4" long)
L Note: This threaded insert is
recessed in the case.
S
Preparation:
__ 1. Separate the case halves and thoroughly clean them
with mineral spirits. Remove all traces of metal chips
and dust from the case. Pay particular attention to
removing metal chips which still cling to the edge of
machined surfaces (see photo) and to casting slag on the
inside of the case which may dislodge after the engine
is in service.
M
L
M
M
S
M
Remove
Clinging
Chips
L
Remove clinging chips and loose slag from the cases interior.
__2. If you are painting the case, now is the best time to do
so. Mask off all machined surfaces, mating surfaces,
and holes before painting.
Note: We have had good luck using "Barbecue Black"
spray paint on the case and piston barrels.
Sonex Aircraft LLC
© 2014 All Rights Reserved
12
AeroVee 2.1 Rev Z. 01/14/2015
__2. Lay the case on it's side so the oil pressure relief ports
in the bottom of the case are accessible.
2
Oil Pressure Relief Ports
CRANK CASE PREPARATION
__8. Insert the short spring
behind the non-grooved
plunger.
10
__9. Place a metal gasket
on a retaining plug and
screw the plug into the
relief port.
__10.Install the Main Bearing Stud Seals (Qty. 6) from the
Gasket Set (ACV-P02-15). The seals slide over the 6
large studs in the right case half.
10
__3. Find the oil pressure
relief plungers (2),
springs (1 long, 1
short), metal gaskets
(2) and retaining plugs
(2) in the Case Kit.
Note: The remainder
of the case kit may be
discarded as it is not
needed on the AeroVee.
__4. Insert the grooved
plunger, lightly lubricated with motor oil,
solid end first into the
oil pressure relief port
in the bottom of the
case near the prop hub.
3
The Stud Seals slide over the 6 large studs in the right case
half.
4
Note: The plungers
must move freely in
the passages. If they do
not, clean the plungers
with fine emery cloth
until they do.
__11. Wipe clean the case journals and the back of each Cam
Bearing and install the bearings in the left half of the
case. The following photos show where each bearing is
installed.
11
__5. Insert the long spring
behind the grooved
plunger.
__6. Place a metal gasket
on a retaining plug and
screw the plug into the
relief port.
__7. Insert the non-grooved
plunger, lightly lubricated with motor oil,
solid end first into the
oil pressure relief port
in the bottom of the
case near the flywheel.
Sonex Aircraft LLC
5, 6, & 9
The cam bearings are installed in the left case half as shown
in these photos. The left photo is the rear (flywheel end) of the
case, the right photo is the front (prop hub end).
7
© 2014 All Rights Reserved
13
AeroVee 2.1 Rev Z. 01/14/2015
__12.The flanged cam bearing for the right case half must
have its alignment tab filed off. File the tab off with a
fine file.
12
CRANK CASE PREPARATION
__14.Test fit each Valve Lifter in a guide. The lifters must
slide freely in the guides. If a lifter sticks, clean the
guide with very fine emery cloth. After test-fitting, liberally lubricate each lifter with white lithium grease and
install them in their guides.
14
File the tab (arrow) off the flanged bearing with a fine file.
__13.Wipe clean the case journals and the back of each Cam
Bearing and install the bearings in the right half of the
case. The following photos show where each bearing is
installed.
13
Test fit each valve lifter to assure smooth operation.
__15.Test fit the Cam Shaft in each case half to make sure
there is clearance between the lobes of the camshaft and
each valve lifter. Interference between the cam shaft and
a lifter must be investigated.
15
The cam bearings are installed in the right case half as shown
in these photos. The right photo is the rear (flywheel end) of
the case, the left photo is the front (prop hub end).
Test fit the camshaft to confirm there is clearance between the
lobes of the camshaft and each lifter.
__16.Install four (4) Dowel Pins in the right case half. Make
sure they are fully inserted.
16
Dowel Pins
Sonex Aircraft LLC
© 2014 All Rights Reserved
14
AeroVee 2.1 Rev Z. 01/14/2015
CRANK CASE PREPARATION
__17.Install one (1) Dowel Pin in the left case half. Make
sure it is fully inserted.
__18.Install one half of the Split Main Bearing (from Main
Bearing Set, ACV-P01-57) into the middle journal of
each case half, carefully aligning the recess in the bearing with the dowel pin in the journal. A light tap may be
required to properly seat each bearing half.
18
Recess
Dowel Pin
Align the recess in the bearing half with the dowel pin in the
bearing journal and press the bearings in place.
__19.Apply an even coat of white lithium grease to all of the
cam bearings and main bearings.
Sonex Aircraft LLC
© 2014 All Rights Reserved
15
AeroVee 2.1 Rev Z. 01/14/2015
CRANK CASE ASSEMBLY
Tools Required:
__ White Lithium Grease
__ "Red" Locktite (High Strength Threadlocker)
__ Torque Wrench (25 ft-lbs. capacity)
__ Torque Wrench (227 ft-lbs. capacity)
__ Rubber Mallet
__ Feeler Gauge Set
__ 13, 19 and 36mm Sockets
__ Permatex Aviation Form-A-Gasket #3 or Flange Sealant
__ Cam Assembly Lubricant
Parts Required:
__ Previously Completed Sub-Assemblies
__ Main Bearing Set, Bearing #4 (Flanged), ACV-P01-57
__ Flywheel Assembly, ACV-F01-02
__ Cam Plug, ACV-P01-35
__ Gland Nut, ACV-P01-42
__ End Shim Kit, ACV-P02-19
__ Gland Nut Washer, ACV-P01-44
__ ACV-Z01-75, Elastic Stop Nut, 12mm, Qty. 6
__ ACV-Z01-16 Bolts, Qty. 3
__ ACV-Z01-23 Elastic Stop Nuts, Qty. 15
__ ACV-Z01-26 Washers, Qty. 17
__ ACV-Z01-28 Washers, Qty. 6
__ Cam Screw Gaskets from Gasket Kit), Qty. 2, ACV-P02-15
Assembly Instructions:
__1. Apply a coat of white
lithium grease to the
inside of Main Bearing
#4 and slide it onto the
end of the crank shaft
assembly. Make sure
the dowel pin hole is
toward the end of the
crankshaft.
__2. Carefully set the crank
shaft assembly into
right case half. Make
sure dowel pin hole in
each bearing is aligned
with the dowel pins in
the case half, and the
crankshaft assembly is
fully seated in the case
half.
Sonex Aircraft LLC
1
__3. IMPORTANT! Temporarily mate the case halves and
rotate the crankshaft. Listen and "feel" for a knock
which may indicate the case is interfering with the connecting rods. If interference is detected:
a. Disassemble the case halves and identify the location of the interference.
b. Remove crank assembly.
c. Taking care not to get grinding dust on other parts,
use a remove case material to provide at least .045"
clearance. Dremel-style motor tools work well for
this operation.
d. Reinstall the crankshaft assembly and repeat step 3
until all interference is eliminated.
__4. Apply a small amount
of cam assembly
lubricant to each valve
lifter.
4
__5. Align the single dot on the gear of the cam shaft assembly with the two dots on the gear of the crankshaft
assembly and rotate the cam down into the into the
cam bearings in the right case half. After seating the
camshaft in the bearing, make sure the dots still align as
shown in photo 5a.
5a
5b
Dowel Pin Hole
__6. IMPORTANT! Make sure the main bearings of the
crankshaft are still fully seated on the dowel pins in the
case half.
2
© 2014 All Rights Reserved
16
AeroVee 2.1 Rev Z. 01/14/2015
CRANK CASE ASSEMBLY
__7. Align the 8 holes in the center of the flywheel with
the dowel pins on the end of the crankshaft. The hole
pattern permits the flywheel to be installed in only one
position.
__13.Check your shim selection by sliding the shims, together with a feeler gauge, between the flywheel and the
main bearing. You should have between .003" and .006"
of end play.
__8. The flywheel is a tight
fit onto the crankshaft.
It must go on squarely.
If it binds, remove it
and lightly polish the
dowel pins with fine
emery cloth. Once
the flywheel has been
started by hand, complete the installation
by tightening the gland
with an impact wrench.
If necessary, adjust your shim selection to achieve the
required end play of .003" to .006"
Set the shims aside for later installation.
__14.Remove the gland nut and flywheel from the crank
shaft. It may be necessary to use a flywheel puller.
__9. Push the crankshaft
towards the back
(flywheel end) of the
engine and, with a
feeler gauge, measure
the gap between the
flywheel and the rear
main bearing. Record
this measurement in the
"Shim Chart".
__10.Complete the shim
chart by subtracting .006" from gap
recorded in step 9. This
is the total thickness of
shims you will use to
set the proper end play.
__15.Carefully align the
Cam Plug, with its
closed (flat) end out,
and install it in the cam
plug bore at the flywheel end of the case.
Shim Chart:
__11. Clean the end shims
with a mild solvent to
remove the preservative.
Complete this chart to
determine the total thickness of shims required. See
steps 9 through 10.
__12.Select any combination
of three to five shims
which most closely
equals the "Shim
Thickness" determined
in step 10.
Gap (see Step 9) = 0.______"
Subtract .006"
Shim Thickness
Note: Most cases have
a smooth cam bore for
a “ribbed” plug. Some
cases have a groove
in the cam bore for a
cam plug with a raised
bead.
CAM
FLYWHEEL
- .006 "
= 0.______"
Continue with step 11.
ACV-P01-35
Metal plug with a single
ridge. Used in cases
with a "grooved" cam
bore.
Sonex Aircraft LLC
CAM PLUG
© 2014 All Rights Reserved
ACV-P01-34
Plastic plug with a
ribbed diameter. Used
with a "smooth" cam
bore.
17
AeroVee 2.1 Rev Z. 01/14/2015
__16.Apply Permatex Aviation Form-A-Gasket #3
or Flange Sealant to the
mating surfaces of the
case halves. Apply according to the product
manufacturer's instructions. Apply sparingly.
__21.In the order shown in the photo, re-torque the 6 large
nuts to 25 foot-pounds. Do not exceed 25 foot-pounds.
16
__22.Check for free movement of the crankshaft, as described
in step 20.
__17.Note: While assembling the case halves,
the lifters in the left
half will want to slide
out. This can be minimized by giving them
each a heavy coat of
white lithium grease.
CRANK CASE ASSEMBLY
__23.Apply Permatex Aviation Form-A-Gasket #3
to two (2) ACV-Z01-26
washers and place them
over the cam shaft
studs the lower left side
of the engine.
17
23, 24
A
__24. Install an ACV-Z01-23
stop nut on each cam
shaft stud and lightly
tighten.
Assemble the two case
halves by placing the
left half over the right
half. Gently tap the left
half with a rubber mallet to seat it against the
right half of the case.
The cam shaft studs (A).
__25.Install an ACV-Z01-26 washer and ACV-Z01-23 stop
nut on the remaining (10) studs on the perimeter of the
case. Lightly tighten each nut.
__18.Place one ACV-Z01-28 washer and one ACV-Z01-75
12mm elastic stop nut on each of the six large studs. Do
not tighten the nuts at this time.
25
18, 19, 21
1
3
4
2
5
6
There are 10 studs protruding through the case which serve
to join to two case halves. Each must have a washer and nut
installed (inset photo).
Torquing order for the six 12mm nuts. See steps 19 and 21.
__19.In the order shown in the photo above, torque the 6
large nuts to 15 foot-pounds.
__20.Check for free movement of the crankshaft. If interference is detected, identify the source of the interference
(most likely poorly seated main or cam bearings).
Note: If the connecting rods are not held near their normal operating position while checking for interference,
you may experience interference which does not exist
on an assembled engine.
Sonex Aircraft LLC
© 2014 All Rights Reserved
18
AeroVee 2.1 Rev Z. 01/14/2015
__26.Install and lightly
tighten an ACV-Z01-16
hex head cap screw,
two (2) ACV-Z01-26
washers, and an ACVZ01-23 stop nut in each
of the three throughholes which serve to
join to two case halves. Minimal thread engagement is normal.
Nuts will be flush with
ends of screws.
CRANK CASE ASSEMBLY
25
__27.Torque the two cam nuts (from step 24) to 10 ft.-lbs.
__28.Torque the remaining case-assembly nuts (from steps 25
and 26) to 13 ft-lbs. There is no defined order for torquing these nuts.
__29.Check for free movement of the crankshaft, as described
in step 20.
Sonex Aircraft LLC
© 2014 All Rights Reserved
19
PISTON & CYLINDER ASSEMBLY
AeroVee 2.1 Rev Z. 01/14/2015
Tools Required:
__ Needle-Nose Pliers
__ SAE 30 Motor Oil
__ 1” Utility Brush
__ Permatex Aviation Form-A-Gasket No. 3 Sealant
__ Rubber Mallet
__ Ring Compressor
__ Vise-Grips
__ Micrometer Caliper
tween the top of the piston and the top of the cylinder).
If the piston is below the top of the cylinder you have a
positive (+) deck height. If the piston is higher than the
top of the cylinder, you have a negative (-) deck height.
Use your measured deck height to determine which
cylinder shims are required from the chart on page 21.
5
Parts Required:
__ Crank Case Sub-Assembly
__ Big Bore Piston and Cylinder Kit, ACV-P02-14
__ Barrel Shims, .090, ACV-P01-39
__ Barrel Shims, .040, ACV-P01-40
__ Barrel Shims, .060 (2 sets), ACV-P01-41
__ Super Tin, ACV-P06-71
__6. Remove the cylinder and piston assembly from the case.
__7. Apply a light coat of motor oil to the outside of each
piston and the inner wall of each cylinder.
Assembly Instructions:
IMPORTANT: Pistons and
pins have been matched to
within 5 grams. Keep each
piston and pin together as a
set.
1
__8. Install the cylinder shims (as required, see chart on next
page) onto each cylinder. Align the shims so they match
the reliefs in the cylinder for the case studs.
__ 9. Apply Permatex Aviation Form-A-Gasket No. 3 Sealant
to the shims and base of cylinder.
__ 1. Remove a piston ring
from each piston and
slide it squarely inside
it's matched cylinder. Measure the gap
between the ends of
the ring - it should be
between 0.012"-0.022".
Re-install the ring on
the piston.
__10.Rotate the crank to
bring a connecting rod
to top dead center - this
eases installation of the
piston and cylinder.
__11. Note: The arrow on
each piston face points
to the flywheel end of
the engine.
__2. Re-install the piston
into the cylinder using
a ring compressor.
3
__3. Slide one piston and
cylinder assembly into
place on the crank
case. Install the piston
pin and make sure the
cylinder is well seated.
__ 4. Bring the piston to Top
Dead Center.
__5. Measure the deck
height (distance be-
Sonex Aircraft LLC
11
© 2014 All Rights Reserved
Partially slide the
cylinder over the head
studs. Push the piston
out the bottom of the
cylinder just far enough
to attach the piston to
the connecting rod with
a piston pin, and secure
the pin in place with a
snap ring on each side
of the piston pin.
11
Note: The snap rings
were included in the
piston/cylinder box.
20
AeroVee 2.1 Rev Z. 01/14/2015
PISTON & CYLINDER ASSEMBLY
__12.Remove excessive sealant and tap the cylinder with a
rubber mallet to seat it in position.
__13.Repeat steps 10 through 12 for the other cylinders.
__14.Install the super tin (below) under the cylinders and
cylinder head. It "snaps" in place with the dividing rib
between the cylinders and the cylinder head. See photo
at right.
The super tin is installed under the cylinders and cylinder
heads. Friction keeps it in place.
CYLINDER SHIM CHARTS
These charts identify the shims needed to achieve the desired
compression ratio based on your engine's measured deck
height (See step 5). Compression ratios are based on the 55cc
cylinder heads provided with the kit. Choose the correct
compression ratio for the type of fuel you will be using.
8.0:1 Compression*
For use with aviation gasoline 91/98 minimum grade conforming to ASTM D 910. Not compatible with auto fuel.
Use of a lower grade fuel will result in high temperatures, detonation, and damage to the engine.
Measured
Deck Height
(+/-.005")**
Head
Gasket
-0.10
.06
.09 + .09
.24
-0.09
.06
.09 + .06
.21
-0.08
.06
.09 + .06
.21
-0.07
.06
.09 + .04
.19
-0.06
.06
.09 + .04
.19
-0.05
.06
.06 + .06
.18
-0.04
.06
.06 + .04
.16
-0.03
.06
.06 + .04
.16
-0.02
.06
.09
.15
Total
Shims
-0.01
.06
.09
.15
0.00
.06
.06
.13
For future reference, record your measured deck
height here:_______
7.0:1 Compression*
For use with automotive gasoline with a posted (R+M)/2
of 90 or greater conforming with ASTM D 4814. Also
compatible with aviation gasoline 91/98 minimum grade
conforming to ASTM D 910. Slightly less power output
than 8.0:1 compression ratio.
+
Cylinder
Shims Needed:
=
Total
Shims
Measured
Deck Height
(+/-.005")**
Head
Gasket
-0.08 to -0.10
.06
.09 + .09 + .06 +.04
.34
+0.01
.06
.06
.12
-0.05 to -0.07
.06
.09 + 06 + .06 +.04
.31
+0.02
.06
.04
.10
-0.01 to -0.04
.06
.09 + .06 + .04
.25
+0.03
.06
.04
.10
0.00 to +0.01
.06
.09 + .04 + .04
.23
+0.04
.06
.04
.10
+0.02 to +0.03
.06
.09 + .04 + .04
.23
+0.05
.06
---
.06
+0.04 to +0.05
.06
.06 + .06
.18
+0.06
.06
---
.06
.09 + .04
.19
+0.07
.06
---
.06
.06 + .04
.16
+0.08
---
.04
.04
+0.09
---
.04
.04
+0.10
---
.04
.04
+0.06 to +0.07
+0.08 to +0.10
+
.06
.06
Cylinder
Shims Needed:
=
* Actual compression ratio will be between 6.9 and 7.1 to 1, based on
55cc heads (as supplied).
**"+" means piston is below top of cylinder, "-" means it is above the
top of the cylinder. See step 4.
Sonex Aircraft LLC
© 2014 All Rights Reserved
21
AeroVee 2.1 Rev Z. 01/14/2015
CYLINDER HEAD INSTALLATION
Parts Required:
__ Cylinder Head Nuts and Washers, from ACV-P01-86
__ Copper Cylinder Head Gaskets, 0.060 Thick, ACV-P01-92
__ Cylinder Head Assemblies, (See packing list for part number)
__ Push Rod Tubes, ACV-P06-50
__ Rocker Arm Nuts, (from Valve Cover package)
__ Gasket Set (partial), ACV-P02-15
__3. Align the cylinder head
with the engine studs
and cylinders and then
install the push rod
tubes. Check alignment
of Push Rod Tubes and
barrels as you push
the cylinder head into
place.
Assembly Instructions:
Important: The cylinder heads will contain debris from
machining. You must clean and inspect the cylinder heads
for debris before installing them.
Note: The process of machining the spark lug holes
for the secondary ignition
often damages neighboring
cooling fins. Missing fins
is normal. You may wish to
sand/file the rough edges to
make them smooth.
__4. Place washers and retaining nuts (from the head stud
kit) onto the head studs. Tighten in sequence shown
in drawings A and B, below. Torque sequence must be
used to prevent the head from warping.
Note: "Grooves" in the seat of
the secondary ignition spark
plug hole are normal and
do not impact the seal of the
spark plug washer
__1. Install Push Rods Seals
(from Gasket Set) on
each end of the Push
Rod Tubes. Expand the
bellows end of each
push rod tube slightly.
This will improve the
seal between the push
rod tubes, engine case,
and cylinder heads.
__2. Insert Cylinder Head
Gaskets into Head Assemblies.
First Tighten: 7-10 Ft. Lbs.
1
Final Torque: 18 Ft. Lbs.
2
__5. Perform this step only
if the cylinder head
has an O-ring recess
at the base of the stud.
Sonex Aircraft LLC
© 2014 All Rights Reserved
Install O-ring (from
Gasket Set) onto the
two head studs that
hold the rocker assembly in place.
5
22
ROCKER SHAFT INSTALLATION
AeroVee 2.1 Rev Z. 01/14/2015
Parts Required:
__ Push Rods, ACV-P06-51
__ Pushrod Measuring Tool
__ Cylinder Head Nuts and Washers, from ACV-P01-86
__ Rocker Arm Nuts, from Valve Cover package
__ Rocker Shaft Assembly, ACV-P02-10
Note: Steps 3 through 19 apply to one side of the engine at a
time and will be repeated for each side.
__ 3. Place a square spacer from the rocker arm package over
each of the rocker shaft mounting studs on a cylinder
head.
Assembly Instructions:
Note: Pre-assembled rocker assemblies often need to be disassembled for proper installation.
__ 1. Assemble the rocker shafts with the gap in the rocker
blocks facing the cupped end of the rocker arms and the
thin shims evenly distributed.
__ 4. Place a rocker assembly over the mounting studs and
inspect for interference between the rocker arm assembly and the head studs. If the rocker arm assembly
contacts the head studs, trim the ends of the head studs
to remove the interference.
The spacers placed under the rocker blocks influence
the alignment of the rocker arm swivel pads to the valve
tip. Proper alignment is achieved when the flat of the
swivel pad is partially off-center from the valve stem.
This is typically achieved with 1 or 2 shims under each
rocker block.
GAP IN ROCKER BLOCKS
The rocker blocks are installed so their gaps are toward the
cupped end of the rocker arms.
__ 2. Turn each adjuster fully counter-clockwise until the pad
lightly contacts the rocker arm, and then turn it back
clockwise 1.5 turns.
Incorrect - Too
few spacers. The
swivel pad is centered on the valve
stem.
Incorrect - Too
many spacers. The
flat of the swivel
pad is off the edge
of the valve stem.
Correct - The flat
of the swivel pad is
off center from the
valve stem but sits
fully on the valve
stem. Typically 1 or
2 shims.
Two different swivel pads exist. The one on the right is a large,
swiveling pad, the one on the right is a ball with a flat spot.
The flat spot on the ball must contact the valve's stem.
Sonex Aircraft LLC
© 2014 All Rights Reserved
23
ROCKER SHAFT INSTALLATION
AeroVee 2.1 Rev Z. 01/14/2015
__ 5. Observe the lateral alignment of each swivel pad to
its corresponding valve stem. Arrange the spacers on
the rocker shaft, between each rocker arm and mounting block, as needed to get each swivel pad properly
aligned. It is acceptable to have no spacer between
components if that will achieve the proper alignment
between the valve stem and the swivel pad.
This slight offset rotates the valve a small amount each
time it opens, improving the life of the valve train.
__ 6. Torque the hex head cap screws on the end of the rocker
shaft assembly to 25 foot-pounds.
__ 7. Remove the rocker assembly from the cylinder head.
__ 8. Slide the pushrod
length tool into a
pushrod tube until it
engages the lifter in the
case.
__ 9. Rotate the crank until
the pushrod reaches the
bottom of it's travel.
__10.Re-install the rocker
shaft assembly and
secure it with the
retaining nuts included
with the valve covers.
Torque the nuts to 14
foot-pounds.
Correct - The flat
of the swivel pad
is off center from
the valve stem but
sits fully on the
valve stem.
Incorrect - The flat
of the swivel pad
is centered on the
valve stem.
Incorrect - The
flat of the swivel
pad is off the edge
of the valve stem.
The pushrod length tool is inserted in a pushrod tube after
removing the rocker shaft.
__11. Adjust the length of the pushrod tool until it is engaging the lifter, is seated in the cup of the rocker arm, and
is holding the rocker arm swivel pad against the tip of
valve stem.
__12.Remove the rocker arm assembly.
__13.Remove the pushrod length tool without disturbing it's
setting. The pushrod length tool is set for the over-all
length of the four (4) pushrods for that side of the engine.
Note: It is not necessary to measure and trim each pushrod
individually, however, it may be beneficial to determine the
pushrod lengths for each side of the engine individually.
__14.Allow for the length of the pushrod tip and trim the
pushrod bodies as needed.
__15.Make sure the inside of each pushrod is clean.
__16.Press a tip onto each of the trimmed pushrods. The end
of the pushrod body may be heated if necessary, but do
not apply excessive localized heat.
__17.Apply white lithium grease to the end of each pushrod
and slide them into the pushrod tubes.
__18. Re-install the rocker assembly, carefully aligning the
pushrods with the cups of the rocker arms.
The spacers between the rocker arms and mounting blocks
must be distributed as needed to get each swivel pad correctly aligned with each valve stem. It is acceptable to have
no spacer between components if that will achieve the proper
alignment between the valve stem and the swivel pad.
Sonex Aircraft LLC
© 2014 All Rights Reserved
__19. Install the rocker assembly retaining nuts and torque
them to 14 ft-lbs.
__20. Repeat steps 3 through 19.
24
OIL SCREEN INSTALLATION
AeroVee 2.1 Rev Z. 01/14/2015
__ 5. Install the oil drain plug and included metal/copper
gaskets, or the optional oil temp sender w/gasket.
Tools Required:
__ Socket Wrench
__ 10 mm Socket
Parts Required:
__ Oil Change Kit, ACV-P01-53
__ ACV-Z01-22, 6mm Elastic Stop Nut (Qty 6)
__ Oil Temp Sender (Optional), ACV-P01-77
__ Machined Oil Sump Plate (Optional), ACV-P02-20
Note: On engine cases requiring an ACV-P01-12 Oil
Temperature Plate it is recommended that an oil temperature sender be installed in that plate rather than the
oil screen. See "Block-Off Plates and Plugs", page 30.
Note: It is not uncommon to have to deform the oil
screen when installing the optional oil temp sender.
Assembly Instructions:
__ 1. Install a gasket from the oil change kit over the studs in
the oil sump.
The optional oil temperature sender can be installed in the
oil drain hole of either standard sump plate (shown) or the
optional sump plate (below).
__ 2. Install the oil screen.
1/4 NPT PORT
M14 x 1.5 PORT
__ 3. Install the second gasket from the oil change kit over
the oil screen.
__ 4. Install the steel bottom plate, or optional ACV-P02-20
Oil Sump Plate, with the 6mm copper washers from the
oil change kit and the 6mm nuts from the shakeproof
nut kit. Do not over-tighten these nuts.
0r
__
Install the optional ACV-P02-20 Oil Sump Plate with
the provided 6mm copper washers and acorn nuts. You
may also use the elastic stop nuts from the Shakeproof
nut kit instead of the acorn nuts.
Sonex Aircraft LLC
© 2014 All Rights Reserved
Optional ACV-P02-20 Sump Plate
The optional Oil Sump Plate's dual ports provide flexibility
for installing combinations of an oil temperature sender, drain
plug, quick drain, or oil return line from an oil separator. Any
unused port can be plugged with a pipe plug.
25
OIL PUMP INSTALLATION
AeroVee 2.1 Rev Z. 01/14/2015
Tools Required:
__ Socket Wrench
__ 13 mm Socket
__ Plastic Mallet
__ White Lithium Grease
__ Aviation Form-A-Gasket #3 or Flange Sealant
Important! Failure to properly align the passages in
the ported cover plate will result in low oil pressure
and engine damage.
These Passages Must Align
Parts Required:
__ Maxi Oil Pump (with Oil Cooler Ports), ACV-P01-55
__ Straight Pump (without Oil Cooler Ports), ACV-P01-56
Assembly Instructions
__1. Measure the clearance
between the pump
gears and the pump
cover. Proper clearance
is .000" to .004". Tighter is better. Clearances
greater than .004" will
result in reduced oil
pressure.
PUMP COVER
The ported oil pump cover plate must be installed so the upper
oil passage in the back of the cover is directly over the oil passage in the pump body. Though it appears there should be an
o-ring, the pump does not have an o-ring in its outer groove.
__7. Install the 4 mount bolts and torque them to 14 ft-lbs.
Oil Cooler Installation
__2. Install oil pump gasket
under the oil pump
housing and align
pump housing with oil
galley ports.
Installation of an oil cooler is described in the Appendix of
this manual. All oil cooler installations must use threaded AN
fittings and high quality -06 hose.
Operation Without an Oil Cooler
__3. Tap oil pump housing
into place with a plastic
mallet.
To operate your AeroVee without an oil cooler you must either
run a loop of -06 hose from the output side of the ported pump
to the input side of the ported pump, or replace the entire
pump with the ACV-P01-56 Straight (unported) Pump.
Important: Do not plug the output and input ports of a
ported pump with plugs. This will prevent oil flow and
cause significant engine damage.
__4. Liberally grease the
top gear and install it,
making sure it engages
the cam.
Important: Do not replace
a ported pump cover with a
non-ported cover. This will
prevent oil flow and cause
significant engine damage.
__5. Liberally grease and
install the free running
bottom gear.
__6. Apply a very thin coat of Aviation Form-A-Gasket or
Flange Sealant to the oil pump cover. If installing the
ported oil pump, make sure the oil passages are aligned
properly (see photo, next column).
Sonex Aircraft LLC
OIL PUMP
© 2014 All Rights Reserved
Additional information on
installing oil coolers can be
found in Appendix A of this
manual.
OUT
IN
26
AeroVee 2.1 Rev Z. 01/14/2015
OIL SEAL INSTALLATION
Tools Required:
__ High Temperature RTV Silicone Gasket Maker
__ VW Oil Seal Installation Tool (optional, recommended)
__ Rubber Mallet
Parts Required:
__ End Shims, ACV-P02-19
__ Oil Seal, ACV-P01-68
Assembly Instructions
Note: The correct number and
thickness of end shims was
determined in Crank Case
Assembly, page 17.
__1. Clean the oil seal bore
of excessive sealant,
particularly around
near the case parting
lines.
__2. Install the end shims
over the flywheel end
of the crank.
__3. Apply a light coat of
High Temperature RTV
Silicone Gasket Maker
to the outside diameter of the oil seal and
install the seal. A VW
seal installation tool
may be used for best
results, however the
seal can also be lightly
tapped in place if care
is used.
__4. Wipe off any excess
sealant.
Sonex Aircraft LLC
© 2014 All Rights Reserved
27
AeroVee 2.1 Rev Z. 01/14/2015
PROP DRIVE LUG INSTALLATION
Tools Required:
__ 5/16-18" x 2” Hex Head Cap Screw (not supplied in kit)
__ 5/16-18 Nut (not supplied in kit)
__ 5/16 Washer (not supplied in kit)
__ 5/8" Socket
Parts Required:
__ Prop Drive Bushings, ACV-H01-11
Assembly Instructions
__1. Insert a prop drive
bushing into the prop
hub.
__2. Insert the bolt through
a drive bushing using a
socket as a spacer.
__3. Use the bolt, washer,
nut and socket to pull
the drive bushing into
the hub.
__4. Repeat for other 5 drive
Bushings.
Sonex Aircraft LLC
© 2014 All Rights Reserved
28
AeroVee 2.1 Rev Z. 01/14/2015
VALVE ADJUSTMENT
Tools Required:
__ 0.006" Feeler Gauge
__ Flat blade screw driver
__ Socket Wrench
__ 13 mm Socket
Parts Required:
__ Valve Covers, ACV-P01-15
Assembly Instructions:
__ 1. Rotate the prop hub until the # 1 cylinder is at top dead
center and both the intake and the exhaust valves are
closed (valve springs fully extended). The TDC mark on
the prop hub should also be lined up with the split-line
of the engine case.
__ 2. Insert a .006" feeler
gauge between the
adjusting screw and the
valve.
__ 3. Adjust the screw until the 0.006" feeler gauge moves
smoothly between the valve and the swivel foot.
__ 4. Lock the adjustment screw in place by torquing the
locking nut to 14 foot pounds.
__ 5. Recheck the valve setting with the .006 feeler gauge.
__ 6. Repeat steps 2 through 5 for the other valve of cylinder
#1.
__ 7. Rotate the crankshaft 180 degrees and adjust the valves
of cylinder #4, following steps 2 through 6.
__ 8. Rotate the crankshaft 180 degrees and adjust the valves
of cylinder #3, following steps 2 through 6.
__ 9. Rotate the crankshaft 180 degrees and adjust the valves
of cylinder #2, following steps 2 through 6.
__10.Install the valve covers using the cork gaskets, hex head
cap screws, O-rings, and washers included with the
valve covers. The cap screws are tightened by feel to
secure the covers and prevent leaks.
Sonex Aircraft LLC
© 2014 All Rights Reserved
29
AeroVee 2.1 Rev Z. 01/14/2015
BLOCK-OFF PLATES and PLUGS
Parts Required
__ Gasket Set (partial), ACV-P02-15
__ ACV-Z01-18 Bolts, Qty 6
__ Machined Breather Plate, ACV-P01-85
__ Oil Temperature Plate, ACV-P01-12
__ Fuel Pump Block-Off Plate, ACV-P01-14
__ Oil Fill Plug, ACV-P01-17
__ Dip Stick, ACV-P01-24
__ Oil Pressure Sender (Optional), ACV-P01-76
__ 4. Some engines require
the installation of an
oil temperature plate
below cylinder #2. It is
installed with two (2)
ACV-Z01-23 nuts and
the corresponding gasket (from Gasket Set).
Note: If your engine
requires the use of this
plate, it can be drilled
and tapped for an
optional M14 x 1.5 oil
temperature probe.
The oil temperature plate
is not needed on all engine
blocks. It is located on the
front of the engine, below
cylinder #2.
__ 5. Slide the dipstick into
the dipstick tube in
front of cylinder #2.
Assembly Instructions
__ 1. Install fuel pump
block-off plate using
ACV-Z01-18 Bolts
(Qty 2) and the corresponding gasket (from
Gasket Set).
__ 2. Spread a light coat of
clean engine oil on the
O-rings of the oil fill
plug and insert it in the
case.
__ 6. If you will not be installing an oil pressure
sender in the port in
the side of the case (C),
install a 1/8 NPT pipe
plug.
B
A
Fuel pump block-off plate (A)
and oil fill plug (B).
__ 3. Remove the preinstalled studs from the
engine case and install
Oil Breather Plate
using ACV-Z01-18
Bolts (Qty 4) and the
corresponding paper
gasket from Gasket
Set. Do not install the
metal louvered gasket
as it will restrict the
breather.
Sonex Aircraft LLC
Note: The dipstick
will be calibrated and
marked in a later procedure.
© 2014 All Rights Reserved
Important: Do not
overtighten the oil
pressure sender or the
pipe plug as this can
result in a cracked
case.
D
C
Note: A small tapped
hole (D) near the oil fill
plug does not need to
be plugged.
30
FLYWHEEL INSTALLATION
AeroVee 2.1 Rev Z. 01/14/2015
Tools Required:
__Socket Wrench
__36mm Socket
__Torque Wrench
__Permatex High Temp Red RTV Silicone Gasket
Parts Required:
__ Flywheel Assembly, ACV-F01-02
Hardware Required
__ ACV-Z01-13 Cap Screws
__ ACV-Z01-20 Bolts
__ACV-Z01-21 Bolt
__ACV-Z01-24 Nut
__ACV-Z01-27 Washers
__3. Install wavy washer and
gland nut with Locktite
272. Torque to 227 ft-lbs.
Note: A piece of wood
temporarily bolted to
the prop hub provides
good leverage to keep the
crank from turning while
the gland nut is being
torqued.
Assembly Instructions:
__1. Using a high-temperature silicone sealant, lightly coat
the dowel pin area of the flywheel and place a small bead
(1/8" diameter) in the groove near the dowel pin area of
the flywheel.
Note: The engine assembly DVD may show an O-ring
being used instead. The O-ring has been discontinued.
__2. Install the flywheel on
the back of the engine.
Important: The 8 dowel
pins will only align one
way.
Note: The flywheel may
require some effort to
get it started and seated
on the drive pins. This is
normal.
Sonex Aircraft LLC
© 2014 All Rights Reserved
31
AeroVee 2.1 Rev Z. 01/14/2015
Sonex Aircraft LLC
© 2014 All Rights Reserved
FLYWHEEL MAGNET ORIENTATION
32
AeroVee 2.1 Rev Z. 01/14/2015
Tools Required:
__ Socket Wrench
__ 13mm Socket
__ 13mm Ignition Wrench
__ 9/64" Allen Wrench
__ 7/32" Ignition Wrench
ACCESSORY PLATE INSTALLATION
__ 3. Match the accessory plate to the raised
groove on the back of
the engine case.
Parts Required:
__ Accessory Plate, ACV-A01-10
__ Ignition Modules (Magnatron), ACV-A01-19
__ ACV-Z01-13 Cap Screws
__ ACV-Z01-20 Bolts
__ ACV-Z01-21 Bolt
__ ACV-Z01-24 Nut
__ ACV-Z01-27 Washers
__ ACV-Z01-30 MS Hex Nuts
__ Shim Stock .010", ACV-P01-75
__ 4. Attach accessory plate
using the ACV-Z01-20
Bolts (Qty 3), ACVZ01-21 Bolt (Qty. 1),
ACV-Z01-24 Nut,
ACV-Z01-27 Washers
(Qty 4). Torque to 25
ft-lbs.
__ 5. Rotate the flywheel until the magnet shoe on
the flywheel is under
the Magnatron.
__ 1. Bend P-Lead tabs on
ignition modules 900
to clear the accessory
plate.
__ 6. Slide the 0.010 shim
between the ignition
module and magnet
shoe.
__ 2. Attach ignition
modules to the accessory plate using ACVZ01-13 Cap Screws
and ACV-Z01-30 hex
nuts. Install bolt at
the bottom of the slot.
The note ‘THIS SIDE
OUT” stamped in
each Magnatron must
face towards the front
of the engine.
“This Side Out”
__ 7. Push module down
against the shim and
tighten the module
mount bolts.
__ 8. Remove 0.010 Shim.
__ 9. Repeat steps 5 through
9 for the remaining
ignition module.
Note: The Ignition Timing
is fixed. There is no need
to time the primary ignition
system.
Sonex Aircraft LLC
© 2014 All Rights Reserved
33
AeroVee 2.1 Rev Z. 01/14/2015
TRIGGER SHAFT INSTALLATION
Tools Required
__ 9/64" Hex Drive
__ Locktite 242
__ 2. Line up the witness hole in the trigger shaft (C) with the
witness hole in the flywheel. Apply Locktite 242 to each
of the four (4) ACV-Z01-81 flat head cap screws and
install them loosely. They will be tightened in step 3.
Parts Required
__ Trigger Shaft Assembly, ACV-F01-24
__ ACV-Z01-81 Flat Head Socket Cap Screw, Special, Qty. 4
Note: If your trigger shaft does not have a witness hole,
the trigger shaft may be attached in any orientation.
C
Trigger Shaft Installation
__ 1. Rotate the crank until the magnet shoe (A) on the flywheel is at the top of the engine. This will also put the
witness hole in the flywheel assembly (B) near the 12
o'clock position, as shown in the photo below.
A
B
The "C" identifies the witness hole on the trigger shaft. Alin
this hole with the witness hole in the flywheel.
__ 3. Sequentially tighten the screws in the crossing pattern
shown below. This will center the shaft on the flywheel.
1
3
Rotate the engine until the magnet shoe (A) is in the 12 o'clock
position. This will also put the flywheel's witness hole (B)
near the 12 o'clock position. For clarity the flywheel is shown
removed from the engine.
4
2
The screws are sequentially tightened in the crossing pattern
shown here. This helps center the trigger shaft on the flywheel.
Sonex Aircraft LLC
© 2014 All Rights Reserved
34
AeroVee 2.1 Rev Z. 01/14/2015
SPARK PLUG INSTALLATION
Tools Required:
__ 11/16” Spark Plug Socket Wrench
__ 0.018" & 0.032 Feeler Gauges
__ Anti-Seize Compound
Parts Required:
__ Autolite 4163 Spark Plugs (Qty 8), ACV-P01-21
Plug Installation:
__ 1. Gap four (4) TOP spark
plugs to 0.018".
__ 2. Gap four (4) BOTTOM
spark plugs to 0.032".
__ 3. Apply an anti-seize compound to the threads of each
spark plug and install them in the cylinders.
__ 4. Torque each spark plug to 12 foot-pounds.
Sonex Aircraft LLC
© 2014 All Rights Reserved
35
AeroVee 2.1 Rev Z. 01/14/2015
INTAKE MANIFOLD INSTALLATION
Supplies Required:
__ Permatex Aviation Form-A-Gasket #3 or Flange Sealant
__4. Thoroughly clean the
inside of the manifold
before installing it.
Parts Required:
__ AeroInjector, ACV-C07S
__ Intake Manifold, as supplied
__ Intake Elbow Spacers (Qty 2) ACV-M01-17
__ Intake Elbow-Right Hand, ACV-M01-11
__ Intake Elbow-Left Hand, ACV-M01-12
__ Intake Hose (Qty 3), ACV-M01-20 (was ACV-M01-13)
__ Hose Clamp (Qty. 6), ACV-Z01-10
__ ACV-Z01-49, Socket Head Cap Screw (Qty. 4)
__ ACV-Z01-26, Washer (Qty. 4)
__5. Secure an intake hose
to each intake elbow
with a hose clamp from
the intake boot kit.
Assembly Instructions
__1. Temporarily place each
of the intake elbow
spacers and intake
elbows on the cylinder
heads and inspect for
interference between
the elbows and the
two upper, center head
studs. If necessary, trim
the ends of the studs to
eliminate interference.
__7. Secure the intake
manifold to the engine
with the lower, aft
engine case bolt. Bend
the mounting tab on
the intake manifold
as needed to clear the
lower Magnatron.
__8. Attach the AeroInjector
to the bottom of the
manifold using the remaining hose and hose
clamps from the intake
boot kit.
__2. Apply Permatex Aviation Form-A-Gasket #3
to one side of each intake elbow spacer and
position each spacer
on each cylinder head,
Permatex side against
the cylinder head.
Note: For uniform
delivery of the fuel mixture, the AeroInjector
must be installed parallel to the airframe.
Note: Fuel inlet goes to
the back of the engine.
__9. Safety wire the
AeroInjector to the
intake manifold.
__3. Apply Permatex Aviation Form-A-Gasket #3
to each intake elbow
and secure the elbows
to the cylinder heads
with ACV-Z01-26
Washers (Qty 4), and
ACV-Z01-49 Cap
Screws (Qty. 4) torqued
to 10 foot pounds.
Sonex Aircraft LLC
__6. Push the intake manifold securely inside the
hose and secure it with
hose clamps from the
intake boot kit.
__10.Throttle, mixture, fuel
line and air filter connections are described
in the AeroInjector
manual.
© 2014 All Rights Reserved
36
ALTERNATOR INSTALLATION
AeroVee 2.1 Rev Z. 01/14/2015
Installing the Stator Assembly
__ 1. "Paint" the surface of each magnet in the magnet ring
and the outside of the stator with a permanent marker.
Tools Required
__ 9/64" Hex Drive
__ Locktite 242
__ Locktite 7088 Primer
Parts Required
__ Alternator Mount Plate w/ Ignition Modules, ACV-A01-03
__ Alternator Stator, 20 Amp, ACV-A01-15
__ ACV-Z01-12 Cap Screw, Qty. 6
__ACV-Z01-76 Cap Screw, Patched, Qty. 4
Important: The magnets of the magnet ring are very
strong and will try to pull the stator assembly out of your
hands as you install it. Maintain a firm grip to avoid
pinched fingers.
Stator Assembly
__ 1. Test fit the stator to the stator plate. If interference is
noted between the mounting lugs of the stator and the
boss on the plate, sand or file the lugs to remove the
interference.
__ 2. Carefully place the stator assembly over the magnet
ring with the "top" pick-up near the 1 O'clock position
and the "bottom" pick-up near the 7 O'clock position.
The magnet ring may force the stator assembly into an
unwanted position. Rotate the flywheel until the stator
plate can be properly positioned.
__ 3. Temporarily install
6 (six) ACV-Z01-12
cap screws to secure
the stator assembly in
place.
Make sure the lugs of the stator do not interfere with the
raised boss of the stator plate.
__ 2. Pass the wires of the
stator through the hole
in the stator plate.
__ 3. Prime four ACVZ01-76 screws with
Locktite 7088 Primer.
__ 4. Rotate the crank shaft
3 or 4 full revolutions.
This is easily done by
removing a spark plug
and turning the crank
with a socket wrench
on the prop hub bolt.
__ 5. Remove the stator plate and inspect the magnet ring
and stator for signs that the two are in contact with each
other. If the marker is intact on both parts, your clearance is acceptable. Continue with Step 6.
__ 4. Attach the stator to
the alternator mount
plate using the four (4)
primed ACV-Z01-76
screws and Locktite
242 on each screw
prior.
Sonex Aircraft LLC
If there is evidence of contact between the parts, use a
belt sander or equivalent to remove some material from
the stator where the marker has been rubbed away and
then repeat steps 1 through 5.
__ 6. Re-install the stator assembly as described in Step 2.
__ 7. Prime six ACV-Z01-12 screws with Locktite 7088
Primer.
__ 8. Secure the stator assembly to the accessory plate using
six primed ACV-Z01-12 screws and Locktite 242.
© 2014 All Rights Reserved
37
FIREWALL PREPARATION
AeroVee 2.1 Rev Z. 01/14/2015
Secondary Ignition Coil Installation
Parts Required
__ Voltage Regulator, ACV-A01-20
__ Ignition Coils (Red), Qty. 2, ACV-A01-25
__ AN-grade hardware as required (not supplied)
Before the engine is installed on the engine mount, the firewall
should be prepared. This includes mounting the AeroVee's
secondary ignition coils and voltage regulator.
Though not part of the AeroVee kit, careful consideration
must be given to the placement of the gascolator, battery box,
master solenoid, and other firewall-mounted components to
avoid interference with the engine installation and assure ease
of maintenance.
Voltage Regulator Installation
Note: The voltage regulator must be grounded. In a typical
installation the regulator will be grounded through the hardware which secures it to the firewall. If your installation uses
non-conductive materials for the firewall, or for the mounting
of the regulator, dedicated ground wires will be necessary
between the regulator and a suitable ground point.
__ 1. Mount the voltage
regulator to the firewall
in a location which
allows easy connection
of the wires from the
alternator. The use of
3/8" long stand-offs
(aluminum or bronze
tubing) is recommended to space the
regulator away from
the firewall.
Note: The ignition coils must be grounded. In a typical installation the coils will be grounded through the hardware which
secures them to the firewall. If your installation uses non-conductive materials for the firewall, or for mounting the coils,
dedicated ground wires will be necessary between the coils
and a suitable ground point.
__ 1. Mount the ignition coils (ACV-A01-25) to the firewall
in a location which allows easy connection of the lower
spark plug wires. The use of 3/4" long stand-offs (aluminum or bronze tubing) is recommended to space the
coils away from the firewall.
B
A
Stand-offs (A) are used to
space the regulator off the
firewall.
Stand-offs (B) are used to space the coils off the firewall.
Wiring the alternator to the
voltage regulator is described
later in this manual.
Sonex Aircraft LLC
© 2014 All Rights Reserved
38
AeroVee 2.1 Rev Z. 01/14/2015
MOUNTING the ENGINE
Parts Required
__ Motor Mount Shock Bushings (Qty. 8), ACV-P01-19
__ 3/8" ID x 1.25" OD Fender Washer (Qty. 16), ACV-Z01-40
__ AN4-36A Bolt (Qty. 4, not supplied)
__ AN363-428 Nut (Qty. 4, not supplied)
__ AN960-416 Washer (as needed, not supplied)
Sonex Aircraft Airframes
Bolting the engine to the engine mount is shown in detail in
the "Engine Installation, AeroVee" drawing of your airframe
plans and on the next page of this manual, however, these few
notes may save you some time.
All Airframes
Mount Bushings
The engine mount bushings will go on the engine mount much
easier if they lightly lubricated with soapy water.
Lifting the Engine
When lifting the engine into place care must be taken to make
sure the pushrod tubes are not damaged.
Installing the Mount Bolts
The head of the mounting bolts may be inserted in either
direction.
A typical engine mount and shock-rubber installation. A minimum of two ACV-Z01-40 washers (1/8" thick total, minimum)
must be placed against the front bushing. Additional washers
may be used as needed, and washers may be used behind the
rear bushings as spacers to shim the thrust line as needed.
Sonex Aircraft LLC
© 2014 All Rights Reserved
39
Sonex Aircraft LLC
3/8" Diameter x .058" Wall 4130 Steel Tube
© 2014 All Rights Reserved
Change
Discription
AN4-36A Bolt, 4 Required on -01/-02
AN960-416 Washer, 8 Required on -01/-02
AN363-428 Nut, 4 Required on -01/-02
Revision
Letter
FULL
Drawing Scale
Drawing Number
SNX-P31-03
N/C
Revision
AeroVee Mount Pin Detail and
Typical Installation
Sonex Aircraft, LLC
ACV-P01-19 Shock Absorber Bushing
4 Sets required
Note: Corrections to the Engine Alignment (Propeller Hub Location) may be
made by usings Spacers under to Rubber Cushions. The maximum
Spacer thickness on any one mount is 1/16" [1.6mm]
Typical Detail of Engine Mount Cushions & Bolts
Typical 4 Locations
Mount Pin on Welded Motor
Mount Assembly Reference
ACV-A01-01 AeroVee Engine Accessory Plate Reference
1/4" ID x 1" OD x 1/8" Thick Washers
4 Required on -01 / -02
Engine Mount Pin Typical for AeroVee, 4 Required per Mount
Weld together using Number 7 welding rod
Full Scale
1.625000" [41.3mm]
3.125000" [79.4mm]
1" [25.4mm] O.D. x 3/8" [9.5mm] I.D. x .090" Thick Steel Washer
The information disclosed herein is the property of the
originator who reserves all patent, design, proprietary,
manufacturing, use and sales rights thereto, except for
the rights expressly granted to others. This document
shall not be reproduced nor shall the information
contained within be used by or disclosed to others
except as expressly authorized by the originator.
AeroVee 2.1 Rev Z. 01/14/2015
MOTOR MOUNT PIN DETAIL
40
MAGNATRON IGNITION WIRING
AeroVee 2.1 Rev Z. 01/14/2015
Parts Required
__ Spark Plug Boots, Qty. 4, ACV-P01-23
__ Dual Pole, Single Throw Switch (not supplied)
Magnatron Circuit Basics
The magnatron is a very simple ignition system, however,
understanding the circuit wiring is often confusing. Unlike
most other electrical devices, when the switch is "Off" the
Magnatron circuit is closed and the Magnatrons are disabled.
When the switch is "On" the ground path is open and the
Magnatrons become operational.
Magnatron Circuit Basics
"P-Lead"
Mag Switch
Magnatron
Wire from Mag switch
to airframe ground.
Ground wire between Magnatron
body and engine.
Magnatron Wiring
The Magnatron ignition
should be controlled by a single Dual Pole, Single Throw
(DPST) toggle switch.
Important: Aircraft-style
key switches (Off-LeftRight-Both-Start) may
not work, depending on
how they are internally
wired. Sonex Aircraft LLC
is unable to assist on any
installation with this type of
switch.
Important: The DPST
switch must be installed
in the panel in a manner
that assures that when
the switch is in the down
("Off") position, its contactors are closed, grounding
the P-Leads to the airframe and disabling the
Magnatron ignition.
This DPST switch would
have a P-lead from each
Magnatron attached to the
top terminals, and wires to
ground attached to the lower
terminals. Your switch may
vary.
To check for proper switch installation:
__ A. Place the switch in the down ("Off") position.
__ B. Place an ohmmeter across a pair of the switches' terminals. If there is no resistance (0 ohms) between the
terminals, the switch is properly oriented in the panel.
Switch "Off", Mags are "Off"
Switch contacts are closed, completing the "P-Lead"
ground path to the airframe. Magnatrons will not fire.
If the resistance is infinite, the switch is "On" and needs
to be rotated 180-degrees in the panel for proper installation.
MAGNATRON IGNITION SCHEMATIC
Switch "On", Mags are "On"
Switch contacts are open, disrupting the "P-Lead" ground
path to the airframe. Magnatrons are "hot" and will
generate a spark. Note: Removing the "P-Lead" from the
Magnatron is the same as turning the switch "On".
Sonex Aircraft LLC
© 2014 All Rights Reserved
41
MAGNATRON IGNITION WIRING
AeroVee 2.1 Rev Z. 01/14/2015
__ 1. Attach a 20 gauge
(minimum) ground
wire to the body of
each magnatron. The
ground wire may be attached to a magnatron
mounting bolt, or to
one of the "studs" (A)
on the metal frame.
Attach the other end
of the ground wire to a
suitable ground on the
engine block.
A
A large spade terminal will
slip over a stud (A), providing a ground point for each
Magnatron.
Do not attach the ground wire to the "P-Lead" terminal ("B", photo below). This terminal must only
be used for the ignition switch wiring.
__ 2. Attach a 20 gauge
(minimum) wire between a DPST ignition
switch and the P-Lead
terminal (B) of each
magnatron.
B
Magnatron P-Lead terminal.
__ 3. Attach a 20-gauge (minimum) wire between the remaining terminals of the DPST switch and an appropriate
airframe ground.
__ 4. Slide a spark plug boot
over the end of each
spark plug wire.
__ 5. Attach the top Magnatron's spark plug wires to the upper front spark plugs.
__ 6. Attach the bottom Magnatron's spark plug wires to the
upper rear spark plugs.
Sonex Aircraft LLC
© 2014 All Rights Reserved
42
ELECTRONIC IGNITION WIRING
AeroVee 2.1 Rev Z. 01/14/2015
__ 2. Red wire (+12V). Attach to rear terminal screw of right
hand coil (terminal "B" in photo).
Parts Required
__ Electrical Terminals (not supplied)
__ Electrical Wire (not supplied)
__ 3. Orange wire (Trigger). Attach to the front terminal (terminal "A" in photo) of right hand coil.
SECONDARY IGNITION SCHEMATIC
RIGHT COIL
Right Coil
(Co-pilot's Side)
To Lower Front
Spark Plugs
LEFT COIL
18 GA.
RED
A
C
B
IGNITION
SWITCH
SPST - N.O.
TO LOWER,
REAR SPARK
PLUGS
D
18 GA.
ORANGE
TO LOWER,
FRONT SPARK
PLUGS
ORANGE
Left Coil
(Pilot's Side)
To Lower Rear
Spark Plugs
D
RED
B
C
BLACK
10 AMP
FUSE
A
TOP
TRIGGER
-
BOTTOM
TRIGGER
+
BATTERY
BLACK
The coils are mounted on the firewall as near the fuselage centerline as possible. Note that "Left" and "Right" are as viewed
from the pilot's seat.
Top Trigger Wiring
__ 1. Black wire (ground). Attach to any ground point. The
ground wires from both the top trigger and bottom trigger can share the same ground point.
Top Trigger
Energizes Right Coil / Lower Front Plugs
Bottom Trigger Wiring
__ 1. Black wire (ground). Attach to any ground point. The
ground wires from both the top trigger and bottom trigger can share the same ground point.
__ 2. Red wire (+12V). Attach to the rear terminal screw of
left coil (terminal "C" in photo).
__ 3. Orange wire (Trigger). Attach to the front terminal (terminal "D" in photo) of left coil.
Coil Wiring
__ 1. Connect an 18 ga. wire between terminals "B" and "C".
This is a jumper for the +12V power supply wire.
__ 2. From the ignition switch, run an 18 ga. wire through a
10 amp fuse and connect the wire to terminal "B" of the
right coil.
Bottom Trigger
Energizes Left Coil / Lower Rear Plugs
__ 3. The coils must be grounded. In a typical installation
the coils will be grounded through the hardware which
secures them to the firewall. If your installation uses
non-conductive materials for the firewall, or for the
mounting of the coils, dedicated ground wires will be
necessary between the coils and a suitable ground point.
The secondary ignition triggers.
Sonex Aircraft LLC
© 2014 All Rights Reserved
43
SPARK PLUG WIRES
AeroVee 2.1 Rev Z. 01/14/2015
Parts Required:
__ Spark Plug Wires, ACV-A01-24
__2. Slide a boot (included with ACV-A01-24) over the cut
end of each spark plug wire.
Assembly Instructions:
Important: The factory crimped ends of each wire will be
re-used. When cutting the wires to the correct length, do
not cut the crimped ends off.
Note: Extra wires have been included with your kit. It is possible to wire your secondary ignition with a single package of
spark plug wires, leaving the second set for spares.
__1. Determine the length for each spark plug wire.
The front, lower plug wires attach to the right coil.
The rear, lower plug wires attach to the left coil.
The pre-crimped ends are kept in place for the spark
plugs. Cut the wires to the correct length.
Right Coil
(Co-pilot's Side)
To Lower Front
Spark Plugs
Left Coil
(Pilot's Side)
To Lower
Rear Spark
Plugs
2
The boot included with the spark plug wires is slipped over the
cut end of each wire.
__3. Remove the black
outer jacket and the
white insulation core to
expose a 3/8" length of
the inner conductor.
__4. Fold the conductor over
the jacket and crimp
a metal connector in
place. The end of the
cable must come to the
hole in the connector.
__5. Slide the boot over the
connector. This is the
end of the cable which
attaches to the coil.
1
Attach the spark plug wires to the proper coils. Note that
"Left" and "Right" are as viewed from the pilot's seat.
3
4
5
__ 6. Attach the spark plug
wires to the coils and
spark plugs.
1
The crimped end of each plug wire is re-used - do not cut them
off.
Sonex Aircraft LLC
© 2014 All Rights Reserved
44
ELECTRONIC IGNITION TIMING
AeroVee 2.1 Rev Z. 01/14/2015
Timing the Secondary Ignition
Tools Required
__ 5/32" hex wrench
Timing Basics
The electronic (secondary) ignition is timed to match the
Magnatron (primary) ignition, which is fixed at 28 degrees
BTDC. Accurate timing is accomplished when the two ignition systems are firing as one, which is indicated by little or no
difference in engine RPM when switching between ignition
systems.
The trigger cap (A) of the secondary ignition system rotates to
make timing adjustments. It is locked in position by a socket
head cap screw (D). When the magnet in the trigger cap passes
by the sensor in the triggers (C), it fires the spark plugs. The
location of the magnet in the trigger cap is marked with a line
(B).
Important: The secondary ignition will spark when the
ignition is on and the trigger magnet passes by the sensor.
This can cause ignition. Avoid serious injury or death by
turning off the fuel, ignition switch, and master switch and
remaining clear of the propeller while timing the ignition.
Initial timing is achieved by aligning the right edge of the
magnet shoe on the flywheel (E, photo below) with the right
edge of the top Magnatron (F) and then rotating the trigger cap
(A) until the mark on the cap (B, previous column) is centered
under the sensor (C) of the upper trigger. The following steps
detail this process.
F
C
A
D
E
B
The trigger cap (A) is locked in position by a socket head cap
screw (D). A mark (B) on the trigger cap corresponds with the
location of the trigger magnet. When this magnet passes by
a sensor (C) in the upper and lower triggers, the spark plugs
fire.
Sonex Aircraft LLC
© 2014 All Rights Reserved
The black / white line on the right shows how the top
Magnatron and magnet shoe on the flywheel align prior to setting the secondary ignition timing. For clarity these parts are
shown removed from the engine.
__ 1. Turn off the aircraft's Master switch, secondary ignition
switch and fuel valve.
__ 2. Pull the cockpit mixture control to "Idle Cut-off".
__ 3. Rotate the crank until the right edge of the magnet shoe
on the flywheel (E, above) is aligned with the right edge
of the top Magnatron (F, above). Look down between
the accessory plate and the rear flange of the engine
case to check the alignment of the top Magnatron to
magnet shoe on the flywheel.
45
ELECTRONIC IGNITION TIMING
AeroVee 2.1 Rev Z. 01/14/2015
__ 4. Loosen the socket head cap screw (D) and rotate the
magnet cap (A) until the mark on the magnet cap (B) is
centered under the sensor (C) of the upper trigger.
Timing Check
Ground Check. Running the engine and performing a mag
check will indicate the accuracy of the timing of the secondary ignition. A mag check at 1600 - 2000 RPM should reveal
little or no change in RPM. If a change of 50 RPM or greater
is noted, the magnet cap should be rotated slightly one way or
the other.
In Flight Check. Under normal cruise power (2900 to 3400
rpm):
C
__1.Turn off the secondary ignition and observe the cylinder
head temperature.
__2.Turn on the secondary ignition and turn off the Primary
ignition. Observe the cylinder head temperature.
A
B
D
If the cylinder head temperature rises when operating with
only the secondary ignition, the secondary ignition is advanced. Retard the secondary ignition by turning the magnet
cap slightly clockwise, as viewed from the flywheel end of the
engine.
When the crankshaft is in the proper position (see steps 1 thru
4), static timing is achieved by loosening the cap screw (D)
and rotating the trigger cap (A) until the mark on the cap (B)
is centered under the sensor of the upper trigger (C).
__ 5. Tighten the socket head cap screw.
Sonex Aircraft LLC
© 2014 All Rights Reserved
46
AeroVee 2.1 Rev Z. 01/14/2015
ALTERNATOR / REGULATOR WIRING
Parts Required
__ Electrical Terminals (not supplied)
__ Electrical Wire (not supplied)
Alternator - Regulator Wiring
__ 1. Attach the two wires from the alternator to the two outer
terminals of the voltage regulator. It does not matter
which wire attaches to which terminal.
__ 2. Attach an 8 or 10 gauge wire from the center terminal
of the voltage regulator to the positive battery terminal.
__ 3. If you will be using a tachometer which senses pulses
from the alternator, it must be spliced in to one of
the wires from the alternator. Consult the instrument
manufacturer's instructions for proper installation and
set-up.
Note: The 20 amp alternator delivers 6 pulses per revolution.
__ 4. If the voltage regulator is attached to a non-conductive
surface a ground wire needs to be attached between
the body of the regulator and an appropriate airframe
ground.
ALTERNATOR WIRING SCHEMATIC
Sonex Aircraft LLC
© 2014 All Rights Reserved
47
AeroVee 2.1 Rev Z. 01/14/2015
Tools Required:
__ 3/8" Hex Wrench
__ Locktite 262
STARTER INSTALLATION / WIRING
Starter Wiring
Parts Required
__ Starter, ACV-A01-16
__ ACV-Z01-14 Cap Screws
__ Electrical Terminals (not supplied)
__ Electrical Wire (not supplied)
Starter Installation
Note: Though the starter is grounded through the bolts which
secure it to the accessory plate, anodizing in the threads of
the accessory plate and the recommended use of Locktite can
degrade this ground path. You may wish to install an 8 to
10 gauge supplemental ground wire under one of the starter
attachment bolts and attach the other end to an appropriate
ground on the airframe or battery.
Do not use an engine mount bolt for a grounding point as
they are insulated from the engine by the rubber engine
mounts and do not provide a good ground path.
The drawing below illustrates a typical starter wiring schematic. This can be modified to suit your needs. Note that a
separate starter solenoid is not needed as the AeroVee starter
has a built-in solenoid.
The starter has two points
for electrical connections:
A large threaded lug (A) for
the 6 gauge starter wire, and
a small male spade terminal
(B) for the 14 gauge solenoid
wire.
A
B
Electrical connectors on the
starter solenoid.
STARTER WIRING SCHEMATIC
__ 1. Attach the starter to the accessory plate using two (2)
ACV-Z01-14 cap screws and Locktite 262.
When installing the starter, consider attaching an 8 gauge
ground wire under one of the starter mounting bolts and connecting the other end to the negative terminal of the battery.
Sonex Aircraft LLC
© 2014 All Rights Reserved
48
AeroVee 2.1 Rev Z. 01/14/2015
OIL BREATHER TUBE
Materials Required
__ 5/8" O.D. x .035" Aluminum Tube (6061-T6 or 5052-0)
__ Permatex High Temp Red RTV Silicone Gasket
Breather Installation
__ 1. Form an engine
breather tube from 5/8
diameter x .035" wall
6061-T6 or 5052-0
aluminum tube. The
tube should curve up
slightly after exiting
the breather plate. This
encourages oil to flow
back into the case rather than get discharged.
Additionally, a 1/16" diameter hole drilled at the top of
the curve permits crankcase breathing in the event the
exit tube freezes shut.
Route the tube so it discharges out the bottom of the
cowling, or into the top of the optional AeroConversions
Oil Separator.
__ 2. Secure the tube in the breather plate with high temperature silicone gasket.
__ 3. Secure the tube as needed to prevent vibration.
Sonex Aircraft LLC
© 2014 All Rights Reserved
49
AeroVee 2.1 Rev Z. 01/14/2015
OIL COOLER INSTALLATION OPTIONS
The AeroVee can be fitted with two different factory-developed oil cooler installations or, in rare circumstances, no oil
cooler at all.
Your engine kit was shipped with the AeroConversion-specific
parts needed for one of the two oil cooler installations detailed
on the following pages. The oil cooler and some additional
items such as hardware and fittings must be sourced by each
builder. Each section begins with a list of items that will be
needed to complete the installation. In many cases these are
common parts which may be sourced locally from automotivesupply stores or hardware stores.
Additionally, both Wicks and Aircraft Spruce offer AeroVee
Firewall Forward Kits which may contain the parts you need
for the oil cooler installation as well as the fuel system.
IMPORTANT: Because of the wide range of possible installation variations, the hardware and fittings mentioned
in this manual and included in the 3rd-party hardware kits
may or may not match your specific needs or desires. Each
builder must make their own determination of which parts
are appropriate for their particular installation.
Sonex Aircraft LLC
© 2014 All Rights Reserved
50
AeroVee 2.1 Rev Z. 01/14/2015
Parts Required
__ Optional Sonex/AeroVee Baffle Kit (p/n SNX-P30-10)
The following parts are not supplied by Sonex Aircraft.
__ Oil Cooler (Jeg's P/N 130-70265)
__ AN912-4D Reducer Bushing, Qty. 2
__ AN816-6-6D Straight Flare Fitting, Qty. 2
__ AN816-6D Straight Flare Fitting, Qty. 2
__ -06 Straight Hose Fitting, Qty. 4 (Jeg's P/N 799-610020)
__ -06 Pro Flex Hose, 2 ft. (Jeg's P/N 799-632060)
__ AN3-3 bolts, Qty. 4
__ AN960-1032 Washers, Qty. 4
__ MS20365-1032 Lock Nuts, Qty. 4
Installing the Oil Cooler
The optional Sonex / AeroVee Fence Baffle kit includes lasercut parts for the oil cooler installation.
OIL COOLER, BOTTOM MOUNT
3. Cut an air passage in the bottom of the shroud and install
an air deflector to force the air traveling under the oil
sump to exit through the oil cooler.
Forward
Temp.
Sender
1. Position the oil cooler near the back of the lower shroud
with the inlet ports facing forward. Make sure the cooler
does not interfere with the exhaust and mark the location
of the mounting holes.
This view, looking up at the bottom of the engine, shows the
clearance hole for the oil temperature sender (see step 3).
4. Attach the oil cooler shroud to the engine case with four
M6x1 screws, or re-tap the holes and use 1/4-20 screws.
See photo below.
The oil cooler is mounted to the shroud. This photo shows the
oil cooler hoses and baffle seal already installed on the cooler,
however these steps come later.
2. Drill four 3/16" diameter mounting holes in the shroud to
match those in the oil cooler and attach the cooler with
four AN3-3A bolts, MS20365-1032 nuts, and AN960-10
washers.
Existing mounting
hole in case.
The oil cooler shroud is attached to the engine case at each
corner of the case's oil sump.
5. Apply teflon paste (do not use teflon tape) to the threads
of each AN912-4D bushing and install one in each port of
the oil cooler.
6. Apply teflon paste (do not use teflon tape) to the threads
of two AN816-6-6D nipples and install one in each of the
bushings installed in step 5.
Sonex Aircraft LLC
© 2014 All Rights Reserved
51
OIL COOLER, BOTTOM MOUNT
AeroVee 2.1 Rev Z. 01/14/2015
7. Install a straight hose fitting (Jeg's p/n 799-610020) on
each end of a 12" length of Pro-Flex hose. Do this twice
to make two hose assemblies.
8. Install the hose assemblies on the oil cooler. Do not use
sealing compounds or teflon tape on these fittings.
9. Apply teflon paste (do not use teflon tape) to the threads
of each AN816-6D nipple and install one in each port of
the oil pump.
Oil Cooler Bypass Plate
The oil cooler bypass plate is required on all bottom-mounted
oil cooler installations.
Parts Required (Supplied by Sonex Aircraft)
__ Oil Cooler Bypass Plate, ACV-P01-11
__ Viton O-Ring, ACV-Z01-73
__ ACV-Z01-17 Bolts Qty 2
__ ACV-Z01-19 Bolts Qty 1
__ ACV-Z01-22 Nut-Elastic Stop Qty 2
__ ACV-Z01-25 Washer, 6mm- Qty 2
__ Oil Pressure Sender (optional), ACV-P01-76
__1/8 NPT Pipe Plug (optional, not supplied)
__ 1. Insert Viton O-ring
into the oil cooler
bypass plate.
This photo shows the oil cooler lines attached to the oil pump.
10. Install the free end of each hose assembly on the oil
pump. Do not use sealing compounds or teflon tape on
these fittings.
Note: The cooling air inlets of the cowl must be cut open before you install the baffle seal. Refer to the "Cowl Openings"
section of this manual.
11. Fit one half of the cowl at a time and note any interference with the oil cooler shroud. Remove the cowl and
trim the shroud as needed to achieve a gap of 1/4" to 3/8"
between the cowling and the shroud.
Note: Bend the front lips of the cooling shroud as needed
so they seal above and below the cowl's oil cooler inlet.
12. Install baffle seal to seal the gap between the metal shroud
and cowling.
13. Install the Oil Pressure Bypass Plate. See next column.
Sonex Aircraft LLC
© 2014 All Rights Reserved
__ 2. Install the oil cooler
bypass plate using the
ACV-Z01-19 bolt (Qty.
1), ACV-Z01-17 bolts
(Qty. 2), ACV-Z01-22
elastic stop nut (Qty
2), and ACV-Z01-25
washer (Qty 2).
__3. Install a 1/8 NPT pipe
plug or an optional oil
pressure sender (B)
(1/8 NPT) in the tapped
hole of the oil bypass
plate.
The pipe plug can be
installed with teflon
paste.
When installing the
optional oil pressure
B
A
Oil cooler bypass plate (A),
with optional oil pressure
sender installed (B). If no oil
pressure sender is installed
in that port then it must be
plugged with a 1/8 NPT pipe
plug.
sender do not use teflon paste or teflon tape on the
threads as this will inhibit the grounding of the sender;
good grounding is required for an accurate signal. You
may even consider adding a dedicated ground wire to
the body of the sender.
52
OIL COOLER, TOP MOUNT
AeroVee 2.1 Rev Z. 01/14/2015
2. Carefully position the Oil Cooler Mount Plate over the
seals and bolt the plate to the engine case using the hardware identified in the photo below.
Parts Required
Supplied by/available from Sonex Aircraft:
__ Oil Cooler Mount Plate, ACV-P01-106
__ Rubber gaskets from ACV-P02-15 Gasket Kit
__ AN4-13A bolt, Qty. 2
__ MS20365-428 Stop Nut, Qty. 3
__ ACV-Z01-80, M8-1.25 x 20mm Button Head Screw, Qty. 1
__ AN4-23A bolt, Qty. 1
__ AN4-27A bolt, Qty. 2
__ AN960-416 Washers, Qty. 6
A
B
Not supplied by Sonex Aircraft:
__ Oil Cooler for 1971 or later T1 or T2 VW engine
(such as CB Performance part number 1727)
B
The Oil Cooler Mount Plate is attached with the following
hardware:
A = ACV-Z01-80, M8-1.25 x 20mm button head screw
B = AN4-13A bolt, AN960-416 washer (under nut) and
MS20365-428 stop nut.
3. Insert the two short, orange-colored flanged seals from the
gasket kit (provided with your AeroVee engine) in the oil
ports of the Top Plate. See photo below.
The top-mounted oil cooler positions the oil cooler on top of
the case, near the accessory plate.
Important: The gasket kit contains both tall (thick)
and short (thin) flanged oil seals. Be sure to use the
short (thin) seals for this installation.
C
Installing the Oil Cooler
1. Insert the two orange-colored cylindrical seals from the
gasket kit (provided with your AeroVee engine) in the oil
cooler ports on the top, right-hand side of the engine.
C
The short (thin) flanged oil seals installed in the Top Plate's oil
ports (C).
The arrow in this photo shows This photo shows both seals
one of the seals before it is
installed in the ports.
installed in its port.
Sonex Aircraft LLC
© 2014 All Rights Reserved
53
OIL COOLER, TOP MOUNT
AeroVee 2.1 Rev Z. 01/14/2015
4. Remove a 1-5/8" long portion of the front, lower flange of
the oil cooler. This is necessary to eliminate interference
between the oil cooler's flange and the adapter plate. See
photo below for details.
__ 6. Install the optional oil
pressure sender or a 1/8
NPT pipe plug in the
port in the side of the
case (F).
Remove Part of
Lower Flange
for Clearance.
1-5/8"
Important: Do not
overtighten the oil
pressure sender or the
pipe plug as this can
result in a cracked
case.
F
When installing the optional oil pressure sender do not
use teflon paste or teflon tape on the threads as this will
inhibit the grounding of the sender; good grounding is
required for an accurate signal. You may even consider
adding a dedicated ground wire to the body of the
sender.
5. Carefully position the oil cooler over the seals in the
mount plate and bolt the oil cooler to the plate using the
hardware identified in the photo below.
D
D
E
The Oil Cooler is attached with the following hardware:
D = AN4-27A Bolt with AN960-416 washer.
E = AN4-23A Bolt with two AN960-416 washers (one top, one
bottom) and MS20365-428 stop nut.
Sonex Aircraft LLC
© 2014 All Rights Reserved
54
AeroVee 2.1 Rev Z. 01/14/2015
OIL COOLER REMOVAL / BYPASS
Bypassing / Removing a Bottom-Mounted
Oil Cooler
Bypassing / Removing a Top-Mounted
Oil Cooler
Parts Required
Parts Required
__ 6061-T6 Sheet (approx 12"' x 12")
__ Oil Pump, AeroConversions p/n ACV-P01-56
__ Oil Cooler Bypass Plate, AeroConversions p/n ACV-P01-56
__ Viton O-Ring, ACV-Z01-73
The AeroVee has flown successfully in the Sonex airframes
without an oil cooler. Depending on your flight conditions and
climate, you may not need the oil cooler.
The AeroVee has flown successfully in the Sonex airframes
without an oil cooler. Depending on your flight conditions and
climate, you may not need the oil cooler. You must, however,
retain the cooling shroud to direct cooling air across the bottom of the engine case.
To operate the AeroVee without the top-mounted oil
cooler:
To operate the AeroVee without the bottom-mounted oil
cooler:
1. Remove the oil cooler from the adapter plate.
1. Disconnect the oil cooler lines from the oil pump.
3. Install the Oil Cooler Bypass Plate as shown on page 52.
2. Remove the adapter plate.
2 Remove the oil cooler and hoses from the cooling shroud.
3. Seal the opening in the bottom of the cooler shroud with a
piece of aluminum.
Important: Do not plug the inlet and outlet ports of the
oil pump after removing the hoses. This will result in oil
starvation and engine damage. To properly eliminate the
oil cooler from the system you must complete one of the
options in step 4, below.
4. Run a loop of -06 braided hose from the inlet port of the
existing oil pump to the outlet port.
or:
Remove the oil pump and replace it with a Standard Oil
Pump, AeroConversion part number ACV-P01-56.
This airplane has had the oil cooler removed. Note the aluminum panel which closes off the oil cooler opening in the
bottom of the shroud.
Sonex Aircraft LLC
© 2014 All Rights Reserved
55
INSTALLING the EXHAUST
AeroVee 2.1 Rev Z. 01/14/2015
__ 4. Attach a spring between each pair of spring clips. It may
be necessary to shorten the springs for your particular
installation.
Parts Required
__ Optional Sonex Aircraft Exhaust Kit
__ Exhaust Gaskets (included in ACV-P02-15
Gasket Kit). Available separately as p/n ACV-P01-73.
__ 1.Using the supplied
Exhaust Attach Bolts
(ACV-Z01-39), temporarily attach the exhaust manifolds to the
cylinder heads without
exhaust gaskets.
4
1
Note: If your cylinder
heads have exhaust
studs installed they will
need to be removed to
fit the 2-into-1 exhaust.
Note: The left side exhaust pipe (pilot's side) may contact the super tin and/or cylinder head baffle. The super
tin and/or baffle can be reformed as needed to minimize
the contact, though some contact is not a concern.
Note: The space between the exhaust flanges can be
increased or decreased by hand if it is too tight or too
loose on the cylinder head. Tightening the exhaust attach bolts during final installation will pull the header
together for a proper fit on the cylinder head.
__ 2. Slide an extension pipe onto each manifold. It may be
necessary to shorten the length of the exhaust manifold
if the extensions interfere with the firewall. Do not
shorten the expanded portion of the extension pipes.
__ 5. Attach a loop-type line
support clamp (AN742
or equivalent) to the
firewall approximately
3" above the spring
clips on the exhaust
extensions.
5&6
Clamp
installed
on
Firewall
__ 6. Attach a spring
between the support
clamp and each exhaust
extension. It may be
necessary to shorten
the springs for your
particular installation.
2
__ 7. Trim the ends of the exhaust pipes to final length. The
pipes must be long enough to ensure the exhaust gases
exit the cowl, yet pipes which extend too far below the
cowl will add drag and reduce your airspeed.
Installing EGT Probes
Trim the end of each exhaust manifold (arrow) as needed to
get the exhaust extensions to exit the cowl in the desired location.
__ 3. After each exhaust manifold has been trimmed to the
proper length, remove the manifolds from the cylinder
heads and re-install them with new exhaust gaskets
(included in the gasket kit).
Sonex Aircraft LLC
© 2014 All Rights Reserved
EGT probe(s) must be installed 4" from the exhaust flange of
each cylinder that is being monitored. This distance is based
on a path down the center of the exhaust pipe. It is also important to consider the orientation of each probe to avoid interference between the probe and cowling.
Important: Do not trim the EGT probe wires.
There are a variety of EGT probe styles with different mounting methods. Follow the instructions provided with your
probes for the proper mounting method.
56
FUEL SUPPLY
AeroVee 2.1 Rev Z. 01/14/2015
This section supplements the fuel system installation page(s)
of the Sonex Aircraft airframe blueprints. Additionally, the
AeroCarb/AeroInjector manual provided with your AeroCarb/
AeroInjector should be referenced.
Other than the fuel tank (included with your Sonex Aircraft
airframe kit) and the AeroInjector (AeroCarb) included with
your AeroVee engine kit, all other fuel system components
must be sourced by each builder. Many of the pipe nad tube
fittings can often be sourced from automotive-supply stores or
hardware stores.
Additionally, both Wicks and Aircraft Spruce offer AeroVee
Firewall Forward Kits which may contain the parts you need
for the fuel system.
Fuel Line Installation
The fuel line must flow smoothly from the gascolator to the
AeroInjector, with no part of the fuel hose rising higher than
the carburetor fuel inlet. If the hose is higher than the fuel inlet
at any point between the gascolator and the AeroInjector, an
air pocket can form and hinder fuel flow.
The use of 3/8" I.D. (-06 hose) stainless steel reinforced fuel
line, such as Pro-Flex brand hose from Jegs, with AN hose
fittings is recommended. Do not use barbed hose fittings and
hose clamps in the fuel system.
Important. Never use teflon tape on any fuel system connections as it may block fuel flow.
IMPORTANT: Because of the wide range of possible installation variations, the hardware and fittings mentioned
in this manual and included in the 3rd-party hardware kits
may or may not match your specific needs or desires. Each
builder must make their own determination of which parts
are appropriate for their particular installation.
Gascolator Installation
The gascolator must be the lowest point in your fuel system so
it will collect water from your fuel system for easy draining.
Never use teflon tape on any fuel system connections as it may
block fuel flow.
Position the gascolator on the firewal after the motormount
has been installed so there is no interference between the
gascolator, drain fitting, and motormount.
A street elbow and fuel drain are installed in the gascolator
before the gascolator is positioned on the firewall.
Sonex Aircraft LLC
© 2014 All Rights Reserved
This view shows very clearly the fuel line routing on a Sonex,
Waiex, or Xenos. While the fuel connection at the AeroInjector
should be installed exactly as shown, the use of a different gascolator may require slightly different fittings at the
gascolator outlet.
The fuel line at the gascolator can be fitted with either a 90O
swivel fitting (left), or a straight fitting (right). The choice of
which to use should be based on the best routing for the fuel
line to avoid the exhaust pipes.
57
AeroVee 2.1 Rev Z. 01/14/2015
FUEL SUPPLY
A typical fuel line connection at the AeroInjector
Sonex Aircraft LLC
© 2014 All Rights Reserved
58
AeroVee 2.1 Rev Z. 01/14/2015
The AeroVee requires the use of baffles to direct air over and
through the piston barrels and cylinder heads. The system
must designed and installed to keep the cylinder head within
their operating limits during normal operation.
ENGINE COOLING BAFFLES
Available Fence Baffle Systems
__ SNX-P30-10, For a Sonex, Waiex, or Xenos airframe.
__ ONX-P01-10, For a Onex airframe.
Sonex Aircraft LLC has developed a fence baffle system
specifically for use on Sonex Airframes /AeroVee installations.
These system may also be adapted to other airframe installations.
Each fence baffle comes with its own instructions for fitting.
An AeroConversions' fence baffle fitted to a Sonex airframe. The installation shown here has a bottom-mounted oil cooler.
Sonex Aircraft LLC
© 2014 All Rights Reserved
59
ENGINE OIL
AeroVee 2.1 Rev Z. 01/14/2015
Parts Required
__ 3 quarts approved SAE engine oil. Approved oils are
listed below.
Approved Oils
Break-in Period (First 25 hours)
The flat-tappet (non-roller rocker) design of the AeroVee requires an oil with zinc and phosphate levels of approximately
.12% to .14% (1200 - 1400 ppm)
Additionally, break-in oil must be non-detergent, non-synthetic, and contain no friction modifiers.
Do not use diesel engine oils (Rotella) and do not use oil additives.
Approved break-in oils are:
Valvoline VR-1, 20w50, non-synthetic
Brad Penn Penn-Grade 1 Racing 20w50
Post Break-in
The flat-tappet (non-roller rocker) design of the AeroVee requires an oil with zinc and phosphate levels of approximately
.12% to .14% (1200 - 1400 ppm)
Do not use diesel engine oils (Rotella) and do not use oil additives.
Synthetic oils may be used but do not extend the recommended oil change interval. The primary benefit to using a synthetic
oil is improved heat transfer.
Approved post break-in oils are:
Valvoline VR-1, 20w50, non-synthetic
Valvoline VR-1, 20w50, synthetic
Brad Penn Penn-Grade 1 Racing 20w50
Mobil 1, 15W-50
Priming the Engine and Setting Oil Level
The AeroVee has a 2.75 quart capacity without oil cooler and
lines. The following method may be used to achieve the proper
oil level for your engine wether fitted with oil cooler or not:
__ 1. Add 2 quarts of oil to the crankcase and allow it to settle
into the sump.
__ 2. With the aircraft in its normal ground attitude (on its
tailwheel for tailwheel aircraft), remove the dipstick
and file a mark on the dipstick at the oil line. This is the
"Low" mark for the oil level.
__ 3. Add an additional .75 quart of oil to the crankcase and
allow it to settle into the sump.
__ 4. With the aircraft in its normal ground attitude (on its
tailwheel for tailwheel aircraft), remove the dipstick
and file a mark on the dipstick at the oil line. This is the
"Full" mark for the oil level.
__ 5. Remove one spark plug from each cylinder.
__ 6. With the fuel off and ignition switches off, operate the
starter until oil pressure registers on the oil pressure
gauge.
Note: If no oil pressure registers, the oil pump may need
to be re-primed with white lithium grease. Also, check
the electrical connection of the oil pressure sender.
__ 7. Re-install the spark plugs.
__ 8. Add oil as needed to bring the oil level back to "Full".
In operation you may find that your engine prefers a slightly
lower oil level. This will be evidenced by excessive oil draining from the breather tube and, in some cases, the front seal. It
is acceptable to operate your engine with less than 2.75 quarts,
2.5 quarts being fairly common.
If your oil level is allowed to drop too low you will experience
increased oil temperatures and fluctuating and/or decreased oil
pressure. Do not operate your engine in this condition.
Oil Changes During Break-in Period
During the first 25 hours of operation the oil level should
be monitored closely and oil changes performed at 1 hour,
5 hours, 15 hours, and 25 hours. Thereafter, oil should be
changed every 25 hours or 3 months.
Note: Engines which are not operated frequently collect damaging moisture. This moisture can only be removed by operating the engine until oil temperatures are above 190-degrees
for an extended period of time, or by changing the oil. Short
runs of the engine, which do not allow the engine to come to
full operating temperature, are more damaging than not running the engine at all.
Sonex Aircraft LLC
© 2014 All Rights Reserved
60
START-UP and BREAK IN
AeroVee 2.1 Rev Z. 01/14/2015
Bringing your engine to life is exciting and rewarding. These
points and procedures will assure the greatest success.
SAFETY FIRST!
__ 1. Have the correct propeller installed, torqued and
tracked. DO NOT OPERATE THE ENGINE WITHOUT A PROPELLER.
__ 2. Remove loose tools, rags, and debris from the engine
and immediate area.
__ 3. One person MUST remain in the cockpit while the
engine is running, and an observer MUST be on hand to
keep an eye on the engine in case of oil leak, fire, and to
observe and keep bystanders safely away.
__ 4. Have an approved fire extinguisher available.
__ 5. Know your aircraft's cockpit controls.
__ 6. Tie the aircraft down securely, set the brakes, and chock
the wheels.
__ 7. Start the engine using a checklist. The AeroCarb manual
includes some sample start-up and shut-down checklists
which may be used or adapted to your aircraft.
Starting the Engine
__ 1. Install the correct oil and prime the engine as described
in "Engine Oil", previous page.
__ 2. Use your start-up checklist to start the engine.
__ 3. Immediately upon engine start look for oil pressure. If
no oil pressure registers in 5 seconds, turn off the engine
and investigate.
__ 4. If the engine does not start, investigate the cause (see
Troubleshooting section).
__ 5. Adjust the timing of the electronic ignition as required.
There should be little or no change in RPM when performing a mag check between 1600 and 2000 RPM. A
change of more than 50 RPM indicates a timing correction is needed.
__ 6. Tune the AeroCarb for optimum engine performance.
Tuning is detailed in the AeroCarb manual.
__ 7. Limit ground running to the minimum necessary to
correct the timing, tune the AeroCarb, assure smooth
throttle response, confirm proper oil pressure, and assure no oil leaks.
Engine Checks
__ 1. Cowl removed.
Important: Extended ground running will overheat
the engine and cause serious damage.
Break-in, the First 25 Hours
__ 2. Oil in crankcase.
__ 3. All parts installed and secured.
__ 4. Propeller installed, torqued, and tracked.
__ 5. Heads torqued and valves properly adjusted.
__ 6. Electronic ignition system static-timed.
Proper break-in will help you get the best performance and
longest life from your AeroVee engine.
__ 1. Limit ground running to what is needed to properly tune
the engine and assure no oil leaks.
__ 2. Do not "baby" the engine during the first few flights.
As soon as possible, climb to a safe altitude over your
airfield and operate the engine at 3000 rpm and above
for at least an hour. This will seat the rings. Monitor the
engine's temperatures and reduce throttle as needed to
keep the engine temperatures "in the green". Step climb
if needed. Higher than normal temperatures during the
break-in period are to be expected, however, temperatures which exceed the redline or continue to climb
must be investigated.
__ 3. Change the oil at 1 hour, 5 hours, 10 hours, and 25
hours.
__ 4. Adjust the valves at 5 hours, 10 hours, and 25 hours.
__ 5. Torque the heads and adjust the valves at 10 hours and
25 hours. Always torque the heads before adjusting the
valves.
Sonex Aircraft LLC
© 2014 All Rights Reserved
After 25 hours you should see the engine's temperatures
decrease and stabilize and there should be little change
in the head torque.
61
MAINTENANCE
AeroVee 2.1 Rev Z. 01/14/2015
Minimum Maintenance Interval
1 Hour Accumulated
___ Change the oil and wash the oil screen.
5 Hours Accumulated
___ Change the oil.
___ Adjust the valves (cold engine). See page 29.
10 Hours Accumulated
___ Change the oil.
___ Torque the heads to 18 foot pounds. Do NOT loosen
the nuts prior to torquing them. See page 22 for proper
torque sequence. The rocker shaft assemblies must be
removed to torque the heads.
___ Adjust the valves (cold engine). See page 29. Valves must
be adjusted after torquing the heads.
___ Check all fasteners for tightness and security.
25 Hours Accumulated
___ Change the oil and wash the oil screen.
___ Torque the heads to 18 foot pounds. Do NOT loosen
the nuts prior to torquing them. See page 22 for proper
torque sequence. The rocker shaft assemblies must be
removed to torque the heads.
___ Adjust the valves (cold engine). See page 29. Valves must
be adjusted after torquing the heads.
On Annual Inspection
___ Change the oil and wash the oil screen.
___ Torque the heads to 18 foot pounds. Do NOT loosen
the nuts prior to torquing them. See page 22 for proper
torque sequence. The rocker shaft assemblies must be
removed to torque the heads.
___ Adjust the valves (cold engine). See page 29. Valves must
be adjusted after torquing the heads.
___ Inspect and/or replace air filter.
___ Inspect and/or replace spark plugs.
___ Check all fasteners for tightness and security.
___ Check all hoses for condition, tightness and security.
___ Check all wiring for condition and security.
___ Perform a leak-down test of each cylinder. 80 psi is
normal, anything below 60, or a large deviation between
individual cylinders, requires additional investigation.
When to Rebuild Your AeroVee
Experimental engines, such as the AeroVee, have no TBO. As
the owner/operator of an Aerovee engine you decide when it
will be rebuilt and to what extent.
Signs an engine needs some degree of rebuilding include low
compression, loss of power, increased oil usage, and low oil
pressure.
Torque Values
Every 25 Hours
___ Change the oil.
Every 50 Hours
___ Change the oil and wash the oil screen.
___ Adjust the valves (cold engine). See page 29.
___ Inspect and/or replace air filter.
Item................................. Socket........Ft. lbs....... In. lbs.
Large Case Nuts...................19mm................25..............300
Cam Case Nuts...............................................10..............120
Small Case Nuts...................13mm................14..............168
Cylinder Head Nuts..............15mm................18..............216
Rocker Arm Nuts.................13mm................14..............168
Prop Hub Nuts.....................30mm............. 70-80........ 840-960
Flywheel Gland Nut.............36mm...............227............2724
Connecting Rod Nuts...........14mm................30..............360
Oil Pump Cover...................13mm................14..............168
Valve Cover Bolts................13mm................10..............120
Oil Pump Cover...................13mm................14..............168
Oil Pan Cover Nuts..............10mm.................5................60
Rear Unit Mount Bolts.........17mm................25..............300
Prop Bolts/Nuts*..................1/2"....................11..............132
Spark Plugs..........................11/16"................12.............. 144
*Refer to the propeller manufacturer's torque specification. In the absence of a
manufacturer specification, use these values.
Sonex Aircraft LLC
© 2014 All Rights Reserved
62
AeroVee 2.1 Rev Z. 01/14/2015
TROUBLESHOOTING
Engine does not start
Possible Cause
1)
2)
3)
4)
5)
6)
Ignition OFF
Spark plug gaps too large
Closed fuel valve or clogged filter
Remedy
Switch ON
Adjust gaps or replace plugs
Open valve, replace or clean filter, check
for fuel system leaks
Refuel
Connect as shown in manual
Recharge or replace battery
No fuel in tank
Wrongly connected spark plug leads
Starting speed too low, faulty or discharged
battery
7) Coil to magnet gap too wide
Adjust to .010”
8) High tension leads loose or damaged
Check or renew connections
9) Spark plugs damp due to condensation
Thoroughly dry both inside and outside of
plugs
10) Spark plugs wet by fuel due to flooding
Remove, dry and reinstall spark plugs
11) Water in fuel system
Drain water from sump and tank
12) Insufficient compression
Trace pressure loss & repair if necessary
13) Engine damage
Inspect oil screen for metallic particles
If present, an engine overhaul may be
necessary.
14) No Spark from Secondary Ignition
Check for/add ground wires from ignition
module cap screws to engine case.
Engine idles unsteadily after warm-up period and/ or smokey exhaust emission
Possible Cause
Remedy
Adjust AeroCarb (See AeroCarb manual)
Tighten all connections, replace hose
1) Rich idle setting
2) Intake manifold leak
Engine runs erratically or misfires occasionally
Possible Cause
Remedy
1) Spark plug failure
Check plugs, clean inside & outside, adjust electrode gap. If necessary,
replace plugs
2) Faulty ignition leads or caps
Dry damp leads, replace damaged leads
3) Faulty ignition unit
Replace ignition unit
4) Clogged fuel filter
Clean or replace fuel filter
Engine runs too hot - Oil temperature above 230oF (110o C) or high CHT (400o+)
Possible Cause
1) Too much oil in crankcase
2) Low oil level
3) Poor quality oil
4) Clogged oil screen
5) Excessive piston blow by
6) Faulty bearings
7) Faulty oil or CHT temperature gauge/ probes
8) Faulty cooling baffles
9) Oil cooler not installed
10) Secondary Ignition Advanced
Sonex Aircraft LLC
© 2014 All Rights Reserved
Remedy
Check oil level & adjust if necessary
Check oil level & add oil if necessary
Change oil, use specified oil
Clean screen
Common reason: worn or sticking piston
rings, “top” engine overhaul necessary
If metallic particles are present in oil,
a complete engine overhaul is necessary
Replace the gauge or probes
Check for leaks, cowl inlets and exits and
baffles are built to plans
Install recommended oil cooler and baffles
Retard Secondary Ignition Timing
63
TROUBLESHOOTING
AeroVee 2.1 Rev Z. 01/14/2015
Unsatisfactory power output
Possible Cause
Remedy
Possible Cause
Remedy
1) Ignition failure
Check ignition circuits; Check wiring and /or replace ignition units
2) Too much oil in crankcase
Check oil level & adjust if necessary
3) Insufficient fuel supply
Check fuel supply system
4) Fuel not according to specifications
Refuel with specified fuel
5) Incorrect throttle adjustment
Readjust throttle setting
6) Leak in air intake
Check and tighten all manifold and Carb
connections
Low oil pressure
1)
2)
3)
4)
5)
Insufficient oil in sump
High oil temperature
Faulty pressure gauge, sender or wiring
Faulty crankshaft bearings
Oil Pump plate on Incorrectly
Check oil level and top as necessary
Improve engine cooling
Check gauge, sender & wiring. Replace if necessary
Engine overhaul
Properly install oil pump cover
Engine Keeps Running with Ignition Off
Possible Cause
Remedy
Possible Cause
Remedy
1) Faulty ignition switch
Check switch & cables.
2) Overheated engine
Conduct cooling run at 900 RPM
3) Bad fuel or octane rating too low
Refuel with recommended fuel Excessive oil consumption
1)
2)
3)
4)
Worn, broken or poorly fitted piston rings
Poor oil quality
Worn valve guides
Oil leaks
Repair or engine overhaul necessary
Oil change, use specified oil
Repair of cylinder head necessary
Seal leaks
Knocking under load
Possible Cause
1) Octane rating of fuel too low
2) Spark plug fitted without sealing washer
3) Heavy carbon deposits
tion chamber
Remedy
Use fuel with higher octane rating
Ensure one sealing washer on each plug
Remove cylinder heads & remove deposits in combus-
Engine Hard to Start at Low Temperature
Possible Cause
1)
2)
3)
4)
Remedy
Starting speed too low
Low battery charge
No spark
Lean or rich mixture
Sonex Aircraft LLC
Preheat engine
Charge or replace battery
Check ignition gaps and adjust
Adjust AeroCarb. See AeroCarb manual.
© 2014 All Rights Reserved
64
AeroVee 2.1 Rev Z. 01/14/2015
ELECTRICAL SCHEMATICS
This page is a quick reference of electrical schematics associated with the AeroVee installation. Detailed instructions for
each sub-system are provided elsewhere in this manual.
ALTERNATOR WIRING SCHEMATIC
STARTER WIRING SCHEMATIC
SECONDARY IGNITION SCHEMATIC
RIGHT COIL
LEFT COIL
18 GA.
B
RED
A
C
D
RED
IGNITION
SWITCH
SPST - N.O.
TO LOWER,
REAR SPARK
PLUGS
ORANGE
ORANGE
TO LOWER,
FRONT SPARK
PLUGS
18 GA.
MAGNATRON IGNITION SCHEMATIC
BLACK
10 AMP
FUSE
TOP
TRIGGER
BOTTOM
TRIGGER
-
+
BATTERY
BLACK
Sonex Aircraft LLC
© 2014 All Rights Reserved
65
APPENDIX A - SONEX COWL OPENINGS
AeroVee 2.1 Rev Z. 01/14/2015
Proper cooling inlets and exhaust outlets are critical to proper
engine cooling. Arbitrarily changing any of the defined openings can have a negative affect on cooling.
Oil Cooler Inlet Cut-outs
This Appendix details the cowling inlets and outlets of a
Sonex Aircraft cowling fitted to a Sonex, Waiex, or Xenos.
Important: Even if you do not fit an oil cooler you must
provide this cut-out so cooling air will flow over the bottom
of the oil sump.
The cowling of a Onex airframe is supplied with all cut-outs
pre-finished so no additional details are provided in this
manual.
Cylinder Head Cooling Air Cut-outs
These photos identify the depth of the cowl lips for the cylinder head cooling air.
Left Cowl Half
Important: Due to slight variations in each installation, the
location of the oil cooler inlet may vary slightly.
The approximate location of the oil cooler inlet is shown in the
photo below. The exact location can be determined by fitting
one cowl half and centering the cut-out on the oil cooler baffle
fitted to your engine (see bottom photo).
Oil Cooler Inlet
1/4" or less
5"
2"
5/8"
1"
5"
5/8"
Right Cowl Half
1/2"
1/8"
3/8"
5/8"
Sonex Aircraft LLC
This photo identifies the size and approximate location of the
oil cooler inlet.
© 2014 All Rights Reserved
While the top photo gives approximate dimension for the location of the oil cooler inlet, fitting one cowl half and marking
the exact location will ensure the correct fit for your airplane.
Note that the oil cooler inlet is required even if no cooler is
installed, as on this airplane.
66
AeroVee 2.1 Rev Z. 01/14/2015
APPENDIX A - SONEX COWL OPENINGS
Exhaust Cut-outs
The size of the exhaust outlet(s) is a critical for proper cooling.
The Sonex requires 47 to 50 square inches of outlet area for
the cooling air.
The cowling provided with your kit is one of two types: a VW
cowl with premolded exhaust tunnels (detailed below), or a
Universal cowl, detailed on the next page.
VW Cowl with Pre-molded Exhaust Tunnel
The VW cowl with pre-molded exhaust tunnels was phased
out in favor of the Universal cowl in 2004. The change was
made to eliminate the cheeks on the side of the cowl.
The VW cowl must have the exhaust outlets cut open to the
proper size and have air deflector lips added, as shown in the
accompanying photos. In addition, .025" aluminum sheet is
riveted to the exhaust tunnel to protect the fiberglass from the
hot exhaust gasses.
6-3/4"
(Width of Tunnel)
Aluminum-lined
Exhaust Tunnel
This tunnel has been lined with .025" 6061-T6 aluminum to
protect the fiberglass from the heat of the exhaust. The aluminum wraps around the inside as well, but only extends a few
inches back. The aluminum lining is needed only for aircraft
fitted with the 4-piece Sonex exhaust, which was phased-out in
2005.
3-1/2"
Exhaust Cut-out
This is a view of the exhaust cut-out before the lips are added.
1"
30O
This view of a completed cowl clearly shows the air deflector
lips which are added to the front of the exhaust cut-out. These
lips create a low pressure area which draws the cooling air
through the cowl. These lips are particularly important when
the airplane is in a climb attitude. This aircraft is fitted with
the old-style 4-piece exhaust.
Exhaust Outlet Lip
The exhaust lips can be molded from fiberglass, as shown here,
or made from .025" aluminum and riveted in place.
Sonex Aircraft LLC
© 2014 All Rights Reserved
67
AeroVee 2.1 Rev Z. 01/14/2015
APPENDIX A - SONEX COWL OPENINGS
Cowl with Pre-molded (Fiberglass) Exhaust Tunnels.
If your cowling has the premolded exhaust tunnels, the tunnels
must be opened as described on page 67. These openings provide the necessary outlet for the engine's cooling air.
If you are fitting the 2-into-1 exhaust you will also need to
make a cowling cut-out at the firewall large enough for the exhaust pipes to exit. The cutout should be large enough to clear
the exhaust, but not over-sized. If the cut-out for the exhaust is
too large it can degrade engine cooling.
A small deflector lip must also be fitted in front of the exhaust
pipe outlet, and a curved stainless steel deflector may be added
to the bottom of the fuselage skin for the exhaust to spill
against.
Universal Cowl with No Existing Exhaust Tunnel
Fitting the 2-into-1 exhaust to a cowling with no existing
outlets is very simple.
A 4" x 12.5" cut-out is made on the lower aft edge of the cowling, where it attaches to the bottom of the firewall. This opening provides both an outlet for the exhaust pipes as well as an
outlet for the engine's cooling air. No other cooling air outlets
should be added to the cowl.
Note: The loss of piano hinge in this area has no impact on the
strength and security of the cowl installation.
An aluminum exhaust lip must be added to the front of the
opening. The lip should be 1" high and rake back 60 degrees
from front to back.
A stainless steel deflector may be added to the bottom of the
fuselage floor to guide and deflect the exhaust gases.
This photo shows the standard outlet for a 2-into-1 exhaust
fitted to a cowl without pre-molded tunnels. If you are fitting a
cowl with premolded exhaust tunnels, this opening must only
be large enough to allow the exhaust pipes to exit. The small
tube in this photo is the oil breather.
Universal Cowl with Aluminum Exhaust Tunnels.
If your universal cowling has aluminum exhaust tunnels installed, you will need to follow the installation outlined above
for "Cowl with Pre-molded (Fiberglass) Exhaust Tunnels".
This photo shows the standard outlet for a 2-into-1 exhaust
fitted to a cowl without pre-molded tunnels. The cut-out
measures 4" x 12.5". No additional cowl outlets are needed for
cooling air. The small tube in this photo is the oil breather.
Custom Exhaust Installations
Custom exhaust installations can set your airplane apart, but
may also require extensive testing and modification to perfect.
If you do pursue a custom installation you will need to provide
47 to 50 square inches of outlet area for the cooling air. This
must be placed in a low-pressure area of the cowl to function
properly.
Sonex Aircraft LLC
© 2014 All Rights Reserved
68
AeroVee 2.1 Rev Z. 01/14/2015
MANUAL REVISION LOG
Rev. Z
01/14/15
Updated some part numbers to match packing list.
Rev. L
02/08/11
Integrated Firewall Forward Manual in to Assembly manual.
Rev. Y
09/11/14
Added Intake Elbow Spacer to Intake Manifold Installation procedure.
Changed hardware requirements for installation. Spacers needed only on
engines equipped with ACV-P07-47 Cylinder Heads.
Rev. K
01/14/11
Dipstick was ACV-P01-18, should be ACV-P01-24.
Added grounding wire to starter motor.
Added note to Accessory Plate photo referencing Mounting Pin Drawing.
Added Motor Mount Pin drawing.
Added ACV-P02-20 Oil Sump Plate.
Added Exhaust Gasket part number.
Added note to adjust exhaust manifold width.
Added torque specification for valve covers.
Added reference to dual pole Oil Pressure Sender, Part no. ACV-P01-135.
Added ACV-P01-104 as interchangeable number for Aft Woodruf Key.
Rev. X
08/15/14
Cylinder Head Installation, Step 5. Added note to not install O-ring if the supplied cylinder head does not have an O-ring recess.
Valve cover bolt torque specification reduced - tighten by feel, snug enough to
secure and prevent leaks.
Rev. W
06/18/14
Added part number ACV-M01-20 Intake Hose
Rev. V
04/29/14
Added reference photos of cylinder head characteristics.
Added option to attach intake elbows with ACV-Z01-39 cap screws.
Rev. U
12/12/13
Added part number and packing list statement to the "Before You Begin" section of the manual.
Reformatted manual, de-emphasizing part numbers.
Removed non-current part number cross-references.
Added Part Number and Packing List Addendum to back of manual.
Rev. T
12/04/13
Corrected shim call-out for 8:1 compression ratio with -.07 measured deck
height.
Rev. S
09/26/13
Deleted ACV-P02-21 Connecting Rods, added ACV-P06-33 Connecting Rods.
Rev. R
12/04/12
Added place to record engine's serial number.
Added ACV-P02-22 as interchangeable Super Case number.
Added note to remove clinging chips from machined surfaces of case.
Added photo of super tin installed.
Revised installation of trigger shaft to include longer screws (ACV-Z01-81
and specific tightening pattern.
Revised installation of stator mount plate to include priming screws (ACVZ01-81) with Locktite primer.
Rev. Q
03/28/12
Changed recommended Top Mounted Oil Cooler. Was CB Performance p/n
1722, should be part number 1727.
Rev. P
02/28/12
Added top-mounted oil cooler installation details.
Revised Revision Log format.
Removed specific fuel system installation details and referenced the airframe
plans for this detail.
Removed fuel and oil system specific shopping lists.
Reduced Spark Plug torque value from 22 ft. lbs. to 12 ft. lbs.
Rev. O
10/21/11
Expanded information on installing ACV-P01-56, non-ported oil pump.
Rev. N
09/1/11
Screws to attach stator is ACV-Z01-76, was ACV-Z01-12.
Added note to use ARP Ultra-Torque if provided. Increased torque of rod bolts
to 30.
Rev. M
04/14/11
Added ACV-P02-21 as alternate part number for connecting rods.
Sonex Aircraft LLC
© 2014 All Rights Reserved
Rev. J
10/14/10
Added step to check oil pump cover clearance.
Added note about not using the louvered metal gasket under the breather plate.
Added note to ground the oil pressure sender.
Rev. I
04/13/10
Elaborated on rocker shaft assembly and installation
Rev. H
12/18/09
Added torque value (14 ft. pounds) for rocker adjuster locking nut.
Added note to keep piston and pins together as a set.
Rev. G
09/25/09
Added specific oil recommendations and "Engine Priming" detail.
Rev. F
05/19/09
Removed Locktite application to Cylinder Head Studs.
Added ACV-P01-86 head studs.
7:1 Shim chart for -0.01 to -0.04 was .09+.06+.06 shims.
Added weight for Nikasil-equipped engines.
Corrected photo to show proper (flanged) bearing.
Added Shim Kit p/n ACV-P02-19.
Added optional ACV-P03-10 Nikasil Cylinder Kit.
Added additional package of ACV-P01-41 .060 barrel shims.
Added note for builders with pre-assembled crank to proceed to Cam Assembly page.
Rev. E
03/18/09
Changed minimum end play from .004" to .003".
Deleted cam stud gaskets.
Added Permatex coating to cam stud washers.
Added note to adjust spacers as needed on rocker assemblies.
Added flywheel installation and removal detail.
Rev. D
04/22/08
Removed incorrect mention of copper head gaskets.
Added interchangeable part numbers.
Rev. C
04/22/08
Replaced ACV-P01-65 Oil Slinger with ACV-P01-101.
Rev. B
04/07/08
Deleted ACV-P01-61 Shakeproof Nut Kit. Replaced with individual hardware
part numbers.
Rev. A
03/08/08
General clean up from Rev N/C. No significant changes.
Rev. N/C 03/05/08
Original Publication of 2.1 engine Assembly Manual.
69
AeroVee 2.1 Rev Z. 01/14/2015
Part Numbers and Packing Lists
Keep Your Packing Lists
The packing list provided with each AeroVee kit lists the specific parts provided for that specific engine. Please reference
your engine's packing list for correct part numbers when ordering maintenance and repair parts for your particular engine.
In addition to the packing list secured to the outside of the
engine kit boxes, a duplicate packing list has been attached to
the back of each physical manual supplied with that engine.
If you are holding a manual provided with an engine that was
shipped after January 1st, 2014, there should be a copy of the
original packing list attached after third page. If there is no
packing list attached the manual you have may have printed
from the website, provided as a replacement, or the packing
list may have been removed.
Copies of (most) packing lists are archived by Sonex Aircraft
and you may request an electronic (PDF) copy. To get a copy,
provide evidence you own the engine for which you are requesting the original packing list as well as the engine's serial
number.
Part Number Changes - Interchangeable Parts
AeroConversions reserves the right to supply compatible,
alternative replacement parts for any part of the core engine or
conversion package. Such parts may appear different than the
part originally provided in the kit or depicted in the manual,
and may bear a different part number, but will be functionally
identical or superior to the original kit-supplied component.
Sonex Aircraft LLC
© 2014 All Rights Reserved
70


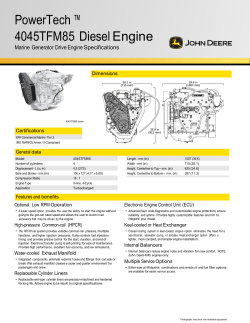
© Copyright 2026