
PIES FOR ALL SEASONS What You’ll Need APPLE PIE CRUST
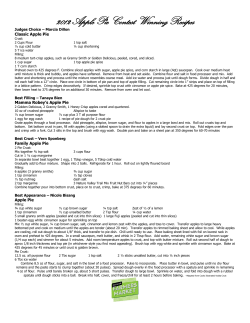
PIES FOR ALL SEASONS
with Sue Gray & P.J. Hamel
What You’ll Need
APPLE PIE CRUST
2 1/2 cups Mellow Pastry Blend*
3/4 tsp. salt (extra-fine, if you have it)
2 tbsp. buttermilk powder (optional)
1 tbsp. sugar (optional)
1 cup (2 sticks) butter, cut into 1/4" cubes and
frozen for 1/2 hour; or 1/2 cup (1 stick) butter
and 1/2 cup vegetable shortening or lard
6–8 tbsp. ice water
*Or substitute 1 1/4 cups unbleached all-purpose flour
and 1 1/4 cups unbleached pastry flour. Or use all
unbleached all-purpose flour; you'll need to add a bit
more water to the crust, and it'll be slightly less tender.
APPLE PIE FILLING
8–10 large apples (about 2 lbs.)
2 tsp. lemon juice
3 tbsp. cornstarch or 1/3 cup unbleached
all-purpose flour or 1/4 cup tapioca flour
or 1/3 cup Pie Filling Enhancer or 3 tbsp.
Instant ClearJel®*
1/2 tsp. salt
1 tsp. cinnamon
1/2 tsp. nutmeg
3/4–1 cup sugar
2 tbsp. butter
2 tbsp. dark (Grade B) maple syrup, boiled
cider, or golden syrup (optional)
*Of all of these choices, we like the Pie Filling Enhancer or
Instant ClearJel® options the best. Why? Because they
make a filling that's clear, not cloudy; they have
absolutely no floury or starchy taste; and they're freezerstable, meaning you can freeze an unbaked pie and
then bake it later without a chance of the filling
becoming runny.
What You’ll Need
FRESH BERRY PIE CRUST
1 1/3 cups Mellow Pastry Blend*
1/3 tsp. salt (extra-fine, if you have it)
1 tbsp. dried buttermilk powder (optional, but it
helps tenderize the crust)
2 tsp. sugar (optional)
1/2 cup (1 stick) cold butter or 1/2 cup chilled
vegetable shortening
3–4 tbsp. cold water
*Or substitute 2/3 cup unbleached all-purpose flour plus
2/3 cup unbleached pastry flour. Or simply use all
unbleached all-purpose flour; you may need to use
additional water.
FRESH BERRY FILLING
1 1/2 qt. (6 cups) fresh berries*, washed, hulled
if needed
2 tbsp. fresh lemon juice or 1/8 tsp. lemon oil
1/4 cup Instant ClearJel® powder or 3 tbsp. corn
starch or 3 tbsp. tapioca flour
1/2 cup water (ONLY if you’re using cornstarch
or tapioca flour)
1 cup (7 1/4 oz.) sugar (increase to 1 1/4 cups if
the berries are very tart)
Red food coloring (optional)
*We used strawberries and blueberries when we made
the pie for this lesson. However, use all one type of
berry, or mix and match as your taste dictates—use
your imagination!
What You’ll Need
PUMPKIN CHEESECAKE CRUST
About 20–30 cookies (2–2 1/2 inches in diameter) or 1 cellophane sleeve of graham crackers
(there are three sleeves to a box); enough to
yield 1 1/4–1 1/2 cups crushed cookie crumbs
1/4 cup sugar
1/3 cup melted butter
CHEESECAKE FILLING
6 oz. (2 small packages) cream cheese, softened
1/2 cup sugar
1 tbsp. Instant ClearJel® powder (optional)*
1/4 cup cream or evaporated milk
2 tsp. vanilla extract
1/4 cup finely diced candied ginger (optional,
but delicious if you’re a ginger-lover)
PUMPKIN FILLING
3/4 cup sugar
2 tbsp. Instant ClearJel® powder or cornstarch
1 tsp. salt
1 tsp. ground ginger
1 tsp. ground cinnamon
1/2 tsp. ground nutmeg
1/4 tsp. ground allspice
1 15-oz. can pumpkin or squash, or 1 3/4 cups
pumpkin puree*
1 cup light cream or evaporated milk
2 eggs
*Be sure to use plain pumpkin or squash, not “pumpkin
pie filling.”
*The ClearJel® will yield a cheesecake layer that’s just a bit
stiffer and less likely to ooze.
MOM’S APPLE PIE
Like the chocolate chip cookie, apple pie is one of those all-American treats that’s as much symbol as foodstuff. “As American as apple pie” is a phrase that comes immediately to mind—though, in reality, apples are
a native European fruit, and apple pie has an English tradition stretching back centuries before the American
Revolution. But, “never mind the facts, just the way it is”—apple pie is America at its best.
Try this pie hot from the oven, topped with melting vanilla ice cream or whipped cream, for dessert; or cold,
splashed with milk, for breakfast. Sue claims apple pie is a breakfast food because it includes fruit, grain and
fiber. Vermonters eat their apple pie with a slice of sharp Cheddar “store cheese.” And the beverage of choice
is, of course, hot coffee.
THE CRUST
The following is our current favorite pie crust recipe. We say current because you never know when a better
one will come along! This crust uses King Arthur Mellow Pastry Blend, a moderate-protein (10.5%) flour that
we feel strikes the right balance between tenderness and “body.” It also uses buttermilk powder (for tenderness). If you’re a baker who likes to stick to the basics, you can simply use unbleached all-purpose flour and
eliminate the buttermilk powder; but if you’re an impassioned baker who’s always searching for “the very
best (fill in the blank) recipe,” then give these “special” ingredients a try; we think you’ll be pleased.
MAKING DOUGH BY HAND
In a medium-sized bowl, whisk together the flour(s), salt, and buttermilk powder and sugar, if you’re using
them. Now you’re ready to add the fat. If you’re using butter, cut it into into 1/2-inch cubes. Vegetable shortening can remain in a glob. Using a pastry blender, a fork, your fingers, or two knives, combine the butter or
shortening with the dry ingredients, mixing until the dough is crumbly. Leave chunks of butter or shortening
about the size of small peas in the dough.
PIES FOR ALL SEASONS
Page 2
A PASTRY BLENDER OR FORK WORKS WELL
Once you’ve whisked together the dry ingredients, use a pastry blender or pastry fork (or your fingers) to mix
in the frozen butter chunks. Keep mixing until everything’s crumbly; it’s OK for some larger chunks of butter
to remain, but overall the mixture should look “gravelly.”
ADDING THE LIQUID
Sprinkle the ice water over the mixture and toss it together; add just enough water so it holds
together when squeezed. Once you’ve added the water, gently mix the dough only until it comes
together. Remember, once water is added to flour, gluten starts to develop, and this is what can
toughen a pie crust. So use a light hand!
CHILL OUT
Turn the dough out onto a floured work surface and gently fold it over several times, until it’s
cohesive. Divide the dough in half, flatten it to thick disks, wrap it well, and refrigerate it for 30
minutes, or until you’re ready to use it.
Readying the dough for the fridge…
PIES FOR ALL SEASONS
Page 3
MAKING DOUGH IN A FOOD PROCESSOR
Your food processor will do a wonderful job with pie crust dough. Place the flours, salt, buttermilk powder and
sugar into the bowl of a food processor, and pulse a few times to combine the ingredients. Add the frozen butter or vegetable shortening and process, using short pulses, until the mixture is crumbly. Leave chunks of butter or shortening about the size of small peas in the dough. Sprinkle with the smaller amount of water, then
pulse once or twice. Feel the dough to see if you can squeeze it together. If necessary, add more water until the
dough holds together.
Here’s another way to use your processor, particularly good if you’re making a butter crust. First, leave the
butter whole; don’t cut it into pieces. Unwrap it from its wrapper(s), then rewrap loosely, and freeze. Combine
the dry ingredients using the processor’s metal blade, then switch to a coarse shredding disk. Feed the frozen
stick(s) of butter through the feed tube; switch back to the metal blade, and pulse very briefly just to combine
the butter shreds and dry ingredients. Sprinkle in the water and proceed as directed above.
A food processor makes short work of preparing a pie crust. Just be sure to have a light finger on the pulse
button, as it’s easy to over-process and thus toughen the crust once you’ve added the fat and water.
PIES FOR ALL SEASONS
Page 4
AND NOW, A WORD ABOUT APPLES
The United States is the world’s largest producer of apples, and the varieties—though not as plentiful now as
100 years ago—are bountiful. Even the names of apples are evocative: Granny Smith (named after Mary
Anne Smith, who discovered the variety in Australia in the mid-nineteenth century); Newtown Pippin (after
Newton, New York); Northern Spy, Rome Beauty, Jonathan, Gravenstein, Winesap, Delicious…Each of these
apples has its own taste and texture, its special characteristics and uses, and its own history.
Nowadays, we see in the grocery store Delicious and Granny Smiths (and maybe upstarts Braeburn, Fuji and
Gala) year-round, with McIntosh and Cortland and possibly Baldwins making a brief appearance in
September and October. The others are regional and brief-seasonal—maybe you’ll find them at a farmer’s
market or at a serve-yourself stand on a lightly traveled country road; or maybe you won’t find them at all,
as they retreat from the current culinary scene and fade into mere historical background. Nevertheless, when
apples flood the market in September, be they Macs or Cortlands or a local variety, it’s time to get out the
rolling pin and make pie.
Our favorite apple pie apple is the Cortland. It has a nice, tart flavor, doesn’t lose its shape in baking, and is
in plentiful supply here in Vermont. In the fall, the local orchards put up their signs—this row is Cortlands,
this Macs, this grove is all Baldwin—and people pick their own pie and lunchbox mix of fruits. That said, we
have to admit that we often make apple pie out of the apples—any variety, bruised, soft or misshapen—that
the kids have left in the bottom of the fruit bin; it’s that forgiving a dish.
If you’re not in apple country and don’t have access to anything other than Delicious and Granny Smiths,
feel free to use those apples, remembering that Granny Smiths are quite tart while Delicious are juicy and
sweet; you’ll have to use a little extra sugar with the Grannies, and lemon juice and extra thickener with the
Delicious. One of our favorite combinations is McIntosh (for the flavor) and Granny Smith (for the crisp texture, ideal if you like your apple pie filling with some “bite.”) In this recipe we’ve used all Cortlands, which
produce a smooth, almost creamy filling. To vary the texture and/or taste in your apple pie filling, try different types of apples.
PEEL, CORE AND SLICE THE APPLES
An apple peeler works very well, simultaneously peeling, coring and slicing apples into rounds with just a few
quick turns of the handle (Figures 1 and 2.) Or, peel the apples by hand, then slice them into 1/3- to 1/2-inch
slices. Core the apple before slicing (using a corer) or just cut slices from the apple till all that’s left is the core
(Figure 3.)
Figure 1
PIES FOR ALL SEASONS
Figure 2
Figure 3
Page 5
MIX THE APPLES WITH THE SUGAR AND SPICES
Put the apple slices in a large bowl, and sprinkle them with lemon juice. In a small bowl, whisk together the
cornstarch (or thickener of your choice,) salt, cinnamon, nutmeg and sugar. Add this dry mixture to the
apples, and stir to combine. Thoroughly combine the apples and dry ingredients; a large spoon works well
(Figures 4 and 5.)
Note: If the apples seem particularly juicy and you want to be sure the pie filling will thicken, put the mixture
in a heavy pot and cook over medium heat, stirring constantly, until the juices come to a boil and the mixture thickens. The cooked filling should be quite thick, as more juice will continue to cook out of the apples as
the pie bakes.
Figure 4
Figure 5
READY TO ROLL
Remove one piece of dough from the refrigerator. If it’s been refrigerated longer than 30 minutes, allow it
to rest at room temperature, covered, for about 10–15 minutes, or until it’s still cool, but flexible enough
to handle.
To roll out the dough, dust a clean work surface with flour. Dust the top of the dough with flour. Roll it out,
using short, strong strokes, starting at the center, working outwards and stopping occasionally to be sure
the dough isn’t sticking to the work surface. If it starts to stick, gently peel it off—a giant spatula works well
here—and throw a bit of flour under it. Dust the top of the dough with flour and flip it over, then continue
to roll it out to the desired size. The crust to fit a 9-inch pie pan should be rolled into a 13- to 14-inch circle,
about 1/8-inch thick. We like to use pie crust rings; they help us make a perfectly round, flat crust.
Fold the dough in half, then in quarters, and lift it into the pan. Unfold the dough, being careful not to
stretch it into place. As noted above, a giant spatula works really well here—no need to fold the dough,
just slide it off the work surface and into the pan.
Once you’ve rolled the dough to at least 12-inches in diameter (Figure 6,) gently transfer it to your ungreased
9-inch pie pan (Figure 7.) Try to center it over the pan before lowering it in; once it’s nestled in the pan, don’t
stretch it! If you need to move it around, slide it till it’s better centered in the pan. Stretching and tugging pie
crust is the chief reason it slides down the sides and tries to puddle in the bottom of the pan while your pie
is baking.
Figure 6
PIES FOR ALL SEASONS
Figure 7
Page 6
FILLING THE PIE
Spoon the apple mixture into the crust, and dot the filling with bits of butter (for extra flavor), if desired. This
filling recipe will make a normal-looking apple pie. For a “mile-high” pie, one that's domed on top and just
stuffed with filling, increase all of the filling ingredients by half.
ADDING THE TOP CRUST
Roll out the remaining piece of crust, just as you did the first piece. Gently lay it over the filling, making sure
it completely covers the edges of the bottom crust. Trim off the excess (leaving yourself about 1/2 inch all
around to work with.) Seal the edges of the top and bottom crusts together by brushing the edge of the bottom crust with water, then folding the edges under and crimping with your fingers or with a fork to seal.
Slice a few steam vents in the top crust.
Again, a giant spatula is the perfect tool for moving your pie crust around (Figure 8.) Center it over the filling, then use a pair of scissors to snip off all but 1/2-inch of the overhanging crusts (Figure 9.) And don’t
throw the scraps away—put them on a baking sheet, sprinkle with cinnamon-sugar, and bake them very
briefly (just till they’re a light golden brown) alongside the pie. Yum!
Seal the top crust to the bottom crust by pressing the two together. Then, use your fingers to form a fluted
edge, or a fork to make a simpler decorated seal (Figure 10.) Brush the top crust with a bit of milk, and sprinkle with some sugar (coarse white or Demerara, if you’ve got it). This will help the crust brown, and give it a
slightly sweet, crunchy top (Figure 11.)
Figure 9
Figure 8
PIES FOR ALL SEASONS
Figure 10
Figure 11
Page 7
BAKING THE PIE
Bake the pie in a preheated 450°F oven for 15 minutes, reduce the oven heat to 350°F, and continue to bake
for 1 hour or longer, till it’s as brown as you like. While baking, if the edges start to brown too much, cover
them with a pie shield or foil. And be sure to place a parchment- or foil-lined cookie sheet below the pie to
catch any drips that boil out. The juices should boil out clear when the pie is done, but be sure to give it at
least a full hour. Yield: 8 generous slices.
You can’t beat a warm slice of apple pie. Add some vanilla ice cream (Ben & Jerry’s
World’s Best Vanilla is our choice,) and you’ll have attained Pie Heaven!
PIES FOR ALL SEASONS
Page 8
FRESH BERRY PIE
This delicious pie combines fresh and briefly cooked berries in a pre-baked crust. The texture is a delightful
combination of smooth and firm, and the taste is out of this world.
THE CRUST
This recipe make a single 9-inch, pre-baked pie crust. Besides being ideal for this berry pie, it’s also perfect for
cream pies (chocolate cream, banana cream, coconut cream…) or other pies that include a cooked or fully
prepared filling, and don’t require further baking.
MAKING THE CRUST BY HAND
In a medium-sized bowl, whisk together the flour(s), salt and buttermilk powder and sugar, if you’re using
them (Figure 12.) Now you’re ready to add the fat. If you’re using butter, cut it into into 1/2-inch cubes.
Vegetable shortening can remain in a glob. Using a pastry blender, a fork, your fingers or two knives, combine
the butter or shortening with the dry ingredients, mixing until the dough is crumbly (Figure 13.) Leave
chunks of butter or shortening about the size of small peas in the dough. Sprinkle water over the dough, 1
tablespoon at a time, tossing to combine; add just enough water so the dough will hold together when you
squeeze it in your hands. Turn the dough out onto a floured work surface and gently fold it over several
times, until it’s cohesive. Flatten it to a thick disk, wrap it well, and refrigerate it for 30 minutes, or until
you're ready to use it.
Figure 12
Figure 13
MAKING THE DOUGH IN A FOOD PROCESSOR
Place the flours, salt, and buttermilk powder and sugar (if you’re using them) into the bowl of a food processor, and pulse a few times to combine the ingredients. Add the cold butter or vegetable shortening and
process, using short pulses, until the mixture is crumbly. Leave chunks of butter or shortening about the size
of small peas in the dough. Sprinkle the dough with the smaller amount of liquid, then pulse once or twice.
Feel the dough (watch out for that processor blade!) to see if you can squeeze it together. If necessary, add just
enough more water so that the dough holds together. Flatten it to a thick disk, wrap it well, and refrigerate it
for 30 minutes, or until you’re ready to use it.
Preparing the dough for chilling.
PIES FOR ALL SEASONS
Page 9
READY TO ROLL
To roll out the dough, dust a clean work surface with flour. Dust the top of the dough with flour. Roll it out,
using short, strong strokes, starting at the center, working outwards, and stopping occasionally to be sure the
dough isn't sticking to the work surface. If it starts to stick, gently peel it off—a giant spatula works well
here—and throw a bit of flour under it. Dust the top of the dough with flour and flip it over, then continue to
roll it out to the desired size. The crust to fit a 9-inch pie pan should be rolled into a 13- to 14-inch circle,
about 1/8-inch thick.
Fold the dough in half, then in quarters, and lift it into the pan. Unfold the dough, being careful not to
stretch it into place. As noted above, a giant spatula works really well here—no need to fold the dough, just
slide it off the work surface and into the pan. Pie rings help you roll dough into a perfectly sized circle, but
you can also skip the rings and just eyeball it as you go (Figure 14.)
Figure 14
THE FINISHING TOUCH
Trim the excess dough from the edges, so that you have about 1/2 inch of extra dough hanging over the rim
all the way around the pan. Fold this extra dough under itself and tuck it all atop the rim. Pinch or crimp the
dough to form a decorative edge. Next, you're going to “blind-bake” the crust, i.e., bake it without any filling.
It’s necessary to weigh the crust down as it bakes, so it doesn’t bubble up; you can do this in a variety of
ways. Line the bottom of the crust with waxed paper, aluminum foil, or parchment paper, and fill the bottom
with pie weights, or dried beans or dry rice. Or, do as we do—set a perforated pie pan into the crust, being
careful not to press it down around your decorated edge (Figure 15.)
Crimp the dough to make a decorative edge.
Figure 15
BAKING THE CRUST
Bake the crust in a preheated 450°F oven for 12–14 minutes. Remove the weights or extra pie pan and bake
for an additional 6 minutes or so, or until the crust is golden brown. Remove the crust from the oven; if any
parts of it have bubbled up, press them down gently.
PIES FOR ALL SEASONS
Page 10
THE FILLING
OK, the first thing we’re going to do is have a beauty contest. Divide the berries into three groups. The least
perfect-looking (2 cups) will be mashed and used to bind the filling together; the next (3 cups) will be sliced for
the filling; and the best-looking berries (a total of 1 cup) will be used to garnish the top of the pie.
Mash the 2 cups of least-perfect berries in a medium bowl. Stir in the lemon juice or oil. A pie blender works
well for mashing berries. Try a potato masher, or just a heavy spoon, too; or whirl the berries VERY briefly in
a food processor or blender (Figure 16.)
If You’re Using Instant Clearjel® This product is our absolute favorite pie thickener. It thickens fruit pie filling without lending it any starchy taste or cloudy color, and it doesn’t need to be cooked. In a small bowl,
whisk together the Instant ClearJel® and the sugar. Sprinkle this mixture over the mashed berries, and stir
well.
If You’re Using Cornstarch or Tapioca Flour In a small saucepan, whisk together the cornstarch or tapioca
flour and the sugar. Stir in the water and mashed berries. Bring the mixture to a boil over medium heat and,
stirring constantly, cook for 1–2 minutes, until thickened. Remove the berries from the heat.
Completing The Filling Slice the 3 cups of berries that you’ve reserved for the filling. Combine them with the
mashed berries and a few drops of red food coloring, if you feel the pie needs extra color (Figure 17.) Gently
stir together the mashed and sliced berries. Spoon the berry mixture into the baked pie shell, and smooth it
out with a spatula.
Figure 17
Figure 16
PIES FOR ALL SEASONS
The pie’s looking good already. Who gets to lick the berry bowl?
Page 11
GARNISHING
Decorate the top of the pie with the remaining berries, arranging them around the edge and in the middle. If
you’ve used strawberries, you’ll probably want to slice them lengthwise. If you’re using blueberries, raspberries, blackberries or other smaller berries, leave them whole. Chill the pie for several hours before slicing.
Note: This pie is quite soft; when you cut it, it’ll ooze onto the plate. It;s not the “cleanest” looking pie in the
world, but oh my, it’s very tasty!
Here's what you saved your best-looking berries for.
PIES FOR ALL SEASONS
Berry pie, anyone?
Page 12
PUMPKIN CHEESECAKE PIE
Ah! On Thanksgiving Day, when from East and from West
From North and from South come pilgrim and guest,
When the gray-haired New Englander sees round his board
The old broken links of affection restored,
When the care-wearied man seeks his mother once more,
And the worn matron smiles where the girl smiled before,
What moistens the lip and what brightens the eye?
What calls back the past, like the rich pumpkin pie?
—John Greenleaf Whittier, 1844
There’s no denying it—pumpkin pie at Thanksgiving has become an American icon. While some folks
turn up their nose at this ubiquitous confection, for others it's a once-a-year thrill, one of the first mileposts
in the annual holiday baking season.
The following is one of King Arthur Flour’s all-time most requested recipes. Several years ago a picture of
this pie graced the cover of our November Baker’s Catalogue and we were deluged with calls and mail—
Where’s the recipe for that delicious-looking pie? With its traditional pumpkin filling poured atop a thin layer
of cheesecake, all nestled in a crumb crust, this pie strikes a chord with pumpkin pie (and cheesecake)
lovers everywhere.
THE CRUST
We like to use graham crackers or gingersnaps for this crust, but if you’re a fan of the chocolate-cheesecake
combination, try chocolate wafers. Vanilla wafers are fine, too.
In a medium-sized bowl, mix together the crumbs, sugar and butter until the crumbs are moistened. Press
them into the bottom and up the sides of a 9-inch pie pan. Bake the crust in a preheated 350°F oven for 8
minutes. Remove it from the oven, and cool it slightly before filling.
Forming the Crust Press the crumbs into the bottom of the pan and up the sides; try to press crumbs all the
way to the rim of the pan (Figure 18.) Use the palm of your hand to smooth the bottom of the crust before
popping it into the oven to bake (Figure 19.)
Figure 18
PIES FOR ALL SEASONS
Figure 19
Page 13
THE CHEESECAKE FILLING
Soften the cream cheese by unwrapping it and warming it to room temperature. In a small bowl, whisk
together the sugar and ClearJel® (if you’re using it,) and set it aside.
Place the cream cheese in a medium-sized mixing bowl, and mix in the cream or evaporated milk, stirring
till smooth. Add the sugar, vanilla and ginger. Use a rubber spatula, or low speed of an electric mixer, to
blend until almost smooth, but don’t whip the mixture; you don’t want to beat in any air. Don’t worry if a
few lumps of cream cheese remain; once the pie is baked, they’ll disappear. Gently spoon the cream cheese
mixture into the baked crumb crust, spreading it evenly.
Gently mix together the cream cheese filling ingredients.
Spoon the filling into the crust—smoothing it with a rubber spatula.
THE PUMPKIN FILLING
In a medium-sized mixing bowl, whisk together the sugar, ClearJel® or cornstarch, salt and spices. Add the
pumpkin, cream or evaporated milk and eggs and whisk gently until smooth. You don’t want to beat a lot of air
into this mixture; just be sure it’s thoroughly combined. Gently spoon the pumpkin filling atop the cheesecake
layer, filling within 1/4-inch of the top of the crust. Note: Do this carefully at first, so as not to disturb the
cheesecake layer; once you've covered the cheesecake, you can be less careful.
Depending on the exact depth of your pie pan, you may have leftover filling. Simply pour it into a custard
cup or other small baker, and bake it along with the pie, removing it from the oven when it appears set, and
a cake tester inserted into the center comes out clean.
Gently mix together the pumpkin filling ingredients.
PIES FOR ALL SEASONS
Slowly pour the pumpkin mixture atop the cream cheese mixture in
the crust.
Page 14
BAKING THE PIE
Place the pie in a preheated 425°F oven, and bake it for 15 minutes. Reduce the oven temperature to 350°F,
and continue to bake for 40–45 minutes, covering the edges of the pie with a crust shield or aluminum foil if
they seem to be browning too quickly. The pie is done when it looks set, but still wobbles a bit in the center
when you jiggle it. If you have an instant-read thermometer, the pie will register 165°F at its center when it’s done.
Remove the pie from the oven, allow it to cool to room temperature, then refrigerate it till serving time. Serve
with lightly sweetened whipped cream flavored with a pinch of ginger and teaspoon of vanilla. Yield: 10 to 12
rich servings.
A FINAL WORD
We hope you enjoyed these lessons. If you ever have any questions, please call us at 800.827.6836. The bakers
here at King Arthur are always ready to lend a sympathetic ear, and a helping hand!
PIES FOR ALL SEASONS
Page 15


© Copyright 2026