
Document 78248
Cake Decorating
Made Easy!
You do not have resell rights or giveaway rights to this book. Only
customers that have purchased this material are authorized to view it. If
you think you may have an illegally distributed copy of this book, please
contact us immediately. Please email [email protected] to report
any illegal distribution.
Copyright Notice
Copyright © 2005 Samantha Mitchell and Randy Pryor
All rights reserved.
No part of this publication may be reproduced or transmitted in any form or
by any means, mechanical or electronic, including photocopying and
recording, or by information storage and retrieval system, without
permission in writing from the publisher. Requests for permission or further
information should be emailed to: [email protected]
Legal Notices
While all attempts have been made to verify information provided in this
publication, neither the author nor the publisher assumes any responsibility
for errors, omissions or contrary interpretation of the subject matter herein.
The Publisher wants to stress that the information contained herein may be
subject to varying state and/or local laws or regulations. All users are
advised to retain competent counsel to determine what state and/or local
laws or regulations may apply to the user’s particular operation.
The purchaser or reader of this publication assumes responsibility for the
use of these materials and information. Adherence to all applicable laws
and regulations, both federal and state and local, governing professional
licensing, operation practices, and all other aspects of operation in the
United States or any other jurisdiction is the sole responsibility of the
purchaser or reader. The publisher and author assume no responsibility or
liability whatsoever on the behalf of any purchaser or reader of these
materials. Any perceived slights of specific people or organizations is
unintentional.
Cake Decorating Made Easy!
2
Table of Contents
Introduction
10
Part 1. How To Make An Icing Friendly Cake
11
Making The Cake
Baking the Perfect Cake Step-By-Step
Leveling the Cake
Cake Boards
Stacking the Cake
Tortes
Icing the Cake
12
12
13
14
15
15
16
Part 2. Icing Friendly Cake Recipes
17
Butter Cake
Carrot Cake
Chocolate Groom's Cake
Classic White Cake
Italian Wedding Cake
Margaret Trudeau’s Wedding Cake
Orange Buttermilk Cake
Orange Pound Cake
Princess Diana's Wedding Cake
Red Velvet Cake
Sherry Wedding Cake
Traditional Fruit Wedding Cake
Yellow Pound Cake
Yellow Sponge Cake
17
18
20
20
21
22
23
24
25
25
26
27
28
28
Part 3. How Much Cake Should You Make?
29
Wedding Cake Baking and Cutting Guide for 2” Deep Pans
29
Cake Decorating Made
Easy!
3
Wedding Cake Baking and Cutting Guide for 3” Deep Pans
Party Cake Baking and Cutting Guide for 2” Deep Pans
Party Cake Baking and Cutting Guide for 3” Deep Pans
31
33
35
Part 4. Glazes
36
Almond Glaze
Apple Cider Glaze
Amaretto Glaze
Apricot Glaze
Buttermilk Glaze
Brown Sugar Glaze
Caramel Glaze
Carrot Cake Glaze
Chocolate Glaze
Apple Cider Glaze II
Cinnamon Glaze
Coconut Glaze
Confectioners’ Sugar Glaze
Fruit Cake Glaze
Harvey Wallbanger Glaze
Honey Glaze
Lemon Glaze
Maple Glaze
Orange Glaze
Orange Marmalade Glaze
Pear Glaze
Rum Butter Glaze
Sour Cream Glaze
Strawberry Glaze
36
36
36
37
37
37
37
38
38
38
38
39
39
39
39
40
40
40
40
41
41
41
41
42
Part 5. Cake Fillings
43
Apricot Mousse Filling
Almond Filling
43
44
Cake Decorating Made Easy!
4
Banana Filling
Banana Whip
Blueberry Filling
Butter Custard Filling
Canoli Filling
Canoli Mousse
Caramel Filling
Chantilly Mousse
Cherry Cream Filling
Chestnut Mousse
Chocolate Filling
Chocolate Mousse
Chocolate Cherry Mousse
Chocolate Raspberry Mousse
Chocolate Whipped Cream
Coconut Pineapple Filling
Clear Lemon Filling
Clear Orange Filling
Custard
Dark Chocolate Filling
Date Cream Filling
Fig Filling
French Crème Filling
Grand Marnier Filling
Honey Mousse
Kahlua Mousse
Lemon Cake Filling
Lemon Cream Cheese Filling
Lemon Curd
Lemon Lime Filling
Macaroon Filling
Maple Sugar Filling
Orange Cake Filling
Orange Candied Mousse
Orange and Walnut Filling
Pastry Cream Filling
Pecan Cream Cheese Filling
Pineapple Filling
Cake Decorating Made Easy!
44
44
45
45
45
46
46
46
47
47
47
48
48
48
49
49
49
50
50
50
51
51
51
52
52
52
53
53
53
54
54
54
55
55
55
56
56
56
5
Peach Mousse
Peanut Butter Mousse
Peppermint Mousse
Pistachio Filling
Raisin Filling
Raspberry Almond Crème
Raspberry Fool Filling
Raspberry Rose Mousse
Royal Red Velvet Cake Filling
Toasted Walnut Filling
Strawberry Mousse
Twinkie Cake Filling
Vanilla Mousse
Walnut Cake Filling
White Chocolate Mousse
White Fluff
57
57
57
58
59
59
59
60
60
60
61
61
61
62
62
63
Part 6. Decorative Icing Recipes
64
7-Minute Frosting
Almond Butter Cream Icing
Amaretto Butter Frosting
Angel Mallow Frosting
Banana Icing
Bourbon Frosting
Brown Butter Brandy Frosting
Brown Sugar Marshmallow Frosting
Buttercream Icing
Chocolate Buttercream Icing
Chocolate Butter Icing
Chocolate Fudge Icing
Chocolate Mocha Frosting
Chocolate Rum Buttercream Icing
Cream Cheese Icing
Egg Yolk Butter Cream Icing
Fluffy Boiled Icing
Maple Butter Icing
64
65
65
65
66
66
66
67
67
68
69
69
69
70
70
71
71
71
Cake Decorating Made Easy!
6
Marshmallow Frosting
Mexican Chocolate Frosting
Mocha Icing
Orange Icing
Ornamental Frosting
Ornamental Meringue Frosting
Peppermint Frosting
Pineapple Butter Frosting
Piping Gel
Raspberry Butter Cream Frosting
Royal Icing
Snow White Buttercream Icing
Stabilized Whipped Cream Icing
White Chocolate Cream Cheese Butter Cream
Vanilla Buttercream
Wilton Buttercream Icing
72
72
72
73
73
73
74
74
74
75
75
75
76
76
76
77
Part 7. Fondants and Gum Paste
78
Rolled Fondant
Preparing A Cake For Ready To Use Fondant
Making A Rose Out of Fondant
Rolled Fondant Bows And Loops
Recipe For Rolled Fondant
Recipe For Quick Pour Fondant
Gum Paste
Rolling Out Gum Paste
Gum Paste Recipe
80
81
82
84
85
85
86
88
88
Part 8. The Basics Of Decorating With Icing
89
Featherweight Bags
Disposable Icing Bags
The Coupler
Handling Icing Bags
Icing Consistency
89
90
91
92
92
Cake Decorating Made Easy!
7
Mixing Food Coloring To Create A Unique Palette
93
Part 9. Must Have Decorator Nozzle Tips
96
Basket Weave Tips
Closed Star Tips
Drop Flower Tip
Leaf Tips
Open Star Tips
Petal Decorating Tips
Round Decorating Tips
Ruffle Decorating Tips
97
97
98
99
100
101
102
102
Part 10. Decorating Icing Techniques
103
Beads
Bows
Lace Work
Lattice Work
Ruffle
Shells
Star Flowers
Stringwork
Swirl Flower
103
103
103
105
106
107
108
109
110
Part 11. Creating Different Flowers
111
Apple Blossom
Bachelor Button
Carnation
Chrysanthemum (Mum)
Daisy
Leaf
Lily
Lily of the Valley
111
112
113
113
114
115
116
117
Cake Decorating Made Easy!
8
Morning Glory Poinsettia Primrose Rosebud Roses 118
119
119
120
121
Part 12. Creative Decorating Techniques 125
Cake Spray Paint Cake Stencils Decorating Combs Decorating Gel Edible Confetti Edible Glitter Gold Leaf Luster Dust Marzipan Tiers Part 13. Questions And Answers Cake Decorating Made Easy!
125
126
127
128
128
129
130
130
131
136
138
9
Introduction
Everybody loves cake. However it is the homemade cake that expresses the
most thought, feeling and appreciation. Even the most flawed of homemade cakes (except the one where you use salt instead of sugar in the cake mix) is usually seen as a
greater expression of love than one that is purchased from a store.
However just because a cake is home made, doesn’t mean that it can’t look as
fantastic as one created by a professional pastry chef. In this book you will not only
learn the basics including how to bake a cake, level it, stack it and ice it but you will also
learn how to use various types of icing and cake decorating tips to create all kinds of
ribbons, drapes and flora and fauna. We’ll also show you how to torte a cake (layer it
with fillings) as well as roll a fondant over it to create a smooth finish.
Whether you are decorating a birthday, wedding or anniversary cake, you are
sure to find the perfect recipe for your cake and your icing as well as plenty of tips on
how to turn an ordinary culinary confection into an impressive artistic creation.
Cake Decorating Made Easy!
10
Part 1. How To Make An Icing Friendly Cake
Anyone can make a cake, but there is an actual art to making a cake that won’t
collapse, crumble or seep fillings all over the place. Here are some tips to baking a cake
that is friendly to icing as well as the spatula spreading it!
Making The Cake
The cake that you make serves as the canvas for the great works of art you will
be creating on its surface. It is very difficult to roll fondant or create icing decorations on
a cake that is crooked, sunken or tilted to one side. This chapter is not only devoted to
teaching you how to create a cake that tastes good, but also how to master cake architecture.
Mostly baking the perfect cake is about creating as level as a surface as possible
for the artist (that’s you!) Ideally after you remove the cake from the oven, the cake
should be a light golden brown (with no crispy edges) and boast a level top and straight
sides. The cake should also have very few crumbs. If it doesn’t have straight sides you
can always buy a tool called a cake leveler to shave the bump off of the tops of your
cake.
A cake leveler
www.kerekes.com
Cake Decorating Made Easy! 11
Another important consideration is the state of your cake pans. Pans that are
warped or bent out of shape are sure to create a cake that is crooked. To save yourself
a lot of cutting and leveling time (as well as a lot of wasted cake) use pans that are in
good shape in the first place.
Baking the Perfect Cake Step-By-Step
To create the perfect cake for decorating:
1) Start with a good, quality pan, properly prepared for baking.
2) Preheat oven to the temperature specified in your recipe.
3) Prepare the pan by polishing it liberally with solid vegetable shortening. Never
use butter, margarine or a liquid based vegetable oil as those can cause the
edges of your cake to crisp and burn. Oils and butters can also cause your cake
to stick to the pan.
4) Dust the pan lightly with flour. Turn the pan in your hands to make sure all the
greased surfaces are covered with the flour. As a rule try to use about two tablespoons of flour per nine inch pan. Tap the bottom of the pan after dusting to see if
there are any shiny spots. If so dust the pan again. If you want to spare yourself
the trouble of larding and dusting the pans you could also use a product such as
Wilton’s Cake Release, which is designed to help cakes pop easily out of the
pan. This is a highly respected product that is applied straight to the pan like lard,
but there is no need to dust the pans with flour after using it.
5) Pour cake batter in the pan and spread the batter evenly with a spatula. Give the
pan a light bang on your table counter to remove any bubbles that might be in the
batter.
6) Bake cake on the middle rack of a preheated oven for the amount of time specified in the recipe.
7) To test whether the cake is done, insert a toothpick or cake tester near center
and remove. If tip is clean, cake is done. If batter is visible, bake a little longer
until toothpick comes out clean. When done, remove your cake from the oven
and cool in the pan on a rack for 10 minutes.
8) To unmold the cake place a cooling rack on top and flip it over so that when the
cake is unmolded it will be resting on the rack. Lift the pan carefully off of the
cake and gently brush away any loose crumbs.
Cake Decorating Made Easy! 12
Leveling the Cake
No cake emerges straight from the oven perfectly straight and flat. After the cake
has cooled one hour, you will need to level it. In essence leveling means using a knife or
a cake leveler to removes the bump (sometimes called the crown) from the cake center
and gives you an even decorating surface.
Trim off the raised center portion using a serrated knife or a cake leveler. Wilton makes
a good one.
An adjustable cake Leveler
www.kerekes.com
Most cake levelers come with three or four different notches through which you
insert wires. You can use several wires to “torte” your cake (separate it into several layers) by gliding it through the cake. Cake levelers come in different heights and widths to
suit different cake sizes.
If you’re using the Cake Leveler, start with your cake on a cardboard cake circle.
Measure the height you want to cut from your cake, then position the ends of the cutting
wire into the side notches to reach that height. Keep the legs standing level on your
work surface, and cut into the cake, using an easy sliding motion.
If using a knife, place the cake on a cardboard cake circle, then place on it on a
cake turntable. While slowly rotating the turntable, move the knife back and forth across
the top of the cake in a sawing motion to remove the crown (the bulge in the center of
the cake). Try to keep the knife level as you cut. Brush off all loose crumbs.
Cake Decorating Made Easy!
13
A tilting cake turntable
www.kerekes.com
Some people also set their cakes on turntables to ice them. Tilting cakeboards
with rubber mats on the bottom that keep the cake board (a circle or square of cardboard that fits below the cake) from slipping.
Fancy antique Wilton style cake boards
Cake Boards
A cake board sounds like a fancy thing but it’s really just a piece of cardboard
that fits beneath the cake. Usually the cake board sitting beneath your cake should be
about two inches wider than the cake itself. For example if the cake is a ten inch cake
then get an appropriate shaped cake board (square or circle) to fit beneath it. Some
cake boards are fancy, such as the ones made by the prestigious cake supply company
Wilton, and have a shiny side made of foil and a cardboard side.
If your cake is an odd shape you can cut the cake board to fit using special cardboard you can purchase at specialty cake supply stores. Some people make their own
cake boards before they bake the cake by tracing the circumference or perimeter of the
pan and adding two inches.
Cake Decorating Made Easy!
14
Cake boards are also used as bases for tiered cakes, such as wedding cakes
that sit on pedestals or other pediments.
Ambitious chefs can also decorate the edges of their cakes with Fanci-Foil or
Tuk-N-Ruffle. These are products that allow you to edge the cake board with crinkled
foil to give it a cleaner more decorative look.
Another consideration is using a cake board that already boasts an aluminum foil
edging or a very classic edging. Using these boards gives your cake a very traditional
and antique look.
Stacking the Cake
The simplest cake you can bake consists of two layers sandwiching your favorite
filling. A cake that has more than two layers is technically considered to be a torte.
You can fill your cake with icing or whipped cream but you can also fill them with
spreads and jam. A more modern approach is to fill the center of your cake with fresh
fruits or puddings.
To stack a cake like the professionals do you will want to fill a decorating bag with
icing that is of a medium consistency. You can just squeeze the icing or the filling
through the coupler (an attachment that fits at the end of the bag) or you can attach the
fat nozzle shaped number 12 cake decorating tip to create a thick ridge of icing around
the rim (insider edge of the cake.) This acts as a dam so that when you add any type of
filling it doesn’t spill over the side of the cake. Adding a rim of icing also helps to stabilize your next cake tier as well as give it more height.
Your next step would be to simply fill the center of the cake with icing, fruit filling,
whipped cream or pudding. You are then ready to place the next layer on top of the
cake. If your icing is not too soft the next layer should fit perfectly on top of the filling. It
is normal for a bit of the icing to expand out from the sides of the cake slightly.
Tortes
Torting a cake simply means using a knife or a leveler to add many levels to the
cake. Between these tiers you can add all kinds of fillings. The key to making a successful torte is to not use any fillings that are too runny. Buttercream or thick jams or
fruit compotes work best for this.
It is easiest to cut the cake into layers for torting using a cake leveler. However if
you are going to do it by hand, make sure you use a long thin serrated knife such as the
type that is used for cutting bread and that you place the cake on a turntable.
Cake Decorating Made Easy!
15
To cut a cake on a turntable, hold the top of it steady with the flat of your hand
and then while slowly turning the cake cut it laterally into slices. You might want to mark
the cake with toothpicks or dots of icing to make sure you are cutting it straight as opposed to on a slope.
Icing the Cake
The trickiest thing about icing a cake is keeping crumbs out of the icing. The trick
to keeping crumbs out of the cake is to keep your first layer of icing which is spread on
top of the cake thinner. Think of this foundation layer of icing as being like plaster,
which seals the cake itself and prepares it for decorative moldings.
One tip is to thin the first layer of icing with tiny amounts of corn syrup so that it
does not stick to the cake and cause it to stick to the spatula. Another tip is to let the
spatula glide over the surface of the cake area without actually touching the top of the
cake.
There are many ways to dress up a cake but the following method describes the
basic steps to icing a cake with buttercream or royal icing.
1) Place a large amount of thin consistency icing in the center of the top of the cake.
2) Spread the icing across the top, while never actually touching the cake surface.
Pushing the excess icing down onto the sides of the cake. Build up enough icing
in front of the spatula to prevent pulling up crumbs.
3) Ice the sides of the cake a section at a time. When the sides are covered, hold
the spatula with the edge against the side, slowly spinning the turntable without
lifting the spatula from the cake's surface. Return excess icing to the bowl and
repeat until sides are smooth.
4) Smooth the top of the cake in the same manner, moving the spatula across the
top until the cake is completely iced.
Congratulations! You are have now created a cake canvas that can support any
one of the popular cake decorating techniques which are described in more detail in
the rest of this book.
Cake Decorating Made Easy!
16
Part 2. Icing Friendly Cake Recipes
There are thousands of cake recipes in the world but some types of cakes simply
have the buoyancy, mass and support that is needed to support fillings and icing. Here
are some traditional and fail-proof recipes for iced cakes.
Butter Cake
This is the classic recipe that is used to create tiered confections for wedding
cakes. Butter cake has a firm, moist texture that makes it perfect for tiered designs. The
almond extract is optional but if you are making a wedding cake it is a very traditional
additive. You could also add extra vanilla, rum flavoring, cognac or brandy, orange blossom water or rosewater instead of the almond flavoring if you prefer.
1 1/2 cups butter, room temperature
2 1/2 cups granulated sugar
5 eggs
1 teaspoon Pure Vanilla Extract
3/4 teaspoon Almond Flavoring (optional)
3 cups all-purpose flour
3/4 teaspoon baking powder
1/4 teaspoon salt
1 cup milk
Preheat oven to 350°F. Spray pans with vegetable pan spray or grease pans.
In mixer bowl cream butter and sugar until light and fluffy. Add eggs one at a
time, mixing well after each addition. Mix in vanilla and almond (or other) flavorings. Mix
in flour with baking powder and salt. Add flour mixture alternately with milk, starting with
the flour.
Pour into prepared pans. Bake until toothpick comes out clean. Cool 10 minutes
in pan. Loosen sides and remove. Cool completely before decorating.
Makes 7 1/2 cups batter.
Cake Decorating Made Easy!
17
A buttercream cake iced with buttercream icing.
Carrot Cake
4 eggs
1 cup vegetable oil
1 teaspoon Pure Vanilla Extract
2 cups all-purpose flour
2 cups sugar
2 teaspoons baking soda
2 teaspoons cinnamon
1/4 teaspoon each nutmeg, cloves, allspice and salt
4 cups (approx. 1 lb.) grated carrots
2/3 cup chopped nuts
1/2 cup raisins
1/2 cup crushed pineapple, drained
Preheat oven to 350¡F. Lightly spray 2 nine in. round pans with vegetable spray, or use
grease pans.
Cake Decorating Made Easy!
18
In large mixing bowl, beat eggs until foamy; add oil and vanilla and beat well. Mix flour,
sugar, baking soda, cinnamon, nutmeg, cloves, allspice and salt together; add to egg
mixture and mix well. Fold in carrots, nuts, raisins and pineapple.
Pour into prepared pans and bake 30-35 minutes or until toothpick inserted in center
comes out clean. Cool 10 minutes in pans on cooling grid and invert on grid to cool.
Makes 5 1/2 cups batter. Goes well with a white chocolate or cream cheese icing.
Chocolate Groom’s Cake
Cake Decorating Made Easy!
19
Chocolate Groom's Cake
Chocolate is not that traditional for tiered cakes, but this recipe has the buoyancy
and support needed if you want to make great alternative to the traditional white wedding cake.
2 cups unsifted all-purpose flour
1 teaspoon baking powder
1 teaspoon baking soda
1/2 teaspoon salt
3/4 cup butter or margarine (room temperature)
2 cups sugar
3 eggs
1 teaspoon Wilton Pure Vanilla Extract
1 1/2 cups milk
3 oz. unsweetened chocolate, melted
Preheat oven to 350°F. Combine flour, baking powder, soda and salt. Cream butter and
sugar together until light in texture. Add eggs and vanilla to creamed mixture. Beat thoroughly. Add flour mixture to creamed mixture alternately with milk, beating well after
each addition. Add melted chocolate and beat thoroughly.
Brush two 8 or 9 in. cake pans with Wilton Cake Release or generously grease pans
with solid vegetable shortening and flour. (Click here for complete instructions on preparing baking pans.) Pour batter into pans. Bake for 35-40 minutes or until top springs
back when touched lightly in center.
Makes 6 cups batter.
Classic White Cake
6 cups sifted cake flour
2 tablespoons baking powder
1 1/2 cups butter or margarine
3 cups sugar
2 cups milk
1 1/4 teaspoons Pure Vanilla Extract
12 egg whites
Preheat oven to 325°F. Grease bottom of pans and line with waxed paper. Sift together
flour and baking powder. Set aside. Cream butter and sugar together until light and
fluffy. Set aside. Beat egg whites until stiff, but not dry. Set aside.
Cake Decorating Made Easy!
20
With a mixer at slow speed, add flour mixture to butter mixture, alternately with milk.
Beat well after each addition. Beat in vanilla extract. Fold egg whites into batter. Pour
into prepared pans. Bake until toothpick inserted into center comes out clean.
Makes 12 cups batter.
Italian Wedding Cake
This is a white cake that has a bit of pineapple and coconut flair to it.
1/2 cup buttermilk
1-teaspoon baking soda
1-teaspoon salt
1/2 cup shortening
1/2-cup margarine
2 cups white sugar
5 egg yolks
1/4 teaspoon almond extract
1-teaspoon vanilla extract
2 cups all-purpose flour
5 egg whites
1/2 cup drained crushed pineapple
1/2 cup flaked coconut
1 cup chopped pecans
Preheat oven to 350 degrees F (175 degrees C). Grease and flour three 8-inch pans.
Combine the buttermilk, baking soda and salt. Set aside.
In a large bowl, cream together the shortening, margarine and sugar until light and fluffy.
Beat in the egg yolks one at a time, and then stir in 1-teaspoon vanilla and almond extract. Beat in the buttermilk mixture alternately with the flour, mixing just until incorporated. In a separate bowl, beat the egg whites until they form stiff peaks. Gently fold the
egg whites into the batter. Stir in pineapple, coconut and 1 cup pecans.
Pour batter evenly into prepared pans. Bake in the preheated oven for 35 minutes, or
until a toothpick inserted into the center of the cake comes out clean. Allow cake layers
to cool 10 minutes in pans, and then turn out onto wire racks to cool completely.
Cake Decorating Made Easy!
21
Margaret Trudeau’s Wedding Cake
Margaret Sinclair made this famous wedding cake for her wedding to Prime Minister Pierre Elliot Trudeau – the Prime Minister of Canada.
1/4 cup sugar
1/4 cup boiling water
2 lbs currants
1 lb sultana raisins
2 lbs seedless raisins
1 lb chopped mixed candied peel
3/4 lb-candied cherries, halved
1/2 lb blanched slivered almonds
1/4 lb slivered brazil nuts
2 teaspoons grated fresh lemon rind
7 cups sifted all-purpose flour
1 1/2 teaspoons salt
1 1/2 teaspoons cinnamon
1 teaspoon cloves
1 1/2 teaspoons nutmeg
1 teaspoon allspice
2 2/3 cups soft butter
2 3/4 cups sugar
12 eggs
1/2 cup brandy
1/3 cup bottled grape juice
Mix fruit and nuts together in a large bowl and let marinate in brandy at room
temperature for at least 8 hours.
Put 1/4 c sugar in a heavy skillet. Cook over moderate heat until mixture is
melted and brown. Stir in boiling water. Heat over moderate heat stirring constantly. Return to low heat and stir just until any lumps of sugar are melted and it becomes caramelized. (do not boil) Remove from stove and immediately pour into a cup or bowl so
cooking ceases. Let caramelized mixture cool.
Generously grease a set of pans (1 ea- 8" sq, 6" sq, 4" sq) and line with heavy
greased brown paper.
Sift together flour, salt, and spices, and sift one cup of mixture over fruit/nut mixture. Toss together so fruit is coated with mixture.
Cream together butter and sugar thoroughly. Add eggs one at a time to butter
and sugar mixture, Blend in dry ingredients alternately with the mixture of grape juice
Cake Decorating Made Easy!
22
and cooled caramel mixture. Add fruit/nut mixture and blend thoroughly (Hands are the
easiest)
Preheat oven to 300F. Place a pan of hot water in the bottom of the oven.
Put batter in prepared pans. Cook until center becomes clean after insertion of toothpick.
Remove cakes from pans, cool thoroughly.
Strip off the paper, wrap in a cheesecloth. Wet with brandy (or dark rum) and
wrap cake again with aluminum foil. Store at least 2 weeks in a cool place to allow flavors to blend.
Orange Buttermilk Cake
This is a classic recipe for making a sturdy tiered cake.
11 cups sifted cake flour
11 teaspoons baking powder
2 1/2 teaspoons salt
3 cups buttermilk
6 tablespoons thawed frozen orange juice concentrate
5 tablespoons vanilla extract
1 1/2 cups (3 sticks) unsalted butter, room temperature
6 1/2 cups sugar
1 1/2 cups vegetable oil
2 1/2 cups egg whites (about 20 large)
1/2 teaspoon cream of tartar
Position rack just below center of oven and preheat to 350° F. Butter and flour
12-inch-diameter cake pan with removable bottom and 3-inch-high sides. Butter and
flour 9-inch-diameter cake pan with removable bottom and 3-inch-high sides. Butter and
flour 6-inch-diameter cake pan with removable bottom and 3-inch-high sides. Sift 5 1/2
cups sifted cake flour, 5 1/2 teaspoons baking powder, and 1 1/4 teaspoons salt 3 times
into large bowl. Mix 1 1/2 cups buttermilk, 3 tablespoons orange juice concentrate, and
2 1/2 tablespoons vanilla in small bowl.
Using electric mixer, beat 3/4 cup (1 1/2 sticks) butter in large bowl until smooth
and fluffy. Gradually beat in 1 1/4 cups sugar, then 3/4 cup oil. Beat in 1 more cup sugar.
Beat in flour mixture in 4 additions alternately with buttermilk mixture in 3 additions,
scraping down sides of bowl often. Using clean dry beaters, beat 1 1/4 cups (about 10)
egg whites and 1/4 teaspoon cream of tartar in another large bowl until soft peaks form.
Gradually add 1 cup sugar, beating until whites fall from beaters in thick, puffy (not stiff)
ribbon, about 4 minutes. Fold whites into batter in 4 additions. Transfer batter to prepared 12-inch pan.
Cake Decorating Made Easy!
23
Bake cake until brown and tester inserted into center comes out clean, about 1
hour 25 minutes. Cool cake in pan on rack 30 minutes. Cut around cake to loosen; remove pan sides. Maintain oven temperature.
Make second batch of cake batter following same technique as for first cake and
using same amount of each ingredient. Transfer 8 1/2 cups batter to prepared 9-inch
pan; transfer 4 cups batter to prepared 6-inch pan. Bake cakes until brown and tester
inserted into center comes out clean, about 1 hour 10 minutes for 6-inch cake and 1
hour 18 minutes for 9-inch cake. Cool cakes in pans on racks 30 minutes. Cut around
cakes to loosen. Remove pan sides. Cool all cakes completely. (Can be made 1 day before filling and frosting the cakes. Return cakes to pans. Cover with foil and store at
room temperature.)
Orange Pound Cake
This cake is a little heavier and has a sharper citrus taste than the buttermilk cake.
2 pounds sweet butter
10 cups sugar (5 pounds)
2 dozen large eggs
1/2 cup freshly grated orange zest
3 tbs orange extract
3 tbs vanilla extract
13 1/4 cups unleavened sifted cake flour
2 tsp baking soda
1/2 tsp salt
2 cups orange juice concentrate
4 cups sour cream
Grease with shortening 9 round cake pans, 3 in each of the following sizes: 12
inch, 8 inch and 5 inch (all 3 inches deep) and set aside.
In a large mixing bowl, cream the butter and sugar on low speed until light and
pale yellow. Beat in the eggs, orange zest and extracts. Slowly add the flour, baking
soda and salt, incorporating fully after each addition. Mix in the concentrate and the
sour cream. Scrape the sides of the bowl and mix to smooth out any lumps.
Divide the mixture into prepared pans so that each is equally full. Bake in a preheated 325 degree F. oven for 35-40 minutes or until cakes pull away from the sides of
the pans and cake tester comes out clean. Check cakes after 30 minutes. (Do not let
pans touch each other or the sides of the oven. It is important not to overcrowd the
oven. Unbaked cake layers can sit at room temperature until oven space is available.)
Remove cakes from oven and allow them to cool in their pans on a wire rack.
Baked cooled cakes can be wrapped in their pans and refrigerated up to one
week, or frozen.
Cake Decorating Made Easy!
24
Princess Diana's Wedding Cake
This is the recipe for the cake served at the beloved English royal’s wedding to
Prince Charles.
1 1/4 cups oil
3 eggs, beaten with mixer
1 3/4 cups granulated sugar
1 teaspoon vanilla extract
2 1/4 cups flour
1 1/2 teaspoons cinnamon
1 teaspoon baking soda
8 ounces crushed pineapple, with juice
1 1/2 cups chopped bananas
1 cup chopped apples
3/4 cup coconut
3/4 cup chopped nuts
Grease and flour the bottom of a 9 x 13-inch pan.
Mix together the oil, eggs, sugar and vanilla extract. Sift the dry ingredients; add to mixture. Add remaining ingredients. Bake at 350 degrees for 48 minutes or until Cake becomes clean when tested with a toothpick.
Red Velvet Cake
1/2 c. shortening
1 1/2 c. sugar
2 eggs
2 tbsp. cocoa
2 oz. red food coloring
1 tsp. salt
1 tsp. vanilla
1 c. buttermilk
2 1/2 c. cake flour
1 1/2 tsp. baking soda
1 tbsp. vinegar
Cream shortening and sugar. Add eggs. Make a paste of the cocoa and red food coloring and add it to the shortening mixture. Mix together the salt, vanilla, buttermilk and
vinegar; set aside. Combine the cake flour and baking soda and set aside.
Mix the buttermilk mixture and the cake flour mixture alternately to the shortening mixture by gently folding them into the batter. Do not overbeat! Bake at 350 degrees for 30
minutes. Cool and ice with Red Velvet Frosting.
Cake Decorating Made Easy!
25
Sherry Wedding Cake
1 pound candied red cherries (not maraschino)
1 pound candied green cherries (not maraschino)
1 pound seedless raisins
2 pounds seeded Lexia raisins
1 pound currants
1 pound mixed peel
4 1/2 cups all-purpose flour
1 pound butter
2 cups white sugar
1 cup brown sugar
5 eggs
1 cup medium-dry sherry, plus more for basting (optional)
1 cup strawberry jam, preferably home-made
1 teaspoon baking soda
2 teaspoons ground cinnamon
1/2 teaspoon ground cloves
1 teaspoon mace
1/2 teaspoon ground nutmeg
2 teaspoons (vanilla extract
Additional sherry, for basting (optional)
Cut cherries into 3 pieces. Working in small batches, dust all fruit well by placing fruit
and some of the flour in a heavy freezer bag and tossing well. Set aside.
In a large bowl, cream together butter, white and brown sugar; add eggs and mix well.
Add sherry, jam and remaining flour, baking soda, all spices and vanilla. Add fruit. Mix
well with clean hands.
Line 3 or 4 baking tins, size and shape as you prefer, with parchment paper. Place a
pan of warm water on the bottom shelf of oven and preheat oven to 350°F (180°C).
Fill pans to a depth of 21/2 to 3 inches (7.5 cm), or as you prefer. Bake 60 minutes, then
reduce heat to 325°F (160°C) and bake for 60 minutes.
Reduce heat again to 300°F (150°C) and bake for another 60 minutes. Total baking time
3 hours. (Cakes may be loosely covered with foil in the last hour if they become too
dark.) Add more hot water to the pan in the lowest rack, as required, during baking.
Cake is done when it sinks in the middle or a wooden skewer inserted in middle comes
out clean.
Remove from oven, cool to room temperature and wrap each loaf in 2 or 3 layers of
cheesecloth. Brush cheesecloth with 1 to 2 Tablespoons (15 to 25 mL) of sherry (depending on size of loaf -- enough sherry to moisten the cloth). Wrap well in plastic, seal
in a non-metal container (a plastic pail with lid works well), store in a cool, dark place or
in the refrigerator.
Cake Decorating Made Easy!
26
Traditional Fruit Wedding Cake
This recipe is just a stone’s throw away from being Christmas fruitcake so if you
don’t like the heavier taste of a fruitcake then this recipe is not for you. However its virtue is that it makes very stable tiers or layers for a decorated cake.
1 pound candied pineapple rings
1 pound each dates and figs
4 cups flour
1 teaspoon baking soda
2 teaspoons cinnamon
1 teaspoon ground cloves
1 teaspoon grated nutmeg
2 cups butter
2 cups brown sugar, firmly packed
12 eggs, separated and beaten separately
1/2 cup molasses
1/2 cup fruit juice, wine, rum, or brandy
2 pounds seeded raisins
1 pound sultana raisins
1/4 pound each candied orange, lemon rind, and citron, (finely chopped)
1 pound candied cherries
1/2 pound almonds, blanched
1/2 pound pecans, unbroken
brandy
Preheat oven to 300 degrees F. Cut each ring of pineapple in 2 slices, then in
half crosswise. Remove stem end from figs, cut in half lengthwise. Stone and cut dates,
and mix them with 1 cup of flour. Mix the rest of the flour with baking soda and spices.
Cream butter, add sugar, then the well-beaten egg yolks and stir well. Add the flour mixture alternately with the molasses and fruit juice, wine, rum, or brandy. Gently fold in the
beaten whites, then the dates and gradually the raisins.
Line 4 greased loaf pans with waxed paper. Put in a layer of batter, add a layer of
pineapple down the center, fill spaces and sides lightly with citron, orange, lemon rind,
cherries, and nuts; another layer of batter, then a layer of figs, the rest of the fruit and
nuts, and top with remaining batter. (Or cut up all fruit and mix through batter, adding
beaten whites last.) Fill pans 2/3 full.
Set pans in oven, in a pan filled with 1 inch hot water. Bake 1/2 hour, cover with
waxed paper, bake 2 hours longer, remove pans from water, and bake 1/2 hour more.
Remove from pans. Remove paper. Wrap in cloth moistened with brandy. Store in tightly
covered tin box.
Cake Decorating Made Easy!
27
Yellow Pound Cake
1 cup cold butter
1 2/3 cups granulated sugar
1/4 teaspoon salt
5 eggs
2 cups all-purpose flour, sifted
1 tablespoon vanilla extract
1 teaspoon fresh lemon juice
Preheat oven to 300 degrees F. Grease pans.
Put butter in a large mixing bowl and work it with a wooden spoon until it become
shiny, about 5 minutes. Add sugar and salt; continue to work sugar and butter together.
When well mixed, add eggs one at a time, stirring well after each addition. After third
egg has been incorporated, add 2 tablespoons flour. Add the last 2 eggs and continue to
stir, and then add the rest of the flour in 4 parts, stirring well after each addition. Beat in
vanilla extract and lemon juice.
Spoon batter into prepared pans. Bake for 40 minutes or until toothpick comes
out clean.
Remove cake from oven and run a knife around the sides of the pan; turn out
onto a wire rack, then turn cake face up. Cool, uncovered, for 15 minutes, then cover
with a clean towel (otherwise the cake will become dry and hard).
Yellow Sponge Cake
12 egg yolks
1/2 cup water
1 3/4 cups granulated sugar, divided
1/2 cups flour
1/2 teaspoon salt
2 teaspoons baking powder
1 to 2 teaspoon vanilla extract
Beat egg yolks and water with electric beater until lemon-colored. Add 1/2 cup
sugar and continue beating until light yellow. Sift together the remaining sugar, flour, salt
and baking powder. Fold dry ingredients and vanilla extract into egg yolk mixture. Bake
in a greased pans.
Cake Decorating Made Easy!
28
Part 3. How Much Cake Should You Make?
There is no one recipe that universally serves all the people at a large event such
as a wedding. However the charts below should give you a rough idea of how many
pans you need to serve a certain number of individuals attending any one event.
The charts below show baking information and serving amounts for both 2-inch
pans and 3-inch high pans. The figures for 2-inch pans are based on a 2-layer or 4-inch
depth cake. The figures for 3-inch pans are based on a 1-layer cake, which has been
torted and filled to reach a 3-inch depth.
The serving amounts listed are based on party-sized portions of approximately 11/2 x 2 inches or wedding-sized portions which are cut smaller, about 1 x 2 inches. You
may wish to cut larger or smaller pieces, depending on whether you are using a 4-inch
layer or a 3-inch layer.
Wedding Cake Baking and Cutting Guide for 2”
Deep Pans
Pan
Shape
Pan Size
Servings
2 layer
Cups Batter for 1
layer
Baking
Temps.
Baking
Time
Minutes
Approx.
Cups
Icing to
Ice &
Decorate
2 Layer
Cake
Oval
7 3/4" x 5 3/8"
13
2 1/2
350
25-30
3
10 3/4" x 7 7/8"
26
5
350
25-30
4
13 1/2" x 9 7/8"
45
8
350
35-40
5 1/2
16 1/2" x 12 3/8" 70
11
325
40-45
7 1/2
6"
12
2
350
25-30
3
8"
24
3
350
30-35
4
9"
32
5 1/2
350
30-35
4 1/2
10"
38
6
350
35-40
5
12"
56
7 1/2
350
35-40
6
Round
Cake Decorating Made Easy!
29
Pan
Shape
Pan Size
Servings
2 layer
Cups Batter for 1
layer
Baking
Temps.
Baking
Time
Minutes
Approx.
Cups
Icing to
Ice &
Decorate
2 Layer
Cake
14"
78
10
325
50-55
7 1/2
16"
100
15
325
55-60
9
6"
8
1 1/2
350
25-30
4
9"
18
3 1/2
350
35-40
6
12"
40
7
350
35-40
9
15"
64
12
325
50-55
11
Hexagon 6"
12
1 3/4
350
30-35
3
9"
26
3 1/2
350
35-40
5
12"
40
6
350
40-45
6
15"
70
11
325
40-45
9
6"
14
1 1/2
350
25-30
3 1/2
8"
22
3 1/2
350
30-35
4 1/2
9"
28
4
350
30-35
6
10"
38
5
350
30-35
8 1/2
12"
56
8
325
45-50
9
14"
72
10
325
45-50
10
15"
74
11
325
40-45
11
16"
94
12 1/2
325
40-45
12
6"
18
2
350
30-35
3 1/2
8"
32
4
350
35-40
4 1/2
10"
50
6
350
35-40
6
Petal
Heart
Square
Cake Decorating Made Easy!
30
Pan
Shape
Pan Size
Servings
2 layer
Cups Batter for 1
layer
Baking
Temps.
Baking
Time
Minutes
Approx.
Cups
Icing to
Ice &
Decorate
2 Layer
Cake
12"
72
10
350
40-45
7 1/2
14"
98
13 1/2
325
45-50
9 1/2
16"
128
15 1/2
325
50-55
11
18"
162
18
325
60-65
13
*Batter for each half round pan
** Four half rounds
Note: For Pans 10" and larger, use a heating core when baking.
Wedding Cake Baking and Cutting Guide for 3”
Deep Pans
Pan
Shape
Pan Size
Servings
2 layer
Cups
Batter
for 1
layer
Baking
Temps.
Baking
Time
Minutes
Approx.
Cups
Icing to
Ice &
Decorate 2
Layer
Cake
Round
6"
12
3
350
35-40
3
8"
24
5
350
55-60
4
10"
38
8
325
65-75
5
12"
56
10 1/2
325
60-65
6
14"
78
15
325
75-85
8
16"
100
18
325
75-85
9
Cake Decorating Made Easy!
31
Pan
Shape
Servings
2 layer
Cups
Batter
for 1
layer
Baking
Temps.
Baking
Time
Minutes
Approx.
Cups
Icing to
Ice &
Decorate 2
Layer
Cake
18" Half 2" layer
Round
146*
9**
325
60-65
10 1/2
3" layer
146*
12**
325
60-65
10 1/2
8"
32
6 1/2
350
60-65
4 1/2
10"
50
9
325
65-75
6
12"
72
14
325
65-75
7 1/2
14"
98
19
325
65-75
9 1/2
Contour 7"
11
3 1/2
350
45-50
2
9"
17
5 1/2
350
45-50
2 1/2
11"
24
8
350
80-85
3
13"
39
13
325
75-80
4
15"
48
16
325
75-80
5
9 x 13"
65
11 1/2
325
70-75
5
11 x 15" 90
16
325
80-85
6 1/2
12 x 18" 108
20
325
85-90
8
Square
Sheet
Pan Size
Note: For Pans 10" and larger, use a heating core when baking.
*Two half rounds.
**For each round pan.
Cake Decorating Made Easy!
32
Party Cake Baking and Cutting Guide for 2” Deep
Pans
Pan Shape
Size
Number
of Servings
2 Layer
Cups
Batter
1 Layer,
2 in.
Baking
Temp.
Baking
Time
Minutes
Approx.
Cups
Icing to Ice
& Decorate
2 Layer
Cake
Round
6"
7"
8"
9"
10"
12"
14"
16"
12
16
20
24
28
40
63
77
2
2-1/2
3
5-1/2
6
7-1/2
10
15
350°
350°
350°
350°
350°
350°
325°
325°
25 - 30
30 - 35
30 - 35
30 - 35
35 - 40
35 - 40
50 - 55
55 - 60
3
3 1/2
4
4 1/2
5
6
7 1/2
9
Sheet
7 x 11"
9 x 13"
11 x 15"
12 x 18"
14 x 22"
28
45
60
72
98
5-1/2
7
11
14
16
350°
350°
325°
325°
325°
30 - 35
35 - 40
35 - 40
40 - 45
45 - 50
5
6
8
10
12
Square
6"
8"
10"
12"
14"
16"
12
20
30
48
63
80
2
4
6
10
13-1/2
15-1/2
350°
350°
350°
350°
325°
325°
25 - 30
35 - 40
35 - 40
40 - 45
45 - 50
50 - 55
3 1/2
4 1/2
6
7 1/2
9 1/2
11
Heart
6"
8"
9"
10"
12"
14"
15"
16"
8
18
20
24
34
48
50
64
1-1/2
3-1/2
4
5
8
10
11
12 1/2
350°
350°
350°
350°
325°
325°
325°
325°
25 - 30
30 - 35
30 - 35
30 - 35
45 - 50
45 - 50
40 - 45
40 - 45
3 1/2
4 1/2
6
8 1/2
9
10
11
12
Cake Decorating Made Easy!
33
Pan Shape
Size
Number
of Servings
2 Layer
Cups
Batter
1 Layer,
2 in.
Baking
Temp.
Baking
Time
Minutes
Approx.
Cups
Icing to Ice
& Decorate
2 Layer
Cake
Petal
6"
9"
12"
15"
6
14
38
48
1-1/2
3-1/2
7
12
350°
350°
350°
325°
25 - 30
35 - 40
35 - 40
50 - 55
4
6
9
11
Hexagon
6"
9"
12"
15"
10
20
34
48
1-3/4
3-1/2
6
11
350°
350°
350°
325°
30 - 35
35 - 40
40 - 45
40 - 45
3
5
6
9
Oval
7-3/4 x 5-5/8"
10-3/4 x 7-7/8"
13 x 9-7/8"
16 x 12-3/8"
9
20
30
44
2-1/2
5
8
11
350°
350°
350°
325°
25 - 30
25 - 30
35 - 40
40 - 45
3
4
5 1/2
7 1/2
Note: For pans 10" and larger, use a heating core when baking.
Cake Decorating Made Easy!
34
Party Cake Baking and Cutting Guide for 3” Deep
Pans
Pan Shape
Size
Number
of Servings
1 Layer
Cups
Batter
Baking
Temperature
Baking
Time
(Minutes)
Approx.
Cups Icing
to Ice &
Decorate 2
Layer Cake
Round
6"
8"
10"
12"
14"
16"
18" Half
(2 halves)
12
20
28
40
63
77
55
3
5
8
10 1/2
15
18
12
350°
350°
325°
325°
325°
325°
325°
35 - 40
55 - 60
65 - 75
60 - 65
75 - 85
75 - 85
60 - 65
3
4
5
6
8
9
10 1/2
Squares
8"
10"
12"
14"
20
30
48
63
6-1/2
9
14
19
350°
325°
325°
325°
60 - 65
65 - 75
65 - 75
65 - 75
4 1/2
6
7 1/2
9 1/2
Sheet
9 x 13"
11 x 15"
12 x 18"
45
60
72
11-1/2
16
20
325°
325°
325°
70 - 75
80 - 85
85 - 90
5
6 1/2
8
Contour
7"
9"
11"
13"
15"
6
11
16
22
32
3 1/2
5-1/2
8
13
16
350°
350°
325°
325°
325°
45 - 50
45 - 50
80 - 85
75 - 80
75 - 80
2
2 1/2
3
4
5
Beveled
8 x 2"
10 x 2"
12 x 2"
14 x 1-1/4"
16 x 1-1/4"
6
10
14
12
16
3
5
7
6
8
350°
350°
350°
325°
325°
35 - 40
35 - 40
45 - 50
45 - 50
45 - 50
Note: For Pans 10" and larger, use a heating core when baking.
Source: www.wilton.com
Cake Decorating Made Easy!
35
Part 4. Glazes
Cakes can sometimes be varnished with glazes before they are iced. Glazes
have a great deal of sugar in them and along with the other ingredients can act as a
kind of sealant that once cooled, prevents the cake from crumbling or the spatula from
picking up parts of the cake as you are spreading the icing.
Glazes can be used to add a slight twist or tang to a cake that adds a pleasant
element of surprise. They also make the cake a little stiffer so it will more easily support
icing and other decorations.
Almond Glaze
4 tablespoons melted butter
½ cup confectioner’s sugar
2 teaspoons almond extract
Whisk ingredients together until smooth. Pour over cake that has cooled for 15
minutes.
Apple Cider Glaze
1/2 c. apple cider or juice
1/4 c. firmly packed brown sugar
2 tbsp. butter
1/2 c. applejack
Combine all ingredients in a small saucepan and bring to a boil, stirring until
sugar is dissolved. Pour over cake
Amaretto Glaze
stick butter
1 c. sugar
1/4 c. orange juice
1/4 c. Amaretto Liqueur
Combine all ingredients in a small saucepan and bring to a boil, stirring until
sugar is dissolved. Brush onto cake.
Cake Decorating Made Easy!
36
Apricot Glaze
This is the cake sealant that is traditionally used for most white and butter cakes.
1 cup apricot preserves
Heat preserves to boiling, strain. Brush on cake while still hot. Let dry. Glaze will
dry to a hard finish in 15 minutes or less.
Buttermilk Glaze
1/2 c. buttermilk
1/2 c. butter
1 tbsp. white corn syrup
1/2 tsp. soda
Bring to boil. Boil 5-6 minutes until thick and syrupy. Add 1 teaspoon vanilla.
Glaze cake.
Brown Sugar Glaze
1 c. brown sugar
1/4 c. milk
1 stick butter
Boil ingredients for 3 minutes. Pour over cake.
Caramel Glaze
1/2 c. sugar
1/4 c. buttermilk
1/2 tsp. soda
1 tbsp. corn syrup
1/4 c. butter
1/4 tsp. vanilla
Combine all in saucepan; bring to rolling boil over low heat. Boil 10 minutes, stirring occasionally. Pour over hot cake immediately
Cake Decorating Made Easy!
37
Carrot Cake Glaze
1/2 c. buttermilk
1 tbsp. white corn syrup
1 c. brown sugar
1/2 tsp. soda (add to buttermilk)
Bring ingredients to a boil and pour over cake.
Chocolate Glaze
1/2 cup semisweet chocolate chips
2 tablespoon butter
1 tablespoon corn syrup
1 teaspoon vanilla
Combine chocolate chips, butter, and corn syrup in saucepan. Stir over low heat
until chocolate is melted. Remove form heat and add vanilla. Frost top and sides of
torte.
Apple Cider Glaze II
1/2 c. sugar
1/4 tsp. salt
3 tbsp. cornstarch
1 c. cider
2 tbsp. lemon juice
1 tbsp. butter
Mix sugar, salt and cornstarch. Heat cider and lemon juice; when hot, stir in
sugar mixture and cook until thickened and clear. Add butter. Cool before spreading on
cake.
Cinnamon Glaze
1 cup sugar
1 cup water
Slice fresh lemon
1/4 - 1/2 tsp. cinnamon
Dissolve ingredients in a bowl. Brush surface of cake with mixture.
Cake Decorating Made Easy!
38
Coconut Glaze
1/4 cup butter
1 cup sugar
1/2 cup water
1 tsp. coconut extract
Combine ingredients over medium heat. Boil 1 minute. Drizzle over cooled cake.
Confectioners' Sugar Glaze
1 1/4 cups confectioners' sugar
3 tablespoons milk
Stir milk into sugar. Drizzle on cake and let it harden.
Fruit Cake Glaze
1/2 c. reconstituted orange juice
1/2 c. powdered sugar
Mix ingredients together in a bowl until dissolved. Brush over cake surface.
Harvey Wallbanger Glaze
1 cup sifted confectioners' sugar
1 tbsp. orange juice
1 tsp. Galliano
1 tsp. Vodka
Mix ingredients together in a bowl until dissolved. Brush over cake.
Cake Decorating Made Easy!
39
Honey Glaze
1/4 c. sugar
1/4 c. honey
1/4 c. buttermilk
1/2 tsp. Vanilla
Combine sugar, honey and buttermilk in saucepan. Bring to boil, stirring until
caramel colored, about 10 minutes. Remove from heat, stir in vanilla and 1 teaspoon
water. Brush over cake.
Lemon Glaze
1/3 cup sugar
1/3 cup lemon juice, fresh squeezed
Whisk ingredients together. Drizzle on cake and let it harden.
Maple Glaze
1-1/2 cups Maple Syrup
1 cup water
2 Tablespoons cornstarch
Mix ingredients together. Cook over low to medium head. Stir constantly until
thickened.
Orange Glaze
1/4 cup butter
2/3 cup sugar
1/3 cup orange juice
Heat ingredients for glaze until sugar is dissolved. Pour over cake in pan. Allow
cake to thoroughly cool in pan.
Cake Decorating Made Easy!
40
Orange Marmalade Glaze
2/3 cup orange marmalade
3/4 cup confectioners' sugar
Warm marmalade. Blend in sugar and glaze warm cake.
Pear Glaze
2 tbsp. butter
2 tbsp. pear syrup
1/4 c. brown sugar, firmly packed
1/3 c. sifted powdered sugar
Stir ingredients until melted over medium heat. Brush glaze over cake.
Rum Butter Glaze
1 c. sugar
1/2 c. water
2 tbsp. butter
1 tbsp. rum extract
Bring ingredients to a boil and pour over warm cake.
Sour Cream Glaze
¾ cup confectioner’s sugar
2 teaspoons sour cream
Stir confectioners' sugar and sour cream over low heat until almost smooth. Remove from heat and stir in 1/4 teaspoon vanilla and 1/2 teaspoon water. Put cake on a
rack over a dish and pour on glaze. Let stand a few minutes until glaze starts to set.
Scrape up any glaze that has dripped into the dish and pour it back over the cake.
Cake Decorating Made Easy!
41
Strawberry Glaze
2 (12 oz.) jars red strawberry jelly
1 tbsp. cornstarch
1/4 c. orange liqueur
1/4 c. water
Stir ingredients together over high heat.
Cake Decorating Made Easy!
42
Part 5. Cake Fillings
As long as it is not too runny just about anything can be used as a cake filling.
Many people simply opt to use icing as a filling for a cake with the layers tinted a different color. Jams, preserves, fruit, curds, nut butters, whipped creams, mousses, puddings and cream cheeses are also popular choices to fill the layers between wedding
cakes, tortes and party cakes.
There are a lot of fillings for cakes that you can simply buy as a commercial item.
This includes mixes for lemon pie filling, puddings, custard and frozen fruit preserves.
The following are recipes for some of the tried and true homemade fillings that are
commonly used in all kinds of cakes.
Keep in mind that a cake filling is not the same thing as icing, although icing can
be used as a filling. The key to make two batches of icing: one batch should be slightly
thicker used to rim the edge of the cake and one batch that is moister icing to fill the
center.
Apricot Mousse Filling
1 pound fresh or canned apricots, peeled and pitted
Granulated sugar
1/4 cup water
1 envelope plus 1 teaspoon unflavored gelatin
5 eggs, separated
1 or 2 tablespoons apricot brandy
1/8 teaspoon salt
1 cup heavy cream, whipped
Purée apricots in electric blender. There should be about 1 1/2 cups purée. Add
1/2 cup sugar. Combine water and 1/2 cup sweetened purée; sprinkle gelatin over purée to soften. Set aside.
Beat egg yolks with 1/2 cup sugar in top of double boiler. Cook over boiling water,
stirring frequently, for 10 minutes or until thickened. Add brandy and gelatin mixture; stir
until gelatin dissolves. Cook, then combine with remaining purée in large bowl; chill until
mixture mounds slightly. Beat egg whites with salt until soft peaks form. Gradually add
1/4 cup sugar and continue beating until stiff and shiny. Fold egg whites into gelatin mixture, and then fold in whipped cream. Chill several hours, until set.
Cake Decorating Made Easy!
43
Almond Filling
1 cup heavy cream
1/3 cup granulated sugar
1/4 cup toasted chopped almonds
1 teaspoon vanilla extract
1 teaspoon almond extract
2 egg whites
1 tablespoon instant coffee
2 tablespoons granulated sugar
Chocolate curls for garnish (optional)
Whip cream until it holds peaks. Add 1/3 cup sugar, almonds and vanilla extract.
In a separate bowl, beat egg whites and instant coffee together until stiff. Add 2 tablespoons sugar and beat until satiny in texture. Fold whipped cream into beaten egg
whites and pour into a serving dish or individual dishes. Fold in chocolate curls if desired. Chill for two hours.
Banana Filling
4 tbsp. Flour
3/4 c. cold water
2 small mashed bananas
1 egg, well beaten
2 tbsp. butter
1 tsp. vanilla
1/2 c. chopped nuts
Combine sugar, flour, water, egg, butter and vanilla and cook until thick. Then
add 2 bananas and chopped nuts. Stir until cooked and let cool.
Banana Whip
1 banana
1/3 cup of double cream
¼ cup of sugar
½ cup pistachio nuts
1 tablespoonful of lemon juice
Peel the banana, scrape off the coarse threads and press the pulp through a
sieve; add the sugar and lemon juice and cook over medium heat, stirring constantly
until the mixture boils; remove from heat and chill.
Cake Decorating Made Easy!
44
Beat chilled cream until firm. In separate bowl, pour boiling water over the nuts,
let stand about two minutes, pour off the water, add cold water and push off the skins
from the nuts. Fold into creamed mixture and chill.
Blueberry Filling
2 cups fresh blueberries
1 cups water
1 1/2 c. sugar
4 tbsp. cornstarch
4 tbsp. lemon juice
Combine blueberries and water; bring to boil. Reduce heat and simmer 2 minutes. Strain, reserve juice. Cook, stirring constantly until thick and clear. Cool slightly;
add lemon juice, cooked berries and chill.
Butter Custard Filling
2 1/2 cups milk
1/2 cup granulated sugar
1/2 cup flour
1/4 teaspoon salt
2 teaspoons vanilla extract
1 cup butter
Heat milk in double boiler. Stir hot milk gradually into the sugar, flour and salt
mixed together. Return to boiler; cook about 10 minutes, stirring constantly. Cool; add
vanilla extract. Cream butter; add the custard to butter gradually, stirring until smooth.
Fill cake.
Canoli Filling
1 lb. Ricotta cheese
3 tbsp. sugar
1 sq. semi-sweet chocolate
1 1/2 tbsp. orange rind, grated
Combine all ingredients in a bowl. Use as filling.
Cake Decorating Made Easy!
45
Canoli Mousse
1 (15 ounce) container part skim ricotta cheese
3 tablespoons granulated sugar
1 teaspoon vanilla extract
1 tablespoon grated orange rind
1/4 cup golden raisins
1/2 cup mini semisweet chocolate chips
1/3 cup walnuts, finely chopped
1 pint strawberries, raspberries or blueberries, stemmed
2 tablespoons orange-flavored liqueur
Process ricotta in a food processor until smooth. Add sugar and vanilla extract;
process to blend. Transfer to medium-size bowl. Stir in orange rind, raisins, chips and
walnuts. Cover and refrigerate until ready to use.
Caramel Filling
3 c. sugar, divided
3/4 c. milk
1 egg, beaten
Pinch of salt
1/2 c. butter (cut up)
Sprinkle 1/2 cup sugar in heavy saucepan; place over medium heat. Cook, stirring constantly, until sugar melts and syrup is golden brown.
Combine remaining 2 1/2 cups sugar, milk, egg and salt in a bowl, stirring well;
stir in butter. Stir butter mixture in caramelized sugar. (The mixture will lump, becoming
smooth with further cooking.) Cook over medium heat, stirring frequently, until a candy
thermometer registers 230 degrees (15-20 minutes). Cool 5 minutes. Beat with a
wooden spoon to almost spreading consistency and spread between layers and on top
of cake.
Chantilly Mousse
½ pint cream
¼ cup powdered sugar
Few grains salt
1 teaspoon vanilla or
5 drops essence of violet
candied violets
Beat cream until stiff gradually adding in sugar salt, vanilla and violet essence.
Fold in candied violets and chill.
Cake Decorating Made Easy!
46
Cherry Cream Filling
1 (9 ounce) container frozen whipped topping, thawed
2 tablespoons maraschino cherry juice
1/2 teaspoon unflavored gelatin
Sprinkle gelatin into juice to soften. Heat in microwave 10 to 15 seconds. Cool a
minute or two, then whip mixture into topping with a wire whip. Frost cake.
Chestnut Mousse
This recipe is sometimes also known as Marron Mousse.
1 quart vanilla ice cream
½ cup sugar
¼ cup water
Whites two eggs
1 teaspoon granulated gelatin
1½ cups prepared French chestnuts
1 pint cream
½ tablespoon vanilla
Beat egg whites till stiff. Boil sugar and water and add to egg white mixture. Dissolve gelatin in 1 1/2 tbls. boiling water, and add to first mixture. Pour mixture into bowl
set into a pan of ice water, and stir until cold; add chestnuts. Whip ice cream and cream
and vanilla. Fold cream mixture into egg white mixture. Fold in chestnuts. Chill.
Chocolate Filling
Make basic pastry cream filling below and after removing from heat, add 2
ounces of melted, unsweetened chocolate to the mixture along with the vanilla. For Mocha Filling, reduce amount of milk/cream by 2 Tablespoons, substituting 2 Tablespoons
of extra-strong fresh coffee.
2/3 cup. milk
2 tbsp. butter
1/4 cup. flour
1/4 tsp. salt
1/3 cup. sugar
1/3 cup cold milk
Heat milk and butter over low heat. Add dry ingredients gradually and stir until
smooth. Add to hot milk and cook until thick. Blend in slightly beaten egg to which a little
of the hot mixture has been added. Cook until thick. Add 1/2 teaspoon vanilla. Fill cake.
Cake Decorating Made Easy!
47
Chocolate Mousse
2 squares dark unsweetened chocolate
½ cup powdered sugar
1 cup cream
3/4 tablespoon granulated gelatin
3 tablespoons boiling water
¾ cup sugar
1 teaspoon vanilla
1 quart cream
Melt chocolate in double boiler. Add powdered sugar and one cup cream. Stir
over heat until boiling point is reached, and then add gelatin dissolved in boiling water,
sugar, and vanilla. Strain mixture into a bowl, set in a pan of ice water, stir constantly
until mixture thickens, then fold in the whip from remaining cream. Chill for four hours.
Chocolate Cherry Mousse
1 small box chocolate instant pudding mix
1 (21 ounce) can cherry pie filling
2 cups cold milk
2 cups nondairy whipped topping, thawed
In a small bowl with an electric mixer, combine pudding mix and milk. Beat on low
speed 1 to 2 minutes, or until well blended. Allow pudding to thicken slightly, and then
stir in cherry filling. Gently fold in whipped topping. Chill for 2 hours.
Chocolate Raspberry Mousse
1 (10 ounce) box frozen raspberries, thawed
and drained with 1 tablespoon liquid reserved
1 cup frozen whipped topping, thawed
4 brownies, each cut diagonally in half
2 tablespoons chocolate flavor syrup
In a medium bowl, combine the raspberries, the reserved 1-tablespoon liquid, and the
whipped topping; mix well.
Spoon the raspberry mousse equally into 4 martini glasses. Drizzle with the chocolate
syrup. Fill cake with mixture.
Cake Decorating Made Easy!
48
Chocolate Whipped Cream
1 cup chilled whipping cream
1/3 cup Hershey's syrup
2 tablespoons confectioners’ sugar
1/2 teaspoon vanilla extract
In small mixer bowl, combine all ingredients; beat until soft peaks form. Fill cooled cake.
Coconut Pineapple Filling
1 c. sugar
1 tbsp. flour
1/2 c. pineapple juice
Juice and rind of 1 lemon
1 egg yolk, beaten
1 coconut, grated fresh or moist shredded
1/2 c. crushed pineapple
1 tbsp. butter
Mix sugar with flour; add pineapple juice, lemon juice and juice and cook until
thick. Stir in beaten egg yolk and cook another minute. Remove from heat; add coconut,
pineapple and butter. Cool. Use as filling for white cake.
Clear Lemon Filling
1 cup granulated sugar
4 tablespoons cornstarch
1/2 teaspoon salt
1 cup water
2 tablespoons grated lemon rind
1/2 cup lemon juice
2 tablespoons butter
Mix all ingredients in saucepan. Bring to boil; boil 1 minute, stirring constantly. Chill before using.
Cake Decorating Made Easy!
49
Clear Orange Filling
1 cup granulated sugar
4 tablespoons cornstarch
1/2 teaspoon salt
1 cup orange juice
2 tablespoons grated orange rind
1 1/2 tablespoons lemon juice
2 tablespoons butter
Mix all ingredients in saucepan. Bring to boil; boil 1 minute, stirring constantly. Chill before using.
Custard
6 eggs
3 cups granulated sugar
2 quarts milk, divided
2 tablespoons cornstarch
1/2 package miniature marshmallows
2 teaspoons vanilla extract
Beat eggs, then add sugar. In double boiler, heat 1/2 quart of the milk until it comes just
to the boiling point. Take 2 cups of hot milk and mix well with the cornstarch. Slowly add
this to egg and sugar mixture, stirring constantly. Then add the egg mixture to the remaining milk. Stir custard slowly over medium heat, in double boiler, until custard thickens. Add marshmallows and stir until marshmallows are dissolved. Remove from heat
and let cool. Add vanilla extract, then chill immediately.
Dark Chocolate Filling
3 cups heavy cream
4 tbs sweet butter
3 pounds semisweet chocolate, finely chopped
In a large saucepan bring cream and butter to a rolling boil. When the cream mixture rises in the pan, add the chocolate, stirring constantly. Remove the pan from heat
and stir for 5 minutes. Cover the filling and store at room temperature for 3 days of refrigerate up to one week. Bring the filling to room temperature when ready to use. It may
be necessary to heat the filling in a double boiler to achieve a spreadable consistency.
Cake Decorating Made Easy!
50
Date Cream Filling
1 tsp. vanilla
1 c. milk
1 1/2 c. chopped dates
1 tbsp. flour
1/4 c. sugar
1 egg, beaten
1/2 c. nuts, chopped
Cook milk and dates in a double boiler. Add remainder of ingredients. Cook until
thickened. Spread between layers of cake when cool.
Fig Filling
1 lb. figs
1 c. water
2 tbsp. sugar
Juice of 1 lemon
Process figs in a blender or food processor until finally chopped, add the water
and sugar, and cook until they form a thick pulp. Add lemon juice, beat well and when
cool, spread between the layers of a cake.
French Crème Filling
1 cup milk
2 teaspoons vanilla
1 stick butter
½ cup lard or Criso
1 cup white sugar
Cook milk until thickened on low heat stirring constantly. Add vanilla. Remove
from heat and cool mixture in refrigerator. Beat butter and lard together. Slowly add
sugar to mixture while beating and then the cooled milk and vanilla mixture. Beat on
high with a mixer for four minutes. Keep cool in refrigerator until ready to serve.
Cake Decorating Made Easy!
51
Grand Marnier Filling
2 large eggs (at room temperature)
3/4 cup granulated sugar
3 tablespoons brewed coffee, cooled
2 tablespoons Grand Marnier or orange liqueur
2 teaspoons dark rum
24 ounces cream cheese, cut into small pieces (at room temperature)
Whipped cream
Finely shredded orange peel
8 fresh mint leaves
Blend eggs and sugar in processor 1 minute. Add coffee, liqueur and rum and
blend 20 seconds. With machine running, gradually add cream cheese through feed
tube and blend until very smooth. Add finely chopped orange peel and mint. Cover with
plastic wrap and refrigerate overnight. Fold in whipped cream. And finely chopped
orange peel and mint.
Honey Mousse
1/2 cup honey
3 eggs, beaten
2 cups (1 pint) heavy cream
In a small saucepan or a double boiler, combine the honey and eggs over very
low heat, whisking until the mixture is thick and bubbling. Remove from the heat and let
cool to room temperature.
In a large bowl, beat the cream until soft peaks form. Slowly beat in the honey
mixture, continuing to beat until well mixed and stiff peaks form. Chill until ready to use.
Kahlua Mousse
2 cups Cool Whip plus more for serving
1/2 cup heavy cream
2 tablespoons unsweetened cocoa powder
1 tablespoon instant coffee
3 tablespoons granulated sugar
6 tablespoons Kahlúa
Chocolate sprinkles optional
In a medium bowl, whip the Cool Whip with the heavy cream until stiff peaks form. With
a rubber spatula, stir in the cocoa powder, instant coffee and sugar; blend well. Add the
Kahlúa and stir thoroughly with the spatula. Fold in chocolate sprinkles. Chill in the refrigerator until ready to use.
Cake Decorating Made Easy!
52
Lemon Cake Filling
3/4 cup sugar
2 Tablespoons cornstarch
1/8 teaspoon salt
3/4 cup cold water
2 egg yolks, slightly beaten
1 teaspoon grated lemon peel
Juice of medium lemon
1 tablespoon butter or margarine
Combine sugar, cornstarch and salt in a small saucepan. Gradually add water
and whisk until well blended. Whisk in egg yolks, lemon peel and lemon juice. Cook
over medium heat, whisking constantly until thick and bubbly. Boil one minute; remove
from heat. Stir in butter. Cool to room temperature, without stirring. Fill cake.
Lemon Cream Cheese Filling
2 (8 oz.) pkgs. cream cheese, softened
1/2 c. sugar
2 tbsp. lemon juice
1 c. flaked coconut
Blend the ingredients together well in a bowl. Use as filling.
Lemon Curd
6 cups sugar
9 teaspoons cornstarch
3 cups fresh lemon juice
36 large egg yolks
3 cups (6 sticks) chilled unsalted butter, cut into 1/2-inch cubes
Whisk 3 cups sugar and 4 1/2 teaspoons cornstarch in heavy medium saucepan
to blend. Gradually whisk in 1 1/2 cups lemon juice, then 18 yolks. Add 1 1/2 cups butter. Cook over medium heat until curd thickens and boils, whisking constantly, about 18
minutes. Transfer curd to medium bowl. Press plastic wrap directly onto surface of curd.
Make second batch of curd, using same amount of each ingredient. Refrigerate at least
1 day. (Can be made 7 days ahead. Keep chilled.)
Cake Decorating Made Easy!
53
Lemon Lime Filling
1 c. granulated sugar
3 tbsp. cornstarch
1/2 tsp. salt
1/2 c. orange juice
2 tbsp. lemon juice
2 tbsp. lime juice
1/4 c. water
3 egg yolks
1 tbsp. grated lemon peel
1 tbsp. grated lime peel
Green food color (optional)
In a small saucepan, mix 1 cup sugar with cornstarch and salt. Gradually stir in
orange, lemon and lime juices and the water. Bring to boiling over medium heat, stirring.
Remove from heat. Add egg yolks, one at a time, beating well after each addition. Bring
to boiling, stirring; boil 1 minute. Remove the pan from heat. Stir in lemon and lime
peels and a few drops color. Turn into bowl; cool over ice water. Fill cake.
Macaroon Filling
One dozen macaroons
1 cup milk
3 egg whites
3 egg yolks
½ cup powdered sugar
1/cup whipped cream
Scald one dozen macaroons in a cup of milk, and pour gradually upon the beaten
yolks of three eggs, cooking over hot water until slightly thickened. When almost cold,
fold into the mixture the stiffly beaten whites of three eggs, half a cup of powdered
sugar, and half a pint of whipped cream. Chill until set.
Maple Sugar Filling
1 c. thin cream
2 c. scraped maple sugar
1/2 c. chopped nuts
Cook the cream and maple sugar slowly until they thicken; remove from the first
and add the nuts and beat until creamy before filling cake.
Cake Decorating Made Easy!
54
Orange Cake Filling
2 1/2 tbsp. cake flour
1/2 c. milk
1/2 c. shortening
1/2 c. sugar
1/4 tsp. salt
1/2 tsp. vanilla
1/2 c. coarse chopped nuts
1/3 cup. powdered sugar
Blend the 2 1/2 tablespoon cake flour and the 1/2 cup milk in small saucepan, stir
constantly until a thick paste, about 10 minutes. Remove from heat and cool to lukewarm. Cream the 1/2 cup shortening with the 1/2 cup sugar. Add 1/4 teaspoon salt. Add
to the paste and beat until fluffy. Fold in the 1/2 teaspoon vanilla and the nuts.
Orange Candied Mousse
¾ cups sugar
grated rind 1 orange
¼ cup cold water
2/3 cup orange juice
2 tablespoons lemon juice
½ cups cream beaten stiff
¼ cup pistachio nuts
¼ candied cherries
1 teaspoon gelatin
Warm sugar, water and orange rind in saucepan until sugar is dissolved. Dissolve gelatin into hot syrup that results. Transfer to bowl and add orange juice and
lemon juice. When mixture begins to thicken add cream nuts and cherries. Chill mixture
for at least two hours.
Orange and Walnut Filling
1/2 lb. English walnuts
Juice and pulp of 1 orange
1 c. powdered sugar
Shell the nuts. Combine orange pulp and juice with sugar and nuts and fill cake.
Cake Decorating Made Easy!
55
Pastry Cream Filling
This is the filling that you use when you don’t know what the heck to use! It is
suitable for all cakes.
3 Tablespoons flour
1/8 teaspoon salt
6 Tablespoons sugar
1 cup half & half or 1/2 cup whipping (heavy) cream plus 1/2 cup whole milk
4 egg yolks
1 teaspoon Pure Vanilla Extract
Mix the flour, salt and sugar in a saucepan and blend in a little of the cream.
Place on medium heat and stir constantly. Add the rest of the cream and continue stirring until the mixture reaches the consistency of medium cream sauce. Stir a little of the
sauce into the egg yolks, then pour egg yolks into the sauce in pan. Cook for a few minutes on low heat until thickened. Remove from heat, add vanilla and cool quickly. To
prevent a skin from forming, brush with melted butter. Stir a little before using.
Pecan Cream Cheese Filling
1 stick butter
1 (8 oz.) pkg. cream cheese
1 box 10X confectioners' sugar
1 c. pecans
Cream butter and cream cheese; add sugar until it is all mixed, then add pecans. Fill
cake.
Pineapple Filling
3/4 c. sugar
3 tbsp. cornstarch
12 oz can crushed pineapple with juice
Put all ingredients in pot and bring to a boil for 1 minute. Let cool and fill cake.
Cake Decorating Made Easy!
56
Peach Mousse
1 (16 ounce) package frozen fresh
peaches, preferably home-frozen
1 envelope unflavored gelatin
4 eggs, separated
1/2 cup juice, drained from peaches
1 tablespoon lemon juice
1/2 cup water
1/8 teaspoon salt
1/4 teaspoon almond extract
1/2 cup granulated sugar
1/2 pint whipping cream, whipped
Drain juice from peaches and set peaches aside.
Sprinkle gelatin on juice to soften. Beat egg yolks and water together and add to gelatin
mixture. Cook in double boiler until gelatin is dissolved and mixture is somewhat thickened. Remove from heat; add lemon juice, salt and almond extract. Chill slightly.
Purée peaches and add to cooled mixture. Beat egg whites until thick and add sugar
gradually, beating until stiff. Fold into peach mixture. Whip the cream and fold into mixture. Chill overnight.
Peanut Butter Mousse
2/3 cup milk
1 2/3 cups peanut butter chips
1/2 cup peanut butter, room temperature
1 cup heavy cream, chilled
1/4 cup bittersweet chocolate, shaved
In a small saucepan, bring the milk to a simmer. Place the peanut butter chips in
a medium mixing bowl. Pour the hot milk over the chips, let stand for about 30 seconds,
then stir until the chips are melted and the mixture is smooth. Add the peanut butter and
stir just until smooth. Refrigerate for a few minutes until cooled.
Whip the cream in a medium bowl. Fold it into the peanut butter mixture. Fold in
chocolate curls. Refrigerate for at least 15 minutes or for up to 6 hours.
Cake Decorating Made Easy!
57
Peppermint Mousse
1 envelope unflavored gelatin
2 tablespoons cold water
1 cup milk
4 ounces chocolate-covered peppermint patties
1/2 teaspoon vanilla extract
1/4 teaspoon salt
1 cup whipping cream, whipped
In a saucepan, sprinkle gelatin over water; let stand for 1 minute. Add milk and
peppermint patties; stir over low heat for 5 minutes or until candies and gelatin are dissolved. Add vanilla extract and salt. Pour into a mixing bowl; place in freezer for 15 to 20
minutes, stirring frequently until mixture is cooled and thickened.
Remove cooled mixture from fridge. Beat for 1 minute or until fluffy. Fold in
whipped cream. Chill until ready to use.
Pistachio Filling
10 eggs
2 cups granulated sugar
1/2 cup lime juice
1/2 cup lemon juice
Grated rind of 2 lemons and 2 limes
Pinch of salt
2 tablespoons unflavored gelatin
1/2 cup rum
3 cups whipping cream
Green food coloring
Pistachio nuts
Beat egg yolks. Add 1 cup sugar. Add lime and lemon juices, rinds, and salt.
Cook in double boiler over hot water until thick. Soak gelatin in rum. Stir into hot custard. Cool.
Beat the 10 egg whites until stiff. Add the other cup of sugar. Gradually fold
whites into COOL custard.
Whip 2 cups of the cream, and fold into custard mixture. Add enough green food coloring to color a delicate green. Whip the remaining cup of cream. Fold in lemon and lime
rind, pistachio nuts and lime curls.
Cake Decorating Made Easy!
58
Raisin Filling
1 lb. raisins
1 c. sugar
2 c. water
2 tbsp. flour
1 c. walnuts
Cook raisins, sugar and water. Add flour, cook until thick, then add nuts. Set
aside to cool. Combine dry ingredients and cut in shortening. Add beaten eggs and
vanilla. Fill cake.
Raspberry Almond Creme
1 tablespoon unflavored gelatin
2 tablespoons cold water
1 1/2 cups non-fat milk
1/4 teaspoon salt
1/4 cup granulated sugar
1/4 teaspoon vanilla extract
1/4 teaspoon almond extract
1 cup low-fat whipped topping
1/2 pint raspberries
Sprinkle gelatin over cold water to soften. Heat milk to simmering. Stir in salt and two
tablespoons sugar. Stir in softened gelatin until dissolved. Stir in vanilla and almond extract. Chill until slightly thickened.
Puree raspberries in blender. Fold in whipped topping. Add pureed raspberries and fold
some more.
Raspberry Fool Filling
You can also make this with strawberries, blueberries, peaches, kiwis – any frozen fruit
you prefer!
2 cups fresh or frozen raspberries or strawberries
1/2 cup granulated sugar, halved
Splash of sherry, bourbon or rum
1 1/2 cups cream
Purée fruit with half the sugar in a food processor or blender. Strain out seeds.
Combine purée with spirits. In a cold bowl with cold beaters, whip the cream and remaining sugar to stiff peaks. Gently fold in fruit purée, leaving streaks. Spoon onto cake.
Cake Decorating Made Easy!
59
Raspberry Rose Mousse
1 (12 ounce) package frozen raspberries
1 small box raspberry gelatin
1 tablespoon granulated sugar
1 ½ cups Rosé Wine
1/2 cup whipping cream, stiffly beaten
Thaw berries; drain juice into measuring cup. Add enough Rosé to measure 1 1/2
cups; heat to boiling. Add gelatin and sugar; stir to dissolve. Cool until slightly thickened;
beat until fluffy. Fold in whipped cream and raspberries. Chill.
Royal Red Velvet Cake Filling
2 cups. milk
2 cups. sugar
4 tbsp. cornstarch
1 cup. Crisco shortening
1 cup soft Parkay butter
1 can coconut (opt.)
Mix sugar and cornstarch in a boiler, add milk and cook until thick like pudding.
Let cool and refrigerate until cold; when you are ready to ice cake, split each layer in
half.
In a large mixing bowl, cream Crisco shortening and butter. Beat on high until light and
fluffy. IMPORTANT: Now gradually add cold pudding, continue beating until all pudding
is added and filling is fluffy. Ice each layer generously, this makes a lot of filling.
Toasted Walnut Filling
Great for tortes!
1/2 c. brown sugar
1/4 tsp. salt
2 tbsp. butter
1 tbsp. water
1 egg yolk, slightly beaten
3/4 c. walnuts, chopped and toasted
Combine brown sugar, salt, butter and water in top of double boiler and heat until
sugar is dissolved. Pour over egg yolk. Return to double boiler and cook until thickened,
stirring constantly. Cool. Add walnuts, spread between cake layers.
Cake Decorating Made Easy!
60
Strawberry Mousse
3/4 cup boiling water
1 (3 ounce) package strawberry gelatin
1 cup ice cubes
1 cup fresh strawberries, hulled and halved
1/2 cup frozen whipped topping, thawed
Pour boiling water into a blender container. Add gelatin and blend at low speed
until completely dissolved, about 30 seconds. Add ice cubes and stir until ice is partially
melted. Add strawberries and whipped topping. Blend at high speed 30 seconds or until
smooth.
Twinkie Cake Filling
5 tbsp. flour
1 c. milk
1/2 c. butter
1/2 c. solid shortening
1 c. sugar
1 tsp. vanilla
Bring milk and flour to boil and cook, stirring constantly until thick. Cool.
Cream together rest of ingredients. Add to cooled flour mixture. Add vanilla and beat
until thick and resembles whipped cream, about 5 minutes. Fill Cake.
Vanilla Mousse
1 1/2 cups granulated sugar
1 cup water
8 egg yolks
1 vanilla bean, split lengthwise
1 quart heavy cream
Pure vanilla extract to taste
Boil sugar and water rapidly for 5 minutes. Cool. Beat egg yolks on top of a double boiler and whip into the syrup gradually. Add vanilla bean, and cook custard over
very hot, but not boiling water, stirring constantly, until it becomes creamy and thick.
Remove vanilla bean, and squeeze, pressing out seeds. Rub custard through a sieve
and stir over a bowl of ice water until it cools.
Whip 1-quart heavy cream until it is stiff enough to hold a shape, add vanilla extract to taste, and fold the cream into the cooled custard. Chill and fill cake. Flavored liqueurs can be added instead of vanilla extract for a delicate secondary flavor, if desired.
Cake Decorating Made Easy!
61
Walnut Cake Filling
This recipe is also known as Mamool Cake Filling.
2 c. ground English walnuts
1/2 c. sugar
2 - 3 tbsp. clarified butter
1 tsp. orange blossom water
1 1/4 c. sugar
3 tbsp. plain flour
2 tbsp. cornstarch
Pinch of salt
1 c. milk
3/4 c. orange juice
2 tsp. orange rind
2 tbsp. lemon juice
2 eggs, beaten
1 tbsp. butter
Coconut
Combine walnuts, sugar, butter, orange blossom water and set aside.
Combine sugar, flour, cornstarch, salt and milk. Cook in top of double boiler, stirring until
thick. Add orange juice, rind, lemon juice and eggs. Cook 2 more minutes. Remove from
heat; add butter; blend and cool. Fold in walnut mixture. Cool and fill cake.
White Chocolate Mousse
6 ounces white chocolate
1 1/2 cups whipping cream, divided
Microwave white chocolate and 1/4 cup of the cream in a large microwavable
bowl on HIGH for 2 minutes or until white chocolate is almost melted, stirring halfway
through heating time. Stir until white chocolate is completely melted. Cool 20 minutes or
until it reaches room temperature, stirring occasionally.
Beat remaining 1 1/4 cups cream in a chilled bowl until soft peaks form. Do not
over-beat. Fold 1/2 of the whipped cream into the white chocolate mixture. Fold in remaining whipped cream just until blended. Refrigerate 2 hours before spooning into
cake.
Cake Decorating Made Easy!
62
White Fluff
2 envelopes gelatin
1/2 cup cold water
1/3 cup boiling water
6 large egg whites
1/4 teaspoon salt
3/4 cup granulated sugar
2 cups heavy cream
1 teaspoon vanilla extract
1 cup flaked coconut
Soften the gelatin in cold water for five minutes and then add the boiling water to
dissolve.
Beat the egg whites until stiff. Add the salt to the whites when foamy and gradually beat in the sugar. Make sure not to under beat the whites. Fold the gelatin mixture
into the beaten whites. Take care to do this before the gelatin begins to set and fold
thoroughly. Beat the cream until stiff and add vanilla extract. Fold cream into the egg
whites.
Fold coconut into cream mixture, cover with plastic wrap and chill overnight.
Cake Decorating Made Easy!
63
Part 6. Decorative Icing Recipes
You can use almost any icing to decorate a cake, however some icings are better
than others for certain purposes. For instance, buttercream is the best type of icing to
use if you are thinking of creating realistic looking flowers or drapery on the cake.
If you are planning on writing words on the cake or applying symbols then piping
icing (which has more of glycerin or corn syrup base) is probably best.
As a rule of thumb, remember the more corn syrup you add, the thinner the icing.
The more confectioner’s sugar that you use the easier it will be to plaster the cake. You
can thin or thicken your icings to the consistency you want by adding more sugar or
corn syrup.
You can buy decorative tubes or icing, but you know the saying “nothing tastes
as good as homemade.”
7-Minute Frosting
This is a very shiny icing and probably better for plastering the cake surface and
writing than creating flowers. This is because the recipe is based on granulated sugar
rather than confectioner’s sugar. However it’s gleam is quite impressive!
2 egg whites
1 cup granulated sugar
1/4 teaspoon cream of tartar
1/8 teaspoon salt
1/4 cup water
1 cup Marshmallow Crème
1 teaspoon vanilla extract
Combine all ingredients except vanilla extract in the top of a double boiler. Place over
boiling water. Beat until soft peaks form. Remove from heat and beat until stiff. Beat in
vanilla extract.
Cake Decorating Made Easy!
64
Almond Butter Cream Icing
3 cups confectioners' sugar
4 egg yolks
2 eggs
1/3 cup almond paste, softened
1/4 teaspoon salt
1 cup heavy cream
1 teaspoon vanilla extract
2 cups butter, at room temperature
Combine sugar, egg yolks, eggs, almond paste and salt in medium size saucepan. Beat with electric mixer until pale and fluffy. Beat in cream and vanilla extract until
blended. Cook over medium heat, stirring constantly, for about 6 minutes until mixture
just starts simmering. Strain into large bowl. Refrigerate for 1 1/2 hours or until chilled.
Beat in butter with electric mixer until fluffy.
Icing can be made up to 1 week in advance, covered in airtight container and stored in
the refrigerator. Let stand at room temperature until good spreading consistency.
Amaretto Butter Frosting
2/3 cup butter, softened
6 cups sifted confectioners' sugar
1/4 cup Amaretto
1 to 2 tablespoons milk
1 teaspoon vanilla extract
Cream butter. Gradually add confectioners' sugar, beating until smooth. Add
Amaretto and milk, beating until mixture reaches spreading consistency. Stir in vanilla
extract.
Angel Mallow Frosting
1/2 cup granulated sugar
2 tablespoons water
1/2 teaspoon vanilla extract
2 egg whites
1 (7 ounce) jar Marshmallow Crème
Combine sugar, egg whites and water in the top of a double boiler over boiling
water. Beat until soft peaks form. Add Marshmallow Crème. Beat until stiff peaks form.
Remove from heat and beat in vanilla extract until mixture forms stiff peaks.
Cake Decorating Made Easy!
65
Banana Icing
2 cups confectioners' sugar
1/8 teaspoon salt
1 teaspoon lemon juice
1/2 teaspoon vanilla extract
Puree bananas into 1/2 cup banana pulp. Sift sugar and stir into banana pure.
Add lemon juice, vanilla extract and beat until mixture forms peaks.
Bourbon Frosting
1 1/2 cups granulated sugar
1/3 cup plus 1 teaspoon water
1/8 teaspoon salt
1 tablespoon bourbon whiskey
1 teaspoon lemon extract
2 egg whites
1/4 teaspoon cream of tartar
Combine sugar, water and salt in a saucepan. Cook over medium heat, stirring
until it reaches 240 degrees F. on a candy thermometer. Stir in bourbon and flavoring.
Beat egg whites until foamy. Add cream of tartar. Beat at medium speed, slowly pouring
hot syrup over the whites. Beat at high speed until stiff peaks form.
Brown Butter Brandy Frosting
1/4 cup shortening
2 cups confectioners' sugar
2 tablespoons milk
2 tablespoons brandy
Melt shortening until golden brown. Add to confectioners' sugar, milk and brandy.
Mix to desired consistency.
Cake Decorating Made Easy!
66
Brown Sugar Marshmallow Frosting
2 cups brown sugar, firmly packed
1 cup granulated sugar
3/4 cup water
1/2 teaspoon vanilla extract
5 marshmallows
2 egg whites
Cook sugar and water over low heat until it spins a thread. Add vanilla extract
and marshmallows. Beat until marshmallows are dissolved. Pour gradually onto the
stiffly beaten whites, beating constantly until mixture reaches desired consistency.
Buttercream Icing
This is the classic recipe for buttercream icing.
1/2 cup solid vegetable shortening
1/2 cup butter or margarine*
1 teaspoon Vanilla Extract
4 cups sifted confectioners' sugar (approx. 1 lb.)
2 tablespoons milk or cream
Cream butter and shortening with electric mixer. Add vanilla. Gradually add
sugar, one cup at a time, beating well on medium speed. Scrape sides and bottom of
bowl often. When all sugar has been mixed in, icing will appear dry.
Add milk and beat at medium speed until light and fluffy. Keep icing covered with
a damp cloth until ready to use. For best results, keep icing bowl in refrigerator when
not in use. Refrigerated in an airtight container, this icing can be stored 2 weeks. Rewhip before using.
Cake Decorating Made Easy!
67
Buttercream cake
Chocolate Buttercream Icing
1/2 cup solid vegetable shortening
1/2 cup butter or margarine
3/4 cup cocoa or three 1 oz. unsweetened chocolate squares, melted
1 teaspoon Clear Vanilla Extract
4 cups sifted confectioners' sugar (approx. 1 lb.)
3-4 tablespoons milk or cream
Cream shortening and butter with electric mixer. Add cocoa and vanilla. Gradually add sugar, one cup at a time, beating well on medium speed. Scrape sides and bottom of bowl often. When all sugar has been mixed in, icing will appear dry. Add milk and
beat at medium speed until light and fluffy. Keep icing covered with a damp cloth until
ready to use.
Cake Decorating Made Easy!
68
Chocolate Butter Icing
3 tablespoons butter, melted
2 tablespoons milk
Confectioners' sugar
2 tablespoons cocoa
1/4 teaspoon vanilla extract
Combine butter and milk. Beat in enough confectioners' sugar to create a good
spreading consistency (about 1/2 cup). Add cocoa and vanilla extract.
Chocolate Fudge Icing
2 cups granulated sugar
1/2 cup cocoa
1/2 cup milk
6 tablespoons margarine
2 tablespoons light corn syrup
1 teaspoon vanilla extract
Mix sugar, cocoa, milk, margarine and corn syrup. Slowly bring to a full boil. Let
boil for 1 minute. Add vanilla extract. Cool and beat with mixer until mixture is of spreading consistency. Spread quickly after this is made.
Chocolate Mocha Frosting
3/4 cup Crisco®
1 tablespoon vanilla extract
1/2 teaspoon salt
1/2 cup cocoa powder
4 1/2 cusp confectioners’ sugar
1/2 cup coffee or 1 tablespoon instant coffee
dissolved in 1/2 cup water
Cream Crisco®, vanilla extract, salt and cocoa. Beat in confectioners' sugar and
coffee. Adjust confectioner’s sugar amounts to reach desired consistency.
Cake Decorating Made Easy!
69
Chocolate Rum Buttercream Icing
3/4 cup butter
3/4 cup firmly packed dark brown sugar
1 egg yolk
1 tablespoon rum
Pinch salt
1 tablespoon unsweetened cocoa
1/2 cup semisweet chocolate pieces
Beat butter in large bowl of electric mixer until fluffy. Add brown sugar, beating
well until very fluffy and light. Add egg yolk, rum, salt, and cocoa, mixing well.
Melt chocolate pieces over simmering water. Cool slightly and add to butter
brown sugar mixture, beating thoroughly. Refrigerate until ready to spread.
Cream Cheese Icing
1 cup (2 sticks) butter
16 oz. cream cheese, softened
2 lb. (8 cups) confectioners' sugar
2 tablespoon milk
In a medium mixer bowl cream butter and cream cheese together until smooth. Add
sugar and milk. Beat on high until smooth (only 30 seconds to 1 minute). Thin to ice
cake smooth; use full strength for piping borders.
Cake Decorating Made Easy!
70
Egg Yolk Butter Cream Icing
2/3 cup sugar
1/8 teaspoon cream of tartar
1/3 cup water
5 egg yolks
1 cup soft butter
Combine sugar, cream of tartar, and water in a saucepan. Stir over low heat until
sugar is completely dissolved. Raise the heat and boil syrup without stirring until candy
thermometer reads 238 degrees F, or a few drops form a soft ball in cold water.
While syrup is cooking, beat egg yolks until they are fluffy. Pour hot syrup in a
thin stream into yolks, beating constantly.
As the mixture cools, it will become thick and light. Continue to beat for a few
minutes and then set aside until entirely cooled. If the syrup has not been cooked sufficiently, no amount of beating will make the mixture thick enough. If the syrup has been
cooked too long, it will not beat smoothly into the egg yolks but will form little lumps of
sugar.
Beat in softened butter. It will then become thick and creamy. Flavor as desired.
Fluffy Boiled Icing
3 Tablespoons meringue powder
1/2 cup cold water
2 cups granulated sugar
1/4 cup corn syrup
1/2 cup water
Beat meringue powder and cold water until stiff, about 4 minutes. In microwave
safe bowl stir sugar, corn syrup and water. In microwave bring syrup mixture to a boil
(approx. 5 minutes). Remove, let mixture cool slightly (1-2 minutes). Then slowly add
syrup to meringue mixture. Beat on HIGH for 4 minutes.
Maple Butter Icing
1/3 cup soft butter
3 cups sifted confectioners' sugar
1/2 cup maple syrup
Blend butter and sugar. Add syrup and beat until well blended and fluffy.
Cake Decorating Made Easy!
71
Marshmallow Frosting
3 egg whites
2/3 cup granulated sugar
2 tablespoons corn syrup
1 teaspoon vanilla extract
Over double boiler, beat all ingredients until firm peaks form
Mexican Chocolate Frosting
1/4 cup softened butter or margarine
1/2 cup unsweetened cocoa powder
1/2 cup sour cream
4 cups confectioners' sugar
1 tablespoon coffee liqueur
Melt butter and cocoa together in saucepan. Beat the rest of the ingredients together while gradually adding cocoa mixture to the bowl. Beat until stiff peaks form.
Mocha Icing
1/2 cup butter or margarine
1 1/2 cup confectioners' sugar
2 tablespoons cocoa
2 tablespoons strong coffee
1 teaspoon vanilla extract
Cream butter and sugar together, stir in cocoa, coffee and vanilla extract. Add a bit more
confectioners’ sugar if needed. Mix until smooth and of spreading consistency.
Cake Decorating Made Easy!
72
Orange Icing
1 cup granulated sugar
1 tablespoon white corn syrup
1/8 teaspoon cream of tartar
1/2 cup water
1/4 cup confectioners' sugar
1 teaspoon grated orange rind
1 tablespoon orange juice
3/4 teaspoon vanilla extract
2 egg whites
Stir all ingredients except egg whites over heat until sugar is dissolved. Cover
and cook for 3 minutes or until crystals wash down from sides. Uncover and cook to 238
degrees F without stirring. Pour syrup in a slow, steady stream over 2 beaten egg
whites, while beating. Beat for 10 minutes to desired consistency.
Ornamental Frosting
This is good for piping, writing and making decorations. It is a very hard frosting.
1 (16 ounce) package confectioners' sugar
3 tablespoons meringue powder
Assorted food colorings
In bowl with mixer at low speed beat confectioners' sugar, meringue powder and
1/3 cup warm water until mixture is stiff and knife drawn through it leaves a clean-cut
path, about 7 minutes.
If you like, tint frosting with food colorings as desired; keep covered with plastic
wrap to prevent drying out. With small metal spatula, artists' paintbrushes, or decorating
bags with small writing tubes, decorate cake with frosting. You may need to thin frosting
with a little warm water to obtain the right spreading or piping consistency.
Ornamental Meringue Frosting
1 cup granulated sugar
1/2 cup water
2 egg whites
1/2 teaspoon flavoring extract
Boil sugar and water over low heat until syrup spins a thread; pour very slowly
onto stiffly beaten whites and beat until smooth and stiff enough to spread. Add flavoring. Put over boiling water, stirring continually until icing grates slightly on bottom of
bowl. Spread some on cake, force remainder through pastry tube to make decorative
designs.
Cake Decorating Made Easy!
73
Peppermint Frosting
1/4 cup crushed peppermint stick candy
1/2 cup milk
About 1 pound confectioners' sugar, sifted
Heat candy and milk over hot water in a double boiler until candy is melted. Add
enough confectioners' sugar to make frosting thick enough to spread on cake.
Pineapple Butter Frosting
This is good with carrot cake!
3 cups confectioners' sugar
6 tablespoons soft butter
Pinch of salt
1/2 cup canned crushed pineapple, drained
Beat ingredients together until the icing reaches the desired consistency.
Piping Gel
You don’t have to buy piping gel in the tube. You can make it yourself!
2 envelopes (2 tablespoon) Knox unflavored gelatin
2 tablespoons cold water
2 cups light Karo syrup
Soak gelatin in water. Heat over low heat source until clear and dissolved. Do
NOT boil. Add syrup and heat thoroughly. Cool and store in refrigerator for up to 2
months.
To Color: Add coloring paste/gel or food coloring drops to get desired color.
Pip designs and messages or glaze cakes before icing. Use clear or tint with
icing color.
Piping gel has many uses. It stabilizes whipped cream (whip pint heavy whipping
cream to soft peak stage, add 2 tablespoons piping gel and continue to whip to stiff
peaks) and is used to coat cakes before covering with rolled fondant.
Cake Decorating Made Easy!
74
Raspberry Butter Cream Frosting
3 cups confectioners' sugar
2 cups butter, softened
2 egg yolks
1 teaspoon raspberry flavored extract
1 teaspoon vanilla extract
In large bowl, with mixer at low speed, beat confectioners' sugar and butter just
until blended. Increase speed to high. Beat until light and fluffy. With mixer at medium
speed, gradually beat in egg yolks and raspberry extract and vanilla extract until
smooth.
Royal Icing
This smooth, hard-drying icing is perfect for making decorations that last. It is
also useful as a "cement" to fasten decorations together. Royal icing is edible, but not
recommended for icing cakes.
3 Tablespoons Meringue Powder (Wilton Brand is preferred)
1 lb. (4 cups) confectioners' sugar
6 Tablespoons warm water*
Beat all ingredients until icing forms peaks (7-10 minutes at low speed with a
heavy-duty mixer, 10-12 minutes at high speed with a hand-held mixer). Recipe makes
3 cups.
Snow White Buttercream Icing
This buttercream icing has an ideal consistency for frosting cakes. It is usually
not necessary to thin this icing for frosting cakes. Do so accordingly if you prefer a thinner consistency for spreading. It has a firm quality making it good for wedding cake
decorations and flat surface or flower nail flowers. It helps to air-dry decorations for 24
hours.
2/3 cup water
4 Tablespoons Meringue Powder
12 cups sifted confectioners' sugar
1-1/4 cups shortening
3/4 teaspoon salt
3/4 teaspoon No Color Almond Extract
3/4 teaspoon Clear Vanilla Extract
1/2 teaspoon No Color Butter Flavor
Combine water and meringue powder; whip at high speed until peaks form. Add
4 cups of sugar, one cup at a time, beating after each addition at low speed. Alternately
add shortening and remainder of sugar. Add salt and flavorings; beat at low speed until
smooth.
Cake Decorating Made Easy!
75
Stabilized Whipped Cream Icing
1/2 pint (1 cup) heavy whipping cream
2 tablespoons confectioners' sugar
2 tablespoons Piping Gel (Wilton brand is preferred)
1/2 teaspoon White Vanilla Extract
Combine whipping cream and sugar in mixing bowl. Whip to soft peak stage. Add
piping gel and vanilla, then continue to whip stiff peaks. Do not overbeat.
As an alternative, you can use Frozen Non-Dairy Whipped Topping or Packaged
Topping Mix. Thaw frozen whipped topping in refrigerator before coloring or using for
decorating. Use packaged topping mix immediately after preparing. Do not allow either
to stay at room temperature, as it becomes too soft for decorating. Store decorated
cake in refrigerator until ready to serve.
White Chocolate Cream Cheese Butter Cream
3 (3 ounce) bars good quality white chocolate
12 ounces cream cheese softened
3/4 cup unsalted butter softened
1 1/2 tablespoons lemon juice
Break the chocolate in to squares and place in a microwave safe bowl. Cook on
HIGH, stirring every 15 seconds until almost melted. Remove from microwave and stir
until completely melted. Allow to cool.
Beat cream cheese until soft and creamy. Gradually beat in the cooled chocolate
until smooth. Beat in the butter and lemon juice. Re-beat at room temperature to insure
smoothness before frosting.
Vanilla Buttercream
4 egg yolks
1/3 cup granulated sugar
1/2 cup HOT half-and-half
2 teaspoons vanilla extract
1 cup chilled unsalted butter
Put egg yolks and sugar into a bowl and beat until thick. Add HOT half and half
gradually, beating CONSTANTLY. Pour into a saucepan. Cook and stir about 5 minutes,
or until thickened.
Remove from heat and stir in vanilla extract. Pour into a bowl and beat 1 minute
to cool slightly. Add butter, a small amount at a time, beating until butter is melted after
each addition. Cool.
Cake Decorating Made Easy!
76
Wilton Buttercream Icing
This is the buttercream icing recommended by the biggest manufacturer of cake
decorating supplies in the world.
1 cup solid vegetable shortening
1/2 teaspoon butter extract
2 tablespoons milk
4 cups sifted confectioners' sugar
Cream shortening with electric mixer. Add butter extract. Gradually add sugar,
one cup at a time, beating well on medium speed. Scrape sides and bottom of bowl often. When all sugar has been mixed in, icing will appear dry. Add milk and beat at medium speed until light and fluffy. Keep icing covered with a damp cloth until ready to use.
For best results, keep icing bowl in refrigerator when not in use. Refrigerated in
an airtight container, this icing can be stored 2 weeks. Re-whip before using Icing.
A Buttercream Cake
Cake Decorating Made Easy!
77
Part 7. Fondants and Gum Paste
Both fondant and gum paste are almost what you can describe as being utilitarian icing.
Fondant is a hardened yet flexible sheet of icing that can be used to wrap up a
cake the same way you would a Christmas present. Cakes with a fondant surface are
ideal for decorating as it creates a very, very smooth canvas on top of the cake. You can
buy prepackaged fondant from a company such as Wilton or you can make your own.
Fondant can also be used to create drapes, bows, tiles and other artistic effects
on a cake.
An example of a fondant wrapped cake.
Cake Decorating Made Easy!
78
Gum paste is used to create very hard, yet edible candy-like cake decorations
using a pastry bag. It can also be used as a kind of glue to cement flowers or other
decorations onto the cake. It can also be used to make a seam in fondant if you are attaching two slabs of fondant together to make a covering for a cake.
An example of roses created from gumpaste
Cake Decorating Made Easy!
79
Rolled Fondant
Wilton is the cake supply company that is most famous for it’s Ready-To-Use
Fondant. Life is probably a lot simpler for the novice cake decorator that uses the premade type of fondant. To use it you simply roll it out like pie dough on a board. The fondant drapes in your hand yet is strong enough to allow you to tie bows with it, drape a
long length of it over a cake and even tie bows.
You can order this fondant directly from www.jo-ann.com. She sells Wilton Fondant mix as well as Fondant Ready-To-Use Sheets.
www.jo-ann.com
Fondant is sold in one color – pure white. The white color of Wilton Ready-ToUse Rolled Fondant Icing can be easily tinted any color using Icing Colors. Add icing
color, a drop at a time and knead into icing until color is evenly blended.
Wilton Ready-To-Use Rolled Fondant Icing has a mellow flavor, which can be
enhanced using Wilton Vanilla Extract, Almond Extract, Orange Extract, Lemon Extract
or Peppermint Extract. Knead flavor/extract into icing until well blended.
Cake Decorating Made Easy!
80
This icing is rolled out and used as a covering for a firm cake such as pound or
fruit cake, which is traditionally first covered with a layer of marzipan to seal in flavor
and moistness of the cake. A light layer of buttercream or apricot glaze may also be
used. Cakes covered with rolled fondant can be decorated with Royal or Buttercream
Icing. Wilton also has convenient, Ready-to-Use Rolled Fondant for easy-to-handle fondant with no mixing.
If you are not planning to use fondant to decorate the cake but simply want to the
cake to have a very smooth surface you can try one of the recipes in this chapter for
Quick Pour Fondant. In this case the fondant is poured over the cake and allowed to
harden like a very thick glaze.
Preparing A Cake For Ready To Use Fondant
To prepare a cake for a fondant treatment, fill the layers with the desired fillings
being sure to stabilize the rims with a solid buttercream icing.
To create a perfectly smooth fondant cake, the surface of your cake must also be
perfectly smooth. Any imperfections in your cake’s architecture or surface will show up
under fondant. This is the reason you must level the cake and glaze it to make the surface for icing as flat as possible. Your next step is to plaster the cake with buttercream
icing.
Ice the cake with a thin layer of buttercream icing, covering all holes and imperfections. Think like you are plastering a wall. Buttercream icing is the only icing recommended for this part of the procedure. After you are done icing the cake let the cake icing stand long enough to harden.
To determine the diameter you need to roll fondant for covering the cake: measure opposite sides and top of cake across center; roll out fondant to that size, 1/4 inch
thick. For example, an 8-inch, two-layer cake, with two sides each 4 inches, equals 16
inches diameter.
Before rolling out fondant, knead until it is a workable consistency. If fondant is
sticky, knead in a little confectioner’s sugar. Roll fondant with rolling pin, lifting and moving as you roll. Add more confectioners sugar if necessary.
When rolling fondant, it is extremely important to remember to lift and reposition it
several times. You must keep fondant from sticking to your rolling surface or it will tear
when you try to lift it up. Dusting the surface with confectioners sugar helps prevent
sticking.
Gently lift fondant over rolling pin, or lift with the support of both hands, taking
care not to tear it with your fingernails. Position on cake. Smooth outward and down the
Cake Decorating Made Easy!
81
sides to smooth and shape fondant to the cakes surface. To cover the cake simply
drape a single piece of fondant over a cake that has been set on a cake board. Tuck
and trim any excess with a sharp knife to encase the cake in a perfect fondant package.
In general, the less height on your cake, the easier it will be to cover with rolled
fondant.
Iced cake can be stored at room temperature for 2-3 days. Excess fondant can
be stored 2 months in an airtight container. Do not refrigerate or freeze.
Making A Rose Out of Fondant
1. Using a 3/4-inch diameter ball of fondant, mold a cone base approximately 1-1/2-inch
high.
2. Roll a 3/8-inch diameter ball of fondant.
3. Flatten this ball into a circular petal about 1/4 inch thick on bottom and thin on the top.
Make about the diameter of a nickel. Make several petals this size.
4. Wrap first petal around the point of the cone to form a bud.
Cake Decorating Made Easy!
82
5. Press three more petals around the base of the bud. Gently curl edges of petals.
6. Make five more petals using slightly larger balls of fondant. Flatten, then thin edge
with finger and shape petals. Press petals under first row of petals. Continue, placing
petals in between and slightly lower than previous row.
fondant images courtesy of www.jo-ann.com
Cake Decorating Made Easy!
83
Rolled Fondant Bows And Loops
1. Roll fondant 1/8 inch thick. Make a practice bow using these measurements; once
you have mastered these steps, modify the measurements for your own cake design:
Cut two strips 1 inch wide x 6 inches long for loops and one length 1 inch wide x 2
inches long for center.
2. Make two loops: Fold strip over to form a loop, aligning ends. Brush ends with a
damp brush. Pinch ends slightly to secure. Stand loops upright on side to dry. Make a
bow center: Wrap length around your finger to create a loop; brush area to be seamed
with a damp brush; overlap the ends slightly and press together to secure. Stand bow
center on its side to dry.
3. Insert the ends of two loops into center; secure with dots of icing if necessary and position on cake.
An example of bows and drapery made with fondant.
Cakes By Joan
www.weddingcakesbyJoan.com
Cake Decorating Made Easy!
84
Recipe For Rolled Fondant
If you want to make your fondant from scratch, here is the recipe!
1 Tablespoon unflavored gelatin
1/4 cup cold water
1/2 cup Glucose
1 Tablespoon Glycerin
2 Tablespoons solid vegetable shortening
2 lbs. sifted confectioners' sugar
Color and flavor as desired.
Combine gelatin and cold water; let stand until thick. Place gelatin mixture in top
of double boiler and heat until dissolved. Add glucose and glycerin, mix well. Stir in
shortening and just before completely melted, remove from heat, add flavoring and
color. Mixture should cool until lukewarm.
Next, place 1 lb. confectioners' sugar in a bowl and make a well. Pour the lukewarm gelatin mixture into the well and stir with a wooden spoon, mixing in sugar and
adding more, a little at a time, until stickiness disappears. Knead in remaining sugar.
Knead until the fondant is smooth, pliable and does not stick to your hands. If fondant is
too soft, add more sugar; if too stiff, add water (a drop at a time). Use fondant immediately or store in airtight container in a cool, dry place. Do not refrigerate or freeze. When
ready to use, bring to room temperature and knead again until soft. This recipe yields
enough to cover a 10 x 4 in. high cake.
Recipe For Quick Pour Fondant
Quick pour fondant is kind of like liquid plaster. You pour it over a cake that is
iced with butter cream. Professionals like to smooth the buttercream with a tool called
an icing comb that creates a very even surface.
6 cups confectioners' sugar, sifted (1 1/2 lbs.)
1/2 cup water (4 ounces)
2 tablespoons light corn syrup
1 teaspoon Almond Extract
Wilton Icing Colors, optional
Cakes should be covered with apricot glaze or a thin coating of buttercream icing. Let set 15 minutes before covering with fondant.
After you pour the fondant and you are sure the cake is completely covered use
a scraper to quickly clean any excess from the bottom of the cardboard. Do this as fast
as you can as this stuff hardens quickly. Your other option is to wait for it to harden and
then chip away any excess. A pizza cutter can work well for cleaning up excess quick
pour fondant from the bottom of a cake.
Cake Decorating Made Easy!
85
Gum Paste
Gum Paste is a pliable mixture that can be used to shape flowers, favors, and all
kinds of fancy shapes. These confections are very hard so they are not often eaten.
Once again Wilton is the company that makes the ideal gum paste mix. This is
very simple to use. You simply prepare the mix, tint it with food coloring and then simply
put it in a cake bag and use it to create confections that resemble seashells, daisies,
roses, lilies, holly, ivy and hundreds of more cake decorations.
www.jo-ann.com
To prepare the Wilton gum paste mix, combine 1 lb. of mix and 1/4 cup of water
in a large bowl. Stir until well mixed. Dust your work surface with confectioners' sugar;
turn out mixture on surface and knead like bread dough until mix is well worked in.
Place in a tightly sealed plastic bag and let rest for 15 minutes at room temperature.
Turn out on a surface lightly dusted with confectioners' sugar. Knead for about 5
minutes, gradually working in 1/3 cup of confectioners' sugar. Mixture should be smooth
and non-sticky.
Use at once, or store at room temperature in a tightly sealed bag in a covered
container.
Cake Decorating Made Easy!
86
Will keep up to 6 weeks. Refrigerate if storing longer than 1 week. Makes enough
for 50 roses or 100 daisies.
To tint this type of gum paste you simply add a dab of food or icing coloring with a
toothpick. With your fingers, knead the color into the gum paste until it is evenly spread.
Repeat until you reach the desired color.
Wilton also sells a world famous kit for making gum paste cake decorations.
These consist of little molds and cutters that can help you cut out petals and other forms
so you can make flowers fast. Otherwise you roll out the paste by hand and cut the
shapes yourself. In fact you can mold gum paste the same way you mold modeling clay.
It is different that decorating with cake icing because it is simply not put in a pastry bag
or squeezed through a specially designed tip or coupler as icing is. It is a totally different
cake decorating material altogether.
www.jo-anne.com
Cake Decorating Made Easy!
87
Rolling Out Gum Paste
1. Prepare a smooth work surface -- formica, plastic or glass. To be sure the gum paste
does not stick while you are rolling it, grease the work surface lightly with white vegetable shortening.
2. Break off the amount of gum paste you need (see directions for the decoration you
are making). Keep the remainder under a glass or plastic container.
3. Knead the piece of gum paste with your fingers, knead in color. Form into a ball about
1 1/2 inches in diameter.
4. Roll out the gum paste ball to about 1/2" thickness. Pick up the piece, turn it over and
give it a quarter turn on the work surface. Repeat this procedure 2 or 3 times until the
gum paste is about 1/16" thick.
Gum Paste Recipe
If you don’t want to buy Wilton’s mix (which is about the only game in town when
it comes to gum paste) you can also try making your own.
1 heaping Tablespoon Glucose
3 tablespoons warm water
1 tablespoon tragacanth gum
1 lb. sifted confectioners' sugar (or more)
Heat glucose and water till just warm. Mix Gum with 1 cup of the sugar and add
to glucose mixture. Mix well. Gradually knead in enough sugar until you have used
about 3/4 pound.
Gum paste handles best when aged, so store in a plastic bag at least overnight,
then break off a piece and work in more sugar until pliable but not sticky. Always keep
well covered. Follow directions above for tinting and rolling out gum paste.
Cake Decorating Made Easy!
88
Part 8. The Basics Of Decorating With Icing
In this chapter, you will learn the basics of how to use decorating bags, couplers
and how to use food coloring to create specialty colors.
Decorating bags are simply pastry bags that are filled with icing. However you
should not use bags that have been filled with batter as grease can cause your icing to
become lumpy and affect the pressure of the flow of icing out through the bag. There
are three types of bags: Featherweight, Disposable, and Parchment.
Featherweight Bags
Featherweight Bags are lightweight, and created from strong, washable
polyester. These bags can be used over and over again.
Wilton Featherweight Pastry Bags
www.joann.com
These bags can be used with or without a coupler. To use without a coupler, cut
about 3/4 in. off tip of Disposable Bag (Featherweight Bag is ready to use). Simply drop
the decorating tip you want into the bag with the narrow end of the tip down.
Cake Decorating Made Easy!
89
A new Featherweight bag will have to be trimmed with scissors to accommodate
the coupler base. First, twist the ring off the coupler base. Drop the coupler base, narrow end first, into the bag and push as far down as you can.
With a pen or pencil, mark the spot on the outside where the bottom thread is
outlined against the bag material. Push the coupler back up into the bag, and cut across
where you have made the mark. Push the coupler base back down through the bag
opening. One thread should be showing.
Choose the decorating tip you want to use and slip it onto the coupler base. Now
twist the coupler ring over the tip, locking it in place. Changing decorating tips is easy:
Twist off the ring, replace with new tip, then screw the ring back on.
Disposable Icing Bags
Disposable Bags are made of clear plastic. You simply throw them away when
you are done.
Wilton Disposable Icing Bags
www.jo-ann.com
Cake Decorating Made Easy!
90
Parchment Bags are made from envelopes created by parchment paper triangles. Generally, you'll use parchment bags to make decorative highlights with small
amounts of icing, then discard each bag when it's empty.
Wilton Parchment Triangle Icing Bag
www.jo-ann.com
The Coupler
The coupler is a two-part device that screws on to the icing bag. This allows you
to change the decorating tip without changing the bag.
The two parts of the coupler are the base and the ring. The base fits inside the
bag, and then you put the decorating tip of your choice over the portion of the coupler
that sticks out of the bag. When you screw the ring on, you've locked the decorating tip
onto the coupler and bag.
When using disposable bags notice that the threads in the coupler base start
about 1/2 in. above the tip. Push the coupler base into the bag as far down as possible.
With scissors, trim bag about 1/4 in. below bottom edge of coupler. Position decorating
tip over coupler base and bag. Screw ring in place to secure. To change decorating tips,
unscrew ring, replace decorating tip and screw on ring.
Cake Decorating Made Easy!
91
Standard Couplers
www.jo-ann.com
Handling Icing Bags
The most important thing to remember is not to overfill the bag, or icing may
squeeze out the wrong end. The right amount of icing to start with is about 1/2 cup.
Fold down the top to form a generous cuff, and hold the bag beneath the cuff.
Use your spatula to fill the bag with approximately three tablespoons of icing at a time.
To remove icing from the spatula, hold the bag on the outside between the thumb
and fingers. Then pull the spatula out of the bag, using the bag and your fingers to
squeeze the icing off.
To close the bag, twist the icing bag tightly closed, forcing the icing down into the
bag. You can make sure you've released any air trapped in the bag by squeezing some
of the icing out of tip into the bowl. This is called "burping" the bag.
To hold the Featherweight and Disposable bag, place the twist in the V between
your thumb and forefinger. Remember that it's important to be able to apply pressure
with all your hand.
The size and uniformity of your icing design are affected by the amount of pressure you apply to the bag and the steadiness of the pressure as you squeeze and relax
your grip. Practice makes perfect when it comes to this which is why it is a good idea to
practice your design on a piece of cardboard before you begin decorating your cake.
Icing Consistency
If the consistency of your decorating icing isn't just right, your decorations make
collapse. Often just a few drops of corn syrup can make your icing the right consistency
so that it squeezes out of the decorating tip properly.
Cake Decorating Made Easy!
92
Stiff Icing holds a 3/4 in. peak on the spatula. Use it for flowers with upright petals
- if icing is not stiff enough, petals will droop.
Medium Icing is used for flowers with flat petals and for borders -when the icing is
too stiff or too thin, you can't get the uniform designs that characterize a perfect border.
Thin Icing is used for writing, stems, leaves and for frosting a cake.
Mixing Food Coloring To Create A Unique Palette
You can add a few drops of food coloring to your icing, fondant or gum paste to
create all kinds of unusual colors. If you are a novice it might be a good idea to invest in
a good basic food coloring kit.
www.kerekes.com
When mixing color always mix a small amount of color to experiment. Start with
base color and then add very small amounts of secondary color. Be sure to mix enough
color for the cakes to be decorated, as it is difficult to match an exact color.
Wilton is the only company that makes as many tints for icing as there are for oil
paints. The colors come in individual containers and color kits.
They have a comprehensive list of the colors on their website at www.wilton.com.
Once again when it comes to mixing colors for cake decorating Wilton is the only game
in town.
Cake Decorating Made Easy!
93
Here is Wilton’s guide to using their icing colors to create unusual colors.
ANTIQUE GOLD: Add Leaf Green to Golden Yellow
AQUA: Mix Sky Blue and Leaf Green
CHARTREUSE: Add 9 parts Lemon Yellow to 1 part Leaf Green
CORAL: Add Creamy Peach and a touch of pink or orange and a touch of pink.
FLESH: Add just an extremely small touch of Copper to white icing. Ivory can also be
used. Light pink with a small amount of brown will also create a flesh toned icing.
GRAY: Add just a touch of Black to white icing.
HUNTER GREEN: Mix Kelly Green and a touch of Black
JADE: Mix Leaf green, Royal Blue and a touch of Black
LAVENDER: Mix Pink and Violet
MARIGOLD: Mix Lemon Yellow and Orange
MAROON: Mix Burgundy and Red.
MAUVE: Mix Burgundy with very little Black.
MISTY GREEN: Mix Leaf Green, Royal Blue and a touch of Black
MOSS GREEN: Mix Violet and Lemon Yellow
MULBERRY: Mix Rose with a touch of Royal Blue.
NAVY BLUE: Mix Royal Blue and Black
PERIWINKLE: Mix Royal Blue and Violet
PLUM: Use violet with a touch of Christmas red.
RASPBERRY: Mix Pink and Red
RUST: Mix Orange, Red and Brown
TURQUOISE: Mix Sky Blue and Lemon Yellow
WARM GOLD: Use Golden Yellow with just a touch of brown
Source: www.wilton.com
Cake Decorating Made Easy!
94
An Icing Color Kit by Wilton
www.candylandcrafts.com
Cake Decorating Made Easy!
95
Part 9. Must Have Decorator Nozzle Tips
Decorating tips are nozzles can be made of metal or plastic. They are basically
attached to the coupler. The different mouth sizes on these nozzles allow you to create
all sorts of different icing effects when you squeeze icing out of the tube.
There are hundreds of decorating tips on the market. The Wilton Company set
the standard for the tips by numbering them all about a century ago.
If you don’t know where to start when it comes to buying tips then you might want
to consider buying a small kit that contains all of the basic nozzles. Wilton makes many
good ones that you can access at www.jo-ann.com. You can also access other kits at
www.instawares.com and www.Candyland.com
Wilton Master Kit Tip Set
What follows is a description of the most common, must-have basic decorating
tips. Any of the tips that are about to be discussed can be purchased at the aforementioned sites.
Cake Decorating Made Easy!
96
Basket Weave Tips
Closed Star Tips
Cake Decorating Made Easy!
97
Drop Flower Tip
Cake Decorating Made Easy!
98
Leaf Tips
Cake Decorating Made Easy!
99
Open Star Tips
Cake Decorating Made Easy!
100
Petal Decorating Tips
Cake Decorating Made Easy!
101
Round Decorating Tips
Ruffle Decorating Tips
Cake Decorating Made Easy!
102
Part 10. Decorative Icing Techniques
Royal Icing and buttercream icing are your best choices if you want to create
flora and fauna on the side of your cake. In this section you will find a breakdown of
what icing tips to use in order to create specific decorations such as different kinds of
flowers, leaves and fruits.
Beads
Beads are used to dot the center of flowers, animal shapes as well as create
“edible pearls.”
• Tip Number: 3
• Icing Consistency: Medium
• Positions: Hold icing bag at 90 degree angle or perpendicular to cake surface.
Squeeze bag briefly and then release quickly to make a round bead.
An example where a professional chef has used beading to create pearls
Cake Decorating Made Easy!
103
Bows
Usually bows are made of fondant but it is possible to sculpt them using royal or
buttercream icing.
• Tip Number: 104
• Icing consistency: medium
• Position: Hold bag at 45 degree
• Sequence:
1. Squeeze, loop to left.
2. Squeeze, loop right.
3. Add two streamers.
Bows Made With Royal Icing
www.sugarcraft.com
Lace Work
Lacework is a special cake decorating technique that is particularly suited to
wedding, shower and fondant-covered cakes. Usually done in white on pastel cakes for
feminine occasions, lacework requires nearly perfect pressure control. Continued practice should give you pleasing results.
Use thinned buttercream or royal icing for buttercream frosted cakes; thinned
royal or boiled for fondant-covered cakes. (For this lesson always use thinned buttercream icing.)
Cake Decorating Made Easy!
104
• Icing tip: 1
• Icing consistency: thin consistency
• Position: Hold bag at slightly less than a 90 degree angle. Hold bag close
enough to the cake so that the icing attaches without scraping the icing on
the cake.
Lattice Weave
Sometimes called basket weave work, the icing is used in a way that makes the
cake surface look like a woven basket
Tip Number:
Icing: medium consistency
Positions: Hold bag at 45 degrees
Sequence:
1. Squeeze evenly, vertically.
2. Stop squeezing.
3. Lift tip away.
4. Squeeze evenly, horizontally across vertical strip.
5. Stop squeezing.
6. Lift tip away.
Cake Decorating Made Easy!
105
Lattice Work Cake
Ruffle
Ruffles are used to give cakes a decorative edge.
Tip Number: 104
• Icing Consistency: Medium
Cake Decorating Made Easy!
106
• Position: Hold bag at 45 degree angle and squeeze up and down for ruffled or
ruched effect.
www.sugarcraft.com
Shells
Shells are often used to create a border ribbon around a cake.
Tip Number: 21
Icing Consistency: Medium
Position: Hold bag at 45° . Hold tip slightly above cake surface.
Sequence:
1. Hold the bag in the 6:00 position so that you can pull the bag toward you. The tip should be slightly above the surface.
2. Squeeze hard, letting the icing fan out generously as it lifts the tip –
do not lift the bag. Gradually relax your pressure as you lower the
tip until it touches the surface.
3. Stop pressure and pull the tip away, without lifting it off the surface,
to draw the shell to a point.
4. To make a shell border, start the end of your next shell so that the
fanned end covers the tail of the preceding shell
Cake Decorating Made Easy!
107
Creating shells.
www.wilton.com
Star Flowers
Star Flowers are one of the simplest flowers you can make.
• Tip Number: 3
• Icing Consistency: Medium
• Position: Hold bag at 45 degree angle. Apply pressure to squeeze as many petals as you like laterally out from the center. Fill in center of star with a dab of icing to create a star.
A Simple Star Flower
www.baking911.com
Cake Decorating Made Easy!
108
Stringwork
Stringwork is used to write on cakes and add a dramatic finish.
• Icing Tip Number: 3
• Icing consistency: stiff consistency thinned slightly with corn syrup.
• Positions: bag held at 45 degrees, lightly typing surface. Dot surface first
as a guide before you glide tip across surface of the cake.
An example of basic string work
www.sugarcraft.com
Here are some other ideas for patterns that are commonly created using string
work
Cake Decorating Made Easy!
109
Swirl Flower
The Swirl Flower is done the same way as a Star flower only when you are making the petals give the bag a slight tilt so that the flowers have a curve.
www.baking911.com
Cake Decorating Made Easy!
110
Part 11. Creating Different Flowers
Some of the flower designs you find below are created on a device called a
flower nail. This is simply a small metal device that looks like a giant nail. You rotate the
shaft of the “nail” between your fingers and create the flower on top of the nail.
You don’t necessarily have to use a flower nail to create a flower design, you can
simply create the flower on a flat surface, however keep in mind it is easier to rotate the
flower then it is to rotate your entire body as you create the blossom.
Wilton Flower Nail
www.jo-ann.com
Apple Blossom
Cake Decorating Made Easy!
111
Tip: rose tip 101, plain tip 1
Icing: medium consistency petals - pink center – yellow
Positions: Hold nail: in left (right) hand. Bag: 45° angle at 3:00 (9:00) for petals 90° angle for center
Sequence:
1.
2.
3.
4.
5.
Squeeze bag with light pressure and move tip out 1/8 inch to form first petal
Turn nail clockwise letting spin of nail form petal
Relax pressure as you move tip back to starting point
Repeat procedure to make remaining four petals
Using Tip 1 to add about five small dots to create the center of the flower.
Bachelor Button
Tips: 1, 5, 16
Icing Consistency: Medium (Royal Icing works best)
Positions:
For mound and center stamens, 90°
For star petals, 45° at 3:00 (9:00)
Sequence:
1. Hold bag at 90° angle to flower nail, lightly touching surface. Pipe tip 5 dot base.
2. Pipe a cluster of short pull-out dots in the center using tip 1.
3. Using tip 16, cover the remainder of mound with stars. Start at base, then work
toward center.
Cake Decorating Made Easy!
112
Carnation
Tips: 12, 150 (104 is optional)
Icing consistency: Stiff royal icing
Positions: For mound, 90° angle; For petals, 45° at 4:30 (7:30)
Sequence:
1. Hold bag at 90° angle to flower nail. Use stiff royal icing. Pipe tip 12 ball on flower
nail.
2. Using tip 150 (104 optional), pipe several upstanding petals in center of ball with a
jiggling up and down motion, then circle them with ruffled petals.
3. As you continue piping rows of petals to cover ball, turn narrow end of tip farther out.
Pipe last row of petals at base of flower with tip straight out.
Chrysanthemum (Mum)
Tips: 5, 81
Icing Consistency: Stiff Royal Icing
Position: For mound, 90º; for petals, 45º
Cake Decorating Made Easy!
113
Sequence:
1. Hold bag at 90º angle to flower nail. Pipe a tip 5 mound of icing on center nail.
2. Use tip 81 and hold bag at a 45º angle to outer base edge of mound, with half moon
opening of tip pointing up. Squeeze row of 1/2 inch long cupped base petals, pull up
slightly as you release pressure to form petals.
3. Add second row of shorter petals atop and in between those in first row. Repeat procedure making each additional row of petals shorter than the previous row.
Daisy
Tips: 104, 5
Icing Consistency: Medium Royal Icing
Position: For Petals, 45° For center, 90°. Hold Tip: For petals, wide end lightly touching
1/4 inch away from center of nail, narrow end pointing out to outer edge; for center, hold
slightly above flower.
Sequence:
1. Dot center of flower nail with icing as guide for flower center. Starting at any point
near outer edge of nail, squeeze and move tip towards center icing dot. Stop pressure,
pull tip away.
2. Repeat for a total of 12 or more petals.
3. Add tip 5 flower center and press to flatten. For a special effect, dampen your finger,
dip in crushed Cake Sparkles, then press on center.
Cake Decorating Made Easy!
114
Leaf
The Wilton company makes all kinds of decorating tips that are designed to make
different kinds of leaves. There are many examples of this in section ten. However tip 67
is the decorating nozzle most often used to make leaves.
Tip: 67
Icing: thin consistency
Positions: Bag is at 45 degree angle.
Sequence:
1. Squeeze hard, lift to build base.
2. Relax pressure, draw to point.
3. Stop, lift away.
Basic Leaf
Hold the bag at a 45° angle to the surface. Squeeze hard to build up base, and at the
same time, lift the tip slightly. Then relax your grip while pulling the leaf tip to a point.
Ruffle Leaf
To create a leaf, move your bag in and out in a series of quick motions to produce the
ruffled effect. Complete your leaf as before.
Cake Decorating Made Easy!
115
Stand-up Leaf
Return to your starting position with tip held a little more upright than 45° angle and
build up your leaf base. Pull the tip up and away from the surface as you relax pressure.
Finally, stop squeezing, and lift tip up into a curl.
Lilac
Tips: 59, 32, 14
Icing Consistency: Medium-thick.
Sequence:
1.
Pipe four tiny rounded petals with tip 59. You can use Flower Nail No. 7 and pipe
several at a time if you like. Let dry thoroughly.
2.
Make a base for the flowers and arrange on your cake. Pipe a tip 32 upside down
elongated shell. (The tail/tip of the shell will be the top of the lilac cluster.) Overpipe for
more dimension if needed.
3. Using a tip 14, pipe stars and position your flowers on the base, forming a lilac cluster
of flowers.
Lily
Cake Decorating Made Easy!
116
To make this type of flower you need to create a bit of a tin foil armature on top of a
flower nail. You could also create the same kind of frame inside an egg cup or any fluted
small container. A small dish or votive candle holder might work well too as a frame.
Tips 68, 14
Icing Consistency: Stiff royal icing
Position: For petals, 45° at 3:00; For center, 90°
Sequence:
1. Line 1 lily nail with foil. Use tip 68. Touch center well of nail with tip and squeeze, pulling petal up and over edge of foil cup. Decrease pressure as you reach end of petal and
hesitate before you stop pressure and pull tip away, drawing petal to a point.
2. Pipe two more petals.
3. Pipe three more petals in between open spaces.
4. Add tip 14 star center and push in stamens.
Lily of the Valley
Tips: 67, 2, 81, 1
Tip 2 for stems; slightly touching decorating surface
Tip 81 for flower; tip above decorating surface
Tip 1 for stamens; lightly touching inside of flower
Cake Decorating Made Easy!
117
Icing: Medium consistency; white for flower; thin consistency green for leaf,
stems and stamens
Position: Bag: 45° angle at 3:00 (9:00) for leaf and stems; 30° angle at 4:30
(7:30) for flower
Sequence:
Leaf
1. Using tip 67, press out icing, letting it build up slightly for a broad width. Move upward, curve to right and gradually stop pressure to bring leaf to a point.
Stems
2. Add tip 2 stem along center of leaf, moving off to an angle. Pipe short green secondary stems outward from the main stem.
Flowers
3. Using tip 81, squeeze with light pressure ABOVE surface with inner curve of tip facing
you. Press out a curve of icing and continue squeezing until a tiny bell shape is formed.
Stop pressure. Lightly touch tip to surface, give an additional quick squeeze, stop and
lift away. Add two tip 1 stamens to center.
Morning Glory
Tips: 104, 103, 2, 1
Icing Consistency: Stiff Royal Icing
Position: For Ruffled Cup, 45° at 3:00); For Stamen, 90°
Sequence:
1.
Line 1 5/8 inch lily nail or a shallow tiny dish (such as an egg cup)l with foil.
Position wide end of tip down in nail. Using tip 104 and white icing, pipe a
shallow cup within the nail. Pipe a second cup slightly above the first. Smooth
with a damp brush.
Cake Decorating Made Easy!
118
2.
Using tinted icing and tip 103, pipe a ruffled cup slightly above the white inner
cup, increasing pressure in five places to form points.
3.
With dampened decorator brush, blend tinted icing into white center. Next,
brush white icing up to form a star shape.
4.
Using tip 1 and thinned white icing, pipe five lines from base of flower to edge.
Pipe tip 2 center stamen using yellow icing
Poinsettia
Tips: 352, 2
Icing: Stiff consistency royal
Positions: Bag: 45° angle at 3:00 (9:00) for petals, 90° angle for center
Sequence:
Insert tip into lily nail. Using tip 352 squeeze hard and pipe leaf shaped petal just over
edge of foil cup; relax pressure, stop and pull away.
1.
Pipe two more petals, dividing the nail into thirds. Add three more petals in the
open spaces.
2.
Add six smaller leaf shaped petals on top and between the larger ones.
3.
Add seven tip 2 dots to center using tip 2.
Primrose
Cake Decorating Made Easy!
119
Tips: 1, 14, 103
Icing Consistency: Medium Royal Icing
Position: For Petals, 45°; For Center, 90°
Sequence:
1. Squeeze bag and move tip out 1/4 inch using a "curve, dip, curve" motion to form first
heart-shaped petal while turning nail in opposite direction (Move tip out 1/4 inch, then in
1/8 inch and back out.) Relax pressure as you return to starting point.
2. Repeat procedure for remaining four petals.
3. Pipe tip 14 center star with tip 1 dot. Let dry.
Rosebud
Tips: 104, 3
Icing consistency: Stiff buttercream for petals, thinner consistency for sepals and
calyx.
Position: 45° at for petals, 45° for sepals and calyx.
Sequence:
1.
Using tip 104, make the base petal. Keep the narrow end of the tip raised up
and slightly to the right. While squeezing, move the tip along the surface away
from you and continue squeezing as the icing fans out. Returning the tip to
the original position and halfway back, start to release pressure, move tip to
starting point, stop pressure and pull tip away.
2.
Using tip 104, make the overlapping petal. Touch the wide end of the tip to the
outside edge of completed petal. As you continue squeezing, the icing will
catch the edge of the base petal and roll it over naturally. When the second
petal looks complete, stop pressure and pull tip away.
Cake Decorating Made Easy!
120
3.
Using tip 3, make the sepals. Form the middle sepal first by squeezing and
letting icing build up. Lift the bag up and away from the flower. Stop pressure
as you pull away to form the point of the sepal. Repeat, making a sepal on the
left and right sides.
4.
For the calyx, insert tip into the base of the center sepal on the left and right
sides. Squeeze, letting the icing build up. Slowly draw the tip toward you, relaxing pressure as you move away from the flower. Stop pressure, pull away.
Roses
Fit a decorating bag with round tip 12 and fill 1/2 full with stiff consistency Buttercream
Icing.
Cut wax paper into 1 1/2 in. squares.
Preparing the Flower Nail:
Hold the nail in your left (right) hand between your thumb and forefinger so that you can
turn it slowly in a counterclockwise (clockwise) direction.
Place a dot of icing on the nail.
Press a wax paper square onto the nail.
Rose Base
Tip: 12
Icing: stiff consistency
Positions:
- Nail: in left (right) hand
- Bag: 90 angle (straight up)
- Tip: slightly above nail
Sequence:
1. Squeeze hard for base.
2. Relax, lift for cone.
3. Stop squeezing, lift tip away.
Hold decorating bag straight up, the end of tip 12 slightly above the center of waxed paper covered flower nail, which is held in your other hand. Using firm and steady pressure, squeeze a heavy base of icing, keeping the end of the tip buried in it as you
squeeze. Start to lift the top higher and decrease the pressure when the base fills out
the circle drawn on the nail. Stop pressure, pull up and lift away. Rose base should be 1
1/2 times as high as the rose tip opening.
Cake Decorating Made Easy!
121
Try This: First build up the right size base on your practice board. When you feel comfortable with the technique, try it out on the flower nail several times, using a fresh piece
of wax paper each time.
Rose Center
Tip: 104
Icing: stiff consistency
Positions:
- Nail: in left (right) hand
- Bag: 45 angle at 4:30 (7:30)
- Tip: wide end touching base at midpoint, narrow end up and in slightly
Sequence:
1. While squeezing, turn nail to the end of your finger counterclockwise (clockwise);
move tip up then down, overlapping starting point.
2. Stop, lift tip away.
Hold nail, containing base in left (right) hand and bag with rose tip 104 in right (left). Bag
should be at a 45 angle to the flat surface of the nail and in the 4:30 (7:30) position. The
wide end of the tip should touch the cone of the icing base at or slightly below the midpoint, and the narrow end of the tip should point up and slightly inward. Now, you must
do three things at the same time: squeeze the bag, move the tip and rotate the nail. As
you squeeze the bag, move the tip up from the base, forming a ribbon of icing. Slowly
turn the nail counterclockwise (clockwise) to bring the ribbon of icing around to overlap
at the top of the mound, then back down to starting point. Move your tip straight up and
down only; do not loop it around the base. The motions forming the center of the rose
are quite important and will be repeated as you put the petals on.
Cake Decorating Made Easy!
122
Top Row Petals
Tip: 104
Icing: stiff consistency
Positions:
- Bag: 45 angle at 4:30 (7:30)
- Tip: wide end touching base at or slightly below midpoint, narrow end straight up.
Sequence:
1. While squeezing, turn nail to the end of your fingers counterclockwise (clockwise),
move up and down, connect petal to base.
2. Stop, lift tip away.
3. Repeat for other two petals.
Hold the flower nail with the completed rose base and center in your left (right) hand
and the bag in your right (left) hand at a 45 angle to the nail surface. The wide end of
rose tip should touch the base at or slightly below the midway point, and the narrow end
of tip should point straight up. As with the rose center, you now must do three things at
one time: squeeze the bag, move the tip up and rotate the nail.
While you squeeze the bag, move the tip and rotate the nail. While you squeeze the
bag, move the tip up and down again. As you turn the nail, the up and down motion of
the tip will make a half-circle shaped upright petal. Wide end of tip must touch rose base
while making a petal at all times. Stop squeezing, then lift tip away. The procedure for
the second and third petals is the same. Be sure your tip is clean before starting next
petal. The second petal should overlap the end of the first. And the third petal should
begin by overlapping the second and end by overlapping the first. Turn the nail one third
of the nail circumference as you make each petal.
Middle Row Petals
Tip: 104
Icing: stiff consistency
Positions:
- Bag: 45 angle at 4:30 (7:30)
- Tip: wide end touching base below center of any petal, narrow end out slightly. End of
tip at 1:00 position.
Cake Decorating Made Easy!
123
Sequence:
1. Make a petal as before.
2. Repeat for 4 more petals, with the last petal overlapping first petal.
Proceed exactly as you did in making the top row of petals except for these two
changes: (1) start the middle row with the wide end of the tip touching the rose base directly beneath the center of one of the petals in the top row, and the narrow end of the
tip leaning out slightly, and (2) make five petals instead of three, with the back edge of
the fifth petal overlapping the front edge of the first petal. The petals in this middle row
should overlap the spaces between the petals in the first row. Remember turn the nail
one-fifth of the nail circumference for each petal.
Bottom Row Petals
Tip: 104
Icing: stiff consistency
Positions:
- Bag: 45 angle at 4:30 (7:30)
- Tip: Wide end touching base below previous row; narrow end out further, end of tip at
2:00 position.
Sequence:
1. Make 1 petal
2. Make 6 more petals.
Continue as you did for the middle row, except that the narrow end of the tip should be
leaning out further so the petals appear to be opening. And this time, you'll make seven
petal instead of five, with the last overlapping the first and all of them overlapping the
spaces between petals in the row above. Turn the nail one seventh of the circumference
for each petal. Remove rose from the flower nail by lifting the wax paper square off.
Cake Decorating Made Easy!
124
Part 12. Creative Decorating Techniques
The cake decorating industry has grown by leaps and bounds when it comes to
creating products that really can add a touch of originality to your cakes. Here is a
breakdown of some of the more inspiring gadgets and products on the market that can
make the difference between an ordinary cake and one that is truly spectacular and
unique.
Cake Spray Paint
This allows you to spray paint your cake any color you want. A great idea is to
make your own stencil and simply spray lettering, shapes images, anything you like on
the cake.
The spray comes out in a fine mist that you can use to create a speckled effect or
you can layer it on thickly to create a richly colored effect. One word of warning – don’t
hold the nozzle of the spray can too close to the icing or the force of the air coming
through may cause dents or shirring in the icing.
Cake Spray Paint
www.partyworks.com
Cake Decorating Made Easy!
125
Cake Stencils
You can buy cake stencils just about anywhere on the net but just about any kind
of stencil can be used to create an image on a cake. The easiest surface of all to stencil
on is a fondant cake because it is the simplest and flattest surface however great effects
can be achieved on buttercream or royal cream iced cakes as well.
To use a stencil all you do is lay it over the cake surface and apply color, glitter or
tinted icing sugar using a shaker, spray can or brush.
You can also use a stencil to create raised lettering. Simply lay the stencil on the
cake, apply a Royal Cream Icing thickly over the stencil and before it hardens lift the
stencil off the cake to create raised letter.
To emboss a cake using a cake stencil simply press the stencil into a cake that
has been iced flat with Royal cream and then lift it up gently.
Below are some examples of cake stencils found at www.kereke.com
Cake Decorating Made Easy!
126
Decorating Combs
Cake decorating combs look like giant hair combs. Different varieties have different widths and types of serrated edges.
A cake decorating comb comes in very handy for smoothing buttercream frosting
to prepare it to be rolled in fondant or tiled with fondant pieces. This is because it creates a very flat yet slightly tacky edge that allows the fondant to adhere more smoothly
to the cake.
Cake combs can also be used to create swirls and patterns in frosting the same
way you can use a plaster comb to create patterns in ceiling plaster.
A Cake Decorating Comb
www.kerekes.com
Cake Decorating Made Easy!
127
Decorating Gel
Decorating gel is that pretty see-through stuff you often see used on cakes to
create writing or decorations. It is almost pure glycerine. Sometimes it is handier just to
buy this in a tube than try to tint glycerin yourself.
Decorating gel can also be used to add accents (such a dew drops) to flowers on
a cake. You can also use it to create a stained glass effect. It is best used on cakes with
slightly rougher surfaces such as those iced with buttercream, stiff whip cream or royal
icing.
Kosher Decorating Gel
www.kerekes.com
Edible Confetti
These are small bags of star shaped or rosette shaped candies that you buy by
the package. They can be used singly to create a border or lettering on a cake or you
can sprinkle them liberally on the cake for a festive look.
Cake Decorating Made Easy!
128
Edible Confetti
www.partyworks.com
Edible Glitter
Edible glitter is large sparkles that can be consumed. They come in a rainbow of
metallic colors. Edible Glitter is great for highlighting sugar paste or buttercream decoration or for using with stencils.
Glitter Stamens
So you have made a beautiful flower out of buttercream icing but you want it to
have a little extra oomph. If you are creating a flower such as a Stargazer Lily or a Calla
Lily you can add plastic stamens with glitter on them
A bundle of glitter stamens
www.kerekes.com
Cake Decorating Made Easy!
129
Gold Leaf
Edible gold leaf can be applied to any shape or surface. You simply apply it with
tweezers and it clings to any confection. You can also buy gold flakes which can be
sprinkled on any kind of frosting surface to give a cake a festive flair.
A sheet of gold leaf
www.kerekes.com
Luster Dust
This stuff is absolutely fantastic for decorating fondants and adding a bit of sparkle to anywhere on your cake. It is a very, very fine edible glitter that creates a lustrous
sheen on frosting, sugar shapes, gum paste and just about any decoration you can
think of. It mixes especially well with Royal Paste.
Luster Dust is mixed with a spirit such as vodka or gin, or an extract like clear
vanilla or lemon extract. Never mix it with water and use it on sugarpaste decorations or
the decorations may soften and become sticky.
You can use several colors of luster dust on your cake at once to create a cake
that gleams. It can also be mixed with a spirit and applied with an airbrush or small
paintbrush. You can also dust it on a cake using a large fluffy brush.
A simple way to use it to add sparkle to a fondant is to brush the fondant lightly
with water and put the shimmer dust into a small tea strainer. You then shake the tea
strainer over your cake.
Cake Decorating Made Easy!
130
Marzipan
Marzipan is a molding dough that is made from almond paste. The marzipan
dough can be pressed into molds shaped like fruits, animals or flowers and then attached to the cake with gumpaste.
You can also make your own marzipan. Here are some popular recipes.
Shiny Imitation Marzipan
1/3 cup soft butter or margarine
3/4 teaspoon salt
1/3 cup white corn syrup
1 teaspoon vanilla
3 cups (1 lb.) sifted confectioners sugar
1/2 Lb. almond paste
Add coconut & almond oil and you have an imitation flavoring, scant drop. Blend
butter, syrup, salt and vanilla in large mixing bowl. Add sifted sugar all at once. Mix all
together. Knead with hands. Turn out on board and continue kneading until mixture is
well blended and smooth. Makes about 1 1/3 lbs. Store in cool place. Roll into 1" balls
and push into molds. Close molds, open and let fruit drop out.
www.candylandcrafts.com
Cake Decorating Made Easy!
131
Marzipan Pine Cones
7 ounces almond paste
4 ounces sliced almonds
1 1/4 cups semisweet chocolate chips
1 tablespoon shortening
Divide almond paste into 6 equal portions. Form each into cone shape about 1 1/2" tall
& 1" in diameter. Beginning at the base insert pointed ends of almond slivers into paste,
to resemble a pine cone (see step #1).
In a microwave safe bowl, melt chocolate chips & shortening; stir until smooth. Insert a
toothpick into the bottom of each cone. Holding over a bowl, spoon melted chocolate
over almonds (step #2). If needed, use another toothpick to spread the chocolate to
completely cover the almonds (step #3). Place on a wire rack over wax paper, let stand
until firm. Yields 6 appetizing and simply delicious pine cones!
Step #1
Step #2
www.candylandcrafts.com
Step #3
European Marzipan Recipe
1 to 2 egg whites
1 lb. powdered sugar
1 lb. almond paste
5 ozs. fondant
Mix together with color well and knead like bread. Pack mixture into molds and
clamp shut. Open and knock out. Roll the candy in the appropriate colored sugar or
paint top with a green leaf.
Cake Decorating Made Easy!
132
Marzipan Strawberry Recipe
1-3 oz. box strawberry gelatin dessert
1/2 teaspoon almond flavor
1 lb. granulated sugar
2/3 cup ground almonds
2/3 cup sweetened condensed milk
Mix together and pack into mold, clamp shut, open mold - tap the mold and the candy
will drop out into coating mixture.
Coating for Home Made Marzipan Strawberries
2 cups macaroon coconut
1 1/2 tablespoons gelatin dessert
1 1/2 tablespoons red sugar
Roll candy in coating mixture, top with leaf or make your own using Royal Icing.
Remember that Marzipan also looks great sprinkled with Edible glitter dust. You
can get a really nice pink shade for strawberries at www.partyworks.com.
All of the above marzipan recipes are suitable for pressing into molds. You can
use absolutely any kind of candy mold to make a cake decoration as well. For instance
you can buy molds meant for lollipops and simply fill the strawberry part of the mold to
make a marzipan fruit as shown below.
Strawberry Candy Mold
www.candylandcrafts.com
Cake Decorating Made Easy!
133
Fruit also looks especially nice when made with marzipan. To get the color you
desire you simply tint the mold with food or icing coloring. Here is an example of a typical fruit marzipan mold.
Marzipan Fruit Molds
www.candylandcrafts.com
You can also roll the marzipan out in a layer and use cookie cutters to create
shapes that you can affix to the cake with gum pastes.
Cake Decorating Made Easy!
134
Marzipan Cutters
www.kereke.com
If you need to make scores or even hundreds of marzipan fruits or flowers to
decorate a cake you can also use a marzipan rollerboard. This is a handy time saving
device that allows you to insert a tube of marzipan dough. By inserting different cutting
heads, you can make a lot of different kinds of fruits. Below is an illustration of a rollerboard that creates both strawberry and lemon shaped marzipan fruits from a tube of
dough.
Marzipan Roller Kit for Making Miniature Lemons
www.kerekesequip.com
Cake Decorating Made Easy!
135
Tiers
If you are building a wedding cake, the good news is that you don’t have to assemble all of the components yourself. Many wedding cakes are sold in kits that include
the cake stand, the tiers and the topper. You can find such kits at www.instawares.com
and www.candylandcraft.com.
A cake made from a Filgree Gazebo Kit
www.candylandcrafts.com
If you are building your cake’s architecture from scratch you will need to buy columns to support the tiers.
Cake Decorating Made Easy!
136
www.candlylandcrafts.com
Another trend is to use real flower blossoms instead of tiers to support the wedding cake. In this case, flowers are fixed in a spoke like pattern on a cake board and
placed on top of each cake layer to create a spectacular effect.
An example of a wedding cake tiered with flowers.
www.cakesbyjoan.com
Cake Decorating Made Easy!
137
Part 13. Questions And Answers
As you know, decorating cakes is not an exact science and is derived from rather
varied styles and traditions. Sometimes the entire subject evokes some very specific
questions from fellow decorators. We have decided to leave the questions exactly as
asked and answer them in this section.
Q. How do l cover a 20 inch cake perfectly?
A. This all depends on what you are covering the cake with. If you want to cover
a cake with icing, then all you need to do is glaze the surface of the cake first. The glaze
acts as a sealant to prevent the icing from picking up any crumbs. It also coats the cake
slightly and covers any imperfections on the cake’s surface. Then simply use a spatula
to ice the cake. A medium thick icing consistency is best for creating a smooth surface.
If you are using a fondant the key is to roll out your fondant sheets so that they
are perfectly flat on a board dusted with icing sugar. Then cut the fondant so that it fits
your cake and add about an inch. If it is a 20 inch round cake then take a pizza cutter
and cut excess fondant off of the bottom edge of the cake. If it is a square cake then
simply use a knife.
Q. If decorating a fruit cake with marzipan and roll out icing, how long before the cake is needed do I put on the marzipan and how long then until roll out
icing. Is there a minimum time scale between the marzipan and the icing?
A. It is a good idea to make the marzipan decorations first. Your cake should be
completely cooled to room temperature before you apply the fondant icing. You can then
apply the marzipan to the fondant surface with gum paste.
Q. How to get a really smooth "faux" look with a buttercream icing?
A. The only way to get a smooth look is to use fondant, as opposed to buttercream icing. However the thinner the icing the more likely it is to look smooth and shiny.
How smooth the final product looks can also depend a lot on your skills when it comes
to applying the icing with a spatula. There is no secret to this. If you want a smooth look,
use a fondant.
Q. What is the best frosting recipes for decorating cakes?
To be honest, frosting is not necessarily used for decorating cakes. The proper
term is icing. Frosting implies a much fluffier substance. Usually buttercream and royal
icing are the icings of choice for professional chefs.
Cake Decorating Made Easy!
138
Q. How come everyone makes roses look so easy when they really are not?
The hardest time I am having is with making a rose. I know once I get the first one
made correctly, it's all good from there but there are no books that show detailed
enough pictures on how to make the first one.
The answer to this question is really dependent on what kind of substance you
are using to prepare your rose. Making roses from fondant is a lot easier than making
them from icing. However, once you have the right tips, making roses should not be that
difficult as they do practically make themselves. As making roses from icing is a craft, it
is not necessarily that reliant on pictures, but more on your ability to manipulate the icing bag and nozzle and use your natural common sense and creativity to intuitively
make a rose. (But, don’t forget to check out the pictures in this book!) If you feel you
lack the ability to create a rose, your best bet is to buy pre-made sugarcrafted roses
from a supply store.
Q. Where can I get gold and silver foil and gold dust to decorate chocolates
in Ottawa?
A. Edible gold leaf is illegal in Canada which is why you are having trouble finding
it. It is available in the U.S. at www.kerekes.com
Q. What is the easiest way to make an icing rose?
A. The easiest way to make an icing rose is to make it out of fondant. Simply
press your thumb into a round piece of fondant dough to make the petals and then
gather the petals together and twist them to make a full blossom.
Q. When piping a design on a cake, what is the easiest way to cover a mistake made on a complicated design already well underway?
A. Unfortunately there is no such thing as an icing eraser. Your best bet is to let
the icing completely harden and then pick it off the cake and start again.
Q. How would you make a stiff textured frosting for a cake, but not to the
candy stage, I hate to make frosting so this has to be very simple to make and
taste real good.
A. Avoid all recipes that use a candy thermometer in the recipes. These are not
the best icing recipes for cake decorating anyway. Use buttercream icing and add more
confectioner’s sugar to make the icing as stiff as you like.
Cake Decorating Made Easy!
139
Q. How do you make layer cakes or novelty cakes stable. Sometimes I have
great ideas but when I stack pieces they slide around or the weight is too heavy
and I don't know the secret to stacking cakes.
A. There is no real secret to stacking cakes. It is simple math and geometry. For
example, if you are using tiers, you can stabilize your layers by making the top layers of
the cake smaller than the lower layers. You may also be using fillings that are too soft
causing the layers to slip and slide around. To stabilize your cake even more try rimming
the perimeter with stiff buttercream frosting and then filling the cake. Let the buttercream
frosting harden before you balance the next layer on top of it.
Q. What is the best way to make a cake in advance, say, for your own wedding?
A. This really depends on the type of cake you are planning to serve. Fruit cakes
and cakes soaked in liquors can be made weeks (even months) ahead and simply
stored in the refrigerator. Otherwise you can bake the cake layers in advance and
freeze them until they are ready to use.
Q. How do I get nice rich color? Even with expensive paste color, my cakes
are always "too pastel-y" (So say the men in my house!)
A. Whipped cream and fluffier meringue or corn syrup icings are only capable of
producing a pastel color. Buttercream icing can be tinted a deep color. Wilton makes a
color paste specifically designed to color icings and frostings. Keep in mind that most
cake icings are only meant to be tinted with food coloring otherwise the icing will have a
chemical taste.
Q. I am new to this and have a terrible teacher! What’s the secret to making
roses? Do you have to use shortening to make most decorations or can you use
the Boiled buttercream and get the same results. Also, what is the perfect consistency for all decorating?
A. To be honest, roses are simply not that difficult to make. In your case you simply may not have acquired a knack for it yet. You may have to practice making roses a
1000 times to get it right. Practice makes perfect. There is no such thing as boiled buttercream icing. You might be referring to meringue based icings which are not appropriate for icing cakes. Also, there is no such thing as a perfect icing consistency as different pipings require different consistencies. For instance you would need a medium consistency icing to make a rose but a thin icing to create writing.
Cake Decorating Made Easy!
140
Q. How do you make a perfect cake?
A. The best way to make a perfect cake is to follow the directions of the recipe to
the letter. Cakes are less than perfect when the oven is not preheated, when ingredients
are left out of the recipe, when steps are skipped in the recipe and if the chef keeps
opening and closing the oven door which often causes the cake to fall.
Q. How can I make my flowers taste better for my cake. I have used all
types of coloring and the darker the color, the worse it taste.
A. You’re right. Unfortunately, there is no way around this particular problem. You
could try using colored liquors as pale tints but your color choices would be limited. Also
the flavors may not match. You can use chocolate flavored liquors to make brown or
pinkish icings, crème-de-menthe to make green icing and raspberry liqueur to make
pink icings. However keep in mind that these icings will be a very pale tint (but the taste
will be improved!)
Q. What is the best type of icing to use on a cake for a diabetic?
A. Unfortunately icing is 90% or more pure sugar. There is no recipe for diabetic
cake decorating icing in existence that we know of. Sugar substitutes are simply too
granular to substitute for confectioners sugar. (If you find one, please let me know!
Email: [email protected])
Q. How to make different shapes of cakes without having to buy a mold?
A. Unfortunately it is usually dangerous to make your own molds as you never
know what kind of material will melt or catch on fire in your oven. One way is to cut the
shapes of the pieces of cake that you need out of existing round or square shapes that
you have baked in proper pans.
Q. How do you keep your cake from looking lop-sided as if its ready to drop
on the floor or table.
A. If your cake is lopsided, it is probably not level. After the cake comes out of the
oven, use a cake leveler to make all of the tiers perfectly flat on top. Then when you
layer the cake it will balance properly.
Cake Decorating Made Easy!
141
Q. No matter how hard I try, I always have crumbs in the icing, even after a
crumb coating. What's the true secret to avoid this?
A. Glazing your cake and letting the glaze harden and cool before you ice it is
recommended so that your spatula will not pick up crumbs.
Q. How do you get the cake to stay flat and not round?
A. The round bump on top of the cake is called the crown. You can saw the
crown off with a knife or use a cake leveler to remove it so that the cake is flat.
Q. How do I cover a victoria sandwich without the sides being all wobbly?
A. The Victoria Sandwich Cake is simply a torte with very thin layers of pastry. (It
is really not even a cake.) My suggestion is to use a Quick Pour Fondant rather than try
to manipulate it too much with icing or sheets of fondant.
Q. How do you successfully get a good smooth finish to royal icing before
decorating?
A. If you follow the recipe for Royal Icing exactly, you should end up with a
smooth finish no matter what you do. This is simply a skill to do with manipulating your
spatula so that the icing is smooth. There is no secret to it. If you are getting waves or
mounds of icing you might want to consider adding a bit of corn syrup to thin it out.
Q. Are the actual cake decorating classes worthwhile, or can I learn from a
book?
A. Many, many people learn cake decorating from books. However, others prefer
hands on instruction with a teacher. It really depends on what kind of learner you are.
Q. What are some of the basic tools that you need to make beautiful cakes.
I can't afford to have every gadget.
A. You need a good quality spatula, a sharp bread knife, baking pans that are not
warped, icing bags, one coupler and at least three icing tips to give your designs some
variety.
Cake Decorating Made Easy!
142
Q. I want a frosting that can be used for all decorations plus taste good not artificial.
A. The icing you want is homemade buttercream icing (not frosting!) You can ice
and decorate a cake with buttercream. If you don’t want it to taste artificial use pure vanilla extract instead of artificial vanilla extract.
Q. What ingredients should I use to make royal icing (for piping) so that it
doesn't set too hard (and you break your teeth on a shell!)? Especially for wedding cakes when the cakes may be made well in advance of the date.
A. Unfortunately, this is a scientific impossibility as royal icing decorations are
meant to be hard. Your only solution may be to make the cake a couple of days in advance instead of weeks as the longer Royal Icing sits, the harder it gets.
Q. How do you use modeling chocolate?
A. There is no such thing as modeling chocolate as true chocolate melts at skin
temperature. You can however buy sheets of chocolate fondant which you can mold the
same way you would clay. You simply roll the fondant out and stretch it or pinch it into
the desired shapes.
Q. Should a fondant covered cake be refrigerated?
A. All iced cakes should be refrigerated. Although fondant does not go bad fast,
ingredients in the cake it is wrapped on (eggs, cream, etc.) can go bad quickly.
Q. I would like to learn the technique on how to make topsy turvy cakes.
A. Topsy turvy cakes are created by shaving off the base of the base tier so it
slants in one direction. The next tier is plopped on with the tier shaved off in the opposite direction. Tiers are stacked on until the topsy turvy effect is achieved. (See photo.)
Cake Decorating Made Easy!
143
An example of a topsy turvy cake.
Q. When icing a cake, do you really need to use apricot glaze or marzipan
or can you ice directly on the cake?
A. You can use any kind of icing to frost a cake. Marzipan is never used to ice a
cake as it is a solid molding material. Apricot glaze is used to prepare the cake for icing.
It is not an icing in itself.
Q. Where is a good online supplies shop that has an easy to use website?
A. Good websites for all international and U.S. customers are, www.jo-anns.com,
www.candylandcrafts.com, www.instawares.com, and www.kerekesequip.com.
Cake Decorating Made Easy!
144
Q. I would love to know how to decorate a cake for someone who suffers
from many allergies, for example to colors, too much sugar, eggs, dairy, nuts,
wheat and soy! Sorry, it's a tough one!
A. In this instance you may be best off simply to use fresh fruit such as strawberries or blueberries and arrange them in a pleasing design.
Q. I would like to know more about painting cakes, sources for supplies
and instructions.
A. For information about painting cakes and painting supplies visit
www.jo-anns.com or www.candylandcrafts.com.
Q. How do you do spray coloring - do you need the special spray machine
or can you use something else - especially for red flowers.
A. The special spray machine that professional cake decorators use is called a
cake decorating or pastry airbrush. It is usually prohibitively expensive for beginners.
Your easiest option is to buy aerosol cake paint, which is available at
www.kerekesequip.com.
- The End -
Cake Decorating Made Easy!
145
BONUS ARTICLE
“5 Simple Secrets To Perfectly Smooth Icing”
by Samantha Mitchell
Are you fed-up with bumps, blotches, and crumbs in your icing? Do you
go through the trouble of a basket weave simply so the sides of your cake
won’t show?
In this article, I’m going to teach you some quick & easy, low-cost ways to
make your icing smooth as a baby’s behind.
Believe it or not, some cake artists are so highly-skilled that all they need
is an 8” spatula and a turntable. Others hold firm to the belief that for a
“perfect” look - always use fondant.
I don’t know about you, but I need more options. Here are my top 5:
Secret #1: Warm A Spatula
Heat up a spatula by holding it under hot water before smoothing out the
icing. (Just make sure to wipe the excess water off of the spatula before
you use it.)
Secret #2: “Quick Pour Fondant”
If you are not planning to use fondant to decorate your cake but simply
want it to have a very smooth surface, you might try “Quick Pour
Fondant.”
This type of fondant is poured over the cake and allowed to harden like a
very thick glaze. (Kinda like the chocolate coating they dip ice cream
cones into.) For a terrific Quick Pour Fondant recipe, see page 85 of
“Cake Decorating Made Easy!”
Secret #3: Parchment Paper & Palm
First, use buttercream icing and smooth out what you can with a spatula.
Let it dry about 5 minutes to form a crust. (This works best with icing that
“crusts.”)
Then, gently place a sheet of parchment paper on the area you need to
smooth out and rub it with the palm of your hand. The warmth of your
hand often softens the icing just enough to produce a very smooth
Cake Decorating Made Easy!
146
surface.
You can use your fingers on the paper by gently pushing in any stubborn
ridges and then your palm again to smooth any indentations left by your
fingers.
You can also use a spatula on top of the paper to “iron out the wrinkles.”
(You’re going to love how well this works!)
Secret #4: When In Doubt, Glaze
Glaze the surface of the cake first. The glaze acts as a sealant to prevent
the icing from picking up any crumbs. It also coats the cake slightly and
covers any imperfections on the cake’s surface.
Then simply use a spatula to ice the cake. A medium thick icing
consistency is best for creating a smooth surface.
Secret #5: Paper Towel Patterns
Did you know you could lightly press a textured paper towel onto the
surface of your cake to get a nice pattern? Well, you can! The finished
look is, of course, completely dependent on the design of the towel. Ice it
up, wait 5 minutes, then smooth your paper towel over the cake. With
very little practice, it’ll resemble lace.
If you prefer not to have the “lace design” of the paper towel, look for a
brand that won't leave it’s design (there are a few).
NOTES: If you are getting waves or mounds of icing you might want to
consider adding a bit of corn syrup to thin it out.
If you’re still having trouble, try covering your cake with a crumb coat (thin
layer of icing) first. Let it dry, then go for the full icing. Depending on the
cake, you may even need to freeze it first before icing so it doesn't fall
apart. Just be sure to defrost the iced cake before you serve it!
Remember, practice makes perfect!
Cake Decorating Made Easy!
147
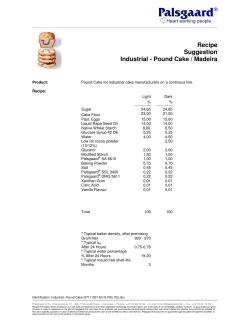
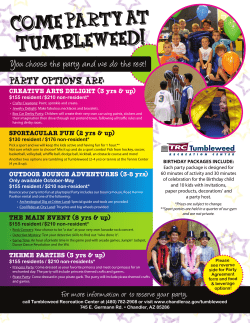
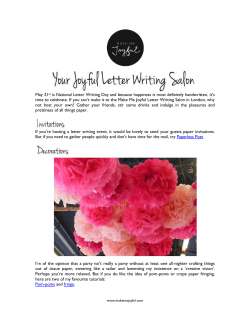


© Copyright 2026