
Online Banking South Africa
Online Banking South Africa User Guide Shaping the Digital Experience March 2015 Account Online Banking User Guide 1 Table of Contents Table of Contents ............................................................................................................................................ 2 1. AN INTRODUCTION TO ONLINE BANKING .............................................................................................. 15 1.1 Introduction ............................................................................................................................................ 16 1.2 An Overview of Online Banking Functionality ......................................................................................... 16 1.3 Primary and Secondary Users ................................................................................................................. 17 1.4 Client ID and Support Number ................................................................................................................ 17 1.5 Online Assistance .................................................................................................................................... 18 1.6 User Guide .............................................................................................................................................. 18 1.7 File Layouts and Import Templates ......................................................................................................... 18 1.8 Online Banking Security .......................................................................................................................... 19 1.8.1 Personalised Login Credentials .......................................................................................................................... 20 1.8.1.1 User ID ........................................................................................................................................................ 20 1.8.1.2 Password .................................................................................................................................................... 20 1.8.2 View Login History ............................................................................................................................................. 20 1.8.3 One Time PIN (OTP) ........................................................................................................................................... 21 1.8.4 Daily Profile Limits ............................................................................................................................................. 21 1.8.5 inContact Messaging ......................................................................................................................................... 21 1.8.6 Webroot® SecureAnywhere™ ............................................................................................................................ 22 1.9 Fraud Prevention Centre ......................................................................................................................... 23 1.10 Channel Stand-In................................................................................................................................... 24 2. PRE-LOGIN FUNCTIONALITY ................................................................................................................... 25 2.1 Logging in ............................................................................................................................................... 26 3. ONLINE BANKING NAVIGATION AND COMMON FUNCTIONS ................................................................. 27 3.1 Page Layout ............................................................................................................................................ 28 3.1.1 Page Header Options ......................................................................................................................................... 30 Help ........................................................................................................................................................................ 30 Apply Online Now ................................................................................................................................................... 30 Contact Us .............................................................................................................................................................. 30 Compliments and Complaints................................................................................................................................. 30 Inbox....................................................................................................................................................................... 31 Online Banking Settings.......................................................................................................................................... 31 Log Out ................................................................................................................................................................... 31 3.1.2 Page Footer Information .................................................................................................................................... 32 Client ID .................................................................................................................................................................. 32 Support Number ..................................................................................................................................................... 32 Technical Reference................................................................................................................................................ 32 3.1.3 Main Tabs and Sub-Tabs .................................................................................................................................... 33 3.1.4 Menu Options .................................................................................................................................................... 34 Online Banking User Guide 2 Menu ...................................................................................................................................................................... 34 Extended Menu Lists............................................................................................................................................... 34 3.1.5 Page Buttons...................................................................................................................................................... 35 Table Actions .......................................................................................................................................................... 35 Easy Buttons ........................................................................................................................................................... 35 Quick Links.............................................................................................................................................................. 35 Page Actions ........................................................................................................................................................... 36 3.2 Common Functionality ............................................................................................................................ 37 3.2.1 Page Navigation ................................................................................................................................................ 37 Number of Records to Display ................................................................................................................................ 37 Paging Options ....................................................................................................................................................... 37 3.2.2 Hyperlink Navigation ......................................................................................................................................... 38 3.2.3 Sorting Function ................................................................................................................................................. 38 3.2.4 Search Table Action ........................................................................................................................................... 38 3.2.5 Account Switchers .............................................................................................................................................. 39 4. ONLINE BANKING SETTINGS ................................................................................................................... 40 4.1 Online Banking Settings Overview .......................................................................................................... 41 ONLINE BANKING SUB-TAB ..................................................................................................................................... 42 4.2 Online Banking Sub-Tab Overview .......................................................................................................... 43 4.3 Limits....................................................................................................................................................... 44 4.3.1 Daily Profile Limits ............................................................................................................................................. 44 4.4 Secondary User ....................................................................................................................................... 47 4.4.1 Add a Secondary User ........................................................................................................................................ 48 4.4.2 View a Secondary User’s Profile ......................................................................................................................... 50 4.4.3 Maintain a Secondary User's Profile and Permissions ....................................................................................... 51 4.4.4 Delete a Secondary User .................................................................................................................................... 52 4.5 View Permissions .................................................................................................................................... 53 4.6 View Login History .................................................................................................................................. 54 4.7 Security ................................................................................................................................................... 55 4.7.1 OTP - One Time PIN............................................................................................................................................ 55 4.7.1.1 Where can you maintain OTP delivery preferences? .................................................................................. 55 4.7.1.2 Maintain OTP Preferences .......................................................................................................................... 56 4.7.1.2.1 Primary User's OTP Preferences .............................................................................................................. 56 4.7.1.2.2 Secondary User's OTP Preferences .......................................................................................................... 57 4.7.2 Change User ID & Password .............................................................................................................................. 58 4.8 Preferences ............................................................................................................................................. 59 4.8.1 Default Account Settings.................................................................................................................................... 59 4.8.2 Visible Accounts ................................................................................................................................................. 60 BANKING SUB-TAB ................................................................................................................................................ 61 4.9. Banking Sub-Tab Overview .................................................................................................................... 62 4.10 Manage My Subscriptions .................................................................................................................... 63 Online Banking User Guide 3 4.10.1 inContact.......................................................................................................................................................... 63 4.10.1.1 Register for inContact ............................................................................................................................... 64 4.10.1.2 Maintain your inContact Details ............................................................................................................... 65 4.10.2 FNB App ........................................................................................................................................................... 66 4.10.2.1 Link your Device with your Online Banking Profile ................................................................................... 67 4.10.2.2 Maintain your FNB Banking App Transaction Limits ................................................................................ 68 4.10.2.3 Delink a Device from your Online Banking Profile .................................................................................... 68 4.10.3 Cellphone Banking ........................................................................................................................................... 69 4.10.3.1 Register for Cellphone Banking ................................................................................................................ 70 4.10.3.2 Maintain your Cellphone Banking Profile ................................................................................................. 71 4.11 Alerts ..................................................................................................................................................... 72 4.11.1 My Balance Alerts ............................................................................................................................................ 72 4.11.1.1 Register for the My Balance Alert Service................................................................................................. 73 4.11.1.2 Maintain your My Balance Alert Service................................................................................................... 74 4.11.1.3 Cancel My Balance Alert Service............................................................................................................... 75 4.11.2 My Limit Alerts ................................................................................................................................................. 76 4.11.2.1 Register for the My Limit Alert service ..................................................................................................... 77 4.11.2.2 Maintain your My Limit Alert Service ....................................................................................................... 78 4.11.2.3 Cancel the My Limit Alert Service ............................................................................................................. 79 4.11.3 Scheduled Payment Alerts ............................................................................................................................... 80 4.11.3.1 Register for Scheduled Payment Alerts..................................................................................................... 81 4.11.3.2 Maintain your Scheduled Payment Alert Details ...................................................................................... 82 4.11.3.3 Cancel the Scheduled Payment Alert Service ............................................................................................ 83 YOUR DETAILS SUB-TAB ......................................................................................................................................... 84 4.12 Your Details Sub-Tab Overview ............................................................................................................. 85 4.13 Personal Details .................................................................................................................................... 86 4.14 Business Details .................................................................................................................................... 88 4.15 Business Directory ................................................................................................................................. 90 4.15.1 Register ............................................................................................................................................................ 91 4.15.2 View Registered Branches................................................................................................................................ 92 4.15.3 Maintain Business Directory Information ........................................................................................................ 93 4.15.3.1 Add a Branch ............................................................................................................................................ 93 4.15.3.2 Update Branch Information...................................................................................................................... 94 4.15.3.3 Hide a Branch ........................................................................................................................................... 95 4.15.3.4 Display a Branch ....................................................................................................................................... 96 4.15.4 Delete a Branch................................................................................................................................................ 96 4.16 Third Party ............................................................................................................................................ 97 4.16.1 Account Relationships Overview ...................................................................................................................... 97 CUAC Relationships with Individuals........................................................................................................................... 98 4.16.1.1 Add an Account Relationship with an Individual ...................................................................................... 98 4.16.1.1.1 Account Roles - Individual...................................................................................................................... 99 4.16.1.1.2 Add New Relationship - Individual ....................................................................................................... 100 4.16.1.2 Maintain Account Permissions - Individual............................................................................................. 101 Online Banking User Guide 4 4.16.1.3 Delete Account Permissions - Individual ................................................................................................. 102 4.16.1.4 View all CUAC Relationships Linked to an Account - Individual .............................................................. 103 4.16.1.5 View the Account Permissions Assigned to an Individual ....................................................................... 103 CUAC Relationships with Businesses ......................................................................................................................... 104 4.16.1.6 Add an Account Relationship with a Business ........................................................................................ 104 4.16.1.6.1 Account Roles - Business...................................................................................................................... 104 4.16.1.6.2 Create a CUAC Relationship - Business ................................................................................................ 105 4.16.1.7 View Sent Requests - Business ................................................................................................................ 106 4.16.1.8 View Received Requests - Business ......................................................................................................... 106 4.16.1.9 Accepting a CUAC Relationship Request................................................................................................. 107 4.16.1.10 Maintain Account Permissions - Business ............................................................................................. 108 4.16.1.11 Delete Account Permissions - Business ................................................................................................. 109 4.16.1.12 View all CUAC Relationships Linked to an Account - Business .............................................................. 110 4.16.1.13 View the Account Permissions Assigned to a Business ......................................................................... 110 4.16.2 Related Parties Overview ............................................................................................................................... 111 4.16.2.1 Add a Related Party ................................................................................................................................ 112 4.16.2.2 Maintain a Related Party ....................................................................................................................... 113 4.16.2.3 Delete a Related Party ............................................................................................................................ 115 4.16.2.4 View Related Parties............................................................................................................................... 116 4.16.3 BEE Application .............................................................................................................................................. 117 4.16.3.1 Register for a BEE Certificate .................................................................................................................. 117 4.16.3.1 Renew your existing BEE Certificate ....................................................................................................... 118 6. NEWS TAB ............................................................................................................................................ 119 5.1 News Tab Overview .............................................................................................................................. 120 7. REWARDS TAB ..................................................................................................................................... 121 6.1 Rewards Tab Overview ......................................................................................................................... 122 6.1.1 What is eBucks? ............................................................................................................................................... 122 6.1.2 The Rewards Tab Landing Page ....................................................................................................................... 123 6.2 eBucks Functionality ............................................................................................................................. 124 6.2.1 Go to eBucks.com ............................................................................................................................................ 124 6.2.2 Order eBucks Card ........................................................................................................................................... 124 6.2.3 Join eBucks or Link Now ................................................................................................................................... 125 8. MY BANK ACCOUNTS TAB .................................................................................................................... 126 7.1 My Bank Accounts Overview................................................................................................................. 127 MY ACCOUNTS SUB-TAB ...................................................................................................................................... 129 7.2. My Accounts Overview ........................................................................................................................ 130 7.2.1 My Accounts Landing Page .............................................................................................................................. 130 7.3 eZiPay.................................................................................................................................................... 131 7.4 eZiTransfer ............................................................................................................................................ 132 7.5 eZiStatements ....................................................................................................................................... 133 Online Banking User Guide 5 7.6 Account Settings: General ..................................................................................................................... 134 7.6.1 Amend Basic Account Settings ......................................................................................................................... 135 7.7 Account Settings: Cheque Accounts ...................................................................................................... 136 7.7.1 Upgrade Cheque Account ................................................................................................................................ 137 7.7.2 Open Savings Pocket ........................................................................................................................................ 138 7.7.3 Debit Order Switching ...................................................................................................................................... 139 7.7.4 Stop Cheque ..................................................................................................................................................... 141 7.7.4.1 Add a Stop Cheque Instruction ................................................................................................................. 142 7.7.4.2 View Stop Cheque Instructions ................................................................................................................. 143 7.7.4.3 Cancel a Stop Cheque Instruction ............................................................................................................. 144 7.7.5 Stop Debit Order .............................................................................................................................................. 145 7.7.5.1 Add a Stop Debit Order Instruction........................................................................................................... 146 7.7.5.2 View Stop Debit Order Instructions .......................................................................................................... 147 7.7.6 Overdraft Maintenance ................................................................................................................................... 148 7.7.6.1 Apply for an Overdraft.............................................................................................................................. 149 7.7.6.2 Increase Overdraft Facility........................................................................................................................ 150 7.7.6.3 Decrease the Limit of an Existing Overdraft Facility ................................................................................. 151 7.7.6.4 Cancel Overdraft Facility .......................................................................................................................... 152 7.7.7 Apply for a Temporary Loan ............................................................................................................................ 153 7.7.8 Apply for a Revolving Loan............................................................................................................................... 154 7.7.9 Notification Services ........................................................................................................................................ 155 7.7.9.1 inContact .................................................................................................................................................. 155 7.7.9.2 Balance Alert ............................................................................................................................................ 155 7.7.9.3 Limit Alert ................................................................................................................................................. 155 7.7.9.4 Scheduled Payment Alert.......................................................................................................................... 155 7.7.10 Order Tablet / Smartphone ............................................................................................................................ 157 7.8 Account Settings: Credit Card Accounts ................................................................................................ 158 7.8.1 Upgrade Credit Card ........................................................................................................................................ 159 7.8.2 Increase Credit Limit ........................................................................................................................................ 160 7.8.3 Balance Transfer .............................................................................................................................................. 161 7.8.4 Credit Limit Shifts ............................................................................................................................................. 163 7.8.5 Auto Payment .................................................................................................................................................. 164 7.8.5.1 Add an Auto Payment............................................................................................................................... 165 7.8.5.2 View Auto Payment .................................................................................................................................. 167 7.8.5.3 Maintain Auto Payment ........................................................................................................................... 168 7.9 Account Settings: Investment Accounts ................................................................................................ 169 7.9.1 Interest Instruction .......................................................................................................................................... 170 7.9.1.1 Maintain Interest Instruction.................................................................................................................... 171 7.9.1.2 Delete an Interest Instruction ................................................................................................................... 172 7.9.2 Maturity Instruction ......................................................................................................................................... 173 7.9.2.1 Add a Maturity Instruction ....................................................................................................................... 174 7.9.2.2 Maintain Maturity Instruction .................................................................................................................. 175 7.9.2.3 Delete a Maturity Instruction ................................................................................................................... 176 Online Banking User Guide 6 7.9.3 Notice to Withdraw ......................................................................................................................................... 177 7.9.3.1 Add Notice to Withdraw Instruction ......................................................................................................... 178 7.9.3.2 Maintain Pending Notice to Withdraw Instruction................................................................................... 180 7.9.3.3 Delete Pending Notice to Withdraw Instruction ....................................................................................... 181 7.10 Transaction History ............................................................................................................................. 182 7.10.1 View Transaction History ............................................................................................................................... 182 7.10.2 Detailed Transaction Information .................................................................................................................. 183 7.10.3 Search Transaction History ............................................................................................................................ 185 7.11 Detailed Balance ................................................................................................................................. 188 7.12 Statements .......................................................................................................................................... 189 7.12.1 Statement History .......................................................................................................................................... 190 7.12.2 Interim Statements ........................................................................................................................................ 192 7.12.3 Recreated Statements.................................................................................................................................... 193 7.12.3.1 Search for a Recreated Statement .......................................................................................................... 194 7.12.3.2 Export a Recreated Statement................................................................................................................ 195 7.12.4 Email Statements ........................................................................................................................................... 196 7.12.4.1 Subscribe to Email Statements ............................................................................................................... 197 7.12.4.2 Maintain Email Statement Settings ........................................................................................................ 198 7.12.4.3 Unsubscribe from Email Statements ...................................................................................................... 199 7.12.5 Tax Certificates .............................................................................................................................................. 200 7.13 Instant Solutions ................................................................................................................................. 201 7.13.1 Instant Accounting ......................................................................................................................................... 202 7.13.2 Instant Financial Management ...................................................................................................................... 203 7.13.3 Instant Payroll ................................................................................................................................................ 204 7.13.4 Merchant Insights .......................................................................................................................................... 205 7.14 FNB Connect........................................................................................................................................ 206 MY CARDS SUB-TAB ............................................................................................................................................ 207 7.15 My Cards Sub-Tab Overview ............................................................................................................... 208 7.16 Activate Card ...................................................................................................................................... 209 7.17 Reactivate Card ................................................................................................................................... 210 7.18 Update Card Delivery Details .............................................................................................................. 211 7.19 Online Secure ...................................................................................................................................... 213 7.19.1 Activate Online Secure ................................................................................................................................... 214 7.19.2 Update Online Secure Details ........................................................................................................................ 215 7.19.3 Unblock Card for Online Secure ..................................................................................................................... 216 7.20 Maintain Card Limits........................................................................................................................... 217 7.21 PIN Management ................................................................................................................................ 218 7.21.1 View PIN......................................................................................................................................................... 218 7.21.2 Create / Modify PIN ....................................................................................................................................... 219 7.22 Cancel Card ......................................................................................................................................... 220 7.23 Order Replacement Card..................................................................................................................... 221 7.24 Order Additional Card ......................................................................................................................... 223 Online Banking User Guide 7 7.25 Customer to Account (CUAC) Relationships ........................................................................................ 225 7.26 (CUAC) Relationships - Replace Business Cheque or Petrol Card ........................................................ 227 7.26.1 Sole Authorised Representative (SAR)/ Transactor replacing their own business card from their personal profile ....................................................................................................................................................................... 227 7.26.2 A Transactor replacing another cardholder’s business card from their (Transactor’s) personal profile ........ 228 7.26.3 A Cardholder replacing their own business card from their personal profile ................................................. 229 7.26.4 A Primary User replacing another cardholder’s business card from the business profile .............................. 230 7.27 Customer to Account (CUAC) Relationships - Order a Business Cheque and Petrol Card ................... 231 7.27.1 Sole Authorised Representative (SAR)/ Transactor ordering their own business card from their personal profile ....................................................................................................................................................................... 231 7.27.2 Transactor ordering a business card for another cardholder from their (Transactor’s) personal profile ....... 232 7.27.3 A Primary User ordering a business card for another cardholder from the business profile.......................... 233 7.28 Add and or Maintain Cardholder ........................................................................................................ 234 7.28.1 Transactor adding another cardholder – CUAC functionality from their personal profile ............................. 234 7.28.2 Primary User adding a new cardholder – CUAC functionality from the business profile ............................... 235 7.29 Maintain Business Cheque and Petrol Card Limits.............................................................................. 236 7.29.1 Sole Authorised Representative (SAR)/Transactor maintaining their own business card limits from their personal profile ......................................................................................................................................................... 236 7.29.2 Transactor maintaining another cardholders business limits from their personal profile ............................. 236 7.29.3 Primary User maintaining another cardholders business limits from the business profile ............................ 237 7.30 Cancel Card ......................................................................................................................................... 238 7.30.1 Sole Authorised Representative (SAR)/Transactor cancelling his own business card from his personal profile .................................................................................................................................................................................. 238 8.TRANSFER TAB .......................................................................................................................................... 239 8.1 Transfers Tab Overview ........................................................................................................................ 240 8.1.1 Transfer Functionality ...................................................................................................................................... 241 BETWEEN ACCOUNTS SUB TAB ............................................................................................................................... 242 8.2 Transfer Funds Between Accounts ........................................................................................................ 243 8.3 Transfer Funds to Budget...................................................................................................................... 244 8.4 Transfer Funds to or from a Global Account ......................................................................................... 245 8.5 Transfer History .................................................................................................................................... 249 8.5.1 View Transfer History....................................................................................................................................... 249 8.5.2 Search Transfer History .................................................................................................................................... 249 8.6 Forex Transfer History ........................................................................................................................... 251 8.7 Loan Account Transfers......................................................................................................................... 253 8.7.1 Loan Account - Request Deposit ...................................................................................................................... 254 8.7.2 Loan Account - Request Withdrawal................................................................................................................ 255 8.8 Unit Trust Transfers .............................................................................................................................. 256 8.8.1 Lump Sum Transfers ........................................................................................................................................ 256 8.8.2 Disinvest Funds ................................................................................................................................................ 257 SCHEDULED TRANSFERS SUB-TAB ........................................................................................................................... 259 Online Banking User Guide 8 8.9 Scheduled Transfers Overview .............................................................................................................. 260 8.9.1 Create a Scheduled Transfer ............................................................................................................................ 261 8.9.2 View Scheduled Transfers ................................................................................................................................ 262 8.9.3 Maintain a Scheduled Transfer ........................................................................................................................ 263 8.9.4 Delete a Scheduled Transfer ............................................................................................................................ 264 9. PAY TAB ............................................................................................................................................... 265 9.1 Pay Tab Overview ................................................................................................................................. 266 9.1.1 Payment Functionality ..................................................................................................................................... 267 9.1.2 Payment Service Types..................................................................................................................................... 267 9.2 Business Rules for Payment Transactions ............................................................................................. 268 9.2.1 Daily Profile Limits ........................................................................................................................................... 268 9.2.2 Cross Border Payments .................................................................................................................................... 269 9.2.3 Pay and Clear Now........................................................................................................................................... 269 9.2.4 Payment Cut Off Times .................................................................................................................................... 269 9.2.5 Payment Processing Times............................................................................................................................... 271 9.2.6 Payment Clearing Times .................................................................................................................................. 271 9.2.7 Alpha Numeric Character Rules / Payment and Reference Names .................................................................. 271 9.2.8 Bank Account Number Rules ............................................................................................................................ 272 9.3 Payment Reversals ................................................................................................................................ 273 Payment Reversal Process and Documentation: .................................................................................................. 273 Important Information about Reversals: .............................................................................................................. 273 Reversals from an FNB Account:........................................................................................................................... 274 Reversals from a non-FNB Account: ..................................................................................................................... 274 PAYMENTS SUB-TAB ............................................................................................................................................ 275 9.4 Payments Sub-Tab Overview ................................................................................................................ 276 9.4.1 Payments Sub-Tab Functionality...................................................................................................................... 276 9.4.1.1 Pay Recipient Landing Page .......................................................................................................................... 277 9.5 Pay a Recipient...................................................................................................................................... 279 9.6 Add a Recipient ..................................................................................................................................... 281 9.6.1 Add a Beneficiary to your Recipient List ........................................................................................................... 282 9.6.2 Add a Public Recipient to your Recipient List ................................................................................................... 283 9.7 View and Search Recipient List ............................................................................................................. 284 9.8 Maintain a Recipient ............................................................................................................................. 285 9.9 Delete a Recipient ................................................................................................................................. 286 9.10 Branch Code Search ............................................................................................................................ 287 9.11 Validate Recipient ............................................................................................................................... 288 9.12 Verify Account Owner ......................................................................................................................... 289 9.12.1 Verify Account Owner Responses................................................................................................................... 290 9.12.2 Verify a Single Account Owner ....................................................................................................................... 291 9.12.3 Verify Multiple Account Owners .................................................................................................................... 291 9.12.4 View Verify Account Owner History ............................................................................................................... 292 Online Banking User Guide 9 9.12.4 Delete Verify Account Owner History............................................................................................................. 292 9.13 View Public Recipients ........................................................................................................................ 293 9.14 Payment History ................................................................................................................................. 294 9.14.1 View Payment History .................................................................................................................................... 294 9.14.2 Search Payment History ................................................................................................................................. 294 9.15 Recipient Payment History .................................................................................................................. 296 9.16 Proof of Payment Notifications ........................................................................................................... 297 9.16.1 Create or Resend a Proof of Payment Notification ........................................................................................ 298 9.16.2 Download or Print a Proof of Payment Notification ...................................................................................... 298 ONCE OFF PAYMENTS SUB-TAB ............................................................................................................................ 299 9.17 Once-Off Payment .............................................................................................................................. 300 9.17.1 Make a Once-Off Payment............................................................................................................................. 301 9.17.2 Make a Once-Off Payment to a Public Recipient ........................................................................................... 302 PENDING PAYMENTS SUB-TAB .............................................................................................................................. 303 9.18 Pending Payments .............................................................................................................................. 304 9.18.1 Create an Import Payment File ...................................................................................................................... 305 9.18.2 Import a Payment File.................................................................................................................................... 305 9.18.3 View Pending Payments................................................................................................................................. 306 9.18.4 Pay Pending Payment Batches....................................................................................................................... 306 9.18.5 Delete Pending Payment Batches .................................................................................................................. 306 SCHEDULED PAYMENTS SUB TAB ............................................................................................................................ 307 9.19 Scheduled Payments Overview ........................................................................................................... 308 9.19.1 Create a Scheduled Payment ......................................................................................................................... 309 9.19.2 View Scheduled Payments ............................................................................................................................. 310 9.19.3 Maintain a Scheduled Payment ..................................................................................................................... 311 9.19.4 Delete a Scheduled Payment ......................................................................................................................... 312 TRAFFIC FINES SUB-TAB ........................................................................................................................................ 313 9.20 Traffic Fines Overview ......................................................................................................................... 314 9.20.1 View or Search Traffic Fines ........................................................................................................................... 314 9.20.2 Pay Traffic Fine .............................................................................................................................................. 315 9.20.3 View Traffic Fine Payment History ................................................................................................................. 316 EFILING SUB-TAB ................................................................................................................................................. 317 9.21 eFiling Overview .................................................................................................................................. 318 10. BUY TAB ........................................................................................................................................... 319 10.1 Buy Tab Overview ............................................................................................................................... 320 AIRTIME & BUNDLES SUB-TAB ............................................................................................................................... 321 10.2 Airtime and Bundles Overview ............................................................................................................ 322 10.3 My Phonebook .................................................................................................................................... 323 10.3.1 Add a Recipient to your Phonebook ............................................................................................................... 323 10.3.2 Maintain a Recipient in your Phonebook ....................................................................................................... 324 10.3.3 Delete a Recipient from your Phonebook....................................................................................................... 324 Online Banking User Guide 10 10.4 Purchase Prepaid Airtime and Bundles for a Recipient ....................................................................... 325 10.5 Make a Once-Off Prepaid Purchase .................................................................................................... 326 10.6 Prepaid Purchase History - Airtime & Bundles .................................................................................... 327 10.6.1 View Prepaid Purchase History - Airtime and Bundles ................................................................................... 327 10.6.2 Search Prepaid Purchase History - Airtime and Bundles ................................................................................ 327 SCHEDULED PREPAIDS SUB-TAB ............................................................................................................................. 329 10.7 Scheduled Prepaid Purchases Overview.............................................................................................. 330 10.8 Create a Scheduled Prepaid Purchase................................................................................................. 331 10.9 View Scheduled Prepaid Purchases ..................................................................................................... 332 10.10 Maintain a Scheduled Prepaid Purchase .......................................................................................... 333 10.11 Delete a Scheduled Prepaid Purchase ............................................................................................... 334 ELECTRICITY SUB-TAB ........................................................................................................................................... 335 10.12 Prepaid Electricity Overview ............................................................................................................. 336 10.13 My Electricity Recipients ................................................................................................................... 337 10.13.1 Add a Recipient to your Electricity Recipient List ......................................................................................... 337 10.13.2 Maintain a Recipient in your Electricity Recipient List ................................................................................. 338 10.13.3 Delete a Recipient from your Electricity Recipient List ................................................................................. 338 10.14 Purchase Prepaid Electricity for a Recipient ..................................................................................... 339 10.15 Purchase Prepaid Electricity Once-Off .............................................................................................. 340 10.16 Claim Free Basic Electricity (FBE) Units for a Recipient ..................................................................... 341 10.17 Claim Free Basic Electricity (FBE) Units Once-Off.............................................................................. 342 10.18 Prepaid Electricity Purchase History ................................................................................................. 343 10.18.1 View Prepaid History - Electricity ................................................................................................................. 343 10.18.2 Search Prepaid Purchase History - Electricity ............................................................................................... 343 LOTTO SUB-TAB ................................................................................................................................................ 344 10.19 LOTTO Overview ............................................................................................................................... 345 10.20 Play LOTTO ........................................................................................................................................ 347 10.21 Play LOTTO QuickPick ....................................................................................................................... 348 10.22 View and Replay from your LOTTO History ....................................................................................... 349 POWERBALL SUB-TAB .......................................................................................................................................... 350 10.23 PowerBall Overview .......................................................................................................................... 351 10.24 Play PowerBall .................................................................................................................................. 353 10.25 Play PowerBall QuickPick .................................................................................................................. 354 10.26 View and Replay from your PowerBall History ................................................................................. 355 11. SEND MONEY TAB ............................................................................................................................ 356 11.1 Send Money Overview ........................................................................................................................ 357 SEND MONEY TO EWALLET SUB-TAB ...................................................................................................................... 358 11.2 eWallet - How it Works ....................................................................................................................... 359 11.3 My Phonebook - eWallet Recipients ................................................................................................... 360 Online Banking User Guide 11 11.3.1 Add a Recipient to your eWallet Phonebook.................................................................................................. 360 11.3.2 Maintain a Recipient in your eWallet Phonebook .......................................................................................... 361 11.3.3 Delete a Recipient from your eWallet Phonebook ......................................................................................... 361 11.4 Send Money to an eWallet.................................................................................................................. 362 11.4.1 Send Money to an eWallet - My Phonebook Recipient .................................................................................. 363 11.4.2 Send Money to an eWallet - Once-Off Payment ............................................................................................ 363 11.5 View eWallet Payment History ........................................................................................................... 364 SEND MONEY TO ZIMBABWE SUB-TAB .................................................................................................................... 365 11.6 Send Money to Zimbabwe - How it Works .......................................................................................... 366 11.7 Send Money to Zimbabwe .................................................................................................................. 367 11.7.1 Send Money to Zimbabwe - Once-Off Payment ............................................................................................. 368 11.8 View Send Money to Zimbabwe Payment History .............................................................................. 369 SEND MONEY TO MOZAMBIQUE SUB-TAB ............................................................................................................... 370 11.9 Send Money to Mozambique - How it Works ..................................................................................... 371 11.10 Send Money to Mozambique ............................................................................................................ 372 11.10.1 Send Money to Mozambique - Once-Off Payment....................................................................................... 373 11.11 View Send Money to Mozambique Payment History ........................................................................ 374 12. INVEST IN SHARES + GOLD TAB .............................................................................................................. 375 12.1 Invest in Shares and Gold Overview .................................................................................................... 376 12.1.1 Share Investing Products................................................................................................................................ 377 Tax-Free Shares .................................................................................................................................................... 377 Share Saver........................................................................................................................................................... 377 Share Builder ........................................................................................................................................................ 377 Share Investor....................................................................................................................................................... 378 MY PORTFOLIO SUB-TAB ...................................................................................................................................... 379 12.1.2 My Portfolio Overview ................................................................................................................................... 380 12.2 View Share Investing Portfolio ............................................................................................................ 381 12.3 View Shares Info ................................................................................................................................. 382 12.3.1 View Share Info - Share Builder ...................................................................................................................... 383 12.3.2 View Shares Info - Share Investor................................................................................................................... 384 12.4 View Krugerrand Info .......................................................................................................................... 385 12.5 View Daily Indicators .......................................................................................................................... 386 12.6 Buy Shares........................................................................................................................................... 387 12.6.1 Buy Shares - Share Saver................................................................................................................................ 387 12.6.2 Buy Shares - Share Builder ............................................................................................................................. 388 12.6.3 Buy Shares - Share Investor............................................................................................................................ 389 12.7 Buy Krugerrands ................................................................................................................................. 391 12.8 Sell Shares ........................................................................................................................................... 393 12.8.1 Sell Shares - Share Saver ................................................................................................................................ 394 12.8.2 Sell Shares - Share Builder.............................................................................................................................. 395 12.8.3 Sell Shares - Share Investor ............................................................................................................................ 396 Online Banking User Guide 12 12.9 Sell Krugerrands .................................................................................................................................. 398 12.10 Instruction Maintenance - Share Saver ............................................................................................. 400 12.11 Detailed Balance ............................................................................................................................... 401 12.12 Transaction History ........................................................................................................................... 402 12.12.1 View Cash Transaction History..................................................................................................................... 403 12.12.2 View Holdings Transaction History .............................................................................................................. 404 12.12.3 View Order History ....................................................................................................................................... 406 12.13 Cancel Order ..................................................................................................................................... 407 12.14 Switch/Upgrade Account .................................................................................................................. 408 MY NOTIFICATIONS.............................................................................................................................................. 410 12.15 My Notifications Overview................................................................................................................ 411 12.16 My Watch List ................................................................................................................................... 412 12.16.1 Add an Instrument to your Watch List ......................................................................................................... 413 12.16.2 View the Instruments on your Watch List .................................................................................................... 414 12.16.3 Maintain the Instruments on your Watch list .............................................................................................. 415 12.16.4 Remove an instrument from your Watch List .............................................................................................. 416 12.16.5 Buy an Instrument via your Watch List ........................................................................................................ 417 12.16.6 Sell an Instrument via your Watch List......................................................................................................... 418 12.17 My Price Alerts .................................................................................................................................. 419 12.17.1 Add a Price Alert on an Instrument .............................................................................................................. 420 12.17.2 View instruments with Price Alerts .............................................................................................................. 421 12.17.3 Maintain the Price Alert on an instrument .................................................................................................. 422 12.17.4 Remove the Price Alert on an Instrument .................................................................................................... 423 12.17.5 Buy an instrument via your Price Alert list ................................................................................................... 424 12.17.6 Sell an instrument via your Price Alert list ................................................................................................... 425 13. FOREX TAB ....................................................................................................................................... 426 13.1 Forex Tab Overview ............................................................................................................................ 427 13.1.1 Forex Tab Functionality.................................................................................................................................. 428 13.1.2 Currency Indicators ........................................................................................................................................ 430 14. PORTFOLIO TAB ................................................................................................................................ 431 14.1 Portfolio Management Overview........................................................................................................ 432 15. INSURANCE TAB ............................................................................................................................... 433 15.1 Insurance Tab Overview ...................................................................................................................... 434 LIFE + HEALTH SUB-TAB ....................................................................................................................................... 435 15.2 Life + Health Insurance Overview ....................................................................................................... 436 15.2.1 Get Quote .................................................................................................................................................. 436 15.2.2 View Policy Details..................................................................................................................................... 437 15.2.3 Request Policy Assistance .......................................................................................................................... 437 15.2.4 Request Claim Assistance .......................................................................................................................... 438 Online Banking User Guide 13 HOME, CAR + VALUABLES SUB-TAB ........................................................................................................................ 439 15.3 Home, Car + Valuables Insurance Overview ....................................................................................... 440 15.3.1 Get Quote .................................................................................................................................................. 440 15.3.2 View Policy Details..................................................................................................................................... 441 15.3.3 Request Policy Assistance .......................................................................................................................... 441 15.3.4 Request Claim Assistance .......................................................................................................................... 442 16. MERCHANT SERVICES ....................................................................................................................... 443 16.1 Merchant Services Overview ............................................................................................................... 444 16.2 Merchant Services - View Transaction History.................................................................................... 444 16.3 Merchant Services - View Transaction Details .................................................................................... 445 16.4 Merchant Services - View Receipts ..................................................................................................... 445 16.5 Merchant Services - Search Transactions ........................................................................................... 445 17. CONTACT US ..................................................................................................................................... 447 Online Banking User Guide 14 1. An Introduction to Online Banking Online Banking User Guide 15 1.1 Introduction Welcome to Online Banking, giving you banking convenience with greater flexibility wherever and whenever it suits you. Online Banking allows you the benefit of direct, secure and real-time electronic access to your FNB accounts, as well as the opportunity to manage your finances anytime, anywhere. 1.2 An Overview of Online Banking Functionality • A single view of all the accounts linked to your Online Banking profile • Real time account balances • Detailed transaction history and transaction search functionality. • Retrieval of current and historical account statements • Account maintenance • Stop cheques or debit orders • Transfer funds between your accounts, including future dated transfers and scheduled/recurring transfers • Make payments to 3rd parties, including future dated payments, scheduled/recurring payments or once-off payments • Send Money to a recipient without an account • Purchase Prepaid Services such as Airtime & Bundles and Electricity • Purchase LOTTO and PowerBall tickets • Buy and Sell Shares and Krugerrands • View your investment Portfolio • View your Insurance Portfolio • Buy Forex currency, make and receive Forex payments and top up or withdraw from your PayPal account. • Apply for banking products and services online. Online Banking User Guide 16 1.3 Primary and Secondary Users There are two types of users on Online Banking, a Primary User and a Secondary User. Primary User Owner of the Online Banking profile Has full access to all functionality relevant to the accounts that are linked to his profile Secondary User Third party user which has been added to the Online Banking profile by the Primary User Has limited access which is determined by the permissions, transact and/or viewing, that the Primary User sets An Online Banking user will only have access to the tabs, functions and menus that pertain to the accounts that they have and, in the case of a Secondary User, have been given permissions to. For security purposes, certain functionality is not available to Secondary Users at all and will not be displayed. 1.4 Client ID and Support Number o Your Client ID and Support Number will be shown in the footer at the bottom left of each page. When contacting FNB Online Assistance, our agents will require these numbers in order to assist you. o Online Banking User Guide 17 1.5 Online Assistance Help is at your fingertips 24/7. Online Assistance Contact Centre o Contact our Online Assistance agents at 087 575 0000 for navigational and technical assistance. o Our agents will require your unique Client ID and Support Number in order to assist you; these numbers are displayed at the bottom left of every page. Online Assistance Operating Hours Monday - Saturday 08h00 - 19h00 Sunday 08h00 - 13h00 Public Holidays Closed 1.6 User Guide For your convenience, a step by step User Guide is available for all functionality on Online Banking. Simply click on the Help icon in the page header options to access the Help content. 1.7 File Layouts and Import Templates The primary user has the option to add multiple recipients simultaneously via a file import into Online Banking. The required File Layouts and Templates are available in the Help Text; simply click on the Help icon in the pager header options to access these File Layouts. Online Banking User Guide 18 1.8 Online Banking Security Online Banking is continuously being enhanced and we are always investigating new methods to improve upon our security features. • Online Banking offers a multi-layered security approach: • Multi-layered firewalls • 128 bit Encryption • VeriSign Secure Server ID • Card number and PIN authentication • Personalised Login Credentials • The One Time PIN (OTP) • inContact Messaging • Webroot® SecureAnywhere™ Online Banking User Guide 19 The functionality listed below is available in the Online Banking Settings option in the page header. Please refer to the chapter about Online Banking Settings for further details. 1.8.1 Personalised Login Credentials You will require a User ID and Password to log into your Online Banking profile. These are created by you personally and should be kept safe at all times. Never share these details with anyone. 1.8.1.1 User ID • Minimum of 8 characters • Combination of alpha and numeric e.g. James007. 1.8.1.2 Password • Minimum of 7 characters, may not exceed 30 characters • Combination of upper and lower case letters (e.g. Abc) • Include at least one special character (e.g.!#%@$) • Include at least one numeric (e.g. 0 to 9) • The same character cannot be used consecutively, e.g. aardvark • Avoid sequential numbers or letters e.g. abcdef or 12346 • New passwords may not be the same as the previous 12 passwords • Passwords should never be similar to the User ID or any other personal details (e.g. name, I.D. number, e-mail address, date of birth). 1.8.2 View Login History You can view both successful and failed login events on your profile for the past 60 days. The Date & Time and the Status of the event will be displayed. If you are the Primary User you can View the Login History for each Secondary User that is linked to your profile. Online Banking User Guide 20 1.8.3 One Time PIN (OTP) The OTP is a unique 4-digit security PIN which is time-sensitive; you will be required to enter this OTP as confirmation when performing certain functions on Online Banking. When registering for Online Banking, you will be directed to a page requiring you to set-up your One Time PIN (OTP) preferences. SMS is the suggested means of receiving an OTP; if you do not have access to a cellphone, please contact Online Assistance to make alternative arrangements. Your OTP preferences can be maintained via your Online Banking Settings. When prompted to enter an OTP, if you do not receive your OTP within a few minutes, simply click on Resend to Primary Option; alternatively click on Resend to Secondary Option to have it resent. 1.8.4 Daily Profile Limits For your security, daily limits are applied to Payment and Transfer transactions on your Online Banking profile. All transactions performed by the Secondary Users on your profile accumulate towards your respective Daily Profile Limits. A Daily Profile Limit is made up of the following transaction limits: • Payment Limit o • Own Accounts Transfer o • Payments made to third parties Transfers made between your own accounts Linked Accounts Transfer o Transfers made from your own accounts to accounts that are linked to your profile. 1.8.5 inContact Messaging inContact is an innovative messaging service which keeps you in touch with financial transactions on your accounts as they occur. Receive alerts of account activity such as deposits, transfers, withdrawals and purchases on all your transactional accounts in real-time. All you need is your cellphone number or an email address! Online Banking User Guide 21 1.8.6 Webroot® SecureAnywhere™ We believe that the user's’ entire online experience needs to be secured, and not only their Online Banking. The sensitive information that you share on the internet is invaluable to fraudsters. If you do not protect this information all of the time, on all websites, your identity and your money may be at risk. Webroot® SecureAnywhere™ is a downloadable application that works on top of any anti-virus software and alongside all other security products on the user's PC. Unlike anti-virus software, it is designed to protect login details like your User ID and Password, and other personal credentials e.g. name, bank account details, addresses etc when banking, shopping and social networking online. Webroot® SecureAnywhere™ protects in three ways: 1. It helps to ensure that the websites that you access are genuine and it will alert you if the site that you are attempting to access is a reported phishing site 2. It can help to ensure that the login information entered is meant for the website being accessed 3. It protects personal information, even if there is existing malicious software running on the user's computer The Webroot® SecureAnywhere™ software can be downloaded from our website, www.fnb.co.za, and is quick and simple to install. For more information or to download the software, click on the Webroot® SecureAnywhere™ hyperlink. Online Banking User Guide 22 1.9 Fraud Prevention Centre Contact the Fraud Prevention Centre at 087 575 9444 to report fraud, suspected fraud or for any other fraud related queries or information. The Fraud Prevention Centre is available 24/7/365. Please forward suspicious emails to [email protected] for investigation. Our Fraud Prevention Centre provides a host of information on our website to help you keep up to date with the latest security threats within the online environment and offers advice on how to guard yourself against these. The Fraud Prevention link is located on the top right of the home page above the Online Banking Login fields. Online Banking User Guide 23 1.10 Channel Stand-In To further enhance Online Banking, Channel Stand-In functionality is available. If we are performing routine maintenance or, in the event of an unforeseen system outage, you will still be able to perform limited functionality on Online Banking, thus eliminating the inconvenience of complete system unavailability. All non-core functionality / menu items will be hidden and will not be accessible when Channel StandIn has been invoked. Click on the hyperlink in the Maintenance message to view a list of functionality that is available during Stand-In. To minimise customer inconvenience, major system maintenance is only done outside of normal banking hours. Online Banking User Guide 24 2. Pre-Login Functionality Online Banking User Guide 25 2.1 Logging in The login function is used to log into the system. You will need a User ID and Password. Online Banking User Guide 26 3. Online Banking Navigation and Common Functions Online Banking User Guide 27 3.1 Page Layout An Online Banking user will only have access to the tabs, functions and menus that pertain to the accounts that they have and, in the case of a Secondary User, have been given permissions to. For security purposes, certain functionality is restricted to the Primary User and will not be displayed to Secondary Users. General Page Layout: Please note that this is not an actual Online Banking page; it is an illustration of the various components that can be present on different pages. Online Banking User Guide 28 Menu Layout: Online Banking User Guide 29 3.1.1 Page Header Options Page Header Options: The following options are accessible on the top right of every page: Help Click on the Help icon (?) in the page header options to access the Online Banking User Guide as well as File Layouts, Templates and Forms. The Help contains the following information: • Online Banking User Guide • Recipient Import User Guide • Cut-Off Times • Participating Banks • Payment Reversal Process and Forms • Recipient Import Template • Bulk Payments Import Template • Webroot® SecureAnywhere™ - FAQ Doc Apply Online Now Use this function to apply for FNB accounts directly from your Online Banking session. Contact Us Use this function to view the contact details or to submit an email to either Online Assistance or your Relationship Banker. Compliments and Complaints Use this function to submit Queries, Suggestions, Complaints or Compliments. Your email will be directed to the relevant department. Online Banking User Guide 30 Inbox Business Clients have an Online Banking Inbox to which they can download certain Online Banking files and documents. Select the required file in your Inbox and then click on: • Download to view or save the file • Delete to permanently delete the file from your Inbox Online Banking Settings This is where a user can maintain their profile settings such as user preferences, personal details, profile limits and, if you are a Primary User, you can add and maintain Secondary Users. Online Banking Settings will be covered in a separate chapter. Log Out Click on the Log Out button to end your Online Banking session. Online Banking User Guide 31 3.1.2 Page Footer Information Page Footer Information: The following information is displayed on the bottom left of every page: Client ID The Client ID is created when a Primary User registers for Online Banking and is used to identify the Online Banking profile. The Primary and Secondary Users will have the same Client ID as they are using the same profile. Support Number The Support Number is unique to each user and is used to identify the user that is logged into the profile. Technical Reference The Technical Reference is unique to every banking session, i.e. each time a user logs in this number will be different. You may need to quote this number to an Online Assistance agent if a technical error has occurred; this number will assist our developers to investigate technical errors and queries. Online Banking User Guide 32 3.1.3 Main Tabs and Sub-Tabs All functionally is grouped into tabs. Where a function within a tab has a number of options, those options are grouped together in subtabs to ensure that all functionality is easily accessible within a single page. Main Tabs and Sub-Tabs: Click on the tabs / sub-tabs at the top of the page to navigate to the type of functionality that you require. The tab that you are on can easily be identified by the black text of the Tab Name and the light blue line under the selected tab. Selected Tab in Black: Online Banking User Guide 33 3.1.4 Menu Options Each tab and sub-tab has its own menu of functionality. Menu Clicking on the Menu on the left of the page will display the options that are applicable to the page and tab that you are on. Items displayed in the orange menu are functions specific to the page that you are currently on. Extended Menu Lists When the Menu is active, an Extended Menu List will be displayed in grey. This list provides quick access to functionality within that tab / sub-tab as well as to other commonly used functions on Online Banking. Menu and extended Menu List: Online Banking User Guide 34 3.1.5 Page Buttons The buttons that you need to click on to proceed with an action are called action buttons. There are four types of action buttons: 1. Table Actions 2. Easy Buttons 3. Quick Links 4. Page Actions Table Actions Table Actions are the actions that you can perform on the current page. E.g. Search, Add, Print and Download. Table Actions are situated below the tab / sub-tabs on the top right of the page. Table Action Buttons: Easy Buttons Easy Buttons are shortcuts to the most common functions that can be performed for the selected item; e.g. Based on the account type, the Easy Buttons for an account record would be Transfer, Pay and Statement whereas the Easy Buttons for a Secondary User record would be Maintain and Delete. Clicking on an Easy Button for a specific item will take you directly to the capture page for the selected transaction type. Easy Buttons are displayed on the far right of each record line. Easy Buttons per Account: Quick Links Quick Links are account specific menu options. Online Banking User Guide 35 Quick Links are displayed at the end of each record line. Quick Links per Account: Page Actions Page Actions are triggers to perform a step within a process, e.g. Edit, Submit, Cancel, Confirm. Page Actions are situated at the bottom right of a transactional page. Page Action Buttons: Online Banking User Guide 36 3.2 Common Functionality 3.2.1 Page Navigation Number of Records to Display The number of records displayed on a page can be amended by selecting the desired number from the drop down menu. The selections are in increments of 10. The minimum is 10 records per page with a maximum of 150 records per page. Number of Records to Display – Drop Down Menu: Paging Options Use the Previous or Next options at the bottom of the record table to page sequentially through a list of records. Paging Options: If you have multiple pages of records you can move directly to a specific page by entering the Previous Page Number and then clicking on Next. Online Banking User Guide 37 3.2.2 Hyperlink Navigation By clicking on any information that is underlined you can view additional information about that item e.g. clicking on the Available Balance for an account will redirect you to the Transaction History for that account. Hyperlink Navigation: 3.2.3 Sorting Function The columns of information in a record table can be sorted by clicking on a hyperlinked column header. Clicking on the column header a second time will reverse the sorting order. The Default Sort Order is as follows: • Order for alphabetical items = A –Z • Order for dates = earliest to latest • Order for numbers = smallest to largest 3.2.4 Search Table Action The Search Table Action enables you to search across columns and multiple pages of records by entering any part of the description that you are looking for. You need to enter a minimum of two alphanumeric characters in the Search field. The Search Option in Table Actions: Note: The Search Table Action does not search the Date column; if you would like to search for a transaction by date, please use the Transaction History Search function within Transaction History as this allows you to specify a Date Range. The Search Options under Transaction History Search: Online Banking User Guide 38 3.2.5 Account Switchers If you are performing an account specific transaction you can use the Account Switcher functionality to switch between accounts. Simply click on the arrow to select a different account from the drop down menu. For non-financial transactions such as Account Settings, the Account Switcher is situated on the top left of the workspace. Standard Account Switcher: For financial transactions such as Payments, the Account Switcher is situated at the bottom of the page and also displays both the Available Limit and Available Balance for the selected account. Account Switcher for a Financial Transaction: Online Banking User Guide 39 4. Online Banking Settings Online Banking User Guide 40 4.1 Online Banking Settings Overview The Online Banking Settings functionality enables the owner of an Online Banking profile (Primary User) to capture and manage their personal details and user preferences, as well as the user permissions and personal details of any additional users (Secondary Users) that have been added to their profile. A Secondary User is limited to the functionality for Default Account Settings (Default Payment Account and Default Billing Account). Online Banking Settings is divided into three sub-tabs: • Online Banking Sub-Tab • Banking Sub-Tab • Your Details Online Banking User Guide 41 Online Banking Sub-Tab Online Banking User Guide 42 4.2 Online Banking Sub-Tab Overview The Online Banking sub-tab allows you to manage your Online Banking settings and preferences. The following functionality is available: • Online Banking Sub-Tab o Limits Daily Profile Limits o Secondary Users o Permissions o Login History o Security o OTP Change User ID & Password Preferences Default Payment Account Default Billing Account Visible Accounts Online Banking User Guide 43 4.3 Limits 4.3.1 Daily Profile Limits Use this function to manage your Daily Profile Limits; these are the limits that you specify for Payment and Transfer transactions that can be performed on your Online Banking profile. Limits can be set Permanently or Temporarily. A Daily Profile Limit is made up of the following three transaction limits: • Payment Limit o • Recipient Payments Prepaid Purchases Send Money Transactions Own Accounts Transfer o • All payments made to third parties; this includes: Transfers made between your own accounts Linked Accounts Transfer o Transfers made from your own accounts to third party accounts that are linked to your profile. Important Information about Daily Profile Limits • This functionality is restricted to the Primary User. • All transactions performed by the Secondary Users on your profile accumulate towards the respective Daily Profile Limits. • If you increase your limit temporarily, your limit will automatically be reduced to your default limit at midnight. • If you decrease your default limit, the decreased limit will apply until such time that you amend it again; it will not revert back to your default limit at midnight. Online Banking User Guide 44 Important Information about Preset Payment Limits All payments made to third parties accumulate towards the Payment Limit within your Daily Profile Limit. For your security, the Maximum Daily Limit for certain payment transactions are preset and can not be increased; i.e. increasing your daily Payment Limit will not increase the limit on these transaction types: • • • Prepaid Purchases (Available on the Buy Tab) o Airtime and Bundles o Electricity o Gaming Purchases (LOTTO and PowerBall) Send Money Transactions (Available on the Send Money Tab) o To eWallet o To Zimbabwe o To Mozambique Utilisation of the Pay and Clear Now payment type If you use your eBucks to purchase Prepaid Services via Online Banking the equivalent Rand value will accumulate towards your Prepaid Services limit, thereby decreasing your overall Payment Limit by that amount. Online Banking User Guide 45 • Have your Card and PIN on hand as this may be required for validation purposes. Change Daily Profile Limits 1. Click on Online Banking Settings in the page header options. 2. The Settings dashboard for the Online Banking sub-tab will be displayed. 3. Click on the Change easy button next to Daily Profile Limits. 4. The Daily Profile Limits capture page will be displayed. 5. Amend the required Payment and/or Transfer Limits. 6. Select to set your limits Temporarily or Permanently. 7. If you select to set the amended limits Permanently you will be required to read and accept the disclaimer before you can continue. 8. Click on Update. 9. A confirmation page reflecting the changes that you have requested will be displayed. 10. Check that this information is correct and, if necessary, click on Edit to make amendments. 11. For validation purposes, you will be required to enter your Card Number and PIN. 12. Click on Confirm. 13. A results page will display the status of your request. 14. Click on Finish to complete the process. Online Banking User Guide 46 4.4 Secondary User A Secondary User is a third party user which has been added to the Online Banking profile by the Primary User. Secondary Users have limited access which is determined by the permissions, transact and/or viewing, that the Primary User sets. An Online Banking user will only have access to the tabs, functions and menus that pertain to the accounts that they have and, in the case of a Secondary User, have been given permissions to. For security purposes, certain functionality is not available to Secondary Users at all and will not be displayed. The following functionality is available to the Primary User: • Add a Secondary User • View a Secondary User’s Profile • Maintain a Secondary User’s Profile and Permissions • Delete a Secondary User Online Banking User Guide 47 4.4.1 Add a Secondary User Use this function to add an unlimited number of Secondary Users to your profile. The following information must be captured for each Secondary User: • Personal Details • Contact Details • Permissions per Account • Limits per Account (where applicable) The following permissions can be set per account: • No Permission • View Only Permission • Transact Only Permission • View and Transact Permission Important Information about Secondary Users • This functionality is restricted to the Primary User. • User Permissions can be set per account: o View Only o Transact Only o View and Transact • Transaction Limits can be set per account. • Transactions performed by the Secondary User/s on your profile accumulate towards the total Daily Profile Limit for the respective transaction type. • The first time that the Secondary User logs on they will need to use the default password that you set when you created their profile. On log in they will be prompted to change their password. Online Banking User Guide 48 Add a Secondary User 1. Click on Online Banking Settings in the page header options. 2. The Settings dashboard for the Online Banking sub-tab will be displayed. 3. Click on the View easy button next to Secondary Users. 4. A list of the Secondary Users linked to your profile will be displayed. 5. Click on Add User in the table actions. 6. The Add User capture page will be displayed. 7. Complete the Personal Details and Contact Details of the Secondary User. 8. Allocate the required Permissions and Limits for the Secondary User. 9. Click on Continue. 10. Create a User ID and Temporary Password for the Secondary User. 11. Enter the OTP Delivery Details for the secondary User. 12. Click on Add. 13. A confirmation page will be displayed. 14. Check that this information is correct and, if necessary, click on Edit to make amendments. 15. Before you can continue you will be required to read and accept the Terms and Conditions. 16. Click on Confirm to continue. 17. A results page will display the status of your request. 18. Click on Finish to complete the process. Online Banking User Guide 49 4.4.2 View a Secondary User’s Profile Use this function to view a Secondary User's profile details. The following information can be viewed: • Personal Details • Status • Permissions • Limits Important Information about Viewing Secondary Users • This functionality is restricted to the Primary User. View a Secondary User’s Profile 1. Click on Online Banking Settings in the page header options. 2. The Settings dashboard for the Online Banking sub-tab will be displayed. 3. Click on the View easy button next to Secondary Users. 4. A list of the Secondary Users linked to your profile will be displayed. 5. Click on the Maintain easy button for the respective Secondary User. 6. The Maintain User page will display the Personal Details, Status, Permissions and Limits for the respective user. 7. Click on Cancel to return to the My Profile dashboard. Online Banking User Guide 50 4.4.3 Maintain a Secondary User's Profile and Permissions Use this function to maintain the details and permissions of a Secondary User. The following information can be maintained: • • • Status (Active / Inactive) Personal Details Permissions and Limits Important Information about Maintaining a Secondary User’s Profile • This functionality is restricted to the Primary User. Maintain a Secondary User’s Profile and Permissions 1. Click on Online Banking Settings in the page header options. 2. The Settings dashboard for the Online Banking sub-tab will be displayed. 3. Click on the View easy button next to Secondary Users. 4. A list of the Secondary Users linked to your profile will be displayed. 5. Click on the Maintain easy button for the respective Secondary User. 6. The Maintain User page will display the Personal Details, Status, Permissions and Limits for the respective user. 7. Click on Continue. 8. The Maintain User capture page will be displayed. 9. Make the required changes. 10. Click on Update. 11. A confirmation page will be displayed. 12. Check that this information is correct and, if necessary, click on Edit to make amendments. 13. Click Confirm to continue. 14. A results page will display the status of your request. 15. Click on Finish to complete the process. Online Banking User Guide 51 4.4.4 Delete a Secondary User Use this function to permanently delete a secondary User from your Online Banking profile. Important Information about Deleting a Secondary User • This functionality is restricted to the Primary User. Delete a Secondary User 1. Click on Online Banking Settings in the page header options. 2. The Settings dashboard for the Online Banking sub-tab will be displayed. 3. Click on the View easy button next to Secondary Users. 4. A list of the Secondary Users linked to your profile will be displayed. 5. Click on the Maintain easy button for the respective Secondary User. 6. The Maintain User page will display the Personal Details, Status, Permissions and Limits for the respective user. 7. Click on Continue. 8. The Maintain User capture page will be displayed. 9. Click on Delete User. 10. A confirmation page will be displayed. 11. Check that this is the user that you would like to delete and, if necessary, click on Cancel to return to My Profile dashboard. 12. Click on Delete to continue. 13. A results page will display the status of your request. 14. Click on Finish to complete the process. Online Banking User Guide 52 4.5 View Permissions The Primary User can use this function to view the default permissions on the accounts linked to their Online Banking profile. These permissions are based on product type and can not be changed. View Permissions 1. Click on Online Banking Settings in the page header options. 2. The Settings dashboard for the Online Banking sub-tab will be displayed. 3. Click on the View easy button next to View Permissions. 4. A list of all the accounts linked to your profile will be displayed together with your current online permissions for each account. 5. Click on Finish to return to the Online Banking sub-tab. Online Banking User Guide 53 4.6 View Login History Use this function to view both successful and failed login events on your profile for the past 60 days. The following information is displayed: • Date & Time • Event Description (successful / unsuccessful) If you are the Primary User you can View the Login History for each Secondary User that is linked to your profile. Important Information about Login History • For your convenience, your last login event is displayed on the News Tab. • Should you notice any suspicious activity on your Login History please contact our Fraud Prevention Centre immediately. View Login History 1. Click on Online Banking Settings in the page header options. 2. The Settings dashboard for the Online Banking sub-tab will be displayed. 3. Click on the View easy button next to View Login History. 4. The last 60 days of login history for yourself will be displayed. 5. If you are the Primary User you can view the Login History for each Secondary User that is linked to your profile by simply selecting the user from the User Name drop down list above the record table. 6. Click on the Search table action to search across all fields. 7. Enter a minimum of two alphanumeric characters in the Search field. 8. The results of your search will be displayed. 9. Click on Finish. Online Banking User Guide 54 4.7 Security 4.7.1 OTP - One Time PIN Use this function to maintain your One Time PIN (OTP) delivery preferences. The following functionality is available: • Maintain the cellphone number for both your Primary / Secondary OTP delivery option. • Change OTP delivery option/s from Email to Cellphone. • If you have not yet done so, you can add cellphone details for a Secondary option. • Maintain details for both the Primary and Secondary options for your Secondary Users. Important Information about OTP Preferences • In order to update your OTP Preferences via Online Banking you must have your new cellphone number and you must still be receiving your OTP notifications on your old cellphone number. • This functionality is restricted to the Primary User. • For your security, the preferred delivery mechanism for OTP notifications is via sms; should you require your delivery mechanism to be an email address, please contact Online Assistance. 4.7.1.1 Where can you maintain OTP delivery preferences? Update via Online Banking o If you have a new cellphone number and you are still receiving your OTP notifications on your old cellphone number, which is in your possession, you can update your preferences via Online Banking. Update via an FNB ATM o If you have a new cellphone number and you no longer receive your OTP notifications on your old cellphone number, and you are in possession of a Chip and PIN card, you can update your preferences via an FNB ATM. Online Banking User Guide 55 4.7.1.2 Maintain OTP Preferences Important Information about OTP Preferences • In order to update your OTP Preferences via Online Banking you must have your new cellphone number and you must still be receiving your OTP notifications on your old cellphone number. 4.7.1.2.1 Primary User's OTP Preferences Change your (Primary User) OTP Preferences 1. Click on Online Banking Settings in the page header options. 2. The Settings dashboard for the Online Banking sub-tab will be displayed. 3. Click on the Change easy button for OTP. 4. You will be presented with two options, click on Continue for Option 1. 5. Your current details will be displayed. 6. Amend your OTP details as required. 7. Click on Update. 8. A confirmation page will be displayed. 9. Check that this information is correct and, if necessary, click Edit to make any amendments. 10. Click on Confirm. 11. An OTP capture page will be displayed. 12. Enter the OTP that has been sent to your old cellphone number and then click on Submit. 13. A results page will display the status of your request. 14. Click on Finish to complete the process. Online Banking User Guide 56 4.7.1.2.2 Secondary User's OTP Preferences Change a Secondary User's OTP Preferences 1. Click on Online Banking Settings in the page header options. 2. The Settings dashboard for the Online Banking sub-tab will be displayed. 3. Click on the View easy button next to Secondary Users. 4. A list of the Secondary Users linked to your profile will be displayed. 5. Click on the Maintain easy button for the respective Secondary User. 6. The Maintain User page will display the Personal Details, Status, Permissions and Limits for the respective user. 7. Click on Continue. 8. The Maintain User capture page will be displayed. 9. Click on the Maintain easy button for the respective user. 10. The Online Banking Settings for the selected user will be displayed. 11. The user’s current details will be displayed. 12. Amend the OTP details as required. 13. Click on Update. 14. A confirmation page will be displayed. 15. Check that this information is correct and, if necessary, click Edit to make any amendments. 16. Click on Confirm. 17. A results page will display the status of your request. 18. Click on Finish to complete the process. Online Banking User Guide 57 4.7.2 Change User ID & Password Use this function to maintain your Online Banking access details; your User ID and/or Password. Important Information about Access Details Please take note of the Business Rules for a User ID and/or Password. User ID: • Minimum of 7 characters • Combination of alpha and numeric e.g. James007. Password: • Minimum of 7 characters, may not exceed 30 characters • Include a combination of upper and lower case letters (e.g. Abc) • Include at least one special character (e.g. !#%@$) • Include at least one numeric (e.g. 0 to 9) • New passwords may not be the same as the previous 3 passwords • Avoid sequential numbers or letters e.g. abcdef or 12346 • Passwords should never be similar to the User ID or any other personal details (e.g. name, I.D. number, e-mail address, date of birth etc.). Change User ID and/or Password 1. Click on Online Banking Settings in the page header options. 2. The Settings dashboard for the Online Banking sub-tab will be displayed. 3. Click on the Change easy button next to Change User ID & Password. 4. The Change User ID & Password capture page will be displayed. 5. Enter the New User ID and/or New Password. 6. Click on Update. 7. A confirmation page will be displayed. 8. Check that this information is correct and, if necessary, click on Edit to make amendments. 9. Click on Confirm. 10. A results page will display the status of your request. 11. Click on Finish to complete the process. Online Banking User Guide 58 4.8 Preferences 4.8.1 Default Account Settings Use this function to specify your Default Account Settings. Default Account Settings • Default Payment Account o Select the account that you would use most frequently when making payments; when making a payment this will be the default account but you can still select a different account from the account drop down list. • Default Billing Account o Select the account to be billed for all non-financial events that occur on your Savings and Transmission Accounts; an example of a non-financial event is the cost for using the Verify Owner functionality. Important Information about a Default Billing Account • Your day to day service fees will still be billed to the respective account; the Default Billing Account is only for non-financial events. Change Default Account Settings 1. Click on Online Banking Settings in the page header options. 2. The Settings dashboard for the Online Banking sub-tab will be displayed. 3. Click on the Change easy button next to the Payment Account or Billing Account. 4. The Preferences capture page will be displayed. 5. Select the respective Default Account from the drop down list. 6. Click on Update. 7. A confirmation page reflecting the changes that you have requested will be displayed. 8. Check that this information is correct and, if necessary, click on Edit to make amendments. 9. Click on Confirm. 10. A results page will display the status of your request. 11. Click on Finish to complete the process. Online Banking User Guide 59 4.8.2 Visible Accounts By default, all accounts that are linked to your Online Banking profile are displayed on the My Bank Accounts sub-tab and are available for online transacting. Use this function to select which of your accounts you would like to be visible on your My Bank Accounts subtab.. Important Information about a Visible Accounts • This functionality is restricted to the Primary User. • De-selecting the Visible option will only remove an account from your Online Banking profile; the account will still be visible and accessible via other electronic channels such as ATMs. • When making changes to the visibility of an account on your profile, it will affect permissions given to any Secondary Users. o If an account is set as ‘Not Visible’ it will no longer be displayed to Secondary Users. o If an account is changed back to ‘Visible’ you will need to grant the respective Permissions to the Secondary User again. Set Visible Accounts 1. Click on Online Banking Settings in the page header options. 2. The Settings dashboard for the Online Banking sub-tab will be displayed. 3. Click on the Change easy button next to the Visible Accounts. 4. The Visible Accounts capture page will be displayed. 5. Click in the check box to select the account/s that you would like to be Visible on the My Bank Accounts page. To deselect an account simply click in the check box again to remove the tick. 6. Click on Update. 7. A confirmation page will be displayed. 8. Check that this information is correct and, if necessary, click on Edit to make any amendments. 9. Before you can continue you will be required to read and accept the Terms and Conditions. 10. Click on Confirm. 11. A results page will display the status of your request. 12. Click on Finish to complete the process. Online Banking User Guide 60 Banking Sub-Tab Online Banking User Guide 61 4.9. Banking Sub-Tab Overview The Banking sub-tab allows you to manage your electronic subscriptions and alerts. The following functionality is available: • Banking Sub-Tab o o Manage My Subscriptions inContact FNB App Cellphone Banking Alerts Balance Alerts Limit Alerts Scheduled Payment Alerts Online Banking User Guide 62 4.10 Manage My Subscriptions 4.10.1 inContact Use this function to register for the inContact / inContact Pro service and maintain your inContact settings. inContact is an innovative messaging system that notifies you of activity on your accounts, helping you to keep track of your financial transactions as they occur and identify unauthorised transactions immediately. A message will be sent each time a transaction above an amount specified by you is carried out on any of your transactional account/s. inContact • For Consumer clients • 1 SMS and 1 Email Notification for all transactional accounts linked to profile. inContact Pro • For Business clients • Up to 3 SMS and 3 Email Notifications per transactional account. Important Information about inContact • This functionality is restricted to the Primary User. • Registration is free and there are no subscription fees. • By default. messages are only sent for transactions that are greater than R100.00 but you can set your preferences. • If you select to only receive messages during business hours, you will receive a single message in the morning which details multiple debits that were processed overnight i.e. debit orders, stop orders, and scheduled payments • You can only select to receive messages for transactions on the accounts that you own; you cannot set up inContact for accounts which you access via a link or a mandate. • To de-register from this service please contact Online Assistance or your Branch. Online Banking User Guide 63 4.10.1.1 Register for inContact Use this function to register for the inContact service. Register for inContact 1. Click on Online Banking Settings in the page header options. 2. The Settings dashboard for the Online Banking sub-tab will be displayed. 3. Click on the Banking sub-tab. 4. The Settings dashboard for the Banking sub-tab will be displayed. 5. Click on the Change easy button for inContact. 6. The inContact capture page will be displayed. 7. Select a Notification Method for the inContact messages, SMS, Email or Both. 8. Based on the Notification Method/s that you selected, enter the SMS Cellphone Number and/or Email Address. 9. Select your Message Preferences, i.e. during which hours you would like to receive messages. 10. Click on Add. 11. A confirmation page will be displayed. 12. Check that this information is correct and, if necessary, click Edit to make any amendments. 13. Before you can continue you will be required to read and accept the Terms and Conditions. 14. Click on Confirm. 15. A results page will display the status of your request. 16. Click on Finish to complete the process. Online Banking User Guide 64 4.10.1.2 Maintain your inContact Details Use this functionality to maintain your inContact settings. The following inContact options can be maintained online: • Notification Method o SMS o Email o Both • SMS Cellphone Number / Email Address • Message Preferences • o Business Hours Only o 24 Hours a Day Transaction Amount Maintain your inContact Details 1. Click on Online Banking Settings in the page header options. 2. The Settings dashboard for the Online Banking sub-tab will be displayed. 3. Click on the Banking sub-tab. 4. The Settings dashboard for the Banking sub-tab will be displayed. 5. Click on the Change easy button for inContact. 6. The inContact capture page will be displayed. 7. Make the required changes to your inContact settings. 8. Click on Update. 9. A confirmation page will be displayed. 10. Check that this information is correct and, if necessary, click Edit to make any amendments. 11. Before you can continue you will be required to read and accept the Terms and Conditions. 12. Click on Confirm. 13. A results page will display the status of your request. 14. Click on Finish to complete the process. Online Banking User Guide 65 4.10.2 FNB App Use this functionality to maintain your FNB Banking App settings online. The following functionality is available online: • Link your device to your Online Banking Profile • Maintain your FNB Banking App Transaction Limits • Delink a device from your Online Banking Profile Important Information about the FNB App • This functionality is restricted to the Primary User. • If you download both the FNB and RMB Private Bank Banking Apps you can link both of the respective Banking Apps to the same device. • For queries or assistance with FNB App Banking please contact the FNB App Call Centre. What is the FNB App? The FNB App is a banking application for smart phones or tablet devices that enables you to transact, make payments, check balances, obtain the latest FNB information and promotions, and locate FNB ATM’s and Branches. The FNB APP also has the ability to make on-net calls to the bank or to friends and family by using our unique VoIP service, FNB Connect. What are the requirements to use the FNB App? • An FNB Online Banking Profile • A compatible smart phone or mobile device with a 3G or Wi-Fi connection Where do you download the FNB App from? Download using your Device • Applications > Market Icon > Search Icon • Search for 'FNB' • Select FNB from the search results • Download the FNB application from the application store and install it to your device Online Banking User Guide 66 Download using your PC • Online Banking > Online Banking Settings > FNB App • Click on the applicable application store image • Download the FNB App application from the application store and install it to your device What do I need to do before I can start banking on the FNB App? • Link your device to your Online Banking Profile 4.10.2.1 Link your Device with your Online Banking Profile Link your Device to your Online Banking Profile 1. Download the FNB Banking App on your smart device. 2. Once it has downloaded and opened, select Register. 3. Select Yes to indicate that you have an existing Online Banking Profile. 4. Enter your Online Banking User ID 5. Select Link 6. Logon to Online Banking via your pc. 7. As you login a confirmation page will request you to confirm that you are attempting to link your device to your Online Banking profile. 8. Before you can continue you will be required to read and accept the Terms and Conditions. 9. Click on Accept. 10. A results page will display the status of your request. 11. Click on Finish to complete the linking process. 12. You will be prompted to set your Daily Transaction Limits for the FNB Banking App. 13. Click on Update. 14. A confirmation page will display the limits that you have entered. 15. Check that this information is correct and, if necessary, click on Edit to make amendments. 16. Click on Confirm. 17. A results page will display the status of your request. Online Banking User Guide 67 4.10.2.2 Maintain your FNB Banking App Transaction Limits Maintain your FNB Banking App Transaction Limits 1. Click on Online Banking Settings in the page header options. 2. The Settings dashboard for the Online Banking sub-tab will be displayed. 3. Click on the Banking sub-tab. 4. The Settings dashboard for the Banking sub-tab will be displayed. 5. Click on the Change easy button for the FNB App. 6. The FNB App capture page will be displayed. 7. Amend the Daily Limits for FNB App transactions as required. 8. Click on Update. 9. A confirmation page will be displayed. 10. Check that this information is correct and, if necessary, click Edit to make any amendments. 11. Click on Confirm. 12. A results page will display the status of your request. 13. Click on Finish to complete the process. 4.10.2.3 Delink a Device from your Online Banking Profile Delink a Device from your Online Banking Profile 1. Click on Online Banking Settings in the page header options. 2. The Settings dashboard for the Online Banking sub-tab will be displayed. 3. Click on the Banking sub-tab. 4. The Settings dashboard for the Banking sub-tab will be displayed. 5. Click on the Change easy button for the FNB App. 6. The FNB App capture page will be displayed. 7. Click on the Delink hyperlink for the respective device. 8. A confirmation page will be displayed. 9. Click on Cancel to end the process or click on Confirm to continue. 10. A results page will display the status of your request. 11. Click on Finish to complete the process. Online Banking User Guide 68 4.10.3 Cellphone Banking Use this function to register online for Cellphone Banking and maintain your Cellphone Banking profile and transaction limits. Registration is free and there are no subscription fees. Once you have registered you can start banking right away, dial *120*321# and follow the prompts. With Cellphone Banking you can buy prepaid airtime for yourself even if you don’t have airtime on your phone! Important Information about Cellphone Banking • This functionality is restricted to the Primary User. • Registration is free and there are no subscription fees. • Standard network operator charges apply. • To make payments to third parties via Cellphone Banking the recipient must be saved as a beneficiary on your personal Recipient List. This can be done via the following channels: Online Banking User Guide o Online Banking o ATM o Branch 69 4.10.3.1 Register for Cellphone Banking Use this function to register online for Cellphone Banking. Register for Cellphone Banking 1. Click on Online Banking Settings in the page header options. 2. The Settings dashboard for the Online Banking sub-tab will be displayed. 3. Click on the Banking sub-tab. 4. The Settings dashboard for the Banking sub-tab will be displayed. 5. Click on the Change easy button for Cellphone Banking. 6. The Cellphone Banking capture page will be displayed. 7. Select a Default Account; this is the account that you would use most frequently when making payments. 8. Enter a 5 digit Cellphone Banking PIN for your Cellphone Banking profile and then reenter it to confirm it. 9. Before you can continue you will be required to read and accept the Terms and Conditions. 10. Click on Register. 11. A confirmation page will be displayed. 12. Check that this information is correct and, if necessary, click Edit to make any amendments. 13. Click on the User Guide hyperlink to view further information on how to use Cellphone Banking. 14. Click on Confirm. 15. A results page will display the status of your request. 16. Click on Finish to complete the process. Online Banking User Guide 70 4.10.3.2 Maintain your Cellphone Banking Profile Use this function to maintain or cancel your Cellphone Banking profile. The following Cellphone Banking options can be maintained online: • Profile Status o Activate o Suspend o De-Register (Cancel) • Cellphone Banking PIN • Active Services • o View Accounts & Transfers o Payments o Prepaid Limits and Default Accounts o Payments o Transfers o Services (Prepaid and Gaming) Maintain your Cellphone Banking Profile 1. Click on Online Banking Settings in the page header options. 2. The Settings dashboard for the Online Banking sub-tab will be displayed. 3. Click on the Banking sub-tab. 4. The Settings dashboard for the Banking sub-tab will be displayed. 5. Click on the Change easy button for Cellphone Banking. 6. The Cellphone Banking Profile capture page will be displayed. 7. Enter your 5 digit Cellphone Banking PIN and then re-enter it to confirm it. 8. Make the required changes to your Cellphone Banking profile. 9. Click on Update. 10. A confirmation page will be displayed. 11. Check that this information is correct and, if necessary, click Edit to make any amendments. 12. Click on Confirm. 13. A results page will display the status of your request. 14. Click on Finish to complete the process. Online Banking User Guide 71 4.11 Alerts 4.11.1 My Balance Alerts Use this function to register, maintain or cancel the My Balance Alert service. The Balance Alert service will send an sms and/or email alert to you on a day and frequency specified by you to notify you of the previous day's closing account balance/s. Important Information about My Balance Alerts • This functionality is restricted to the Primary User. • Electronic Services are account/product specific. • Electronic Services are subject to a monthly subscription fee per account. See the pricing guide for more information. • Balance Alerts can be set-up for multiple accounts, (a maximum of 20 accounts can be maintained at one time), and the Balance Alert amount can be specified per account, however, the selected frequency for alerts will apply to all of the selected accounts. • Online Banking User Guide Alerts are sent at 07h00 on the day that you specify. 72 4.11.1.1 Register for the My Balance Alert Service Use this function to register for the My Balance Alert Service. The Method of Notification and the Frequency of alerts is specified by you: • Notification Method o • SMS and/or Email Frequency o Daily o Weekly o Monthly Register for Balance Alerts 1. Click on Online Banking Settings in the page header options. 2. The Settings dashboard for the Online Banking sub-tab will be displayed. 3. Click on the Banking sub-tab. 4. The Settings dashboard for the Banking sub-tab will be displayed. 5. Click on the Change easy button for My Balance Alert. 6. The Balance Alert capture page will be displayed. 7. Enter the required Email Address and/or Cellphone Number for the alerts. 8. Select the Frequency for the alerts. 9. Based on the Frequency that you selected, you will be required to receive the day/date that you would like to receive the notification/s. 10. Click in the Activate Balance Alert check box of the respective account/s that you would like to receive alerts for. 11. Before you can continue you will be required to read and accept the Terms and Conditions. 12. Click on Update. 13. A confirmation page will be displayed. 14. Check that this information is correct and, if necessary, click Edit to make any amendments. 15. Click on Confirm. 16. A results page will display the status of your request. 17. Click on Finish to complete the process. Online Banking User Guide 73 4.11.1.2 Maintain your My Balance Alert Service Use this function to maintain your My Balance Alert settings. The following options can be maintained: • Notification Method • Frequency of the Alerts • Account selection Maintain Balance Alert settings 1. Click on Online Banking Settings in the page header options. 2. The Settings dashboard for the Online Banking sub-tab will be displayed. 3. Click on the Banking sub-tab. 4. The Settings dashboard for the Banking sub-tab will be displayed. 5. Click on the Change easy button for My Balance Alert. 6. The Balance Alert capture page will be displayed. 7. Make the required changes to your Balance Alert settings. 8. Before you can continue you will be required to read and accept the Terms and Conditions. 9. Click on Update. 10. A confirmation page will be displayed. 11. Check that this information is correct and, if necessary, click Edit to make any amendments. 12. Click on Confirm. 13. A results page will display the status of your request. 14. Click on Finish to complete the process. Online Banking User Guide 74 4.11.1.3 Cancel My Balance Alert Service Use this function to cancel the My Balance Alert Service. To only remove selected accounts from the Balance Alert service, please use the maintenance function. Cancel Balance Alert Service 1. Click on Online Banking Settings in the page header options. 2. The Settings dashboard for the Online Banking sub-tab will be displayed. 3. Click on the Banking sub-tab. 4. The Settings dashboard for the Banking sub-tab will be displayed. 5. Click on the Change easy button for My Balance Alert. 6. The Balance Alert capture page will be displayed. 7. If you only have a few transactional accounts, simply click in the Activate Balance Alert checkbox to deselect the selected accounts. If you have a large volume of transactional accounts, click on the Select All hyperlink above the Activate Balance Alert checkbox to select all of your account and then click on the Deselect All hyperlink. 8. Before you can continue you will be required to read and accept the Terms and Conditions. 9. Click on Update. 10. A confirmation page will be displayed. 11. Check that this information is correct and, if necessary, click Edit to make any amendments. 12. Click on Confirm. 13. A results page will display the status of your request. 14. Click on Finish to complete the process. Online Banking User Guide 75 4.11.2 My Limit Alerts Use this function to register, maintain or cancel the My Limit Alert service. The Limit Alert service will send an sms and/or email alert to you when your account has reached a limit specified by you. Important Information about My Limit Alerts • This functionality is restricted to the Primary User. • Electronic Services are account/product specific. • Electronic Services are subject to a monthly subscription fee per account. See the pricing guide for more information. • Limit Alerts can be set-up for multiple accounts, (a maximum of 20 accounts can be maintained at one time), and the Limit Alert amount can be specified per account. Online Banking User Guide 76 4.11.2.1 Register for the My Limit Alert service Use this function to register for the My Limit Alert Service. Register for Limit Alerts 1. Click on Online Banking Settings in the page header options. 2. The Settings dashboard for the Online Banking sub-tab will be displayed. 3. Click on the Banking sub-tab. 4. The Settings dashboard for the Banking sub-tab will be displayed. 5. Click on the Change easy button for My Limit Alert. 6. The Limit Alert capture page will be displayed. 7. Enter the required Email Address and/or Cellphone Number for the alerts. 8. Click in the Activate Limit Alert check box of the respective account/s that you would like to receive alerts for and enter the Limit Amount for each of the selected accounts. 9. Before you can continue you will be required to read and accept the Terms and Conditions. 10. Click on Update. 11. A confirmation page will be displayed. 12. Check that this information is correct and, if necessary, click Edit to make any amendments. 13. Click on Confirm. 14. A results page will display the status of your request. 15. Click on Finish to complete the process. Online Banking User Guide 77 4.11.2.2 Maintain your My Limit Alert Service Use this function to maintain your My Limit Alert settings. The following options can be maintained: • Notification Method • Account Selection • Limit Amount Maintain Limit Alert settings 1. Click on Online Banking Settings in the page header options. 2. The Settings dashboard for the Online Banking sub-tab will be displayed. 3. Click on the Banking sub-tab. 4. The Settings dashboard for the Banking sub-tab will be displayed. 5. Click on the Change easy button for My Limit Alert. 6. The Limit Alert capture page will be displayed. 7. Make the required changes to your Limit Alert settings. 8. Before you can continue you will be required to read and accept the Terms and Conditions. 9. Click on Update. 10. A confirmation page will be displayed. 11. Check that this information is correct and, if necessary, click Edit to make any amendments. 12. Click on Confirm. 13. A results page will display the status of your request. 14. Click on Finish to complete the process. Online Banking User Guide 78 4.11.2.3 Cancel the My Limit Alert Service Use this function to cancel the My Limit Alert Service. To only remove selected accounts from the My Limit Alert service, please use the maintenance function. Cancel Balance Alert Service 1. Click on Online Banking Settings in the page header options. 2. The Settings dashboard for the Online Banking sub-tab will be displayed. 3. Click on the Banking sub-tab. 4. The Settings dashboard for the Banking sub-tab will be displayed. 5. Click on the Change easy button for My Limit Alert. 6. The Limit Alert capture page will be displayed. 7. If you only have a few transactional accounts, simply click in the Activate Limit Alert checkbox to deselect the selected accounts. If you have a large volume of transactional accounts, click on the Select All hyperlink above the Activate Limit Alert checkbox to select all of your account and then click on the Deselect All hyperlink. 8. Before you can continue you will be required to read and accept the Terms and Conditions. 9. Click on Update. 10. A confirmation page will be displayed. 11. Check that this information is correct and, if necessary, click Edit to make any amendments. 12. Click on Confirm. 13. A results page will display the status of your request. 14. Click on Finish to complete the process. Online Banking User Guide 79 4.11.3 Scheduled Payment Alerts Use this function to register, maintain or cancel the Scheduled Payment Alert service. The Scheduled Payment Alert Service sends you an alert one business day prior to the processing date of your Scheduled Payment/s. When activating the Scheduled Payment Alert option on an account you can choose between two types of alerts: 1. One Working Day Prior as a reminder 2. Inadequate funds in the respective account to fund an upcoming Scheduled Payment Important Information about Scheduled Payment Alerts • This functionality is restricted to the Primary User. • Electronic Services are account/product specific. • Electronic Services are subject to a monthly subscription fee per account. See the pricing guide for more information. • Scheduled Payment Alerts can be set-up for multiple accounts, (a maximum of 20 accounts can be maintained at one time), and the Alert Type can be specified per account. • Online Banking User Guide Alerts are sent at 07h00 one day before the specified transaction date. 80 4.11.3.1 Register for Scheduled Payment Alerts Use this function to register for the Scheduled Payment Alert Service. Register for Scheduled Payment Alerts 1. Click on Online Banking Settings in the page header options. 2. The Settings dashboard for the Online Banking sub-tab will be displayed. 3. Click on the Banking sub-tab. 4. The Settings dashboard for the Banking sub-tab will be displayed. 5. Click on the Change easy button for Scheduled Payment Alerts. 6. The Scheduled Payment Alert capture page will be displayed. 7. Enter the required Email Address and/or Cellphone Number for the alerts. 8. Click in the Activate Limit Alert check box of the respective account/s that you would like to receive alerts for and select the Alert Type from the drop down menu for each of the selected accounts. 9. Before you can continue you will be required to read and accept the Terms and Conditions. 10. Click on Update. 11. A confirmation page will be displayed. 12. Check that this information is correct and, if necessary, click Edit to make any amendments. 13. Click on Confirm. 14. A results page will display the status of your request. 15. Click on Finish to complete the process. Online Banking User Guide 81 4.11.3.2 Maintain your Scheduled Payment Alert Details Use this function to maintain your Scheduled Payment Alert settings. The following options can be maintained: • Notification Method • Account Selection • Alert Type Maintain Scheduled Payment Alert Settings 1. Click on Online Banking Settings in the page header options. 2. The Settings dashboard for the Online Banking sub-tab will be displayed. 3. Click on the Banking sub-tab. 4. The Settings dashboard for the Banking sub-tab will be displayed. 5. Click on the Change easy button for Scheduled Payment Alerts. 6. The Scheduled Payment Alert capture page will be displayed. 7. Make the required changes to your Scheduled Payment Alert settings. 8. Before you can continue you will be required to read and accept the Terms and Conditions. 9. Click on Update. 10. A confirmation page will be displayed. 11. Check that this information is correct and, if necessary, click Edit to make any amendments. 12. Click on Confirm. 13. A results page will display the status of your request. 14. Click on Finish to complete the process. Online Banking User Guide 82 4.11.3.3 Cancel the Scheduled Payment Alert Service Use this function to cancel the Scheduled Payment Alert Service. Cancel the Scheduled Payment Alert Service 1. Click on Online Banking Settings in the page header options. 2. The Settings dashboard for the Online Banking sub-tab will be displayed. 3. Click on the Banking sub-tab. 4. The Settings dashboard for the Banking sub-tab will be displayed. 5. Click on the Change easy button for Scheduled Payment Alerts. 6. The Scheduled Payment Alert capture page will be displayed. 7. Click in the check box of the respective account to remove the tick and no longer receive Scheduled Payment Alerts for that account. 8. Before you can continue you will be required to read and accept the Terms and Conditions. 9. Click on Update. 10. A confirmation page will be displayed. 11. Check that this information is correct and, if necessary, click Edit to make any amendments. 12. Click on Confirm. 13. A results page will display the status of your request. 14. Click on Finish to complete the process. Online Banking User Guide 83 Your Details Sub-Tab Online Banking User Guide 84 4.12 Your Details Sub-Tab Overview The Your Details sub-tab allows you to manage your contact details and the relationships of the users with permissions on your accounts The following functionality is available: • Your Details o Personal Details o Business Details o Business Directory o Third Party Account Relationships (CUAC) Related Parties BEE Application Online Banking User Guide 85 4.13 Personal Details The Primary User can use this function to maintain his own personal details as well as the personal details of his Secondary Users. It is imperative that your personal details are kept up to date as this assists us to provide you with secure communications related to your Online Banking profile. Important Information about Maintaining your Personal Details • The Personal Details for a Secondary User are captured by the Primary User / Profile Owner; only the Primary User can maintain these details. • Updating your email and/or cellphone number in your Personal Details will not update your OTP details; please update your OTP details separately by going to Online Banking Settings > Notifications > OTP If you have updated your Cellphone Number or Email Address and you subscribe to any Electronic Notifications or to Email Statements, you will be presented with the option to update the amended details on each of these services. • For your added security, certain details cannot be amended on Online Banking; please contact Online Assistance should you need to change any of the following: o Name or Surname o Identity Number or Passport Number o The email or cellphone number that your One Time PIN (OTP) is sent to Online Banking User Guide 86 Maintain Personal Details 1. Click on Online Banking Settings in the page header options. 2. The Settings dashboard for the Online Banking sub-tab will be displayed. 3. Click on the Your Details sub-tab. 4. The Settings dashboard for the Your Details sub-tab will be displayed. 5. Click on the Change Personal Details easy button. 6. The Personal Details capture page will be displayed. 7. Amend the required details. 8. Click on Update. 9. If you have updated your Cellphone Number or Email Address and you subscribe to any Electronic Notifications or to Email Statements, you will be presented with the option to update the amended details on each of these services. 10. Click on Update. 11. A confirmation page reflecting the changes that you have requested will be displayed. 12. Check that this information is correct and, if necessary, click on Edit to make amendments. 13. Click on Confirm. 14. A results page will display the status of your request. 15. Click on Finish to complete the process. Online Banking User Guide 87 4.14 Business Details Use this function to maintain your business details. It is imperative that your business details are kept up to date as this assists us to provide you with secure communications related to your Online Banking profile. Important Information about Maintaining your Business Details • Updating your email and/or cellphone number in your Personal Details will not update your OTP details; please update your OTP details separately by going to Online Banking Settings > Notifications > OTP If you have updated your Cellphone Number or Email Address and you subscribe to any Electronic Notifications or to Email Statements, you will be presented with the option to update the amended details on each of these services. • For your added security, certain details cannot be amended on Online Banking; please contact Online Assistance should you need to change any of the following: o Business Name o Trading Name o Business Type o Registration Number o Online Banking User Guide 88 Maintain Business Details 1. Click on Online Banking Settings in the page header options. 2. The Settings dashboard for the Online Banking sub-tab will be displayed. 3. Click on the Your Details sub-tab. 4. The Settings dashboard for the Your Details sub-tab will be displayed. 5. Click on the Change Business Details easy button. 6. The Business Details capture page will be displayed. 7. Amend the required details. 8. Click on Update. 9. If you have updated your Cellphone Number or Email Address and you subscribe to any Electronic Notifications or to Email Statements, you will be presented with the option to update the amended details on each of these services. 10. Click on Update. 11. A confirmation page reflecting the changes that you have requested will be displayed. 12. Check that this information is correct and, if necessary, click on Edit to make amendments. 13. Click on Confirm. 14. A results page will display the status of your request. 15. Click on Finish to complete the process. Online Banking User Guide 89 4.15 Business Directory The Business Directory is an online directory that lists the contact details and service information of FNB banked businesses; the directory can be viewed by anyone on the FNB web site. • www.fnb.co.za > For My Business > General > Business Directory > Business Directory Search Business clients can register and maintain their branch details in the Business directory via their Online Banking profile. The following functionality is available via Online Banking: • Register for Business Directory • View Registered Branches • Maintain Business Directory Information • o Add a Branch o Update Branch Information o Hide a Branch o Make a Branch Visible Delete a Branch Online Banking User Guide 90 4.15.1 Register Use this function to register your business on the Business Directory. Important Information about Registering your Business • This section is for Business Directory registration only. Changes to your business details and address need to be made under Business Details. Register your business on the Business Directory 1. Click on Online Banking Settings in the page header options. 2. The Settings dashboard for the Online Banking sub-tab will be displayed. 3. Click on the Your Details sub-tab. 4. The Settings dashboard for the Your Details sub-tab will be displayed. 5. Click on the Register easy button next to Business Directory. 6. The Business Directory Registration page will be displayed. 7. Complete the required fields. 8. Click on Add. 9. A confirmation page will be displayed. 10. Check that this information is correct and, if necessary, click on Edit to make amendments. 11. Click on Confirm. 12. A results page will display the status of your request. 13. Click on Finish to complete the process. 14. If you selected to make the branch visible, the branch will reflect on the Business Directory Registration page on the Visible Branches view and will have a Pending Approval status. Once approved by FNB, the status will change to Approved and the branch will reflect in the Business Directory. 15. If you selected to hide the branch, the branch will reflect on the Business Directory Maintenance page on the Hidden Branches view and will have an Pending Approval status. Once approved by FNB, the status will change to Approved and the branch will still reflect on the Hidden Branches view. Online Banking User Guide 91 4.15.2 View Registered Branches Use this function to view a list and status of branches that you have added to the Business Directory. You can view both Visible and Hidden Branches. A Visible Branch can be seen in the Business Directory and a Hidden Branch is not visible in the Business directory. View Branches 1. Click on Online Banking Settings in the page header options. 2. The Settings dashboard for the Online Banking sub-tab will be displayed. 3. Click on the Your Details sub-tab. 4. The Settings dashboard for the Your Details sub-tab will be displayed. 5. Click on the Change easy button next to Business Directory. 6. By default, the list of Visible Branches will be displayed. 7. If required click on the Hidden Branches view. 8. Click on Cancel to return to the Your Details dashboard. Online Banking User Guide 92 4.15.3 Maintain Business Directory Information Use this function to maintain your Business Directory information. The following maintenance functionality is available: • Add a Branch • Update Branch Information • Hide a Branch • Display a Branch 4.15.3.1 Add a Branch Use this function to add more branches of your business on the Business Directory. Add a Branch 1. Click on Online Banking Settings in the page header options. 2. The Settings dashboard for the Online Banking sub-tab will be displayed. 3. Click on the Your Details sub-tab. 4. The Settings dashboard for the Your Details sub-tab will be displayed. 5. Click on the Change easy button next to Business Directory. 6. By default, the list of Visible Branches will be displayed. 7. Click on the Add (+) table action. 8. Click on the Add hyperlink. 9. The Business Directory Registration page will be displayed. 10. Complete the required fields. 11. Click on Add. 12. A confirmation page will be displayed. 13. Check that this information is correct and, if necessary, click on Edit to make amendments. 14. Click on Confirm. 15. A results page will display the status of your request. 16. Click on Finish to complete the process. 17. If you selected to make the branch visible, the branch will reflect on the Business Directory Registration page on the Visible Branches view and will have a Pending Approval status. Once approved by FNB, the status will change to Approved and the branch will reflect in the Business Directory. 18. If you selected to hide the branch, the branch will reflect on the Business Directory Maintenance page on the Hidden Branches view and will have an Pending Approval status. Once approved by FNB, the status will change to Approved and the branch will still Online Banking User Guide 93 reflect on the Hidden Branches view. 4.15.3.2 Update Branch Information Use this function to update the details that you have captured for a branch. Update Branch Information 1. Click on Online Banking Settings in the page header options. 2. The Settings dashboard for the Online Banking sub-tab will be displayed. 3. Click on the Your Details sub-tab. 4. The Settings dashboard for the Your Details sub-tab will be displayed. 5. Click on the Change easy button next to Business Directory. 6. By default, the list of Visible Branches will be displayed. 7. If required click on the Hidden Branches view. 8. Click on the Maintain easy button for the respective branch. 9. The Business Directory Registration page will be displayed. 10. Make the required changes. 11. Click on Update. 12. A confirmation page will be displayed. 13. Check that this information is correct and, if necessary, click on Edit to make amendments. 14. Click on Confirm. 15. A results page will display the status of your request. 16. Click on Finish to complete the process. 17. If you selected to make the branch visible, the branch will reflect on the Business Directory Registration page on the Visible Branches view and will have a Pending Approval status. Once approved by FNB, the status will change to Approved and the branch will reflect in the Business Directory. 18. If you selected to hide the branch, the branch will reflect on the Business Directory Maintenance page on the Hidden Branches view and will have an Pending Approval status. Once approved by FNB, the status will change to Approved and the branch will still reflect on the Hidden Branches view. Online Banking User Guide 94 4.15.3.3 Hide a Branch Use this function to hide a branch that is currently displayed in the Business Directory. The branch information will be retained and moved to the Hidden Branches view. Important Information about Hiding a Branch • By selecting Hide you are removing your branch from view on the Business Directory. Hiding all your branches will make your whole business not visible on the Business Directory. Hide a Branch 1. Click on Online Banking Settings in the page header options. 2. The Settings dashboard for the Online Banking sub-tab will be displayed. 3. Click on the Your Details sub-tab. 4. The Settings dashboard for the Your Details sub-tab will be displayed. 5. Click on the Change easy button next to Business Directory. 6. By default, the list of Visible Branches will be displayed. 7. Click in the check box for the respective branch. 8. Click on Hide. 9. A confirmation page will be displayed. 10. Click on No to cancel this request or click on Yes to proceed. 11. The branch will now reflect on the Business Directory Maintenance page on the Hidden Branches view with its existing status. Branches that were Pending Approval, will become Inactive on the Hidden Branches view as these branches were updated before obtaining approval from FNB. Inactive branches will remain inactive on the Hidden Branches view when hidden. Online Banking User Guide 95 4.15.3.4 Display a Branch Use this function to display a previously Hidden Branch in the Business Directory. Display a Branch 1. Click on Online Banking Settings in the page header options. 2. The Settings dashboard for the Online Banking sub-tab will be displayed. 3. Click on the Your Details sub-tab. 4. The Settings dashboard for the Your Details sub-tab will be displayed. 5. Click on the Change easy button next to Business Directory. 6. By default, the list of Visible Branches will be displayed. 7. Click on the Hidden Branches view. 8. Click in the check box for the respective branch. 9. Click on Display. 10. A confirmation page will be displayed. 11. Click on No to cancel this request or click on Yes to proceed. 12. The branch will now reflect on the Business Directory Maintenance page on the Visible Branches view with its existing status. Branches that were Pending Approval, will become Inactive on the Visible Branches view as these branches were updated before obtaining approval from FNB. Inactive branches will remain inactive on the Visible Branches view. 4.15.4 Delete a Branch Use this function to permanently delete a branch from the Business Directory. Delete a Branch 1. Click on Online Banking Settings in the page header options. 2. The Settings dashboard for the Online Banking sub-tab will be displayed. 3. Click on the Your Details sub-tab. 4. The Settings dashboard for the Your Details sub-tab will be displayed. 5. Click on the Change easy button next to Business Directory. 6. By default, the list of Visible Branches will be displayed. 7. If required click on the Hidden Branches view. 8. Click in the check box for the respective branch. 9. Click on Delete. 10. A confirmation page will be displayed. 11. Click on No to cancel this request or click on Yes to proceed. 12. The branch will no longer display in the Business Directory. Online Banking User Guide 96 4.16 Third Party 4.16.1 Account Relationships Overview This functionality enables Business Banking and Commercial clients to grant permissions to an Individual or Business to access their accounts by way of a Customer to Account Relationship (CUAC). Creating a CUAC Relationship enables the Individual or Business to access the respective account/s via all available personal channels, including their personal Online Banking and FNB App. An updated mandate will automatically be issued to the Online Banking user detailing the Account Permissions and type of Relationship. The mandate will be stored Online. Do not confuse Account Relationships with the role of a Secondary User: Secondary User Customer to Account (CUAC) Relationship Does not require an FNB profile Requires an FNB profile Cards can not be issued in the secondary User’s Cards (Cheque / Petro Card) can be issued to the name user Is not a Signatory Can be made a Signatory No Account Mandate required An Account Mandate is required Important Information about (CUAC) Relationships • This functionality is restricted to the Primary User of a Business or Commercial profile. • The SAR (Sole Administrator) and CAR (Commercial Administrator) cannot be maintained Online. The following Account Relationship functionality is available: • Create an Account Relationship • Maintain Account Permissions • Delete Account Permissions • View all CUACs Relationships Linked to an Account • View the Account Permissions Assigned to an Individual/Business Online Banking User Guide 97 CUAC Relationships with Individuals 4.16.1.1 Add an Account Relationship with an Individual Use this function to create a Customer to Account (CUAC) Relationship with an individual. When creating a CUAC Relationship with an Individual you are able to use the Individual’s ID or Passport Number as a unique identifier. • You will require the following information about the individual in order to complete this function: o ID, Temporary ID or Passport details. o Contact Details o Physical Address Once the individual’s personal details are captured a search will be conducted to establish if the individual has an existing FNB profile. • If the individual’s profile exists the individual will have access to the respective accounts immediately. • If the individual’s profile does not match or does not exist, they will only have access to respective accounts once they have been verified by FNB. • • • • Exact Match o The individual has a matching profile on the system. o The user can Continue to create the CUAC Relationship immediately. Duplicate Match o A match has been found with the same ID Number but with a different surname. o The user can Edit, Cancel or Continue to create the CUAC Relationship. o FNB will verify the individual before the CUAC Relationship can be applied. Not Exact Match o The ID Number matches more than one profile. o The user can Edit, Cancel or Continue to create the CUAC Relationship. o FNB will verify the individual before the CUAC Relationship can be applied. No Match o There is no matching profile for this individual. o The user can Edit, Cancel or Continue to create the CUAC Relationship but will be required to complete additional information. o FNB will verify the individual before the CUAC Relationship can be applied. Online Banking User Guide 98 4.16.1.1.1 Account Roles - Individual The following types of Account Permissions are available online: • Transactor Can view and transact on the account using a full function cheque and/or petrol card through any banking channel. • Viewer Can obtain account information at any FNB Branch and through personal electronic banking services, such as their personal Online Banking profile. • Cardholder Is limited to transacting on the account using a full function Business Cheque and/or Petrol card. Options include: 1. Limited function FNB Visa business cheque card only 2. Limited function FNB Visa business cheque card and petrol card 3. FNB business petrol card only • Signatory Sole Account Signatory Can transact on the account using a full function FNB Visa business cheque card and/or petrol card. Joint Account Signatory Can transact on the account using a limited function FNB Visa business cheque card and/or petrol card. Online Banking User Guide 99 4.16.1.1.2 Add New Relationship - Individual Add a new CUAC Relationship with an Individual 1. Click on Online Banking Settings in the page header options. 2. The Settings dashboard for the Online Banking sub-tab will be displayed. 3. Click on the Your Details sub-tab. 4. The Settings dashboard for the Your Details sub-tab will be displayed. 5. Click on the View easy button for Account Relationships. 6. The accounts on your profile that are eligible for Account Relationships will be displayed. 7. Click on the Account Name hyperlink of the account that you would like to create the relationship for. 8. If there are any existing Account Relationships linked to this account they will be displayed. 9. Click on the Add (+) table action and select Add Individual. 10. The Add New User page will be displayed. 11. Complete the individual’s personal details in the fields provided. 12. Click on Continue. 13. The Set Up New User Details page will be displayed. 14. Continue to complete the individual’s personal details in the fields provided. 15. Click on Continue. 16. The system will verify if the individual has an FNB profile. 17. If there is not an exact match or no match, you can continue to create the CUAC Relationship but the permissions will only be applied once the individual has been verified by an FNB representative. 18. The Add User Permissions page will be displayed. 19. Select the applicable Account Role that you would like to assign to this individual from the drop down menu. 20. If you select a role that includes cards, you will be required to select the Card Type, set Card Limits and complete Card Delivery Details. 21. Click on Continue. 22. A confirmation page will be displayed. 23. Check that this information is correct and, if necessary, click Edit to make any amendments. 24. You will be required to read the new Account Relationship Mandate and then acknowledge that you accept the applicable mandate before you can continue. 25. Click on Confirm. 26. A results page will display the status of your request. 27. Click on Finish to complete the process. 28. The user will receive an email copy of the new mandate. 29. The CUAC Relationship individual will receive an sms advising that they have been allocated Online Banking User Guide 100 permissions to an account, together with the account details and the assigned permissions. 4.16.1.2 Maintain Account Permissions - Individual Use this function to Maintain Account Permissions for an existing CUAC Relationship. 1. Click on Online Banking Settings in the page header options. 2. The Settings dashboard for the Online Banking sub-tab will be displayed. 3. Click on the Your Details sub-tab. 4. The Settings dashboard for the Your Details sub-tab will be displayed. 5. Click on the View easy button for Account Relationships. 6. The accounts linked to your Online profile that are eligible for Account Relationships will be displayed. 7. Click on the Account Name hyperlink of the account that the respective CUAC Relationship is linked to. 8. A list of all Account Permissions will be displayed on the Active Users view. 9. Click on the Name hyperlink of the individual user that you would like to Add Permissions for. 10. The View User Permissions page will be displayed for the individual. 11. A list of the Account Relationship Permissions assigned to this user will be displayed per account. 12. Click on the Maintain easy button for the respective account. 13. Select the Account Role that you would like to assign to this individual. (Based on the role that you select, you may be required to make some additional selections such as card details.) 14. Click on Continue. 15. A confirmation page will be displayed. 16. Check that this information is correct and, if necessary, click Edit to make any amendments. 17. You will be required to read the new Account Relationship Mandate and then acknowledge that you accept the applicable mandate. 18. Click on Confirm. 19. A results page will display the status of your request. 20. Click on Finish to complete the process. 21. The user will receive an email copy of the new mandate. 22. The CUAC Relationship individual will receive an sms advising that they have been allocated permissions to an account, together with the account details and the assigned permissions. Online Banking User Guide 101 4.16.1.3 Delete Account Permissions - Individual Use this function to delete a CUAC Relationship. You can delete the CUAC Relationship for an individual for a single account or for all accounts simultaneously. Important Information about Deleting a (CUAC) Relationship • • • If the Individual had a cheque card or the ability to sign cheques the cancellation is immediate. Cheques issued prior to the deletion will still be processed. Cheques issued after the deletion will not be processed 1. Click on Online Banking Settings in the page header options. 2. The Settings dashboard for the Online Banking sub-tab will be displayed. 3. Click on the Your Details sub-tab. 4. The Settings dashboard for the Your Details sub-tab will be displayed. 5. Click on the View easy button for Account Relationships. 6. The accounts linked to your Online profile that are eligible for Account Relationships will be displayed. 7. Click on the Account Name hyperlink of the account that the respective CUAC Relationship is linked to. 8. A list of all Account Permissions will be displayed on the Active Users view. 9. Click on the Name hyperlink of the individual user that you would like to Add Permissions for. 10. The View User Permissions page will be displayed for the individual. 11. A list of the Account Relationship Permissions assigned to this user will be displayed per account. 12. Click on the Delete easy button for the respective account. 13. Click on the respective hyperlink to delete the CUAC Relationship for this account only, or for all accounts that this individual is linked to. 14. Click on Continue. 15. A confirmation page will be displayed. 16. Check that this information is correct and, if necessary, click Edit to make any amendments. 17. Click on Confirm. 18. A results page will display the status of your request. 19. Click on Finish to complete the process. 20. The CUAC Relationship individual will receive an sms advising that the CUAC Relationship has been terminated. Online Banking User Guide 102 4.16.1.4 View all CUAC Relationships Linked to an Account - Individual Use this function to view the CUAC Relationships linked to a specific account. 1. Click on Online Banking Settings in the page header options. 2. The Settings dashboard for the Online Banking sub-tab will be displayed. 3. Click on the Your Details sub-tab. 4. The Settings dashboard for the Your Details sub-tab will be displayed. 5. Click on the View easy button for Account Relationships. 6. The accounts on your profile that are eligible for Account Relationships will be displayed. 7. Click on the Account Name hyperlink of the account that you would like to view the CUAC Relationships for. 8. A list of all the CUAC Relationships linked to this account will be displayed together with their respective Permissions. 4.16.1.5 View the Account Permissions Assigned to an Individual Use this function to view the CUAC Relationships linked to a specific account. 1. Click on Online Banking Settings in the page header options. 2. The Settings dashboard for the Online Banking sub-tab will be displayed. 3. Click on the Your Details sub-tab. 4. The Settings dashboard for the Your Details sub-tab will be displayed. 5. Click on the View easy button for Account Relationships. 6. The accounts on your profile that are eligible for Account Relationships will be displayed. 7. Click on the Account Name hyperlink of the account that you would like to view the CUAC Relationships for. 8. A list of all of the CUAC Relationship linked to this account will be displayed together with their respective Permissions. 9. Click on the Name hyperlink of the Individual that you would like to view Permissions for. 10. A new page will display a list of all the Accounts as well as the Permissions that the Individual has on each of them. Online Banking User Guide 103 CUAC Relationships with Businesses 4.16.1.6 Add an Account Relationship with a Business Use this function to create a Customer to Account (CUAC) Relationship with a Business. When creating a CUAC Relationship with an Individual you are able to use the Individual’s ID or Passport Number as a unique identifier. Unfortunately there is no unique identifier for a business so the process to create a Business Relationship is very different: 1. A request is sent from you, the Profile Owner, via Online Banking to the Contact Person at the Business that you would like to create the CUAC Relationship for. 2. The Contact Person is then required to respond via Online Banking with their business account number. 3. This account number will then be used to create the Relationship. Important Information about Creating a CUAC Relationship with a Business The Business will need to meet the following requirements: • The Account Number must be for an FNB account that has a SOL relationship code. • The Business must be KYC’d . • The Business must have an Online Banking or Online Banking Enterprise profile. • The Business has 5 days to accept the request. 4.16.1.6.1 Account Roles - Business • Business Transactor Can view the account balances, transaction history and statement history on the nominated account. Can make payments or transfers to and from the nominated account. • Business Viewer Can only view account balances, transaction history and statement history on the nominated account Online Banking User Guide 104 4.16.1.6.2 Create a CUAC Relationship - Business Add a new CUAC Relationship with a Business 1. Click on Online Banking Settings in the page header options. 2. The Settings dashboard for the Online Banking sub-tab will be displayed. 3. Click on the Your Details sub-tab. 4. The Settings dashboard for the Your Details sub-tab will be displayed. 5. Click on the View easy button for Account Relationships. 6. The accounts on your profile that are eligible for Account Relationships will be displayed. 7. Click on the Account Name hyperlink of the account that you would like to create the relationship for. 8. If there are any existing Account Relationships linked to this account they will be displayed. 9. Click on the Add (+) table action and select Add Business. 10. The Add New Business page will be displayed. 11. Enter the Business Account Number and then click on Search. 12. The results of the Search will be displayed. 13. Check that this is the correct account according to the details provided to you by the Business; click in the check box to verify. 14. Click on Confirm. 15. Complete the details of the Contact Person at the Business in the fields provided. 16. Click on Continue. 17. Select the Permissions that you would like to assign to the Business for the respective accounts. 18. Click on Continue. 19. A confirmation page will be displayed. 20. Check that this information is correct and, if necessary, click Cancel to start again. 21. Before you can continue, you will be required to read the new Account Relationship Mandate/s and then acknowledge that you accept the applicable mandate/s for each account before you can continue. 22. Click on Confirm. 23. A results page will display the status of your request; the Status column of each Request will reflect as Pending. 24. Click on Finish to complete the process. 25. The Contact Person at the Business will receive an email notification of the request. Online Banking User Guide 105 4.16.1.7 View Sent Requests - Business Use this function to view the Status of the CUAC Relationship Requests that you have sent to Businesses. 1. Click on Online Banking Settings. 2. Select the Account Relationships sub-tab. 3. Click on the Sent Requests viewing option. 4. The details of each Request will be displayed together with their Status. 4.16.1.8 View Received Requests - Business Use this function to view the CUAC Relationship Requests that have been sent to you by other Businesses. 1. Click on Online Banking Settings in the page header options. 2. The Settings dashboard for the Online Banking sub-tab will be displayed. 3. Click on the Your Details sub-tab. 4. The Settings dashboard for the Your Details sub-tab will be displayed. 5. Click on the View easy button for Account Relationships. 6. Click on the Received Requests viewing option. 7. The details of each Request will be displayed together with their Status. Online Banking User Guide 106 4.16.1.9 Accepting a CUAC Relationship Request The Business that has been invited to have account access will need to accept the Relationship Link before the permissions will be implemented. The Contact Person has 5 days to accept the request before it expires. 1. If you have been sent a CUAC Relationship request, the next time you login to Online Banking a page called New Account Added will be displayed to you. 2. Click on Continue to proceed to the News Tab. 3. Click on Online Banking Settings. 4. Select the Account Relationships sub-tab. 5. Click on the Received Requests viewing option. 6. The new request will be displayed. 7. Click on the Accept or Reject easy button to respond to the request. 8. If you click on Accept a confirmation page will be displayed. 9. Before you can continue, you will be required to read the new Account Relationship Mandate/s and then acknowledge that you accept the applicable mandate/s for each account before you can continue. 10. Click on Confirm. 11. Click on Finish to complete the process. 12. The person that initiated the request will receive an email to advise them of the Status of the request. Online Banking User Guide 107 4.16.1.10 Maintain Account Permissions - Business Use this function to Maintain Account Permissions for an existing CUAC Relationship. 1. Click on Online Banking Settings in the page header options. 2. The Settings dashboard for the Online Banking sub-tab will be displayed. 3. Click on the Your Details sub-tab. 4. The Settings dashboard for the Your Details sub-tab will be displayed. 5. Click on the View easy button for Account Relationships. 6. The accounts linked to your Online profile that are eligible for Account Relationships will be displayed. 7. Click on the Account Name hyperlink of the account that the respective CUAC Relationship is linked to. 8. A list of all Account Permissions will be displayed on the Active Users view. 9. Click on the Name hyperlink of the individual user that you would like to Add Permissions for. 10. The View User Permissions page will be displayed for the individual. 11. A list of the Account Relationship Permissions assigned to this user will be displayed per account. 12. Click on the Maintain easy button for the respective account. 13. Select the Account Role that you would like to assign to this individual. (Based on the role that you select, you may be required to make some additional selections such as card details.) 14. Click on Continue. 15. A confirmation page will be displayed. 16. Check that this information is correct and, if necessary, click Edit to make any amendments. 17. You will be required to read the new Account Relationship Mandate and then acknowledge that you accept the applicable mandate. 18. Click on Confirm. 19. A results page will display the status of your request. 20. Click on Finish to complete the process. 21. The user will receive an email copy of the new mandate. 22. The CUAC Relationship individual will receive an sms advising that they have been allocated permissions to an account, together with the account details and the assigned permissions. Online Banking User Guide 108 4.16.1.11 Delete Account Permissions - Business Use this function to delete a CUAC Relationship. You can delete the CUAC Relationship for an individual for a single account or for all accounts simultaneously. Important Information about Deleting a (CUAC) Relationship • • • If the Individual had a cheque card or the ability to sign cheques the cancellation is immediate. Cheques issued prior to the deletion will still be processed. Cheques issued after the deletion will not be processed 1. Click on Online Banking Settings in the page header options. 2. The Settings dashboard for the Online Banking sub-tab will be displayed. 3. Click on the Your Details sub-tab. 4. The Settings dashboard for the Your Details sub-tab will be displayed. 5. Click on the View easy button for Account Relationships. 6. The accounts linked to your Online profile that are eligible for Account Relationships will be displayed. 7. Click on the Account Name hyperlink of the account that the respective CUAC Relationship is linked to. 8. A list of all Account Permissions will be displayed on the Active Users view. 9. Click on the Name hyperlink of the individual user that you would like to Add Permissions for. 10. The View User Permissions page will be displayed for the individual. 11. A list of the Account Relationship Permissions assigned to this user will be displayed per account. 12. Click on the Delete easy button for the respective account. 13. Click on the respective hyperlink to delete the CUAC Relationship for this account only, or for all accounts that this individual is linked to. 14. Click on Continue. 15. A confirmation page will be displayed. 16. Check that this information is correct and, if necessary, click Edit to make any amendments. 17. Click on Confirm. 18. A results page will display the status of your request. 19. Click on Finish to complete the process. 20. The CUAC Relationship Business will receive an sms advising that the CUAC Relationship has been terminated. Online Banking User Guide 109 4.16.1.12 View all CUAC Relationships Linked to an Account - Business Use this function to view the CUAC Relationships linked to a specific account. 1. Click on Online Banking Settings in the page header options. 2. The Settings dashboard for the Online Banking sub-tab will be displayed. 3. Click on the Your Details sub-tab. 4. The Settings dashboard for the Your Details sub-tab will be displayed. 5. Click on the View easy button for Account Relationships. 6. The accounts on your profile that are eligible for Account Relationships will be displayed. 7. Click on the Account Name hyperlink of the account that you would like to view the CUAC Relationships for. 8. A list of every CUAC Relationship linked to this account will be displayed together with their respective Permissions. 4.16.1.13 View the Account Permissions Assigned to a Business Use this function to view the CUAC Relationships linked to a specific account. 1. Click on Online Banking Settings in the page header options. 2. The Settings dashboard for the Online Banking sub-tab will be displayed. 3. Click on the Your Details sub-tab. 4. The Settings dashboard for the Your Details sub-tab will be displayed. 5. Click on the View easy button for Account Relationships. 6. The accounts on your profile that are eligible for Account Relationships will be displayed. 7. Click on the Account Name hyperlink of the account that you would like to view the CUAC Relationships for. 8. A list of every CUAC Relationship linked to this account will be displayed together with their respective Permissions. 9. Click on the Name hyperlink of the Business that you would like to view Permissions for. 10. A new page will display a list of all the Accounts as well as the Permissions that the Business has on each of them. Online Banking User Guide 110 4.16.2 Related Parties Overview Business banking clients can use this functionality to add a Related Party to their profile. A Related Party is a person or a company that has a relationship with your company. For example, depending on what type of company you have, this could be a Shareholder or Trustee relationship. For more information on Related Parties please refer to the Related Parties User Guide. Important Information about Related Parties • This functionality is restricted to the Primary User of a Business Profile. • The number of Related Parties that can be linked to your profile are dependent on the Customer Type of the Related Party. The following Related Parties functionality is available on Online Banking: • Add a Related Party • Maintain a Related Party o Change Relationship Type o Change Name of Related Party • Delete a Related Party • View Related Parties o Upload KYC Documents The following customer types can be created as Related Parties: • Private Individual • Private Company (Pty) (Ltd) • Wesbank Individuals • 06 Public Company (Ltd) • Foundation • Non Profit Company NPC/ (SEC 21) • Registered Friendly Society • Incorporated Company INC (SEC 53(b)) • Other Associations / Clubs / etc. • Registered Trust • Sole Proprietor • Co-operative • Partnership • Foreign Company registered in RSA • Close Corporation • Foreign Company not Registered in RSA Online Banking User Guide 111 4.16.2.1 Add a Related Party Use this function to add a Related Party to your profile. Important Information about Adding a Related Party • A Related Party is not linked to your profile in real-time as the respective KYC documentation has to be verified first. • To speed up the linking process, have the required supporting KYC documentation saved and ready to be uploaded before you begin this process. • Refer to the Related Parties User Guide to confirm the documentation required for the respective Relationship Type. Add a Related Party 1. Click on Online Banking Settings in the page header options. 2. The Settings dashboard for the Online Banking sub-tab will be displayed. 3. Click on the Your Details sub-tab. 4. The Settings dashboard for the Your Details sub-tab will be displayed. 5. Click on the View easy button for Related Parties. 6. If you have Related Parties linked to your profile they will be displayed together with their respective Relationship Type and linked Status. 7. Click on the Add (+) button in the table actions and then click on the Add Related Party hyperlink. 8. The Add Related Party capture page will be displayed. 9. Select the Type of Related Party that you would like to add, Individual or NonIndividual, and then click on Add. 10. Complete the details of the Related Party in the fields provided. 11. Click on Continue. 12. The Assign Relationship capture page will be displayed. 13. Select the Relationship Type for this party from the drop down menu. 14. Click on Continue. 15. A confirmation page will be displayed. 16. Check that this information is correct and, if necessary, click on Edit to make amendments. 17. Click on Confirm. Online Banking User Guide 112 18. A results page will display the status of your request. 19. Click on Upload Docs to begin loading the supporting documentation or click on Finish to complete the process and load the documents at a later stage. 4.16.2.2 Maintain a Related Party Use this function to maintain the details of a Related Party that is linked to your profile. There are two options available: 1. Replace the Name of the Related Party 2. Change Related Party Relationship Type Important Information about Maintaining a Related Party • The changes made to a Related Party are not processed in real-time as the respective KYC documentation has to be verified first. • To speed up the linking process have the required supporting KYC documentation saved and ready to be uploaded before you begin this process. • Refer to the Related Parties User Guide to confirm the documentation required for the respective Relationship Type. Maintain Relationship details of a Related Party 1. Click on Online Banking Settings in the page header options. 2. The Settings dashboard for the Online Banking sub-tab will be displayed. 3. Click on the Your Details sub-tab. 4. The Settings dashboard for the Your Details sub-tab will be displayed. 5. Click on the View easy button for Related Parties. 6. A list of the Related Parties linked to your profile together with their respective Relationship Type and linked Status will be displayed. 7. If the Relationship Type of a Related Party can be maintained online, a Maintain easy button will be displayed for that Related Party. Click on the Maintain easy button. Online Banking User Guide 113 Replace the Name of the Related Party 8. Select the Change Related Party Relationship Type option from the menu. 9. The Replace Related Party capture page will be displayed. 10. Select the new Type of Related Party, Individual or Non-Individual, and then click on Add. 11. Complete the details of the Related Party in the fields provided. 12. Click on Continue. 13. The Assign Relationship capture page will be displayed. 14. Select the Relationship Type for this party from the drop down menu. 15. Click on Continue. 16. If the Related Party has an active FNB profile you will be directed to the confirmation page; if they do not have a FNB profile you will be required to complete their Contact Details. 17. Click on Continue. 18. A confirmation page will be displayed. 19. Check that the details displayed are correct and, if necessary, click on Edit to amend these details. 20. Click on Confirm. 21. A results page will display the status of your request. 22. Click on Upload Docs to begin loading the supporting documentation or click on Finish to complete the process and load the documents at a later stage. Or Change Related Party Relationship Type 8. Select the Change Related Party Relationship Type option from the menu. 9. The Maintain Related Party capture page will be displayed. 10. Use the drop down menu to select the new Relationship Type that you would like to apply to this Related Party. 11. Click on Update. 12. A confirmation page will be displayed. 13. Check that the new Relationship Type is correct and, if necessary, click on Edit to amend these details. 14. Click on Confirm. 15. A results page will display the status of your request. 16. Click on Upload Docs to begin loading the supporting documentation or click on Finish to complete the process and load the documents at a later stage. Online Banking User Guide 114 4.16.2.3 Delete a Related Party Use this function to delete a Related Party from your profile. There are two options available: 1. Delete the Related Party Only 2. Delete the Related Party and any linked account permissions Important Information about Deleting a Related Party • The deletion of a Related Party will not take place real time, however the person that has been deleted will receive an SMS to inform them. Delete a Related Party 1. Click on Online Banking Settings in the page header options. 2. The Settings dashboard for the Online Banking sub-tab will be displayed. 3. Click on the Your Details sub-tab. 4. The Settings dashboard for the Your Details sub-tab will be displayed. 5. Click on the View easy button for Related Parties. 6. A list of the Related Parties linked to your profile together with their respective Relationship Type and linked Status will be displayed. 7. Click on the Delete easy button for the respective Related Party. 8. The Delete option screen will be displayed. 9. Select the type of deletion that you require, Delete the Related Party Only or Delete the Related Party and any linked account permissions. 10. Click on the Related Party Only option. 11. A confirmation page will be displayed. 12. Check that you are deleting the correct Related Party and, if necessary, click on Edit to amend these details. 13. Click on Confirm. 14. A results page will display the status of your request. 15. Click on Finish to complete the process. Online Banking User Guide 115 4.16.2.4 View Related Parties Use this function to view the Related Parties linked to your profile and / or to upload the required KYC documentation for a new Related Party. View Related Parties and / or Upload Documentation 1. Click on Online Banking Settings in the page header options. 2. The Settings dashboard for the Online Banking sub-tab will be displayed. 3. Click on the Your Details sub-tab. 4. The Settings dashboard for the Your Details sub-tab will be displayed. 5. Click on the View easy button for Related Parties. 6. A list of the Related Parties linked to your profile together with their respective Relationship Type and linked Status will be displayed. 7. If there are documents outstanding the Status of the linked party will reflect as ‘Upload Docs’; simply click on this hyperlink to begin uploading the required documents. Online Banking User Guide 116 4.16.3 BEE Application If you have a Business profile you can use this function to submit your BEE compliance applications online; you can have your BEE rating calculated and certified or have an existing certification renewed. A lead form will be generated online and sent directly to Empowerdex who will in turn contact you to complete the process, i.e. calculate a BEE rating and issue BEE certification to the Business. Once issued, your BEE certificate will be stored online. Businesses that request their BEE Certificate via Online Banking will receive a discount on their Empowerdex fees. The following functionality is available online: • Register for a BEE certificate • Renew an existing BEE certificate Important Information BEE Applications • Should you require more information or if you have any queries, kindly contact Empowerdex directly on 010 072 0500 or email queries to: [email protected], you can also visit the Empowerdex site at www.empowerdex.com 4.16.3.1 Register for a BEE Certificate Register for a BEE Certificate 1. Click on Online Banking Settings in the page header options. 2. The Settings dashboard for the Online Banking sub-tab will be displayed. 3. Click on the Your Details sub-tab. 4. The Settings dashboard for the Your Details sub-tab will be displayed. 5. Click on the Apply easy button for BEE Application. 6. The BEE Empowerdex Application Form will be displayed 7. Click on the Register (New Application) view. 8. Complete the required information in the fields provided. 9. If you have Shareholders in your business, click on the Add Shareholder Details hyperlink. 10. Complete the required information in the fields provided. Online Banking User Guide 117 11. Click on Add Shareholder. 12. The Shareholder’s details will reflect below the application form. 13. Repeat this process for each Shareholder. 14. Click on Submit. 15. A confirmation page will be displayed. 16. Check that this information is correct and, if necessary, click Edit to make any amendments. 17. Before you can continue you will be required to read and accept the Disclaimer. 18. Click on Submit. 19. A results page will display the status of your request; please take note of the Reference Number for your request. 20. Click on Finish to complete the process. 4.16.3.1 Renew your existing BEE Certificate Renew your existing BEE Certificate 1. Click on Online Banking Settings in the page header options. 2. The Settings dashboard for the Online Banking sub-tab will be displayed. 3. Click on the Your Details sub-tab. 4. The Settings dashboard for the Your Details sub-tab will be displayed. 5. Click on the Apply easy button for BEE Application. 6. The BEE Empowerdex Application Form will be displayed 7. Click on the Renew view. 8. Complete the required information in the fields provided. 9. Click on Submit. 10. A confirmation page will be displayed. 11. Check that this information is correct and, if necessary, click Edit to make any amendments. 12. Before you can continue you will be required to read and accept the Disclaimer. 13. Click on Submit. 14. A results page will display the status of your request; please take note of the Reference Number for your request. 15. Click on Finish to complete the process. Online Banking User Guide 118 6. News Tab Online Banking User Guide 119 5.1 News Tab Overview Every time you Log On to Online Banking you will be defaulted to the News Tab. It is imperative that you take note of the content on this page as important system alerts and information are communicated via the News Tab. The following information is available on the News Tab: Important Information o System alerts and upgrades are communicated on the News Tab. o This information may require action from a user. o The highlights ensure that you are up to date with new and enhanced functionality Highlights on Online Banking. Things You Can Do Online o These are quick links to the most commonly used functionality on Online Banking. eBucks Rewards o A high level overview of your eBucks status (Balance and Reward Level) is displayed. Login History o For your security, your last 3 login events for the past 14 days are displayed on the News Tab. o Click on the View History hyperlink to access a comprehensive Login History for your profile for both yourself and your Secondary Users. Pricing/Rewards Letters o View your Annual Price Review Letter for billable transactions and/or services fees for your respective accounts. You can Download or Print this document. Terms and Conditions o View FirstRand’s Remote Banking Terms and Conditions. You can Download or Print this document. Download Webroot® SecureAnywhere™ o Click on the link to download Webroot® SecureAnywhere™. Webroot® SecureAnywhere™ is an application that works on top of any anti-virus software and alongside all other security products on the user's PC. Online Banking User Guide 120 o 7. Rewards Tab Online Banking User Guide 121 6.1 Rewards Tab Overview FNB rewards their clients with up to 15% back in cash or eBucks on their purchases when they use their qualifying Cheque or Credit Card products. There are two rewards options: 1. My Rewards o Rewards for consumer clients 2. eBucks for Business o Rewards for business clients Important Information about Rewards • The Rewards tab is restricted to the Primary User and is therefore not visible to a Secondary User, this includes all eBucks functionality. • A Secondary User will only be able to View or Search the Transaction History and Detailed Balance of an eBucks Account via the My Bank Accounts Tab if the Primary User has granted the Secondary User Viewing Permissions to that account. • For all eBucks related queries please call the eBucks Contact Centre. o 6.1.1 What is eBucks? eBucks is a reward programme which enables you to earn and spend eBucks through various partners. You earn eBucks by simply banking with FNB and for using your Credit or Cheque Cards to make purchases from any of the eBucks partners. Ten eBucks is worth one Rand. Unlike other rewards, eBucks never expire and can be saved up. There are a number of ways that you can spend your eBucks: • • • • • • eBucks Shop eBucks Travel Online at eBucks internet partners In-store at eBucks card partners Fill up with eBucks at Engen Use your eBucks to purchase Prepaid Services or LOTTO/PowerBall tickets via Online Banking Online Banking User Guide 122 6.1.2 The Rewards Tab Landing Page The following information is displayed on the landing page of the Rewards Tab: • • Your eBucks Balance o This is the total balance of the eBucks earned on all of your linked accounts/products. o This balance is also displayed on the Accounts landing page. eBucks Actions o This column displays the current eBucks status of qualifying accounts/products that could earn you more eBucks. o Simply click on the Link Now hyperlink of a qualifying product to link it to your eBucks account. • Last Earn Amount o • This is the last amount of eBucks earned on each of your linked accounts. eBucks Retail Partners o Learn more about the current eBucks Retail Partners and how you can earn or spend eBucks at these partners. o Note: Clicking on the Retail Partners hyperlink will end your current Online Banking session and will redirect you to the eBucks web site. • Discounts and Monthly Top Sellers o Current eBucks Discounts and Monthly Top Sellers are displayed for your convenience. o Note: Clicking on the Retail Partners hyperlink will end your current Online Banking session and will redirect you to the eBucks web site. Online Banking User Guide 123 6.2 eBucks Functionality 6.2.1 Go to eBucks.com Use this function to be redirected to the eBucks website. Note: Your current Online Banking session will be ended and will redirect you to the eBucks website. 1. Click on the Rewards Tab. 2. Click on the Menu and select Go to eBucks.com. 3. Your Online Banking session will be ended and you will be redirected to the eBucks website. 6.2.2 Order eBucks Card Use this function to order an eBucks card. Note: Your current Online Banking session will be ended and will redirect you to the eBucks website. 1. Click on the Rewards Tab. 2. Click on the Menu and select Order eBucks Card. 3. Your Online Banking session will be ended and you will be redirected to the eBucks website where you can order an eBucks Card. Online Banking User Guide 124 6.2.3 Join eBucks or Link Now Use this function to join the eBucks rewards programme or, if you are an existing eBucks member, to link a qualifying FNB account/product to your existing eBucks account. Once registered, your eBucks account will be displayed on the My Bank Accounts tab with your other accounts. Important Information about the Join eBucks process • The Join eBucks process is not immediate; once you have submitted your information the process may take up to 30 minutes; you do not have to remain logged into Online Banking during this time. • There is a linkage fee to earn eBucks on a Credit Card. • For all eBucks related queries please call the eBucks Contact Centre. 1. Click on the Rewards Tab. 2. Click on the Menu and select Join eBucks to open a new eBucks account or Link Now to link a qualifying FNB account to earn eBucks. 3. The Join eBucks Rewards Programme registration page will be displayed. 4. To ensure that eBucks can keep you updated with your balances and latest offers, complete your Communication Preference and your Contact Details. 5. Before you can proceed you will be required to read and accept the eBucks Terms and Conditions. 6. Click on Continue. 7. A confirmation page will be displayed. 8. Check that the information displayed is correct and, if necessary, click on Edit to make any amendments or click Confirm to submit this information. 9. A results page will display the status of your application. 10. Click on Finish to complete the process. Online Banking User Guide 125 8. My Bank Accounts Tab Online Banking User Guide 126 7.1 My Bank Accounts Overview The My Bank Accounts tab provides you with an overview of the accounts and cards that are linked to your Online Banking Profile. The My Bank Accounts tab is divided into two sub-tabs: • My Accounts • My Cards The following functionality is available: My Accounts sub-tab: • eZiPay • eZiTransfer • eZiStatements • Account Settings • Transaction History • Detailed Balance • Statements • o Statement History o Interim Statements o Recreated Statements o Email Statements o Tax Certificates Instant Solutions o Instant Accounting o Instant financial Management o Instant Payroll o Merchant Insights Online Banking User Guide 127 My Cards sub-tab: Activate Card Update Card Delivery Details Online Secure Maintain Limits View PIN Create PIN Cancel Card Order Replacement Card Order Additional Card Online Banking User Guide 128 My Accounts Sub-Tab Online Banking User Guide 129 7.2. My Accounts Overview 7.2.1 My Accounts Landing Page The My Accounts page provides you with an overview of the accounts that are linked to your Online Banking Profile. The following information and functionality is available on this page: • Tailored Product and Service Offerings: o Product and/or service offerings that may be of benefit to you as an individual, small business owner, or to your existing product profile, are displayed at the top of the My Accounts landing page. o Simply click on the respective icon to read more about the product or service offering. o If you Decline the offer, the offer will not be displayed again. o • Account Category: o For your convenience, your accounts are grouped together by the product type; this makes it simpler to find an account. • Account Name: o Clicking on the Account Name hyperlink will direct you to the Account Settings functionality for the respective account. • Balance: o • This is your current account balance, excluding any pending debits or credits. Available Balance: o This is your available account balance, taking pending debits and credits into consideration. o Clicking on the Available Balance hyperlink will direct you to the Transaction History for the respective account. • Add a New Account: o Clicking on the “+Add a .....Account” option under an account category, will direct you to a list of products that you qualify for in the respective category. Clicking on a specific product will direct you to the seamless application process for that product. Online Banking User Guide 130 7.3 eZiPay Use this functionality to make a quick payment to a beneficiary on your Recipient List using the respective account. Make an eZiPayment 21. Click on the My Bank Accounts tab and, if it isn’t already selected, click on the My Accounts sub-tab. 22. The accounts linked to your profile will be displayed. 23. Click on the Pay easy button of the account that you would like to make the payment from. 24. The eZiPay slide out will be displayed. 25. Select the Recipient Category from the drop down menu; if you have not categorised this recipient leave the selection on All Categories. 26. Select the Recipient from the drop down menu. 27. Enter the My Reference; this is the reference that you would like to appear on the account that you are transferring the funds from e.g. Lift Club. 28. Enter the Their Reference; this is the reference that you would like to appear on the recipient’s account e.g. AC Smith. 29. Enter the amount that you would like to pay. 30. Click on Pay. 31. A confirmation page will be displayed. 32. Check that this information is correct and, if necessary, click Edit to make any amendments. 33. Click on Confirm. 34. A results page will display the status of your request. 35. Click on Finish to complete the process. Online Banking User Guide 131 7.4 eZiTransfer Use this functionality to make quick transfers from the respective account. Make an eZiTransfer 1. Click on the My Bank Accounts tab and, if it isn’t already selected, click on the My Accounts sub-tab. 2. The accounts linked to your profile will be displayed. 3. Click on the Transfer easy button of the account that you would like to make the transfer from. 4. The eZiTransfer slide out will be displayed. 5. Use the account switcher to select the account that you would like to Transfer To. 6. Enter the amount that you would like to transfer. 7. Enter the From Reference; this is the reference that you would like to appear on the account that you are transferring the funds from e.g. Holiday Savings. 8. Enter the To Reference; this is the reference that you would like to appear on the recipient’s account e.g. Cheque Savings. 9. Click on Transfer. 10. A confirmation page will be displayed. 11. Check that this information is correct and, if necessary, click Edit to make any amendments. 12. Click on Confirm. 13. A results page will display the status of your request. 14. Click on Finish to complete the process. Online Banking User Guide 132 7.5 eZiStatements Use this functionality to email or download the last three statements on the respective account. Email or Download eZiStatements 1. Click on the My Bank Accounts tab and, if it isn’t already selected, click on the My Accounts sub-tab. 2. The accounts linked to your profile will be displayed. 3. Click on the Statements easy button of the account that you would like the statements for. 4. The eziStatement slide out will be displayed. 5. Click on the respective button to select to Email or Download the statement/s. 6. Select which statements you would like from the drop down menu. Email 7. Enter the Email Address that you would like the statements to be sent to. 8. Click on Continue. 9. A confirmation page will be displayed. 10. Before you can continue you will be required to read and accept the Terms and Conditions. 11. Check that this information is correct and, if necessary, click Edit to make any amendments. 12. Click on Confirm. 13. A results page will display the status of your request. 14. Click on Finish to complete the process. Download 7. Click on Download. 8. Select to Open or Save the statement download. Online Banking User Guide 133 7.6 Account Settings: General Use the Account Settings functionality to perform account maintenance on the accounts linked to your profile. The Account Settings dashboard provides a single point of entry to the most commonly used functionality for the selected account. Important Information about Account Settings • All Account Settings functionality is restricted to the Primary User. • To maintain a PayPal Profile, select the PayPal Services menu option on the Forex Tab. • Account settings functionality is account specific; only the functionality available on the selected account will be displayed. • Transaction limits are set at a profile level and not account level; to amend your daily limits please use the Daily Profile Limits functionality which is available in the Online Banking Settings page header options. For your convenience, the Account Settings information in the User Guide is grouped by product type. Access Account Settings 1. Click on the My Bank Accounts tab and, if it isn’t already selected, click on the My Accounts sub-tab. 2. The accounts linked to your profile will be displayed. 3. Click on the Account Name hyperlink of the respective account. 4. The Account Settings dashboard for the selected account will be displayed. Online Banking User Guide 134 7.6.1 Amend Basic Account Settings Use this function to view and maintain basic account details. These settings are generic to most account types. The following Basic Account Settings can be maintained: • Account Nickname o This is the personalised Account Name that reflects on the My Accounts record table. o o Why would you use this? o Name your accounts to suit you; it’s easier to remember a name than an account number! o If you have two cheque accounts linked to your profile and one is joint account, you can change the Account Nicknames to Joint Cheque Account and Personal Cheque Account so that you can identify them more easily. o • Name on Proof of Payment o This is the name that will appear on Payment Notifications that you send. o o Why would you use this? o Many clients are known only by their shortened name or by a nickname; instead of Joseph Soap, you may prefer to have Joe Soap reflect on the Payment notifications that you send. Maintain Account Settings 1. Click on the My Bank Accounts tab and, if it isn’t already selected, click on the My Accounts sub-tab. 2. The accounts linked to your profile will be displayed. 3. Click on the Account Name hyperlink of the respective account. 4. The Account Settings dashboard will be displayed. 5. Amend the Account Nickname and the Name for your Proof of Payments as required. 6. Click on the Update easy button. 7. A confirmation page will be displayed. 8. Check that this information is correct and, if necessary, click Edit to make any amendments. 9. Click on Confirm. 10. A results page will display the status of your request. 11. Click on Finish to complete the process. Online Banking User Guide 135 7.7 Account Settings: Cheque Accounts The following Account Settings functionality is available for Cheque Accounts: • Upgrade Cheque Account • Open Savings Pocket • Debit Order Switching • Stop Debit Order • Stop Cheque • Apply for a Temporary Loan • Overdraft Maintenance • Apply for a Revolving Loan • Order Tablet / Smartphone • Join eBucks • Electronic Notifications Online Banking User Guide 136 7.7.1 Upgrade Cheque Account Use this function to Upgrade your Cheque Account. Important Information about Upgrading a Cheque Account • When you upgrade your cheque account the account number will not change. • If you have created Recipients and Scheduled Payments against the account these will not be affected by the upgrade. • Your existing Account Settings will still apply to your upgraded account, e.g. inContact and Alerts • If you have an existing Savings Pocket linked to your cheque account this will be transferred to the upgraded account. Upgrade Cheque Account 1. Click on the My Bank Accounts tab and, if it isn’t already selected, click on the My Accounts sub-tab. 2. The accounts linked to your profile will be displayed. 3. Click on the Account Name hyperlink of the respective Cheque account. 4. The Account Settings dashboard will be displayed. 5. Click on the Upgrade Account easy button. 6. Selecting this option will end your current banking session and redirect you to the FNB Product Shop; select No to cancel or Yes to continue. 7. Once you have completed the application click on the Return to Online Banking hyperlink on the top right of the page to open a new Online Banking session. Online Banking User Guide 137 7.7.2 Open Savings Pocket A Savings Pocket helps you to keep your savings separate from your transactional account. Use this function to open a Savings Pocket and link it to a cheque account. Important Information about Opening a Savings Pocket • Only one Savings Pocket can be opened per qualifying account. • The Savings Pocket account will only be displayed on the My Accounts sub-tab when a new Online Banking session is opened, i.e. log out and log back on). Open Savings Pocket 1. Click on the My Bank Accounts tab and, if it isn’t already selected, click on the My Accounts sub-tab. 2. The accounts linked to your profile will be displayed. 3. Click on the Account Name hyperlink of the respective Cheque account. 4. The Account Settings dashboard will be displayed. 5. Click on the Open Savings Pocket easy button. 6. The Savings Pocket capture page will be displayed. 7. Use the account switcher to select the account that you would like to link the Savings Pocket to. 8. Click on Open Savings Pocket. 9. The results of your request will be displayed. 10. Click on Finish to complete the process. Online Banking User Guide 138 7.7.3 Debit Order Switching Use the Debit Order Switching functionality to move your existing debit orders from other banking institutions to your new or existing FNB Cheque account. You can also use this functionality to switch your debit orders from one FNB account to another FNB account within your profile. Important Information about Debit Order Switching • The Debit Order functionality is restricted to Consumer clients. • The Debit Order Switching service is free. • Certain service providers may not accept instructions from FNB. In such instances, FNB will inform you. There are three Debit Order Switching options to choose from: 1. Debit Order Switching via bank statement import (csv or txt format) 2. Debit Order Switching via manual capture 3. Download the Debit Order Switching application form and submit the completed form via fax or email Online Banking User Guide 139 • If you select to Import your debit order details using an electronic banking statement, saved the statement on your desktop in either csv or txt format before you begin. Apply for Debit Order Switching 1. Click on the My Bank Accounts tab and, if it isn’t already selected, click on the My Accounts sub-tab. 2. The accounts linked to your profile will be displayed. 3. Click on the Account Name hyperlink of the respective Cheque account. 4. The Account Settings dashboard will be displayed. 5. Click on the Debit Order Switching easy button. 6. Selecting this option will end your current banking session and redirect you to the FNB Product Shop; select No to cancel or Yes to continue. 7. Once you have completed the application click on the Return to Online Banking hyperlink on the top right of the page to open a new Online Banking session. Online Banking User Guide 140 7.7.4 Stop Cheque Use this function to add and manage Stop Payments on your cheques. A Stop Payment is an instruction to your bank to not allow a specified cheque or debit order to be processed against your account. You can add Stop Payments for a single cheque or for multiple cheques simultaneously. Important Information about Stop Cheque Instructions • Before adding a Stop Cheque instruction, it is essential that you check the Transaction History of the respective account to verify that the cheque has not yet been processed; once a cheque has been processed and it reflects on your account, you cannot place a Stop Payment against it. • Should you use this facility to stop a cheque that has been presented for payment, the cheque cannot be stopped, even though successful confirmation is displayed. • The Bank is not liable for any losses sustained due to incorrect information supplied or if the cheque has already been paid. • You cannot stop a Bank Guaranteed cheque if the amount on the cheque does not exceed the guarantee amount and the drawer adhered to the guarantee conditions. • For confirmation that a stop payment was successful, please contact your branch. The following functionality is available: • Add a Stop Cheque instruction • View Stop Cheque instructions • Cancel a Stop Cheque instruction Online Banking User Guide 141 7.7.4.1 Add a Stop Cheque Instruction Use this function to add a Stop Cheque instruction for a single cheque or multiple cheques simultaneously. Reasons to stop a cheque: • Lost/Stolen • Issued in error • Cancelled • Other • Before adding a Stop Cheque instruction, it is essential that you check the Transaction History of the respective account to verify that the cheque has not yet been processed; once a cheque has been processed and it reflects on your account, you cannot place a Stop Payment against it. Add a Stop Cheque Instruction 1. Click on the My Bank Accounts tab and, if it isn’t already selected, click on the My Accounts sub-tab. 2. The accounts linked to your profile will be displayed. 3. Click on the Account Name hyperlink of the respective Cheque account. 4. The Account Settings dashboard will be displayed. 5. Click on the Stop Cheque easy button. 6. The Stop Cheques capture page will be displayed. 7. Click on the menu and select the Stop Cheque Options > Add Stop Cheque option. 8. The Add Stop Cheque Instruction capture page will be displayed. 9. Select if you would like to stop a Single Cheque or Multiple Cheques. 10. Based on your selection, enter the Cheque Number or the Cheque Number Range that you would like to stop. 11. Select the Reason from the drop down menu. 12. Click on Stop Cheque. 13. A confirmation page will be displayed. 14. Check that this information is correct and, if necessary, click on Edit to make amendments. 15. Click on Confirm to proceed. 16. The results page will display the status of your request. 17. Click on Finish to complete the process. Online Banking User Guide 142 7.7.4.2 View Stop Cheque Instructions Use this function to view Stop Cheque instructions that you have loaded against a Cheque account The following information is displayed for a Stop Cheque instruction: • Date Placed o • Date Expires o • Date on which the Stop Cheque instruction will expire Cheque Number o • Date on which the Stop Cheque instruction was requested Cheque Number or Range of Cheque Numbers that you have requested to stop. Amount: o Value of the cheque View Stop Cheque Instructions 1. Click on the My Bank Accounts tab and, if it isn’t already selected, click on the My Accounts sub-tab. 2. The accounts linked to your profile will be displayed. 3. Click on the Account Name hyperlink of the respective Cheque account. 4. The Account Settings dashboard will be displayed. 5. Click on the Stop Cheque easy button. 6. The View Stop Cheque Instructions page will be displayed. Online Banking User Guide 143 7.7.4.3 Cancel a Stop Cheque Instruction Use this function to cancel a Stop Cheque instruction. Cancel a Stop Cheque Instruction 1. Click on the My Bank Accounts tab and, if it isn’t already selected, click on the My Accounts sub-tab. 2. The accounts linked to your profile will be displayed. 3. Click on the Account Name hyperlink of the respective Cheque account. 4. The Account Settings dashboard will be displayed. 5. Click on the Stop Cheque easy button. 6. The View Stop Cheque Instructions page will be displayed. 7. Click on the Cancel Instruction easy button for the instruction that you would like to cancel. 8. A confirmation page will be displayed. 9. Check that this information is correct and, if necessary, click on Edit to make amendments. 10. Click on Confirm to proceed. 11. The results page will display the status of your request. 12. Click on Finish to complete the process. Online Banking User Guide 144 7.7.5 Stop Debit Order Use this function to add and manage Stop Payments on your debit orders. A Stop Payment is an instruction to your bank to not allow a specified cheque or debit order to be processed against your account. Important Information about Stop Debit Order Instructions • This functionality is not available to Business Banking clients. • FNB direct debit orders, Home Loans, Revolving Loan repayments etc. cannot be stopped via Online Banking; should you wish to submit an instruction to stop a FNB debit order please contact your branch or the relevant department. • You must create a stop payment for a debit order a minimum of five business days prior to the processing date. • Please note that if the debit order was not stopped at least 5 working days before it was scheduled to go off your account it might still be processed. In that case, your request to stop a debit order will be effective from the following month. • The Bank is not liable for any losses incurred due to incorrect information supplied or if the debit order has already been paid. • It is your responsibility to relay this instruction to the relevant service provider. • For confirmation that the debit order was stopped, please contact 0860 11 22 44. The following functionality is available: • Add a Stop Debit Order instruction • View Stop Debit Order instructions Online Banking User Guide 145 7.7.5.1 Add a Stop Debit Order Instruction Use this function to add a Stop Debit Order instruction against a cheque account. Important Information about Stop Debit Order Instructions • FNB direct debit orders, Home Loans, Revolving Loan repayments etc. cannot be stopped via Online Banking; should you wish to submit an instruction to stop a FNB debit order please contact your branch or the relevant department. Add a Stop Debit Order Instruction 1. Click on the My Bank Accounts tab and, if it isn’t already selected, click on the My Accounts sub-tab. 2. The accounts linked to your profile will be displayed. 3. Click on the Account Name hyperlink of the respective Cheque account. 4. The Account Settings dashboard will be displayed. 5. Click on the Stop Debit Order easy button. 6. The Stop Debit Orders page will be displayed. 7. Click on the menu and select the Stop Debit Order > Add Instruction option. 8. A list of current Debit Orders on the selected account will be displayed. 9. Click on the Stop easy button of the respective debit order. 10. The Stop Debit Order slide out will be displayed. 11. Enter the Amount Range of the debit order. 12. Click on Stop. 13. A confirmation page will be displayed. 14. Before you can continue you will be required to read and accept the Disclaimer as well as the Terms and Conditions. 15. Check that this information is correct and, if necessary, click on Edit to make amendments. 16. Click on Confirm to proceed. 17. The results page will display the status of your request. 18. Click on Finish. 19. Click on the Download Instruction hyperlink to download a pre-populated letter to the respective service provider instructing them to stop the debit order. 20. Click on Back to complete the process. Online Banking User Guide 146 7.7.5.2 View Stop Debit Order Instructions Use this function to view Stop Debit Order instructions that you have loaded against an account in the past six months. The following information is displayed for a Stop Debit Order instruction: • Stopped Date o • Description o • Name/Description of the service provider as it appears on your bank statement Amount o • Date on which the Stop Debit Order instruction was initiated Value of the debit order, this can be a specific amount or a range. Instruction: o This is a pre-populated instruction to the respective service provider to stop the debit order. View Stop Debit Order Instructions 1. Click on the My Bank Accounts tab and, if it isn’t already selected, click on the My Accounts sub-tab. 2. The accounts linked to your profile will be displayed. 3. Click on the Account Name hyperlink of the respective Cheque account. 4. The Account Settings dashboard will be displayed. 5. Click on the Stop Debit Order easy button. 6. The Stop Debit Orders page will be displayed. 7. Click on the Download hyperlink under Instruction to download a pre-populated instruction to the respective service provider. Online Banking User Guide 147 7.7.6 Overdraft Maintenance An Overdraft Facility provides you with a convenient means of short-term finance when you need it and is available on qualifying Cheque Accounts. Use this function to manage your overdraft requirements. The following functionality is available: • Apply o • Increase o Apply to increase your existing overdraft facility • Decrease o Decrease your existing overdraft facility in real-time. • Cancel o Cancel your existing overdraft facility in real-time. Apply for a new overdraft facility Important Information about Applying for an Overdraft Facility • This functionality is restricted to Consumer clients. • Your application is subject to the National Credit Act (NCA) scoring process; this will ensure that you have the ability to pay back the amount that you borrow. • The minimum amount that can be taken up is R300 and the maximum amount will be determined by your NCA score. • If you have an existing Temporary Loan you cannot apply for an Overdraft facility. Online Banking User Guide 148 7.7.6.1 Apply for an Overdraft Use this function to apply for an overdraft facility on your qualifying Cheque Account An Overdraft Facility provides you with a convenient means of short-term finance when you need it. Important Information about Applying for an Overdraft Facility • Your application is subject to the National Credit Act (NCA) scoring process; this will ensure that you have the ability to pay back the amount that you borrow. • You will be required to upload Proof of income (latest payslip or last three month's bank statements) as part of the application process. Apply for an Overdraft Facility 1. Click on the My Bank Accounts tab and, if it isn’t already selected, click on the My Accounts sub-tab. 2. The accounts linked to your profile will be displayed. 3. Click on the Account Name hyperlink of the respective Cheque account. 4. The Account Settings dashboard will be displayed. 5. Click on the Overdraft > Apply easy button. 6. Selecting this option will end your current banking session and redirect you to the FNB Product Shop; select No to cancel or Yes to continue. 7. Once you have completed the application click on the Return to Online Banking hyperlink on the top right of the page to open a new Online Banking session. Online Banking User Guide 149 7.7.6.2 Increase Overdraft Facility Use this function to apply for an increased limit on your existing Overdraft Facility. Important Information about Applying for an Increased Overdraft Facility • Your application is subject to the National Credit Act (NCA) scoring process; this will ensure that you have the ability to pay back the amount that you borrow. • You will be required to upload Proof of income (latest payslip or last three month's bank statements) as part of the application process. Apply to Increase an Overdraft Facility 1. Click on the My Bank Accounts and, if it isn’t already selected, click on the My Accounts sub-tab. 2. The accounts linked to your profile will be displayed. 3. Click on the Account Name hyperlink of the respective Cheque account. 4. The Account Settings dashboard will be displayed. 5. Click on the Overdraft > Increase easy button. 6. Selecting this option will end your current banking session and redirect you to the FNB Product Shop; select No to cancel or Yes to continue. 7. Once you have completed the application click on the Return to Online Banking hyperlink on the top right of the page to open a new Online Banking session. Online Banking User Guide 150 7.7.6.3 Decrease the Limit of an Existing Overdraft Facility Use this function to decrease the limit on your existing overdraft facility in real-time. Important Information about Decreasing an Overdraft Facility • When the overdraft facility is reduced, this takes immediate effect. • Your requested overdraft limit cannot be less than your current debit balance. • Should you require an increase to your overdraft facility in future, please note that your re-application is subject to the National Credit Act (NCA) scoring process and the limit you qualify for may differ to your current limit. Decrease an Overdraft Facility 1. Click on the My Bank Accounts and, if it isn’t already selected, click on the My Accounts sub-tab. 2. The accounts linked to your profile will be displayed. 3. Click on the Account Name hyperlink of the respective Cheque account. 4. The Account Settings dashboard will be displayed. 5. Click on the Overdraft > Decrease easy button. 6. The Decrease Overdraft capture page will be displayed. 7. Enter the New Overdraft Limit. 8. Before you can continue you will be required to read and accept the Terms and Conditions. 9. Click on Update. 10. A confirmation page will be displayed. 11. Check that this information is correct and, if necessary, click on Edit to make amendments. 12. Click Confirm to proceed. 13. The results page will display the status of your request. 14. Click on Finish to complete the process. Online Banking User Guide 151 7.7.6.4 Cancel Overdraft Facility If your overdraft facility is currently not in use, you can use this function to cancel it in real-time. Important Information about Cancelling an Overdraft Facility • An Overdraft Facility cannot be cancelled while it is still in use, i.e. there is a Debit Balance on the respective account. • Cancelling your overdraft limit will result in the immediate termination of your overdraft facility. • Should you require an overdraft facility in the future, please note that your re-application is subject to the National Credit Act (NCA) scoring process and the limit you qualify for may differ to your current limit. Cancel an Overdraft Facility 1. Click on the My Bank Accounts and, if it isn’t already selected, click on the My Accounts sub-tab. 2. The accounts linked to your profile will be displayed. 3. Click on the Account Name hyperlink of the respective Cheque account. 4. The Account Settings dashboard will be displayed. 5. Click on the Overdraft > Cancel easy button. 6. The Cancel Overdraft capture page will be displayed. 7. Before you can continue you will be required to read and accept the Terms and Conditions. 8. Click on Continue. 9. A confirmation page will be displayed. 10. Check that this information is correct and, if necessary, click on Cancel to terminate the request. 11. Click Confirm to proceed. 12. The results page will display the status of your request. 13. Click on Finish to complete the process. Online Banking User Guide 152 7.7.7 Apply for a Temporary Loan A Temporary Loan is a short-term credit facility whereby you are offered a fixed loan amount interest-free for a period of 31 days. Use this function to apply for a Temporary Loan. Important Information about Applying for a Temporary Loan • This functionality is restricted to Consumer clients. • Your application is subject to the National Credit Act (NCA) scoring process; this will ensure that you have the ability to pay back the amount that you borrow. • The minimum amount that can be taken up is R300 and the maximum amount will be determined by your NCA score. • If you have an existing Overdraft Facility you cannot apply for a Temporary Loan. What you need before starting this application: • The loan is repayable within 31 days or monthly interest will apply • Any deposits into your account will be used to repay the loan. • An initiation fee, including VAT, applies Apply for a Temporary Loan 1. Click on the My Bank Accounts tab and, if it isn’t already selected, click on the My Accounts sub-tab. 2. The accounts linked to your profile will be displayed. 3. Click on the Account Name hyperlink of the respective Cheque account. 4. The Account Settings dashboard will be displayed. 5. Click on the Take Up a Temporary Loan easy button. 6. Selecting this option will end your current banking session and redirect you to the FNB Product Shop; select No to cancel or Yes to continue. 7. Once you have completed the application click on the Return to Online Banking hyperlink on the top right of the page to open a new Online Banking session. Online Banking User Guide 153 7.7.8 Apply for a Revolving Loan Use this function to apply for a Revolving Loan. Important Information about Applying for a Temporary Loan • This functionality is restricted to Consumer clients. • Your application is subject to the National Credit Act (NCA) scoring process; this will ensure that you have the ability to pay back the amount that you borrow. Apply for a Revolving Loan 1. Click on the My Bank Accounts tab and, if it isn’t already selected, click on the My Accounts sub-tab. 2. The accounts linked to your profile will be displayed. 3. Click on the Account Name hyperlink of the respective Cheque account. 4. The Account Settings dashboard will be displayed. 5. Click on the menu and select the Revolving Loan > Apply option. 6. Selecting this option will end your current banking session and redirect you to the FNB Product Shop; select No to cancel or Yes to continue. 7. Once you have completed the application click on the Return to Online Banking hyperlink on the top right of the page to open a new Online Banking session. Online Banking User Guide 154 7.7.9 Notification Services There are two types of Notification Services on Online Banking: 1. inContact 2. Electronic Services • Balance Alert • Limit Alert • Scheduled Payment Alerts More information and step by step guides for each of these Notification Services can be found in the chapter about Online Banking Settings. Important Information about Notification Services • inContact and Electronic Services are account/product specific. • Registration for inContact is free and there are no subscription fees. • Electronic Services are subject to a monthly subscription fee per account. See the pricing guide for more information. 7.7.9.1 inContact inContact is an innovative messaging system that notifies you of activity on your accounts, helping you to keep track of your financial transactions as they occur and identify unauthorised transactions immediately. 7.7.9.2 Balance Alert The Balance Alert service will send an sms and/or email alert to you on a day and frequency specified by you to notify you of the previous day's closing account balance/s. 7.7.9.3 Limit Alert The Limit Alert service will send an sms and/or email alert to you when your account has reached a limit specified by you. 7.7.9.4 Scheduled Payment Alert The Scheduled Payment Alert Service sends you an alert one business day prior to the processing date of your Scheduled Payment/s. Online Banking User Guide 155 When activating the Scheduled Payment Alert option on an account you can choose between two types of alerts: 1. One Working Day Prior as a reminder 2. Inadequate funds in the respective account to fund an upcoming Scheduled Payment Online Banking User Guide 156 7.7.10 Order Tablet / Smartphone Use this function to order a Smartphone, Tablet or Laptop at discounted prices via FNB and pay for the device over a 24 month period. Important Information about Ordering Mobile Devices. • Please expect a call from our fulfilment team regarding your application within 10 working days. • If you have any queries regarding this deal please contact 0860 10 29 70 Order a Smartphone, Tablet or Laptop 1. Click on the My Bank Accounts tab and, if it isn’t already selected, click on the My Accounts sub-tab. 2. The accounts linked to your profile will be displayed. 3. Click on the Account Name hyperlink of the respective Cheque account. 4. The Account Settings dashboard will be displayed. 5. Click on the menu and select the Apply > Tablet / Smartphone Order option. 6. The logos of the available brands will be displayed. 7. Click on the brand logo to view the products offered for that brand. 8. Click on the Select button of the preferred device to proceed with your order. 9. The Devices Setup page will be displayed. 10. Select the Additional Accessories that you would like. 11. Click on the Yes or No easy button to select your Insurance option. 12. Click on Continue. 13. A confirmation page will be displayed. 14. Before you can continue you will be required to read and accept the Terms and Conditions. 15. Check that this information is correct and, if necessary, click on Cancel to terminate the request. 16. Click Confirm to proceed. 17. The results page will display the status of your request. 18. Click on Finish to complete the process. Online Banking User Guide 157 7.8 Account Settings: Credit Card Accounts The following Account Settings functionality is available for Credit Card Accounts: • Upgrade Credit Card • Increase Credit Limit • Balance Transfers • Credit Limit Shifts • Auto Payments • Order Additional Cards • Join eBucks • Subscribe to Value Added Services Online Banking User Guide 158 7.8.1 Upgrade Credit Card Use this function to Upgrade your Credit Card (Card Swop) to a qualifying card colour; the Card Swop options presented to you are determined by your gross annual income. You can upgrade with or without a Credit Limit Increase. Important Information about Upgrading a Credit Card Account • This function is not applicable to Private Clients or Private Wealth Clients. • Your current credit card must be at least 6 months old. • A new account number will be generated. • The pricing of the new card will apply; the new card fees will be applied from the following billing cycle. • There will be no change to the credit limit when performing a card swop. • If the card swop process is successful then any linked cards will be swopped automatically. Upgrade Credit Card 1. Click on the My Bank Accounts tab and, if it isn’t already selected, click on the My Accounts sub-tab. 2. The accounts linked to your profile will be displayed. 3. Click on the Account Name hyperlink of the respective Credit Card account. 4. The Account Settings dashboard will be displayed. 5. Click on the Upgrade Credit Card / Increase Credit Limit easy button. 6. Selecting this option will end your current banking session and redirect you to the FNB Product Shop; select No to cancel or Yes to continue. 7. Once you have completed the application click on the Return to Online Banking hyperlink on the top right of the page to open a new Online Banking session. Online Banking User Guide 159 7.8.2 Increase Credit Limit Use this function to apply for an increased credit limit facility on an existing Credit Card account. Important Information about Applying for a Credit Limit Increase • Your application is subject to the National Credit Act (NCA) scoring process; this will ensure that you have the ability to pay back the amount that you borrow. Apply to Increase Credit Limit 1. Click on the My Bank Accounts and, if it isn’t already selected, click on the My Accounts sub-tab. 2. The accounts linked to your profile will be displayed. 3. Click on the Account Name hyperlink of the respective Credit Card account. 4. The Account Settings dashboard will be displayed. 5. Click on the Upgrade Credit Card / Increase Credit Limit easy button. 6. Selecting this option will end your current banking session and redirect you to the FNB Product Shop; select No to cancel or Yes to continue. 7. Once you have completed the application click on the Return to Online Banking hyperlink on the top right of the page to open a new Online Banking session. Online Banking User Guide 160 7.8.3 Balance Transfer Use this function to create a new budget transaction with a special repayment plan by transferring a portion of your Straight Balance to a Budget Transaction. Once the Balance Transfer transaction has been approved, the Balance Transfer amount will be transferred to your straight facility, enabling you to then use these funds to settle any balance owing on other debts. Important Information about Balance Transfers • This functionality is restricted to Consumer clients. • The minimum Balance Transfer Amount is R2,000.00. • The shortest Repayment Period you can select is 18 months; the longest Repayment Period is 60 months. • A reduced interest rate will apply to the Balance Transfer amount for a limited period, thereafter the interest rate will revert to your current rate. Online Banking User Guide 161 Transfer Straight Balance to Budget 1. Click on the My Bank Accounts and, if it isn’t already selected, click on the My Accounts sub-tab. 2. The accounts linked to your profile will be displayed. 3. Click on the Account Name hyperlink of the respective Credit Card account. 4. The Account Settings dashboard will be displayed. 5. Click on the Balance Transfer easy button. 6. The Balance Transfer Offer for the selected Credit Card will be displayed. 7. To accept the offer click on Continue, alternatively click on the Customise This Offer hyperlink if you would like to customise the Amount and the repayment terms. 8. Enter the Preferred Amount and Repayment Terms in the fields provided. 9. Click on Calculate to update the offer information. 10. To return to the original offer click on Reset, alternatively, click on Accept Offer to proceed with the revised offer. 11. A confirmation page will be displayed. 12. Before you can continue you will be required to read and accept the Terms and Conditions. 13. Check that this information is correct and, if necessary, click on Edit to make amendments. 14. The results of your request will be displayed. 15. Click on Finish to complete the process or click on Make a Payment to make a payment from your revised Straight Balance. Online Banking User Guide 162 7.8.4 Credit Limit Shifts This functionality enables you to shift the credit limit on your Credit Card between your straight and budget facilities to suit your personal requirements. You can allocate a portion of the available balance on your straight facility to your budget facility, thereby increasing the available limit on your budget facility, and vice versa. Important Information about Credit Limit Shifts • This functionality is restricted to Consumer clients. • The 20:80 rule applies; i.e. the straight limit may not be less than 20% and the budget limit may not exceed 80% of your total credit limit. Shift Credit Limits 1. Click on the My Bank Accounts and, if it isn’t already selected, click on the My Accounts sub-tab. 2. The accounts linked to your profile will be displayed. 3. Click on the Account Name hyperlink of the respective Credit Card account. 4. The Account Settings dashboard will be displayed. 5. Click on the Credit Limit Shift easy button. 6. The Credit Limit Shift capture page will be displayed. 7. Amend the Straight or Budget Limits according to your requirements; the opposite Limit will adjust automatically when you make changes. 8. Click on Submit. 9. 10. 11. 12. 13. A confirmation page will be displayed. Check that this information is correct and, if necessary, click on Edit to make amendments. Click on Continue to proceed. The results page will display the status of your request. Click on Finish to complete the process. Online Banking User Guide 163 7.8.5 Auto Payment Use this functionality to create and manage automatic monthly payments to your credit card account. Payments can be made from a banking account held at any registered financial institution. The following functionality is available: • Add Auto Payment • View Auto Payment • Maintain Auto Payment Important Information about Auto Payments • It is mandatory for all new credit card applicants to utilise the Auto Payment Facility; at the time of application you will be required to select a preferred Debit Order Date, Method of Payment and provide the details of the bank account to be debited. • An Auto Payment can be edited at anytime, but the changes will only be effective from the next payment cycle date. Online Banking User Guide 164 7.8.5.1 Add an Auto Payment Use this function to create an automatic monthly payment to your credit card on a pre-selected day. Payments can be made from a banking account held at any registered financial institution. There are six Auto Payment Authorisation options: 1. Actual Balance Settlement (Straight) o Settle your full monthly straight balance within the current billing cycle. This balance is affected by all debits and credits after the statement date up until the selected Auto Payment date. 2. Fixed Amount o Pay a fixed amount of your choice; the specified amount cannot be less than the minimum monthly payment due on your account. 3. Full Amount o Settle your full statement balance. Any payments processed during the billing period will be deducted and you will only pay the outstanding balance. 4. Full Statement Balance o Pay only the balance due on the relevant month's statement. 5. Minimum Amount Due o Pay the minimum monthly payment amount due on your account (as indicated on your statement); this amount is calculated at 5% of your total outstanding balance. 6. Payment Percentage o Pay a percentage of your straight balance ranging from 5% - 100% Online Banking User Guide 165 • You will need the Account Number of the account that you would like to make the Auto Payments from. Add an Auto Payment 1. Click on the My Bank Accounts and, if it isn’t already selected, click on the My Accounts sub-tab. 2. The accounts linked to your profile will be displayed. 3. Click on the Account Name hyperlink of the respective Credit Card account. 4. The Account Settings dashboard will be displayed. 5. Click on the Auto Payment easy button. 6. The Auto Payment Authorisation capture page will be displayed. 7. Select the preferred Auto Payment Authorisation from the drop down menu. 8. Enter the Account Number and Bank or Branch Code of the account that you would like to use to make the Auto Payment. 9. Select the Account Type from the drop down menu. 10. Select the preferred Payment Day from the drop down menu. 11. Click on Add. 12. 13. 14. 15. 16. 17. A confirmation page will be displayed. Before you can continue you will be required to read and accept the Declaration. Check that this information is correct and, if necessary, click on Edit to make amendments. Click on Confirm to proceed. The results page will display the status of your request. Click on Finish to complete the process. Online Banking User Guide 166 7.8.5.2 View Auto Payment Use this function to view your existing Auto Payment settings. The following information is displayed: • Account Name • Auto Payment Authorisation • Payment Day View an Auto Payment 1. Click on the My Bank Accounts and, if it isn’t already selected, click on the My Accounts sub-tab. 2. The accounts linked to your profile will be displayed. 3. Click on the Account Name hyperlink of the respective Credit Card account. 4. The Account Settings dashboard will be displayed. 5. Click on the Auto Payment easy button. 6. Your existing Auto Payment instruction/s will be displayed. 7. Click on Back to return to the Account settings dashboard. Online Banking User Guide 167 7.8.5.3 Maintain Auto Payment Use this function to maintain an existing Auto Payment instruction. The following information can be maintained: • Auto Payment Authorisation • Payment Banking Details • Payment Day Important Information about Maintaining Auto Payments • An Auto Payment can be edited at anytime, but the changes will only be effective from the next payment cycle date. Maintain Auto Payment 1. Click on the My Bank Accounts and, if it isn’t already selected, click on the My Accounts sub-tab. 2. The accounts linked to your profile will be displayed. 3. Click on the Account Name hyperlink of the respective Credit Card account. 4. The Account Settings dashboard will be displayed. 5. Click on the Auto Payment easy button. 6. Your existing Auto Payment instruction/s will be displayed. 7. Click on the Maintain easy button for the respective instruction. 8. The Auto Payment capture page will be displayed. 9. Make the required changes. 10. Click on Update. 11. A confirmation page will be displayed. 12. Before you can continue you will be required to read and accept the Declaration. 13. Check that this information is correct and, if necessary, click on Edit to make amendments. 14. Click on Confirm to proceed. 15. The results page will display the status of your request. 16. Click on Finish to complete the process. Online Banking User Guide 168 7.9 Account Settings: Investment Accounts The following Account Settings functionality is available for Investment Accounts: • Maintain Interest Instruction • Add / Maintain /Delete Maturity Instruction • Add / Maintain / Delete Notice to Withdraw • Add / Maintain / Delete Notice to Close Online Banking User Guide 169 7.9.1 Interest Instruction Use this function to maintain how the interest earned on a selected investment account should be distributed. There are two types of Interest Instructions: • Reinvest (Capitalise) Interest • Redirect Interest o Into a linked Account o Into a third party account The following functionality is available: • Maintain an Interest Instruction • Delete an Interest Instruction Important Information about Interest Instructions o This functionality is available to both Consumer and Business Banking clients. o Business Banking clients cannot redirect interest to a non-FNB account. o The interest earned on a Tax-Free Cash Deposit account cannot be redirected as the interest is capitalised into your Tax-Free Cash Deposit account by default. Reinvest (Capitalise) Interest o Capitalised Interest will reflect in the account selected by you, on the interest payment date as specified to the Bank when opening or amending the account. Redirect Interest to a Linked Account o Redirecting Interest to your own account or other FNB Accounts will reflect on the Interest Payment date as specified to the Bank when opening or amending the account. Redirect Interest to a Third Party Account o Redirecting Interest to a Non FNB Account will reflect 3 working days after the Interest Payment date as specified to the Bank when opening or amending the account. Online Banking User Guide 170 o 7.9.1.1 Maintain Interest Instruction Maintain Interest Instruction 1. Click on the My Bank Accounts tab and, if it isn’t already selected, click on the My Accounts sub-tab. 2. The accounts linked to your profile will be displayed. 3. Click on the Account Name hyperlink of the respective Savings and Investment account. 4. The Account Settings dashboard will be displayed together with all instructions that you currently have on the selected account. 5. Click on the Interest Instruction easy button. 6. Your current Interest Instruction will be displayed. Reinvest Interest 7. Click on the Reinvest easy button. 8. Click on Continue. 9. A confirmation page will be displayed. 10. Check that this information is correct and, if necessary, click on Edit to make amendments. 11. Click on Confirm to proceed. 12. The results page will display the status of your request. 13. Click on Finish to complete the process. Redirect Interest 7. Click on the Redirect easy button. 8. Select your preferred Interest Cycle from the drop down menu. Redirect Interest to a Linked Account 9. Click on the Linked account easy button. 10. Select the Account that you would like the interest to be paid into from the drop down menu. 11. Click on Continue. 12. A confirmation page will be displayed. 13. Check that this information is correct and, if necessary, click on Edit to make amendments. 14. Click on Confirm to proceed. 15. The results page will display the status of your request. 16. Click on Finish to complete the process. Online Banking User Guide 171 Redirect Interest to a Third Party Account 9. Click on the Other account easy button. 10. Complete the recipient account details in the fields provided. 11. Click on Continue. 12. A confirmation page will be displayed. 13. Check that this information is correct and, if necessary, click on Edit to make amendments. 14. Click on Confirm to proceed. 15. The results page will display the status of your request. 16. Click on Finish to complete the process. 7.9.1.2 Delete an Interest Instruction Use this function to delete an existing Interest Instruction on the selected investment account. Important Information about Deleting an Interest Instruction o If you Delete an Interest Instruct the instruction will automatically revert to the instruction that you gave at the time of opening the account. 1. Click on the My Bank Accounts tab and, if it isn’t already selected, click on the My Accounts sub-tab. 2. The accounts linked to your profile will be displayed. 3. Click on the Account Name hyperlink of the respective Savings and Investment account. 4. The Account Settings dashboard will be displayed together with all instructions that you currently have on the selected account. 5. Click on the Delete easy button to delete the current Interest Instruction. 6. A confirmation page will be displayed. 7. Check that this information is correct and, if necessary, click on Edit to make amendments. 8. Click on Confirm to proceed. 9. The results page will display the status of your request. 10. Click on Finish to complete the process. Online Banking User Guide 172 7.9.2 Maturity Instruction Use this function to add or maintain a Maturity Instruction on the selected investment account. Funds can be transferred to a Linked account or to an Other (Third Party) account. There are two maturity options: • Transfer All • Transfer Portion and Reinvest Rest The following functionality is available: • Add a Maturity Instruction • Maintain a Maturity Instruction • Delete a Maturity Instruction Important Information about Maturity Instructions o This functionality is available to both Consumer and Business Banking clients. o Business Banking clients cannot have the funds paid into a non-FNB account. o Funds paid to a FNB account will reflect on the specified withdrawal date; funds paid to a non-FNB account will reflect 3 working days after the specified maturity date. o Online Banking User Guide 173 7.9.2.1 Add a Maturity Instruction Add a Maturity Instruction 1. Click on the My Bank Accounts tab and, if it isn’t already selected, click on the My Accounts sub-tab. 2. The accounts linked to your profile will be displayed. 3. Click on the Account Name hyperlink of the respective Savings and Investment account. 4. The Account Settings dashboard will be displayed together with all instructions that you currently have on the selected account. 5. Click on the Maturity Instruction easy button to create a new instruction. 6. Your current Maturity Instruction will be displayed. Transfer Portion and Reinvest Rest 7. Select the Transfer Portion and Reinvest Rest option from the drop down menu. 8. Enter the Amount that you would like to transfer. Transfer All 8. Select the Transfer All option from the drop down menu. Transfer to a Linked Account 9. Click on the Linked account easy button. 10. Select the Account that you would like the funds to be transferred into from the drop down menu. 11. Click on Add. 12. A confirmation page will be displayed. 13. Check that this information is correct and, if necessary, click on Edit to make amendments. 14. Click on Confirm to proceed. 15. The results page will display the status of your request. 16. Click on Finish to complete the process. Online Banking User Guide 174 Transfer to a Third Party Account 9. Click on the Other account easy button. 10. Complete the recipient account details in the fields provided. 11. Click on Continue. 12. A confirmation page will be displayed. 13. Check that this information is correct and, if necessary, click on Edit to make amendments. 14. Click on Confirm to proceed. 15. The results page will display the status of your request. 16. Click on Finish to complete the process. 7.9.2.2 Maintain Maturity Instruction Use this function to maintain an existing / pending Maturity Instruction. Maintain a Maturity Instruction 1. Click on the My Bank Accounts tab and, if it isn’t already selected, click on the My Accounts sub-tab. 2. The accounts linked to your profile will be displayed. 3. Click on the Account Name hyperlink of the respective Savings and Investment account. 4. The Account Settings dashboard will be displayed together with all instructions that you currently have on the selected account. 5. Click on the Manage easy button to maintain the current Maturity Instruction. 6. Your current Maturity Instruction will be displayed. 7. Make the amendments that you require. 8. Click on Update. 9. A confirmation page will be displayed. 10. Check that this information is correct and, if necessary, click on Edit to make amendments. 11. Click on Confirm to proceed. 12. The results page will display the status of your request Online Banking User Guide 175 7.9.2.3 Delete a Maturity Instruction Use this function to delete an existing / pending Maturity Instruction. Delete a Maturity Instruction 1. Click on the My Bank Accounts tab and, if it isn’t already selected, click on the My Accounts sub-tab. 2. The accounts linked to your profile will be displayed. 3. Click on the Account Name hyperlink of the respective Savings and Investment account. 4. The Account Settings dashboard will be displayed together with all instructions that you currently have on the selected account. 5. Click on the Delete easy button to delete the current Maturity Instruction. 6. A confirmation page will be displayed. 7. Check that this information is correct and, if necessary, click on Edit to make amendments. 8. Click on Confirm to proceed. 9. The results page will display the status of your request. 10. Click on Finish to complete the process. Online Banking User Guide 176 7.9.3 Notice to Withdraw Use this function to withdraw funds from an investment account. A Notice to Withdraw instruction is for partial withdrawals only. The following functionality is available: • Add a Notice to Withdraw • Maintain a pending Notice to Withdraw • Delete a pending Notice to Withdraw There are two withdrawal options: 1. Withdraw into Linked Account 2. Withdraw into Other Bank Account Important Information about Notice to Withdraw Instructions o This functionality is available to both Consumer and Business Banking clients. o Business Banking clients cannot have the funds paid into a non-FNB account. o This functionality is product specific, i.e. the withdrawal options, dates and amounts are determined by the respective product. o Funds paid to a FNB account will reflect on the specified withdrawal date; funds paid to a non-FNB account will reflect 3 working days after the specified closure date. o Online Banking User Guide 177 7.9.3.1 Add Notice to Withdraw Instruction Use this function to add a new Notice to Withdraw instruction for an investment account. Important Information about Adding a Notice to Withdraw Instruction o A Notice to Withdraw instruction is for partial withdrawals only. o The withdrawal amount may not exceed 15% of the account balance. o The Withdrawal Date is the date that you would like the money to be paid to you. This date must be at least equal to or greater than the Notice Period required for withdrawals on your account. Withdraw to Linked Account o Withdrawing funds into your own account or other FNB Accounts will reflect on the withdrawal date as specified. Withdraw to Other Bank Account o Withdrawing funds into a non-FNB Account will reflect 3 working days after the withdrawal date. o Add a Notice to Withdraw Instruction 1. Click on the My Bank Accounts tab and, if it isn’t already selected, click on the My Accounts sub-tab. 2. The accounts linked to your profile will be displayed. 3. Click on the Account Name hyperlink of the respective Savings and Investment account. 4. The Account Settings dashboard will be displayed together with all instructions that you currently have on the selected account. 5. Click on the Notice to Withdraw easy button, alternatively click on the Manage easy button next to the existing Maturity Instruction. 6. The Investment Maintenance page will be displayed. 7. Enter the Amount that you would like to withdraw from the account. Online Banking User Guide 178 Withdraw funds into a Linked Account 8. Click on the Linked account easy button. 9. Select the Account that you would like the interest to be paid into from the drop down menu. 10. Enter the required Withdrawal Date. 11. Click on Withdraw. 12. A confirmation page will be displayed. 13. Check that this information is correct and, if necessary, click on Edit to make amendments. 14. Click on Confirm to proceed. 15. The results page will display the status of your request. 16. Click on Finish to complete the process. Withdraw funds into an Other (Third Party) Account 8. Click on the Other account easy button. 9. Complete the recipient account details in the fields provided. 10. Enter the required Withdrawal Date. 11. Click on Withdraw. 12. A confirmation page will be displayed. 13. Check that this information is correct and, if necessary, click on Edit to make amendments. 14. Click on Confirm to proceed. 15. The results page will display the status of your request. 16. Click on Finish to complete the process. Online Banking User Guide 179 7.9.3.2 Maintain Pending Notice to Withdraw Instruction Use this function to modify a pending Notice to Withdraw instruction on an investment account. Important Information about Maintaining a Notice to Withdraw Instruction o The information that can be maintained is determined by the product rules of the selected investment account. o Maintain Pending Notice to Withdraw Instruction 1. Click on the My Bank Accounts tab and, if it isn’t already selected, click on the My Accounts sub-tab. 2. The accounts linked to your profile will be displayed. 3. Click on the Account Name hyperlink of the respective Savings and Investment account. 4. The Account Settings dashboard will be displayed together with all instructions that you currently have on the selected account. 5. Click on the Maintain easy button to maintain the current Withdrawal Instruction. 6. Your current Withdrawal Instruction will be displayed. 7. Make the amendments that you require. 8. Click on Continue. 9. A confirmation page will be displayed. 10. Check that this information is correct and, if necessary, click on Edit to make amendments. 11. Click on Confirm to proceed. 12. The results page will display the status of your request Online Banking User Guide 180 7.9.3.3 Delete Pending Notice to Withdraw Instruction Use this function to delete a pending Notice to Withdraw instruction on an investment account. Important Information about Deleting a Notice to Withdraw Instruction o The option to Delete a pending instruction will only be displayed if the instruction still falls within the cancellation period; this is based on the product rules of the respective investment product. o Delete Pending Notice to Withdraw Instruction 1. Click on the My Bank Accounts tab and, if it isn’t already selected, click on the My Accounts sub-tab. 2. The accounts linked to your profile will be displayed. 3. Click on the Account Name hyperlink of the respective Savings and Investment account. 4. The Account Settings dashboard will be displayed together with all instructions that you currently have on the selected account. 5. Click on the Delete easy button to delete the current Withdrawal Instruction. 6. A confirmation page will be displayed. 7. Check that this information is correct and, if necessary, click on Edit to make amendments. 8. Click on Confirm to proceed. 9. The results page will display the status of your request Online Banking User Guide 181 7.10 Transaction History Use this function to view or search for a specific transaction on your account or to view Detailed Transaction Information for a selected transaction. Important Information about Transaction History • Transaction History can be viewed by both the Primary and Secondary User, provided that the Primary User has granted View Permissions to the Secondary User. • Transaction History is available for the last 90 days; to view transactions older than three months please utilise the Statement History option. • The number of records returned for Transaction History is account/product specific. 7.10.1 View Transaction History Use this function to view the Transaction History for an account or to view Detailed Transaction Information for a specific transaction. View Transaction History 1. Click on the My Bank Accounts and, if it isn’t already selected, click on the My Accounts sub-tab. 2. The accounts linked to your profile will be displayed. 3. Click on the menu and select the Accounts > Transaction History option. 4. A list of your applicable accounts will be displayed. 5. Click on the Account Name to select the respective account. 6. The Transaction History for the selected account will be displayed. 7. To view the Transaction History of another account, select the respective account from the account switcher drop down menu. 8. Click on the Transaction Amount hyperlink to view the Detailed Transaction Information for the respective transaction. 9. Click on Back to return to the Transaction History for the selected account. 10. Click on Close to return to the My Accounts page. Online Banking User Guide 182 7.10.2 Detailed Transaction Information The following information is displayed for every transaction: • Transaction Details • Transaction Description • Customer Service Information Transaction Details Field Name Description The reference from the account that the transaction originated Description One from. If this is a transaction that you initiated, this field will be the recipient reference. The second reference is the selected account. If this is a Description Two: transaction that was initiated by you then this field will be own reference. Transaction Amount: The full transaction amount. Service Fee: The service fee paid on the selected transaction Authorisation Date: The date that the transaction was authorised Effective Date: The date that the transaction took place Post Date: Current Balance: Cash Amount: Original Currency Amount: ENC Amount: This date should be the same as the above unless the transaction was future dated or delayed due to system maintenance. The current balance in the selected account. The cash amount of the transaction. (Physical cash - no cheques or internet transfers). The original amount including transfers and cheques. If any cheques were deposited, this is the amount not cleared on (Effects not Cleared) those cheques. ENC Days: This is the number of days it will take for the above cheques to (Effects not Cleared) clear. Cleared: Online Banking User Guide If some of the deposited cheques were cleared, this is the amount that was cleared. 183 Transaction Description Field Name Description Code: The code used by FNB to identify transaction types. Description: The description of what the transaction was. Category: The transaction category e.g. a debit or a credit. Sub-Category: This further explains the transaction category e.g. a payment or an internet transfer. Customer Service Information Field Name User Code: User Name: Contact Number: Online Banking User Guide Description This is applicable to FNB indicating where the transaction originated from. This is usually the company name from where the debit or credit came from. This will be the contact number from where the selected transaction originated. 184 7.10.3 Search Transaction History Use this function to search your Transaction History for a specific transaction. The maximum search period is 90 days. There are four Search Options: 1. Search o Enter a minimum of two alphanumeric characters in the Search field to search across multiple pages of Transfer History. o The Search table action does not search the Date column; if you would like to search for a transaction by date, please use the Advanced Search option under the Search History function. o 2. Quick Search o The Quick Search function enables you to search your Transaction History by predefined date periods. o Today o From Yesterday o Last 7, 15, 30 or 60 Days o 3. Custom Search o The Custom Search function enables you to search your Transaction History by: o Ledger Type (Debit or Credit) o Date Range - up to 180 days o Amount Range o Transaction Reference o Cheque Number Range o 4. Advanced Search o The Advanced Search function enables you to search your Transaction History by: o Multiple Account Numbers o Ledger Type (Debit or Credit) o Date Range - up to 180 days o Amount Range o Transaction Reference o Cheque Number Range o Transaction Type (Debit Orders, Cheques, Fees, Unpaid, Electronic Debits, and Electronic Credits The steps for each of the four search options are detailed below. Online Banking User Guide 185 Search Transaction History 1. Click on the My Bank Accounts tab and, if it isn’t already selected, click on the My Accounts sub-tab. 2. The accounts linked to your profile will be displayed. 3. Click on the menu and select the Accounts > Transaction History option. 4. A list of your applicable accounts will be displayed. 5. Click on the Account Name to select the respective account. 6. The Transaction History for the selected account will be displayed. 7. Click on the Search button in your table actions. 8. Enter a minimum of two alphanumeric characters in the Search field. 9. The results of your search will be displayed. 10. Click on the Close button in your table actions to return to the full Transaction History. Perform a Quick Search of your Transaction History 1. Click on the My Bank Accounts tab and, if it isn’t already selected, click on the My Accounts sub-tab. 2. The accounts linked to your profile will be displayed. 3. Click on the menu and select the Accounts > Transaction History option. 4. A list of your applicable accounts will be displayed. 5. Click on the Account Name to select the respective account. 6. The Transaction History for the selected account will be displayed. 7. Click on the menu and select the Search option. 8. The Transaction History Search capture page will be displayed. 9. Click on the Quick easy button. 10. Select the required Date Range from the drop down menu. 11. Click on Search. 12. The results of your search will be displayed. 13. Click on Close to return to the My Accounts page. Online Banking User Guide 186 Perform a Custom Search of your Transaction History 1. Click on the My Bank Accounts tab and, if it isn’t already selected, click on the My Accounts sub-tab. 2. The accounts linked to your profile will be displayed. 3. Click on the menu and select the Accounts > Transaction History option. 4. A list of your applicable accounts will be displayed. 5. Click on the Account Name to select the respective account. 6. The Transaction History for the selected account will be displayed. 7. Click on the menu and select the Search option. 8. The Transaction History Search capture page will be displayed. 9. Click on the Custom easy button. 10. To refine your search, complete as many of the search fields as possible. 11. Click on Search. 12. The results of your search will be displayed. 13. Click on Close to return to the My Accounts page. Perform an Advanced Search of your Transaction History 1. Click on the My Bank Accounts tab and, if it isn’t already selected, click on the My Accounts sub-tab. 2. The accounts linked to your profile will be displayed. 3. Click on the menu and select the Accounts > Transaction History option. 4. A list of your applicable accounts will be displayed. 5. Click on the Account Name to select the respective account. 6. The Transaction History for the selected account will be displayed. 7. Click on the menu and select the Search option. 8. The Transaction History Search capture page will be displayed. 9. Click on the Advanced easy button. 10. Select the accounts that you would like to search from the drop down menus. 11. To refine your search, complete as many of the search fields as possible. 12. Click on Search. 13. The results of your search will be displayed. 14. Click on Close to return to the My Accounts page. Online Banking User Guide 187 7.11 Detailed Balance Use this function to view and search Detailed Balance Information for an account. Important Information about Detailed Balance Information • The Detailed Balance can be viewed by both the Primary and Secondary User, provided that the Primary User has granted View Permissions to the Secondary User. • Detailed Balance Information is account/product specific. View Detailed Balance Information 1. Click on the My Bank Accounts tab and, if it isn’t already selected, click on the My Accounts sub-tab. 2. The accounts linked to your profile will be displayed. 3. Click on the menu and select the Accounts > Detailed Balance option. 4. A list of your applicable accounts will be displayed. 5. Click on the Account Name to select the respective account. 6. The Detailed Balance Information for the selected account will be displayed. 7. To view the Detailed Balance of another account, select the respective account from the account switcher drop down menu. 8. Click on Close to return to the My Accounts page. Online Banking User Guide 188 7.12 Statements Use this function to view, create and download account statements or tax certificates. Important Information about Statements • Statement functionality is account/product specific. • Statement functionality can be performed by both the Primary and Secondary User, provided that the Primary User has granted View Permissions to the Secondary User. The following Statement functionality is available: • Statements History o • Use this function to view, download or export historical account statements. Interim Statements o Use this function to view, download or export an interim statement which reflects all transactions that have taken place on an account since the last statement date. • Recreated Statements o Use this function to view, download or export a Recreated Statement which contains a summary of all declared transaction data for a selected statement period. • Email Statements o Use this function to facilitate and manage the email delivery options of your account statements. • Tax Certificates o Use this function to request IT3B statements for the accounts linked to your profile. Online Banking User Guide 189 7.12.1 Statement History Use this function to access your historical account statements. For your convenience, the last 12 statements for the selected account are displayed on screen. Important Information about Statement History • Statement functionality is account/product specific. • Historical statements are available from January 2004. • The latest three statements can be downloaded for free; a fee will be charged to download older statements. • A historical statement is considered to be a legal bank statement. The following options are available: • Search Statement History • Print the Interim Statement • Export Statement History • Download Statement History Search Statement History 1. Click on the My Bank Accounts tab and, if it isn’t already selected, click on the My Accounts sub-tab. 2. The accounts linked to your profile will be displayed. 3. Click on the menu and select the Statements > Statements History option. 4. A list of your applicable accounts will be displayed. 5. Click on the Account Name to select the respective account. 6. The Statements History for the selected account will be displayed. 7. To view the Statements History for another account, select the respective account from the account switcher drop down menu. 8. If you would like to search for a specific statement, click on the Search table action. 9. Enter the date range that you would like to search. 10. Click on Search. 11. The results of your search will be displayed. Online Banking User Guide 190 Download or Export Statement History 1. Click on the My Bank Accounts tab and, if it isn’t already selected, click on the My Accounts sub-tab. 2. The accounts linked to your profile will be displayed. 3. Click on the menu and select the Statements > Statements History option. 4. A list of your applicable accounts will be displayed. 5. Click on the Account Name to select the respective account. 6. The Statements History for the selected account will be displayed. 7. To view the Statements History for another account, select the respective account from the account switcher drop down menu. Export to Email Option: 8. Click in the eMail check box for the respective statement/s that you would like to export to email. 9. Enter the email address to which the statements must be sent. 10. Click on Continue. 11. A confirmation page will be displayed. 12. You will be required to read and accept the Terms and Conditions before you can continue. 13. Check that this information is correct and, if necessary, click Edit to make any amendments. 14. A results page will display the status of your request. 15. Click on Finish to complete the process. Download Option: 8. Click in the Download hyperlink for the respective statement. 9. You can choose to Open the file or to Save it. Online Banking User Guide 191 7.12.2 Interim Statements Use this function to view or export an interim statement which reflects all transactions that have taken place on an account since the last statement date. Important Information about Interim Statements • Statement functionality is account/product specific. • An interim statement is not a legal bank statement and should therefore not be presented to third parties. The following options are available: • Print the Interim Statement • Download the Interim Statement • Export the Interim Statement to an email address in a maximum of three formats selected by you Print, Download or Export an Interim Statement 1. Click on the My Bank Accounts tab. 2. If it is not already selected, click on the My Accounts view. 3. The accounts linked to your profile will be displayed. 4. Click on the menu and select the Statements > Interim Statements option. 5. A list of your applicable accounts will be displayed. 6. Click on the Account Name to select the respective account. 7. An Interim Statement for the selected account will be displayed. 8. To view an Interim Statement for another account, select the respective account from the account switcher drop down menu. 9. Click on the Print or Download table action; alternatively click on the Export page action to export the statement to email. 10. The Export Interim Statement capture page will be displayed. 11. Enter the Email Address and Email Subject for the export. 12. Select the Format/s that you would like of this interim statement. 13. Select to have the statement sent as either An Email Per Format or A Single Email for all Formats. 14. Click on Finish to complete the process. Online Banking User Guide 192 7.12.3 Recreated Statements Use this function to view, download or export a Recreated Statement which contains a summary of all declared transaction data for a selected statement period. A Recreated Statement provides a summary of the selected statement: • • • Statement Information o Statement Date o Opening Balance o Closing Balance o Total Value of Debits o Total Value of Credits Number of Transactions o Number of Debits o Number of Credits Transactions Important Information about Recreated Statements • Statement functionality is account/product specific. • A recreated statement is not a legal bank statement and should therefore not be presented to third parties. The following options are available: • Search for a Recreated Statement • Export the Recreated Statement to an email address in a maximum of three formats selected by you Online Banking User Guide 193 7.12.3.1 Search for a Recreated Statement Search for a Recreated Statement 1. Click on the My Bank Accounts tab and, if it isn’t already selected, click on the My Accounts sub-tab. 2. The accounts linked to your profile will be displayed. 3. Click on the menu and select the Statements > Recreated Statements option. 4. A list of your applicable accounts will be displayed. 5. Click on the Account Name to select the respective account. 6. You will be required to read and acknowledge the Terms and Conditions before you can continue. 7. Click on Continue. 8. A Recreated Statement for the most recent Statement Date of the selected account will be displayed. 9. Click on the menu and select the Search option. 10. The Search Statements capture page will be displayed. 11. Select the Date Range that you would like to search from the drop down menus. 12. Click on Search. 13. The most recent Recreated Statement for the specified Date Range will be displayed. 14. Use the Previous or Next buttons to navigate between the statements for that period. 15. Click on Close to return to the My Accounts page. Online Banking User Guide 194 7.12.3.2 Export a Recreated Statement Export a Recreated Statement 1. Click on the My Bank Accounts tab and, if it isn’t already selected, click on the My Accounts sub-tab. 2. The accounts linked to your profile will be displayed. 3. Click on the menu and select the Statements > Recreated Statements option. 4. A list of your applicable accounts will be displayed. 5. Click on the Account Name to select the respective account. 6. You will be required to read and acknowledge the Terms and Conditions before you can continue. 7. Click on Continue. 8. A Recreated Statement for the most recent Statement Date of the selected account will be displayed. 9. Click on the menu and select the Export option. 10. The Export Recreated Statements capture page will be displayed. 11. Select the Date Range of the statements that you would like to export from the drop down menus. 12. Enter the Email Address and Email Subject for the export. 13. Select the Format/s that you would like of this interim statement. 14. Select to have the statement sent as either An Email Per Format or A Single Email for all Formats. 15. Click on Finish to complete the process. Online Banking User Guide 195 7.12.4 Email Statements Use this function to facilitate and manage the email delivery options of your account statements. You can specify up to 3 email addresses to send your statements to. For Business Accounts you can also change the Statement Cycle. The following functionality is available: o Subscribe o Maintain o Unsubscribe Important Information about Email Statements • Statement functionality is account/product specific. • Email Statement functionality is restricted to the Primary User. • If you subscribe to receive statements via email your current statement delivery option will apply one more time. Thereafter you will receive your statement via email only. Business Accounts • If you currently receive cheque vouchers via post and you choose to subscribe to receive statements via email, your current delivery option will apply one more time. Thereafter your cheque vouchers will be available for viewing via Transaction History. • Please note that Business Accounts cannot be unsubscribed from Email Statements. Online Banking User Guide 196 7.12.4.1 Subscribe to Email Statements Use this function to setup your Email Statement preferences for your account/s. You can specify up to 3 email addresses to send your statements to. Subscribe to Email Statements 1. Click on the My Bank Accounts tab and, if it isn’t already selected, click on the My Accounts sub-tab. 2. The accounts linked to your profile will be displayed. 3. Click on the menu and select the Statements > Email Statements option. 4. A list of your applicable accounts will be displayed. 5. Click on the Account Name to select the respective account. 6. The Email Statements capture page will be displayed. 7. Enter the Email Address/es that you would like the statements to be sent to. 8. Select your preferred Format, PDF or PDF and CSV. 9. If you selected a Business Account you will have the option to change the Statement Cycle as well. Select the preferred Statement Cycle option from the drop down menu. 10. Before you can continue you will be required to read and accept the Disclaimer. 11. Click on Continue. 12. A confirmation page will be displayed. 13. Check that this information is correct and, if necessary, click Edit to make any amendments. 14. Click on Confirm. 15. A results page will display the status of your request. 16. Click on Finish to complete the process. Online Banking User Guide 197 7.12.4.2 Maintain Email Statement Settings Use this function to maintain your Email Statement preferences for your account/s. The following settings can be modified: • Email address/s for statement delivery • File Format • Statement Cycle (Business Accounts Only) Important Information about Maintaining Email Statements • Any changes that you make will only come into effect after your next currently scheduled statement has been issued. Maintain Email Statement Settings 1. Click on the My Bank Accounts tab and, if it isn’t already selected, click on the My Accounts sub-tab. 2. The accounts linked to your profile will be displayed. 3. Click on the menu and select the Statements > Email Statements option. 4. A list of your applicable accounts will be displayed. 5. Click on the Account Name to select the respective account. 6. The Email Statements capture page will be displayed. 7. Amend the options as required. 8. Before you can continue you will be required to read and accept the Disclaimer. 9. Click on Continue. 10. A confirmation page will be displayed. 11. Check that this information is correct and, if necessary, click Edit to make any amendments. 12. Click on Confirm. 13. A results page will display the status of your request. 14. Click on Finish to complete the process. Online Banking User Guide 198 7.12.4.3 Unsubscribe from Email Statements Use this function to unsubscribe an account from the Email Statements service. Please note that Business Accounts cannot be unsubscribed from Email Statements. Important Information about Unsubscribing from Email Statements • Please note that Business Accounts cannot be unsubscribed from Email Statements. • Any changes that you make will only come into effect after your next currently scheduled statement has been issued. • If you unsubscribe from email statements, your statements will be sent via the postal address on your branch profile. Should you wish to receive your cheques by post or if your postal address has since changed, please visit an FNB branch or contact Online Assistance. Unsubscribe from Email Statements Settings 1. Click on the My Bank Accounts tab and, if it isn’t already selected, click on the My Accounts sub-tab. 2. The accounts linked to your profile will be displayed. 3. Click on the menu and select the Statements > Email Statements option. 4. A list of your applicable accounts will be displayed. 5. Click on the Account Name to select the respective account. 6. The Email Statements capture page will be displayed. 7. Before you can continue you will be required to read and accept the Disclaimer. 8. Click on Unsubscribe. 9. A confirmation page will be displayed. 10. Check that this information is correct and, if necessary, click Edit to make any amendments. 11. Click on Confirm. 12. A results page will display the status of your request. 13. Click on Finish to complete the process. Online Banking User Guide 199 7.12.5 Tax Certificates Use this function to request IT3B statements for the accounts linked to your profile. The Tax Certificate search is done at client level and not at account level which means that there is no need to select a specific account; the search will be conducted across your entire profile and all results will be displayed. Tax certificates are stored for a 5 year period. Export Tax Certificate/s 1. Click on the My Bank Accounts tab and, if it isn’t already selected, click on the My Accounts sub-tab. 2. The accounts linked to your profile will be displayed. 3. Click on the menu and select the Statements > Tax certificates option. 4. A list of Tax Certificates issued on your accounts for the last five years will be displayed. 5. Click in the check box of the certificate/s that you would like to export. 6. Enter the Email Address that you would like the certificate/s to be sent to. 7. Click on Submit. 8. A confirmation page will be displayed. 9. Check that this information is correct and, if necessary, click Edit to make any amendments. 10. Click on Confirm. 11. A results page will display the status of your request. 12. Click on Finish to complete the process. Online Banking User Guide 200 7.13 Instant Solutions The following instant Solutions products are currently available via Online Banking: o Instant Accounting o Instant Financial Management o Instant Payroll o Merchant Insights When accessing the Instant Solutions products via Online Banking your banking session will be ended and you will be redirected to the Instant Solutions website. Important Information about Instant Solutions • Only the Primary User can register for Instant Solutions. • Secondary users can access Instant Solutions if they have been granted viewing permissions by the Primary User. Online Banking User Guide 201 7.13.1 Instant Accounting Use this function to register for Instant Accounting or to access your Instant Accounting profile. Instant Accounting is a unique, online accounting solution which uses your electronic bank statement/s to automatically generate financial statements and reports. This reduces manual data capturing and processing which enables you to produce updated financials effortlessly and with increased accuracy. Instant Accounting generates various financial statements and reports, including: o Income statements o Balance sheets o Cash-flow statements o VAT reports o Debtors and Creditors Management o Budgeting How to register for / access Instant Accounting: 1. Click on the My Bank Accounts tab and, if it isn’t already selected, click on the My Accounts sub-tab. 2. Click on the menu and select the Instant Solutions > Instant Accounting option. 3. Select Create New Profile. 4. Before you can continue you will be required to read and accept the Terms and Conditions. 5. Click on Next. 6. Your banking session will end and you will be redirected to the Instant Solutions site. Online Banking User Guide 202 7.13.2 Instant Financial Management Instant Financial Management is an easy-to-use online solution that uses the information from your electronic bank statements to provide you with a complete overview of your personal financial position. The system automatically assigns transactions to predefined income and expense categories, although you can adjust the categories and teach it your preferences. With Instant Financial Management you can generate various reports and graphs, which you can view online or have e-mailed to you, that will reflect your: o Income and Expenditure o Cash Flow (Surplus or Deficit) o Investments o Assets, Liabilities and Nett Worth o Budgets vs Actuals Having a single view of your finances can help you to: o Better manage your income and expenditure o Set and attain financial goals o Easily complete your tax return and loan applications Online Banking User Guide 203 7.13.3 Instant Payroll Instant Payroll is a complete, web-based payroll processing solution that helps you to manage your business’ payroll quickly and easily. It enables you to generate payslips and pay your employees and third parties with minimum fuss. Instant Payroll also ensures that you, as an employer, adhere to current SARS requirements. Because Instant Payroll is web-based, you have access to the system wherever you have an Internet connection. Online Banking Functionality: After generating payslips for your employees on Instant Payroll, bulk payment files, (ACB Files), for salaries and third-party payments will automatically be sent directly to Online Banking where you can submit them for payment, without having to add any of the employees/third-parties to your Recipient List. All payments will be processed via your Online Banking profile. In the event that you need to make a Once-Off payment to your employees, such as bonuses, you can also utilise the Import Payments functionality on Online Banking. You simply need to complete the ACB file layout offline, (ACB template available for download), and then import the file directly into Online Banking in order to make a bulk payment. How to register for Instant Payroll: 1. Click on the My Bank Accounts tab and, if it isn’t already selected, click on the My Accounts sub-tab. 2. Click on the menu and select the Instant Solutions > Instant Payroll option. 3. Before you can continue you will be required to read and accept the Terms and Conditions. 4. Click on Next. 5. Your banking session will end and you will be redirected to the Instant Solutions site. Online Banking User Guide 204 7.13.4 Merchant Insights Merchant Insights, a web-based service, allows you quick and easy access to all processed card transactions and the ability to retrieve various reports on any acquired transactions via Online Banking. With Merchant Insights you can: • • • • View and download current and archived processed transactions; Reconcile daily settlements to individual point of sale transactions; Generate customised reports that will be emailed to you for FREE; Download data or analysis to a spreadsheet. How to register for Merchant Insights: 1. Click on the My Bank Accounts tab and, if it isn’t already selected, click on the My Accounts sub-tab. 2. Click on the menu and select the Instant Solutions > Merchant Insights option. 3. Before you can continue you will be required to read and accept the Terms and Conditions. 4. Click on Next. 5. Your banking session will end and you will be redirected to the Instant Solutions site. Online Banking User Guide 205 7.14 FNB Connect Use this function to access the FNB Connect website. Save on your phone and internet bills with FNB Connect. FNB Connect offers affordable data and voice services and also rewards you with free surfing and call benefits. Cheque Account customers receive free monthly data and all new customers get 1GB free ADSL data when signing up. FNB Connect also offers free browsing to a variety of FNB, Social Media, and educational sites to all FNB Connect customers. With Connect Talk, you can make calls and send messages for free to other Connect users, as well as make free calls to FNB Call Centres. New users also get free airtime just for signing up. There are no contracts, so you can be in control of how much you spend. • Connect Talk o Pre-paid voice package o Make calls at lower rates via the internet with your PC or Cellphone. • Connect Surf o Pre-paid internet bandwidth solution. o Control your monthly data budget with this pay-as-you-go ADSL data solution and top up online whenever you like. o Enjoy unshaped prepaid ADSL data with a 12-month data carry over. Online Banking User Guide 206 My Cards Sub-Tab Online Banking User Guide 207 7.15 My Cards Sub-Tab Overview The My Cards sub-tab functionality enables you to view and maintain the cards linked to your Online Banking profile. Important Information about Cards • All Card functionality is restricted to the Primary User. • Card functionality is dependent on the card type. The following functionality is available on the My Cards sub-tab: Activate Card Update Card Delivery Details Online Secure Maintain Limits View PIN Create PIN Cancel Card Order Replacement Card Order Additional Card Online Banking User Guide 208 7.16 Activate Card Use this function to activate your new Cheque or Credit card plastic online. For your security, you should be in possession of the respective card before you activate it. Important Information about Card Activations This functionality is restricted to the Primary User of a Consumer profile. For your security, you should be in possession of the respective card before you activate it. For queries regarding Cheque card activations please contact Online Assistance. For queries regarding Credit Card activations please contact the Credit Card Division. Activate Card 1. Click on the My Bank Accounts tab and select the My Cards sub-tab. 2. A list of the cards linked to your Online Banking profile will be displayed. 3. Check the Status column; you can only activate a new card if the Status reflects as 'Activate Now'. 4. Click on the Activate Now hyperlink for the respective card. 5. You will be prompted to confirm that you are in possession of the selected card before you can continue; click on Yes or No. 6. A results page will display the status of your request. 7. Click on Finish to return to the My Cards page; if your activation was successful the Status of the respective card will now appear as 'Active'. Online Banking User Guide 209 7.17 Reactivate Card In the event that you have blocked/deactivated your Cheque or Debit card by entering the PIN incorrectly three times; you can use this function to reactivate your card online. For your security, you need to be in possession of your card in order to reactivate it. Important Information about Card Reactivations This functionality is restricted to the Primary User of a Consumer profile. For queries regarding Cheque and Debit card reactivations please contact Online Assistance. For queries regarding Credit Card activations please contact the Credit Card Division. Have the respective card available before you begin this process. Reactivate Card 1. Click on the My Bank Accounts tab and select the My Cards sub-tab. 2. A list of the cards linked to your Online Banking profile will be displayed. 3. Check the Status column; you can only re-activate the card if the Status reflects as 'Reactivate Now'. 4. Click on the Reactivate Now hyperlink for the respective card. 5. For your security, you will be required to enter an OTP before you can continue. Enter the OTP in the field provided and click on Submit. 6. If you are activating a Cheque/Debit card you will be prompted to confirm that you are in possession of the selected card before you can continue. Click on Yes or No. 7. A results page will display the status of your request. 8. Click on Finish to return to the My Cards page; if your reactivation was successful the Status of the respective card will now appear as 'Active'. Online Banking User Guide 210 7.18 Update Card Delivery Details Use this function to proactively update your card delivery details before your new Credit Card is due to be issued. Important Information about updating Card Delivery Details This functionality is restricted to the Primary User of a Consumer profile. For your security, the delivery options available for certain product/card types are restricted; you will only be presented with the options applicable to the respective product/card type. Your new card will be created and sent to you approximately 14 days before your current card expires. Should you wish to change delivery details at a later stage, please contact the number on the back of your card. Update Card Delivery Details 1. Click on the My Bank Accounts tab and select the My Cards sub-tab. 2. A list of the cards linked to your Online Banking profile will be displayed. 3. Check the Status column; if the card is due to expire soon the Expiry Date will be hyperlinked. 4. Click on the Expiry Date hyperlink for the respective card. 5. The Card Expiry Delivery Details capture page will be displayed. 6. Click on the respective button to select your preferred delivery option, Deliver to Me or Collect from an FNB Branch. Deliver to Me: 7. 8. 9. 10. 11. 12. 13. Complete the Address Details and your Contact Details in the fields provided. Click on Continue. A confirmation page will be displayed. Check that this information is correct and, if necessary, click on Edit to make amendments. Click on Confirm. A results page will display the status of your request. Click on Finish to complete the process. Online Banking User Guide 211 Collect from an FNB Branch: 7. 8. 9. 10. 11. 12. 13. 14. Enter any part of the Branch Name and then click on Search. A list of possible matches will be displayed; click on the respective name to select it. Click on Continue. A confirmation page will be displayed. Check that this information is correct and, if necessary, click on Edit to make amendments. Click on Confirm. A results page will display the status of your request. Click on Finish to complete the process. Online Banking User Guide 212 7.19 Online Secure Online Secure is a unique service offered by Visa International which helps to protect clients against the unauthorised use of their Cheque or Credit Card/s for online purchases. Once activated, the Visa Card number cannot be used for online purchases at participating merchants without a One Time PIN (OTP). Most major online merchants participate in the Online Secure programme and therefore require their clients to activate the Online Secure functionality on their cards before making online purchases. Important Information about Online Secure This functionality is restricted to Consumer clients. The following Online Secure functionality is available: Activate Online Secure Update Online Secure Details Unblock Card for Online Secure Online Banking User Guide 213 7.19.1 Activate Online Secure In order to make purchases from any online merchant that participates in the Online Secure programme, your Visa Cheque or Credit Card must be activated for Online Secure. Use this function to activate your card for Online Secure. Activate Online Secure 1. Click on the My Bank Accounts tab and select the My Cards sub-tab. 2. A list of the cards linked to your Online Banking profile will be displayed. 3. If the Online Secure option is available on a card, an Activate hyperlink will be displayed in the Online Secure column. 4. Click on the Activate Now hyperlink for the respective card. 5. The Online Secure Activation page will be displayed. 6. Select your preferred method of delivery for your OTP, either SMS or Email. 7. If you selected SMS, select your Country from the drop down menu and enter your cellphone number, if you selected Email, enter your email address. 8. Create your Personal Message; this message will be displayed to you during the payment authentication process when using your card to shop online. 9. Before you can continue you will be required to read and accept the Disclaimer. 10. Click on Activate. 11. A results page will displayed the status of your request. 12. Click on Finish to return to the My Cards page; if your activation was successful the Online Secure status of the respective card will now appear as 'Activate/Update’. Online Banking User Guide 214 7.19.2 Update Online Secure Details Use this function to maintain your Online Secure OTP delivery details and your Personal Message. Update Online Secure Details 1. Click on the My Bank Accounts tab and select the My Cards sub-tab. 2. A list of the cards linked to your Online Banking profile will be displayed. 3. Click on the Activate/Update hyperlink in the Online Secure column for the respective card. 4. The Online Secure Activation page will be displayed. 5. Amend your contact details and Personal Message as required. 6. Before you can continue you will be required to read and accept the Disclaimer. 7. Click on Update. 8. A results page will displayed the status of your request. 9. Click on Finish to complete the process. Online Banking User Guide 215 7.19.3 Unblock Card for Online Secure Use this function to unblock your card; a card will be blocked if the OTP has been entered incorrectly three times within an online shopping session. If a card has been blocked the verification status in the Online Secure table column will change to Unblock Now. Unblock Card for Online Secure 1. Click on the My Bank Accounts tab and select the My Cards sub-tab. 2. A list of the cards linked to your Online Banking profile will be displayed. 3. If the card has been blocked, the status in the Online Secure column will reflect as ‘Unblock Now’. 4. Click on the Unblock Now hyperlink for the respective card. 5. A message will be displayed to confirm that the card has been successfully unblocked; the card can be used immediately to make online purchases. 6. Click on Finish to complete the process. Online Banking User Guide 216 7.20 Maintain Card Limits Use this function to manage your ATM withdrawal limits and Point of Sale transaction limits by setting daily and monthly limits. Important Information about Card Limits This functionality is restricted to Consumer clients. Credit Cards Credit Cards only use ATM limits, no Point of Sales (POS) limits are used. For your security, International Limits for Credit Cards cannot be maintained online. Update Card Limits 1. 2. 3. 4. 5. 6. 7. 8. 9. 10. 11. Click on the My Bank Accounts tab and select the My Cards sub-tab. A list of the cards linked to your Online Banking profile will be displayed. Click on the Limits easy button for the respective card. The Update Limits capture page will be displayed; it is divided into Local and International Limits for both ATM withdrawals and Point of Sale (POS) transactions. Amend your limits as required. Click on Update. A confirmation page will be displayed. Check that this information is correct and, if necessary, click on Edit to make amendments. Click on Confirm. A results page will display the status of your request. Click on Finish to complete the process. Online Banking User Guide 217 7.21 PIN Management The PIN Management functionality is available to Cheque, Debit and Credit cards which use a magnetic strip or a Chip and PIN. 7.21.1 View PIN Use this function to view the current PIN for a card that is linked to your profile. View PIN 1. 2. 3. 4. 5. 6. Click on the My Bank Accounts tab and select the My Cards sub-tab. A list of the cards linked to your Online Banking profile will be displayed. Click on the View PIN easy button for the respective card. The current PIN for the selected card will be displayed. Please read the Safety Tips on how to keep your PIN safe. Click on Close to return to the My Cards page. Online Banking User Guide 218 7.21.2 Create / Modify PIN Use this function to create or modify the PIN for a card that is linked to your profile. Important Information about Creating or Modifying your PIN • This functionality is restricted to Consumer clients. • Once you have changed the PIN on Online Banking, the new PIN needs to be synchronized with the respective card. This can be done via an ATM or at a branch. Create or Modify PIN Click on the My Bank Accounts tab and select the My Cards sub-tab. A list of the cards linked to your Online Banking profile will be displayed. Click on the Create PIN easy button for the respective card. Before you can continue you will be required to read and accept the Terms and Conditions; please take note of the process to synchronise your new PIN with your card. 5. Click on Confirm. 6. A results page will display the status of your request. 1. 2. 3. 4. Online Banking User Guide 219 7.22 Cancel Card Use this function to cancel a card which is linked to your profile. Cheque Cards: Credit Cards: • Account Closed • Damaged Card • Lost Card • Misplaced Card • Stolen Card • Lost or Stolen Card Important Information about Cancelling Cards • If you are cancelling a Credit Card and you select the reason as Lost or Stolen you will be required to complete a brief online Incident Report as part of the process. o The following information is required: o Date and Time of incident o Where the incident took place o Date the card was last used o Where the card was last used o Cancel a Card 1. 2. 3. 4. 5. 6. 7. 8. 9. 10. 11. Click on the My Bank Accounts tab and select the My Cards sub-tab. A list of the cards linked to your Online Banking profile will be displayed. Click on the Cancel card easy button for the respective card. The Cancel Card slide out will be displayed. Please select the reason for cancelling the card from the drop down menu; if you are cancelling a Credit Card because it has been lost or stolen you will be required to complete a brief Incident Report. Click on Cancel Card. A confirmation page will be displayed. Check that this information is correct and, if necessary, click on Edit to make amendments. Click on Confirm. A results page will display the status of your request. If you would like to order a Replacement Card, click on the Replace Card option; alternatively click on Finish to complete the process. Online Banking User Guide 220 7.23 Order Replacement Card Use this function to order a Replacement Cheque or Credit Card online if you have cancelled your card. This functionality can only be utilised for cards that are personalised i.e. your name is embossed on the card. Important Information about Ordering a Replacement Card • This functionality is restricted to Consumer clients. • This functionality is limited to cards that are personalised i.e. your name is embossed on the card. For your security, the delivery options available for certain product/card types are restricted; you will only be presented with the options applicable to the respective product/card type. • A fee may apply for personal delivery; please refer to the pricing guide. • Online Banking User Guide The order process takes approximately 5 business days. 221 Order a Replacement Cheque Card 1. 2. 3. 4. 5. 6. 7. 8. 9. 10. 11. 12. 13. 14. Click on the My Bank Accounts tab and select the My Cards sub-tab. A list of the cards linked to your Online Banking profile will be displayed. Click on the menu and select the Replace Card > Cheque Card / Credit Card option. A list of the accounts linked to your profile which have cards will be displayed. Click on the Account Name to select the respective account. The Replace Card capture page will be displayed. If there is more than one card linked to the selected account you will be required to select the Card Type from the drop down menu. Based on the Product and Card type you will need to complete the required Card Delivery Details. Click on Continue. A confirmation page will be displayed. Check that this information is correct and, if necessary, click on Edit to make amendments. Click on Confirm. A results page will display the status of your request. Click on Finish to complete the process. Online Banking User Guide 222 7.24 Order Additional Card Use this function to order secondary cards on the credit card/s that are linked to your profile. Important Information about Ordering an Additional Card • This functionality is restricted to Consumer clients. • This functionality is limited to cards that are personalised i.e. your name is embossed on the card. • Additional cards share the Primary User’s credit limit; no separate limits are allocated. For your security, the delivery options available for certain product/card types are restricted; you will only be presented with the options applicable to the respective product/card type. • A fee may apply for personal delivery; please refer to the pricing guide. • The order process takes approximately 5 business days. • You will require Secondary Card Holder’s ID number in order to complete this process. Online Banking User Guide 223 Order an Additional Card 1. 2. 3. 4. 5. 6. 7. 8. 9. 10. 11. 12. 13. 14. 15. 16. 17. 18. Click on the My Bank Accounts tab and select the My Cards sub-tab. A list of the cards linked to your Online Banking profile will be displayed. Click on the menu and select the Additional Card option. A list of card accounts linked to your profile will be displayed. Click on the Account Name to select the respective account. The Additional Cards capture page will be displayed. Select the Card Type that you would like to link. Complete the Personal Details of the person that the card is for (Card Holder). Complete your Contact Details. Based on the Product and Card type you will need to complete the required Card Delivery Details. If applicable to the selected product, click on Select to choose a preferred Card Design, click on Change to select the respective design. Before you can continue you will be required to read and accept the Disclaimer. Click on Continue. A confirmation page will be displayed. Check that this information is correct and, if necessary, click on Edit to make amendments. Click on Confirm. A results page will display the status of your request. Click on Finish to complete the process. Online Banking User Guide 224 7.25 Customer to Account (CUAC) Relationships CUAC – Customer to Account Relationships (mandates) allows customers to apply account based permissions i.e. Transactor, Viewer, Cardholder, Signatory and Custom based permissions Online. A mandate is issued to the user with the account permission indicating the relationship. Important Information about (CUAC) Relationships • This functionality is restricted to the Primary User of a Business or Commercial profile. • The SAR (Sole Administrator) and CAR (Commercial Administrator) cannot be maintained Online. Account Based Roles: • Transactor View and transact on the account using a full function cheque and/or petrol card through any physical business banking channels and own choice of personal banking channels • Viewer Obtain account information at any FNB Branch and through own personal electronic banking services • Cardholder Can transact on the account using a limited function FNB Visa business cheque card and/or petrol card • Sole Cheque Signatory Can transact on the account using a full function FNB Visa business cheque card and/or petrol card • Joint Cheque Signatory Can transact on the account using a limited function FNB Visa business cheque card and/or petrol card • Customised Can transact on the account using a full function FNB business cheque card and /or limited petrol Online Banking User Guide 225 card Functions which the Account based roles can perform Online Banking User Guide 226 7.26 (CUAC) Relationships - Replace Business Cheque or Petrol Card The CUAC and card maintenance functionality is available to the Sole Authorised Representative (SAR), Transactor (SST) and Cardholder on their personal profiles and the Primary User on the business profile. Important Information about CUAC Card Maintenance • This functionality is limited to Business or Commercial Clients. 7.26.1 Sole Authorised Representative (SAR)/ Transactor replacing their own business card from their personal profile Important Information about SAR/Transactor Replacing their Own Card • The SAR can only replace his own cancelled card. • A Transactor follows the same steps to replace his own card • The replacement card will be a replica of the initial card issued. 1. Click on My Bank Accounts tab and select the My Cards sub-tab. 2. A list of all the SAR’s cards will appear. 3. Click on the Replace Easy Button for the respective card. 4. A Replace Card overlay will be displayed; the replacement card will be a replica of the initial card issued. 5. Completed the Card Delivery Details. 6. Click on Replace Card. 7. A confirmation page will be displayed. 8. Check that this information is correct and, if necessary, click on Edit to make amendments. 9. Click on Confirm. 10. A results page will display the status of your request. 11. Click on Finish to complete the process. Online Banking User Guide 227 7.26.2 A Transactor replacing another cardholder’s business card from their (Transactor’s) personal profile Important Information about a Transactor replacing a Cardholder’s Card • The Transactor can only replace a cancelled card for a cardholder who has a limited function cheque card and/or petrol card • The replacement card will be a replica of the initial card issued. 1. Click on My Bank Accounts tab. 2. A list of all the accounts linked to your profile will be displayed. 3. Click on the Name Hyperlink of the respective account that you need to request a replacement card for. 4. The Account Settings dashboard will be displayed for the selected account. 5. Click on the Cards view. 6. A list of cardholders and the type of card that they have linked to the respective account will be displayed. 7. Click on the Replace Easy Button for the respective card. 8. A Replace Card overlay will be displayed; the replacement card will be a replica of the initial card issued. 9. Completed the Card Delivery Details. 10. Click on Replace Card. 11. A confirmation page will be displayed. 12. Check that this information is correct and, if necessary, click on Edit to make amendments. 13. Click on Confirm. 14. A results page will display the status of your request. 15. Click on Finish to complete the process. Online Banking User Guide 228 7.26.3 A Cardholder replacing their own business card from their personal profile Important Information about a Cardholder replacing their own Card • The cardholder can only replace their card if it was cancelled through another channel. If the card was cancelled Online the Primary User needs to replace the card. • The replacement card will be a replica of the initial card issued. 1. Click on My Bank Accounts tab and select the My Cards sub-tab. 2. A list of all the cards linked to you will be displayed. 3. Click on the Replace Easy Button for the respective card. 4. A Replace Card overlay will be displayed; the replacement card will be a replica of the initial card issued. 5. Completed the Card Delivery Details. 6. Click on Replace Card. 7. A confirmation page will be displayed. 8. Check that this information is correct and, if necessary, click on Edit to make amendments. 9. Click on Confirm. 10. A results page will display the status of your request. 11. Click on Finish to complete the process. Online Banking User Guide 229 7.26.4 A Primary User replacing another cardholder’s business card from the business profile Important Information about a Primary User replacing a Card from the business profile • The replacement card will be a replica of the initial card issued. 1. Click on My Bank Accounts tab. 2. A list of all the accounts linked to your profile will be displayed. 3. Click on the Name Hyperlink of the respective account that you need to request a replacement card for. 4. The Account Settings dashboard will be displayed for the selected account. 5. Click on the Cards view. 6. A list of cardholders and the type of card that they have linked to the respective account will be displayed. 7. Click on the Replace Easy Button for the respective card. 8. A Replace Card overlay will be displayed; the replacement card will be a replica of the initial card issued. 9. Completed the Card Delivery Details. 10. Click on Replace Card. 11. A confirmation page will be displayed. 12. Check that this information is correct and, if necessary, click on Edit to make amendments. 13. Click on Confirm. 14. A results page will display the status of your request. 15. Click on Finish to complete the process. Online Banking User Guide 230 7.27 Customer to Account (CUAC) Relationships Order a Business Cheque and Petrol Card 7.27.1 Sole Authorised Representative (SAR)/ Transactor ordering their own business card from their personal profile Important Information about SAR/Transactor Ordering their Own Card • The SAR can only order a new card for himself. • A Transactor follows the same steps to order a new card 1. Click on My Bank Accounts tab and select the My Cards sub-tab. 2. A list of all the SAR’s cards will appear. 3. Click on the (+) Add Table Action. 4. A list of accounts that can have cards linked to them will be displayed; click on the respective account hyperlink to select the account. 5. Select your own name as the Cardholder. 6. An Order New Card page will be displayed. 7. Completed the Card Delivery Details. 8. Before you can continue, you will be required to read and accept the Terms and Conditions. 9. Complete the required Limits for the new card. 10. Click on Continue. 11. A confirmation page will be displayed. 12. Check that this information is correct and, if necessary, click on Edit to make amendments. 13. Click on Confirm. 14. A results page will display the status of your request. 15. Click on Finish to complete the process. Online Banking User Guide 231 7.27.2 Transactor ordering a business card for another cardholder from their (Transactor’s) personal profile Important Information about a Transactor ordering a card for another Cardholder • The Transactor can order a limited function business cheque and/or petrol card for a cardholder as per the mandate. • A new mandate must be accepted every time a new card is ordered. 1. Click on My Bank Accounts tab. 2. A list of all the accounts linked to your profile will be displayed. 3. Click on the Name Hyperlink of the respective account that you need to order a card for. 4. The Account Settings dashboard will be displayed for the selected account. 5. Click on the Cards view. 6. A list of cardholders and the type of card that they have linked to the respective account will be displayed. 7. Click on the (+) Add Table Action. 8. You will be required to select the Cardholder from a list. 9. A confirmation overlay will be displayed requesting you to confirm if you would like to order a new card, as this will require a new mandate to be accepted. 10. Click on Yes. 11. An Order New Card page will be displayed. 12. Completed the Card Delivery Details. 13. Before you can continue, you will be required to read and accept the Terms and Conditions. 14. Complete the required Limits for the new card. 15. Click on Continue. 16. A confirmation page will be displayed. 17. Check that this information is correct and, if necessary, click on Edit to make amendments. 18. Click on Confirm. 19. A results page will display the status of your request. 20. Click on Finish to complete the process. Online Banking User Guide 232 7.27.3 A Primary User ordering a business card for another cardholder from the business profile 1. Click on My Bank Accounts tab. 2. A list of all the accounts linked to your profile will be displayed. 3. Click on the Name Hyperlink of the respective account that you need to order a card for. 4. The Account Settings dashboard will be displayed for the selected account. 5. Click on the Cards view. 6. A list of cardholders and the type of card that they have linked to the respective account will be displayed. 7. Click on the (+) Add Table Action. 8. You will be required to select the Cardholder from a list. 9. A confirmation overlay will be displayed requesting you to confirm if you would like to order a new card, as this will require a new mandate to be accepted. 10. Click on Yes. 11. An Order New Card page will be displayed. 12. Completed the Card Delivery Details. 13. Before you can continue, you will be required to read and accept the Terms and Conditions. 14. Complete the required Limits for the new card. 15. Click on Continue. 16. A confirmation page will be displayed. 17. Check that this information is correct and, if necessary, click on Edit to make amendments. 18. Click on Confirm. 19. A results page will display the status of your request. 20. Click on Finish to complete the process. Online Banking User Guide 233 7.28 Add and or Maintain Cardholder 7.28.1 Transactor adding another functionality from their personal profile cardholder – CUAC 1. Click on My Bank Accounts tab. 2. A list of all the accounts linked to your profile will be displayed. 3. Click on the Name Hyperlink of the respective account that you need to order a card for. 4. The Account Settings dashboard will be displayed for the selected account. 5. Click on the Cards view. 6. A list of cardholders and the type of card that they have linked to the respective account will be displayed. 7. Click on the (+) Add Table Action. 8. You will be required to select the Cardholder from a drop-down list; to create a new cardholder click on the Add User hyperlink below the list of cardholders. 9. The Add New User capture page on the Account Relationships sub-tab will be displayed. 10. Complete the Cardholder’s Name and Identification Details in the fields provided. 11. Click on Continue. 12. A new capture page will be displayed; complete the cardholder’s details in the fields provided. 13. Click on Continue. 14. A confirmation page will display the new CUAC Relationship. 15. Before you can continue, you will be required to read and accept the Terms and Conditions. 16. Check that this information is correct and, if necessary, click on Edit to make amendments. 17. Click on Confirm. 18. A results page will display the status of your request. 19. Click on Finish to complete the process. Online Banking User Guide 234 7.28.2 Primary User adding a new cardholder – CUAC functionality from the business profile 1. Click on My Bank Accounts tab. 2. A list of all the accounts linked to your profile will be displayed. 3. Click on the Name Hyperlink of the respective account that you need to order a card for. 4. The Account Settings dashboard will be displayed for the selected account. 5. Click on the Cards view. 6. A list of cardholders and the type of card that they have linked to the respective account will be displayed. 7. Click on the (+) Add Table Action. 8. You will be required to select the Cardholder from a drop-down list; to create a new cardholder click on the Add User hyperlink below the list of cardholders. 9. The Add New User capture page on the Account Relationships sub-tab will be displayed. 10. Complete the Cardholder’s Name and Identification Details in the fields provided. 11. Click on Continue. 12. A new capture page will be displayed; complete the cardholder’s details in the fields provided. 13. Click on Continue. 14. A confirmation page will display the new CUAC Relationship. 15. Before you can continue, you will be required to read and accept the Terms and Conditions. 16. Check that this information is correct and, if necessary, click on Edit to make amendments. 17. Click on Confirm. 18. A results page will display the status of your request. 19. Click on Finish to complete the process. Online Banking User Guide 235 7.29 Maintain Business Cheque and Petrol Card Limits 7.29.1 Sole Authorised Representative (SAR)/Transactor maintaining their own business card limits from their personal profile 1. Click on My Bank Accounts tab and select the My Cards sub-tab. 2. A list of all the SAR’s cards will appear. 3. Click on the Limits easy button for the respective card. 4. An Update Limits overlay will be displayed. 5. Amend the Limits as required and then click on Update. 6. A confirmation page will be displayed. 7. Check that this information is correct and, if necessary, click on Edit to make amendments. 8. Click on Confirm. 9. A results page will display the status of your request. 10. Click on Finish to complete the process. 7.29.2 Transactor maintaining another cardholders business limits from their personal profile 1. Click on My Bank Accounts tab. 2. A list of all the accounts linked to your profile will be displayed. 3. Click on the Name Hyperlink of the respective account that you need to order a card for. 4. The Account Settings dashboard will be displayed for the selected account. 5. Click on the Cards view. 6. A list of cardholders they are linked to the respective account will be displayed. 7. Click on the Limits easy button for the respective cardholder. 8. An Update Limits overlay will be displayed. 9. Amend the Limits as required and then click on Update. 10. A confirmation page will be displayed. 11. Before you can continue, you will be required to acknowledge that you have read and understood the new Account Relationship Mandate. 12. Check that this information is correct and, if necessary, click on Edit to make amendments. 13. Click on Confirm. 14. A results page will display the status of your request. 15. Click on Finish to complete the process. Online Banking User Guide 236 7.29.3 Primary User maintaining another cardholders business limits from the business profile 1. Click on My Bank Accounts tab. 2. A list of all the accounts linked to your profile will be displayed. 3. Click on the Name Hyperlink of the respective account that you need to order a card for. 4. The Account Settings dashboard will be displayed for the selected account. 5. Click on the Cards view. 6. A list of cardholders they are linked to the respective account will be displayed. 7. Click on the Limits easy button for the respective cardholder. 8. An Update Limits overlay will be displayed. 9. Amend the Limits as required and then click on Update. 10. A confirmation page will be displayed. 11. Before you can continue, you will be required to acknowledge that you have read and understood the new Account Relationship Mandate. 12. Check that this information is correct and, if necessary, click on Edit to make amendments. 13. Click on Confirm. 14. A results page will display the status of your request. 15. Click on Finish to complete the process. Online Banking User Guide 237 7.30 Cancel Card 7.30.1 Sole Authorised Representative (SAR)/Transactor cancelling his own business card from his personal profile 1. Click on My Bank Accounts tab and select the My Cards sub-tab. 2. A list of all the accounts linked to the profile will be displayed. 3. Click on the Name Hyperlink of the respective account that you need to cancel the card for. 4. The Account Settings dashboard will be displayed for the selected account. 5. Click on the Cards view. 6. Click on the Cancel easy button for the respective card. 7. A confirmation overlay will be displayed requesting you to confirm if you would like to cancel this card. 8. Click on Yes. 9. The Cancel Card overlay will be displayed. 10. You will be required to select the reason why you are cancelling the card from a drop down list. 11. A confirmation page will be displayed. 12. Check that this information is correct and, if necessary, click on Edit to make amendments. 13. Click on Confirm. 14. A results page will display the status of your request. 15. Click on Finish to complete the process. Online Banking User Guide 238 8.Transfer Tab Online Banking User Guide 239 8.1 Transfers Tab Overview The Transfer function enables you to transfer funds between the accounts linked to your profile, including your Global Accounts. To move funds to a Recipient / third party account you will need to use the Pay functionality. To transfer funds to your PayPal account please utilise PayPal Services which is located on the Forex tab. Important Information about Transfers • Transfer functionality can be performed by both the Primary and Secondary User, provided that the Primary User has granted Transact Permissions to the Secondary User. • For your security there is a Daily Limit for Transfers. • Transfers can be future dated to take place within the next 365 days. o A future dated transfer will be stored with your Scheduled Transfers until it has been processed. o A future dated transfer can be modified until 18h00 two business days prior to the scheduled transfer date. • Transfers submitted after 20h00 will take up to 12 hours to reflect. • Transfer functionality is dependent on the account/product type. o Online Banking User Guide You cannot transfer funds to your eBucks account. 240 8.1.1 Transfer Functionality The Transfer Tab is divided into two sub-tabs: 1. Between Accounts 2. Scheduled Transfers The following functionality is available on the Between Accounts sub-tab: • Transfer Funds Between Accounts o • Transfer funds between the accounts linked to your profile. Transfer Funds to Budget o Transfer funds to a specific budget item or across all budget items on your Credit Card/s • Transfer History o • View and search your Transfer History Forex Transfer History o View the details and status of pending Forex Transfer Applications that you have initiated on Online Banking • Loan Account Transfers o Transfer funds into or out of your Loan Account o Unit Trust Transfers o Transfer funds into or out of your existing Unit Trust account The following functionality is available on the Scheduled Transfers sub-tab: • Scheduled Transfers o Create and maintain transfers that will take place automatically on a specified date without you having to log on to Online Banking. Online Banking User Guide 241 Between Accounts Sub Tab Online Banking User Guide 242 8.2 Transfer Funds Between Accounts Use this function to transfer funds between the accounts that are linked to your profile. Please note that the process to transfer funds to or from your Global Accounts is a separate function and is detailed later in this chapter. Important Information about Transfers • Transfers can be future dated to take place within the next 365 days. o A future dated transfer will be stored with your Scheduled Transfers until it has been processed. o The details of a future dated transfer can be modified until 18h00 two business days prior to the scheduled transfer date. • Transfers submitted after 20h00 will take up to 12 hours to reflect. • Transfer functionality is dependent on the account/product type. o You cannot transfer funds to your eBucks account. Transfer Funds Between Accounts 1. Click on the Transfer tab. 2. If it is not already selected, click on the Between Accounts sub-tab. 3. The Transfer Between Accounts capture page will be displayed. 4. Select the account that you would like to transfer the funds From e.g. cheque account. 5. Select the account that you would like to transfer the funds To e.g. savings account. 6. Enter the Amount that you would like to transfer. 7. Select the date that you would like the transfer to take place; a transfer can be future dated up to 365 days in advance. 8. Enter the From Reference; this is the reference that you would like to appear on the account that you are transferring the funds from e.g. Transfer to savings. 9. Enter the To Reference; this is the reference that you would like to appear on the account that you are transferring the funds to e.g. Holiday. 10. Click on Transfer. 11. A confirmation page will be displayed. 12. Check that this information is correct and, if necessary, click on Edit to make amendments. 13. Click Confirm to proceed. 14. A results page will display the status of your request. 15. Click on Finish to complete the process. Online Banking User Guide 243 8.3 Transfer Funds to Budget Use this function to transfer funds to the budget facility on your credit card; either to a specific transaction or across all budget transactions. Important Information about Transferring Funds to Budget • If you do not select a budget item to which you want to transfer the funds, the funds will be distributed across all budget items. • If you choose to distribute the funds, the funds will be allocated from the oldest to most recent purchase. Transfer Funds to Budget 1. Click on the Transfer Tab. 2. If it is not already selected, click on the Between Accounts sub-tab. 3. Click on the Menu and select Funds to Budget in the extended menu. 4. The Funds to Budget capture page will be displayed 5. Select the account that you would like to transfer the funds From e.g. cheque account. 6. Select the credit card account that you would like to transfer the funds To. 7. Enter the From Reference; this is the reference that you would like to appear on the account that you are transferring the funds from e.g. Transfer to Budget. 8. Enter the To Reference; this is the reference that that you would like to appear on the account that you are transferring the funds to e.g. Bonus. 9. Enter the Amount that you would like to transfer. 10. A list of your budget items will be displayed. 11. Click in the respective checkbox to select a specific budget item, alternatively, click in the checkbox to Transfer funds across all budget items. 12. Click on Transfer. 13. A confirmation page will be displayed. 14. Check that this information is correct and, if necessary, click on Edit to make amendments. 15. Click Confirm to proceed. 16. The results page will be displayed. 17. Click on Finish to complete the process. Online Banking User Guide 244 8.4 Transfer Funds to or from a Global Account There are three possible scenarios for Global Account Transfers: 1. Transfer funds from a South African transactional account to a Global Account 2. Transfer funds from a Global Account to a South African transactional account 3. Transfer funds from one Global Account to another Global Account Important Information about Global Account Transfers • All Forex functionality is restricted to the Primary User. • Charges for a Forex Transfer can only be debited to a South African transactional account. • It is imperative that all information is captured correctly as it is required for Balance of Payment (BOP) reporting to the South African Reserve Bank (SARB). • Global account transfers will not reflect immediately. Once the online instruction has been submitted you will be able to track the status of the transaction by viewing your Forex Transfer Applications. • When transferring funds from a South African transactional account to a Global Account you will be required to submit a Foreign Investment Allowance Form (MP1423) and an original Tax Clearance Certificate. • When transferring funds from a South African transactional account to a Global Account you will be required to submit a Foreign Investment Allowance Form (MP1423) and an original Tax Clearance Certificate. Online Banking User Guide 245 Transfer funds to or from a Global Account 1. Click on the Transfer tab. 2. If it is not already selected, click on the Between Accounts sub-tab. 3. The Transfer Between Accounts capture page will be displayed. 4. Select the account that you would like to transfer the funds From. 5. Select the account that you would like to transfer the funds To. 6. Enter the Amount that you would like to transfer. The amount to transfer can be specified in the currency of either the To or From account. Enter the amount that you would like to transfer and then select the required currency for that amount. E.g. If you need to transfer an exact amount of USD700 from your South African transactional account into your USD Global account, simply enter the amount of 700 and select the USD currency. 7. Enter the Statement Reference that you would like to appear on the account that you are transferring funds From e.g. Transfer to USD account. 8. Enter the Statement Reference that you would like to appear on the account that you are transferring funds To e.g. USD investment. 9. If you are not transferring funds from one of your South African transactional accounts you will be required to select a Charge Account. 10. Continue with the steps below based on the type of transfer that you are performing. Online Banking User Guide 246 Scenario 1: Transfer funds from a South African transactional account to a Global Account 1. Complete steps 1 to 10 of the general Global Accounts Transfer process above. 2. Complete the required Reporting Information in the fields provided. 3. Click on Transfer. 4. A confirmation page will be displayed. 5. Check that this information is correct and, if necessary, click on Edit to make amendments. 6. Click Confirm to proceed. 7. A results page will display the status of your request and will also advise you of any outstanding information or required documentation. 8. Click on Finish to complete the Forex Transfer Application. 9. The pending transfer application can be accessed via Forex Transfer Applications on the action bar. 10. Once you receive notification that the required documents have been received and verified you can then continue the process by accessing the pending application via Forex Transfer Applications in the action bar and requesting a quote for the rate of exchange for the transaction. 11. A confirmation page will be displayed. The page is divided into three sections: o Quote o Transaction Details o Terms and Conditions 12. Check that these details are correct and, if required, click on Edit to make any amendments. 13. Before you can continue you will be required to read and accept the Terms and Conditions. 14. You will have the option to request another Quote Later, Decline the Quote or Accept the Quote. For statistical purposes, if you elect to Decline the Quote you will be prompted to give a reason. 15. Accept the quote. 16. A results page will display the status of your request. 17. Click on Finish to complete the process. Online Banking User Guide 247 Scenario 2: Transfer funds from a Global Account to a South African transactional account And Scenario 3: Transfer funds from one Global Account to another Global Account 1. Complete steps 1 to 10 of the general Global Accounts Transfer process above. 2. Click on Transfer. 3. A confirmation page will be displayed. The page is divided into three sections: o Quote o Transaction Details o Terms and Conditions 4. Check that these details are correct and, if required, click on Edit to make any amendments. 5. Before you can continue you will be required to read and accept the Terms and Conditions. 6. You will have the option to either Decline the Quote or Accept the Quote. For statistical purposes, if you elect to Decline the Quote you will be prompted to give a reason. 7. Accept the quote. 8. A results page will display the status of your request. 9. Click on Finish to complete the process. Online Banking User Guide 248 8.5 Transfer History Use this function to view and search a history of the transfers that you have made between the accounts on your profile. 8.5.1 View Transfer History Use this function to view the transfers that you have made between the accounts on your profile. View Transfer History 1. Click on the Transfer Tab. 2. If it is not already selected, click on the Between Accounts sub-tab. 3. Click on the Menu and select Transfer History in the extended menu. 4. All transfers that have taken place between the accounts linked to your profile will be displayed on the Transfer History page. 5. Click on the From Account hyperlink to view further details of the transfer. 6. Click Back to return to the Transfer History page. 8.5.2 Search Transfer History Use this function to search your Transfer History for a specific transfer. There are two Search Options: 1. Search o Enter a minimum of two alphanumeric characters in the Search field to search across multiple pages of Transfer History. o The Search Table Action does not search the Date column; if you would like to search for a transaction by date, please use the Advanced Search function. 2. Advanced Search o The Advanced Search enables you to refine your search by: o Type of Transaction o Originating Account o Date Range o Amount Range Online Banking User Guide 249 Search Transfer History 1. Click on the Transfer Tab. 2. If it is not already selected, click on the Between Accounts sub-tab. 3. Click on the Menu and select Transfer History in the extended menu. 4. All transfers that have taken place between the accounts linked to your profile will be displayed on the Transfer History page. 5. Click on the Search button in your table actions. 6. Enter a minimum of two alphanumeric characters in the Search field. 7. The results of your search will be displayed. 8. Click on Back to return to the Transfer Between Accounts page. Perform an Advanced Search of your Transfer History 1. Click on the Transfer Tab. 2. If it is not already selected, click on the Between Accounts sub-tab. 3. Click on the Menu and select Transfer History in the extended menu. 4. All transfers that have taken place between the accounts linked to your profile will be displayed on the Transfer History page. 5. Click on the Menu and select Advanced Search. 6. The Transaction Search slide out will be displayed. 7. To refine your search, complete as many of the fields as possible. 8. Click on Search. 9. The results of your search will be displayed. 10. Click on Back to return to the Transfer Between Accounts page. Online Banking User Guide 250 8.6 Forex Transfer History Use this function to view the details and status of pending Forex Transfer Applications that you have initiated on Online Banking. A pending application is an application that either has outstanding document requirements or is pending acceptance of the rate of exchange quote. Once the required documents have been received and verified you will receive a notification from FNB Forex upon which you will be able to select the pending transfer application and request a quote for the rate of exchange for the transaction. Important Information about Global Account Transfers • All Forex functionality is restricted to the Primary User. • Only transactions initiated on Online Banking are displayed under the Forex Transfer Applications. • The Exchange Quote is only valid for two minutes. • For advice or general Forex queries please contact the Forex Help Line via phone or email. View Forex Transfer Applications 1. Click on the Transfer Tab. 2. If it is not already selected, click on the Between Accounts sub-tab. 3. Click on the Menu and select Forex Transfer History in the extended menu. 4. A list of your Forex Transfer Applications and their transaction status will be displayed. 5. To view the Details and Reporting Information of the Forex Transfer Application, click on the Name or Status hyperlink. 6. Dependent on the status of the application, you will only have the option to click on Back to return to the list of Forex Transfer Applications or, if all outstanding requirements have been received and verified, you will also have the option to continue with the transfer process by clicking on Get Quote. 7. Click on Get Quote. 8. A confirmation page will be displayed. 9. The page is divided into three sections: o Quote Online Banking User Guide 251 o Transaction Details o Terms and Conditions 10. Before you can continue you will be required to read and accept the Terms and Conditions. 11. You will have the option to request another Quote Later, Decline the Quote or Accept the Quote. For statistical purposes, if you elect to Decline the Quote you will be prompted to give a reason. 12. Accept the quote. 13. A results page will display the status of your request. 14. Click on Finish to complete the process. Online Banking User Guide 252 8.7 Loan Account Transfers Use this function to transfer funds into (Request Deposit) or out of (Request Withdrawal) a structured Loan Account. Important Information about Loan Account Deposit Requests • Wealth Transfer Functionality is restricted to the Primary User. • Deposits made before 12h00 South African time on business days are processed the same day and the balance will be updated the following working day. • Deposits made after 12h00 South African time on business days are processed the following working day and the balance will be updated two days later. • Online Banking User Guide Business days exclude weekends and public holidays. 253 8.7.1 Loan Account - Request Deposit Use this function to transfer funds into a Loan Account account. This request will be directed to either the RMB Private Bank Client Service Centre or to your RMB/FNB Relationship Manager. Important Information about Loan Account Deposit Requests • Deposits made before 12h00 South African time on business days are processed the same day and the balance will be updated the following working day. • Deposits made after 12h00 South African time on business days are processed the following working day and the balance will be updated two days later. • Business days exclude weekends and public holidays. Loan Account - Request Deposit 1. Click on the Transfer Tab. 2. If it is not already selected, click on the Between Accounts sub-tab. 3. Click on the Menu and select Request Deposit in the extended menu. 4. The Request Deposit capture page will be displayed. 5. Select the account that you would like to transfer the funds To (Deposit To) e.g. Mortgage Redemption. 6. Select the account that you would like to transfer the funds From (Withdraw From) e.g. Cheque Account. 7. Enter the Amount that you would like to transfer (Deposit). 8. Click on Continue. 9. A confirmation page will be displayed. 10. Check that this information is correct and, if necessary, click on Edit to make amendments. 11. Click Confirm to proceed. 12. The results page will be displayed. 13. Click on Finish to complete the process. Online Banking User Guide 254 8.7.2 Loan Account - Request Withdrawal Use this function to withdraw funds from your Loan Account. This request will be directed to either the RMB Private Bank Client Service Centre or to your RMB/FNB Relationship Manager. Important Information about Loan Account Deposit Requests • Withdrawal made before 12h00 South African time on business days are processed the same day and the balance will be updated the following working day. • Withdrawals made after 12h00 South African time on business days are processed the following working day and the balance will be updated two days later. • Business days exclude weekends and public holidays. Loan Account - Request Withdrawal 1. Click on the Transfer Tab. 2. If it is not already selected, click on the Between Accounts sub-tab. 3. Click on the Menu and select Request Withdrawal in the extended menu. 4. The Request Withdrawal capture page will be displayed. 5. Select the account that you would like to transfer the funds From (Withdraw From) e.g. Mortgage Redemption. 6. Select the account that you would like to transfer the funds To (Deposit To) e.g. Cheque account. 7. Enter the Amount that you would like to transfer (Withdraw). 8. Click on Continue. 9. A confirmation page will be displayed. 10. Check that this information is correct and, if necessary, click on Edit to make amendments. 11. Click Confirm to proceed. 12. The results page will be displayed. 13. Click on Finish to complete the process. Online Banking User Guide 255 8.8 Unit Trust Transfers Use this function to transfer funds into (Lump Sum Transfer) or out of (Disinvest Funds) your existing Unit Trust account. You can also set up Scheduled Transfers into your Unit Trust account. 8.8.1 Lump Sum Transfers Use this function to transfer funds into your Unit Trust account. Important Information about Lump Sum Transfers • You cannot transfer funds from a Credit Card account to a Unit Trust account. • The minimum amount for a Lump Sum Transfer is R500.00. • A Lump Sum Contribution before 13h00 on a business day will purchase units at the closing Unit Price of that business day. • A Lump Sum Contribution after 13h00 or, on a non-business day, will purchase units at the closing Unit Price of the following business day. • Funds will reflect in the Unit Trust account within two business days. Lump Sum Transfer into a Unit Trust Account 1. Click on the Transfer Tab. 2. If it is not already selected, click on the Between Accounts sub-tab. 3. Click on the Menu and select Lump Sum Transfer in the extended menu. 4. The Lump Sum Transfer capture page will be displayed. 5. Select the account that you would like to transfer the funds From e.g. Cheque account. 6. Select the Unit Trust account that you would like to transfer the funds To e.g. FNB Growth Fund. 7. Enter the Amount that you would like to transfer. 8. Enter the From Reference; this is the reference that you would like to appear on the account that you are transferring the funds from e.g. Unit Trust Savings. 9. Click on Transfer. 10. A confirmation page will be displayed. 11. Check that this information is correct and, if necessary, click on Edit to make amendments. 12. Click Confirm to proceed. Online Banking User Guide 256 13. The results page will be displayed. 14. Click on Finish to complete the process. 8.8.2 Disinvest Funds Use this function to transfer funds out of your Unit Trust account. Important Information about Disinvesting Funds from a Unit Trust Account • The Disinvestment value can be up to 90% of the available balance or the full available balance in the Unit Trust account. • Disinvestment before 13h00 on a business day will sell units at the closing Unit Price of that business day. • Disinvestment after 13h00 or, on a non-business day, will sell units at the closing Unit Price of the following business day. • Business days exclude weekends and public holidays. • Funds will reflect in the specified account within two business days. Disinvest Funds from a Unit Trust Account 1. Click on the Transfer Tab. 2. If it is not already selected, click on the Between Accounts sub-tab. 3. Click on the Menu and select Disinvest Funds in the extended menu. 4. The Disinvest Funds capture page will be displayed. 5. Select the Unit Trust account that you would like to transfer the funds From e.g. FNB Growth Fund. 6. Select the account that you would like to transfer the funds To e.g. Cheque Account. 7. Enter the Amount that you would like to transfer. 8. Enter the From Reference; this is the reference that you would like to appear on the account that you are transferring the funds from e.g. Holiday. 9. Select Yes to Disinvest All Funds or No to only disinvest a specified amount. Online Banking User Guide 257 Yes - Disinvest All Funds (Sell all Unit Trusts) 1. Complete steps 1 to 9 of the general Disinvest Funds process above. 2. Click on Disinvest. 3. A confirmation page will be displayed. 4. Check that this information is correct and, if necessary, click on Edit to make amendments. 5. Click Confirm to proceed. 6. The results page will be displayed. 7. Click on Finish to complete the process. No - Disinvest All Funds (Select a value or amount of Unit Trusts to sell) 1. Complete steps 1 to 9 of the general Disinvest Funds process above. 2. Select how you would like to disinvest, by Amount (Rand Value) or Units (Specified Number of Unit Trusts). 3. Based on your selection, enter either the Rand Value or the Amount of Units to transfer. 4. Click Disinvest. 5. A confirmation page will be displayed. 6. Check that this information is correct and, if necessary, click on Edit to make amendments. 7. Click Confirm to proceed. 8. The results page will be displayed. 9. Click on Finish to complete the process. Online Banking User Guide 258 Scheduled Transfers Sub-Tab Online Banking User Guide 259 8.9 Scheduled Transfers Overview Use this function to create and maintain Scheduled Transfers. A Scheduled Transfer is a transfer that you set up to take place on a specific date; this can be a onceoff transfer or a recurring transfer with or without an expiry date. Once the Scheduled Transfer has been saved, the transfer will be processed automatically on the date/s that you have requested without you having to log on to Online Banking. Important Information about Scheduled Transfers • To set up automatic monthly payments to a Credit Card account please avail of the Auto Payment functionality in the Account Settings menu. • To allow sufficient time for the changes to be updated, amendments or deletions of a Scheduled Transfer must be submitted before 18h00 a minimum of two business days prior to the specified transaction date. Online Banking User Guide 260 8.9.1 Create a Scheduled Transfer Use this function to create a once-off or recurring transfer to take place on a specified date. You can schedule a transfer up to 365 days in advance and can set an expiry date or leave it as an open ended transfer. Create a Scheduled Transfer 1. Click on the Transfer tab and select the Scheduled Transfer sub-tab. 2. If you have existing Scheduled Transfers these will be displayed. 3. Click on the Add Scheduled Payment button (+) in the table actions. 4. The Create Scheduled Transfer capture page will be displayed. 5. Select the account that you would like to transfer the funds From e.g. Cheque account. 6. Select the account that you would like to transfer the funds To e.g. Savings account. 7. Enter the Amount that you would like to transfer. 8. Enter the From Reference; this is the reference that you would like to appear on the account that you are transferring the funds from e.g. Cheque Savings. 9. Enter the To Reference; this is the reference that that you would like to appear on the account that you are transferring the funds to e.g. Savings. 10. Enter a Transfer Name for this Scheduled Transfer e.g. Savings. 11. Select the Start Date for the Scheduled Transfer; a transfer can be future dated up to 365 days in advance. 12. Select the Frequency of the transfer from the drop down menu. 13. Enter the End Date for the transfer; you can select to end it on a specific date, after a specific number of transfers or to leave it open ended. 14. Click on Add. 15. A confirmation page will be displayed. 16. Check that this information is correct and, if necessary, click on Edit to make amendments. 17. Click Confirm to proceed. 18. The results page will be displayed. 19. Click on Finish to complete the process. Online Banking User Guide 261 8.9.2 View Scheduled Transfers Use this function to view your existing Scheduled Transfers. The following information is available at a single glance: • Transfer Name • Transfer Amount • Next Transfer Date • Remaining Number of Transfers • Frequency View Scheduled Transfers 1. Click on the Transfer tab and select the Scheduled Transfer sub-tab. 2. Your existing Scheduled Transfers will be displayed. 3. Click on the View easy button of the respective Scheduled Transfer to see the details. 4. Click on Back to return to your list of Scheduled Transfers. Online Banking User Guide 262 8.9.3 Maintain a Scheduled Transfer Use this function to maintain the details of a Scheduled Transfer. The following information can be maintained: • To and From Accounts • Transfer Amount • Statement References • Transfer Name • Transfer Date • Frequency Important Information about Maintaining Scheduled Transfers • To allow sufficient time for the changes to be updated, amendments to a Scheduled Transfer must be submitted before 18h00 a minimum of two business days prior to the specified transaction date. o Maintain a Scheduled Transfer 1. Click on the Transfer tab and select the Scheduled Transfer sub-tab. 2. Your existing Scheduled Transfers will be displayed. 3. Click on the Maintain easy button of the Scheduled Transfer that you would like to amend. 4. The Modify Scheduled Transfer capture page will be displayed. 5. Make the amendments that you require and then click Update. 6. A confirmation page will be displayed. 7. Check that this information is correct and, if necessary, click on Edit to make amendments. 8. Click Confirm to proceed. 9. The results page will be displayed. 10. Click on Finish to complete the process. Online Banking User Guide 263 8.9.4 Delete a Scheduled Transfer Use this function to permanently delete a Scheduled Transfer. Important Information about Deleting Scheduled Transfers • To allow sufficient time for the changes to be updated, the deletion of a Scheduled Transfer must be submitted before 18h00 a minimum of two business days prior to the specified transaction date. Delete a Scheduled Transfer 1. Click on the Transfer tab and select the Scheduled Transfer sub-tab. 2. Your existing Scheduled Transfers will be displayed. 3. Click on the Delete easy button of the Scheduled Transfer that you would like to permanently delete. 4. A confirmation page will be displayed. 5. Check that this is the Scheduled Transfer that you would like to delete and, if necessary, click on Cancel to return to your list of Scheduled Transfers. 6. Click Confirm to proceed. 7. The results page will be displayed. 8. Click on Finish to complete the process. Online Banking User Guide 264 9. Pay Tab Online Banking User Guide 265 9.1 Pay Tab Overview Use the Payments functionality to make payments to your recipients and other third parties, produce payment notifications as proof of payment, view your payment history and manage your recipient list. To make use of PayPal as a payment mechanism or to make foreign currency payments please utilise the PayPal Services and Global Payments functionality respectively which is located on the Forex tab. Important Information about Payments • Payment functionality is dependent on the account/product type. • Payment functionality can be performed by both the Primary and Secondary User, provided that the Primary User has granted Transact Permissions to the Secondary User. • For your security, there is a Daily Limit for Payment transactions; please refer to the chapter on Online Banking Settings for further information. • Payments can be future dated to take place within the next 365 days. o A future dated payment will be stored with your Scheduled Payments until it has been processed. o To allow sufficient time for the changes to be updated, amendments or deletions of a Scheduled Payment must be submitted before 18h00 a minimum of two business days prior to the specified transaction date. o If the transaction date falls on a Sunday or public holiday, the payment will only be processed on the next business day. • If you have submitted a payment incorrectly please follow the Payment Reversal Process to have the transaction reversed. This is detailed in the Payment Reversal chapter in this section. • Please familiarise yourself with the general Business Rules for Payments which are detailed in a separate chapter in this section. Important notes or rules that only pertain to a specific function are detailed in the respective section. Online Banking User Guide 266 9.1.1 Payment Functionality There are five types of Payment transactions available on Online Banking; each of these options has its own sub-tab: • Payments • Once-Off Payments • Pending Payments • Scheduled Payments • Traffic Fines • eFiling Payments The functionality available for each of these sub-tabs is detailed in the respective chapters below. 9.1.2 Payment Service Types Pay and Clear Now is a fee based service which ensures that a payment from FNB to a Participating Bank is cleared within 60 minutes. The Pay and Clear Now option is displayed on all pages where payment transactions can be processed. Unless you have selected the Pay and Clear Now option as a service type, payment transactions will be processed as per the standard Payment Cut-Off Times. Please refer to the Business Rules for Payments chapter for further information regarding Participating Banks and Payment Cut-Off Times. Online Banking User Guide 267 9.2 Business Rules for Payment Transactions It is imperative that you familiarise yourself with the Business Rules for Payment Transactions. Important notes or rules that only pertain to a specific payment function are detailed in the respective section. The following rules are explained: • Daily Profile Limits • Cross Border Payments • Pay and Clear Now • Payment Cut-Off Times • Payment Processing Times • Payment Clearing Times • Alpha Numeric Character Rules / Payment and Reference Names • Bank Account Number Rules 9.2.1 Daily Profile Limits For your security, Daily Limits apply to all Payment transactions on your Online Banking profile. A Daily Profile Limit is made up of the following transaction limits: • Personal Payment Limits o • Payments made to your recipients and to third parties Default Payment Limits o The Maximum Daily Limit for the following payment types are preset and accumulate towards your total Daily Payment Limit; these limits cannot be increased: o Pay and Clear Now payment transactions o Prepaid Services and Send Money transactions o Gaming purchases (LOTTO/PowerBall) All transactions performed by the Secondary Users on your profile accumulate towards your respective Daily Profile Limits. To amend your Daily Payment Limit for Online Banking please utilise the Daily Profile Limits functionality which is available in the Table Actions on all payment tabs and in your Online Banking Settings. Changes to your limits can be set Temporarily or Permanently. Online Banking User Guide 268 9.2.2 Cross Border Payments Cross border payments can only be made within the Common Monetary Area: • South Africa • Namibia • Swaziland • Lesotho 9.2.3 Pay and Clear Now Pay and Clear Now is a fee based service which ensures that a payment from FNB to a participating bank is cleared within 60 minutes. Participating Banks include: • ABSA Bank • Bidvest Bank • Capitec Bank • FirstRand Bank (FNB and RMB) • Nedbank Limited • Sasfin Bank • Standard Bank S.A. You do not need to use this option to pay FNB or RMB Private Bank accounts as these transactions will automatically be processed on the same business day at no additional cost. The Default Limit for Pay and Clear Now transactions is R35,000.00 per day. This limit can be amended using the Daily Profile Limits functionality. Please take note of the Payment Cut-Off Times below for Pay and Clear Now transactions. 9.2.4 Payment Cut Off Times Payments which miss the cut-off time will be processed the following business day. Online Banking User Guide 269 Online Banking User Guide 270 9.2.5 Payment Processing Times Even if you make a payment to a recipient after business hours, your account balance and available balance will be reduced immediately by the payment amount. 9.2.6 Payment Clearing Times • Payments to FNB or RMB Private Bank accounts: o Payments made to FNB or RMB Private Bank accounts within the cut-off times will reflect in the recipient’s account the same day. o • Payments made after the cut-off time will reflect in the recipient’s account within 12 hours. Payments to other Financial Institutions: o Payments made to other financial institutions within the cut-off times will reflect in the recipient’s account the same day but will only become available after 12pm. o Payments made after the cut-off time will reflect in the recipient’s account the following business day but will only become available after 12pm. o To make a payment to a participating bank and have it cleared within 60 minutes; use the Pay and Clear Now payment service type for nominal fee. 9.2.7 Alpha Numeric Character Rules / Payment and Reference Names Only certain characters can be used when capturing a Payment Name, Recipient Reference or Own Reference. The following are the only characters which can be used for the Payment Name, Recipient Reference and Own Reference fields when capturing a Recipient or Payment transaction: a-z A-Z 0-9 . / - & *, ( ) space < + $ ; > = @ ? : % [ ] \ ^_ ! " # Online Banking User Guide 271 9.2.8 Bank Account Number Rules Most banks only allow for an 11 digit account number to be captured. If you are capturing a Once-Off payment or trying to add a recipient that has an account number that is more than 11 digits long, please consult the Bank Account Number Rule Table below for a resolution. HSBC CURRENT: DROP DIGIT 1 DIGIT 1 2 3 4 5 6 7 8 9 10 11 12 DROP 0 0 0 0 0 0 0 0 0 0 0 0 NEDBANK BOND: DROP DIGITS 12 AND 13 DIGIT 1 2 3 4 5 6 7 8 9 10 11 12 13 DROP 0 0 0 0 0 0 0 0 0 0 0 0 0 ABN AMRO BANK: DROP DIGIT 1 DIGIT 1 2 3 4 5 6 7 8 9 10 11 12 DROP 0 0 0 0 0 0 0 0 0 0 0 0 UNIBANK TRANSMISSION: DROP DIGITS 1,2,3,4 AND 5 DIGIT 1 2 3 4 5 6 7 8 9 10 11 12 13 14 15 16 DROP 0 0 0 0 0 0 0 0 0 0 0 0 0 0 0 0 UNIBANK TRANSMISSION: DROP DIGITS 1,2,3 AND 4 DIGIT 1 2 3 4 5 6 7 8 9 10 11 12 13 14 15 DROP 0 0 0 0 0 0 0 0 0 0 0 0 0 0 0 Online Banking User Guide 272 9.3 Payment Reversals If you have submitted a payment incorrectly and the transaction has already been debited from your account and processed into the recipient's account, please follow the Payment Reversal process below to have the transaction reversed. Payment Reversal Process and Documentation: Please download the required documentation from the Downloads section of the Help Text: • Reversal Waiver and Indemnity • Reversal Form Once completed and signed, please scan and email the documentation to our FNB Online Reversals Department at [email protected] On receipt, our Reversals Department will send you a confirmation email which contains the Reference Number for your request together with the process that will be followed to action your request. Important Information about Reversals: • It is critical to submit the completed forms to the FNB Online Reversals Department speedily as this will improve the chances of a successful reversal • Reversals are not guaranteed but are done on a best effort basis to reverse the funds back into your account • Reversals are not possible if you selected to use the Pay and Clear Now service type for the payment/s • Reversals cannot be executed without the implicit authorization of the recipient who was paid incorrectly • Reversals can only be attempted within 30 days from the action date • There is a cost associated with reversal requests which is charged irrespective of the result of the reversal Online Banking User Guide 273 Reversals from an FNB Account: • FNB needs to obtain authority from the account holder before the reversal can be processed • If authority has been obtained, and funds are available in the recipient’s account, the funds will be returned electronically into your Nominated account and an email will be sent to you to confirm the success of the reversal request • If authority is not obtained we are not permitted to process the reversal; an email will be sent to you advising you of the unsuccessful result • This process should be completed within 3 to 5 working days after receiving the initial instruction Reversals from a non-FNB Account: • FNB may not contact another Bank's account holders directly to obtain authority for a reversal, a request is sent to the other bank requesting that they obtain authorisation from their account holder in order to reverse the funds. • If authority has been obtained, and funds are available in the recipient’s account, the funds will be returned electronically into your Nominated account and an email will be sent to you to confirm the success of the reversal request • If authority is not obtained we are not permitted to process the reversal; an email will be sent to you advising you of the unsuccessful result and will contain the names and contact details of the relevant people at the other bank. • This process should be completed within 5 working days after receiving the initial instruction. however some banks take longer to process reversal requests Reversals cannot be performed for payments made to the following companies or account types: • South African Revenue Services (PAYE, VAT, UIF etc.) • Public recipients e.g. Edgars, SARS, Telkom, etc. • Investment Accounts (e.g. 32 notice accounts) • Vehicle Finance Accounts • Credit Cards • eBucks • Suspense Accounts • Municipal Accounts • Estate Late Accounts • Recovery Accounts Online Banking User Guide 274 Payments Sub-Tab Online Banking User Guide 275 9.4 Payments Sub-Tab Overview The Payments sub-tab enables you to manage your own Recipient List and to make payments to those beneficiaries. Important Information about Payments • Payment functionality is dependent on the account/product type. • Payment functionality can be performed by both the Primary and Secondary User, provided that the Primary User has granted Transact Permissions to the Secondary User. • For your security, there is a Daily Limit for Payment transactions; please refer to the chapter on Online Banking Settings for further information. • Payments can be future dated to take place within the next 365 days. o A future dated payment will be stored with your Scheduled Payments until it has been processed. o To allow sufficient time for the changes to be updated, amendments or deletions of a Scheduled Payment must be submitted before 18h00 a minimum of two business days prior to the specified transaction date. o If the transaction date falls on a Sunday or public holiday, the payment will only be processed on the next business day. 9.4.1 Payments Sub-Tab Functionality The following functionality is available on the Payments sub-tab: • Pay Recipient • Add, Maintain and Delete Recipients • Recipient Payment History • Verify Account Owner • Validate Recipient • View Public Recipients • Payment History • Create, Print and Download Proof of Payment Notifications Online Banking User Guide 276 9.4.1.1 Pay Recipient Landing Page The My Recipients page provides you with an overview of the beneficiaries that you have added to your Recipient List. The following information and functionality is available on this page: • Recipient Category o For your convenience, your recipients are grouped together by the Recipient Category that you have selected; this makes it simpler to find a Recipient and/or pay multiple Recipients from the same Recipient Category simultaneously. o Recipients that have not been categorised are displayed at the bottom of your Recipient List in the following order: • o New Recipients o Recipients Paid in the Last 3 Months o Older Recipients Recipient Name: o Clicking on the Recipient Name hyperlink will direct you to the Maintain Recipient functionality. • Pay Amount: o This is the amount that you would like to pay the recipient. o Clicking on the Pay Amount hyperlink will display the Payment History for the respective recipient. • Last Paid: o This is the Date that you last paid the respective recipient. Online Banking User Guide 277 • My Reference: o This is the Statement Reference that will reflect on your bank statement when you make a payment to the respective recipient; you can change this reference every time you pay the recipient. • Their Reference: o This is the Statement Reference that will appear on the recipient's bank statement. This could be an account/reference number or a name/description; you can change this reference every time you pay the recipient. • Pay and Clear Now: o Click in the Pay and Clear Now check box if you would like this payment to be cleared within 60 minutes. o This option is only available for Participating Banks. Online Banking User Guide 278 9.5 Pay a Recipient Use this function to pay funds to a beneficiary that is saved on your Recipient List. You can pay single or multiple recipients from your Recipient List simultaneously and you can also future date your payment/s up to 365 days in advance. If you would like to pay a Global Recipient please make use of the Global Payments facility on the Forex Tab. Important Information about Paying Recipients • The Pay and Clear Now option is not available for payments to Public Recipients. • Payments can be future dated to take place within the next 365 days. o A future dated payment will be stored with your Scheduled Payments until it has been processed. o To allow sufficient time for the changes to be updated, amendments or deletions of a Scheduled Payment must be submitted before 18h00 a minimum of two business days prior to the specified transaction date. o If the transaction date falls on a Sunday or public holiday, the payment will only be processed on the next business day. Online Banking User Guide 279 Pay a Recipient 1. Click on the Pay tab. 2. If it is not already selected, click on the Payments sub-tab and select the My Recipients view. 3. Your Recipient List will be displayed. 4. Amend the Pay Amount, My Reference and Their Reference fields for the respective recipient as required. 5. If the recipient's account is held at a participating bank you will have the option to select the Pay and Clear Now service type. 6. Repeat this process for all of the recipients that you would like to pay. 7. Use the account switcher to select the account that you would like to use to make the payment/s. 8. The Payment Date is defaulted to Today, if you would like to Future Date the payment/s please use the calendar switcher to select the required date. Note: All of the respective recipients will be paid on the selected date. 9. Click on Pay. 10. A confirmation page will be displayed. 11. Check that this information is correct and, if necessary, click on Edit to make amendments. 12. If you selected to use the Pay and Clear Now service you will need to select either Yes or No to confirm your request. 13. Click on Confirm. 14. A results page will display a summary of your payment transactions together with the status of each request. 15. Click on the respective easy button to Download or Print the Proof of Payment Notification for the transaction. 16. Click on Finish to complete the process. Online Banking User Guide 280 9.6 Add a Recipient Use this functionality to save the banking details of the beneficiaries that you pay regularly, including Public Recipients, to your own Recipient List thereby eliminating the need to capture these details each time that you need to pay the recipient. You can also save Payment Notification details for the recipient so that, every time you make a payment to the recipient, a Payment Notification will automatically be sent to the recipient via the notification method that you have selected, i.e. email, sms or fax. You can select any combination of the following types of Payment Notifications per recipient: • 5 e-mail notifications • 2 SMS notifications • 2 fax notifications Important Information about Adding a Recipient • Please take note of the Bank Account Number Rules and Alpha Numeric Character Rules before capturing a Recipient or Payment transaction; this information is in the Business Rules for Payments chapter. • It is recommended that you use the Validate Recipient function to verify that the account number and branch code combination of an account are valid before you add the beneficiary's details to your Recipient List. This service is free of charge. • You can also Verify the Account Owner; i.e. use the recipient's Account Number and ID Number / Business Registration Number to verify that the account number and the account owner correspond. There is a fee for this service. • Fees are applicable for requesting a Proof of Payment Notification. Public Recipients: • Public Recipients are available for all countries within the Common Monetary Area; the Public Recipient Lists are stored per country. • You do not need to complete any bank details for a Public Recipient as these details are stored on the Public Recipient database. The steps for adding a (personal) Beneficiary and a Public Recipient to your Recipient List are detailed Online Banking User Guide 281 separately. 9.6.1 Add a Beneficiary to your Recipient List Add a (Personal) Beneficiary to your Recipient List 1. Click on the Pay tab. 2. If it is not already selected, click on the Payments sub-tab and select the My Recipients view. 3. Click on the menu and select the Pay Recipient > Add option. 4. The Add Recipient capture page will be displayed. 5. Use the account switcher to select the default account that you would like to use when paying this recipient; you have the option to select a different account when capturing a payment instruction. 6. If it is not already selected, click on the An Account view. 7. Enter the Recipient’s Name. 8. Enter the recipient’s Account Number. 9. Enter the recipient’s Branch Code or, if you do not have it, use the Choose a Bank option to look up the Branch Code by Country, Bank and Division. 10. Most banks use a Universal / Default Branch Code for payments; if you choose one of these banks the Default Branch Code will be populated automatically; you can edit this Branch Code. 11. If you would like to add the recipient to a Recipient Category select the group from the Add to Group drop down menu. 12. Enter the Statement References, these are the references that will appear on the bank statement. 13. If you would like to send the recipient an automatic Proof of Payment Notification every time you pay them, complete their Proof of Payment details. Click on the (+) to add more details. 14. Click on Add Recipient. 15. A confirmation page will be displayed. 16. Check that this information is correct and, if necessary, click on Edit to make amendments. 17. Click on Confirm. 18. A results page will display the status of your request. 19. Click on Finish to complete the process. Online Banking User Guide 282 9.6.2 Add a Public Recipient to your Recipient List Add A Public Recipient to your Recipient List 1. Click on the Pay tab. 2. If it is not already selected, click on the Payments sub-tab and select the My Recipients view. 3. Click on the Add table action and select Add. 4. The Add Recipient capture page will be displayed. 5. Use the account switcher to select the default account that you would like to use when paying this recipient; you have the option to select a different account when capturing a payment instruction. 6. Click on the A Public Recipient view. 7. Click on the Find a Public Recipient Search option to look up the required recipient. 8. Select the Country from the drop down menu. 9. Enter the Recipient’s Name in part or full. 10. Click on Search. 11. The results of your search will be displayed. 12. Click on the Recipient Name hyperlink to select the required recipient account. 13. Enter a Payment Name for this payment 14. If you would like to add the recipient to a Recipient Category select the group from the Add to Group drop down menu. 15. Enter the Statement References, these are the references that will appear on the bank statement. In the case of a Public Recipient this is usually an Account Reference Number. 16. If you would like to send the recipient an automatic Proof of Payment Notification every time you pay them, complete their Proof of Payment details. Click on the (+) to add more details. 17. Click on Add Recipient. 18. A confirmation page will be displayed. 19. Check that this information is correct and, if necessary, click on Edit to make amendments. 20. Click on Confirm. 21. A results page will display the status of your request. 22. Click on Finish to complete the process. Online Banking User Guide 283 9.7 View and Search Recipient List Use this function to search across all fields of your Recipient List. View and Search Recipient List 1. Click on the Pay tab. 2. If it is not already selected, click on the Payments sub-tab and select the My Recipients view. 3. Your Recipient List will be displayed. 4. Click on the Search table action above the record table. 5. Enter a minimum of three alphanumeric characters in the Search field. 6. A list of recipients matching your search criteria will be displayed in order of Recipient Category. 7. Click on Clear to return to your full Recipient List. Online Banking User Guide 284 9.8 Maintain a Recipient Use this function to maintain the details of a beneficiary that you have added to your Recipient List. Important Information about Maintaining a Recipient Scheduled Payments: • If you change a recipient’s details these details will not update in your Scheduled Payments; you need to maintain the Scheduled Payment. The following information can be maintained: • Default Account that you would like to use to pay the recipient • Recipient Name • Recipient Account Details • Recipient Category • Statement References • Proof of Payment details Maintain Recipient Details 1. Click on the Pay tab. 2. If it is not already selected, click on the Payments sub-tab and select the My Recipients view. 3. Your Recipient List will be displayed. 4. Click on the menu and select the Pay Recipient > Maintain option. 5. A list of your recipients will be displayed; click on the Recipient Name to select the respective recipient. 6. The Maintain Recipient capture page will be displayed. 7. Amend the details as required. 8. Click on Update. 9. A confirmation page will be displayed. 10. Check that this information is correct and, if necessary, click on Edit to make amendments. 11. Click on Confirm. 12. A results page will display the status of your request. 13. Click on Pay Recipient Now to make a payment or click on Finish to complete the process. Online Banking User Guide 285 9.9 Delete a Recipient Use this function to permanently delete a beneficiary from your Recipient List. You can delete single or multiple recipients from your Recipient List simultaneously. Important Information about Deleting a Recipient Scheduled Payments: • If you delete a recipient from your Recipient List this will not delete a Scheduled Payment to the recipient; you will need to delete the Scheduled Payment. These changes will not carry over to Scheduled Payments. To modify or delete a Scheduled Payment, click on the Payments tab, followed by Scheduled Payments. Delete a Recipient 1. Click on the Pay tab. 2. If it is not already selected, click on the Payments sub-tab and select the My Recipients view. 3. Your Recipient List will be displayed. 4. Click on the menu and select the Pay Recipient > Delete option. 5. A list of your recipients will be displayed; click in the check box of the respective recipient that you would like to delete. 6. Click on Delete. 7. A confirmation page will be displayed. 8. Check that this information is correct and, if necessary, click on Edit to make amendments. 9. Click on Confirm. 10. A results page will display the status of your request. 11. Click on Pay Recipient Now to make a payment or click on Finish to complete the process. Online Banking User Guide 286 9.10 Branch Code Search Use this function to search for the Branch Code for any registered financial institution within the Common Monetary Area by Country, Bank and Division. You can also perform a Branch Code Search when adding or modifying a recipient. Perform a Branch Code Search 1. Click on the Pay tab. 2. If it is not already selected, click on the Payments sub-tab and select the My Recipients view. 3. Click on the (+) Add table action button. 4. The Add Recipient capture page will be displayed. 5. If it is not already selected, click on the An Account view. 6. Click on the Choose a Bank option. 7. The Branch Code Search slide out will be displayed. 8. Select the applicable Country from the drop down menu. 9. Select the Bank and, if applicable, the Division from the respective drop down menus. 10. The Branch Code will be populated automatically on the Add Recipient capture page. 11. Click on Cancel to complete the process. Online Banking User Guide 287 9.11 Validate Recipient Use the Validate Recipient function to check that the account number and branch code combination of an account are valid; the bank account can be held at any registered banking institution and does not have to belong to an existing beneficiary on your Recipient List. A validation checks that: • • The format of the account number meets the requirements of the relevant bank. The account number and corresponding branch number are correct. To check that the recipient's Account Number and ID or Business Registration Number correspond; use the Verify Account Owner functionality. Validate a Recipient 1. Click on the Pay Tab. 2. If it is not already selected, click on the Payments sub-tab. 3. Click on the menu and select the Validate Recipients option. 4. The Validate Recipient capture page will be displayed. 5. Select the Account Type from the drop down menu. 6. Enter the Account Number and Branch Number. 7. If you would like to validate more than one account click on the (+) to add more fields. 8. Click on Validate. 9. The results of your validation request/s will be displayed together with the respective status/es. 10. Click on Finish to complete the process. Online Banking User Guide 288 9.12 Verify Account Owner Verify Account Owner is a fee based service which enables you to confirm that the (Participating Bank) account details provided belong to the intended recipient. If you only need to check that the Account Number of a recipient is correct, please use the Validate Recipient functionality which is free of charge. You will require the following information in order to Verify an Account Owner: Individual Client: Account Number Branch Code Full Name ID Number Business Client: Account Number Branch Code Business Name Business Registration Number There are two options available when verifying an account owner: 1. Single Account Verification • Verifications for the following banks can be done via the Single Account Verification and are processed in real time: • o FirstRand (FNB and RMB) o ABSA Bank o Investec o Nedbank Limited o Standard Bank Verifications for all other Participating Banks must be done using the Multiple Account Verification option.are processed within two hours. 2. Multiple Account Verification (Max. Of 5 accounts per batch) • A batch containing FirstRand (FNB and RMB) accounts only will be processed in real time. • A batch containing accounts from multiple Participating Banks will be processed within two hours. For your convenience, the Verify Account Owner functionality for FNB/RMB accounts only is also available at the following touch points: • Pay Tab > Payments Sub-Tab > Add Recipient • Pay Tab > Payments Sub-Tab > Modify Recipient Details • Pay Tab > Once-Off Sub-Tab Online Banking User Guide 289 Important Information about Verifying an Account Owner • This functionality is available to both Primary and Secondary Users. • Details can be verified for Participating Banks only. o There is no cut-off time for FNB/RMB Only verifications. o Verifications for Participating Banks are processed between 08h00 and 16h00 on business days only; requests after the cut-off time will be processed on the next business day. • Please note that there is a fee to Verify an Account Owner. o Your Default Billing Account will be debited for every account record queried, regardless of whether the response is True or False. o If a record is returned as Unverified due to late response from a Participating Bank, you will not be charged. o 9.12.1 Verify Account Owner Responses There are three possible responses for a Verify Account Owner request: 1. True • 2. False • The details have been successfully verified; the account number and account owner details correspond. The details have been verified but they do not correspond, i.e. the Account Number, ID Number / Company Registration Number are valid, but do not belong to the same record. 3. Unverified • The details could not be verified. • If a Participating Bank does not respond to the request in time all recipients for that bank will be returned as unverified; you will not be billed for these. • Invalid data, i.e. name does not match the detail or name held by the recipient bank, invalid ID Number / Company Registration Number or Account Number; you will be billed for these. Online Banking User Guide 290 9.12.2 Verify a Single Account Owner Verify a Single Account Owner 1. Click on the Pay tab and select the Payments sub-tab. 2. Click on the menu and select the Verify Account Owner option. 3. The Verify Account Owner History page will be displayed. 4. Click on the Verify sub-tab; the Verify Account Owner Online capture page will be displayed. 5. Click on the Single view. 6. Enter the recipient’s details in the fields provided. 7. If you have entered an account number for a Participating Bank other than FNB, RMB, Nedbank or Standard Bank you will be required to enter the Email Address to which the results must be sent once they have been processed. 8. Click on Verify. 9. The verification results will be displayed in real time. 10. Click on Finish to complete the process. 9.12.3 Verify Multiple Account Owners Verify Multiple Account Owners 1. Click on the Pay tab and select the Payments sub-tab. 2. Click on the menu and select the Verify Account Owner option. 3. The Verify Account Owner History page will be displayed. 4. Click on the Verify sub-tab; the Verify Account Owner Online capture page will be displayed. 5. Click on the Multiple view. 6. Enter the recipient’s details in the fields provided. 7. Click on the (+) to Add Another Recipient’s details. 8. If you have entered an account number for a Participating Bank other than FNB, RMB, ABSA, Nedbank or Standard Bank you will be required to enter the Email Address to which the results must be sent once they have been processed. 9. Click on Verify. 10. The verification results for a batch containing FNB/RMB accounts only will be processed in real time. If the batch contains accounts for other Participating Banks (other than FNB/RMB) the results will be processed within two hours and will be sent to the specified email address. 11. Click on Finish to complete the process. Online Banking User Guide 291 9.12.4 View Verify Account Owner History View Verify Account Owner History 1. Click on the Pay tab and select the Payments sub-tab. 2. Click on the menu and select the Verify Account Owner option. 3. The Verify Account Owner History page will be displayed. 4. A list of all your previous verification responses will be displayed. 5. You can Search, Download and Print this history. 9.12.4 Delete Verify Account Owner History View Verify Account Owner History 1. Click on the Pay tab and select the Payments sub-tab. 2. Click on the menu and select the Verify Account Owner option. 3. The Verify Account Owner History page will be displayed. 4. A list of all your previous verification responses will be displayed. 5. Click in the check box to select the result that you would like to delete, alternatively click on the Select All hyperlink above the check box to select all results and then click on Delete. 6. The result/s will be deleted from your history. Online Banking User Guide 292 9.13 View Public Recipients Use this function to view and search for a Public Recipient from any of the common monetary areas. A public recipient is a beneficiary such as a Service Provider or Corporate Company that is paid by numerous citizens of a country. Examples would be your municipal service providers, cellphone network providers, large chain stores etc. The recipient's bank details are stored on a bank data base which enables Online Banking users to select the recipient as a payee from a Pre-Defined List of Public Recipients when capturing a payment. Public Recipients are grouped by country. View and Search the Public Recipient List 1. Click on the Pay tab. 2. Click on the menu and select the View Public Recipients option. 3. The View Public Recipient page will be displayed. 4. Select the respective country from the drop down menu. 5. The public recipients for the selected country will be displayed. 6. To search for a specific recipient click on the Search table action above the record table. 7. Enter a minimum of three alphanumeric characters in the Search field. 8. A list of recipients matching your search criteria will be displayed. 9. Click on Back to return to the full Public Recipient List. Online Banking User Guide 293 9.14 Payment History Use this function to view and search a history of the payments that you have made from a selected account. Important Information about Payment History • Payment transaction details are stored for a maximum of 18 months. • Fees are applicable for viewing, printing or downloading Payment History details older than 90 days. Please refer to the pricing guide. The fees are billed to the account from which the payment originated. • A Future Dated Payment will only reflect on your Payment History once the payment has been processed, until then, the instruction is stored with your Scheduled Payments. The following functionality is available: • • • View the Payment History of a selected account Search your Payment History for a specific transaction View the Payment Details and Proof of Payment Notification details for a transaction 9.14.1 View Payment History Use this function to view a history of the payments that you have made from a selected account. View Payment History 1. Click on the Pay tab. 2. If it is not already selected, click on the Payments sub-tab and select the Payment History view. 3. Your Payment History for the past 18 months will be displayed. 4. Click on the Recipient Name hyperlink to view the details of the respective transaction. 5. Click on Back to return to your Payment History. 6. Click on the respective easy button to Pay the Recipient, Send, Download or Print the Proof of Payment Notification for the transaction. 7. Click on Back to return to the My Recipients view. 9.14.2 Search Payment History Online Banking User Guide 294 Use this function to search your Payment History for a specific transaction. There are two search options available: 1. Search o Enter a minimum of three alphanumeric characters in the Search field to search across all fields in the record table.. 2. Advanced Search o The Advanced Search enables you to refine your search by: o Type of Transaction o Recipient Category o Recipient o From Account o Date Range o Amount Range Search Payment History 1. Click on the Pay tab. 2. If it is not already selected, click on the Payments sub-tab and select the Payment History view. 3. Your Payment History for the past 18 months will be displayed. 4. Click on the menu and select the Payments History > Advanced Search option. 5. The Payment History Search capture page will be displayed. 6. Complete as many of the fields as you can in order to refine your search. 7. Click on Search. 8. The results of your search will be displayed. 9. Click on the respective easy button to Pay the Recipient, Send, Download or Print the Proof of Payment Notification for the transaction. 10. Click on Back to return to the My Recipients view. Online Banking User Guide 295 9.15 Recipient Payment History Use this function to view the Payment History for a selected recipient. View Recipient Payment History 1. Click on the Pay tab. 2. If it is not already selected, click on the Payments sub-tab and select the My Recipients view. 3. Your Recipient List will be displayed. 4. Click on the quick link for the respective recipient and select the View History option. 5. The Payment History for the selected recipient will be displayed. 6. Click on the Recipient Name hyperlink to view the details for the respective payment transaction. 7. Click on the respective easy button to Download, Send or Print the Proof of Payment Notification for the transaction. 8. Click on Finish to complete the process. Online Banking User Guide 296 9.16 Proof of Payment Notifications Use this functionality to Send, Download or Print a Proof of Payment Notification for a processed payment transaction. When you add a recipient you can save Payment Notification details for the recipient so that, every time you make a payment to the recipient, a Payment Notification will automatically be sent to the recipient via the notification method that you have selected, i.e. email, sms or fax. You can select any combination of the following types of Payment Notifications per recipient: • 5 e-mail notifications • 2 SMS notifications • 2 fax notifications Important Information about Proof of Payment Notifications • There is a fee to send Payment Notifications, please consult the Online Banking Pricing Guide. • When creating or re-sending a Payment Notification the contact details that you enter will not be updated on the Recipient's record; you will need to Maintain the Recipient details. Online Banking User Guide 297 9.16.1 Create or Resend a Proof of Payment Notification Use this function to create or re-send Proof of Payment Notifications to a recipient for a processed payment transaction. The Notification will be generated as a pdf document. Create or Resend a Proof of Payment Notification 1. Click on the Pay tab. 2. If it is not already selected, click on the Payments sub-tab and select the Payment History view. 3. Your Payment History for the past 18 months will be displayed. 4. Click on the Send easy button for the respective transaction. 5. The Send Proof of Payment capture page will be displayed. 6. Select the Notification Method from the drop down menu. 7. Based on your selection, enter the Email Address, Cellphone Number or Fax Number. 8. If you would like to send multiple notifications click on the (+) to add more details. 9. Click on Send. 10. A confirmation page will be displayed. 11. Check that this information is correct and, if necessary, click on Edit to make amendments. 12. Click on Confirm. 13. A results page will display the status of your request. 9.16.2 Download or Print a Proof of Payment Notification Create or Resend a Proof of Payment Notification 1. Click on the Pay tab. 2. If it is not already selected, click on the Payments sub-tab and select the Payment History view. 3. Your Payment History for the past 18 months will be displayed. 4. Click on the Print or Download easy button for the respective transaction. Online Banking User Guide 298 Once Off Payments SubTab Online Banking User Guide 299 9.17 Once-Off Payment Use this function to make a once-off payment to a beneficiary/third party that has not been saved on your recipient list. Important Information about Once-Off Payments • Please take note of the Bank Account Number Rules and Alpha Numeric Character Rules before capturing a Payment transaction; this information is in the Business Rules for Payments chapter. • It is recommended that you use the Validate Recipient function to verify that the account number and branch code combination of an account are valid before you add the beneficiary's details to your Recipient List. This service is free of charge. • You can also Verify the Account Owner; i.e. use the recipient's Account Number and ID Number / Business Registration Number to verify that the account number and the account owner correspond. There is a fee for this service. • Payments can be future dated to take place within the next 365 days. o A future dated payment will be stored with your Scheduled Payments until it has been processed. o To allow sufficient time for the changes to be updated, amendments or deletions of a Scheduled Payment must be submitted before 18h00 a minimum of two business days prior to the specified transaction date. o If the transaction date falls on a Sunday or public holiday, the payment will only be processed on the next business day. • Online Banking User Guide Fees are applicable for requesting a Proof of Payment Notification. 300 9.17.1 Make a Once-Off Payment Make a Once-Off Payment to an Account Holder 1. Click on the Pay tab and select the Once-Off sub-tab. 2. If it is not already selected, click on the An Account view. 3. Enter the Recipient’s Name. 4. Enter the recipient’s Branch Code or, if you do not have it, use the Choose a Bank option to look up the Branch Code by Country, Bank and Division. 5. Most banks use a Universal / Default Branch Code for payments; if you choose one of these banks the Default Branch Code will be populated automatically; you can edit this Branch Code. 6. Enter the recipient’s Account Number. 7. Select the Account Type from the drop down menu. 8. Enter the amount that you would like to pay the recipient. 9. If the recipient's account is held at a participating bank you will have the option to select the Pay and Clear Now service type. 10. Enter the Statement References, these are the references that will appear on the bank statement. 11. If you would like to send the recipient an automatic Proof of Payment Notification every time you pay them, complete their Proof of Payment details. Click on the (+) to add more details. 12. Use the account switcher to select the account that you would like to use to pay this recipient. 13. If required, select a payment date. 14. Click on Pay. 15. A confirmation page will be displayed. 16. Check that this information is correct and, if necessary, click on Edit to make amendments. 17. Click on Confirm. 18. A results page will display the status of your request. 19. Click on Finish to complete the process. Online Banking User Guide 301 9.17.2 Make a Once-Off Payment to a Public Recipient Important Information about Once-Off Payments to Public Recipients • The Pay and Clear Now option is not available for payments to Public Recipients. Make a Once-Off Payment to a Public Recipient 1. Click on the Pay tab and select the Once-Off sub-tab. 2. Select the A Public Recipient view. 3. Click on the Find a Public Recipient Search option to look up the required recipient. 4. Select the respective country from the drop down menu. 5. Enter the recipient’s name. 6. Click on Search. 7. A list of recipients matching your search criteria will be displayed. 8. Click on the Recipient Name hyperlink to select the respective recipient. 9. Enter a Payment Name for this payment 10. Enter the amount that you would like to pay the recipient. 11. Enter the Statement References, these are the references that will appear on the bank statement. In the case of a Public Recipient this is usually an Account Reference Number. 12. If you would like to send the recipient an automatic Proof of Payment Notification complete their Proof of Payment details. Click on the (+) to add more details. 13. Use the account switcher to select the account that you would like to use to pay this recipient. 14. If required, select a payment date. 15. Click on Pay. 16. A confirmation page will be displayed. 17. Check that this information is correct and, if necessary, click on Edit to make amendments. 18. Click on Confirm. 19. A results page will display the status of your request. 20. Click on Finish to complete the process. Online Banking User Guide 302 Pending Payments SubTab Online Banking User Guide 303 9.18 Pending Payments This functionality enables you to process an off-line Payment File for bulk payments which has been imported into Online Banking. An off-line file can be created and imported in one of two ways: 1. Creating your own off-line payment file using either the Bankserv (ACB) or Excel (.CSV) file layout which you can download from the Online Banking Help. You will then need to Import the completed Payment File into Online Banking. 2. If you process salary or third party payments via Instant Payroll the off-line file will be generated and imported into Online Banking automatically. The following options are available: • Import Payment File • View Pending Payments • Pay Pending Payment Batches • Delete Pending Payment Batches Important Information about Pending Payments • The Payment-Import and Pending Payments functionality is restricted to the Primary User. • Payments made via a Payment-Import accumulate towards your Daily Profile Limit for Payment transactions. • If the execution date is on a Sunday or public holiday, the payment will only be processed on the next business day. Online Banking User Guide 304 9.18.1 Create an Import Payment File This functionality enables you create an off-line payment file containing multiple recipients. The Payment File can be created by using either the Bankserv (ACB) or an Excel (.CSV) file layout which can be downloaded from the Online Banking Help. Please refer to the Online Banking Help for a detailed explanation of ACB and CSV file layouts; the File Layout for a CSV file is also contained in the guide. 9.18.2 Import a Payment File This functionality enables you to Import a Payment File, which you have created off-line or via your Payroll system, into Online Banking so that you can process a bulk payment without having to add the beneficiaries to your Recipient List. Import Saved Payment File 1. Click on the Pay tab and select the Pending Payments sub-tab. 2. A list of all Pending Payment batches will be displayed. 3. Click on the More Options Menu and select the Import option. 4. The Payments - Import capture page will be displayed. 5. Select the File Type that you will be uploading from drop down list; either BankServ (ACB) or Excel (.CSV). 6. Enter a Name for the respective payment, e.g. 2012 Year End Bonuses 7. Click on Browse to locate the saved Payment File. 8. Specify where and in what format the Import Results must be sent to you. 9. Click on Continue. 10. The Details for the Import File will be displayed. 11. Check that these details are correct and, if necessary, click on Cancel to amend the import details or click on Confirm to proceed. 12. The results of the file import will be sent to your selected mailbox, check the results and, if required, make the necessary changes to the off-line Payment File and Import it again. 13. A successfully imported Payment File will reflect under the Pending Payments sub-tab. 14. If you would like to import another file simply click on Import Again to return to the Payment-Import capture page or click on Finish to complete the Import process. Online Banking User Guide 305 9.18.3 View Pending Payments Use this function to view the list or contents of your Pending Payment batches. View Pending Payments 1. Click on the Pay tab and select the Pending Payments sub-tab. 2. A list of all Pending Payment batches will be displayed. 3. Click on the Batch Name hyperlink to view the contents of the respective Payment Batch. 4. Click on Back to return to the list of all Pending Payment batches. 9.18.4 Pay Pending Payment Batches Use this function to submit your Pending Payment batches for processing. Pay Pending Payment Batches 1. Click on the Pay tab and select the Pending Payments sub-tab. 2. A list of all Pending Payment batches will be displayed. 3. Click on the Pay easy button of the respective batch that you would like to pay. 4. The contents of the respective Payment Batch will be displayed, check that this is the correct file and, if necessary, click on Cancel to select a different batch or click on Confirm to proceed. 5. A results page will display the status of your request. 6. Click on Finish to complete the process. 9.18.5 Delete Pending Payment Batches Use this function to delete Pending Payment batches. Delete Pending Payment Batches 1. Click on the Pay tab and select the Pending Payments sub-tab. 2. A list of all Pending Payment batches will be displayed. 3. Click on the Delete easy button of the respective batch that you would like to delete. 4. The contents of the respective Payment Batch will be displayed, check that this is the correct file and, if necessary, click on Cancel to select a different batch or click on Confirm to proceed. 5. A results page will display the status of your request. 6. Click on Finish to complete the process. Online Banking User Guide 306 Scheduled Payments Sub Tab Online Banking User Guide 307 9.19 Scheduled Payments Overview Use this function to create and maintain Scheduled Payments to your recipients. A Scheduled Payment is a payment that you set up to take place on a specific date; this can be a once-off payment or a recurring payment with or without an expiry date. Once the Scheduled Payment has been saved, the Payment will be processed automatically on the date/s that you have requested without you having to log on to Online Banking. Important Information about Scheduled Payments • To set up automatic monthly payments to a Credit Card account please avail of the Auto Payment functionality in the Account Settings menu. • For your security, there is a Daily Limit for Payment transactions; please refer to the chapter on Online Banking Settings for further information. o The amount for a Scheduled Payment will accumulate towards your Daily Profile Limit only when you create or modify the transaction. • To allow sufficient time for the changes to be updated, amendments or deletions of a Scheduled Payment must be submitted before 18h00 a minimum of two business days prior to the specified transaction date. • If the action date falls on a Sunday or a Public Holiday, FNB recipients will receive their funds on the same day; non-FNB payments will only be processed on the next business day. Online Banking User Guide 308 9.19.1 Create a Scheduled Payment Use this function to create a once-off or recurring payment to a recipient. Important Information about Creating a Scheduled Payment • To allow sufficient time for processing, a Scheduled Payment must be created before 18h00 a minimum of two business days prior to the specified transaction date. • If the action date falls on a Sunday or a Public Holiday, FNB recipients will receive their funds on the same day; non-FNB payments will only be processed on the next business day. Create a Scheduled Payment 1. Click on the Pay tab and select the Scheduled Payments sub-tab. 2. If you have existing Scheduled Payments these will be displayed. 3. Click on the Add Scheduled Payment button (+) in the table actions. 4. The Add Scheduled Payment capture page will be displayed. 5. Use the account switcher to select the account that you would like to use to pay this recipient. 6. Enter the Amount that you would like to pay. 7. Enter a Payment Name for this Scheduled Payment e.g. School Fees. 8. Click on Choose to select a recipient. 9. The Select Recipient page will display a list of all of your recipients. If the recipient is not on your Recipient List, click on the Add Recipient easy button to add them. 10. Click on the Recipient Name hyperlink to select the respective recipient. 11. Enter the Statement References, these are the references that will appear on yours and the recipient’s bank statements for this transaction. 12. If required, modify the Proof of Payment details for this transaction. 13. Select the Start Date for the Scheduled Payment; a payment can be future dated up to 365 days in advance. 14. Select the Frequency of the transfer from the drop down menu. 15. Enter the End Date for the transfer; you can select to end it on a specific date, after a specific number of transfers or to leave it open ended. 16. Click on Add. 17. A confirmation page will be displayed. 18. Check that this information is correct and, if necessary, click on Edit to make amendments. 19. Click Confirm to proceed. 20. The results page will be displayed. Online Banking User Guide 309 21. Click on Finish to complete the process. 9.19.2 View Scheduled Payments Use this function to view your existing Scheduled Payments. The following information is available at a single glance: • Payment Name • Payment Amount • Next Payment Date • Remaining Number of Payments • Frequency View Scheduled Payments 1. Click on the Pay tab and select the Scheduled Payments sub-tab. 2. Your existing Scheduled Payments will be displayed. 3. Click on the Payment Name hyperlink of the respective Scheduled Payment to see the details. 4. Click on Cancel to return to your list of Scheduled Payments. Online Banking User Guide 310 9.19.3 Maintain a Scheduled Payment Use this function to maintain the details of a Scheduled Payment. The following information can be maintained: • From Account • Payment Amount • Payment Name • Statement References • Proof of Payment Details • Payment Date • Frequency • End Date Important Information about Maintaining Scheduled Payments • To allow sufficient time for the changes to be updated, amendments to a Scheduled Payment must be submitted before 18h00 a minimum of two business days prior to the specified transaction date. • For security purposes, when modifying the details of a Scheduled Payment you cannot modify the recipient's bank details; you will need to Delete the current Scheduled Payment and Create a new Scheduled Payment. Maintain a Scheduled Payment 1. Click on the Pay tab and select the Scheduled Payments sub-tab. 2. Your existing Scheduled Payments will be displayed. 3. Click on the Maintain easy button of the Scheduled Payment that you would like to amend. 4. The Modify Scheduled Payment capture page will be displayed. 5. Make the amendments that you require and then click Update. 6. A confirmation page will be displayed. 7. Check that this information is correct and, if necessary, click on Edit to make amendments. 8. Click Confirm to proceed. 9. The results page will be displayed. 10. Click on Finish to complete the process. Online Banking User Guide 311 9.19.4 Delete a Scheduled Payment Use this function to permanently delete a Scheduled Payment. Important Information about Deleting Scheduled Payments • To allow sufficient time for the changes to be updated, the deletion of a Scheduled Payment must be submitted before 18h00 a minimum of two business days prior to the specified transaction date. Delete a Scheduled Payment 1. Click on the Pay tab and select the Scheduled Payments sub-tab. 2. Your existing Scheduled Payments will be displayed. 3. Click on the Delete easy button of the Scheduled Payment that you would like to delete. 4. A confirmation page will be displayed. 5. Check that this is the Scheduled Payment that you would like to delete and, if necessary, click on Cancel to return to your list of Scheduled Payments. 6. Click Confirm to proceed. 7. The results page will be displayed. 8. Click on Finish to complete the process. Online Banking User Guide 312 Traffic Fines Sub-Tab Online Banking User Guide 313 9.20 Traffic Fines Overview Traffic fines obtained within the South African border can be viewed and/or paid via Online Banking for selected municipalities. Important Information about Paying Traffic Fines • Traffic Fine payments are not reversible. • Any queries following the payment of the fine will need to be directed to the respective municipality. 9.20.1 View or Search Traffic Fines You can search for traffic fines by your ID Number or by the Notice Number. Searching by ID Number will return all traffic fines linked to the respective ID number; searching by Notice Number will return only that specific traffic fine. View or Search Traffic Fines 1. Click on the Pay tab. 2. Click on the Traffic Fines sub-tab. 3. Select the My Fines viewing option. 4. By default, all fines linked to your ID number will be displayed. The Amount payable and the Payment Status of the fine are displayed. 5. Click on the respective easy button, ID Number or Notice Number to start a new search. 6. Enter the ID Number / Notice Number in the field provided and then click on Search. 7. The results of your search will be displayed. 8. Click on the Notice + Registration Number hyperlink of the fine to view the Traffic Fine Details for the respective fine. 9. Click on Back to return to the My Fines page. Online Banking User Guide 314 9.20.2 Pay Traffic Fine Use this function to pay a Traffic Fine. Important Information about Paying Traffic Fines • Traffic Fines need to be paid one by one; you cannot process multiple payments simultaneously. • Traffic Fine payments are not reversible. • Any queries following the payment of the fine will need to be directed to the respective municipality. Pay Traffic Fine 1. Click on the Pay tab. 2. Click on the Traffic Fines sub-tab. 3. Select the My Fines viewing option. 4. By default, all fines linked to your ID number will be displayed. The Amount payable and the Payment Status of the fine are displayed. 5. Click on the respective easy button, ID Number or Notice Number to start a new search. 6. Enter the ID Number / Notice Number in the field provided and then click on Search. 7. The results of your search will be displayed. 8. If a fine is in a payable status a Pay easy button will be displayed; click on the Pay easy button to pay the fine. 9. A confirmation page will be displayed. 10. Check that the details displayed are correct and, if necessary, click on Cancel to return to your list of Traffic Fines. 11. Click Confirm to proceed. 12. The results page will display the status of your request. 13. Click on Finish to complete the process. Online Banking User Guide 315 9.20.3 View Traffic Fine Payment History Use this function to view the details of traffic fines that you have paid via any of FirstRand's Electronic Channels, (Online Banking, Cellphone Banking and ATMs) in the last three months. View Traffic Fine Payment History 1. Click on the Pay tab. 2. Click on the Traffic Fines sub-tab. 3. Select the Paid Fine History viewing option. 4. The fines that you have paid in the last three months will be displayed. Online Banking User Guide 316 eFiling Sub-Tab Online Banking User Guide 317 9.21 eFiling Overview If you have registered for SARS eFiling you can use this function to manage your tax and/or UIF (Unemployment Insurance Fund) payments. SARS Electronic filing (eFiling) is a secure electronic tax return and submission service offered by the South African Revenue Services (SARS) that removes the risks and hassles of manual tax returns. Register for SARS eFiling at www.sarsefiling.co.za More information about how to create and export SARS payments into the Online Banking system can be found on the SARS eFiling website at www.efiling.co.za, alternatively you can call their contact centre on 0860 709 709. More information about how to create and export UIF payments into the Online Banking system can be found on the uFiling website at www.ufiling.co.za Important Information about eFiling • The eFiling functionality is restricted to the Primary User. • Both eFiling and UIF payments need to be set up on the SARS site before you can utilise this functionality. Online Banking User Guide 318 10. Buy Tab Online Banking User Guide 319 10.1 Buy Tab Overview The Buy Tab is all about convenience at your fingertips! The following functionality is available on the Buy Tab: Prepaid Services o Purchase prepaid vouchers online for yourself, family members or friends for the following services: o Airtime, SMS Bundles and Data Bundles o Electricity o Enjoy the convenience and security of purchasing your gaming tickets online and having your Gaming winnings paid directly into the purchasing account. o LOTTO o PowerBall Important Information about Prepaid Services and Gaming Functionality • Prepaid Services functionality can be performed by both the Primary and Secondary User, provided that the Primary User has granted Transact Permissions to the Secondary User. • Gaming functionality is restricted to the Primary User. • For your security, a Daily Profile Limit applies to all Prepaid Services and Gaming transactions; this limit is preset and cannot be changed. o If you use your eBucks to purchase Prepaid Services via Online Banking the equivalent Rand value will accumulate towards your Prepaid Services limit, thereby decreasing your overall Payment Limit by that amount. • Please ensure that you have entered the correct details before submitting your transaction; Prepaid Services transactions cannot be reversed as they are processed in real-time. • For queries or assistance regarding Prepaid Services please contact the Prepaid Services Help Desk. Online Banking User Guide 320 Airtime & Bundles Sub-Tab Online Banking User Guide 321 10.2 Airtime and Bundles Overview Use this function to purchase prepaid vouchers and/or bundles for yourself, family members or friends. Airtime will automatically be credited to the cellphone number selected/entered. The following functionality is available: • Create and maintain an online Phonebook for your Prepaid Recipients • Purchase Prepaid Airtime, SMS Bundles and Data Bundles • View and Search Prepaid Airtime History The following prepaid vouchers and bundles can be purchased on Online Banking: • • • • • Cell C o Airtime o SMS Bundles o Data Bundles o All in One Vouchers (SMS, Data and Airtime combo.) MTN o Airtime o SMS Bundles o Data Bundles Telkom Landline o PrepaidFone Vouchers o WorldCall Vouchers (International Calls) Telkom Mobile o Airtime o Data Bundles Virgin Mobile o • Airtime Vodacom o Airtime o SMS Bundles o Data Bundles o Blackberry Bundles o Big Bonus Voucher Online Banking User Guide 322 10.3 My Phonebook Use this functionality to add and maintain the cellphone numbers of the recipients that you regularly purchase Airtime and Bundles for, or that you Send eWallet payments to. By doing so, you can make eWallet payments or send recharge vouchers to these recipients without having to capture their cellphone number each time. Important Information about your online Phonebook • Please ensure that the cellphone number that you have entered is correct; Prepaid Services and Send Money transactions cannot be reversed as they are processed in real-time. 10.3.1 Add a Recipient to your Phonebook Use this function to add a cellphone recipient to your online phonebook - My Phonebook. Add a Number to your Phonebook 1. Click on the Buy tab. 2. If it is not already selected, click on the Airtime & Bundles sub-tab. 3. Select the My Phonebook view. 4. Your current Phonebook Recipients will be displayed. 5. Click on the Add table action. 6. Enter the Name and Cellphone Number of the recipient. 7. Select the recipient’s Service Provider from the drop down menu. 8. If required, click on the (+) to add more recipient capture fields; you can add a maximum of 5 recipients per Add transaction. 9. Click on Add Recipients. 10. A confirmation page will be displayed. 11. Check that this information is correct and, if necessary, click on Edit to make amendments. 12. Click on Confirm. 13. A results page will display the status of your request. 14. Click on Finish to complete the process. Online Banking User Guide 323 10.3.2 Maintain a Recipient in your Phonebook Use this function to maintain the details of a recipient in your My Phonebook. Maintain My Phonebook 1. Click on the Buy tab. 2. If it is not already selected, click on the Airtime & Bundles sub-tab. 3. Select the My Phonebook view. 4. Your current Phonebook Recipients will be displayed. 5. Click on the quick link for the respective recipient and select the Maintain option. 6. The Phonebook Setup page will be displayed. 7. Make the required amendments. 8. Click on Update. 9. Your updated Phonebook will be displayed. 10.3.3 Delete a Recipient from your Phonebook Use this function to permanently delete a recipient from your My Phonebook. Delete a Recipient from your My Phonebook 1. Click on the Buy tab. 2. If it is not already selected, click on the Airtime & Bundles sub-tab. 3. Select the My Phonebook view. 4. Your current Phonebook Recipients will be displayed. 5. Click on the quick link for the respective recipient and select the Delete option. 6. A confirmation page will be displayed. 7. Check that this information is correct and, if necessary, click on Cancel to make amendments. 8. Click on Update. 9. Your updated Phonebook will be displayed. Online Banking User Guide 324 10.4 Purchase Prepaid Airtime and Bundles for a Recipient Use this function to purchase prepaid airtime vouchers, sms bundles and data bundles for recipients in your Phonebook. Important Information about Prepaid Purchases • When purchasing for multiple recipients simultaneously you are restricted to a maximum of 5 recipients per transaction; there is no restriction on the amount of products selected per recipient. • Please ensure that the cellphone number and purchase options that you have selected are correct; Prepaid Services transactions cannot be reversed as they are processed in real-time. • If your purchase is not confirmed, please check your Transaction History before you try again, to avoid duplication. Buy Airtime, SMS and Data Bundles for a Recipient 1. Click on the Buy tab. 2. If it is not already selected, click on the Airtime & Bundles sub-tab. 3. Select the My Phonebook view. 4. Your current Phonebook Recipients will be displayed. 5. Use the drop down menu/s to select the purchase option/s for the respective recipient. 6. If required, repeat this process to purchase for multiple recipients simultaneously. 7. Use the account switcher to select the account that you would like to use to pay for the purchase/s. 8. Click on Buy. 9. A confirmation page will be displayed. 10. Check that this information is correct and, if necessary, click on Edit to make amendments. 11. Click Confirm to proceed. 12. A results page will display the status of your request. 13. Click on Finish to complete the process. Online Banking User Guide 325 10.5 Make a Once-Off Prepaid Purchase Use this function to purchase prepaid airtime vouchers, sms bundles and data bundles for a beneficiary that you have not added to your Phonebook. Important Information about Prepaid Purchases • When buying Once-Off you are restricted to one voucher type per transaction, i.e. An Airtime, SMS, Data or Other Bundle. • Please ensure that the cellphone number and purchase options that you have selected are correct; Prepaid Services transactions cannot be reversed as they are processed in real-time. • If your purchase is not confirmed, please check your Transaction History before you try again, to avoid duplication. Once-Off Purchase of Airtime, SMS and Data Bundles 1. Click on the Buy tab. 2. If it is not already selected, click on the Airtime & Bundles sub-tab. 3. Select the Once-Off Purchase view. 4. The Buy capture page will be displayed. 5. Select the recipient’s Service Provider from the drop down menu. 6. Enter the recipient’s Cellphone Number. 7. Select the Voucher Type that you would like to purchase from the drop down menu. 8. Choose the Recharge Amount from the drop down menu. 9. If you have selected the Flexi Recharge option you will be required to enter a Recharge Amount. 10. Use the account switcher to select the account that you would like to use to pay for the purchase. 11. Click on Buy. 12. A confirmation page will be displayed. 13. Check that this information is correct and, if necessary, click on Edit to make amendments. 14. Click Confirm to proceed. 15. A results page will display the status of your request. 16. Click on Finish to complete the process. Online Banking User Guide 326 10.6 Prepaid Purchase History - Airtime & Bundles 10.6.1 View Prepaid Purchase History - Airtime and Bundles Use this function to view the last three months of Prepaid Airtime and Bundles purchases that you made using the accounts linked to your profile. View Prepaid Airtime and Bundles Purchase History 1. Click on the Buy tab. 2. If it is not already selected, click on the Airtime & Bundles sub-tab. 3. Select the Purchase History view. 4. All Airtime & Bundles purchases that you have made using the accounts linked to your profile will be displayed. 5. Click on the Product hyperlink to view the details of a specific transaction. 6. Click on Back to return to the Airtime and Bundles page. 7. Click on the Save to Phonebook easy button to save the respective recipient’s details to your My Phonebook. 10.6.2 Search Prepaid Purchase History - Airtime and Bundles Use this function to search your Prepaid Purchase History for a specific Airtime and Bundles transaction. There are three Search Options: 1. Search o Enter a minimum of three alphanumeric characters in the Search field. o The Search Table Action does not search the Date column; if you would like to search for a transaction by date, please use the Advanced Search option under the Search History function. 2. Quick Search o The Quick Search function enables you to search your Prepaid History by predefined date periods. o Today o Yesterday o Last 7, 15, 30 60 or 90 Days 3. By Date o The By Date Search enables you to refine your search by: o Product o Date Range Online Banking User Guide 327 Search Prepaid History - Airtime and Bundles 1. Click on the Buy tab. 2. Click on the Menu and select Prepaid History in the extended menu. 3. All purchases that you have made using the accounts linked to your profile will be displayed on the Prepaid History page. 4. Click on the Search button in the table actions. 5. Enter a minimum of two alphanumeric characters in the Search field. 6. The results of your search will be displayed. 7. Click on Back to return to your full Transfer History. Perform a Quick Search of your Prepaid History - Airtime and Bundles 1. Click on the Buy tab. 2. Click on the Menu and select Prepaid History in the extended menu. 3. All purchases that you have made using the accounts linked to your profile will be displayed on the Prepaid History page. 4. Click on the Search hyperlink on the top left of the page, above the record table. 5. Click on the Quick Search easy button. 6. Select the search period from the drop down menu. 7. The results of your search will be displayed. 8. Click on Back to return to your full Transfer History. Perform a By Date Search of your Prepaid History - Airtime and Bundles 1. Click on the Buy tab. 2. Click on the Menu and select Prepaid History in the extended menu. 3. All purchases that you have made using the accounts linked to your profile will be displayed on the Prepaid History page. 4. Click on the Search hyperlink on the top left of the page, above the record table. 5. Click on the Advanced Search easy button. 6. Select the Product from the drop down menu. 7. Enter the date range that you would like to search. 8. Click on Search. 9. The results of your search will be displayed. 10. Click on Back to return to your full Transfer History. Online Banking User Guide 328 Scheduled Prepaids SubTab Online Banking User Guide 329 10.7 Scheduled Prepaid Purchases Overview Use this function to create and maintain Scheduled Prepaid Purchases for Airtime and Bundles. A Scheduled Prepaid Purchase is a Prepaid Airtime and/or Bundles Purchase that you set up to take place on a specific date; this can be a once-off purchase or a recurring purchase, with or without an expiry date. You can schedule a Prepaid Purchase up to 365 days in advance. Once the Scheduled Prepaid Purchase has been saved, the purchase will be processed automatically on the date/s that you have requested without you having to log on to Online Banking. Important Information about Scheduled Prepaid Purchases • For your security, you must be registered for inContact messaging to avail of the Scheduled Prepaids functionality. • Your processed Scheduled Prepaid Purchases are stored under Prepaid History. • To allow sufficient time for the changes to be updated, amendments or deletions of a Scheduled Prepaid Purchase must be submitted before 18h00 a minimum of two business days prior to the specified transaction date. • Online Banking User Guide Scheduled Prepaid purchases are processed 7 days a week. 330 10.8 Create a Scheduled Prepaid Purchase Use this function to create a Scheduled Prepaid Purchase instruction for Airtime and Bundles. Create a Scheduled Prepaid Purchase 1. Click on the Buy tab. 2. Click on the Scheduled Prepaids sub-tab. 3. If you have any existing Scheduled Prepaid transactions these will be displayed. 4. Click on the Add button (+) in the table actions. 5. The Add Scheduled Prepaid capture page will be displayed. 6. Select the respective Service Provider from the drop down menu. 7. Enter the cellphone number that you would like to send the vouchers to or click on Phonebook to select a number from your saved list of cellphone recipients. 8. Select the Voucher Type that you would like to purchase from the drop down menu. 9. Choose the Recharge Amount from the drop down menu. 10. If you have selected the Flexi Recharge option you will be required to enter a Recharge Amount. 11. Enter a Name for this Scheduled Prepaid Purchase e.g. Dad. 12. Select the Start Date for the Prepaid Purchase; a purchase can be future dated up to 365 days in advance. 13. Select the Frequency of the Prepaid Purchase from the drop down menu. 14. Enter the End Date for the Scheduled Prepaid Purchase; you can select to end it on a specific date, after a specific number of purchases or to leave it open ended. 15. Use the account switcher to select the account that you would like to use to pay for the purchase. 16. Click on Continue. 17. A confirmation page will be displayed. 18. Check that this information is correct and, if necessary, click on Edit to make amendments. 19. Click Confirm to proceed. 20. A results page will display the status of your request. 21. Click on Finish to complete the process. Online Banking User Guide 331 10.9 View Scheduled Prepaid Purchases Use this function to view your existing Scheduled Prepaid Purchases. The following information is available at a single glance: • Purchase Name • Purchase Amount • Next Purchase Date • Remaining Number of Purchases • Frequency View Scheduled Prepaid Purchases 1. Click on the Buy tab. 2. Click on the Scheduled Prepaids sub-tab. 3. Your existing Scheduled Prepaid transactions will be displayed. 4. Click on the View easy button of the respective Scheduled Prepaid Purchase to see the details. 5. Click on Back to return to your list of Scheduled Prepaids. Online Banking User Guide 332 10.10 Maintain a Scheduled Prepaid Purchase Use this function to maintain the details of a Scheduled Prepaid Purchase. The following information can be maintained: • Purchasing Account • Recipient Cellphone Number • Service Provider • Voucher Type • Recharge Amount • Transaction Name • Purchasing Date • Frequency Important Information about Maintaining Scheduled Prepaid Purchases • To allow sufficient time for the changes to be updated, amendments to a Scheduled Prepaid Purchase must be submitted before 18h00 a minimum of two business days prior to the specified transaction date. Maintain a Scheduled Prepaid Purchase 1. Click on the Buy tab. 2. Click on the Scheduled Prepaids sub-tab. 3. Your existing Scheduled Prepaid transactions will be displayed. 4. Click on the Maintain easy button of the Scheduled Prepaid Purchase that you would like to permanently delete. 5. The Modify Scheduled Prepaid capture page will be displayed. 6. Make the amendments that you require and then click Update. 7. A confirmation page will be displayed. 8. Check that this information is correct and, if necessary, click on Edit to make amendments. 9. Click Confirm to proceed. 10. The results page will be displayed. 11. Click on Finish to complete the process. Online Banking User Guide 333 10.11 Delete a Scheduled Prepaid Purchase Use this function to permanently delete a Scheduled Prepaid Purchase instruction. Important Information about Deleting Scheduled Prepaid Purchases • To allow sufficient time for the changes to be updated, the deletion of a Scheduled Prepaid Purchase must be submitted before 18h00 a minimum of two business days prior to the specified transaction date. Delete a Scheduled Prepaid Purchase 5. Click on the Buy tab. 6. Click on the Scheduled Prepaids sub-tab. 7. Your existing Scheduled Prepaid transactions will be displayed. 8. Click on the Delete easy button of the Scheduled Prepaid Purchase that you would like to amend. 9. A confirmation page will be displayed. 10. Check that this is the Scheduled Prepaid Purchase that you would like to delete and, if necessary, click on Cancel to return to your list of Scheduled Transfers. 11. Click Confirm to proceed. 12. The results page will be displayed. 13. Click on Finish to complete the process. Online Banking User Guide 334 Electricity Sub-Tab Online Banking User Guide 335 10.12 Prepaid Electricity Overview If you have a prepaid meter number with a participating municipality or distributor you can use this function to • Create and maintain an online Electricity Recipient List • Purchase Prepaid Electricity Tokens • Claim your Free Basic Electricity (FBE) Units • View and Search Prepaid History A full list of participating municipalities and distributors is available via a hyperlink on the top left of the Electricity Sub-Tab. Both old and new meter types are supported: • • Proprietary meters: (older meters) o Alphanumeric o 8 digits in length Standard Transfer Specification (STS) meters: (new meters) o Numeric o 11digits in length Important Information about Prepaid Electricity • You will need the respective Meter Number in order to make the purchase. • Please ensure that the Meter Number that you have entered is correct as no refunds will be made for incorrect purchases. • A Token Number consists of five groups of four digits, e.g. 1111-2222-33334444-5555 • Please note that 14% VAT is included in your prepaid electricity purchase. • A portion of the recharge amount requested may be utilized to settle any outstanding fees. • Online Banking User Guide For Prepaid Electricity queries please contact your Electricity Distributor. 336 10.13 My Electricity Recipients Use this functionality to add and maintain the meter details of the recipients that you regularly purchase Prepaid Electricity for. By doing so, you can purchase recharge vouchers or claim Free Basic Electricity (FBE) units for these recipients without having to capture their meter details each time. Important Information about your Electricity Recipient List • Please ensure that the Meter Number that you have entered is correct as no refunds will be made for incorrect purchases. 10.13.1 Add a Recipient to your Electricity Recipient List Use this function to add a meter number to your Electricity Recipient List. Add a Meter Number to your Electricity Recipient List 1. Click on the Buy tab and then click on the Electricity sub-tab. 2. Select the My Recipients view. 3. Your current Electricity Recipients will be displayed. 4. Click on the Add table action. 5. Click on the Add Recipient hyperlink. 6. Enter the Name and Meter Number of the recipient. 7. Click on Add Recipients. 8. A confirmation page will be displayed. 9. Check that this information is correct and, if necessary, click on Edit to make amendments. 10. Click on Confirm. 11. A results page will display the status of your request. 12. Click on Finish to complete the process. Online Banking User Guide 337 10.13.2 Maintain a Recipient in your Electricity Recipient List Use this function to maintain the details of a recipient in your My Phonebook. Maintain a Meter Number 1. Click on the Buy tab and then click on the Electricity sub-tab. 2. Select the My Recipients view. 3. Your current Electricity Recipients will be displayed. 4. Click on the quick link for the respective recipient and click on the Maintain hyperlink. 5. The Recipient Setup page will be displayed. 6. Make the required amendments. 7. Click on Update. 8. Your updated Recipient List will be displayed. 10.13.3 Delete a Recipient from your Electricity Recipient List Use this function to permanently delete a recipient from your Electricity Recipient List. Delete a Recipient from your Electricity Recipient List 1. Click on the Buy tab and then click on the Electricity sub-tab. 2. Select the My Recipients view. 3. Your current Electricity Recipients will be displayed. 4. Click on the quick link for the respective recipient and select the Delete hyperlink. 5. A confirmation page will be displayed. 6. Check that this information is correct and, if necessary, click on Cancel to make amendments. 7. Click on Update. 8. Your updated Recipient List will be displayed. Online Banking User Guide 338 10.14 Purchase Prepaid Electricity for a Recipient Use this function to purchase prepaid electricity units for the Recipients/Meter Numbers in your Electricity Recipient List. When purchasing prepaid electricity, should they be available to you, your Free Basic Electricity (FBE) units will be issued simultaneously. They will have a separate Token Number. Important Information about Prepaid Electricity Purchases • Any outstanding fees or arrears on your municipal account will be deducted from the recharge amount. • When purchasing for multiple recipients simultaneously you are restricted to a maximum of 5 recipients per transaction. • Please ensure that the meter number that you have entered is correct as no refunds will be made for incorrect purchases. • To avoid duplication, if your purchase is not confirmed, please check your Transaction History before you try again. • Your Token Number/s can be viewed in your Purchase History. • For meter related queries, please contact your municipality. n. Buy Prepaid Electricity for a Recipient 1. Click on the Buy tab and then click on the Electricity sub-tab. 2. Select the My Recipients view. 3. Your current Electricity Recipients/Meter Numbers will be displayed. 4. Use the drop down menu to select the Buy Amount for the respective recipient/s. 5. If required, repeat this process to purchase for multiple recipients simultaneously. 6. Use the account switcher to select the account that you would like to use to pay for the purchase/s. 7. Click on Buy. 8. A confirmation page will be displayed. 9. Check that this information is correct and, if necessary, click on Edit to make amendments. 10. Before you can proceed you will be required to read and accept the Terms and Conditions. 11. Click Confirm to proceed. 12. A results page will display the status of your request together with your Token Number/s. Please record the Electricity Token Number/s as you will need to enter this on your meter in order to activate your units. 13. Click on Finish to complete the process. Online Banking User Guide 339 10.15 Purchase Prepaid Electricity Once-Off Use this function to purchase prepaid electricity tokens for beneficiaries/Meter Numbers that you have not added to your Electricity Recipient List. When purchasing prepaid electricity, should they be available to you, your Free Basic Electricity (FBE) units will be issued simultaneously. They will have a separate Token Number. Important Information about Prepaid Electricity Purchases • Any outstanding fees or arrears on your municipal account will be deducted from the recharge amount. • Please ensure that the meter number that you have entered is correct as no refunds will be made for incorrect purchases. • To avoid duplication, if your purchase is not confirmed, please check your Transaction History before you try again. • Your Token Number/s can be viewed in your Purchase History. • For meter related queries, please contact your municipality. Once-Off Purchase of Prepaid Electricity 1. Click on the Buy tab and then click on the Electricity sub-tab. 2. Select the Once-Off Purchase view. 3. The Buy capture page will be displayed. 4. Choose the Recharge Amount from the drop down menu. 5. If you have selected the Flexi Recharge option you will be required to enter a Recharge Amount. 6. Enter the recipient’s Meter Number. 7. Use the account switcher to select the account that you would like to use to pay for the purchase. 8. Click on Buy. 9. A confirmation page will be displayed. 10. Check that this information is correct and, if necessary, click on Edit to make amendments. 11. Before you can proceed you will be required to read and accept the Terms and Conditions. 12. Click Confirm to proceed. 13. A results page will display the status of your request together with your Token Number/s. Please make a note of your Token Number as you will need to enter this on your meter in order to activate your units. 14. Click on Save Recipient to save this Meter Number in your Electricity Recipients list, alternatively, click on Finish to complete the process. Online Banking User Guide 340 10.16 Claim Free Basic Electricity (FBE) Units for a Recipient Use this function to claim Free Basic Electricity (FBE) Units (without purchasing Prepaid Electricity) for the Recipients/Meter Numbers in your Electricity Recipient List. Free Basic Electricity (FBE) is the amount of electricity deemed sufficient to provide basic electricity to your household. The amount of FBE units you qualify for is controlled by the municipality. For more information regarding whether you qualify for FBE units, contact your municipality. A separate Token Number is issued for your FBE units. Important Information about Free Basic Electricity (FBE) • Free Basic Electricity (FBE) is provided in accordance with the respective municipality’s rules; the bank can only issue the units to you if they have been made available by the respective municipality. • Free Basic Electricity (FBE) can only be claimed for one recipient at a time. • Prepaid Electricity purchases and Free Basic Electricity (FBE) transactions are issued separate Token Numbers. • Your Token Number can be viewed in your Purchase History. • Please refer all queries regarding Free Basic Electricity (FBE) to your municipality. Claim Free Basic Electricity (FBE) Units for an Electricity Recipient 1. Click on the Buy tab and then click on the Electricity sub-tab. 2. Select the My Recipients view. 3. Your current Electricity Recipients/Meter Numbers will be displayed. 4. Click on the Claim FBE easy button for the respective Recipient/Meter Number. 5. A confirmation page will be displayed. 6. Check that this information is correct and, if necessary, click on Edit to make amendments. 7. Before you can proceed you will be required to read and accept the Disclaimer. 8. Click on Confirm. 9. A results page will display the status of your request together with your FBE Token Number. Please make a note of your Token Number. 10. Click on Finish to complete the process. Online Banking User Guide 341 10.17 Claim Free Basic Electricity (FBE) Units Once-Off Use this function to claim Free Basic Electricity (FBE) Units Once-Off. Free Basic Electricity (FBE) is the amount of electricity deemed sufficient to provide basic electricity to your household. The amount of FBE units you qualify for is controlled by the municipality. For more information regarding whether you qualify for FBE units, contact your municipality. Important Information about Free Basic Electricity (FBE) • Free Basic Electricity (FBE) is provided in accordance with the respective municipality’s rules; the bank can only issue the units to you if they have been made available by the respective municipality. • Free Basic Electricity (FBE) can only be claimed for one recipient at a time. • Prepaid Electricity purchases and Free Basic Electricity (FBE) transactions are issued separate Token Numbers. • Your Token Number can be viewed in your Purchase History. • Please refer all queries regarding Free Basic Electricity (FBE) to your municipality. Once-Off Claim of free Basic Electricity 15. Click on the Buy tab and then click on the Electricity sub-tab. 16. Select the Claim FBE Token view. 17. The FBE Once-Off Claim capture page will be displayed. 18. Enter the respective Meter Number in the field provided. 19. Click on Get Token. 20. A confirmation page will be displayed. 21. Check that this information is correct and, if necessary, click on Edit to make amendments. 22. Before you can proceed you will be required to read and accept the Disclaimer. 23. Click Confirm to proceed. 24. A results page will display the status of your request together with your Token Number. Please make a note of your Token Number as you will need to enter this on your meter in order to activate your units. 25. Click on Finish to complete the process. Online Banking User Guide 342 10.18 Prepaid Electricity Purchase History 10.18.1 View Prepaid History - Electricity Use this function to view and search the last three months of Prepaid Electricity purchases and Free Basic Electricity (FBE) claims that you have made using the accounts linked to your profile. View Prepaid Electricity Purchase History 1. Click on the Buy tab and then click on the Electricity sub-tab. 2. Select the Purchase History view. 3. Your Prepaid Electricity purchases and/or FBE claims will be displayed. 4. Click on the Product hyperlink to view the details of a specific transaction. 5. The Transaction Details will be displayed. 6. Click on Claim FBE to claim for FBE for that meter number, alternatively, click on Back to return to the Purchase History page, 10.18.2 Search Prepaid Purchase History - Electricity Use this function to search your Prepaid Purchase History for a specific Electricity transaction. Search Prepaid Purchase History - Electricity 1. Click on the Buy tab and then click on the Electricity sub-tab. 2. Select the Purchase History view. 3. The Prepaid Electricity purchases that you have made using the accounts linked to your profile will be displayed. 4. Click on the Search button in the table actions. 5. Enter a minimum of two alphanumeric characters in the Search field. 6. The results of your search will be displayed. 7. Click on Back to return to your full Transfer History. Online Banking User Guide 343 LOTTO Sub-Tab Online Banking User Guide 344 10.19 LOTTO Overview Enjoy the convenience and security of purchasing your LOTTO tickets online and having your winnings paid directly into the purchasing account. Tickets can be purchased for single or multiple draw dates; the total cost for all draws will be debited to your account on the day that you purchase your ticket. The following LOTTO functionality and information is available on the LOTTO landing page: • How to Play • LOTTO Game Rules • FirstRand Terms and Conditions • LOTTO Draw Details • Play LOTTO • Play LOTTO QuickPick • View and Replay from History Important Information about LOTTO Purchases • LOTTO functionality is restricted to the Primary User. • Players must be 18 years or older. • Once the LOTTO transaction has been confirmed, the ticket cannot be cancelled. • A Daily Profile Limit applies to Gaming Transactions; this limit is preset and cannot be changed. If you use your eBucks to purchase your LOTTO ticket/s, the equivalent Rand value of your purchase will be deducted from your Daily Profile Limit. • Any winnings of R50,000.00 or less will automatically be paid into the purchasing account. • If your winnings are greater than R50,000.00 you will be contacted by the Bank's representative within 2 working days and will be advised of the process to redeem your winnings. • If you use your eBucks to play, your winnings will be paid into your selected Default Account and not into your eBucks Account. • Charges apply for online gaming purchases. Please refer to the pricing guide for more details. Online Banking User Guide • Contact the National Lottery Player Help Line for LOTTO queries. • Contact Online Assistance for navigational queries. 345 Important Information about LOTTO Purchases continued To ensure sufficient processing time, LOTTO and LOTTO QuickPick game sales close on Online Banking at 20h30 on a draw day. LOTTO Cut Off Times Non-Draw Days Monday 06h00 - 23h00 Tuesday Thursday Friday Sunday 06h00 - 18h00 Draw Days Wednesday 06h00 - 20h30 Saturday Online Banking User Guide 346 10.20 Play LOTTO Enjoy the convenience and security of purchasing your LOTTO tickets online and having your winnings paid directly into the purchasing account. Tickets can be purchased for single or multiple draw dates; the total cost for all draws will be debited to your account on the day that you purchase your ticket. Play LOTTO 1. Click on the Buy tab. 2. Click on the LOTTO sub-tab. 3. Click on the LOTTO or the LOTTO Plus view to see the respective jackpots and winning numbers for the last draw. 4. Click on the Play Now quick link. 5. The Play LOTTO slide out will be displayed. 6. Use the account switcher to select the account that you would like to use to purchase the ticket/s. 7. Click on the Yes or No button to indicate if you would like to play LOTTO Plus. 8. Select the Number of Draws that you would like this ticket to be valid for. 9. By default two game boards are displayed, click on the + to add another game board or click on the x to remove a game board. 10. Click on the Board hyperlink and select your 6 numbers; double clicking on a number will deselect that number. 11. Click on Done. 12. Repeat this process for each board. 13. Once you have completed your selection for each game board click on Buy to proceed. 14. A confirmation page will be displayed. 15. Check that this information is correct and, if necessary, click on Edit to make amendments. 16. Before you can continue you will be required to accept the Terms and Conditions. 17. Click Confirm to proceed. 18. A results page will display the status of your request. 19. Click on Finish to complete the process. Online Banking User Guide 347 10.21 Play LOTTO QuickPick QuickPick is a faster way to play LOTTO as you do not need to select your own LOTTO numbers. This enables you to select the number of boards that you would like to play and then LOTTO will provide your QuickPick numbers for you. Tickets can be purchased for single or multiple draw dates; the total cost for all draws will be debited to your account on the day that you purchase your ticket. Play LOTTO QuickPick 1. Click on the Buy tab. 2. Click on the LOTTO sub-tab. 3. Click on the LOTTO or the LOTTO Plus view to see the respective jackpots and winning numbers for the last draw. 4. Click on the QuickPick quick link. 5. The Play LOTTO QuickPick slide out will be displayed. 6. Use the account switcher to select the account that you would like to use to purchase the ticket/s. 7. Click on the Yes or No button to indicate if you would like to play LOTTO Plus. 8. Select the Number of Draws that you would like this ticket to be valid for. 9. Select the Number of Game Boards that you would like to buy. 10. Click on Buy to proceed. 11. A confirmation page will be displayed. 12. Check that this information is correct and, if necessary, click on Edit to make amendments. 13. Before you can continue you will be required to accept the Terms and Conditions. 14. Click Confirm to proceed. 15. A results page will display the status of your request. 16. Click on Finish to complete the process. Online Banking User Guide 348 10.22 View and Replay from your LOTTO History This functionality enables you to view and/or replay any of the LOTTO transactions that you have played over the past three months. Important Information about Replaying from your LOTTO History • If you Replay from your LOTTO History you cannot change the Account that was used to purchase the ticket or the Number of Draws. View and Replay LOTTO History 1. Click on the Buy tab. 2. Click on the LOTTO sub-tab. 3. Click on the LOTTO or the LOTTO Plus view to see the respective jackpots and winning numbers for the last draw. 4. Click on the View and Replay History hyperlink. 5. Your LOTTO History will be displayed. 6. Click on the View Ticket & Replay easy button to view the details and numbers of the respective ticket. 7. Click on Cancel to return to the summary of your LOTTO History or, if you would like to replay this transaction, click on Replay. 8. A confirmation page will be displayed. 9. Check that this information is correct and, if necessary, click on Edit to make amendments. 10. Before you can continue you will be required to accept the Terms and Conditions. 11. Click Replay to proceed. 12. A results page will display the status of your request. 13. Click on Finish to complete the process. Online Banking User Guide 349 PowerBall Sub-Tab Online Banking User Guide 350 10.23 PowerBall Overview Enjoy the convenience and security of purchasing your PowerBall tickets online and having your winnings paid directly into the purchasing account. Tickets can be purchased for single or multiple draw dates; the total cost for all draws will be debited to your account on the day that you purchase your ticket. The following PowerBall functionality and information is available on the PowerBall landing page: • How to Play • PowerBall Game Rules • FirstRand Terms and Conditions • PowerBall Draw Details • Play PowerBall • Play PowerBall QuickPick • View and Replay from History Important Information about PowerBall Purchases • PowerBall functionality is restricted to the Primary User. • Players must be 18 years or older. • Once the PowerBall transaction has been confirmed, the ticket cannot be cancelled. • A Daily Profile Limit applies to Gaming Transactions; this limit is preset and cannot be changed. If you use your eBucks to purchase your LOTTO ticket/s, the equivalent Rand value of your purchase will be deducted from your Daily Profile Limit. • Any winnings of R50,000.00 or less will automatically be paid into the purchasing account. • If your winnings are greater than R50,000.00 you will be contacted by the Bank's representative within 2 working days and will be advised of the process to redeem your winnings. • If you use your eBucks to play, your winnings will be paid into your Default Account and not into your eBucks Account. • Charges apply for online gaming purchases. Please refer to the pricing guide for more details. Online Banking User Guide • Contact the National Lottery Player Help Line for PowerBall queries. • Contact Online Assistance for navigational queries. 351 Important Information about PowerBall Purchases continued To ensure sufficient processing time, PowerBall game sales close on Online Banking at 20h30 on a draw day. PowerBall Cut Off Times Non-Draw Days Monday 06h00 - 23h00 Wednesday Thursday Saturday Sunday 06h00 - 18h00 Draw Days Tuesday 06h00 - 20h30 Friday Online Banking User Guide 352 10.24 Play PowerBall Enjoy the convenience and security of purchasing your PowrBall tickets online and having your winnings paid directly into the purchasing account. Tickets can be purchased for single or multiple draw dates; the total cost for all draws will be debited to your account on the day that you purchase your ticket. Play PowerBall 1. Click on the Buy tab. 2. Click on the PowerBall sub-tab. 3. The current jackpot and winning numbers for the last draw will be displayed. 4. Click on the Play Now quick link. 5. The Play PowerBall slide out will be displayed. 6. Use the account switcher to select the account that you would like to use to purchase the ticket/s. 7. Select the Number of Draws that you would like this ticket to be valid for. 8. By default two game boards are displayed, click on the + to add another game board or click on the x to remove a game board. 9. Click on the Board hyperlink and select your 5 numbers; double clicking on a number will deselect that number. 10. Select your PowerBall Number. 11. Click on Done. 12. Repeat this process for each board. 13. Once you have completed your selection for each game board click on Buy to proceed. 14. A confirmation page will be displayed. 15. Check that this information is correct and, if necessary, click on Edit to make amendments. 16. Before you can continue you will be required to accept the Terms and Conditions. 17. Click Confirm to proceed. 18. A results page will display the status of your request. 19. Click on Finish to complete the process. Online Banking User Guide 353 10.25 Play PowerBall QuickPick QuickPick is a faster way to play PowerBall as you do not need to select your own PowerBall numbers. This enables you to select the number of boards that you would like to play and then PowerBall will provide your QuickPick numbers for you. Tickets can be purchased for single or multiple draw dates; the total cost for all draws will be debited to your account on the day that you purchase your ticket. Play PowerBall QuickPick 1. Click on the Buy tab. 2. Click on the PowerBall sub-tab. 3. The current jackpot and winning numbers for the last draw will be displayed. 4. Click on the QuickPick quick link. 5. The Play PowerBall QuickPick slide out will be displayed. 6. Use the account switcher to select the account that you would like to use to purchase the ticket/s. 7. Select the Number of Draws that you would like this ticket to be valid for. 8. Select the Number of Game Boards that you would like to buy. 9. Click on Buy to proceed. 10. A confirmation page will be displayed. 11. Check that this information is correct and, if necessary, click on Edit to make amendments. 12. Before you can continue you will be required to accept the Terms and Conditions. 13. Click Confirm to proceed. 14. A results page will display the status of your request. 15. Click on Finish to complete the process. Online Banking User Guide 354 10.26 View and Replay from your PowerBall History This functionality enables you to view and/or replay any of the PowerBall transactions that you have played over the past three months. Important Information about Replaying from your PowerBall History • If you Replay from your PowerBall History you cannot change the Account that was used to purchase the ticket or the Number of Draws. View and Replay PowerBall History 1. Click on the Buy tab. 2. Click on the PowerBall sub-tab. 3. The current jackpot and winning numbers for the last draw will be displayed. 4. Click on the View and Replay History hyperlink. 5. Your PowerBall History will be displayed. 6. Click on the View Ticket & Replay easy button to view the details and numbers of the respective ticket. 7. Click on Cancel to return to the summary of your PowerBall History or, if you would like to replay this transaction, click on Replay. 8. A confirmation page will be displayed. 9. Check that this information is correct and, if necessary, click on Edit to make amendments. 10. Before you can continue you will be required to accept the Terms and Conditions. 11. Click Replay to proceed. 12. A results page will display the status of your request. 13. Click on Finish to complete the process. Online Banking User Guide 355 11. Send Money Tab Online Banking User Guide 356 11.1 Send Money Overview The Send Money functionality enables a user to send money to a beneficiary that does not have an account; the beneficiary can then withdraw/collect these funds immediately. The following functionality is available: • Create and maintain an online Phonebook for your eWallet Recipients • Send Money to a recipient or to a once-off beneficiary • View and Search your Send Money History There are three types of Send Money transactions available on Online Banking; each of these options has its own sub-tab: • • Send Money to eWallet o Send Money to a recipient or to a once-off beneficiary using their local cellphone number. o The funds can be withdrawn at any FNB ATM. Send Money to Zimbabwe o Send Money to a Zimbabwean resident using the recipient’s cellphone number and ID Number. o • The funds can be collected at participating OK Stores in Zimbabwe. Send Money to Mozambique Send money to a Mozambican resident using the recipient's cellphone number. The funds can be collected at selected FNB Branches in Mozambique. Important Information about Send Money Transactions • Send Money transactions can be performed by both Primary and Secondary Users of a consumer profile; provided that the profile owner has allocated transact permissions to the Secondary User. • For your security, a Daily Profile Limit applies to Send Money transactions; this limit is preset and cannot be changed. • Send Money payments cannot be made from a Credit Card account. • Please ensure that you capture the recipient’s details correctly; Send Money transactions cannot be reversed as they are processed in realtime. • For queries about Send Money please contact the Cellphone Banking Call Centre. Online Banking User Guide 357 Send Money to eWallet Sub-Tab Online Banking User Guide 358 11.2 eWallet - How it Works The Send Money to eWallet functionality enables a user to send money to a beneficiary via the beneficiary's local cellphone number; the beneficiary does not require a bank account and can withdraw these funds at any FNB ATM without an ATM Card. When money is sent to the beneficiary, an eWallet is created using the beneficiary's cellphone number as the account number. The eWallet holder will receive an automated Short Message Service (SMS) with instructions on how to access the money sent to them and will be required to set up a once-off Wallet PIN via a dial string. The eWallet holder is able to access the funds immediately via an FNB ATM using their Wallet PIN; there are no ATM charges. Although the recipient does not have to withdraw all of the funds in one transaction, daily account limits are applied. If the eWallet holder is an existing FNB client they can transfer the funds from their eWallet into an account linked to their profile. Important Information about eWallet • If you are a recipient of a Send Money transaction and you link your eWallet account to your Online Banking profile; please note that functionality on a eWallet account is limited to transfers in or out of the account. • For queries about Send Money please contact the Cellphone Banking Call Centre. Online Banking User Guide 359 11.3 My Phonebook - eWallet Recipients Use this functionality to add and maintain the cellphone numbers of the recipients that you regularly Send eWallet payments to in your own eWallet Phonebook. By doing so, you can make eWallet payments to these recipients without having to capture their details each time. Important Information about your eWallet Phonebook • Please ensure that the cellphone number that you have entered is correct; Send Money transactions cannot be reversed as they are processed in realtime. • The Name and Cellphone Number of the recipient need to be unique; i.e. you cannot have two recipients called John, you would need to add their surname to differentiate between them. Likewise, you cannot use the same cellphone number for different recipients. 11.3.1 Add a Recipient to your eWallet Phonebook Use this function to add a recipient to your eWallet Phonebook. Add a Recipient to your eWallet Phonebook 1. Click on the Send Money tab. 2. If it is not already selected, click on the To eWallet sub-tab. 3. Select the My Phonebook view. 4. Your current eWallet Recipients will be displayed. 5. Click on the Add table action and then click on the Add Recipient hyperlink. 6. The eWallet Recipient Capture page will be displayed. 7. Enter the Name and Cellphone Number of the recipient. 8. If required, click on the (+) to add more recipient capture fields; you can add a maximum of 5 recipients per transaction. 9. Click on Add Recipients. 10. A confirmation page will be displayed. 11. Check that this information is correct and, if necessary, click on Edit to make amendments. 12. Click on Confirm. 13. A results page will display the status of your request. 14. Click on Finish to complete the process. Online Banking User Guide 360 11.3.2 Maintain a Recipient in your eWallet Phonebook Use this function to maintain the details of a recipient in your eWallet Phonebook. Maintain your eWallet Phonebook 1. Click on the Send Money tab. 2. If it is not already selected, click on the To eWallet sub-tab. 3. Select the My Phonebook view. 4. Your current eWallet Recipients will be displayed. 5. Click on the quick link for the respective recipient and select the Maintain Recipient option. 6. The Phonebook Setup page will be displayed. 7. Make the required amendments. 8. Click on Update. 9. Your updated Phonebook will be displayed. 11.3.3 Delete a Recipient from your eWallet Phonebook Use this function to permanently delete a recipient from your eWallet Phonebook. Delete a Recipient from your eWallet Phonebook 1. Click on the Send Money tab. 2. If it is not already selected, click on the To eWallet sub-tab. 3. Select the My Phonebook view. 4. Your current eWallet Recipients will be displayed. 5. Click on the quick link for the respective recipient and select the Delete Recipient option. 6. A confirmation page will be displayed. 7. Check that this information is correct and, if necessary, click on Cancel to make amendments. 8. Click on Delete. 9. Your updated Phonebook will be displayed. Online Banking User Guide 361 11.4 Send Money to an eWallet The Send Money to eWallet functionality enables a user to send money to a beneficiary via the beneficiary's local cellphone number; the beneficiary does not require a bank account and can withdraw these funds at any FNB ATM using their cellphone. There are two payment options: • Send Money to an eWallet for a Recipient saved in your eWallet Phonebook • Make a Once-Off payment to an eWallet If the eWallet holder is an existing FNB client they can transfer the funds from their eWallet into an account linked to their profile. The cellphone number can belong to a prepaid or contract subscription. Important Information about eWallet Payments • For your security, a Daily Profile Limit applies to Send Money transactions; this limit is preset and cannot be changed. • Payments can be made to multiple recipients simultaneously, within the prescribed Daily Profile Limit. • Send Money payments cannot be made from a Credit Card account. • Please ensure that you capture the correct cellphone number; Send Money to eWallet transactions cannot be reversed as they are processed in real-time. • Although the recipient does not have to withdraw all of the funds in one transaction, daily account limits are applied. • Cellphone numbers are not saved to your eWallet Phonebook automatically; you will need to Update your Phonebook. • For queries about eWallet please contact the Cellphone Banking Call Centre. Online Banking User Guide 362 11.4.1 Send Money to an eWallet - My Phonebook Recipient Send Money to an eWallet - Recipient 1. Click on the Send Money tab. 2. If it is not already selected, click on the To eWallet sub-tab. 3. Select the My Phonebook view. 4. Your current eWallet Recipients will be displayed. 5. Enter the Amount that you would like to send to the respective recipient/s. 6. Use the account switcher to select the account that you would like to use to pay the recipient/s. 7. Click on Send. 8. A confirmation page will be displayed. 9. Check that this information is correct and, if necessary, click on Edit to make amendments. 10. Click on Confirm. 11. A results page will display the status of your request. 12. Click on Finish to complete the process. 11.4.2 Send Money to an eWallet - Once-Off Payment Send Money to an eWallet - Once-Off 1. Click on the Send Money tab. 2. If it is not already selected, click on the To eWallet sub-tab. 3. Select the Once-Off Payment view. 4. Enter the recipient’s Cellphone Number. 5. Enter the Amount that you would like to send to the respective recipient. 6. Use the account switcher to select the account that you would like to use to pay the recipient. 7. Click on Send. 8. A confirmation page will be displayed. 9. Check that this information is correct and, if necessary, click on Edit to make amendments. 10. Click on Confirm. 11. A results page will display the status of your request. 12. Click on Finish to complete the process. Online Banking User Guide 363 11.5 View eWallet Payment History Use this function to view a history of all payments that you have made to an eWallet. The following functionality is available: • View eWallet History • Search eWallet History • Save a Recipient to your prepaid phonebook - My Phonebook • Send Money Again from your eWallet History View eWallet Payment History 1. Click on the Send Money tab and select the To eWallet sub-tab. 2. Select the History view. 3. Your eWallet History will be displayed. 4. Use the Search function in the action table to search for a specific transaction; the search will be performed across all fields except the Date column. 5. Click on the Save Recipient quick link to add the respective recipient to your My Phonebook. 6. Click on the Send Again quick link to send money to the same recipient; you can edit the amount. 7. Click on Back to return to the My Phonebook page. Online Banking User Guide 364 Send Money to Zimbabwe Sub-Tab Online Banking User Guide 365 11.6 Send Money to Zimbabwe - How it Works The Send Money to Zimbabwe functionality provides a safe and affordable solution for both South African residents and migrant workers based in South Africa to transfer low value funds to family and friends in Zimbabwe. The user can send money to a Zimbabwean resident using the recipient's ID Number; the recipient does not require a bank account and can collect these funds at participating OK Stores Ltd. in Zimbabwe. Once the payment has been processed, the user will receive a system generated SMS/email via his inContact method which will contain the Voucher Reference Number for the transaction. The user will then need to communicate this Voucher Reference Number and the payment amount to the Zimbabwean recipient. The recipient is able to access the funds immediately using the Voucher Reference Number and their ID Book. The funds can either be withdrawn in cash or they can be transferred to an OK Shop Easy card which can be utilised for in-store purchases. The funds will be remitted in South African Rand (ZAR) as the Rand is recognized as official tender in Zimbabwe. Online Banking User Guide 366 11.7 Send Money to Zimbabwe The Send Money to Zimbabwe functionality enables a user to send money to a Zimbabwean resident using the Recipient's cellphone number and ID Number; the Recipient does not require a bank account and can collect these funds at participating OK Stores Ltd. in Zimbabwe. The recipient is able to access the funds immediately using the Voucher Reference Number and their ID Book. The cellphone number can belong to a prepaid or contract subscription. Important Information about Send Money to Zimbabwe Payments • For your security, a Daily Profile Limit applies to Send Money transactions; this limit is preset and cannot be changed. • Should you wish to send an amount that is greater than this limit please use the Once-Off Global Payment function on the Forex tab. • Send Money payments cannot be made from a Credit Card account. • Please ensure that you capture the correct information; Send Money transactions are processed in real-time and can only be reversed in the following circumstances: o If the recipient has not yet redeemed the funds the user can contact the eWallet Call Centre to have the funds reversed. o If the recipient has not redeemed the funds within 14 days; the funds will automatically be reversed back into the user’s account. • For queries about Send Money please contact the Cellphone Banking Call Centre. Online Banking User Guide 367 11.7.1 Send Money to Zimbabwe - Once-Off Payment Send Money to Zimbabwe - Once-Off 1. Click on the Send Money tab and select the To Zimbabwe sub-tab. 2. Select the Once-Off Payment view. 3. The Send Money to Zimbabwe capture page will be displayed. 4. Enter the recipient’s Name, cellphone number and ID Number. 5. Enter the Amount that you would like to send. 6. Before you can continue you will be required to accept the Disclaimer. 7. Use the account switcher to select the account that you would like to use to pay this recipient. 8. Click on Send. 9. A confirmation page will be displayed. 10. Check that this information is correct and, if necessary, click on Edit to make amendments. 11. Click on Confirm. 12. A results page will display the status of your request; if successful, a Voucher Reference Number for the transaction will be displayed in the results. 13. Click on Finish to complete the process. Online Banking User Guide 368 11.8 View Send Money to Zimbabwe Payment History Use this function to view a history of all payments that you have made using the Send Money to Zimbabwe functionality. The following functionality is available: • View History • Search History View and/or Search Send Money to Zimbabwe Payment History 1. Click on the Send Money tab and select the To Zimbabwe sub-tab. 2. Select the History view. 3. Your Payment History will be displayed together with the Voucher Reference Number for the respective transaction. 4. Use the Search function in the action table to search for a specific transaction; the search will be performed across all fields except the Date column. 5. Click on Back to return to the Send Money to Zimbabwe capture page. Online Banking User Guide 369 Send Money to Mozambique Sub-Tab Online Banking User Guide 370 11.9 Send Money to Mozambique - How it Works The Send Money to Mozambique functionality provides a safe and affordable solution for both South African residents and migrant workers based in South Africa to transfer low value funds to family and friends in Mozambique. The user can send money to a Mozambican resident using the recipient's Cellphone Number; the recipient does not require a bank account and can collect these funds at selected FNB Branches in Mozambique. Once the payment has been processed, the user will receive a system generated SMS/email via his inContact method which will contain the amount of the transaction in Mozambican Meticals together with the Voucher Reference Number and Transfer Code (created by user). The user will then need to communicate these details to the Mozambican recipient. The recipient is able to access the funds immediately using the Voucher Reference Number, Transfer Code and their ID Card. The funds will be issued to the recipient in Mozambican Meticals. Online Banking User Guide 371 11.10 Send Money to Mozambique The Send Money to Mozambique functionality enables a user to send money to a Mozambican resident using the Recipient's cellphone number; the Recipient does not require a bank account and can collect these funds at selected FNB Branches in Mozambique. The recipient is able to access the funds immediately using the Voucher Reference Number, Transfer Code and their ID Card. The cellphone number can belong to a prepaid or contract subscription. Important Information about Send Money to Mozambique Payments • For your security, a Daily Profile Limit applies to Send Money transactions; this limit is preset and cannot be changed. Should you wish to send an amount that is greater than this limit please use the Once-Off Global Payment function on the Forex tab. • Send Money payments cannot be made from a Credit Card account. • Please ensure that you capture the correct information; Send Money transactions are processed in real-time and can only be reversed in the following circumstances: o If the recipient has not yet redeemed the funds the user can contact the eWallet Call Centre to have the funds reversed. o If the recipient has not redeemed the funds within 14 days; the funds will automatically be reversed back into the user’s account. • For queries about Send Money please contact the Cellphone Banking Call Centre. Online Banking User Guide 372 11.10.1 Send Money to Mozambique - Once-Off Payment Send Money to Mozambique - Once-Off 1. Click on the Send Money tab and select the To Mozambique sub-tab. 2. Select the Once-Off Payment view. 3. The Send Money to Mozambique capture page will be displayed. 4. Enter the recipient’s Name and cellphone number. 5. Create a four digit Transfer Code; the recipient will require the code in order to redeem the funds. 6. Specify the Currency and the Amount that you would like to send in the chosen currency. 7. Use the account switcher to select the account that you would like to use to pay this recipient. 8. Click on Continue. 9. A Confirmation page will be displayed together with the quoted rates for the transaction. 10. Check that the information captured is correct and, if necessary, click on Edit to make amendments. 11. Before you can continue you will be required to accept the Disclaimer. 12. Click on Accept Quote to continue with the transaction at the quoted rates. 13. A results page will display the status of your request. 14. A Voucher Reference Number for this transaction will be sent to your inContact option; please send the Voucher Reference Number and the Transfer Code that you created to the recipient. 15. Click on Finish to complete the process. Online Banking User Guide 373 11.11 View Send Money to Mozambique Payment History Use this function to view a history of all payments that you have made using the Send Money to Mozambique functionality. The following functionality is available: • View History • Search History 1. View and/or Search Send Money to Mozambique Payment History 2. Click on the Send Money tab and select the To Mozambique sub-tab. 3. Select the History view. 4. Your Payment History will be displayed together with the Voucher Reference Number for the respective transaction. 5. Click on the Pay easy button to initiate a payment transaction to the respective recipient. 6. To view the History Details for a specific transaction, click on the Recipient Cellphone Number hyperlink of the respective transaction. 7. Use the Search function in the action table to search for a specific transaction; the search will be performed across all fields except the Date column. 8. Click on Back to return to the Send Money to Mozambique capture page. Online Banking User Guide 374 12. Invest in Shares + Gold Tab Online Banking User Guide 375 12.1 Invest in Shares and Gold Overview The Shares and Gold Tab provides the ordinary man on the street with a simple and convenient means to trade in Shares and Krugerrands. A host of information about Shares and Krugerrands can be found on the FNB website, including a product comparison. The Shares and Gold functionality is split into two sub-tabs: • Portfolio • Notifications Important Information about Investing in Shares and Gold • Shares and Gold functionality is restricted to the Primary User. • Consumers can hold multiple Share Investing accounts and products; there is no limit imposed on either the number of accounts or product types. • Business clients are limited to the Share Investor product. • All prices are quoted in Rand value. • Share prices are 15 minutes delayed. Prices are updated during trading hours between 09h00 and 17h00 weekdays. • Krugerrand prices are provided by RMB and are updated during business hours from 09h00 until 16h45. • Krugerrands are stored in safe custody at Rand Refinery Ltd. on your behalf. • For any queries regarding Krugerrands, shares, shares that do not reflect, balances on shares etc. please call or email the Share Investing Contact Centre. Online Banking User Guide 376 12.1.1 Share Investing Products A host of information about Shares and Krugerrands can be found on the FNB website, including a product comparison. There are four Share Investing products to choose from: Tax-Free Shares • For the consumer and mass market. • If you would like to trade in shares but do not want to choose your own share portfolio. • A Share Saver account enables you to select a regular investment amount which FNB will invest in the RMB Top 40 and RMB MidCap Exchange Traded Funds on your behalf. • You cannot purchase Krugerrands using a Share Saver account. • The minimum investment amount is R1,000.00 lump sum or R300.00 per month. • Provided that the capital investment per annum is < R30,000 on all Tax-Free Savings products combined, any interest earned, dividends received or capital gains will be tax-free. Share Saver • For the consumer and mass market. • If you would like to trade in shares but do not want to choose your own share portfolio. • A Share Saver account enables you to select a regular investment amount which FNB will invest in the RMB Top 40 and RMB MidCap Exchange Traded Funds on your behalf. • You cannot purchase Krugerrands using a Share Saver account. • The minimum investment amount is R300.00 per month. Share Builder • For the consumer and mass market. • If you are a beginner and would like to trade on your own, but require guidance in selecting your share portfolio. • A Share Builder account holder has a predetermined list of shares to select from. • You have access to purchase the full range of Krugerrands online. • The minimum amount required to open a Share Builder account is R100.00. Online Banking User Guide 377 Share Investor • For the self driven investor. • If you have some experience in share investing and enjoy the challenge of doing it on your own. • A Share Investor account holder will have access to purchase any shares that are listed on the Johannesburg Stock Exchange (JSE). • You have access to purchase the full range of Krugerrands online. • The minimum amount required to open a Share Investor account is R100.00. More information about our Share Investing products can be found on the Product Info menu option and on the FNB website. Online Banking User Guide 378 My Portfolio Sub-Tab Online Banking User Guide 379 12.1.2 My Portfolio Overview The following Share Investing functionality is available online: View and Maintain • View and maintain your Share Investing accounts View Information • Shares / Krugerrand Info • Daily Indicators • Glossary • Shares FAQs and Krugerrand FAQs Buy Shares • Purchase Shares and/or Krugerrands Sell Shares • Sell Shares and/or Krugerrands Detailed Balance • View the Detailed Balance of a Share Investing account Transaction History • View and Search the Share and Gold trading transactions that have taken place on a Share Investing account, both Cash History and Holdings History Order History • View the history and transaction details of the Shares and Krugerrands that you have ordered Cancel Order • Cancel a pending order to purchase Shares or Krugerrands Instruction Maintenance • Maintain the Instruction Details and Instruction Options for your Share Saver and/or Tax-Free Shares Account. Switch or Upgrade Account • Change your current share investing account from a Share Builder to a Share Investor account and vice versa. Online Banking User Guide 380 12.2 View Share Investing Portfolio Use this function to view your portfolio for your Share Investing account/s. The following information is available: • • • A summary of your Share Investing account/s which includes the following information: o Account Name o Purchase Value o Market Value o Gain / Loss (Rand Value) o Gain / Loss (% View) The Portfolio for each of your Share Investing account/s which includes the following information: o Holdings (Cash Balances) o Shares Details o Krugerrands The Detailed Cash Balance for each account View Share Investing Portfolio 1. Click on the Invest in Shares + Gold tab. 2. Your existing Share Investment Accounts will be displayed. 3. Click on the Name hyperlink of the respective Share Investing account to view the Portfolio Details for that account. 4. The My Portfolio sub-tab will display the Holdings (Cash Balances), Shares and Krugerrands for the selected account. 5. You can select to view the Portfolio details of another Share Investing account by selecting the respective account from the Account Switcher drop down list. 6. Click on the Cash Balance hyperlink to view the Detailed Balance information for your Cash Holdings. 7. Click on Close to return to the My Portfolio page. 8. Click on the Instrument Name hyperlink to view detailed information about the selected instrument; this includes both the Share Info and the Company Info. 9. Click on Back to return to the My Portfolio page. Online Banking User Guide 381 12.3 View Shares Info Use this function to view the Shares Info and Company Info for a specific share. The following information is available: Shares Info • View trading information about a specific share: o Share Details o Current Share Price Information o Share Price History presented as a Financial Graph o Broker Consensus o Market Capitalisation (Market Capitalisation % Change Over Time) Company Info • View detailed information about the holding company of a specific share: o Share Ratios o Financials o Company Information o Dividend History o SENS and Company News o Director's Dealings o Company Share Information o Event Calendar The search process for each Share Investing product differs slightly due to their different share selection options; both processes are detailed below. Online Banking User Guide 382 12.3.1 View Share Info - Share Builder A Share Builder account holder has a predetermined list of shares to select from when buying shares; only these shares are displayed in the Shares List. The Shares List function enables you to search for shares by Industry. View the Shares List for a Share Builder Account 1. Click on the Invest in Shares + Gold tab. 2. Your existing Share Investment Accounts will be displayed. 3. Click on the Name hyperlink of a Share Builder account. 4. Your current Holdings for the selected account will be displayed on the My Portfolio sub-tab. 5. Click on the menu and select the View > Shares Info option. 6. The Shares List page will be displayed. 7. Click on the Industry Name hyperlink to select the Industry that you are interested in. 8. Further information about the selected industry is displayed together with a list of companies in that industry. 9. Click on the respective Company icon to view the respective Shares and Company Info. 10. Click on Back to return to the portfolio page. Online Banking User Guide 383 12.3.2 View Shares Info - Share Investor You are able to locate listed company information using the Company Code or Company Name search functionalities. The steps below will demonstrate how to view the shares list. View the Shares List for a Share Investor Account 1. Click on the Invest in Shares + Gold tab. 2. Your existing Share Investment Accounts will be displayed. 3. Click on the Name hyperlink of a Share Investor account. 4. Your current Holdings for the selected account will be displayed on the My Portfolio sub-tab. 5. Click on the menu and select the View - Shares Info option. 6. The Shares Search capture page will be displayed. 7. Enter the Company Name or Share Code for the share that you would like to view. 8. A list of companies or shares matching your search criteria will be displayed. 9. Click on the Instrument Name hyperlink to view the respective Shares and Company Info. 10. Click on Back to return to the portfolio page. Online Banking User Guide 384 12.4 View Krugerrand Info Use this function to view more information about Krugerrands. The following information is available: Krugerrand Info • View trading information about Gold: o Current Gold Price Information o Gold Price History presented as a Financial Graph Coin Info • View trading information about Krugerrands: o Current Krugerrand Price Information o Gold Price % Change Over Time News • View a News Brief for: o Current Gold News o Historic Gold News View Krugerrand Info 1. Click on the Invest in Shares + Gold tab. 2. Your existing Share Investment Accounts will be displayed. 3. Click on the Name hyperlink of either a Share Builder or Share Investor account. 4. Your current Holdings for the selected account will be displayed on the My Portfolio sub-tab. 5. Click on the menu and select the Krugerrand Info option. 6. The Krugerrand Info page will be displayed with the three viewing options; Krugerrand Info. 7. Click on Back to return to the portfolio page for the selected Share Investing account. Online Banking User Guide 385 12.5 View Daily Indicators Use this function to view the Daily Indicators: • JSE Indices • Currencies • Commodities • Interest rates • SENS The following information is available: • Value • Move • % Change Important Information about the Daily Indicators • The Daily Indicators are 15 minutes delayed. • Information is updated by McGregor BFA during trading hours, between 09h00 and 17h00 on business days. • These market statistics are calculated by McGregor BFA and are therefore not the official JSE market statistics. View the Daily Indicators 1. Click on the Invest in Shares + Gold tab. 2. Your existing Share Investment Accounts will be displayed. 3. Click on the menu and select the Daily Indicators option. 4. The Daily Indicators page will be displayed. 5. Click on Back to return to the Shares and Gold landing page. Online Banking User Guide 386 12.6 Buy Shares Use this function to purchase Shares. The process to buy shares differs slightly for each Share Investing product due to the share selection options; all three processes are detailed below. Important Information about Buying Shares • When you buy shares with a Share Saver account you have the option of trading on any day (Today at 15h00) or, at a reduced brokerage fee, the First Trading Day of the Month. • Once your quote is confirmed the order will be stored and submitted for processing. • Funds used to purchase shares will be blocked in your cash account and will not be available to transfer, withdraw or buy other shares. • The final cash reserved figure will be determined by the traded price. 12.6.1 Buy Shares - Share Saver Buy Shares – Share Saver 1. Click on the Invest in Shares + Gold tab. 2. Your existing Share Investment Accounts will be displayed. 3. Click on the Name hyperlink of the Share Saver account that you would like to use to purchase Shares. 4. Your current Holdings for the selected account will be displayed on the My Portfolio sub-tab. 5. Click on the menu and select the Buy > Shares option. 6. The Buy Shares capture page will be displayed. 7. Select the Buy Instruction for this purchase, i.e. Today at 15h00 or First Trading Day of the Month. 8. Enter the Amount that you would like to invest. 9. Click on Buy. 10. A confirmation page will be displayed together with a quote. 11. Check that this information is correct and, if necessary, click on Edit to make amendments. 12. Before you can continue you will be required to accept the Terms and Conditions. 13. Click on Confirm to proceed with your purchase at the quoted price. Online Banking User Guide 387 14. A results page will display the status of your order. 15. Click on Finish to complete the process. 12.6.2 Buy Shares - Share Builder A Share Builder account holder will have a predetermined list of shares to select from. Buy Shares - Share Builder 1. Click on the Invest in Shares + Gold tab. 2. Your existing Share Investment Accounts will be displayed. 3. Click on the Name hyperlink of the Share Builder account that you would like to use to purchase Shares. 4. Your current Holdings for the selected account will be displayed on the My Portfolio sub-tab. 5. Click on the menu and select the Buy > Shares option. 6. The Share Selection page will be displayed. 7. To view more information about a share click on the respective Company hyperlink. 8. Click on the Buy easy button of the share that you would like to buy. 9. Enter the Amount that you would like to use to purchases shares. 10. Click on Buy. 11. A confirmation page will be displayed together with a quote. 12. Check that this information is correct and, if necessary, click on Edit to make amendments. 13. Before you can continue you will be required to accept the Terms and Conditions. 14. Click on Confirm to proceed with your purchase at the quoted price. 15. A results page will display the status of your order. 16. Click on Finish to complete the process. Online Banking User Guide 388 12.6.3 Buy Shares - Share Investor A Share Investor account holder will have access to purchase any shares that are listed on the Johannesburg Stock Exchange (JSE). Important Information about Buying Shares for a Share Investor Account • A Share/Instrument Code ranges from 3 to 6 characters long and may only consist of alpha and/or numeric characters. • You are able to search using the first character of the Company Name. Purchase Instruction: • There are two purchasing options available: o Buy Now o Buy End of Day Pricing Instruction: There are two pricing options available: • Best o Select this option to have a Broker trade for you at the best price. • Limit o Select this option to if you would like to specify a Rand Limit with which to purchase the shares. o If you place price limits on your order, market conditions may result in the trade taking a longer time to be executed or only a portion of the order being traded by end of the day - this is called a partial trade. o In order to complete the full quantity you will need to submit a new order for the balance of the shares. Each partial trade executed will be charged at least the minimum brokerage fee. o Online Banking User Guide Partial trades are less likely to occur if you use Best pricing. 389 Buy Shares - Share Investor 1. Click on the Invest in Shares + Gold tab. 2. Your existing Share Investment Accounts will be displayed. 3. Click on the Name hyperlink of the Share Investor account that you would like to use to purchase Shares. 4. Your current Holdings for the selected account will be displayed on the My Portfolio sub-tab. 5. If you would like to purchase an instrument that exists in your Share Portfolio, simply click on the Buy easy button next to the respective instrument. 6. If you would like to purchase an instrument from the JSE listing, click on the menu and select the Buy > Shares option. 7. The Search for Shares capture page will be displayed. 8. Enter the Company Name (in full or in part) or the Share Code for the share that you would like to buy. 9. Click on Search. 10. A list of shares matching your search criteria will be displayed. 11. Click on the Buy easy button of the Share that you would like to buy. 12. Select when you would like to buy the shares; Buy Now or Buy End of Day. 13. Enter the Number of shares that you would like to buy. 14. Select the Pricing Option for your purchase; Best or Limit; if you select Limit you will be required to enter the Rand Limit for your purchase. 15. Click on Buy. 16. A confirmation page will be displayed together with a quote. 17. Check that this information is correct and, if necessary, click on Edit to make amendments. 18. Before you can continue you will be required to accept the Terms and Conditions. 17. Click on Confirm to proceed with your purchase at the quoted price. 18. A results page will display the status of your order. 19. Click on Finish to complete the process. Online Banking User Guide 390 12.7 Buy Krugerrands Use this function to purchase Krugerrands. Important Information about Buying Krugerrands • Krugerrands are stored in safe custody at Rand Refinery Ltd. on your behalf. • Within trading hours, the quote will remain valid for 2 minutes from the time that it is generated. If the quote is not accepted within this time limit, it will expire and the transaction will not be executed. • Orders can only be executed if there are sufficient funds in the Cash Account of the respective Share Investing account. • Within trading hours, orders will settle immediately upon acceptance of this quote. • The quote displayed is a refreshed version of the price displayed in the preceding capture pages. • Trading hours are from 09h00 to 16h45 weekdays. • Trades placed outside of trading hours will be placed as soon as trading resumes on the next business day. These orders will be placed at the first quoted price of this business day. Should the funds in the cash account be insufficient to cover the cost of the order, the trade will be rejected. Online Banking User Guide 391 Buy Krugerrands 1. Click on the Invest in Shares + Gold tab. 2. Your existing Share Investment Accounts will be displayed. 3. Click on the Name hyperlink of the Share Investing account that you would like to use to purchase the Krugerrands. 4. Your current Holdings for the selected account will be displayed on the My Portfolio sub-tab. 5. Click on the menu and select the Buy > Krugerrands option. 6. The Buy Gold selection page will be displayed. 7. Click on the Buy easy button of the Krugerrand option that you would like to purchase. 8. Enter the Number of Krugerrands that you would like to purchase. 9. Click on Buy. 10. A confirmation page will be displayed together with a quote. 11. Check that this information is correct and, if necessary, click on Edit to make amendments. 12. Before you can continue you will be required to accept the Terms and Conditions. 13. Click on Confirm to proceed with your purchase at the quoted price. 14. A results page will display the status of your order. 15. Click on Finish to complete the process. Online Banking User Guide 392 12.8 Sell Shares Use this function to sell your Shares. Please note that the process per Share Investing product differs slightly due to the share selection options. All three processes are detailed below. Important Information about Selling Shares • The Sell Shares option will only be displayed if there are shares available to sell. • Shares that are on hold for pending instructions, (Suspended), or that are in a partially processed status, will be low lighted in grey and will not be available to sell. • Selling of shares from a Share Saver account can only be done by Rand value. • Selling of shares from a Share Builder or Share Investor account can only be done on quantity of shares and not Rand value. • Once your quote is confirmed the order will be stored and submitted for processing. • Funds used to purchase shares will be blocked in your cash account and will not be available to transfer, withdraw or buy other shares. • Online Banking User Guide The final cash reserved figure will be determined by the traded price. 393 12.8.1 Sell Shares - Share Saver Sell Shares – Share Saver 1. Click on the Invest in Shares + Gold tab. 2. Your existing Share Investment Accounts will be displayed. 3. Click on the Name hyperlink of the Share Saver account that you would like to sell shares from. 4. Your current Holdings for the selected account will be displayed on the My Portfolio sub-tab. 5. Click on the menu and select the Sell > Shares option. 6. The Sell Shares capture page will be displayed. 7. Enter the Lump Sum Amount (Rand Value) that you would like to sell. 8. Click on Continue. 9. A confirmation page will be displayed together with a quote. 10. Check that this information is correct and, if necessary, click on Edit to make amendments. 11. Before you can continue you will be required to accept the Terms and Conditions. 12. Click on Confirm to proceed with your instruction at the quoted price. 13. A results page will display the status of your order. 14. Click on Finish to complete the process. Online Banking User Guide 394 12.8.2 Sell Shares - Share Builder Use this function to sell a selected quantity of shares from a Share Builder account. 1. Click on the Invest in Shares + Gold tab. 2. Your existing Share Investment Accounts will be displayed. 3. Click on the Name hyperlink of the Share Builder account that you would like to sell shares from. 4. Your current Holdings for the selected account will be displayed on the My Portfolio sub-tab. 5. Click on the menu and select the Sell > Shares option. 6. The Share Selection page will be displayed. 7. Click on the Sell easy button of the Share that you would like to sell. 8. Enter the Quantity of shares that you would like to sell. 9. Click on Sell. 10. A confirmation page will be displayed together with a quote. 11. Check that this information is correct and, if necessary, click on Edit to make amendments. 12. Before you can continue you will be required to accept the Risks associated with the quote. 13. Click on Confirm to proceed with your instruction at the quoted price. 14. A results page will display the status of your order. 15. Click on Finish to complete the process. Online Banking User Guide 395 12.8.3 Sell Shares - Share Investor Use this function to sell a selected quantity of shares from a Share Investor account. Important Information about Selling Shares from a Share Investor Account Selling Instruction: • There are two purchasing options available: o Buy Now o Buy End of Day Pricing Instruction: There are two pricing options available: • Best o Select this option to have a Broker trade for you at the best price. • Limit o Select this option to if you would like to specify a Rand Limit at which to sell the shares. o If you place price limits on your instruction, market conditions may result in the trade taking a longer time to be executed or only a portion of the order being traded by end of the day - this is called a partial trade. o In order to sell the full quantity of shares you will need to submit a new order for the balance of the shares. Each partial trade executed will be charged at least the minimum brokerage fee. o Online Banking User Guide Partial trades are less likely to occur if you use Best pricing. 396 Sell Shares - Share Investor 1. Click on the Invest in Shares + Gold tab. 2. Your existing Share Investment Accounts will be displayed. 3. Click on the Name hyperlink of the Share Investor account that you would like to sell shares from. 4. Your current Holdings for the selected account will be displayed on the My Portfolio sub-tab. 5. Click on the menu and select the Sell > Shares option. 6. Click on the Sell easy button of the Share that you would like to sell. 7. Select when you would like to sell the shares; Now or End of Day. 8. Enter the Number of shares that you would like to sell. 9. Select the Pricing Option for your sale; Best or Limit; if you select Limit you will be required to enter the Rand Limit for your sale. 10. Click on Continue. 11. A confirmation page will be displayed together with a quote. 12. Check that this information is correct and, if necessary, click on Edit to make amendments. 13. Before you can continue you will be required to accept the Terms and Conditions. 20. Click on Confirm to proceed with your instruction at the quoted price. 21. A results page will display the status of your order. 22. Click on Finish to complete the process. Online Banking User Guide 397 12.9 Sell Krugerrands Use this function to sell a selected quantity of Krugerrands. Important Information about Selling Krugerrands • The Sell Krugerrands option will only be displayed if there are Krugerrands available to sell. • Krugerrands that are on hold for pending instructions or are in a partially processed status will be low lighted in grey and will not be available to sell. • Selling of Krugerrands can only be done on quantity and not Rand value. • Within trading hours, the quote will remain valid for 2 minutes from the time that it is generated. If the quote is not accepted within this time limit, it will expire and the transaction will not be executed. • Within trading hours, orders will settle immediately upon acceptance of this quote. • The quote displayed is a refreshed version of the price displayed in the preceding capture pages. • Trading hours are from 09h00 to 16h45 weekdays. • Trades placed outside of trading hours will be placed as soon as trading resumes on the next business day. These orders will be placed at the first quoted price of this business day. Should the funds in the cash account be insufficient to cover the cost of the order, the trade will be rejected. Online Banking User Guide 398 Sell Krugerrands 1. Click on the Invest in Shares + Gold tab. 2. Your existing Share Investment Accounts will be displayed. 3. Click on the Name hyperlink of the Share Investing account that you would like to sell Krugerrands from. 4. Your current Holdings for the selected account will be displayed on the My Portfolio sub-tab. 5. Click on the Menu and select the Sell > Krugerrands option. 6. The Sell Gold selection page will be displayed. 7. Click on the Sell easy button of the Krugerrand option that you would like to sell. 8. Enter the Number of Krugerrands that you would like to sell. 9. Click on Continue. 10. A confirmation page will be displayed together with a quote. 11. Check that this information is correct and, if necessary, click on Edit to make amendments. 12. Before you can continue you will be required to accept the Terms and Conditions. 13. Click on Confirm to proceed with your request at the quoted price. 14. A results page will display the status of your order. 15. Click on Finish to complete the process. Online Banking User Guide 399 12.10 Instruction Maintenance - Share Saver Use this function to amend the monthly purchase instruction for your Share Saver account. The following options can be amended: • Instruction Status (Activate or Suspend the monthly instruction) • From Account • Monthly Investment Amount • Increase Options: o Increase Annually (Yes / No) o Increase Percentage o Annual Increase Month Maintain Share Saver Instruction 1. Click on the Invest in Shares + Gold tab. 2. Your existing Share Investment Accounts will be displayed. 3. Click on the Name hyperlink of the Share Saver account that you would like to maintain. 4. Your current Holdings for the selected account will be displayed on the My Portfolio sub-tab. 5. Click on the menu and select the Instruction Maintenance option. 6. The Instruction Maintenance capture page will be displayed. 7. Amend the Instruction Details and Instruction Options as required. 8. Click on Continue. 9. A confirmation page will be displayed together with a quote. 10. Check that this information is correct and, if necessary, click on Edit to make amendments. 11. A results page will display the status of your order. 12. Click on Finish to complete the process. Online Banking User Guide 400 12.11 Detailed Balance Use this function to view detailed information about your Cash Balance. The following information is displayed: • Ledger Balance • Anticipated Credits • Pending Credits • Pending Debits • Reserved Funds • Cash Balance • Minimum Balance • Uncleared Funds o These are funds that have been credited to your account but are not yet available for withdrawal • Outstanding Charges • Available to Buy Shares o • The portion of your Cash Balance that can be used to buy more shares Outstanding Anticipated Credits o These are the proceeds from a sale of shares for which the cash has not yet been received; these proceeds are available to purchase shares. • Available to Transfer / Buy Krugerrands o The portion of your cash balance that is available for you to transfer or to buy Krugerrands with. View Detailed Cash Balance 1. Click on the Invest in Shares + Gold tab. 2. Your existing Share Investment Accounts will be displayed. 3. Click on the Name hyperlink of the respective Share Investing account to view the Portfolio Details for that account. 4. The My Portfolio sub-tab will display the Holdings (Cash Balances), Shares and Krugerrands for the selected account. 5. Click on the Cash Balance hyperlink to view the Detailed Balance information for your Cash Holdings. 6. Click on Close to return to the My Portfolio page. 7. Use the account switcher to select another account that you would like to view. Online Banking User Guide 401 12.12 Transaction History Use this function to view and search the Cash or Holding Transaction History for a Share Investing account. Transactions in an Executed, Partially Executed and/or Settled status will be displayed in the Transaction History. Important Information about Transaction History Cash Transaction History: • Available for the last 6 months. • You can use the search option in the table actions to search across all fields on the record table. Holdings Transaction History: • Available from inception of the respective Share Investing account. • You will need to enter the Instrument Code of the respective share in order to view the Holdings Transaction History; the Instrument Code is displayed above the Share Name on your Holdings page. A Share/Instrument Code ranges from 3 to 6 characters long and may only consist of alpha and/or numeric characters, eg. FSR • Online Banking User Guide You can search across all fields on the record table. 402 12.12.1 View Cash Transaction History Use this function to view the history and transaction details of the cash transactions on your account, i.e. the transfer of cash funds into or out of a Share Investing account. The following information is displayed: • Effective Date • Description • Reference Number • Transaction Fee • Transaction Amount • Balance Important Information about Cash Transaction History • Cash Transaction History is available for the last 6 months. • You can search across all fields on the record table. o View Cash Transaction History 1. Click on the Invest in Shares + Gold tab. 2. Your existing Share Investment Accounts will be displayed. 3. Click on the Name hyperlink of the respective Share Investing account. 4. Your current Holdings for the selected account will be displayed on the My Portfolio sub-tab. 5. Click on the menu and select the History > Cash Transaction History option. 6. The Cash Transaction History for the selected account will be displayed. 7. Use the Search table action to search across all fields of the record table. 8. Click on the Transaction Amount hyperlink to view the details for the respective transaction. 9. Click on Back to return to your Cash Transaction History. 10. Click on Close to return to the Holdings page. Online Banking User Guide 403 12.12.2 View Holdings Transaction History Use this function to view the history and transaction details of the holdings transactions on your account, i.e. the purchase or sale of shares and/or Krugerrands. The following information is displayed: • Transaction Date • Instrument Code • Instruction • Quantity • Purchase Price • Transaction Amount Important Information about Holdings Transaction History • Holding Transaction History is available from inception of the respective Share Investing account. • You can search across all fields on the record table. o • You will need to enter the Instrument Code of the respective share in order to view the Holdings Transaction History; the Instrument Code is displayed above the Share Name on your Portfolio page. • A Share/Instrument Code ranges from 3 to 6 characters long and may only consist of alpha and/or numeric characters, eg. FSR Online Banking User Guide 404 View Holdings Transaction History 1. Click on the Invest in Shares + Gold tab. 2. Your existing Share Investment Accounts will be displayed. 3. Click on the Name hyperlink of the respective Share Investing account. 4. Your current Holdings for the selected account will be displayed on the My Portfolio sub-tab. 5. Click on the menu and select the History > Holdings Transaction History option. 6. The Transaction History capture page will be displayed. 7. Enter the Instrument Code of the respective share. 8. Click on Search. 9. All transactions for the selected share will be displayed. 10. Use the Search table action to search across all fields of the record table. 11. Click on the Transaction Amount hyperlink to view the details for the respective transaction. 12. Click on Back to return to your Cash Transaction History. 13. Click on Close to return to the Holdings page. Online Banking User Guide 405 12.12.3 View Order History Use this function to view the history and transaction details of the shares and/or Krugerrands that you have ordered, i.e. the purchase of shares and/or Krugerrands. The following information is displayed: • Order Date • Instrument Type (Shares / Krugerrands) • Instrument Code/Name • Instruction • Order Status • Quantity • Order Number View Order History 1. Click on the Invest in Shares + Gold tab. 2. Your existing Share Investment Accounts will be displayed. 3. Click on the Name hyperlink of the respective Share Investing account. 4. Your current Holdings for the selected account will be displayed on the My Portfolio sub-tab. 5. Click on the menu and select the History > Order History option. 6. The Order History for the selected Share Investing account will be displayed. 7. Use the Search table action to search across all fields of the record table. 8. Click on the Instrument Code/Name hyperlink to view the order details for the respective transaction. 9. Click on Back to return to your Cash Transaction History. 10. Click on Close to return to the Holdings page. Online Banking User Guide 406 12.13 Cancel Order Use this function to cancel a pending order to purchase shares or Krugerrands. Important Information about Cancelling an Order • An order has only been cancelled once its order status reflects as ‘Cancelled’. • On a Share Builder account you can cancel your order while the status is ‘Initiated’. Once the order status has changed to ‘Sent to Broker’, cancellations are no longer possible. • On a Share Investor account you can cancel your order while the status is ‘Initiated’ or ‘Sent to Broker’. However, once the order status is ‘Open’, cancellations are no longer possible. • For bulked orders, an order can only be cancelled if it is in a status of ‘Initiated’ Cancel Order 1. Click on the Invest in Shares + Gold tab. 2. Your existing Share Investment Accounts will be displayed. 3. Click on the Name hyperlink of the respective Share Investing account. 4. Your current Holdings for the selected account will be displayed on the My Portfolio sub-tab. 5. Click on the menu and select the Cancel Order option. 6. The Cancel Order page will be displayed. 7. Click on the Cancel easy button for the respective order. 8. A confirmation page will be displayed. 9. Check that this information is correct and, if necessary, click on Edit to make amendments. 10. Click on Confirm to proceed with your request at the quoted price. 11. A results page will display the status of your order. 12. Click on Finish to complete the process. Online Banking User Guide 407 12.14 Switch/Upgrade Account Use this function to switch or upgrade your current Share Investing account to another product. Important Information about Switching and/or Upgrading your Share Investing Account • A Share Saver product cannot be switched or upgraded. • A Share Builder product can be upgraded to a Share Investor. • A Share Investor product can be switched to a Share Builder. • Business Banking clients will not have this option as they are restricted to the Share Investor product. Upgrade a Share Builder to a Share Investor 1. Click on the Invest in Shares + Gold tab. 2. Your existing Share Investment Accounts will be displayed. 3. Click on the Name hyperlink of the Share Builder account that you would like to Upgrade. 4. Your current Holdings for the selected account will be displayed on the My Portfolio sub-tab. 5. Click on the menu and select the Switch/Upgrade Account option. 6. The Upgrade to Share Investor capture page will be displayed. 7. Select your preferences for Corporate Action Instructions and Switch Instructions. 8. Click on Continue. 9. A confirmation page will be displayed. 10. Check that this information is correct and, if necessary, click on Edit to make amendments. 11. Before you can continue you will be required to read and accept the Terms and Conditions. 12. Click on Confirm to proceed with your request.. 13. A results page will display the status of your order. 14. Click on Finish to complete the process. Online Banking User Guide 408 Switch a Share Investor to a Share Builder 1. Click on the Invest in Shares + Gold tab. 2. Your existing Share Investment Accounts will be displayed. 3. Click on the Name hyperlink of the Share Investor account that you would like to Switch. 4. Your current Holdings for the selected account will be displayed on the My Portfolio sub-tab. 5. Click on the menu and select the Switch/Upgrade Account option. 6. The Switch to Share Builder capture page will be displayed. 7. Select your preferences for Switch Instructions. 8. Click on Continue. 9. A confirmation page will be displayed. 10. Check that this information is correct and, if necessary, click on Edit to make amendments. 11. Before you can continue you will be required to read and accept the Terms and Conditions. 12. Click on Confirm to proceed with your request. 13. A results page will display the status of your order. 14. Click on Finish to complete the process. Online Banking User Guide 409 My Notifications Online Banking User Guide 410 12.15 My Notifications Overview Consumer and Business clients who have a Share Investor account can enjoy the convenience of having additional share information at their disposal by making use of the following functionality: • My Watch List o By setting up a Watch List you can monitor the performance of the instruments that you have selected. • o The maximum number of instruments that you will be able to add to your Watch List is 15. o You can have a separate Watch List for each Share Investor account that you have. My Price Alerts o By setting up a Price Alert you will be notified when the price that you have captured is reached. o You can specify a High Price and/or a Low Price for the instrument. o There is a cost associated with this service - please refer to the pricing guide. o You can have a separate Price Alert list for each Share Investor account that you have. Important Information about My Notifications • The My Notifications functionality is restricted to the Primary User of a Consumer or Business profile. • This functionality is only applicable to the Share Investor product. • For any queries regarding shares please call or email the Share Investing Contact Centre. Online Banking User Guide 411 12.16 My Watch List Use this function to create and manage your own shares Watch List. By setting up a Watch List you can monitor the performance of the instruments that you have selected. You can have a separate Watch List for each Share Investor account that you have. The following information is displayed per instrument: • Instrument Code / Name • Sector • Last Traded Price • Percentage Move • Number of Shares in the Market Important Information about My Watch List • The maximum number of instruments that you will be able to add to your Watch List is 15. The following functionality is available: • Add an instrument to your Watch List • View the instruments on your Watch List • Maintain the instruments on your Watch list • Remove an instrument from your Watch List • Buy an instrument via your Watch List • Sell an instrument via your Watch List Online Banking User Guide 412 12.16.1 Add an Instrument to your Watch List Use this function to add an instrument to your Watch List. • Have the required Instrument Names or Instrument Codes on hand as you will need to enter these. Add an Instrument to your Watch List 1. Click on the Invest in Shares + Gold tab. 2. Your existing Share Investment Accounts will be displayed. 3. Click on the Name hyperlink of the required Share Investor account. 4. Your current Holdings for the selected account will be displayed on the My Portfolio sub-tab. 5. Click on the My Notifications sub-tab. 6. The My Watch List view will be displayed. 7. Click on Add (+) in the table actions. 8. Click on the Instrument to my Watch List hyperlink. 9. Enter the Instrument Name or Instrument Code and click on Search. 10. All instruments matching your search criteria will be displayed. 11. Click on the Select easy button to add the respective instrument. 12. The Add Instrument to My Watch List page will be displayed. 13. Select Yes to add the instrument to your Watch List. 14. If you would like to create a Price Alert for this instrument click on Yes and then enter the High and/or Low values for the Price Alert. 15. Click on Add. 16. A confirmation page will be displayed. 17. Check that this information is correct and, if necessary, click on Edit to make amendments. 18. Click on Confirm. 19. A results page will display the status of your request. 20. Click on Finish to complete the process. 21. The selected instrument will now reflect on your My Watch List view. Online Banking User Guide 413 12.16.2 View the Instruments on your Watch List Use this function to view the Instruments that you have added to your Watch List. The following information is displayed per instrument: • Instrument Code / Name • Sector • Last Traded Price • Percentage Move • Number of Shares in the Market View the Instruments on your Watch List 1. Click on the Invest in Shares + Gold tab. 2. Your existing Share Investment Accounts will be displayed. 3. Click on the Name hyperlink of the required Share Investor account. 4. Your current Holdings for the selected account will be displayed on the My Portfolio sub-tab. 5. Click on the My Notifications sub-tab. 6. The instruments that you have added to your Watch List will be displayed on the My Watch List view. Online Banking User Guide 414 12.16.3 Maintain the Instruments on your Watch list Use this function to maintain the instruments on your Watch List. You can maintain the following: • Keep or delete the instrument on your Watch List • Add or remove a Price Alert for the instrument • Amend the High and/or Low Price Alert Maintain the Instruments on your Watch List 1. Click on the Invest in Shares + Gold tab. 2. Your existing Share Investment Accounts will be displayed. 3. Click on the Name hyperlink of the required Share Investor account. 4. Your current Holdings for the selected account will be displayed on the My Portfolio sub-tab. 5. Click on the My Notifications sub-tab. 6. The My Watch List view will display a list of the instruments that you have added to your Watch List. 7. Click on the Maintain easy button of the respective instrument. 8. The Maintain Instruction page will be displayed. 9. Make the required changes. 10. Click on Update. 11. A confirmation page will be displayed. 12. Check that this information is correct and, if necessary, click on Edit to make amendments. 13. Click on Confirm. 14. A results page will display the status of your request. 15. Click on Finish to complete the process. Online Banking User Guide 415 12.16.4 Remove an instrument from your Watch List Use this function to remove an instrument from your Watch List. Remove an Instrument from your Watch List 1. Click on the Invest in Shares + Gold tab. 2. Your existing Share Investment Accounts will be displayed. 3. Click on the Name hyperlink of the required Share Investor account. 4. Your current Holdings for the selected account will be displayed on the My Portfolio sub-tab. 5. Click on the My Notifications sub-tab. 6. The My Watch List view will display a list of the instruments that you have added to your Watch List. 7. Click on the Delete easy button of the respective instrument. 8. A confirmation page will be displayed. 9. Click on Yes to delete this instrument. 10. The deleted instrument will no longer be displayed on the My Watch List view. Online Banking User Guide 416 12.16.5 Buy an Instrument via your Watch List Use this function to buy an instrument via your Watch List. The instrument will be bought using the respective Share Investor account that you used to access your Watch List. Buy an Instrument via your Watch List 1. Click on the Invest in Shares + Gold tab. 2. Your existing Share Investment Accounts will be displayed. 3. Click on the Name hyperlink of the required Share Investor account. 4. Your current Holdings for the selected account will be displayed on the My Portfolio sub-tab. 5. Click on the My Notifications sub-tab. 6. The My Watch List view will display a list of the instruments that you have added to your Watch List. 7. Click on the Buy easy button of the respective instrument. 8. The Buy Shares page will open for the Share Investor account that you used to open your Watch List. 9. Complete the required fields. 10. Click on Buy. 11. A Quote will be displayed. 12. Check that this information is correct and, if necessary, click on Edit to make amendments. 13. Before you can continue you will be required to read and accept the Terms and Conditions regarding the quote. 14. Click on Confirm. 15. A results page will display the status of your request. 16. Click on Finish to complete the process. Online Banking User Guide 417 12.16.6 Sell an Instrument via your Watch List Use this function to sell an instrument via your Watch List. The instrument will be sold from the respective Share Investor account that you used to access your Watch List. Important Information about Selling a Share via your Watch List • The Sell easy button will only be displayed for the instruments that you hold and are available to sell. Sell an Instrument via your Watch List 1. Click on the Invest in Shares + Gold tab. 2. Your existing Share Investment Accounts will be displayed. 3. Click on the Name hyperlink of the required Share Investor account. 4. Your current Holdings for the selected account will be displayed on the My Portfolio sub-tab. 5. Click on the My Notifications sub-tab. 6. The My Watch List view will display a list of the instruments that you have added to your Watch List. 7. Click on the Sell easy button of the respective instrument. 8. The Sell Shares page will open for the Share Investor account that you used to open your Watch List. 9. Complete the required fields. 10. Click on Sell. 11. A Quote will be displayed. 12. Check that this information is correct and, if necessary, click on Edit to make amendments. 13. Before you can continue you will be required to read and accept the Terms and Conditions regarding the quote. 14. Click on Confirm. 15. A results page will display the status of your request. 16. Click on Finish to complete the process. Online Banking User Guide 418 12.17 My Price Alerts Use this function to create and manage your own Price Alerts on instruments. By setting up a Price Alert you will be notified when the price that you have captured is reached. You can set up both a High Price Alert and a Low Price Alert, or just one of the two - it is not a requirement to set up both. In the event that you set up both a High Price Alert and a Low Price Alert per instrument, the prices captured for each one cannot be the same. You can have a separate Price Alert list for each Share Investor account that you have. Important Information about My Price Alerts • There is a cost associated with this service; please refer to the pricing guide. • Alerts will be sent to your inContact details; please ensure that these details are up to date. • All prices quoted are 15 minutes delayed. • There is a cost per alert that is triggered. • A Price Alert will automatically expire after 6 months. • If, for any reason, an instrument becomes not tradable after an alert was created, the alert will automatically be removed. The following functionality is available: • Add a Price Alert on an instrument • View instruments with Price Alerts • Maintain the Price Alert on an instrument • Remove the Price Alert on an instrument • Buy an instrument via your Price Alert list • Sell an instrument via your Price Alert list Online Banking User Guide 419 12.17.1 Add a Price Alert on an Instrument Use this function to add a Price Alert on an instrument. You can set up both a High Price Alert and a Low Price Alert, or just one of the two - it is not a requirement to set up both. In the event that you set up both a High Price Alert and a Low Price Alert per instrument, the prices captured for each one cannot be the same. • Have the required Instrument Names or Instrument Codes on hand as you will need to enter these. Add a Price Alert on an Instrument 1. Click on the Invest in Shares + Gold tab. 2. Your existing Share Investment Accounts will be displayed. 3. Click on the Name hyperlink of the required Share Investor account. 4. Your current Holdings for the selected account will be displayed on the My Portfolio sub-tab. 5. Click on the My Notifications sub-tab and select the My Price Alerts view. 6. The My Price Alerts view will be displayed. 7. Click on Add (+) in the table actions. 8. Click on the Instrument to my Price Alerts hyperlink. 9. Enter the Instrument Name or Instrument Code and click on Search. 10. All instruments matching your search criteria will be displayed. 11. Click on the Select easy button to add the respective instrument. 12. The Add Instrument to Price Alerts page will be displayed. 13. Select Yes to add the instrument to your Price Alerts. 14. Enter the High and/or Low price for the alert. 15. If you would like to add this instrument to your Watch List click on Yes. 16. Click on Add. 17. A confirmation page will be displayed. 18. Check that this information is correct and, if necessary, click on Edit to make amendments. 19. Before you can continue you will be required to read and accept the Terms and Conditions for this service. 20. Click on Confirm. Online Banking User Guide 420 21. A results page will display the status of your request. 22. Click on Finish to complete the process. 23. The selected instrument will now reflect on your My Price Alerts view. 12.17.2 View instruments with Price Alerts Use this function to view the Instruments that you have added to your Price Alerts. The following information is displayed per instrument: • Instrument Code / Name • Expiry Date of the Price Alert • Instruction High Price • Instruction Low Price View Instruments with Price Alerts 1. Click on the Invest in Shares + Gold tab. 2. Your existing Share Investment Accounts will be displayed. 3. Click on the Name hyperlink of the required Share Investor account. 4. Your current Holdings for the selected account will be displayed on the My Portfolio sub-tab. 5. Click on the My Notifications sub-tab and select the My Price Alerts view. 6. The instruments that you have added to your Price Alert list will be displayed on the My Price Alerts view. Online Banking User Guide 421 12.17.3 Maintain the Price Alert on an instrument Use this function to maintain the instruments on your Price Alert list. You can maintain the following: • Keep or delete the instrument on your Price Alert list • Amend the High and/or Low Price Alert • Add or remove the instrument on your Watch List Maintain the Price Alerts on an Instrument 1. Click on the Invest in Shares + Gold tab. 2. Your existing Share Investment Accounts will be displayed. 3. Click on the Name hyperlink of the required Share Investor account. 4. Your current Holdings for the selected account will be displayed on the My Portfolio sub-tab. 5. Click on the My Notifications sub-tab and select the My Price Alerts view. 6. The My Price Alerts view will display a list of the instruments that you have added to your Price Alert list. 7. Click on the Maintain easy button of the respective instrument. 8. The Maintain Instruction page will be displayed. 9. Make the required changes. 10. Click on Update. 11. A confirmation page will be displayed. 12. Check that this information is correct and, if necessary, click on Edit to make amendments. 13. Before you can continue you will be required to read and accept the Terms and Conditions for this service. 14. Click on Confirm. 15. A results page will display the status of your request. 16. Click on Finish to complete the process. Online Banking User Guide 422 12.17.4 Remove the Price Alert on an Instrument Use this function to remove the Price Alert from an instrument. Remove the Price Alert on an Instrument 1. Click on the Invest in Shares + Gold tab. 2. Your existing Share Investment Accounts will be displayed. 3. Click on the Name hyperlink of the required Share Investor account. 4. Your current Holdings for the selected account will be displayed on the My Portfolio sub-tab. 5. Click on the My Notifications sub-tab and select the My Price Alerts view. 6. The My Price Alerts view will display a list of the instruments that you have added to your Price Alert list. 7. Click on the Delete easy button of the respective instrument. 8. A confirmation page will be displayed. 9. Click on Yes to delete this instrument. 10. The My Price Alerts page will no longer display the deleted Price Alert. Online Banking User Guide 423 12.17.5 Buy an instrument via your Price Alert list Use this function to buy an instrument via your Price Alert list. The instrument will be bought using the account that you used to access your Price Alert list. Buy an Instrument via your Price Alert list 1. Click on the Invest in Shares + Gold tab. 2. Your existing Share Investment Accounts will be displayed. 3. Click on the Name hyperlink of the required Share Investor account. 4. Your current Holdings for the selected account will be displayed on the My Portfolio sub-tab. 5. Click on the My Notifications sub-tab and select the My Price Alerts view. 6. The My Price Alerts view will display a list of the instruments that you have added to your Price Alert list. 7. Click on the Buy easy button of the respective instrument. 8. The Buy Shares page will open for the Share Investor account that you used to open your Watch List. 9. Complete the required fields. 10. Click on Buy. 11. A Quote will be displayed. 12. Check that this information is correct and, if necessary, click on Edit to make amendments. 13. Before you can continue you will be required to read and accept the Terms and Conditions regarding the quote. 14. Click on Confirm. 15. A results page will display the status of your request. 16. Click on Finish to complete the process. Online Banking User Guide 424 12.17.6 Sell an instrument via your Price Alert list Use this function to sell an instrument via your Price Alert list. The instrument will be sold from the account that you used to access your Price Alert list. Sell an Instrument via your Price Alert list 1. Click on the Invest in Shares + Gold tab. 2. Your existing Share Investment Accounts will be displayed. 3. Click on the Name hyperlink of the required Share Investor account. 4. Your current Holdings for the selected account will be displayed on the My Portfolio sub-tab. 5. Click on the My Notifications sub-tab and select the My Price Alerts view. 6. The My Price Alerts view will display a list of the instruments that you have added to your Price Alert list. 7. Click on the Sell easy button of the respective instrument. 8. The Sell Shares page will open for the Share Investor account that you used to open your Price Alert list. 9. Complete the required fields. 10. Click on Sell. 11. A Quote will be displayed. 12. Check that this information is correct and, if necessary, click on Edit to make amendments. 13. Before you can continue you will be required to read and accept the Terms and Conditions regarding the quote. 14. Click on Confirm. 15. A results page will display the status of your request. 16. Click on Finish to complete the process. Online Banking User Guide 425 13. Forex Tab Online Banking User Guide 426 13.1 Forex Tab Overview Forex is the exchange of foreign currency which enables trade and transactions between countries. The Forex Tab functionality is grouped into the following sub-tabs: • Global Payments • Global Receipts • Travel • Trade • Help Online Banking provides a host of Forex functionality for your convenience. Important Information about the Forex Tab • Forex functionality is restricted to the Primary User. • For advice or general Forex queries please contact the Forex Help Line via phone or email. Online Banking User Guide 427 13.1.1 Forex Tab Functionality The following Forex functionality is available on online Banking: Global Accounts (Foreign Currency Accounts) • Resident South African citizens can Apply Online for a Global Account for themselves or their business in the following currencies: o Australian Dollar Account o British Pound Account o Euro Account o Indian Rupee Account o Chinese Renminbi Account o US Dollar Account Note: Currently, Outward Payments, Inward Payments and Transfers from/to a Renminbi account can not be performed using an Australian Dollar or Indian Rupee account. Global Payments • Make regular or once-off payments to a Global Recipient (International Beneficiary) • Add and maintain beneficiaries on your Global Recipients List • View your Global Payments transaction history Global Receipts • Take receipt of foreign currency payments from an international bank directly into your account. • View your Global Receipts transaction history. • Manage standing instructions for recurring inward payments. PayPal Services • Use your PayPal account to transact internationally and eliminate the risk of having to divulge any personal information. You can buy and sell products online and receive payments directly into your PayPal account, or use your PayPal account to send and receive money globally. • Top Up your PayPal Account in U.S. Dollars from your Online Banking account. • Withdraw available funds from your PayPal Account and transfer them into an account linked to your Online Banking profile. Online Banking User Guide 428 Travel (Only available to consumers) • View and Search Forex Rates • Use the Forex Order Calculator to calculate the funds required to perform an intended transaction • Purchase Foreign Currency • View Foreign Currency Order History Help • For your added convenience, a Help sub-tab has been added within the Forex tab to provide you with further information regarding the different types of Retail Forex Transactions that are available to South African citizens. Online Banking User Guide 429 13.1.2 Currency Indicators A currency indicator is an internationally recognised code used to identify a specific currency. The table below provides a summary of the Currency Indicators used on Online Banking: Country Currency Name Currency Symbol Currency Indicator Australia Australian Dollar A$ AUD Botswana Botswana Pula P BWP China Renminbi ¥ CNY European Union Euro € EUR India Indian Rupee Rs INR Lesotho Lesotho Loti L LSL Mozambique Mozambican Metical MT MZN Namibia Namibian Dollar $ NAD South Africa South African Rand R ZAR Swaziland Swazi Lilangeni E SZL Tanzania Tanzanian Shilling TZ TZS Zambia Zambian Kwacha ZK ZMK United Kingdom British Pound £ GBP United States United States Dollar $ USD Online Banking User Guide 430 14. Portfolio Tab Online Banking User Guide 431 14.1 Portfolio Management Overview At FNB Private Wealth Clients, we have an integrated approach to growing your wealth and the pillars of our wealth management service include: • Estate planning, wills, trusts and fiduciary related services • Wealth planning and advice • Investment solutions and management • Business ownership succession planning • Offshore structuring and investments Portfolio Management Portfolio Management is a professional service offering to Private Wealth Clients wishing to obtain exposure to local and offshore stock markets. Your portfolio manager is responsible for advising and guiding you on potential investment opportunities in companies, preference share instruments, commodities, exchange traded funds, and many other investment instruments that may be of interest. This specialist service is for hands-on clients who want to play a role in chartering their own financial course while making use of our experience and proven investment skills. Call us on 0861 362 720 or send an email to [email protected] for more information. Current Online Banking functionality for Wealth Management: General: • View Wealth Management Accounts and Products • Perform Account Maintenance • View details about other Wealth Management products Wealth Banking Accounts • Viewing and transacting Wealth Investment Products • Viewing only • Contact the Wealth Investment Team Wealth Life Insurance Products • Viewing only Online Banking User Guide 432 15. Insurance Tab Online Banking User Guide 433 15.1 Insurance Tab Overview The Insurance Tab functionality enables you to view and submit queries for both your long-term and short-term insurance products for the following providers: • • • Online Life FNB Life FNB Insurance Brokers The Insurance tab has two sub-tabs: 1. Life + Health 2. Home, Car + Valuables If you do not have existing Insurance products you can read more about the various options on the respective sub-tab and request a quote by clicking on the Get Quote button. Important Information about the Insurance Tab • All Insurance Tab functionality is restricted to the Primary User/Profile Owner. Online Banking User Guide 434 Life + Health Sub-Tab Online Banking User Guide 435 15.2 Life + Health Insurance Overview View a summary of your long-term insurance products for the following Service Providers: • Online Life • FNB Life The following functionality is available: • Get Quote • View Policy Details • Request Policy Assistance • Request Claim Assistance 15.2.1 Get Quote If you do not yet have a policy you can use this function to request a quote for Life + Health Insurance. Request a Quote: 1. Click on the Insurance tab and, if it is not already selected, click on the Life + Health sub-tab. 2. A new page containing product information will be displayed. 3. Click on the Get Quote action button. 4. A new page will display your Contact Details and Comments field; check that your Contact Details are correct and enter a short description of what it is that you require. 5. Click on the Submit action button. 6. A results page will display the status of your request. 7. Click on Finish to complete the request. Online Banking User Guide 436 15.2.2 View Policy Details Use this function to view the details of a specific policy. View Policy Details: 1. Click on the Insurance tab and, if it is not already selected, click on the Life + Health sub-tab. 2. A list of the policies linked to your profile will be displayed. 3. Click on the Policy Number hyperlink of the respective policy. 4. A new page will display the Policy Details. 5. Click on Cancel to return to the Life + Health landing page. 15.2.3 Request Policy Assistance Should you require policy information or, if you would like to amend your existing policy details, you can submit a 'Call Me Back' request Request Policy Assistance: 1. Click on the Insurance tab and, if it is not already selected, click on the Life + Health sub-tab. 2. A list of the policies linked to your profile will be displayed. 3. Click on the Policy Number hyperlink of the respective policy. 4. A new page will display the Policy Details. 5. Click on the More Options Menu and then select the Policy Assistance option. 6. A Policy Assistance capture page will be displayed. 7. Enter the details of your query in the Comments field provided. 8. Click on Submit. 9. A results page will display the status of your request. 10. Click on Finish to complete the request. Online Banking User Guide 437 15.2.4 Request Claim Assistance Should you require claim information or, if you would like to submit a claim, you can submit a 'Call Me Back' request Request Claim Assistance: 1. Click on the Insurance tab and, if it is not already selected, click on the Life + Health sub-tab. 2. A list of the policies linked to your profile will be displayed. 3. Click on the Policy Number hyperlink of the respective policy. 4. A new page will display the Policy Details. 5. Click on the More Options Menu and then select the Claim Assistance option. 6. A Claim Assistance capture page will be displayed. 7. Enter the details of your query/claim in the Comments field provided. 8. Click on Submit. 9. A results page will display the status of your request. 10. Click on Finish to complete the request. Online Banking User Guide 438 Home, Car + Valuables Sub-Tab Online Banking User Guide 439 15.3 Home, Car + Valuables Insurance Overview View a summary of your short-term insurance products for the following Service Providers: • FNB Insurance Brokers The following functionality is available: • Get Quote • View Policy Details • Request Policy Assistance • Request Claim Assistance 15.3.1 Get Quote If you do not yet have a policy you can use this function to request a quote for Home, Car + Valuables Insurance. Request a Quote: 1. Click on the Insurance tab and then click on the Home, Car + Valuables sub-tab. 2. A new page containing product information will be displayed. 3. Click on the Get Quote action button. 4. A new page will display your Contact Details and Comments field; check that your Contact Details are correct and enter a short description of what it is that you require. 5. Click on the Submit action button. 6. A results page will display the status of your request. 7. Click on Finish to complete the request. Online Banking User Guide 440 15.3.2 View Policy Details Use this function to view the details of a specific policy. View Policy Details: 1. Click on the Insurance tab and then click on the Home, Car + Valuables sub-tab. 2. A list of the policies linked to your profile will be displayed. 3. Click on the Policy Number hyperlink of the respective policy. 4. A new page will display the Policy Details. 5. Click on Cancel to return to the Home, Car + Valuables landing page. 15.3.3 Request Policy Assistance Should you require policy information or, if you would like to amend your existing policy details, you can submit a 'Call Me Back' request Request Policy Assistance: 1. Click on the Insurance tab and then click on the Home, Car + Valuables sub-tab. 2. A list of the policies linked to your profile will be displayed. 3. Click on the Policy Number hyperlink of the respective policy. 4. A new page will display the Policy Details. 5. Click on the More Options Menu and then select the Policy Assistance option. 6. A Policy Assistance capture page will be displayed. 7. Enter the details of your query in the Comments field provided. 8. Click on Submit. 9. A results page will display the status of your request. 10. Click on Finish to complete the request. Online Banking User Guide 441 15.3.4 Request Claim Assistance Should you require claim information or, if you would like to submit a claim, you can submit a 'Call Me Back' request Request Claim Assistance: 1. Click on the Insurance tab and then click on the Home, Car + Valuables sub-tab. 2. A list of the policies linked to your profile will be displayed. 3. Click on the Policy Number hyperlink of the respective policy. 4. A new page will display the Policy Details. 5. Click on the More Options Menu and then select the Claim Assistance option. 6. A Claim Assistance capture page will be displayed. 7. Enter the details of your query/claim in the Comments field provided. 8. Click on Submit. 9. A results page will display the status of your request. 10. Click on Finish to complete the request. Online Banking User Guide 442 16. Merchant Services Online Banking User Guide 443 16.1 Merchant Services Overview The Merchant Services tab provides you (the Merchant) with an overview of the devices that are linked to your Online Banking Profile. Merchants can view and manage their transactions from the Merchant Services Tab. Important Information about the Merchant Services Tab • The Merchant Services Tab and all of it’s functionality is restricted to the Primary User/Profiile Owner of a Business Profile. The following functionality is available: • View Transaction History • View Transaction Details for each transaction; • View Receipts • Search for specific Transactions • View and Print Statements 16.2 Merchant Services - View Transaction History Use this function to view the Transaction History for a specific Device (Terminal ID). View Transaction History: 1. Click on the Merchant Services Tab. 2. The Merchant ID/s linked to your profile will be displayed. 3. Click on the Merchant ID hyperlink of the respective group that you would like to view. 4. The list of Terminals linked to the respective Merchant ID will be displayed. 5. Click on the Terminal ID hyperlink to view the transactions linked to that device. 6. The Transaction History for the selected device will be displayed. 7. You can Export/Download the Transaction History for a specified period by clicking on Export and then completing the From and To Date fields. 8. Click on Send to have the export emailed to you. 9. Click on Finish to complete the process. Online Banking User Guide 444 16.3 Merchant Services - View Transaction Details Use this function to view the details of a specific transaction. View Transaction Details: 1. Click on the Merchant Services Tab. 2. The Merchant ID/s linked to your profile will be displayed. 3. Click on the Merchant ID hyperlink of the respective group that you would like to view. 4. The list of Terminals linked to the respective Merchant ID will be displayed. 5. Click on the Terminal ID hyperlink to view the transactions linked to that device. 6. The Transaction History for the selected device will be displayed. 7. Click on the Date & Time hyperlink of the respective transaction to view the details. 8. Click on Back to return to the Transaction History for the selected device or click on View Receipt to view the Transaction Receipt. 16.4 Merchant Services - View Receipts Use this function to view the receipt for a specific transaction. The receipt can be forwarded via Email or SMS. View Transaction Receipt: 1. Click on the Merchant Services Tab. 2. The Merchant ID/s linked to your profile will be displayed. 3. Click on the Merchant ID hyperlink of the respective group that you would like to view. 4. The list of Terminals linked to the respective Merchant ID will be displayed. 5. Click on the Terminal ID hyperlink to view the transactions linked to that device. 6. The Transaction History for the selected device will be displayed. 7. Click on the View Receipt easy button to view the Transaction Receipt for the respective transaction. 8. Enter Email or SMS details and click on Send to forward the Receipt, alternatively, click on Cancel to return to the Transaction History. 9. A confirmation page will display the Receipt Sending Details. 10. Check that this information is correct and, if necessary, click on Edit to make amendments. 11. Click on Confirm to proceed with your request. 12. A results page will display the status of your order. 13. Click on Finish to complete the process. 16.5 Merchant Services - Search Transactions Online Banking User Guide 445 Use this function to search for a specific transaction. The search will be performed across all Terminal IDs linked to a Merchant ID. There are two search options: • Quick Search • Advanced Search A search can be performed on the following search criteria: • Card number • Sequence number • Batch number Search Transactions - Quick Search: 1. Click on the Merchant Services Tab. 2. The Merchant ID/s linked to your profile will be displayed. 3. Click on the Merchant ID hyperlink of the respective group that you would like to search. 4. The list of Terminals linked to the respective Merchant ID will be displayed. 5. Click on the Terminal ID hyperlink to view the transactions linked to that device. 6. The Transaction History for the selected device will be displayed. 7. Click on the Search hyperlink in the table actions. 8. Enter the required keyword/s and click on Search. 9. The results of your search will be displayed. Search Transactions - Advanced Search: 1. Click on the Merchant Services Tab. 2. The Merchant ID/s linked to your profile will be displayed. 3. Click on the Merchant ID hyperlink of the respective group that you would like to search. 4. The list of Terminals linked to the respective Merchant ID will be displayed. 5. Click on the Terminal ID hyperlink to view the transactions linked to that device. 6. The Transaction History for the selected device will be displayed. 7. Click on the Search hyperlink in the table actions and then click on the Advanced Search hyperlink below the capture field. 8. Complete the required search fields and then click on search. 9. The results of your search will be displayed. Online Banking User Guide 446 17. Contact Us Online Banking User Guide 447 Contact Us Need to Contact Us? Simply click on the Contact Us hyperlink at the op of any page to view the contact details for the following business areas: • Your Personal Banker • FNB Online Banking - Call Centre • Complaints Resolution For your convenience, the call centre numbers for various business areas are also listed here, e.g. Credit Card, eBucks, Forex etc. Compliments, complaints or suggestions about Online Banking? We want to hear from you! Simply complete the online form and click on Submit. A representative from the respective business area will contact you. Online Banking User Guide 448

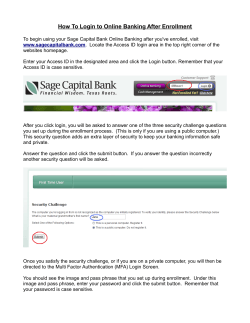

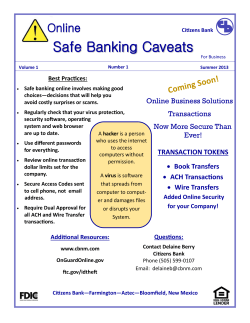

© Copyright 2026