
Hershey's Kiss Rosebud Favor
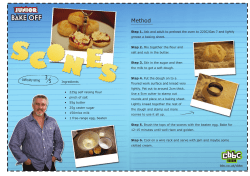
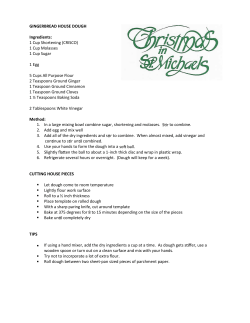
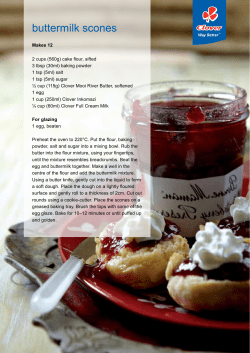
Hershey's Kiss Rosebud Favor
Materials needed:
Hershey's Kisses
Double-sided tape (optional)
Colored cellophane, cut into 4 1/2 inch squares
18-guage florist wire (cut in two equal lengths with wire cutters to get more roses per pack,
or make long-stemmed rosebuds if you desire), green chenille stem, or lollipop stick
Green florist tape
Silk rose leaves (optional)
Ribbon (optional)
Tools needed:
Scissors (to cut the cellophane into squares)
Wire cutters (to cut the wires in half, or trim the rose stems after they are made)
Instructions:
1. Optional first step: Using a small square of the double-sided tape, stick two foil-wrapped
Hershey's Kisses together, bottom to bottom. (This isn't strictly necessary, but it helps some
folks handle the kisses while wrapping.)
2. Take a four 1/2-inch square of cellophane. Place the tip of one of the kisses in the center of the
square, then wrap the cellophane around both kisses, gathering the corners together around the
tip of the other kiss. Wrap the gathered corners together as tightly as you can without tearing
the florist tape.
3. Insert a florist wire into the gathered cellophane until it meets the tip of the Hershey's Kiss.
(DO NOT push the wire into the chocolate! Many people have written to me to tell me that
this makes the rosebud easier to make, but there is a good reason not to do this. Florist wire is
not "food safe," and toxic substances from the paint and metal of the wire can contaminate the
chocolate and make it unsafe to eat. Please be sure that when you make your rosebuds that the
wire and the chocolate do not actually come in direct contact. An alternate to using wire is to
use wood/bamboo skewers, which can be safely inserted into the kiss...many thanks to Kim
for suggesting this!)
4. Tape the "rosebud" onto the wire with the florist tape. Continue taping down the length of the
wire until it is completely covered.
5. Optional: Tape the silk rose leaves onto the stem, and/or decorate with a ribbon bow.
Marshmallow People
Decorate large marshmallows as different "people" or "animals" by using pretzel sticks as hands,
legs or hair. Add colored string candy and other hard candy to complete the art work. Put
together with marshmallow cream.
Graham Cracker Mosaics
Graham crackers make fantastic bases in which to build edible mosaics, and frosting or creamy
peanut butter are the perfect sticky substances in which to build them. Fill a muffin tin with
edible mosaic decorations of your choice (dried fruits, fruit gummies, cereal, candy corn, gummy
bears, M&Ms, etc.), and let your kids use their imagination to make an edible creation.
Licorice String Weaving
Edible craft projects with licorice strings are a great way to teach kids how to braid and weave.
Provide kids with strings of licorice, and demonstrate how to make braids and creatively woven
designs. Buy various colors and flavors of licorice strings, and use your imagination to make
candy rings, bracelets, and edible weavings.
Fruit Roll-up Flowers
You’ll need:
various colors of fruit roll-ups,
craft scissors (cleaned for working with food)
green licorice “vines”
(Alternately you can use decorative-edge scissors for fancier edible flowers)
Cut strips of fruit roll-ups, approximately 1-½ inches wide. Loosely roll them up, and pinch the
bases to create beautiful blooming flowers. Place green licorice vines beneath the blooms, and
cut out fruit roll-up leaves to make complete blooming flowers.
Layer various flavors to make impressive multicolored edible blooms. The flowers can be used
to top cupcakes, birthday cakes, or kids can eat them one by one after making an entire bouquet.
Tootsie Roll Shapes
Tootsie rolls that have been softened and kneaded with warm hands can be formed into all kinds
of fun and interesting edible shapes, and they come in a number of flavors and colors.
Tootsie Rolls can also be kneaded and pressed into small candy molds and used to top frosted
cakes and other desserts.
Jack-O-Lantern Cheese Ball
2 c. shredded cheddar cheese
4 oz. package cream cheese, softened
1/4 c. solid pack pumpkin
1/2 c. pineapple preserves
1/4 tsp. ground allspice
1/4 tsp. ground nutmeg
1 pretzel rod, broken in half
Decorations: Dark rye bread, red pepper, black olive slices, parsley sprigs
Assorted crackers
Beat cheeses, pumpkin, preserves and spices in a medium bowl until smooth. Cover; refrigerate
2 to 3 hours or until cheese is firm enough to shape. Shape mixture into a round pumpkin; place
on serving plate. Using knife, score vertical lines down pumpkin. Place pretzel rod in top for
stem. Cut 2 small triangles for the eyes. Small triangle of red pepper for nose. Slice olives slices
in half for the mouth. Cover loosely; refrigerate until serving time. Serve with crackers.
Rock Candy
Supplies
1 Glass jar or drinking glass
1 Piece of cotton string
1 Pencil or stick
1 Paper clip
1 Food coloring (optional)
1 c Water
2 c Sugar
Additional sugar
How To Make It:
1. Tie a short piece of cotton string to the middle of the pencil or stick.
2. Attach a paper clip to the end of the string for a weight.
3. Moisten the string very lightly, and roll in a bit of sugar (this will "attract" the sugar
crystals from the syrup to the string).
4. Place the pencil or stick over the top of the glass or jar with the string hanging down
inside.
5. Heat the water to boiling, and dissolve the 2 cups of sugar into it. For the biggest crystals
FAST, heat the sugar-water solution a SECOND time, and dissolve as much additional
sugar as you can into it. Let mom and dad do this part
6. Add a few drops of food coloring to the solution if desired.
7. Pour the solution into the prepared glass or jar and leave undisturbed for a couple of days.
Three Rice Mice
Combine 1/4 cup leftover cooked rice with 1 teaspoon cream cheese and 1/2 teaspoon plain
yogurt (or use 1 teaspoon whipped cream cheese instead of the cream cheese and yogurt combo).
Stir in a pinch of salt to taste.
With slightly dampened hands, roll the mixture into 1 1/2-inch balls. Now add the features:
green-pea eyes, corn-niblet noses, chive or cheese-stick tails. For ears? Try olives, cheese,
radishes…
Chocolate Spiders
12 ounces Twizzlers, chocolate flavor
4 ounces milk chocolate cany melts
Cut twizzlers into 1 1/2" pieces. Slice each piece in half lengthwise. On waxed paper place 4 legs
(pieces) on each side and then drop 1 teaspoon melted candy in the middle for the body. Use a
toothpick to smooth uniform circle and connect all candy pieces. Cool completely before
removing from the waxed paper
Ants on a Log
Celery
peanut butter
raisins
Wash celery and cut up into 4 inch lengths, spread peanut butter on celery and put several raisins
on each one.
Ants on a Toilet Seat
1 apple
2 Tbsp. Peanut butter
Raisins
Core an apple and slice into 5 pieces crosswise. Spread each slice with peanut butter and sprinkle
with raisins.
Dirt Dessert
2 small pkg. instant pudding
3 1/2 cup milk
1 tub frozen whip topping
1/2 cup margarine
8 oz. cream cheese
1 cup icing sugar
1 small bag Oreo cookies (crushed)
12 gummy worms
Mix pudding and milk until thick. Add whip topping, set aside. In another bowl cream together
cream cheese, icing sugar, margarine. till smooth. Then add to pudding mixture, beat on medium
speed until well blended. Prepare in a flower pot, alternating, starting with pudding mixture,
cookie crumbs, worms. End with cookie crumbs so it looks like dirt in the pot. Refrigerate 1 or 2
hours. Insert some plastic flowers so it looks like the flowers are growing in the pot.
Squish! Squash! Ice Cream!
For each Cub Scout:
¼ cup milk
¼ cup heavy whipping cream
¼ cup granulated (white) sugar
¼ teaspoon vanilla extract
1 clean quart-size resealable bag
2 cups crushed ice
½ cup table salt
1 clear gallon-size resealable bag
1 pair mittens/gloves (optional)
1 bowl or cup
Team up your group into two Cubs each. Have one Cub hold the quart-size bag while the other
measures the milk, cream, sugar, and vanilla into it. Show them how to close the bag so excess
air is out. Then the partners switch and repeat the process. Each Cub then scoops about 2 cups of
crushed ice into a gallon-size bag, sprinkles it with the salt, and places the full quart-size bag
inside. Squeeze out the air, seal the big bag and the fun begins. The boys may choose to wear
gloves or mittens or have them close by in case their fingers get too cold. Squish and Squash the
bags (knead), turning them over occasionally to work the ingredients together and distribute the
cold throughout. Have the Cubs observe how the ingredients change while they knead them. It
takes about 10 minutes of active manipulation. Pour out the salt-water ice, rinse the outside of
the quart-size bag with cold water to remove the salty residue, scoop out or pour the ice cream
into a cup or bowl. Add sprinkles, chocolate chips, fruits, syrups, or any other favorite topper and
enjoy the Squish! Squash! Ice Cream!
Let’s Eat Wheels
Materials needed:
Twinkies brand desert cakes
Toothpicks or uncooked spaghetti
Oreo brand cookies
Miniature marshmallows
Red Hots brand candies
Vanilla wafers
Various colors tube frosting
Open the Oreos and scrape the frosting from the center. Poke small holes through the centers of
the cookie halves. Insert toothpicks or uncooked spaghetti through the Twinkie front and back,
about half way up, to form axles. Put the Oreo wheels onto the axles. Using frosting for glue,
attach Red Hots for rear tail lights, miniature marshmallows squished flat and "glued" onto
vanilla wafers for front headlights. Embellish further as desired with frosting. When eating,
watch out for those toothpicks/spaghetti.
Chocolate Pretzel Spider
Stick two oreo cookies together with chocolate frosting. Make 8 curved
legs by breaking bow-tied pretzels, and attach them around the middle of
the spider by sticking them into the chocolate frosting. Use M & M's for
eyes on the front, 'glued' with frosting.
As a variation, use sandwich crackers, instead of sandwich cookies,
stuck together with peanut butter.
Bugs On A Log
Celery
Peanut butter or cottage cheese
Raisins, sunflower or sesame seeds
Stuff celery with the peanut butter or cottage cheese. Sprinkle with raisins or seeds and enjoy.
Caterpillar and Butterfly
Common ingredients for both:
Gummy Lifesavers
Taffy
Frosting
Gumdrops
Needed for just butterfly
String Licorice for the butterfly's tongue and antennae
Gum drop fruit slices
Needed for the Caterpillar:
Coated licorice candy
Dampen gummy lifesavers, and press them together to form the body. Roll a piece of taffy into a
ball for the head. Add frosting for the eyes and a gumdrop for the tail. Use coated licorice candy
for the caterpillar's legs and slices of string licorice for the butterfly's tongue and antenna. Use
gumdrop fruit slices for the butterfly wings.
Centipede Sandwich
Ingredients:
Long loaf of bread, cheese slices, slices sandwich meat, olives, cherry tomatoes, lettuce,
mayonnaise, toothpicks, Small carrots cut in half lengthwise
Slice a long loaf of bread crosswise almost to the bottom, and fill in between the slices with
lettuce, cheese and sliced meats. For the legs, slice small carrots in half lengthwise and cut V's at
one end for toes. Tuck the legs under the body.
For the eyes, cut two thin slices of carrot about 2 inches long. Push them into the front of the
loaf. Slip jumbo black olives over the tops of the carrot slices.
Set a row of cherry tomatoes along the top of the sandwich, holding them in place with
mayonnaise or toothpick. Serve with mayonnaise on the side.
Edible Campfire
Ingredients:
1 napkin
1 small paper cup of water or juice
Miniature marshmallows
Cheetos or fat pretzels (fuel - big logs)
Fritos or skinny pretzels (kindling - to keep the fire growing)
Shredded coconut (tinder to make the fire started)
Candy corn or Red Hots (flames)
Spread the napkin (prepare clearing for fire). Place cup of liquid near edge of napkin (for fire
safety). Lay the marshmallows in a circle for fire ring. Arrange the fuel, the kindling and the
tinder in a proper fire-lay formation (teepee or log cabin…). When participants have built a
proper fire, sprinkle red
hots or candy corn on to ‘light’ it.
Twinkie Space Shuttle
Twinkies
Fruit leather
Gumdrops
Toothpicks
Stand Twinkies on end. Cut fruit leather into a triangle shape and cut slits on either side toward
the bottom of the Twinkies long enough to put the triangles in. Attach gumdrops to the top of the
Twinkies with a toothpick.
Mud Balls
Ingredients:
½ cup powdered sugar
2 teaspoons cream cheese
½ to 1 tablespoon cocoa
1 tablespoon margarine
1 to 3 drops vanilla
1 sealable sandwich bag
Directions:
Place all ingredients in the sealable bag and squeeze out all the air. Squish and squash the bag
until all the ingredients are well mixed and there is a creamy consistency. Add any flavoring or
other stuff like raisins, M & Ms, nuts, peanut butter, etc. Each bag makes a serving for one.
Chocolate Graduation Caps
Supplies:
Chocolate covered graham cracker cookies
Miniature Reese's cups
Fruit Roll Up
Unroll Fruit Roll up. Cut strips about 1/8 inch by 1 1/2 inch. If you like, you can cut a V shape
in one in like a ribbon. This is the tassel. Press onto the center of the cookie top (can use
chocolate frosting to adhere). Press cookie onto the bottom side of the Reese cup.
Easy Ice Cream
1 (14 oz) can Eagle Brand Sweetened Condensed Milk
2/3 cup chocolate flavored syrup
2 cups (1 pint) whipping cream
Put into small cleaned coffee can, put lid on. Put down inside a 3 LB coffee can. Put ice and
rock salt around it. Put lid on large can. Have Cubs roll can back and forth between them,
stopping periodically to drain water out and put more ice and rock salt in. Continue until firm.
Cat Cookies
You will need: Oreo Cookies, Candy Corn, 674529 Licorice, White Frosting, Green and Red
M&M's.
Spread the frosting on the cookie. Place the two green M&M'S on as the eyes. Place the red one
on as the nose. Cut the licorice into small pieces (about one inch) and place them on as
whiskers. Put a small amount of the frosting on the bottom of (2) candy corns and place them on
the top of the cookie as the ears.
Lollipop Ghosts
You will need: Tissue Paper or kleenex, Lollipop, String.
Take a tissue paper and cover the top of a tootsie pop and tie a string around the "head" of
Ghost! Draw scary face with fine tipped marker.
Ghost Cookie
You will need: Peanut Shaped Cookies, White Frosting (or Marshmallow Fluff), Chocolate
Chips.
Using peanut shaped cookies, spread with white frosting or marshmallow fluff. Add chocolate
chips for eyes and nose.
Sugar Cone Cornucopias
These miniature horns of plenty also double as edible name cards
Materials:
Sugar cones, ribbon, decorator’s icing (in tubes), fruit-shaped candies or cereal
Directions:
Tie a ribbon around the opening of each sugar cone. With the tube of store-bought decorator’s
icing, carefully squirt the name of your guest along the side of the cone. Place the cone on a
saucer. Then fill the cone with candies, such as raspberry jellies, fruit-shaped fruits, marzipan
fruits, candy corn and citrus slices. You can also use fruit-shaped cereal, which is much
less expensive. Let the goodies spill over the opening and around the cone.
Edible Landfill
Materials
Base layer:
Plastic cup or container"
1 tsp. Oreo cookie crumbs
2 tsp. vanilla pudding
Two 4" Twizzlers®
One shortbread cookie
Municipal waste (middle layer):
1 tsp. Trix® cereal
2 tsp. Rice Krispies® cereal
1 tsp. white chocolate chips
l tsp. butterscotch chips
Six mini marshmallows
Four chocolate rings
1 tsp. mini M&M's®
Chocolate syrup
Final Cap (top layer):
2 tsp. vanilla pudding
1 tsp. Oreo cookie crumbs
1 tsp. green sprinkles
Two 4" chocolate licorice pieces
*Designer used clear Solo® cups.
Instructions:
Add each ingredient in order listed to plastic cup. The layers of a landfill are described below:
Base layer:
Layer 1 (cell): Landfills range in size from four to six acres of land. The area, or cell, must be
free of debris and able to hold the weight of the landfill mass. This is represented
by the plastic cup.
Layer 2: This layer is three feet of clay which prevent fluids from seeping out of the landfill.
This is represented by pressing 1 tsp. of Oreo cookie crumbs firmly into bottom of
cup.
Layer 3: This layer is a thin liner of plastic which is designed to prevent leaks in the ground
beneath the landfill. This is represented by adding 2 tsp. of pudding.
Layer 4: These are pipes that make the leachate collection system. They collect leachate which
is a liquid that is squeezed out of the garbage leachate then travels to a treatment
pond. This is represented by laying two Twizzlers across pudding.
Layer 5: This is a drainage layer that protects the pipes from being damaged. This is
represented by laying the shortbread cookie on top of the Twizzlers. (Note: No
trash has been added yet. Layers 1-5 are designed to protect the environment
by disposing of garbage safely.)
Municipal waste (middle layer):
Municipal solid waste is all of the garbage from peoples' homes and businesses.
Layer 6: This layer is composed of the following:
Organic waste (Trix) is yard waste and food scraps.
Paper (Rice Krispies) consists of cardboard, newspaper, and, packaging products.
Plastics (white chocolate chips) include milk and soda bottles and food
containers.
Glass (butterscotch chips) range from bottles to old building windows.
Metals (mini marshmallows) include tin and aluminum cans and appliances or
sheet metal.
Tires (chocolate rings) include those from cars and trucks.
Other garbage (mini M&M's) contains old toys, shoes, and clothing.
This is represented by adding 1 tsp. Trix, 2 tsp. Rice Krispies, 1 tsp. white chocolate chips, l
tsp. butterscotch chips, six mini marshmallows, four chocolate rings, and 1 tsp. mini M&M's.
Spread evenly.
Layer 7: This layer is the leachate that forms. It seeps through all of the layers to the pipes which
filter the liquid out of the landfill. This is represented by squirting chocolate syrup around the
edge of the cup.
Final Cap (top layer):
This outermost layer prevents rainwater from entering the landfill and keeps gases from
leaving and polluting our air.
Layer 8: This layer is the top plastic barrier that seals the landfill. This is represented by
adding 2 tsp. of pudding.
Layer 9: This layer is five to seven feet of soil. This is represented by sprinkling 1 tsp. of Oreo
cookie crumbs onto pudding.
Layer 10: This layer is grass which prevents soil erosion. This is represented by adding 1 tsp.
of green sprinkles.
Gas collectors. These pipes are placed in the closed cell and act as methane gas collectors.
They prevent fires by collecting the gas produced from decaying trash. This is represented by
inserting two chocolate licorice pieces vertically into the cup.
Wagons
Ingredients:
2 Celery stalks
12 Toothpicks
16 Carrot rounds
1/2 c Peanut butter; cheese spread or ranch dressing
20 Raisins
DIRECTIONS:
Cut celery stalks crosswise into two pieces each, about 3" long. Push toothpicks through sides of
celery to form axles for four wheels. Fill celery wagon with peanut butter, cheese or dressing.
Stick carrot rounds onto ends of toothpicks. Cover tips with raisins. Stick a toothpick into the end
of the celery at a 45-degree angle to form wagon handle. Cover tip with raisin.
Circus Carousel
Take two large sugar cookies. Cover one side of each with frosting. Insert thick pretzel sticks
around the rim on each frosted side, Arrange two or three animal crackers between the pretzels to
finish off your edible circus carousal.
Candy Cane Reindeer
Need –
Candy Cane
Brown or green pipe cleaner
Red pom pom
Wiggly eyes
Directions –
Cut pipe cleaner in half. Cut one half in half again. Twist pipe cleaners to from antlers.
Glue on eyes and nose.
DON'T UNWRAP PLASTIC FROM AROUND CANDY CANE.
Fluttering Butterflies
Materials: gumdrops, small pretzels, string licorice, small candies, frosting, knife
For the body, cut two slits in a gumdrop. For the wings, press 1 pretzel into each slit.
Use string licorice for antennae. Decorate the butterfly with assorted candy.
Use frosting to “glue” the candy to the butterfly.
Banana Rocket
Ingredients:
Banana
Red or green apple slices and chunks (do not peel)
Canned whipped topping
Red sugar sprinkles
Directions:
Cut 2 inches off the end of a banana and discard or eat. Cut banana in half lengthwise.
Lay each piece flat side down on a blue paper plate. Lay 2 apple slices near the bottom of each
banana with one end touching the banana and the other end pointing down (fins).
Place small apple chunks down the banana for windows.
Right before serving, put the whipped cream at the bottom of the rocket to look like smoke.
Add red sprinkles on top of the whipped cream to add color, if you like.
Before serving, put little star stickers on the plate to make it look like space.
Edible Magic Wand
INGREDIENTS:
Pretzel Rods
White Chocolate Chips or Almond Bark
Colorful Sugar or Star-Shaped Sprinkles
PREPARATION:
Start out by melting some of the white chocolate in the microwave in a small bowl. How much
you melt will depend on how many wands you are making. While you are waiting for the
chocolate to melt completely, line a cookie sheet with wax paper.
Once the chocolate is melted, make the wands by dipping both ends of a pretzel rod into the
chocolate to coat about 1-inch in white. Lay the pretzel rod on the wax paper on the cookie sheet
and sprinkle right away with your colored sugar or star sprinkles. Set aside, do not refridgerate,
until the chocolate has hardened.
Instead of white chocolate or almond bark, you can also use white frosting; however, these are
better if eaten immediately.
Boiled Egg Easter Bunnies
Supplies:
one hard boiled egg (makes two bunnies)
chives
two small triangles of red pimento (taken from a stuffed olive), red
pepper or radish for the noses
six small baby carrots
one teaspoon of mayonnaise for each bunny tail
knife
toothpick
serving plate
Instructions:
1. Boil an egg and let it cool. Peel, cut in half lengthwise, and place both sides on your serving
plate.
2. The slimmer part of the egg (the more pointed end) will become the bunny's face. Begin
assembly by making a small hole for the nose triangle in the center of the face area. You can
use a toothpick or the tip of a paring knife for this step. Insert the small red triangle of
pimento (or pepper or radish).
3. Cut two tiny chive pieces (they should be round and hollow). These will be the eyes. Make
two small holes just above the nose where the eyes should go and insert one small chive round
in each eye area.
4. Cut six pieces from the chives to make whiskers. These should be about one a half inches
long, or maybe a little less - it depends on how long you wish the whiskers to be, and how
much you like chives!
Start with the bottom whisker on each side of the nose and work your way up until you have
inserted all six whiskers, three on each side.
Again, cut a small hole, or use a toothpick to create a small hole for the whisker, then insert a
length of chive at the angle you wish it be. You can point the whiskers up, down or straight, so
each bunny you make can have a slightly different look.
5. Cut the tip from a baby carrot, then cut it in half lengthwise for the ears. Cut the bottom
section of each carrot ear into a point. Cut two slits for the ears, just above the eyes, and insert
one carrot ear into each slit, with the flat, cut side pointing forward.
6. If desired, you can give the bunny some carrot paws. (Moms will like the fact that this puts
more veggies on the plate!) To make the front paws, simply cut the tip of a baby carrot in half
lengthwise, gently lift the front of the bunny with the knife, and insert the paws underneath.
The back paws are made in the same way, but are slightly longer. These should be carefully
inserted under each side of the bunny.
7. Finally, put a dollop of mayonaise at the back of the egg bunny to make a tail. You may need
to sculpt the mayonaise with a clean finger or spoon to make it look rounded like a bunny tail.
Wipe any excess off the plate with a paper towel.
Candy Cane Reindeer
What you'll need:
Candy cane (I use 6 inch, individually wrapped)
Ribbon - 8" piece
2 wiggle eyes (we used the 5 mm size)
Red or brown pom-poms (very small)
2 (18") pipe cleaners (craft kind - use any color but we liked gold/metallic)
Tacky glue
How to make it:
Leave the wrapping on the candy cane (so the kids can eat it later). Glue eyes on rounded face of
the candy cane. Glue red pom-pom on the face for a nose. Tie ribbon into a bow on the straight
part of the candy cane. Cut one of the pipe cleaners in half. Use the full pipe cleaner and wrap it
around the crook of the candy cane (both sides equal) to make the beginning part of the antlers.
Use one of the cut pipe cleaner pieces to wrap around the left antler and repeat on the right side.
Manipulate the pipe cleaners to look like antlers.
Candy Airplane Ornament
What you'll need:
One stick of flat (Wrigley's) gum
One package of Smarties candies
Two Lifesavers
Rubber band
How to make it:
1. Place the gum (wings) perpendicular on the Smarties (plane body).
2. Use a rubber band to loop through one Life Saver (wheel) over the gum, through another
Life Saver (wheel) and under the Smarties.
Puffy the Polar Bear
CRAFT MATERIALS:
Toothpicks
2 large marshmallows
6 mini marshmallows
2 white jelly beans, halved
Royal icing
1 brown mini M&M
Scissors
Black shoestring licorice
1. Using a toothpick, attach the two large marshmallows together to make Puffy's body and head.
2. For each arm, thread two mini marshmallows onto one end of a toothpick and poke the other
end into the body. For each leg, do the same, but use one marshmallow for the leg and one half
of a white jelly bean for the foot (so the bear will stand up more easily).
3. Using royal icing, glue on two jelly bean halves for ears and the M&M for a nose. Snip two
short licorice lengths and glue them in place for the eyes.
Candy Race Car
What you'll need:
Low temp hot glue gun
Ribbons or yarn for hanging
1 large package of gum (1 1/4" x 3" x 3/4")
4 round wrapped candies (we used peppermints)
1 shiny wrapped candy (about 1 1/4" long)
2 mini chocolate bars (1 1/2" x 1" x 3/8")
How to make it:
1. Glue the shiny candy to the front of the gum pack as a bumper. Wrap the extra wrapping
around the edges of the pack.
2. Glue the four round candies on as wheels.
3. Glue the one candy bar o the back half of the car, allowing it to stick off the back by a 1/4
of an inch or so.
4. Glue the other candy bar across the back of that candy bar, having at least half of it
extending past the edge of the lower bar. Look at the illustration and experiment.
Tips:
When it comes to choosing candies, think about shape. Go to your local store and look for
rectangles, circles, shiny wrappings, etc. You can find small packages of gum in a large multipack of gum. You can also remove the gum sticks from the package and glue them together to
create a small sized pack of gum.
Don't be afraid to combine several candies (like small Starburst squares) to make larger shapes.
This is an exercise in creativity and these instructions are just to get you started. Experiment with
your candies and try them different ways before you begin gluing. Most of all, have fun!
Popcorn Ball Turkey
Please note: There are a couple of nonedible items in this recipe :)
Popcorn balls (see recipe below)
Peanut butter cup miniatures (head)
Butterscotch chips (beak)
Cinnamon tic tacks (gobbler)
Small pretzels (feet)
Decorator frosting
Colored paper
Toothpicks
Scissors
Have an adult help with the preparation of
the popcorn balls
Peanut Butter Popcorn Balls
3 quarts popped corn
1/2 cup brown sugar
1/2 cup light corn syrup
1/2 cup chunky peanut butter
1/2 tsp vanilla
1/8 tsp salt
Combine brown sugar and corn syrup in a saucepan and heat to a rolling boil, stirring
constantly. Remove from heat. Stir in peanut butter, vanilla and salt until well blended.
Pour over popcorn, stirring until well coated. Shape into balls.
Turkey Instructions:
Cut several feathers from colored papers. Poke toothpicks in and out through the bottom of
each feather leaving half the toothpick sticking out. Poke the toothpick on each feather into
the back of the popcorn ball making two rows of feathers.
Unwrap the peanut butter cup. Using decorator frosting, glue the widest side of the peanut
butter cup to the turkey for the head. Using a toothpick, poke two dents in the top of the
peanut butter cup for the eyes. Using decorator frosting glue a butterscotch chip onto
peanut butter cup for beak. Using decorator frosting glue a tic tac to the bottom of the
peanut butter cup for the gobbler.
Using decorator frosting glue two pretzels to the bottom of the popcorn ball for the feet.
Autumn Gumball Tree
Supplies:
Assorted gum drops
Assorted pretzel rods
Paper plates
Give each child a paper plate. Start doling out different sizes of pretzels. You can use the knotted
pretzels, short pretzel sticks, large pretzel rods, and any other type of pretzels that you can find.
Next, pass out assorted sizes of gumdrops. Most candy stores will have a variety of gum drop
sizes. Try to use red, orange, yellow, pink, green, and white gumdrops for this snack, as they
show the autumn colors. Now, start building gum drop trees! Use the gumdrops to stick pretzels
together. May have to break the pretzels into different sizes, or use two gumdrops together. Let
creative juices flowing.
Sand Art Brownie Gift Mix
Materials
3/4 cup all-purpose flour
1 teaspoon salt
1-quart canning jar with lid
1/2 cup unsweetened cocoa powder
3/4 cup all-purpose flour
3/4 cup packed brown sugar
3/4 cup granulated sugar
1/2 cup semisweet chocolate chips
1/2 cup white chocolate chips
Child's blunt-tip safety scissors
Fabric (choose seasonal fabric if giving a holiday gift)
Ribbon
Pen
Decorative tag
1/2 cup butterscotch or peanut butter chips (optional)
Instructions
1. Mix the flour with the salt in a small bowl.
2. Help your child layer the ingredients in the jar, beginning with the flour/salt mixture,
continuing in order, and ending with the white chocolate chips. (You may not need as
many chips if there’s little room left in the jar.)
3. Screw on the lid.
4. Cut a circle of fabric about 4 inches wider than the diameter of the jar.
5. Tie the fabric circle around the lid with ribbon.
6. Write the following directions on a decorative tag: “Sand Art Brownies: Combine the
contents of the jar with 1 teaspoon vanilla, 3/4 cup vegetable oil, and 4 eggs. Beat until
just mixed. Pour into a greased 9-by-13-inch pan. Bake at 350ºF for 25–30 minutes.”
7. Attach the tag to the jar.
8. If you like, substitute butterscotch or peanut butter chips for either of the chocolate chips.
Graham Cracker Gift Box
Materials
Graham crackers
Cardboard milk carton
Ornamental frosting
Edible decorations (gumdrops, raisins, chocolate chips, and cereal)
Instructions
1. Cut off the top of a cardboard milk carton so what’s left is the same height as a graham
cracker.
2. Use the frosting to stick graham crackers to the sides of the milk carton.
3. Remember to cover the frosting with a damp cloth when you’re not using it.
4. Have your child use additional frosting and edible decorations to decorate the gift box.
5. When the frosting is dry, place wrapped candies or a small gift inside.
Safety
Because the small decorations could be choking hazards, do not include them for children under
3 years of age.
Edible Bird's Nest
Chow mien noodles
chocolate chips or brick chocolate
Jelly beans
candy coated chocolate eggs
marshmallow chicks
peanut butter
wax paper
paper plates (colored plates optional)
Place squares of wax paper onto to individual plates. Put chow mien noodles in a large
bowl. If using brick chocolate, break into pieces. Melt chocolate chips or pieces in the
microwave, or over low heat on stove, just until melted. Pour melted chocolate over chow
mien noodles, mix together to coat.
Place mounds of chocolate/chow mien mixture onto several plates (on top of waxed paper).
Have children form the mixtures into nests. Be sure the chocolate has cooled, but don't
wait too long or it will harden!
Using peanut butter as an adhesive, "glue" down the jelly beans and candy coated
chocolate eggs inside the nest cavity. "Glue" marshmallow chick on the edge of or inside
of the nest.
Ants in the Sand
graham crackers, crushed
chocolate sprinkles
snack sized resealable plastic bags
Note: To crush graham crackers, place inside a large (gallon size) resealable plastic bag. Using
a rolling pin, smash crackers through bag by rolling back and forth over them until they are all
in crumb form.
Fill snack sized resealable bags halfway with graham cracker crumbs. Add a small handful of
chocolate sprinkles to the bags and seal.
Cookie Spiders
black or chocolate licorice twists
fudge sandwich cookies
chocolate frosting
red cinnamon candies
Cut licorice in half. Remove the top of each sandwich cookie; press 8 licorice pieces into the
fudge center to resemble spider legs. Spread a little chocolate frosting over the licorice; replace
cookie tops. Frost the tops of the spider cookies with frosting. Place red cinnamon candies on top
for eyes.
Muenster Beetles
crunchy chow mein noodles
muenster cheese (or other soft block cheese)
Cut cheese into 2" x 1" rectangular blocks. Gently insert three chow mein noodles on each side
of cheese block for legs. Using two broken chow mein noodles, insert into "head" as antennae.
Note: Cheddar makes a bright and colorful beetle, but can be very frustrating for little fingers as
the cheese is a bit too hard to press the noodles into without breaking. Use softer cheese such as
gouda, havarti, monterey jack, or even mozerella.
Peanut Butter Caterpillars
bananas
peanut butter
grapes
chow mein noodles
Peel and slice a banana. Join the slices together by "gluing" them with peanut butter. Carefully
poke two chow mein noodles (or break a pretzel stick in half to make two pieces) through the top
of the grape. Use more peanut butter to attach the head (grape) to the front of the body, with
antennae (chow mein noodles) pointing up.
Fire Truck Snack
Supplies:
A paper plate
Graham crackers (1 1/2 per fire truck)
Tiny Ritz crackers (for wheels)
Stick pretzels
Black licorice
Softened cream cheese (or thick frosting)
Red food coloring
A red jellybean, a red Dots candy, a cherry, or a strawberry
Mix a few drops of food coloring to the cream cheese (or frosting). Use this edible
"glue" to put fire truck together.
Start with a whole graham cracker. Using the back of a spoon, spread some of the
"glue" on one side of it.
Put half a graham cracker on top of the "glue." This is the cab of the fire truck.
"Glue" a red jellybean, a red Dots candy, a cherry, or a strawberry on top of the
cab. This is the fire truck's red light.
"Glue" four of the tiny Ritz crackers to the sides - these are the wheels.
On the back of the truck, "glue" two pretzels parallel to each other. Then "glue" in
broken pieces to make a tiny ladder.
"Glue" on a piece of licorice - this is the firehose.
Chocolate Play Dough
Ingredients:
8 oz. semisweet chocolate
1/4 cup plus one tablespoon light
corn syrup
Directions:
Melt the chocolate in a metal bowl set over a pan of simmering water (a double boiler). Stir the
chocolate with a spoon until smooth, then stir in the corn syrup. The chocolate will stiffen almost
immediately, but stir until completely combined. Transfer the chocolate to a sturdy plastic bag
and refrigerate until firm; the consistency will be that of Play Dough.
When firm, the dough can be worked by kneading. If it is too hard, cut off small pieces and
knead until pliable. If the dough sticks to the counter when rolling, lightly spray counter or
breadboard with vegetable spray or lightly grease with vegetable oil.
1. Hand shape the dough into a rope or braid, making two or three long ropes and twist or
braid them together -- can be used as the outside edge on top of a cake or around the base.
2. Make ribbons to cover the cake. To do this, pat your dough into a disk shape and roll
dough out to desired thickness using a rolling pin or else use a manual pasta machine.
3. Flowers, too!
Storage: When not using, MUST be stored in an airtight container and refrigerate
Kool-Aid Play Dough
Ingredients:
1 cup flour
1 cup water
1/2 cup salt
3 teaspoons Cream of Tartar
1 package Kool-Aid Mix (any flavor of unsweetened)
1 tablespoon cooking oil
Directions:
Mix dry ingredients together in a large saucepan. Slowly add water mixed with oil and stir over
medium heat until mixture thickens to dough. Turn out onto a heatproof bread board or counter
top and knead until cool enough for children to handle. Dough will be the color of the Kool-Aid
mix and will smell like the Kool-Aid mix. (Can be stored in a tightly covered container for up to
six months)
Chocolate Clay
Ingredients:
10 ounces chocolate
almond bard or candy discs
1/3 cup corn syrup
Directions:
Slowly melt candy and stir until smooth. Add syrup and blend thoroughly. Pour onto waxed
paper and spread with fingers until about 1/2 inch thick. Cover loosely with waxed paper and
allow it to stiffen (couple of hours). Then play and eat.
When not using, MUST be stored in an airtight container and refrigerate
Fruit Loop Necklaces
Give the children a piece of elastic cording approximately 18-inches long and a bowl of dry fruit
loops. Help them sort the fruit loops into colors and decide on a pattern to string on the elastic
cording (example: red, yellow, red, green, red, yellow, red, green, etc.)
Pizza Heads
Ingredients:
Refrigerator biscuits (larger ones work best)
Pizza Sauce
Cheese
Pepperoni, sausage, olives or whatever foods you can think of
Directions:
Flatten biscuit for each child and help them put sauce on it. Then let them use their own
imaginations for designing their person's face (example: pepperoni eyes, olive nose, pineapple
mouth or teeth, cheese hair, sausage ears, etc.)
Pretzel Initials
Ingredients:
1 envelope dry yeast
1-1/2 cup warm water
1 tablespoon sugar
4 cups flour
1 teaspoon salt
Glaze: 1 beaten egg and a little salt
Directions:
Soften the yeast in water, add remaining ingredients and knead until pliable. Give each child a
ball of dough and let them roll it out "like a snake" and help them form the letter (or letters) of
their first initial, name, etc. Place formed dough on a greased baking sheet, brush with glaze and
sprinkle with salt. Bake at 425 degrees for 12-15 minutes.
Bread Dough Recipe
Ingredients:
1 tablespoons quick-acting yeast
1 cup water
1 teaspoon sugar
1 teaspoon salt
2 cups flour
1 tablespoon oil
Directions:
Preheat over to 400 degrees. Measure the water, sugar and yeast into a bowl and mix. Wait two
or three minutes for the yeast to soften. Stir in one cup of flour, then add oil, salt and remaining
cup of flour. Sprinkle flour onto a wooden breadboard and place the dough on it. Knead dough
for about five minutes.
Place dough in a bowl and cover it, letting it rise for about 45 minutes in a warm place away
from drafts, open windows, etc. Punch the dough down and work it into a ball. Next, separate the
dough into smaller portions and let the children use their hands to roll the dough into ropes or
snakes to mold dough into different shapes.
Ghost Snack (for a healthier snack use raisins instead of M&M's)
Marshmallow Building Blocks (inexpensive afternoon snack)
Grilled Cheese People (children can use their imaginations while helping you prepare their
lunch!)
Spread softened cream cheese on slices of white bread. Give each child one slice of the bread
and a ghost cookie cutter. After they have cut it out let them use various things to decorate it.
(Change the cookie cutter pattern to fit any holiday throughout the year) Show your child how to
stick toothpicks into the marshmallows and then allow them to build anything their imaginations
allow, including perhaps a contest to see who can build the tallest tower.
Ahead of time, use a round cookie cutter to cut out circles from slices of bread. Let the children
top the circles with cheese. To make each cheesy person, use two circles (one for the head and
one for the body). Place them on a cookie sheet, add bacon bits eyes, noses and buttons. Broil
until the cheese melts and give one cheesy person to each child. Let them then add the arms and
legs (carrot and celery sticks) and the bread left over from cutting out the circles can now be used
as shoes, gloves, hats, neckties, bows, etc.
Tasty Paint
1 can sweetened condensed milk
Several drops of food coloring
Give the children paintbrushes and paper or just let them use their fingers. The paint will be a
pastel color and when it dries, it will be kind of glossy.
Quick, Edible Thanksgiving Turkeys
Ingredients
2 Double Stuff Oreos (Halloween ones or regular white)
Candy corn
Raisinettes
Plate
Cooking Instructions
1. Open one Oreo. The half that has the filling will be the base for your turkey to stand on.
2. Eat the other piece, if desired.
3. Place the other Oreo on the filling standing upright. This is your turkey body.
4. Carefully place five candy corns into the filling on the upright Oreo. These are the
feathers.
5. Place a Raisinette in front of the turkey body. This is the head.
6. Place on your table as a decoration, or gobble it right up!
Santa's Candy Sleigh
Ingredients and Supplies
Royal icing
(ingredients and recipe below)
Decorating bag
Decorating coupler
Decorating tip #3
Three graham crackers
(each is four sections)
Two candy canes
(unwrapped)
Chocolate foil-covered Santa
( approximately 4 inches tall)
Associated Christmas candy
Directions:
1. Follow the directions on the can of the meringue powder mix to make a recipe of Royal
Icing.
2. Working quickly, put the Royal Icing into the decorating bag, coupler, and tip already in
place.
3. Squeeze the icing on top of one graham cracker, then quickly place another graham
cracker on top.
4. Squeeze the icing onto both candy canes and attach one on each side of the long edges of
the crackers.
5. Carefully break the third graham cracker in half widthwise.
6. Again working quickly, attach half of the graham cracker standing on its edge on the
back of the sleigh. ( The front has the curved portion of the candy canes.)
7. Carefully break apart the last half of the third graham cracker.
8. Quickly attach one half on each side, long edges on top of the candy
canes and short edges touching the back of the sleigh.
9. Let the sleigh sit for a few hours to harden.
10. Fill the sleigh with the chocolate Santa Claus and assorted Christmas candy.
11. This is an edible sleigh. Simply pull the crackers and candy canes
apart to eat Santa and his sleigh.
12. Note: You will have plenty of Royal Icing to make more sleighs.
Miniature Gingerbread House
What you'll need:
7 graham crackers
Frosting for glue (recipe below)
Assorted small candies for decorating
Ribbon
Pastry bag and tip or Ziploc bag and scissors
For Frosting
1/2 pound confectioner's sugar
3 tbs. butter/margarine
1/2 tsp. Vanilla
1 1/2 - 2 tbs. Milk
How to make it:
1. Mix all the ingredients together until smooth and easy to spread, but not runny. Add more
sugar if too runny.
2. If you have a pastry bag, place frosting in bag and use a small tip. You can use a Ziploc
bag cutting a small hole in the corner.
3. Place one graham cracker flat on the table, squeeze a little frosting around all edges. You
may need an extra pair of hands.
4. Place one cracker on each side standing up. It now looks like a box without a top.
5. Carefully squeeze more frosting on all outside corners from top to bottom and around the
bottom of the box.
6. Let stand for a short while to let frosting harden a little. This will make working with the
roof a little easier.
7. Now squeeze frosting on two of the top edges of the box and place the last two graham
crackers in a V shape on as the roof. Looks like a triangle on a box now from the side. It
may overhang if you can get the frosting to hold for you.
8. Squeeze frosting along the top of the roof where crackers join. Let stand again until
frosting hardens a little.
9. Now comes the fun part - with leftover frosting, cover the roof to look like snow. (two
sides are left open) Then squeezing small amounts on candy, place candy on the house to
decorate. You can use the frosting to add things like doors and windows. Just use your
imagination.
10. After project is totally dry, string ribbon through to open side of the roof and hang on
Christmas tree.
Tips:
If you want to do this project with young children, you might want to make the base house ahead
of time, gluing the corners from the inside - and let it harden. Then turn them loose with frosting
and small candies to do the decorating.
Notes:
This Gingerbread House is safe to eat, but if you would like to save your treasure for years to
come you can use a spray varnish in a well ventilated area. (2 - 3 coats of varnish).
Reindeer Cookies
Ingredients:
1 cup butter, softened
1 cup brown sugar
1 cup sugar
2 eggs
1 cup smooth peanut butter
1/2 teaspoon salt
1 teaspoon vanilla
2 teaspoons baking soda
3 cups flour (scant)
pretzel pieces
red and green M&Ms candies
mixer
large bowl
measuring spoons
measuring cups
Cooking Instructions
1. Cream the butter and sugars, eggs and peanut butter, salt and vanilla.
2. Add the baking soda and flour and mix well.
3. Roll into balls.
4. Flatten the balls and shape it into a triangles.
5. Place pretzel pieces into 2 of the triangle corners for antlers.
6. Place a red M&Ms candy at the other corner (Rudolph's red nose), and 2 green M&Ms
candies on the cookie for eyes.
7. Bake at 375 degrees F for 10-15 minutes or until golden brown (my oven usually takes
around 11 minutes).
Jell-O Play Dough
Ingredients:
1 cup flour
1/2 cup salt
1 cup water
1 tablespoon oil
2 teaspoons Cream of Tarter
1 (3-1/2 oz.) package "unsweetened" Jell-O
Directions:
Mix all ingredients together and cook over medium heat, stirring constantly until consistency of
mashed potatoes. Let cool and knead with floured hands until dry.
Storage: This recipe needs to cool completely "before" storing it in an airtight container!
Note: The items made from this play dough recipe can be painted when they are dry.
Oatmeal Play Dough
Ingredients:
1 part flour
2 parts oatmeal
1 part water
Directions:
Mix ingredients together and form into shapes.
Note: The items made from this play dough recipe can be painted when they are dry.
Cream Cheese Play Dough
Ingredients:
8 oz. package of cream cheese
1/2 cup non-fat dry milk
1 tablespoon honey
crackers or bread slices
Directions:
Combine cream cheese, milk and honey in a bowl and mix until well blended. Mold sculptures
on wax paper.
Storage: Unused portions MUST BE STORED in an airtight container and kept refrigerated!!!
Because cream cheese is perishable, use the expiration date on the cream cheese package as your
guide for how long you can keep this play dough.
Note: The shapes can then be placed on crackers or bread slices, decorated with edibles (celery
or carrot slivers, raisins, dried fruit pieces, nuts, or seeds for a healthy snack... then EAT!!
Peanut Butter/Graham Cracker Play Dough*
Ingredients:
Equal amounts of Peanut Butter and Marshmallow Cream
Graham Crackers
Directions:
Allow children to crumble up Graham Crackers, then set the crumbs aside. Let them have just a
little touch of the Marshmallow Cream and a little touch of peanut butter to feel the different
textures and to lick off their fingers. (Make sure they wash their hands before starting this
project.)
Mix the peanut butter and Marshmallow Cream together and have the children notice the change
in texture.
Cover surface area with wax paper or use a breadboard, let children make into shapes.
Roll shapes in Graham Cracker crumbs, then EAT!!
Storage: When not using, MUST be stored in an airtight container
Peanut Butter Play Dough*
Ingredients:
One 18-oz. jar creamy peanut butter
6 tablespoons honey
3/4 cup non-fat dry milk
Directions:
Mix ingredients together, using varying amounts of dry milk for desired consistencies. Knead it
with fingers, forming into desired shapes, adding other foods like M&M's or peanuts for eyes,
mouths, etc. Storage: When not using, MUST be stored in an airtight container
When not using, MUST be stored in an airtight container.
Smooth Peanut Butter Play Dough*
Ingredients:
2 cups smooth peanut butter
2 cups rolled oats
2 cups dried milk
2/3 cups honey
Directions:
Mix all ingredients until thoroughly combined.
Storage: When not using, MUST be stored in an airtight container
Frosting Play Dough*
Ingredients:
1 can frosting (any flavor)
1-1/2 cups powdered sugar
1 cup creamy peanut butter
Mix together until dough reaches desired consistency
Storage: When not using, MUST be stored in an airtight container and refrigerated. Next time
you want to use it, let it come to room temperature for pliable dough.
* For the recipes including peanut butter, be aware that some children are allergic to peanut butter.
Chocolate Play Dough
Ingredients:
8 oz. semisweet chocolate
1/4 cup plus one tablespoon light
corn syrup
Directions:
Melt the chocolate in a metal bowl set over a pan of simmering water (a double boiler). Stir the
chocolate with a spoon until smooth, then stir in the corn syrup. The chocolate will stiffen almost
immediately, but stir until completely combined. Transfer the chocolate to a sturdy plastic bag
and refrigerate until firm; the consistency will be that of Play Dough.
When firm, the dough can be worked by kneading. If it is too hard, cut off small pieces and
knead until pliable. If the dough sticks to the counter when rolling, lightly spray counter or
breadboard with vegetable spray or lightly grease with vegetable oil.
1. Hand shape the dough into a rope or braid, making two or three long ropes and twist or
braid them together -- can be used as the outside edge on top of a cake or around the base.
2. Make ribbons to cover the cake. To do this, pat your dough into a disk shape and roll
dough out to desired thickness using a rolling pin or else use a manual pasta machine.
3. Flowers, too!
Storage: When not using, MUST be stored in an airtight container and refrigerate
Kool-Aid Play Dough
Ingredients:
1 cup flour
1 cup water
1/2 cup salt
3 teaspoons Cream of Tartar
1 package Kool-Aid Mix (any flavor of unsweetened)
1 tablespoon cooking oil
Directions:
Mix dry ingredients together in a large saucepan. Slowly add water mixed with oil and stir over
medium heat until mixture thickens to dough. Turn out onto a heatproof bread board or counter
top and knead until cool enough for children to handle. Dough will be the color of the Kool-Aid
mix and will smell like the Kool-Aid mix. (Can be stored in a tightly covered container for up to
six months)
Edible Penguin Craft
Things You Will Need:
Black Shoestring Licorice
Large White Gumdrops
Orange Jelly Beans or Gumdrops, Halved
Orange M&Ms or Gumdrops, Halved
Purple Wafer Candies, Halved
Royal Icing
Scissors
Small White Gumdrops
Toothpicks
Method:
• Use the toothpick to affix one small white gumdrop on top of one large white gumdrop.
• Smaller gumdrop will be the penguin's head and the bigger one will be its body.
• Break a toothpick in half and use the pieces to attach two pieces of halved jellybean or
orange gumdrop as the feet below the large gumdrop body of the penguin. It is easier to
balance gumdrop than jellybean.
• Use dabs of royal icing to glue two pieces of wafer candy halves as wings to your
penguin.
• Sculpt the orange M&M or gumdrop a little to make the beak for the penguin and attach
it to the penguin's head (small gumdrop) using royal icing.
• Use two tiny bits of shoestring licorice as eyes of the penguin and affic it using the royal
icing.
Cinnamon Dough Ornaments
You’ll Need:
1 1/2 cups ground cinnamon
1 cup applesauce
1/4 cup white school glue (like Elmer's)
Bowl
Plastic food wrap
Rolling pin
Wax paper
Cookie cutters or a knife
Ribbon or yarn for hanging
Straw
How to make it:
1. Mix cinnamon, applesauce, and glue together in a bowl. The dough should be as thick as
cookie dough. Add a bit of water if the dough is too stiff.
2. Remove from bowl and knead. Put it back in the bowl, cover with plastic wrap, and let sit
for at least a half hour.
3. Remove the dough, knead again to make sure it's smooth. Flatten/roll the dough between
waxed paper until it's between 1/4" thick and 1/8" thick.
4. Cut out desired shapes, use a straw to punch a hole for the ribbon to hang. The circle of
dough will pull out with the straw.
5. Gently place the shapes on a piece of clean wax paper. They will take 3-5 days to dry,
and you will need to turn them over a couple of times a day for them to dry evenly and
flat.
Don't be surprised to see that the ornaments get smaller during the drying process. Keep this in
mind when you pick out the cookie cutters for your designs. You will also notice that if you do
not turn the ornaments over often enough while they are drying, the edges of the ornaments will
curl.
When dry, thread a piece of ribbon or yarn through the hole to hang.
SHAPE IDEAS: Tree, Apple, House (gingerbread), Bell, Heart, Goose, Gingerbread Man, Star...
Optional Painting ideas - use acrylic paints or fabric paints to paint details, like white 'frosting'
on a gingerbread man or gingerbread house, or eyes on a goose.
Sandwich Art
Candy Train
What You Need
• Low temp hot glue gun
• Ribbons or yarn for hanging
• 1 roll of lifesavers (cylinder about 3 1/2 inches long)
• 1 small package of gum (3" x 3/4" x 3/8")
• 4 round wrapped candies (I used peppermints)
• 1 Hershey's Kiss (this is by far the best shape I've found)
• 1 large rectangular caramel like candy - I found a 3-color candy called "Sundaes" in the
bins of assorted Brach's candy bins at my supermarket. You can also try using multiple
starbursts or caramels, etc. It's about 1" x 1" x 3/4"
• 1 mini chocolate bar (1 1/2" x 1" x 3/8") I got mine from Hershey's in a big bag
• A creative imagination
1. Glue the lifesavers roll to the gum package, letting the lifesaver roll stick over at both
ends. Glue the peppermints to the lower sides for wheels.
2. Push the Sundae/caramel onto the lifesaver body to make the cab of the engine, so that it
will glue on better. Glue.
3. Cut the paper off the top of the Hershey's Kiss, and flatten the point a bit by pushing it
against the table. Put a good sized glob of hot glue on the tip, and then glue it to the
lifesaver roll as shown.
4. Glue the little chocolate bar on top of the cab for the roof.
You can also substitute a rectangular candy package for the lifesavers - we found some called
"Jolly Rancher" that worked, or glue a set of Starburst Candies together.
If you want to make some cars for the train, simply use rectangular candies in various
combinations with 4 round wheels.
About finding the candies: Think shapes. Go to your local store and look for rectangles, circles,
shiny wrappings, etc.
Use wrapped peppermints and fold the extra cellophane around to the back and glue it down
before gluing the candy to the project. And don't be afraid to combine several candies (like the
small squares of Starburst candies) to make larger shapes. This is an exercise in creativity
Zip-Lock Baggie Fudge
1 T. cocoa
1/8 t. vanilla
1 T. cream cheese
raisins (optional)
pinch of salt
1 T. butter or margarine
½ cup powdered sugar
nuts (optional)
Place all ingredients in a pint sized freezer Zip-Lock plastic bag. Put ingredients into baggie and
squeeze out as much air as possible before sealing the bag. Knead and squeeze the bag until the
fudge is creamy. It will take at least ½ hour of kneading and squeezing to be ready to eat, so
have the boys take turns. The bag can be cut open and the fudge eaten right out of the bag; or if
you prefer, you can put it in a pan to harden in the refrigerator.


© Copyright 2026