
RECYCLED SWEATER MITTENS Piece C Piece B Piece A
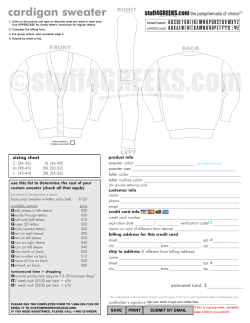
RECYCLED SWEATER MITTENS
DESIGNED BY: Pat Adams
December 2011
www.forestquilting.com
Piece A
Piece C
Piece B
Designed by Patrice Trnka Adams
www.forestquilting.com
December 2011
Designed by Patrice Trnka Adams
www.forestquilting.com
MITTENS FROM OLD SWEATERS...and wool jackets, pants and skirts
Pattern Directions:
Both natural and man-made fibers sweaters work for this project, however, heavy wool-blend sweaters make the
bulkiest and warmest mittens.
Wash all sweaters in hot water and dry the sweaters completely using the hottest dryer setting.
RECOMMENDATION: Make first mitten as a PRACTICE to determine the size and practice the
construction. Do not use your favorite sweater for your first mitten!
Construction notes:
Cut off and save all 'ribbing' from the cuffs and waistline of all the sweaters for the mitten cuffs.
Mark the right side of the fleece of each cut piece with a pin or painter’s tape to avoid sewing two left or two right
linings. It's tricky to tell the right and wrong side to the fleece, so it is easy to sew two identical mitten linings.
IF DESIRED, cut lining slightly larger than the pattern to create fullnes in the mitten.
Sew all seams at 1/4 inch or slightly less.
Sewing does not need to be ‘exact’.
Recommendation: Use a sewing awl to help feed the sweater fabric under the sewing machine needle. This aids
considerably in controlling the even feed of the fabric under the sewing machine needle.
Assemble mitten and lining:
1. Match the right sides of theWRIST/palm (B) piece and FINGER/palm (C) piece and sew a SCANT quarter inch
seam. If sewing a 1/4 inch seam, you may want to trim the seam allowance closer to the seam.
2. Match the right side of the palm piece to the right side of the back of the mitten (A).
3. Sew the assembled palm pieces and back together with the THUMB facing up.
4. Sew from the wrist edge to the stitching around the thumb. Back stitch.
5. Flip the thumb towards the wrist.
6. Begin sewing on the other side of the thumb and continue around the entire mitten to the wrist edge. Back
stitch.
Assemble mitten:
1. Turn mitten right side out.
2. Leave lining right side inside.
3. Slip lining into mitten.
Cutting the Cuff Fabric
Cut the cuffs from a sweater to make the cuff for the mitten. I cut my cuffs about 4 inches wide.
If you don’t have a cuff from the sweater to use for a mitten cuff use either ribbing from the waist area of the sweater
or cut a portion of the sweater to fold over for a mitten cuff. Measure the width of your mitten wrist area. Multiple
that width by 1.5 and add 1/2 inch to calculate how long of a piece of knit you will need to make a cuff. About 9.5
inches wide.
Waist Ribbing:
1. Cut ribbing about 4 inches wide.
2. Sew ends together to make cuff.
Sweater portion:
1. Cut an 8 -9 inches wide piece of knit to the desired length.
2. Sew the ends together.
3. Fold over to make cuff.
Sew cuff to mitten:
1. Insert cuff into the inside of the mitten and lining with the right side of the cuff facing the mitten lining.
2. Pin the cuff to the mitten and lining stretching the cuff evenly around the edge of the mitten.
3. Sew all three layers together.
Turn cuff to the outside. Add a button. Tack down the cuff.
Piece A
SELVAGE
MEDIUM
Cut 2 Piece A (mitten back) knit & fleece
Cut 2 Piece B (mitten palm w/thumb) knit & fleece
Cut 2 Piece C (mitten fingers w/thumb) knit & fleece
Cut 2 Piece Wrist Piece from cuff of sweater 2.5 x 9.5 inches
Designed by Patrice Trnka Adams
www.forestquilting.com
SELVAGE
Piece B
Thumb/Palm
MEDIUM
Designed by Patrice Trnka Adams
www.forestquilting.com
Piece C
SELVAGE
MEDIUM
Designed by Patrice Trnka Adams
www.forestquilting.com
Piece A
SELVAGE
LARGE
Cut 2 Piece A (mitten back) knit & fleece
Cut 2 Piece B (mitten palm w/thumb) knit & fleece
Cut 2 Piece C (mitten fingers w/thumb) knit & fleece
Cut 2 Piece Wrist Piece from cuff of sweater 2.5 x 9.5 inches
Designed by Patrice Trnka Adams
www.forestquilting.com
SELVAGE
Piece B
Thumb/Palm
LARGE
Designed by Patrice Trnka Adams
www.forestquilting.com
Piece C
SELVAGE
LARGE
Designed by Patrice Trnka Adams
www.forestquilting.com


© Copyright 2026