
B W M
BUILDERS
WORKSHOP MANUAL
© Glen Walker 2004 [email protected] All rights reserved. This manual should not be re-designed, copied or quoted without express permission from the author.
The TARDIS Builders Manual 1.0 – http://homepages.paradise.net.nz/~trekker/policeboxes/ All rights reserved – Page
#1
The TARDIS Builders Manual 1.0 – http://homepages.paradise.net.nz/~trekker/policeboxes/ All rights reserved – Page
#2
INTRODUCTION
I was a fan of Doctor Who from a young age though at the time I never realised how deeply it had taken
root. After many years off the air, and of not reading the novels etc which filled that void I could still
recite lines, tell you who played who (and who played Who), recite all the companions in order… but
most importantly I remembered that old Blue Box very clearly. When I decided one day to use the
internet to see if anyone shared my love of the old TARDIS I was delighted to find many fans of the ‘Old
Girl’, but disappointed that there were so few resources of any depth. There was one great website
which had the best round-up of info about the ‘real’ Police Boxes of the United Kingdom, but none of
any authority which detailed the TV Props. Stumbling at length across some users groups where fans
of the TARDIS gathered, I grew strength from their support and started planning my build. Though
there are various sets of designs and measurements floating around – most of them within striking
range of each other in terms of accuracy, I used an amalgam of designs which was put together by
TARDIS expert Anthony Sibley ([email protected]). The Box built in this Manual to Anthony’s
design represents a cross between the best elements of the real Boxes and those used on Television.
I’m not at liberty to disclose the exact dimensions used on the Box as Anthony wishes to retain his
ideas, but there are numerous plans available on the Internet and in the discussion groups which occur
so it would be worth your time to have a look at the different versions around, draw them out yourself
(sometimes with these plans the pictures given are not the same as the measurements given - the first
trap!). Choose a look which fits your aesthetics or ideal version of a Box. There is no right answer, no
perfect design, and no “Correct” measurements. They varied from Box to Box in real life as they did
almost show to show on TV. Choose your look, stick to it and enjoy it. There is a great deal of
reference material on my site - The TARDIS Library at http://homepages.paradise.net.nz/~trekker/policeboxes
This manual is a way of drawing together the experience I gained in building my full-size Police
Box/TARDIS Replica. I can’t say that my techniques were right or wrong, sound or weak, but I can
show you the results and see if they speak for themselves. My Box was completed in a few months of
part-time work (approx 2-4 hours a week) and has been standing successfully for months on end since
then, with not infrequent use! My Box was designed to disassemble into its constituent walls, doors,
base, roof etc which is a level of detail which you may not require, but given the size of these things, it’s
a handy trick to have if you ever want to move it after it’s been built initially! This Manual is not meant to
be the definitive way to build a Police Box, but shows you a process which has been proven to work
and even offers a few alternatives.
I would very much like this work to continue to grow and evolve – ultimately providing tips to any
potential builders out there who are worried that it is all too hard. If you have new, different, better or
just complementary ideas please feel free to email me ([email protected]) with your content and
it may appear in the next version of the Manual.
Good luck with it all, please drop me a line if you have time and I am
always interested in seeing a picture of your Box. Check out the Links
section for further info.
Cheers, glen
Freedom, usage and Copyright
This Manual is free. I decided a long time ago that I would help other builders who like me were disappointed by the lack of quality material on the Internet
(or anywhere else). There are a number of people willing to sell you plans for building a Box, some of them have even built Boxes themselves although
their pictures often speak volumes about the plans you’d be following. This Manual is offered as a free download from my website though I retain copyright
on the content and the moral authority to be identified as author of this work. Copyright on the design and use of the Police Box and word TARDIS are
believed to be held by the BBC (British Broadcasting Corporation). I don’t believe that I am breaching any copyright obligations by creating this manual
and I am not advocating that anyone profit from building TARDIS replicas – that would be a clear violation of Copyright – commercial replicas are currently
available through Licensed Distributors. This manual is for private use only and may not be sold or offered as an enticement in the sale of any other
items. If this manual is offered for sale individually or as part of any other sale I hereby claim the right to a royalty of 50% of the total sale price. This fee
will then be donated to my preferred charities.
The TARDIS Builders Manual 1.0 – http://homepages.paradise.net.nz/~trekker/policeboxes/ All rights reserved – Page
#3
IMPERIAL VS METRIC
Living in New Zealand, everything is supplied and cut in Metric units. Most existing plans for Police
Boxes, TARDISes, DALEKs etc have tended to be in Inches and feet (Imperial Measurements) –
mainly perhaps because the original designers and builders of those items worked in Inches as well.
Luckily the conversion is very simple, and often you will find that if you can round up to the nearest
centimetre or millimetre without losing any credibility in your build.
That said, I converted back and forth so often that I learnt most measurements off by heart (“15.24cm?
- you mean 6 inches don’t you…”) but thought that a handy reference chart of TARDIS units might be
handy:
Inches
Centimetres
Millimetres (1/10 cm)
The Imperial Æ Metric
(Inch Æ cm) conversion is
simple :
simply multiply the
Imperial figure by 2.54 OR
divide a Metric figure by
2.54
0.1968”
¼”
0.3937”
½”
¾”
0.7874”
1”
2”
3”
3.9”
4”
4.3”
4.4”
5”
6”
7”
8”
9”
10”
12
15
50
0.5cm
0.635 cm
1 cm
1.27 cm
1.905cm
2 cm
2.54cm
5.08cm
7.62cm
9.907cm
10.16cm
10.922cm
11.176cm
12.7cm
15.24cm
17.78cm
20.32cm
22.86cm
25.4cm
30.48cm
38.1cm
127cm
5mm
6.35
10
12.7
19.05
20
25.4
50.8
76.2
99.07
101.6
109.22
111.76
127
152.4
177.8
203.2
228.6
254
304.8
381
1270
The TARDIS Builders Manual 1.0 – http://homepages.paradise.net.nz/~trekker/policeboxes/ All rights reserved – Page
#4
PARTS & TOOLS LIST___
PARTS:
Various sheets of MDF & Plywood which can be cut to size (“Marine Grade” materials are better for
outdoors exposure – appropriately treated timber can also be used, though it is expensive)
6 Castors - optional
Selection of bolts and locks
Nuts, bolts and washers (depending on construction style)
Quantities of screws (.75” & 1.5" & 3” mainly)
Wood Glue
Sheets or panes of glass of Perspex cut to size for windows and signs
Yale-type Lock
Door Handles
3 loose-pin hinges per door (medium-large size)
8 loose-pin hinges for windows (small-medium) – optional
“No More Nails” or similar adhesive – optional depending on skill level
Glass or Plastic lens for light on top
Graphics (printed by either you or sign makers)
Paint – interior and exterior painting of the Box requires, sealer, undercoat/primer, black, and blue at
minimum
TOOLS:
Essential – Table/Bench Saw or help for making precise lengths, angles and thicknesses of wood
Essential – Screwdriver
Essential – Drill
Essential – Heaps of sandpaper
Essential – Clamps
Recommended – Jigsaw
Recommended – Router
Recommended – Masking Tape
Recommended – Saw bench
Recommended – Step stool or ladder
Recommended – Files, plane and other traditional woodwork-y things
Strong imagination (“vision”) absolutely required, and strong, willing, friends a huge bonus
SAFETY:
I used MDF as a building material here and indeed for most of my Box, chiefly because of cost. It
came in 1” thick sheets of 1220mmX2440mm. It was extremely heavy material and lifting even one
sheet up onto supporting rollers was quite an effort. I managed it on my own (eventually), but for your
own safety I seriously recommend using a helper. I used 3 free-standing roller supports which allow
the sheet hanging over the side of the table to be supported and makes it easy to push back and forth
for the cutting. I cannot emphasise safety with power tools strongly enough – you should follow all of
the equipments guidelines and you absolutely must have the appropriate safety gear. Without goggles,
earmuffs or mask you will be a very sorry TARDIS owner - if you get that far. With MDF particularly, it
is important to use a good mask as MDF dust can be hazardous to your health and is very good at
getting into your nooks and crannies. Be sure to have a good shake before going back in the house
after cutting MDF.
The TARDIS Builders Manual 1.0 – http://homepages.paradise.net.nz/~trekker/policeboxes/ All rights reserved – Page
#5
CORNER POSTS___
Unless you have solid great lumps of timber available, you will want to make up these posts in a
sandwich of layers.
You could build them up using thin wood (making them essentially hollow) but they also have to bear a
lot of stress so I went for a solid construction.
For each post made using this method you will need numerous boards cut to appropriate sizes. You
then attach them in layers, giving the end appearance of a heavy solid post (which they are by then!).
You can achieve the beaded appearance of the corners by buying lengths of 3/4 inch ’quarter round’
wood from your hardware/home fittings merchant. These are commonly used around the base of walls,
around ceilings etc, but are perfect for TARDISes too.
Once your materials are cut, join a length of 6" wide and 4" wide along one edge, inset by 1". The
easiest way is to lay the 6" on the ground then glue the 4" piece to it along one side-edge, using 1"
blocks to make sure it is in the right spot.
4” board on top of 6”
board.
1” space left on
either side for the
mouldings (test-fitted
here)
If you screw the layers together as you
go, the next layer up will hide the screws.
To screw the outermost layers on, drill
into them from the inside of the post, be
careful not to go all the way through
Scrap 1” blocks are great for
lining up panels 1” from the edge
Tip: Make sure every time that you join panels together that you have one end
designated as the ’bottom’ for when you eventually stand it up and that whenever you are
about to permanently fix a panel on that it lines up perfectly with the Bottom edge. You
can test this by butting the frame up against a flat piece of wood; this way you won’t have
to sand anything down to get it to stand evenly - a recipe for trouble!
Once dry, flip your new L-shaped piece over and secure the join with screws. With MDF particularly it
is wise to pre-drill a pilot hole for your screw so that the material doesn’t crack when the screw is
pushed into it.
Next, prop the L up so that the 6" strip'
s outside surface is level and using 1" blocks (the side of other
lengths or 1" thick offcuts is perfect) line up a 4" length down the centre of the post. Glue the 4" panel
down, clamping if necessary.
When dry, flip the post over and screw the 6" panel to the (now facing the ground) 4" panel – drilling
from the back will ensure that the outward facing surface is blemish free but is still securely held onto
the rest of the structure!
Once you’re happy with that, prop up the post so that the first 4" panel is horizontal and glue the 3" strip
onto it, using 1" spacer blocks if necessary to make sure it is butted hard up against the 6" piece’s
overhanging lip.
The TARDIS Builders Manual 1.0 – http://homepages.paradise.net.nz/~trekker/policeboxes/ All rights reserved – Page
#6
Having secured all the MDF panels together with both glue and screws, prop it up on the blocks again
and position your top two strips of moulding. I used No-More-Nails to fasten the mouldings on and then
a strong masking tape to hold them tightly to the post framework until the adhesive dried. Even then I
could see gaps appearing and used clamps to keep an even pressure on the moulding.
Depending on how carefully you positioned your panels you may need to sand back the edge where
the end of the 6” panel meets the 3” panel. It is probably a good idea to sand it anyway as the texture
on the cut edge of MDF is different to the flat edge, but sanding fixes that up quite nicely.
Repeating 4 times = 4 brand-new Corner Posts
The Post should be able to stand on
it’s own
Cross-section (end-on) view
Notice the layered construction so that it looks solid from the outside
A quick test fit never
goes
astray!
Cutting from a single slab can be hard. I used a
table saw which ensured straight lines, but the
weight was enormous. I used 3 free-standing
rollers to hold up the wood which was off the side of
the saw and stopped frequently in each cut to
reposition the rollers to support the weight of the
wood.
The corner mouldings I bought were called ¼
round moulding and had a small triangular gap at
the back – easily filled with putty at the top of the
post, but otherwise unimportant. Probably helped
in fact, I used No-More-Nails adhesive to stick the
moulding to the corner posts and that space may
have prevented too much squirting out.
Off cuts are supporting the
“L” shaped frame when it is
turned over after gluing. In
this position I drilled the
screw holes through from
the top. Long screws, just
to be sure of a strong
connection
Corner Posts have varied through the series, though the original ‘60’s box and the 80’s GRP box both
had the appropriate round moulded corners. The 70’s version had some small square corner detail but
it was not visible to camera. The 2005 Series box does not appear to have the moulding detail at all.
60’s Box
The 80’s GRP Box & it’s many coats of paint.
The TARDIS Builders Manual 1.0 – http://homepages.paradise.net.nz/~trekker/policeboxes/ All rights reserved – Page
#7
DOOR/WALL FRAMEWORK (WITH ANGLES) ___
Essentially we are making the frames for 8 doors here, except that some of them will be attached to
walls and some (the best) will form actual doors. The thing to remember is that the size shown on plans
does not reflect the amount of material also needed for joinery and to fit behind other sections.
For each individual ’doorframe’ you will need 2 vertical lengths which are wider than whatever your
plans show (so that they can be fitted behind the corner posts) and also including enough width to
allow you to cut the angle into one side which forms one side of all the panels. 2 cross pieces for the
(wider) top and bottom of the doors and including enough width for the angle & 3 cross pieces which
are at least the width shown on your plans but with enough to allow you to cut an angle onto either
side. All of this is of 1” thickness to give the panels an appropriate recess.
For purposes of cutting angles into the wood, you will want to leave all the parts of a similar width as
long lengths for as long as possible, cut the angle in and then slice that length up into the various
cross-pieces.
After assembling this collection of lengths, we need to cut angles into them. The angle we want to cut is
about 22 degrees; this should be a width of cut of about 1cm (.4") - make this cut along both sides of
the lengths of your wood which will form the middle crossbars. Cut the angle into only one side of the
bottom and top crosspieces (since these form the bottom and top of the doorframes and should be flat
to the ground/roof) and only cut the angle along one edge of the perpendicular lengths.
1) An angle cutting platform for your table-saw is invaluable and makes short work of this task
2) To maintain a smooth feed into the saw, I used several freestanding roller-topped work stands
3) TIP: Cut the wood which will form cross-pieces on the doors as strips, cut the angle into them and
THEN cut them into the shorter lengths you need them for, otherwise you will spend forever,
risking inconsistent angles and (more importantly) your fingers !
Now, we want to cut the same angle into the ends of the crosspieces, so that they will meet the side
rails flush. You must cut this angle on the opposite side from which you cut the first, i.e.: if a flat side
marked A was on top when you cut the first angle, that side marked A should be face down when you
cut the end angles out.
1) Once segmented into short lengths, there is quite a pile of wood – remember to
keep the wider (tops and bottoms of doors) sections separate – they should be
easy to recognize because they are only cut on 3 sides instead of 4
2) The cross-pieces/struts should be cut on an angle at each end so that they fit flush
up against the long side rails’ angle. This means that the middle struts are angled
on 4 sides, and end struts are cut on 3 of their 4 sides.
The TARDIS Builders Manual 1.0 – http://homepages.paradise.net.nz/~trekker/policeboxes/ All rights reserved – Page
#8
With all your pieces cut you should be able to lay them out on the floor and test-fit them. Once you’re
happy with the fit, apply a little glue to the end angles and stick it all together. You may need to use
some masking tape to hold a nice tight grip between the pieces of wood.
1) Test fit your pieces together
2) The long side rails should fit snugly 3) Masking tape is good
for
holding
the
pieces
together
tightly during gluing
You may wish to use some staples, small nails or screws to further reinforce the joins (from the back!)
but it shouldn’t be necessary overall since the frames should be strong enough to hold until we mount
them later.
Tip: You might like to cut a piece of wood to 15" long and use it to space the crosspieces apart as you glue them - though remember, it should be 15" between the edge
of the flat surfaces, not the bottom of the angled surfaces.
ALSO: Think about your PULL TO OPEN phone panel. It shouldn’t have bevelled
sides, it is a square frame which fits inside a square hole - will you cut them off the
already angled pieces? (trim 1cm from the relevant side of each piece that surrounds
that panel
Repeat 8 times = 8 doorframes - the best ones will become doors, the other 6 can become walls.
DOOR/WALL FRAMEWORK (NO ANGLES) ___
The TARDIS will not look quite right without angles around the panels, but if you can’t get the
appropriate equipment to cut an angle (other options might include a table-mounted router with a 1”
deep bit, but it would make an absolute dust storm of MDF…) you can use this method happily as
many many Boxes have been built without panel angles in the past.
Essentially we are making the frames for 8 doors here, except that some of them will be attached to
wall panels instead.
For each '
doorframe'you will need 2 vertical lengths which are wide enough to be mounted behind the
corner posts but still fit the width shown on your plans, 2 cross pieces for the top and bottom of the
door & 3 cross pieces which fit across the middle sections of the doors.
After cutting your wood to lengths, lay out on the ground and test-fit.
Spread some glue across the ends of the short crosspieces and hold in place. You can use masking
tape to hold the joints together tightly
You may wish to use some staples, small nails or screws to further reinforce the joins (from the back!)
but it shouldn'
t be necessary overall since the frames should be strong enough to hold until we mount
them later.
Tip: You might like to cut a piece of wood to 15" long and use it to space the crosspieces apart as you glue them.
Repeat 8 times = 8 doorframes - the best ones will become doors, the other 6 can be wall-mounted
later
The TARDIS Builders Manual 1.0 – http://homepages.paradise.net.nz/~trekker/policeboxes/ All rights reserved – Page
#9
WALL/DOOR PANELS___
You will need:
For each wall - One sheet of plywood (12mm recommended for solidity, but 7mm quite adequate), cut
to the total height and width of two doors PLUS factoring in the gap between the frames (where the
dividing strip will later be overlaid).
For each door - Plywood strip cut to door height and width. If you cut the height just slightly under that
of the door (5mm less) you should be able to leave a small gap at the bottom edge, ensuring that the
door will open smoothly and not need sanding later.
I cut the plywood sheets I had bought (1200 mm X 2400 mm – one sheet for each side of the Box) to
about the right size using the table saw. The exact dimensions aren’t critical since they aren’t seen
from the outside, so long as they cover the door/wall frames and give you enough area to screw into.
Make sure that the bottom edge is straight though or you will have wobbly walls!!
Lay the plywood on the ground and place the doorframes in position on them. Lay them out so that
there is a one inch gap between doorframes (using several 1" thick blocks as spacers). With walls,
make sure that the bottom edge of the frame meets the bottom edge of the plywood, with doors, make
sure that the top edge of the doorframes meets the top edge of the plywood (it looks neat, and if it
doesn’t quite meet the very bottom edge that’s fine as they need to be free-swinging anyway and you
don’t want ANY overlap to get in the way)
Once they are perfectly in place draw the
position of the windows onto the plywood.
Remove the framework and draw another set of
lines, 1cm further out from those you have just
made. This is because the windows we make
will be larger than the hole and will press against
the framework from the inside.
1) If you are having an open-able Phone-panel, don’t forget to cut out the
hole in the backing ply now. Exactly the same method as for windows,
though the extra 1cm rim is optional.
You can use a jigsaw to cut out the window
holes. You may like to use a large drill in the 2) Once you’ve marked out the location of the framework, cut out a slightly
corners of the window hole to give the saw a larger hole so that windows can be inserted from behind.
place to start and rotate. You may like to sand
and smooth the hole edges now as it will be
much more difficult (practically impossible unless you’re VERY determined) once the doorframes are
attached.
This next step should be carried out very carefully. Lay out the frames on the ground FACE DOWN
using the spacing blocks to maintain a 1" gap between doorframes and ensuring that they are level with
each other. You may like to use a long piece of flat wood and butt up to the bottoms of the doorframes
making sure that they are at the same level.
Drizzle wood glue over the frames (the back-sides of which should be facing up) and lay the plywood
you have prepared down over them. Be very sure that the ply is meeting the edges smoothly,
particularly the bottom edge!
Holding the ply exactly in place, drill a quick pilot hole and screw the ply onto the frame underneath. If
you start in one corner, then do an opposing corner it should stop the ply sheet moving around.
The TARDIS Builders Manual 1.0 – http://homepages.paradise.net.nz/~trekker/policeboxes/ All rights reserved – Page
# 10
Put as many screws as you can into the wall, I used 2 per cross-piece and about 6 or seven down the
length of the side rails. I don’t know how many it would have taken to be sound, but do you ever want a
piece falling off? It is safe to walk or kneel on the ply as you drill and put screws in, just be VERY sure
of your footing and only put weight on areas with rails underneath, don’t step on an unsupported area
of ply.
Lift it up and have a look. If all has gone well your door/wall frame should now be tightly screwed to a
piece of ply backing which is providing the panels in your wall. It will now be a great deal heavier than
it was too! If you used 7mm ply (as I did) or thinner, your walls will have trouble supporting themselves
and will flex in the middle where there is that 1” gap. Thicker ply may also do this but I doubt it. To
counteract this I made 2 thick timber battens which were glued and screwed to the back of each wall.
These provide the horizontal strength and support that the walls need. I purposely used timber so that
it wouldn’t crumble or snap under stress as MDF or ply might. These battens were connected at the
height of the second and third cross-pieces (counting from the ground up) as that area has the most
weight.
a)
b)
Butting the bottom of the frame hard up with the smooth edge of the ply should let your walls stand well – though they will not stand on their own
at this stage!
Fixing some strong/thick battens to the wall with help immeasurably if you have wobbly walls due to thin ply
screws everywhere I used 2 per cross-piece, one in every corner and about 8 down the length of each side of the door
Obviously, you will need ply sheets as wide and tall as the walls for the wall framework and to cut thinner strips of ply
for the door backings. Once glued and screwed (thoroughly) through the ply into the back of the framework your
doors and walls will be very strong and hold themselves together without complicated methods of holding the frames
together other than their initial gluing.
Alternatively…
Since I built this box, I have been lucky enough to watch and hear about other builds. One popular
trend is to have a single thick piece of wood serving as the centre of each wall – it acts as both
vertical stiles as well as sitting beneath the central divider. This has the benefit of strengthening
the wall since it can’t bend around the gap seen in my build – though it will mean that you have to
source wider wood, and there are now difference between the way you make the doors and walls
– in my build I did find it particularly easy that I could make a big pile of each size of wood required
and then just assembled 8 doors which were exactly the same until some (the less perfect)
became walls. Either or, whichever technique suits you best the visual result will be the same.
I also have a note about the construction of a box where the door moulding was glued directly to
the ply instead of making the door skeleton up first. Just as logical as any other way, but you
would be well advised to mark it all out first to make sure it fits before the glue goes on!
The TARDIS Builders Manual 1.0 – http://homepages.paradise.net.nz/~trekker/policeboxes/ All rights reserved – Page
# 11
WINDOWS – STAGE 1___
With the doors and walls in place, you can take a break from the heavy labour and start some fiddly
labour instead…
I made the windows slightly larger than the holes in the door framework so that the windows can be
pushed up against the frame from the back and secured there. In practice this meant that the edge
stiles were the same width as the visible ones – once again it makes it easy to prefabricate a large pile
of the same-sized materials.
The windows are a very basic construction, simply pre-cut all the pieces and glue together. You will
need (for 8 windows): 32 Vertical bars and 24 Horizontal bars. The length of these will match the
window-gaps you have in your frames – (remembering that the angled part of the framework counts as
part of the width/height shown on most plans) so that they can fit in place behind the frame. Windows
are not very deep as you can see in the photos – they can look odd if the material is too thick. I used
Pine for the window frames, buying a length of dressed timber and cutting it down to the width and
depths I needed on the table saw before making shorter lengths out of it. If you’re lucky you may find
suitable sizes at your wood supply, possibly prepared as wall mouldings. The window framework spars
are all just less than an inch wide, so remember to add that width into your calculations when you work
out the gap needed between panes of glass. The outside of the windows you can only see 1cm from
the outside, the other half is behind the door framework.
Take your time measuring out the gaps between the spars and figure out how far from the edge each
cut will need to be made. I decided to make the windows by cutting half the depth out of all the edges
that meet, so that when put together they almost slot into place and form one-thickness.
Quite a pile of kindling…
See how the recessed cuts help the two halves to fit together? Just remember to make all your cuts on
the same side of the wood – trust me, stranger things have happened…
Obviously this adds up to quite a pile of wood so be careful to keep your two piles of lengths separate
or you could spend a long time sorting through them again. Once I had all of my spars cut to the length
and widths I wanted, I used a table-saw set at a very shallow depth to cut the pockets out of the spars.
I did it spar by spar at first but got tired of that very quickly. Then I started masking taping the raw
spars together in batches of 6 or 8. With the tape facing up I ran the raft of spars back and forth over
the saw blade gradually increasing the lateral depth and got a nice uniform cut from all of them. I
wouldn’t do it with more than this number of spars though. It was a little unwieldy and equal pressure
needs to be maintained on them all so that the cut depth is the same, without risking yourself anywhere
near the saw blade!!
This seems like such a simple exercise but if anything goes wrong you will either need to start again or
spend some time with filler putty later. I miscalculated the space where I needed to cut one of the
central gaps because I forgot to factor in the width of the saw blade when setting the distance guide
rail… won’t do that again, it took me ages to fix it up with putty!
The TARDIS Builders Manual 1.0 – http://homepages.paradise.net.nz/~trekker/policeboxes/ All rights reserved – Page
# 12
Piles and piles of long rectangular bits of wood
Vertical spars - gaps top, bottom and centre
Keep the piles/sizes separate
Horizontal Spars – see the gaps?
Masking tape makes a raft out of the spars
Close-up, not the prettiest cuts - but it worked!
Once you have made up your piles of cut wood, you can begin assembling the window frames. I had
lots of pieces of masking tape at the ready, then dabbed wood glue into the recessed areas and held
the piece together, adding masking tape to hold everything in place while they dried.
Building a window – 3 Horizontal parts
Spaced out when a side rail is added
Oops, made a window frame already!
Once dry, it will stand up happily
More Vertical rails are glued and pressed together
The work goes on and on and…
The TARDIS Builders Manual 1.0 – http://homepages.paradise.net.nz/~trekker/policeboxes/ All rights reserved – Page
# 13
STEPS UNDER SIGNBOXES___
Next come the “steps”, which are bars which fit horizontally above the door/wall frames and sit
underneath the POLICE BOX signs.
There are different preferences on the depth, width and even existence of these items, but the
construction technique for any version can be basically the same.
STEPS: Cut the right length of wood or MDF. It is possible to build this up in layers, using overlapping
pieces of wood so that the steps are essentially hollow, but the one-piece method has several
advantages (Google “The Blue Box Project” for more info on hollow step techniques).
On the face of your rectangular pieces of wood, mark out the distances between the steps. On the
bottom of the piece, mark in the heights of the different steps. Using a table saw, cut out the relevant
chunks.
Close-up of a completed Steps bar.
You can see in this “before” and “after” shot how I used the
table saw to cut the long edges from a rectangular block.
After each of the long cuts, saw it again to cut out the
relevant step. It made sense to me to do the front-most cut
first and create the top & middle steps first.
One done, one not-so-done
Ahhh. For the wall steps, they can be
mounted directly onto the tops of the walls
and glued there. For extra security I did the
same to them as to my front steps and
added a small bar to the back of each end.
This bar will be screwed into the back of the
corner posts and hold the steps in place
safely and in perfect alignment. For the
front steps, they work as a positioning guide
when building the Box and help to stop the
doors pushing the steps forward when they
slam shut against them.
You can see how it would look when stuck
on a Box.
And here she is. You can see how the
steps sit over the top-front of the wall and
butt up against each side of the posts. I
didn’t get clever and try to mould my steps
around the edges of the corner posts like on
the 80’s TARDIS; my steps are only as
deep as the distance from the edge of the
corner moulding to the front of the wall.
Getting the saw level right is very tricky. Don’t forget to compensate for the thickness of the blade itself when figuring out
where to make the cuts! Also, don’t cut your hand off. This is quite fiddly work and you must be as safe as possible. Don’t get
your hands anywhere near the blade even when passing wood directly over it, and just take it slowly!
The TARDIS Builders Manual 1.0 – http://homepages.paradise.net.nz/~trekker/policeboxes/ All rights reserved – Page
# 14
THE BASE___
You’d think that this is where I’d start wouldn’t you? Fair enough - I probably should have, but it’s not
the most exciting part of the job and it must be done right.
I wanted to replicate the TV props in my build so I decided to add castors to my Box enabling it to be
moved around easily at will. You may decide to go with a solid stay-where-it’s-put Box which is quite
understandable – simply leave out the castors. If your Box is going to live outside you will have to look
at putting a water/weather-proof cover on the very bottom of your Box or it may rot though. Either that
or cast one in concrete as at least one other builder has done (and the Police did originally… ), but of
course you must be very sure about where you want to put it!
The base is created out of 7 full lengths of timber and assorted short joints. Imagine that you were
making a grid out of matchsticks and you will see how it comes together. There are 3 lengthways
beams inside of a basic square frame. The internal beams give strength and rigidity to the frame and
we will pack those beams with intersecting crosspieces to firm up the entire structure.
A picture is worth a thousand words at this point:
You can see the simple grid made to support
weight on the top of the base. The short studs
are offset from each other so that screws could
be passed through from the opposing side to hold
the timber.
A bit of putty covering the gaps and screw holes
makes for a very attractive piece of woodwork
<< The base takes up quite a bit of floorspace when laid flat. Be
warned - if you don’t have space for the base, you don’t have space
for a Box! If you put wheels on this works as a giant skateboard (with
no brakes… - don’t ask)
<< I found that there was a bit of movement in the corners of the base
because it was the only loose edge. Because of the bevelled edge you can’t
screw straight into the base board from the outside so a small block glued
and screwed under the baseboard can be fastened against the inside edge
and holds the base in check.
Castors… completely optional. I found some plastic castors which are about 5cm tall. These can
support about 60 kg each and raise the base about 1cm off of the floor. At this height you can barely
tell that the base is off the ground at all (see picture in row above) but on a smooth surface it moves
like a dream.
Castor placement – If you’re planning to put
wheels on your base think about placement and
balance. I put one in each corner so that the
walls were supported in their heaviest spots and
then 2 across the centre to support the areas
where people would be standing.
Worked
perfectly, though I thought about putting more on
for balance in the centre area but no obvious
need so far.
Once it’s painted up, you’ll probably
find it hard to know which side is
which. To me this mattered because
I had put bolts on the walls which slot
into the base as locating pins. I put
these in slightly different positions on
each side so that I could easily tell
which way around to place the base
when putting it together.
The TARDIS Builders Manual 1.0 – http://homepages.paradise.net.nz/~trekker/policeboxes/ All rights reserved – Page
# 15
This base was created by using 4 outside beams which were cut down from standard 2x4” timber. I
mitred the corners so that they would fit together with regular joins (no obvious front/sides) and used
the table-saw to put a 45 degree angle on the outer top edge.
As you can see from the pictures, the three vertical beams are support by alternating rows of 2 or 3
short studs. All of the beams inside of the frame are simply screwed into place through from the other
side of the timber it abuts.
For the vertical beams which are held in place by screws from the outside of the frame, I simply filled
the screw holes with building putty.
The base is probably over designed from an engineering point of view but I felt that it would be better to
share support of weight on any one part of the base. With only 40cm or so between supports, it would
have to be a very heavy impact indeed to warp the top board. Speaking of which, the internal pieces of
timber are all shorter than the outside frame. Shorter by as much as the thickness of the square board
you use to create the top of the base.
Once the base structure is made, you simply drop your square of wood/MDF into the frame and screw
it through into the beams beneath. I found I had a few little gaps which needed puttying and you will
probably also want to fill the crack around the inside of the timber frame before painting.
PHONE PANEL___
This is a nice little section which is relatively easy and can be made up at any stage when you have a
little time. Depending on what model of Box you are building you will have a choice of Phone panel
designs to use. I went for the original Hartnell 1960’s model. This was a fully opening frame which is
hinged on the left-hand side, made up of 4 mitred corners. Of course to make this fit into the door
frame the relevant panel has to be altered slightly too. If you are interested in this option you will need
to do some preparation earlier when planning your walls. The 4 sections of door frame rail surrounding
the phone panel should be sanded or router-ed down so that they have a flat edge. This is easy to do
for the 2 short crosspieces, they can simply have their bevelled edge cut off on the table saw, but the
long door rails will probably need a router to cut a piece out of their long bevelled edges. I made a bit
of a mess of each end but this is covered when the cross pieces are attached.
You will also have to think about whether you want a gap behind the panel in which case you will have
to cut out a hole in your backing board as for windows at the stage when you are attaching backing to
the frames.
It’s basically a picture frame. The actual frame can be made from 4 thin strips of MDF, mitred to 45
degrees at each end and attached as securely as possible. Lacking any advanced joinery experience
or equipment I elected to simply glue the wood together since it wouldn’t be taking any structural weight
– so far so good!
The panel was simply made by routering a small gap into the back half of the door frame and pushing
an appropriately sized panel into it from behind. Be careful about whether you attach this permanently
– you may want to take the panel out later for the signage to be attached more easily.
Hinging the panel to the door frame was not an advanced job but caused me some sweat and tears.
Not the sort of job that you should do by yourself - having someone hold the panel in the right place
whilst you mark and drill the screw holes would be a great advantage. How you secure the panel when
it swing shut is up to you, any little magnetised catch up cupboard fastener would do the trick but I
found that my panel was of a size that there was just enough friction to hold it in place without
additional aids.
The TARDIS Builders Manual 1.0 – http://homepages.paradise.net.nz/~trekker/policeboxes/ All rights reserved – Page
# 16
My number 1 tip for this section? Get the size right. You may think that it’s a panel therefore the same
size as all the rest of your panels right? No. Well, yes… and no. It has to fit into that space, but if you
allow a few millimetres for room to let the thing move, a few mm for hinges (unless you recess them a
little as I did, using a good old chisel) and a few mm for the swing as it pulls open, you will notice that a
small gap is visible around the outside of the panel. This is good; just remember to take this amount off
of your total measurements for the panel frame pieces and the size of the panel which fits into it. Yes,
perhaps a bit obvious but I forgot to take a few mm off when getting some Perspex cut to serve as the
panel (failed experiment there - tell you later) and spent ages trimming it down by a few mm all round.
45 Degree corners look pretty sharp and can be
made out on some stills of the 60’s TV TARDIS as
the way that their panel was put together initially.
Later versions were often just two long and two
short piece attached end to side.
The panel frame comes together
TIP: Masking tape can be a great aid at holding
your wood in place whilst glue dries.
The panel. This one has already been painted in
an appropriate manner and then had signage
applied
Here, the panel has hinges attached to the side,
set into a slight recess that I chiselled out. The
rear half has been routed so that a panel can be
pushed in from behind.
Exploded view of the sign frame structure.
Voila!
Oh alright I‘ll tell you about the Perspex.
While getting the rest of the Box ready I
just had a paper sign in the phone hole
and love the lit up effect when in darkness.
This is how real Police Boxes worked too.
Except they had white painted glass
panels and the light shone through the
non-painted letters. I thought that with
some Perspex and a thin coat of paint I
might get some glow-through. No, the paint
blocked almost all light, the light that got
through just highlighted any painting errors
and also the letters were silhouetted as
black, so you couldn’t see anything. No
harm done though - still looks great in the
daylight!
Hinged on the left or right, handled, unhandled, opening, fixed, silver, blue, metal, glass,
wood, cardboard – even the wording changes... this detail has never been 100% accurate to
(or on) real life Police Boxes, so it is definitely a case of picking the version you like the most.
The TARDIS Builders Manual 1.0 – http://homepages.paradise.net.nz/~trekker/policeboxes/ All rights reserved – Page
# 17
DOORS & DOOR DIVIDERS___
DIVIDERS: Using your table-saw, cut a piece of timber or MDF to the required width. How thick is it?
Well, you need to decide whether you want it to meet the STEPS above it in a flush manner or so that
the divider goes up over the first few steps. I made it only as thick as the lowest step so that it met at
the top. Once cut, simply glue to the framework! For the one at the front of the Box, put it to one side,
until the doors are finished. Put these lengths to one side - they will be dealt with later when we are
fitting the doors.
The actual door construction was covered earlier - in the construction of the walls and door frames but
hanging the doors needs a little thought too.
Hopefully you made the outside rails which make up your doors slightly wider than the width shown on
the plans you’re following. As with walls, the outside edge of the doors will need to butt up against the
inside edge of your corner posts. This gives it something to hinge against and to slam against when
closing. Your doors should be equally wide on the inside edges so that they hit the central divider
which helps to stop them swinging outwards. Yes, they also hit the steps above the doors (if you made
the top of your doors big enough to) – so there is no chance of the doors swinging out and ripping their
hinges off – but if you didn’t have an overlap on any of these areas you run a very high chance of a gap
appearing on that side of the door and you will get a lot of light leakage when lighting your Box from the
inside.
You will have decided earlier how wide to construct your doors – but when they meet they need a small
gap so that they can swing freely as well. I decided to leave a full inch between the doors when closed
so that the central divider could have a reinforcing rail running down its back which would be
sandwiched by the doors when they shut. This style also means that you can use either door without
worrying which order they need to be shut in. You will notice Dr Who episodes where they go through
either door, but sometimes cannot close the door because the central rail is attached to it and cannot
get past the already closed other door. With the rail freestanding you can use either door but it is
slightly harder than simply gluing the central divider to one or other of them. That’s still a perfectly valid
technique though as long as you recognise the limitations on which door you will be using.
Hinging the Doors
I couldn’t find any of the L-shaped hinges I was looking for which would have allowed me to put one
end of the hinge on the back of the door and one on the back of the post (L-shaped would bend around
the depth of the door without the need to allow a recess for the ‘tube’ part of the hinge) – so I built
some little blocks which were attached to the back of the posts in three spots per side and the hinges
simply attached to the block on one side and the door on the other. These blocks were cut so that they
end exactly 1 inch from the corner of the post where the doors abut – this is hard up against the doors.
To compensate for them exactly next to each other, cutting an angle off of the door-facing edge meant
that the door won’t rub against it and also means that the central tube of the hinge will be in the air, - no
rubbing there. Might want to check the pictures to see this design in action – I actually used some offcuts from the door frames which already had the perfect angle cut off of one side.
I used “loose-pin” hinges. They look like those found on most internal household doors (where I live
anyway) and are made up of two identical halves which are held together by a central pin which can be
taken out –allowing the door to be taken off. There are several styles of hinge which would be good for
detachable doors. Consider this even if your Box is a permanent structure, it makes the doors so much
easier to deal with in every way and are at least as good as permanently screwed in hinges except that
if you ever need to take them off you won’t have to drill more holes to re-hang them.
The TARDIS Builders Manual 1.0 – http://homepages.paradise.net.nz/~trekker/policeboxes/ All rights reserved – Page
# 18
To get all the hinges in the right places (3 hinges per door works well, looks right and shares the load)
is a little tricky. If like me you go with a block inside the posts, read on – if not… you never know, you
might glean something here as well.
I created a template for the doors out of a block of scrap wood of the right thickness. By placing this
piece of wood against the edge of the blocks inside of the corner posts at the same point that the door
will be later by you can easily determine the right location for a hinge. Mark the hinge location on the
block and your dummy piece. Now you can use the hinge which is attached to your dummy block to
mark the locations for hinge holes on all of the other blocks. Easy. To match the height of the blocks to the doors I chiselled a small piece out of the panel lining the back
of the doors in the spots where the hinges meet the doors. Another option would have been to use
thicker blocks or add a similar piece of panelling to the blocks but it all seemed like too much work at
that point!
On the inside of my corner posts I fitted some
spacers on one side which the side-walls would
butt up against, on the front edge I put some
wider blocks which extend out to where the door
meets the post and they had a slanted edge
This is the jig I made up for hinging the doors.
Using this I got the positioning right with the
dummy bit of wood acting as a door. Then I
screwed the hinge to the corner post, took out the
centre pin and moved down to attach the next
hinge. This ensures that all the hinges have the
same opening axis.
An old carpenters trick apparently – put a couple
of coins under the door when you hang it - this
means that it won’t grind over or into the
base/floor/carpet whenever you open your doors,
while giving it a flat surface to rest on during your
hanging efforts..
And there it is. With one door hung, the job is looking pretty good. Thanks to the loose-pin hinges the
door is still removable (for painting, storage, transport etc) and can be re-attached in about 1 minute
per door.
Hanging the doors
Picking up a guide to hinging from my local handyman store I discovered an old well-known trick for
hanging doors. Place a few coins on the base before placing the door in place. By holding the door in
its proper position, simply swing the loose end of the hinge which is already attached to the posts into
place and screw it to the doors. Once you have attached the door, simply remove the coins
underneath and it should (fingers crossed) swing smoothly!
Central Dividers
The dividers can be as simple as a piece of timber which is attached to one door or the other
depending on which you want to use or they can be freestanding components of the Box.
I decided to make the divider between the doors a separate unit, which has a few special features. The
front-most part of the divider is simply a rectangle of wood which goes in front of the doors and
continues up to meet the steps above the doors (or higher depending on your build preference).
Because I found my MDF was prone to warp a little under it’s own weight because it was fairly thin
(only as thick as the bottom-most step which it meets) I added a reinforcing strip of timber to the rear of
the divider, only as wide as the gap between the two front doors (one inch max). At that point I realised
that the reinforcing strip was a gift for attaching the divider at the top and bottom so that it would be
The TARDIS Builders Manual 1.0 – http://homepages.paradise.net.nz/~trekker/policeboxes/ All rights reserved – Page
# 19
free-standing. By leaving the reinforcing strip slightly longer than the actually visible dividing strip, it
would extend past the top of the doors on the inside of the Box and attach to the back of the steps. At
the bottom I used a simple sliding bolt to locate the divider in a hole drilled into the base. At the top I
chose to put a small magnetic catch so that the divider would snap into place against a small metal
plate screwed to the back of the steps in the right location.
See photos for how the dividers attach:
These are two corner posts with blocks
attached for door hinges. Note the angle cut
onto the spacing blocks on the side where
they will meet the doors. With the hinges
attached to the top of these block, the central
part of the hinge will be in the cut-off area so
it will not rub against anything and also the
door will not rub against anything as it
swings closed.
3 hinges per side is normal for most doors and
seems ample for the weight of Police Box replica
doors.
Swinging in the breeze
A magnetic catch
is added to the
top of a divider –
specifically to the
reinforcing
rail
which runs up the
back of the divider
and attaches to a
small metal plate
screwed to the
back of the steps.
When priming and painting the door you will
probably want to take your lock out to make
it easier
Door hinges are fully visible on the inside when the
doors are shut. Also note the gap between the
doors, your lock needs to be able to bridge the gap.
So either choose a lock that fits, or buy the lock
before beginning your build and plan ahead for a
gap between doors that suits the lock you have.
One half of a hinge, with its
pin sitting in it for safekeeping.
Divide and conquer
At the bottom of
the
divider
a
simple bolt slots
into a hole in the
base, it holds the
divider in exactly
the right spot.
But if you can’t be bothered once it is
installed and working, I found that
subtle application of masking tape will
help keep it clean. Alternatively you
could paint the doors before installing
the lock. That would be smart…
A part of my lock extends out past the side of the door so that
the visible part of the lock is in the right place. Depending on
your lock this may vary wildly. In the end it worked well for me,
helping to make the lock reach the catch fitted to the other door.
The TARDIS Builders Manual 1.0 – http://homepages.paradise.net.nz/~trekker/policeboxes/ All rights reserved – Page
# 20
You can see here how the divider clips into
place above the doors, on the back of the
‘steps.’
When the doors are both shut, you must
make sure that any reinforcing strips fit into
the gap between your doors.
Locking the door
Following the instructions which come with your lock should cover most of this, but essentially you
need:
One door lock: catch-plate, chamber and keys.
Hole-cutting drill bits
Screws etc.
Once you’ve marked your favoured location for a lock, hold the back part of the lock against the door
and make sure that it will reach the catch-plate that you will mounting on the other door. If it doesn’t
reach you will have to look at where you can put the lock. Mine had to be set so that the rear of the
lock was off the side of the door slightly in order to reach the catch plate on the other door. No problem
with that though and it made the centre of the lock sit in just the right place.
Get all the bits together. The
pack I bought included all
parts of the lock which was
labelled as a “Night Latch.”
Colour is personal preference
of course.
Looking good from the front
now, isn’t it?! You could stop
there and simply cut off any
extra guff at the back if you
don’t actually want a working
lock, otherwise proceed…
Mark out your lock location. –
remember to measure from
the edge of the door where
the divider will be, not from
THE edge of the door
Depending on where you lock
went in and the model you
bought, the back of the latch
may overhang the side of the
door.
Using a hole saw drill, follow
your pilot hole until you’ve cut
a space for the lock cylinder.
The matching strike-plate
needs to be mounted
opposite. The size of mine
meant that mounting it on the
other door was the perfect
location. This also means
that the other door can be
unlocked in the same manner
if I were to start using that
one
The TARDIS Builders Manual 1.0 – http://homepages.paradise.net.nz/~trekker/policeboxes/ All rights reserved – Page
# 21
Pass the cylinder through
and fix in place on the back
of the door.
And in place from the back.
The lock bridges the gap
between the 2 doors – it fits
well and now actually works.
For goodness sake, don’t lose the keys! Put the
spare somewhere else – don’t leave it attached
to the first one (like I have so far… ) or you may
have to buy and fit a new lock!
Drill a guide hole through the door in the exact centre of the spot. Choose a hole-cutting drill bit which
is just slightly larger that the calibre of the lock chamber and cut that out of the door. Attach the
backing plate of the lock to the rear of the door. Put the front sections onto the door and then screw it in
place. Add the back of the lock and there you go. Now simply screw the catch-plate to the other door,
make sure that it all works and do try to remember where you put the keys. On reflection it may be
best to do the lock-fitting after you have painted your doors so that you don’t have to take the lock out
or mask it too much (see photos) – or perhaps you like the painted over look – the Doctor often did.
SIGNBOXES___
Because my Box was designed to be collapsible, I wanted the sign boxes to be used to hold the side
walls in place while I attached the doors and roof. Additionally, these signs were designed to be backlit in the same manner as real Police Boxes – by a central light inside the Box.
It has been suggested to me that the simplest design would be to make rectangular boxes and cut an
appropriately sized hole in the corner posts so that the boxes would slot into them. I didn’t have the
confidence to go cutting into the corner posts and didn’t want to weaken them at all so I designed the
sign-boxes to wrap around the posts and attach on the inside with nuts and bolts.
If you want to make the S18 version of the TARDIS which feature a POLICE public call BOX sign which
went right across the Box you will have to adapt these plans slightly.
Essentially these are 4 hollow boxes with some internal structural supports. Measure, mark and cut out
the top and bottoms for the boxes from your wood.
At each end of the box sheets, rectangles are cut out of the back and then I used a jigsaw to cut a
rounded gap out to accommodate the corner post’s quarter-round mouldings.
They are designed to be deeper than the corner posts, so that there will be a small ledge on the inside
of the Box which the roof will then sit on later. In the picture below you could divide it into thirds
horizontally. The front 1/3rd is visible outside the Box, the middle is where the corner posts fit and the
rest is inside the Box providing a ledge for the roof section.
The TARDIS Builders Manual 1.0 – http://homepages.paradise.net.nz/~trekker/policeboxes/ All rights reserved – Page
# 22
Overall design of the
sign-boxes as see from
above or below
See how the box has
gaps cut out of it to
accommodate
the
shape of the corner
posts?
TIP: When marking this
out, use a scrap of ¼
round moulding to draw
the curve correctly and
in the right spot.
Better TIP: Cut a small
gap out of the rounded
moulding instead – that
way you can avoid
having to jigsaw out this
weird shape I used.
There is a block at the
very end – when the
sign is seen from the
side. The larger piece
is the structural part of
the box, it take the
weight of the roof from
above
and
also
supports the bolts which
hold the sign to the
walls.
I used 12mm thick MDF for the top and bottoms of the sign-boxes. For each end of the sign and for the
internal supports I used 1 inch thick MDF and screwed through the 12mm sheets into the internal
supports which held the boxes firmly.
Here’s the missing part to the structure - there is a gap right along the front of the sign for the actual
front of the sign to slot into later. The bottom and top sheets form the top and lower edges of the front
and the vertical supports are set back from the front edge just enough to provide a stopper when the
front of the sign is slotted in. Examples:
Once the sign-boxes are attached to the walls the end-most block meets
the front of the corner posts and makes the box look very solid.
Additionally, you should be able to make out here how the front panel is
pushed onto the sign-boxes and meets the vertical blocks which were set
back from the very front of the boxes. The graphics will sit behind the front
panel later.
The TARDIS Builders Manual 1.0 – http://homepages.paradise.net.nz/~trekker/policeboxes/ All rights reserved – Page
# 23
Even when the Box was finished, I left the signs detachable for transport.
The inside of the sign housing could house a light source for each sign, or
could be painted/lined to reflect light out through the signs. I didn’t bother
even painting the insides initially
Once the sign is pushed into place from the front it is held firmly by the
sign-box structure. If you don’t have a tight fit you could easily add some
magnetic catches to the back which would snap it into place.
TIP: It would be fairly simple to bevel the panels of the sign so that the
seam doesn’t show along the front, but I was replicating a building style
used on the TV Show.
To hold the sign boxes in place, I bought some metal brackets from the hardware store. These were
simply L-shaped brackets which were screwed to the back edge of the corner posts. Marking and
drilling 2 holes in the appropriate spots, bolts can then be passed from the bracket through the side of
the sign-box and then fastened on the inside with washers and nuts. There are probably more elegant
solutions and ones which facilitate faster building, perhaps something which simply clips in place – but
this method definitely works!
Graphics are mounted on the inside of the Box.
Notice the dual bolts which hold the sign box in place at each side.
Bolts hold the sign boxes in place at each end. You can see how internal
light will cascade out through the signs.
The signs hold both walls together before the doors etc are fitted. Metal
brackets mounted on the inside of corner posts match up with holes in the
side of each sign box.
Lighting the Box comes later, but it’s a helluva reward for you work at the
sign-box stage. Light comes out of the graphics, guided by the sign-boxes
internal design.
The TARDIS Builders Manual 1.0 – http://homepages.paradise.net.nz/~trekker/policeboxes/ All rights reserved – Page
# 24
The front panels
These will depend on the design you wish to use. For a backlit Hartnell/Real style like the one above,
there is a gap cut from a simple rectangle of wood. For a 1980’s style Box you may simply construct a
box picture-frame style to fit on over your graphics.
I used a router to cut the gap out from the front panel. By setting the edge guides carefully, I was able
to cut through the 12mm MDF I was using and then move it up and down to cut out the full rectangle.
Sizing-wise the gap goes from the outside edges of the windows.
Extra for experts. Technically, there is a step detail on the front panel if you’re doing it perfectly. This
is an intermediate step before you get to the graphics. See the pictures below for detail. This was cut
by using the router again at a shallower depth. This was harder than the first cuts because the wood
flexed a bit now that there was no centre to the wood. Slow but sure is the rule there I think.
Because I was only using 12mm thick MDF for the front panel I had to build it up a
little from the back around the step with spare timber strips so that it looked deep
enough down to the level of the graphics when seen from the front.
The graphics are attached to the back of the panel – the extra step is a historically
correct detail though a little complicated to achieve.
The same picture in closer detail. The step is as deep on the first level as it is the
second. I cut down about 8mm on each stage.
Change, change, change. By most accounts the BBC Prop Store was a hard place for a TARDIS to
live, and the breakable signs often sported changes from show to show.
The TARDIS Builders Manual 1.0 – http://homepages.paradise.net.nz/~trekker/policeboxes/ All rights reserved – Page
# 25
ROOF STAGE 1___
The roof for this design was built as two stages. The first is a simple square frame with a platform on
top. This sits on top of the sign-boxes and slips into the gap formed by the insides of the corner posts.
There are several possible designs for this section – real Police Boxes and the original Hartnell Box
had one very high step but this was heavily modified to make the Box shorter over the years. I am
following a design first implemented on the season-18 Box which has the correct number of steps
which make a nicely proportioned roof although not historically correct. If you wish to use a different
design it would be easy to adapt the following process.
The first step of this process is to build a wide square frame. I used mitred corners for neatness. Once
this has been fixed in place, add a narrower strip/ring of timber around the outside of the base of this
frame. This lower ring is of the same height as between the sign-boxes and the top of the corner-posts.
When settled in place it will form the first (condensed) “Step” of the roof (alternatively, you could design
your own roof with an extra full step to recreate ‘real’ Boxes using reference material on my website).
This is the basic frame created; next we want to build a platform into the upper section so that the top
section of the roof will have something to sit on. I didn’t want a simple slab of wood across the entire
top of the frame, both to save on weight and because I want to be able to access the lamp from inside
the Box when complete. I used 4 lengths of wood which were about 5” wide with mitred corners once
again. This are cut to a size that fits just inside of the frame and is held in place not just by glue or
screws but with blocks underneath to hold it in place when weight is place on it later. I used only 12mm
thick MDF for this top stage both for reasons of weight and availability – this did mean that it flexed a
little under its own weight and didn’t join well at the corners so I place an additional triangular block
underneath each corner to reinforce the structure. Pictures may again tell a better story:
Stage 1 of the roof is the basis on which the peaked section and lamp sit. The
traditional “stacked roof” was made of three steps which you can see replicated
here although to save space the first step is much shorter than the others – this
change was also made on the season 18 TARDIS Prop.
Stage 2 of the roof will be covered later.
As you can see, the topmost section of the roof will later sit on the Stage 1 section we
build, so the platform has to be strong enough to support it.
The post caps were also attached to the roof since it couldn’t be lowered into place with
them already fixed to the corner posts.
Start with build a new square frame
On this frame, build another layer –
this will become the ‘first’ step.
Scrap wood of known thickness
becomes handy spacing blocks
I had my measurements wrong and
the lower layer had to overlap the
larger slightly in order to get the
right height on the 2nd step.
You can probably make out the join
here – around the outer edge where
the platform sits flush with the top.
The TARDIS Builders Manual 1.0 – http://homepages.paradise.net.nz/~trekker/policeboxes/ All rights reserved – Page
# 26
Small blocks on the inside help to keep the platform in shape and at the
right height so that it can support the upper roof.
A piece of scrap wood is screwed underneath each corner of the platform
which holds it all together since glue alone would flex and break quickly.
The corner post caps are attached to the top of the first step. As you can
see the first step is the shortest and rises only as high as the top of the
Corner Posts.
This section of the roof simply drops into place over the box structure and
sits on the back of the sign-boxes. It drops down so that the first step is at
the same height as the corner posts, and then the post caps sit on top of
that level.
Internally, the first few steps were a very simple construction. Simply a
square frame initially of the total height of the first 2 steps. After gluing and
screwing together, this is surrounded on the outside by parts comprising the
thinner first step which are glued to the outside lower edges. The top
platform is almost a 2-D sheet made from 4 panels cut with 45 degree
corners. These are slightly shorter than the total size of the step so that
they will sit inside the frame. It is glued in place and then reinforced with
corner supports and a few blocks along their length to add strength.
Remember the next section of roof will be sitting on this platform later.
Step 1 reaches up level with the top of the post, then the post cap sits on
top, rising halfway up the height of the second step. This might vary
depending on your design.
Another perspective. The entire Stage 1 section of the roof sits on the top of
the sign-boxes. With nice straight cuts on your wood, this is a perfectly
adequate join and light won’t escape.
The TARDIS Builders Manual 1.0 – http://homepages.paradise.net.nz/~trekker/policeboxes/ All rights reserved – Page
# 27
ROOF STAGE 2___
I built this section using what seemed to me the simplest method though I had some doubts at the time.
I have since seen what may be an easier technique which I will detail on the next page. In the end, it
may not matter how you get to the end result, but I can at least show you proof that this works.
The first step here is to create another square frame which constitutes the third “Step” of the roof.
I made this from 1” thick MDF once again – it has a solidity which was favourable. Before fixing the
frame together I sliced a shallow angle off of the top edge. The sloping part of the roof will later sit on
top of the frame at this point so a slight inward facing angle helps hold the roof sections in place.
Once this section is fixed together, put it to one side, next we will build up the sections of the sloping
roof.
Another simple square frame to start with.
Slice an angle off of the (inside) top of each
length to accommodate the roof sitting on it
later. Make sure that you get some nice
clean mitred corners on this frame since it
will be wholly visible as part of the roof.
A set of roof panels cut to (trapezoidal) shape
These things are angled on every side in fact
came out quite sharp (no prize for guessing
how I learnt that lesson… ).
With the frame the right way up (angle at
top), sit the lamp pedestal in the centre and
begin placing in your panels. Take your time
and get it right – this may take some slight
adjustments to get a nice fit.
Even with the best of calculations, plans and intentions something is likely to make you fume here. I had
several small gaps and one corner which laughed at attempts to make it fit. “Fine.” With 3 sides looking
good, I fixed them together and slapped some filler in to the gap. Filler is great. A bit of sanding and
where the gap had been was not even noticeable.
I used a good dose of No More Nails to hold
the underside together after an initial join
with glue.
The roof it still not very strong with just the adhesive in
each corner so I used some triangular off cuts from the
panel-cutting process and glued/screwed them into the
corners. This worked a treat at firming up the entire roof
and although one screw accidentally came through the
upper side of the roof some sanding fixed that up.
And there it is. There is no joinery visible on
the outside and all of the gaps/joins have a
light layer of filler to seal any cracks. With a
bit of sanding this looks like one unit and is
solid enough to sling around or store in any
position.
Wouldn’t recommend any
companions climbing on it, but it will look
good atop your Box!
The TARDIS Builders Manual 1.0 – http://homepages.paradise.net.nz/~trekker/policeboxes/ All rights reserved – Page
# 28
Before we calculate the size of the sloping panel you will need to decide
how large a lamp pedestal you will have on your Box. Using the
standard 6” lamp size I built a square base which allowed a comfortable
margin around the outside of the lamp.
It would pay to either make the lamp pedestal first or to at least cut a
dummy square of wood which will serve as a placeholder when building
the roof up.
Quite a few calculations are required at this stage. I can share the ones
relevant to my build but you would be well advised to check them for
your own dimensions. First of all, we need to know the distance from
the outside end of the square frame of the roofs last step to the outside
edge of the lamp pedestal. This forms one side of a right-angled triangle
which represents any given section of roof. The next side is represented
by the height of the sloping section of roof. Using these two figures you
can work out the length of the hypotenuse (the length of your sloping
roof panel) and the angles at which the sides of the panel will meet the
framing on each side.
With these figures in hand you can proceed to mark and cut the panels
for your roof. They are 4 trapezoidal pieces of wood which seem
improbably small when seen on their own – don’t worry they come
together later! To aid in getting a close fit to the rest of the structure I cut
a complementary angle off the inside of the longest edge which will meet
the step framework. From your calculations you will know what the total
angle on that side was so taking the angled you have also cut from the
frame away will reveal the degree of angle to cut off this edge.
The shortest side also needs an angle cut off of the side – so that it will
meet up with the side of the lamp pedestal in a flush join.
As well as that, I shaved off about 20 degrees from each of the other two
edges so that when the edges of these panels meet to build the roof
they will not push each other apart.
Once you are satisfied with your individual pieces, try fitting them
together on the ground. Ideally, you will find that they don’t form a
square or anything like it. The unique angles and lengths required for a
3-D structure means that they won’t build anything on a flat surface.
There are several alternative
ways to build your roof – an
increasingly popular technique
is to make some horizontal
slats which have the roof angle
cut along their top edge.
Fitted together in a box they
can form a frame for the roof
and you then attach the panels
to the frame.
This technique has the dual
benefits of strengthening the
roof and of making it easier to
attach the panels, though you
will have less flexibility with the
fit if you cut the panels
incorrectly.
The roofs on ‘real’ police
boxes were cast in concrete.
You can see the bracing affixed to the
box frame section of the upper roof
Joining the framework together could
be done a number of ways, with
brackets or by cutting slots so that the
pieces mate tightly.
Lay on the right panel shapes and
there’s your roof.
These images are reproduced with
permission from Steve Hobley’s build
(2004)
Joining them together
This is where I started to feel like it was all going wrong, but it comes together just fine, so read on:
Because the height of the sloping section is the same height as the step below it, you can use the
frame as a former to hold the panels in place. Set the step framework out on the ground with the
sloping inner edges at the top – just as it will be in real life. Place the lamp pedestal or placeholder in
the centre of the area formed by the frame – it may pay to weight this down so that it won’t move easily.
The TARDIS Builders Manual 1.0 – http://homepages.paradise.net.nz/~trekker/policeboxes/ All rights reserved – Page
# 29
Now, place the individual panels in place so that the sloped roof is completed upside down. You may
find discrepancies in the fit at this stage; it will be up to you to sand or trim as necessary to make them
all fit. Remember, the outer edge of the panels should reach to the outside of the box framework and
all meet the ground in the middle at the base of the lamp housing.
Once you are satisfied with the fit, simply slather with glue or other bonding agents up and down the
inside joins in each corner of the roof. I used glue and also some builders adhesive called No More
Nails, which is a thick glue that comes in tubes and can be squirted out along seams as required.
Remember, we’re not attaching it to the framework or central box, just joining the panels up. This could
take a while to set if you used as much adhesive as I did. This alone won’t hold the shape of the roof –
it would collapse under its own weight most likely. I found that using a triangular off cut of wood which
was left over from cutting the roof panels out) on the inside of each corner had a great bracing effect.
Not only did I glue them in place but also screwed through into the roof material. If you go through to
the other side of roof panel, don’t sweat too much, you’ll just have to putty it and sand it down later.
Once dry lift it out of the surrounding framework and flip it over. The slanting roof section should be
able to stand on its own, though there’s no point jumping on it to test its resistance!
The next step is to attach it to the outer frame boxing. Test fit the roof section on to the framework. If it
sits evenly all-round congrats, otherwise do some sanding work or whatever is required to get it right.
Next, take away the sloping roof and apply your favourite adhesive to the top of the box framework.
Place the slanting roof section back on the frame and, if necessary, be prepared to clamp or weight it
so that there is a good strong join. If there are small gaps or overlaps around the corners, sides or
corner angles, don’t give it up now, you will simply have to put some filler in these and sand it until it
comes right a bit later. I had plenty of filling and sanding to do but you could not tell in the finished
article especially once it all gets painted over.
That’s it really. Once dry, puttied and sanded, your upper roof section is pretty much done. Except for
a large hole in the middle of course – that’s where we need to put…
THE LAMP HOUSING___
Once again, my Box was designed to break down into its constituent parts – you may choose to fix all
these parts in place permanently but the technique is substantially the same.
The actual glass part of this lamp cannot be easily built - in real Boxes as in better versions of the
Boxes on TV a lens was used from a (naval) ships navigation light – either a lens from the same source
or actually picked up as spare parts. These ‘fresnelled’ lenses were designed to carry light out
horizontally for a great distance much like a lighthouse lens. The best way to find these is to contact
Ships Chandlers and antique/scrap yards near a port. I had no luck with buying a real lens anywhere
near where I live in New Zealand so settled for a similar lens which is made from polycarbonate for
Security Bollards along walkways. The TV show used many similar lamps, even going down to the
level of a Tupperware tube for part of the 1970s! It is not a vital piece of your build but it would be nice
to get the best lamp you can and it will be reflected in the type of light it gives out. No, it should not be
painted blue. Real Boxes weren’t and the TV show only put a blue lamp on the title credits in the
1970’s by mistake and once used a flashing blue light similar to those on old Police Cars in one story.
The size should be in the range of 6-7 inches diameter though there are no thick and fast rules. They
are often as high as they are wide though a matter of a few inches wither way won’t change the look of
your build very much. Good luck with the hunt – if you find a good source of spares do let me know
where it is!
The TARDIS Builders Manual 1.0 – http://homepages.paradise.net.nz/~trekker/policeboxes/ All rights reserved – Page
# 30
A real lens
The lamp in place on a real Police Box
Look for alternatives if you
can’ find a real glass lens.
This is an appropriate size
security light fixed beside a
footpath.
A few calls to security lighting
suppliers later and… voila! - I now
have somewhere to hide my light.
This one is a trifle small (5 and a bit
inches) for me, but looks splendid in
the meantime.
The first step is to determine the width of your lamp base and how high it will raise out of the top of the
roof. After this, it is simply (yet) another square boxed frame which is slightly longer/higher than you
intend to have it appear.
The second part of this is to cut out a square base which will fit inside the box. You’ll need to find or cut
a set of little blocks to glue inside the boxing which will support the top piece of the box.
A simple box construction with a lid which sits
inside the framework. I made my lid by gluing a
couple of scrap pieces together and then cutting
to size
This shot is from later, but you can see the little
blocks fixed inside the lamp pedestal which will
hold the lid flush up at the right height and
stopping it falling into the box
A quick mock-up with various parts
Set this aside for now and work on the top of the lamp.
The lamps and caps on Dr Who changed almost show to show but in its original form the cap was a 1”
thick circle the same diameter as the lamp pedestal – not a square as most people assume. Mark and
cut this circle out – I found it easiest to use a router on a fixed length arm to swing around in a circle
and cut out the circle. The central hole which the router is based in is not a problem since is will not be
seen when completed.
On the base plate, you should place the lamp lens you have (most have a 6” or 7” diameter) in the
middle and trace around it. At regular intervals, mark out and drill through (all the way) some holes for
your 1cm dowels. The top and bottom of the lamp housing is connected by 4 dowels, and once you’ve
drilled those holes out, place the square base on top of the circular top plate and use a pencil to mark
the locations of the dowel holes. Next, very carefully drill part-way into the circular plate so that the
dowels have somewhere to be set and glued into. Do not glue them in yet.
The lamp is completed with a rounded cap which is centred on top of the wooden circle. The rounded
cap is not a full hemisphere and is not the full width of the circle. The hemi is approximately the top
third of a sphere. It meets the circular plate, leaving a 1” gap around the outside. I couldn’t find any off
the shelf items which I could use for this, so I bought a child’s ball of the right diameter, and used it to
make a negative plaster mould in a bucket. Once dry, I filled this mould to the right height and
The TARDIS Builders Manual 1.0 – http://homepages.paradise.net.nz/~trekker/policeboxes/ All rights reserved – Page
# 31
smoother off the top (which will be the bottom of the cap later). Once turned out, this cap had a few
surface irregularities and took a long time to dry, but was generally correct. I used No More Nails
adhesive to fix the plaster dome to the circular wooden base and then spent some time putting body
filler into the cracks and join around the base. With a bit of sanding this started to look like one solid
unit.
Now, you can glue the dowels into the circular base plate.
With the dowels fixed in place it is now safe to try fitting it all together. The dowels should pass easily
into the square base plate, sandwiching the lamp lens in place. This unit should then sit happily in the
box frame you built earlier.
Pulling it apart again to fix the base frame into the roof section: push the square box through from the
inside of the roof. Once it is extending out by the right amount, glue and fix the box in place on the
inside of the roof. For additional strength (given the amount of solid plaster sitting on top of it all… ), I
attached some more blocks to the inside of the sloped roof, which were then glued to the lamp pedestal
as well. This should be more than ample to hold everything in its right place.
The TARDIS Builders Manual 1.0 – http://homepages.paradise.net.nz/~trekker/policeboxes/ All rights reserved – Page
# 32
This lamp simply sits into the top of the
roof’s lamp pedestal and can be easily
removed or sealed in at your discretion.
You’ll notice that the dowels extend through
the base – this is to allow access to the
lamp for repair or replacement by pulling out
the top half of the lamp
Looks about right…
The lamp can be taken out and used or
stored separately
The basic materials: a box, a circle and some sticks.
It just looks right. Tell me I’m wrong. Not
bad for some little oddly cut panels some
filler and glue.
This roof has several steps and although not quite as
tall as many ‘real’ Boxes it eloquently conveys the
‘stacked’ roof sense.
This bowl had the plaster mould I used for making
the lamp cap so it was perfect size to put the whole
thing into whilst the dowels were glued into the top
section of the lamp.
When it all comes together it has quite a bit of
substance
Storage? I find that my current garage can house
my Box - complete up to the Stage 1 Roof before I
hit the roof beams. The Stage 2 Roof and lamp are
stored against the wall though they could also fit
inside the Box easily.
Lights?
I don’t know. I have yet to put a flashing lamp on my Box. It has been suggested than a flashing circuit
from an electronics store or even one salvaged form a car or motorcycle signals would work for this.
You may need to consider whether you want a battery or mains powered light. Also, if you intend to
have the light on for more than a few seconds at a time (flashing) you will have to allow for a little
ventilation in the lamp housing so that it doesn’t overheat. I would suggest raising and fixing the
circular cap of the lamp up just a crack above the glass lens to allow heat to escape if the light is left
on.
The TARDIS Builders Manual 1.0 – http://homepages.paradise.net.nz/~trekker/policeboxes/ All rights reserved – Page
# 33
POST CAPS___
These are just decoration and have no structural role so they can be built in any manner you wish. I
simply cut a few pieces of timber wood to shape. In fact I didn’t have any scraps of the right size
(remember - they are deeper than the corner posts because they also cover the first step of the roof
section) so I did these in two halves for each cap. Cut to the appropriate shape and glued together,
these units then had a short section of corner moulding applied to each corner and some putty/filler
was needed to hide the joins. Once completed, these post caps are simply glued to each corner of the
Stage 1 Roof and left to dry.
Marking up a few scraps of wood, the post caps are made up of parts which fit together
Here is a test-fit of one complete post-cap.
Remember, these are not as wide as the actual
corner post but are deeper so that they can sit
on the first level of the roof.
They can be high as you like. There have been
many different designs, but making them up as
about half the height of the step they rest against
would be usual.
The central parts are glued together and the short pieces of moulding are test-fitted against the
corners. They will need a little filler at the top because the moulding used has a flattened back. No
trouble though – everything needs a bit of filling and sanding at some point!
They are cut at a 45 degree angle so that they’ll
fit snugly. The join will be hidden at the front by
the quarter-round moulding
Mass-producing the parts.
And a test fit of the cap in place. Note that it sits
slightly inward of each edge of the actual corner
post. It sits back from the front by the same
amount, and in calculating it’s depth you have to
add the depth of the first “step” of the roof which
it sits upon.
The TARDIS Builders Manual 1.0 – http://homepages.paradise.net.nz/~trekker/policeboxes/ All rights reserved – Page
# 34
WINDOWS - DETAIL___
With the window frames made up earlier, there is quite a bit of work in sanding them down and getting
some nice flat window frames ready for painting.
Once painted, we need to think about how to put the actual windows in. As with the TV Prop, these are
not as per you standard house windows where the glass sits inside each frame and is held in place by
staples and putty. For effect only, these windows cover the entire back of the window frame so that
they look right from the outside.
It took some effort to find some scraps of pebbled/hammered glass for the corner frames of my
windows. I eventually found some scraps at a second-hand window dealer and they cut them to size
for me for just a few dollars. For the other 4 sections of each window I had some Perspex cut in a T
shape.
Attaching your glass/Perspex
Beforehand, I thought that this would be a quite straight-forward process, but I couldn’t find or buy any
appropriate frames or tools for holding the glass against the frames so I used Hot-melt-glue. By
slathering it on and keeping a tight grip on them as they dry I found that this has been wholly adequate.
I was worried about it holding the glass in particular, but by putting hot-melt-glue both between the
glass and the frame, between the glass and it’s plastic neighbours and also a little across the back so
that it was sandwiched in glue, nothing has shown the slightest sign of moving in the last 6 months.
Another builder (“Scarfwearer” – see Links section) has suggested to me that clear adhesive bathroom
caulk does a fine job. I’ve no doubt that someone out there has more expert ways of holding these
windows together and I would be delighted to hear from more experienced hands in this area for the
next version of this manual: [email protected]
Attaching the windows to your Box
Ah, once again there would be more experienced people than me – but this at least did work!
I attached a loose-pin hinge to the bottom of each window frame and used masking tape to hold the
windows in place while I got the positioning right. Once right, I screwed the loose end of the hinges to
the doors/walls. This method of attaching means that you have the option of opening windows as well
as the windows being removable in case your Box gets transported around and you don’t want the
windows broken. To hold the windows up at the top I simply glued some Velcro to the top of the
window frame and stapled the matching Velcro to the inside of the Box frame. With the Velcro fully
closed the windows are held shut. With subtle adjustments the windows can appear open as per the
real Police Boxes’ hopper style windows and as seen in several of the early Hartnell Stories before they
were fixed shut permanently.
The “window” is made up from Perspex cut to a
T-shape which covers the back of the top and
middle-lower frames.
Pebbled glass is then glued to the back of each
of the lower-corner frames. Indubitably there are
more efficient and prettier options for holding
glass and Perspex to your frames but hot-glue
works too.
When complete, I held the windows to the door
using a hinge at the bottom and Velcro at the top.
You might choose to simply screw them to the
back of the doors/walls.
The TARDIS Builders Manual 1.0 – http://homepages.paradise.net.nz/~trekker/policeboxes/ All rights reserved – Page
# 35
A lower hinge allows these windows to open
inwards and the choice of another “loose-pin”
hinge means that the windows are very easily
removed.
Be sure to plan out which windows goes where.
Once the hinges are attached to the frame you
can line up the window and screw the other half
of the hinge to the doors/walls – but I found that
every windows was attached in a slightly different
spot so they are now assigned their own unique
locations.
I cheated. I couldn’t find the right
gauge of screw and hinge in a hurry so
I used No-More-Nails and simply stuck
the hinges to the window frames. I
should note that all of the glass and
Perspex was sized to leave a 1cm rim
around the back of the frame for
attachment.
Half-hinges
and a loose
pin are
excellent for
taking the
windows out
of the Box.
A row of windows ready to go – there’s quite a
sense of achievement in getting a pile like that
together.
With the window flat down on the ground I left a
mixture of paint and spirits to evaporate leaving
random smudges and stains. Naturally you
should test this process on scrap material first to
get your mix right. Good ventilation is a must for
this procedure as well.
Adding a window (even with masking tape… )
immediately makes a difference to your Box, it
starts to ‘become.”
Glued, painted, hinged and installed. Gorgeous. It is a little more opaque in real life than in the photo
and looks like a very dirty/dusty window though I really like the photographic effect too.
Windows have varied (opening, fixed, step to hide hinges, glass design and position, colour and size) – the lesson is to
choose the look you like.
The TARDIS Builders Manual 1.0 – http://homepages.paradise.net.nz/~trekker/policeboxes/ All rights reserved – Page
# 36
GRAPHICS___
It’s your choice of styles here –you could print out your own backing sheets with graphics on, but I went
with the style of the Real Boxes and the TV Props which were created by printing signage onto some
opaque Perspex or glass. I supplied the design to a local signage shop who printed the blue
background onto the Perspex strips supplied for the POLICE BOX signs The letters were not printed
on the sign, they are created by the absence of coloured background and the light can come through,
illuminating the lettering as white.
The PULL TO OPEN sign was created on a painted background with laser-cut letters, once again cut to
the design I supplied to the signage shop.
This was a relatively expensive process (NZD$150), but the ease and professionalism with which they
were produced made it a very good choice and the illumination effect is excellent. My only complaint is
that I used Perspex which was too see-through so that when not lit-up the lettering was too indistinct.
This is fixed by place a light layer of paper a little behind the signs when unlit but I would have to
consider using OPAL Perspex as recommended by the sign makers if I was to do it again. I was
concerned that their OPAL (white looking) Perspex would not light up very well but the options at your
local supplier may be quite different – ask to see examples.
You can see through
the opaque Perspex at
close distances and
anything placed directly
behind it will show
through to the front
With a light source behind it, the opaque Perspex
becomes white and glows. The surrounding blue
film also illuminates
This light is improvised for effect. Essentially a
light mounted or suspended in the middle of the
Box at the level of the signs will not only make
the signs light up from outside but also lights up
the windows…
The Phone Panel could be printed as a solid
image, but with individually laser-cut letters, you
would still be able to read the sign when there
are lights on the Box. Otherwise you would get a
lot of refection from the panel when using flashphotography.
… like this…
… and this…
… and this. It’s easy to take a lot of photos of
your Box when it’s lit up.
The TARDIS Builders Manual 1.0 – http://homepages.paradise.net.nz/~trekker/policeboxes/ All rights reserved – Page
# 37
COLOURING IN YOUR BOX___
There are several parts to painting up your Box:
Wooden areas:
All of the wood on your Box should have a nice undercoat of paint. In the case of MDF, you should use
a sealing undercoat which helps to stop moisture being absorbed into the fibrous MDF – though
obviously you should be prepared to do several coats because it absorbs the moisture of the paint!
With several coats of undercoating/underproofing paint on the Box it will need a lot less paint and effort
to do the top (blue) coats.
Finding the right shade of blue for your Box is a very personal thing. It has long been held that “Oxford
Blue” is the ideal shade but this can vary from TV Show to show, and from real Box to real Box –let
alone the different mixes of “Oxford Blue” which are available. Personally, I went to the paint store with
a sample picture which I wanted my Box to replicate and took their advice. It should be matt-finish
paint, NOT GLOSS, and you should remember that paint usually dries two shades darker than it looks
when painted on. After my Box was a clean blue all over I used old theatrical tricks to dirty the paintjob,
mixing in darker shades to texture the colouring. Many people also like to physically texture their Box
and paint on a layer of artex, or paint mixed with sand, or use other techniques to add a feeling of
ageing to their Box. Mine is still flat woodwork with only the paint added for effect though I will consider
a bit of surface texturing in the future.
I don’t now about you but I had never done much
painting before. Well after several coats of
primer/sealer and several more of the blue coats
and THEN the discolouring coat I had had
enough!
At least the doors can be laid out and are
relatively light work
The walls are a pain in the arm though and you’ll
want a comfortable step-ladder too. I found it
easiest to break the painting down over a course
of weeks so that some parts were near finished
as I began the painting for still others.
I tried one test-pot of a blue on my door which the
Paint store person recommended, but the result
was too light – it looked like some of the bad
TARDIS spoofs do so I went back for a darker
shade – one that I thought would be right.
The last stage of the painting (depending on what
other weathering/texturing you’re thinking of
doing) is the dirty paintwork.
This is just a mix of streaks of dark paint in with
some fresh patches of blue. It takes a lot of
practice though and can be agonisingly slow.
Windows:
It’s up to you what look you want for the windows, but very few time machines have windows that you
can see into, so you will want to do something to them. Actually if you’re like me you’ll be very proud of
you windows and not want to dirty them up, but it just has to be done! Some people have used car
window tinting film to add a dark shade to their windows and others have simply attached a murkily
painted board behind the glass ensuring that no-one can see in or out! I took the advice of a Prop pro
The TARDIS Builders Manual 1.0 – http://homepages.paradise.net.nz/~trekker/policeboxes/ All rights reserved – Page
# 38
and mixed a few drops of paint in with a quantity of the spirits used for cleaning paintbrushes. This
murky mixture was dashed over the back of the windows (laying flat on the ground) and left for the
alcohol/moisture to evaporate. The resultant stain does a great job of dirtying the windows without the
risk of it rubbing off every time you touch the windows though it would clean off if necessary. NOTE:
The spirits dissolved the strength of the hot-melt glue on my windows in a few places where it sat so
some touch-up work was required there. You may want to think ahead and consider dirtying the glass
and/Perspex before mounting them on the window frames.
Lamp:
No work required here usually – the glass or plastic lens is usually opaque or refractive enough to hide
any mechanism within though you might be well advised to choose a short light fitting so that the
fresnelled ridges hide the bulb within. No biggy though – lamps are not generally scrutinised very
closely - especially as once in place no-one can see them very well anyway.
PHOTO GALLERY___
The TARDIS Builders Manual 1.0 – http://homepages.paradise.net.nz/~trekker/policeboxes/ All rights reserved – Page
# 39
The TARDIS Builders Manual 1.0 – http://homepages.paradise.net.nz/~trekker/policeboxes/ All rights reserved – Page
# 40
The TARDIS Builders Manual 1.0 – http://homepages.paradise.net.nz/~trekker/policeboxes/ All rights reserved – Page
# 41
The TARDIS Builders Manual 1.0 – http://homepages.paradise.net.nz/~trekker/policeboxes/ All rights reserved – Page
# 42
CLOSING REMARKS___
Building my Police Box was enormous fun. I don’t know whether it was discovering an interest in
wood-craft, keeping myself busy, rediscovering mathematics (boy, did I), or seeing the fulfilment of a
very long-held wish – but I’d do it again in an instant. But I’m not allowed… I find myself getting jealous of people who are building their Boxes now and thinking back to the trials
and terrors I had – it is a big deal, building your own Box and it is something that you don’t soon forget
(oddly difficult with a 10 foot high Blue Box in the corner of the room… ). One day perhaps I will move
my current Box on and build V2. Or maybe one of every model… .
You’ll love it.
Whether it’s a prop, a cupboard, a shed or a model, you will love having your own
TARDIS. Happy Travels. - glen
LINKS___
The TARDIS Library - http://homepages.paradise.net.nz/~trekker/policeboxes/
The TARDIS Builders Guild - http://groups.msn.com/thetardisbuildersguild
The TARDIS Rebuilders - http://groups.msn.com/thetardisrebuilders
The Dalek Builders Guild - http://groups.msn.com/thetardisbuildersguild
Relative Dimensions (ScarfWearer’s inspiring builds)- http://relative-dimensions.net/
Doctor Who Prop Builders Club - http://groups.msn.com/thedoctorwhopropbuildersclub
Official Doctor Who Homepage - http://www.bbc.co.uk/cult/doctorwho/
Outpost Gallifrey (unofficial homepage) - http://www.gallifreyone.com/
Search www.Google.com for online Trigonometric calculators – they are great for figuring out lengths
and angles for right-angled triangles (like the roof!!!)- I used:
http://www.geocities.com/SiliconValley/Lakes/5218/trig6.html
Where are the plans and dimensions? To avoid any potential legal problems I cannot include any
plans, and “No,” I will not email any if requested. I’m confident that if you look around the sites
mentioned above, join some groups, do some Googling etc, that you will find some – just don’t give
anyone $ for their own secret plans – not unless you have seen pictures of their build first and fallen in
love with it. That’s all I can say.
The TARDIS Builders Manual 1.0 – http://homepages.paradise.net.nz/~trekker/policeboxes/ All rights reserved – Page
# 43


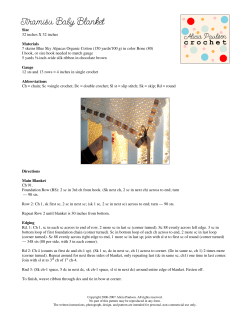


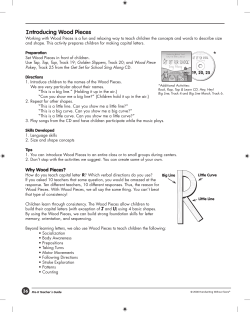


© Copyright 2026