
BC LONES NEWSLETTER Issue #48 - 2012
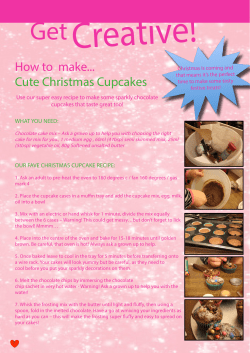
BC LONES NEWSLETTER Issue #48 - 2012 On My Own (Dec 2012) © Girl Guides of Canada - BC Program Committee 1 Table of Contents Page # Content 3 Thoughts from Susan 4 Community Service: Iris Folding Cards 6 Introducing some of our Lones 7 Merry Christmas in other languages, Upcoming events 8 Activity Cards – Holiday Recipes 9 Christmas Traditions from around the World 10 Winter dot to dot 11 National Bird Day – January 5th 12 Activity Cards: Bird Feeder recipes 14 Outside Winter Fun! 15 Penguins, Find the Campsite Maze 16 Activity Cards: Environmental Science 17 Activity Cards: Spa Recipes 19 Bonhomme – February 1st to 17th 21 Activity Cards: International Ideas from Mexico, Denmark, Italy, Greece, Malaysia, Egypt and India 22 WAGGGS Word Search On My Own Is published quarterly by the BC Lones of Girl Guides of Canada - BC Council Created by Lones for Lones Items appearing in this publication may be copied for use within Guiding. Credit as to source would be appreciated. Susan Stephen, BC Lones Adviser / On My Own Editor Address: BC Lones e-mail: [email protected] C/O BC GIRL GUIDES 1476 WEST 8TH AVE. VANCOUVER, BC V6H 1E1 Deadline for submissions to the next issue is: January 30, 2012 On My Own (Dec 2012) © Girl Guides of Canada - BC Program Committee 2 THOUGHTS FROM SUSAN I hope that your Guiding year has started well. Mine has been very busy, and a little unexpected. I’ve had a problem with my computer lately, which is the reason this newsletter is a bit late. Unfortunately, my hard drive crashed and I lost all the files that I’d put together for this newsletter, so had to start over. Oh well, I guess these things happen sometimes! I’m guessing that some of you are already into the holiday season preparation while others aren’t quite there yet. I wasn’t ready before, but I was just in New York City for the Macy’s Thanksgiving Day Parade, and I have to say, I’m a little more in the mood now. I’ve started shopping, but only just, so I guess I’ll have to hustle. I still have baking, decorating, card writing and everything else that goes along with the season, so it will be a very busy December! I’m pleased to say that many of you sent in completed bracelets, so we now have a total of 50 ready to go to Sangam. You can still participate by sending them to me. I have another service project for you, and am including the materials for it. I would like you to make cards for the soldiers, a senior citizen, or someone in your community who could really use one. There are patterns in this newsletter for an Iris Folding Christmas hat and heart. You can make a card for Christmas or Valentines, or both. You can use the pattern in the newsletter or design a card of your own. Please take a picture of your card and email it to me at [email protected]. That way, I can share it with everyone so they can see your special creation! Also in this newsletter are lots of fun ideas for winter, international activities (for the holiday season and for World Thinking Day) and activities that will help you complete program work if you do them. Some of the ideas in this issue came from some Guiders I know (Marlene, Adele, Karen and PJ) who love playing in the outdoors. I think they look like a lot of fun. Try them and let me know what you think. Remember, this is a great time of year to get program work marked off. Any school performances, dances, skating, crafting, baking, etc. can count towards program and badge work, but you have to let your Lones Guider know about it so you get credit for the work you’ve done. I hope you have a wonderful holiday season! Susan Stephen BC Lones Adviser LONES AND THE LOCAL UNIT Can I be in Lones and still do activities with a local unit? Do I get credit for the activities? Absolutely, you can do activities with the local unit. In fact, if you have the opportunity to, you should! The one thing you need to remember is that your Guider is your Lones Guider, so even if you do activities with a unit near you, you need to let your Lones Guider know so that she can give you credit for what you’ve done and so she can order your badges. Can the Guider in the local unit give me badges? She can, but you still need to let your Lones Guider know so that she mark on your Guiding record what you’ve done, and so that she doesn’t buy badges for you that someone else has already given you. Remember that you should be doing your regular program work with your Lones Guider. She will send you packages of information and activities that will help you complete your program. On My Own (Dec 2012) © Girl Guides of Canada - BC Program Committee 3 COMMUNITY SERVICE: IRIS FOLDING CARDS Iris folding began in Holland when they started using the inside of envelopes to fold and create cards. To make your card, you will need: Scissors and craft knife Tape – regular and masking Glue 4"x5" piece of coloured cardstock. 4 1/4" x 5 1/2" note card. Iris folding template & shape scraps of decorative paper in various colours cut in 1" strips & folded in half lengthwise (fig.1) Directions: 1. Using a craft knife/scissors & template, cut out a shape in the 4 X 5‖ coloured cardstock. (fig.2) 2. Position the card with the shape cut-out over your templates, face down so you will be working on the back of the card. Tape the card to the template using masking tape. (fig.3) 3. Arrange your folded strips of paper in the order that you want to put them on the card. 4. Start with #1 on the template. (fig.4) 5. Cut a strip of paper so that it is a little longer than the opening. 6. Line up the folded side of the strip of paper with the inside edge of the area numbered ―1". 7. Tape both ends of the strip of paper to the back of the card. 8. Using the next colour, do the same for #2. Repeat all the way around the pattern, following the numbers and working inward as you complete each round. (fig.5) 9. The back of the card will look quite messy as you progress, but when you flip it over, it should look very neat. 10. On a template that has more than one colour, finish the center with a piece of shiny paper. 11. The last step is taking the finished piece and attaching it to the front of your card using glue or double-sided tape. (fig. 6,7) If you enjoy doing Iris Folding, you can find other patterns by searching the internet for free Iris Folding patterns or by going to http://www.iris-folding.com/freepatterns.html. Video at http://www.youtube.com/watch?v=unl80G_5RhI. Pattern for Santa Hat Colour – plain or patterned red paper Hat edging and pompom: use white paper, cotton Balls or pompoms On My Own (Dec 2012) Pattern for heart: Colour “A” 1,3,5,8,11,14,17 Colour “B” 2,4,6,9,12,15,18 Colour “C” 7, 10, 13, 16, 19 Iris: shiny paper © Girl Guides of Canada - BC Program Committee 4 Fig. 1 – folded strips of paper. Fig. 2 – shape cut out of paper. Fig. 3, 4, 5 – Pattern taped on, then strips of paper taped along the back so they cover the numbered space. I used red and white so you could see what it looks like even though on the front, the hat is totally red. Fig. 6 – finished front. On My Own (Dec 2012) Fig. 7 – finished card with pompoms added. © Girl Guides of Canada - BC Program Committee 5 INTRODUCING SOME OF OUR LONES Payton lives in the Fraser Valley. Here are some pictures of Payton. The first one is Payton at home. The middle one is Payton, her little sister Rhys, her mom and her dad at a tree farm. The final one is Payton’s favourite activity, tubing, which she learned this summer. Van is a Lones Guider with 1st Lones Brownies and is from the Fraser Valley. She is a leader with her daughter Madison. Her favourite meal is sushi. She is proud of her children. Van enjoys shopping and spending time with her family. Her favourite hangout is Lulu Lemon! Madison is a member of 1st Lones Brownies. She lives in the Fraser Valley. She is proud of the second place medal she won. She enjoys camping. Madison also said that her favourite place is the pool, her favourite meal is breakfast and she loves to hang out at the beach. On My Own (Dec 2012) © Girl Guides of Canada - BC Program Committee 6 MERRY CHRISTMAS IN OTHER LANGUAGES The following translations of ―Merry Christmas‖ in the order they appear are: French, Hawaiian, German, Italian, Spanish, Thai, Welsh, and Serbian. You may need to look them up to figure out what they are. Unscramble each of the clue words. Copy the letters in the numbered cells to other cells with the same number. UPCOMING EVENTS The following events are for patrols of girls and Guiders. If they interest you, please contact a local Unit or Commissioner to find out if it’s possible for you to join a patrol that is applying. Registration deadline for both events is December 30 th, 2012. You can get more information from your Lones Guider. G.U.E.S.T. 2013 – Saturday June 1 to Sunday June 2, 2013. This is an opportunity for Guides to have fun while exploring science and technology. It will be held at the UBC-Okanagan campus in Kelowna. It is open to girls and Guiders in Monashee, Thompson-Nicola and Kootenay areas. 2013 Pathfinder Summit – Saturday April 27 to Sunday, April 28, 2013. This is an opportunity for Pathfinders to come together in Vancouver and explore the Pathfinder program with a focus on leadership. Open to 2nd and 3rd year Pathfinders. World Thinking Day – Open to all Guiding members. Open house at Guide House on February 23, 2013 from 1-4 pm. There will be activities, displays and tours. Bring donations of small toys, blankets, clothing, etc. Light refreshments will be served. If you’re interested in attending, let your Lones Guider know. On My Own (Dec 2012) © Girl Guides of Canada - BC Program Committee 7 On My Own (Dec 2012) © Girl Guides of Canada - BC Program Committee 8 Cranberry Apple Cider Ingredients: 2 litres of apple juice 1½ litres of cranberry juice ¼ cup brown sugar 4 sticks cinnamon 1½ tsp cloves Directions: Heat all ingredients in a pot. Bring mixture to boil, reduce heat and simmer 15 minutes. Pour into mugs and add orange slices to garnish. CHRISTMAS HOT CHOCOLATE SBGPR Ingredients: ½ c sugar ¼ cup unsweetened cocoa 1/3 c water ½ tsp cinnamon ¼ tsp ground nutmeg 4 cups milk marshmallows Directions In a med. pot, heat sugar, cocoa, water, cinnamon and nutmeg over low heat, stirring constantly until smooth. Bring to a boil and reduce heat. Simmer 4 minutes, stirring constantly. Stir in milk and continue to heat until hot. Pour into mugs and top with marshmallows. PEPPERMINT SNOW BALL COOKIES (from Karen Griffiths) S B G P R Preheat oven to 400˚F ½ cup shortening ½ butter ½ cup icing sugar 2 cups flour ½ tsp peppermint extract ½ tsp salt Directions Cream butter and sugar together until smooth. Beat in extract and then flour. Roll into 1 inch balls and place on ungreased cookie sheet. Bake for 8-10 minutes. Cool and then dip in icing and coconut or sprinkles and leave on cooling rack to set. Icing 2 tbsp butter 2 cups icing sugar milk ½ tsp peppermint extract Beat together, add 2 tsp milk, divide into 2 bowls and tint one bowl of icing pink or green, leave the other white. Add extra milk if needed to make a thin dipping icing. SBGPR MARS BARS SQUARES (16 bars) (from Donna Kaytor) S B G P R Base: 4 regular size Mars Bars ¼ cup butter or margarine 3 cups Rice Krispies Topping: 1 cup chocolate chips ¼ cup butter or margarine Recipe 1. Cut the Mars Bars and butter into pieces. Melt together in a pot over a low heat. 2. Mix in Rice Krispies, then put the mixture into a 9x9 inch pan. Press down so it’s even. 3. Melt the chocolate and butter for the topping, then pour it on top. 4. Cool in fridge, then cut into pieces and serve. Recipe: 1. Melt chips on low heat. 2. Stir in peanut butter and nuts. 3. Take pan off heat, and quickly add the mini marshmallows. Stir until marshmallows are completely covered. 4. Pour into a 9x13 inch greased pan. Refrigerate. Ingredients: 4 cups semisweet chocolate chips 2 cups butterscotch chips 2 cups crunchy peanut butter 1 cup walnuts or peanuts 6 cups miniature marshmallows ROCKY ROAD BARS (24 bars) CHRISTMAS TRADITIONS AROUND THE WORLD Australia: Christmas in Australia is in the middle of summer vacation so it can be hot. The most popular event during the season is ―Carols by Candlelight,‖ which is an evening where people come together to light candles and sing Christmas carols. It is like an outdoor concert that everyone participates in. China: Not a lot of people in China celebrate Christmas or ―Sheng Dan Jieh,‖ which means Holy Birth Festival. Those who do celebrate put up a tree called ―The Tree of Life‖. The tree is decorated with beautiful lanterns, flowers and red chains. These are all symbols of happiness. England: In England they do a lot of the things that are done in Canada. They bake cookies and hang stockings. Families gather together to read the story ―A Christmas Carol.‖ Children write letters to ―Father Christmas,‖ then toss them in the fire and watch them go up the chimney. Ethiopia: Ethiopians celebrate Christmas on January 7 th in a celebration called ―Ganna.‖ Families attend church. Everyone dresses in white and most wear the traditional shamma, which is a white cotton wrap with bright coloured stripes across the ends. France: Christmas celebrations in France begin December 5th on St. Nicholas Eve. They ring the church bells and sing French Carols that they call Noels. On Christmas Day families go to church and then enjoy lots of food. They end with a traditional dessert called Buche de Noel. It is a cake shaped and iced like a Yule log. Germany: Four Sundays before Christmas, Germans make an Advent wreath of evergreen branches. They put four coloured candles in it. Each Sunday they light a candle, sing Christmas songs and eat Christmas cookies. Holland: Dutch children wait for Sinterklaas to arrive on St. Nicholas Day, which is December 6th. Families make a letterbanket ("letter cake") in the shape of the first letter of their last name. Italy: Christmas in Italy begins on the first Sunday of Advent with Christmas fairs, fireworks, bonfires and holiday music. Families set up the manger scene on the first day of advent, then gather there each evening to light candles and pray. Some families set up a Christmas tree. Mexico: Families decorate homes with lilies and evergreens. They make brown paper lanterns or farolitos that are placed along sidewalks, rooftops, windowsills, etc. to light up the community with the spirit of Christmas. Piñatas are a part of the celebration. Spain: The season begins on December 8 th with the Feast of the Immaculate Conception. Churches and markets are decorated with evergreen boughs. Musical instruments such as gourd rattles and miniature guitars are sold. There is singing and dancing in the streets. Children go door to door singing or reciting poetry and are given small toys or candies. Sweden: Christmas celebrations begin on December 13th with St. Lucia's Day. This day celebrates the Patron Saint of Light. Traditionally, the oldest daughter gets up before dawn and dresses as St. Lucia in a long white dress. She wears a crown of leaves. Singing ―Santa Lucia,‖ she serves every member of the family coffee and treats in their bedroom. On My Own (Dec 2012) © Girl Guides of Canada - BC Program Committee 9 WINTER DOT TO DOT: Have fun connecting the dots to see what appears! Lones Brownies participating in a Shoreline clean-up for Pitch-in week in September. On My Own (Dec 2012) © Girl Guides of Canada - BC Program Committee 10 NATIONAL BIRD DAY – JANUARY 5th ARTS: BIRDSEED ANGEL This angel is easiest made with a partner. One girl lies down in the snow and makes a snow angel. The other girl helps her get up, taking care not to mess up the angel. After the imprint has been made, use various seeds to ―colour‖ the angel, adding features like eyes, nose, mouth, hair, clothes, etc. To make your artwork look more like an angel, add branches or leaves to create the wings. STEM Extension: Watch your seed art every day and write down what you see in a journal or notebook. At the same time each day, write down what the weather is like, including details such as temperature, what the sky looks like, what animals you see and what they are eating. This is a fun activity that helps you learn more about the birds and animals in your area! STEM: WHY WE FEED BIRDS IN THE WINTER? Supplies: Ice cube tray water Pieces of fruit like pineapple, orange, apple, etc. knife Directions: Cut the fruit into ½ inch cubes. Once this is done, smell each of the pieces of fruit. What does it smell like? How strong is the smell? Put a piece of fruit into each section of the ice cube tray. Cover completely with water. Put tray in the freezer and let freeze overnight. Remove the ice cubes from the tray and smell the ice cube. Does it smell like the fruit did yesterday? If it does, is the smell as strong? Conclusion: When the fruit was fresh, it is easy for the animals to smell and find. When the fruit is frozen in ice and snow, it is much harder to find. Try eating the fruit in the ice cube. Is it easy to eat? Will it warm you up and give you energy? If it’s not easy for you to eat when it’s frozen, imagine how hard it is for animals. So, why is it important that we put bird feeders outside in the winter? Food is hard to find because it gets buried in the snow and ice. By hanging feeders we can make it easier for birds to find food that will give them the energy to make it through the winter, but it is important to remember that if you start to feed the birds, you can’t stop until spring. The birds will be depending on you! STEM: SOFT SHELLED EGGS (from the December 2011 FunFinder) Supplies: 2 eggs Vinegar Water 2 clear glass jars with lids Hammer and nail Directions: 1. Record how the eggs look and feel before the experiment. Place one egg into each jar. Fill one jar with vinegar and one jar with water. Label the jars. 2. Poke a hole in the lids using the nail and hammer. Screw the lids on. 3. Let the eggs sit in their liquids for at least a day. You need to leave them in until the calcium carbonate shell has completely dissolved away. Watch what is happening when the eggs are in the jars? There will be bubbles coming from the egg in the vinegar. 4. Carefully pour the liquids out of the jar and remove and touch the eggs. Record how they feel after the experiment. What happened? Egg shells are made from calcium carbonate. When the calcium carbonate comes in contact with vinegar (acetic acid), a chemical reaction occurs: it breaks down into calcium and carbon dioxide gas, which erodes the shell. The bubbles that you saw were carbon dioxide. On My Own (Dec 2012) © Girl Guides of Canada - BC Program Committee 11 On My Own (Dec 2012) © Girl Guides of Canada - BC Program Committee 12 SBG SBG Directions: Using a knife, spread peanut butter over the wreath shape. Cover the peanut butter with bird seed. Using dabs of peanut butter, ―glue‖ popcorn and pieces of dried fruit to the wreath. Tie a piece of fruit rollup into a bow and attach with peanut butter to the top. Hang outside where it can be seen, then watch for the birds and small animals that come and eat off it. Supplies: Cardboard wreaths – about 10 to 12‖ around Peanut butter Bird seed, popcorn, dried fruit, fruit roll-up OUTDOOR POPCORN WREATH Supplies: Large needle Heavy duty thread or fishing line Popped corn Dried fruit; raisins, cranberries, apple and apricot Pieces of orange peel (optional) Directions: Measure about 20 inches of thread. Thread the needle and string the popcorn and other items alternately. Tie the ends together in an overhand knot, and then hang on a tree or shrub for the local wildlife. Tip: The orange peel adds a very pleasant scent. Put a bit of all natural peanut butter on the necklace before placing it outside. The oils and protein are great for the birds! WINTER ANIMAL FEEDER SBGPR Add ¾ cup bird seed and mix well until seeds are coated. There should be little to no excess liquid. If it’s too liquidy, add more seed. Spoon the mixture into your cookie cutter, filling it halfway, pressing down until it is well packed. Take the twine, fold in half and tie an overhand knot in the end. Lay the knotted end onto your packed mixture, and then fill up with the remaining mixture and press firm. Let set for a few hours. You may want to put it in the freezer to firm up enough to remove from the mold. Place on wax paper and let dry out for a couple of days, flipping it at least once a day. You want it really hard and totally dried out so you can hang it in your tree. Put it where the birds can land to eat. BIRDSEED ORNAMENT RECIPE (page 2) See page 2 Directions: Combine gelatine and ¼ cup of water in a small pan. Simmer and stir until dissolved. Cool slightly. Things needed for this project: ¾ cup bird seed 1 small packet of Knox gelatine powder Twine – 8‖ per ornament A cookie cutter in the shape you want. ¼ cup water BIRDSEED ORNAMENT RECIPE This recipe makes 1 large or 2 medium ornaments OUTSIDE WINTER FUN ARTS: SNOW MOLDS Snow is just like sand. It is wet and dense and can be formed easily into shapes. Take your sand molds outside and use them to create a snow castle! ARTS: SNOW WORM Supplies: Food colouring, snow, sticks, fruit or vegetables (oranges, carrot) Directions: 1. Make several large snow balls of equal size, and one bigger one for the head. 2. Use fruit or vegetables to make eyes and a nose. (They will get eaten by animals or birds later if you don’t remove them). 3. Mix food colouring with some water and fill up a spray bottle. Spray your worm with whatever colour(s) you want or you can choose to just leave it white. GAMES: SNOWMAN BUILDING RACE To play: 1. You need 2 teams. 2. Someone yells GO and both teams build a snowman. 3. The snowmen need to be made of 2 balls for the body, 1 for the head, arms, hat, nose, eyes and mouth. You can either gather materials ahead of time for the features or you can use what’s available around you. 4. First team finished is the winner! STEM: FREEZE BUBBLES When the temperature goes below freezing, there are many changes that happen. Water turns to ice, and rain turns to snow. This bubble activity will demonstrate this. Supplies: Bubble solution, bubble wand Directions: 1. The temperature outside must be below freezing (0˚ Celsius) 2. Chill the containers of bubble solution in the fridge before doing this experiment. 3. Blow bubbles. Watch the bubbles carefully as you blow them. Notice that there are ice crystals forming on the surface. 4. Blow a bubble and catch it on your bubble wand. Wait and watch while it freezes. It will look like a crystal ball, and when it breaks, it will shatter like glass. It will also look really colourful! STEM AND ART: ICE BLOCK DESIGNS This activity will allow you to observe how salt melts ice, and at the same time you`ll be creating colourful designs. Supplies: 4 litre milk jug, water, tray (large enough to hold the ice block), newspaper, coarse salt, food colouring, eye droppers Directions: Freeze water in empty 4 litre milk jugs. Carefully cut away the plastic when the water is frozen. Place ice blocks on trays covered with several layers of newspaper. Sprinkle coarse salt on top of the ice blocks, and then drip various colours of food colouring on top of the ice block. You`ll see tunnels of colour form as the salt melts through the ice. Put the colourful ice blocks outside. If cold enough - they should stay frozen for several days, and you can check them each day to note how much they`ve melted and where the colour shows up. On My Own (Dec 2012) © Girl Guides of Canada - BC Program Committee 13 SNOWGLOBES Snow globes are simple to make and are made in small glass jars like baby food jars. Supplies: Small jar Glitter Plastic or ceramic figures (metal will rust) Enamel paint (if you want to paint the lid) Epoxy distilled water glycerine (purchase at pharmacy) artificial evergreen pieces (for trees) sandpaper Directions: 1. If you want to paint the jar lid, use an oil-based enamel paint. 2. Sand the inside of the jar until the surface is rough. Use the epoxy and glue the figurine and evergreen pieces to the inside of the jar. Let the epoxy dry. 3. Fill the jar almost full of distilled water. Add a little glitter and a bit of glycerine (to keep the glitter floating longer). If you add too much, the glitter will stick to the bottom when you turn the jar over. 4. Screw the lid on tightly. Turn the jar over and back again to make it snow! WINTER SCAVENGER HUNT LIST (locate but do not take) Animal Tracks Evidence of an animal’s winter home Pinecone Evergreen needle Dead Leaf A tree that has lost all its leaves Evergreen tree A tree with smooth bark A tree with rough bark Something thorny A plant with berries Frost crystals Evidence of static electricity Sap Lichen Fungi A rock with an interesting shape A woodpecker A feather An insect A Stellar Jay Something wet Something slimy A snowman/snowwoman A snow angel Children sledding Listen Hear a bird chirping Laughter Hear the wind blowing Snowplow or salt truck Water running Ice crunching A dog barking A door slamming Kids playing Someone whistling Smell Fresh air Pine needles The smell of morning Fresh baking Hot chocolate Smoke ICE MOBILE Supplies: Paper plate Scraps of waterproof things like yarn, sparkles, lace Direction: 1. Take a paper plate and make a design on it with waterproof items like yarn, sparkles, and bits of lace. Lay a loop at the top. 2. Take it outside and fill it with water. Let it sit overnight in below freezing temperatures. When it is solid ice, it becomes a round, colourful icicle. On My Own (Dec 2012) © Girl Guides of Canada - BC Program Committee 14 PENGUINS LEARN THE PENGUIN SONG You can find the words at http://www.nlbrownies.co.uk/songs/penguin.html. If you would like to see hear the song and see the actions, go to http://www.youtube.com/watch?v=vXwiP0DNjx4. STUFFED PAPER FISH 1. Fold a large piece of paper in half. 2. Make an outline of a fish on one half of the paper and colour it. You can chose to colour them in rainbow colours or using a pointillist approach and colour it in with dots, either in colour or in black and white. 3. Cut around the fish through both sides of the folded paper so now you have 2 sides of the fish. 4. Staple your fish from the top fin all the way around to the bottom fin. 5. Stuff lightly with scrap paper, then staple the rest of the fish closed. 6. Attach a string and hang from the ceiling. HELP SALLY FIND HER CAMPSITE On My Own (Dec 2012) © Girl Guides of Canada - BC Program Committee 15 On My Own (Dec 2012) © Girl Guides of Canada - BC Program Committee 16 SBGPR That the leaves of a Venus fly trap can close over an insect in less than half a second? That Pacific Giant Kelp can grow 43 centimetres A DAY? An apple tree will lose 19 litres of water each day through its leaves? That the plant life in the ocean makes up 85% of all the plant life on land? The largest seed in the world is a coconut? STEM: DID YOU KNOW STEM: FOREST SQUARES SBGPR Supplies: String 4 meters long paper and pencil Directions: 1. Cut a piece of string that is 4 meters long. Go into the forest, bog, meadow or your back yard and lay your string down so it forms a square. 2. With a pad and pen in hand, draw or write all the different kinds of plants and bugs that can be found in that square. Count up how many plants and bugs you found. 3. Move about 20 steps away and lay down your string in a square again. Do the same thing and identify all the plants and bugs that you can find in the square. Add them up. 4. Compare what you found in first square to the second square...was there any more of one item in one square then the other? If there was, can you think of a reason why? SBGPR SBGPR Supplies: Small 2 oz container with a tight fitting lid Water Directions: 1. Take a small container with a lid that seals ... Fill the container with water and put the lid on tightly. This container is a mouse and it’ is your job to go outside during winter to find a nice place for your mouse to hibernate for the winter when there is snow on the ground. It has to be a place that will keep him warm over the cold night. 2. The next morning go out and get your mouse. If the liquid inside the container is frozen, it means that your mouse froze during the night and didn't have a nice warm place to hibernate. 3. If your mouse froze, try this experiment again, but look for a place that will keep the warmth in, e.g.in a hole by a tree stuffed with leaves. Check your mouse in the morning to see if he stayed warm this time. STEM: HIBERNATION Supplies: Extra-large bowl Large jug of water small glass bowl (clear) Red liquid food colouring 1 measuring cup Directions: 1. Place the large bowl on the table. Fill the small bowl with water and 10 drops of colouring. The small bowl represents a lake and the red food colouring is all the pollution that has come into the lake over the years. 2. The cup represents 10 full years of rain that fall into the lake. Holding the small bowl above the large bowl ... pour water into the cup. Pour it into the lake and the lake water should overflow into the big bowl. 3. Count how many cupful’s of water you need to pour into your lake water before it runs clear ... free of pollution. Times that by 10 and that’s how many years it will take for a lake to become pollution free if we stop polluting today. What happened to the pollution? Did it really go away? STEM: IS DILUTION THE SOLUTION TO POLLUTION On My Own (Dec 2012) © Girl Guides of Canada - BC Program Committee 17 SBGPR For Oily Skin 1 cup of strawberries 1 Egg White Very finely chop the strawberries. Whip the egg white. Combine the strawberries and egg white. Wash your face then spread the mixture all over it. Leave for 10 minutes and rinse off. SPA FACE MASKS GPR For Dry Skin 1 Ripe Avocado Yogurt Mash the avocado with enough yogurt to make a creamy paste. Spread over face and neck. Leave for 10—15 minutes. Gently sponge off, and then rinse with warm water. Supplies: 1 bag of Epson salts Food Colouring Perfume, herbs or potpourri Directions: Pour salts in a large bowl, add a few drops of food colouring and stir. Add more food colouring until you have reached the colour you want. Add a couple of drops of perfume, some herbs or potpourri. Mix well. Put into clean dry clear bottles and close the lid tightly. You can decorate the bottle with dried flowers and ribbon and give it as a gift if you like. If you want to try something different, layer a couple of colours, or some variations of the same colour. SPA BATH SALTS Kool-aid powder hot water SBGPR 1. In a small bowl, mix 1 tbsp of Crisco with 1 tsp of honey. 2. In a separate bowl, mix the Kool-aid powder with ¼ tsp of hot water until it is dissolved. You can keep adding powder as long as it dissolves totally. Don`t use any more than 1 tsp. You can choose your lip gloss colour by the flavour of Kool-aid you use. 3. Add one drop of the water mixture to the shortening/honey base. Stir well. Repeat until you get the color and flavour that you want. Put into a small container. 4. This should be kept in the fridge if it is warm out. It will keep for 3-4 days. SPA LIPS Kool-Aid Lip Gloss 11tbsp Crisco 1 tsp Honey SPA HANDS GPR Nail Strengthener 1 Tablespoon Cider Vinegar 1 Tablespoon Olive Oil 1 Egg Yolk Blend all ingredients and rub into your nails. This is a good treatment for nails that are prone to breaking. Hand Softener Combine the following in a blender 2-4 spoons of cold cream 2 drops tea tree oil 5 drops of lavender oil 1 tsp olive oil Small banana When it is smooth, apply it all over your hands and nails. Put on a pair of rubber gloves over top. Keep on for ½ hour. For even softer hands, put your hands in the gloves under a heating pad. This will help the oils in the lotion go even deeper into your hands. BONHOMME – Quebec’s Winter Carnival - February 1st to 17th At the Quebec Winter Carnival, Bonhomme is the ambassador of the Quebec Winter Carnival. He looks like a live snowman wearing a traditional red hat and red fringed belt that were worn in early French Canadian history. The belt was used to tie jackets to stop the cold from going up them. Both the hat and the belt are part of Quebec folklore and key parts of Bonhomme’s clothing. The Quebec Winter Carnival, held in February, is the largest winter carnival on the planet and in general, is the third largest carnival in the world. Only the Rio de Janeiro Carnival and New Orleans Carnival bring in more visitors. WOOL AND STRAW WEAVING TIE BELT (OR SCARF) Supplies: 5 straws Wool – medium to thick weight (1 or more colours) Directions: 1. Cut 5 pieces of wool a little more than twice the length that you want your belt to be. 2. Drop each piece of wool through a straw. Once you’ve done this, pull the ends even and tie an overhand knot with all 5 strands of wool. 3. Push the straws up to the knot, and then tape the straws together at the top by wrapping it around the top of the straws. 4. Take the end of a ball of wool and tie it to the top of one of the straws just below the tape. (see picture) 5. Start weaving by going over that straw and under the next. (tied to the 1 st straw, under the 2nd straw, over the 3rd straw, under the 4th, over the 5th) 6. When you get to the end, reverse on the way back (under the 5 th, over the 4th, under the 3rd, over the 2nd, under the 1st). 7. Continue the over-under pattern until you want to change colours. Knot the yarn onto an outside straw, and cut it off from the ball or skein, and start a new colour in the same way you started the first one. Tuck the loose ends inside the weaving. 8. When you get to about 1 inch from the end of the straws, put your weaving on a table. Remove the masking tape, and then move some of the weaving off the straws and up your warp threads. Do this by pulling the straws partially out of the weaving, being careful to leave the last inch or so attached to the straws. Repeat this process as often as necessary, and continue weaving till you come to the end. 9. To finish, tie the wool off on one of the straws. Holding the weaving lightly, gently pull the straws out one at a time. Finish by tying another overhand knot at the end you just finished. Trim ends until they are even. FOOD AND SNACKS Cold winter days need yummy warm food and drinks. Try making hot chocolate or warm vanilla milk (milk with ½ tsp vanilla) and use a cinnamon stick to stir it. This will add a nice cinnamony flavour to it. EDIBLE BONHOMME Large marshmallows Icing Raisins or chocolate chips Red licorice Marshmallow strawberries Directions: 1. Stack marshmallows with a bit of icing in between to hold them together. Add raisins or chocolate chips for eyes, nose, mouth and buttons. Add red licorice for the belt and the marshmallow strawberry for the hat. 2. Enjoy eating your creation!! On My Own (Dec 2012) © Girl Guides of Canada - BC Program Committee 18 TOURTIERE (MEAT PIE) 1 - 9 inch deep dish pie Ingredients: 1 ½ pounds ground pork 1 large russet potato 1 large onion, minced ½ teaspoon salt ½ teaspoon ground black pepper ½ teaspoon ground cinnamon ¼ teaspoon ground cloves 1 dash ground allspice ½ cup water 9‖ pie crust – top and bottom 1 egg ¼ teaspoon paprika Directions: Bake the potato until done. This will take approximately 30-45 minutes in a 400˚F oven. Remove the potato from the skin and mash it. Put the ground pork in a large frying pan and brown. Add potato, onion, spices and water and simmer until very thick, for about one hour. Line a deep-dish pie plate with your pie crust. Spoon in the filling, making sure that it is evenly distributed. Cover with top crust. Beat the egg in a separate bowl and lightly brush it onto the pie crust. Sprinkle with a bit of paprika, if you like. Make sure you make some slits in the top of the pie for steam vents. Bake at 350˚F for 50 minutes. Serve warm. TARTE AU SUCRE – SUGAR PIE Ingredients: 1 pie crust, unbaked 6 tablespoons of all purpose flour 2 cups packed brown sugar(or half brown sugar, half maple sugar) 1 1/2 cups low fat evaporated milk 4 tablespoons butter 1/2 teaspoon salt 1 teaspoon vanilla Directions: Preheat oven to 400˚F. In a pot, combine flour and sugar and mix. Stir in milk slowly to avoid lumps, and then add butter and salt. Cook, stirring constantly, until mixture comes to a boil. Be careful not to burn the mixture. Remove from heat, add vanilla. Pour into unbaked pie shell. Bake at 400˚F for 5 minutes. Reduce heat to 350˚F and continue baking for 25 minutes. Remove from oven and let cool in a rack. Serve cooled in small wedges, with vanilla ice cream or whipped cream. MAPLE SYRUP SNOW CANDY Ingredients: Maple Syrup Directions: Bring water with other ingredients to a rolling boil. (Boil for about 10 minutes) Find a smooth clean place in the snow and pour the candy into it, or if you prefer, scoop some snow into a bowl and pour the candy on top. You can make it any shape, just don`t touch until it has cooled. It is extremely hot! On My Own (Dec 2012) © Girl Guides of Canada - BC Program Committee 19 On My Own (Dec 2012) © Girl Guides of Canada - BC Program Committee 20 SBGPR To see finished yarn work, go to http://pinterest.com/search/pins/?q=yarn+painting 2. Start on the outside of one ball, and spread some tacky glue. Start laying down the wool. Continue circling around the ball, filling it in as you go. When you get to the centre, cut the wool. It works best if you glue as you go because otherwise, the glue can dry before you get to the middle. When it`s filled in, press it down to make sure that it sticks.. 3. When you`ve finished one ornament, move on to the next ball. Keep going until you’ve finished all the balls and the star. To do the tree, use the same process to wind your wool around all the balls and fill in the tree shape. Let dry. Note – if you want to make a smaller piece like an ornament, you can use embroidery thread, but it is a little pickier to do. INTERNATIONAL: YARN PAINTING (page 2) To make your own painting you need: Cardboard Bright coloured pieces of wool Tacky Glue paintbrushes Pencil Directions: 1. Drawn a simple picture on your cardboard, e.g. a Christmas tree with See page 2 balls and a star. A group of people called the Huichol (WEE-chol) live in Mexico. They live by a high mountain range. The Huichol do a special type of art work called yarn painting. To do this, they carve a design into wax and then press yarn into the lines. They always include Grandmother Growth (Nakawe) in their paintings. She is believed to bring all good things to the people like water, good harvest, health and long life. INTERNATIONAL: YARN PAINTING INTERNATIONAL: ITALIAN CARNIVAL MASKS SBGPR In Venice, Italy, people welcome spring by dressing in costume, having parades and going to parties. One of the most important parts of their costume is a carnival mask. You can make one with stuff that you may have around the house. Be creative! Supplies: pencil ruler scissors tape dowel/straw glue paintbrushes paints paper towels bowl of water cardstock decorations (feathers, beads, sequins, sparkles, gems, yarn, etc) Directions: 1. Cut out a shape for a carnival mask. 2. Tape dowel to one side of the mask. 3. Use paint and decorations to create a special mask. Directions: scissors 1. Using your tracer, cut one circle from each piece of paper. 2. Fold both circles in half and then slide one inside the other at an angle. 3. Glue them together to make a pocket. 4. Make a hole at the top and tread the ribbon through. 5. Place sweets or a gift inside the pocket in the heart. Supplies: circle tracer – a container lid will work well 2 pieces of colourful paper Scissors, glue, ribbon Candies to fill the hearts SBG Traditionally these are made in red and white and used to decorate homes at Christmas INTERNATIONAL: DANISH HEARTS On My Own (Dec 2012) © Girl Guides of Canada - BC Program Committee 21 Supplies: 6 fan pieces with 3 holes punched in each large needles threaded with heavy thread markers brass paper fasteners clear tape scent Directions: 1. Cut out pieces using the template as a guide. Decorate them with markers. 2. Join the single holes at the bottom with the paper fastener. 3. Tie the thread onto the first hole on the top blade. Weave through the second hole, then the first hole on the 2 nd blade, etc. 4. Tape the back of each blade to hold the thread in place. Tie off at the end. Spray with scent if you wish INTERNATIONAL: MEHNDI GPR Mehndi is the art of applying henna in a non-permanent design on the skin. The henna plant that is used has been used for this purpose since Egyptian times. Mehndi is typically applied to the feet and hands for marriage ceremonies and Muslim festivals. Supplies: a design you’d like to use Henna (make according to directions) Washable Crayola marker, if you don`t have henna Directions 1. Put the Henna mixture into a Ziploc bag and squeeze the air out. Cut a very small hole in one corner, and squeeze the henna towards the hole. 2. Use the bag like an icing bag. Carefully and steadily, squeeze the henna out onto your skin following your design. 3. Leave on until the henna cracks and falls off. Wash carefully with lemon juice. The pale orangey-brown outline will darken during the day. If you don`t have henna, try a washable marker. INTERNATIONAL EGYPTIAN PAPER BEADS GPR The people of Egypt have been making beads for almost 5000 years ago. They wore wide collars of beads made from gems, glass, or ceramics for decoration. Supplies: magazine or flyer pages, yarn, metal washers, buttons or beads, toothpick, glue and scissors Directions: 1. Cut magazines in 1-inch strips and spread glue all over each strip. 2. Place the toothpick on one end of paper strip. Fold the end of the strip over the toothpick and glue it down. 3. Roll the paper around the toothpick, and gently pull the brush out. Leave the bead to dry. 4. String the paper beads on yarn using a washer, button or bead between. 5. If you dip the end of the yarn in glue and let dry, it will make it easier to thread your beads. INTERNATIONAL: MALAYSIAN SCENTED FAN GPR In Malaysia, it’s hot, so they use fans. Artists carve them out of sandalwood. After they are carved, they are pierced with tiny holes to create intricate designs then dipped in water to release the oils in the wood. INTERNATIONAL: GREEK WORRY BEADS SBGPR In the Greece, when you walk around, you will see lots of people carrying strings of beads and playing with them. They roll the beads around in their hand and flip them to relieve tension. These strings are called ―worry beads‖. Supplies: Yarn or string scissors 18-20 beads ruler Directions: 1. Cut a strand of yarn. 2. String the beads on the yarn, leaving about 6 inches of yarn on both ends. 3. Tie the two ends of the yarn together in a knot close to the beads. Unravel the ends of the wool and trim to about 2 inches long. 4. Use your beads in whatever way helps take your mind off your troubles and helps you focus on the beads instead. Template for Malaysian Fan Word Search - WAGGGS Countries There are 10 million girls and young women in 145 countries located in five regions: Africa, Arab, Asia Pacific, Europe and Western Hemisphere in WAGGGS (The World Association of Girl Guides and Girl Scouts).You’ll find 21 of those countries in the Word Search below. Look in every direction to find them. If a country has 2 words, those words may not be right together. Y E M E N I Q P W U S R F N A C I L B U P E R A D E Q F O N Z P P S K G K D N A L A E Z T N O O E Y R D A N T F M R Y I Spain On My Own (Dec 2012) V A N R A R L C S O A A D B L G Y C M T R I W P L N D X W L Syria A R N I E U N A A C A A E R E W E E H N I G Y I A I N B A S D T T E G I S A N N L E Y E S L E A E C I M G L A A R E Y L Turkey N B R N A E C O U D R G K S T Z I M B A B W E D A T E R X U A F M S L H Q D H T S Y U F X M E X I C O G S Y W U N T Z V Q T Y L A T I P M M A K T G L Yemen © Girl Guides of Canada - BC Program Committee Australia Canada Denmark Dominican Republic Ghana Greece Grenada Italy Kenya Lebanon Malaysia Mexico Netherlands Antilles New Zealand Nigeria Portugal Zimbabwe 22


© Copyright 2026