
stage 3 - Candida Diet Plan
1
About The Author
Sandra personally suffered from Systemic Candida for over 10
years, barely holding it at bay with prescribed medication. In 2010
it came to a head and she decided that conventional medicine
wasn’t working for her – she chose to heal herself through her diet
(alongside a natural treatment plan).
This book is the result of all her research, trial and error, testing
what works and what doesn’t – all with the help and feedback
from the thousands of subscribers to her Blog, Newsletter and
Facebook community over the past 3 years.
So let her guide you on your journey to health and vitality
through 100% wholesome & tasty food! It’s worked for her and
many others, and she truly believes it can work for you too!
2
Key to Abbreviations
Naturally all the recipes in this book are free of refined sugars, yeast and processed foods or
artificials.
Most recipes are also gluten free and dairy free. The dairy in the few recipes that do contain dairy
can easily be replaced with a dairy-free alternative. For instance tempeh/ tofu instead of feta/
cottage cheese and rice/ almond/ coconut milk instead of goats milk and unsweetened soy yogurt
instead of sheep or goats.
Regarding common allergens: Whereever possible I give egg free alternatives within the recipe, and
I don’t use Soya. There are only 3 recipes with nuts and these are marked (contains nuts). Shellfish
recipes always name a shellfish free alternative. And with most meat dishes I give a vegetarian
option.
A lot of the recipes are naturally grain free like most soups, salads, meat, fish and vegetarian meals;
except some of the bread, cereal and cake choices. If they are grain free it will say so in the recipes
description.
The abbreviations after each recipe title indicate which recipes are gluten free (gf), dairy free
(df), and vegan (v) (which would include dairy free and egg free).
Since the sweetness of the meals is very important to Candida sufferers I have also included
references to what sweeteners the recipes contain (S) Stevia (X) Xylitol or a little fruit (F). If the
recipe is without any sweetener (sugar or fruit) it is marked with (SF) for sugar & sweetener free.
Hearty mains generally contain no abbreviations. For instance Roast Chicken is naturally (GF), (DF)
and (SF), but I don’t mention this specifically. So please read through the ingredients’s list to doublecheck that the meal doesn’t contain anything that you might be allergic or sensitive to.
(GF) - Gluten free
(DF) - Dairy free
(V) - Vegan (dairy & egg free)
(SF) - 100% sugar and sweetener free
(S) - sweetened with Stevia
(X) - sweetened with Xylitol
(F) - contains fruit
3
Table of Contents
About The Author
2
Key to Abbreviations 3
Why I had to give up sugar
9
Tools You Need
12
Kitchen Ingredients Essentials
12
DRINKS
STAGE 3 -- 4 WEEKS (RE-INTRODUCE CARBS MEALS)
TIPS FOR RE-INTRODUCING FOODS RICH IN CARBS
17
STAGE 3 RECIPES BREAKFAST RECIPES
Creamy Coconut Rice (GF, DF, SF)
19
Curried Cabbage Stir Fry (GF, SF)
21
Creamy Hot Brown Rice Cereal (GF, DF, SF)
22
Granola Style Coconut Oatmeal Porridge (can be GF, DF, SF)
23
Plain Comforting Oatmeal (can be GF, DF, SF)
24
Almond Millet or Quinoa Porridge (GF, DF, SF, V)
25
My Classic Awesome Pancake Recipe (Wheat or Spelt DF, SF with V option)26
More cooked breakfast ideas
27
Breakfast On the Go
27
Chia seeds breakfast pudding
28
BREAD RECIPES
Quick Breads/ Flat Breads (SF, can be GF, V)
Teff Bread Toasties (GF, DF, SF with V option)
Paleo Bread Rolls (GF, DF, SF, V)
Almond Cinnamon Toasties (GF, DF, SF, V)
Sesame Soda Sandwich Bread (SF, V)
Psyllium Oatmeal Bread (GF, DF, SF)
Simple Wholegrain Spelt Pie Crust/ Shortcrust Pastry (DF, SF, V)
Gluten free PIE Crust/ Pastry (GF, DF, SF, V)
4
29
30
31
32
33
35
37
38
LIGHT LUNCH OPTIONS
PIZZA Base (GF, DF, V)
PALEO Pizza Crust (Almond flour Pizza Crust) LUNCH RECIPES
Watercress soup (GF, DF, SF, V)
Creamy Green Detox Soup (GF, DF, SF, V)
Cavolo Nero (Kale), Pork & Canellini Beans Soup (GF, DF, SF, with V option)
Chicken, Beans & Quinoa Soup (GF, DF, SF, V)
Greek Salad (GF, SF)
Salad Niçoise (Pimped Tuna Salad Version) (GF, SF)
Mixed Raw Salad with Hummus (GF, DF, SF, V)
How to make Hummus at home
3 SUPER QUICK MEALS (10-15 minutes max)
Smoked Salmon and Soft-Boiled Eggs Sani (DF, SF & can be GF)
Scrambled Eggs and Bacon with Toast (GF, SF)
Speedy Butter Beans Curry (GF, DF, SF, V)
Veggie Omelet (GF, SF, DF option)
5 HARDLY ANY PREP OVEN BAKED MEALS
Simple Veggie Quiche (GF, SF & grain free option)
Grainfree & Gluten free Alternative: Egg & Dairy free Quiche with Tofu (GF, DF, V, SF)
Broccoli & Chicken or Leek & Bacon Quiche (GF, SF)
40
40
42
43
44
45
46
46
47
48
49
50
51
52
53
54
54
54
BEANS & LENTILS HOT POTS (PERFECT FOR BULKCOOKING & FREEZING)
Speedy Butter Beans Curry (GF, DF, SF, V)
Kidney Bean Stew with Coconut Rice (GF, DF, SF, V)
Thick Healing Red Lentil Soup (GF, DF, SF, V)
German Lentil Soup (GF, DF, SF, can be V)
My Fav Tummy Friendly Pizza Topping (GF, SF, V option)
Baked Potato with Salad and Tuna (GF, DF, SF)
QUICK PASTA DISHES & STIR-FRIES
Soba Noodles with Simple Stir-fried Veggies (GF, DF, SF, V)
Sesame Cabbage Stir-Fry (GF, DF, SF, V)
Rice pasta with Bell Pepper Sauce (GF, DF, SF, V)
OTHER QUICK MEAL IDEAS
Borlotti Beans & Swirly Pasta bake (GF, DF, SF with V option)
Lunch Box Ideas for the Office or when on the Go
5
56
56
57
60
61
62
63
64
64
66
67
DINNER RECIPES
Über Delicious Stir-Fry (Chicken, Shrimp or Veg) (GF, DF, SF, V option)
Savory Pancakes with Greens & Curry Sauce (DF, SF, can be GF and V)
The Creamiest Curry Sauce Recipe Ever
My Staple Spice Mixture for Marinating Chicken or Fish
DESSERTS
Plain Yogurt (GF, SF)
Almondy Millet Pudding (GF, DF, V, SF)
Vanilla Chia Oats Pud (GF, DF, SF, V)
Wholegrain Rice Pudding (GF, DF, SF, V)
Super Quick: Ground Rice Pudding (similar to Semolina Pudding)
SNACKS
Steamed Vegetables with Pumpkin seed oil (GF, DF, V, SF)
Homemade Popcorn (GF, DF, SF, V) Rice cake with veggie curry (GF, DF, V, SF)
Curried rice cake with ham or chickpeas (GF, DF, SF)
Snacks, Cakes & Puddings
Rice cake with Tuna and Cucumber GF, DF, SF)
Almond & Hazelnut Butter Rice Cake (GF, DF, SF, V contains nuts)
Hummus and Veggie Sticks
Sani with Hummus, Grilled Red Pepper & Alfalfa Sprouts
CAKES
Sugar free Carrot & Walnut Cake/ Bread Recipe (DF, SF, can be nut-free)
Vanilla Cake (DF, SF; GF and V option; contains nuts)
Sugar Free Squash Muffins (DF, SF with V option)
No Bake Cheese Cake – Sugar Free Version of the Classic (S)
SAUCES, SPREADS & PANCAKE SYRUP
Vanilla Custard Creme (GF, DF, S, V)
Cinnamon & Almond Butter Spread (GF, DF, S/ SF, V)
Lemony Syrup (GF, DF, S, X, V)
Cinnamon Butter (GF, S)
SPECIAL OCCASION MEALS
Mustard Seed Pancakes with Savory Filling (DF, S, can be GF and V)
Sweet Lamb (or Beef )Bolognese (GF, DF, SF with V option)
Vegetarian/ Vegan Alternative:
RECAP OF STAGE 3
68
70
71
73
74
74
75
75
75
76
77
77
77
79
79
79
79
80
82
83
85
86
87
87
88
89
89
90
91
6
BONUS SECTION:
STAGE 4 -- 1 YEAR (TRANSITION TO EATING WHAT YOU WANT)
RECOMMENDED SWEETENERS
94
DESSERT
Apple Crumble (DF, S, X, F, V, can be GF)
SNACKS
Sugar Free Macadamia Coconut Cookies
with Xylitol & Stevia (DF, can be GF, S, X, with nuts) Apple and Pear Snack Bars (GF, DF, F, V)
Choc Granola Bars (GF, DF, X, S, V, contains nuts)
Maca Morning Glory Smoothie (DF, F, SF, V)
Sports Smoothie (GF, DF, F, V)
Frozen Blueberry Smoothie (GF, DF, V, S, F)
CAKE
Apple Almond Cake (DF, GF, F, V and grain free)
96
–
97
98
99
100
101
102
103
RECAP OF STAGE 4
104
MENU PLANS
106
7
Intro
Hi my name is Sandra, and I’d like to welcome
you to the start of your journey to health!
I am thrilled you picked up this book and
decided to try out some of my Candida diet
friendly recipes – that’s awesome!
All recipes in this book are 100% sugar and
yeast free, and most are gluten and dairy free.
You’ll find Paleo (grain free meat, fish & egg
based) meals as well as plant based meals.
I presume you have already read the first recipes
book in this Candida diet series, dedicated to
protein meals. It is very important that you
cut your carbs consumption right down in the
first few weeks of the Candida diet.
So if you haven’t already done so, please first do a quick fast (optional) and follow a strict
Candida diet protocol (mainly soups, veggies and fish or white meat) for at least two to four
weeks before embarking on this stage of the diet with all its carbs -- otherwise you might
feel worse for wear.
BONUS: 5 NEW CANDIDA DIET RECIPES + 2 WEEK MEAL PLAN
This cookbook contains the latest up-to-date version of over 100 of the most popular
Candida diet recipes from my blog candidadietplan.com including 5 completely NEW
sugar free recipes and a 2 Week Meal Plan (only available as part of this book; not on the
website).
I hope you’ll find my recipes and comments useful,
Keep in touch!
Sandra x
How to get the most out of this book
I recommend you use this recipes book in conjunction with the first one in this series.
Just so that whenever ou are starting to feel unwell or you want to lose weight, you can grab
the first recipes book again and quickly locate the recipes that will enable you to feel better.
8
How good do you feel? This will determine what stage of the diet and
what recipes you should try.
Are you feeling ill or do you want to lose weight? Then you really need the first book
in this series or just pick stage 2 type recipes with fish and veggies or organic meat and
veggies (no grains, sweet veggies or potatoes!).
Starting to feel fitter, but still have some food sensitivities/ health issues or you want to
maintain your weight? Then mix it up. Eat mostly Stage 2 foods with 3 days stage 3 foods.
Are you feeling ok, do you want to put weight on or simply enjoy life? Then try the
recipes in stage 3 and 4.
Don’t have Candida (go through the free symptom checklist on my blog if you’re unsure)
and just want to try some of my healthy recipes? Then you can pick and mix the recipes to
your heart’s content and perhaps add some coconut sugar, fruit or agave nectar to some of
them to adjust the sweetness. I deliberately left those out because all types of sugar make
Candida related health issues worse.
A few words about Candida & My Medical Disclaimer
Basically, if you think you have Candida then you’ll have to follow the diet quite strictly for
several weeks if not months. You’ll have to take some natural meds and probiotics to rebuild your immune system. Diet is only part of the medallion. There are good free resources
on the Internet, if you want to put a treatment plan together yourself. That’s what I did.
You can follow my progress along on my blog at candidadietplan.com or you can peruse my
health journey and treatment plan quickly at your leisure on Amazon (just search for “The
Candida Diet Solution Sandra Boehner”).
That said, if you have access to a nutritionist/ digestive expert with a proven track record
of healing people, then I’d definitely recommend getting professional help. You’d heal so
much quicker by avoiding trial and error. Just bear in mind that what I’m sharing here with
you is just from my own experience and recipes I developed for myself. I have no medical
qualification and if you try out my recipes or you follow in my footsteps, this might very
well not agree with you. I cannot accept any responsibility for that. You have been warned
;-)
Why I had to give up sugar
After conventional doctors had not been able to cure my health symptoms, and the
naturopath had assured me the diet I was following was very wholesome, I carried on with
what I thought was a “healthy” diet: fresh fruit smoothie followed by Müsli with dried fruit
and semi skimmed milk for breakfast, more fruit and copious amounts of tea with manuka
honey; then wholewheat bread with cheese and later wholewheat pasta with chicken and
vegetables.
Since the diet was high in sugar and highly acidic, my symptoms intensified and I just
“knew” that it had to do with the sugar and grains I was consuming. I started researching
on the Internet and found interesting information that confirmed my suspicion.
9
I was able to identify that all my health problems stemmed from a yeast imbalance that
was allowed to undermine my immune system for years as it had been undiscovered and
therefore untreated.
It made total sense to me because even the recurring health issues that had troubled me
half my life (bladder infections, yeast infections/ thrush, hayfever…, sensitivity to smoke
and strong smells… were classic Candida symptoms (You can go through the free symptom
check list here to see if you’re affected).
By that point I had lost faith in the conventional health system I decided I might as well
follow the diet that was meant to cure Candida induced health problems, since I had
nothing to lose.
The Turning Point:
So I printed off some sugar and yeast free recipes I had found on the web and embarked
on the Candida diet. I quickly got better, and I equally as quickly got bored of the recipes I
had found.
As the yeast overgrowth had totally undermined my immune system and caused secondary
infections and hormonal imbalances that weren’t so easy to get rid of, it did take me a while
to get fully well again. Hence I was forced to adapt recipes to my liking, not to have to eat
the same old boring sugar deprived foods again and again.
I learned through trial and error, openly sharing my recipes and what natural treatments I
followed on my blog candidadietplan.com. This gave me a great platform to interact with
and learn from other Candida sufferers who also had chronic health issues.
This sped my recovery up no end. So much so that I got a bit cocky and relaxed the diet,
enjoying lots of fruit and the odd ice cream and cocktail, reveling in how good I felt. That
sadly led to a relapse and the return of some familiar health problems and discomforts, not
to mention the emotional downward spiral this entailed.
But when I started to follow the diet again, it wasn’t long until I got back to where I had left
off. Once again seeing how powerful the diet is when followed systematically.
All throughout the long recovery from my auto-immune, respiratory and emotional health
issues I kept a food diary. I have a very clear idea what meals helped me to get better and
which ones weren’t so beneficial.
The Feedback of Hundreds of Readers and Kind Recipes Testers Helped Shape these Recipes
I also got a lot of feedback from the hundreds of readers who followed in my footsteps,
eating according to my Candida diet recipes. This gave me an abundance of healthy tasty
recipes to choose from for this book. Yet I took it one step further and fed the short-listed
recipes to my family and friends to make sure that they were easy enough to cook for even
busy people.
It was also important to me that the recipes tasted really good to people who don’t know
anything about nutrition.
All the recipes in this book are staple dishes that I’ve been refining for over two years.
10
I am confident that you will find one or the other new dish in here that you will permanently
add to your cooking repertoire. And if you don’t normally cook, then you’ll be pleased to
here that the dishes I’m about to show you don’t require cooking skills. They are quick and
easy to make.
I know how daunting it can feel to take your health into your own hands, and how it can feel
confusing and as if you were tapping in the dark, not knowing what will help you. I truly
hope that I can inspire you to try out a few new recipes.
Nobody expects you to change your diet completely. Just grab a big mug of tea and peruse
the recipes in this book at your leisure.
Best Results When You Follow a Meal Plan
My advice for you though is to pick a week and literally plot out what you’re going to eat
that week. You can just copy mine, that’s what it’s there for ;-) or you can develop your own.
You can download the free meal plan as well as four already filled in meal plans if you
sign up to my weekly newsletter: http://candidadietplan.com/4weekly-meal-plans
It is so much easier to eat healthily, when all you have to do is follow the plan. I do this every
week, and it has helped me no end.
Better still (if you haven’t been feeling so well for quite some time): Also Keep a Food Diary
If you currently suffer from health symptoms then you can take it even one step further:
You could write a food diary.
It’s just a way of documenting what you’ve eaten on a certain date and how you felt. When
you do this regularly you’ll quickly see patterns that you would otherwise miss.
For instance I noticed in my food diary that my inflammations flared up after eating oats,
and yet I believed that I wasn’t allergic to oats and could therefore eat oats. When you
keep seeing that you feel worse after eating what you regard as delicious highly nutritious
breakfast, eventually you’re going to try something different, right? Only because I kept a
food diary and noticed the pattern I started to question the belief I had about what foods
agreed with me. It’s easy to turn a blind eye on something you don’t want to give up.
A Few Words of Encouragement
If some foods don’t agree with you at the moment, don’t despair. At one point I reacted to
meat, eggs, all grains (including Quinoa, millet and Buckwheat which are meant to be so
allergy friendly…!) sugar, yeast, cream, milk, butter, cheese, tomatoes, mushrooms, bell
peppers, garlic, beans, bread, coffee, fruit, alcohol and sweets… not to mention the hefty
allergy fits I had when I so much as just thought of dust mites or pollen…!
Now I can enjoy pretty much anything (in moderation!) I am of course still a little cautious,
because the last thing I want is to jeopardize my newly found wellbeing. But I can enjoy
oatmeal porridge, a sweet pudding, roast chicken and even the odd pizza or a glass of wine
without any problems. Everything is possible! I want you to feel great - and not go hungry,
haha :)
11
Tools You Need
What you normally use for cooking and baking will work just fine. I happened to have
these kitchen ware items at hand, but just use what you normally would:
•
•
•
•
•
•
•
•
•
•
•
A non stick Frying pan (a small one 8inch for toasting seeds or making oatmeal porridge; and a big 11inch one with cover for sautéing vegetables and cooking omelets and frittatas)
A Stainless Steel 3 quart stack and steam saucepan (for quickly steaming vegetables and fish; and to make sauces and melt butter)
A 12-cup muffin pan
A non stick roast and broil pan 13 by 9 by 2 1/4 inches (to roast chicken and vegetables)
Standard rack that sits in the grill part of the top oven (to grill fish, bacon and chicken)
A 2 quart round casserole dish
A 6 quart stainless steel soup pot
A 10 by 15 inches cookie pan
A round Quiche dish/ pie form with 1.6qt capacity 10 1/2 by 1-3/8 inches
A non stick bread loaf pan (a medium 8.5 inch by 4 one baking gluten free breads and a 12
inch by 4 one for baking Spelt or whole-wheat flour breads)
A 9 inch spring form pan (for baking cake) and three small ones 4 by 1 3/4 inches
When I talk about cups in the recipes I mean US cups; I try to give metric measurements
as well wherever possible.
Kitchen Ingredients Essentials
You’ll find that you’ll already have most of the ingredients in the house:
•
meat, eggs, fish, olive oil, plain yogurt, vegetables (and I also recommend wholegrain rice)
At the end of this book you’ll find a pantry list with all the foods I recommend you get on a
regular basis. The list includes the brands I like best and where I buy them. Hopefully this
will help you find good suppliers where you live, too.
Other useful staples to have:
•
Organic brown rice milk (or unsweetened almond or semi skimmed goats milk)
•
Coconut butter/ oil - for frying and spreading on bread instead of dairy butter (although I occasionally use that too). You can get by without Coconut oil. But a little goes a long way, and it kills Candida.
•
Tinned beans (not mixed, butter/ lima beans are great from Stage 3 of the diet onwards, as well as kidney beans and cannelini beans - perfect in salads and for quick Mexican style chilli hot pots and tortilla or potato fillings)
•
Tinned fish (sardines are better than tuna because of the mercury content, but I use both on a regular basis) - makes a great snack or lunch with a salad and boiled egg. You want to eat more oily fish, fresh and tinned - it’s anti-inflammatory!
12
•
Tinned tomatoes and tomato paste (called tomato puree in the UK)- check that these don’t contain citric acid, you might have to buy this at a health food store.
It’s worth it though, tastes milder and is better for you. Great for making sauces and as base for pizza and hot pots.
•
Sunflower and pumpkin seeds and desiccated coconut - for sprinkling on salads and breads and to snack on.
•
Plenty of organic vegetables, eggs, meat and fresh fish.
•
Low salt - I generally use Sea salt, garlic or onion salt, but too much sodium/ salt isn’t good for you - makes your body retain water and toxins in your tissues. So Low Salt is great in that it tastes like “salt” but contains less sodium. Keep an eye out for it next time you go groceries shopping.
•
Probiotic yogurt (I found sheep’s yogurt the tastiest because of it is thick and creamy like Greek yogurt). But regular dairy or goats yogurt works, too. Just make sure that it’s not pasteurized as this kills the goodness. Dairy can cause stomach/ gut upsets; goats tastes as if a goat breathed in your face, haha.
•
A good herbal tea and if you like green tea (yes, you need to wean yourself off coffee, I’m afraid - it messes with your biorhythm and blood sugar levels). Herbal tea is even better for you than black or green tea because the fermentation process of the latter can disrupt the microflora in your gut.
•
Dried lentils (green and red) - make fantastic soups and stews and really come into their own with a touch of Indian spices.
•
Brown rice pasta and brown (wholegrain) rice in place of white wheat pasta and rice
•
Turmeric spice - you’ll see me adding this to most of my recipes - it gives dishes a lovely yellow color with virtually no flavor yet super cancer fighting/ preventing properties.
•
Almond butter - for snacking on; in moderation! ;-)
•
Wholegrain Spelt flour is my ‘go-to-flour’ these days. It’s lower in gluten than wheat flour (so it’s easier on your gut) yet it tastes great and is easy to bake with. Perfect for bread, pizza bases, pastries, cookies - the works! You don’t really need anything else.
I also recommend gluten free flour even if you’re not coeliac (but it’s not essential). It simply makes
you feel good and gives your diet a bit more variety. If you’re currently struggling with digestive
issues or allergies then you could definitely benefit from streamlining your digestion. Gluten free
flours help you do just that: Sorgum, Teff and Millet flour are the main ones. You also often see
almond and coconut flour being used, although these are technically nuts rather than flours. But
very tasty.
That should be all to give you an overview. You don’t need all of these things to get started. Refer to the
Pantry list at the end of the book to see exactly what you need to get started.
13
DRINKS
Water -- I recommend you drink good quality filtered water. Lot’s of it! It’s important to alkalize
your system to aid recovery and also to feel good.
Instead of drinking coke, soda pop or alcoholic drinks have a glass of water with a slice of lemon or
some lemon juice. It also aids digestion which is good.
Natural apple cider vinegar -- I swear by apple cider vinegar, it’s so good.
I have a glass with 2 tsp of it next to my bed - it’s the first thing I drink in the morning and again
whenever I eat something very rich or meaty. Even my mum swears by it; she says it stopped her
arthritis and made her more bendy. Same with taking flax oil every day, it’s so good for your skin
and joints.
Ginger tea -- I have swapped my morning coffee for freshly brewed ginger tea.
Takes only twenty minutes to brew and I make enough for half a week, so I only need to reheat it in
the mornings. One of the best investments in your health you can make. Boosts your metabolism,
combats nausea and colds and simply makes you more active (don’t drink it past lunch time though,
can keep you awake). Peel and finely chop a thumb size of fresh ginger root and simmer in boiling
water for 20 minutes in one liter of water (dilute with more water before serving if too strong).
Chicoree coffee substitute - I didn’t go straight from coffee to ginger tea. For quite some time a
was drinking green tea and loved it, and I also went through a phase of drinking hot water in the
morning. You just have to do what feels right for you. If you can’t let go of coffee try to add some
chicoree coffee to it at least, because it has an alkalizing balancing effect on the otherwise completely
acidic coffee.
A few loose herbal teas should also be in your repertoire in my opinion. You can prevent and treat
illnesses with it. I’ve been using certain teas as home remedies for several years now, and have had
an amazing success with it.
Nettle tea -- to cleanse and rejuvenate (has a really milk sweet flavour - the opposite of what you’d
expect)
Mullein tea -- absorbs excess mucous when you have sniffles or eaten too acidic.
Dandelion tea -- aids digestion.
Chamomile -- to relax in the evening, bring inflammation down, and fall asleep quickly.
Passionflower tea -- if you wake up at night and have trouble going back to sleep (makes you
dream vividly!)
Uva Ursi tea -- cleanses the urinary tract thereby preventing and curing bladder infections and
also alleviating constipation.
Hundred times better than the bitter black tea brew that most people drink, and you almost have to
put sugar and milk in to make it taste alright. I’m not totally against it, but black tea does disrupt the
micro-balance in your gut, so at least for long-term Candida sufferers it’s best to swap to mild herbal
alternatives to re-build your immune system.
14
Now if you’re new to the world of herbal teas perhaps just go for a nice mint tea to begin with.
But I do recommend trying one of the other herbal teas at some time. Drinking tea makes for such a
pleasant calming ritual that can only benefit your wellbeing :)
Needless to say I don’t advocate alcohol during this diet. When you meet friends and family away
from home order sparkling water with a slice of lemon or mint/ chamomile tea or if it’s at
someone’s place bring a coffee substitute.
Yannoh for instance tastes delicious and Barley cup isn’t too bad either (not sure whether you can
get those where you live though. See what you can get where you are that is alkalizing/ contains
Chicoree but no sugar or artificial aroma. Have hot rice or almond milk with it, and you’ve almost
got a latte ;-) When out with friends and when you’re in Stage 4 you could occasionally have a decaf
latte, if you couldn’t resist the coffee shop charm. It’s not ideal because of the milk sugars, but it’s ok
every once in a while.
Don’t drink fruit juices (not even freshly squeezed - unless of course you don’t have a yeast
imbalance, then fruit is absolutely fine). Add protein powder to your smoothies to make them more
filling (hemp protein powder has the best nutritional benefits).
Coconut water is high in electrolytes and minerals which is good, just keep it to a minimum at the
beginning of the diet, because it does contain some natural sugars.
There’s come probiotic coconut drink you can get in some countries it’s called Inner-eco - I’ve heard
good things about it from Candida sufferers. But since it’s fermented you might react to it. So to
be on the safe side I’d try that only from Stage 4 of the diet onwards once you’re feeling fine. Same
applies to Kefir, especially when made with dairy.
15
STAGE 3 -- 4 WEEKS
(RE-INTRODUCE CARBS
MEALS)
For the next four weeks (or longer if you want) try to carry on with your sugar
free diet. In this chapter I’m going to show you what hearty meals and
rich puddings you can have that taste great (even without sugar!)
In this stage of the diet you’re slowly introducing carbs back into your diet. Bread, rice, potatoes…
you get the idea. You should still eat fish at least twice a week, preferably more often, and also meat,
eggs and a lot of vegetables. You should also be taking antifungals to kill the excess Candida.
Great Foods to Re-Introduce & how much:
You can now eat small amounts of beans and legumes, which is a godsend as you can make
wonderful heartwarming lentil stews and dhals that you can eat over several days without having to
cook again.
Only eat wholegrain and organic whenever you can. You’ll learn to cook with millet and quinoa
and to bake with gluten free flours, for maximum allergy-friendly effect.
Eat potatoes only cooked and cooled down, without the skin on. Always combine with salad
or vegetables to slow down the sugar absorption into your blood stream. Eat no more than two
medium ones, and if you can season them with thyme/ and or Rosemary, so much the better,
because of their yeast repelling properties.
Try to mix it up and not eat the same carbs every day. One day brown rice, the next potatoes, the
next maybe bread. Talking of which. Bake your own bread, it’s easy (I’ve included some nice recipes
for you in this chapter!)Tastes awesome and is the only way to prevent the yeast, sugar and artificials
or rising agents in the shop bought stuff. Carefully plan what snacks you’ll have, so you’re prepared
when the cravings hit you. It’s crucial to your success and your energy levels all throughout the day.
I’ll show you some of my simple and quick snacks like crunchy yogurt and flat bread.
Tip: Try not to resort to processed foods like instant millet or quinoa flakes, puffed rice or corn
cakes on a daily basis, as they have a lot less nutritional value than their wholegrain counterpart and
from my experience nearly always eating them meant a hold up in healing, if not a flare up of old
symptoms.
16
Early Warning Signs that some Carbs don’t agree with you - YET!
Listen to your body. If your symptoms flare up after eating butternut squash than acknowledge that
and don’t eat those foods for at least another month if not two and until then you best halve the
amounts. Don’t ever think “Hey the plan says I can eat root vegetables now so I eat two portions of
sweet grilled veg” - always test a small amount of the food first to see if you are ready for it.
It took me a long time until I was able to eat warm carrots or potatoes. Same with Quinoa and Millet
- I just couldn’t get my head around it and continued eating those grains thinking that they were
allowed in stage 3 and better for me than wheat. Sure, but years of living out of balance had made
my digestive system sensitive to grains, any type of grains (even the good ones!)
I particularly reacted to buckwheat, which was confusing since it doesn’t contain wheat or gluten.
It is an acidic food though, and I’m guessing that due to the fact that the Candida hat caused a Leaky
Gut in me, this acidic medium must have seeped into the tissue of my lower abdomen and caused
swelling, bloating and discomfort. Only once the Candida imbalance was down and I had taken
meds specifically to soothe and heal a leaky Gut, I didn’t react to the buckwheat any more (and to a
large extent to wheat, thank god - it is after all a super tasty convenience food!)
TIPS FOR RE-INTRODUCING FOODS RICH IN CARBS
Carrots and other Root Vegetables
Tip for re-introducing carrots: Start with a piece of raw carrot (goes slower into your blood stream
due to the fiber.)
Since you haven’t had any sweet foods for a couple of weeks at least your taste buds will have
changed and you won’t require the same amount of sugar to be content. Therefore you don’t need to
eat whole carrots.
It is sufficient for instance just to grate half a carrot over your salad or nibble a peeled small carrot
with hummus.
Avoid drinking carrot juice and carrot soup until you feel like you can handle that amount of sugar.
How the raw carrot agrees with you is a good indicator.
The same applies to other starchy vegetables. Little does it.
Eat a small beetroot with feta and a sandwich for instance, not several beetroot heads.
Butternut squash in my experience are the worst in terms of encouraging old Candida symptoms to
appear. Only ever buy a small one, bake it and divide it up, then freeze it in small portions.
This rule is also valid for dishes you add starchy vegetables to. As a rule of thumb: Add no more than
a handful of starchy vegetable to your meal (or two if making double the amount for the next day).
That way your body gets the nutritional benefit of the vitamin rich vegetables without the danger of
risking a relapse.
17
Tips for Re-Introducing Bread
A life without bread is no life, right? So we need to get you back to normal so you can enjoy all the
delicious baked goods again.
For that to happen it is crucial that you eat only yeast free wholegrain bread. Millet, Teff, Quinoa
and even Spelt are great (unless you are celiac). If you only have a simple yeast infection (and you
haven’t been displaying symptoms in other places of your body) then you might even be able to eat
wheat bread.
Tips re Oatmeal Porridge (or rolled Porridge Oats as they are called in
the UK)
Oatmeal Porridge was an absolute addiction of mine before I got ill, so when I was able to eat it
again in Stage 3 I felt like I was in heaven. Again I would recommend gluten free porridge, less
sticky in the colon, less chance to foster Candida and cause bloating.
Now this is important: Do not eat oatmeal porridge or any other type of cooked grain or cereal with
milk as a mid morning or mid afternoon snack. I know it’s comforting and quick and it makes you
feel great…! But it’s
sweet, it’s carbs and it DOES feed Candida. So if you want to get through this diet as quickly as
possible, do yourself the favour and stick to low carb snacks. It will really speed up your healing. I
didn’t do this for months and months and I virtually didn’t progress in my healing.
What about Dairy?
That depends on what Candida symptoms you have. If you have any respiratory issues (colds, sore
throat, sinus trouble, wheezing…) then dairy will always make your symptoms worse and therefore
make you feel
more tired, more exhausted and increase the mucus. The first few weeks in Stage 3 you shouldn’t
have any milk, due to the milk sugar.
Yogurt is fine, so is feta. If you want to be on the safe side stick to no more than 4 tbsp of yogurt or a
finger’s width of feta. Mature cheese, mozzarella… are off the books, and even cottage cheese in my
eyes isn’t easy to digest when combined with foods.
Kefir is great. But better wait several weeks before trying it, because it can cause unpleasant die
off reactions. Remember, you don’t have to be extreme about it all. You can add a glug of milk
to scrambled eggs for instance, but in general stick to dairy free alternatives like rice milk or
unsweetened almond milk. And delicious they are, too!
18
STAGE 3 RECIPES
BREAKFAST RECIPES
In this chapter I’ll show you the big choice of hot breakfasts you can enjoy during
the next four weeks or as long as you decide to follow the diet:
The time of deprivation is over -- back to comfort foods :)
Some Carbs are allowed, yeah! And don’t forget you can have all the meals from Stage 2 as
well - have them regularly!
Creamy Coconut Rice (GF, DF, SF)
Makes an excellent snack later the same or the next day. Best make double the
amount.
Prep: 0
Cooking time: 35-40 minutes
-- see recipe Sugar Free & Easy book 1 page 23 or cook wholegrain rice for 40 minutes, stirring
regularly, and once cooked add 1 tbsp of coconut oil, combine until melted, sprinkle with cinnamon
and enjoy (1 portion would be 5-8 heaping table spoons of the cooked rice; rest keeps in the fridge
for several days or you can freeze it).
The rice tastes lovely cooked or reheated in rice milk - sweet like rice pudding. If you put it in your
fridge straight after cooking, there’s no problem reheating the rice.
Lunch Variation:
If eaten for lunch or supper you can add a bit of turmeric and salt and pepper to the rice instead of
the cinnamon or ground seeds. It gives the rice a lovely color and an aromatic flavor - Delicious with
bean dishes and curries!
19
YUMMY BREAKFAST OVERVIEW
20
Curried Cabbage Stir Fry (GF, SF)
The world’s best kept secret healing breakfast!
Why is it a secret? No idea, but I had never heard of it; have you?! And once you’ve tried it you’ll
probably agree that it’s actually really good. I dare you!
Prep: 4 minutes Cooking time: 12 minutes
Ingredients
•
•
•
•
•
•
•
•
¼ of a small white cabbage head (3 big leaves)
1/6 of a block of feta (33g)
cherry tomatoes (5-6; or 2 medium tomatoes)
sunflower seeds (handful)
pumpkin seeds (handful)
1 tsp turmeric and a dash of black pepper
pinch of fennel seeds, cumin seeds and thyme
organic cucumber (1/3 of a big salad cucumber; serve chilled slices as a side dish)
Now don’t look at the ingredients. Humor me. Just make it.
An unusually rustic flavor for the morning that’s for sure. But beggars are no choosers, right?!
Fact is it gives you lots of energy. It’s filling and full of goodness. And best of all - It tastes great, too.
“Cabbage” might sound smelly horrible. But this dish is lovely! If the sweet Candida breakfast
recipes like porridge don’t yet agree with you I urge you to give this dish a try. The sweetness of
the cherry tomatoes and the saltiness of the feta just work. I can’t explain it - I was skeptical myself.
It is the best healing food there is in my humble opinion.
Here’s how you make it:
•
•
•
•
•
•
Heat the seeds & spices briefly in a wok or big frying pan, careful not to burn them.
Meanwhile chop the cabbage and mini tomatoes. When you can smell the lovely aroma of the roasted Indian spices add some water to the pan so that the bottom of it is covered.
Add the chopped cabbage and tomatoes to the spice mix stirring so the veg is coated in the spice mix. If it isn’t you need to add either a bit more water or more ginger spice and a touch of thyme.
If you are brave enough eat the curried cabbage with chilled cucumber slices. It’s cooling, calming properties make it a popular ayurvedan healing food.
Take it out of the fridge, chop 1/3 of it of and either peel or wash it. Then you only need to slice or chop it and put it aside in a little bowl. Also chop the feta. You’ll need it in a minute.
After about 10 minutes of lightly stir-frying the curried cabbage it begins to soften. That’s the time when you want to add the chopped feta. Take 1 medium or 2 small slices of Sesame Soda bread out of the freezer and toast it 2x on the lowest defrost setting, careful not to burn it. Within a few minutes the feta disintegrates into a creamy sauce combining all the ingredients into a thick curry sauce. Spread the toasted bread with coconut oil and sprinkle a tiny bit of sea salt (onion salt or low salt) over it.
Notes: Serve the curried cabbage alongside the chilled cucumber slices and fresh Ginger tea or
Green tea. I tend to make 2-3 times the amount in one go so I don’t have to make it every
morning. That works quite well. But you can also freeze a portion and take it out the night before.
(Estimate 4-5 heaped table spoons for 1 serving).
21
Creamy Hot Brown Rice Cereal (GF, DF, SF)
Quite frankly one of THE best foods I’ve discovered on my health journey -- I love that stuff and
how quick it is to make!
There’s some already pre-ground for your convenience. It’s from Bob’s Red Mill. But I like to grind
a couple of weeks’ worth of brown rice myself in one go in my little coffee grinder (a Vitamix is of
course infinitely preferable for such operations, so don’t buy yourself a poxy little grinder because I
said so, haha - get yourself a slick blender!)
Prep: 1 minute Cooking time: 4 minutes
Ingredients:
•
•
4-5 heaped tbsp (2/3 cup) ground brown rice
400ml (3/4 cup or more) rice milk (I use a mix of almond milk and rice milk; but goats milk is fine, too -- you might just have to add a few drops of Vanilla stevia)
Optional toppings:
•
1/2 tsp cinnamon and flaked (thinly sliced) almonds -- best when lightly roasted in a saucepan overlow heat (careful not to burn them)
Here’s how you make it:
•
•
Bring some of the rice milk to the boil. Stir the ground rice in, put a lid on and let it cook for a few minutes, stirring regularly.
Be sure to add more liquid if it needs it. I like the end result to be quite thick, but it does absorb a lot of liquid. Cooks quicker than oatmeal and it tastes like semolina pudding.
Here’s how I grind my brown rice at home:
•
•
•
I spread the base of a big frying pan with brown rice kernels. I roast them over medium heat until the fragrance comes out but nor to brown them. I let them cool down, stirring occasionally to avoid condensation forming. To speed things up you can transfer them to big plates or a rectangular baking tray. I generally do two-three lots, so while one is cooling I set another lot going.
Fill the grinder with a few tbsp at a time (or more if you have a big blender/grain mill) and process until you have the consistency you like. I personally leave some small grit in there, but maybe you like yours smooth. You’ll have to experiment with that.
Let the ground rice cool down on another cold plate, and then store in a jar with screw top in the fridge. Keeps for a few weeks. Good stuff!
Weekend Treats -- Choose any of the following:
22
Granola Style Coconut Oatmeal Porridge (can be GF, DF, SF)
Delightfully satisfying and keeping you full for longer!
Prep: 1 minute Cooking time: 1 minute
Ingredients:
•
•
•
•
4-5 heaped tablespoons rolled oats (1/2 cup; 60g; preferably gluten free)
3/4 cup 350ml rice or almond milk
1 handful mixed seeds (sunflower & pumpkin seeds - preferably soaked overnight)
1 heaped tablespoon desiccated coconut
Optional:
•
1/2 tsp fresh organic lemon peel
•
add 1 tbsp of chia seeds to the oatmeal porridge above for extra creaminess (be sure to
add extra liquid)
Nice Toppings:
•
•
•
cinnamon
de-hulled hemp seeds or roasted flaked almonds
1 tablespoon flax seed oil 99
Here’s how you make it:
•
•
•
•
•
•
•
Roast the sunflower & pumpkin seeds in a saucepan for 2-3 minutes.
Add the coconut at the end as it is very quick to burn.
It’s not meant to get brown. We’re just looking to bring the nice smell and flavor out a little bit. You’ll be surprised how naturally sweet it tastes.
Bring the rice milk to the boil and add the oats (and lemon peel or chia seeds).
Then simmer steadily for 5-6 minutes, stirring often to give it a creamy consistency.
Add a little bit of water or more rice milk if necessary. Finally fish the lemon peel out and add a pinch of cinnamon to your delicious porridge.
Sprinkle with some shelled hemp seeds, a pinch of cinnamon and a tablespoon of flaxseed oil before serving
23
Plain Comforting Oatmeal (can be GF, DF, SF)
The classic! You don’t need sugar to enjoy this!
Prep: 1 minute Cooking time: 3 minutes
Ingredients:
•
•
•
4-5 heaped tablespoons rolled oats (1/2 cup; 60g; preferably gluten free)
3/4 cup (350ml) goats milk (or rice or almond milk)
filtered water
Optional:
•
Vanilla stevia to taste (I personally refrained from using sweeteners for over a year until I was symptom free)
Nice Toppings
•
•
•
Cinnamon
1 tablespoon freshly ground flax seeds
For a good old traditional porridge simply try goat’s milk. Makes it less sweet but creami-
er. (Not recommended if you have sinuses problems).
Tip: You can also use oatmeal (ground oats) instead of the rolled oats for an even quicker breakfast.
Here’s how you make it:
•
•
•
Bring the rice milk to the boil.
Then add the oatmeal/ rolled oats. Cook for a few minutes while stirring until you have a creamy consistency. You might have to add some water if it gets to stodgy.
Add the ground flax seeds before serving and stir well. Drink a glass of water or a mug of tea with it as the seeds swell up and can cause constipation if you don’t drink enough to flush them down quickly.
24
Almond Millet or Quinoa Porridge (GF, DF, SF, V)
A great gluten free breakfast alternative.
Prep: 0
Cooking time: 20 minutes
Ingredients:
•
•
•
•
•
1/2 cup wholegrain Millet or Quinoa (pre-soaked in water over night with a dash of acidic medium e.g., apple cider vinegar, lemon juice, whey, yogurt or kefir)
1 cup water
1 cup almond milk or rice milk
sprinkle of salt
sliced/ flaked almonds
Optional:
•
•
cinnamon
vanilla bean paste
Here’s how you make it:
•
•
•
•
•
Wash & roast the millet for a minute in a frying pan (to remove the bitter aftertaste some millet has).
Then mix the millet in with boiling almond milk.
Add a sprinkle of salt and perhaps a bit of vanilla. Keep stirring.
It’s ready in about 20 minutes when it has the consistency of thick rice pudding.
Serve with some sliced almonds.
If you’d rather make this with Quinoa you’ll need a little less liquid, and you don’t need to roast it.
You should wash it thoroughly several times though, otherwise it can taste soapy.
Amaranth is also a great wholegrain easy to digest (and gluten free) breakfast alternative. I wasn’t
so smitten with it just because the grains are so tiny they slipped through my sieve when washing it,
and the taste is a little earthy (probably nicer baked as a bread).
25
My Classic Awesome Pancake Recipe (Whole wheat or Spelt)
(DF, SF with V option)
Everyone has their own favorite pancake recipe. Well, these Spelt are mine.
They are even better if you use wheat flour to be honest. But Spelt has less gluten and is therefore
better for healing. These are are the ones that I go back to time and time again, because they are
easy, quick and the perfect comfort food! They are equally as nice with gluten free allpurpose
flour.
I actually often make pancakes instead of cakes. Especially since you can defrost & toast them in the
blink of an eye.
I love these pancakes because they are very wholesome and filling & work with a sweet as well as
a savory filling/ topping.
They are quite solid little things. Crisp on the outside and soft on the inside. You can’t really detect
the coconut in the flavor much. But it just gives it a rich dense texture that holds them together
nicely. And of course it provides slow release energy – so it keeps you full for longer.
They have a very subtle sweetness which makes them great to munch on just on their own – without
a topping. But if you do fancy something you might like them with Cinnamon Butter (page 213) or
Lemon Syrup (page 214).
Prep: 1 minute Cooking time: 15-20 minutes
Ingredients
•
•
•
•
1.5 cups (200 g) gluten free or wholegrain flour (I used Spelt)
1 tbsp flax seeds soaked in 4 times as much water or 1 egg
1.5 cups (3/4 pint) unsweetened almond milk or rice milk
4 tbsp desiccated coconut flakes
Optional:
•
•
for thickening the pancakes: half a tsp of bicarb soda + ¾ tsp baking powder
and if you’re in desperate need for something sweet -- add a few drops of vanilla stevia, but try it without first
Here’s how you make it:
•
•
•
•
•
•
•
Crack the egg open into the center of a mixing bowl filled with the Spelt flour.
Alternatively mix your flax-based egg alternative in with the flour.
Whisk everything together, slowly adding the rice milk, until you have a smooth batter.
Then add the desiccated coconut.
Add a little water (or more rice milk if you prefer a sweeter taste) – just enough so the bat
ter comes off the ladle easily.
Heat half a teaspoon of coconut oil in a frying pan over a medium heat.
When the oil has melted and the pan is sizzling hot, spoon the pancake batter into the pan. One by one. A non-stick pan is ideal for this (especially if you’re trying to re-create the recipe with gluten free flour).
26
NICE SAVORY VARIATION:
•
•
•
Once spooned into the pan drizzle with some dark mustard seeds for a sun savory touch (they don’t taste like mustard, but give the pancakes an interesting look and texture).
When the top has set carefully flip the pancake over and let it cook until the sides are get
ting crisp and are starting to brown.
Eat warm or cool on a wire rack and freeze.
Vegan/ Egg free Option & Pancake Troubleshooting
•
•
•
Almond milk makes for a thicker batter which creates a more substantial pancake. The end result is not sweet though.
Rice milk on the other hand is naturally more runny and creates a pancake that is very soft in the center, which I personally love. For some reason it reminds me of Poor Man’s Omelet. Perhaps because of the sweet squishieness. So they both have their plus points.
Using an egg is the classic. But you can just as well use 1 Tbsp flax meal with a little water instead (holds the pancakes together better and gives it a slightly nutty flavor, yum!)
More cooked breakfast ideas
•
•
Kedgeree (fish, cooked brown rice, boiled eggs, lightly seasoned); Full English (good qual
ity sausages, ham, tomatoes, beans)
Scrambled Eggs… or any of the other breakfast options from Stage 2 of the diet
Breakfast On the Go
What to eat instead of Cereal when you’re in a rush?
Have whole grains whenever you can. And if you’re in a rush choose Brown rice farina from Bob’s
Redmill (or brown rice you ground at home), that’s delicious and it only takes a minute to cook.
You can eat puffed brown rice occasionally, too. I would not recommend having it every day though
simply because it is highly processed and robs your body of nutrients rather than nourishing you.
I’m not a great fan of millet and quinoa flakes either, for the same reason. I ate tons of the stuff early
on during my diet, and it really slowed my healing down. Whole grains are best for you, and also
make you feel a lot better. Just try it one day a week, see how you get on. Buckwheat might be ok for
some people. It never agreed with me as well as Brown rice or Spelt, so I gave it up in the end, and
want to focus here only on what I love and what agreed with me the most.
Have you tried Oatmeal or Brown rice in the Crockpot or perhaps Overnight Oats or Chia Pudding
chilled from the fridge? Saves you time in the morning.
27
Chia seeds breakfast pudding
If time is an issue you can set “overnight oatmeal” or “brown rice breaky” going in a slow cooker or
have a hot chia & oats breakfast pudding (page 181) or a grain free version (page 70) chilled from
the fridge. Just prepare it the night before and grab it in the morning.
Don’t feel hungry in the morning? Have a green smoothie instead or make some egg based muffins
for a brunch snack! Do it!
Think for a moment: How could you make it easier for yourself to get a wholegrain breakfast in the
morning? What can you do today to prepare tomorrow’s breaky, so all you have to do is execute
tomorrow?
Candida Advice:
For the most part of Stage 3 of the Candida diet I diluted my oatmeal porridge/ rice/ millet cereal
with filtered water, as rice milk is naturally very sweet. I wouldn’t have wanted to take any risks.
Once symptom free I stopped doing that and I sometimes use 1-2 drops of vanilla Stevia or a
sprinkle of Xylitol now which tastes lovely and causes no symptoms in me. I did at one point add
small amounts of agave nectar but experienced a bit of a symptom relapse (I did add it to desserts
too mind you and also had ice cream, date paste and plenty of fruit smoothies!)
But I thought I’d mention it to warn you...
28
BREAD RECIPES
In this next chapter I show you how easy it is to make your own bread (yeastand sugar free and much better for you).
Quick Breads/ Flat Breads (SF, can be GF, V)
Yeast free and SO quick to bake - try it! And since you can freeze it as individual flat breads that
you can whip out of the freezer and into your toaster…Guess what – you’ll have extremely tasty
toasties in no time at all- yum! I even take the bread on journeys with me. Once toasted and spread
with coconut oil the little flat breads keep fresh for several hours. Remaining a crisp crust and soft
inside – perfect.
So, if you have ever put off baking your own bread because you thought it was too fussy to make
or takes too long – try this quick bread recipe – It will forever reform the way you look at bread!
Prep: 3 minutes Cooking time: 20 minutes
Ingredients:
•
•
•
•
•
250g finely ground spelt, amaranth, quinoa or buckwheat flour (´pre-packaged is ok, too)
1/4 l (0.25 quart; 1 cup) lukewarm water
2 big table spoons of sheep’s yogurt (acts as raising agent with the soda)
1/2 teaspoon bicarbonate soda
1/4 tsp sea salt or low salt
Optional: handful of roasted sesame and/ or sunflower seeds; pinch of spices or herbs of your choice (I used freshly ground black pepper, thyme, garlic granules, turmeric)
Here’s how you make it:
•
•
•
•
•
•
Preheat the oven to 200C/ 400F/ Gas 6 with a baking tray in the center to warm up.
Mix the flour with the rest of the ingredients. You can also mix some seeds in the dough if you like seedy breads :-) Take the warmed tray out of the oven and line with baking paper. Sprinkle with a bit of flour.
Part the dough into four rough dough balls. Dust flour over them so you can easily shape them into 1cm (0.3 inch) high patties, like oval burgers. Any flatter, and they turn out like crisp bread or a cracker.
Use enough flour so the breads won’t stick to the baking paper. Each yeast free bread should not be higher than 1 cm, because they will still rise quite a bit. Otherwise you’ll create bread rolls, which is nice, too. Just not as easy to toast afterwards, hah.
Before the breads become too coated in flour though roll them in sesame or sunflower seeds. Take a fork and prick holes all over the bread surface. You don’t have to do that. But if you do they look really nice and the yeast free bread bakes more evenly and a bit quicker (which is essential if you’re baking these in the morning!)
Put them in the oven and bake for 15 to 20 minutes until they are as crisp as you like them. Let them cool down on a wire rack, covered with a clean dish cloth. Then cut in half lengthways and freeze or munch straight away :-)
Serving suggestion: Try this yummy yeast free bread with a hearty soup and a fresh salad for lunch
or alongside my healing cabbage stir-fry for breakfast (page 106) - true candida diet warrior style ;-)
29
Teff Bread Toasties (GF, DF, SF with V option)
Fancy a quick ‘cake-like’ snack with your cuppa tea?
Teff flour is easy to get hold of. You can get it from your local health food shop or online.
I used an egg in this recipe. But you can use flax & chia seeds instead for a completely vegan bread.
And to make it even easier for you to re-create this at home, I created flat breads, rather than a big
loaf of bread. This cuts down the cooking time to 20 minutes.
Making these breads is not only quick to bake, but even quicker to toast (straight from frozen –
BAM). And since they are very allergy friendly, they even make great snacks on the Candida diet.
Don’t let the look fool you! The toasties might look rock hard… But they actually have a very soft
texture – More like a cake than a bread!
Makes 8 thin Toasties (bigger than cookies but smaller than bread)
Prep: 3 minutes
Cooking time: 20 minutes
Ingredients:
•
1/2 cup (100g)Teff flour
•
1/2 cup (100g) Buckwheat flour (or double the amount of ground almond flour below instead)
•
1/4 cup (80g) almonds flour/ ground almonds
•
4 tbsp (20g) coconut flour
•
¾ tsp salt, ¾ tsp baking soda
•
1 egg (or 1 tbsp of ground flax seeds with water)
•
1/4l (1 cup) warm water
•
•
•
Option 1: Add 1 tbsp ground or soaked chia seeds (I made two batches, one with one without; I actually preferred it without as the chia seeds give the bread a very earthy, malty flavor; if you do use them add a little more water)
Option 2: Add ¾ tsp xantham or guar gum (holds the toasties together better so you can slice them horizontally to be used like sandwich bread - great with shaved slices of cucumber and hummus. You could also sprinkle a little bit of coarse Kosher salt or a mixture of salt, garlic and sesame over the bread -- a tip I learned from my lovely reader Cat (yum!).
Option 3: Another sound tip from one of my readers, this time from Doris: Add a sprin
kling of sunflower seeds to the dough before baking for a nutty taste.
Here’s how you make it:
Preheat the oven to gas mark 6/ 400F/ 200C, and put a roasting tin in it to warm up.Finely grind the flax (& chia seeds). I used a small electric coffee bean grinder for this.
•
Mix the dry ingredients, then mix the egg/ flax and and add enough water to form a dough.Take the baking tray out, line it with baking paper and part the dough into equal parts.
•
Make 8 oval shapes, put a line in the middle and make tiny holes all over the breads to speed up the baking time.
•
Bake for about 20 minutes or so until cooked through in the center.
•
NOTE: Be sure to drink a lot of water or tea while you munch it as the ground flax/ chia seeds
absorb a ridiculous amount of liquid and can cause digestive issues if you’re not drinking enough.
30
Paleo Bread Rolls (GF, DF, SF, V)
These bread rolls were quite dense and a little crumbly, but the taste was just right because of
the distinct sweet cake flavour from the almond and coconut.
The icing on the cake, uhm bread, are the chia seeds, that not only help to hold the bread together,
but also look extremely pretty with their black dots on the white bread rolls. Since these rolls are
a mixture of flat bread and cake, they make a perfect snack with almond butter or a savory tofu
spread.
Prep: 3 minutes Cooking time: 20 minutes
Ingredients:
•
•
•
•
•
•
•
1/4 cup (50g) coconut flour
1/2 cup (100g) ground almond
1/4 cup (50g) tapioca flour (or swap for gluten free all-purpose flour for a non-paleo treat)
1 Tbsp chia seeds
about 1/2 cup of warm water
1/2 tsp sea salt
1 Tbsp coconut oil (warmed)
Here’s how you make it:
•
Preheat oven to 350 degrees F, 180 C, Gas mark 4
•
Combine the tapioca flour with the ground almond and the coconut flour and pinch of salt.
•
Pour in warm water and coconut oil and mix together until you have a soft but sticky dough.
•
Use enough tapioca or coconut flour in your hands to make 6 equal sized lightly patted rolls. If they are very crumbly pat them out flat, take a round top of a mason jar and turn them into little flatbreads (a great tip I learned from my charming reader Kayla).
•
Place the rolls/ flatbreads on a lined baking tray after rolling them in the sunflower seeds. Bake for 20 minutes or until golden and crisp.
•
Alternatively you could spread them out even thinner and cut into smaller pieces to make crackers (you’d probably only need to bake them for 8-10 minutes then).
31
Almond Cinnamon Toasties (GF, DF, SF, V)
Let’s take a quick bite… mmmh – light, but with a heavenly subtle nutty flavour.
Prep: 2 minutes Cooking time: 20 minutes
Ingredients:
•
•
•
•
•
•
•
•
•
1/2 cup (100g) Bob’s Redmill Gluten free All purpose flour or other gf free mix
1/4 cup (50g)ground almonds
pinch of salt
½ tsp baking soda
¾ tsp guar or xantham gum
¼ l warm water
1 tbsp ground flax seeds
½ tsp cinnamon
handful of sunflower seeds or crushed pecan nuts
Here’s how you make it:
•
•
•
•
•
•
Mix the ground flax seeds with 4 tbsp water and put aside (if you’re using chia seeds add those now with 6 Tbsp of water).
Meanwhile mix all the dry ingredients and preheat a baking tray in the oven to 200C, 400F, gas mark 6
Take the baking tray out and line it with baking paper.
Now combine the soaked flax seeds with the rest of the ingredients. Pour the remaining water into the mix while you knead a dough with your hands. Adding a little more flour if it’s still sticky.
Divide the dough into 4 parts, form bread rolls shapes with your hands and roll them in sunflower seeds/ crushed pecans.
Bake in the oven for about 20 minutes until they are lightly crisp and golden on the out
side and springy to the touch. If unsure insert a skewer to test if the inside is well done.
Perfect, now let’s smother some creamy layer of Almond butter onto two toasty halves and
build a doppel-decker macaroon… Ooh, it could get messy.
32
Sesame Soda Sandwich Bread (SF, V)
A firm favorite amongst my readers -- for a reason!
Prep: 4 minutes Cooking time: 50-60 minutes
Ingredients for a BIG sandwich bread:
•
•
•
•
6 cups (850g) spelt flour (wholegrain wheat works too but that contains even more gluten than Spelt)
4 tsp bicarbonate soda (raising agent)
1 big tub of natural yogurt (450g; 1 1/2 cups)
up to 2 cups (500 ml) warm filtered water
2 tsp sea salt
1 cup (150g) pumpkin seeds (preferably soaked in water with a dash of apple cider vinegar or 1/2 tsp salt overnight)
1 1/2 cups (250g) sunflower seeds (also preferably soaked beforehand)
2 handfuls sesame seeds
extra flour (in case the dough gets too sticky)
•
Optional: 1/2tsp ground garlic/ granules
•
•
•
•
•
This makes A BIG BATCH of bread! (Scroll down for instructions how to make a small loaf).
Enough bread in fact to last you roughly two weeks if you eat it every morning and sometimes with
lunch. It might be wise to bake a small loaf first to try it out, since my German taste-buds might
misguide you ;-)
Here’s how you make a BIG Sesame Soda Sandwich Bread (I’ll show you
how to make a small one in a minute):
•
•
•
•
•
•
Preheat the oven to Gas Mark 6 (200C degrees or 400F) with your 1 kg bread tin. You could also spread the dough over two bread tins for ease of use and quicker baking time, or you could shape two round loafs and bake them directly on a lined baking tray. I prefer the ‘two bread tins methode’ actually, because if you use only one the dough will spill over the top of the tin which makes it much harder to cut into even slices.
Mix the flour with the bicarb soda. Add the salt, sunflower and pumpkinseeds and half of the sesame seeds.
Meanwhile get the preheated bread tin(s) or tray out of the oven and line with baking/ parchment paper.
Mix the yoghurt and some of the water in with the flour ingredients, kneading it until everything is well mixed and pliable. I do this by hand but you could use a food processor for this. Speed is of the essence here. The acid of the yoghurt reacts with the bicarb soda to make the bread rise. The quicker it gets into the oven once mixed the better it rises.
Add the water gradually as you don’t want the dough too sticky. You might even find that you don’t need all the water. Finding the right balance takes a bit of practice. If the dough accidently gets too sticky you can easily add a bit more flour and salt. So make sure you have extra flour handy. I sometimes also split the dough between two bowls as that makes it easier to mix without spilling flour everywhere.
If you are using a bread tin you can simply spread the dough into the lined baking tin(s) -- the dough can still be sticky, that’s fine (makes for a moister, fluffier bread).
33
If you want to shape oval breads you need to use more flour until the dough is so pliable that you can create two round or oval shapes out of the dough on a clean kitchen surface with flour. Roll the breads in the rest of the sesame seeds and place them in the lined bread tins or on a baking tray.
•
Make a line along the top of the bread with a knife or spoon.
•
Bake for 30 minutes. Then turn the oven down to Gas Mark 4 (180C or 350 F) and bake for another 20-30 minutes (or until done) covered with foil to prevent the top from getting too crisp & brown.
•
Let the bread cool down on a wire rack for about an hour or longer, before slicing the bread.
•
TIP: Freeze the Sesame Soda Bread sliced 4-8 slices at a time.
This avoids the bread getting too dry. If you put sandwich paper or baking/ parchment paper in
between the slices they don’t stick together after freezing and can easily be separately defrosted.
Do not try to make this bread with gluten free flour. From my experience even swapping half the
flour for gluten free flour creates a very crumbly bread that falls apart and is very hard to eat.
Whether you eat the bread with a refreshing salad, stir-fry, omelet or soup -- all these foods
work a treat with it; or try this lovely bread freshly toasted with different butters - tastes
fantastic.
If you’d rather try a small loaf first follow this recipe:
Prep: 3 minutes Cooking time: 40 minutes
Ingredients for a SMALL sandwich bread:
•
•
•
•
•
•
Use 3 cups spelt/or wholegrain wheat flour (450g)
1 tsp bicarb
3/4 cup probiotic yogurt (1/2 pint)
2/3 cup warm water (1/4 pint)
and only a couple of handfuls of mixed seeds
2/3 tsp sea salt
Here’s how you make it:
•
•
Bake for 20 minutes on floured tray at gas mark 6 (400 F, 200 C), then for another 20 mins at gas mark 4 (350 F, 177 C Gas 4). If it needs a bit longer, cover with foil to avoid burning.
This delicious Sesame Soda bread recipe is perfect for Candida sufferers and people with a sensitive tummy as it contains no yeast. It is not recommended in phase 1 or 2. But highly recommended from then onwards.
Tip when Traveling:
Toast the Sesame Soda Bread & spread with coconut oil. Wrapped in foil you can nicely take your
yeast-free bread with you as a snack when you’re on the go.
34
Psyllium Oatmeal Bread (GF, DF, SF)
This is one of my favorite breads these days. You got to try it!
With its pleasantly light color, crisp crust and densely squishy insides it makes a mean sandwich
bread (or my latest craze: dipped into a green soup!)
The bread itself can taste a bit bland, so I personally love eating it with a little coconut butter and
smoked salmon or thin slices of prosciutto. The perfect savory snack in my books. I can only
imagine what it would taste like with cheese *sigh*. But since that’s off the menu during the Candida
diet we might as well enjoy it with what’s allowed.
I used a round cake spring form here because I made another bread at the same time. I have
previously made this just on a tray with non stick baking paper or in a medium sized rectangular
shaped bread tin – all works fine. Just bear in mind that the loaf won’t rise much, so the longer/
bigger the tin, the flatter the bread. Btw you can use a coffee grinder to make oatmeal/ almond
meal. A few spins will give you a coarse texture, 1 minute or so will give you a fine texture – your
choice. I quite like mine a bit coarser – I think it adds to the chewy hearty charm of the Psyllium
bread. It also works well with gluten free flour, for an even softer and squishier version. But the
bread is quite forgiving -- works with several variations :)
Prep: 4 minutes Cooking time: 40 minutes
Ingredients
•
•
•
•
•
•
•
•
•
2 cups (170g) ground gluten free oats (I used a grinder to make this from porridge oats)
1 cup (110g) almonds meal or almond flour
2 cups boiling water (475ml)
2 cups almond milk (475ml)
4 heaped tsp psyllium husks
2 eggs/ flax eggs or other egg alternatives (use eggs at room temperature; cold ones stunt the growth of the bread; in a rush warm them up in warm water)
1 1/2 tsp aluminum free baking powder
1-2 tsp of sea salt or onion salt
Optional: 2 cups gluten free flour mix (I used one with millet flour); add 1 more cup (235ml) of water
Here’s how you make it:
•
•
•
•
•
•
Preheat the oven to 350F/175C/Gas 4 with a medium sized bread baking pan.
Meanwhile pour the hot water over the Psyllium husks while stirring to make sure it doesn’t clump together.
If you don’t have oatmeal and ground almonds at hand you can quickly and inexpensively grind your oatmeal or almonds at home with a grain mill or handy little coffee grinder like I did.
Mix the ground oatmeal, almonds, gluten free flour, spices and baking powder together in a bowl.
Take the baking tray or bread tin out of the oven and line with non stick baking paper.
Beat the eggs in a separate bowl (or simply add egg replacer) and then fold the dry ingre
dients and the psyllium mixture under on the lowest setting or manually (careful not to burn yourself). Add 1-2 cups of almond milk if the dough is not pliable enough.
35
•
•
•
I did everything just with a wooden spoon in one bowl, which made it a bit more dense than if I had beaten the eggs.
Either form the dough into an oval shape that you place in the center of your lined baking tray or you fill a medium sized bread baking pan for a rectangular bread loaf shape.
Slash the top in half with a knife and bake for about 40 minutes, or until rich golden-
brown in colour and hard in the center. Leave to cool on a wire rack before slicing. Then freeze and enjoy toasted.
Note about Psyllium Husks:
Psyllium is crazy – something between super glue and jelly – you need not fear it though. It has
virtually no taste yet great binding properties which is useful for gluten free baking as here the
gluten that normally sticks the bread together has been removed. Since we are using oatmeal and
eggs here and they have great binding properties themselves we don’t need much Psyllium husks.
For anyone with digestive issues the colon cleansing properties of the Psyllium are invaluable!
Just be sure to drink a lot of water with it, as in LOTS – otherwise it could promote constipation
and make you worse rather than better. So don’t eat it when you are already constipated or on a full
stomach.
Sweet version of the Psyllium bread:
Use only 1/2 tsp salt and 1 tsp cinnamon and 1 tsp vanilla, swap the water for rice milk (and if you
use sweetener I’d add two drops of vanilla stevia here) -- best enjoyed months into the diet when
symptoms are under control...
36
Simple Wholegrain Spelt Pie Crust/ Shortcrust Pastry (DF, SF, V)
Here’s a pie crust recipe for you that you can practically make sleepwalking. Crisp & flavorful!
You don’t even have to weigh the ingredients. Just measure with help of a tablespoon. Easy! Takes
only 10-12 minutes to bake -- just enough time to prepare a filling ;-)
Prep: 1 minute Cooking time: 12 minutes
12 minutes (just the crust) 30- 45 minutes (crust with filling)
Ingredients:
•
•
•
•
•
•
•
4 heaped tbsp wholegrain Spelt flour (or other wholegrain flour; spelt is lower in gluten than wheat))
3 heaped tbsp oatmeal flour (I used gluten free oats that I ground myself)
1 tsp bicarb soda
2 tbsp olive or coconut oil
Dash of apple cider vinegar or fresh lemon juice (you can’t taste it; helps the pastry rise)
Water
A little butter or extra oil for the pie form and extra flour for rolling out the dough
Here’s how you make it:
•
•
•
•
•
•
Preheat oven at 350F/180C/Gas 4.
Butter/ oil a 10-inch (25cm) round pie form/ quiche dish.
Mix the dry ingredients together. Then add the oil and lemon juice and enough water to form a sticky but pliable dough.
On a floured work surface roll out the dough using some flour to avoid it sticking to the rolling pin. The dough needs to round and big enough to cover at least the base of your pie form. Carefully transfer it across. If it breaks just stick the parts back together in the pie form with a little water. Line the base evenly and press the edges out and upwards to extend the dough up the sides of the pie dish. Finger width is fine. It doesn’t have to cover the whole sides - makes it easier to get out of the dish.
Alternatively don’t roll the dough out at all - just press it into the dish with your fingers - that’s what I tend to do ;-) The dish needs to be well greased and cold for that to work otherwise your pastry might stick to the dish.
Bake for 12 minutes. Then fill with a quiche or other filling of your choice and bake for another 20-35 minutes until slightly golden in color and a skewer or toothpick poked in the pie center comes out clean. If you’re not making a pie straight away you can cool the pastry on a wire rack and then freeze it wrapped in tin foil until you’re ready to make the pie.
37
Gluten free PIE Crust/ Pastry (GF, DF, SF, V)
Another lovely recipe for you to try, and this one is especially easy to digest.
Prep: 2 minutes Cooking time: 12 minutes
See Simple Spelt Pie Crust recipe on the previous page; just use 7 heaped tbsp gluten free oatmeal or
a mix of gluten free all purpose flour and millet or sorghum flour instead of the Spelt flour.
I made a rich tuna, basil and tomato filling for this pie crust recently -- delicious!
38
LIGHT LUNCH OPTIONS
39
PIZZA Base (GF, DF, V)
This pizza crust is delicious! Who would have thought that it’s also gluten, dairy free and
vegan — and therefore easy to digest — a real ‘happy healthy tummy’ food!
Prep: 3 minutes Cooking time: 20-25 minutes
Ingredients:
•
•
•
•
•
•
•
•
•
3/4 cup (100g)tapioca starch
3/4 cup (100g) gluten free all purpose flour
3/4 cup (100g) ground or soaked flax seeds (I used whole golden flax seeds here (similar flavor to sesame seeds; the dark ones taste a little nuttier; grind for even better results)
¼ tsp sea salt
¼ tsp Italian herbs spice mix
¼ tsp garlic granules, turmeric, cayenne, thyme and freshly ground black pepper
1tsp baking soda
½ cup warm water (or enough to form a dough)
1 tbsp extra virgin olive oil
Here’s how you make it:
•
•
•
Preheat the oven at 375F, 190C, gas mark 5.
Mix the base ingredients together to form a pliable dough. Line a rectangular baking tray with baking paper and spread the pizza dough out on it. This will give you a tasty, but soft textured pizza. If you prefer your pizza crisp then use a pizza stone or tray with vents instead to let more moisture evaporate..
Bake in the oven for 20-25 minutes until golden and springy to the to the touch. See the healthy pizza topping recipe on page 157.
TIP: You can freeze any leftovers — comes in handy when you don’t have time to make a
pizza dough.
PALEO Pizza Crust (Almond flour Pizza Crust)
Prep: 3 minutes Cooking time: 20-25 minutes
• As above just add 3/4 cup (100g) ground almonds instead of the flour - super delicious too!
I said this before, but it’s important -have one of these before your meal:
•
•
Bone Broth
Watercress Soup
If you can take one health boosting habit away from this book make it this: always drink a bowl of
mineral rich broth or soup before lunch - massively improves your wellbeing!
40
LUNCH RECIPES
From Quick 20 Minute Meals to Heartwarming Stews -- in this chapter you’ll
find a ton of recipes to suit your lifestyle!
Bone broth (GF, DF, SF)
Prep: 1 minute Cooking time: 4-8 hrs
Continue regularly drinking bone broth (if you have the first Sugar Free and Easy recipes book go to
the broth recipe on page 17; if not google “bone broth” it’s super easy to make.)
Try cooking the broth for a few hours longer. You should be able to handle that now (the longer the
cooking time, the more minerals; but also potentially more die off symptoms).
SOUP RECIPES
Soups are easy to digest and super nourishing, so make sure you have them a lot.
Here’s a few good ones to get you started.
Apart from Watercress soup the soups in this chapter are quite substantial. But you might probably
want to have some chunky homemade bread with them. Be sure to use yeast free broth as the base
for any soup you make at home and don’t use packet soups or those you can buy in supermarkets or
restaurants -- they often contain sugar, yeast and wheat.
Can’t beat a homemade vitamin & mineral rich soup!
41
Watercress soup (GF, DF, SF, V)
The quickest soup ever!
This really IS the quickest soup to make – hands down. Now, we’re not just talking cooking speed
here.
There’s also no prep time involved! And with a veggie soup that is unheard of, right?
All you have to do is heat up some vegetable or chicken stock, add 1 chopped potato, and that’s it.
Never the less this soup tastes absolutely lovely. The watercress gives it a warm peppery flavor and
the texture is clear and refreshing.
Prep: 1 minute Cooking time: 20 minutes
Ingredients
•
•
•
•
100g organic watercress (about 4 big handfuls)
1 medium potato
1l water
1 stock cube
Here’s how you make it:
•
•
•
pieces.
•
Wash the watercress.
Peel and chop the potato.
Bring the water to the boil. Dissolve the stock cube, and add the watercress and potato
Simmer for 20 minutes and blend briefly to create a smooth texture and lovely green color.
TIP: Watercress soup also freezes well, and therefore makes an ideal staple meal that you can quickly
whip out of the freezer when required.
Note:
Just to clarify, this is not a thick, filling soup. It’s light.
It would make an ideal starter or a rejuvenating snack when you are feeling under the weather ,
when you’re craving sweet things or or you have a Candida relapse, this soup will be very helpful
to get you back on track.
An extra dose of greens always helps with cravings. Watercress is high in vitamins and minerals, but
has very little calories – not that you’d have to worry about those anyway .
42
Creamy Green Detox Soup (GF, DF, SF, V)
You’d never guess this soup is good for detoxing – it’s so creamy and yum!
Full of vitamins and minerals and light enough to be an all-year-round classic. The green
asparagus also boosts immunity with its cleansing and digestion promoting properties.
Prep: 1 minute Cooking time: 1 minute
Ingredients:
•
•
•
•
•
•
•
•
•
•
•
2 stock cubes (or 1l; 4 cups of broth)
1 large leek
1 big potato
6 green asparagus spears (trimmed to remove any hard skin)
1 small broccoli head
1 big red bell pepper
1 big green bell pepper
1 big white onion
4 garlic cloves
1 Tbsp desiccated coconut
Spices (Turmeric/Kurkuma, salt, pepper, cayenne, ginger spice)
Here’s how you make it:
•
•
•
•
Chop the leek coarsely and the onion finely and lightly sauté them in a little olive oil with the spices until soft.
Meanwhile dissolve 2 stock cubes in 1 l boiling water (or use equal amounts of broth), and peel, wash and chop the other vegetables into 0.5 inch (1.5 cm) chunks (taking great care to remove any stringy bits of the asparagus).
Add all the veggies and broth to a big pot and cook on medium for 20-30 minutes. If you like your soup with whole vegetable pieces, put some aside now (e.g. some asparagus tips). Add the coconut at this stage.
Blend the soup to a creamy consistency and add the veggie bits back to the soup or blend everything until smooth.
43
Cavolo Nero (Kale), Pork & Canellini Beans Soup
(GF, DF, SF, with V option)
This Soup is totally delicious! In every sense of the word. It is nourishing. It is simple to make.
It looks good. And it even satisfies the demands of a hungry meat eater boyfriend ;-) Perfect!
And once blended, you’re left with a filling thick soup that tastes absolutely gorgeous and contains
health boosting ingredients to boot.
This soup is also a great alternative if you can’t eat potatoes, because the canellini beans give it a
potato-ey flavor. I made one version just with beans and one with beans and meat, both taste great.
But meat has the added bonus of extra protein, making the dish more filling (without having to add
more carbs like pasta, rice or quinoa).
Prep: 2 minutes
Cooking time: 25 minutes
Ingredients:
•
•
•
•
•
•
2-3 small to medium sized cavolo nero leaves (or savoy cabbage leaves)
1 l stock (I used chicken, but veg works fine, too – or bone broth for extra nourishment)
2 leeks
A can of canellini beans (leave out if just started the candida diet)
Spices for seasoning (I used salt, pepper, cayenne, garlic and tumeric)
Olive Oil for frying and marinating
Optional:
•
2-3 slices of roast pork (or roast chicken/ turkey).
•
a dash of apple cider vinegar to tenderize and marinate the meat (if using)
Here’s how you make it:
If using meat you could marinate it in a little olive oil, spices and apple cider vinegar and set it aside.
•
Chop the leeks and cavolo nero into bite size chunks.
•
Then fry the leek in a little olive oil, salt & pepper until golden and soft.
•
Bring 1 l stock to the boil. Add all the veg and simmer for about 20 minutes.
•
Towards the end add the cooked cannellini beans (and the finely chopped roast meat if you like).
•
Bring to the boil briefly and let it simmer for a few more minutes. Adjust the seasoning if necessary.
•
Either serve as is or blend to make a thick creamy soup.
•
Creamy, hearty, YUM!
44
Chicken, Beans & Quinoa Soup (GF, DF, SF, V)
This is one of those soups that you eat and instantly feel comforted and rejuvenated!
Prep: 5 minutes
Cooking time: 25-30 minutes
See basic Chicken soup recipe from page 27 Sugar Free & Easy Book 1 or make a soup just with
broth, chicken and leek.
In stage three of the diet you can now also add a handful of baby corn, a carrot, a couple of potatoes,
beans and quinoa or brown rice; and if you wanted you could serve it with 1-2 slices of rustic bread.
Don’t use barley though --it contains gluten which encourages Candida symptoms.
TOP TIP:
It’s also a great idea to get into the habit of making vegetable soups with rost chicken or grilled
turkey like the one from Sugar Free & Easy page 43.
It’s so easy to make, tastes great, and is infinitely more filling than a soup without the added protein
(and if you make twice the amount and freeze it, you can re-heat it in snack-sized portions for
when you are too groggy to cook something from scratch!)
45
SALADS
Salads make a healthy lunch choice that you can even prepare the day before.
The ones I’m about to show you are real classics and very filling.
They make great lunch box choices, too.
Greek Salad (GF, SF)
Refreshing & rustic - a real summer salad!
Prep: 4 minutes
Cooking time: 0
Ingredients:
Makes 2 servings:
•
•
•
•
•
•
•
Half a cucumber chopped into quarters
4 medium ripe tomatoes chopped into charters
Plenty of olive oil, at least 2 tbsp
Dash of apple cider vinegar
Sea salt and freshly ground black pepper to taste
1/2 tsp dried oregano
50g (1.73 ounces, 1/3 cup) of feta cheese chopped into small cubes
Optional:
•
handful of black olives (if you can get hold of some that didn’t get stored in citric acid)
•
serve with 2 slices of yeast free bread
Here’s how you make it:
Just combine all the ingredients in a salad bowl. Toast your bread, dip into the salad sauce and
imagine you’re sitting in a beach bar on a Greek island while you eat your salad ;-)
Salad Niçoise (Pimped Tuna Salad Version) (GF, SF)
Prep: 8 minutes
Cooking time: 0
Follow the simple Salad Niçoise version from page 31 Sugar Free & Easy Book 1 if you have or just
make a salad with some lettuce leaves, tuna, mini tomatoes, an olive oil based dressing and one or two
bolied eggs, and also add any of the following ingredients:
•
•
•
•
•
Half a grated carrot
Half a small tin of corn
A couple of red radishes, thinly sliced
4 tbsp of cottage cheese
Half a tin of cannelini beans
Mix any of these ingredients in with the original recipe, combining everything well with the salad
sauce, and eat over 3 sittings served with a slice of toasted yeast free bread.
46
Mixed Raw Salad with Hummus (GF, DF, SF, V)
Who would have thought that a salad could be so filling?
TOP TIP: Take this separately in a jar with a screw top if you have this as a packed lunch.
The killer ingredient that brings this vitality booster salad together is the roasted seeds (sunflower,
pumpkin and sesame seeds lightly roasted with salt, pepper and cayenne pepper in a saucepan over
low heat – sprinkle over your salad at the time of eating)
Makes 2 servings
Prep: 6 minutes Cooking time: 1 minute
Ingredients
•
•
•
•
•
A few slices of raw courgette/zucchini or marrow
1 orange bell pepper
Handful of little ripe cherry tomatoes
Half a small raw beetroot
Small gem or romaine lettuce (or mixed salad leaves)
Here’s how you make it:
Option 1: Make a simple dressing with olive oil, salt, pepper and a hint of apple cider vinegar (acv)
or lemon juice.
Option 2: Stir in half a tub of hummus - makes a delicious dressing as well as a tasty addition to a
rustic sani with some fresh alfalfa sprouts and grilled red peppers and slices of tomato, mmmh...!
47
How to make Hummus at home
If you’re not using the hummus as base for a salad sauce, try it as a dip for veggie sticks - great to
munch on during tv breaks.
Ingredients:
•
•
•
•
•
•
•
the juice of 1 small lemon
1 can of chickpeas
1 tsp garlic granules (or 1/2 a small clove of garlic)
3 tbsp of sesame seeds
4 tbsp olive oil
1/2 tsp low salt (or sea salt)
freshly ground black pepper to taste.
Here’s how you make it:
•
Use only the juice of half a lemon and blend everything together, adding the season
ing last. So you can adjust the taste to your liking and avoid it tasting too salty. If it’s not lemony enough, add the juice from the other half of a lemon.
Chances are you’ll need to add a bit more liquid. Water, broth or almond/ goats milk work well to make the hummus more spreadable.
The hummus taste often improves and intensifies with time. So it’s a great food to prepare a day ahead and store in the fridge.
I think you’ll be surprised how much salt must be in supermarket hummus pots to give it its taste! Needless to say, less salt is better for you, because it interferes with the way your body stores water in your cells (nothing to worry about just something to bare in mind, especially if you had high blood pressure).
•
For a salad dressing you might have to dilute the hummus further by adding more lemon juice, olive oil or water. You can make this the traditional way with 1-2 tbsp of tahini instead of the sesame seeds. That’s nice, too. To my taste buds tahini tastes quite bitter though, so I actually prefer sesame seeds for a milder flavor. They also add a bit more texture which I like.
Another great salad to have on a regular basis is a simple salad with grilled chicken breast
(e.g., page 30 Sugar Free & Easy Book 1).
48
3 SUPER QUICK MEALS
(10-15 MINUTES MAX)
You are busy, I get it -- that’s why I’m going to share my tastiest & quickest
recipes with you! The ones I eat ALL the time :)
Smoked Salmon and Soft-Boiled Eggs Sani (DF, SF & can be GF)
My kind’a “fast food” this days!
Prep: 0 Cooking time: 6-7 minutes
Ingredients:
•
•
•
•
•
1.5 big slices of smoked salmon (or dry cured prosciutto)
2 eggs
2 Slices of yeast free bread
Butter or other spread
handful of small tomatoes, 1/3 of cucumber or 3-5 lettuce leaves
Here’s how you make it:
•
•
•
•
Boil the eggs in boiling water for 6 minutes. They will be only a tiny bit soft in the center, not runny. 7 minutes would give you hard boiled eggs.
Quickly cool the eggs off under running cold water, peel and set aside.
Toast 2 slices of your yeast free bread (Psyllium Oatmeal on page 125 tastes particularly great with this, but Sesame Soda or gluten free bread works just as well). Spread the bread with butter put a slice of smoked salmon on top. Then slice the eggs and layer them on top of the salmon. Alternatively don’t peel the eggs, just half them, sprinkle with salt and spoon them out to eat with your sani.
Serve with your prepared vegetables.
49
Scrambled Eggs and Bacon with Toast (GF, SF)
The classic! For an egg free version try chickpea flour batter with seasoning (“Socca”) or
scrambled tofu.
Makes 2 servings
Prep: 0
Cooking time: 10 minutes
Ingredients:
•
•
•
4-5 eggs
dash of goats milk (or almond milk)
small salad or 2-3 tomatoes or cucumber slices (as a side)
Optional:
•
•
•
6 rashers of lean un-smoked bacon
2 slices of yeast free bread (for instance Sesame Soda page )
Olive oil and a little butter
Here’s how you make it:
•
If using the bacon spread each slice out on tin foil under the grill on medium heat. Grill for about 8 minutes until the bacon is starting to scrip up. Then turn on the other side and repeat the process, until the bacon is fully crisp but nor burnt black.
•
Heat a little oil in a big frying pan or Wok. Whisk the eggs with a few dashes of milk, Turmeric, salt and freshly ground pepper in a bowl. Add a smidgen of butter to the oil and pour the eggs into the frying pan, covering the whole base. Let the egg sit there for a bit. Only stirring with a wooden spoon when the egg congeals. Turn the hob off as soon as the egg is just beginning to set completely. It will continue to cook for a bit.
•
Dry the excess fat of the bacon rashers with a kitchen towel, chop into small pieces and sprinkle over the scrambled eggs. In the meantime toast your yeast free bread.
•
Spread the bread with butter or coconut oil, and either eat it with the scrambled egg or serve the eggs on top (depending if you like your bread crisp or soft; the eggs on top would soften it). Serve with a side salad, 2-3 medium tomatoes or cucumber slices.
Vegan alternative: Scrambled Tofu/ Gram Flour Batter “scrambled”
Scrambled tofu is something I haven’t tried myself, but I know some of my readers are making who
cannot eat eggs. Gram flour batter when fried literally looks and tastes very similar to scrambled
eggs.
50
Speedy Butter Beans Curry (GF, DF, SF, V)
No time for cooking? Check out this Super Quick Dish. It’s a life saver!
Takes less than 10 minutes to make and tastes great. Perfect when you just can’t be asked
to prepare a meal and still want to eat something healthy. Naturally gluten free & vegan.
Makes 3 servings (eat any leftovers the next day)
Prep: 0
Cooking time: 4 minutes
Ingredients:
•
•
•
•
•
•
•
2 tins butter beans (lima beans; 240g drained weight per tin)
5 heaping tablespoons tomato paste (or tomato puree in the UK)
water
2-3 Tbsp olive oil
1/2 - 1 tsp low or sea salt
a dash of freshly ground black pepper and turmeric
2 small to medium cloves garlic (about 1 tsp in total, chopped finely)
optional:
•
•
1 big white onion (diced and sautéed)
pinch of ground ginger spice, sea salt, black pepper and cayenne pepper
Here’s how you make it:
•
•
•
•
•
Chop & press the garlic and put aside (you want to add the garlic right at the end of cook
ing to keep the aroma and to stop it burning.)
Drain the beans over a colander and rinse properly.
If you like onions and you want to bulk the dish out a bit so you have more leftovers tomorrow you could dice and sauté one big white onion in a little olive oil, turmeric, gin-
ger spice, salt, pepper and (very small amount of) cayenne pepper until soft.
(I mostly leave this step out these days for ease of use as the beans taste great on their own.)
Then saute the beans briefly in olive oil with a little turmeric, freshly ground back pepper and a generous sprinkling of salt. Add the garlic, tomato paste and a little water to mix everything and cover all beans in tomato sauce (if using onions you can add those back to the beans dish now, mixing thoroughly, perhaps adding a little more tomato paste, salt and water if the mixture appears too dry). Adjust the salt level to your liking.
Heat through, then leave on low heat or fill into a preheated serving dish.
Serving Suggestion: Serve with toasted yeast-free Sesame Soda Bread page 29 and a big green
salad; or have it for breakfast with an egg and a slice of toast like my reader Diana’s husband did
-- nice idea!
The beans will quickly lose their curried flavor when they cool down! So eat them swiftly.
51
Veggie Omelet (GF, SF, DF option)
So quick and versatile -- add different vegetables and enjoy it regularly. If you can’t eat eggs, try the
chickpea flour quiche.
Prep time: 3 minutes
Cooking time: 12 minutes
Ingredients:
•
•
•
4-5 large eggs
2 cups of vegetables (275g, for instance 1 small leek and 1 red bell pepper or 1 onion and a handful of broccoli florets)
dash of semi skimmed goats milk or almond milk, low salt, turmeric, cayenne and black pepper to taste, olive oil for frying
Optional:
•
6-8 rashers of un-smoked lean organic bacon
Here’s how you make it (Makes 4 servings):
•
•
•
•
•
•
If using the bacon grill the slices on tinfoil under the grill for about 6 mins each side until crisp. Remove excess fat with a paper-towel, chop into small pieses and set aside.
Chop the peppers into small strips, break the broccoli into very small florets and the leek into thin rings. Sauté the chopped vegetables in a little olive oil with the season
ing for about ten minutes until soft and golden.
Whisk the eggs and milk in a medium bowl until well combined and foamy, adding a little salt and black pepper.
Pour the vegetables briefly into the bowl with the eggs and mix everything so all the veg
gies are coated in eggs. (Add half of the bacon pieces and mix again.)
Fill everything into the well oiled frying pan over a medium heat. When the top of the eggs is starting to solidify move a spatula underneath the omelet and free the sides of it all-around making sure nothing sticks to the pan.
Then make a cross into the eggs thereby dividing the mass into 4 equal parts. Flip each part over with help of two spatulas. This will leave you with a tasty but a little browned Omelet (well, not a real omelet… but close enough, ey ;-)
Serving Suggestion: Serve with a side salad and 1-2 slices of toasted yeast free bread.
Bake it in the Oven for a change :) Removes the need to watch it, and
avoids burning
Prep time: 3 minutes
Cooking time: 25-35 minutes
•
If you’re striving for optimum looks and zero burn scale then you might want to transfer
the egg mass into a heat proof buttered casserole dish rather than the frying pan and bake for 25-35
minutes until fully cooked in the center. Keeps covered in the fridge for a day or two. But tastes best
at room temperature or re-heated.
•
Another great Oven Omelet flavor combo is kale, pine nuts, organic bacon and a little
feta (or cheese if you’re not following the Candida elimination diet). My charming reader Carla
got a lot of praise for this creation from her guests who she offered this Oven Omelet to. She said
the people were not food conscience, had no idea it was a diet recipe, and they really raved about
the recipe :)
52
5 HARDLY ANY PREP OVEN
BAKED MEALS
If you have a few more minutes to spare it’s worth making these dishes, because
you’ll have leftovers for the next day (that also work beautifully as cold or office
lunch) -- 30-40 minutes cooking time max.
It’s only the chopping of the vegetables that takes the time here. So don’t be put off by it. You can easily prepare the veggies a few hours before (or use frozen ones to save time). Once you got the hang
of these oven omelets and quiches you’ll see that you can prepare amazing meals out of whatever is
left in your fridge -- very handy indeed!
Simple Veggie Quiche (GF, SF & grain free option)
I always thought Quiches were fussy to make and required cheese to taste great -- boy was I wrong!
This is fairly simple and super versatile. Plus it makes really good travel food. Perfection!
Makes enough for 2 people for 2 days (8 slices)
Prep time: 8 minutes Cooking time: 30 minutes
Ingredients:
•
•
•
•
•
4 cups (500-600g) vegetables (for instance broccoli, pepper and leek or green asparagus, purple sprouting and leek like on the cover image)
4 large eggs (preferably organic)
1/2 pint (250 ml, 1 cup) natural unsweetened yogurt (or cottage cheese if it agrees with you); a little olive oil for sautéing and butter for greasing the pie form
1-2 tbsp fresh parsley, chopped
1/2 tsp sea salt, freshly ground black pepper and turmeric
Here’s how you make it:
•
•
•
•
•
•
Use the Spelt pie crust from the previous chapter as base -- recipe page 37.
Preheat the oven to 400 F/ 200C/ Gas 6.
Cut your vegetables into equal sized pieces (about 1.5cm, 0.5 inch) and briefly steam or cook them in water for a few minutes to soften (don’t fully cook them yet otherwise they’ll be overdone when they come out of the oven). If using leek or onion lightly sauté those instead to bring out the flavor better.
Fill your pastry base/ pie crust with the veggies (and any other toppings you like, for instances some artichoke hearts or a few feta cubes).
Then whisk the eggs, add the seasoning, fold under the yogurt/ cottage cheese and pour the mixture over the veggies and sprinkle with parsley.
Bake for 30 minutes until golden around the edges and not soft anymore in the center.
53
Grainfree & Gluten free Alternative:
You can make the Quiche grain free by baking it straight in a greased quiche form (I used a 9in
round pie form); or you use the Paleo Almond pie crust (page 130). or the Gluten free crust (page
38) as base for your quiche. I tend to make this dish at the weekend when I have the time and energy
to make a pastry base/ pie crust. During the week I’d probably skip this step and just make a quick
omelet without the pastry in the oven.
Additionally you can make the Grain free quiche (GF) from the previous chapter (page 31).
TIME & ENERGY SAVING ALTERNATIVE:
Spinach/ Basil & Tomato Topping instead of cooked veg (GF, DF, V)
Prep: 1 minute Cooking time: 15-20 minutes
If you haven’t got the time or energy to chop and cook veggies -- just use spinach or basil leaves
and tomato paste with a bit of onion salt, nutmeg or garlic granules and bake the quiche without
a pastry base - done in 15-20 minutes. Easy! (So easy in fact that I forgot to take a photo in the
haste... oops)
Egg & Dairy free Quiche with Tofu (GF, DF, V, SF)
I have yet to take a photo of this quiche -- but you can take my word for it this vegan combo
tastes good!
Prep: 1 minute •
•
•
Cooking time: 20 minutes
Use 1/2 pint (250 ml, 1 cup) tofu instead of the yogurt.
Or cashew cream with almond milk to make up the same amount of liquid.
Grilled aubergine, courgette/ zucchini or avocados make terrific meat free fillings.
...and you can also still enjoy the Grain & Egg Free Quiche from Stage 2 (made with Gram/ Besan/
Chickpea flour) -- page 53.
Broccoli & Chicken or Leek & Bacon Quiche (GF, SF)
The quiche from the cover photo -- and tasty it was!
Prep: 8 minutes Cooking time: 30 minutes
Follow the Simple Veggie Quiche recipe on page 141 and add 1/2 cup of cooked/ sliced roast chicken or 6 rashers of lean un-smoked bacon, grilled and chopped.
•
If using chicken make sure you sauté the pieces briefly and season with salt, pepper and turmeric and cayenne pepper.
•
Then layer on top and in between the veggies on your Quiche before pouring the eggs on top.
•
54
HEARTY LUNCH MEALS
55
BEANS & LENTILS HOT POTS
(PERFECT FOR BULKCOOKING & FREEZING)
Comfort in a bowl!
Speedy Butter Beans Curry (GF, DF, SF, V)
Prep: 0 Cooking time: 4 minutea
Go to the butterbeans recipe on page 144. I can also highly recommend using the butter beans curry
as pancake filling. Add some sauted red pepper and leek (or other vegetable of your choice for extra
fibre)
Kidney Bean Stew with Coconut Rice (GF, DF, SF, V)
Simple yet nicely filling and ideal for bulk cooking and freezing!
Prep: 3 minutes Cooking time: 20 minutes (40 minutes with brown rice)
Ingredients
•
•
•
•
•
•
2 cans of kidney beans, rinsed and drained (240g drained weight per tin)
2-3 big onions (red or white)
1 tube tomato puree/ 6 oz can of tomato paste (140g paste; should be thick, not runny)
1 can tomatoes (preferably without citric acid; 400g)
3 medium cloves of garlic
2 tsp sea or low salt, freshly ground black pepper and cayenne
Here’s how you make it:
•
•
•
Prepare the rice as in previous chapters - to cook it from scratch takes about 40 minutes. I would always aim to make more for the next day.
Chop and sauté the onions in a little olive oil until soft and golden. Then season with half a tsp of salt and the spices (but not the garlic, it would burn).
Add the tomato, paste and the beans. Season with the rest of the salt, mix well and cook for 5-10 minutes or so until everything is hot. Then mix the chopped garlic in and cook for another 5 minutes. Done!
Serving suggestion: Serve with green salad and Coconut rice, and you can of course cook the beans
yourself and use fresh tomatoes instead of the canned ones. Add a dollop of yogurt (cashew or sour
cream) on top of the beans stew before serving - great tip from my reader Mary.
Health advice: This dish is not suitable for people with acid reflux, heartburn or inflammations, as
the meal is fairly acidic and tomato doesn’t always agree with sensitive individuals.
56
Thick Healing Red Lentil Soup (GF, DF, SF, V)
If you feel in need for an extra health boost - this hearty soup might just be the thing for you :)
It has been known to relieve readers’ cold symptoms, yay!
Prep: 3 minutes Cooking time: 25-30 minutes
Lentil Soup Ingredients
•
•
•
•
•
2 cups (400g) red lentils
1 clove of garlic (crushed and finely chopped)
2 yeast free vegetable or chicken stock cubes (or broth, then leave water out)
2 liter (8.5 cups) filtered water (maybe more)
1-2 handfuls of fresh spinach leaves
Spice Mix Ingredients
•
•
•
•
•
•
•
•
•
•
a very small piece of root ginger (1cm; 0.3 inches; finely chopped)
olive oil
1/2 teaspoon brown mustard seeds
1/2 teaspoon cumin seeds
1/2 teaspoon turmeric
sprinkle of cayenne pepper
1/2 teaspoon black pepper
1 big red onion
punnet of cherry tomatoes (about 8-12)
1/2 teaspoon of fennel seeds
Health Benefits of Eating this Lentil Soup
Due to the fresh ginger root garlic and spice this lentil soup will help you fend off any infections.
Keeping you slim & full of energy! Needless to say that the garlic is a powerful herb and antifungal
that kills Candida and boosts your immune system at the same time. If you soak and rinse the
lentils (and all your legumes) before cooking, you can prevent a good chunk of any problems with
flatulence, irritation or bloating.
Finally you can count on this magical red lentil soup when it comes to soothing your overall
digestive system after having been ill and it alleviates constipation.
The ingredients are enough for 2 people for 2 days.
TIP: I’d recommend you make straight away double or triple the amount. This healing lentil soup is
such nourishing soul food, that you’ll be grateful to have some of it handy in the freezer :-)
Here’s how you make it:
•
•
•
Wash the lentils several times thoroughly. A good practice is to also soak them overnight and rinse the water until it runs clear.
If you’d like to eat some brown rice with your lentil soup, then you’ll have to get the rice going now to give it enough time to cook. Roughly 30-40 minutes.
Bring 2-3 l of filtered water to the boil and dissolve the yeast free stock in it. (allow at least 2-3 cups of water for 1 cup of lentils).
57
•
•
•
Cook the lentils in the stock/broth for twenty minutes; stirring occasionally.
If you prefer a thick soup then add only just enough water for the lentils to expand.
If you’re cooking a big batch of lentil soup you can now also add a can of tomatoes.
Prepare Your Spice Mix Separately:
•
•
•
Chop the garlic and put aside.
In a separate big saucepan or wok lightly roast the cumin, fennel and mustard seeds.
Then add some olive oil, turmeric, freshly ground black pepper and a pinch of cayenne pepper and salt.
•
Meanwhile wash and chop the ginger root and small tomatoes (choose ripe and aromatic ones if you can). Then saute them on a medium heat in the spice mix.
•
Chop the onions and add them to the tomatoes.
•
Put a lid on and leave to sauté for a bit, stirring occasionally until they are golden and the tomatoes fairly disintegrated. Your lentil soup should be starting to smell really heavenly by now.
•
Add some of the garlic to the tomato mix and the majority to the lentil soup.
•
Add 2 cups of the lentil soup liquid to the pan, stirring to flavor the lentils with the nice spices.
•
Now put all the tomato spice mix into the lentil soup pot and continue to cook for 5 min-
utes. Stirring occasionally. Don’t be alarmed that the soup looks brown rather than bright red (the lentils lose color quickly -- tastes just as nice though.
•
Wash and finely chop the spinach and sprinkle over the soup.
•
Add salt and pepper to taste. Mix it all together before serving.
A steaming pot of heart-warming healing lentil soup that will keep you going for weeks!
Side Dish Ideas:
•
You can serve it with brown rice and coconut oil.
•
Or for a quicker alternative whip some of your lovely frozen Sesame Soda bread out of the freezer.
•
Toast it and spread with coconut oil.
•
For an extra protein kick you can also serve 1-2 boiled eggs with your lentil soup - this works perfectly.
Serving Suggestions For Non-Candida Sufferers:
If you have guests who are not following the Candida Diet, this Lentil Soup is a good dish to make,
because it just doesn’t taste like diet food. And you can prepare it beautifully beforehand and only
need to warm it up when they arrive. Easy!
And it’s also a great way to get people to eat spinach, who normally wouldn’t ;-) You simply can’t
taste the Spinach! I recommend you serve the Lentil Soup with toasted wholemeal pitta bread and
salted butter. Delicious!
You really can’t go wrong with this Healing Lentil Soup. Even if you just throw the ingredients
together without following the recipe - It’s very forgiving.
58
Serving Recommendation for Candida Sufferers:
In my experience this soup is best enjoyed a few weeks into Stage 3 of the Candida Diet, no sooner. One
bowl with a small slice of soda bread and a big salad works fine. Best enjoyed at lunch-time and be
sure to drink a few sips of water with a dash of apple cider vinegar before and with the meal to help
digestion.
The only danger is to eat too much as it is so light and more-ish - I’m not joking. You try to eat only one
bowl of it, hah!
Any more than one bowl or eating the lentil soup late at night would make you sleepy or could lead to
a congested nose, itchy eyes or feeling bloated.
I tried it many, many times so I know what I’m talking about ;-)
Your liver would most likely not be able to handle breaking down the big amount of protein...And don’t
forget lentils do contain small amounts of carb/ starch which can potentially feed Candida.
Don’t get me wrong - Lentils really are super healthy! So Lentil Soup makes a fantastic addition to your
staple dishes. During the Candida Diet & thereafter. It’s just that you’ll have to test whether at this stage
your body can already take it.
If you are very hungry it might be best to bulk the Lentil Soup out with some vegetables instead of
having seconds of just lentils. The veggies are easier on your digestive system, too. Broccoli or green
beans for instance work really well with it.
TIP:
•
•
•
Be sure to freeze a load. The lentil soup tastes just as tasty when re-heated.
Try adding roast chicken, turkey or other vegetables of your choice for a filling treat.
Or serve a slightly thicker version of this soup as lentil patte the next day.
Either way, if you make the bigger amount for freezing, have 4-5 decent sized freezer pots handy.
59
German Lentil Soup (GF, DF, SF, can be V)
I would call this “soul food” because it is nourishing & comforting and makes me happy :)
A recipe I love dearly. It was a firm family favorite growing up with my parents in Germany and now I
am carrying on this tradition here in England where I live.
Prep: 7 minutes Cooking time: 45-50 minutes
Ingredients
•
•
•
•
•
•
1 1/4 cup (250g) green lentils
500g potatoes (4-5 medium potatoes)
1-2 big carrots
1 big leek, 1 big white onion
2 stock cubes and 1 liter filtered water (or 1l broth)
10 rashers or 2 handful of streaky un-smoked bacon cubes -- you can leave this out, but it really does add to the nice rustic flavor!
•
Optional: 1 medium cooked or grilled sausage (pork, turkey, gluten free… as additive free as possible - most seem to have sugar and vinegar in them!)
Here’s how you make it:
•
•
•
•
•
•
•
•
•
Boil the water and dissolve two stock cubes in it.
Peel and cube the potatoes, peel and slice the carrots and leek and put aside.
Sauté the onion in a little olive oil until golden. Add the bacon cubes.
Wash the lentils and briefly sauté them with the onions and bacon. Then transfer every
thing to a big stock pot or saucepan and set it cooking over a low heat.
Add the potatoes to the sauce pan. After about ten minutes add the carrots. Another five to ten minutes later add the leek. Stir frequently, to avoid it sticking to the sauce pan.
Continue simmering for another ten to fifteen minutes, adding the sausage slices right at the end, just to heat them up. The overall cooking time is roughly 45-50 minutes. There’s no exact science. The longer it cooks the mushier the vegetables get.
You could add 1-2 tsp of ground arrowroot to a small amount of the soup (without bits) and combine it with a whisk vigorously or shake in a jam jar with lid, so there are no lumps. This added back into the big soup pot will help thicken the soup if it’s too runny. (Mine is generally a lot thicker than in the photo on page 142).
Adjust the seasoning to your liking. It does need a bit of salt and black pepper in my opinion.
You can also thicken the soup by mixing some of the liquid in a cup with 1tbsp of ground arrow root (or corn flour if it agrees with you) with a little handheld whisk before adding back to the soup and briefly heating up.
Note: This soup is a dream to freeze. Just take it out the night before or on the morning when you want to
make it and once defrosted you only need to heat it up. The starch from the potatoes thickens the soup, which
I personally like. But just dilute it with some water or broth if you prefer it as thin as in the photo on the
previous page. Makes enough for two hungry people for three days. We tend to eat one portion, freeze
one and still have one portion left over for the next day.
TIP: Tastes absolutely amazing when you add fried lightly seasoned roast chicken pieces and a bit of
creamed coconut and some greens. Eat flat breads, quick breads or pancakes with it - my fav dish at
the moment hands down.
60
2 MORE OVEN BAKED
GOODIES FOR YOU
The next weekend is just around the corner. Why not try my fav Pizza Topping and
the recipe for Baked Potatoes are -- set and forget!
My Fav Tummy Friendly Pizza Topping (GF, SF, V option)
Perfect for the Pizza crust recipe from the Breads & Pastries chapter from page 120.
Prep: 5 minutes Cooking time: 10-12 minutes
Ingredients:
•
•
•
•
•
•
•
•
1 big onion, chopped finely and sauted
4-5 small ripe tomatoes
kurkuma (turmeric), cayenne, thyme, sea salt and freshly ground black pepper
1 garlic clove
tomato puree/ paste to taste
handful of fresh basil (or Italian dried spice mix)
glass of char-grilled vegetables like artichokes, olives and red peppers or any topping of your choice
a few slices of firm feta (or tofu)
Here’s how you make it:
•
•
•
•
Chop and sauté the onion and tomato in a little olive oil with the spices. Add the finely chopped garlic and torn basil towards the end and tomato puree to give it the tomato consistency you like.
If you are using my pizza crust recipe from the homemade breads chapter then freshly bake it (or defrost and quickly heat up) and spread it with the tomato onion topping. Spread only half and cover the other half with foil if you’d like to keep some as a snack bread (it’s easier to freeze/ store without the topping).
Drain the char-grilled vegetables of any excess oil and place them in amongst your pizza topping. Finally tear a few pieces of tofu or feta and sprinkle them over the top.
Bake in the oven for 10-12 minutes.
61
Baked Potato with Salad and Tuna (GF, DF, SF)
Nutrient rich & filling! (and hardly any prep time at all)
Prep: 4 minutes Cooking time: 50 minutes
Makes 2 servings
•
•
•
•
2 baking potatoes in their skins
1 big tin of tuna in spring water
A small lettuce
Paprika, salt, pepper, apple cider vinegar, olive oil and cayenne to season
Here’s how you make it:
Wash and scrub the potatoes, spread them with olive oil (stops it bursting the skin when baked), sit on a baking tray wrapped in tin foil.
•
Bake in a pre-heated oven on 200C, 400F, Gas mark 5 for 50 minutes or until cooked throughout.
•
Cut the jacket potato in half and sprinkle paprika and a little salt on top. Let it cool down for at least twenty minutes before eating, to lower the glycemic impact of the potato on your blood sugar.
•
Then add the tuna flakes, sprinkling freshly ground pepper on top. Serve the lettuce leaves as a salad, whipping up a basic salad sauce with the olive oil, acv and seasoning.
•
Candida diet advice: Hot potato and mashed potato are bad news for Candida!
If you find you react to the potato, stop eating potatoes, sweet potato, beetroot, carrot for 2 weeks to see
if it makes a difference.
62
QUICK PASTA DISHES
& STIR-FRIES
When you come home and you’re too tired too cook a fancy meal the following
meals will come to your rescue.
Soba Noodles with Simple Stir-fried Veggies (GF, DF, SF, V)
Soba noodles are better for you than egg noodles because the latter contain wheat.
Prep: 3 minutes Cooking time: 15 minutes
•
Steam some finely chopped spring greens, and or cabbage or pepper and broccoli for 5 minutes.
•
Then lightly sauté them in a bit of spice for about 10 minutes or until tender (salt, pepper, turmeric, ginger, cayenne for instance) with some leek and chilli. Coconut oil or sesame oil work we/ll with this, and you could add some shrimp/ king prawns for the last few minutes. They cook really quickly, and taste great just with a little butter (or olive oil) and garlic (just be careful not to burn it).
Serve with soba noodles.
Note for Candida Sufferers regarding soba noodles and buckwheat:
If you experience bloating or discomfort every time you eat buckwheat (soba noodles are made from
buckwheat) then your body might have developed a sesitivity to it.
This can happen, even with gluten free and otherwise healthy foods like buckwheat/ soba noodles. I’m
only pointing this out because it happened to me. Not just with Buckwheat, but with Millet and Quinoa,
too, and the symptoms could have been easily mistaken for something else.
The good news is that often times those sensitivities will disappear again when your gut is healed. You
might just have to avoid those grains or foods that don’t agree with you for a few weeks/ months. That’s
why many Candida sufferers will try out a Paleo or SCD dieting approach at some point, where they
don’t any grains. I did that, too, but I reverted back to a non paleo diet, as soon as the inflammation in
my belly had calmed down - I just love breads, oat porridge... too much, to not ever have it again.
63
Sesame Cabbage Stir-Fry (GF, DF, SF, V)
This tastes just like an asian dish -- who would have thought that it doesn’t have soy sauce in it!
Prep: 3 minutes •
•
•
•
•
Cooking time: 15 minutes
Steam some white cabbage or spring greens for about 5 minutes.
Then lightly sauté them in a bit of spice (salt, pepper, turmeric, ginger, cayenne for in
stance) with some leek.
Use Sesame oil for a nice asian touch.
Sprinkle with sesame seeds and toss around to mix with spice & oil.
Continue sautéing for a moment. Great snack, also nice with a bit of freshly grated raw carrot thrown in at the end or just after cooking.
Rice pasta with Bell Pepper Sauce (GF, DF, SF, V)
Similar to the Soba noodles veggies stir-fry dish above. This one is even faster and made with Rice pasta
instead.
Serves 2
Prep: 3 minutes Cooking time: 12-15 minutes
Ingredients
•
•
•
100g (1/2 cup) brown rice pasta per person
Filtered water to cook the rice pasta
Pinch of salt
For the sauce:
•
•
•
•
•
1 bell pepper
1 leek or big onion
Tomato paste
Sea salt and freshly ground pepper to taste
Handful of fresh basil leaves
Here’s how you make it:
•
•
•
Chop and sauté the vegetables.
Bring enough water to boil to cook the pasta.
Add the tomato paste, seasonings and basil to the veggies and mix everything for an aromatic pasta sauce.
64
QUICK MEAL IDEAS
65
Borlotti Beans & Swirly Pasta bake (GF, DF, SF with V option)
Pasta in a creamy sauce, yes please!
Prep: 4 minutes Cooking time: 20-30 minutes minutes
Ingredients
•
•
•
•
•
•
•
•
1 red bell pepper
1 yellow bell pepper
1 ramiro pepper
1 tblsp mild curry powder (yeast free)
1/2 mild chillie
1 can borlotti beans
100g (3.5oz; 1/2 cup brown short rice pasta or whole wheat pasta bows (if gluten is no issue with you) per person)
1 tube tomato paste (tomato puree in the UK)
Optional:
•
8 pieces of streaky un-smoked bacon(preferably organic)
•
finger’s width of feta
•
a handful of broccoli florets
•
one onion, finely chopped
Here’s how you make it (on the hob):
•
•
•
•
•
•
Chop and sauté the peppers (+broccoli and chopped onions) until soft.
Grill and chop the bacon finely (if using).
Add the beans, spice and tomato paste to the peppers (and some of the bacon).
Cook the pasta and when done, rinse and mix in with the veggies.
You can now add feta/ tofu crumbles, combining them well with the veggies and pasta to create a melted creamy texture that coats everything.
Sprinkle the rest bacon on top (if using) and serve with a big green salad.
Here’s how you make it (in the oven):
As before just put it in the oven in a heatproof greased dish after you have sprinkled feta/ tofu on it.
(You could sprinkle one side with mozzarella or daiya cheese if you’re making this for non-Candida
suffering family members - looks and tastes great!)
Bake for 20 minutes at Gas mark 6/ 400 F/ 200 C
Candida diet advice: Resist the temptation to stuff yourself with this - it contains a ton of carbs. When
I ate big portions of this early on during the diet I noticed an increase of symptoms. Just saying…
TIP: Make twice the amount and freeze half of it. Take out of the freezer the morning you need a quick
no-fuss meal. Then heat in a greased pie form for 20-30 minutes at Gas mark 6/ 400 F/ 200 C until the
top is starting the crisp and the cheese is melted.
66
Lunch Box Ideas for the Office or when on the Go
Stuck for ideas what you can take to work so you won’t get tempted by any unhealthy lunch
choices that throw you off the diet wagon?
Look no further -- I’ve brainstormed, tried and tested and came up with these healthy &
filling options:
•
Slice of quiche
•
Big Green Smoothie in a thermos
•
Toasted Sesame Soda Bread with Coconut butter, two boiled eggs and a chunk of
Cucumber
•
Hummus, homemade bread or oat cakes with veg sticks (prepared the night before)
•
Simple Salad Nicoise (potato, tuna or sardine, green beans; or a bigger version for instance with lettuce or blanched kale, cannellini beans, tuna, tomato, pepper)
•
Greek salad (feta, cucumber, olives, tomato, peppers)
•
Lentil Dhal (optional: cold roast meat or extra green veg in it; Spinach works a treat)
•
Cold Leek & asparagus soup with or without feta (or hot in a flask)
•
Slice of Quinoa loaf (no recipe provided, but it’s worth googling, same with a slice of nut roast which I am dying to try out. I bet it would taste lovely with ratatouille or raw red pepper (add some beans or a little meat/ fish to make it more filling)
PLUS ALL THE GOODIES FROM STAGE 1&2 -- BE SURE TO HAVE
PLENTY OF PROTEIN MEALS STILL:
•
•
•
•
Steamed Salmon and Greens (now you are also allowed potatoes)
Roast Chicken & Veggies (and you’re also allowed oven potatoes, delicious! Just avoid chips/ fries)
Grilled Tuna Steak with Tomato Salsa (with or without potatoes or brown rice)
Salmon Cabbage parcels with gravy (with or without brown rice)
67
DINNER RECIPES
Now we’ve reached Stage 3 --which dinner recipe will you try first?
Über Delicious Stir-Fry (Chicken, Shrimp or Veg) (GF, DF, SF, V option)
This colorful sugar free & gluten free dish is one of my favorite healthy dinner recipes - It is SO flavorsome
and versatile!
Whether you stick to a vegetarian version, you add some white meat or shrimp (king prawns) or you
serve it as savory pancake filling. It always tastes lovely.
Prep: 15 minutes Cooking time: 30 minutes
Ingredients:
•
•
•
•
•
•
•
•
•
4 runner beans (or green beans), trimmed
1 handful mangetouts (snow peas)
2 bell peppers (yellow & red)
1 red pointed pepper
3 medium potatoes (choose good quality)
1 leek
1 drizzle olive oil
1 dash low salt, freshly ground black pepper, turmeric and cayenne pepper
handful roasted cashew nuts
Paleo option:
•
add 2 fresh organic chicken breasts (or equivalent amount of king prawns/ shrimp), no potatoes
Veggie option:
•
•
1 can garbanzo beans (chickpeas)
1 cup soba noodles or quinoa (as a side dish)
Über Delicious Sauce
•
•
•
•
•
•
•
•
1 small handful broccoli florets
1 red pepper
a few mangetouts
1 red onion
3/4 sachet creamed coconut (I used Patak’s; you could scoop out the solid part of a can of coconut milk)
1 yeast free chicken stock cube dissolved in 1 cup filtered water (or broth)
1 tablespoon mild yeast free curry powder (I used Schwartz Mild Curry Powder)
1 dash rice milk (if you are not following the Candida diet you could use cream instead)
68
TOP TIPS:
•
•
•
Prepare the Über Delicious Sauce in advance to save cooking time on the day.
Preferably double the amount so you can freeze some
The meal itself is enough to feed 2 people happily for 2 meals. So you can either freeze half of it or tomorrow’s dinner is taken care of :-)
•
Leftovers of the sauce work beautifully with soba noodles, sea salad and toasted pine kernels or just with steamed asparagus (not to mention pancakes!) How is that for a super quick & ultra healthy dinner idea when you next don’t have time to cook?
Here’s how you make the Stir-fry:
Chop the potatoes into small cubes and saute in a wok with olive oil and a dash of salt, pepper, tumeric and cayenne pepper until lightly brown (around 15 minutes).
•
Add the rest of the washed (and chopped to equal size) vegetables to the potatoes. It is very important to remove any stringy bits from the vegetables especially the green beans and mangetouts/ snow peas.
•
Stir well and let it sit there on a medium heat (for another 10-15 minutes) while you pre
pare your chicken or chickpeas depending if you opt for the vegetarian or paleo/
meaty option.
•
Bring a pot with filtered water to the boil, add a pinch of salt and cook a cup of quinoa or some soba noodles. Bearing in mind that quinoa needs a longer cooking time than soba noodles.
•
Meanwhile you could rinse a can of organic chickpeas and add the pulses to the Wok if you like. As soon as the vegetables are done put them aside to free up the wok for the sauce.
•
Make your seriously Über Delicious Veggie Sauce:
•
•
•
Simply sauté the red onion with the rest of the vegetables in a bit of olive oil and mild curry powder until its tender enough to eat (10-15 minutes).
Then you boil 500ml (0.5 quart) of water and dissolve a yeast free stock cube in it (or use broth to begin with), letting it it cool down slightly so you don’t burn yourself when whiz
zing it up.
Crumble the creamed coconut into the liquid (or spoon the solid cream of a tin of coco
nut milk), mixing well until fully dissolved.Put the vegetables in a blender/ smoothie maker and add some of the stock/ broth. Blend them until the sauce reaches a creamy consistency. Add more broth/water/ rice milk to adjust the consistency and spice level of your sauce.
TIP: Alternatively if there’s no time to make the sauce, just add creamed coconut, a bit of stock,
water and mild curry powder to your main Stir-Fry :-)
•
•
•
Now put all the vegetables and the chickpeas back into the Wok and heat them up briefly.
Then pour your Über Delicious Sauce over it, stir well and heat it through briefly.
For a finishing touch you could sprinkle some toasted, cashew nuts, coconut or almond flakes over the top, and either serve it on its own or with a bowl of soba noodles or quinoa - Truly ÜBER Delish!
Find Out What The Paleo/ Meaty Option Looks Like:
Alternatively you can add a hearty meat component to your lovely stir-fry like I have done.
Cut 2 chicken breasts in half and lightly saute hem in olive oil with the spices you like until they are
golden brown. Then add them to your stir-fry once the veggies and the sauce are done.
69
Savory Pancakes with Greens & Curry Sauce (DF, SF, can be GF and V)
This is one of my absolute favorite meals -- I make it ALL the time. Generally on weekends.
The pancakes that is. The sauce takes more time (worth it). But I often just have steamed or sautéd
vegetables (green asparagus or fine green beans for instance work well) with the pancakes and perhaps a
few rashers of grilled unsmoked organic bacon.
Prep: 0 Cooking time: 15-20 minutes
-- go to the pancakes recipe on page 26.
The pancake recipe works just as well with gluten free allpurpose flour by the way. It doesn’t have to be
spelt or wheat flour.
And on the next page you’ll find the delicious sauce recipe I recommend you make with it when you
have a bit more time (or you can prepare it in advance and freeze it)
70
The Creamiest Curry Sauce Recipe Ever
Also great with cooked chicken or vegetables, pasta, brown rice or quinoa.
Do you like eating Curries? Excellent! But do you know how to make a cracking Curry Sauce?
Let me show you how…
Prep: 3 minutes Cooking time: 20 minutes
Ingredients:
•
•
•
•
•
•
•
•
sunflower oil
8 ripe cherry tomatoes
2 white onions (yes 2! You won’t taste it ;-))
1 red onion
2 cloves of garlic
½-1 tsp tumeric, garam masala, mild curry powder and ground ginger
pinch cayenne pepper
4 heaped tablespoons tomato paste (tomato puree in the UK)
Optional:
•
•
1-2 tablespoon cashew & almond paste (or natural yogurt or cream)
1 red pointed pepper (not essential)
Here’s how you make it:
•
•
•
•
•
Chop the onions, garlic and tomatoes (and pointed pepper if using). Then mix as much of the ground spices together as you think you can muster. I personally thought the auce was still mild after adding just under 1 tea spoon each of the spices. But then, you might prefer it milder. So you might want to use less spice initially, and add more later on if you like.
First sauté the tomatoes in a little sunflower oil until they have come apart like a caramel
ized tomato sauce.
If you’d like to use some red pointed pepper it’s best to sauté those pieces even before the tomatoes, as they take the longest - alternatively roast them and remove the skin before you add them to your tomato-onion mix. Add the chopped onions and sauté those until soft. Add the spices and continue to cook for about 15 minutes.
Towards the end add the crushed garlic and continue sautéing for a couple of minutes, stir
ring frequently. Season with salt and pepper if need be.
Let the curry sauce cool down slightly and fill in your food processor. Then blend the curry sauce as smoothly as possible to a creamy consistency. It really tastes nicer when it’s smooth.
This curry sauce is vegan, gluten-free and heavenly creamy. Even the base version (without red pointed
pepper) has a sweet, rich tomatoey flavor and thick creamy consistency. Very moreish!
TOP TIP:
•
You could prepare a separate bowl with a dollop of cashew & almond paste (or cream, crème fraiche or yogurt) for family members who insist on extra creaminess and a lighter color. But quite frankly - it doesn’t need it :-)
71
Candida diet advice:
•
Whenever you’re experiencing a lot of die off, only eat small amounts of the sauce as the spices & sautéd onions aren’t easy to digest. And always combine with green vegetables or a small piece of fish/ chicken.
•
You could eat the curry sauce with natural yogurt. Later on when your symptoms are virtually gone, and you were that way inclined, you could sneak a bit of cashew & almond paste (yum!) or cream in like ;-)
Veggy Vegan Serving Suggestion:
Serve your curry sauce with green vegetables of your choice. It tastes awesome with steamed green
asparagus, broccoli or mange touts/ snow peas and pancakes of course ;-)
Asparagus being the one that looks classiest, snow peas being the ones that steam the quickest (5 mins).
Paleo Serving Suggestion:
Apologies to my Vegetarian/ Vegan friends, but I have to add that the curry sauce tastes also marvelous
with roast chicken. Personally, I prefer it with fresh steamed Salmon though.
What would you like to eat it with?
Watch out for Sugar, Additives & Spice Bombs in Curry Pastes and Take
aways!
Chinese & Indian take aways and supermarket curry pastes are always lagged with sugar and additives
to extend their shelf-life. Check out the labels next time you shop – you’d be surprised. Even the curry
spice mixes often contain sugar. Red hot chillies and big cloves of garlic on the other hand make your
food acidic and hard to digest, and they also kill all the friendly organisms in your gut. That’s bad news
if you are taking expensive probiotics to re-populate this very area.
72
My Staple Spice Mixture for Marinating Chicken or Fish
This base sauce is very versatile. It works with sauted foods just as well as a salad sauce (with a
dash of apple cider vinegar or lemon juice).
Ingredients:
•
•
•
•
•
•
•
olive oil
low salt or sea salt
freshly ground black pepper
cayenne pepper
turmeric (kurkuma)
crushed garlic or garlic granules
ginger spice
•
Optional: Sometimes I also add a teaspoon of roasted cumin and fennel seeds to mini
mize bloating or a dash of apple cider vinegar to tenderize meat. If you do this a few hours or the night before you cook the meal, then this really brings out the aromatic flavors of the spices.
•
Add this: Adding fresh or dried herbs is also a good idea, especially Thyme and Rose
mary - these not only fend off Candida but they also add a nice aroma to your dishes.
•
Try this: Also try roasting a handful of sesame seeds or sunflower and pumpkin seeds with salt and pepper and then sprinkling them over your food for added crunch & spice factor.
Or my personal favorite: ground almonds or desiccated coconut – tastes heavenly when roasted and added
to stews, soups or curries!!!
Be sure to eat plenty of light protein rich dinner recipes from Stage 2, especially fish dishes like
steamed salmon and greens (page 41 Sugar Free & Easy Recipes Book 1) as often as you can.
73
DESSERTS
(preferably only at the weekends):
Plain Yogurt (GF, SF)
Makes a quick & healthy dessert - refreshing and filling!
Prep: 0 Cooking time: 0
Right to begin of the candida diet eating dairy is not a good idea because it might aggravate your
symptoms. After a few weeks though you can start introducing probiotic yogurt back into your diet.
To aid digestion you can also eat a few spoons of yogurt before a meal. I prefer to eat my “dessert” as a
mid morning/ mid afternoon snack in between meals as it’s an effective way to combat cravings.
I suppose you could eat soy yogurt, too. But make sure it doesn’t contain some hidden sugar (even the
ones labelled “unsweetened” often do!)
TOP TIP: Try adding 1tbsp each of ground hazelnuts, almonds, desiccated coconut and 2 tbsp puffed
brown rice cereal to your yogurt just like I did for the yogurt dessert creation in the photo above. That’s
one way of making your otherwise plain unsweetened yogurt slightly more exotic while adding an
interesting texture.
Alternatively if you haven’t got puffed rice at hand you can crumble half a brown rice cake over it for
some added crunch.
Almondy Millet Pudding (GF, DF, V, SF)
Ha, this is a clever re-purposing action from the almondy millet porridge.
Prep: 0 Cooking time: 20 minutes if cooked from scratch; none if using leftovers
Simply put any leftovers from your millet porridge from page 28 in a pudding bowl and store overnight
in the fridge.
The next day you can take it upside down out onto plates, sprinkle with cinnamon and blanched
almonds – and ready is your chilled dessert.
74
Vanilla Chia Oats Pud (GF, DF, SF, V)
Ok, this could easily be mixed up with the Chia Coconut Pudding from Stage 2 (page 70). This
one is hot though and made with oats....
Prep: 0 Cooking time: 4 minutes
Ingredients:
•
•
•
•
•
4 tbsp gluten free oats
2 tbsp sunflower seeds (preferably soaked in water overnight)
2 tbsp chia seeds
1/4 tsp vanilla spice powder
hint of organic unwaxed lemon peel
Here’s how you make it:
Bring the rice mik to the boil. Add the oats and seeds plus the vanilla and a hint of lemon peel and cook
for about 4 minutes until nice and creamy. Et Voila! This trendy pud good enough to eat for breakfast or
as a dessert.
Wholegrain Rice Pudding (GF, DF, SF, V)
Sweet & Comforting
Prep: 0 minute Cooking time: 40 minutes
Definitely one of my favorite Candida diet desserts – I can eat it all day long.
Just cook brown rice in 1l (4 cups; 0.85 quarts) of water for 30-40 minutes, drain the water, add one table
spoon of coconut oil (and cinnamon if you like).
TOP TIPS:
•
For a sweeter slightly more delux version of this comfort food stir in some hot rice milk with maize meal – great way to thicken up your pud and give it a yellow color, flavor and consistency similar to custard.
•
Another way to pimp up your rice pudding is to add a beaten egg white towards the end of cooking and using rice milk instead of water (and perhaps 1-2 drops vanilla stevia – yum!)
Super Quick: Ground Rice Pudding (similar to Semolina Pudding!)
Prep: 1 minute Cooking time: 5 minutes
Follow the instructions for Hot Brown Rice Pudding from the breakfast section (page 25)
75
SNACKS
Sweet and Savory -- plenty of treats to tide you over...!
Here are all the healthy snack foods you can have in Stage 3
(at one glance):
Steamed Vegetables with Pumpkin seed oil (GF, DF, V, SF)
One of the best most nutricious Candida diet snacks there is. Key is to steam the veg and make
double the amount.
Makes 2 servings (I tend to keep some as a snack for the next day)
Prep: 3 minutes Cooking time: 15 minutes
Ingredients:
•
2-4 broccoli florets
•
2 asparagus stems (trimmed well)
•
a handful of broad beans (fava beans) or peas or whatever green veggies you’ve got handy
•
1 medium sweet potato also works a treat here, but no more!
•
handful of fresh spinach or lettuce leaves
•
handful of mixed seeds (sunflower & pumpkin seeds preferably soaked in water over
night)
Here’s how you make it:
Peel the sweet potato and cut into medium sized cubes (not too small as it cooks quicker than the beans).
•
Steam with the broad beans for 15 miutes then add the peas and steam for another 5 minutes.
•
Toss some pumpkin seed oil (or other oil of your choice) over it. Season with salt and pepper and serve on a bed of lettuce or fresh spinach leaves.
•
TOP TIP: You can also sprinkle some sunflower, pumpkin or sesame seeds on top to make it more
filling (preferably pre-soaked over night to aid digestability). Tastes even better lightly roasted over a low
heat. I’d also recommend you to make double the amount, so you have a handy snack food the next day.
Candida diet advice:
Also, be careful not to overcook the sweet potato and let it cool down before eating to minimise the
effects from the natural sugars in the sweet potato.
76
Homemade Popcorn (GF, DF, SF, V)
This is such good fun to make and so quick!
You’d be amazed how much popcorn comes out of just 1 table spoon of kernels! Why not sneak some
into the cinema next time you go? Beats the overpriced sugared stuff hands down :)
Prep: 0
Cooking time: 1 minute
Ingredients
•
•
1 tbsp popcorn kernels
1tbsp sunflower oil (or other mild oil or butter)
Here’s how you make it:
•
Heat the oil in a deep sauce pan on a medium heat. Add the pop corn and close the lid firmly.
•
The corn will “pop” and expand, jumping all over the place. Shake the saucepan a little to evenly distribute the popcorn.
•
When the popping sound has stopped turn the heat off and pull the saucepan to the side. Discard any corn that hasn’t popped.
Rice cake with veggie curry (GF, DF, V, SF)
Make generous amounts of veggy curries, so the next day you can scoop some on your rice cake,
like I did here – Tada!
This was a deliciously mild curry with coconut cream, mmmhhh!
Prep: 0
Time to make: 1 minute!
Curried rice cake with ham or chickpeas (GF, DF, SF)
Leftover sauce from the curry the night before (different curry – much hotter!)
Prep: 0
Time to make: 1 minute!
The addition of yogurt, cherry tomatoes and a big handful of fresh herbs like Basil and Coriander/
Cilantro made this rice cake creation taste out of this world.
So much so that it didn’t really need the small cubes of “Schinken” cured ham (I hear ya – it’s not good
for ya – use feta or chickpeas instead then… but it tasted rather spectacular I’ll let you know
77
SNACKS, CAKES & PUDDINGS
78
Rice cake with Tuna and Cucumber GF, DF, SF)
Simply tuna (I used line caught tinned tuna and made sure all the oil was drained) mixed with
slices of chilled cucumber and salt & pepper)
Prep: 0
Time to make: 1 minute!
Almond & Hazelnut Butter Rice Cake (GF, DF, SF, V (contains nuts))
Hazelnut or Almond butter is always a winner – whether it’s homemade or bought. Full of
nutrition goodness to speed your healing up & give you energy.
Enjoy it on a rice cake or on toasted yeast free soda bread.
Stock up on the healthy goodies above and you’ll
•
•
•
feel full of energy all day
effortlessly keep your figure (or lose weight if that’s your goal)
and you really won’t feel like snacking on sugary snacks.
Hummus and Veggie Sticks
Of all the glutenfree snacks I know this one is probably the most filling: Hummus
Prep: 0
Time to make: 1 minute!
Homemade or bought – organic hummus is always a fantastic addition to your diet. Eaten with celery
sticks it also has a super positive effect on your digestion.
Sani with Hummus, Grilled Red Pepper & Alfalfa Sprouts
But you could also dip red pepper or carrot slices into it or use it as a delicious sandwich filling
like I did below with grilled pepper and alfalfa sprouts.
Prep: 0
Time to make: 1 minute!
If you grilled the pepper yourself it would take you 8 minutes to grill the pepper halves on medium
heat on both sides. To make hummus from scratch takes 5 minutes -- see instructions how to make
hummus on page 50.
79
CAKES
Yes! You’re allowed the odd piece of cake again. But start slowly. Try a completely
sugar free cake first to see if it agrees with you. The carrot cake/ bread recipe that is
coming up in a minute is perfect for this.
Sugar free Carrot & Walnut Cake/ Bread Recipe
(Not sweet! --DF, SF, can be made nut-free)
Who said Cake was off the books while you’re on the Candida Diet?! OK, this carrot cake is NOT
like traditional cake. It’s more like soda bread. But it’s ever so more-ish and comforting!
TIP: I recommend you use this sugar free carrot cake recipe as the base for baking a big loaf. Cut into
smaller slices you can then easily freeze this healthy snack. It defrosts super quickly and tastes lovely
when it’s toasted – perfect as a healthy snack when you’re craving carbs.
Prep: 2 minutes
Baking time: 25 minutes
Ingredients for the cake base:
•
•
•
•
•
•
•
150g (1 cup) plain wholemeal flour (or Spelt flour)
4 tablespoons coconut or organic sunflower oil
1 teaspoon bicarbonate soda
1 teaspoon cinnamon
2 medium organic eggs
100g (2oz) 1/2 cup, 2 small finely grated carrot
2 tablespoons fresh lemon juice (about half a small lemon)
Optional:
•
1 teaspoon vanilla powder
•
1 teaspoon ground nutmeg
•
1 handful walnuts or pecan nuts
If you want to make the cake with gluten free flour you’d probably need to add 1tsp of xantham gum to
bind the dough.
The cake is totally sugar and sweetener free and ideal to take with you at birthday parties/ other
celebrations so you won’t feel so bad for not eating sugary cakes & cookies... Did you know you can make a
Vanilla Custard Creme Filling for this cake ;-)
Here’s how you make it:
•
•
•
•
Preheat the oven to Gas mark 6/ 400 F/ 200 C.
Grate the carrot, squeeze the juice of half a small lemon out and put aside.
Butter a sandwich tin or small cake tin and line it with baking paper.
Combine the flour, bicarb and cinnamon/ vanilla/ nutmeg. Beat the eggs one after the other with a little flour.
80
•
•
•
Add the grated carrot, lemon juice and the rest of the flour to your egg mixture. You can also add some toasted walnuts/ pecan nuts now if you fancy. Depending on the carrots you are using the dough might be too moist. In that case just add a little bit more flour at this stage.
Fill the cake mixture into the lined sandwich/ cake tin and bake for 25 minutes.
Test to see whether it’s done by poking a thin skewer in the center of the cake - if it’s done it’ll come out clean with no cake sticking to it. Et voila - your sugar free carrot cake is virtually ready to eat. You can put it on a cooling rack and take it out of the tin after it has cooled down a bit.
Candida diet advice:
Less is definitely more here. Listen in with yourself - if you are at the beginning of the Candida diet and
you are still experiencing a lot of symptoms it is probably best NOT to eat the cake at all, sorry.
Your healing is paramount! What you can do though to minimize the likelihood of the carrot cake
causing you any trouble the next day is to leave out the nuts and not have custard with it.
If you’ve been following the anti Candida diet for some time and you can tolerate potatoes and soda
bread - then this sugar free carrot cake recipe is the way forward.
81
Vanilla Cake (DF, SF; GF and V option; contains nuts)
The first cake I ever made on the Candida diet. I took it with me to a family do so I wouldn’t be tempted
by the sugary desserts on offer - worked a treat :) This is not a sweet cake though, just something to
tide you over during the diet!
Prep: 2 minutes
Baking time: 35 minutes
Ingredients
•
•
•
•
•
•
•
•
•
•
2 eggs (or 2 tbsp ground flax seeds with 8 tbsp water)
1/2 cup rice milk (125ml)
Less than 1/2 cup water (100ml)
1/2 cup roasted hazelnuts
1/2 cup roasted unsweetened desiccated coconut
1/2 cup wholegrain semolina (or use millet for a gluten free alternative)
2 tsp baking powder
Peel of 1/2 an un-waxed lemon
1 vanilla bean
Cinnamon to taste
Optional:
•
•
half a green apple (prevents the cake from going too dry)
10-20 drops Vanilla Stevia (or 10 drops and 20g Xylitol/Erytritol)
Here’s how you make it:
•
•
Preheat the oven to Gas mark 6/ 400 F/ 200 C.
Lightly roast the nuts and coconut in a frying pan over a low heat to bring the aroma out, careful not to burn them.
•
Whisk the eggs, grate the lemon peel and scrape the paste of one vanilla bean into it. Then add the apple half, chopped into small slices.
•
Heat the rice milk in a saucepan over a medium heat. Add the semolina, stirring. Cook for a few minutes, stirring occasionally, until the semolina has thickened. Add a little water if necessary.
•
Sprinkle the baking powder over the nuts and mix through, pour the the eggs, spice and apple on top, stirring thoroughly. And add finally add the semolina. Now blend everything together (I used a spatula for this).
•
Fill into a greased round cake spring form and bake for about 35 minutes until springy to the touch, golden in color and fully cooked in the center.
•
Cool on a wire rack then cut in half length-ways with a big bread knife.
•
Serve with a layer of Vanilla Custard spread (page 91) between the two cake halves page… Tastes good cold, but I preferred it warm :)
82
Sugar Free Squash Muffins (DF, SF with V option)
Can you smell the warm cinnamon spice smell wafting through your kitchen? Well, you would if you made
these muffins! They are crisp on the outside and soft on the inside.
The roasted pumpkin seeds add an aromatic crunch that offsets the squishy sweetness of the butternut
pieces. Not unlike carrot cake. Who would have thought that these muffins contain no refined sugar,
coconut sugar or agave. Not me. There is a hint of caramel color and flavor. These muffins are also easy
to make. The trick is to bake the butternut beforehand. If you have never done that follow my quick
instructions below the recipe.
Prep: 2 minutes Cooking time: 20-25 minutes
If you make the butternut squash the same day factor in 15-20 minutes if steamed in small chunks, or
50-60 minutes if baked in the oven. I suggest you do this the day before or better still do it when you
have time and freeze it. If pressed for time, use tinned pumpkin purree instead and perhaps use a little
bit of vanilla stevia to sweeten if necessary.
Makes 3 big muffins.
Ingredients
•
•
•
•
•
•
•
•
•
2/3 cup spelt or gluten free all purpose flour (85g)
1 tsp baking soda
1.5 tsp baking powder
1 heaped tbsp ground flax seeds (soaked in 4 tbsp water for 20 mins) or 1 egg
¼ medium baked or steamed butternut squash (1 cup, puréed)
½ tsp freshly grated nutmeg
½-1 tsp cinnamon (or vanilla)
2 heaped tbsp coconut oil or grapeseed oil
enough almond or rice milk to form a sticky dough (about 1/4 cup)
optional:
•
2 handfuls of pumpkin seeds (preferably pre-soaked)
•
1/4 tsp each nutmeg, ginger spice and cloves
•
If you were concerned the butternut didn’t give enough sweetness and your Candida levels were under control, you could add 1-2 Tbsp of Erythritol or Xylitol. But in my opinion it’s worth trying the muffins without first. Most of my resipes testers found the muffins plenty sweet even without added sweetener.
Notes:
•
If you can’t eat eggs or flax seeds try adding 1 tsp. of apple cider vinegar. This reacts with the
baking soda as raising agent similar to baking powder. Just bare in mind it’s shortlived. So you must add
the apple cider vinegar with the other liquids (including puree) at the very last second before filling the
muffin cups and popping them in the oven. Otherwise the reaction would occur in the mixing bowl
and then dissipate before the muffins had a chance to rise in the oven.
•
•
If you want to make the muffins with gluten free flour you’d probably need to add 2/3 tsp of guar or xantham gum to bind the dough.
Also you really have to purée the butternut squash -- if you leave it as pieces then you’ll be left with a dough that in itself isn’t sweet enough. Everything needs to be mixed well to distribute the sweetness evenly.
83
Here’s how you make it:
•
•
•
•
•
Preheat the oven to 180C / 350F / gas 4. Spray a muffin tin with oil or line with paper bak
ing cups.
Add the spices and the baking soda to the flour. Meanwhile heat the coconut oil up in a small saucepan.
Pour this onto the flour. Add the flax seeds/ egg, puréed butternut squash and pumpkin seeds if using. If you lightly toast them in a skillet on the hob they’ll taste even better.
Fold all the ingredients under adding enough almond/ rice milk to make a smooth dough.
Bake for 20-25 minutes until golden and a skewer inserted comes out clean.
TIP: You can even make the butternut squash a day before and freeze it in zip-log bags to add to muffins
and hot pots later on. It’s also a great idea to double the muffin ingredients amounts and freeze the extra
muffins.
Candida diet advice:
Try eating only a small amount at first - most Candida sufferers are very sensitive to the high sugar
content in them and can only tolerate Butternut squash several months into the diet and often only a few
small pieces eaten with other foods to slow down the absorbtion of the naturally contained sugar into
the bloodstream.
Quick tip: Freeze a handful of steamed or baked Butternut Squash pieces
at a time:
Makes a great addition to lentil hot pots and meaty stews.
•
•
•
•
Put the butternut squash on a baking tray that’s sprayed with oil. Cover with tin foil. Bake for 50-60 mins until the skin is starting to soften to the touch. The longer you leave it in the sweeter and mushier it gets. Alternatively peel and steam in chunks for about 25 minutes.
When it’s done cut it in half with a big knife and let it sit on the side for 30 minutes at least to cool down. Then cut in half again, take the seeds out and peel the skin off with a potato peeler. This should be easy now that the flesh is softer.
Then cut in cubes and blend to a smooth paste. (I mashed mine with a fork).
Put aside or freeze 3/4 of it, a small handful at a time.
84
No Bake Cheese Cake – Sugar Free Version of the Classic (S)
I love cheese cake in all variations so it must not be missed amongst the best Candida diet desserts.
Even if a sugar free version is not quite the real deal.
I first discovered a recipe for a sugar free cheese cake in Erica White’s Beat Candida Cookbook, and
found the cake delightfully refreshing -- it made the base for the recipe you see here which has seen me
nicely through Christmas and prevented me from overindulging on traditionally sugar rich puddings.
Prep: 1 minute Cooking time: 20- 45 minutes
Ingredients & how to make the base:
•
•
Beat 1 free range egg and mix with 2 tblsp melted unsalted butter (or coconut oil or vegan spread) and 1 tsp apple cider vinegar (or fresh lemon juice) then add 125 g/ 1 cup Spelt flour and 1/2 tsp bicarbonate soda to the mix and press the dough into a round cake tin with a press up bottom (lightly buttered)
Bake for 20 minutes at 350 degrees F/ 180 degrees C/ Gas Mark 4 and let cool down before adding the filling.
Ingredients & How to make the cheese cake topping:
•
•
•
•
•
450 g cottage cheese (2 cups)
600 ml/ 1 pint/ 2 1/2 cups probiotic yogurt
1 tbsp (15 g) gelatin or agar-agar and 4 tblsp water
juice of 2 limes
10 drops vanilla stevia (or 1/4 tsp pure stevia concentrate which equals around 4 sachets/
level tbsp erythritol; when symptoms undercontrol adding 20-30g Xylitol would create an even better result)
Baking Instructions for the cake:
•
•
•
Preheat the oven to 350 degrees F/ 180 degrees C/ Gas Mark 4.
Press the cottage cheese and yogurt through a sieve or muslin cloth into a bowl. Dissolve the agar-agar or gelatine in water according to instructions and add the lime juice and sweetener.
Chill until almost set and add to the rest of the ingredients Then pour everything onto the pre-baked cake base, crumble some sugar free biscuit crumbs (for example leftovers from the cookies on page 101) over the top and put it in the fridge until serving.
85
SAUCES, SPREADS &
PANCAKE SYRUP
Candida Diet Recipes can taste so bland... not when they are enhanced with these
healthy sauces though!
Vanilla Custard Creme (GF, DF, S, V)
Not quite the real deal... but close enough! Makes a great addition to toasted cake (like the Carrot cake in the photo).
... andd muffins (that might have turned out a little on the dry side), and of course the classic - apple
crumble - one of my absolute fav’s ;-) I’ll be sharing the recipe with you in the next chapter.
Prep: 0
Cooking time: 2 minutes
Ingredients:
•
•
•
1 tbsp maize meal (unrefined version of corn flour; coarse or fine depending how smooth you’d like the sauce)
1 1/2 cups (300 ml) rice milk (or almond milk)
1/2 tsp vanilla extract or vanilla bean paste
Optional:
•
1-2 drops vanilla stevia
Here’s how you make it:
•
•
•
•
Mix the maize meal and a little of the milk to a paste. (If using whisk in the egg now.)
Heat the rest of the milk up and stir in the maize meal paste. Stir and cook for 1-2 minutes while constantly stirring
When it has thickened to custard consistency turn it off and stir the Vanilla and stevia in to taste.
Dilute this with more milk of your choice to make a vanilla sauce rather than custard if you like.
Candida advice:
Because of the high glycemic value of maize meal I would only have a little of this. For the first few
months I ate it without the stevia, later when my symptoms were more under control I added stevia, and
eventually I was able to use regular custard powder with rice milk and a little Xylitol and Stevia.
86
Cinnamon & Almond Butter Spread (GF, DF, S/ SF, V)
This is heaven -- creamy, buttery, healthy, home made… heaven!
The spread tastes very moreish even without any sweetener (that’s how I enjoyed it for most
of the Candida diet).
Prep: 0
Time to make: 1 minute
Ingredients
•
•
•
•
•
1 cup (100g) blanched almonds
4 tbsp milk of your choice (for instance rice milk or almond milk)
1 tsp cinnamon
1 tbsp flax oil
Vanilla stevia to taste (I suggest no more than 1-2 drops of vanilla stevia)
Tastes great spread thickly on a freshly toasted slice of homemade bread.
Here’s how you make it:
•
•
•
Grind the almonds to a fine powder in a blender or coffee grinder.
Add 4 tablespoons of rice or almond milk, 1 tablespoon flax oil and the cinnamon.
Use a small whisk to combine all the ingredients to a buttery spread.
Try it with the Almond Cinnamon Toasties from page 32 :)
Lemony Syrup (GF, DF, S, X, V)
Great drizzled over blond cakes and pancakes (so great in fact that there was no time to photograph it
;-)
Prep: 0 Time to make: 1 minute
Ingredients:
•
•
Juice of one lemon
2 drops of Vanilla stevia and 1 tsp of Xylitol
optional:
•
2 tbsp of ground arrowroot powder to thicken if required
Makes enough for 1-2 pancakes. If you want to use this to drizzle over a lemon cake then double the
amounts.
87
Cinnamon Butter (GF, S)
Another great pancake sauce -- you can sub the butter for a non-dairy alternative if you like.
Prep: 0
Time to make: 1 minute
Ingredients:
•
•
•
2 tbsp of unsalted organic butter
1/2 tsp cinnamon
1 drop of vanilla stevia
Here’s how you make it:
•
Warm up the butter in a small saucepan. Stir cinnamon and stevia in, combine well and enjoy.
Carob Cocoa Spread (GF, DF, V, S)
Try dipping toasted cake or nuts in it for a snack that is healthier than chocolate.
Prep: 0
Time to make: 1 minute
Ingredients:
•
•
•
•
1 tbsp carob powder
1/2 tsp cocoa powder
2tbsp flax seed oil (or coconut oil)
Vanilla stevia to taste
Here’s how you make it:
•
Pour the flax oil in a small bowl and combine all the ingredients with a whisk.
Recap of the Savory Sauces:
•
•
There’s my spice mixture for marinating fish & chicken and making salad sauces from the previous chapter (page 78)
...and also the creamiest homemade curry sauce (for pasta, pancakes and the likes... -- page 76)
88
SPECIAL OCCASION MEALS
The dishes in this section require a little bit more cooking action - but they
are well worth it :)
Mustard Seed Pancakes with Savory Filling (DF, S, can be GF and V)
Prep: 1 minute
Cooking time: 15-20 minutes
There they are again -- one of my all-time favorites and so versatile: Enjoy the pancakes from page 29 with
a spicy beans (page 60), meat (page 72 ), curry (page 76) or lentil (page 61) filling with some vegetable
goodness (with or without the curry sauce we just looked at).
Sweet Lamb (or Beef )Bolognese (GF, DF, SF with V option)
This is comfort in a bowl! A steaming hot bowl of this will make your weekend, guaranteed!
You do like substantial meaty meals, don’t you? Keep reading even if you don’t – I’ve got a worthy veggy
alternative for you!
I called it “Sweet Lamb Bolognese”, because it works really well with rice pasta, sort of like a good old
Spag Bog (Spagetti Bolognese). It even has the ‘boyfriend seal of approval’, which means something, as
not many candida diet friendly foods pass this test.
Right, before all my lovely vegan friends get the harpoons out – the Lamb Bolognese also tastes
marvelous with red lentils instead of the lamb, phew… that was close ;-) I had you worried there for a
moment, didn’t I?!
Prep: 5 minutes
Cooking time: 35 minutes
To make the butternut squash from scratch would take you 15 minutes. Best done a day or more in
advance to save time.
Basic Sauce:
Ingredients:
•
•
•
•
•
•
3 1/3 cups (450g) organic minced lamb; veggie alternative: red lentils
2 big white onions
1 tin of organic chopped tomatoes (preferably without citric acid)
1 tube of tomato paste (called puree in the UK)
pinch of salt and garlic granules
2 garlic cloves, chopped finely
89
Optional Sauce Additions:
•
•
•
•
•
half a butternut squash, cubed (best bake or steam the day before)
pinch of ground fenugreek
½ tsp tandoori curry spice
pinch of paprika
2 handfuls of fresh spinach
For the spice mix:
•
•
•
•
•
1 tsp of coriander seeds
½ tsp of cumin seeds
½ tsp of fennel seeds
½ tsp of dark mustard seeds
salt, pepper
Here’s how you make it:
•
•
•
•
•
•
•
•
Chop & saute two big onions in olive oil until they are brown.
Whilst this is going on chop half a butternut squash into cubes and steam for about 10-15 minutes, depending how mushy you like it. The longer you leave it the sweeter it gets.
You can save time by using frozen (defrosted) butternut squash. This is what I did.
Saute 450 g (3 1/3 cups) organic lamb (or beef) mince. Add a bit of apple cider vinegar to tenderize the meat.
Briefly roast the seeds over a low heat, then grind them finely.
Stir the spices into your bolognese sauce.
Add the steamed butternut squash and let it simmer for 25 minutes or longer. It does actu-
ally taste even nicer, the longer it cooks.Towards the end add some chopped spinach. Adjust the seasoning if needed.
Serve with pasta of your choice (I used rice pasta).
Vegetarian/ Vegan Alternative:
Prep: 5 minutes
Cooking time: 30 minutes
Saute the onion. Boil the red lentils for 20 minutes. Add to the onion with the spice mix and saute for a
few minutes. Then add the butternut squash pieces and simmer for 10 minutes. Towards the end mix in
some chopped spinach leaves.
•
Serve with brown rice pasta or boiled potatoes and a side salad.
Candida Diet Advice:
During Stage 2 or on days when you are not feeling so well you can serve it with steamed or stir-fried
courgettes strips rather than pasta and leave the butternut squash out. Serve it with a big portion of
greens and only a small amount at first though to test your response. Lentils (and all legumes actually)
can encourage Candida symptoms (in the early stages of the diet).
90
OTHER MEALS YOU CAN ENJOY AT THE WEEKEND
On weekends we also often make hearty stews with spelt or gluten free dumplings (you can make
them with vegetable suet by the way) or homemade curries (god I love a good curry!) for instance
Chicken Tikka or Vegetable curry.
Another delicious meal that I used to eat a lot in the beginning of the diet was Homemade tortillas
as Chicken tacos. The shop bought wheat tortillas are not suitable on the Candida diet unfortunately
because they contain too many additives and the way they are stored in bags encourages yeast growth.
So you better make your own wraps. I don’t want to go into too much detail here, as you can check
out my tutorial for making tortillas at home with Masa Harina cornflour on my blog at http://
candidadietplan.com/homemade-tortillas/
Allergy advice regarding corn:
The only thing I’d say is, watch how your body reacts to the wraps. Oftentimes Candida causes a corn
intolerance, in which case it wraps from gluten free flour or almond/ coconut flour might agree better
with you. This just takes a bit of experimenting, as every body is different and also reacts differently in
different phases of your life.
I personally had no trouble eating corn tortillas. But I would make sure it is non GMO corn. Sometimes
when I overindulged on corn crisps I would really notice an allergic response the next day (feeling
hayfeverish for instance.) And using Spelt pancakes as base for wraps seemed to agree better with me, so
I mostly stuck with those!
RECAP OF STAGE 3
Well done - you swapped a lot of convenience foods for healthier more wholesome alternatives, and you
are already seeing results -- You feel better and have a lot more energy.
Key is to use the momentum and further manifest your health by still mostly eating stage 2 type foods,
with the occasional addition of richer meals from this chapter.
By now you are starting to see that it is easier to maintain the diet than you had thought!
You have learned new habits how to keep your cravings at bay with help of unsweetened snacks.
I you were’nt able to stick to the diet ALL the time, don’t worry. Just carry on where you left off. You can
estimate to have to follow the diet for one month for every year you had a yeast imbalance. This gives
you an idea when you might be able to relax the diet -- that’s what the next chapter is all about.
91
STAGE 4 -- 1 YEAR
(TRANSITION TO EATING
WHAT YOU WANT)
GUIDELINES
This is a bonus section of the book. I did not want to leave you coming out of the diet and going straight
back to your old eating habits that made you ill in the first place. You really will have to watch eating
refined sugar and very sweet foods in general for quite some time after you are symptom free.
On the next few pages I will show you how you can gradually ease yourself out of the diet. I’ll also show
you what sweeteners you can use that don’t encourage Candida so your immune system will get a chance
to prosper.
Only look at the dishes in this section of the book when you are already symptom free.
If you are still experiencing symptoms then your immune system isn’t strong enough yet to deal with
sweet foods on a regular basis without risking a relapse. It is normal for most people to have to follow
the first two stages of the diet for many months. So don’t be discouraged if you are one of them -- you
are in good company.
Once you are symptom free you can eat grains, starchy vegetables or carbs in general a lot more often.
You can also add sausages, ham and roast lamb and beef to your menu. These are a lot harder to digest
and can promote inflammation. Often times they also contain small amounts of sugar, vinegar or
preservatives - not ideal, but your immune system will be able to handle these foods every now and
again.
By now you should hopefully have brought the inflammation in your body right down, so you can enjoy
more variety with your foods.
You can also combine more carbs with your protein meals without causing indigestion or typical food
intolerance symptoms.
For instance you can now enjoy dumplings or bread with your meat stews or brown rice with chicken or
fish. If you find heavy meals give you indigestion then try taking Swedish bitters, at least after your meal
in the evening (helps to break the food down naturally so you can sleep better).
You can eat quick release energy foods like mashed potato or carrot juice or baked butternut squash,
without breaking a sweat, and perhaps eat a bowl of polenta or white rice with your stews.
Even once you’re symptom free it’s a good idea to regularly do a mini fast or at least a lot of light meals
like steamed vegetables and brown rice or quinoa, to give your body a chance to recuperate.
92
What my current diet looks like
What works really well for me is to eat 2 fish meals a week, 2 lentil or beans dishes, 2 grain free, 2 paleo/
meat dishes and the rest just plenty of steamed vegetables and soups with gluten free or Spelt bread.
I rotate grains and never eat the same ones more than two days in a row. For instance I don’t eat bread
every day. I often eat potatoes instead (this gives you the benefit of being alkaline and high in minerals,
whereas bread is mildly acidic which creates the wrong environment for healing to take place).
When I look back at the beginning of the Candida diet it is easy to see I healed the quickest when I stuck
to a very simple and monotonous diet with lots of fish and nourishing soups. You don’t have to eat a
ton of raw salads to do something for your health. Cooked foods are actually better for you when you
are recovering from illness. Salads are hard to digest, whereas cooked foods are gently on your system
(soups at least…)
I go for one to two brisk walks a day and do one high intensity workout per week, sometimes two. This
has a super positive impact on my health. I encourage you to raise your standards -- even in times of
stress when you think you haven’t got the time or energy to exercise -- at least go for a brisk walk (it’s
essential to keep the cells in your body functioning properly to heal).
I tried to show you here how even with a limited choice of foods you can live quite comfortably.
I know when you first embark on this diet you can feel an overwhelming sense of doom and deprivation.
I sure felt that way!
Hence I very much hope that this recipe collection will spark your interest in wholesome cooking
and natural healing, and when you cook the recipes you’ll discover a sense of creative freedom and
enjoyment that will help you through those dark times, when your body is going through a lot of healing
pain.
93
STAGE 4 RECIPES
You can of course enjoy all the recipes from the previous chapters. I just wanted to give you a bit more
variety so you can slowly re-introduce some fruit back into your diet. I’d still mostly stick to “safe
foods” though to avoid a relapse.
From dessert to cake, here are a few delicious new treats for you to sweeten the transition stage for you
where you still won’t be able to eat traditional sugar laden sweets without repercussions.
RECIPES OVERVIEW:
DESSERT:
•
Apple Crumble
SNACKS:
•
•
Apple and Pear Snack Bars
Choc Granola Bars
SMOOTHIES:
•
•
•
Maca Morning Glory Smoothie
Sports Smoothie
Frozen Blueberry Smoothie
RECOMMENDED SWEETENERS
I suggest you sweeten your meals with a combination of vanilla stevia and xylitol (tastes and looks
very similar to sugar but doesn’t cause a spike in blood sugar so it should agree a lot better with you
than high glycemic sweeteners like coconut or date sugar. Even agave nectar, maple and rice syrup I
would not use on a regular basis (just yet!)
And my advice for you would also be to continue to eat a lot of foods without ANY kind of sweetener.
That’s right! Even stevia and xylitol are known to cause some side effects in sensitive individuals (rare,
but it does happen; I certainly noticed it when I consumed big amounts of it).
What worked best for me was to use pear & apple spread to sweeten pancakes and to either use
fresh apples, beetroot, carrot or butternut squash with or without addition of stevia/ xylitol to
sweeten cakes.
Not all Stevia is created equal by the way. You can buy it as pure extract which you only need a tiny
amount of (like 1/4 tsp for a dessert) or you can buy sachets that containg white granules that look like
sugar. These are easier to dosage. You can use one sachet in place of a tsp of regular sugar.
To achieve this “sugar-like” effect other sweeteners get added to the Stevia extract. Mostly Erythritol
or Malitol. The latter is a form of sugar alcohol derived from malt. Sadly often the Stevia product gets
labeled as “pure Stevia” despite containing these additives. I found Erythritol agreed better with me, so
nowadays I try and avoid the ones with Malitol (including the reputable NuNaturals Stevia sachets).
Instead I use NuNaturals Vanilla Stevia drops (which are made with the pure Stevia extract).
94
MORE PUDS, DESSERTS & SMOOTHIES
95
DESSERT
My number one dessert here in the UK -- go on, I’ll share it with you ;-)
Apple Crumble (DF, S, X, F, V, can be GF)
This is definitely one of my favorite desserts. Ever. I had never had it in Germany where I grew up.
And since you’ve done so well with this diet you deserve another treat - why not make this at the weekend?
Prep: 8 minutes Baking time: 30-40 minutes
Ingredients
•
•
•
•
•
2/3 cup (80g) Spelt flour (or gluten free all-purpose mix)
1/3 cup (50g) oats (preferably gluten free; if you can’t eat oats use 1/2 cup finely chopped pecan nuts)
4 medium cooking apples (1pound or more)
3 tbsp coconut butter (Earth Balance Rich and Creamy Melt or dairy butter)
in total 4.5 Tbsp of sweetener for the apple layers and 2 Tbsp for the crumb topping (I mixed 2 Tbsp Stevia with 1.5 Tbsp Xylitol; but you could just use Erythritol if you wanted)
optional: 1/2 tsp of cinnamon and a sprinkle of nutmeg to mix in with the sweetener for apple layers;
1/2 tsp cinnamon for the crumb topping
Here’s how you make it:
•
•
•
•
•
•
•
•
•
Preheat the oven to Gas mark 5/ 350 F/ 180 C.
Grease a round narrow pie form.
Mix the two sweeteners together and put aside. Roughly divide it into two portions (about 4.5 Tbsp for the apple layers and 1.5 Tbsp for the crumble topping; you might want to add 1/2 tsp of cinnamon to each division and a sprinkle of nutmeg additionally to the sweetener dedicated for the apple layers)
Warm the coconut oil in a sauce pan to melt it. Then mix the flour, oats/ chopped pecans, coconut oil/melt and the 1.5 Tbsp of the sweeteners (and cinnamon) to form nice crumbs for the crumble topping. Taste to see if it’s sweet enough for your liking, if necessary adjust. You an also add more oil if it looks too dry.
Peel the cooking apples and arrange them next to each other at the bottom of the pie form like sun rays.
Cover with a fine dusting of sweetener (plus cinnamon and nutmeg), then another layer of apples slices and so on. Finish with a layer of sweeteners. How many layers you get depends on how big a form and how many apples you use. But you can estimate 1Tbsp of sweetener per layer of apples
If you end up with a lot of crumble topping split the amount in half, freeze one half and use the other half to sprinkle over the top apple layer in the pie form.
Bake in the oven on Gas mark 5/ 350 F/ 180 C for about 30-40 minutes if you have a deep pie dish, less if it’s shallow. The crumble topping should be crunchy and golden and the apple slices very soft and juicy.
Set aside for a few minutes (it stays hot for a long time) while you make some Vanilla Custard, page 91 - yes I strongly recommend you make some - it’s a killer combo!
You can of course have all the desserts from Stage 2 and 3, too.
96
SNACKS
You can have the same snacks as in stage 2 & 3 plus these ones:
Sugar Free Macadamia Coconut Cookies
with Xylitol & Stevia (DF, can be GF, S, X, with nuts)
–
These cookies are not only chewy, gluten and sugar free. No they are also heart-friendly with a
buttery flavor, honey color and a nice crunch when you bite the chunky macadamia nuts.
They feel really substantial as well when you hold them under your nose to smell the delightfully sweet
caramel flavor of the coconut clusters. You can make these cookies dairy free by leaving the butter out
and just use coconut oil. Or use Earth Balance to make them fully vegan. You need not worry that
Macadamia nuts might have a high fat content. Apparently they contain mostly un-saturated fats that
your body needs, as well as good amounts of minerals and protein. Hence these cookies are filling in the
most satisfying uplifting oatmeal cereal bar (flapjack) joy kinda way. You could easily graze on one of the
bigger cookies mid morning and not get hung979ry at lunch. That makes them the ideal travel food. But
they are best stored in an airtight container in the fridge, so the nuts don’t get rancid. The cookies have a lovely
subtle caramel flavor – you’d never guess that they don’t contain any sugar. Yes you heard that right – these
cookies are made with no sugar. Only stevia and xylitol!
Prep: 8 minutes Baking time: 10 minutes
Makes 6 medium sized Cookies. These cookies freeze well and thaw within 30 minutes.
Ingredients:
•
1/3 cup (75g) butter or Earth Balance spread, softened (I used half coconut oil and half butter)
•
1/4 cup (50g) granulated Xylitol
•
1 sachet of Stevia with Erythriol
•
½ tsp Vanilla bean; ¼ tsp ground Cinnamon
•
1 egg
•
½ cup (60 g) gluten free all-purpose flour
•
½ tsp baking soda, generous pinch salt
•
½ cup (45g) quick-cooking oats, preferably gluten free (You can grind them with a coffee grinder to a fine texture.)
•
½ cup (75g) desiccated coconut
•
¼ cup coarsely chopped macadamia nuts (plus 6 halves for deco)
Here’s how you make it:
•
•
•
Heat oven to 375°F (190C; gas mark 5).
If using coconut oil/ butter soften it in a small sauce pan over a low heat. When dissolved add the Xylitol and Stevia and stir well.
In a large bowl, beat butter and the Xylitol mix with an electric mixer on medium speed until light and fluffy. Beat in vanilla and eggs until well blended. On low speed, beat in flour, baking soda, cinnamon and salt until well blended. Stir in oats, coconut and nuts. Line a cookie sheet with baking paper. Then shape six flat circles of dough about a finger’s width thick. Alternatively form small round mounds. Leave a little space in between each cookie. Stick a Macadamia nut in the center of each cookie. Bake until golden brown. Takes about ten minutes. Cool down on a cooling rack.
97
Apple and Pear Snack Bars (GF, DF, F, V)
The apple pieces make the slices moist and the sweet pear takes away any tartness of the apple,
giving the snack bars a lovely mild flavor.
They are also a great way to use up excess almond pulp from making almond milk, if you have any. With
a sticky, chewy, oaty filling, these bars make a fabulous addition to your smoothie (tada!) or just eaten
on their own. These delectable healthy bars are not only refined sugar free, they are also gluten – and
dairy free and also vegan. Did I mention that they also taste nice? Well they do. Ok, I admit, compared
with your normal chocolatey snack bar they taste a bit bland. And they can get a bit crumbly in places.
But as far as sugar free snacks go this is a revelation in my opinion, especially since they are filling and
comforting. Another good thing about these refined sugar free snack bars is that they freeze well (and
as it turns out they defrost in no time in the slow cooker/ crockpot – my latest Cooking Trickery, hah!)
Toasting them from frozen brought less success, as the outer side was hot and crisp, whereas the center
stayed half frozen, uhm, not so nice. Handled with a little more patience and foresight by taking the
snack bars out of the freezer in the morning – this could have easily been remedied so they had been
thawed before toasting…
Prep: 8 minutes Baking time: 25-30 minutes
Ingredients:
•
•
•
•
•
•
•
10 heaped Tbsp gluten free oats, 10 heaped Tbsp puffed rice (unsweetened)
5 Tbsp ground almonds, pinch of cinnamon or vanilla
unsweetened almond milk (about half a cup); 2 heaped Tbsp coconut oil
3 heaped Tbsp chopped or flaked almonds, 2 handfuls of sunflower seeds
1 small apple (leave out during stage 2,3 on the candida diet)
½ pear (leave out during stage 2,3 on the candida diet)
1 tsp apple & pear fruit spread (leave out during stage 2,3 on the candida diet)
Here’s how you make it:
•
•
•
•
•
•
Preheat the oven to 350°F/180°C/Gas 4 with a 9”x 13”/23cm x 33cm tin.
Chop the fruit into small pieces.
Melt the coconut butter in a small pot. Mix all the dry ingredients in with the coconut oil.
Add enough almond milk to form a sticky dough, a bit stickier than oatmeal porridge consistency. Take the baking tin out of the oven, line with baking paper and spread your sticky oaty dough over it. Make a square shape if possible.
Bake at for 25-30 minutes or until golden brown.
Cool on a cooling rack.
Makes 6 slices. Freezes well. They are too moist to be kept in a jar though (they would quickly get
moldy). So freeze whatever you have left over – waawawaaa, you have leftovers?!! If you can eat sugar
without problem and don’t have to fear candida, then you might want to add a little more sweetness, for
instance agave or coconut sugar. A Candida Diet friendly alternative would be stevia.
Be aware that the coconut butter naturally softens at room temperature, so it’s best to keep your Snack
Bars where it’s a bit chilled. And if you’re after a crunchier texture spread the dough thinner and use
more coconut butter instead of the almond milk.
98
Choc Granola Bars (GF, DF, X, S, V, contains nuts)
These bars are a firm favorite with all my friends and family - if you like chocolate - you’ll LOVE
these!
Prep: 5 minutes Baking time: 25 minutes
Serves: 8
Ingredients
•
•
•
•
•
•
•
200g (1.5 cups) gluten free oats
25g shredded coconut (3 Tbsp)
100g coconut butter warmed up (8 Tbsp)
8 Tbsp agave syrup (you could try 20g Xylitol instead or 10g Xylitol and 3 drops Vanilla Stevia for less of a sugar impact)
100g brazil nuts (1 cup)
50g almonds (half a cup)
35g good quality dark chocolate (1/3 of a bar)
Instructions
•
•
•
•
•
•
•
Preheat the oven to 180 C, Gas 4 or 400 F. Line a 23cm/ 9in square tin and pre-heat it in the oven.
Mix together the gluten free oats and coconut.
Chop the almonds and nuts into chunks and break the chocolate into pieces
Heat up the Coconut butter and syrup in a small saucepan over a low heat until fully dis
solved. Stir in the coconut oats mixture. If too sticky add a little water to make the dough pliable. Add the nuts and stick bits of chocolate into the mixture.
Spread over the lined pre-heated tin to form a square, about 2 cms (0.8 inch) high.
Bake for 25-30 minutes until golden and lightly crisp.
Use the back of a knife to mark into bars. Cool completely though before cutting, because it can get a bit crumbly. They keep in an airtight container or cake tin for a few days.
Notes:
Whenever someone moves or we have a long journey ahead of us, I make whip this Chocolate granola
bars recipe out, and they are always gratefully received.
They are perfect to nibble on in times of stress and need, because the magnesium in the oats, nuts and
chocolate instantly relaxes and you’ll feel better.
These bars are not just food for your nerves though, with the essential oils in the nuts and the slow
release energy in the oats, you won’t get hungry as quickly, which makes this the perfect snack when
you can’t have a meal because you’re traveling. Infinitely better than a sickly sweet snack bar at a service
station!
99
Maca Morning Glory Smoothie (DF, F, SF, V)
This is the perfect mid-morning pick me up smoothie!
On a grey day when everything just feels overwhelming, and you are in desperate need for something
sweet. Well, on any day really
The Maca powder gives it a slight caramel flavour which makes the drink so comforting and energizing.
It goes very well with the nutty sweetness of the buckwheat.
If you add the buckwheat groats to the blender without prior soaking then they get broken down pretty
well, but the texture is not hundred percent smooth. More like fine soaked oats.
I really liked this, because the tiny buckwheat flakes bulked it up to a rich full bodied oaty yumminess.
You can still see the tiny white flakes in the photos below.
I was in fact so smitten by the funny colour and texture that I forgot to put my chlorella & spirulina
powder in, hah. Oh goodie – a green smoothie without the greens, well most greens, anyway
Don’t worry, if you don’t have Maca powder. I’m pretty sure the smoothie tastes perfectly lovely without.
But if you do happen to have it flying about – try it out.
Prep: 3 minutes Time to make: 1 minute
Ingredients:
•
•
•
•
•
•
•
2 sticks of celery
1 small apple (I used Braeburn)
1 tbsp buckwheat groats
1 tbsp flax seeds
half a tin of organic coconut milk
½ tsp Maca powder
sprinkle of cinnamon
Here’s how you make it:
•
Soak the flax seeds (and buckwheat if you like) in 3 times as much water for 15 minutes or longer.
•
Wash and chop the celery sticks and cut them into chunks that your blender can handle.
•
Peel and quarter the apple and add to the blender.
•
Add the flax seeds, buckwheat and the spices to the blender.
•
Mix everything.
•
For a smoother consistency you could grind the buckwheat groats beforehand.
100
Sports Smoothie (GF, DF, F, V)
Drink this straight after your workout, and you’ll recover from your sporty activity in no time at
all.
To be fair, once you’ve seen the health benefits of this juice, you’ll want to drink it even when you are not
exercising!
Prep: 3 minutes Time to make: 1 minute
Ingredients
•
•
•
•
½-1 cucumber
1 stick celery
2 small cox orange apples (or 1 green apple & 1/2 orange)
1 slice organic lemon with rind on
Here’s how you make it:
Juice or blend all the ingredients and either drink straight away. Or store in a juice flask. The lemon
helps prevent oxidising and keeps your juice fresh for longer.
Health Benefits – It’s jam packed with Vitamins & Minerals!
This juice is super rich in B Vitamins, Vit C, iron, potassium, bioflavonoids, beta-carotene, calcium and
folic acid.
How Can this Hydrating Smoothie Help You?
With the cooling cucumber and celery’s super cleansing properties this juice greatly helps your liver and kidneys.
•
It mops up excess carbon dioxide and provides healthy digestion.
•
The juice also replaces electrolytes that you might have lost from sweating and working out.
•
And it prevents muscle cramps by inhibiting lactic acid build up.
•
Overall it is a fantastically alkalizing juice/ smoothie, which helps with joint pain and speeds up healing in general.
•
I can hear you thinking “oh, but I need an expensive juicer to make this, and it’s so much work to clean
it afterwards and ladeda…”Stop right there – you don’t really need anything – I make my sports drink in
an ancient smoothie blender. So you can get by without a juicer. And you’ll then also only have 1 item to
clean, which is quick.
Note for Candida Sufferers:
Take more cucumber and less or no apple. Generally apple is well tolerated, especially green ones. But be
careful. It’s not worth a relapse due to the fruit sugar.
101
Frozen Blueberry Smoothie (GF, DF, V, S, F)
Prep: 3 minutes Time to make: 1 minute
Ingredients
•
•
•
•
•
•
•
•
2 handful of frozen blueberries
2 tbsp of soya yogurt or yogurt (I used sheep’s yogurt)
glass of rice milk
4 coconut milk ice cubes
dash of cinnamon
dash of lemon juice
1 tsp of agave nectar or preferably a few drops of stevia for sweetening
handful of spinach leaves
Here’s how you make it:
•
•
Fill your blender with the rice milk, frozen blueberries and coconut ice cubes.Then add the yogurt, spice, lemon juice (and spinach if using).
Sweeten to taste
102
CAKE
1 cake to rule them all...
Apple Almond Cake (DF, GF, F, V and grain free)
This cake is truly delicious -- light and more-ish. The soya flour gives it a sweet flavour that
complements the sharp fruitiness of the apples very well.
The caramel crunch of the almonds rounds this moist tea cake off beautifully. And as the icing of the
cake you must try whipped coconut cream with a sprinkle of cinnamon.
Such a healthy festive treat. And it even freezes well. Not that you’ll have any leftovers.
But you could always make double the amount and freeze a few slices for a rainy day, couldn’t you.
Note for Candida Sufferers:
This is a Special Occasion Cake. You know how conscious I am of sharing cakes and desserts. Simply
because I don’t want to tempt those of my readers who are still struggling with Candida. It is hard
enough to stick to the Candida Diet as it is. Having said that – I do want to share this cake with you. So I
hope it agrees with you! For long term Candida sufferers there just has to be an occasional sweet treat on
the horizon. This is one of them!
Prep: 3 minutes Baking time: 50 minutes
Ingredients
•
1/2 cup (110g) coconut oil (or unsalted butter)
•
1/2 cup (110g) sweetener (I used xylitol. If using stevia you might need less as stevia is sweeter)
•
1/2 cup (110g) organic soya flour
•
1 tsp baking powder
•
1/2 cup (110g) ground almonds
•
1/2 cup (110g) flaked almonds (plus some for sprinkling on top)
•
2 1/3 cup (300g) Bramley apples (peeled, quartered and sliced)
•
4 eggs (or 4 tbsp of soaked flax seeds in equal amounts of water)
•
1/2 tsp Cinnamon (optional)
Here’s how you make it:
•
•
•
•
•
Preheat the oven to 180 degrees Celsius (350 F/ Gas 4).
Grease a 23cm (9in) cake tin
Blend the coconut butter and sweetener creamy. Stir in the flour, baking powder and ground almonds.
Then chop a good handful of the apple slices into small pieces and add them alongside the flaked almonds to the dough mix (they soften when baking, don’t worry!)
Now fold the eggs into the cake mixture with a spatula.
103
•
•
Take the cake tin out of the oven. Line it with baking paper and fill the cake batter on top, spreading it equally. Lay out the remaining apple pieces on top of the dough in circles, starting near the cake rim, working your way towards the center. The more apple pieces you can get in, the better the taste.
Last but not least sprinkle some cinnamon and flaked almonds on top. Bake for 25-30 minutes (until the top is golden and set). Then cover the cake with tin foil and bake for a further 25-30 minutes (until a skewer inserted in the center comes out clean).
It is an all round lovely cake that is diabetic friendly and low GI.
I spotted the original cake that I adapted to make Candida diet friendly in Patrick Holford’s book
“Say No to Diabetes”.
So be safe in the knowledge that this cake won’t mess with your blood sugar levels as much as
traditional cake would. Try not to eat it in the first 4-6 weeks of the Candida diet though. It’s best
enjoyed once you’re well on your way with stage 3 and you can already tolerate small amounts of
carbs, being it yeast free breads, starchy vegetables or apples.
But be assured, as far as cakes go, this is one of the healthiest and easiest to digest. With full apple
& almond flavor, without missing out on sweetness. Just like a “normal” cake (you know, meltingly
sweet with a sponge-cake-y texture). The apple in the dough prevents it from drying out and also
magically softens the almond flakes, giving it a subtle sweetness. You wouldn’t know that it has no
sugar in it.
RECAP OF STAGE 4
You can finally start sweetening your foods again, a little.
Agave nectar, dates, raisins, coconut sugar, molasses, apple spread, maple syrup… all good… But
keep it to a minimum and only enjoy sweet foods at special occasions.
The same applies to chocolate, coffee, dairy, fruit, yeast and cheese, glass of wine, white rice or pasta.
Yes, you can have small amounts of these foods every now and again when you are symptom free.
But not regularly yet.
On a daily basis stick to mostly unsweetened (Candida safe foods) and at the weekends perhaps treat
yourself to a piece of cake or pancake sweetened with vanilla Stevia and Xylitol or a green smoothie
with a little fruit - that way you’ll ensure that your immune system is going strong and you won’t get
any Candida relapse. I’ve had three in my time. So I know what a fine line there is between getting
away with a little sugar here and there and causing the typical Candida symptoms.
It’s best to carry on with the diet for several months after you are symptom free, ideally a year. And
do re-introduce foods one at a time, very gradually, so in case you do react to them you can quickly
get the outbreak under control by following the strict diet and taking stronger Probiotics and natural
medication.
104
Congratulations! You’ve made it through the diet.
I hope you can see now that the diet is manageable and you could easily follow it a bit longer if you
wanted to. Not because you have to. But because it has become your new way of living.
A way of eating that gives you more energy than you’ve had in a long time. You feel so empowered
in fact that you actually don’t want to go back to your old way of eating as that lowered your
immune system.
You have a much better understanding now what foods are good for you and how to make super
quick nourishing meals.
Please do let me know how you’re getting on, what recipes you liked and which ones have become
regulars on your table.
And if you’ve spotted any typos or incorrect measurements, descriptions or I missed something in
one of the recipes then please let me know. This is my first ever recipes book. Chances are there’ll be
something I can improve.
Make sure you’re on my email list to Claim Your FREE Meal Plan, Resources List (and Secret
Bonus ;-)-- go to http://candidadietplan.com/4weekly-meal-plans/weekly-meal-plans -- And get
my latest recipes, health tips and updates emailed to you for free.
I’m also sharing tasty recipes from other blogs that caught my eye over on Facebook at
https://www.facebook.com/CandidaDietPlan
and on Pinterest at http://www.pinterest.com/sandraboehner/
If you’re on twitter, I’d love you to tweet me that you read my book @candidadiettips :)
You are taking your health into your own hands - you’re awesome! Let’s connect!
If you found my recipes collection useful, please go to the book on Amazon and “leave a review”,
that would help me in a big way.
105
Monday
Sesame Bread
+ Cabbage
Stir-fry
Avocado
Chicken Soup
w quinoa or
brown rice,
beans &
Sesame bread
Hummus, red
pepper &
celery
Salmon & veg
Menu
Breakfast
Snack
Lunch
Snack
106
Dinner
Butter beans
curry with
Sesame
bread &
salad
Avocado
Bone broth
Small
pancake
with green
veggies
Wednesday
Coconut
Rice
Rice pasta with Ü-delish stirbell pepper
fry with
sauce
shrimp or
veg &
garbanzo
Veg incl. sweet
potato with
flax oil, salt
&pepper
Chicken Soup
w quinoa or
brown rice,
beans &
Sesame bread
Hummus, red
pepper &
celery
Tuesday
Sesame Bread
+ Cabbage
Stir-fry
Ü-delish stirfry with
shrimp or veg
& garbanzo
Rice cake
with veg
topping &
Spicy
Chickpeas
Borlotti
Beans Pasta
Bake
Bone broth
Creamy
Calmer
Smoothie
Thursday
Teff Toasties+
Cabbage Stirfry
Yogurt with
coconut
German
Lentil Soup
w pancakes
Almond
Cinnamon
Toasties
with almond
butter
Saturday
Ground Rice
Pudding
Tuna steak
with Salsa
Cabbage
rolls with
salmon &
bone broth
Veg incl.
Almond
sweet potato butter dough
with flax oil, balls
salt &pepper
German
Lentil Soup
w Sesame
bread
Friday
Teff
Toasties+
Cabbage
Stir-fry
Spicy
Chickpeas
WEEKLY MENU PLAN – STAGE 3 (LOW CARBS) - WEEK 1
Roast
Chicken, veg
& oven
potatoes
Sugar free
Carrot cake
with carob
sauce
Chia
Pudding
Bone broth
Coconut
pancakes
Sunday
Kedgeree
MENU PLANS
107
Chicken
Curry with
veg &
coconut rice
Dinner
Veg with Flax
oil, salt
&pepper &
roasted
seeds
Cavolo Soup
with Psyllium
bread
Salad
Nicoise
(pimped
version)
Cavolo nero,
cannellini &
roast
chicken soup
Avocado
Bone broth
Tuesday
Cabbage
Stir-fry
&Sesame
Bread
Hummus,
celery & red
pepper
Monday
Cabbage
Stir-fry
&Sesame
Bread
Rice cake
with tuna &
cucumber
slices
Bone broth
Snack
Lunch
Snack
Menu
Breakfast
Thursday
Cabbage Stirfry & Quick
bread
Veggie broth
Avocado
Soba
Salmon & Veg
noodles with
Sesame
Cabbage stirfry
Hummus,
celery & red
pepper
Oven Omelet Veggie &
with Psyllium bacon quiche
Oatmeal
bread
Veggie broth
Sugar free
Green Calmer
Carrot cake
Smoothie
w coconut oil
Wednesday
Millet
Porridge
Sweet lamb/
beef
bolognese
Watercress
Soup
Almond
butter dough
balls
Saturday
Ground Rice
Pudding
Vanilla Chia
Pud
Veg with Flax Homemade
oil, salt,
Popcorn
pepper &
spicy
chickpeas
Veg & bacon Savory
quiche
pancakes
with greens
& curry
Sauce
Salad with
grilled turkey
strips
Watercress
Soup
Spicy
Chickpeas
Friday
Cabbage
Stir-fry &
Quick bread
WEEKLY MENU PLAN – STAGE 3 (LOW CARBS) - WEEK 2
Tummy
friendly pizza
with
artichoke
feta tom
Yogurt with
puffed rice&
cinnamon
Squash
Muffin
Sweet lamb/
beef
bolognese
Bone broth
Crunchy rice
milk snack
Sunday
Granola
Oatmeal
Porridge
Enjoyed this read...?
Well, if you haven’t already done so you might want to grab the first
in the series of the Sugar Free And Easy Candida Diet Recipes. Book 1
contains a selection of quick super low carb (and anti-inflammatory)
meals) that will aid you in your journey back to health!
Just search on Amazon for...
Sugar Free And Easy Candida Diet Recipes Book 1
108
INDEX
A
Almond Cinnamon Toasties 32
Almond Millet or Quinoa Porridge 25
Almondy Millet Pudding 74
Apple Almond Cake 103
Apple and Pear Snack Bars 98
Apple Crumble 96
B
Baked Potato with Salad and Tuna 62
Borlotti Beans & Swirly Pasta bake 66
Bread (Almond Cinnamon Toasties) 32
Bread (Paleo Bread Rolls) 31
Bread (Psyllium Oatmeal GF Bread) 35
Bread (Sesame Soda Wholegrain Sandwich Bread) 33
Bread (Teff Bread Toasties) 30
Breakfast Recipes 19
Butter Beans Curry 56
C
Cake (Apple Almond with Xylitol-- GF, V) 103
Cake (Layered Vanilla Cake) 82
Cake (Sugar free Carrot & Walnut Cake/ Bread Recipe) 80
Carob Cocoa Spread 88
Carrots 17
Carrot & Walnut Cake/ Bread Recipe 80
Cavolo Nero, Pork & Canellini Beans soup 44
Cheese Cake 85
Chia Oats Breakfast Pudding 75
Chicken & Quinoa Soup (Stage 3) 45
Choc Granola Bars 99
Cinnamon & Almond Butter Spread 87
Cinnamon Butter 88
Cookies (Macadamia nut with Xylitol & Stevia) 97
Creamiest Curry Sauce Recipe 71
Creamy Green Detox Soup 43
Creamy Hot Brown Rice Cereal 22
Curried Cabbage Stir Fry 21
D
Desserts (stage 3 carbs) 74
Desserts (stage 4 sweetened) 96
Drinks 14
E
109
Egg & Dairy free Quiche with Tofu 54
F
Frozen Blueberry Smoothie 102
G
German Lentil Soup 60
Gluten free Pie Crust/ Pastry 38
Grain free Cake (Apple Almond Cake) 103
Granola style overnight Coconut Oatmeal Porridge 23
Greek Salad 46
Ground Rice Pudding 75
Guidelines and tips for stage 3 (low carbs) 16
Guidelines and tips for transition out of the diet 92
H
Homemade Popcorn 77
How to make Hummus at home 47
K
Kidney Bean Stew with Coconut Rice 56
L
Lemony Syrup 87
Lentil Soup (German recipe with Green Lentils and Bacon) 60
Lentil Soup (Healing Red Lentil Soup) 57
Lunch Box Ideas for the Office or when on the Go 67
M
Macadamia Coconut Cookies 97
Mixed Raw Salad with Hummus 47
Muffins 83
My Staple Spice Mixture for Marinating Chicken or Fish 73
O
Oat Cookies 97
Oatmeal Bread 35
Oatmeal (Porridge) 24
P
Paleo Bread Rolls 31
PALEO Pizza Crust (Almond flour Pizza Crust) 40
Pancakes 26
Pancakes with Green Asparagus or Green Beans & Mild Curry Sauce 70
Pasta & Noodle Dishes 63
110
Pizza Base 40
Pizza Topping 61
Psyllium Oatmeal Bread 35
Q
Quiche (Broccoli & Chicken or Leek & Bacon) 54
Quiche (Simple Veggie Filling) 53
Quiche with Tofu (Egg & Dairy free ) 54
R
Recap of stage 3 91
Recap of stage 4 104
Rice Cake Variations (with different toppings) 77
Rice Pasta with Bell Pepper Sauce 64
S
Salad Niçoise (Pimped Version of Tuna Salad) 46
Salad Niçoise (Simple Version of Salad with Tuna & Boiled Egg) 46
Scrambled Eggs and Bacon with Toast 50
Sesame Cabbage Stir-Fry 64
Sesame Soda Bread 33
Simple Stir-fried Veggies with Soba Noodles 63
Smoked Salmon and Soft-Boiled Eggs Sani 49
Smoothie (Frozen Blueberry) 102
Smoothie (Maca Morning Glory) 100
Smoothie (Sports Smoothie) 101
Snack Bars (Apple and Pear) 98
Snack Bars (Choc Granola) 99
Snacks (Stage 3 Carbs) 76
Snacks (Stage 4 Sweetened) 97
Soba Noodles with Simple Stir-fried Veggies 63
Soup (Cavolo Nero, Pork & Canellini Beans ) 44
Soup (Chicken, Quinoa, Potato & Beans) 45
Soup (Creamy Green Detox) 43
Soup (Watercress) 42
Speedy Butter Beans Curry 51
Spelt Pie Crust/ Shortcrust Pastry 37
Spice Mixture for Marinating Chicken or Fish 73
Steamed Vegetables with Pumpkin seed oil 76
Sugar free Carrot & Walnut Cake/ Bread Recipe 80
Sugar free Squash Muffins 83
Sweet Lamb (or Beef )Bolognese 89
T
Teff Bread Toasties 30
111
The Creamiest Curry Sauce Recipe Ever! 71
U
Über delicious stir-fry 68
V
Vanilla Chia Oats Pud 75
Vanilla Pudding Creme 86
Veggie Omelet 52
Veggie Quiche 53
W
Watercress soup 42
Wholegrain Rice Pudding 75
Wholegrain Wheat Pie Crust/ Shortcrust Pastry 37
Y
Yogurt 74
112
113
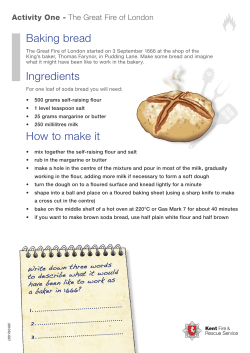


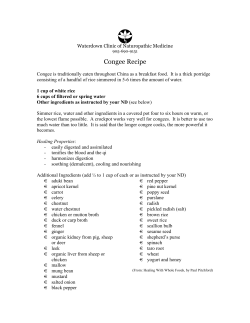


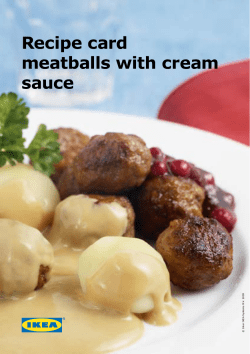

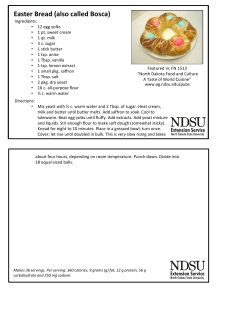
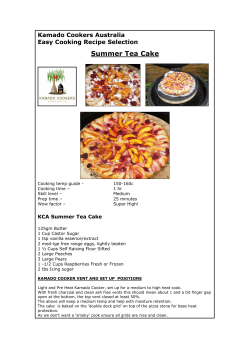
© Copyright 2026