
C OSTUMING
The Virtual Costumer
the costuming magazine of the
Silicon Web Costumers’ Guild
COSTUMING THE UNIVERSE OF
The Virtual Costumer Volume 12, Issue 1
Copyright © 2014 Silicon Web Costumers’ Guild
-1ISSN 2153-9022
February 2014
Table of Contents
Silicon Web Costumers' Guild
President’s Message
From the Editor
Feature Articles
The Well-Dressed Doctor
An essential guide to costumes of all the Doctors
The Cybermen – Nightmare in Silver
Learn how to create your own army, both old and new
Recreating the “Impossible Astronaut”
A NASA connection was the impetus for this costume
How-To
The Third Doctor's Sonic Screwdriver
Discovering the history and design for an iconic prop
Madame Vastra: Making Latex Prosthetics in Your Kitchen
Learn to make the prosthetics for this Victorian alien
Event Report
Virtual Postcards from Gallifrey One 2014
All about the event, the people and the costumes
Short Subjects
Doctor Who Experience
An exhibit in Cardiff Wales explores the series history
Interview with the First Doctor Who Costume Designer
Costuming for the First Doctor wasn't always easy
Instructions Online for TARDIS Blue Envelope
Spruce up the invitations for your next party or picnic
Fantasy Makeup: The Doctor Who Universe
A website with female fantasy and sci-fi makeup
Parting Shot
A photo that's just too good not to use
Upcoming
Calendar of Events
Ongoing Events
The Virtual Costumer Volume 12, Issue 1
Copyright © 2014 Silicon Web Costumers’ Guild
The Virtual Costumer (ISSN 2153-9022) is a publication of the Silicon Web
Costumers’ Guild (SiW), a non-profit, volunteer-run chapter of the International
Costumers' Guild (ICG)
3
4
Copyright © 2014 Silicon Web Costumers’ Guild. This work is
licensed under a Creative Commons Attribution-NoncommercialNo Derivative Works 3.0 United States License. Images, and
material related to novels, movies, exhibits, or otherwise owned by others, remain
the property of their respective copyright holders.
6
15
Authors with "*" beside their names are Silicon Valley Costumers' Guild members.
29
33
41
46
53
53
About the Cover
54
When the seventh series of the BBC television
program Doctor Who premiered in 1970, it was
the first to be made in color, and the old blackand-white opening title (left) had a complete
make-over too. Like the original, the new title
used “howlaround” feedback of a TV camera
pointing at its own monitor. This one had red
and green swirling flames, climaxing in a new
logo design that reflected the psychedelic feeling of the era. Our colorful cover
ushers in an issue devoted to costuming for this amazing series, which celebrated
its 50th anniversary in November 2013.
54
55
56
57
-2ISSN 2153-9022
February 2014
Silicon Web Costumers' Guild
Silicon Web Staff
President:
Kevin Roche
Vice-President:
Elaine Sims
Treasurer:
Bruce MacDermott
Secretary:
Deb Salisbury
Website Editor:
Kathe Gust
Virtual Costumer Editor
Philip Gust
President’s
Message
Kevin Roche*
Fortunately, I just finished
building a time rotor core, because it’s one
week after “Gallifrey One” and I was
supposed to deliver this column the weekend
of the convention. So wibbly-wobbly, timeywimey and allons-y, I can still turn it in on
time!
I’ve been watching Doctor Who since
it first starting showing on PBS in the SF
Bay Area, and Gallifrey One is the only
media convention Andy attend. DW is also
one of the only shows I’ve constructed
media recreation costumes for. The first was
the Vardans from The Invasion of Time
serial, who on screen appeared as strange
shimmering force fields. We accomplished
that by cello-taping flat bags of
superinsulation (very thin aluminized Mylar,
thin enough that we could see through) open
at the bottom for us to walk.
There is something about Doctor Who
that inspires my wickedly depraved
costuming sense of humor. A grey silk
housecoat in a community closet became the
frock coat in a
monochromatic version of
“The Fourth Doctor as seen
on a very old, very small
black and white television
set,” featuring a 37-foot
long scarf knitted for me
on very large needles by
Jennifer Tifft. From the
new series, there is
Captain Jack Harkness,
a character so appealing
that I actually wore
wool (itchy!) and
sprayed my hair black
to more effectively
play his omnivorous
rake.
And then
there was the Tiki
Dalek (right), the construction of which I
detailed in a construction diary at the Project
Dalek Forum (yes, an entire web community
of Dalek Builders) and wrote about as well
in the March 2011 issue of Yipe! magazine.
Kevin Roche's Tiki Dalek. Photo: Heather E. Croft.
The Virtual Costumer Volume 12, Issue 1
Copyright © 2014 Silicon Web Costumers’ Guild
-3ISSN 2153-9022
The Tiki Dalek* (TDK) is one of my
few “creature” costumes, and one of my
favorite to play, because its general zaniness
(and island music soundtrack) seems to put a
smile on everyone’s face. This year I finally
thought to trundle him out to the poolside
oasis at the LAX Marriott for some photos
amongst the palms (alas! the cabana bar was
no longer there, so we could only pretend to
sip frosty tropical cocktails) and
rediscovered his Pied Piper
nature. An impromptu conga
line formed behind TDK as
soon as he entered the pool
deck, which proved helpful
in getting him up and over the
little bridge, and I was quickly surrounded
by a dozen dancing children. TDK
actually managed 30 minutes of banter
with the 8-and-under set before they
wandered off and I could pop the hatch
and change into my trunks for our
photo shoot.
Gallifrey One is actually one
of our favorite events and very
costume and cosplay friendly, and
one of the few places where we’ve
observed a more traditional fan base (from
the original series) melding successfully
with a much younger generation
(discovering DW with the recent reboot).
* I should also note that I’ve deployed just the
bottom half of TDK to execute a “Tiki Davros”.
February 2014
The wardrobe ingenuity ranges from
screen-accurate cosplay (and crossplay) to
creature costumes to wild concoctions like
the “femme” versions of the Doctor, a
plethora of Tardis- and Dalek-inspired
dresses, and wild wackiness like the Tiki
Dalek or Bryan and Mette’s “disco mode”
for their Ogri (stone monolith creature from
“The Stones of Blood”).
This year Andy and I stretched our
comfort level and produced an exhibitiononly masquerade entry that was all
assembled store-bought clothing instead of
constructed costumes (to create Mike
Brewer and Edd China in a mashup of
Doctor Who with Wheeler Dealers, an
obscure but fun British car-restoration
reality series). This foray into something
more on the cosplay side of the game was
great fun, and we expect Mike and Edd (and
the Time Rotor) will make a number of
repeat appearances.
From the Editor
Philip Gust*
The BBC television
series Doctor Who is a cult
phenomenon in the sci-fi and cosplay
communities. It began as a family show that
first aired in November, 1963 in a serial
format. The theme of time travel allowed the
show to explore scientific ideas and famous
moments in history. It was to have alternated
between science and history, but eventually
gravitated to sci-fi as the historical episodes
proved less popular.
PS. Conventions coming up! Include
Costume-Con in Toronto at the end of April,
from which Andy and I will be dashing
directly to Des Moines where we’re
delighted to be Fan Guests of Honor.
The Virtual Costumer Volume 12, Issue 1
At first just an eccentric alien time
traveler, the Doctor explored time and space
in an unreliable time machine called the
TARDIS (time and relative dimensions in
space) that looked like a blue police call box
outside, but was much larger inside. Only
later did the writers develop the storyline of
a renegade Time Lord on the run.
Regeneration was also introduced later
because William Hartnell, the first actor who
portrayed the Doctor, was in poor health and
the part had to be recast. Each incarnation
had his own wardrobe that kept elements
from previous ones, while introducing new
and often more fanciful elements.
I hope you enjoy The Virtual
Costumer’s dive into the Time Vortex!
PPS. Are you attending LonCon3 (This
year’s Worldcon at the Excel in the London
Docklands)? Andy and I are in charge of the
Costume, Cosplay and Style area of the
programme, and hope to make use of your
talent and ideas. The first step is to fill out
the programme volunteer survey
The show was famously low-budget,
and production staff were always scrambling
for scripts, sets, costumes, and props that
kept them under the BBC's strict budget. It
resulted in some very creative story lines,
using weirdly re-dressed BBC sets (in part
of one story no set at all), costumes from
BBC wardrobe or put together by the actors,
and an assortment of recycled prop gizmos.
The first twelve incarnations of Doctor Who. Photo: BBC.
-4-
Clothing worn by the Doctor, his
“companions,” and assorted villains became
the grist for generations of children who
“played” Doctor Who, grew up as sci-fi
fans, and eventually attended conventions in
recreations of the show's costumes and its
props, including the Sonic Screwdriver. As a
kid growing up in the 1960s, I remember
watching black and white episodes that were
imported from the UK as filler. William
Hartnell and especially Patrick Troughton
were the Doctors that I knew.
February 2014
The show also featured alien creatures.
The Doctor's best-known nemeses, the
Daleks, first appeared in a 1963 script that
was rejected because of a BBC ban on “bugeyed monsters.” With no other script ready,
the show was forced to use it, introducing
the aliens that became the series' most
popular monsters, and ushering in the BBC's
first merchandising boom. This cleared the
way for a menagerie of creatures, including
the robotic Cybermen and an ancient earth
race, the Silurians, which offered a rich vein
of new material for costumers to explore.
This issue of VC explores some of the
costuming, the prop-making, and the
creature-building opportunities that this
venerable series has provided over its first
fifty years.
Leading off is Christopher Erickson, a
renowned cosplayer and a leading Doctor
Who character re-enactor, who talks about
the essential elements every costumer needs
to recreate his or her own favorite Doctor
from head to toe.
Next, Stacy Meyn and Tracy Newby
introduce us to a “nightmare in silver,” the
Cybermen. With a long pedigree in
recreating everything from Storm Troopers
to assorted aliens, they offer an introduction
to these fearsome menaces, and present
several projects that show how you can
create your own from either the classic or
the new series.
With a family background in NASA
and the U.S. Space program, it was only
natural that Jennifer Wylie would take on the
The Virtual Costumer Volume 12, Issue 1
mission of recreating “The Impossible
Astronaut” from the episode of the same
name. Her costuming odyssey and the
techniques she developed make for some
fascinating reading.
I have a long-standing interest in propmaking, so what could be a better as a
project than to recreate the classic Sonic
Screwdriver, used by the Third, Fourth and
Fifth Doctors? The biggest challenge wasn't
construction, but the process of researching
it and working out its shape and dimensions.
The essential techniques that I illustrate in
my article can be used to reproduce many
other movie and TV props as well.
Madame Vastra, was one of the more
popular aliens in the Doctor Who series.
Awakened from hibernation in the 19th
century when her lair was disturbed during
construction of the London Underground,
she became a part of London society and a
consulting detective to Scotland Yard.
Sahrye Cohen describes how she made the
costume, and created the complex
prosthetics for the character in her kitchen,
with little prior experience.
With the Gallifrey One convention in
Los Angeles barely over, we are pleased to
present a series of “Virtual Postcards” from
one of the premier Doctor Who creature
cosplayers, Mette Hedin. Mette gives us an
insider's view of the venue, the people, and
the costumes at one of the largest Doctor
Who conventions. Her report includes hall
costumes and some of the best entries from
the costume masquerade.
-5-
Here is a quick preview of what is
upcoming in VC. The May 2014 issue will
take us to the Wonderful World of Disney
costuming. The many colorful characters in
Disney's cartoon and live-action classics
provide an opportunity for imaginative and
occasionally goofy takes on some of the
most iconic costumes anywhere.
The August 2014 issue will be all about
embellishment techniques and “Wearable
Arts,” which incorporate unusual materials
and construction techniques to create
wearable works of art, and provide
costumers with new avenues for creativity.
I'm pleased to announce that the
November 2014 issue is “Odds and Ends,”
which includes a variety of costuming topics
that don't always fit into a single theme. This
issue will include a fascinating variety of
articles on both common and unusual
aspects of costuming, by some of the most
interesting new and veteran VC authors
See the Upcoming Issues page of the
SiW website for details. Now is a great time
to start writing for VC, and share what you
know and love with your fellow costumers.
Well, that's it for
this issue. It's time for
me to get back in the
TARDIS and go on to
my next adventure!
Now where did I put
that key?
February 2014
Feature
The WellDressed Doctor
“Revelation of the Daleks”), he has worn
clothing that has always been different for
the place and time he was in.
Christopher
Erickson
This article will present the basic
outfits that each Doctor is known for with
some resources for putting together the
costume.
Here is an essential
guide to the costumes and accessories for
all the incarnations of Doctor Who by a
renowned cosplayer of the genre, including
hints on where to locate those hard-to-find
items.
With the recent 50th anniversary of
Doctor Who, there has been new interest in
recreating the costumes. With both doubledigit Doctors and a number of companions,
there are wealth of costumes to recreate. I
am going to focus on the most typical outfits
for each Doctor and a general outline for the
different types of companions (people from
the past, the “present” and the future).
The Doctor’s outfits (except for the
Ninth Doctor, Christopher Eccelston) have
served to highlight that he is a man from
another time and another world. His outfits
have never quite fit into the time period he
was on nor the planet he has been on. Except
for a few times when he has changed
clothing to match the era and planet he was
on (such as when he wears a cowboy hat in
“The Gunfighters” or when he wears a blue
cloak as was custom on the planet Necros in
The Virtual Costumer Volume 12, Issue 1
Copyright © 2010 Silicon Web Costumers' Guild
The First Doctor
The very first time we meet The
Doctor, he is hiding out in a scrap yard in
1963 London. His outfit is that of an
Edwardian or Victorian gentleman, not the
suits or sport coats that were in fashion even
for older men at the time. As recently
described on the TV movie about the first
few years of the show, An Adventure In Time
and Space, the outfit could be described as
similar to the Wizard of Oz.
The basic outfit is dark checkered or
houndstooth pattern pants (grey as the basic
color), a wing-tipped collared shirt (or a
shirt with a smaller collar), a vest (a
houndstooth pattern, checkered or solid
color in beige or cream would work best),
black frock coat and ribbon tie are the basic
items that are needed. Shoes are simply
black dress shoes. The pants and vest can be
located at thrift stores or in most men’s
departments of any store that sells clothing.
The wing-tipped collar shirt could be
purchased at any tuxedo store or online
tuxedo shirt sellers. I purchased mine at Buy
The first eleven Doctors: William Hartnell (1963=1966), Patrick Troughton (1966-1969), Jon Pertwee (1970-1974),
Tom Baker (1974-1981), Peter Davison (1981-1984), Colin Baker (1984-1986), Sylvester McCoy (1987-1989, 1996),
Paul McGann (1996), Christopher Eccleston (2005), David Tennant (2005-2010), Matt Smith (2010-2013).
-6ISSN 2153-9022
February 2014
For Less Tuxedo. A frock coat can be found
at any seller of Victorian fashion. I
purchased mine through the Gentleman's
Emporium. The ribbon tie can just be a
simple black ribbon purchased from any
fabric store or could be made from a strip of
dark blue or black satin fabric.
Essential accessories for the
First Doctor are a cane
and monocle tied with
black ribbon. The
cane is of the twisted vine
style and the monocle is worn
around the neck. Other
accessories can include a
pocket watch, a pen light and a
handkerchief. For the cane,
check any stores that sell
canes (such as a
walking store) or
online stores or even
Ebay. A monocle or
pocket watch can be
purchased at
Gentleman's
Emporium or Ebay. A
penlight can be found
at any hardware store
or car parts store.
Any handkerchief
will do.
Right: William Hartnell as the first
Doctor (1963-1966). Above: First
Doctor's signature spiral cane with
elk horn handle.
The Virtual Costumer Volume 12, Issue 1
The Second Doctor
The Second Doctor was described
as a “clown” (by the First Doctor) and a
“space hobo.” His outfit reflects his
foppish nature and behavior. The main
look is a pair of baggy black-andwhite checked pants, light blue
button shirt, polka-dot bow tie
(pinned onto the shirt), and
baggy cutaway coat (also
known as a morning coat).
A paisley-patterned scarf
pinned to the
handkerchief pocket of
the coat is the main
accent that is
necessary for
the look. Basic
dress shoes
that are slightly
scuffed will
complete the
look. The one
item that is not
always seen is the
suspenders that he wears.
It is a red pair with
yellow fruit and flowers
on them. A basic red
pair will work.
Resources for the
shirt and scarf can be
any thrift store or store
that sells clothing. The
checkered pants can be
found at thrift stores or traditional
chef’s pants with a
-7-
button closure can be substituted. There
are numerous sites for chef’s pants,
but three good resources are Chef Works,
Happy Chef Uniforms, and Chef
Uniforms. Make sure that you buy a pair
that is one to two sizes larger than what
you would normally wear. The
cutaway coat can be found at
tuxedo sites such as Buy For Less
Tuxedo and Gentleman's
Emporium. Another good source
is to find out when a sale
happens at a tux rental store.
Before purchasing the coat,
make sure to identify your size
and buy one or two sizes
bigger to get the proper baggy
look. A basic bow tie will
work. Cut off the collar band
and sew on a safety pin to the
back. A good source for
suspenders is Suspenders.
The one required accessory is
the light blue recorder. Other
accessories include his sonic
screwdriver (he was the first one
wield it) and the 500-year diary. The
recorder can be found at most music
stores or on Ebay. The sonic
screwdriver is just a basic
penlight that was mentioned
earlier in the article. The 500-year diary is a
licensed product as a journal or notebook
and is available at Amazon and Ebay.
Patrick Troughton as the second Doctor (1966-1969) –
shows tie, handkerchief and checkered pants.
February 2014
The Third Doctor
The Third Doctor was a gadget lover
and more action- oriented. With the show
finally being broadcast in color for the first
time in 1970, he was given a colorful
dandyish wardrobe. The outfit is best
described as a 1970s mod fashion with
inspired Victorian touches. He wore a
velvet smoking jacket of varying colors,
large, frilled shirts (both the chest and the
cuffs were frilled), and often bow ties. The
pants were also varying, but were
more subdued compared to the rest
of the outfit. He was also
known to sport a short opera
cape with a colored
lining.
The velvet smoking
jacket can be found at thrift
stores or at the men’s
department of most stores
when in season. Victorian
smoking jackets can also be
found at the Gentleman's
Emporium or at other
Victorian clothiers. Vintage
1970s tuxedo shirts can be
found at some thrift stores or
at costume stores as well as
on Ebay or Amazon. A tailor can
also design one for you if you are
looking for a specific color. The
cuff ruffles might have to be
created by a tailor as well if they
Jon Pertwee as the third Doctor
(1970-1974).
The Virtual Costumer Volume 12, Issue 1
are not part of the shirt if you are looking
for more authenticity. The larger bow ties
are hard to find, but they might be located
in a vintage clothing store or thrift store.
Costuming stores or tuxedo stores might
also be a location to find them. If
an oversized bow tie can’t be
located, a standard bow tie in
a contrasting color such as
black, brown or blue
would suffice. Pants can
be any type of dark
dress slacks or pants.
Shoes should be dress
shoes in black or
brown. The
opera cape
could be made
if a pattern is
found, but I had
difficulty
locating a
pattern. You might
want to have a
friend help draft a
pattern. Another
idea is to purchase
a Victorian-style
opera cape and
have a lining put
in and the cape tailored
shorter.
The main accessory is the third
Doctor’s Sonic Screwdriver (it has
the yellow-striped stem). This
accessory can be found on Ebay and
Amazon
-8-
The Fourth Doctor
The Fourth Doctor had the most
bizarre costume to reflect
his wacky outlook on life.
His outfit has been
described as Bohemian.
The main part of the
outfit was the multicolored scarf that he was
known for wearing. The rest
of the outfit went through a
number of changes while
retaining the overall look. The jacket
he wore could be a reddish half-coat
or blazer of a softer material or a
brown or grey overcoat. He usually
wore a white collared shirt with
either a red cravat or a black
Edwardian tie with a brown
square patterned vest or a green
scarf as a tie with a brown
argyle cardigan sweater. Pants
and shoes could widely vary, so grey
or brown khaki or wool pants would
work best with brown boots or dress
shoes. Resources for most of the
clothing items would be thrift stores,
men’s departments or Victorian
clothiers.
The scarf has a number of
resources. For those who want to knit the
scarf, Doctor Who Scarf and Witty Little
Knitter are the best resources for patterns
and explanations of the various scarfs.
Knitting-and is another site with just the
Tom Baker as the fourth Doctor (1974-1981).
February 2014
basic pattern in a text format. A basic search
for “doctor who scarf pattern” on Google or
Yahoo! Search will yield a number of other
results that are helpful as well.
For those who do not want to knit,
there are two choices: The officially licensed
BBC replica at Lovarzi (this is a UK
website, so shipping will be from the UK)
and the replica 12-foot scarf available from
Amazon and ThinkGeek among other
places. If a “close-enough” look works, you
can find sellers of available multi-colored
scarfs in the proper length. The basic colors
would have to consist of brown, tan and red.
The amount of accessories for the
Fourth Doctor
is staggering.
The basic
accessories would
be a bag of jelly
babies and the
sonic
screwdriver.
For jelly
babies, you can
check candy
stores such as
Powell’s Sweet
Shoppe or
places that
carry British
candies or purchase them from specialty
online stores such as JollyGrub or the
English Tea Store. Put the jelly babies in a
white or brown paper bag that is cut in half
and the top rolled down.
The Virtual Costumer Volume 12, Issue 1
The sonic screwdriver is
available at Amazon or Ebay (choose
the one without the yellow stem or do a
keyword search for “fourth doctor
sonic screwdriver”). Other
accessories that were
common to this Doctor
are a plain wooden yoyo and a large battered
brown felt hat. A
wooden yo-yo
can be found
at small toy
stores or
online.
The felt
hat can be found at
any store that sells
hats or any of the
online stores such as
Village Hat Shop or
Hats in the Belfrey.
Make sure to purchase
one with a cloth or
ribbon band instead of
the leather band. Any
number of other
whimsical items could
be used as
accessories such as
rubber balls, rubber
ducks, false
nose/eyeglass
combos and even
tools such as pliers
or wire cutters as
well.
-9-
The Fifth Doctor
The Fifth Doctor is the first of the more
complicated outfits to put together. His
outfit consists of a red trimmed tan
Edwardian cricketer’s jacket, a white
cricketer’s sweater, a dress shirt with red
question marks on the collar, red and tan
vertical striped pants and white canvas
hightop shoes. Red socks are also worn as
part of the outfit. A cricket sweater can be
found at a store where cricket supplies are
found or also at online sellers. The Doctor
Who Cosplay group on Live Journal will
also have production runs for the sweater.
The pants would likely have to be sewn
with a pattern. Patterns can be found at
Laughing Moon. The fabric would have to
have equal sized stripes. The fabric can also
be found on Spoonflower. The basic jacket
can be made from Simplicity pattern 2581
(Edwardian driving jacket) with some
modifications. Other patterns may be
available. The shirt can be any dress shirt
with a red question mark sewn into it.
The other item is a stick of celery that
was worn on the jacket lapel. There are
several places where fake celery can be
found at Barnard Ltd., Just Dezine It, and
Fake Food Online. Some modification may
be needed to include leaves that could be
found at a hobby or craft store. One could
be made out of moldable plastic, such as
Plastic Make. An example is their
celery brooch.
Peter Davison as the fifth Doctor (1981-1984).
February 2014
Accessories can include a sonic
screwdriver (the Fourth Doctor sonic
screwdriver suffices), a red cricket ball
and a fedora style roll-up panama hat
with a red band. The cricket ball can be
found at cricket suppliers. The panama
hat can be found at hat stores, fancy suit
stores or online hat sellers. The hat
band fabric can be found on
Spoonflower.
The Sixth Doctor
The Sixth Doctor has the
most complex outfit, a brightly
colored patchwork coat,
yellow pants with blue
pinstripes (this material also is
the cuffs of the jacket), a white
collar shirt with red question
marks (similar to the fifth
Doctor’s shirt), a blue or red
with white polka dot cravat tied
in a very large bow and a vest
that changed over the course of
his run on the show.
The pants and cuff fabric
can be found at fabric stores or
quilting stores or online at
Spoonflower. The cravat fabric can
also be found at fabric stores. The
vest can be a simple cardigan
without the sleeves in a dark blue
color. Another vest style is a bright
red tartan. The coat is the hardest
part to find. Replicas can be
Colin Baker as the sixth Doctor (1984-1986).
Cat lapel pin (right)
The Virtual Costumer Volume 12, Issue 1
purchased online but tend to be expensive. A
mockup of the coat can be found at the
Doctor Who Cosplay group at Live Journal.
There is a specific breakdown there that
will help explain the coat construction.
The shoes were green with orange
spats. Green boots or shoes would work.
The shoes can also be made green
with Nu Life Leather Spray.
Good tips on the type and color
of the shoe can be found at the
breakdown link. A quick
word search for “spat
pattern” provides a pattern or
DIY sites for making spats.
The necessary accessory is
a cat pin for the lapel (right). Any
pin with a cat would work but
the best choice is an enamel pin.
The other accessory is a rainbow
patterned umbrella. This can be
found at most stores that sell
umbrellas such as Target.
The Seventh Doctor
The Seventh Doctor had a
country gentleman’s look. His
ensemble consisted of a colonial style
roll-up panama hat with a red paisley hat
band and the brim rolled up, brown or
white sport coat jacket, a paisley silk
scarf under the collar and lapels of the
jacket, a yellow pullover sweater vest
with red question marks, white dress
shirt, red paisley tie, grey
houndstooth pants and saddle shoes.
-10-
First brooch was china tortoise shell cat, introduced in
“The Twin Dilemma” and worn through to “Vengeance
On Varos.” See “Sixth Doctor” on Blogspot for more info.
February 2014
The jacket, tie and pants can be found
at thrift stores. The panama hat can be
found at the previously mentioned
online hat stores. The saddle shoes
can be found at many shoe sellers.
There is a knitting pattern for the
vest at Witty Little Knitter or a
licensed replica can be bought
from Lovarzi. The Doctor
Who Cosplay group at
Live Journal will also do
production runs from time
to time for the vest.
Another way to
make the vest is to take a
knit yellow vest and use
red fabric paint to make to
question marks. The jacket
scarf can be made from a
silken red paisley fabric that
can be found at fabric stores
or a licensed replica can be
purchased from the same
site as the Fourth Doctor
scarf or the vest. The hat
band can be made from
the same fabric as the
scarf or can be
found on
Spoonflower. A
hatband can also
be made from a
headscarf by
rolling it up
and tying it.
The main accessories are a pocket
watch and his umbrella. The pocket watch is
tucked into the handkerchief pocket of the
jacket and looped over the scarf and
hooked through the buttonhole in the
lapel. A black umbrella with a curved
bamboo handle is the easiest one to find.
The orange question-mark handle umbrella
is a hard find. Some do come up
on Ebay or replica runs are done
by the Doctor Who Cosplay
group at Live Journal. One can
also be made from the
instructions found on this
group.
The Eighth Doctor
The Eight Doctor has a
Victorian gentleman’s outfit
consisting of a green velvet
frock coat, a double breasted
brocade vest, wingtip collar
shirt, simple grey cravat in
a silken material with a pearl
stickpin. Pants were simply
beige dress pants and simple dress
shoes. The frock coat may be
found at Victorian clothing sellers
or can be made from a frock coat
pattern. A good pattern can be
found at Laughing Moon.
The wingtip collar shirt
can be the same as the one
for the First Doctor. A
substitute vest can be single
breasted from Victorian
clothiers with the lapels or
Sylvester McCoy as the seventh Doctor (1987-1989, 1996) can be made from a
The Virtual Costumer Volume 12, Issue 1
modified pattern. The cravat can be a simple
strip of cloth six feet long and about six
inches wide. A stickpin can be found at
online sellers.
-11-
Paul McGann as the eighth Doctor (1996).
February 2014
The War Doctor
The War Doctor from the
50th anniversary special (The
Time of the Doctor) has a
simple outfit. It is a
battered leather
jacket (very scraped
up and destroyed), a
double breasted
dark brown
Victorian style vest,
a red and tan scarf
and black pants and
boots. The vest can
be found at the
previously mentioned
Victorian clothing
sellers, the jacket can be
found at a thrift store and
the scarf could be found
at most stores. His one
accessory is his sonic
screwdriver. This can be
found at Amazon and
ThinkGeek.
pants and black boots. The
cut of the leather jacket is
one with a fold-over collar
with lapels and buttons. A
decently worn-coat can
usually be found on
the rack at a thrift
store. The v-neck
shirt can be of
almost any solid
color (no patterns),
but red, green and
blue were the most
common colors.
Most men’s
departments have
a variety of these
shirts.
The two
accessories most
closely associated
with this Doctor was
his sonic screwdriver
and the psychic paper.
A toy version is
available in a pack for
The Ninth Doctor
both
on Ebay. The
The Ninth Doctor is
sonic screwdriver is
the simplest of the
available
separately (as
costumes. It was meant as
the Tenth Doctor’s
a back-to-basics approach
sonic
screwdriver) on
that the new show had as well as bringing a
Amazon, ThinkGeek and Ebay. A
modern look to the outfit. The simple outfit
substitute for the psychic paper is a
consists of a battered black leather jacket, a
black leather card holder with a solid
v-neck long-sleeved shirt or sweater, black
white paper sheet attached to one end
or a similar
Above left: John Hurt as the “War” Doctor (2013) – from the 50th Anniversary episode
document holder.
“Day of the Doctor.” Above right: Christopher Eccleston as the ninth Doctor (2005).
The Virtual Costumer Volume 12, Issue 1
-12-
The Tenth Doctor
The Tenth Doctor brought a geek chic
look to his ensemble. The basic was a brown
suit with pin striping (blue in color) with a
dress shirt (often blue) and brown patterned
necktie (solid red also works) and tan canvas
high-top sneakers (such as the Chuck Taylor
All-Star shoe from Converse). He
also wore a chocolate brown
trench coat with the outfit. He had
an alternative blue suit with brown
pin striping and red canvas
sneakers. For simple costuming,
an off-the-rack suit with regular
pin striping (brown with white
pin striping or blue with dark
pin striping) will work fine.
The shoes can be found in a
number of stores. A regular
brown overcoat that has a
softer material (not raincoat
material) would work for
the look. For those who are
more ambitious, a suit
pattern with a square cut to
the front would be needed for
sewing the pattern. The cloth
for the suit is available from
Spoonflower. The coat would
be made from a heavy
material (almost a suede or
nubuck weight) or heavy kona
cotton would be ideal. The
liner for the coat would be a
color to match the suit color.
David Tennant as the tenth Doctor (2005-2010).
February 2014
Accessories for the Tenth Doctor
would be the previously mentioned sonic
screwdriver and psychic paper that the Ninth
Doctor would use. Other accessories would
be rectangular-framed reading glasses or
red/blue paper 3-D glasses. Some urban
clothing stores will carry the
glasses as might costume shops or
online costume stores. The
3-D glasses can be found
on Amazon.
The Eleventh
Doctor
The Eleventh
Doctor brought an
English college professor
look to the role. The
ensemble usually consisted of
a light red or light blue dress
shirt that has a tiny square
pattern, a burgundy or navy
blue bow tie to match the
color of the shirt, a pair of
suspenders that matched the color
of the shirt as well, black jeans
with the pants rolled up to create
cuffs and high-ankle black boots.
He also wore a sport coat of
brown square-patterned Harris
tweed or grey Harris tweed with
elbow patches. The dress shirts can
be found in thrift stores or men’s
departments. The sport coats can also
be obtained from thrift stores. The
suspenders can be found at
suspenders.com (the one inch
The Virtual Costumer Volume 12, Issue 1
or ¾ inch width works best). If
you need elbow patches, a craft
or fabric store will usually have
them or you can find them at
online sellers. If you would
like to have screenaccurate shirts, the
specific fabric is available
at Spoonflower.
Accessories for the
Eleventh Doctor are his sonic
screwdriver and a gold
watch with the metal
expanding wristband.
The sonic screwdriver is
available at the usually
mentioned sites. A
cheap watch can be
found at Target,
Walmart or K-Mart. Other
popular accessories are the
red fez or the grey Stetson
hat. Both can be found at
online hat retailers or at hat
stores.
The Twelfth Doctor
The twelfth incarnation
of the Doctor premiered on
December 25, 2013 with a
pared-down outfit. Actor
Peter Capaldi, who plays
the twelfth Doctor, fronted a punk-rock band
in the 1980s. Earlier, around the time Tom
Baker succeeded John Pertwee as the
Doctor, he wrote a letter to the program's
spin-off magazine declaring his fondness for
-13-
arch-enemy The Master, played by Roger
Delgado. These influences are evident in his
outfit, which, Capaldi predominantly
shopped for himself.
A hallmark are his
brogue boots which,
according to an article in
The Telegraph, are from
the British Boot
Company,
which Capaldi
says are,
“truly and archetypically English.”
The BBC describes the coat as
a Crombie, which can refer to
either a style of coat cut in Crombie
cloth or a coat made by Crombie itself.
Crombie has denied making the coat
shown in the first appearance, and it is
more likely one custom made by
Capaldi's friend, Sir Paul Smith.
Crombie said that it did supply
several coats to the BBC costume
department for the new series,
however..
Finally, the cardigan is from the
John Smedley shop on Brook Street,
which has examples of a style
called the “Cavendish” in
midnight blue New Zealand
merino wool. It is the Derbyshire knitwear
company's best-seller in the cardigan
category.
Above left: Matt Smith as the eleventh Doctor (20102013). Above: Peter Capaldi as the twelfth Doctor
(2013-present).
February 2014
A photograph on the io9 website
(below) shows a startling comparison
between Jon Pertwee as the third Doctor and
Peter Capaldi as the twelfth Doctor. The
similarities are strong enough that it may be
a deliberate choice to return to a simpler
style, and a sign of more classic references
to come in the new season.
Most of the characters have one outfit
that they are known for and there are a few
who have multiple recognizable ensembles
such as Sarah Jane Smith, Rose Tyler and
Romana. Most of the outfits can be made
from thrift store finds or online stores. The
Doctor Who Cosplay group at Live Journal
also has a wealth of information with
breakdowns and simple outlines for a
majority of the companion characters. Their
profile page has links to most of the
information.
The popularity of Doctor Who offers
many opportunities to tackle sewing projects
or put together costumes from found items
that will look great at a number of events.
A comparison of the third and twelfth Doctors may
indicate a return to a more classic style.
Christopher Erickson is a renowned
Doctor Who cosplayer who has taken on the
challenge of portraying many incarnations
of the Doctor. He is also a fan photographer,
and is managing editor and a writer for the
“Science Fiction / San Francisco” e-zine.
The Companions
A specific breakdown of the
companions would fill several magazines, so
I will focus on the general types of clothing
that were worn. They tend to fall into three
categories: past, present and future/alien.
Due to the wide range of clothing styles,
there were few characters that had a
definitive outfit with the exception being
Captain Jack Harkness, Leela (companion to
the Fourth Doctor), Adric (companion to the
Fourth and Fifth Doctors) and Ace (Seventh
Doctor companion).
The Virtual Costumer Volume 12, Issue 1
A new series of posters introduced by the BBC features
every companion from Susan Foreman up to Jenna-Louise
Coleman, who was introduced in the 2013 Christmas Special
-14-
February 2014
Feature
The Cybermen –
Nightmare
in Silver
Stacy Meyn* and
Tracy Newby*
A dynamic duo of props and costuming
effects talk about one of the most feared
creatures in the pantheon of Doctor Who
nemeses, and show you how to build them.
Background
“You belong to us. You will be like us.
You are incomplete. You will be upgraded.
You will be deleted.”
To most Whovians, these chilling
words were just read in the latest distinctive
Cyberman voice (supplied by Nicholas
Briggs, who also voices the current Daleks).
Battlestar Galactica’s Cylons and Star Trek’s
Borg Collective owe more than a few nods
to Doctor Who and the Cybermen. One of
the Doctor’s most prevalent foes, the
Cybermen originally were an organic
species from Mondas, Earth’s twin.
As the Mondasian planet drifted out of
the solar system, self-preservation efforts led
to more cyber and less man, and they had no
qualms about adding to their ranks by
conscripting Earth humans via “cyberconversion” or “robotisation”. While there
The Virtual Costumer Volume 12, Issue 1
Copyright © 2010 Silicon Web Costumers' Guild
have been more Cybermen versions than
Doctor regenerations, we will touch upon
several of the more rank-and-file iterations
and briefly examine some build methods
using differing media.
Conceptualized by humans Dr. Kit
Pedler and Gerry Davis, the Cybermen
debuted in 1966 during “The Tenth Planet”
serial, with William Hartnell as the First
Doctor. The early Cyberman costumes were
created by BBC costume designer
Alexandra Tynan,
credited as “Sandra
Reid.” Tynan trained at
Belfast College of Art
and worked as a
costume designer for the
Royal Shakespeare
Company and the
National Theatre before
accepting a staff role at
the BBC in 1964.
“Mark/MK”
variants would pop up
during Classic Who,
running the gamut of
materials and props,
some appearing more
convincing than others.
Cybermen costumes
consisted of rubber
diving outfits,
repurposed flight suits,
cricket player gloves, and Doc Martens
painted silver. Chest packs, various tubing
and PVC pipe, even practice golf balls could
and did show up on the Cybermen, who
seemed to change with every appearance on
the program. Some design elements did
remain consistent, such as the iconic helmet
“handles” and rounded eyeholes. Typically
silver or steel-like, black “stealth”
Cybermen were seen in “Attack of the
Cybermen.”
Mondasian Cybermen, designed by Alexandra Tynan, used repurposed rubber diving
outfits. Screenshot of television program from the Tardis group. on wikia.com.
-15ISSN 2153-9022
February 2014
Build-a-figure classic and new series Cybermen toys, 2008. Photo: DrWhoSite Merchandise Guide,
"Earthshock" Cyberman. Photo: Ash Cybershock.
“Here they come…walking down the street…” Old Cybermen from “The Invasion” 1968, and November 2010 recreation. Photos: Life and Sciences blog on blogspot.com.
The Virtual Costumer Volume 12, Issue 1
-16-
February 2014
Yet another redesign occurred in
2013’s “Nightmare in Silver”, featuring
blindingly-fast, instantly-upgradeable
Cybermen with layered armor, considered a
merge between the Mondasian and Cybus
Industries models.
NuWho brought on a completely
revamped and terrifying Cyberman, hailing
from a parallel universe version of Earth and
manufactured by Cybus Industries. The
mission remained the same: make more
Cybermen by “upgrading” humans and other
lifeforms through an excruciating process of
replacing organics with cybernetics and
emotional inhibitors.
It bears mentioning that there have
been Cyberwomen in the Who realm.
Torchwood’s “Cyberwoman” involved
Institute Director Lisa Hallett becoming
partially converted and fully insane. Her
Cybergetup is more Thierry Mugler than
Thomas/Gorton.
War Cyberman from “Nightmare in Silver” (2013).
Cyberman by Russell T. Davies.
The Virtual Costumer Volume 12, Issue 1
The 2006 two-parter “Rise of the
Cybermen” and “The Age of Steel”
showcased the crueler, more heavilyarmored, Art Deco-influenced Cybermen.
Production designer Edward Thomas and his
team, with Millennium FX’s Neill Gorton,
made the Cyberman design much more
imposing, at 6ft 7in with a heavy tread, and
a burnished steel look with the Cybus
Industries logo on the chest.
-17-
Partially converted Cyberwoman. Image from
ProjectTorchwood on blogspot.com.
February 2014
In “Doomsday”, the first Doctor Who
episode to feature both the Daleks and the
Cybermen onscreen simultaneously, Yvonne
Hartman fights her “upgrade” and clings to a
vestige of her personality to thwart a
Cybermen attack, appearing to weep an oillike liquid. While she did not get armored,
Mercy Hartigan briefly commanded the
Cyberking dreadnought in the Christmas
Special “The Next Doctor”, which also
showed a Cybershade and Cyberleader. For
a handy chart of the Cybermen hierarchy
and related denizens over the years (plus a
lovely little Dalek display), visit the
Cybermen Designs page of the Doctor Who
website.
The Builds
As far as popular builds, we will cover
a Classic MK I and Nu Who (Russell T.
Davies or “RTD”) era model. We will finish
up by discussing some of our own vacuumforming ideas for Classic and Nu Cybermen.
Visit the Cyberman Creator page of the
DoctornWho website to familiarize yourself
with Cyberparts and assembly,
Bob Mitsch build
Bob Mitsch built an amazing MK I
Cyberman from 1975’s “Revenge of the
Cybermen”. He wanted to “tackle a classic
era Cyberman…because hey…Cybermen
just rock.” No argument there. After mulling
over a few versions, he chose his favorite
Cyberman design, the 1975 “Revenge of the
Cybermen” style. It turned out to be the first
Doctor Who story he “rented and later
owned on VHS.”
The Gloves. After a rubber glove and
paint debacle, Bob chose “silver nylon
costume gloves you can pick up at any
Halloween or costume store. They're long
which helps so it'll slip well under the body
suit and not slip out and show any skin. The
real gloves were apparently leather
motorcycle gloves sprayed silver by a
company called Morley. I may upgrade to
these but honestly I like the length of the
costume gloves (so they won't slip out from
the sleeve), the dexterity they give me.”
Cyber-converted Bob Mitsch. Photo: Vickie Sebring.
The Virtual Costumer Volume 12, Issue 1
The Body Suit. “I opted for a
Neoprene Wet Suit. But it has to be a
vintage style with the farmer john style
-18-
MK I front.
February 2014
pants, and a jacket with center closure (not
to mention virtually no brand name or
design markings on it!). Also you may need
to order one size larger then what you'd
think you'd wear to allow for movement and
some shrinkage due to paint.”
Several painting experiments ensued,
“…because neoprene absorbs the paint it
takes ‘several’ coats and a primer to get it to
really gleam silver. I tried putting clear coat
on the pants the third time around but it
didn't seem to do that much good but FYI.
(The whole suit still needs minor touch ups
every time after I wear it.) For a final coat I
used metallic paint but silver should be fine
otherwise. Fabric paint is another option
here but I could never apply that evenly nor
be satisfied the right shade of silver...but
again FYI.”
The Knee/Elbow Coils. “Still not
quite sure what the BBC used for these as
they certainly look like they had pretty full
range of leg and arm motion. The best
option I found was dryer vent tubing had for
about 3ft length sections. I got the 4in
diameter for the elbows and the 6in diameter
for the knees. I refolded any loose hanging
metal underneath (pretty easily moldable
aluminum here) and then used duct tape on
the underside to smooth those rough edges
to avoid chaffing. For the elbows, I left the
tubes intact to be slipped on.
“For the knees I initially made them I
two pieces [but] I re-did them with the 6inch diameter tubing and made a cut down
the center that would face inner side of my
The Virtual Costumer Volume 12, Issue 1
knee when worn. Then I added strips of
velcro again along the overlap to seal them.
I used more velcro strips around the top
wetsuit portion and the bottom leather
legging portion to attach them and also have
it act as an extra connector for the wetsuit
and leggings. I still had restricted movement
but I could walk with that slow Cyberlumber and the knee joint held so I was
happy.”
New Connectors. “We took away 90%
of the velcro, replaced most of the side tubes
with a larger size and sewed on electronic
wire ‘C’ clamps to connect the tubes more
securely (yet allow them to be removed
when the suit has to come off!) Works like a
charm. The only tube issues I had was one
of the remaining Velcro tubes did drop off
and the body side tubes tended to bend
oddly but they held on after several
bystander brushes and a guy hugging me!”
The Belt. “The BBC Cyber-Belt looks
like it's pretty wide or thin depending on the
Cyberman you're looking at and it's got
sectional hexagonal look to it. My guess is
that it's another plastic piece modified from
an older costume in the wardrobe or custom
made. For mine I took an old leather belt
and sniped off the buckle and belt notches
(so make sure it's LONG). Then I got some
plastic tubing at used for gardening and
plumbing in the 1-2-cm diameter range. I cut
off two lengths to match the belt and then
sliced them both length-wise down the
center.
MK I rear.
-19-
February 2014
“Using this new cut 'slit' I slipped both
lengths over the upper and underside of the
belt to create the edging. I thought I'd need
some glue to help hold it on but to be honest
the plastic was pretty strong and it held fine
on its own. Once done I primed and sprayed
the whole belt silver in 2 coats and put it on
the suit using 4 velcro strips. Although to
help hide the back joint, we used some spare
leather already sprayed silver from my
leather pants and folded it over the point
where the belt met once with velcro and it
masked it much better. “
New Belt. “I hated the fact my original
belt wasn't sectional or terribly wide. Thanks
to my good friend Alexi, a new one was
crafted out of L-200 foam, using insulating
1-inch diameter tubes for the edges (which
were cut in half and barge glued over the
top/bottom for the trim) and put over the old
belt to secure it back onto the suit. The back
section was riveted on over the thin leather
piece we crafted as the belt joint/velcro
connector to make it look more uniform and
hide the join.”
The Side/Arm/Leg/Back Tubing.
“Not entirely sure what was used here again
on the BBC version. It looks like vacuum
tubing so…I bought 5 sets (5 feet per set) of
¾-inch split wire covering - the black ribbed
plastic tube one would use to centralize their
wires and make it look neat going from TV
to speakers or whatnot. I primed and sprayed
all of these silver. Although even with a
clear coat the paint had a tendency to chip
off with moderate wear and tear so they
The Virtual Costumer Volume 12, Issue 1
always need a touch up. I'll probably try the
Krylon plastic paint next time.”
The Shoulder/Back Discs. “For the
two shoulder and back pieces or discs - it
looks like BBC had special molded plastic
pieces that could go over the tubes…I found
a close match with large bottle mouthwash
caps and 3-inch diameter spice tins. I went
with the space tins since they had better
scale and I only had to paint the tops of
them. Plus they were metal so I debated
using strong magnet to keep them on- but in
the end we used velcro strips again. “The
Leggings: In order to simulate the open legs
I used the bottoms of leather pants. I used
women's leather pants as they tapered better.
I cut them off just above the knees and
added velcro strips on both sides of the
knees of the wetsuit so the leggings would
fit over them with about 2 inches overlap.”
The Boots. “I used a pair of black
leather combat boots. Timberlands basically
with a high ankle. I primed and sprayed
these silver which worked fine but the paint
tends to crack when worn so I plan to use
the leather spray on them before wearing
them again.”
The Chest Unit. “The little I know
about the BBC original was that it was refitted from the ‘Moonbase’ costumes. It's a
fiberglass shell and the circuitry in the side
panels are from an old TV set. I started with
a long center cardboard box. I got mine from
the box packing from my old DVD player.
However a good wine bottle box should
work too - as long as it's sturdy cardboard
-20-
Almost there! Stay on target…
February 2014
and has as little writing/embossing on it as
possible. I cut a hole in the bottom front of
the box and took a cheap flashlight,
unscrewed the top light and placed it in the
hole. I stuffed it first with newspaper and
used a little glue gun to secure it in place.
Then I found some vintage 1930's radio
speaker cloth that had a great crisscross
pattern that looked close to the diagonal
mesh used in the onscreen prop. I cut off a
piece of this speaker cloth and glue gunned
it on the front of the box.
“Next I purchased two vintage ice cube
trays (1950's or 60's- tin aluminum with
removable ice cube section). I took out the
ice cube sectionals and stuffed them both
with newspaper and leveled it off with thin
cardboard. Then I bought a second set of
1930's Radio Speaker cloth with a darker
tone/denser mesh to look like the display
version of the chest unit. I cut out two pieces
using the trays to trace the pattern. I glued
both pieces of radio cloth onto the ice cube
trays. Another option on the chest unit sides
I considered are those long rectangular tool
parts trays with the clear plastic coverings
like drill bit and screwdriver heads...or using
license plate frames over ice cube trays or a
cardboard shell. So FYI.”
Back to the finished product. “I
bought two sheets of thin foam. I cut out
‘frames’ for all three chest sections to cover
the rough fabric edges and unify the look. It
took a few attempts to get good looking
'false frame' or each but after getting
something close I glued all three over the
trays/box. Then I placed all three on thick
cardboard and glued them together using 3M
Super77 spray adhesive and more glue gun both at the side seams and onto the
cardboard to be the base. Finally I primed
and sprayed the entire chest unit with the
silver spray paint.
“Last touch - I bought four round black
jacket buttons and glued them in the square
pattern in the lower right panel so I would
have a fake 'control' to hit and ‘activate’ my
helmet gun. To help keep the buttons
Screen-used chest unit for “Revenge of the Cybermen.”
The Virtual Costumer Volume 12, Issue 1
-21-
February 2014
attached, I used a knife to create small slits
in the fabric and slipped the back of the
buttons in with the glue. I attached the chest
unit to the suit (remarkably light as it is)
with two long velcro strips from the
cardboard backing to both sides of the front
zipper on the wetsuit. Not perfect, but it
seemed to do the job really well. Total cost
for the materials involved ran around $65.”
The Helmet. “Unless you're naturally
good with paper mache or fiberglass
molding you'll probably need to buy a
Helmet which is the most distinctive piece
of this costume - the make it or break it part!
I got mine from a UK seller…who made
garage kit fiberglass copies of the ‘Invasion’
and ‘Revenge’ style Cyber-helmets.
New Chest Unit. “This was the major
piece I wanted to upgrade. A proper chest
unit! Alexi helped me here again, crafting
the base again out of L-200 foam. I used a
'67 Chevy model kit for the fake circuitry
and super glued it on the side panels. Then
three sections of plexiglass were cut and
rounded/sanded down and riveted over the
sides. The third sheet was painted silver for
opaqueness and glued to the middle section.
“Once I got the Helmet - I found that
you could still somewhat make out my eyes
and mouth in it so I added a dark blue
photography gel to the eye holes inside and
a stretch of black nylon from some
pantyhose for the mouth and they worked
fine. HOWEVER! I found when wearing it
the gel tended to fog up and ergo render me
blind. So I've since put in black nylon for
the eyes too so it'll 'breathe' and not fog up
again.
“To help keep me cool I also installed
using velcro and duct tape two mini-CPU
fans inside with a 9-volt batteries for them to
run on. They're pretty quiet and make a good
bit of difference in keeping my head cool
inside.”
Helmet tweak. “I re-enforced the
mini-fans inside the helmet while replacing
the dark blue gel at the eyes (which fogged
up last time) with a stretched piece of black
nylon. My visibility is not quite as good but
at least I won't fog up!”
We added some dark mesh-looking
sandpaper over this and created the middle
'grill'. Then we added the same jacket
buttons (sanded down to more of a flat and
mate finish) to the right side panel and
added some plastic wire (like those used to
hold toys in their packages) for the button
wiring. Then we cut off the bottom of a cup,
made a resin copy to give it more solidity
and glued it in place at the bottom for the
'lens'. We added a circle of plexiglass over
this. Last touch, I glued together 5 strips of 3
silver bolts each and glued them on top of
the center piece. We also re-outfitted the
chest and the shirt piece with hooks and
loops to more easily (yet securely) fasten
and unfasten the Chest Unit to the suit.”
As far as comfort factor, Bob warns
that the costume can be “tolerated by the
wearer for no more than 2-3 hours without a
good break.” He definitely recommends
Under Armor as a base. Bob also pointed us
toward a “Cybermaniacs and Builders”
Facebook group that shares the work of
other builders who are doing different
designs, such as the “Earthshock”
Cyberman. Bob has recently started a “Tenth
Planet” Cyberman build.
Shiny! Bob’s MK I “upgrade” (photo by Kevin Kittridge).
The Virtual Costumer Volume 12, Issue 1
-22-
February 2014
Malaki Keller build
Malaki Keller cleverly created an
awesome RTD Cyberman using foam. This
process is popular among anime fans who
want to make the Gundam and mecha suits
as they can get decent detail in a wearable,
articulating medium. It is also a brilliant
alternative to vacuum-forming if one does
not have those resources. The photos on the
next several pages show key steps. For all
the pictures of Malaki’s build, visit his
“Cyberman” photo album on Facebook.
Malaki’s friend “Brian Uiga is a big
fan of Inspector Spacetime…it was
something I had heard of as a parody of
Doctor Who, but not to any great detail.
Thanks to Brian I was given the opportunity
to create the iconic Circuit Chaps for [the]
web series.”
Above left: Assembling the helmet templates. Above right: Face template. Below left: Yes, that kind of foam, plentiful
and fairly inexpensive. Below right: Layering the foam to form the helmet. Mal used a bandsaw to trim the pieces.
The Virtual Costumer Volume 12, Issue 1
-23-
February 2014
Above left: Getting the faceplate right. Above center: Assembling the torso templates. Above right: Head and chest coming together. Below left: RTD arm. Mal coated the pieces in
vinyl and painted silver. The coating is Plasti-Dip aerosol and the paint is Design Master Super Silver. Below right: The piping detail for the joints. Mal used foam stripping glued over
a fabric base. The base is then sewed together to make a tube and coated with vinyl. Extra coats were used for the joints so they would handle the wear and tear.
The Virtual Costumer Volume 12, Issue 1
-24-
February 2014
Above left: Now for those pesky hands by tracing the templates…so many templates. Above right: Layering the pieces on the glove. Below left: Sealing and painting the paws.
Below right: Airbrushed shading to make the detail pop, and then added a coat of clear gloss to seal.
The Virtual Costumer Volume 12, Issue 1
-25-
February 2014
Test fitting: Mal’s RTD “upgrade” is nearly complete. Photos: Makaki Keller. For all the pictures of Malaki’s build, visit his “Cyberman” photo album on Facebook.
The Virtual Costumer Volume 12, Issue 1
-26-
February 2014
Tracy's Vac-forming Tips
I will not go into all the methods for
the art and science of vacuum-forming or
vac-forming. I just want to talk about basic
techniques to show of how many of the
Cybermen seen on TV were made. Even the
Stormtroopers of the original Star Wars
trilogy were vac-formed. It is a great way to
do “hardware” or rigid costumes.
First, a few disclaimers:
1. There are a few up-front expenses like
building the heating box. You can use
your oven with LOTS of ventilation.
2. The process requires some sculpting
skills, mechanical skills, patience and
a willingness to shed some blood as
well as sweat in the process.
3. It can get VERY stinky and some
plastics release somewhat toxic fumes.
4. Once you have gone over to the Vacside, you won’t want to come back…
What parts of a Cyberman can and in
my opinion should be vacuum-formed?
Definitely the helmet: lighter than fiberglass
and likely cooler than layers of foam that is
basically insulation. It has a rigid quality
that is only matched by metal, fiberglass
(too stinky for most people), or clear coating
the dickens out of other medium.
Having built Star Wars Stormtroopers,
Colonial Marines armor (Aliens), and a few
other odds and ends with vac-forming, it is
my preferred method for making “hardware”
costume pieces. There are several reasons:
1. Once made, the molds last far longer
than silicone molds for casting resin
(some molds are made of stone, wood,
metal or fiberglass). Add in some
polycarbonate plastic detail pieces and
you have a nearly indestructible mold.
2. With nearly indestructible molds you
can build as many sets as you want:
can we say ARMY of Cybermen?
3. Molds can be duplicated and resized to
fit taller, shorter, thinner, or thicker
costumers.
4. Spare parts are easier to produce, and
save time over repairing other
mediums.
5. It is easier to trade parts or (I do not
encourage copyright infringement) sell
bits to help fund a TARDIS project.
If you go this route for building an
RTD or “Nightmare in Steel” Cyberman,
you will need access to a
vacuum former. Professional
shops can pull parts for
you, but they want the
molds to be metal, wood or
fiberglass; Ultracal 30
molds are too fragile for
their machines and can
crack or shatter when
they pull the parts
and bang them out of
the sheet. If you are like me,
you are a do-it-yourselfer and
want to build your own.
Making the table
Making your own vacuum former is
not too hard, and once you have one you
will thank me later. A vacuum forming
system has two parts: the heating box and
the vac-table. The heating box must generate
enough heat to cause the plastic to become
soft and pliable, around 250 to 350 degrees
F, though some materials form at higher and
some at lower temperatures. If you are very
careful you can build frames that fit inside
your oven, but only do this if your kitchen is
ventilated VERY WELL! Gases released by
heated or burning plastic can be toxic.
If you build your own box, you can use
electric dryer coils, 220V, 3-phase circuit, or
even electric hot plates for each square foot
(4 for a 2’ x 2’ box, 6 for a 2’ x 3’ box, etc.).
These run on 110/120V wall outlet voltage
and amperage. If you are not electricallyinclined, have a friend help you out. Use 16gauge (or thicker) aluminum that can be
riveted or screwed together. Even if you use
your oven, you will need to build the table
as well as the frames that hold the plastic.
The table should be slightly larger
than the largest frame. Use sturdy marine
grade plywood at least ¾” thick and
cover it in neoprene foam rubber. Cut a
hole in the middle of the table
to accommodate a plastic
elbow fitting that attaches to
a large shop-vac to pump out
all the air between the hot
plastic and your mold(s).
Vac table exploded view. Drawing: Cris Knight.
The Virtual Costumer Volume 12, Issue 1
-27-
February 2014
Make the frames of ¼” to ½” thick
wood that is 1 ½” to 2” wide. Use hinges,
screws, or other fasteners to hold the front
and back frame pieces together. If you are
pulling small parts you can use smaller
dimensions, with the maximum size being
what your oven or hot box will handle.
Making molds
Once you build a vacuum forming
system, the main costs are plastic, electricity
and molding materials. Clay is not too
expensive and oil based clay can be reused if
you take care not to get any foreign
materials mixed into it. Ultracal 30
is a plaster-like material that can
be poured into a first pull off of a
clay or wood mold. You can sand,
carve or shape it later to get the
finished mold. A drawback is they
can be heavy for making large parts
(chest plates, thigh pieces, etc.).
You can make your molds from
pink art foam by layering it together and
using a thinner plastic for the first pull
which I would fiberglass into. Yes I did say
the other F word. Fiberglass is great for a
mold as it is light-weight, strong, flexible
(unlike Ultracal), and can be used with
Bondo for a mold as precise as you need it.
For mold making, visit the lazywebs
and locate many examples of what is done
professionally for manufacturing, and by
artists for various projects.
Working with the plastic
Start with high impact polystyrene
(HIPS), which has a low forming
temperature. You can find it at Tap Plastics
or most other plastic suppliers. It takes great
detail, especially in lower thicknesses. It is
similar to the styrene used in plastic model
kits and the glue is a solvent that melts the
two pieces together. Other plastics like ABS,
acrylic or polycarbonate require different
forming temperatures and can be finicky to
handle as their forming range is tighter than
that of other plastics.
I recommend buying an inexpensive
band saw to make cutting out
parts easier. Trim the plastic fairly
close to the finished size and
shape after removing it from the
frame. For very close trimming
use a Dremmel or similar electric
hand tools and some sandpaper on a
wooden or rubber block. You can
glue, rivet, bolt, Velcro, or attach the
parts with magnets.
Finishing the plastic
Cybermen are essentially silver, so
you just need the surface to be consistent
with the material surface you are trying to
duplicate. Fill in spaces, gaps or gouges with
Bondo, model putty, or take scrap pieces and
mix it with the glue to make a paste that will
fill the gaps. A good sandable auto primer in
gray works great for this. You can always
sand the finish colors between coats to get a
Above: Example of vacuum-formed Cyberman helmet.
The Virtual Costumer Volume 12, Issue 1
-28-
smooth finish. Paint hides mistakes or goofs
like nobody’s business.
Hobby, outdoor, and automotive paints
will stick to HIPS. If you want distressed
surfaces or something that looks leathery or
like rough metal, you can over-heat the
plastic slightly so it “orange peels” a bit to
create the look of rough hammered metal.
Use a clear coat to protect the paint.
Acknowledgements
Special thanks to Bob Mitsch and
Makaki Keller for allowing us to use their
photos and project descriptions.
Stacy Meyn was doomed to a fate of
costuming and prop-building as mom
performed in music and theater groups and
dad scratch-built intricate historical and
sci-fi models. Stacy has worked on and won
awards for softwear and hardwear in the
Star Trek, Star Wars, BSG, Firefly, Aliens,
and Jin-Roh realms, and enjoys dabbling in
period costuming. Someday she will learn to
sew more than a blind hem stitch.
Tracy Newby is a Sci-Fi and historical
costumer who wears many hats... and
helmets:501st Stormtrooper Legion,
Battlestar Galactia, Firefly and Star Trek.
Having learned from professional prop
makers in L.A., he is always happy to pass
on what he has absorbed from studying at
the feet of the masters -- vacuum forming,
mold making, resin casting, fiberglassing
and machining of steel, aluminum and
plastic and you have some great hardware.
He can also work with "software".
February 2014
Feature
begin to regenerate, but his companions are
horrified to witness the astronaut shoot him
again, killing him before he can fully
regenerate.
Recreating
“The Impossible
Astronaut”
Later, they are surprised to meet a
younger incarnation of the Doctor. He is
attempting to locate a young girl who made
a series of mysterious phone calls to the U.S.
President asking for help. They trace her to
the space center in Florida, where they again
encounter a figure in an astronaut suit. In
danger, and without thinking, Amy picks up
a gun and shoots at the suit. However, she
realizes too late that the helmet's visor has
opened to reveal the little girl.
Jennifer Wylie
An ardent Doctor Who fan pays tribute
to her NASA roots by recreating the Apollo
11 spacesuit from the season six episode,
“The Impossible Astronaut.”
Back in 2011, I decided to make the
Apollo 11 astronaut suit from the Doctor
Who episode, “The Impossible Astronaut.” I
had a vested interest in this project, not just
as a fan of the television show, but as a fan
of the space program in general. My father
worked in the Mission Control Center of
NASA’s Johnson Space Center in Houston
for about as long as I had been alive, so I
grew up with a great fascination for the stars
and planets.
“The Impossible Astronaut" is the first
episode of the sixth series of the series, and
is the first of a two-part story that concluded
with "Day of the Moon." In the episode,
Amy Pond, Rory and River Song are
summoned to Utah, USA, by the eleventh
Doctor. While on a picnic, a figure in an
American astronaut suit emerges from the
nearby lake. The Doctor approaches it, but
warns his companions not to interfere. The
astronaut shoots the Doctor, causing him to
The Virtual Costumer Volume 12, Issue 1
Copyright © 2010 Silicon Web Costumers' Guild
What follows is a “build diary” starting
from when I first decided to start the project.
I'll start by saying that building a “jumpsuit
with just some stuff on it” is not an easy
project, especially when it comes to the fit
and the finish, and making the costume
worthy of bearing the honor of the NASA
patch. Here we go!
Jennifer Wylie as River Song, from the episode "The Impossible
Astronaut." Astronaut photo: Jade Falcon. Background image: BBC.
-29ISSN 2153-9022
The first thing I had to do was research
the design and materials. For that, I picked
the brain of fellow space junky Phil Gust. It
turned out that he had a copy of a new book
put out by the Smithsonian Institution called
Spacesuits: The Smithsonian National Air
and Space Museum Collection by Amanda
Young, with photographs by Mark Avino
(ISBN 978-1-57687-498). It has a wealth of
February 2014
information, including reference photos and
descriptions of the materials and the
construction techniques that were used for
almost every spacesuit ever made, including
those from the Apollo era. After looking at
his copy, I quickly ordered my own through
Amazon. Wow!
My plan, such as it was, was to make a
muslin for fit, use some lightweight fusible
interfacing to fuse the muslin to lightweight
twill, and from there to fuse that to the final
fabric to create the right amount of weight
and durability. I picked up the twill at
Hancock's Fabrics for $2.99 a yard on sale,
and found the final fabric on sale at at
Fabrics R Us in San Jose, California.
The first thing I had to do was find a
pattern. You would think that finding a
jumpsuit/coverall pattern would be easy, it
wasn't! None of the big makers (Vogue,
Burda, Butterick, McCall's, Simplicity) had
one. I finally found one from Kwik Sew,
3389 (right), but I had to go to four different
stores to get my hands on one. I also wound
up making extra trips to the store for basic
supplies simply because as I have not really
done any big projects in three years, I hadn't
realized that I had run out of important stuff
that I needed, like a seam gauge, marking
chalk, and thread. (Who ever runs out of
plain black and plain white thread? THIS
GIRL!) So, while I got a lot done, I didn't
really make a lot of progress at first.
Spacesuits: The Smithsonian National Air and Space
Museum Collection was a guide for my project.
The Virtual Costumer Volume 12, Issue 1
Now I was ready to put together the set
of muslin coveralls. It's admittedly very
strange, creating something that is not only
not fitted to me, but is supposed to be bulky.
I'm not used to that, so my usual modus
operandi of just 'draping a pattern to fit' was
not going to work this time. I also had to
make pants, and I HATE making pants.
Making pants is only second to setting in
sleeves, and I hate that the most! I had five
-30-
I used this Kwik Sew pattern 3389 for the coveralls.
months to get this done (actually four; I
didn't want to have to be in a crunch the two
weeks before Costume-Con 30) and I had to
figure out how to transport the darned thing.
It was going to easily take up my biggest
suitcase and then some, so I had to employ
some help by someone driving down to take
it for me. Despite flying on Southwest
Airlines with free baggage, I thought that I
might get quite a few 'love notes” from the
TSA along the way, and since I would have
to send the helmet down by car anyway, I
might as well save myself the aggravation.
February 2014
of crying, a bunch of seam ripping, more
sewing, more crying, and a couple of
moments where I gave serious thought to
just dumping the whole pile of fabric onto
the driveway and setting it on fire.
Inside view of the overlocked seams and the zippers
There was a month where I didn’t do
anything except for assemble the muslin
shell. While the shape was promising,
getting it to fit over the football pads that I
was going to wear underneath to get the
proper shape was proving…well…
impossible! This involved several episodes
Home stretch! I needed to find patches that looked
‘weathered’ but nothing I found on-line looked right. So, I got
some printable fabric, ran the designs I found online through
my printer, and overlocked the patches onto the jumpsuit.
The Virtual Costumer Volume 12, Issue 1
The only reason I didn’t decide to just
chuck the whole thing was because I had
dumped a considerable amount of money
into purchasing the helmet. There was just
no way I could fabricate what I needed,
especially when it came to a gold opaque-toflash-photo visor. I finally stopped crying,
had a couple of beers (not necessarily in that
order) and got down to business.
(Above) TAP Plastic drilled the holes in the disks, and I used
a Sonic Screwdriver screw driver to attach them. (Below) I
bolted them through plastic canvas to hold the shape.
Once the muslin finally fit, getting the
layers cut and sewn together was actually
relatively easy. However, I discovered when
I went to overlock the inside seams that the
fluff from the quilt batting was preventing
me from getting the needles into the fabric,
so I had to take a very fine scissor and
carefully cut the fluff out of all the seams.
This was tedious and time-consuming, but I
got to chat further in-depth with Phil and
Kathe about the costume, and Kathe was
kind enough to allow me to use her Serger.
After getting that done, we went on a
trip to Orchard Supply Hardware to look for
the “bits” to put on the front. Thankfully, the
trip was fruitful and Phil helped me find
some plumbing couplers that worked
perfectly. I used nail polish to color them
blue and red, and purchased some plastic
discs from TAP Plastics to make the
backings.
Front of jumpsuit with the disks attached.
-31-
February 2014
The backpack is cardboard box,
covered with the same fabric as the
spacesuit, so it’s very light. It connects with
plastic clips to straps sewn into the shoulder
seams of the suit. I purchased the
helmet online from Space Toys.
Although it came with a nylon
cover, I created a secondary cover
for it out of the same fabric as the
suit so that it would match.
It's extremely hot to wear!
I have to safety pin a washcloth
to my undershirt and put "blue
squishie" ice packs in it on my chest
and the small of my back. I can tolerate
wearing it with ice for a few hours- without
ice, about half an hour!
Front of jumpsuit with couplers, and magnets.
The hoses are pieces of rope covered
with the same fabric as the suit. Rare Earth
magnets glued to the rope and inside of the
plumbing connectors lock them into place.
The gloves are knit gloves with blue PVC
caps glued to the tips. Black
nylon backing was folded to
create the hand, and
attached to a cuff of
matching fabric from the
suit. I originally ordered
a pair from Space Toys,
but they were too large,
so I made my own version
based on their ‘pattern’. The
black nylon pieces were
‘cannibalized’ from the
purchased version.
The Virtual Costumer Volume 12, Issue 1
Despite all the heartburn, setbacks, and
tears, and thanks to some support and advice
from friends, everything finally came
together, and I managed to finish the
costume in time to enter it in the scifi/fantasy masquerade at Costume-Con 30 in
2012. I was very proud of what I had
accomplished. For me, recreating “The
Impossible Astronaut” was my very
own “Space Odyssey.”
Jennifer Wylie is a sci-fi and
fantasy costumer who is a fan of a
number of genres, including Girl
Genius and Dr. Who. She has been
the masquerade director for Silicon,
and was recently masquerade codirector for Gallifrey One in 2010.
Jennifer Wylie as River Song from the episode “The Impossible Astronaut”. Photo: © Richard Man.
-32-
February 2014
Feature
The Third
Doctor's Sonic
Screwdriver
Philip Gust*
A prop maker discusses the problems
of recreating props from movie and TV
shows, and illustrates by taking us through
the steps he followed to research and
uncover the design of the Third Doctor's
Sonic Screwdriver.
One area of costuming that I specialize
in is prop-making. I have always been
fascinated by the props and accessories that
help bring costumes to life. If, as Mark
Twain says, “clothes make the man” then, to
tweak his conclusion, costumers without
props have little or no influence on society.
I especially enjoy recreating props
from movies and TV shows. One of the
biggest challenges is to determine exactly
what the prop looks like, its dimensions, and
what materials and finishes will reproduce
the original. However, recreating movie and
TV show props doesn't start out with
construction: it starts with research. Without
good research, the prop maker has no way to
know what to construct, and no guidance
about the materials and techniques that were
used to create the original that can provide
guidance on how to make a reproduction.
The Virtual Costumer Volume 12, Issue 1
Copyright © 2010 Silicon Web Costumers' Guild
For modern props, research is not hard.
In many cases, the prop still exists and may
be accessible when it appears in a traveling
exhibit, like the ones for Star Wars, Star
Trek, or Lord of the Rings. In some cases,
people who have access to the prop or the
plans used to make it may publish the
information. Sometimes, the prop even
comes up for auction. In other cases, a
combination of techniques can be used,
including measurements from high-quality
photos of the original, and interviews with
those who made it. It is
often possible to make a
close reproduction because
so much information is
available.
For older props, the
situation is different. The
prop often no longer exists
because it was lost or
stolen, the studio destroyed
or discarded it, or it was
heavily modified later and
is no longer useful for
reference. Often, there is
also a lack of high-quality
photos available, and those
who want to reproduce a
prop have to rely on
“screen caps” and secondScreen-cap of Third Doctor's sonic
screwdriver from “The Sea Devils”.
-33ISSN 2153-9022
hand sources like interviews with people
who had access at one time, or toys makers
who sold a version of the prop when the
movie or TV show first came out that bears
only a passing resemblance to the original.
The important thing to realize with
older props is that no amount of research
will lead to The Truth. Unless you stumble
on the original during your research, any
reproduction is only an approximation, and
yours is no more or less valid than the next.
A case in point is the Third
Doctor's Sonic Screwdriver from the
Doctor Who series. The original
version of this iconic prop was used by
Jon Pertwee between
1970 and 1974, and also
later by several other
incarnations of the
Doctor. While not as
flashy as ones of later
Doctors, its classic design
and the fact that it was
used for so long makes it
attractive as a
prop-making
project. The fact
that is is an older
prop also allows
me to illustrate
some of the
methods and also
the pitfalls.
February 2014
The author of the blog was working on
the 1992 Doctor Who exhibition with exBBC visual effects man Ian Scoones, when
Ian told him the story of how the prop came
to be in Doctor Who.
Research
One of the first things I do is determine
whether the pop still exists and who owns it.
This is a great help in locating images and
determining whether the original is available
to view. In this case, I looked for photos
from the “Doctor Who Experience” exhibit
currently in Cardiff Bay, Wales. [See the
Short Subject on page 53 for details – Ed]
The exhibit claims to include many original
costumes and props from the show.
Photos from the exhibit (right) show
sonic screwdrivers for both the Third, and
the Fourth and Fifth Doctors. This is not
good news, because most sources say that
the Fourth and Fifth Doctor's prop is just a
redress of the one used by Third Doctor. If
that is so, there is no way both could appear
in the exhibit. Consequently, at least one
must be a later reproduction, or made
especially for the exhibit. Still, they were
probably reproduced using some kind of
reference material, so I filed them away.
“He couldn’t recall exactly the year,
but settled on the late 1960s, he’d got wind
that Gerry Anderson’s Century 21 Studios
were selling off all their props and models
and thus he was invited to purchase some of
the stuff. He jumped in a van and tootled
over to the studios with his assistant Mat
Irvine and loaded the van to capacity with
loads of stuff – much of which would end up
in Doctor Who in one shape or another. One
particular prop would become the Doctor’s
trusty Sonic Screwdriver.”
Sonic screwdrivers for the Third Doctor (above), and the Fourth
and Fifth Doctors (below) from “Doctor Who Experience” exhibit.
Both cannot be “original.”
Next, I tried to locate who owns the
two screwdrivers on exhibit or failing that,
who was behind the props that appeared in
the exhibit. After following a number of
dead-ends, I finally stumbled a 26 April
2011 entry on the PurpleBlancMange blog
that provided a wealth of information. It was
written by a man who was not only involved
in the props for an earlier Doctor Who
exhibit, but is also in the industry, says that
he handled the original, and had spoken to
many of those involved with the show. The
story is fascinating.
The Virtual Costumer Volume 12, Issue 1
When asked at the opening reception
for the exhibition how many screwdrivers
there had been, producer John Nathan
replied, “Just one.” This confirms the
common wisdom that the Third, Fourth, and
Fifth Doctors used the same prop. According
to the blog's author,
“It’s clear that Sonic Pertwee had is the
same that Davison had; on the central grip
ring is a large gouge in evidence during
“The Carnival of Monsters” – and it’s still in
evidence during Davison’s tenure.”
Apparently, not only did Pertwee keep
nicking it with his rings, but Tom Baker kept
damaging the prop, usually by bending the
emitter head, so it was always being bent
back into shape. It was eventually
refurbished, its paint touched up, and it was
given a bit of a polish. According to the
-34-
February 2014
Dunsterville. “He was
given some pictures and
some drawings and told to
come up with a quick little
prop based on these
items.” According to the
blog's author, Dunsterville
had passed away and his
wife, who worked with
him, was reluctant to talk
about it.
blog's author, “the prop
was made of metal, so
naturally it’d be very
durable and it’s no wonder
that it survived pretty
much intact.”
At that point,
producer John Nathan let
loose with a real shocker:
“Remember the original
was on my desk? Well
someone waltzed in one
day and nicked it!”
So, according to
reliable, named sources,
the original screwdriver
handle really was a hand-made, metal prop
screwdriver used in Thunderbirds are Go!
movie. No other information is likely to be
available unless the prop itself or the
pictures and drawings used to build it are
found eventually.
Barrel of the "sonic screwdriver" was a regular screwdriver prop from Thunderbirds are Go!
So not only do we
have confirmation that the same prop was
used by the Third, Fourth, and Fifth Doctors,
we also know that it was refurbished at least
once, that it was made of metal, and that the
original was acquired from the Gerry
Anderson Studios around 1960. Finally, we
now know that it had been stolen from
producer John Nathan's desk before 1992.
Neither the props in the current exhibit is
“original” and it is unlikely that there are
any high-quality reference photos of it from
Doctor Who for reference.
Is there any evidence of the original
prop in a Gerry Anderson production that
might be helpful? According to the blog's
author, there is.
“Sometime later, a matter of months
maybe, Thunderbirds had returned to our
screens and was suddenly all the rage with
children up and down the country. My
brother came home with a bunch of episodes
and some of the films on VCD and so we
The Virtual Costumer Volume 12, Issue 1
watched them together over a few
weekends. Thunderbirds are Go! was one of
the films and to my amazement as we were
watching, there for all to see was the Sonic
Screwdriver in its original form – it was just
a normal screwdriver being used by one of
the Thunderbirds team to repair a doomed
space ship.” (above)
The next question is, whether this was
a custom piece or something commercially
available. There has been much speculation
about whether it was some kind of medical
device or something from a DYI store that
Anderson's crew purchased.
According to the blog's author, he first
asked Thunderbirds are Go! Director David
Lane, who remembered the prop and said
that they had it made by someone on staff
whose job was to produce all the metal
pieces for the show. The man who was in
charge of the props and model department
said that the prop man's name was Tony
-35-
The blog writer also notes:
“When Jon Pertwee inherits the prop as
the Doctor’s Sonic Screwdriver in 'The Sea
Devils', it’s been modified a little with pin
striping tape, heat shrink and various other
oddments to break up the bland silver mass
of the piece (this being the early 1970s when
designers used a rich and vibrant colour
palette for almost everything), but the most
notable addition is that of a bullet type affair
with a ringed halo surround added to the top.
It remains looking like this for just five
stories, after that, all the adhesive material is
removed, quite possibly due to it having
started to peel off with handling in the
course of making the episodes.”
February 2014
At left are images of Pertwee holding
the Third Doctor's sonic screwdriver with
and without the added embellishments.
The community owes a debt of
gratitude to PurpleBlancMange for sharing
what he knows about this prop on his blog.
Highly recommended.
Dimensioning
Sonic Screwdriver with and without pin striping tape,
heat shrink, and other oddments.
We now know everything we're likely
to know about the prop, so it's time to start
dimensioning it. Dimensioning is the
process of drafting the replica prop and
determining its original shape and size. For
modern props that are still available, the
franchise will often allow a toy or
collectables company to scan the original.
Unless there is some special change required
(e.g. for electronics or mechanical integrity),
measuring the replica prop can be a good
substitute for directly measuring the original
since it is much more available.
High-quality photos can also be useful
for deriving the size and shape of the prop,
and can provide a wealth of details from
many different angles. Determining the
shape and proportions from photos in fairly
straight-forward. The trick when working
with images is to identify a reliable scale for
the prop so that it is not only the same shape
but also the same size.
Dimensioning forward
The most common way to determine
the scale in a set of photos of the prop is to
identify scale items in the photos that will
The Virtual Costumer Volume 12, Issue 1
-36-
enable you to determine the scale of the prop
itself. I call this dimensioning forward.
If you are lucky enough to have a ruler
in the photo, you can scale the photo from
that, and then either print it and measure
with a ruler, or use on-screen tools to
determine dimensions. Otherwise, you will
need to determine scale using a combination
of scale items in the photo whose sizes are
known or fall into a narrow range. To do
this, pick one of the scale items and compute
the scale based on it. Then repeat the
process for other scale items in the photo.
You will eventually arrive at a scale
that is in relatively good agreement for all
the scale items in the photo. At this point,
you have a working scale for the prop itself.
Repeat this process for other photos and
compare the prop scale derived from each.
Give higher weight to scale items that are
more reliable. For example, ruler or a coin
are relatively reliable scale items, while a
hand or finger is much less so unless you
know a lot about the person in the photo. In
general, use an “average” size of body parts
for each gender unless you know otherwise.
Reconciling backward
Once you have scales for the prop from
a collection of photos, they should fall
within a narrow band, and you will need to
determine the final scale from these.
Remember, there is no Truth, only evidence
and judgement. Just make sure that the scale
you come up with is internally consistent
with measurements from the photos.
February 2014
To verify this requires going through a
process that I call reconciling backward.
Take your final scale, go back to each photo,
and use the relative size of the prop to the
scale items you used earlier to determine
their sizes. They may not be what you came
up at first, but make sure they all fall within
a plausible range, taking into account that
there is error inherent in any measurement.
If everything checks out, great!
Otherwise, you'll need to go back through
your scale item measurements and see where
errors may have occurred, then repeat the
process to come up with new working and
final scales for the prop. Remember, you
cannot eliminate all inconsistency: there lies
madness. Decide how much inconsistency
you're willing to live with, document your
decision, and don't look back.
Sources of dimensioning error
There are several sources of errors to
watch out for when dimensioning from a
photo or screen image.
Precision errors: This is the error in
the precision of your measurement device
and scale. I recommend always using metric
for measurements. Working with 1/16 or
1/32 inch measures is just not worth the
headache and potential errors in calculating
based on them. If you are using on-screen
tools to measure an image, I recommend
zooming in as far as practical to improve
precision. If you measure a printout, always
use a magnifying glass and good light at an
angle that won't throw shadows.
The Virtual Costumer Volume 12, Issue 1
Observation errors: These come from
your eyes not being incident to the ruler and
image. It can result from parallax between
your two eyes, but even if you close one eye
it is still difficult to eliminate this kind of
error. I recommend repeating measurements
of scale items frequently to verify previous
ones, and average the measurements.
Image errors: This error is caused by
problems with the image you are measuring.
A common problem is that the prop is not
incident to the image plane. If one end of the
prop recedes from the camera, the image
will be foreshortened. It is possible to
roughly compensate for this by estimating
the angle and extending the length
accordingly. For example, if you estimate
the angle to be 25 degrees, increase the
measured length by around 10%. The
greater the angle, the greater the error from
inaccurately estimating the angle.
You can also use this angle to
adjust other measurements
you make from the image
Another problem is a
“fish-eye” effect from the
camera being too close
to the prop and
distorting the image. I
recommend not using
images where the
incident angle is too
large, and avoiding
fisheye images
because it is so hard
to compensate.
-37-
Example
I will show how this works in practice
with the Third Doctor's Sonic Screwdriver.
There are many replicas out there, but absent
direct measurements from the original, their
makers followed a very similar process.
Since there do not appear to be
publicity photos that show the prop in any
detail, I used several frame captures from
episodes. This is not uncommon for props
from TV shows of that era. The fact that the
prop was used for so long gives us a better
chance at finding ones with good scale
items. I decided to use the Thunderbirds are
Go! image shown earlier and several Doctor
Who Pertwee screen caps. I also decided to
use higher-resolution images of the prop for
the Third Doctor from the “Doctor Who
Experience” exhibit. I definitely treated
those with some suspicion because so little
is known about the prop on display, but it
was useful for comparing shapes.
Finally, I decided to use the toy
replica recently re-released by
Underground Toys. (left) The
PurpleBlancMange blog author
stated that he provided
dimensioning information to the
company based on his research
and viewing the actual prop
before it was stolen. It is reputed
to be mostly accurate except that
the barrel is said to be slightly
larger in diameter to
accommodate the electronics
when it was first released.
February 2014
Thunderbirds are Go! Image
The Thunderbirds image is one of
those rare examples that are nearly ideal to
determine both shape and size. It is of good
quality and free of “fish-eye” distortion. The
angle of incidence is not too great. We know
the shaft is circular, but the left end appears
as a shallow ellipse, with a ratio of 10:24.
This gives an incident angle of about
25 degrees. That means increasing the
length along the shaft measurement by 10%
to get its true length, and any features
measured from this image will also have to
be adjusted from one end to the other.
There are two scale items in this image.
The best one is the pair of copper tubes
directly behind the handle. Copper tubing
comes in standard sizes, and these are very
likely copper supply lines with an outside
diameter (OD) of 3/8” (10mm). It is a very
common dimension and the smallest one
used for the purpose. The next size up, 1/2”
24
10
Measurements for computing incident angle.
(12mm) OD would make the prop too large
compared to what we see in photos of it
being held.. The other scale item in the
image, the glove fingers, also weighs in
favor of 3/8” (10mm) as the most likely size
because again, the fingers would too large
with the larger diameter tubing.
Knowing the actual size of the copper
tubing, we can scale the image to actual size,
and determine the true length by measuring
the image length and increasing that by
10%. This results in a true length of 176mm.
Possible inaccuracies in the incidence angle
and and the scale factor from the copper
tube make this length a reasonable guess,
but not necessarily the length of the actual
prop. Try changing a few things to get an
idea of variability.
Jon Pertwee Image
Before deriving other measurements
from the length, let's check this against a
life-size blowup of Jon Pertwee holding the
Sonic Screwdriver from “The Sea Devils”
(right). The overall length appears shorter
because Pertwee is partially pressing down
the ring to activate the Sonic Screwdriver.
This causes the assembly to telescope into
the handle. Normally, the base of the ring
Barrel of screwdriver prop from Thunderbirds are Go! scaled to actual size based on water pipe and glove scale items.
The Virtual Costumer Volume 12, Issue 1
-38-
February 2014
would be flush with the cone. It appears that
about 10mm of the assembly has telescoped
into the shaft in this image. The image has
been scaled on this basis.
Is the size of Pertwee's hand as a
dimensioning item consistent with the
computed scale? If I hold the Underground
Toys replica in the same position, the
distance from the top of my index finger to
the bottom of my little finger is about
70mm. From the image, the distance on
Pertwee is 80mm. I am 1700mm (5ft 7in)
tall, while Pertwee was 1890mm (6ft 2in).
Assuming hands scale with stature, the
ratios of the distances between Pertwee's
and my hand measurements agrees fairly
well with the ratios of our heights, so we can
say the reconciliation succeeded. I did
reconciliations with several other images
with similar results.
The Underground Toys replica
My final test was to compare the length
computed from the Thunderbirds photo and
verified with the Pertwee photo with the
Underground Toys replica for which
the author of the
PurpleBlancMange blog said he
provided dimensions to the
company. A direct measurement of
the toy from the base to the end of
the cone gives a length of between
177mm and 178mm. This is well within
the margin of accuracy for these
techniques.
Deriving the other measurements
Deriving the other measurements
means going back to the photos and
measuring all the features, taking into
consideration corrections for image errors.
For each one, you use the ratio of something
whose measurement you know to one whose
measurement you do not. The trick is to
avoid accumulating errors by basing one
derived measurement on another. In no time
at all, accuracy will decrease and subsequent
measurements will be further and further
off. Instead, it's best to go back to scale
items and make other measurements from
those wherever possible.
Most of the measurements for the main
body were derived from the Thunderbirds
photo and reconciled with other photos by
comparing ratios. The most difficult part of
using the Thunderbirds image was to correct
the sizes of features along the main axis
based on the computed angle of incidence.
Some advance image packages can do this.
I have not found photos that provide
reliable dimensions for the emitter halo, so I
relied on measurements from other screen
caps based on computed ratios, which are
less reliable. That there is wider variation
in this part among the various replicas is
not surprising.
Finally, I reconciled the individual
measurements derived from the screen caps
to those taken from the Underground Toys
The emitter halo on the “Doctor Who Adventure”
replica is widely thought to be out of scale.
The Virtual Costumer Volume 12, Issue 1
-39-
replica. The toy's dimensions agree very
well in most aspects with those from the
dimensioning process, although the handle is
slightly too wide based on my calculations.
As I mentioned earlier, this is reportedly to
accommodate the electronics.
The scale illustration on the next page
shows the dimensions derived from the the
Thunderbirds and Doctor Who screen caps.
An image of the Underground Toys replica
is used to illustrate. The two other images
shown for comparison were corrected for
distortion for the purposes of illustration
only. Always use uncorrected images for
measurements.
Conclusion
I hope that this article has given you an
appreciation for what goes into recreating a
a prop replica before the process of building
it begins. In may cases, the research and
dimensioning process are the most difficult
parts. I also hope that the techniques
illustrated here will be useful for your own
recreation of a prop from a movie or TV
show. It requires a combination of luck,
persistence, attention to detail, and knowing
when to stop planning and start building.
Most important of all is to accept that there
is seldom a single, right answer.
Philip Gust enjoys sci-fi and fantasy
costuming, and has particular interests in
props, special effects, and prosthetic
makeup. He also costumes in historical
periods, including Regency, Victorian, and
early 20th C.
February 2014
Third Doctor's Sonic Screwdriver
Dimensioned by Philip Gust from Thunderbirds are Go! and Doctor Who screen caps.
176mm
48mm
76mm
11mm
8
18mm
65mm
3
6
16mm
4 4 4
18mm
14mm
7
16mm
24mm
24mm
20mm
52mm
30mm
5 2
18mm
20mm
12mm
22mm
6
16mm
16
6
15mm
20mm
2mm dia.
x 5mm l
Underground Toys replica show for comparison (closest to screen caps)
“Doctor Who Experience” replica shown for comparison (note problems with upper barrel and emitter halo)
Thunderbirds are Go! original prop shown for comparison (stretched 10% for incident angle distortion)
The Virtual Costumer Volume 12, Issue 1
-40-
February 2014
How-To
Madame Vastra:
Making Latex
Prosthetics in
Your Kitchen
Sahrye Cohen
For those who think
that creating killer
prosthetic makeup requires expensive
equipment and elaborate
techniques, this article is a real
eye-opener!
Doctor Who’s 50 year history
has provided fans with many
fabulous characters to cosplay. I
began watching Doctor Who in
2006 with the new series and
the Ninth Doctor. One of my
recent favorite characters is
Madame Vastra, a Silurian
currently living in late
Victorian England. Last
season’s episode, “The
Crimson Horror,”
showcasing Madame
Vastra and the rest of the
Paternoster Gang,
inspired me to make the
costume. The cosplay
was appealing because it combined one of
my favorite historical costume eras, the
Bustle period, with a non-human
character, which would be a challenge to
make. There were two major parts to this
project, making the costume and making
the prosthetics.
The Costume
In “The Crimson Horror”
Madame Vastra mostly wears a
purple and black bustle dress.
Observant costumers will note
that the episode supposedly
takes place 1893, a year in
which the fashionable and well-todo Madame Vastra would no longer
be wearing an unfashionable
bustle. However, since I am fond
of this style, and the show uses
an earlier style dress, I decided
to make a 1880s style bustle
dress. I already own the
necessary Victorian
undergarments, a corset and
lobster tail style bustle, and
only needed to make the
dress and accessorize
fabulously.
Right: Sahrye Cohen as Madame Vastra. Photo: GP Mckenzie,
Unimedia. Above: Neve McIntosh as Madame Vastra. Photo: BBC.
The Virtual Costumer Volume 12, Issue 1
Copyright © 2014 Silicon Web Costumers’ Guild
The dress appears to be
in two parts; a bodice with a
fake front, lapels, and skirt
drapes, and a full length
skirt. I often use Truly
-41ISSN 2153-9022
Victorian patterns as a base for many of
my bustle era dresses. The bodice and
skirt patterns mix and match nicely
and the measurement system always
produces garments that fit me
well. In this case I altered the
simple 1871 day bodice
pattern to add lapels and a
skirt drape, and paired it with
the 4-gore underskirt pattern.
I decided to use a separate
shirt under the bodice
instead of the false front
because I already had a
costume shirt with a similar
collar.
The most difficult part
of the costume was finding
the correct fabric. Although
I would guess that the
original costume uses a
synthetic material, I prefer
to make my historical
costumes from natural
materials and wanted either
a silk or cotton fabric. On a
trip to the Fashion District
in Los Angeles, I finally
found a cream silk with
black flocking in a paisley
pattern. After dyeing this
with purple Jacquard acid
dye I had purple silk with a quite a bit
February 2014
less flocking. Lesson learned; silk with
flocking is not machine washable. The dress
was constructed using a combination of
historical and modern techniques. The
bodice was flat-lined and boned along the
seams, which is typical of Victorian
construction. But all seams were finished
with a serger for speed!
two-part mold. Based on my research I was
confident that I could sculpt, cast and finish
the facial latex applications. The process is
inexpensive, requires very few specialized
materials, a relatively small amount of time,
and can be accomplished with the guidance
of easily accessible references.
To complete the look I wore several
vintage black glass bead necklaces, black
gloves (fashionable and I didn’t have to
paint my hands), and a long black lace veil.
References and Materials
The Latex Prosthetics
Special
Makeup Effects for
Stage and Screen:
Making and
Applying
Prosthetics by Todd
Debreceni (ISBN
978-0240816968) is
an excellent text
geared for serious
prop and
prosthetic makers. While many of
the materials and methods are more
appropriate for those with
specialized shop space, the chapters
on sculpting are valuable for
beginning prosthetic makers. It
should be noted that Debreceni does
not cover the latex prosthetic
method that I used in this article but
he does describe making glycerin
prosthetics, which are a great alternative
to latex and can also be easily made in
your kitchen.
My decision to cosplay Madame Vastra
was the impetus for learning how to make
latex prosthetics in my kitchen. The special
effects makeup on actress Neve McIntosh is
the collaboration of several industry
professionals. Barbara Southcott was the
makeup designer; Pam Mullins was the
makeup supervisor; Neill Gorton’s
MillenniumFX was responsible for the
prosthetics. From research on the
application process it appeared to
me as though the makeup was
accomplished using two
prosthetics, a large cowl and a
facial mask. After researching
prosthetic and mask
production I decided to
purchase an unfinished latex
cowl (right) from Kyle
Pasciutti at Decimated
Designs because of the
complexity of making a large
mold, for the cowl, possibly a
The Virtual Costumer Volume 12, Issue 1
Several excellent references provided
guidance for my first foray into latex
prosthetics.
-42-
The Monster Makers provides mask
making kits and an instruction manual for
making both latex prosthetics and more
complex latex masks. The website provides
a good overview of the materials and
methods. If you would like to make multiple
latex prosthetics from your mold I would
recommend the sturdier materials used in the
Monster Makers kits.
The most invaluable reference was the
tutorial “Prosthetics on a Budget” by
Mistress of Disguise. I used many of the
same materials and methods she describes.
The reality TV show “Face Off” on the
Syfy channel is excellent for watching
professional prosthetic makers complete the
entire process from initial design through
sculpting, casting and application.
I ordered my latex and prosthetics
application materials from The Engineer
Guy who specializes in moldmaking, casting
and special effects (Special FX) supplies.
Materials
•
Head or face base
•
Sculpting clay
•
Petroleum jelly
•
Plaster of Paris
•
Casting Latex
•
Powder (setting powder, translucent
makeup powder, baby powder)
•
Acrylic paint
February 2014
Selecting a base and sculpting
Professional prosthetics makers, such
as those on “Face Off” or in the movie
industry, often use a precise copy of their
actor, called a life cast, as a base
for sculpting a prosthetic. In my
quick version I used a beauty
school hair dressing model,
which had the advantage of
being a hard, impermeable
plastic. Mistress of Disguise
recommends using a male sized
Styrofoam head, which would
also be an excellent choice. A
full sized sealed plaster or
plastic mask could also be used
as a base if you are sculpting
small latex prosthetics.
clay just using your fingers and a Popsicle
stick but some specific sculpting tools
available online or at your local craft store
can make this easier.
not very sturdy and I was only able to make
two copies of my latex prosthetics before the
fine details started crumbling. Before casting
your mold, use your fingers to lightly spread
a thin layer of petroleum jelly
over your clay sculpt. This acts
as a mold release so the clay
doesn’t get stuck to the plaster.
To make your mold, you
can build a clay dam around
your sculpt and cover it in
thick plaster or place it into a
contained pool of thinner
plaster. I formed a clay dam
around my sculpt, but because
my plaster was a bit too thin I
found it easier to place the
whole piece into a pool of
plaster with the dam helping to
hold it in place.
The most important factor
is to be sure the face size is
comparable to your face. The
To do this I lined a small
hairdressing model turned out
cardboard box with a plastic
to have a smaller face than mine Left: Beginning sculpt on foil covered head base. Right: Finished sculpt with deeply carved details. bag and began to pour the
even though the measurement
plaster of Paris into the box. I
Before beginning your sculpt find
around the head was the right size. I
placed my sculpt facedown into the box and
some good reference images of your
recommend covering the form with either
continued to pour in the plaster until it
character from several different angles. Very
plastic wrap or aluminum to make the
reached the level of my clay dam. Plaster of
fine lines and shallow details will be hard to
cleanup easier after sculpting and casting.
Paris dries fairly quickly so be sure to have
produce on your final prosthetics, so be sure
enough to complete your mold in one pour;
Either water-based or oil-based clays
to exaggerate details and incise lines a bit
you don’t want to run off to the store to get
can be used for sculpting. The main
deeper than they appear in your image.
more halfway through. Pour slowly and
difference between the clays is drying time.
carefully so the the plaster gets into all the
Water-based clays dry out quickly unless
Making
your
mold
details and doesn’t form air bubbles. A tarp
they are tightly covered while oil-based
on the floor and plastic gloves are good
I
used
Plaster
of
Paris
to
make
my
clays never completely harden. I used an oil
safety pre-cautions.
mold because it is inexpensive and easily
based clay modeling clay that was purchased
available in small amounts. However, it is
at my local craft store. You can sculpt your
The Virtual Costumer Volume 12, Issue 1
-43-
February 2014
Casting your latex prosthetics
Allow your mold to set according to
the plaster of Paris package instructions.
Once you remove your sculpt allow the
mold to completely dry before you begin
adding your latex. Do not rush this step!
Once your mold is dry you can begin the
layers of latex that will make your
prosthetic. I used casting latex rather than
liquid latex because it is a thicker material
that requires fewer layers, however liquid
latex, sometimes available at costume or
Halloween stores, can also be used.
Above: In my kitchen, preparing to pour the plaster.
Below: Sculpt surrounded by clay dam. This will go
into the box face down. Below center: Plaster of Paris
mold in plastic lined box..Below right: Trimmed and
unpainted latex prosthetic appliances
The Virtual Costumer Volume 12, Issue 1
Pour in a small amount of latex into the
mold and spread around with your fingers or
a brush. You want this initial layer to form
nice thin edges around your whole prosthetic
appliance that will be better to blend when
they are worn. Allow this layer to dry and
repeat the process continuing to build
-44-
several layers. Depending on the thickness
of your latex you will probably need
between 5 and 10 layers of latex. Allow the
latex to dry overnight just to be sure.
Once the latex has dried completely
you may need to powder it to prevent it from
sticking to itself as you carefully pull it from
the mold. Setting powder is made for this
purpose but you can also use translucent
makeup powder or baby powder.
Finishing and painting
My Vastra pull had some ragged edges
and was too small to function as a complete
piece. This is because the face base I used
was smaller than my actual face, and latex
may shrink as much as 5-15% smaller than
the original sculpt. I pulled out my scissors
and cut the facial mask into several different
latex appliances before painting.
February 2014
I painted my purchased latex cowl and
the facial appliances at the same time to
ensure color consistency. Grease paint or
other face paints can be used to paint latex
prosthetics, but I recommend regular acrylic
paint mixed with latex. I used one part latex
to 3-4 parts acrylic paint for my Vastra cowl
and appliances. This mixture can be thinned
with a little water if necessary.
Cowl before and after painting.
At this point it is tempting to jump
right into combining your prosthetics and
costume and rushing to a Con or event. If
you are new to special effects makeup, I
highly recommend testing the makeup in the
comfort of your home. I spent an evening
applying the cowl, prosthetics and makeup
to be sure that I could got everything in
place before the mad dash at the beginning
of an event. I covered my hair with a latex
bald cap before applying the cowl, and
applied the bald cap, cowl and latex
prosthetic appliances with Pros-aide, a
prosthetic adhesive. I used Kryolan
aquacolor face paint to paint any bare skin
and to blend the edges of the appliances.
The first application required 2 hours and I
refined subsequent applications to 1 hour.
Summary
The entire process of cosplaying
Madame Vastra was a fantastic learning
experience and required learning a couple
new costuming skills. Before beginning I
had never made latex prosthetics, nor had I
applied any sort of special effects make-up.
Producing a recognizable character costume
was challenging but extremely satisfying.
The Virtual Costumer Volume 12, Issue 1
-45-
Makeup application test.
Acknowledgements
Many thanks to Hal Rodriguez for help
with painting, mold-making photography,
and makeup application. Thanks to Kyle
Pasciutti for painting advice.
Sahrye Cohen is a costumer and
crafter from San Francisco, California who
loves any opportunity to costume or cosplay.
Last year she ran a marathon costumed as
Wonder Woman. Sahrye is interested in
fashion design using electronic components
and responsive materials, she collects hand
fans and Lucite purses. Sahrye is currently
the Workshop Coordinator for the Greater
Bay Area Costumers Guild.
February 2014
Event Report
Virtual Postcards
from Gallifrey
One 2014
Mette Hedin*
A veteran Doctor
Who costumer files a series of personal
highlights and photos of costumes and
costumers from the convention.
This year was my seventh year in a row
attending Gallifrey One, the annual Doctor
Who convention in Los Angeles. The
convention has grown 200% in that time,
and the costuming has gone from healthy to
completely out of control. The costume bug
is spreading like wildfire and shows no signs
of slowing.
Hall Costumes
While it is impossible to capture it all
due to sheer amount of activity, here are a
series of snapshots from this year's event.
The War Doctor
Two of the most popular costumes this
year were the War Doctor and the Moment.
While the time war had nothing on the
Gallifrey 2014 photo lines, CJ DeAngelus
and Lauren Brooks (right) prove that the
lines were better braved in costume.
CJ De Angelus as the War Doctor, with Lauren Brooks as the Moment's main interface, brave the photo lines.
The Virtual Costumer Volume 12, Issue 1
Copyright © 2014 Silicon Web Costumers’ Guild
-46ISSN 2153-9022
February 2014
The Ubiquitous Tenth Doctor
A dapper Fifth Doctor
No matter where at the convention you
are, you pretty much can't throw a sonic
screwdriver without hitting a Tenth Doctor.
The restaurant, the lobby, the bathroom,
even the vending area where I ran into new
acquaintance Brandon Hillock looking for
some ice (below left).
It isn't just the Tenth Doctor that gets
love, I saw pretty much every single doctor
represented, by both genders throughout the
weekend. Here is a particular dapper Fifth
Doctor (below), complete with celery in the
buttonhole.
Many of the doctor and companion
costumes are quite comfortable so, it is not
uncommon for many costumers to go about
their entire day in costume. By the pool I
found two Tenth doctors side by side in
vacation mode (right).
A pair of tenth Doctors in vacation mode.
Another pair of Tenth Doctors in the
Karaoke lounge, (below) this time recreating
the drunken doctor scene with the tie around
the head from "Girl in the Fireplace" while
doing the time warp.
Brandon Hillock as the tenth Doctor.
The Virtual Costumer Volume 12, Issue 1
A pair of Tenth Doctors recreate a scene.
-47-
A dapper fifth Doctor.
February 2014
First timers and old timers
The number of first time costumers
were staggering this year, and friends I have
known for many years showed up in
costume for the first time ever. Here I am
(right) with my old friends John O'Connor
and Will York from the Doctor Who podcast
Mutter's Spiral as the War Doctor (on the
left) and the Third Doctor (on the right)
respectively.
Seeing my old friends experience a
whole new side of the convention, running
around with smiles on their faces, and
having their photos taken was fantastic.
A gaggle of Zygon scientist clones in the lobby.
A gaggle of Zygon scientists
With the growth of the costuming at
this convention, it is more likely than not
that someone else will be wearing the same
thing as you. The Gally costumers mostly
embrace this, with prescheduled costume
The Virtual Costumer Volume 12, Issue 1
meetups for specific characters or costumes.
In this case it is especially not awkward to
be wearing the same dress as someone else,
as a group of Zygon scientist clones (above)
hanging out together in the lobby.
Mette wIth first-time costumers and old friends John
Connor (left) and Will York (right).
-48-
February 2014
A family photo
Costume check
The family that costumes together
stays together. A whole family dressed up as
River Song, the Eleventh Doctor and the
Ninth Doctor. I didn't have the heart to tell
the boy that he was married to his mom
(spoilers).
Costuming is always better when
you're not flying solo. Here, a Novice Hame
(below) is having the hood of her costume
checked by her Master costuming buddy in
the dealer's room.
The Master checks the hood of a Novice Hame.
A serious young cosplayer
I really wanted to show you all the
sweat that goes into costuming with this kid
(right) who was dripping sweat as he was
pulled out of his gas mask. When he saw the
camera, though, he insisted that it be put
back on for the photo however. Rock on
little costuming dude!
A photo of mother "River Song" with Ninth Doctor
father and Eleventh Doctor son.
The Virtual Costumer Volume 12, Issue 1
A young cosplayer really got into the spirit of the event.
-49-
February 2014
Punch & Judy and Doctor Who
If you don't feel like dressing up, there
are other options for letting your costuming
creativity flow. Here is Lee Thompson (left)
with his "Avenue Who" River Song as well
as a Punch & Judy style Tenth Doctor /
Weeping Angel puppet show.
The Creator of Doctor Who
You might think that a convention
where all the costumes draw from one show
might be limiting, but there are 50 years of
genre crossing episodes to choose from as
well as many related shows. Here Simon
Harries shows up in his first Gally costume
ever as Canadian TV executive and Doctor
Who creator Sydney Newman from the BBC
drama, "An Adventure in Time and Space"
which dramatized the creation of the Doctor
Who series 50 years ago.
Finis!
The convention isn't over until I finish
my costume! Right as we were getting
kicked out of the lobby very late Sunday
night Sammi (below) who had been knitting
fervently suddenly yelled "Done!" as he
finished his season 18 Tom Baker Fourth
Doctor scarf, just in the nick of time!
A Doctor Who puppeteer a puppet show.
A first-time Gally costumer as Doctor Who creator
Sydney Newman.
The Virtual Costumer Volume 12, Issue 1
-50-
Finishing a Fourth Doctor scarf at the last minute!
February 2014
The Masquerade
Cross-over quandary
The masquerade this year contained
over 30 entries and held a surprisingly even
quality throughout. Here are some of the
highlights. I was one of the judges and
couldn't take photos, but Shawn Sulma was
kind enough supply his for this section.
While I am generally not keen on
crossovers and the recent Star Trek/Doctor
Who crossover comic having provided some
of the odder costuming moments at the
convention, I loved this highly entertaining
skit (below) about the time lords looking
just like Klingons and the 4th Doctor
recruiting a new companion by showing off
the sonic bat'leH
Right out of the Tardis
Sometimes you have the costuming
skill, sometimes you have the looks. When
you have both, you make it feel like the
Doctor has actually stepped right out of the
Tardis to cheat in the masquerade. This Fifth
Doctor (below) was unusually good in
costume, mannerisms and appearance. Extra
kudos for the awful early 80's hair style.
Novice Hame took top workmanship honors.
Scary Novice
The contestants have the added boost
of two MC's ready to play as well as a full
size Tardis on stage. Novice Hame (above),
who ironically was in the Novice category,
took Best in Show Workmanship as well as
a Costume College scholarship in her first
ever costume having made every aspect of
her costume including the electronics.
Spot-on Fifth Doctor, straight from the Tardis!
The Virtual Costumer Volume 12, Issue 1
Despite my cross-over reservations, I loved the skit!
-51-
February 2014
The Odd Couple
Another amusing skit
(right) had the Kandyman
and a 10th planet cyberman
sharing an apartment, Odd
Couple style.
A very sexy Tardis
Above: A Tardis dress had some very sexy moves.
Below: Female Sixth Doctor with a rainbow umbrella.
Things took an
unexpected turn after this
unusually sexy Tardis dress
(top left) which had some
beautiful lighting effects. It
Kandyman and 10th planet cyberman make an odd couple.
threw the rest of the
masquerade off with later
how much of it is covered every year with
contestants scrambling to add their own sexy
the amazing number of costumes that parade
moves to compensate, leading to some
by and the boundless amount of skill and
rather amusing moments.
creativity people pour into their costumes.
Rainbow Sixth Doctor
In any other masquerade a recreation of
the Sixth Doctor's coat on its own would be
enough to make the audience feel like a
rainbow threw up all over them. In the Gally
masquerade this is an everyday occurrence
so it might be necessary to add even more
color to get the attention, like this female
Sixth Doctor's umbrella. (bottom left)
That's a Wrap!
Another year down, and Gally remain
my favorite event of the year both for the
convention itself, my many fantastic friends
and the incredible costumes. Even though
the show provides seemingly endless
sources for costumes it is stunning to see
The Virtual Costumer Volume 12, Issue 1
-52-
The costumers at Gally span the gamut
of the hobby from young fans, enthusiastic
first timers seasoned journey-men and
highly skilled masters and every hybrid in
between. Every year I am both terrified and
inspired by my fellow costumers, and I am
looking forward to see what crazy stuff they
have in store for next year.
Mette Hedin is a sci-fi and fantasy
costumer who specializes in recreations of
things that don't exist in the real world. She
loves learning new techniques and
materials, and is always looking to expand
her costuming horizons. Visit her Costuming
Fools web site.
February 2014
Short Subjects
Doctor Who Experience
Exhibit in Cardiff Bay, Wales celebrates 50
years of the iconic BBC TV series
For Doctor Who fans attending
Worldcon in London or planning a vacation
in the UK, “The Doctor Who Experience” in
Cardiff Bay, Wales is a worthwhile side trip.
This exhibit features Doctor Who costumes,
props, and sets from the BBC to celebrate
the 50th anniversary of the TV series. “The
Doctor Who Experience” brings together
material from the BBC archive as well as
items from individual collectors.
Costumes include not only the Doctors'
but also ones from supporting characters
River Song and Astrid Perth. There is also
an extensive exhibit of the Tardis sets,
Daliks, and even the third Doctor's yellow
roadster, “Bessie.”
Photos from the exhibit have been
posted to a number of sites, including
Hollywood Movie Costumes and Props
(HMCP), which has a number of articles
showing representative costume displays for
the first eleven Doctors.
The “Doctor Who Experience” also
features a gift show with an extensive line of
Doctor Who-related merchandise, including
clothing and replica props.
Timed tickets are available online or at
the location. Prices are £13.00 for adults and
£9.00, with special packages available at
higher prices. For more information, visit
the “Doctor Who Experience” website.
Interview with First Doctor
Who Costume Designer
Interview in 3Story Magazine reveals
secrets of designing for first Doctor Who.
An interview with the costume
designer Maureen Heneghan Tripp in the
online magazine 3Story reveals that
costuming for William Hartnell, the first
Doctor in 1963, required good people skills
as well as clever costuming.
Representative costumes for the first six Doctors from
the "Doctor Who Experience Exhibit" Photo: HMCP.
The Virtual Costumer Volume 12, Issue 1
Copyright © 2014 Silicon Web Costumers’ Guild
discovered that the trick was to make sure
the actor wants to act in the costume and
really wants to wear it. Finally, she
observed, “you learn never to say 'no' to an
actor.”
Heneghan was always fascinated by
the history of dress, and decided on the last
19th C. and edwardian periods. for the first
Doctor's clothing. “ "It had to be something
related to the 20th century but not too far
away from it,” she remembers.
She also had to deal with the shine
from Hartnell's bald head, which caused
problems for the TV cameras of the day. She
finally decided on a wig and hats. She
presented Hartnell with a half dozen hats,
and he was delighted with an Astrakahn,
which he thought suited his face.
Read the complete interview with
Maureen Heneghan Tripp on the 3Story
Magazine website.
According to the article, "William
Hartnell was not an easy man to work with.
He was an angry actor, not simpatico. And
he had definite ideas of what he wanted
Doctor Who to look like.” Heneghan,
William Hartnell in his Asterkahn hat.
-53ISSN 2153-9022
February 2014
Instructions Online for
TARDIS Blue Envelope
Behind each thumbnail is a a reference page
on the creature, and the actress who
portrayed it on the series, and notes about
the makeup and the actress' experience
wearing it.
Accessorize your costume or invite friends
to a picnic with this TARDIS Blue envelope.
In the opening episode of the sixth
Doctor Who season, “The Impossible
Astronaut,” Amy Pond, Rory and River
Song received a summons to Utah, USA, by
the Eleventh Doctor. The summons arrived
in a “TARDIS blue” envelope with a Royal
Mail sticker, and a particular set of postage
stamps. On the flap of the envelope was a
number.
For those who want to re-enact these
characters, the “TARDIS blue” envelop is an
essential accessory. It is also great for
inviting your friends to a Doctor Who
themed picnic or party. Many fans have
scrambled to find the right color of paper
and the right set of stamps and stickers.
Now, an article on the website Instructables
shows how to do it.
Replica "Tardis Blue" envelope from "The Impossible
Astronaut" episode.
Fantasy Makeup: The
Doctor Who Universe
Website has reference pages and photos for
Doctor Who creatures played by women.
A website called The Makeup Gallery
has a special Doctor Who landing page that
shows thumbnails of the prosthetic makeup
for many of the creatures in the Doctor Who
universe that were portrayed by actresses.
For example, the page for “Alaya &
Rastac” has a photo of actress Neve
McIntosh, a progress photo of the makeup
being applied, and seven high-resolution
photos of the makeup itself from different
angles. The page introduces the Silurians,
which episodes the makeup was worn in
with brief synopses, the name of the makeup
designer (Barbara Southcott), makeup
supervisor (Pam Mullins), and builder (Neill
Gorton's MillenniumFX studio). There are
also quotes from McIntosh about her
experience wearing the makeup and some of
the challenges she faced.
The article includes a list of materials,
step-by-step instructions, and a printable
page with the right Royal Mail sticker and
set of postage stamp images to glue to the
envelope. The article estimates the time to
completion at 10-15 minutes. The article
even includes a link to a website where fans
used their skills to find the specific stamps.
In addition to Doctor Who creature
makeup, this amazing website also features
the work of many movie and TV makeup
artists who create makeup for actresses. The
transformations from actress into character
are illustrated with before and after shots
and, wherever possible, with behind the
scenes shots of the makeup design and
application. The site also has a place to
register for notification when page are
updated. According to the site, registration is
private.
This is a great project for Doctor Who
cosplayers and for young fans, too. Visit the
Instructables page “How to Make a Doctor
Who Envelope” for details.
To learn more about the makeup for
creates from Doctor Who and the actresses
who wore it, visit The Makeup Gallery's
“The Doctor Who Universe” page.
Neve McIntosh as Rastac.
The Virtual Costumer Volume 12, Issue 1
-54-
February 2014
Parting Shot
A photo that's just too good not to use.
Sometimes a story has a great leftover
photo that deserves to be used, but there's no
room left or it's slightly off-topic and doesn't
fit in. A case in point is this photo (far right)
of Jennifer Wylie as “The Impossible
Astronaut” from the Doctor Who episode.
Only, that's not the costume that Jennifer
describes how she made in her article in this
issue. It is the screen-worn costume from the
Doctor Who episode that was made in Utah.
The story of how she came to be wearing it
is almost as strange as the episode.
Mid-February 2014 found
Jennifer at the annual Gallifrey
One celebration in Los
Angeles, mixing with other
fans and many who
worked on the show,
including actors who
played the Doctor and
other characters.
That's where
Jennifer encountered a
fellow named John
Harrington, who brought
the screen-worn suit from
a costume house in northern Los Angeles
where the production rented it. Would she
like to try it on? Yes!!!
“The suit is designed to be zipped into
from the back, so the person wearing it is
basically steps into it and puts it on
backwards. The suit is somewhat adjustable.
The Virtual Costumer Volume 12, Issue 1
The shoulders were almost too big for me. If
I had worn my football pads underneath, it
may have not been as much of an issue; I
just didn't think to bring them up to that
hotel room. The crotch came almost halfway
to my knees, even with all the adjustments.
Actress Alex Kingston is 5ft 7in, so she had
no problem with it fitting correctly!
“Jade Falcon is very good at posing
subjects, so she was able to direct me to
stand in the best possible way to make it
look "right", but I was still swiiiiiiiimming
in it. John told me I could even go so far as
to walk the floor if I wanted, but I didn't
want to do that because the suit isn't mine
and I didn't want anything to happen to it.
Once I was buckled up into it, I don't
think I could have done it anyway!
“The suit was moderately
uncomfortable due to the size,
and the weight, especially the
backpack, was phenomenal. I
could only stand wearing it
about 10 minutes! Now I don't
feel so bad about the fact that I
went through all that trauma to
get mine to fit me correctly!”
One detail Jennifer learned
was that another patch had to be
used instead of the NASA “meatball logo”
patch, as NASA hadn't given clearance for
its use. At left is the actual patch on the
screen worn costume.
Right: Jennifer Wylie as River Song at Gallifrey One 2014 in the
screen-worn “Impossible Astronaut” space suit. Photo: Jade
Falcon. Left: Design used instead of the NASA “meatball” patch.
-55-
February 2014
Upcoming Events
Calendar of Events
Minami Con 20
March 7-9, 2014
Novotel Hotel Southampton
South Hampton, England
http://www.minamicon.org.uk/
Anime and cosplay convention includes costuming
related programming, a cosplay photo shoot, a
cosplay parade, a masquerade, and an “Iron Cosplay”
competition.
Norwescon 37
April 17-20, 2014
SeaTac Washington Doubletree Hotel
Seattle, Washington USA
http://www.norwescon.org/
Pacific Northwest's premier sci-fi and fantasy
convention. Features single-pattern contest and a full
masquerade.
WonderCon 2014
April 18-20, 2014
Anaheim Convention Center
Anaheim, California USA
http://www.comic-con.org/wc/
The biggest stars in the comics world come to
Anaheim. Masquerade attracted 2,400 people, 28
entries, and 62 costumes.
Monsterpalooza
April 28-30, 2014
Marriott Burbank Hotel & Convention Center
Burbank, California USA
http://www.monsterpalooza.com//
The premier convention on the art of the monster.
Includes numerous sessions on monster making and
prothetic makeup techniques for costumers.
The Virtual Costumer Volume 12, Issue 1
Copyright © 2014 Silicon Web Costumers’ Guild
Costume-Con 32
April 25-28, 2014
Sheraton Hotel
Toronto, ON, Canada
http://costumecon32.com
The premier costuming convention of the year
features panels, classes, historical and sci-fi/fantasy
masquerades, a future fashion folio design contest
and other costuming related activities.
Gaslight Gathering 4
May 2-4, 2014
Town and Country Hotel
San Diego, California USA
http://www.gaslightgathering.org/
Southern California's first dedicated Steampunk &
Victoriana Convention, features many costuming
events, and a Steampunk Grand Tea.
Baycon 2013
May 23-26, 2014
Hayatt Santa Clara
Santa Clara, California USA
http://baycon.org/2014
The SF Bay Area’s largest sci-fi and fantasy
convention, with costume panels, and a Masquerade.
Anime North 2014
May 24-26, 2014
Toronto Congress Center
Toronto, Ontario CA
http://www.animenorth.com/
One of the 10 biggest anime conventions, includes
anime/manga costuming events, plus both skit and
costume Masquerades.
Phoenix Comic-Con 2014
June 5-8, 2014
-56ISSN 2153-9022
Phoenix Convention Center and Hyatt Regency
Phoenix, Arizona USA
http://www.phoenixcomicon.com
Guests to be announced. Numerous panels on
costuming, makeup, effects, and cosplay, a costume
doll contest, hall costume contest, and a masquerade
ball.
FanimeCon 2014
May 23-26, 2014
San Jose Convention Center
San Jose, California USA
http://www.fanime.com/
One of the10 biggest anime conventions, includes
anime/manga costuming events, plus a costume
Masquerade.
Clockwork Alchemy 2014
May 23-26 2014
DoubleTree Hotel
San Jose, California USA
http://www.clockworkalchemy.com
A Steampunk themed conference featuring its
inaugural Fashion Show, a cavalcade of ladies' and
men's designer ready-to-wear, avant garde, and
couture fashions by established and up-and-coming
designers
Westercon 67
July 3-6, 2014
Marriott Hotel Downtown at the Creek
Salt Lake City, Utah USA
http://www.westercon67.org/
This venerable sci-fi convention features a full
costume masquerade and numerous costumingrelated panels and tracks, and staged masquerades
and other costuming events. Features con chairs
Kevin Roche and Andy Trembley.
February 2014
Comic-Con International 2014
July 24-27, 2014
San Diego Convention Center
San Diego, California USA
http://www.comic-con.org/cci/
World’s largest comic book convention with over
125,00 attendees. Masquerade attracted over 10,000
people, 40+ entrants, and 150+ costumes, with
presentation, workmanship, and industry awards. If it
isn’t sold out yet, get your tickets and hotel now!
Costume College 2014
July 31-August 4, 2014
Warner Center Marriott
Woodland Hills, California USA
http://www.costumecollege.net/
Collinsville with a full costume masquerade and
costume related panels.
Peninsula Wearable Arts Guild
(PenWAG)
Ongoing Events
Campbell Community Center
Campbell, California USA
Second Saturday of each month
http://www.penwag.org/
Bay Area English Regency Society
(BAERS)
Various San Francisco Bay Area locations
Numerous dance parties – see their schedule
http://www.baers.org/
Early 19th c. English Regency with dances from
English Country tradition. Second-Friday dance
parties, and fancy-dress balls throughout the year.
Period dress admired but not required.
Gaskell Occasional Dance Society
Three-day educational conference on costuming and
clothing, produced by Costumer's Guild West. Didn’t
inherit tickets? Try anyway: you might get lucky!
Scottish Rite Tempe
Oakland, California USA
http://www.gaskellball.com/
Worldcon: Loncon 3
Victorian Ballroom dances with live music, and a
fancy Victorian dress ball. Semi-formal clothing
required. Period formal dress of the 19 th- 21st century
admired but not required.
August 14 – August 18, 2014
ExCeL, London Dockland, UK
http://www.lonecon3.org/
The catwalk style Masquerade is rivaled only by the
Hugo Award Ceremony. Costuming-related panels
and events. Theme honors Mercury space program.
DragonCon
August 29 – September 1, 2014
Atlanta, Georgia USA
http://www.dragoncon.org/
Multi-media popular culture convention on sci-fi,
fantasy, gaming, and comics. Features costuming
track, and a plethora of costuming contests.
Archon 38
October 3-5, 2014
#38 Gateway Center Drive
St. Louis, Missouri USA
http://www.archonstl.org/38/
Greater Bay Area Costumers’ Guild
(GBACG)
Various San Francisco Bay locations
Many themed events – see their schedule
http://www.gbacg.org/
For recreational costumers in the SF Bay Area.
Activities include workshops, costume salons, a
costuming academy and many costumed events.
Period Events and Entertainment
Society (PEERS)
Masonic Lodge of San Mateo,
San Mateo, California USA
Ongoing monthly period dance events
http://www.peersdance.org/
Sponsors events, classes, and living history
performances. Activities include historic dance,
drama, music, literature and costume. Period dress
admired but not required
Tech Shop
120 Independence Drive
Menlo Park, CA, USA
Ongoing classes monthly
http://www.techshop.ws/
Classes on the shop’s computerized embroidery,
industrial, and conventional sewing machines, and
serger. Also molding, vaccuforming, cutting, and
machining classes.
National Civil War Association
(NCWA)
Various Northern California locations
Many re-enactment and educational events – see their
schedule http://www.ncwa.org/
The NCWA presents living history for the public in
many forms, including military and civilian
encampments, battles, and lectures.
This sci-fi and fantasy convention returns to
The Virtual Costumer Volume 12, Issue 1
Members embellish garments with machine and hand
appliqué, patchwork, fabric painting and dyeing,
stenciling and stamping, machine and hand
embroidery, beading, and more.
-57-
Editors Note
Send calendar or ongoing costume-related
events to [email protected]. Include event
name, location, dates, URL, and brief description
highlighting costume-related activities.
February 2014


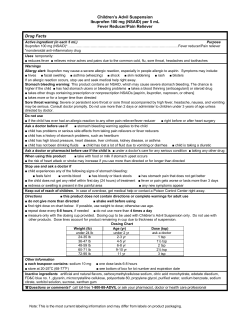
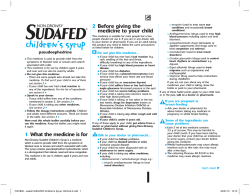
© Copyright 2026