
Registrar User Manual - Civil Registration System
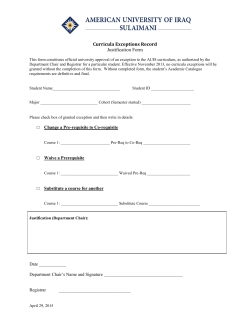
User Manual (For Registrar) Civil Registration System Birth and Death Registration BIRTH & DEATH REGISTRATION GOVERNMENT OF INDIA MINISTRY OF HOME AFFAIRS OFFICE OF THE REGISTRAR GENERAL, INDIA V.S. Division, West Block –I, R.K. Puram, New Delhi – 110066 Registrar User Manual Version1.0 The Registrar General and Census Commissioner, India Civil Registration System Registrar User Manual Version 1.0 Table of Contents Page No. 1. 2. 1 Introduction Registrar Login 2.1 Logging in 2.2 Master (Hospital) 2.3 2.2.1 Add Hospital 2.2.2 Edit Hospital User Management 2.4 2.5 2.6 2.3.1 User Registration 2.3.2 Registered User Birth 2.4.1 Add Birth Registration (Legal Information) 2.4.2 Add Birth Registration (Statistical Information) 2.4.3 Birth Confirm Page 2.4.4 NAC Issued 2.4.5 Search Birth Registration 2.4.6 Incomplete Registration Form 2.4.7 Received Applications 2.4.8 Rejected Application Death 2.5.1 Add Death Registration (Legal Information) 2.5.2 Add Death Registration (Statistical Information) 2.5.3 Death Confirm Page 2.5.4 NAC Issued 2.5.5 Search Death Registration 2.5.6 Incomplete Registration Form 2.5.7 Received Applications 2.5.8 Rejected Application Still Birth 2.6.1 Add Still Birth Registration (Legal Information) 2.6.2 Add Still Birth Registration (Statistical Information) 2.6.3 Still Birth Confirm Page 2.6.4 Search Still Birth Registration 2.6.5 Incomplete Registration Form 3 4-5 6 7 8 9 10-36 10-16 16-18 19-21 22-23 24-30 31 32-35 36 37-62 37-42 42-45 46-48 48-50 51-56 57 58-62 62 63-75 63-67 68-69 70-71 71-74 75 Acronyms CRS BDR Civil Registration System Birth and Death Registration Page 2 of 64 1. Introduction Civil Registration System (CRS) primarily, is a web based application as a common solution for Birth, Death and Still Birth Registration and Certificate generation across the country. System provides centralized data management of all recorded events for Birth and Death and Still Birth registration. System also facilitates frequent reports for analysis and planning based on data of birth, death and still birth registration. An offline version of the application is also available for registration for those areas where internet facility is not available. Offline version of application works on simple computer without internet facility and the record of registration can be import subsequently from that computer to centralize online application server for consolidation of database and all records will be available with online application across the country. System provides robust User management based on different user authorization to access and generate data and reports. Different users are provided access to application at different level of authorization and authentication. System provides secured access to users having user ID and password. A user having basic knowledge of computer and internet can work easily with application. Functions of the application1. User Registration 2. Master Data Management 3. Birth Registration 4. Death Registration 5. Still Birth Registration 6. Not Availability Certificate (NAC) Issuance 7. Reports Generation This manual is intended for use of the registration functionaries, namely, the Registrar and Sub-Registrar. Civil Registration System 2. Registrar User Manual Version 1.0 Registrar Login 2.1. Logging in The Online CRS-BRD Application presently resides on NIC Server under the domain name http://crsorgi.gov.in. The Application can be accessed from any net browser. However, it is best viewed in Google-chrome web browser. You can also can access online application of CRS by typing http://censusindia.gov.in in the address bar of the internet browser, and then select „Birth and Death Software‟ on the Home Page. The following Login Page will appear: Fig2.1.1: CRS Login page To login as Registrar, perform the following steps: Enter the valid user name and password. Type the CAPTCHA exactly as given in the picture. Click the Login button given at the bottom. Home page will be displayed. The active items displayed in the Menu Bar on Home Page for User „Registrar‟ are: Home, Master, User Management, Birth, Death, Still Birth and Logout (One inactive items, namely, „Reports‟ on the Menu bar are available to higher level functionaries i.e. District Registrar, Chief Registrar and the Registrar General and have been Page 4 of 64 Civil Registration System Registrar User Manual Version 1.0 discussed in another manual). Also please note the three panels (i) „Quick Launch‟ (extreme left) – To access quick functionality (ii) „Registration Summary‟ (extreme right)- To view daily registered events (iii) „News Management‟ (top middle) and – To view active news (iv) 'Dash Board' (middle) – To display events submitted by Hospitals On the activity screen which are meant to carry out specific functions as indicated thereon. The statistics revealed in the table under „Registration Summary‟ depicts the number of births, deaths, still births and infant deaths registered in the Registration Area in reference on the current date or some specified date selected for the purpose. A snapshot of the Home page as displayed, is shown below: Fig2.1.2: Registrar Homepage Click the active menu links to view the sub-links and functionality they will allow to perform. Page 5 of 64 Civil Registration System Registrar User Manual Version 1.0 2.2. Master Put the cursor on menu option “Master” for the sub link under it. Click on link Hospital to access hospital master. Here user can perform following operations: 1. Add new Hospitals 2. Edit hospital's details 2.2.1. Add new Hospital To add a new hospital in user master, click on the Hospital Master link. Following screen will be displayed: Fig2.2.1: Hospital Master List To add a new hospital in hospital master, user has to click at link given down-left named as +New at the page. Following screen will be displayed: Page 6 of 64 Civil Registration System Registrar User Manual Version 1.0 Fig2.2.2: Add New Hospital Enter hospital code just more one to previous added hospital code. Enter Hospital name Since hospital should lie in the jurisdiction area of registrar so state, district, subdistrict and registration unit names will be auto filled and non-editable. Select Village/town name in which hospital exists Enter E-mail ID of hospital Enter mobile number of hospital Select place type either govt. or private Select the status out of two, active or inactive Now click on button “Save & Add” 2.2.2. Edit Hospital For editing details of any hospital, Please follow the steps Click “edit” link given against the desired hospital from hospital master. Hospital profile will be opened with previously filled information. After updating desired information, please click on “save ”button to update information One confirmation message will be displayed on the screen. Page 7 of 64 Civil Registration System Registrar User Manual Version 1.0 2.3. User Management Click the User Management link for the Sub links under it. Functions which can be performed with this link are shown in the screen snapshot shown below: 1. Create, update and delete users. 2 . View the Registered user list. 2.3.1. User Registration To create a new user (sub-registrar) under the user „Registrar‟, click on the User Registration link. Following screen will be displayed: Fig2.3.1: User Registration Enter „User Name ‟in the respective text-box. Enter the User „E-mail id ‟in the text-box provided, the email id should be unique and in the proper email format. Select Gender of the user. Select role of user under creation from the drop-down box of the item „Role‟. Please note that in present case there are only two roles available would be „sub-registrar‟ and 'data entry operator' as the application has built in user wise permissions in it. Page 8 of 64 Civil Registration System Registrar User Manual Version 1.0 Since the sub-registrar/data entry operator will also belong to the same Registration unit, further fields till Registration unit will not be available for selection. Click on “Submit” button to save the user details. 2.3.2. Registered Users To view the user created, click the Registered Users link under User Management Link. Following screen will be displayed: Fig2.3.2: Registered users All the Users created by Registrar will be available here and Registrar can edit the user for modifying his information like Name, Email id, Gender etc. The User can also be deleted from the list. Page 9 of 64 Civil Registration System 2.4. Registrar User Manual Version 1.0 Birth Keeping the mouse pointer over the Birth link will display the sub links which will allow registering the birth event, View NAC issued list, Search for registered births, and complete the incomplete registration form respectively. 2.4.1. Add Birth Registration (Legal information) To register a birth, click the Add birth registration link under Birth link. Following screen will be displayed. The first screen displayed will allow enter the Birth legal information and the second screen linked to it the related statistical information provided to the Registrar in Reporting Form-1 for registering the birth event. Fig: 2.4.1 Birth menu Page 10 of 64 Civil Registration System Registrar User Manual Version 1.0 Fig2.4.1.1: Add Birth Legal information Page 11 of 64 Civil Registration System Registrar User Manual Version 1.0 System facilitates users to fill reporting form in their regional language of state to which they belongs. There are 4 options of reporting languages in which birth reporting can be donei. English-None ii. English-Regional language iii. Regional language-English iv. Regional language-None According to ease of reporting, user can fill reporting form any one combination out of above four. In case of bilingual reporting, as soon as user types in primary language, system auto translates in secondary language. If there is any discrepancy in auto translated text, then it can be corrected by typing manually in that text-box. Form No.: Enter the form number of the birth that is going to be registered (if any). Reporting Date: Select the reporting date from calendar control provided. Information of the child Date of Birth: Select the date of birth from the calendar control. The application validates the date of birth with the reporting date keyed in. Three checks on Date of birth and Date of Reporting have been applied as under. If any of the below conditions is true then the event is registered in the category „Delayed‟: 1. Date of Reporting–Date of Birth is more than 21 Days but within 30 Days. 2. Date of Reporting–Date of Birth is more than 30 Days but within 1 Year. 3. Date of Reporting–Date of Birth>1 Year. In such a case the system will prompt that the event is a delayed event and will later, based on the period of delay, ask for requisite documents in the statistical form. The period of delay and documents required are as under: Documents Period of Delay Receipt No. More than21 days but within 30 days Receipt No. Order No. of Competent Authority Date of Order More than 30 days but Within one year Receipt No. Magistrate Order No. Date of Order After1year Page 12 of 64 Civil Registration System Registrar User Manual Version 1.0 The system will check for requisite documents and an alert will be displayed to the user. If user clicks on “OK” then the software will allow user to proceed with the registration and if the user presses “Cancel” then the system will start with the new registration. Fig2.4.1.2: Delayed Registration Sex: Select child‟s gender from the drop-down box. First Name: Enter the child‟s first name if available. Middle Name: Enter Middle name of the child. Last Name: Enter last name of the child, if any. Father’s information First Name: Enter father‟s first name here. Middle Name: Enter father‟s middle name here. Last Name: Enter father‟s last name here. UID: Enter father‟s UID, if available. Mother’s information First Name: Enter mother‟s first name here. Middle Name: Enter mother‟s middle name here. Last Name: Enter mother‟s last name here. UID: Enter mother‟s UID, if available. Page 13 of 64 Civil Registration System Registrar User Manual Version 1.0 Address of parents at the time of birth of child System facilitates two options to fill address of parents at the time of birth of child Inside India or Outside India By click on radio buttons given in address panel, any option can be selected. If user selects outside India then system will displays a single text-box to fill complete address within it. In case of inside India, an address panel will be displayed with following options to fillBldg. No & name: Enter name and number of building here. House no.: Enter House no. here. Street/Lane name: Enter Street/lane name here. Locality/Post office: Enter locality/Post office here. State: Select the state from the drop-down box here. District: Select respective district for the state selected. Sub-district: Select corresponding sub-district for the selected district. Village/Town: Select the Village/Town for the selected sub-district. Pin: Enter the pin for the address here. Permanent address of parents: System facilitates two options to fill permanent address Inside India or Outside India By click on radio buttons given in address panel, any option can be selected. If user selects outside India then system will displays a single text-box to fill complete address within it. In case of inside India, an address panel will be displayed with following options to fillBldg. No & name: Enter name and number of building here. House no.: Enter House no. here. Street/Lane name: Enter Street/lane name here. Locality/Post office: Enter locality/Post office here. State: Select the state from the drop-down box here. District: Select respective district for the state selected. Sub-district: Select corresponding sub-district for the selected district. Village/Town: Select the Village/Town for the selected sub-district. Pin: Enter the pin for the address here. If permanent address is same as that of address of parents at the time of birth, then a check-box is provided. This check-box will make both the addresses same. Place of Birth Page 14 of 64 Civil Registration System Registrar User Manual Version 1.0 System facilitates two options to fill of place of birth Inside India or Outside India By click on radio buttons given in address panel, any option can be selected. If user selects outside India then system will displays a single text-box to fill complete address within it. In case of inside India, an address panel will be displayed with following options to fillHospital: If place of birth is selected as Hospital, then a block with the Name and Address of hospital will be displayed. The Hospitals displayed in the list will be from the same Registration unit to which the Registrar belongs. Fig: 2.4.1.3 Birth– Place of birth I House or Others: If the place of birth is selected as House or Others, then the address block will be displayed. And fill in the address block. Fig: 2.4.1.4Birth– Place of birth II Informant’s information Two check boxes have been given in this block to enable user to select if the Informant‟s address is same as „Permanent addresses‟ or „Hospital addresses. Name: Enter the name of the informant here. If the place of birth is Hospital then check Page 15 of 64 Civil Registration System Registrar User Manual Version 1.0 the check box, “Informant‟s address same as Hospital address.” to automatically display informant‟s name and address. Address: Enter the Address of the informant here. If address same as Permanent address then check the corresponding checkbox to automatically display informant‟s address in the text box. Pin: Enter Pin here. Save: On clicking this button, the entered information will be saved and control will be transferred to Birth statistical information. Cancel: Clicking the Cancel button will take the user to the homepage. 2.4.2. Add Birth Registration (Statistical Information) Once the Legal information is saved, the user will be redirected to next screen where in statistical information will be filled in. Following screen shot shows the Birth statistical screen: Fig2.4.2.1: Birth Statistical information Page 16 of 64 Civil Registration System Registrar User Manual Version 1.0 Town/Village of Residence of mother State: Select the state from the drop-down box here. District: Select respective district for the state selected. Sub-district: Select corresponding sub-district for the selected district. If user does not know sub-district name, then an option “All sub-district” can be selected and corresponding list of villages will populate all villages of district. Is it a Town/Village: Select the corresponding Town/Village for the selected. Name of Village/Town: Select the Village/Town for the selected sub-sub district. Town/ Village. If residence of mother is same as that of address of parents at the time of birth of child, then a check-box is provided. This check-box will make both the address are same. Father and Mother’s information Religion: Select the Religion from the drop-down box provided. Father’s level of education: Select level of education from the drop-down provided. Father’s occupation: Select the occupation of father from the drop-down box. Mother’s level of education: Select level of education from the drop-down provided. Mother’s occupation: Select the occupation of mother from the drop-down box. Other information Age of mother at the time of first marriage: Enter the age of mother in completed years. Age of mother at the time of this birth: Enter the age of mother in years. This field wills not accept the value if it is less than Age of mother at the time Of first marriage. Number of children born alive to the mother so far including this child: Enter the number of children value here. Type of attention at the delivery: Select the appropriate value from the drop-down box provided. Type of Delivery: Select the required value from the drop-down provided. This field is inline with the place of birth in legal portion. Birth weight: Enter the weight of the baby in the text-box provided. Duration of pregnancy (in weeks): Enter the duration of pregnancy in the text-box provided. Upload Reporting form Upload reporting form: Upload the scanned copy of the reporting form here. Page 17 of 64 Civil Registration System Registrar User Manual Version 1.0 Remarks Remarks: Enter remarks in the text are a provided. Save: After clicking the button, the entered information will be saved and control will be transferred to Birth conformation page as shown below (Fig2.4.3.1). Cancel: Cancel button click will take the user to the homepage. 2.4.3. Birth Confirm Page Fig2.4.3.1: Birth confirm page Registration date: System facilitate to user to change the date of registration. Date of registration can lie between dates of reporting to current date otherwise system will take current date as default. Page 18 of 64 Civil Registration System Registrar User Manual Version 1.0 Confirm: Click the Confirm button after verifying the information displayed as an acknowledgment. This will make the registration permanent and Registration number will be generated at this step. Edit: User may click on Edit button if any information requires modification. Fig2.4.3.2: Birth legal confirm (Acknowledgment) After clicking Confirm button, the legal information acknowledgment is shown to the user. User has following three options here. Add Next Record: On clicking this button, user will be able to add a next registration. Generate Certificate: On click of this button, a certificate will be displayed to the user. Refer below snapshot (Fig2.4.3.3) of the certificate. View birth registration list: To navigate to the Birth registration list page, this button will be clicked. Newly added registration will be available on the list page. Page 19 of 64 Civil Registration System Registrar User Manual Version 1.0 Fig 2.4.3.3: Birth certificate Page 20 of 64 Civil Registration System Registrar User Manual Version 1.0 The certificate can be downloaded or printed from this screen. Print: Click the Print button for printing the birth certificate. Cancel: Clicking the Cancel button will take the user to the home page. 2.4.4. NAC issued The NAC Issued link is to view the list of Non availability certificates issued. NAC is issued on request to an applicant against payment of prescribed fee, if search made in the database of registered events for the desired event reveals that the same is not found to be registered. The NAC so obtained will allow the applicant to get the event registered thereafter. Screen below shows the NAC list as it appears and displayed: Fig2.4.4.1:NAC issued list View: On clicking View, the NAC Certificate displayed is as shown below: Page 21 of 64 Civil Registration System Registrar User Manual Version 1.0 Fig2.4.4.2: Birth Non-Availability Certificate Print: Click the Print button for printing the NAC certificate. 2.4.5. Search Birth Registration Search Birth screen is to search if a given birth event is registered in the database of registered births of the Application. For the purpose, enter some or all of the desired parameters listed on the Birth search screen. The Search result will display a list with records matching the search criteria. Page 22 of 64 Civil Registration System Registrar User Manual Version 1.0 Fig2.4.5.1: Birth search screen Birth Year: Select birth year range. Registration no.: Enter the Registration no. Gender: Select gender from the drop-down box. Date of Birth: Enter the date of Birth. Page 23 of 64 Civil Registration System Registrar User Manual Version 1.0 Name of father: Enter the name of the father. Name of mother: Enter the name of the mother. Name of the child: Enter name of the child. Search: On click of Search, there cord for the parameter provided will be displayed. Reset: Reset click will clear the entered search criteria. Registration no. link: If user clicks on the Registration no. Link in the search list, then a screen with the details of registration will be displayed. Refer snapshot (Fig: 2.4.5.2) below. Fig: 2.4.5.2Birth information Certificate view: Click the View link for viewing the certificate. (Refer Fig: 2.4.2.4above) Correction: On clicking the Correction link, the Birth registration page opens in Edit mode. User can modify the values in Legal and statistical section. The correction limit is set to 3 times only, once user crosses the limit, the correction button will be disabled. Page 24 of 64 Civil Registration System Registrar User Manual Version 1.0 History: On click of View link in History column, the Original and the corrected records are displayed. The records are displayed in the descending order as in the latest updated record will be on the top. Fig2.4.5.3: Birth history list On clicking the View link in Corrections of History list page, the record details are shown. The data which is changed first time is shown in Blue color and the data which is modified in second correction is shown in Pink color. Page 25 of 64 Civil Registration System Registrar User Manual Version 1.0 Fig: 2.4.5.4Birth history details How to generate Non-availability Certificate? If user tries to search an event presumed to have been registered and it is not found in the system, then a Non-Availability certificate has to be issued for such cases as shown below: Page 26 of 64 Civil Registration System Registrar User Manual Version 1.0 Fig: 2.4.5.5Birth Search On clicking “Generate Certificate” button as displaying in Fig (2.4.5.5), following screen will be displayed which will generate the certificate. Fig: 2.4.5.6 Birth NAC Save: After clicking the button, the entered information will be saved. Cancel: Cancel button click will take the user to the homepage. Page 27 of 64 Civil Registration System Registrar User Manual Version 1.0 2.4.6. Incomplete Registration Form The incomplete form will be saved in Incomplete Registration link as shown below: Fig2.4.6.1Incompleteregistrationform Continue Registration: On clicking the Continue Registration link, the Birth registration page opens in Edit mode. User can continue with in complete section. The correction limit is set to 3 times only, once user crosses the limit, the correction button will be disabled. Delete: To delete the record Page 28 of 64 Civil Registration System Registrar User Manual Version 1.0 2.4.7. Application Received The birth events submitted by Hospitals and Data Entry Operators to Registrar for approval, are listed under this link. Fig 2.4.7.1 Here registrar can perform following two activities: View Remark: Registrar can view remark against any birth event submitted by Hospitals or Data Entry Operators by click on link “View” under column Remark. For any new application, remark will display default text ”New Application”. If application is re-submitted after some clarification asked by registrar then remarks will display the message written by Hospitals or Data Entry Operators. Page 29 of 64 Civil Registration System Registrar User Manual Version 1.0 Fig 2.4.7.2 Proceed: On clicking button ”Proceed” against any submitted birth event for registration, system will redirect to the page as displaying below where registrar will be able to review submitted event by applicants. After Reviewing submitted event, as per own satisfaction through any communication or verification, registrar may take any action among of three as listed below. Approve: Being satisfied with information filled by applicant, registrar can approved the application and system will redirect on confirmation page from where events registration can be confirmed and registered in usual flow of birth registration. After registration that event will display in usual “Search Birth Registered” linked list. Seek Clarification: If registrar is partially satisfied and requires some clarification from applicant then application can be send back to applicant for clarification with adding some remark (optional). (Note): After send back for clarification, the birth event will be listed in list with only “View” option under column “Action”. As soon as applicant re-submits the event after updating the information as required by registrar, again option “Proceed” will be available to registrar against that application under column “Action”. Reject Application: If registrar is completely unsatisfied with the information filled by applicant then application can be rejected by click on button “Reject Application”. Now that application will list in rejected application list. Page 30 of 64 Civil Registration System Registrar User Manual Version 1.0 2.4.8. Rejected Applications The applications of birth events submitted by Hospitals or Data Entry Operators, after rejection by Registrar will listed here as shown below. Fig 2.4.8.1 Page 31 of 64 Civil Registration System Registrar User Manual Version 1.0 2.5. Death Registration Keeping the mouse pointer over Death link will display the sub links which will allow registering death; View NAC issued list, Search for registered Deaths, Incomplete Registration Form respectively. Fig: 2.5.1 Death menu 2.5.1. Add Death Registration (Legal Information) To register a death, click Add death registration link under Death. Following screen will be displayed. This screen will display Death legal information and the screen linked to this will display statistical portion of Death. System facilitates users to fill reporting form in their regional language of state to which they belongs. There are 4 options of reporting languages in which birth reporting can be donei. ii. iii. iv. English-None English-Regional language Regional language-English Regional language-None According to ease of reporting, user can fill reporting form with any one combination out of above four. In case of bilingual reporting, as soon as user types in primary language, system auto translates in secondary language. If there is any discrepancy in auto translated text, then it can be corrected by typing manually in that text-box. Page 32 of 64 Civil Registration System Registrar User Manual Version 1.0 Fig2.5.1.1: Add Death Legal information Page 33 of 64 Civil Registration System Registrar User Manual Version 1.0 Form No.: Enter the form number (if any)of the death event that is going to be registered. Reporting Date: Select the reporting date from calendar control provided. Deceased Information Date of Death: Select the date of death from the calendar control. The application validates the date of death with the reporting date as keyed in. There are three checks on Date of Death for checking the delayed registration. If any of the below conditions is true then it is considered to be delayed. 1. Date of Reporting–Date of Death is more than21Daysbut within30Days. 2. Date of Reporting–Date of Death is morethan30Daysbutlessthan1 Year. 3. Date of Reporting–Date of Death> 1Year. If the registration falls under any of these categories then the software would prompt for the event being a delayed event and in the „statistical form ‟it will ask for the documents based on the period of delay as follows: Documents Period of Delay Receipt No. Receipt No. More than21 days but within 30 days Order No. of Date of Order Competent Authority Receipt No. Magistrate Order More than30daysbut Within one year Date of Order After1year No. If user clicks on “OK” then the software will allow user to proceed with the Registration and if the user presses “Cancel” then the system start with the new registration. The alert snap hot is shown below. Page 34 of 64 Civil Registration System Registrar User Manual Version 1.0 Fig2.5.1.2: Delayed Registration Sex: Select child‟s gender from the drop-down box. Age: Select the age of deceased from the drop-down box and enter the actual age in the text-box provided. This value is validated against the selected parameter in the drop-down box. First Name: Enter the child‟s first name if available. Middle Name: Enter Middle name of the child. Last Name: Enter last name of the child if any. UID: Enter UID of the deceased, if available. Father/Husband information First Name: Enter father‟ s first name here. Middle Name: Enter father‟s middle name here. Last Name: Enter father‟s last name here. UID: Enter UID of father/husband, if available. Mother’s information First Name: Enter mother‟s first name here. Middle Name: Enter mother‟s middle name here. Last Name: Enter mother‟s last name here. UID: Enter UID of mother, if available. Page 35 of 64 Civil Registration System Registrar User Manual Version 1.0 Address of deceased at the time of death Bldg. No & name: Enter name and number of building here. House no.: Enter House no here. Street/Lane name: Enter Street/lane name here. Locality/Post office: Enter locality/Post office here. State: Select the state from the drop-down box here. District: Select respective district for the state selected. Sub-district: Select corresponding sub-district for the selected district. Village/Town: Select the Village/Town for the selected sub-district. Pin: Enter the pin for the address here. Permanent address of deceased Bldg. No& name: Enter name and number of building here. House no.: Enter House no here. Street/Lane name: Enter Street/lane name here. Locality/Post office: Enter locality/Post office here. State: Select the state from the drop-down box here. District: Select respective district for the state selected. Sub-district: Select corresponding sub-district for the selected district. Village/Town: Select the Village/Town for the elected sub-district. Pin: Enter the pin for the address here. If permanent address is same as that of address of deceased at the time of death, then a check-box is provided. This check-box will make both the addresses same. Place of Death Hospital: If place of death is selected as Hospital, then a block with the Name and Address of hospital will be displayed. The Hospitals displayed in the list will be for the same Registration unit to which the Registrar belongs. Fig: 2.5.1.3Death –Place I Page 36 of 64 Civil Registration System Registrar User Manual Version 1.0 House or Others: If the place of death is selected as House or Others, then the address block will be displayed. And if the address is same as that of permanent address then tick the check-box to fill in the address block. Fig: 2.5.1.4Death Place II Informant’s information Name: Enter the name of the inform an there. If the place of birth is Hospital then check the check box as, “Informant's address same as Hospital address.” Automatically display informant‟s name and address. Address: Enter the Address of the inform an there, if address same as Permanent address then check the check box, automatically display informant‟s address in the text box. Pin: Enter Pin here. A check-box is given in the block which will enable user to select if the Informant‟s information is same as that of Permanent address and Hospital address. Save: After clicking the button, the entered information will be saved and control will be transferred to Death statistical information. Cancel: Cancel button click will take the user to the home page. 2.5.2. Add Death Registration (Statistical Information) Once the Legal information is saved, the user will be redirected to next screen where in statistical information will be filled in. Following screen shot shows the Death Registration – Statistical Information screen: Page 37 of 64 Civil Registration System Registrar User Manual Version 1.0 Fig2.5.2.1: Death Statistical information Town/Village of Residence of deceased State: Select the state from the drop-down box here. District: Select respective district for the state selected. Sub-district: Select corresponding sub-district for the selected district. Is it a Town/Village: select the corresponding Town/Village for the selected sub-district. Name of Village/Town: Select the Village/Town for the selected Town/Village. If residence of deceased is same as that of address of deceased, then a check-box is provided. This check-box will make both the address are same. Deceased information Religion: Select the Religion from the drop-down box provided. Occupation: Select the occupation of father from the drop-down box. Page 38 of 64 Civil Registration System Registrar User Manual Version 1.0 Other informationType of medical attention received before death: Select the type of medical attention received before death. Was the cause of death medically certified: Select the cause of death medically certified? If user selects “Yes” then the list of medically certified caused will be populated with Auto-complete facility. And if user selects “No” then the list of defined causes will be populated in a drop-down box. Name of Decease or Actual Cause of Death: Select the Name of Decease Or Actual Cause of Death from the drop down box. In case this is a female death, did the death occurred while pregnant: Select the option from the drop-down box here. If used to habitually smoke?: Enter the appropriate value in the text-box provided If used to habitually chew tobacco?: Enter the appropriate value in the text-box provided. If used to habitually chew areca nut?: Enter the appropriate value in the text-box provided. If used to habitually drink alcohol? Enter the appropriate value in the text-box provided. Upload Reporting form Upload reporting form: Upload the scanned copy of their porting form here. Remarks Remarks: Enter remarks, if any, in the text are a provided. Save: After clicking the button, the entered information will be saved and control will be transferred to Death information page as shown below. Cancel: Cancel button click will take the user to the homepage. Page 39 of 64 Civil Registration System Registrar User Manual Version 1.0 2.5.3. Death Confirm Page Fig2.5.3.1: Death confirm page Page 40 of 64 Civil Registration System Registrar User Manual Version 1.0 Confirm: Click the Confirm button after verifying the information displayed as an acknowledgment. This will make the registration permanent and Registration number will be generated at this step. Edit: User may click on Edit button if any information requires modification. Fig2.5.3.2: Death legal confirm After clicking Confirm button, the legal information acknowledgment is shown to the user. User has following three options here. Add Next Record: On clicking this button, user will be able to add a new record. Generate Certificate: A click on this button, will display the registration certificate corresponding to the event registered. Refer below snap shot (Fig2.5.2.4)of the certificate. View death registration list: To navigate to the Death registration list page, This button will be clicked. Newly added registration will be available on the list page. Print: Click the Print button for printing the death certificate. Cancel: Cancel button click will take the user to the home page. Page 41 of 64 Civil Registration System Registrar User Manual Version 1.0 Fig2.5.3.3: Death certificate Page 42 of 64 Civil Registration System 2.5.4. Registrar User Manual Version 1.0 NAC Issued The link “NAC Issued” is used to view the list of Non-Availability Certificates issued. NAC is issued on request to an applicant against payment of prescribed fee, if search made in the database of registered events for the desired event reveals that the same is not found registered. The NAC so obtained will allow the applicant to get the event registered thereafter. Screen below shows the NAC list as it appears and displayed: Fig2.5.4.1: NAC issued list View: On click of View, the NAC Certificate will be displayed as shown in Below fig2.5.4.2. Fig2.5.4.2: NAC Certificate Print:Click the Print button for printing the death certificate. Page 43 of 64 Civil Registration System 2.5.5. Registrar User Manual Version 1.0 Search Death Registration Search Death screen is to search the registered Deaths with the desired parameters. User can enter any parameter which he/she are aware of. Search result will display a list with records matching to the search criteria. Fig2.5.5.1: Death search screen Death Year: Select death year range. Registration no.: Enter the Registration no. Gender: Select gender from the drop-down box. Date of Death: Enter the date of Death. Name of father: Enter the name of the father. Name of mother: Enter the name of the mother. Name of the deceased: Enter name of the deceased. Search: On click of Search, the record for the parameter provided will be displayed. Page 44 of 64 Civil Registration System Registrar User Manual Version 1.0 Reset: Reset click will clear the entered search criteria. Registration no. link: If user clicks on the Registration no. link in the search list, then a screen with the details of registration will be displayed. Refer snap shot (Fig: 2.5.5.2) below. Fig: 2.5.5.2 Death information Page 45 of 64 Civil Registration System Registrar User Manual Version 1.0 Certificate view: Click the View link for viewing the certificate. (Refer Fig: 2.4.2.4above) Correction: On clicking the Correction link, the Death registration page opens in Edit mode. User can modify the values in Legal and statistical section. The correction limit is set to3, once user crosses the limit, the correction button will be disabled. History: On click of View link in History column, the Original and the correctedrecordsaredisplayed.Therecordsaredisplayedinthedescending Order as in the latest updated record will be on the top. Fig: 2.5.5.3Death history On clicking the View link in Corrections of History list page, there cord details are shown. The data which is changed first time is shown in Blue color and the data which is modified in second correction is shown in Pink color. Fig: 2.5.5.4 Death history details Page 46 of 64 Civil Registration System Registrar User Manual Version 1.0 How to generate Non-availability Certificate? If user tries to search a registration and it is not found in the system, then a Non-Availability certificate has to be issued for such cases as shown below: Fig: 2.5.5.5Death search for NAC On clicking “Generate Certificate” button, following screen will be displayed which will generate the certificate. Page 47 of 64 Civil Registration System Registrar User Manual Version 1.0 Fig: 2.5.5.6 Death NAC Save: After clicking the button, the entered information will be saved. Cancel: Cancel button click will take the user to the homepage. Page 48 of 64 Civil Registration System Registrar User Manual Version 1.0 2.5.6.Incomplete Registration Form The incomplete form will save in Incomplete Registration link as shown below: Fig2.5.6.1Incomplete registration form Continue Registration: On clicking the Continue Registration link, the Death registration page opens in Edit mode. User can continue with incomplete section. The correction limit is set to 3, once user crosses the limit, the correction button will be disabled. Delete: To delete the record 2.5.7. Application Received The death events submitted by Hospitals and Data Entry Operators to Registrar for approval, are listed under this link. Here registrar can perform following two activities: Page 49 of 64 Civil Registration System Registrar User Manual Version 1.0 Fig 2.5.7.1 View Remark: Registrar can view remark against any death event submitted by Hospitals or Data Entry Operators by click on link view under column Remark. For any new application, system will display default text ”New Application” as remark (Fig 2.5.7.2). If application is re-submitted after some clarification then remarks will display the message written by Hospitals or Data Entry Operators. Fig 2.5.7.2 Proceed: On clicking button ”Proceed” against any submitted death event for registration, system will redirect to next page as displaying below where registrar will be able to review the submitted event. Page 50 of 64 Civil Registration System Registrar User Manual Version 1.0 Fig 2.5.7.3 After Reviewing submitted event, registrar may take any action among of three as listed below as per own satisfaction through any communication or verification. Page 51 of 64 Civil Registration System Registrar User Manual Version 1.0 Approve: Being satisfied with information filled by applicant, registrar can approved the application and system will redirect on confirmation page from where event registration can be confirmed in usual flow of death registration. See Fig 2.5.7.4. After registration that event will be displayed in usual “Search death Registered” linked list. Fig 2.5.7.4 Seek Clarification: If registrar is partially satisfied and required some clarification from applicant then application can be send back to applicant for clarification with adding some remark (optional). (Note): After send back for clarification, the birth event will be listed in list with only “View” option under column “Action”. As soon as applicant re-submits the event after updating the information as required by registrar, again option “Proceed” will be available to registrar against that application under column “Action”. Page 52 of 64 Civil Registration System Registrar User Manual Version 1.0 Reject Application: If registrar is completely unsatisfied with the information filled by applicant then application can be rejected by click on button “Reject Application”. Now that application will list in rejected application list. 2.5.8. Rejected Applications The applications of birth events submitted by Hospitals or Data Entry Operators, after rejection by Registrar will list here as shown below. Fig 2.5.8.1 Page 53 of 64 Civil Registration System Registrar User Manual Version 1.0 2.6. Still Birth Keeping the mouse pointer over Still Birth link, it will display the sub links which will allow registering still birth, Search for registered Still births, incomplete registration form, Application Received and Rejected Applications respectively. Fig: 2.6.1 Still birth menu 2.6.1. Add still birth Registration (Legal information) To register a Still Birth, click Add Still birth registration link under still birth. Following screen will be displayed. This screen will display Still birth legal information and the screen linked to this will display statistical portion of Still Birth. Form No.: Enter the form number of the still birth that is going to be registered. Reporting Date: Select the reporting date from calendar control provided. General Information Date of Birth: Select the date of birth from the calendar control. The application validates the date of birth with reporting date as in, the date of birth should always be smaller than that of reporting date. TherearethreechecksonDateofBirthforcheckingthedelayedregistration, If any of the below condition is true then it is considered as delayed: 1. Date of Reporting–Date of Birth is more than 21 Days but within 30Days. 2. Date of Reporting–Date of Birth is more than 30 Days but within 1Year. 3. Date of Reporting–Date of Birth>1Year. Page 54 of 64 Civil Registration System Registrar User Manual Version 1.0 Fig2.6.1.1: Add Still birth Legal information If the registration falls under any of these categories then in the statistical form it will ask for the documents based on the period of delay as follows: Documents Period of Delay Receipt No. More than21 days but within 30 days Receipt No. Order No. of Date of Order More than30daysbut Receipt No. Competent Authority Magistrate Order Date of Order withinoneyear After 1year No. If user clicks on “OK” then the software will allow user to proceed with the Registration and if the user presses “Cancel” then the system start with the new registration. The alert snap shot is shown below. Page 55 of 64 Civil Registration System Registrar User Manual Version 1.0 Fig: 2.6.1.2 Delayed Registration Sex: Select child‟s gender from the drop-down box. Father’s information First Name: Enter father‟s first name here. Middle Name: Enter father‟s middle name here. Last Name: Enter father‟s last name here. UID: Enter UID of father/husband, if available. Mother’s information First Name: Enter mother‟s first name here. Middle Name: Enter mother‟s middle name here. Last Name: Enter mother‟s last name here. UID: Enter UID of mother, if available. Place of Birth Hospital: If place of birth is selected as Hospital, then a block with the Name and Address of hospital will be displayed. The Hospitals displayed in the list will be from the same Registration unit where Registrar belongs. Page 56 of 64 Civil Registration System Registrar User Manual Version 1.0 Fig: 2.6.1.3 Still birth–place of birth I House or Others: If the place of death is selected as House or Others, then the address block will be displayed. And if the address is same as that of permanent address then tick the check-box to fill in the address block. Fig: 2.6.1.4Still birth–place of birth II Informant’s information Name: Enter the name of the informant here. If the place of birth is Hospital then checks the check box as, “Informant's address same as Hospital address.” Automatically display in formant‟s name and address. Address: Enter the Address of the informant here, if address same as Permanent address then check the check box, automatically display informant‟s address in the text box. Pin: Enter Pin here. A check-box is given in the block which will enable user to select if the Informant‟s information is same as that of Permanent address and Hospital address. Save: After clicking the button, the entered information will be saved and control will be transferred to Death statistical information. Cancel: Cancel button click will take the user to the home page. Page 57 of 64 Civil Registration System Registrar User Manual Version 1.0 2.6.2. Add Still Birth Registration (Statistical Information) Once the Legal information is saved, the user will be redirected to next screen where in statistical information will be filled in. Following screen shot shows the Still Birth statistical screen: Fig2.6.2.1: Still Birth Statistical information Town/Village of Residence of mother State: Select the state from the drop-down box here. District: Select respective district for the state selected. Sub-district: Select corresponding sub-district for the selected district. Is it a Town/Village: select the corresponding Town/Village for the selected sub-district. Name of Village/Town: Select the Village/Town for the selected Town/Village. Other information Age of mother at the time of this birth: Select the occupation of father from the dropdown box. Mother’s level of education: Select level of education from the drop-down provided. Type of attention at delivery: Select the appropriate value from the Drop-down box provided. Duration o f p r e g n a n c y ( in w e e k s ): Enter the value for duration of pregnancy; the value should not exceed 42 weeks. Page 58 of 64 Civil Registration System Registrar User Manual Version 1.0 Cause of foetal death: Select the cause of foetal death. Upload Reporting form Upload reporting form: Upload the scanned copy of the reporting form here. Save: After clicking the button, the entered information will be saved and control will be transferred to still birth information page as shown below. Cancel: Cancel button click will take the user to the homepage. 2.6.3. Still Birth Confirm Page Fig2.6.3.1: Still Birth confirmation page Confirm: Click the Confirm button after verifying the information displayed as an acknowledgment. This will make the registration permanent and Registration number will be generated at this step. Edit: User may click on Edit button if any information requires modification. After clicking Confirm button, the legal information acknowledgment is shown to the user. User has following options here. Page 59 of 64 Civil Registration System Registrar User Manual Version 1.0 Fig2.6.3.2: Still Birth legal info Add Next Record: On clicking this button, user will be able to add a next registration. View still birth registration list: To navigate to the Still Birth registration List page, this button will be clicked. Newly added registration will be available on the list page. 2.6.4. Search Still Birth Registration Search Still Birth screen is to search the registered births with the desired parameters. User can enter any parameter which he/she are aware of. Search result will display a list with records matching to the search criteria. Page 60 of 64 Civil Registration System Registrar User Manual Version 1.0 Fig2.6.4.1: Birth search screen Birth Year: Select birth year range. Registration no.: Enter the Registration no. Gender: Select gender from the drop-down box. Date of Birth: Enter the date of Birth. Name of father: Enter the name of the father. Name of mother: Enter the name of the mother. Search: On click of Search, the record for the parameter provided will be displayed. Reset: Reset click will clear the entered search criteria. Registration no. link: If user clicks on the Registration no. link in the search list, then a screen with the details of registration will be displayed. Refer snapshot (Fig: 2.6.4.2) below. Page 61 of 64 Civil Registration System Registrar User Manual Version 1.0 Fig: 2.6.4.2 Still Birth information Correction: On clicking the Correction link, the Birth registration page opens in Edit mode. User can modify the values in Legal and statistical section. The correction limit is set to 3, once user crosses the limit, the correction button will be disabled. History: On click of View link in History column, the Original and the Corrected records are displayed. The records are displayed in the descending order as in the latest updated record will be on the top. Fig: 2.6.4.3 Still Birth history list Page 62 of 64 Civil Registration System Registrar User Manual Version 1.0 On clicking the View link in Corrections of History list page, the record details are shown. The data which is changed first time is shown in Blue color and the data which is modified in second correction is shown in Pink color. Fig: 2.6.4.4 still Birth history information Page 63 of 64 Civil Registration System 2.6.5. Registrar User Manual Version 1.0 Incomplete Registration Form The incomplete form will save in Incomplete Registration link as shown below: Fig2.6.5.1 Incomplete registration form Continue Registration: On clicking the Continue Registration link, the Still Birth registration page opens in Edit mode. User can continue with incomplete section. The correction limit is set to 3, once user crosses the limit, the correction button will be disabled. Delete: To delete the record. Page 64 of 64

© Copyright 2026