
B S A Guide for Patients and Families
BREAST SURGERY
A Guide for Patients
and Families
Table of Contents
The Breast . . . . . . . . . . . . . . . . . . . . . . . . . . . . . . . . . . . . . . . . . . . . . . . . . . . . . . . . . . . . . . . . . . 4
Understanding the Cancer Process
...............................................4
Types of Procedures . . . . . . . . . . . . . . . . . . . . . . . . . . . . . . . . . . . . . . . . . . . . . . . . . . . . . . . . . . 6
– Biopsy
– Partial Mastectomy (lumpectomy)
– Mastectomy
– Wire Localization
– Axillary Node Surgery
Anesthetic Options for Breast Surgery
– Intravenous Sedation
– Regional Anesthesia
– General Anesthesia
............................................8
After Breast Surgery . . . . . . . . . . . . . . . . . . . . . . . . . . . . . . . . . . . . . . . . . . . . . . . . . . . . . . . . . 10
– Managing Discomfort
– Incision and Drain Care
– Drain Output Sheet
– Resuming Usual Activities After Breast Surgery
– On Your Own at Home
– Follow-up Appointments
– Breast-Fitting Services
– Emotional Support
– Exercising After Breast Surgery
• Overall Fitness
• Stretching
• Strength Training
– Lymph Node Removal and Lymphedema
Reconstructive Surgery . . . . . . . . . . . . . . . . . . . . . . . . . . . . . . . . . . . . . . . . . . . . . . . . . . . . . . . . 30
– Types of Procedures and General Guidelines
– Tissue Expander and Saline Implant Insertion
– TRAM Flap Reconstruction (from your abdomen)
– Latissi
Summary . . . . . . . . . . . . . . . . . . . . . . . . . . . . . . . . . . . . . . . . . . . . . . . . . . . . . . . . . . . . . . . . . . 38
Resources . . . . . . . . . . . . . . . . . . . . . . . . . . . . . . . . . . . . . . . . . . . . . . . . . . . . . . . . . . . . . . . . . 39
Contact Information . . . . . . . . . . . . . . . . . . . . . . . . . . . . . . . . . . . . . . . . . . . . . . . . . . . . . . . . . 41
– Important Telephone Numbers
– Hospital Telephone Numbers
2
Dear Patient,
As our patient, you are the most important member of your healthcare
team. You can help us best by being prepared and letting us know how
you feel during your care.
We perform many breast procedures everyday. From this experience, we
know there is a typical pattern to recovery and common concerns as
you move through the healing process. Our goal is to develop a plan of
care to meet your needs. There are many hospital and community
resources to assist you on your road to recovery.
We have prepared this guide to outline the key activities that will
happen before and after surgery. You will find a description of:
–
–
–
–
Procedures and hospital routines
Types of anesthesia
Options for breast reconstruction
Care after surgery
Your journey through this process may be brief or extended. We hope
this guide will serve as a helpful reference to inform and reassure you as
you move through this process.
We invite you to share this guide with your family and friends. There
will be many opportunities for them to help you during your recovery.
3
The Breast
Each breast has 15 to 20 sections called lobes
(see Figure 1). Within each lobe are many smaller
lobules. Lobules end in dozens of tiny bulbs that
can produce milk. The lobes, lobules, and bulbs
are all linked by thin tubes called ducts. These
ducts lead to the nipple in the center of a dark
area of skin called the areola.
Fat surrounds the lobules and ducts. There are
small muscles in the nipple and areola which aide
the process of nipple erection for lactation. In
addition, the pectoralis muscles lie under each
breast and cover the ribs.
Each breast also contains blood vessels and
lymph channels, which exist outside the ducts
and lobules in the surrounding fat tissue. The
lymph vessels carry clear, whitish fluid called
lymph and lead to small bean-shaped lymph
nodes. As a part of the immune system, the
nodes filter out germs and foreign matter.
Clusters of lymph nodes are found near the
breast in the axilla (under the arm), above the
collarbone, and in the chest. Lymph nodes also
are found in many other parts of the body.
Understanding the Cancer Process
Cancer refers to a group of many related diseases
that begin in cells, the body’s basic unit of life. To
understand cancer, it is helpful to know what
happens when normal cells become cancerous.
The body is made up of many types of cells.
Normally, cells grow and divide to produce
more cells — only when the body needs them.
This orderly process helps keep the body healthy.
Sometimes, however, cells keep dividing when
new cells are not needed. These extra cells form
a mass of tissue called a growth or tumor.
Tumors can be benign or malignant. Benign
tumors are not cancer. They usually can be
removed, and in most cases, they do not come
back. Cells from benign tumors do not spread to
other parts of the body. Most important, benign
breast tumors are not a threat to life.
Malignant tumors are cancer. Cells in these
tumors are not normal. They divide without
control or order. They can invade and damage
nearby tissues and organs. Cancer cells also can
break away from a malignant tumor and enter
the bloodstream or the lymphatic system. That is
how cancer spreads from the original (primary)
cancer site to form new tumors in other organs.
The spread of cancer is called metastasis.
4
When cancer arises in breast tissue and spreads
outside the breast, cancer cells are often found
in the lymph nodes under the arm (axillary
lymph nodes). Cancer cells may also spread to
other parts of the body — other lymph nodes
and other organs, such as the bones, liver, or
lungs. When cancer spreads, the new tumor has
the same name as the primary tumor. For
example, if breast cancer spreads to the lung,
the cancer cells in the lung are actually breast
cancer cells. The disease is called metastatic
breast cancer. It is not lung cancer.
Figure 1: Normal Healthy Breast
5
Types of Procedures
There are many different types of breast surgery
procedures. These can be performed alone or
in combination depending on your situation.
The major types of breast surgeries include:
Biopsy
A biopsy involves removing either a portion of
(incisional biopsy) or all of (excisional biopsy) an
area of abnormal breast tissue (a lump, a tissue
irregularity found on mammography, etc.) to
help make a diagnosis. Prior to this surgical
procedure, feel free to discuss with your surgeon
the placement and length of your incision. The
procedure takes about 30 to 60 minutes. After
the tissue is removed, it is sent to the pathology
department for evaluation. You can go home on
the same day as the procedure.
Partial Mastectomy (lumpectomy)
This is performed when a cancer is known
to exist (see Figure 2). It involves removing
the abnormal tissue and a margin of healthy
surrounding tissue. Before this procedure, feel
free to discuss the placement and length of the
incision with your surgeon. The tissue that
has been removed is sent to the pathology
department for evaluation. You can go home
on the same day after this procedure.
Mastectomy
This involves removing the entire breast
including the nipple and areola (the dark circle
of skin around the nipple). Drains are placed
under the skin to collect fluid during the first
week or so after the operation. The removed
breast is sent to the pathology department for
evaluation. The incisions are made differently
depending if reconstruction is planned (see
Figures 3 and 4). If a mastectomy is performed
without reconstruction, most patients are able to
go home the day of the procedure. On occasion,
the patient will stay overnight. Some patients
may choose to undergo breast reconstruction at
the time the mastectomy is performed (immediate
reconstruction). Later in this book, we will
discuss reconstructive procedures.
6
Wire Localization
This procedure is performed during the biopsy
or partial mastectomy. It is usually done if the
mammogram was abnormal but the surgeon
feels no lump. A local anesthetic is used for
the wire placement. During the procedure,
the radiologist uses x-ray guidance to place a
slender wire into the patient’s breast to locate
the abnormality. Using the wire as a guide, the
surgeon then removes the appropriate tissue.
Axillary Node Surgery
This involves removing some lymph nodes
from under the arm. For patients with a known
breast cancer, a sentinel node mapping and
excision may be performed to see if cancer
cells have spread (see Figure 5). Sentinel node
mapping involves the injection of a dye around
the known breast cancer. The dye is taken up
by the lymphatic channels in the breast and is
carried to the first draining lymph node, or
sentinel node, under the arm.
Two dyes can be used: Technitium (Tc) or
isosulfane blue (blue dye). Technitium is a
radioactive material that is injected in the
nuclear medicine radiology department the
day before or the day of surgery. At the time of
surgery, a gamma probe is used to find the node
that contains the Tc, which is identified by its
increased radioactivity. The node is removed.
If it is cancer-free, the remaining nodes are left
untouched. When Tc does not work, blue dye
may be used to find the sentinel node.
If the sentinel node contains cancer cells, there
is a 50-50 chance that other nodes under the
arm may also contain cancer cells. Thus, the
surgeon will remove additional lymph nodes
for evaluation (axillary dissection). A drain is
placed to prevent the buildup of fluid after these
lymph nodes have been removed. This drain
is typically removed about a week after the
surgery. Most patients will go home following
this day-surgery procedure.
Figure 3: Non-skin Sparing Mastectomy
Figure 2: Lumpectomy or Partial Mastectomy
If reconstruction is not planned at the time of mastectomy,
this incision allows the skin to heal flat against the chest wall
so that a breast prosthesis can be worn comfortably.
Figure 4: Skin-sparing Mastectomy
Figure 5: Axillary Node Surgery With Sentinel
Node Mapping
7
Anesthetic Options For Breast Surgery
For most breast surgeries, anesthesia can be
provided by various techniques. The choices
vary with the type of surgical procedure, your
medical history and preferences, and the advice
of your surgeon and anesthesiologist. Below is a
brief description of anesthetic techniques and
how they are usually used. Your surgeon and
anesthesiologist can provide more information
about each option.
Intravenous Sedation
This is also referred to as Monitored Anesthesia
Care, or MAC. It consists of giving sedatives
through your intravenous line (IV) or in the
breathing mask. The sedatives are used with a
local anesthetic that your surgeon will inject into
the surgical area to numb the tissues. The level
of sedation can be varied to achieve conditions
ranging from being able to talk with your
doctors to being partially asleep during the
procedure. The combination of sedatives and
local anesthetic is effective in ensuring your
comfort for most minor breast surgical procedures.
It is used most commonly for biopsies or the
removal of breast lumps.
Regional Anesthesia
This refers to the technique of providing anesthesia to the region of the body where surgery is
being performed. Because only the tissues around
the site of surgery are made numb, it differs from
general anesthesia (see below), in which the
entire body is insensitive to pain. To improve
patient comfort, regional anesthesia is commonly
given with intravenous sedation (see above). Or
in some situations, both regional and general
anesthesia may be given. In these cases, the
regional anesthetic provides long-lasting pain
relief after waking up from surgery. The three
main kinds of regional anesthetics used for breast
surgeries are thoracic epidural anesthesia, paravertebral blocks and intrathecal morphine.
• Thoracic epidural anesthesia. Many people are
familiar with epidurals in the setting of childbirth, where they commonly are used to relieve
the pain associated with labor and delivery.
8
Epidurals are also for a variety of surgical
procedures. In contrast to labor epidurals
where the catheter is inserted in the lower
back, for breast surgery epidurals are placed
higher up the back — between the shoulder
blades. A tiny catheter is inserted between
the bones of the spine into an area called
the epidural space, which contains the
nerves to be blocked for surgery. Local
anesthetic is injected through the catheter,
causing the surgical area to become numb.
It is insensitive to pain until the effects of
the local anesthetic have worn off.
• With thoracic epidural anesthesia, pain
relief can be prolonged after surgery for as
long as the catheter remains in place. As a
result, it is most appealing for extensive
procedures, such as mastectomies with
reconstruction, when a longer hospitalization
is required. On occasion, it is also
performed for procedures that don’t require
hospitalization after the operation. In this
setting, because pain will be felt within a
few hours of the epidural catheter being
removed, another form of pain relief will
need to be substituted at that time. This
is usually done with oral medication
prescribed by your surgeon before your
discharge from the hospital.
• Paravertebral blocks are another form of
regional anesthesia used during breast
surgery. Like thoracic epidural anesthesia,
this technique involves injecting a local
anesthetic into an area of the back where
the nerves are located to numb the chest.
But there are important differences.
Thoracic epidural anesthesia requires the
placement of a catheter at a single location
in the back. It produces a “block” that usually
makes both sides of the chest pain-free but
wears off within hours of the catheter’s
removal. Paravertebral blocks do not
require catheters to be placed in the back.
The technique involves a series of injections
of local anesthetic at several places along
the back of the ribcage. It is given with
intravenous sedation. These injections usually
“block” only the nerves on the side of the
chest where the surgery will be performed.
They have the distinct advantage of lasting 18
to 24 hours or more. These are most popular
for patients who are having partial or complete
mastectomies and are planning to go home on
the same day of surgery. The likelihood of
being nauseated after surgery is lower with
regional anesthesia.
• Intrathecal morphine is used in combination
with general anesthesia for patients who
require mastectomies with flap reconstructions.
These patients are always hospitalized after
surgery. Intrathecal morphine involves an
injection of morphine into the lower back,
prior to the administration of general
anesthesia. The injection is performed within
the spinal fluid (similar to a spinal anesthetic).
It is different than a traditional spinal
anesthetic, in which the lower portion of
the body cannot move for several hours. By
contrast, intrathecal morphine does not alter
the ability to move the lower body. It provides
pain relief lasting 18 to 24 hours or more.
Intrathecal morphine can depress breathing
for a few hours after surgery. Its use is restricted
to people who will be in the hospital after surgery.
If you are in the hospital overnight after your
procedure, pain relief is usually provided by
an IV pump called an IV-PCA. This stands
for Intravenous Patient-Controlled Analgesia.
The nurses in the recovery room will start this
pump after surgery and will also teach you
how to use it properly. The pump is set so you
can receive a certain amount of medicine every
five to seven minutes. A physician from the
anesthesia department will visit you daily
(and is available 24 hours each day) to check
on you and be sure you are comfortable.
General Anesthesia
This remains the most common form of anesthesia provided to people undergoing breast surgery.
With this choice, you are completely asleep during your operation. General anesthesia is often
combined with a local anesthetic to reduce pain
at the incision site. Sometimes, a form of regional
anesthesia will be used for this purpose. General
anesthesia is started with medicine given in your
IV or through a breathing mask. If you have a
fear of needles, the IV can sometimes be started
after you are asleep. Great improvements have
been made in recent years with the drugs and
techniques used for general anesthesia. Patients
are much less likely to be sleepy after the initial
recovery time. Also, there are many new effective
approaches to control postoperative problems
such as nausea and vomiting. Some day-surgery
patients feel well enough to go directly from
the operating room to a reclining chair in the
recovery lounge. Most day-surgery patients are
moved to recovery with minimal discomfort
from nausea, vomiting, or pain.
9
After Breast Surgery
The doctors and nurses will be watching over
you until you awaken from anesthesia. When
you wake up from surgery, there will be a lot of
activity. We will check your heartbeat and blood
pressure often. We also will ask you to cough
and take deep breaths to keep your lungs clear.
Though you may just want to sleep, these
activities are important to speed your recovery.
You may breathe oxygen through a mask for a
short time until you are fully awake. Sometimes
patients feel cold when they are waking up.
If you feel cold, the nurse will provide extra
blankets.
You will be taken to the recovery room or the
post-anesthesia care unit (PACU). This is a large
open room with many other patients recovering
from surgery. You will be asked a lot of questions.
This is to make sure you are alert and that
you are not experiencing anything out of the
ordinary. We want you to be as comfortable as
possible, so please let us know how you feel.
We may ask you to rate your pain on a scale of
1 to 10 (1 is least pain, 10 the most). This helps
us decide the type and amount of pain medication
you need. The recovery process and the time you
spend in the PACU vary depending on the type
of surgery and anesthesia you received.
When you wake up, you may wonder about the
pathology results. These results generally are not
ready before you leave the hospital. They will be
available several days to a week or more after
surgery. The surgeon will discuss this information
with you as soon as the results become available.
A follow-up appointment with your surgeon may
be scheduled to do this in person.
Whether you are going home directly or staying
in the hospital overnight, the plan for your
care after surgery will focus on managing your
discomfort, caring for your incision and drains,
and increasing your activities.
10
Managing Discomfort
Managing your discomfort will be an important
part of helping you increase your activity.
When you are discharged from the hospital,
you will be given a prescription for pain
medication. This will contain a narcotic (for
example, Tylenol® with codeine or percocet),
which you should take as directed for pain
relief. You should take this medication freely
without worrying about addiction. If you wait
too long, your pain may not be as easily
relieved. To avoid nausea, it is best to take
pain medications after you have eaten.
Do not drive while you are taking narcotics.
You must be able to move freely in the car to
observe oncoming traffic and to react quickly
without being limited by pain or weakness.
If you are concerned about grogginess and
your ability to remain alert while taking your
pain medications, please discuss this with
your nurse or surgeon to find out what other
options may be available.
If your prescribed pain medication is not
working or you have nausea, vomiting, or
dizziness, call your surgeon’s office. Due to
state and federal regulations, any changes or
renewals of narcotic prescriptions must be
done during regular office hours. They cannot
be phoned into the pharmacy. Someone will
need to come to the clinic to pick up the
prescription for you.
Narcotics often cause constipation. To help
prevent this, eat bran cereals or muffins as
well as raw fruits and vegetables. Also, drink
plenty of fluids. An over-the-counter stool
softener also should be taken while you are
taking your narcotic medication. This will
keep your stool soft, but it will not cause you
to have a bowel movement. You may need to
take a laxative, such as Milk of Magnesia,
until your normal bowel function has
returned.
Incision and Drain Care
After surgery, your incision will be covered with a
dry sterile dressing. You may notice that the skin
around your incision feels thickened or firm. These
changes are normal. After your incision is healed
(approximately three weeks), you can massage the
area with a hypoallergenic, non-scented moisturizing lotion, cocoa butter or vitamin E cream. Or
feel free to try other over-the-counter scar creams
suggested by your pharmacist. Within a few weeks
to several months, your scar will begin to soften.
A drain is usually placed at the time of a mastectomy
(see Figure 6, page 12). It is usually removed
within a week or so. At that time a small gauze
dressing will be used to cover the drain hole for
one to two days. The gauze can be removed when
the small drain hole is sealed.
Once you leave the hospital, you will need to
empty the drain when it is one-third full. The
drain requires attention at least twice a day —
in the morning and just before you go to bed at
night. If the bulb becomes full during the day, you
will need to empty it more frequently. It is a good
idea to schedule routine times to check your drains
so they do not become too full. Of note, a small
amount of leakage around the drain exit site is
normal.
Please use the “Drain Output Sheet” (page 13) to
record the amounts drained at the different times
of the day. If you empty the drain between the
standard emptying times, record the amount in the
“other” category on the chart.
In caring for the drain, follow these guidelines:
1. Gather the supplies you need: a measuring cup
and the “Drain Output Sheet.”
2. Wash and dry your hands.
3. Take the stopper out of the bulb. Empty the
fluid into the measuring cup.
4. After emptying it, grasp the entire bulb in
your hand. Squeeze it tightly and reinsert the
stopper into the bulb. The bulb should remain
compressed at all times.
5. Record the amount of drainage on the sheet.
6. Flush the removed fluid down the toilet.
7. Wash and dry the measuring cup. Keep it with
your supplies and the “Drain Output Sheet.”
The amount of fluid that drains over a 24-hour
period will gradually decrease. When the total
amount of drainage in a 24-hour period is down
to about 30cc (1 ounce), the drain tube is ready
to be removed. Contact your surgeon’s office to
schedule an appointment for drain removal. If
you have any questions or difficulties caring for
the drain, call your surgeon. If your surgeon
cannot be reached, call the BWH operator at
(617) 732-6660 to page the resident who works
with your surgeon. A resident physician is
available 24 hours a day, seven days a week.
If the drainage suddenly stops, it may mean that
the tubing is clogged or leaking. You may try
“milking” the drain tube. To do this, grasp the
tubing tightly between your thumb and index
finger near your skin. With the other hand,
compress the tubing and slide your fingers down
the tube toward the bulb. This will help dislodge
any material that may be blocking the tube and
resolve the leakage. Do this at least two times
per day until the drain is removed. Milking the
tubing is easier using a small alcohol pad. If there
is still no drainage, please call your surgeon’s
office. Gradually the color of the drainage may
change from cherry-red to a red-yellow to a
straw color.
What to watch out for:
Be sure to call your surgeon if any of the
following occur:
1. Temperature greater than 101.5°F.
2. Signs of infection (redness, swelling)
3. Foul-smelling drainage from the wound
4. Worsening of pain
5. Nausea and vomiting
6. Chest pain, shortness-of-breath,
rapid heart beat
7. Leg-calf tenderness or pain
8. Bruising easily
9. Blood in stool or urine
10. Black, tarry stool
11. Unusual weight gain or loss
12. Sudden trouble seeing clearly
13. Loss of speech or trouble talking
14. Sudden weakness or numbness of face,
arm, or leg on one side of the body
15. Sudden, severe headache with
no known cause
16. Other:________________________________
11
Figure 6: Drain Placement After A Mastectomy
12
Drain Output Sheet
Begin recording drainage the day after your surgery. Bring this sheet with you when you have the drain
removed. Use the same measuring container so that you can track the amount in the same units, such as
ounces or cc’s.
Drain 1
Drain 2
Drain 3
Drain 4
Date:_____________
After Surgery
Day 1
AM ___________cc
PM ___________cc
Other _________cc
Total __________cc
After Surgery
Day 1
AM ___________cc
PM ___________cc
Other _________cc
Total __________cc
After Surgery
Day 1
AM ___________cc
PM ___________cc
Other _________cc
Total __________cc
After Surgery
Day 1
AM ___________cc
PM ___________cc
Other _________cc
Total __________cc
Date:_____________
After Surgery
Day 2
AM ___________cc
PM ___________cc
Other _________cc
Total __________cc
After Surgery
Day 2
AM ___________cc
PM ___________cc
Other _________cc
Total __________cc
After Surgery
Day 2
AM ___________cc
PM ___________cc
Other _________cc
Total __________cc
After Surgery
Day 2
AM ___________cc
PM ___________cc
Other _________cc
Total __________cc
Date:_____________
After Surgery
Day 3
AM ___________cc
PM ___________cc
Other _________cc
Total __________cc
After Surgery
Day 3
AM ___________cc
PM ___________cc
Other _________cc
Total __________cc
Day 3
After Surgery
AM ___________cc
PM ___________cc
Other _________cc
Total __________cc
Day 3
After Surgery
AM ___________cc
PM ___________cc
Other _________cc
Total __________cc
Date:_____________
After Surgery
Day 4
AM ___________cc
PM ___________cc
Other _________cc
Total __________cc
Day 4
After Surgery
AM ___________cc
PM ___________cc
Other _________cc
Total __________cc
After Surgery
Day 4
AM ___________cc
PM ___________cc
Other _________cc
Total __________cc
After Surgery
Day 4
AM ___________cc
PM ___________cc
Other _________cc
Total __________cc
Date:_____________
After Surgery
Day 5
AM ___________cc
PM ___________cc
Other _________cc
Total __________cc
After Surgery
Day 5
AM ___________cc
PM ___________cc
Other _________cc
Total __________cc
After Surgery
Day 5
AM ___________cc
PM ___________cc
Other _________cc
Total __________cc
After Surgery
Day 5
AM ___________cc
PM ___________cc
Other _________cc
Total __________cc
Date:_____________
After Surgery
Day 6
AM ___________cc
PM ___________cc
Other _________cc
Total __________cc
After Surgery
Day 6
AM ___________cc
PM ___________cc
Other _________cc
Total __________cc
Day 6
After Surgery
AM ___________cc
PM ___________cc
Other _________cc
Total __________cc
Day 6
After Surgery
AM ___________cc
PM ___________cc
Other _________cc
Total __________cc
Date:_____________
After Surgery
Day 7
AM ___________cc
PM ___________cc
Other _________cc
Total __________cc
Day 7
After Surgery
AM ___________cc
PM ___________cc
Other _________cc
Total __________cc
After Surgery
Day 7
AM ___________cc
PM ___________cc
Other _________cc
Total __________cc
After Surgery
Day 7
AM ___________cc
PM ___________cc
Other _________cc
Total __________cc
Date:_____________
After Surgery
Day 8
AM ___________cc
PM ___________cc
Other _________cc
Total __________cc
After Surgery
Day 8
AM ___________cc
PM ___________cc
Other _________cc
Total __________cc
After Surgery
Day 8
AM ___________cc
PM ___________cc
Other _________cc
Total __________cc
After Surgery
Day 8
AM ___________cc
PM ___________cc
Other _________cc
Total __________cc
Date:_____________
After Surgery
Day 9
AM ___________cc
PM ___________cc
Other _________cc
Total __________cc
After Surgery
Day 9
AM ___________cc
PM ___________cc
Other _________cc
Total __________cc
After Surgery
Day 9
AM ___________cc
PM ___________cc
Other _________cc
Total __________cc
After Surgery
Day 9
AM ___________cc
PM ___________cc
Other _________cc
Total __________cc
Date:_____________
After Surgery
Day 10
AM ___________cc
PM ___________cc
Other _________cc
Total __________cc
After Surgery
Day 10
AM ___________cc
PM ___________cc
Other _________cc
Total __________cc
After Surgery
Day 10
AM ___________cc
PM ___________cc
Other _________cc
Total __________cc
After Surgery
Day 10
AM ___________cc
PM ___________cc
Other _________cc
Total __________cc
13
Resuming Usual Activities After Breast Surgery
Most people feel very tired when they leave the hospital. Even when you are told you can resume
normal activities, you may not feel up to it. For this reason, it is best to pace yourself as you return to
your daily routine. We provide the following general guidelines and suggestions. The list includes
common daily activities grouped by how much work or energy they require. Activities at the top of
the list take the least energy. Those further down are more strenuous. We encourage you to discuss
each item with your nurse and physician.
Activity
When to Resume
Wearing a bra,
getting dressed
After a biopsy, lumpectomy, or mastectomy, you may wear a bra
throughout the day and night for comfort and support.
After TRAM or latissimus dorsi reconstruction, wearing a bra can limit
the circulation, so be sure to check with your doctor or nurse about the
best time to start wearing a bra.
Taking a tub bath,
shower
If you had any reconstruction, you should not take a tub bath or shower
until the drains are removed. It takes about two weeks for your incision to
heal completely. You should not lift your arms to your head to wash your hair.
If you did not have reconstruction, and your surgeon has used a plastic dressing
to cover your incision, you may shower as usual, letting the water roll off the
plastic dressing. The plastic dressing can remain in place for one to two weeks.
If you do not have a plastic dressing in place, you can allow the water to
run over your incision, but avoid letting the water hit it directly. You may
gently wash away dried material from around the incision. Dry the incision
completely by gently patting, instead of rubbing.
Lifting
If you did not have reconstructive surgery, do not lift more than five pounds
after your surgery for one to two weeks.
If you had reconstructive breast surgery, avoid lifting more than five to 10
pounds for six to eight weeks. Your inner tissues and muscles require time to
heal and regain their usual strength. Be sure to ask for help with groceries
and housekeeping activities like vacuuming.
Housework,
cooking
14
Refrain from any heavy push-pull activities like vacuuming and loading the
washer/drier. Light housekeeping such as dusting and light meal preparations
are permissible.
Activity
When to Resume
Walking, Exercise
Walking is a good way to get yourself back to your usual level of activity.
Walk a little bit every day and gradually increase the distance.
Be sure to pace yourself and don’t allow yourself to become too tired.
If you did not have reconstructive surgery, you may resume your usual
exercises once your drains have been removed, and as your comfort
level allows.
If you had reconstructive surgery, moderate exercise is generally fine after
six weeks, though this first should be confirmed with your plastic surgeon.
If you had axillary surgery requiring placement of a drain or reconstructive
surgery, the range-of-motion at the shoulder should be limited to 90 degrees
until your drains have been removed and your surgeon has confirmed that
range-of-motion exercises can begin. This means that your arm should never
be above the level of your shoulder when reaching forward or out to the
side away from your body. You may use the arm for routine activities
(e.g., washing your face), primarily using the wrist and the elbow, thus
limiting your shoulder motion. Once your drain is removed, you will be
instructed to perform regular exercises to help maintain shoulder range
of motion.
Climbing stairs
If you had an operation on your abdomen, minimize going up and down
stairs for the first week until your strength and balance have returned.
Sexual activity
You may resume sexual activity when you and your partner feel comfortable
unless your doctor has instructed otherwise.
Driving
DO NOT DRIVE until you have completely stopped taking narcotic pain
medication. You must be able to move freely in the car to observe oncoming
traffic and to react quickly without being limited by pain or weakness.
Back to work
Returning to work will depend on the type of work you do and the type of
surgery you’ve had. Discuss this with your surgeon.
Travel
You may go outside. Avoid long-distance travel until after your first postoperative visit (unless previously discussed with your surgeon).
15
On Your Own at Home
Breast-Fitting Services
Before surgery, you can begin planning for your
first weeks at home. It is especially important to
have family and friends available to help with
housework, shopping, and meal preparation.
If you do not have help readily available, speak
with your care providers about your needs.
There may be resources in your community to
which we can refer you.
If you had a mastectomy without reconstruction
or a mastectomy with a temporary tissue
expander, you will be given a gift pack from the
Friend’s Boutique of Dana-Farber Cancer
Institute’s Gillette Center for Women’s Cancers.
The kit contains a temporary breast form and a
bra. You can be fitted for a permanent breast
form after the swelling is gone, generally four to
six weeks after surgery. If you had a lumpectomy
with a noticeable loss of breast tissue, you may
also want to contact this or another breast-fitting
service. Fitters have breast forms especially
designed for women who have had either a
mastectomy or a lumpectomy.
Child care also can be a major challenge after
surgery. Checking your children’s social and
school calendars may prompt you to organize
with other parents and family members the
arrangements for your child’s activities and
transportation in advance. If you have small
children, have them come to you while you are in
a seated position rather than trying to pick them
up. Lifting and carrying them can be unsafe for
both you and the child during your recovery.
In the first week after leaving the hospital,
include the following in your daily routine:
• Take your pain medication.
• Check your incision for drainage or signs of
infection.
• Care for your drains, if you have them (see
“Incision and Drain Care,” page 11).
• Get back to your usual activities.
Remember it is important to pace yourself.
• Rest and get plenty of sleep.
• Eat well and drink plenty of fluids. Eating a
balanced and healthy diet will provide your
body with plenty of the protein and nutrients
that it needs to heal.
Follow-up Appointments
Following any breast surgery, you will need to
schedule an appointment to see your surgeon or
nurse, usually within one week. At this time,
your surgeon will review the results of your
pathology findings and the next step in your
treatment plan. Your care team also will review
any guidelines for increasing your activities
including returning to work and starting an
exercise program. You may need to be in touch
with your primary care doctor if you have other
health issues. This doctor will routinely receive
information from the surgeon about your
progress after surgery.
16
You can call the Friends Boutique at the
Dana-Farber Cancer Institute, (617) 632-2211.
Emotional Support
We understand that recovery from breast surgery
can be a very emotional time with many feelings
of fear and loss. These feelings can influence social
relationships and even your physical recovery.
At Brigham and Women’s Hospital, social workers
are available who have experience with the
emotional impact of breast surgery. If you would
like to talk with someone, ask your nurse or
doctor to help you arrange for a visit.
For women who find they have breast cancer
there is a special volunteer support network
serving the Dana-Farber/ Brigham and Women’s
Cancer Center (DF/BWCC). One-to-One: The
Cancer Connection includes cancer survivors and
their family members who have volunteered to
listen and to share their own experiences with
others whose lives are affected by cancer and
other related diseases. All One-to-One volunteers
have completed a special training program. They
can help allay people’s fears and concerns, provide
information, guide patients through the DF/BWCC
system, and discuss available resources. Most
importantly, they provide support and reassurance
over the course of one’s illness and treatment.
Referrals can be made by any member of your
health care team. Just inform any team member
that you want to speak with a One-to-One volunteer, or call the Eleanor and Maxwell Blum Patient
and Family Resource Center at (617) 632-5570. A
One-to-One coordinator will contact the volunteer
who will be most helpful to you. The volunteer
will then call you to schedule a time to talk
or meet.
We want you to know that we are here to help
you throughout recovery. You also may wish to
join a support group with other women recovering from breast surgery. Contact information is
listed on page 40 of this guide.
Exercising After Breast Surgery
Exercise is an important component of a healthy
lifestyle. It also plays a crucial role as a woman
recovers from breast surgery. Breast surgery and
reconstruction have specific physical side effects,
such as skin tightness, postural problems, muscle
imbalances, and limited range of motion and
flexibility. Exercise is key in reducing these side
effects so you can return to your usual daily
activities. By exercising and being active, you can
take control of your rehabilitation, leading to a
more complete and timely recovery.*
Flexibility training can help:
• Stretch and lengthen tight areas to relieve
muscle stiffness.
• Improve muscle imbalances.
• Realign muscles and joints.
• Improve your posture and balance.
On the next few pages, you will find some simple
guidelines for stretching exercises you can begin
after surgery. In the first week, you can begin
with two simple exercises: the “Hand Wall
Climb” and the “Butterfly Stretch”. Depending
on the type of surgery you’ve had, you may begin
doing other exercises as soon as two weeks after
surgery. Be sure to check with your surgeon
before you start to exercise and stretch.
Overall Fitness
The first component of rehabilitation is cardiovascular fitness. This may begin the day after
surgery. Women who undergo chemotherapy
often experience sarcopenia, a rapid loss of
muscle mass and gain of fat tissue, which can
lead to the onset of obesity. For healthy women,
the percent of body fat increases about 2.5
percent between the ages of 40 and 50. But for
a 40-year-old undergoing chemotherapy, this
decade worth of increase in body fat may occur
within one year. A walking-based cardiovascular
program will help counter these effects by
helping to reduce body fat and retain muscle.
Strength training further helps in maintaining
and building muscle mass.
Stretching
The second component of an overall exercise
program is stretching. After breast surgery,
women commonly experience body stiffness,
skin or muscle tightness, muscle imbalances,
and a decrease in range-of-motion at their
joints, particularly at the shoulder on the side
of surgery. In addition, inactivity after surgery
and being forced to maintain less-than-ideal
postural positions can tighten and shorten
muscles and tendons. Stretching is critical to
lessen these side effects and to regain flexibility.
* References:
• Breast Cancer Survivor’s Guide to Fitness. Reebok
University with Brigham and Women’s Hospital,
Dynamix, 2005.
• Living Through Breast Cancer: What a Harvard
Doctor Wants You to Know about Getting the Best
Care While Preserving Your Self-Image, Kaelin, C.,
McGraw Hill, 2005.
17
Weeks 1 to 2
Hand Wall Climb: Front
Purpose
This stretch helps in regaining shoulder range-of-motion,
specifically to be able to reach up above your head.
The primary muscle groups stretched in this exercise are
the chest muscles (pectoralis), the underarm region
(choracobrachialis), and the back muscle (latissimus dorsi).
Getting started
• Stand facing the wall, about a foot away. Place one hand
on the wall at shoulder height.
How to complete the exercise
• With your elbow kept straight, walk the hand up the
wall as high as you can to the point of tightness. If you
can, step in towards the wall to increase the stretch.
Hold for five seconds. Return to starting position.
Counting and pacing
• Walk up the wall three counts slowly and hold for five
counts, then walk down for three counts. Repeat three to
five times.
Things to keep in mind
• First, walk the unaffected arm up the wall to get a
sense of your range-of-motion. Then repeat with the
operated arm.
• If the unaffected arm achieves full range-of-motion easily,
then just perform this exercise on the operated side.
• Stop at your point of tightness, then try to go a
little farther.
• No pain at any time!
Number of times you need to complete
Repeat each stretch three to five times at least once a day.
Repeat this exercise twice a day if possible.
18
Hand Wall Climb - front
Hand Wall Climb: Side
Purpose
This stretch helps in regaining shoulder range-of-motion,
and specifically to be able to reach up above your head.
The primary muscle groups involved in this exercise are the
chest muscles (pectoralis), the underarm region (choracobrachialis), the side of the back from the underarm to the
waist (latissimus dorsi), and the front of your shoulder/
upper arm (anterior deltoid).
Getting started
• With your affected side, stand about two feet from the
wall with the wall at your side. Place the palm of your
hand on the wall.
How to complete the exercise
• Keeping your elbow straight, walk your hand up the
wall as high as you can to the point of tightness. If you
can, step in closer to the wall. Hold the stretch.
Counting and pacing
• Walk up the wall three counts slowly and hold for five
counts, then walk down for three counts. Repeat three to
five times.
Things to keep in mind
• Walk the unaffected arm up the wall to get a sense of
your range-of-motion. Then turn and repeat with the
operated arm.
• If the unaffected arm achieves full range-of-motion easily,
then just perform this exercise on the operated side.
• Stop at your point of tightness. Then try to go a little farther each time.
• No pain at any time!
Number of times you need to complete
• Repeat each stretch three to five times at least once a day.
Repeat this exercise twice a day if possible.
Hand Wall Climb - side
Over a three-week period, you will find that you can gradually
extend your reach a couple inches up and outward. Do not
pull on any of these muscles — just a simple and gentle
stretch. If you are unable to achieve your full reach at the
end of three weeks, you may benefit from physical therapy.
Be sure to discuss this option with you surgeon.
19
Week 2
By the end of the second week you can begin the following exercises.
Butterfly Stretch
Purpose
When performed lying down, this stretch externally rotates your shoulders back and down and
stretches your chest and underarm areas. The primary muscles stretched in this exercise are the major
and minor chest muscles (pectoralis).
Getting started
• Lie on your back with your knees bent and feet on the floor.
• Place your hands behind your head with your elbows pointing towards the ceiling.
How to complete the exercise
• Lower your elbows to the sides towards the floor.
• Hold the stretch five to 30 seconds. Return slowly to the starting position.
Counting and pacing
• Hold each stretch five to 30 seconds.
• After 20 seconds, you may feel a release in the muscles being stretched.
Things to keep in mind
• Slowly lower your elbows to the floor with control.
• Stop at the point of tightness.
• Do not bounce.
• Inhale and exhale and try to go an inch farther.
• Maintain slow, rhythmic breathing — in through the nose and out through the mouth.
If you are having trouble, try the following
• Pillow press: Place a pillow to the side of each elbow. As you lower your elbows, press them into the
pillow. If you are very tight on the operated side or underarm area, this is a good way to start this
stretch because it safely limits your range-of-motion.
Number of times you need to complete
• Repeat each stretch three to five times at least once a day. Repeat twice a day if possible.
20
Butterfly Stretch
21
Weeks 2 to 4
Single Arm Overhead Stretch
Purpose
This stretch helps in regaining overhead arm range-of-motion. The primary muscle group stretched in
this exercise is the latissimus dorsi (side of back from the underarm to waist).
Getting started
• Lie on back with knees bent and feet on floor. With the other hand, hold the affected arm just above
the wrist.
• The thumb of the affected arm should point to the ceiling.
How to complete the exercise
• Relax the affected arm. Let the other arm do the work. Exhale and lift the affected arm
slowly up and overhead as far as possible.
• Stop at the point of tightness. Hold the stretch. Then, return to the starting position.
Counting and pacing
• Hold each stretch five to 50 seconds.
• After 20 seconds, you may feel a release in the muscles being stretched.
Things to keep in mind
• Start slowly and lift the arm to point of tightness.
If you are having trouble, try the following
• Pillow press: Place a pillow on the floor above your shoulder. As you raise the affected arm
overhead, press into the pillow. This smaller range-of-motion may be easier when starting to
stretch after surgery.
• Perform the stretch while holding a dowel or a towel shoulder-width apart with your palms
facing forward.
Number of times you need to complete
• Repeat each stretch three to five times at least once a day. Repeat twice a day if possible.
22
Single Arm Overhead Stretch
23
Leg Stretch
Purpose
The front of the hip may be very tight due to bending forward, particularly after TRAM reconstruction.
The purpose of this exercise is to help you regain comfortable upright posture. Muscles used in this
movement include the hip flexors and the abdominal muscles.
Getting started
• Lie on your back with knees bent and feet on the floor. Your arms are at your side.
How to complete the exercise
• Extend one leg out straight so your knee touches the floor.
• Hold for five seconds, then return slowly to starting position.
• Repeat using the opposite leg.
• When each leg can be comfortably extended, repeat by extending both legs at the same time.
Counting and pacing
• Extend slowly for a count of five, hold, then return slowly for a count of five.
• Breathe normally or count out loud.
Things to keep in mind
• Move slowly and with control.
• Stretch only to the point of tightness.
If you are having trouble, try the following
• Use a pillow under your head for additional support and comfort
Number of times you need to do
• Repeat stretch three to five times at least once a day. Repeat twice a day if possible.
• Once you are comfortably able to perform the Single Arm Overhead Stretch and the Leg Stretch,
these two stretches should be combined with the goal of achieving comfort when fully stretch out
on the floor.
24
Leg Stretch
25
The following series of stretches will help strengthen your abdominal muscles.
Heel Lift
Lie flat on your back in bed or on the floor. Lift one leg at a time six inches and hold to a count
of 10. Start with 10 lifts twice a day, every morning and night. Add five lifts each week until
you reach 50.
Heel Lift
Side-to-Side Heel Reach
Lie on the floor (or bed), flat on your back with legs extended. Place the palms of your hands
flat on the floor, fingertips pointing to your feet. Slide your torso side-to-side, reaching for your
heels — right hand to right heel, then left hand to left heel. Hold the position and count to 5.
Be sure to keep your back flat on the floor and your hands in contact with the floor while
reaching for each heel.
Side-to-Side Heel Reach
26
Right/left Middle Heel Reach
This is a low-level modified sit-up. Lie flat with knees bent at a 90-degree angle and the palms of your
hand flat on the floor (or bed). Do not lift your back off the floor. Each hand should simultaneously
reach for each heel. Keep your back and hands in contact with the floor at all times.
Right/left Middle Heel Reach
Once you have mastered these exercises, speak with your doctor about the next steps for
advancing your activity.
27
Strength Training
The third and final component of a comprehensive
exercise program is strength training. Two
important steps must be taken before initiating
a strength-training program:
Obtain your surgeon’s permission. Your surgeon
will tell you when the surgical area is properly
healed and will confirm when you can safely
begin strength training.
Regain full, upright posture, and full comfortable
range-of-motion at your joints. If sound posture
and joint range-of-motion are not fully recovered,
prematurely beginning a strength-training
program can result in injury.
Strength training usually may begin between two
and six weeks after surgery, depending on the
nature of your specific surgery. It plays a crucial
role in countering the effects of sarcopenia,
a rapid loss of muscle mass and gain of fat
tissue, by stimulating muscle growth. Muscle
imbalances resulting from surgery may be
corrected or minimized by strengthening the
muscles that surround those areas.
In addition, some women undergoing chemotherapy experience accelerated bone loss, which can
increase their risk of developing osteoporosis.
Women who experience chemotherapy-induced
menopause are even more at risk because this
type of bone loss is sudden and exacerbated by
the decreased estrogen levels. Research has
shown that weight-bearing exercise may help
maintain bone density.
Strength training makes it easier to perform
activities of daily living. It can be empowering,
both physically and mentally, allowing you to
regain the feeling of control that may have been
lost during treatment.
Exercising after breast surgery is the key to a
complete recovery. Many side effects of surgery
and breast cancer treatment can be alleviated by
incorporating a program of cardiovascular walking, stretching exercises, and strength training.
Exercising may be difficult at first, especially if
you have not exercised before. Remember to
start slow, go slow, and be patient with yourself.
With consistent and continuous effort, you will
be on your way to a new and healthy you!
28
Lymph Node Removal and
Lymphedema
In certain cases, lymph nodes from under the
arm are removed as part of the surgery for breast
cancer. This is called an axillary node dissection.
This may lead to a condition called lymphedema.
This is the swelling of a body part — in this case
the arm.
The job of the lymph vessels is to carry lymph
fluid (a protein-rich fluid that contains water, fat,
bacteria, and old blood cells) to the larger lymph
ducts and into the main circulatory system.
When the lymph vessels are altered by surgery or
radiation, the body may be unable to properly
drain this fluid, thus resulting in swelling in the
arm. The body responds by enlarging the
remaining lymph channels to take over the
work of those removed or altered.
You will need to take steps to prevent
lymphedema. Below are measures to help:
Avoid exposure to excessive heat and burns
The following will minimize increased lymph
production.
• Wear sunscreen when in the sun and minimize
sun exposure to prevent burning.
• Avoid extreme heat with sun exposure.
• Avoid extreme heat when bathing and washing
dishes.
• Do not use the sauna or hot tub.
Avoid muscle strain
This also will minimize increased lymph production.
• Use the arm normally, not excessively, and
minimize heavy lifting.
• Warm up muscles before exercise.
• Avoid long durations of repetitive vigorous
movements against resistance (scrubbing, pushing, and pulling).
• Initiate new exercise gradually, and limit sports
with forceful repetitive arm strokes. If the arm
begins to ache, lie down and elevate it. Speak
to your surgeon before starting any program
of exercise.
Avoid compressing the affected area
This will help lymph channels stay open. They
can collapse if too much pressure is applied.
• Avoid having blood pressure taken on the
treated side. Use the untreated side.
• Avoid tight clothing and accessories on the
shoulder, arm, and hand such as:
— Pocketbooks slung over the shoulder
— Narrow bra straps that leave an
indentation in the skin
— Shirts with tight elastic sleeves
— Tight bracelets, watches, and rings
Maintain skin integrity to minimize infection
The following are recommended to minimize the
chance of infection, which can cause scarring and
narrowing of the lymphatic channels.
• Use an antibacterial soap (e.g., Dial , Lever
2000®) for daily bathing.
®
• Use hypoallergenic moisturizing lotion (e.g.,
Lubriderm®) on the arm and hand to keep the
skin moist. In the dry winter months, apply
twice daily.
• Use an electric shaver, wax, or consider laser
hair removal to remove underarm hair. If using
a razor blade when shaving under your arm,
do so in front of a mirror with great care to
avoid breaks in the skin.
If you get a cut, burn, or scrape
• Cleanse the area well with antibacterial soap.
• Apply antibiotic ointment (e.g., Bacitracin®,
Neosporin®, triple antibiotic).
• Cover with a bandage.
• If signs of an infection develop, such as
redness, warmth, or swelling, call the Breast
Health Center at (617) 732-8111 or your
surgeon’s office. You many need to be
evaluated for a prescription for an antibiotic
to help treat the infection.
Keep your weight in a healthy range for your
body type and height
At the time of your surgery, you will receive
information about buying a “lymphedema alert”
bracelet to wear for your protection.
With air travel, you may need to wear a compression sleeve because cabin-pressure changes
may cause lymphedema. The sleeve needs to be
refitted if it is worn often or if your weight
changes. You can be fitted at the Friends
Boutique at Dana-Farber Cancer Institute or at
a medical supply company.
For more information, please contact the Greater
Boston Area Lymphedema Support Group at
(781) 894-2309 or the National Lymphedema
Network at (800) 541-3259.
• Avoid cutting cuticles during a manicure/
pedicure.
• Wear protective gloves when doing dishes
and gardening.
• Avoid pet scratches and bites, especially with
kittens.
• Wear long sleeves and insect repellent when
outdoors during insect season.
• Avoid taking your blood pressure, blood draws
and IV placement in the arm.
29
Reconstructive Surgery
If you choose reconstruction, there are several
options to consider. Reconstruction can be
performed on the same day as your mastectomy
(immediate reconstruction), or at any time in
the future following your mastectomy (delayed
reconstruction). Sometimes it is better to wait for
reconstructive surgery depending on factors such
as tumor size, nodal involvement, the need for
chemotherapy or radiation therapy, or your
own physique.
Reconstruction is intended to help restore your
confidence and physical appearance. It will
provide a breast mound to closely match your
other breast. Sometimes a breast reduction on the
unaffected side may be recommended to achieve
a more balanced appearance. Women also may
choose not to undergo surgical reconstruction.
In this situation, they may consider a breast
prosthesis, fitted to match your remaining breast.
It is worn in a special bra or, in the case of a
custom-made prosthesis, is worn with your
usual bra.
Your plastic surgeon will help you decide
which type of reconstruction is best for you.
This decision will be based on your:
• Past history
• Body type
• Presence of scars on the breast and at a possible reconstruction donor site
• Physical activity level
• Need for additional therapy such as radiation
• Personal preferences
30
Types of Procedures and General
Guidelines
There are two major categories for reconstructive
procedures used to create a new breast mound:
• Flaps
Involve using tissue from one part of your
body and transferring it to your breast area.
• Saline implants
Involve an initial placement of a silicone
envelope (tissue expander), a series of saline
injections to expand the silicone envelope,
and later removal of the tissue expander and
placement of a permanent saline or silicone
implant.
Flaps can be performed in two ways, either as a
pedicle flap or a free flap. A pedicle flap uses
tissue that remains attached to its blood vessel
source and is tunneled under the skin to the
chest surgical site. This tissue can be taken from
your abdomen or your back. A pedicle flap
from the abdomen is called a TRAM flap,
which refers to the transverse rectus abdominus
muscle used to rebuild the breast. A pedicle flap
from the back is called a latissimus dorsi muscle
flap, or Lat-flap.
A free flap involves using tissue that is totally
disconnected from its blood supply at the source
and reconnected to blood vessels at the new site.
A free flap is usually taken from the abdomen
muscle (TRAM) although in some instances a
buttock muscle may be used.
After any breast reconstruction, plans may be
made to add a nipple and areola. This can be
done about three months following your flap
reconstruction or your saline implant, allowing
for any swelling to subside and the breast to
heal and develop a more natural shape. This
procedure is usually performed as an outpatient
under local anesthesia.
Approximately two months following the
reconstruction of a nipple and areola, they will
be tattooed to match the color of the nipple
areola complex of your other breast. This will
be done on an outpatient basis, usually in your
plastic surgeon’s office.
If your reconstruction is scheduled to be performed
on the day of your mastectomy, you will go
through the routine procedures to prepare for
surgery. You will visit the Weiner Center for
Pre-Operative Evaluation in the week(s)
beforehand. You will be admitted to the hospital
on the day of surgery. Similar to other breast
surgery procedures, your care after this surgery
will be focused on managing pain, caring for
your incision and drains, and progressing your
activity. You may refer to earlier sections of this
book for a review of these routines. You will find
the following general guidelines helpful after any
breast reconstruction procedure:
Incision
Following any type of reconstruction, your breast
may be swollen and slightly bruised for two to
six weeks. This is normal. Your bandages/
dressings will be removed prior to leaving the
hospital, and your incisions may be left open to
air. You may choose to keep a dry dressing
around your drain sites.
Drains
You will have one or more drains in place until
the drainage is less than 20 to 30 cc’s (about an
ounce) per drain in a 24-hour period. Empty the
drains as needed when they are one-third full and
record the amounts. After emptying it, grasp the
entire bulb in your hand, squeeze it tightly, and
reinsert the stopper into the bulb. The bulb
should remain compressed at all times. This is
important for the drain to work properly.
In general, by the time of you leave the hospital,
the drainage will have become pink or yellow in
color. If you see new leakage from around a
drain site, you may try stripping the drain. Grasp
the tubing tightly between your thumb and index
finger near your skin. With the other hand, pinch
the tubing and slide your fingers down the tube
toward the bulb. This maneuver may dislodge
any material that may be blocking the tube and
end the leakage. Call your plastic surgeon’s office
when the drainage in your drains is less than 20
to 30 cc’s per drain for a 24-hour period and
arrange to come to the office for removal of one
or more drains.
In most cases, incisions are closed with stitches
beneath the skin (intra-dermal) and will be
covered with steri-strips or a non-adherent gauze.
The sutures will be absorbed by your body over
the next four to six weeks and do not have to be
removed. The steri-strips will fall off or can be
removed in two weeks. On occasion, a surgeon
may decide to use external nylon sutures that
will be removed during one of your follow up
visits (about 10 to 14 days after surgery). To
minimize infection, you will be discharged with
an antibiotic medication to take as long as the
drains are in place.
Diet and nutrition
Return to your normal diet as soon as possible.
You need plenty of proteins to help your body
heal. Protein can be found in lean meats,
poultry, and fish or in beans, legumes, or nuts.
Carbohydrates found in grains, fruits, and
vegetables are important for energy. Narcotic
medications and decreased physical activity
are causes of constipation. Try to include bran
cereals or muffins as well as raw fruits and
vegetables to counteract this. You also should
drink plenty of fluids. An over-the-counter stool
softener should be taken while you are taking
your narcotic medication. This will keep your
stool soft, however, it will not cause you to have
a bowel movement. If need be you may take a
laxative, such as Milk of Magnesia, until your
normal bowel function has returned.
You should never apply hot water bottles or
heating pads to any surgical site. Your suture
lines and flaps are not as sensitive to heat, so
burns easily can occur. Also avoid other heat
situations such as saunas, hot tubs, sunbathing,
phototherapy, or tanning salons. Cold packs
should never be placed over a flap because this
will cause constriction of blood vessels and
hinder circulation in the flap.
Daily activities
Resume normal activities as your strength allows.
You should alternate periods of activity with
periods of rest during the first two weeks after
your operation. You may go up and down stairs
but try to restrict this to a minimum for the first
week. Walking is a good form of exercise for the
first two weeks. Until your incisions are healed,
you do not need to do any arm stretching
31
exercises other than gentle, limited range-of-motion
of your shoulder joint. At your first follow-up
visit, you will be instructed when to start an
exercise program.
Do not lift anything greater than 10 pounds for
two months. Also avoid any active arm motions
such as those needed for vacuuming or mopping
floors for the same period of time. A safe rule
when beginning activity is to try something, and
if it causes discomfort, wait a week and try again.
Bathing and shampooing
You will need to take sponge baths until 24 hours
after the last drain is removed. You should not
soak any incision in a bath tub or go swimming
for at least three weeks — or until all incisions
are completely healed. Soaking incisions will
cause problems with the suture lines and delay
healing. You may shampoo your hair over the
sink at anytime. 24 hours after the last drain has
been removed, you may shampoo your hair in
the shower. Be careful, not to raise your arm on
the operative side higher than 90 degrees for the
first week.
Driving
DO NOT DRIVE while you are taking any
narcotic medication. You must be able to move
freely in the car to observe oncoming traffic and
react quickly without being limited by pain or
weakness.
Travel
Do not travel by airplane until 10 days after
your operation. When you do fly, walk up and
down the aisle several times during your flight
to stimulate your circulation. Be sure to drink
plenty of water throughout the flight.
In the next section, we will discuss the common
reconstructive procedures in more detail including
what you can expect during your hospital stay
and during your recovery at home.
Tissue Expander
and Saline Implant Insertions
A saline implant is rarely placed at the time of
mastectomy because there generally is insufficient
muscle tissue to cover it. Instead, a two-stage
procedure is planned. At the time of your
mastectomy, a tissue expander will be placed into
a pocket made for it under your breast muscle
(Figure 9, page 38). At a later time, the expander
will be exchanged for a permanent saline implant.
32
A tissue expander is a silicone envelope with an
injection port, which you may be able to feel under
your skin. The port is about the size of a quarter
and is usually placed centrally in the breast. A small
amount of saline may be injected at the time of your
mastectomy, but your incisions must be allowed to
heal before any significant expansion can begin.
What to expect
After placement of the tissue expander, your
newly reconstructed breast will be smaller than
your unaffected breast. You may want to wear
a temporary breast form to balance your bust
line. If so, please call the Friend’s Boutique at
Dana-Farber Cancer Institute. They will provide
a temporary breast form and a bra.
First few weeks after surgery
Approximately two to six weeks after your
surgery, a series of injections into the expander
will begin. Two to four ounces of saline will be
injected every week or two until the desired size
is reached. At the completion of this process, the
expander will be larger than the desired breast
size in order to have enough soft, loose skin to
drape nicely over the implant. These injections
usually are not painful, but you may experience
some tightness in your breast for 24 to 48 hours
following each injection. Tylenol® or Advil® is
helpful for the relief of this discomfort.
Once the expansion process is completed, there
will be a waiting period of four to six weeks to
allow the tissues to relax. After this period, you
will be ready for the insertion of a permanent
saline implant. There are two types: smooth
surface and textured surface. You will be
scheduled for a day surgery in the operating
room. The expander will be removed and the
permanent saline implant will be inserted through
the previous mastectomy incision.
After the permanent implant is placed, it will need
time to settle into place. You must avoid shoulder
movement in any direction above 90 degrees for one
week. This means that your upper arm should not
be raised above the level of your shoulder when
reaching forward or sideways away from your body.
You may move your elbow and wrist to do such
things as combing or washing your hair. You should
also avoid lifting more than 10 pounds for the same
period of time. If your shoulder feels stiff, bend over
slightly and do circle exercises with your arm. This
will help the flexibility of your shoulder joint.
In addition to a dressing, you may have a bra or
chest wrap in place for the first few post-operative
days to minimize the chance of the implant from
changing position in its pocket. After this dressing
is removed, you may wear a supportive bra.
You may return to your normal activities in
four to six weeks. Check “Resuming Usual
Activities After Breast Surgery” on page 14 for
more specific details. Be sure to check with your
surgeon or nurse if you have specific questions.
Figure 9: Tissue Expander and Saline Implant Insertion
33
TRAM Flap Reconstruction
A TRAM flap is an acronym for transverse
rectus abdominus muscle flap. There are two
such muscles in your abdomen. In this procedure,
a portion of one muscle, along with its overlying
skin and fat, will be raised up but still left
connected to its blood supply in the muscle
(see Figure 7). A tunnel will be prepared so that
this tissue flap can be passed along through it,
beneath your skin, to the breast area to create a
new breast mound. The flap is then trimmed and
sewn into place. The abdominal wound will be
closed, and you will have a single scar across
your lower abdomen. To complete the abdominal
repair, a small incision will be made in the
abdominal wall and the umbilicus (belly button)
will be brought out and sutured into place.
What to expect
This surgical procedure will require you to be
in the hospital for 3 to 4 days on average. Right
after surgery, you will awaken in the Post
Anesthesia Care Unit. Usually, patients receive
their pain medication through an intravenous
line (IV), which is connected to a PCA (patientcontrolled analgesia) pump. Using this pump
helps you to better control the pain by allowing
you to push a button to receive a dose of
medication when you need it. The pump is set
to allow you to receive the correct amount of
medication at certain time intervals, usually
about every seven minutes. Do not be concerned
that you are using it too much; it will not allow
you to overdose. When you are able to tolerate
food, the pump will be stopped and you can
begin to take your pain medication by mouth.
You will be instructed to cough and take deep
breaths frequently as this is helpful in getting
your lungs to expand fully.
After your surgery is completed and you are fully
awake, you may be offered ice chips. This will be
followed by a short period of clear liquids, after
which you can begin your regular diet when you
are up to it. On the evening of your surgery or
early the next day, you will be encouraged to get
out of bed. It is important for your circulation to
become active. You will be asked to walk and to
sit in a chair for short periods.
During the days after surgery, you may feel that
your hands and face are puffy. This is caused by
the fluids you were given intravenously during
surgery. Your body must rid itself of this fluid in
34
your urine, which usually occurs during the first
48 hours. A bladder catheter may be in place for
most of this time. When you are able to be out of
bed and walk to the bathroom, your catheter will
be removed.
At first, you will probably feel most comfortable
lying on your back. You may lie on your
unaffected side as well. Right after surgery, your
operative breast will be swollen. There may be
some bruising either on the flap itself or on the
skin left behind after the mastectomy (your
native skin). This bruising should subside over
the next few days.
After two days, it is unlikely that there will be
additional drainage from any of your incisions.
Dressings are generally not required after this
time. To manage drainage of wound fluid, you
will be discharged with several drains in place,
both in your breast and abdomen. These will
remain until the drainage is less than 20 to 30
cc’s for a 24-hour period. Your drains will be
removed in the plastic surgery clinic during one
of your follow-up visits (see “Incision and Drain
Care,” on page 11).
First few weeks after surgery
After a TRAM flap procedure, your abdomen
will feel quite tight for several weeks. This
tightness will eventually lessen as you increase
your activity and the tissues relax. You may feel
more comfortable wearing loose clothing. It is
important to avoid lifting more than 10 pounds
or doing any heavy activity for up to two
months. This will allow the interfacing layers
of tissue to completely seal together and heal.
After a TRAM flap procedure, you should not
wear a bra for one month. Tight-fitting garments
can cause pressure over the blood supply to your
flap, resulting in poor circulation. After a month,
a new blood supply will have been established at
the base of the flap and you may resume wearing
a bra.
You should not raise your shoulder on the
operated side more than 90 degrees for one week
to avoid any stretch on your incisions. This
means that your arm should never be above the
level of your shoulder when reaching forward or
out to the side away from your body. If your
shoulder begins to feel stiff, bend over slightly
and do circle exercises with your arm. This will
maintain the flexibility of your shoulder joint.
It will take three to four months for your
incisions to completely heal and for your breast
swelling to totally resolve. At this time you can
begin to make plans for your nipple/areola
reconstruction and any minor revisions of your
reconstructed breast to achieve greater symmetry
with your remaining breast.
You may return to all of your usual daily
activities in about six to eight weeks. Check the
instructions for “Resuming Usual Activities After
Breast Surgery” (page 14) for more specific
details. If you have specific questions, please
ask your surgeon or nurse.
Figure 7: TRAM Flap Resconstruction
35
Latissimus Dorsi Flap Reconstruction
A latissimus dorsi flap reconstruction involves
lifting up the latissimus dorsi muscle in your
back, along with a portion of overlying fat and
skin (see Figure 8, page 36). A tunnel is prepared
under the skin of your armpit (axilla). The flap is
passed through this tunnel and brought out to
your breast area. The flap is then trimmed to fit
and secured into place. Frequently a small saline
implant is placed under the flap to increase the
breast size and achieve a better likeness to the
remaining breast. This procedure usually requires
a stay in the hospital for two to three days.
What to expect
After your surgery, a PCA (patient-controlled
analgesia) pump may deliver your pain medication. You will be instructed to push a button to
receive intravenously a dose of your prescribed
narcotic. The pump is set to allow you to receive
the right amount of medication. You do not need
to be afraid of using it too much. When you are
able to eat, the pump will be stopped and you
can take your pain medication by mouth.
Once fully awake from anesthesia, you will be
offered ice chips. This will be followed by a short
period of clear liquids, after which you will
advance to a regular diet. On the evening of your
surgery or the next day, you will be encouraged
to get out of bed. It is important for your
circulation for you to move about, walk, and
sit in a chair for short periods. You will need to
cough and take deep breaths frequently. This will
help your lungs fully expand. You will probably
be most comfortable sleeping partially on your
back, with pillows behind to prop you up off
your incision. You should not lie directly on the
incision area until this it is healed fully and it is
comfortable to do so. You also may lie on the
unaffected side with a pillow between your arms
to avoid stretching the back incision.
After surgery, your hands and face may be puffy.
This is because during your operation you were
given fluids intravenously and now your body
must get rid of this fluid in the urine. This will
naturally happen over the next 48 hours. A
bladder catheter may be in place for most of this
time. When you are able to be out of bed and
walk to the bathroom, your catheter will be
removed.
36
Your back will likely feel tight for several weeks.
This tightness will go away as you increase your
activity and the tight tissues relax. You will feel
most comfortable wearing loose clothing. It is
important to avoid lifting more than 20 pounds
or doing any heavy activity for up to two
months. This will allow the newly connecting
tissues to completely seal together and heal.
You will have two drains in your back. These
may remain in place for more than two weeks.
This will prevent fluid buildup under the skin of
your back, which occasionally happens. Your
drains will be removed in the Plastic Surgery
Clinic as soon as they drain less than 20 to 30
cc’s (about half an ounce) over a 24-hour period.
After the drains are removed, you will need to
watch for any new swelling, especially in your
back. Please contact the Plastic Surgery Clinic if
swelling occurs. There may be an accumulation
of wound fluid called a seroma. This can be
drained in the clinic. It is not a painful procedure
because the skin at the operative site is still numb
from your surgery.
After a month, a new blood supply will have
formed at the base of your flap, and you may
resume wearing a bra. It will take at least three
to four months for your incisions to fully heal
and for the breast swelling to completely go
away. You can then begin planning for your
nipple/areola reconstruction and any minor
revisions to your reconstructed breast to
achieve the greatest possible symmetry to your
other breast.
You may return your normal activities in about
six to eight weeks. Check “Resuming Usual
Activities After Breast Surgery” on page 14 for
more specific details. Be sure to check with your
surgeon or nurse if you have any questions.
In general, do not raise your shoulder on the
affected side more than 90 degrees for one week.
This precaution is to avoid any stretch on the
incisions. This means that your upper arm should
not be raised above the level of your shoulder
when reaching forward or out to the side away
from your body. If your shoulder begins to feel
stiff, bend over slightly and do circle exercises
with your arm. This will keep flexibility in your
shoulder joint. Also, do not use the arm on your
operated side to push yourself to a sitting
position or to get up from a chair for two weeks.
This is to avoid stretching your new incisions.
You will be taught when and how to begin
an exercise program at your first follow-up
appointment.
Please refer to the exercise schedule in this guide.
Figure 8: Latissimus Dorsi Flap Reconstruction
37
Summary
We know that having breast surgery, and possibly
having chemotherapy and radiation, is a very
stressful time in your life. We want you to know
that we will do everything possible to help you
through this time. There also are many agencies
that you may contact for support. You will find a
list of these resources at the back of this guide.
After breast surgery with or without reconstruction,
it is important to have confidence in your ability
to move ahead. The process of getting back to
your usual lifestyle will take several months, and
will be aided by a great deal of patience and a
positive attitude on your part.
38
Resources
Books
• A Breast Cancer Journey: Your Personal Guidebook, American Cancer Society, 0-9442-3528-X,
American Cancer Society, 2001
• A Woman’s Decision: Breast Care, Treatment & Reconstruction, Berger, 1-576260-80-1, Quality
Medical Pub, 1998
• Advanced Breast Cancer: A Guide to Living with Metastatic Disease, Mayer, 156592522X, O’Reilly,
1998
• After Breast Cancer: A Common-Sense Guide to Life After Treatment, Hill Schnipper, 0553381628,
2003
• After Surgery, Illness or Trauma: 10 Practical Steps to Renewed Energy and Health, Ryan,
0-934252-95-5, Hohm Press, 2000
• American College of Physicians home medical guide to breast problems, Horowitz, 0-7894-4174-8,
Dorling Kindersly, 2000
• Breast Cancer: Beyond Convention, Tagliaferri, 0-7434-1012-2, Atria Books, 2002
• Breast Cancer Husband: How to Help Your Wife (and Yourself) Through Diagnosis, Treatment and
Beyond, Silver, 1579548334, Rodale Books, 2004
• Diseases of the Breast, Harris, 0-781718-39-2, Lippincott Williams & Wilkins Publishers, 2000
• Dr. Susan Love’s Breast Book, Love, 0-738202-35-5, Perseus Book Group, 2000
• Helping your Mate Face Breast Cancer, Kneece, 1-886665-11-7, Edu-Care Publishing, 1999
• Living Through Breast Cancer: What a Harvard Doctor Wants You to Know about Getting the Best
Care While Preserving Your Self-Image, Kaelin, McGraw Hill, 2005
• Prepare for Surgery; Heal Faster, Huddleston, 0-96457-5744, Angel River Press, 2002
• Surgery: A Patient’s Guide from Diagnosis to Recovery, Mailhot, 0-9436-7119-1, UCSF Press, 1999
• The Surgery Handbook: A Guide to Understanding Your Operation, Ruggieri, 1-886039-38-0,
Addicus Books, 2000
• The Victoria's Secret Catalog Never Stops Coming, and Other Lessons I Learned from Breast Cancer,
Nash, 0-452-28366-3, Plume, 2001
• Woman to Woman: A Handbook for Women Newly Diagnosed with Breast Cancer, Berns,
0-380806320, Wholecare, 1999
• You've Got a Friend: A Journal of Hope for Women with Breast Cancer, Manley, 1-57826-056-6,
Hatherleigh Press, 2001
39
Books for Children:
• Michael's Mommy has Breast Cancer, Torrey, 0-964776-36-7, Hibiscus Press, 1999
• The Hope Tree: Kids Talk about Breast Cancer, Numeroff, 0-689845-26-X, Simon & Schuster,
2001
eBooks
• The Breast Sourcebook: Everything You Need to Know About Cancer Detection, Treatment,
and Prevention
• Pocket Guide to Breast Cancer
Brigham and Women’s Hospital Publications
• Breast Care and You
• Your Guide to Cancer Prevention & Screening
Magazines
• Coping with Cancer
• MAMM: Women, Cancer and Community
eMagazines
• New Medical Therapies – Breast Cancer
DVDs/Videos
• Breast Cancer Survivor’s Guide to Fitness
(www.brighamandwomens.org/breastcancerexercisedvd)
• Breast Health For Women Over 60
• Breast Reconstruction: Is it Right for You?
• DCIS: Choosing Your Treatment
• Early Stage Breast Cancer: Choosing your Surgery
• Get Up & Go after Breast Surgery
• Hormone Therapy and Chemotherapy
• On with Life: Practical Information on Living with Advanced Breast Cancer
• A Significant Journey: Breast Cancer Survivors and the Men Who Love Them
CD-ROMs
• Surgery
Web sites
• American Cancer Society: www.cancer.org
• National Cancer Institute: www.nci.nih.gov
• National Lymphedema Network: www.lymphnet.org
• Women’s Pavilion: www.obgyn.net
40
Contact Information
Important Telephone Numbers
Your Surgeon
Telephone Number
Your Plastic Surgeon
Telephone Number
If you cannot reach your surgeon, please call (617) 732-6987.
Ask the page operator to page the “physician on call” for your surgeon.
Primary Nurse
Unit Telephone
Hospital Telephone Numbers
Comprehensive Breast Health Center
Main Hospital Number
Plastic Surgery Resident on Call
Plastic Surgery Nurse Practitioner on Call
Pre-Admitting Test Center
Day Surgery Unit
Admitting Office
Rehabilitation Services (outpatient)
Patient Relations
(617)
(617)
(617)
(617)
(617)
(617)
(617)
(617)
(617)
732-8111
732-5500
732-5700 Beeper 14000
732-5700 Beeper 34343
732-7484
732-7625
732-7450
732-5304
732-6636
Social Work Services
Monday–Friday, 8:30 a.m.–5:00 p.m.
(617) 732-6462
Evenings/Weekends/Holidays
(617) 732-6987
Ask the operator to page the “social worker on call”
Services
Friends Boutique at
Dana-Farber Cancer Institute
(617) 632-2211
(800) 322-2232
Resource Centers
Kessler Health Education Library
at Brigham & Women’s Hospital
Blum Patient and Family Resource Center
at Dana-Farber Cancer Institute
(617) 732-8103
TTY (617) 525-7337
(617) 632-5570
(800) 525-5068
Other Resources
American Cancer Society: Boston
For local chapters:
Cancer Information Service:
National Cancer Institute
Greater Boston Lymphedema Network
National Lymphedema Network
(617) 556-7400
(800) 227-2345
(800) 4-CANCER (800-422-6237)
(781) 894-2309
(800) 541-3259
41
Notes
42
Notes
43
#0700144 11/05

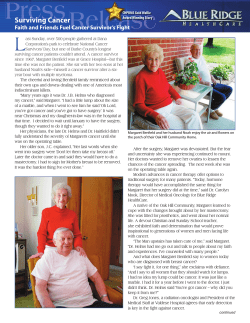


© Copyright 2026