
cold crop transplant instructions
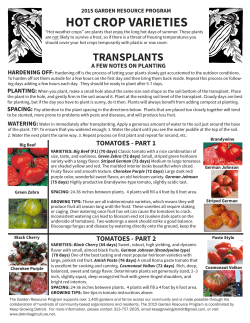
2015 GARDEN RESOURCE PROGRAM
COLD CROP VARIETIES
and
planting instructions
WHAT ARE COLD WEATHER CROPS?
A “cold weather crop” is a plant that is cold hardy and frost-tolerant. They are planted in early spring not only
because they can tolerate these conditions, but also because they must have time to mature before the weather
becomes too warm. Too much heat can cause some cold crops such as lettuce to go to seed and become bitter.
Many cold weather crops can also be planted in late summer if there is a long enough period for them to reach
maturity before winter. TRANSPLANTS NEED TO BE HARDENED OFF!
Hardening off is a process of letting your plants slowly get accustomed to the outdoor conditions after being gently
cared for since they were first planted in the greenhouse. Slowly expose your plants to the outdoor conditions. Set
them outside for a few hours on the first day and then bring them back inside. On the second day and third day, leave
them out for an entire afternoon. After that, leave them out all day long for a few days, bringing them back inside or
covering them with row cover each evening. They should be ready to plant after 5-7 days. Because the weather in
spring is so variable, there is no exact schedule you need to follow, but we highly recommend you gradually expose
them to outdoor conditions before you plant them.
A FEW NOTES ON TRANSPLANTING
• PLANTING: Loosen the soil of the area you are planting with a shovel. When you plant, make a small hole
about the same size and shape as the soil bottom of the transplant. Place the plant in the hole, and gently firm
in the soil around it. Do not plant deeper than the existing soil level of the transplant, especially on lettuce.
Overcast days are best for transplanting.
• WATERING: Water immediately after transplanting. Apply a generous amount of water to the soil just
around the base of the plant. TIP: To ensure that you have watered enough, do these steps: 1. Water the plant
until you see the water glisten at the top of the soil. 2. Water the next plant the same way. 3. Go back to the
first plant and re-water, then repeat for the second, etc.
• SPACING: Pay attention to the plant spacing in the attached directions.
Plants that are placed too closely
together will tend to be stunted and prone to problems with pests and diseases.
QUESTIONS?
Please don’t hesitate to contact us with questions. Keep Growing Detroit’s staff is always available during office hours
(Wednesdays 4-6PM or Fridays 10-12PM at 76 E. Forest) if you want to stop by or contact us by phone at 313-757-2635.
The Garden Resource Program supports over 1,400 gardens and farms across our community and is made possible
through the collaboration of hundreds of community-based organizations and residents. The 2014 Garden Resource
Program is coordinated by Keep Growing Detroit (KGD). For more information, please contact 313-757-2635, email
[email protected], or visit www.detroitagriculture.net.
LETTUCE
Romaine
Family & School Gardens: Take 1 pack
Community & Market: Take 3 packs
NOTE: Each pack has a mix of Romaine, Red Butterhead, and Green Frilly lettuce plants
Red Butterhead
VARIETIES: Romaine Coastal Star (43 days to harvest), heat-resistant romaine head lettuce. Red
Butterhead Alkindus (37 days to harvest), dense heads, buttery red leave. Green Frilly Black Seeded
Simpson (55 days to harvest), large, heavy, slow-bolting heads of frilly lettuce.
SPACING: 8 inches between plants. One pack contains 6 transplants which will plant approximately a 2
foot by 2 foot area.
Green Frilly
GROWING TIPS: Lettuce grows well in areas with a few hours of shade each day. You can harvest whole
heads (head lettuce) or pick larger outside leaves as the plant grows. It is best to harvest leaves early
in the morning to avoid bitter tasting lettuce. Pay attention to the plants as they get larger, if you see
the center of the head begin to extend upwards, this is the beginning of the seed stalk and the lettuce
should be harvested right away. The formation of the seed stalk is called “bolting” and is a natural
part of the lettuce’s life cycle. Hot weather encourages earlier bolting. Leaves will also turn bitter once
bolting begins.
KALE
Dinosaur Kale
Family & School Gardens: Take1 mix-pack (each pack has 2 of each type of kale)
Community & Market: Take 3 mix-packs (each pack has 2 of each type of kale)
VARIETIES: Lacinato (51 days to harvest) Dark green leaves, also called lacinato or dinosaur kale,
known for it’s high quality flavor. Vates (F1) (46 days to harvest), extra productive kale with ruffly,
blue-green leaves. Re-grows vigorously for successive harvests. Smaller than regular curly varieties.
Curly Kale
SPACING: 12-18 inches between plants. One pack contains 6 transplants which will plant
approximately a 3 foot by 3 foot area.
GROWING TIPS: Kale and collards are among the hardiest of garden vegetables. Harvests can be
extended through whole season by harvesting the bottom older leaves and leaving younger top leaves
to grow. Keep yellow and dying leaves cleared off the plant. Putting row cover over the plants early in
the season will help keep your crops free from flea beetles.
Broccoli
BROCCOLI OR COLLARDS
Family & School Gardens: Choose 1 pack of Broccoli or Collards
Community & Market: Choose 3 packs
Broccoli (4-Pack)
VARIETY: Gypsy (F1 hybrid) (58 days to harvest), Heads are medium green and domed with a mediumsized head. Strong, stress-tolerant plants also have good side shoot production.
SPACING: 15 inches between plants. One pack contains 4 transplants which will plant approximately a
3 1/2 foot by 3 1/2 foot area.
Collards
GROWING TIPS: Watch broccoli carefully. It is ready to harvest when a large, tight head has formed,
before buds have begun to stretch and separate. After the center head is havested, smaller side shoots
will continue to form and can be harvested the same way. Using row cover early in the season will help
keep your crops free from flea beetles. In order to minimize the chances of black rot on your heads,
avoid watering the crown or leaves. Instead, water the base of the plant.
Collards (6-Pack)
VARIETY: Georgia (70 days to harvest), Georgia is a large, sweet, smooth-leafed collard.
SPACING: 12 inches between plants. One pack contains 6 transplants which will plant approximately a
3 foot by 3 foot area.
GROWING TIPS: See tips for kale.
Green Cabbage
CABBAGE, BRUSSELS SPROUTS OR PAC CHOI
Family & School Gardens: Choose 2 pack of Cabbage or Brussels Sprouts
Community & Market: Choose 6 packs (Mix & Match!)
Note: Brussels Sprouts limit 1 pack per garden
Green and Red Cabbage (6-Pack)
Red Cabbage
VARIETIES: Golden Acre (64 days to harvest) Attractive, deep green heads have short, dense cores filled with
tender, thin, crisp, peppery-sweet leaves.
Red Express (63 days to harvest) Extra-early red cabbage. Compact plants and solid, round, 2-4 pound heads.
SPACING: 15 inches between plants. One pack contains 6 transplants which will plant approximately a 3 1/2
foot by 3 1/2 foot area.
Brussels Sprouts
GROWING TIPS: Heads should feel very firm and solid, with little to no space between leaves when they
are ready for harvest, Give them a sqeeze to test if they are ready. Loose outer leaves can be used for boiling
or braising. After central head has been harvested, smaller mini cabbage heads will often form that can be
harvested as well. Putting row cover on at planting until the plants mature a bit will help keep your crops
free from flea beetles and cabbage loopers.
Brussels Sprouts and Pac Choi (4-Pack)
Pac Choi
Red Potato
VARIETY: Brussells Sprouts Gustus (F1) (99 days to harvest) Sprouts are medium-sized, slightly oval, remarkably
uniform (perfect for market) and grow large further up the stalk if plants are topped (see below for more info).
SPACING: 18 inches between plants. One pack contains 4 transplants which will plant approximately a 3 foot by 3
foot area.
GROWING TIPS: Do not plan on harvesting brussels sprouts until late in the season after the first frost as the
cold weather sweetens the crop. When they are ready to be harvested (about 1-2 inches), you can pick individual
sprouts, starting from the bottom of the stalk and moving up, or you can use a saw to take down the whole stalk
at the base. Cut off the very top of the plant in early September to stimulate more sprout prduction.
VARIETY: Pac Choi Black Summer (45 days to harvest) Broad, flat, light green stems are topped with oval dark
green leaves. Forms a perfect thick vase shape even when small.
SPACING: 10-12 inches between plants. One pack contains 4 transplants which will plant approximately a 2 foot
by 2 foot area.
GROWING TIPS: Harvest when plants get 10-12 inches.
POTATOES
Family & School Gardens: Choose 2 unit
Community & Market: Choose 6 units
Note: One unit is 1/2 pound (approximately 4-5 potatoes that can be cut to create 12-15 seeds)
Golden Potato
Blue Potato
VARIETY: Red Pontiac (70-90 days to harvest) A high yielding variety with bright red skin and white
flesh, great for roasting. Yukon Gold (70-85 days to harvest) Golden-fleshed with excellent flavor and
dry texture, great for roasting. Adirondack Blue (80 days to harvest) Dependable, high-yielding bluefleshed potato.
PLANTING: Cut potatoes so that each piece is about 2-3 inches big and contains at least 1 or 2 eye
buds. If a potato is smaller than a golf ball, leave it whole. Dig a trench 6-8 inches deep, and place
potato inside with cut side facing down and eye buds facing up. Cover with 4 inches of soil. As the
plant grows, mound more soil around the base, eventually going above the ground level. You do not
need to harden off this plant.
SPACING: 12 inches between plants. Twelve seed pieces will plant approximately a 6 foot by 6 foot area.
GROWING TIPS: Potatoes do not compete well against weeds. Plant in a well-weeded spot, and keep
clean of weeds throughout the season. Potatoes always do best in full sun. Keep potatoes well watered
through the summer, especially when they are flowering. Stop watering when leaves turn yellow and
plants appear to be dying back. This is a signal that the plant is putting its energy into the tubers
(potatoes) that you will later harvest! Fresh “new” potatoes (not for storage) can be dug as soon as the
potatoes have reached about golf ball sized. These potatoes will need to be refrigerated. Potatoes for
storage should be ready to dig 2-3 weeks after the leaves dry up. When storing, choose potatoes with
no blemishes or cuts in the skin. Also, watch out for rotten potatoes - they can encourage more to rot
if stored next to each other and they smell AWFUL! Store unwashed potatoes in a paper bag in a cool,
dry place where they are protected from rodents. Do not wash until you are ready to use.
ALLIUMS (ONION FAMILY)
Family & School Gardens: Choose 2 unit
Community & Market: Choose 6 units (Mix & Match!)
Note: One unit is 10 red onions, 10 yellow onions, 10 leeks
Red Onions
Red and Yellow Onions
VARIETY: Red Zeppelin (F1) (110 days to harvest) A sweet, reliable, dark red variety with a 4 inch bulb.
Copra (F1) (110 days to harvest) This sweet, yellow onion normally grows a bulb that is 3-4 inches wide.
PLANTING: Plant onions about 1 inch deep. Be sure to water thoroughly after planting and at least one
time per week after planting. You do not need to harden off this plant.
SPACING: 6 inches between onion plants. 10 transplants will plant approximately a 2 1/2 by 2 1/2 foot area.
Yellow Onions
GROWING TIPS: Thrips are very small insects and can be a problem pest on onions. Look for them at
the base of the succulent inner leaves. Their bites can let in rain which will rot the onion layers. If they
become a problem, consider an organic pesticide, or try setting mirrors or aluminum foil facing up
under your plants. The intense reflected sunlight can confuse the pests. Fresh, green onions can be
harvested as soon as bulbs reach desired size. For storage (dry-skinned) onions, watch for when the
outer-most ring of leaves dies and harvest when leaves have fallen over. Lay out to dry in single layers
or hang them in a warm, dry place with good air circulation. Let onions dry at least 2-3 weeks. Clip or
pull tops off the plants after fully dried. Watch out for any rotten onions - if left to fester, they smell
terrible and will ruin your crop!
Leeks
VARIETY: King Richard (75 days to harvest) Beautiful full-sized leeks. If planted in deep loose soil, the
white stems are over a foot long to the first leaf.
Leeks
PLANTING: Plant as soon as possible. Wrap leeks gently in damp paper towel until you are ready to
plant. Overcast days are best for transplanting. Plant these leeks carefully, ensuring all roots are well
buried. Leeks like to be transplanted at a fairly deep level - just leave at least 2 inches of leaves above
ground. Be sure to water thoroughly after planting and at least one time per week after planting. You
do not need to harden off this plant.
SPACING: 8 inches between plants. 10 transplants will plant approximately a 3 by 3 foot area.
GROWING TIPS: Leeks do not compete well against weeds, so keep well weeded. Leeks and onions will not
need to be watered as frequently as most other vegetable crops. Leeks can be harvested as soon as they are
the thickness of a quarter. However, leeks can also be left in the ground until late fall or even next January.
The Garden Resource Program supports over 1,300 gardens and farms across our community and is made possible
through the collaboration of hundreds of community-based organizations and residents. The 2014 Garden Resource
Program is coordinated by Keep Growing Detroit (KGD). For more information, please contact 313-757-2635, email
[email protected], or visit www.detroitagriculture.net.


© Copyright 2026