
Managing Your Non-Tunneled (Percutaneous) Catheter:
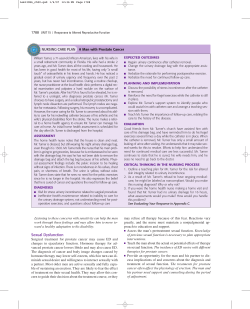
Managing Your Non-Tunneled (Percutaneous) Catheter: PICC, SICC, and JCC The staff of the Procedure, Vascular Access, Conscious Sedation Service has written this information to explain your new PICC (peripherally inserted central catheter), SICC (subclavian inserted central catheter) or JICC (jugular inserted central catheter). While your doctor or nurse may have already talked to you about why you need a PICC/SICC, you may still have questions. Your nurse will go over this booklet with you or the person who will be caring for you. You will learn how the catheter is inserted, how to flush the catheter, and how to change the catheter cap. You or the person caring for you will also learn how to change the dressing (but you may not be expected to do this yourself). Your nurse will also review safety and cleanliness precautions you may need to take, and what to do when problems arise. Persons who have non-tunneled catheters manage them well. We encourage you to learn about caring for your catheter so that you can feel confident about it. What is a PICC catheter? The PICC is a soft, flexible, intravenous (I.V.) line, about 20 to 24 inches long. The catheter is inserted by a doctor or nurse into one of the major blood vessels leading to your heart. The insertion site is in your arm. Depending on your therapy, the catheter may have a single or double lumen (opening). PICCs can be used for drawing blood and for giving intravenous fluids, blood, medication, or nutrition. Above: A photo of how the PICC looks in the arm. Left: A diagram of how the PICC is placed in the body. Patient Education 1 Managing Your Non-Tunneled (Percutaneous) Catheter: PICC, SICC, and JCC What is a SICC or JICC catheter? The SICC and JICC are soft, flexible intravenous (I.V.) lines, about 6 to 9 inches long. The catheter is inserted by a doctor into one of the major blood vessels leading to your heart. The vessels are usually the subclavian. The insertion site is in your chest or neck. Depending on your therapy, the catheter may have a single, double, or triple lumen (opening). SICCs and JICCs can be used for drawing blood and for giving intravenous fluids, blood, medication, or nutrition. Above: A photo of how the SICC looks in the chest. Left: A diagram of how the SICC is placed in the body. How is the catheter placed? Before your catheter is placed, your blood will be drawn for various blood tests. Then, the doctor or nurse who will insert the catheter will explain the procedure, the reason for doing it, and the risks involved in placing and using the catheter. Feel free to ask questions at this time. Procedure You will be asked to lie down on a bed. The vein for catheter placement will be found. The skin will be cleansed. A sterile sheet will be draped on your arm (for a PICC), chest (for a SICC), or neck (for a JICC). If the catheter will be put into your arm, a tourniquet will be placed around your arm. You may be given an injection of lido caine to numb your skin. You will feel a pinprick Patient Education 2 and slight burning. When the area is numb, the catheter will be inserted. The catheter will be held in place by a stitch or another device to hold it down. After the procedure, a chest x-ray will be taken to make sure the catheter tip is in the right place. How will the catheter feel while in place? When the catheter is in your arm, chest, or neck, you may feel some tenderness. This usually goes away in about 24 to 48 hours. If the catheter was placed in your chest or neck, there may be an antimicrobial cuff on the catheter under the skin. You may feel it or see it under your skin. This cuff helps prevent infections by stopping bacteria from entering the exit site and traveling up to the vein. Managing Your Non-Tunneled (Percutaneous) Catheter: PICC, SICC, and JCC How to care for the catheter at home Flushing a non-tunneled catheter The catheter lumens must be flushed to keep the inside of the catheter clean and free-flowing. Schedule The Groshong non-tunneled catheter is flushed with 10 mL of 0.9 percent normal saline. Be sure to treat each lumen as a separate catheter. Flush each lumen of Step 3: Remove the prefilled heparin your catheter after each use or every 7 syringe and blunt plastic cannula from the days when the catheter is not in use. plastic bag. All other non-tunneled catheters are 4. Loosen the cap on the cannula tip. Be flushed with heparin (1:100 units per mL). careful not to touch the tip. Treat each lumen as a separate catheter. Flush the catheter after each use or once 5. Check for air bubbles in the syringe. a day when the catheter is not in use with Note: If there are air bubbles, tap the 200 units (2 mL) of heparin. syringe to make the bubbles rise to the Supplies for flushing top. Then, gently push the plunger for alcohol prep pads ward to force the air out. Stop at the 10 mL mark on the syringe of normal 10 mL normal saline prefilled syringe saline or at the 2 mL mark on the or syringe pre-filled with 3ml syringe of heparin. (100 units/ml) heparin blunt plastic cannula Procedure for flushing 1. Prepare a clean work area. Gather the supplies listed previously. 2. Wash your hands thoroughly with soap and water. 3. Remove the prefilled heparin syringe or 0.9% normal saline syringe and blunt plastic cannula from the plastic bag. Peel open the blunt plastic cannula wrapper and set the cannula aside. Remove the cap from the syringe. Screw the blunt plastic cannula onto the syringe. Be careful not to touch the tip of the syringe or the end of the cannula that connects to the syringe. Patient Education 3 6. Hold the catheter in your nondominant hand and scrub the catheter cap with an alcohol pad. Allow the cap to dry. 7. Continue to hold the catheter in your nondominant hand. Remove the tip cover and insert the tip of the syringe into the center of the catheter cap. Step 7: Holding the catheter. Managing Your Non-Tunneled (Percutaneous) Catheter: PICC, SICC, and JCC 8. Unclamp the catheter before injecting the flush solution (if applicable). Inject the solution into the catheter using a push-pause method. Reclamp the catheter (if applicable). 9. Continue pressing in the syringe plunger as you withdraw the syringe tip from the catheter. 10. Discard the used syringe into a proper container such as a coffee can with lid or a needle box. Never reuse a syringe. (Refer to the booklet “Handling Sharp Objects Safely at Home.”) 11. Repeat for each lumen. Changing the catheter cap When you are at home, change the cap to prevent infection and overuse. Schedule Change the cap once a week, or as needed. Supplies (per lumen) 1 alcohol prep pad 1 new sterile luer-lock intermittent infusion cap 4. Check to be sure the catheter is clamped (if applicable) 5. Hold the catheter in your nondominant hand and scrub the cap-catheter connection with an alcohol prep pad. Let the cap-catheter connection dry. 6. While holding the catheter in your nondominant hand, remove the old cap from the catheter. 7. Remove the protective tip from the new cap and screw the new cap on the catheter. After the protective tip has been removed, do not touch the sterile tip with your fingers. 8. Repeat for each lumen. What to do when problems occur Procedure 1. Prepare a clean work area. Gather the supplies listed before. 2. Wash your hands thoroughly with soap and water. 3. Open the supplies and place them on the work area. Do not remove the protective tip covering the luer-lock cap. This keeps the cap sterile until you place it on the catheter. Patient Education Step 3: Open the supplies and place them on the work area. 4 While most patients continue their daily activities without having problems with their catheters, problems may occur. Air embolism This may occur if air enters your vein through the catheter. You may feel short of breath or develop a cough. If this happens, call your nurse or doctor immediately. Managing Your Non-Tunneled (Percutaneous) Catheter: PICC, SICC, and JCC Catheter breakage It is rare for your catheter to break or tear, but this can happen. Catheter breakage can be caused by using long needles or other sharp objects on the catheter, too much twisting when changing the cap, too much kinking, or using too much force when flushing. Here is how you can prevent catheter breakage: Never use a needle on the catheter. Never use less than a 10-cc syringe when flushing the catheter. Avoid putting sharp objects near the catheter (for example, scissors, knives). Avoid twisting the catheter. Instead, grasp it by the hub when flushing or changing the cap. If your catheter does break, you might see that your dressing is wet, or that your catheter leaks when you flush it. Your nurse will give you a smooth-edged clamp to carry with you at all times. If the catheter breaks, immediately place the clamp above the break closest to your skin. Call your nurse or doctor. Many non-tunneled catheters can be mended. Clotting A blood clot may block the flow of fluid through your catheter if the catheter is not flushed right after blood drawing, or if blood backing up in the catheter is not cleared. To prevent clotting, flush the catheter with saline or heparin. If it feels like you cannot push any liquid into the catheter, stop. Do not force the syringe. Call your nurse or doctor. Patient Education 5 Bleeding A small amount of bleeding at the exit site is normal for the first 24 hours after your catheter is placed. However, if bleeding persists, or if the blood leaks through the dressing, apply firm pressure to the site and call your nurse or doctor for help. Infection Infection may occur if the exit site is not kept clean and dry. Every time the infusion cap is removed, bacteria may enter the catheter and travel to your bloodstream. If you feel chills after flushing, call your nurse or doctor right away. Closely check your catheter exit site for signs of infection: redness, tenderness, drainage, or pain at the site. If your white blood cell count is low, you will not see drainage or pus. You may also have fever and chills. If you see any signs or symptoms of infection, call your nurse or doctor right away. Thrombosis Thrombosis may occur if a blood clot forms and blocks blood flow through the vein where your catheter is placed. Signs of thrombosis are pain and/or swelling in your neck, face, chest, or arm. You may also feel fullness in your face. If you notice these signs, call your nurse or doctor right away. Mechanical phlebitis This problem is caused by an irritation of the vein; it is not an infection. Mechanical phlebitis usually occurs within the first 24 to 48 hours after your catheter is placed, but it may occur at any time. Signs of mechanical phlebitis are redness, warmth, Managing Your Non-Tunneled (Percutaneous) Catheter: PICC, SICC, and JCC tenderness, swelling, or hardness at the site. These feelings may go along the wall of the vein. If you see these signs and symptoms, call your nurse or doctor right away. This problem may be treated by doing the following: apply warm compresses four times a day for 20 minutes, for 2 to 3 days raise the affected arm do gentle arm exercise take anti-inflammatory medication (if prescribed). Take-Home Supplies When you are low on these supplies, inform your nurse. • You may pick up supplies for home catheter care from hospital central supply (CHS). • The supply kit will contain 10 alcohol pads, 5 pair sterile gloves size 7, 5 pair non-sterile gloves, 5 skin prep swabs, 5 packages Steri-strips and/or 5 stat loks, 5 4 x 5 transparent dressings, 5 sterile barriers, 5 to 15 injection caps, 5 chlorhexidine gluconate and alcohol applicators, and 1 tape measure. Heparin syringes may be picked up from pharmacy. Catheter migration • If you had the catheter placed when you This occurs when the catheter moves were an outpatient, you may obtain your from where it was first placed. Migration supplies upon discharge the day of the promay be caused by hard coughing, frecedure. You may also receive supplies durquent nausea/ vomiting, physical activity, ing your return visit to the clinic the next or a catheter that is loosely anchored. day. Signs of a migrated cathe-ter include must be covered with plastic. If the increased length of the external catheter, dressing or catheter gets wet, contact swelling in the chest or neck during an your health care team to have dressing infusion, pain or discomfort during the infuchanged. Never let the catheter dangle sion, no blood return, or leaking at the in the water. catheter site. If you think your catheter has moved more than an inch, or if you feel You may continue your normal activities any of the signs and symptoms, inform including work, school, exercise (except your nurse or doctor right away. for swimming), and sexual activity. Contact sports are not recommended. Precautions to observe with your catheter After your catheter is in place, there are a few key things you will need to remember. Never use scissors near your catheter. In case the catheter breaks, always carry the smooth-edged clamp your nurse gave you. You may shower with the dressing in place, but the dressing and catheter Patient Education 6 Information for your health care provider Dressing change and site care Your dressing change should always be performed using sterile technique. Sterile technique means that special steps will be followed to cut down your risk of infection. Since the catheter can be accidentally pulled out during a dressing change, only trained persons should change the dressing. Managing Your Non-Tunneled (Percutaneous) Catheter: PICC, SICC, and JCC Some medical staff members are unfamiliar with the catheter, and these directions will help them change the dressing easily. Schedule Dressing change should be done 24 hours after insertion, and every 7 days or when the catheter is soiled or loose. Supplies 1 pair of nonsterile gloves 1 pair of sterile gloves 1 chlorohexidine gluconate and alcohol applicator 2 cotton-tipped applicators 1 skin prep swab stick (optional) 1 package of Steri-strips 1 4 x 5 cm transparent dressing 1 roll of tape 1 sterile barrier 1 tape measure securing material (burn net, tape) Procedure 1. Wash your hands thoroughly with soap and water. 2. Set up a sterile field with supplies. 3. Put on nonsterile gloves. 4. Secure the catheter extension and I.V. tubing to the patient. 5. While stabilizing the catheter, remove old dressing and Steri-strips, working from the edges to the exit site. Remove the dressing in an upward direction. Patient Education 7 6. Inspect the catheter exit site, surrounding skin, and vein track for skin integrity, signs and symptoms of infection, phlebitis, swelling, and bleeding. 7. Remove your gloves. 8. Put on sterile gloves. 9. With sterile gloves on hold catheter with non-dominant hand to prevent catheter migration or dislodgement. 10.Grab chlorhexidine gluconate and alcohol applicator by the handle, and squeeze the two wings on either side of the handle until you hear a “snap.” Hold the applicator with the pad facing down until you see the pad become wet. Clean the catheter exit site and surrounding skin using an up-anddown and side-to-side motion (bidirectional). Step 10: Cleaning the catheter site. 11.(optional) Swab the skin that will be under the dressing with protective skin barrier. 12.Secure the catheter with sterile Steristrips to provide stability and prevent catheter migration. 13.Loop the catheter. For a PICC, loop towards the shoulder. Avoid the antecubital fossa. Managing Your Non-Tunneled (Percutaneous) Catheter: PICC, SICC, and JCC 14.Apply transparent dressing over the catheter site. Form an occlusive seal by pinching the adhesive portion of the dressing around the catheter. 15.Measure the length of the catheter from the proximal edge of the catheter sleeve to the insertion site. (If the c atheter has migrated in or out more than 2 cm, notify the physician, nursepractitioner, or physician assistant to obtain an order for an x-rayto confirm the catheter tip's location.) 16.Provide more stability by securing the catheter extension tubing with tape, tubular bandage, or compression bandage. (Do not apply bandages too tightly, or apply tape to transparent dressing.) 17.Remove your gloves. Wash your hands18. Label the dressing with the date, time, catheter size, and measured length of the external catheter. Handy Telephone Numbers Your Doctor____________________________________________ 301-496-_____________ Your Nurse_____________________________________________ 301-496- _____________ NIH Information: Available 24 hours a day at 301-496-4000. Ask for the PCVS (Procedures, Vascular access, Conscious Sedation) nurse on call. This information is prepared specifically for persons taking part in clinical research at the National Institutes of Health Clinical Center and may not apply to patients elsewhere. If you have questions about the information presented here, talk to a member of your health care team. Products/resources named serve as examples and do not imply endorsement by NIH. The fact that a certain product/resource is not named does not imply that such product/resource is unsatisfactory. National Institutes of Health Clinical Center Bethesda, MD 20892 Questions about the Clinical Center? http://www.cc.nih.gov/comments.shtml 9/2003 Patient Education 8 Managing Your Non-Tunneled (Percutaneous) Catheter: PICC, SICC, and JCC


© Copyright 2026