
- Magento
Magento
Enterprise Edition
User Guide
Part III:
Marketing & Promotions
Content Elements
Design & Theme
Version 1.14.2
Contents
Marketing & Promotions
1
Chapter 1: Promotions
3
Catalog Price Rules
4
Price Rule with Multiple SKUs
10
Shopping Cart Price Rules
12
Coupon Codes
24
Auto-Generated Coupon Codes
26
Coupon Report
29
Free Shipping Promotion
30
Buy X Get Y Free
33
Discount with Minimum Purchase
34
Product Relationship Rules
39
Email Reminder Rules
42
Email Reminder Setup
43
Creating Email Reminder Rules
45
Email Reminder Templates
48
Customer Segments
49
Customer Segment Attributes
50
Creating a Customer Segment
51
Target Customer Segments with Price Rules
54
Target Customer Segments with Banners
55
Chapter 2: Shopping Tools
57
Opportunities to Engage
58
Updated: 4/20/2015
Copyright © 2015 Magento, Inc. All rights reserved.
Email a Friend
61
Polls
63
Tags
66
Products Tagged by Administrators
67
Moderating Tags
68
Tag Activity
68
Wishlists
70
Wishlist Setup
71
Wishlist Search Widget
72
Wishlist Reports
73
Product Relationships
74
Compare Products
75
Recently Viewed/Compared Products
77
Product Reviews
78
Configuring Product Reviews
78
Writing Reviews
79
Moderating Reviews
79
Custom Ratings
80
Chapter 3: Gift Options
83
Gift-Related Products & Services
84
Gift Options Workflow
86
Gift Options Setup
87
Gift Options Tax
88
Gift Message Module
89
Gift Wrap
90
Chapter 4: Gift Registries
93
Gift Registry Workflow
93
Using a Gift Registry
94
Gift Registry Setup
95
Creating Gift Registries
98
Gift Registry Search Widget
104
Chapter 5: Rewards & Loyalty
109
Reward Point Setup
Magento Enterprise Edition User Guide, Version 1.14.2
110
iii
Reward Exchange Rates
118
Reward Points in Price Rules
120
Chapter 6: Private Sales and Events
121
Event Components
122
Event Ticker
123
Selling Restrictions
123
Event Configuration
124
Creating Events
125
Editing Events
128
Invitations
129
Invitation Workflow
129
Invitation Reports
133
Chapter 7: Newsletters
135
Newsletter Configuration
136
Newsletter Templates
138
Newsletter Queue
139
Newsletter Reports
140
Chapter 8: Sales Channels
141
Google Shopping
142
Setting Up RSS Feeds
149
Social Media
151
Facebook Open Graph
152
Chapter 9: Google Tools
155
Google Merchant Center
156
Google Sitemap
161
Google Sitemap Configuration
iv
164
Google Tag Manager
169
Google Universal Analytics
178
Using Universal Analytics with Enhanced Ecommerce
181
Troubleshooting Tools
186
Google “Classic” Analytics
188
Magento Enterprise Edition User Guide, Version 1.14.2
Content Elements
191
Chapter 10: Magento CMS
193
CMS Tools
194
Chapter 11: Content Pages
197
Core Content
198
Creating a Page
200
Using the Editor
203
Inserting a Link
204
Inserting Images
204
Adding a Widget
206
Version Control
208
Editing a Versioned Page
211
Chapter 12: Page Hierarchy
213
Page Hierarchy Setup
214
Adding a Node
215
Chapter 13: Blocks
217
Creating a Static Block
218
Positioning Blocks by Reference
219
Chapter 14: Banners
223
Creating a Banner
224
Creating a Banner Rotator
226
Using Banners with Price Rules
229
Chapter 15: Widgets
231
Widget Types
232
Creating a Widget
234
CMS Static Block Widget
236
New Products List
237
Order by SKU Widget
242
Mini Shopping Cart Widget
244
Magento Enterprise Edition User Guide, Version 1.14.2
v
Chapter 16: Variables
247
Predefined Variables
248
Custom Variables
250
Chapter 17: Markup Tags
253
Markup Tag Syntax
254
Store URL
254
Media URL
254
Block ID
254
Template Tag
254
Non-Inline CSS Tag
255
Widget Code
255
Using Markup Tags in Links
256
Design & Theme
259
Chapter 18: Your Store Design
261
Uploading Your Logo
262
Uploading a Favicon
263
Changing the Welcome Message
264
Store Demo Notice
265
Chapter 19: Page Layout
267
Standard Layouts
268
Storefront Examples
270
1 Column Layout
270
2 Columns with Left Bar
271
2 Columns with Right Bar
271
3 Columns
272
Chapter 20: Layout Updates
273
Placing a Block with a Layout Update
274
Controlling Block Order
vi
275
Standard Block Layout
276
Layout Update Syntax
278
Magento Enterprise Edition User Guide, Version 1.14.2
<block>
279
<reference>
280
<action>
280
<remove>
280
<extend>
280
Layout Update Examples
281
page/template_links
282
cms/block
282
core/text
283
page/html_welcome
283
XML Load Sequence
284
Chapter 21: Page Setup
285
HTML Head
286
Page Header
288
Page Footer
289
Chapter 22: Your Store’s Theme
291
Responsive Web Design
292
Technical Information
293
Using the Default Theme
293
Installing a New Theme
294
Appendix: Editor Toolbar
297
Index
Magento Enterprise Edition User Guide, Version 1.14.2
307
vii
Notes
ix
Magento Enterprise Edition User Guide, Version 1.14.2
Marketing & Promotions
In this section…
Promotions
Shopping Tools
Gift Options
Gift Registries
Rewards & Loyalty
Private Sales & Events
Newsletters
Sales Channels
Google Tools
Chapter 1:
Promotions
In this chapter, you will learn how to use promotions to offer discounts based on a
variety of conditions. You can send your best customers a coupon for a discount on a
specific product, create a banner that appears only to certain customers, offer free
shipping for purchases over a certain amount, and much more. Promotions can be set
up in advance, so they spring into action whenever the required conditions are met.
Topics in this chapter:
l
Catalog Price Rules
l
Shopping Cart Price Rules
l
Coupon Codes
l
Product Relationship Rules
l
Email Reminder Rules
l
Customer Segments
Magento Enterprise Edition User Guide, Version 1.14.2
3
Catalog Price Rules
Chapter 1: Promotions
Catalog Price Rules
Catalog price rules can be used to selectively put products on sale under certain conditions.
Catalog price rules do not use coupon codes, because they are triggered before a product is
placed into the shopping cart.
Catalog Rules
Process Overview:
Step 1: Add a New Rule
Step 2: Define the Conditions
Step 3: Define the Actions
Step 4: Add Related Banners
Step 5: Apply the Rule
Step 1: Add a New Rule
1.
On the Admin menu, select Promotions > Catalog Price Rules.
2.
In the upper-right corner, click the Add New button.
The options in the panel on the left include Rule Information, Conditions, Actions, and
Related Banners.
4
Magento Enterprise Edition User Guide, Version 1.14.2
Chapter 1: Promotions
Catalog Price Rules
Rule Information
3.
On the Rule Information page, do the following:
a.
Complete the Rule Name and Description fields. These fields are for your internal
reference only.
b.
Set Status to “Active.”
c.
Select the Websites where the rule will be available.
d.
Select the Customer Groups to which this rule applies.
To select multiple options, hold down the Ctrl key (PC) or Command key (Mac), and click
each option.
e.
Set From Date and To Date to define the range of dates when the rule will be in effect.
If you leave the dates blank, the rule is enabled as soon as the price rule is saved.
f.
Enter a number to establish the Priority of this rule in relation to other rules.
Magento Enterprise Edition User Guide, Version 1.14.2
5
Catalog Price Rules
Chapter 1: Promotions
Step 2: Define the Conditions
Most of the available conditions are based upon existing attribute values. If you want to
apply the rule to all products, leave the conditions blank.
1.
In the panel on the left, select Conditions. The first rule begins:
If ALL of these conditions are TRUE:
The statement has two underlined links, which when clicked, display the options for that
part of the statement. If you save the condition without making additional selections, the
rule will apply to all products.
l
Click the ALL link, and select “ALL” or “ANY.”
l
Click the TRUE link and select “TRUE” or “FALSE.”
l
Leave the condition unchanged to apply the rule to all products.
You can create different conditions by changing the combination of these values.
Condition - Line 1
2.
Click the Add
a.
button at the beginning of the next line.
In the list under Product Attribute, select the attribute that you want to use as the
basis of the condition. For this example, the selected condition is “Attribute Set.”
Condition Line 2, Part 1
For an attribute to appear in the list, it must be configured to be used in promo rule
conditions. To learn more, see: Attribute Frontend Properties.
6
Magento Enterprise Edition User Guide, Version 1.14.2
Chapter 1: Promotions
Catalog Price Rules
The selected condition appears in the statement, followed by two more underlined
links. The statement now says:
If ALL of these conditions are TRUE:
Attribute Set is …
b.
Click the is link, and select either “IS” or “IS NOT.”
c.
Then, click the ... “more” link, and choose the attribute set upon which the condition
is based.
Condition Line 2, Part 3
The selected item appears in the statement to complete the condition.
If ALL of these conditions are TRUE:
Attribute Set is Eyewear
3.
To add another line to the statement, click the Add
button, and choose one of the
following:
l
Conditions Combination
l
Product Attribute
Then, repeat the process until the condition is complete.
If at any time you want to delete part of the statement, click the Delete
button at the
end of the line.
Magento Enterprise Edition User Guide, Version 1.14.2
7
Catalog Price Rules
Chapter 1: Promotions
Step 3: Define the Actions
1.
In the panel on the left, select Actions.
Actions
2.
In the Update Prices Using the Following Conditions section, do the following:
a.
Set Apply to one of the following options:
By Percentage of
the Original Price
Discounts item by subtracting a percentage from the original
price. For example:
Enter 10 in Discount Amount for an updated price that is 10%
less than the original price.
By Fixed Amount
Discounts item by subtracting a fixed amount from original
price. For example:
Enter 10 in Discount Amount for an updated price that is $10
less than the original price.
To Percentage of
the Original Price
Discounts item by defining the final price based on percentage.
For example:
Enter 10 in Discount Amount for an updated price that is 10%
of the original price.
To Fixed Amount
b.
Do one of the following:
l
l
8
Sets the price to a fixed amount.
Enter the Discount Amount.
To apply the discount amount to associated products, set Enable Discount to
Subproducts to “Yes.” Then, enter the Discount Amount to apply.
3.
If you want to stop the processing of other rules after this rule has been applied, set Stop
Further Rules Processing to “Yes.” This safeguard prevents customers from receiving
multiple discounts for the same product.
4.
Click the Save and Continue Edit button to save your changes.
Magento Enterprise Edition User Guide, Version 1.14.2
Chapter 1: Promotions
Catalog Price Rules
Step 4: Add Related Banners
1.
In the panel on the left, select Related Banners.
2.
In the list, select the checkbox of each banner that you want to associate with this price
rule.
If your banners don’t appear in the table, click the Reset Filter button to clear the previous
filter rules.
Related Banners
Step 5: Apply the Rule
As new rules are added, the prices and the priorities are recalculated accordingly.
To apply a new rule immediately, do one of the following:
l
Click the Save and Apply button.
l
From the Catalog Price Rules list, click the Apply Rules button.
When you create a new price rule, it might take an hour or so for it to become available.
Allow enough time for it to get into the system. Then, test the rule to make sure that it
works correctly. Unless otherwise specified, price rules are automatically processed with
other system rules each night.
Magento Enterprise Edition User Guide, Version 1.14.2
9
Catalog Price Rules
Chapter 1: Promotions
Price Rule with Multiple SKUs
A single price rule can be applied to multiple SKUs, which makes it possible to create a
variety of promotions based on a product, brand, or category. In the following illustration,
multiple products are selected for a catalog price rule.
Selecting Multiple SKUs for a Price Rule Condition
To apply a price rule to multiple SKUs:
1.
On the Admin menu, select Promotions > Catalog Price Rules.
2.
Do one of the following:
3.
l
Follow the instructions to create a catalog price rule.
l
In the list, click to open the catalog price rule that you want to change.
In the panel on the left, select Conditions. Then, do the following:
a.
In the first line, set the first parameter to “ANY.”
If ANY of these conditions are TRUE
b.
If the price rule doesn't have a line for SKU, Click the Add
button at the beginning
of the next line. Then, in the list under Product Attribute, select SKU.
10
Magento Enterprise Edition User Guide, Version 1.14.2
Chapter 1: Promotions
Catalog Price Rules
Choose the Condition
c.
Click the … “more” link to display more options. Then, click the Chooser
button to
display the list of available products.
SKU IS
d.
In the list, select the checkbox of each product that you want to include. Then, click
the Select
button to add the SKUs to the condition.
Multiple SKUs Added to Condition
4.
Complete the rule, including any Actions to be taken when the conditions are met.
5.
To apply the rule, click the Save Rule button.
When you create a new price rule, it might take an hour or so for it to become available.
Allow enough time for it to get into the system. Then, test the rule to make sure that it
works correctly. Unless otherwise specified, price rules are automatically processed with
other system rules each night.
Magento Enterprise Edition User Guide, Version 1.14.2
11
Shopping Cart Price Rules
Chapter 1: Promotions
Shopping Cart Price Rules
Shopping cart price rules create discounts for orders at the checkout level, based on a set of
conditions. The discount can be applied automatically when the conditions are met, or be
applied when the customer enters a valid coupon code. When applied, the discount
appears on the shopping cart page under the subtotal.
Once established, the price rule can be used as needed for a season or promotion by
changing its status and date range.
Process Overview:
Step 1: Add a New Rule
Step 2: Define the Conditions
Step 3: Define the Actions
Step 4: Complete the Labels
Step 5: Add Related Banners (Optional)
Step 6: Apply the Rule
Step 1: Add a New Rule
1.
On the Admin menu, select Promotions > Shopping Cart Price Rules. Then, click the
Add New Rule button.
Shopping Cart Price Rules
The options in the panel on the left include Rule Information, Conditions, Actions, Labels,
and Related Banners.
12
Magento Enterprise Edition User Guide, Version 1.14.2
Chapter 1: Promotions
Shopping Cart Price Rules
Shopping Cart Price Rule Settings
2.
Under General Information, complete the Rule Name and Description. These fields are for
internal reference only.
3.
If you want the rule to go into effect immediately, set Status to “Active.”
4.
To establish the scope of the rule, do the following:
a.
Select the Websites where the promotion is to be available.
b.
Select the Customer Groups to which the promotion applies.
To make the promotion available only to registered customers, do not select the
“NOT LOGGED IN” option.
To select multiple options, hold down the Ctrl key (PC) or Command key (Mac), and
click each option.
5.
To associate a coupon with the price rule, set Coupon to “Specific Coupon.” Then, do the
following:
a.
Enter a numeric Coupon Code that the customer must enter to receive the discount.
b.
To set a limit on the number of times the coupon can be used, complete the following:
Uses per Coupon
Determines how many times the coupon code can be used. If
there is no limit, leave the field blank.
Magento Enterprise Edition User Guide, Version 1.14.2
13
Shopping Cart Price Rules
Chapter 1: Promotions
Uses per Customer Determines how many times the coupon code can be used by
the same registered customer who belongs to any of the selected
customer groups. The setting does not apply to guest shoppers
who are members of the NOT LOGGED IN customer group, or
to customers who shop without logging in to their accounts. If
there is no limit, leave the field blank.
6.
To define the “good through” date range for the promotion, do the following:
Click the Calendar
a.
button next to the From Date field, and choose the first date.
The promotion will start at the beginning of that day.
b.
Click the Calendar
button next to the To Date field, and choose the last date. The
promotion will stop at the end of that day.
7.
Enter a number to determine the Priority of this price rule in relation to the Action settings
of other price rules that might be active at the same time. (Number 1 has the highest
priority.)
8.
To apply the rule to published listings in RSS feeds, set Public In RSS Feed to “Yes.”
Step 2: Define the Conditions
In this step, the conditions are described that must be met for an order to qualify for the
promotion. The price rule goes into action whenever the set of conditions is met.
1.
In the panel on the left, select Conditions. The first rule appears by default, and states:
If ALL of these conditions are TRUE:
The statement has two underlined links which when clicked, display the selection of
options for that part of the statement. You can create different conditions by changing the
combination of these values. Do any of the following:
l
Click the ALL link, and select “ALL” or “ANY.”
l
Click the TRUE link and select “TRUE” or “FALSE.”
l
Leave the condition unchanged to apply the rule to all products.
Condition - Line 1
2.
Click the Add
button at the beginning of the next line. Then, choose one of the
following options from the list to describe the condition that you want to set for the rule.
14
Magento Enterprise Edition User Guide, Version 1.14.2
Chapter 1: Promotions
Shopping Cart Price Rules
l
Product attribute combination
l
Products subselection
l
Conditions combination
l
Cart Attribute
Condition - Line 2, Part 1
Example 1: Regional Price Rule
To create a regional price rule, select one of the following cart attributes:
l
Shipping Postcode
l
Shipping Region
l
Shipping State/Province
l
Shipping Country
Example 2: Shopping Cart Totals
To base the condition on shopping cart totals, select one of the following cart attributes:
l
Subtotal
l
Total Items Quantity
l
Total Weight
When you make a selection, the basic structure of the statement appears in the box with
additional links to mark where you can select information. Each underlined word is a
building block that describes a different aspect of the condition.
3.
In the list under Product Attribute, select the attribute upon which the condition is based.
For this example, the selected condition is Attribute Set.
Magento Enterprise Edition User Guide, Version 1.14.2
15
Shopping Cart Price Rules
Chapter 1: Promotions
Condition - Line 2, Part 1
For an attribute to appear in the list, its Use for Promo Rules Conditions property must be
set to “Yes.”
The condition appears in the statement, followed by two more underlined links. The
statement now says:
Condition - Line 2, Part 2
If ALL of these conditions are TRUE:
If an item is FOUND in the cart with ALL of these conditions true
Attribute Set is …
4.
Click the is link, and select either “IS” or “IS NOT” to describe the condition to be met. In
this example, the options are “IS” and “IS NOT.”
5.
Click the ... “more” link, and choose the attribute set upon which the condition is based.
The selected item appears in the statement to complete the condition.
Completed Condition
16
Magento Enterprise Edition User Guide, Version 1.14.2
Chapter 1: Promotions
Shopping Cart Price Rules
If ALL of these conditions are TRUE:
Attribute Set is Electronics
6.
If you want to add more conditions, click the Add
button. Then, choose one of the
following:
l
Conditions Combination
l
Product Attribute
Then, repeat the process until the condition is complete.
To delete part of the statement, click the Delete
button at the end of the line.
Step 3: Define the Actions
The shopping cart price rule actions describe how prices are updated when the conditions
of the rule are met.
Shopping Cart Price Rule Actions
1.
In the panel on the left, select Actions. Then, set Apply to one of the following discount
options:
Percent of product
price discount
Discounts item by subtracting a percentage from the original price.
The discount applies to each qualifying item in the cart. For
example:
Enter 10 in Discount Amount for an updated price that is 10% less
than the original price.
Fixed amount
discount
Discounts item by subtracting a fixed amount from original price.
The discount applies to each qualifying item in the cart. For
example:
Magento Enterprise Edition User Guide, Version 1.14.2
17
Shopping Cart Price Rules
Chapter 1: Promotions
Enter 10 in Discount Amount for an updated price that is $10 less
than the original price.
Fixed amount
discount for whole
cart
Discounts the entire cart by subtracting a percentage from the cart
total. For example:
Buy X get Y free
Defines a quantity that the customer must purchase to receive a
quantity for free. (The Discount Amount is Y.)
Enter 10 in Discount Amount to subtract 10% from the cart total.
2.
Enter the Discount Amount as a number, without symbols. For example, depending on
the discount option selected, the number 10 might indicate a percentage, a fixed amount,
or a quantity of items.
3.
In the Maximum Qty Discount is Applied To field, enter the largest number of the same
product that can qualify for the discount.
4.
For a “Buy X Get Y Free” promotion, in the Discount Qty Step (Buy X) field, enter the
number of products that must be purchased to receive the number of free products
represented by “Y.”
5.
To include the cost of shipping in the discount, set Apply to Shipping Amount to “Yes,”
6.
To determine how free shipping is applied, set Free Shipping to one of the following:
No
Free shipping is not available for the promotion.
For matching
items only
Free shipping is available only for specific items in the cart that
match the rule.
For shipment with Free shipping is available for the entire cart when a coupon that is
matching items
based on the rule is used.
7.
Set Stop Further Rules Processing to “Yes” to stop processing other rules as soon as this
one is applied. This safeguard prevents customers from receiving multiple discounts for the
same purchase.
8.
To define an additional action that applies to specific items in the cart, only when a
specific set of conditions is met, click the Add
button. Then, choose an item from the
following sections in the list:
l
Cart item attribute
l
Price in cart
l
Quantity in cart
l
Row total in cart
l
Product attribute (from all available in your catalog)
Add as many levels as you need to describe the conditions to be met.
18
Magento Enterprise Edition User Guide, Version 1.14.2
Chapter 1: Promotions
9.
Shopping Cart Price Rules
When complete, click the Save Rule button.
Step 4: Complete the Labels
The label appears on the order below the subtotal to identify the discount. You can enter a
default label for all store views, or enter a different label for each view.
1.
In the panel on the left, select Labels.
2.
In the Default Label section, enter the text for the Default Rule Label for All Store Views.
Default Label
3.
In the Store View Specific Labels section, enter the label text for each store view. For
example, if each store view is in a different language, enter the label translation for each
view.
Store View Specific Labels
Step 5: Add Related Banners
Any banners that are associated with the promotion appear in the store when the
conditions of the price rule are met.
1.
In the panel on the left, select Related Banners.
2.
In the list, select the checkbox of each banner that you want to associate with the price
rule.
Magento Enterprise Edition User Guide, Version 1.14.2
19
Shopping Cart Price Rules
Chapter 1: Promotions
Shopping Cart Price Rule - Related Banners
If your banners don’t appear in the table, click the Reset Filter button to clear the previous
filter rules.
Step 6: Apply the Rule
20
1.
When complete, click the Save Rule button.
2.
When you create a new price rule, it might take an hour or so for it to become available.
Allow enough time for it to get into the system. Then, test the rule to make sure that it
works correctly. Unless otherwise specified, price rules are automatically processed with
other system rules each night. As new rules are added, Magento recalculates the prices and
the priorities accordingly.
Magento Enterprise Edition User Guide, Version 1.14.2
Chapter 1: Promotions
Shopping Cart Price Rules
Field Descriptions
FIELD
DESCRIPTION
RULE INFORMATION
Rule Name
(Required) The name of the rule is for internal reference.
Description
A description of the rule should include the purpose of the rule,
and explain how it is used.
Status
(Required) Determines if the rule is currently active in the store.
Options include: Active / Inactive
Websites
(Required) Identifies the websites where the rule can be used.
Customer Groups
(Required) Identifies the customer groups where the rule applies.
Coupon
(Required) Indicates if a coupon is associated with the rule.
Options include:
Uses per Coupon
No Coupon
No coupon is associated with the rule.
Specific Coupon
A specific coupon is associated with the
rule.
Coupon
Code
When prompted,
enter the Coupon
Code that the
customer must enter
to take advantage of
the promotion.
Use Auto
Generation
Select the checkbox
to automatically
generate multiple
coupon codes which
can be used with the
promotion.
The number of times the coupon code can be used.
Magento Enterprise Edition User Guide, Version 1.14.2
21
Shopping Cart Price Rules
Chapter 1: Promotions
Field Descriptions (cont.)
FIELD
DESCRIPTION
Uses per Customer
Determines how many times the coupon code can be used by
the same registered customers who belongs to any of the
selected customer groups. The setting does not apply to guest
shoppers who are members of the NOT LOGGED IN customer
group, or to customers who shop without logging in to their
accounts. If there is no limit, leave the field blank.
From Date
The first date in the “good through” time period when the coupon
can be used.
To Date
The last date in the “good through” time period when the coupon
can be used.
Priority
A number that indicates the priority of this rule in relation to
others. The highest priority is number 1.
Public in RSS Feed
Determines if the promotion is included in your store’s public
RSS feed. Options include: Yes / No.
ACTIONS
Apply
Determines the type of calculation that is applied to the
purchase. Options include:
Percent of product
price discount
Discounts item by subtracting a
percentage from the original price.
For example: Enter 10 in Discount
Amount for an updated price that is 10%
less than the original price.
Fixed amount
discount
Discounts item by subtracting a fixed
amount from original price.
For example: Enter 10 in Discount
Amount for an updated price that is $10
less than the original price.
Fixed amount
discount for whole
cart
22
Discounts the entire cart by subtracting
a percentage from the cart total.
For example: Enter 10 in Discount
Amount to subtract 10% from the cart
total.
Magento Enterprise Edition User Guide, Version 1.14.2
Chapter 1: Promotions
Shopping Cart Price Rules
Field Descriptions (cont.)
FIELD
DESCRIPTION
Buy X Get Y Free
(discount amount is
Y)
Defines a quantity that the customer
must purchase to receive a quantity for
free. (The Discount Amount is Y.)
Discount Amount
(Required) The amount of discount that is offered, entered as a
number and without symbols. Depending on the discount option
used, the number 10 might denote a percentage, fixed amount, or
quantity.
Maximum Qty Discount is
Applied To
Determines the maximum number of products that the discount
can be applied to in the same purchase.
Discount Qty Step (Buy X)
In a “Buy X Get Y Free” promotion, determines the number of
products that must be purchased to receive “Y” free.
Apply to Shipping Amount
Determines if the discount can be applied to the cost of shipping.
Options include: Yes / No.
Free Shipping
Determines if free shipping is included in the promotion, and if so,
for which items. Options include:
No
Free shipping is not available for orders
that qualify for the promotion.
For matching items
only
Free shipping is available only for items
in the cart that qualify for the promotion.
For shipment with
matching items
Free shipping is available for the entire
cart if any item qualifies for the
promotion.
Stop Further Rules
Processing
Determines if additional promotions can be applied to this
purchase. To prevent a single purchase from receiving multiple
discounts, select “Yes.” Options include: Yes / No
Add Reward Points
Determines the number of reward points earned when the the rule
is applied.
DEFAULT LABEL
Default Rule Label for All
Store Views
Enter a default label to identify the discount that can be used for
all store views.
Magento Enterprise Edition User Guide, Version 1.14.2
23
Coupon Codes
Chapter 1: Promotions
Field Descriptions (cont.)
FIELD
DESCRIPTION
Store View Specific Labels If applicable, enter a different label to identify the discount for
each store view.
Coupon Codes
Coupons codes can be associated with shopping cart price rules to apply a discount when a
set of conditions is met. For example, a coupon code can be created for a specific customer
group, or for anyone who makes a purchase over a certain amount.
In-store Coupon for Mobile Users
Here are a few ways that you can use coupons in your store:
l
Email coupons to customers
l
Produce printed coupons
l
Create in-store coupons for mobile users
Coupon codes can be sent by email, or included in newsletters, catalogs, and
advertisements. You can even create in-store coupons with a quick response code that
shoppers can scan with their smart phones. The QR code links to a page on your site with
more information about the promotion.
To apply the coupon to a purchase, the customer enters the coupon code during checkout
from the shopping cart page of your site, or possibly at the cash register of your “brick and
mortar” store.
24
Magento Enterprise Edition User Guide, Version 1.14.2
Chapter 1: Promotions
Coupon Codes
Enter Coupon Code in Shopping Cart
To set up a coupon code:
1.
Follow the instructions to create a shopping cart price rule.
2.
On the General Information page, do the following:
a.
Set Coupon to “Specific Coupon.”
b.
Enter a numeric Coupon Code to be used with the promotion. If you want to autogenerate coupon codes, select the Use Auto Generation checkbox.
c.
To limit the number of times the coupon can be used, complete the following:
l
Uses per Coupon
l
Uses per Customer
If you leave these fields blank, there will be no limit on the number of times the coupon
can be used.
d.
To make the coupon valid for a limited period of time, complete the From Date and To
button next to each field.
Date fields. To select the date, click the Calendar
If you leave the date range empty, the rule will never expire.
Magento Enterprise Edition User Guide, Version 1.14.2
25
Coupon Codes
Chapter 1: Promotions
Price Rule Coupon Code Settings
3.
Follow the standard instructions to complete the shopping cart price rule.
Auto-Generated Coupon Codes
Batches of discount coupon codes can be formatted and generated automatically. Coupon
codes can also be exported, and incorporated into other applications. For example, you
might use a series of auto-generated coupon codes to produce printed coupons with unique
codes.
Generated Coupon Codes
26
Magento Enterprise Edition User Guide, Version 1.14.2
Chapter 1: Promotions
Coupon Codes
To configure auto-generated codes:
1.
On the Admin menu, select System > Configuration.
2.
In the panel on the left under Customers, select Promotions. Then, click to expand the
Auto Generated Specific Coupon Codes section.
Auto Generated Specific Coupon Codes
3.
4.
To create a specific format for your codes, enter the following:
l
Code Length
l
Code Format
l
Code Prefix
l
Code Suffix
l
Dash Every X Characters
When complete, click the Save Config button.
These settings can be overridden from the Shopping Cart Price Rule page.
To generate a batch of coupon codes:
1.
On the Admin menu, select Promotions > Shopping Cart Price Rules.
2.
Select an existing rule, or create a new one.
3.
Set Coupon to “Specific Coupon.” Then, do the following:
a.
Select the Use Auto Generation checkbox.
b.
Complete the other rule settings as needed.
Important! Shopping cart price rules with auto-generated coupon codes cannot be used in
automated email reminders. If a shopping cart price rule for a “Specific Coupon” is used in
an automated email reminder, it is automatically unassigned when the rule is saved.
4.
Click the Save and Continue Editing button.
5.
In the panel on the left, select Manage Coupon Codes. Then, do the following:
Magento Enterprise Edition User Guide, Version 1.14.2
27
Coupon Codes
Chapter 1: Promotions
a.
In the Coupon Qty field, enter the number of codes to be generated.
b.
Adjust the code format settings, as needed.
c.
Click the Generate button.
The generated coupon codes appear in the list, with the number of times each has been
used.
To delete coupon codes:
1.
In the list, select the checkbox of each code that you want to delete.
2.
Set the Actions control to “Delete.”
3.
Click the Submit button. When prompted, click OK to confirm.
To export coupon codes:
1.
In the list of generated codes, use the filter controls at the top of each column to display
the codes that you want to export.
2.
Set Export to to the file format that you want to use for the data file.
3.
Click the Export button.
Field Descriptions
FIELD
28
SCOPE
DESCRIPTION
Code Length
Global
Defines the length of the coupon code, excluding
the prefix, suffix and separators.
Code Format
Global
Defines the coupon code format. Options include:
Alphanumeric
Any combination of
letters and numbers.
Alphabetical
Letters only.
Numeric
Numbers only.
Code Prefix
Global
A value that is appended to the beginning of all
coupon codes. If you do not want to use a prefix,
leave the field blank.
Code Suffix
Global
A value that is appended to the end of all codes. If
you do not want to use a suffix, leave the field
blank.
Magento Enterprise Edition User Guide, Version 1.14.2
Chapter 1: Promotions
Coupon Codes
Field Descriptions (cont.)
FIELD
Dash Every X Characters
SCOPE
Global
DESCRIPTION
An interval where a dash (-) can be inserted into all
coupon codes. If you do not want to use a dash,
leave the field blank.
Coupon codes that differ by only a dash are
considered to be different codes.
Coupon Report
To learn how your coupons are being used, you can run a detailed coupon usage report for
each website, store, or view.
To generate a coupon report:
1.
On the Admin menu, select Reports > Sales > Coupons.
2.
In the upper-right corner, set Show Report For to define the scope of the report.
3.
Set the filters as needed. Then, do one of the following:
l
l
4.
To include coupon codes from all price rules in the report, set Shopping Cart Price Rule
to “Any.”
To include coupon codes related to specific rules, set Shopping Cart Price Rule to
“Specified.” Then, select the rules that you want to include in the report.
When complete, click the Show Report button.
Magento Enterprise Edition User Guide, Version 1.14.2
29
Coupon Codes
Chapter 1: Promotions
Coupon Usage Report
Free Shipping Promotion
Free shipping can be offered as a promotion, either with, or without a coupon. A free
shipping coupon, or voucher, can also be applied to customer pick-up orders, so the order
can be invoiced and “shipped” to complete the workflow.
Some shipping carrier configurations give you the ability of offer free shipping based on a
minimum order. To expand upon this basic capability, you can use shopping cart price
rules to create complex conditions based on multiple product attributes, cart contents, and
customer groups.
Process Overview:
Step 1: Enable Free Shipping
Step 2: Create the Shopping Cart Price Rule
Step 3: Test the Rule
30
Magento Enterprise Edition User Guide, Version 1.14.2
Chapter 1: Promotions
Coupon Codes
Step 1: Enable Free Shipping
1.
Enable the Free Shipping method in the configuration of your store.
2.
Complete the free shipping settings for any carrier service that you want to use for free
shipping.
Step 2: Create the Shopping Cart Price Rule
1.
On the Admin menu, select Promotions > Shopping Cart Price Rules.
2.
Follow the steps below to set up the free shipping promotion that you want to offer.
3.
When complete, click the Save Rule button.
When you create a new price rule, it might take an hour or so for it to become available.
Allow enough time for it to get into the system. Then, test the rule to make sure that it
works correctly. Unless otherwise specified, price rules are automatically processed with
other system rules each night.
Free Shipping for Any Order
1.
Complete the General Information settings as follows:
a.
Enter a Rule Name for internal reference.
b.
Set Status to “Active.”
c.
Set Website to “Main Website.” (Click to make sure the entry is selected.)
d.
Select the Customer Groups to which the rule applies.
e.
Do one of the following:
l
l
2.
To offer a free shipping promotion without a coupon, accept the default, “No
Coupon” setting.
To use a coupon with the price rule, set Coupon to “Specific Coupon.” If necessary,
complete the instructions to set up a coupon.
In the panel on the left, select Actions. Then, do the following:
a.
Set Apply to “Percent of product price discount.”
b.
Set Apply to Shipping Amount to “Yes.”
c.
Set Free Shipping to “For shipment with matching items.”
Magento Enterprise Edition User Guide, Version 1.14.2
31
Coupon Codes
Chapter 1: Promotions
Price Rule Action
3.
In the panel on the left, select Labels. Then, do one of the following:
l
Enter a Default Rule Label for All Store Views. This label is visible to the customer.
l
If your store is available in multiple stores, enter a label for each view, as needed.
4.
When complete, click the Save Rule button.
Free Shipping for Orders Over $Amount
1.
Complete the General Information settings as follows:
a.
Enter a Rule Name for internal reference.
b.
Set Status to “Active.”
c.
Set Website to “Main Website.” (Click to make sure the entry is selected.)
d.
Select the Customer Groups to which the rule applies.
e.
Do one of the following:
l
l
To use a coupon with the price rule, set Coupon to “Specific Coupon.” If necessary,
follow the instructions to set up a coupon.
2.
In the panel on the left, select Conditions.
3.
Click the Add
4.
button to insert a condition. Then, do the following:
a.
In the list under Cart Attribute, click Subtotal.
b.
Click the is link, and select “equals or greater than.”
c.
Click the … “more” link, and enter a threshold value for the Subtotal, such as
100, to complete the condition.
In the panel on the left, select Actions. Then, do the following:
a.
32
To offer a free shipping promotion without a coupon, accept the default, “No
Coupon” setting.
Set Apply to “Percent of product price discount.”
Magento Enterprise Edition User Guide, Version 1.14.2
Chapter 1: Promotions
5.
Coupon Codes
b.
Set Apply to Shipping Amount to “Yes.”
c.
Set Free Shipping to “For shipment with matching items.”
In the panel on the left, select Labels. Then, do one of the following:
Enter a Default Rule Label for All Store Views. The label is visible to the customer
during checkout.
l
If your store is available in multiple views, enter a label for each view, as needed.
l
6.
When complete, click the Save Rule button.
Step 3: Test the Rule
When you create a new price rule, it might take an hour or so for it to become available.
Allow enough time for it to get into the system. Then, test the rule to make sure that it
works correctly. Unless otherwise specified, price rules are automatically processed with
other system rules each night.
Buy X Get Y Free
This example shows how to set up a shopping cart price rule for a “Buy X, Get Y Free”
promotion. The format of the discount is as follows:
Buy X quantity of product, get Y quantity for free.
Process Overview:
Step 1: Create a Shopping Cart Price Rule
Step 2: Define the Conditions
Step 3: Define the Actions
Step 4: Complete the Label
Step 5: Add Related Banners
Step 6: Apply the Rule
Step 1: Create a Shopping Cart Price Rule
Complete Step 1 of the shopping cart price rule instructions to create a shopping cart rule
with the general information.
Step 2: Define the Conditions
Complete Step 2 of the shopping cart instructions to define the conditions for the price
rule. The conditions can be triggered by purchasing a specific product, making a purchase
of a certain amount, or any other scenario.
Magento Enterprise Edition User Guide, Version 1.14.2
33
Coupon Codes
Chapter 1: Promotions
Step 3: Define the Actions
1.
In the panel on the left, select Actions. Then, do the following:
Buy X Get Y Free
2.
a.
Set Apply to “Buy X get Y free (discount amount is Y).”
b.
Set Discount Amount to 1. This is the quantity the customer will receive for free.
c.
In the Discount Qty Step (Buy X) field, enter the quantity that the customer must
purchase to qualify for the discount.
Click the Save and Continue Edit button. Then, complete the rest of the rule as needed.
Step 4: Complete the Label
Complete Step 4 of the shopping cart price rule instructions to enter the label that appears
during checkout.
Step 5: Add Related Banners
Complete Step 5 of the shopping cart price rule instructions to associate an existing banner
with the shopping cart rule.
Step 6: Apply the Rule
When complete, click the Save Rule button.
When you create a new price rule, it might take an hour or so for it to become available.
Allow enough time for it to get into the system. Then, test the rule to make sure that it
works correctly. Unless otherwise specified, price rules are automatically processed with
other system rules each night.
Discount with Minimum Purchase
Shopping cart price rules can be used to offer a percentage discount based on a minimum
purchase. In the following example, a 25% discount is applied to all purchases over
$200.00 in a specific category. The format of the discount is as follows:
34
Magento Enterprise Edition User Guide, Version 1.14.2
Chapter 1: Promotions
Coupon Codes
X% off all Y (category) over $Z dollars
Process Overview:
Step 1: Create a Shopping Cart Rule
Step 2: Define the Conditions
Step 3: Define the Actions
Step 1: Create a Shopping Cart Rule
Follow the steps to create a shopping cart rule.
Step 2: Define the Conditions
1.
In the panel on the left, select Conditions.
2.
Click the Add
button at the beginning of the next line, and select Product Attribute
Combination.
Product Attribute Combination
3.
Click the Add
button at the beginning of the next line.
If an Item is FOUND
4.
In the list under Product Attribute, click Category.
Magento Enterprise Edition User Guide, Version 1.14.2
35
Coupon Codes
Chapter 1: Promotions
Choose Condition to Add
a.
Click the … “more” link to display additional options.
Category IS
b.
Click the Chooser
button to display the available categories. Then in the category
tree, select the checkbox of each category that you want to include.
Category Tree
c.
36
Click the Select
button at the end of the line to add the categories to the condition.
Magento Enterprise Edition User Guide, Version 1.14.2
Chapter 1: Promotions
Coupon Codes
Category Condition
5.
Click the Add
button at the beginning of the next line, and do the following:
a.
In the list under Product Attribute, select Price.
b.
Click the first underlined option, is. Then in the list, select “equals or greater than.”
Price Equals or Greater Than
c.
Click the ... “more” link to display the price field. Then, enter the amount that the
price must be to meet the condition. For example, enter 200.00.
Enter the Price to Complete the Condition
6.
Click the Save and Continue Edit button.
Magento Enterprise Edition User Guide, Version 1.14.2
37
Coupon Codes
Chapter 1: Promotions
Step 3: Define the Actions
1.
In the panel on the left, select Actions. Then, do the following:
Actions
2.
38
a.
Set Apply to “Percent of product price discount.”
b.
Enter the Discount Amount. For example, enter 25 for twenty-five percent.
c.
If you want to prevent the purchase from qualifying for additional promotions, set
Stop Further Rules Processing to “Yes.”
Click the Save and Continue Edit button. Then, complete the rule as needed.
Magento Enterprise Edition User Guide, Version 1.14.2
Chapter 1: Promotions
Product Relationship Rules
Product Relationship Rules
Product rules give you the ability to target the selection of products that are presented to
customers as related products, up-sells, and cross-sells. Each product rule can be
associated with a customer segment to produce a dynamic display of targeted
merchandising.
The process is similar to setting up a price rule. First, you define the conditions to match,
and then choose the products you want to display. At any given time, there might be a
number of active rules that can be triggered to display related products, up-sells, and crosssells. The priority of each rule determines the order in which the block of products appears
on the page.
Manage Product Rules
To create a product relationship rule:
1.
On the Admin menu, select Catalog > Rule-Based Product Relations.
2.
In the upper-right corner, click the Add Rule button.
General Rule Information
3.
Complete the General Information as described in the field descriptions below.
Magento Enterprise Edition User Guide, Version 1.14.2
39
Product Relationship Rules
4.
Chapter 1: Promotions
In the panel on the left, select Products to Match. Then, build the condition as you would
for a catalog price rule.
Match Condition
5.
In the panel on the left, select Products to Display. Then, build the results condition as
you would for a catalog price rule.
a.
To base the result on a price relationship with the matched product, under Product
Special, select Price (percentage).
Special Price Percentage
b.
Complete the condition to describe the products that you want to include in the
results. In this example, the matching products must have a higher value than the
original product.
Results Condition
6.
40
When complete, click the Save button.
Magento Enterprise Edition User Guide, Version 1.14.2
Chapter 1: Promotions
Product Relationship Rules
Field Descriptions
FIELD
DESCRIPTION
Rule Name
A name that identifies the rule for internal use.
Priority
Determines the sequence in which the results of the rule appear
when displayed with other sets of results that target the same
place on the page. The value can be set to any whole number,
with the highest priority of 1.
For example, if there are multiple up-sell rules that apply, the one
with the highest priority appears before the others. The sort order
of the products within each set of results is random.
Any up-sell, cross-sell, and related products that were manually
configured always appear on the page before any rule-based
product promotions.
Status
Controls the active status of the rule. Options include: Active /
Inactive
Apply To
Identifies the type of product relationship that is associated with
the rule. Options include:
Related Products
Up-sells
Cross-sells
From Date
If the rule is active for a range of time, determines the first date
the rule is active.
To Date
If the rule is active for a range of time, determines the last date
the rule is active.
Result Limit
Determines the number of products that appear in the results at
one time. The maximum number is 20. If more matching results
are found, the products rotate through the block each time the
page is refreshed.
Customer Segments
Identifies the customer segments to which the rule applies.
Options include: All / Specified
Magento Enterprise Edition User Guide, Version 1.14.2
41
Email Reminder Rules
Chapter 1: Promotions
Email Reminder Rules
Automated reminder email rules give you the ability to send email reminders to customers
when a specific set of conditions is met. For example, you might send email reminders to
customers who have added something to their shopping cart or wishlist, but have not yet
made a purchase.
Email reminders can be triggered after a certain number of days have passed since a cart
was abandoned, or for any other condition you want to define, such as total cart value,
quantity, items in cart, and so on.
You can use email reminders to encourage customers to return to your store, and include a
coupon code as an incentive. Coupon codes can be automatically generated for each batch
of email reminders, to give you control over the offers that are associated with each batch.
Email Reminder Rules
42
Magento Enterprise Edition User Guide, Version 1.14.2
Chapter 1: Promotions
Email Reminder Rules
Email Reminder Setup
Email reminder rules can be configured to be sent at regular intervals by the minute, hour,
or day.
Important! For automated email reminders to be sent as configured, the crontab service (for
UNIX/BSD/Linux ) or the Scheduled Tasks service (for Windows) should be configured to run the
necessary script periodically. For more information, see: How to Set Up a Cron Job.
To configure email reminders:
1.
On the Admin menu, select System > Configuration.
2.
In the panel on the left, under Customers, select Promotions.
3.
Click to expand the Automated Email Reminder Rules section. Then, complete the section
as shown in the field descriptions below.
Automated Email Reminder Rules
4.
When complete, click the Save Config button.
Field Descriptions
FIELD
SCOPE
DESCRIPTION
Enable Reminder Emails
Global
Enables automated email reminders. If this is set
to No, the following values will be ignored.
Options include: Yes / No
Frequency
Global
Indicates the frequency with which Magento
should check for new customers who qualify for
the automated email reminders. Options include:
Magento Enterprise Edition User Guide, Version 1.14.2
43
Email Reminder Rules
Chapter 1: Promotions
Field Descriptions (cont.)
FIELD
SCOPE
DESCRIPTION
Minute Intervals
Sends the email
according to the selected
interval. Options include:
5 minutes
10 minutes
15 minutes
20 minutes
30 minutes
44
Hourly
Sends email hourly, at the
minute after the hour
specified. Enter a value
between 0-59.
Daily
Sends email daily, from t
he Start Time.
Start Time
Global
The day, minute, and second the email is sent.
Specified in 24-hour format, based on the system
time on your server.
Maximum Emails per One
Run
Global
Limits the number of emails sent in a scheduled
block.
Email Send Failure
Threshold
Global
The number of times the reminder attempts to
send out notifications to specific email address
and fails. When the value is set to 0, there is no
threshold, and notifications will keep being sent
despite any failures.
Reminder Email Sender
Store View
The store contact shown as the sender of the
email.
Magento Enterprise Edition User Guide, Version 1.14.2
Chapter 1: Promotions
Email Reminder Rules
Creating Email Reminder Rules
Before setting up an automated email reminder rule, make sure that you have a shopping
cart price rule set up that defines the promotion that is being offered. Rule conditions can
be based on shopping cart properties, wishlist properties, or both.
l
l
Wishlist trigger conditions include: the number of days abandoned, sharing, number of
items, and specific items in the wishlist.
Shopping cart trigger conditions include: the number of days abandoned, if a specific
coupon code has been applied, line items quantity, items quantity, total, if items are
virtual, and specific items in the shopping cart.
To create an email reminder rule:
1.
On the Admin menu, select Promotions > Automated Email Reminder Rules.
2.
In the upper-right corner, click the Add New Rule button.
General Information
3.
Complete the General Information, as shown in the field descriptions section below.
4.
In the panel on the left, select Conditions. The process is similar to building a catalog price
rule. Do the following:
Magento Enterprise Edition User Guide, Version 1.14.2
45
Email Reminder Rules
Chapter 1: Promotions
Conditions
a.
Click the Add
button to display the list of options. Then, choose one of the
following conditions to apply:
b.
l
Wishlist
l
Shopping Cart
Complete the condition to describe the scenario that triggers the reminder email.
Completed Condition
5.
In the panel on the left, select Emails and Labels. Then, do the following:
Email Templates
a.
Assign an email template to each store to which you have access. Then, select the
email reminder template to use for each.
If you don’t want to send this rule’s reminder email to customers of a store, leave the
value, “Not Selected.”
6.
46
b.
Enter the Rule Title to be used as the default for all stores. The value can be
incorporated into email templates by using the promotion_name variable.
c.
Enter the Rule Description, which is the default for all stores The value can be
incorporated into email templates by using the promotion_description variable.
When complete, click the Save button.
Magento Enterprise Edition User Guide, Version 1.14.2
Chapter 1: Promotions
Email Reminder Rules
Field Descriptions
FIELD
DESCRIPTION
Rule Name
The name of the automated reminder rule identifies the rule
internally.
Description
A description of the rule for internal reference.
Shopping Cart Price Rule
The shopping cart rule that is associated with this email
reminder. Reminder emails can promote a shopping cart price
rule with or without coupon. If a shopping cart price rule includes
an auto-generated coupon, the reminder rule will generate a
random, unique coupon code for each customer.
Assigned to Website
The websites to receive automated reminder emails based on
this rule.
Status
Activates the rule. If status is inactive, then all other settings will
be ignore and the rule will not be triggered.
Options include: Active / Inactive
From Date
The starting date for this automated reminder rule. If no date is
specified, the rule becomes active immediately.
To Date
The ending date for this automated reminder rule. If no date is
specified, the rule becomes active indefinitely.
Repeat Schedule
The number of days before the rule is triggered, and the reminder
email sent again, provided the conditions are met.
To trigger the rule more than once, enter the number of days
before the next email blast, separated by a comma. For example,
enter “7” to have the rule triggered again seven days later; enter
“7,14” to have the rule triggered in seven days, and again fourteen
days later.
Magento Enterprise Edition User Guide, Version 1.14.2
47
Email Reminder Rules
Chapter 1: Promotions
Email Reminder Templates
The default email reminder template can be customized, and additional templates created.
To learn more, see: Customizing Email Templates.
To create a template for email reminders:
1.
On the Admin menu, select System > Transactional Emails.
2.
Click the Add New Template button.
3.
Select the default email template, Rule Reminder. Then, click the Load Template button.
Email Reminder Template
4.
Assign a new Template Name, and follow the standard instructions to customize the
template. The following variables are specific to email reminders, and can be incorporated
into the message:
promotion_name
promotion_description
coupon.getCode()
coupon.getUsageLimit()
coupon.getUsagePerCustomer()
48
Magento Enterprise Edition User Guide, Version 1.14.2
Chapter 1: Promotions
Customer Segments
The information in these variables is determined by the automated email reminder rule that
you set up, and by the shopping cart price rule that is associated with the coupon.
5.
When complete, click the Save Template button.
Customer Segments
Customer segments allow you to dynamically display content and promotions to specific
customers, based on properties such as customer address, order history, shopping cart
contents, and so on. You can optimize marketing initiatives based on targeted segments by
using shopping cart price rules and banners. You can also generate reports and export the
list of targeted customers.
Because customer segment information is dynamic and is constantly refreshed, customers
can become associated and disassociated from a segment as they shop in your store.
Additional Resources
3 Segmentation Tactics to Ignite Conversion
Manage Segments
Magento Enterprise Edition User Guide, Version 1.14.2
49
Customer Segments
Chapter 1: Promotions
Customer Segment Attributes
Customer segments are defined in a manner similar to shopping cart and catalog price
rules. For an attribute to be used in a customer segment condition, the Use for Customer
Segment Conditions property must be set to “Yes.” Customer segment conditions can
incorporate the following attributes:
Customer Address
You can define any of the address fields, such as city or country. Any address in a
customer’s address book can match these conditions for the customer to match. Or, you
can specify that only the default billing or shipping addresses can be used to match a
customer. Customer address attributes are available only for customers who are logged in
to their accounts.
Customer
Miscellaneous customer information can be defined, including Customer Group, name,
email, newsletter subscription status, and Store Credit balance. Customer information is
available only for customers who are logged in to their accounts.
Shopping Cart
Shopping cart properties can be based on either quantity (line items or total quantity) or
the value (grand total, tax, gift card, etc.) of the cart contents.
Products
You can reference products that are currently in the shopping cart or wishlist, or that have
previously been viewed or ordered. You can also set a date range for when this occurred.
The products are defined using product attributes.
Sales
Order characteristics for past orders can be defined based on the billing/shipping address in
the order, the total or average amount or quantity of the orders, or the total number of
orders. You can also set a date range for when this occurred, and the order status of the
orders that match these conditions. Available only for customers who are logged in.
Conditions that are set for shoppers who are not logged in stop working when they log in.
50
Magento Enterprise Edition User Guide, Version 1.14.2
Chapter 1: Promotions
Customer Segments
Creating a Customer Segment
The process of creating a customer segment is similar to building a shopping cart price
rule, except that the options also include customer-specific attributes.
Process Overview:
Step 1: Complete the General Setup
Step 2: Describe the Conditions
Step 3: Generate the List of Matched Customers
Step 1: Complete the General Setup
1.
On the Admin menu, select Customers > Customer Segments.
2.
In the upper-right corner, click the Add Segment button.
3.
Complete the General Properties as described in the following field description section.
4.
When complete, click the Save and Continue Edit button.
General Properties
Magento Enterprise Edition User Guide, Version 1.14.2
51
Customer Segments
Chapter 1: Promotions
Step 2: Describe the Conditions
1.
In the panel on the left, click the Conditions tab.
Conditions
2.
To create a condition that targets the Millennium Generation, do the following:
a.
Click the Add
button to display the list of conditions. Then, in the list under
Customers, select Date of Birth.
b.
Click the is link, and select “equals or greater than.”
c.
Replace the inserted date with the following: “1977/01/01.”
d.
On the next line, click the Add
button. Then again, in the list under Customers,
select Date of Birth.
e.
Click the is link, and select “equals or less than.”
f.
Replace the inserted date with the following: “1994/12/31.”
Condition for Millennium Generation
3.
52
Click the Save and Continue Edit button.
Magento Enterprise Edition User Guide, Version 1.14.2
Chapter 1: Promotions
Customer Segments
Step 3: Generate the List of Matched Customers
1.
In the panel on the left, select Matched Customers to generate a list of customers who
match the condition.
Millennium Generation Customer Segment
2.
When complete, click the Save button.
This customer segment can now be used for targeting promotions, content, and mailings.
Field Descriptions
FIELD
DESCRIPTION
Segment Name
A name that identifies the segment for internal reference.
Description
A brief description that explains the purpose of the segment for
internal reference.
Assigned to Website
The single website where the segment can be used.
Status
Activates and deactivates the segment. Any associated price
rules and banners are deactivated when the segment is disabled.
Options include: Active / Inactive.
Apply to
Defines the customer types to which the segment is applied. The
selection influences the set of conditions available for creating
the segment. The setting cannot be changed after the segment is
saved. Options include:
Magento Enterprise Edition User Guide, Version 1.14.2
53
Customer Segments
Chapter 1: Promotions
Field Descriptions (cont.)
FIELD
DESCRIPTION
Visitors and Registered
Customers
Includes all shoppers, regardless
of whether they are logged in to
an account.
Registered Customers
Includes only shoppers who are
logged in to an account
Visitors
Includes only shoppers who are
not logged in to an account.
Target Customer Segments with Price Rules
A customer segment can be targeted by associating it with a shopping cart price rule and
banner.
To associate a segment with a shopping cart price rule:
1.
On the Admin menu, select Promotions > Shopping Cart Price Rules.
2.
Do one of the following:
3.
l
In the upper-right corner, click the Add New Rule button.
l
Open an existing rule in edit mode.
In the panel on the left, select Conditions. Then, complete the condition as follows:
a.
Click the Add
button to display the list of conditions. Then in the list, select
Customer Segments.
54
b.
To target a specific segment, click the … “more” link to display additional options.
icon to display the list of customer segments.
Then, click the Chooser
c.
In the list, select the checkmark of each segment that you want to target in the
condition.
Magento Enterprise Edition User Guide, Version 1.14.2
Chapter 1: Promotions
Customer Segments
Choose Customer Segments
4.
Click the Select
button to place the selected customer segments into the condition.
Completed Condition
5.
Complete the rest of the price rule, as needed.
6.
When complete, click the Save button.
Target Customer Segments with Banners
A banner can target a specific customer segment, and be incorporated into a shopping cart
price rule. Because customer segments are dynamic, the price rule can adjust to changes in
customer activity.
Magento Enterprise Edition User Guide, Version 1.14.2
55
Customer Segments
Chapter 1: Promotions
Banner
To associate a customer segment with a banner:
1.
2.
On the Admin menu, select CMS > Banners. Then, do one of the following:
l
In the upper-right corner, click the Add Banner button.
l
Open an existing banner in edit mode.
Set Specified from the Customer Segments to “Specified.” Then in the list, select each
customer segment that you want to target with the banner.
Customer Segments
56
3.
Make any other changes to the banner, as needed.
4.
When complete, click the Save Banner button.
Magento Enterprise Edition User Guide, Version 1.14.2
Chapter 2:
Shopping Tools
Your store includes a set of shopping tools that create opportunities for your customers
to engage with your store, and to share the experience with friends.
Topics in this chapter:
l
Opportunities to Engage
l
Email a Friend
l
Polls
l
Tags
l
Wishlists
l
Product Relationships
l
Compare Products
l
Recently Viewed / Compared Products
l
Product Reviews
Additional Resources
Customer Engagement
The 3 Components of Building eCommerce Customer Loyalty
Magento Enterprise Edition User Guide, Version 1.14.2
57
Opportunities to Engage
Chapter 2: Shopping Tools
Opportunities to Engage
Email a Friend
The Email a Friend link makes it easy for your
customers to share links to products with their
friends.
Polls
The Poll block displays a series of polls or surveys
that you can use to learn more about your customers.
Tags
Tags help customers organize and remember the
products that they have seen, offer quick navigation,
and help search engines index your store.
58
Magento Enterprise Edition User Guide, Version 1.14.2
Chapter 2: Shopping Tools
Opportunities to Engage
Wishlist
The Wishlist block displays the items from the
customer’s wishlist.
Product Relationships
Products in your catalog can be promoted on other
pages as Up-sells, Cross-sells, and Related
Products.
Compare Products
The Compare Products block lets your customers
quickly compare the features of one product with
another.
Magento Enterprise Edition User Guide, Version 1.14.2
59
Opportunities to Engage
Chapter 2: Shopping Tools
Recently Viewed / Compared
The Recently Viewed and Recently Compared
blocks usually appear in the right sidebar of a catalog
page.
Product Reviews
Product reviews help build a sense of community,
and are considered to be more credible than any
advertising money can buy.
60
Magento Enterprise Edition User Guide, Version 1.14.2
Chapter 2: Shopping Tools
Email a Friend
Email a Friend
The Email a Friend link makes it easy for your customers to share links to products with
their friends. In the Magento demo store, the Email a Friend link appears as an envelope
icon.
The automated message that is sent from your store is referred to as transactional email.
The message template can be customized for your voice and brand. To prevent spamming,
customers can send only five messages per hour.
Email a Friend
To configure email to a friend:
1.
On the Admin menu, select System > Configuration.
2.
In the panel on the left, under Catalog, select Email to a Friend.
3.
Click to expand the Email Templates section. Then, do the following:
a.
Set Enabled to “Yes.”
b.
Set Select Email Template to the template you want to use as the basis of the
messages.
c.
If you want to require that only registered customers can send email to friends, set
Allow for Guests to “No.”
d.
In the Max Recipients field, enter the maximum number of friends who can be on the
distribution list for a single message.
Magento Enterprise Edition User Guide, Version 1.14.2
61
Email a Friend
Chapter 2: Shopping Tools
e.
In the Max Products Sent in One Hour field, enter the maximum number of products
that can be shared by a single user with friends over a one-hour time period.
f.
Set Limit Sending By to one of the following methods to identify the sender of emails:
IP Address
(Recommended) Identifies the sender by the IP address of the
computer that is used to send the emails.
Cookie (unsafe)
Identifies the sender by browser cookie. This method is less
effective because the sender can delete the cookie to bypass the
limit.
Email Templates
4.
When complete, click the Save Config button.
To send email to a friend:
1.
On a catalog page, click the Email a Friend link. When prompted, either log into your
customer account or register to open an account.
2.
Complete the Message and enter the recipient Name and Email Address.
To send the message to more than one person, click the Add Another Recipient link and
complete the information for each person.
3.
When ready to send the message, click the Send Email button.
Email to a Friend Form
62
Magento Enterprise Edition User Guide, Version 1.14.2
Chapter 2: Shopping Tools
Polls
Polls
Polls make it easy to learn about your customers’ opinions and preferences. The poll
occupies a small amount of space and is usually placed in the right sidebar of a catalog
page. Poll results appear immediately after a response is submitted. If you create multiple
polls, a new poll appears each time the page is refreshed.
Original Poll and Results
To create a poll:
1.
On the Admin menu, select CMS > Polls.
2.
In the upper-right corner of the Poll Manager, click the Add New Poll button.
3.
In the Poll Information section, do the following:
Poll Information
4.
a.
Enter the Poll Question.
b.
By default, Status is set to “Open.” If you later want to remove the poll from your
store, set Status to “Closed.”
c.
Set Visible In to the store view where you want the poll to appear.
In the panel on the left, select Poll Answers. Then, for each answer, do the following:
Magento Enterprise Edition User Guide, Version 1.14.2
63
Polls
Chapter 2: Shopping Tools
a.
Click the Add New Answer button. Then, do the following:
Assigned Answers
5.
b.
In the Answer Title field, enter the answer as you want it to appear in the poll.
c.
To weight an answer, enter a number in the Votes Count field. The number will
increment each time a customer chooses the answer.
Click the Save Poll button to save your poll.
To prevent multiple voting:
You can protect the poll results by preventing people from voting multiple times from the
same computer.
1.
On the Admin menu, select System > Configuration.
2.
In the Configuration panel on the left, under General, select Web.
3.
Click to expand the Polls section, and set Disallow Voting in a Poll Multiple Times from
Same IP Address to “Yes.”
Disallow Voting Multiple Times
4.
64
When complete, click the Save Config button.
Magento Enterprise Edition User Guide, Version 1.14.2
Chapter 2: Shopping Tools
Polls
To edit a poll:
1.
2.
From the Poll Manager list, click to open the poll in edit mode. Then, make the necessary
changes.
l
To close the poll so that it no longer appears in the store, set Status to “Closed.”
l
To see the vote count for each answer, click Poll Answers in the panel on the left.
When complete, click the Save Poll button.
Poll Answer Count
Magento Enterprise Edition User Guide, Version 1.14.2
65
Tags
Chapter 2: Shopping Tools
Tags
Tags are one-word descriptors that are used as keywords for your catalog. Tags can be
assigned to products by registered customers who are logged in, and also by guests. Tags
help customers organize and remember the products that they have seen, offer quick
navigation, and help search engines index your store.
Popular Tags
Tags are formatted as a tag cloud, and typically appear in the Popular tags block in the
right sidebar of catalog pages. The size of the text indicates the popularity of the tag. Each
product page has an “Tag this Product” section at the bottom of the page, where shoppers
can enter their own tags. As an incentive, customers can earn reward points for adding tags
to a product. Tags that customers have assigned to a product appear on the Customers
Tagged Product tab in the product record, and includes the tag, the customer name, and
email address.
To add a tag from the store:
1.
From any product page, scroll down to Tag this Product at the bottom of the page.
Tag this Product
2.
66
In the Add a Tag text box, type the tag you want to associate with the product.
l
To enter multiple tags, separate each with a blank space.
l
To enter a phrase, enclose the text in single quotes.
Magento Enterprise Edition User Guide, Version 1.14.2
Chapter 2: Shopping Tools
3.
Tags
Click the Add Tags button.
The tag will be submitted for review and published on the site when approved.
Products Tagged by Administrators
There’s no reason to wait for customers to tag products. As part of your SEO effort, you can
tag products with high-value keywords as part of your SEO effort. As the store
administrator, you can apply new tags to products, and reuse existing tags.
Products Tagged by Administrators
To add a new tag:
1.
On the Admin menu, select Catalog >Tags > All Tags.
2.
In the upper-right corner, click the Add New Tag button. Then, do the following:
3.
a.
Enter the Tag Name.
b.
Set Status to “Approved.”
c.
In the Base Popularity field, enter a numeric value to assign a weight to the tag. The
number assigns a base value to the tag and increases its size in the tag cloud.
When complete, click the Save Tag button.
To apply an existing tag to specific products:
1.
In the Manage Tags list, click to open the tag.
2.
Click to expand the Products Tagged by Administrators section. Then, do the following:
3.
a.
Click the Reset Filter button to display all product records.
b.
Select the checkbox of each product that you want to tag.
When complete, click the Save Tag button.
The products now appear in the list of Products Tagged by Administrators.
Magento Enterprise Edition User Guide, Version 1.14.2
67
Tags
Chapter 2: Shopping Tools
Moderating Tags
After a customer submits a product tag, an administrator must approve the tag before it
becomes visible in the store. After a tag has been approved, it can be used for other
products without further approval.
Changing the Status of Pending Tags
Tag Activity
The remaining sections give you a snapshot of the tag activity, including which customers
have used the tag, and products tagged by the store administrator and customers.
Customers Submitted this Tag
You can jump to a specific customer or product by clicking its row in the list.
Products Tagged by Customers
68
Magento Enterprise Edition User Guide, Version 1.14.2
Chapter 2: Shopping Tools
Tags
To approve multiple tags:
1.
On the Admin menu, select Catalog >Tags > Pending Tags. Then in the list, click to open
a pending tag.
2.
In the list, select the checkbox of each tag that you want to approve.
3.
Set the Actions control to “Change Status.” Then, set the Status control to “Approved.”
4.
When complete, click the Submit button.
To manage a single tag:
1.
On the Admin menu, select Catalog >Tags > Pending Tags. Then in the list, click to open
a pending tag.
Editing a Tag
2.
3.
If necessary, you can edit the text as needed. Then, do one of the following:
l
To approve and publish the pending tag, set Status to “Approved.”
l
To reject the tag, set Status to “Disapproved.”
When complete, click the Save Tag button.
Magento Enterprise Edition User Guide, Version 1.14.2
69
Wishlists
Chapter 2: Shopping Tools
Wishlists
A wishlist is a list of products that registered customers can share with friends or transfer
to their shopping carts at a later date. When wishlists are enabled, the Add to Wishlist link
appears on the category and product pages of your store.
Customers can maintain multiple wishlists, which allows them to:
l
Make each wishlist private or public
l
Move items between wishlists
l
Search for public wishlists of other customers, and purchase items
Depending on the theme, the Add to Wishlist might be a text link or a graphic image. In
the Magento demo store, the link is represented by a heart image. Registered customers can
click the Add to Wishlist link, add the product to the wishlist, and share it with friends.
Wishlists increase customer loyalty and bring new people to your store.
Add to Wishlist Link on Product Page
Shared wishlists are sent from a store email address, but the body of the message contains
a personalized note from the customer. You can customize the email template that is used
for the notification message when wishlists are shared, and choose the store contact that
appears as the sender.
Each wishlist can be maintained in the customer’s account dashboard, where it can be
updated, and used to add products to the shopping cart. When a product with multiple
options is added to a wishlist, any options selected by the customer are included in the
wishlist item description. For example, if the customer adds the same pair of shoes, but in
70
Magento Enterprise Edition User Guide, Version 1.14.2
Chapter 2: Shopping Tools
Wishlists
three different colors, each pair appears as a separate wishlist item. On the other hand, if
the customer adds the same product to the wishlist multiple times, the product appears in
the wishlist only once, but with an updated quantity that reflects the number of times the
product was added. Customers can update their wishlists from their account dashboard.
However, merchants can also update a customer’s wishlist from the Admin.
Wishlist Setup
If enabled in your store configuration, customers can maintain multiple wishlists.
General Options
To configure wishlists:
1.
On the Admin menu, select System > Configuration.
2.
In the Configuration panel on the left, under Customers, select Wishlist.
3.
Click to expand the General Options section. Then, do the following:
4.
Verify that Enabled is set to “Yes.”
5.
To give customers the ability to maintain multiple wishlists, do the following:
a.
Set Enable Multiple Wishlists to “Yes.”
b.
Enter the Number of Multiple Wishlists that each customer can maintain.
If you use multiple wishlists, and later disable the feature, only the default wishlist remains
available to customers. However, the data from any previous multiple wishlists remains
accessible from the store Admin.
6.
Click to expand the Share Options section, and do the following:
Share Options
Magento Enterprise Edition User Guide, Version 1.14.2
71
Wishlists
Chapter 2: Shopping Tools
7.
a.
Set Email Template to the template to be used for the notification that is sent when a
customer shares a wishlist.
b.
Set Email Sender to the store contact that appears as the sender of the notification.
When complete, click Save Config.
Wishlist Search Widget
All Wishlists that are set to be public can be found using the Wishlist Search widget. The
widget enables a customer to search by Wishlist owner name or email address. Store
customers can find wishlists that belong to other customers, view them and order products
from them, or add the products to their own wishlists. When items from a customer’s
public wishlist are purchased by another customer, the items are not removed from the
original wishlist.
Shipping addresses are not included in wishlists.
The Wishlist Search widget can be added to any page of your store to make it easy for
customers to search for wishlists. To learn more, see: Widgets.
To add a Wishlist Search widget:
1.
On the Admin menu, select CMS > Widgets.
2.
In the upper-right corner, click the Add New Widget Instance button. Then, in the Settings
section, do the following:
Settings
3.
72
a.
Set Type to “Wishlist Search.”
b.
Set Design Package/Theme to the theme of the store where the wishlist will be added.
Then, click the Continue button.
In the panel on the left, select Widget Options. Then, do the following:
Magento Enterprise Edition User Guide, Version 1.14.2
Chapter 2: Shopping Tools
Wishlists
Widget Options
4.
Set Quick Search Form Types to one of the following:
All Forms
Gives customers the option to search by all available
parameters.
Wishlist Owner Name
Search
Gives customers the option to search for wishlists by owner
name.
Wishlist Owner Email
Search
Gives customers the option to search for wishlists by owner
email address.
5.
Configure the remaining widget properties as needed, following the standard instructions.
6.
When complete, click the Save button.
Wishlist Reports
A customer Wishlist report includes the following information for each wishlist the
customer has created:
l
The date when a product was added
l
The customer name
l
The wishlist name and status (public or private)
l
The product name and SKU
l
Customer comments
l
Quantity of the product in the Wishlist, quantity currently available in the store, and
the difference between these two values.
You can choose to see a report for the entire website or for an individual store view. The
scope is selected in the Show Report For field. The report can be exported to .csv or Excel
.xml format.
To generate a wishlist report:
On the Admin menu, select Reports > Customers > Customers Wishlist.
Magento Enterprise Edition User Guide, Version 1.14.2
73
Product Relationships
Chapter 2: Shopping Tools
Product Relationships
Products in your catalog can be promoted on other pages by defining the nature of the
relationship between the products. The options available are: Up-sell products, Related
products, and Cross-sell products.
Related Products
Related products are meant to be purchased in
addition to the item the customer is viewing. They
complement, enhance, or add optional features to the
product.
Up-sells
Up-sell products are items that are similar, but are
perhaps of a higher-quality, more popular, or have a
better profit margin than the item the customer is
considering.
Cross-sells
Cross-sell products are offered on the shopping cart
page as last-minute purchases before the checkout
process begins.
74
Magento Enterprise Edition User Guide, Version 1.14.2
Chapter 2: Shopping Tools
Compare Products
Compare Products
The Compare Products block usually appears in the far right column, or sidebar of the
category page, and provides a detailed, side-by-side comparison of two or more products.
You can customize the report to include additional attributes or remove ones that you don’t
want to include. In the Magento demo store, the Add to Compare link is represented by an
icon, rather than a link.
Compare Products
To compare products:
1.
From your storefront, find the products that you want to compare, and click the Add to
Compare link for each.
2.
In the Compare Products block in the right sidebar, click the Compare button. The
Compare Products report opens in a new window.
3.
To clear the Compare Products list, click the Clear All link.
Magento Enterprise Edition User Guide, Version 1.14.2
75
Compare Products
Chapter 2: Shopping Tools
Compare Products Report
76
Magento Enterprise Edition User Guide, Version 1.14.2
Chapter 2: Shopping Tools
Recently Viewed/Compared Products
Recently Viewed/Compared Products
The Recently Viewed and Recently Compared blocks usually appear in the right sidebar of a
catalog page. The number of products listed can be set for each website, store, or view.
Recently Viewed
To configure Recently Viewed/Compared Products:
1.
On the Admin menu, select System > Configuration.
2.
In the panel on the left, under Catalog, select Catalog.
3.
Click to expand the Recently Viewed/Compared Products section. Then, do the following:
Recently Viewed/Compared Products
4.
a.
Set Show for Current to the website, store, or view where the configuration applies.
b.
In the Default Recently Viewed Products Count field, enter the number of recently
viewed products you want to include.
c.
In the Default Recently Compared Products Count, enter the number of recently
compared products you want to include.
When complete, click the Save Config button.
Magento Enterprise Edition User Guide, Version 1.14.2
77
Product Reviews
Chapter 2: Shopping Tools
Product Reviews
Product reviews help to build a sense of community, and are considered more credible than
any advertising money can buy. In fact, some search engines give sites with product
reviews a higher ranking than those without. For those who find your site by searching for
a specific product, a product review is essentially the landing page of your store. Product
reviews help people find your store, keep them engaged, and often lead to sales.
Add Your Review
Configuring Product Reviews
The configuration determines whether reviews can be submitted by guests, or if customers
are required to open an account with your store before writing reviews. Requiring reviewers
to open an account improves the quality of reviews by preventing anonymous submissions.
To configure product reviews:
1.
On the Admin menu, select System > Configuration.
2.
In the panel on the left, under Catalog, select Catalog.
3.
Click to expand the Product Reviews section.
4.
Set Allow Guests to Write Reviews according to your preference.
Product Reviews
78
Magento Enterprise Edition User Guide, Version 1.14.2
Chapter 2: Shopping Tools
5.
Product Reviews
When complete, click the Save Config button.
Writing Reviews
Customers can write reviews for any product in your catalog. Reviews can be written from
the product page by clicking the “Add Your Review” link. For products that haven't been
reviewed, the link says, “Be the first to review this product.”
The number of stars indicates the satisfaction rating. Visitors can click the link to read the
reviews and write their own. As an incentive, customers can receive reward points for
submitting a review.
Writing a Product Review
Moderating Reviews
When a review is submitted, it is sent to the Admin for moderation. When approved, the
review is published in your store.
Magento Enterprise Edition User Guide, Version 1.14.2
79
Product Reviews
Chapter 2: Shopping Tools
To edit and approve customer reviews:
1.
On the Admin menu, select Catalog > Reviews and Ratings > Customer Reviews >
Pending Reviews.
Pending Reviews
2.
In the list, click a pending review to view the details, and edit if necessary.
3.
To approve a pending review, change the Status from “Pending” to “Approved.” To reject a
review, select “Not Approved.”
4.
When complete, click the Save Review button.
Custom Ratings
By default, customer can rate the quality, price, and value of a product. In addition, you
can add your own custom ratings that relate to your products and customers. The average
rating for each product appears in catalog lists and on the product page.
Manage Ratings
To create your own ratings:
80
1.
On the Admin menu, select Catalog > Reviews and Ratings > Manage Ratings.
2.
In the upper-right corner, click the Add New Rating button.
3.
In the Rating Title section, enter the Default Value for the new rating. Then, enter the
translation for each language supported by your store.
Magento Enterprise Edition User Guide, Version 1.14.2
Chapter 2: Shopping Tools
Product Reviews
Rating Title
4.
In the Rating Visibility section, set Visibility In to the store view where the rating will be
used. (Hold down the Ctrl key to select multiple options.)
5.
In the Sort Order field, enter a number to determine the sequence that this rating appears
in the list of ratings.
Rating Visibility
6.
When complete, click the Save Rating button.
Magento Enterprise Edition User Guide, Version 1.14.2
81
Product Reviews
Chapter 2: Shopping Tools
Notes
82
Magento Enterprise Edition User Guide, Version 1.14.2
Chapter 3:
Gift Options
At checkout, customers are presented with the available gift options during the
Shipping Method step of the process. If the customer chooses to add gift options, two
groups of checkboxes appear: Gift Options for Entire Order and Gift Options for
Individual Items. If enabled, the Send Gift Receipt and Add Printed Card checkboxes
appear below. Prices for the selected gift wrapping options and the printed card are
shown as individual lines in the order totals during Order Review.
Gift Options During Checkout
Magento Enterprise Edition User Guide, Version 1.14.2
83
Gift-Related Products & Services
Chapter 3: Gift Options
Gift-Related Products & Services
Magento offers a variety of gift-related products and services. Some can be applied to an
individual item or to the entire order. An additional charge can be added to include a
printed card or gift wrapping.
Gift Wrapping
Gift wrapping can be applied to an entire order, or for
specific items in the order during checkout. The price
for gift wrapping an individual item is set in the
product record.
Gift Messages
A gift message or printed card can be added to the
entire order or to specific items in the order during
checkout.
Gift Receipt
During checkout, a gift receipt can be included in the
order by selecting the Include Gift Receipt checkbox.
84
Magento Enterprise Edition User Guide, Version 1.14.2
Chapter 3: Gift Options
Gift-Related Products & Services
Gift Cards
A gift card is a product that you can offer for sale from
your catalog. The gift card can be physical, virtual, or
a combination of the two. Each gift card has a value
assigned, with a unique code that is entered during
checkout. Each gift card has an associated account
to keep track of the balance.
Gift Registries
Your customers can create gift registries for special
occasions, and invite friends and family to
participate. When items are purchased from the gift
registry, the inventory is updated.
Magento Enterprise Edition User Guide, Version 1.14.2
85
Gift Options Workflow
Chapter 3: Gift Options
Gift Options Workflow
Entire Order
When the customer selects the Gift Options for the Entire Order checkbox, the Gift
Wrapping Design and the Gift Message options appear below. The customer can select a
gift wrapping design and write a gift message for the entire order. After the gift wrapping
design is selected, its price and an image preview, if available, appear.
Individual Items
When the customer selects the Gift Options for Individual Items checkbox, the list of
product names appears with the Gift Wrapping Design options for each product. To learn
more, see: Product Gift Options.
Send Gift Receipt
The customer can select the Send Gift Receipt checkbox to send a gift receipt for the order
Add Printed Card
If the customer selects the Add Printed Card checkbox, the card price appears below.
86
Magento Enterprise Edition User Guide, Version 1.14.2
Chapter 3: Gift Options
Gift Options Setup
Gift Options Setup
The Gift Options configuration determines if customers have the option to add a gift
message and gift wrap during checkout. The gift options must be configured first for the
website, and can then be overridden at the product level.
Gift Options Configuration
To enable gift options:
1.
On the Admin menu, select System > Configuration. Then in the panel on the left, under
Sales, select Sales.
2.
Click to expand the Gift Options section. Then, do the following:
a.
b.
3.
Set the following options according to your preference:
l
Allow Gift Messages on Order Level
l
Allow Gift Messages for Order Items
l
Allow Gift Wrapping on Order Level
l
Allow Gift Wrapping for Order Items
l
Allow Gift Receipt
l
Allow Printed Card
If applicable, enter the Default Price for Printed Card.
When complete, click the Save Config button.
When gift wrapping is enabled, the gift wrapping-related settings become available at the
product level.
Magento Enterprise Edition User Guide, Version 1.14.2
87
Gift Options Setup
Chapter 3: Gift Options
Field Descriptions
SCOPE
FIELD
DESCRIPTION
Allow Gift Messages on
Order Level
Website
Specify whether a gift message can be added for
the entire order.
Allow Gift Messages on
Order Items
Website
Specify whether a gift message can be added for
an individual order item.
Allow Gift Wrapping on
Order Level
Website
Specify whether gift wrapping can be selected for
the entire order.
Allow Gift Wrapping on
Order Items
Website
Specify whether gift wrapping can be selected for
an individual order item.
Allow Gift Receipt
Website
Specify whether a person creating the order can
choose to send a gift receipt (that is, a shipping
document where the prices and totals are not
shown) instead of the general shipping document.
Allow Printed Card
Website
Specify whether a printed card can be added to
the order.
Default Price for Printed
Card
Website
The default price for the card (it is displayed when
the card is selected during the order creation).
Gift Options Tax
Because you can charge customers for gift wrapping and printed cards, you can also specify
a tax class for these items, at either the global or website level. Gift wrapping and printed
gift card prices can be configured to include or exclude tax, or to display both options.
Orders, Invoices, Credit Memos Display Settings
To assign a tax class to gift options:
88
1.
On the Admin menu, select System > Configuration. Then in the panel on the left, under
Sales, select Tax.
2.
Click to expand the Tax Classes section.
Magento Enterprise Edition User Guide, Version 1.14.2
Chapter 3: Gift Options
Gift Options Setup
3.
Set Tax Class for Gift Option to the applicable tax class.
4.
When complete, click the Save Config button.
To configure gift option taxes:
1.
On the Admin menu, select System > Configuration. In the panel on the left, under Sales,
select Tax.
2.
Click to expand the Orders, Invoices, Credit Memos Display Settings section. Then, do
the following:
a.
b.
3.
Set Display Gift Wrapping Prices to one of the following:
l
Excluding Tax
l
Including Tax
l
Including and Excluding Tax
Set Display Printed Gift Card Prices to one of the following:
l
Excluding Tax
l
Including Tax
l
Including and Excluding Tax
When complete, click the Save Config button.
Gift Message Module
The Gift Wrapping module is connected with the Gift Message module. If the Gift Message
module is disabled, then the Gift Wrapping module is disabled too. This means the Gift
Options tab will be missing on the product page and the order page, and the Gift Wrapping
page will not be available in Sales Management. The Add Gift Options check box will not be
available during checkout.
To turn off the Gift Message module:
1.
On the Admin menu, select System > Configuration.
2.
In the panel on the left, under Advanced, select Advanced.
3.
Click to expand the Disabled Modules Output section.
4.
Find the Mage_GiftMessage module in the list, and change its status to “Disable.”
5.
When complete, click the Save Config button.
Magento Enterprise Edition User Guide, Version 1.14.2
89
Gift Wrap
Chapter 3: Gift Options
Gift Wrap
Gift wrapping is available for any product that can be shipped. Gift wrapping can be
offered for individual items or for the entire order. You can charge a separate price for each
gift wrap design, and upload a thumbnail image of the design that appears during
checkout.
Gift Wrapping Design at Checkout
To add new gift wrap designs:
1.
On the Admin menu, select Sales > Gift Wrapping.
Manage Gift Wrapping
2.
90
In the upper-right corner, click the Add Gift Wrapping button. Then, do the following:
Magento Enterprise Edition User Guide, Version 1.14.2
Chapter 3: Gift Options
Gift Wrap
New Gift Wrapping
3.
a.
Enter a name for the Gift Wrapping Design that will appears with the option during
checkout.
b.
Select the Websites where the gift wrap design will be available.
c.
Set Status to “Enabled.”
d.
Enter the Price of the gift wrap design.
e.
To upload a thumbnail Image of the gift wrapping, click the Choose File button.
Then, select the image file and click the Upload File button.
When complete, click the Save button.
To delete gift wrap designs:
Method 1: Delete Single Gift Wrap Design
1.
Open the gift wrapping design in edit mode.
2.
Click the Delete button. When prompted, click OK to confirm.
Method 2: Delete Multiple Gift Wrap Designs
1.
On the Manage Gift Wrapping page, select the checkbox of each gift wrap design that you
want to delete.
2.
Set the Actions control to “Delete.”
3.
Click the Submit button.
Magento Enterprise Edition User Guide, Version 1.14.2
91
Gift Wrap
Chapter 3: Gift Options
Field Descriptions
FIELD
Gift Wrapping Design
SCOPE
Store View
Websites
92
DESCRIPTION
The name of the gift wrap option that appears to
customers during checkout. The name can be
different for each store view.
Select the websites where the new gift wrap will
be available.
Status
Global
Determines if gift wrapping is available. Options
include: Enabled / Disabled.
Price
Global
Specifies the price of the gift wrap option. This
setting can be overridden by the gift wrap price set
at the product level.
Image
Global
Uploads a thumbnail image of the gift wrap design
that appears next to the gift wrap option.
Magento Enterprise Edition User Guide, Version 1.14.2
Chapter 4:
Gift Registries
Magento Enterprise Edition gives your customers the ability to create gift registries for
special occasions and to notify their friends and family. Friends and family can
purchase items from the gift registry, and Magento keeps track of all items purchased
and the quantities remaining.
Customers can create gift registries and share them with others. A gift registry owner
can add products to the registry from the customer dashboard. In addition, products
can be transferred from the wishlist or shopping cart. The store administrator can view
and share customer gift registries, add items from the customer’s shopping cart, update
gift registry item quantities, or delete a gift registry.
Gift Registry Workflow
Gift Registry Setup
Enables the gift registry, and sets up the registry types and attributes.
Customer / Gift Registry Owner
Creates the gift registry for an upcoming occasion. Adds items to the registry, and
shares it with friends and family.
Gift Registry Recipient
Receives email notification, and clicks the link to visit the gift registry. Then, places an
order for an item in the gift registry.
Magento
Updates gift registry item counts, and notifies the gift registry owner.
Magento Enterprise Edition User Guide, Version 1.14.2
93
Using a Gift Registry
Chapter 4: Gift Registries
Using a Gift Registry
The gift registry is included with other useful quick links. In the demo store, the quick links
are in the footer of the store, but the exact position varies by theme. In addition, the
Widget tool can be used to place a gift registry quick search box anywhere in your store.
Gift Registry Search
To access a gift registry, recipients can click the link in the email they receive, or search by
the recipient's name, email, or gift registry ID. Recipients who want to purchase a product
can add the item from the gift registry directly to their shopping carts. When the order is
placed, the gift registry is updated to reflect the purchase.
Wedding Gift Registry
94
Magento Enterprise Edition User Guide, Version 1.14.2
Chapter 4: Gift Registries
Gift Registry Setup
Gift Registry Setup
Before you can offer gift registries to your customers, you must enable gift registries and
configure the related email notifications. Magento sends the following email notifications in
response to events in the gift registry workflow.
To the gift registry owner upon successful creation of the gift registry. Email contains a
link to the newly created gift registry that can be shared with friends and family
l
Optionally, if the gift registry owner wishes to send notifications from the store, to the
friends and family (gift registry recipients) of the gift registry owner. Email contains a
link to the gift registry.
l
To the gift registry owner when updates are made to the gift registry. Email indicates
that items have been purchased but does not specify by whom.
l
Magento has predefined templates for each of these emails that can be modified and
customized as any other email template.
Process Overview:
Step 1: Enable Gift Registries
Step 2: Configure Email Notifications
Step 1: Enable Gift Registries
1.
On the Admin menu, select System > Configuration.
2.
In the panel on the left, under Customers, select Gift Registry
3.
Click to expand the General Options section, and do the following:
General Options
a.
Set Enable Gift Registry to “Yes.”
b.
In the Max Recipients Limit field, enter the maximum number of people that can be
invited to any registry.
4.
When complete, click the Save Config button.
5.
When prompted to update the cache, click the link in the message at the top of the
workspace and follow the instructions.
Magento Enterprise Edition User Guide, Version 1.14.2
95
Gift Registry Setup
Chapter 4: Gift Registries
After the cache is refreshed, Gift Registry appears in the Customers menu, and becomes
available to customer accounts.
Step 2: Configure Email Notifications
1.
Click to expand the Owner Notification section, and do the following:
Owner Notification
2.
a.
Select the Email Template that is used to notify gift registry owners that their
registries have been created.
b.
Select the store identity that appears as the Email Sender of the message.
Click to expand the Gift Registry Sharing section, and do the following:
Gift Registry Sharing
3.
a.
Select the Email Template that is used to notify gift registry recipients that a registry
has been shared with them.
b.
Select the store identify that appears as the Email Sender of the message.
c.
Max Emails Allowed to be Sent at One Time
Click to expand the Gift Registry Update section, and do the following:
Gift Registry Update
96
Magento Enterprise Edition User Guide, Version 1.14.2
Chapter 4: Gift Registries
4.
Gift Registry Setup
a.
Select the Email Template that is used to notify gift registry owners of changes to the
gift registry.
b.
Select the store identify that appears as the Email Sender of the message.
When complete, click the Save Config button.
Field Descriptions
FIELD
SCOPE
DESCRIPTION
General Options
Enable Gift Registry
Max Recipients Limit
Store View
Store View
Determines if gift registries are available.
Yes
Enables gift registries for the
selected store view.The Gift
Registry tab appears in the
account dashboard of registered
customers.
No
Gift registries are not available for
the store view.
Sets the number of recipients that a customer can
add to a gift registry. The customer shares the gift
registry with each recipient.
In the storefront, the Add Recipient button is to
customers available until the Max Recipients
Limit is reached.
Owner Notification
Email Template
Store View
Identifies the template used for the Owner
Notification email that is sent when a gift registry
is created.
Email Sender
Store View
Identifies the store identity that appears as the
sender of the Owner Notification email.
Gift Registry Sharing
Email Template
Magento Enterprise Edition User Guide, Version 1.14.2
Identifies the template used for the Gift Registry
Sharing email that is sent when a gift registry is
created. When the owner clicks the Share Gift
Registry button, the email is sent to each
recipient.
97
Creating Gift Registries
Chapter 4: Gift Registries
Field Descriptions (cont.)
FIELD
SCOPE
DESCRIPTION
Email Sender
Store View
Identifies the store identity that appears as the
sender of the Gift Registry Sharing email.
Max Emails Allowed to be
Sent at One Time
Store View
The maximum number of Gift Registry Sharing
email notification messages that can be sent at
one time.
Email Template
Store View
Identifies the template used for the Gift Registry
Update email that is sent to the gift registry owner
when a purchase is made from the gift registry.
The update includes information about the item
and quantity purchased, but does not include the
name of the person who placed the order.
Email Sender
Store View
Identifies the store identity that appears as the
sender of the Gift Registry Update email.
Gift Registry Update
Creating Gift Registries
The gift registry type is the special event that is associated with the gift registry. It can be a
wedding, birthday, anniversary, new baby, or any other special occasion. By default,
Magento provides gift registry types for the following special events:
l
Baby Registry
l
Birthday
l
Wedding
Each gift registry type consists of a number of attributes, which are the data entry fields
that a customer completes to create a gift registry. The attributes can be used to provide
additional information about the gift registry owner, the event, time and location, or any
other information that relates to the gift registry. Depending on the input type, some
attributes have multiple options. For example, the gift registry type “Wedding,” has the
attribute “Role,” with the options, “Bride,” “Groom,” and “Partner.” To learn more about
attributes and input types, see: Managing Attributes.
Process Overview:
Step 1: Set Up the Gift Registry Type
Step 2: Define the Gift Registry Attributes
98
Magento Enterprise Edition User Guide, Version 1.14.2
Chapter 4: Gift Registries
Creating Gift Registries
Step 1: Set Up the Gift Registry Type
1.
On the Admin menu, select Customers > Gift Registry.
Gift Registry Types
2.
In the upper-right corner, click the Add Gift Registry Type button.
3.
Under General Information, complete the following:
General Information
a.
Enter a unique Code to identify the gift registry internally. The code must begin with
a lowercase letter. The rest of the code can be any combination of lowercase letters (az), numbers (0-9), and underscore (_).
b.
In the Label field, enter a name for the gift registry, as you want it to appear in the
store.
c.
In the Sort Order field, enter a number to determine the sequence in which this gift
registry appears when listed with other gift registries that are available in the store.
d.
To activate the gift registry, set Is Listed to “Yes.”
Step 2: Define the Gift Registry Attributes
1.
In the panel on the left, click Attributes.
Attributes
2.
In the panel on the left, click Attributes. Then, click the Add Attribute button.
Magento Enterprise Edition User Guide, Version 1.14.2
99
Creating Gift Registries
3.
Chapter 4: Gift Registries
To add a predefined static attribute, do the following:
a.
Set Input Type to one of the following:
l
Event Date
l
Event Country
l
Event Location
l
Role
b.
In the Label field, enter a name for the gift registry, as you want it to appear in the
store.
c.
In the Sort Order field, enter a number to determine the sequence in which this gift
registry appears when listed with other gift registries that are available in the store.
4.
Assign a unique Code to identify the gift registry type internally. The first character should
be a lowercase letter. The rest of the code can include lowercase letters(a-z), numbers (0-9)
and the underscore (_) character to separate words.
5.
Set Input Type to the type of data and input control you want to use.
6.
For attributes of either the Role or Select input type, click the Add New Option button and
do the following:
Add New Option
100
Magento Enterprise Edition User Guide, Version 1.14.2
Chapter 4: Gift Registries
7.
8.
Creating Gift Registries
a.
Enter a unique Code to identify the option
b.
Enter a Label to identify the data entry field in the store.
c.
To preset to the field to a specific value, select the Is Default option.
d.
Repeat this process for each new option.
Select the Attribute Group where you want the field to appear in the gift registry.
a.
Enter the Label that you want to appear next to the field in the store..
b.
To require that a value is entered, set Is Required to “Yes.”
c.
In the Sort Order field, enter a number to determine the sequence in which this
attribute appears when listed with other attributes in the gift registry.
When complete, click the Save button.
Field Descriptions
ATTRIBUTE
DESCRIPTION
General Information
Code
A unique name to identify the gift registry type internally. The first
character of the code must be a lowercase letter. The rest of the
code can be any combination of lowercase letters (a-z), numbers
(0-9), and the underscore character (_).
Label
The name of the gift registry type that appears in the store.
Sort Order
Determines the sequence in which this gift registry type appears
when listed with other types.
Is Listed
Determines if the gift registry type is available to customers in
the store. Options include: Yes / No.
Attributes
Code
A unique name to identify the attribute internally.The code can
include any combination of lowercase letters (a-z), numbers (09), and the underscore character (_).
Input Type
Determines the type of data and input control that is associated
with the attribute, according to type. Options include:
Custom Types
Text
Magento Enterprise Edition User Guide, Version 1.14.2
Displays the attribute as a text field.
101
Creating Gift Registries
Chapter 4: Gift Registries
Field Descriptions (cont.)
ATTRIBUTE
DESCRIPTION
Select
Displays the attribute as a drop-down list.
Date
Displays the attribute as a date field.
Country
Displays the attribute as a drop-down list of
countries. Set Show Region to: Yes / No.
Static Types
Event Date
Determines how the date attribute is used in
the store. Options include:
Searchable Determines if the attribute is
available for Advanced
Search. Options include:
Yes / No.
Is Listed
Determines if the event is
included in the list of events
that is available in the store.
Options include: Yes / No.
Date
Format
Determines the format of the
event date. Options include:
Short (3/23/2014)
Medium (Mar 23, 1914)
Long (March 23, 1914)
Full (Sunday, March 23,
2014)
Attribute Group
102
Event Country
Displays the attribute as a drop-down list of
countries. Set Show Region to: Yes / No.
Event Location
The location of the event that is related to the
gift registry.
Role
The role that identifies who the gift is for. For
example, "Bride," "Groom," or "Partner."
Select the group where the attribute is listed in the gift registry.
Options Include:
Magento Enterprise Edition User Guide, Version 1.14.2
Chapter 4: Gift Registries
Creating Gift Registries
Field Descriptions (cont.)
ATTRIBUTE
DESCRIPTION
Event
Information
Groups all gift registry attributes that add the
information about the gift registry event, its
time, place, etc.
Gift Registry
Properties
Combines all attributes that add information
directly about the gift registry.
Privacy
Settings
Lists the attributes that add information about
the gift registry event privacy.
Recipients
Information
Groups the attributes that provide information
about the person who creates a gift registry.
Label
The name that identifies the attribute in the customer's account
dashboard.
Is Required
Indicates if the attributes is a required entry. The gift registry
cannot be saved until all required attributes are complete.
Options include: Yes / No.
Sort Order
Determines the sequence in which attribute appears when listed
with other attributes.
Magento Enterprise Edition User Guide, Version 1.14.2
103
Gift Registry Search Widget
Chapter 4: Gift Registries
Gift Registry Search Widget
The Widget tool can be used to place a gift registry quick search box anywhere in your
store. You can specify which search options are available to customers, including: name,
email address, and gift registry ID.
Gift Registry Search Widget
After clicking the Search button, the customer is provided with the search results on the
Gift Registry Search page. If the search returns no results, the customer can try searching
again by using the search options on the page. To learn more, see: Widgets.
104
Magento Enterprise Edition User Guide, Version 1.14.2
Chapter 4: Gift Registries
Gift Registry Search Widget
To add a gift registry search widget:
1.
On the Admin menu, select CMS > Widgets. Then in the upper-right corner, click the Add
New Widget Instance button.
2.
In the Settings section, do the following:
Widget Settings
3.
a.
Set Type to “Gift Registry Search.”
b.
Set Design Package/Theme to the theme that is used by the store.
c.
Click the Continue button.
In the Frontend Properties section, do the following:
Frontend Properties
4.
a.
In the Widget Instance Title field, enter a name to identify the widget internally.
b.
Set Assign to Store Views to the store views where you want the widget to be available.
c.
Set Sort Order to the sequence in which this widget appears when it appears in the
same location as other widgets.
In the Layout Updates section below, click the Add Layout Update button. To specify
where the Gift Registry Search appears in the store, do the following:
Magento Enterprise Edition User Guide, Version 1.14.2
105
Gift Registry Search Widget
Chapter 4: Gift Registries
Layout Updates
5.
a.
Set Display On to the pages in your store where you want the widget to appear.
b.
If applicable, select the Categories where you want the widget to appear.
c.
Set Block Reference to the page layout block where you want to place the widget.
In the panel on the left, select Widget Options. To specify how visitors to your site can
search for gift registries, select as many of the following that apply:
l
All Forms
l
Recipient Name Search
l
Recipient Email Search
l
Gift Registry ID Search
Widget Options
106
6.
When complete, click the Save button.
7.
When prompted to refresh the page cache, click the link in the message at the top of the
workspace and follow the instructions.
Magento Enterprise Edition User Guide, Version 1.14.2
Chapter 4: Gift Registries
Gift Registry Search Widget
Field Descriptions
FIELD
DESCRIPTION
Settings
Type
Identifies “Gift Registry Search” as the widget type.
Design Package/Theme
The theme that is used by the store where the widget is to be
used.
Frontend Properties
Widget Instance Title
The name of the widget to be used for internal reference.
Assign to Store Views
Identifies the store views where the widget is to be available.
Sort Order
Order in which widget should appear, relative to other elements in
the block in which it appears.
Layout Updates
Display On
Indicate the specific pages or the types of pages on which the
gift registry search widget should appear.
Categories
If applicable, identifies the category pages where the widget will
appear.
Block Reference
Indicates the page layout block where the widget will be placed.
The options vary by template and theme.
Widget Options
Quick Search Form Types
Specifies the parameters that are included in the gift registry
quick search box. Options include:
All Forms
Recipient Name Search
Recipient Email Search
Gift Registry ID Search
Magento Enterprise Edition User Guide, Version 1.14.2
107
Gift Registry Search Widget
Chapter 4: Gift Registries
Notes
108
Magento Enterprise Edition User Guide, Version 1.14.2
Chapter 5:
Rewards & Loyalty
The Magento Reward Points System gives you the ability to implement unique
programs that enhance user experience and increase customer loyalty. You can set up
points to be awarded based on a wide range of transaction and customer activities. and
control the point allotment, balance, and expiration. Customers can redeem points
toward purchases, based on the conversion rate that you establish between reward
points and currency. Here are a few examples:
Shopping Cart Price Rules
Points can be rewarded to customers on the basis of a shopping cart rule. They can be
rewarded as the only action of the price rule, or in conjunction with a discount.
Customer Balance
Reward Points balances can be managed by admin users per customer. If enabled in the
storefront, customers can also view the details of their points balance.
Redeeming Points
Points can be redeemed by admin users and (if enabled) customers during the checkout
process. In the Payment Method section, a Use my Reward Points checkbox appears
above the enabled payment methods. The available points and monetary exchange rate
is included. If the available balance is greater than the order grand total, no additional
payment methods is required. The amount of reward points applied to the order
appears with the order totals, subtracted from the grand total, similar to a store credit
or gift cards. If reward points are used in conjunction with store credit or a gift card,
the reward points are deducted first, and the store credit or gift card is deducted if the
order total is greater than the redeemable amount of reward points.
Refunding to Reward Points
Orders placed with reward points can be refunded to the reward points balance up to
the amount redeemed in the order. On the New Credit Memo page, the amount of
points to be applied to the customer’s balance can be entered. By default, the field
contains the full amount of points that were used in the order.
Magento Enterprise Edition User Guide, Version 1.14.2
109
Reward Point Setup
Chapter 5: Rewards & Loyalty
Reward Point Setup
The Reward Point configuration settings define the basic operating parameters, including
the lifetime, cap limits, and the presentation of reward points in the store.
Reward Points
Process Overview:
Step 1: Configure the Reward Points
Step 2: Configure Points Earned for Customer Activities
Step 3: Complete the Email Notification Settings
Step 1: Configure the Reward Points
1.
On the Admin menu, select System > Configuration. Then in the panel on the left, under
Customers, select Reward Points.
2.
Click to expand the Reward Points section. Then, do the following:
3.
110
a.
To activate reward points, set Enable Reward Points Functionality to “Yes.”
b.
To allow customers to earn their own reward points, set Enable Reward Points
Functionality on Frontend to “Yes.”
c.
To allow customers to see a detailed history of their rewards, set Customers may see
Reward Point History to “Yes.”
Enter the number of points that must accrue before they can be redeemed in the Minimum
Reward Points Balance to Be Able to Redeem field. Leave blank for no minimum. Then,
do the following:
Magento Enterprise Edition User Guide, Version 1.14.2
Chapter 5: Rewards & Loyalty
Reward Point Setup
a.
Enter the maximum number of points a customer can accrue in the Cap Reward
Points Balance At field. Leave blank for no limit.
b.
Enter the number of days before the reward points expire in the Reward Points Expire
in (days) field. Leave blank for no expiration.
c.
Set Reward Points Expiry Calculation to one of the following:
Static
Determines the remaining lifetime of reward points based on
the number of days set in the configuration. If the expiration
limit in the configuration changes, the expiration date of
existing points does not change.
Dynamic
Calculates the number of days left whenever the reward point
balance increases. If the expiration limit in the configuration
changes, the expiration of all existing points are updated
accordingly.
d.
If you want to refund available reward points automatically, set Refund Reward
Points Automatically to “Yes.”
e.
If you want to automatically deduct reward points from the amount of a refund, set
Deduct Reward Points from Refund Amount Automatically to “Yes.”
4.
Set Landing Page to the CMS page that explains your reward points program. Make sure
to update the default Rewards Points page with your own information.
5.
When complete, click the Save Config button.
Step 2: Configure Points Earned for Customer Activities
This section specifies the number of reward points that can be earned for various customer
activities. When points can be earned for completing an action, a message appears to let
customers know how many points they can earn.
1.
2.
Click to expand the Actions for Acquiring Reward Points by Customer section. Then, do
the following:
a.
In the Purchase field, enter the number of points earned for placing an order.
b.
In the Registration field, enter the number of points earned for opening a customer
account.
c.
In the Newsletter Signup field, enter the number of points earned by registered
customers who subscribe to a newsletter.
In the Converting Invitation to Customer field, enter the number of points earned by a
customer who sends an invitation, if the recipient then opens a customer account. Then,
do the following:
Magento Enterprise Edition User Guide, Version 1.14.2
111
Reward Point Setup
3.
Chapter 5: Rewards & Loyalty
a.
Enter a number in the Invitation to Customer Conversions Quantity Limit field to
limit the number of invitation conversions that can be used to earn points for the
customer who sends the invitation. Leave blank for no limit.
b.
In the Invitation Conversion to Order Reward field, enter the number of points earned
by a customer who sends an invitation, and the recipient places an initial order.
In the Review Submission field, enter the number of points earned by a customer who
submits a review that is approved for publication. Then, do the following:
To limit the number of reviews that can be used to earn points per customer, enter the
number in the Rewarded Reviews Submission Quantity Limit field. Leave blank for no
limit.
4.
In the New Tag Submission field, enter the number of points earned by the customer
when a submitted tag is approved for publication.
To limit the number of tags that can be used to earn points per customer, enter the number
in the Rewarded Tag Submission Quantity Limit field. Leave blank for no limit.
Actions for Acquiring Reward Points by Customers
112
Magento Enterprise Edition User Guide, Version 1.14.2
Chapter 5: Rewards & Loyalty
Reward Point Setup
Step 3: Complete the Email Notification Settings
1.
2.
Click to expand the Email Notification Settings section. Then, do the following:
a.
Set Email Sender to the store contact that appears as the sender of balance updates
and expiration notifications.
b.
If you want to subscribe customers by default to be notified of balance updates and
upcoming expiration dates, set Subscribe Customers by Default to “Yes.”
c.
Set Balance Update Email to the template used for the notification that is sent to
customers whenever their point balance is updated.
d.
Set Reward Points Expiry Warning Email to the template used for the notification
that is sent to customers when the expiration limit for a batch of points is reached.
e.
In the Expiry Warning Before (days) field, enter the number of days before points
expire that notification is sent.
When complete, click the Save Config button.
Email Notification Settings
Field Descriptions
FIELD
SCOPE
DESCRIPTION
REWARD POINTS
Enable Reward Points
Functionality
Global
Activates or deactivates reward points.
Options include: Yes / No.
Enable Reward Points
Functionality on Frontend
Website
When enabled, customers can earn points
through their activities, and redeem them at
checkout. If disabled, only Admin users can
assign and redeem points on behalf of
customers. Options include: Yes / No.
Magento Enterprise Edition User Guide, Version 1.14.2
113
Reward Point Setup
Chapter 5: Rewards & Loyalty
Field Descriptions (cont.)
FIELD
114
SCOPE
DESCRIPTION
Customers may see
Reward Points History
Website
When enabled, customers can see a detailed
history with each accrual, redemption, and
expiration of Reward Points in their account
dashboard. Options include: Yes / No
Minimum Reward Points
Balance to Be Able to
Redeem
Website
Requires customers to achieve a minimum
point balance before they can redeem them for
orders. Leave blank for no minimum.
Cap Reward Points
Balance At
Website
Prevents customers from accruing more than
this maximum points balance. Leave blank for
no maximum.
Reward Points Expire in
(days)
Website
Indicates the lifetime of reward points in days.
Batches of points earned for separate activities
have separate lifetimes. Each batch in the
Reward Points history indicates the number of
days left before the points expire. The history
can be viewed from the customer’s account
dashboard, if enabled, and from the Admin.
Leave blank for no expiration.
Reward Points Expiry
Calculation
Website
Determines the method used to determine
when reward points expire. Options include:
Static
Determines the remaining
lifetime of reward points
based on the number of
days set in the
configuration. If the
expiration limit in the
configuration changes, the
expiration date of existing
points does not change.
Dynamic
Calculates the number of
days left whenever the
reward point balance
increases. If the expiration
limit in the configuration
changes, the expiration of
all existing points are
updated accordingly.
Magento Enterprise Edition User Guide, Version 1.14.2
Chapter 5: Rewards & Loyalty
Reward Point Setup
Field Descriptions (cont.)
FIELD
SCOPE
DESCRIPTION
Refund Reward Points
Automatically
Global
Determines if available reward points are
refunded automatically. Options include: Yes /
No
Deduct Reward Points
from Refund Amount
Automatically
Global
Determines if reward points are automatically
deducted from the amount of a refund. Options
include: Yes / No.
Landing Page
Store View
Specifies the CMS page that explains your
reward points program. A link to the default
Rewards page appears at the locations in your
store where points can be earned.
ACTIONS FOR ACQUIRING REWARD POINTS BY CUSTOMERS
Purchase
Website
Specifies the number of points earned for
placing an order.
Registration
Website
Specifies the number of points earned for
opening a customer account.
Newsletter Signup
Website
Specifies the number of points earned by
registered customers who subscribe to a
newsletter. (Points are not available for
subscriptions by guests.) If a customer
unsubscribes, and then subscribes again,
points are not earned for the second
subscription.
Converting Invitation to
Customer
Website
Specifies the number of points earned by a
customer who sends an invitation, when the
recipient then opens a customer account.
Invitation to Customer
Conversions Quantity
Limit
Website
Limits the number of invitation conversions
that can be used to earn points for the
customer who sends the invitation. Leave
blank for no limit.
Converting Invitation to
Order
Website
Specifies the number of points earned by a
customer who sends an invitation when the
recipient places an initial order.
Magento Enterprise Edition User Guide, Version 1.14.2
115
Reward Point Setup
Chapter 5: Rewards & Loyalty
Field Descriptions (cont.)
FIELD
116
SCOPE
DESCRIPTION
Invitation to Order
Conversions Quantity
Limit
Website
Limits the number of order conversions that
can be used to earn points per inviter. If left
blank, there will be no maximum limit.
Invitation Conversion to
Order Reward
Website
Indicates how often a customer can earn
reward points when invitees make purchases.
Options include:
First
The customer will receive
reward points only for the
first invoiced order placed
by the invitee-customer.
Even if more than one
invitee registered and
placed orders, only the
amount of the first order
will be converted to reward
points and granted to the
customer.
Each
The customer will receive
reward points for each
invoiced order placed by
the invitee-customer.
Reward points will be given
according to the reward
point exchange rates set
for the required
combination of a website
and a customer group.
Review Submission
Website
Specifies the number of points earned by a
customer who submits a review that is
approved for publication.
Rewarded Reviews
Submission Quantity Limit
Website
Limits the number of reviews that can be used
to earn points per customer. Leave blank for no
limit.
New Tag Submission
Website
Specifies the number of points earned when a
tag is submitted and approved for publication.
Magento Enterprise Edition User Guide, Version 1.14.2
Chapter 5: Rewards & Loyalty
Reward Point Setup
Field Descriptions (cont.)
FIELD
Rewarded Tag
Submission Quantity Limit
SCOPE
Website
DESCRIPTION
Limits the number of tags that can be used to
earn points per customer. Leave blank for no
limit.
EMAIL NOTIFICATION SETTINGS
Email Sender
Store View
Determines the store contact that appears as
the sender of the balance update and expiration
notification emails.
Subscribe Customers by
default
Global
Determines the default subscription status of
customers for both balance update and
expiration notifications emails.
Balance Update Email
Store View
Determines the template used for the
notification that is sent to customers whenever
their point balance is updated. Default
template: Reward Points Balance Update.
Reward Points Expiry
Warning Email
Store View
Determines the template of the email that
customers receive when the expiration warning
limit has been reached for a batch of points.
Default template: Reward Points Expiry
Warning.
Expiry Warning before
(days)
Global
Specifies the number of days before points
expire that notification is sent. Leave blank to
send no expiration notifications. Notification is
not sent if the number of days entered is
greater than the remaining lifetime of the
points.
Magento Enterprise Edition User Guide, Version 1.14.2
117
Reward Exchange Rates
Chapter 5: Rewards & Loyalty
Reward Exchange Rates
Reward Exchange Rates determine the amount of points that are earned based on the order
amount, as well as the amount of monetary credit that is available when points are
redeemed.
Manage Reward Exchange Rates
Different exchange rates can be applied to different websites and different customer groups.
If multiple exchange rates from different websites and customer groups apply to the same
customer, the following rules of priority apply:
Exchange Rate Priority
PRIORITY
DESCRIPTION
1
Applies to specific website and specific customer group.
2
Applies to all websites and a specific customer group.
3
Applies to a specific website and all customer groups.
4
Applies to all websites and all customer groups.
When converting currency to points, the amount of points cannot be divided. Any currency
remainder is rounded down. For example, if $2.00 converts to 10 points, points will be
earned in groups of $2.00. Therefore, a $7.00 order would earn 30 points, and the
remaining $1.00 would be rounded down. The monetary amount of the order is defined as
the amount which the merchant receives, or the grand total minus shipping, tax,
discounts, store credit, and gift cards. The points will be earned the moment when there are
no non-invoiced items in the order (all items are either paid or canceled). If an Admin user
does not want to allow customers to earn Reward Points for canceled orders, those points
can be manually deducted from the Manage Customers page.
118
Magento Enterprise Edition User Guide, Version 1.14.2
Chapter 5: Rewards & Loyalty
Reward Exchange Rates
To manage exchange rates:
1.
On the Admin menu, select Customers > Reward Exchange Rates. Then. in the upperright corner, click the Add New Rate button.
2.
In the Reward Exchange Rate Information section, do the following:
Reward Exchange Rate Information
a.
Set Website to the sites where the reward exchange rate applies.
b.
Set Customer Group to the groups where the reward exchange rate applies.
c.
Set Direction to one of the following:
l
Points to Currency
l
Currency to Points
For either Direction setting, the amount is represented in the base currency of the
website.
3.
Enter the Rate values according to the Direction setting.
Points to Currency
In the first Rate field, enter the number of points. In the
second Rate field, enter the monetary value of the points.
Currency to Points
In the first Rate field, enter the monetary value. In the
second Rate field, enter the number of points that is
represented by the monetary value.
When converting points to currency, the amount of points cannot be divided. For example,
if 10 points converts to $2.00, points must be redeemed in groups of ten. Therefore, 25
points would redeem for $4.00, with 5 points remaining in the customer’s balance.
4.
When complete, click the Save button.
Magento Enterprise Edition User Guide, Version 1.14.2
119
Reward Points in Price Rules
Chapter 5: Rewards & Loyalty
Field Descriptions
FIELD
DESCRIPTION
Website
The website(s) where the reward rates apply.
Customer Group
The customer group(s) to which the reward rates apply.
Direction
Determines which type of transaction the exchange rate define.
Options include:
Points to Currency
Defines the number of points that can be
applied as credit towards the amount of
an order.
In the first rate field, enter the number of
points. In the second Rate field, enter
the monetary value of the points.
Currency to Points
Defines the amount of an order that can
earn the customer a number of points.
In the first Rate field, enter the monetary
value. In the second Rate field, enter the
number of points represented by the
monetary value.
Reward Points in Price Rules
Reward points can be awarded to customers on the basis of a shopping cart rule. The award
of points can be the only action of the price rule, or used in conjunction with a discount.
To add reward points to a price rule:
1.
On the Admin menu, select Promotions > Shopping Cart Price Rules. Then, do one of the
following:
l
In the list, click to open an existing price rule.
l
Click the Add New Rule button.
2.
In the panel on the left, select Actions. Then, enter the amount of points in the Add
Reward Points field.
3.
Follow the standard instructions to complete the shopping cart price rule.
When the price rule is activated, a message appears in the shopping to let customers know
how many points they can earn by placing the order.
120
Magento Enterprise Edition User Guide, Version 1.14.2
Chapter 6:
Private Sales and Events
Private sales are a great way to leverage your existing customer base to generate buzz
and new leads, or to offload surplus inventory. You can create limited-time sales, limit
sales to specific members, or create a stand-alone private sale page. You can also define
invitations and event details.
Increase brand loyalty and generate a buzz by giving your best customers the VIP
treatment. Offer exclusive access to Member Only sales or private sales to increase
brand loyalty. You can also use these sales to liquidate excess merchandise. Customer
Groups are extremely useful in setting up these types of Members Only and VIP sales.
Magento Enterprise Edition User Guide, Version 1.14.2
121
Event Components
Chapter 6: Private Sales and Events
Event Components
Categories
Each event is associated with a category from your catalog.
Events
Event sales are based on a starting and ending date. You can display a countdown ticker to
show the time remaining.
Event Widget
When the Event Widget is enabled, it appears on the home page and category pages. It
lists open and upcoming events, sorted by end date. If two or more events share the same
end date, the events are sorted based on the order specified in the configuration.
Customer Groups
Category permissions are based primarily on customer groups.
Category Permissions
Category permissions gives you full control over the specific activities that can take place in
a given category.
Website Restrictions
Prevent access to a website by redirecting to a landing page, login page, or registration
page.
Invitations
Email messages are sent with a link to create an account in the store. You can restrict the
ability to create an account to only those who receive an invitation.
122
Magento Enterprise Edition User Guide, Version 1.14.2
Chapter 6: Private Sales and Events
Event Ticker
Event Ticker
If the Category Page ticker is enabled for an event, the ticker block appears at the top of the
product list. If the Product Page ticker is enabled, the ticker block also appears at the top of
the product page (for products that are associated with the category).
Like the Event Widget, the ticker block displays a countdown ticker for open events, with
the start and end date for upcoming events. If an event is closed, the ticker block will
indicate this (and includes the start and end date, similar to Upcoming events).
Event Ticker
Selling Restrictions
By default, products that appear in upcoming or closed events are not available for general
sale, and the Add to Cart button does not appear on the product list or product page.
To restore the Add to Cart button for a closed event, the event must be deleted. However, if
a product is associated with another category that has no selling restrictions, the Add to
Cart button does appear on the product page. Similarly, the ticker block does not appear on
the product page if the product is associated with another category that has no selling
restrictions.
Magento Enterprise Edition User Guide, Version 1.14.2
123
Event Configuration
Chapter 6: Private Sales and Events
Event Configuration
Before you can create an event, you must first complete the basic configuration to enable
events and set up the event sidebar widget.
To enable and configure events:
1.
On the Admin menu, select System > Configuration. Then in the panel on the left, under
Catalog, select Catalog.
2.
Click to expand the Catalog Events section, and do the following:
Catalog Events
3.
124
a.
Set Enable Catalog Events Functionality to “Yes.”
b.
Set Enable Catalog Event Widget on the Frontend to “Yes.”
c.
Enter the Number of Events to be Displayed in the Event Sidebar Widget. By
default, this value is set to 5.
d.
Enter the number of Events to Scroll per Click in Event Sidebar Widget.
When complete, click the Save Config button.
Magento Enterprise Edition User Guide, Version 1.14.2
Chapter 6: Private Sales and Events
Creating Events
Field Descriptions
FIELD
SCOPE
DESCRIPTION
Enable Catalog Events
Functionality
Website
Determines whether the Events module is
enabled.
Enable Catalog Event
Widget
Store View
Determines if the Event Widget is available in the
storefront. This is a static block with information
about events in your site.
Number of Events to be
Displayed on Category
Store View
Determines the number of events that appear in
the Event widget on the category pages.
Number of Events to be
Displayed on CMS Pages
Store View
Determines the number of events that appear in
the Event widget on CMS pages, such as the
home page.
Creating Events
Each event is associated with a category from your catalog, and only one event can be
associated with any given category at a time.
Manage Catalog Events
To create an event:
1.
On the Admin menu, select Catalog > Categories > Catalog Events.
2.
In the upper-right corner, click the Add Catalog Event button. Then, do the following:
3.
In the category tree, select the category that you want to associate with the event.
Because each category can have only one event at a time, any categories that already have
an event are disabled in the category tree.
Magento Enterprise Edition User Guide, Version 1.14.2
125
Creating Events
Chapter 6: Private Sales and Events
Category Tree
4.
In the Catalog Event Information section, do the following:
Catalog Event Information
5.
126
a.
Click the calendar
button to select the Start Date and time of the event.
b.
Click the calendar
button to select the End Date and time of the event.
c.
To upload an Image for the event widget, click the Choose File button. Then, select
the image file from your directory.
d.
In the Sort Order field, enter a number to indicate the sequence in which this event
appears when listed with other events.
e.
Select the checkbox of each page that you want to Display Countdown Ticker On.
When complete, click the Save button.
Magento Enterprise Edition User Guide, Version 1.14.2
Chapter 6: Private Sales and Events
Creating Events
Field Descriptions
FIELD
SCOPE
DESCRIPTION
Category
Global
When creating a new event, this field links back to
the category tree. When editing an event, it links
to the category page related to the event.
Start Date
Global
The starting date and time of the event in
MMDDYYYY HH;MM format. Click the calendar
button to select the date.
End Date
Global
The ending date and time of the event in
MMDDYYYY HH;MM format. Click the calendar
button to select the date.
Image
Store View
Uploads an image for the event widget.
Sort Order
Global
Determines the sequence in which this event
appears when listed with other events.
Display Countdown Ticker
On
Global
Displays the countdown ticker in the header of
each page specified. Options include:
Category Page / Product Page
Status
Global
Magento Enterprise Edition User Guide, Version 1.14.2
Indicates the status of the event based on the
Start Date and End Date range. Status is a readonly value. Values include:
Open / Closed / Upcoming
127
Creating Events
Chapter 6: Private Sales and Events
Editing Events
Events can be edited from either the Manage Catalog Events page or from the category that
is associated with the event. Whenever a category has an associated event, an Edit Event
button appears in the upper-right corner that takes you to the event information.
Edit Event
Method 1: Edit Event from Manage Catalog Events
1.
On the Admin menu, select Catalog > Categories > Catalog Events.
2.
On the Manage Catalog Events page, click to open the event that you want to edit.
3.
Make the necessary changes to the event.
Edit Catalog Event
4.
128
When complete, click the Save button.
Magento Enterprise Edition User Guide, Version 1.14.2
Chapter 6: Private Sales and Events
Invitations
Method 2: Edit Event from Category
1.
On the Admin menu, select Catalog > Categories > Manage Categories.
2.
In the category tree on the left, click to select the category. Then in the upper-right corner,
click the Edit Event button.
3.
Make the necessary changes to the event.
4.
When complete, click the Save button.
Invitations
When invitations are enabled, customers can send and view invitations from their account
dashboard. The invitation email includes a link to the customer account registration form
in your store. The invitation configuration enables invitations for the store and identifies
the referring customer group. Invitations must be configured before they can be used for an
event.
Invitation Workflow
The customer’s account lists all invitations sent, including the email address of the
recipient, and the current status (Sent, Accepted, or Canceled) on the “My Invitations”
page. It also includes a Send Invitations button, which redirects to the Invitation form that
contains a field for the email address of each recipient. The fields included and message
text box are set up in the configuration. When the Send Invitations button is clicked, the
invitation email is sent to the recipients. If a recipient email belongs to an existing
customer, the invitation email is not sent to the email address, and no record is created in
the system. Customers can also send invitations using the Send Invitations link in the
store header.
Magento Enterprise Edition User Guide, Version 1.14.2
129
Invitations
Chapter 6: Private Sales and Events
To configure invitations:
1.
On the Admin menu, select System > Configuration.
2.
In the panel on the left, under Customers, select the Invitations.
3.
Click to expand the General section. Then, complete the settings as described in the field
description section below.
General
4.
Click to expand the Email section. Then, do the following:
Email
5.
130
a.
Select the store identity to be used as the Customer Invitation Email Sender.
b.
Select the Customer Invitation Email Template that is used for the invitations that are
sent.
When complete, click the Save Config button.
Magento Enterprise Edition User Guide, Version 1.14.2
Chapter 6: Private Sales and Events
Invitations
Field Descriptions
FIELD
SCOPE
DESCRIPTION
General
Enable Invitations
Functionality
Global
Determines whether the Invitations module is
enabled.
Referred Customer Group
Website
Determines the customer group of the invitee.
Options include:
New Accounts
Registration
Allow Customers to Add
Custom Message to
Invitation Email
Store View
Store View
Magento Enterprise Edition User Guide, Version 1.14.2
Same as Inviter
Invitees are
automatically
assigned to the
same customer
group as the
customers who
invited them.
Default Customer Group
from Configuration
Invitees
automatically
have the default
customer group.
Determines how invitees can create an account.
Options include:
By Invitation Only
Invitees must
follow the link in
the Invitation
email to create an
account.
Available to All
Invitees can use
the account
registration form
that is available in
the store.
Determines whether there will be a field in the
Invitation form in which the inviter can add a
custom message which will be sent to the invitee
via email. This does not affect the administrator's
ability to add a message to an Invitation. Options
include: Yes / No.
131
Invitations
Chapter 6: Private Sales and Events
Field Descriptions (cont.)
FIELD
Max Invitations Allowed to
be Sent at One Time
SCOPE
DESCRIPTION
Store View
Determines the maximum number of invitations
that the inviter can send at once. A different
invitation is sent out to each email address that
the inviter includes in the form. This protects
server resources by preventing large numbers of
Invitations from being sent at once, and makes it
less likely for invitations to be sent as spam.
Customer Invitation Email
Sender
Store View
Determines the sender of the email that invitees
receive when an Invitation email is sent.
Customer Invitation Email
Template
Store View
Determines the template of the email that invitees
receive when an Invitation email is sent.
Email
132
Magento Enterprise Edition User Guide, Version 1.14.2
Chapter 6: Private Sales and Events
Invitations
Invitation Reports
General
This report summarizes invitation information for the designated scope and period of time.
The scope is defined in the Show Report control at the top of the page. There is one line for
each period. A period can be a day, month, or year, and is defined in the Show by control at
the top of the page. The number of periods in the report depends on the date range
designated. For each period, you can see the total number of invitations sent, accepted, and
canceled, as well as the percentage of sent invitations which have been accepted, and the
percentage of sent invitations which have been canceled.
Customers
This report summarizes invitation information by customer for the designated scope and
period of time. The scope is defined in the Show Report control at the top of the page. There
is one line for each period. A period can be a day, month, or uear, and is defined in the
Show by control at the top of the page. The number of periods in the report depends on the
date range designated. For each period, you can see a list of all customers who have sent
invitations, including their ID, name, email, and customer group. Additionally, you can see
the number of invitations they have sent during that period, and the number of invitations
which have been accepted.
Order Conversion Rate
This report summarizes Invitation and sales information for the designated scope and
period of time. The scope is defined in the Show Report control at the top of the page. There
is one line for each period. A period can be a day, month, or year, and is defined with the
Show by control at the top of the page. The number of periods in the report depends on the
date range designated. For each period, you can see the number of invitations which have
been sent, the number of the invitations which have been accepted, the number customers
who have completed an order after accepting an invitation, and the percentage of
invitations sent that led to a completed order.
To view invitation reports:
1.
On the Admin menu, select Reports > Invitations.
2.
Select the report you want to view. Then, follow the process to generate the report.
Magento Enterprise Edition User Guide, Version 1.14.2
133
Invitations
Chapter 6: Private Sales and Events
Notes
134
Magento Enterprise Edition User Guide, Version 1.14.2
Chapter 7:
Newsletters
Publishing a regular newsletter is considered to be one of the most powerful and
affordable marketing tools available. Magento Enterprise Edition gives store
administrators the ability to publish and distribute newsletters to customers who have
registered to receive them, plus all the tools necessary to:
l
Promote your newsletter
l
Build and manage your list of subscribers
l
Develop content
l
Maintain an archive of back issues
l
Drive traffic to your store
Magento Enterprise Edition User Guide, Version 1.14.2
135
Newsletter Configuration
Chapter 7: Newsletters
Newsletter Configuration
The first step in creating newsletters is to configure the newsletter settings for your site.
You can require customers to confirm the registration by clicking a confirmation link sent
by email. This technique is called double opt-in, because customers must confirm twice
that they want to receive a newsletter. This method reduces the number of customers that
might otherwise consider your newsletter as spam.
To configure newsletter settings on your site:
1.
On the Admin menu, select System > Configuration.
2.
In the panel on the left, under Customers, select Newsletters.
3.
Click to expand the Subscription Options section. Then, do the following:
a.
Confirm the email templates and senders of the following email messages sent to
subscribers:
l
Success email
l
Confirmation email
l
Unsubscription email
b.
To require people to double-opt in to confirm their subscription, set Need to Confirm
to “Yes.”
c.
To allow people who do not have an account with your store to subscribe to the
newsletter, set Allow Guest Subscriptions to “Yes.”
d.
When complete, click the Save Config button.
Subscription Options
136
Magento Enterprise Edition User Guide, Version 1.14.2
Chapter 7: Newsletters
Newsletter Configuration
Field Descriptions
FIELD
SCOPE
DESCRIPTION
Success Email Template
Store View
Determines the email template used for the
notification sent to those who successfully
subscribe to a newsletter. Default template:
Newsletter subscription success
Unsubscription Email
Sender
Store View
Identifies the store contact that appears as the
sender of email sent to those who request to end
their newsletter subscription.
Unsubscription Email
Template
Store View
Determines the email template used for the
notification sent to those who request to end their
newsletter subscription. Default template:
Newsletter unsubscription success
Success Email Sender
Store View
Identifies the store contact that appears as the
sender of email sent to those who successfully
subscribe to a newsletter.
Confirmation Email
Template
Store View
Determines the email template used for the
notification sent to confirm a request to subscribe
to a newsletter. Default template: Newsletter
subscription confirmation
Need to Confirm
Store View
Determines if subscription requests must be
confirmed. This double-opt-in method is a
validation measure that prevents people from
being subscribed without their consent. Options
include: Yes / No
Confirmation Email Sender Store View
Identifies the store contact that appears as the
sender of email sent to confirm a subscription
request.
Allow Guest Subscription
Determines if unregistered guests can subscribe
to a newsletter. Options include: Yes / No
Store View
Magento Enterprise Edition User Guide, Version 1.14.2
137
Newsletter Templates
Chapter 7: Newsletters
Newsletter Templates
Before sending a newsletter, create a newsletter template. You can create and save as many
of these as required for any situation, whether it be an annual holiday newsletter or weekly
product updates.
The example newsletter template uses separate templates for the header and footer, and
converts external CSS into inline styles. To learn more, see: Managing Email Templates.
Example Newsletter Template
To create a newsletter template:
138
1.
On the Admin menu, select Newsletter > Newsletter Templates. The page lists the
available newsletter templates. You can edit an existing template or create a new one.
2.
To add a new template, click the Add New Template button. Then, do the following:
a.
In the Template Name field, specify a unique and indicative name for this template.
This value is not visible for customers.
b.
In the Template Subject field, specify the subject of the email to be sent to your
customers.
Magento Enterprise Edition User Guide, Version 1.14.2
Chapter 7: Newsletters
3.
Newsletter Queue
c.
In the Sender Name and Sender Email fields, specify the name and email of the
sender of the email to be sent to your customers.
d.
In the Template Content field, use the WYSIWYG editor to compose the body of the
email. Note that this field is pre-filled with tags showing an unsubscribe link in the
email. We recommend that you do not remove this link so that all emails that are sent
enable your customers to unsubscribe from the newsletter.
e.
Click Preview Template, to display the content with the formatting as it will be viewed
by your subscribers.
When complete, click the Save Template button.
After the template has been saved, a Save As button appears whenever the template is
opened in edit mode. This gives you the ability to make changes and save it as a new
template, without affecting the original.
Newsletter Queue
A newsletter that has many recipients must be sent in stages. The process of sending the
newsletter is managed by a queue. After you start the queue, Magento sends the emails in
packs.
To ensure delivery of your newsletters, it is recommended that you integrate your Magento
installation with a third-party newsletter provider. These services are “white listed” by
email service providers. Look for newsletter providers in Magento Connect.
To send your newsletter using a queue:
1.
On the Admin menu, select Newsletter > Newsletter Templates.
2.
Set the Actions control to the relevant template. Then, select Queue Newsletter.
3.
In the Queue Date Start field, specify when the newsletter will start being sent.
4.
In the Subscribers From field, select one or more store views whose customers this
newsletter will be sent to.
5.
Review the template and parameters and then click the Save Newsletter button to schedule
sending the newsletter.
Magento Enterprise Edition User Guide, Version 1.14.2
139
Newsletter Reports
Chapter 7: Newsletters
Newsletter Reports
Newsletter Queue
Shows the newsletter queues that have been defined and indicates their progress in sending
emails.
Newsletter Subscribers
Shows a list of customers that have subscribed to your newsletter. It also enables you to
unsubscribe these customers manually.
Newsletter Problem Reports
Shows a list of errors that have occurred while sending the email. This Report enables you
to remove the incorrect emails from the subscribers list.
140
Magento Enterprise Edition User Guide, Version 1.14.2
Chapter 8:
Sales Channels
Publishing your catalog through multiple channels is an effective way to widen your
distribution without much effort. You can start by syndicating your content with RSS
feeds, and then expand by sending your catalog data to shopping sites and aggregators
and marketplaces.
Topics in this chapter:
l
Social Media
l
RSS Feeds
Magento Enterprise Edition User Guide, Version 1.14.2
141
Google Shopping
Chapter 8: Sales Channels
Google Shopping
Google Shopping is a Google AdWords service that publishes product feeds from merchant
catalogs. Any Simple product from your catalog can be uploaded to Google Shopping.
Each product attribute is mapped to Google and used as search parameters by customers
who are searching for products. After mapping the product attributes to synchronize with
Google Content attributes, you can publish products from your store on Google Shopping.
To use Google Shopping, you need both a Google Merchant account and a Google AdWords
account. To learn more, visit the Google Ads Shopping page on their site.
The following instructions show how to set Google Content for your store. You might also
find extensions on Magento Connect that simplify the process.
Google Shopping
Process Overview
Step 1: Set Up Your Google Accounts
Step 2: Configure Your Store for Google Shopping
Step 3: Map Your Product Attributes
Step 4: Add Your Google Content Items
Step 5: Manage Your Content
142
Magento Enterprise Edition User Guide, Version 1.14.2
Chapter 8: Sales Channels
Google Shopping
Step 1: Set Up Your Google Accounts
1.
Visit Google Merchant Center, and sign up for an account. Complete the following steps in
the Beginner’s Guide:
l
Open your Merchant account
l
Set up your account
l
Verify and claim your website URL
Google Merchant Center Help
2.
Write down the following information from your Google account:
l
Account ID
l
Account Login
l
Account Password
l
Account Type
l
Target Country
Step 2: Configure Your Store for Google Shopping
1.
Log in to the Admin of your store. Then on the Admin menu, select System >
Configuration.
2.
In the panel on the left under Sales, select Google API.
3.
Click to expand the Google Shopping section, and do the following:
Magento Enterprise Edition User Guide, Version 1.14.2
143
Google Shopping
Chapter 8: Sales Channels
a.
Enter the following information from your Google merchant account:
l
Account ID
l
Account Login
l
Account Password
l
Account Type
l
Target Country
b.
Set Update Google Shopping Item When Product Is Updated to “Yes.”
c.
Set Debug to “No.” You can change this setting later, if necessary.
d.
Under Destinations, select each place where you want your products to be listed. Each
destination can be set to Default, Required, or Excluded.
l
Google Product Search
l
Product Ads
l
Commerce Search
Default
Your updates are submitted using the Google default
settings.
Required
The update must be submitted to the required
destination. If the update does not pass Google’s
validation rules, you receive notification of validation
errors, and the update is not submitted to any
destination.
Excluded
The update is not submitted to this destination, but
it can still be submitted to other destinations,
depending on the settings.
Google Shopping
4.
144
When complete, click the Save Config button.
Magento Enterprise Edition User Guide, Version 1.14.2
Chapter 8: Sales Channels
Google Shopping
Step 3: Map Your Product Attributes
In this step, you will map your attribute sets to match Google item types and attributes, so
Google can retrieve your product information. During the process, you will add the
attributes you want to upload from your catalog to Google Content.
In addition to the two required attributes, Product Type and Product Condition, it is
recommended that you include the Title, Description and Price in the attribute section. In
addition to these, you should include any other attributes that will help people find the
product. To learn more about mapping different product types, see Google’s Summary of
Attribute Requirements.
Product Attributes
REQUIRED
RECOMMENDED
Product Type
Title
Condition
Description
Price
Because Condition is a required field, why not create a drop-down attribute called
“condition” with the values “New” and “Used” before you begin? Then, add it to the
attribute set that you are mapping.
1.
On the Admin menu, select Catalog > Google Content > Manage Attributes.
2.
Click the Add Attribute Mapping button. Then do the following:
a.
Select the Target Country where your business is located.
b.
In the Attribute Set list, select the first attribute set you want to map. For example:
Clothing.
Add Attribute Mapping
3.
To begin mapping attributes, click the Add New Attribute button. Then do the following:
a.
Set Target Country to where the products are available for sale.
b.
Choose the first Attribute Set from your catalog that you want to map.
c.
Set the Google Product Category to the best match for your catalog’s attribute set.
For example, the closest match for “Clothing” is “Apparel & Accessories.”
Magento Enterprise Edition User Guide, Version 1.14.2
145
Google Shopping
Chapter 8: Sales Channels
New Attribute Set Mapping
4.
When that attribute set is mapped, click the Add New Attribute button to map the
individual attributes. Then, do the following:
a.
Select an Attribute from your store. Then, find the Google Content Attribute that is
the best match.
b.
Click Add New Attribute to map the next attribute that you want to use.
c.
Repeat these steps until you have mapped all the attributes that you need.
Attribute Mapping
5.
146
When complete, click the Save Mapping button.
Magento Enterprise Edition User Guide, Version 1.14.2
Chapter 8: Sales Channels
Google Shopping
Mapping Complete
Step 4: Add Your Google Content Items
After you finish mapping, the next step is to select the products that you want to publish
to Google Content. From this page, you can publish, delete, and synchronize your products
to Google Content. After the products are synchronized, you can view the status and
expiration date of each product, the number of clicks and impressions it has received. 1.
On the Admin menu, select Catalog > Google Content > Manage Items.
2.
Use the list and filter controls to find the products that you want. Then, select the
checkbox of each product you want to add to Google Content.
3.
When you finish selecting products, set the Actions control to “Add to Google Content.”
Then click the Submit button.
Magento Enterprise Edition User Guide, Version 1.14.2
147
Google Shopping
Chapter 8: Sales Channels
Add Your Products
Step 5: Manage Your Content
It can take up to twenty-four hours for a product to be published in Google Content, and
products do not immediately appear in the Manage Items list. Changes also can take up to
a day to process. After you make changes, you can synchronize your content Google
Shopping.
After completing the configuration, return to your Google merchant account to make sure
that your products appear. If they don’t appear, make sure that the Country setting in the
upper-right corner is correct.
When your product feed is live, you can view the number of impressions and clicks from
the Manage Items page.
148
Magento Enterprise Edition User Guide, Version 1.14.2
Chapter 8: Sales Channels
Setting Up RSS Feeds
Setting Up RSS Feeds
RSS (Really Simple Syndication) is an XML-based data format that is used to distribute
information online. Your customers can subscribe to your RSS feeds and be notified of new
products and promotions. RSS Feeds can also be used to publish your product information
to shopping aggregation sites, and can also be included in newsletters.
When RSS feeds are enabled, any additions to products, specials, categories, and coupons
in your store are automatically sent to the subscribers of each feed. A link to all the RSS
feeds that you publish is in the footer of your store.
The software that is used to read an RSS feed is called a feed reader, and allows people to
subscribe to headlines, blogs, podcasts, and much more. Google Reader is one of the many
feed readers which are available online for free.
To set up RSS feeds for your store:
1.
From the Admin menu, select System > Configuration.
2.
In the upper-right corner, set Current Configuration Scope to the store view where you
want the feeds to be available.
3.
In the panel on the left, under Catalog, select RSS Feeds.
RSS Feed Configuration
4.
In the Rss Config section, set Enable RSS to “Enable.” Then, in each section below, set the
feeds that you want to activate to “Enable.”
a.
In the Wishlist section, set Enable RSS to “Enable.”
b.
In the Catalog section, set any, or all, of the following feeds to “Enable.”
Magento Enterprise Edition User Guide, Version 1.14.2
149
Setting Up RSS Feeds
c.
5.
Chapter 8: Sales Channels
l
New Products
l
Special Products
l
Coupons/Discounts
l
Tags Products
l
Top Level Category
l
Top Level Category
In the Order section, set Customer Order Status Notification to “Enable.”
When complete, click the Save Config button.
Types of RSS Feeds
RSS FEED
150
DESCRIPTION
Wishlist
When enabled, an RSS feed link will be available on top of
customer wishlist pages. Additionally, the wishlist sharing page
will also include a checkbox that lets you add a link to wishlist
RSS feeds on shared wishlists.
New Products
The new products RSS feed tracks new products added to the
store catalog and will syndicate them.
Special Products
The special products RSS feed will syndicate products with
special pricing.
Coupons / Discounts
Any special coupons or discounts generated in your store will be
added to this RSS feed.
Tags Products
The tags products RSS feed manages and syndicates newly
added product tags.
Top Level Category
This RSS feed tracks new top level categories, or root level
categories, in your catalog.
Customer Order Status
Allows customers to track their order status with an RSS feed.
When enabled, an RSS feed link will appear on the order.
Magento Enterprise Edition User Guide, Version 1.14.2
Chapter 8: Sales Channels
Social Media
Social Media
There are many social marketing extensions that can be added to your store. To learn
more, visit Magento Connect.
Social Marketing Extensions
Magento Enterprise Edition User Guide, Version 1.14.2
151
Social Media
Chapter 8: Sales Channels
Facebook Open Graph
The Facebook Open Graph 2.0 extension enables Facebook developers to add custom social
networking buttons to your store. The Facebook Open Graph 2.0 extension is free of charge
and can be downloaded from Magento Connect.
Facebook Open Graph
The extension uses the Facebook Open Graph 2.0 protocol. When the Facebook Open Graph
2.0 extension is successfully installed and all configuration is complete, the Facebook
buttons appear on each product page in the store, along with the Facebook blocks that
provide information about other Facebook users and friends who have clicked the social
buttons. The information provided in the blocks depends on the customer who is logged in
to Facebook and whether friends have performed actions with your app, such as clicked a
social button.
Process Overview:
Step 1: Download and install the extension
Step 2: Create an application on the Facebook Developer site
Step 3: Configure Magento
Step 1: Download and Install the Extension
152
1.
Visit Magento Connect, and download the Facebook Open Graph 2.0 extension. Then, copy
the Extension Key to the clipboard.
2.
On the Admin menu, select System > Magento Connect > Magento Connect Manager.
3.
When prompted, enter your Admin credentials, and click the Log In button.
Magento Enterprise Edition User Guide, Version 1.14.2
Chapter 8: Sales Channels
4.
Social Media
Paste the Extension Key, and click the Install button.
Step 2: Create Application on Facebook Developer Site
The current implementation of the Facebook Open Graph 2.0 extension requires an
application to be created manually on the Facebook Developers site.
1.
Navigate to: https://developers.facebook.com/
2.
In the main menu, click Apps.
3.
Click Create New Application and perform all of the steps of the app creation wizard.
The App Namespace value that you entered will be used in the Magento configuration.
4.
In the left column, select Settings > Basic. Under the “Select how your app integrates with
Facebook” heading, select Website. Then in the Site URL field, enter your store address.
Important! Your website and store should have one domain name.
a.
For Action Types in the Advanced settings in the Graph API URL field enter own,
want or other action you want to be associated with a social networking button on
your product pages. This title is for internal use.
The dislike action is not supported by Facebook Open Graph 2.0, and cannot be saved.
b.
The Object Type you create should have the following Object Properties:
l
URL (page URL)
l
Title (product title)
l
Image (image URL)
l
Description (product description)
l
Price
By default, a new Object Type has only the first four properties. To add the Price
property, use the Add Another Property button on the Object Type page.
Step 3: Configure Magento
1.
On the Admin menu, select System > Configuration.
2.
In the panel on the left, under Social, select Facebook.
If the extension is installed, the Social tab appears in the Configuration panel.
3.
Set Current Configuration Scope to your website.
4.
In the Facebook Config section, do the following:
Magento Enterprise Edition User Guide, Version 1.14.2
153
Social Media
Chapter 8: Sales Channels
a.
To display Facebook buttons in the store, set Enable Facebook on Frontend to “Yes.”
b.
Enter the App Namespace value of your application. You can find it in the Basic
Settings section of your app on the Facebook Developers site.
c.
Specify the App ID and App Secret values of your application. You can find them in
the Basic Settings section of your app on the Facebook Developers site.
d.
Enter the Open Graph Type value of your Object Type. To find it on the Facebook
Developers site, open the settings of your application, navigate to Open Graph >
Dashboard, click your object type, and expand the Advanced settings.
On the page header, the system will display the Apps > %Your Facebook Application
Name% > Open Graph > Object Type: %Object name%.
e.
5.
To add and configure a social networking button, click Add Action Button and
complete the setup for each button. The action settings can be different for each store
view.
Action
In the Action column, specify the internal button action title,
for example, own or want. This value should correspond to the
value you have specified in the Graph API URL field on the
Facebook Developers site. The Graph API URL field is available
in the Advanced section of the Action Type settings.
Button Title
In the Button Title column, specify the name of the social
networking button as you want it to appear in the frontend.
Enable Friend Box
In the Enable FriendBox column decide if you want to display
in the frontend the related Facebook block, which contains the
count and the pictures of friends.
Count Friend Box
In the Count in FriendBox column, set the maximum number
of friends that can be displayed in the related Facebook block.
By default, it is set to 3. If you set zero value (0) or leave the
field empty, then the default value is applied.
When complete, click Save Config button.
The social network buttons you have created and the corresponding Facebook blocks now
appear on the product pages of your store.
154
Magento Enterprise Edition User Guide, Version 1.14.2
Chapter 9:
Google Tools
Your store includes a number of tools to help optimize your content, analyze your
traffic, and connect your catalog to shopping aggregators and marketplaces.
Topics in this chapter:
l
Google Merchant Center
l
Google Sitemap
l
Google Analytics
Google Merchant Center
Magento Enterprise Edition User Guide, Version 1.14.2
155
Google Merchant Center
Chapter 9: Google Tools
Google Merchant Center
Google Merchant Center helps you manage Google’s shopping tools and services from a
single dashboard. In addition to the following services, you can also link Google Analytics
to your Merchant Center account.
Google Shopping
Google Shopping is a commercial service that helps shoppers find products on Google,
compare products, and connect with merchants.
Product Listing Ads
Your product listings can include rich information, such as product image, price, and
merchant name. Whenever a user enters a search query on Google.com that is relevant to
an item you are trying to sell, Google will automatically show the most relevant products
along with the associated image, price, and product name.
Process Overview:
Step 1: Open a Google Merchant Account
Step 2: Verify Your Website URL
Step 3: Claim Your Website URL
Step 1: Open a Google Merchant Account
1.
Visit the Google Merchant Center, and do one of the following:
l
l
2.
156
If you have a Google account, enter your Email address and password, and click the
Sign In button.
Click the Sign Up button, and follow the instructions to create an account.
In the panel on the left, click to expand Settings, and select General.
Magento Enterprise Edition User Guide, Version 1.14.2
Chapter 9: Google Tools
Google Merchant Center
Google Merchant Center Dashboard
3.
Enter your Store name and Description.
4.
Enter the full Website URL for your store. Depending on your domain, the URL might be
formatted as one of the following:
http://mystore.com
http://www.mystore.com
At this time, your Website URL is unclaimed and unverified.
Website URL Unverified - Unclaimed
5.
Complete the remaining General settings information, and Save Changes.
Magento Enterprise Edition User Guide, Version 1.14.2
157
Google Merchant Center
Chapter 9: Google Tools
Step 2: Verify Your Website URL
In this step, you will use Google Webmaster Tools to verify that you have the right to
upload product listings from your store.
1.
On a new browser tab, go to Google Webmaster Tools. Then, do the following:
a.
Click the Add a Site button. When prompted, enter the URL of your store, and click
Continue.
b.
When prompted to verify that you are the owner of the site, click the Alternate
methods tab.
c.
Select the HTML tag method, and press Ctrl + C to copy the code.
HTML Meta Tag Code
158
1.
Return to your store's Admin, and select System > Configuration.
2.
In the Configuration panel on the left, under General, select Design. Then, do the
following:
a.
Click to expand the HTML Head section.
b.
Scroll down to the Miscellaneous Scripts box and press Ctrl + V to paste the
verification code from the clipboard.
c.
When complete, click the Save Config button.
Magento Enterprise Edition User Guide, Version 1.14.2
Chapter 9: Google Tools
Google Merchant Center
Paste Google Site Verification Code
3.
Return to Google Webmaster Tools, and click the Verify button. When prompted, click
Continue. Your site is now verified.
Google Webmaster Tools - Site Verified
Magento Enterprise Edition User Guide, Version 1.14.2
159
Google Merchant Center
Chapter 9: Google Tools
Step 3: Claim Your Website URL
In this final step, you will establish the connection between your site and your Google
Merchant account.
1.
Return to the Google Merchant Center. The General Settings now show that your site is
verified, but not claimed.
Google Merchant Center- Claim this URL
2.
Click the Claim this URL link. Your Website URL is now both verified and claimed.
Website URL Verified and Claimed
Now that your site is verified, you can submit a sitemap to Google. You can also set up a
Google Analytics account, and link it to your Merchant Center Dashboard.
160
Magento Enterprise Edition User Guide, Version 1.14.2
Chapter 9: Google Tools
Google Sitemap
Google Sitemap
Google Sitemap improves the way your store is indexed by their search engine, and is
specifically designed to find pages which might otherwise be overlooked. As with the
standard Magento sitemap, Google Sitemap is an index of all the pages on your site.
However, unlike the Magento sitemap, the Google Sitemap is not visible to customers.
Process Overview:
Step 1: Remove any “robots.txt” Restrictions
Step 2: Generate the Sitemap
Step 3: Submit Your Sitemap to Google
Step 4: Restore Previous “robots.txt” Restrictions
Step 1: Remove any "robots.txt" Restrictions
When first setting up your Google Sitemap, you must provide full access for Google to
index your site. If you have a robots.txt file, make sure that it includes the following
instruction:
User-agent:*
Disallow:
After your sitemap has been successfully submitted to Google, you can restore any
instructions to exclude certain locations of your site. If you have not yet set up a robots.txt
file, you can do so after you finish the sitemap.
Step 2: Generate the Sitemap
1.
On the Admin menu, select Catalog > Google Sitemap.
2.
In the upper-right corner, click the Add Sitemap button. Then, do the following:
a.
In the Filename field, enter “sitemap.xml.”
b.
Enter the path on the server to the location of the sitemap. The path must be writable.
l
l
c.
To put the sitemap in a folder, enter the path to the folder:
/sitemaps
To put the sitemap at the base path of your store, enter a forward slash: /
Set Store View to the view where the sitemap will be used.
Magento Enterprise Edition User Guide, Version 1.14.2
161
Google Sitemap
Chapter 9: Google Tools
Configure Google Sitemap
3.
Click the Save & Generate button to create the sitemap.
The sitemap appears in the list, with a link to sitemap.xml file. From here, you can do the
following:
l
l
To view the sitemap, click the hyperlink in the Link for Google column. This is the link
that you will later submit to Google.
To update the sitemap, click the Generate link.
Step 3: Submit Your Sitemap to Google
1.
2.
Go to Google Webmaster Tools and do one of the following:
l
Log in to your existing account.
l
Create a new account, and log in.
Click the Add a Site button.
Add a Site
3.
When prompted to enter your store address, enter the full URL of your store:
http://www.mystore.com
Click the Continue button.
162
Magento Enterprise Edition User Guide, Version 1.14.2
Chapter 9: Google Tools
4.
Google Sitemap
To verify that you are the owner of the site, click the Alternate Methods tab. Then, choose
one of the following methods:
l
Add a DNS record to your domain’s configuration
l
Add a meta tag to your site’s home page
To verify your site with a meta tag, do the following:
a.
Open two tabs on your browser; one for Google Webmaster Central, and the other that
is logged in to the Admin of your store.
b.
Follow the instructions on Webmaster Central to copy the full text of the Google site
verification meta tag.
c.
On the Admin menu, select System > Configuration. In the Configuration panel on
the left, under General, click Design.
d.
In the HTML Head section, scroll down to Miscellaneous Scripts and paste the site
verification meta tag. Then, click the Save Config button.
e.
Return to Google Webmaster Central, and click Verify.
Google Site Verification
5.
6.
After your site is verified and appears in your Google dashboard, do the following:
a.
Click the name of your store. Then, click the Sitemaps button.
b.
In the upper-right corner, click the Add/Test Sitemap button.
Return to your store Admin, and copy the path to your Google sitemap. If necessary, log
back in and do the following:
Magento Enterprise Edition User Guide, Version 1.14.2
163
Google Sitemap
Chapter 9: Google Tools
a.
Go to Catalog > Google Sitemap.
b.
In the Link for Google column, right-click the link to your sitemap. Then on the
context menu, click Copy Shortcut.
c.
Open a text editor and paste the link. Then, copy the part of the link that comes after
the “dot com.” It looks like this:
/media/s4d71280645299/sitemaps/sitemap.xml
7.
Return to Google Webmaster Tools and paste the text into the box to complete the
address of your sitemap. Then, click the Submit Sitemap button.
Submit Google Sitemap
8.
Make sure that the link to your sitemap is working correctly, and that your Google
dashboard shows the number of pages indexed.
Step 4: Restore Previous "robots.txt" Restrictions
If you changed your robots.txt file to make it fully accessible, you can now restore the
previous instructions to disallow access to certain areas of your site.
Google Sitemap Configuration
Your Google sitemap should be updated as frequently as the content on your site changes,
which could be daily, weekly, or monthly. The configuration lets you set the frequency and
priority for each type of content separately.
Step 1: Complete the Generation Settings
164
1.
On the Admin menu, select System > Configuration.
2.
In the panel on the left, under Catalog, select Google Sitemap.
3.
Click to expand the Generation Settings section. Then, do the following:
Magento Enterprise Edition User Guide, Version 1.14.2
Chapter 9: Google Tools
Google Sitemap
a.
To activate Google Sitemap, set Enabled to “Yes.”
b.
Set Start Time to the hour, minute and second that you want the sitemap to be
updated.
c.
Set Frequency to one of the following:
l
Daily
l
Weekly
l
Monthly
d.
In the Error Email Recipient field, enter the email address of the person who is to
receive notification if an error occurs during a sitemap update.
e.
Set Error Email Sender to the store contact who appears as the sender of the error
notification.
f.
Set Error Email Template to the template used for the error notification.
Generation Settings
Step 2: Set the Frequency and Priority of Content Updates
1.
Click to expand the Categories Options section. Then, do the following:
a.
b.
Set Frequency to one of the following:
l
Always
l
Hourly
l
Daily
l
Weekly
l
Monthly
l
Yearly
l
Never
In the Priority field, enter a value between 0.0 and 1.0. Zero has the lowest priority.
Magento Enterprise Edition User Guide, Version 1.14.2
165
Google Sitemap
Chapter 9: Google Tools
Categories Options
2.
Click to expand the Products Options section. Then, complete the Frequency and Priority
settings as needed.
Products Options
3.
Click to expand the CMS Pages Options section. Then, complete the Frequency and
Priority settings as needed.
CMS Pages Options
4.
When complete, click the Save Config button.
Field Descriptions
FIELD
SCOPE
DESCRIPTION
GENERATION SETTINGS
Enabled
Store View
Determines if Google Sitemap is available for the
store. Options include: Yes / No
Start Time
Store View
Specifies the hour, minute, and second of the day
that the sitemap is updated.
Frequency
Store View
Determines how often the sitemap is updated.
Options include:
Daily
Weekly
Monthly
166
Magento Enterprise Edition User Guide, Version 1.14.2
Chapter 9: Google Tools
Google Sitemap
Field Descriptions (cont.)
FIELD
SCOPE
DESCRIPTION
Error Email Recipient
Store View
The email address of the person who receives
notifiation if an error occurs during the sitemap
update process. For multiple addresses, separate
each with a comma.
Error Email Sender
Website
Identifies the store contact that appears as the
sender of the error notification. Options include:
General Contact
Sales Representative
Customer Support
Custom Email 1
Custom Email 2
Error Email Template
Website
Identifies the email template that is used for the
error notification. Default template: Sitemap
generate Warnings
Store View
Determines how often sitemap categories are
updated. Options include:
CATEGORIES OPTIONS
Frequency
Always
Hourly
Daily
Weekly
Monthly
Yearly
Never
Priority
Store View
A value between 0.0 and 1.0 that determines the
priority of category sitemap updates in relation to
other content. Zero has the lowest priority.
Store View
Determines how often sitemap products are
updated. Options include:
PRODUCTS OPTIONS
Frequency
Always
Hourly
Magento Enterprise Edition User Guide, Version 1.14.2
167
Google Sitemap
Chapter 9: Google Tools
Field Descriptions (cont.)
FIELD
SCOPE
DESCRIPTION
Daily
Weekly
Monthly
Yearly
Never
Priority
Store View
A value between 0.0 and 1.0 that determines the
priority of product sitemap updates in relation to
other content. Zero has the lowest priority.
Store View
Determines how often sitemap CMS pages are
updated. Options include:
CMS PAGES OPTIONS
Frequency
Always
Hourly
Daily
Weekly
Monthly
Yearly
Never
Priority
168
Store View
A value between 0.0 and 1.0 that determines the
priority of CMS page sitemap updates in relation
to other content. Zero has the lowest priority.
Magento Enterprise Edition User Guide, Version 1.14.2
Chapter 9: Google Tools
Google Tag Manager
Google Tag Manager
Google Tag Manager is a free tool that helps you manage the many tags, or snippets of
code, that are related to marketing campaign events. You can use Google Tag Manager to
add tracking tags to a Magento site for audience measurement, personalization, retargeting,
and search engine marketing. You can add tags on your own, without calling the IT
department to make code changes. Google Tag Manager directly transfers data and events
to Google Analytics Enhanced Ecommerce and other third-party analytics solutions, to
produce a clear picture of how well the site, products, and promotions are performing.
The following instructions walk you through the process of setting up a Google Tag
Manager account, configuring your Magento store, and creating a tag.
Step 1: Set Up a Google Tag Manager Account
1.
Sign in to your Google account. Then, visit Google Tag Manager, and click the Sign up
now button.
If you have trouble logging in with your browser, either upgrade your browser or try Chrome.
2.
Enter a name for your account and click the Next button.
Sign Up for a Google Tag Manager Account
3.
To create a tag container for your site, do the following:
a.
Enter a Container Name.
b.
To choose where the container will reside, click the Web Pages button.
Magento Enterprise Edition User Guide, Version 1.14.2
169
Google Tag Manager
Chapter 9: Google Tools
Container Setup
c.
If you have a domain, click the Add Domain button, and enter the URL for your store.
Make sure to select the correct protocol (either http:// or https://) for your storefront.
(If you don’t yet have a domain, you can return to this later.)
d.
Select your Country and Time Zone.
e.
Click Create an Account and Continue.
Set Up a Container
170
Magento Enterprise Edition User Guide, Version 1.14.2
Chapter 9: Google Tools
f.
Google Tag Manager
Read the Terms of Service agreement. If you agree to the terms, click I Accept to
continue.
Container Script
g.
A draft of the container script appears in the text box. This code will be added to the
configuration of your store. Select the entire script, and press Ctrl + C to copy it to the
clipboard.
h.
Click the Add Tags Later button. We’ll return to Tag Manager later to create tags for
your store.
Your Container Dashboard
Magento Enterprise Edition User Guide, Version 1.14.2
171
Google Tag Manager
Chapter 9: Google Tools
Step 2: Add the Script to Your Store
1.
Log in to the Admin of your Magento store. Then on the Admin menu, select System >
Configuration.
2.
In the panel on the left under General, select Design. Click to expand the HTML Head
section, and do the following:
a.
Click once in the Miscellaneous Scripts box to position the cursor. Then press
Ctrl + V to paste the snippet of code that you copied from Google Tag Manager.
Miscellaneous Scripts
b.
3.
When complete, click the Save Config button.
In the panel on the left under Sales, select Google API. Click to expand the Google
Analytics Enhanced Ecommerce section, and do the following:
a.
Set Enable to “Yes.”
b.
Set Account type to “Google Tag Manager.”
If Google Tag Manager is installed, the Container Id appears automatically.
Tag Manager Configuration
172
Magento Enterprise Edition User Guide, Version 1.14.2
Chapter 9: Google Tools
c.
Google Tag Manager
Verify the following property values:
PROPERTY
d.
VALUE
List property for the catalog page
Catalog Page
List property for the cross-sell block
Cross-sell
List property for the up-sell block
Up-sell
List property for the related products
block
Related Products
List property for the search results page
Search Results
“Internal Promotions” for promotions field
“Label”
Label
When complete, click the Save Config button.
Step 3: Create a Tag
1.
Return to your Google Tag Manager account. Then, click the link for the container you
created.
2.
In the New Tag box, click Add a new tag.
Google Tag Manager
3.
If you have a Google AdWords account, you can create a tag to track conversions. You will
need the following information from your AdWords account:
l
Conversion ID
l
Conversion Label
If you need help finding this information, visit Google’s support site.
Magento Enterprise Edition User Guide, Version 1.14.2
173
Google Tag Manager
4.
Chapter 9: Google Tools
From the Google Tag Manager dashboard, click the Google AdWords button. Then, do
the following:
a.
Click the title placeholder, and enter a name for the tag.
b.
Under Choose Product, click the Google Adwords button.
Choose Product
c.
5.
Under Choose a Tag Type, click AdWords Conversion Tracking. Then, click
Continue.
Enter the Conversion ID and Conversion Label from your AdWords account. Then, click
Continue.
Configure Tag
6.
174
To create a rule that causes the tag to fire on the conversion page, do the following:
Magento Enterprise Edition User Guide, Version 1.14.2
Chapter 9: Google Tools
Google Tag Manager
a.
Under Fire On, click the Some Pages button.
b.
In the Choose Pages section, complete the following settings:
Name:
Enter a name for the page description.
Variable:
url
Operation:
contains
Value:
checkout/success.*
Conversion Page Location
c.
Select the green checkbox, and click the Save button. The trigger that you set up
appears as a blue button in the Fire On section.
d.
When complete, click the Save Tag button.
Magento Enterprise Edition User Guide, Version 1.14.2
175
Google Tag Manager
Chapter 9: Google Tools
Step 4: Preview and Publish
The next step in the process is to preview the tag. Each time the tag is previewed, a snapshot of
the version is saved. When you are satisfied with the results, go to the version that you want to
use, and click the Publish button.
176
Magento Enterprise Edition User Guide, Version 1.14.2
Chapter 9: Google Tools
Google Tag Manager
Field Descriptions
FIELD
SCOPE
Enable
Store View
DESCRIPTION
Determines if Google Analytics Enhanced
Ecommerce can be used to analyze activity in
your store.
Options include: Yes / No
Account type
Store View
Determines the Google tracking code that is used
to monitor store activity and traffic. Options
include:
Universal Analytics
Google Analytics
Google Tag Manager
Container Id
Store View
If Google Tag manager is already installed and
configured for your store, the Container ID
appears automatically in this field.
List property for the
catalog page
Store View
Identifies the Tag Manager property associated
with the catalog page. Default value: Catalog
Page
List property for the crosssell block
Store View
Identifies the Tag Manager property associated
with the cross-sell block. Default value:Crosssell
List property for the up-sell
block
Store View
Identifies the Tag Manager property associated
with the up-sell block. Default value: Up-sell
List property for the related
products block
Store View
Identifies the Tag Manager property associated
with the related products block. Default value:
Related Products
List property for the search
results page
Store View
Identifies the Tag Manager property associated
with the search results page. Default value:
Search Results
“Internal Promotions” for
promotions field “Label”
Store View
Identifies the Tag Manager property associated
with the labels for internal promotions. Default
value: Label
Magento Enterprise Edition User Guide, Version 1.14.2
177
Google Universal Analytics
Chapter 9: Google Tools
Google Universal Analytics
Google Universal Analytics gives you the ability to define additional custom dimensions
and metrics for tracking. Universal Analytics supports offline and mobile app interactions,
and includes access to ongoing updates.
The Google Analytics Enhanced Ecommerce section of the configuration supports three
different account types:
l
Google Analytics
l
Universal Analytics
l
Google Tag Manager
Because Google will soon retire their “classic” tracking codes, we encourage you to upgrade
your existing Google Analytics account to Universal Analytics, and also to sign up for a free
Google Tag Manager account.
Step 1: Sign Up and Configure Google Tag Manager
Sign up for a Google Tag Manager account, and complete the Magento configuration.
Step 2: Sign Up or Upgrade to Google Universal Analytics
Do one of the following:
l
Sign up for a new Google Universal Analytics account.
l
Upgrade your classic Google Analytics account to Universal Analytics.
During the first part of the upgrade process, your existing account properties and
tracking code are converted to the Universal Analytics format, but your data and
settings are preserved. In the second part of the process, your tracking code is converted
to the Universal Analytics format. You use Google Tag Manager to complete the second
part of the upgrade.
Before beginning the upgrade, visit the Universal Analytics Upgrade Center, and read
the Upgrade Guide. Take note of the Important Considerations section at the bottom of
the page.
178
Magento Enterprise Edition User Guide, Version 1.14.2
Chapter 9: Google Tools
Google Universal Analytics
Step 3: Complete the Magento Configuration
1.
Return to your store, and log in to the Admin. Then on the Admin menu, select System >
Configuration.
2.
In the panel on the left, under Sales, select Google API.
3.
Click to expand the Google Analytics Enhanced Ecommerce section, and do the
following:
a.
Set Enable to “Yes.”
b.
Do one of the following:
l
l
If you have a Google Tag Manager account, set Account type to “Google Tag
Manager.”
Otherwise, set Account type to “Universal Analytics.” Then, enter your Universal
Analytics Account Number.
If you have a Google Tag Manager account, your Universal Analytics account
number should appear automatically.
c.
To anonymize part of your visitor’s IP address before it is sent to Google, set Enable IP
Anonymization to “Yes.”
According to Google, anonymizing IP addresses can reduce the accuracy of geographic
data in the Analytics report.
Universal Analytics Configuration
4.
When complete, click the Save Config button.
Magento Enterprise Edition User Guide, Version 1.14.2
179
Google Universal Analytics
Chapter 9: Google Tools
Field Descriptions
FIELD
SCOPE
Enable
Store View
DESCRIPTION
Determines if Google Analytics Enhanced
Ecommerce can be used to analyze activity in
your store.
Options include: Yes / No
Account type
Store View
Determines the Google tracking code that is used
to monitor store activity and traffic. Options
include:
Universal Analytics
Google Analytics
Google Tag Manager
Account Number
Store View
Identifies the account number associated with
your Universal Analytics account. If you use
Google Tag manager, your account number
should appear automatically.
Enable IP anonymization
Store View
Protects the identity of the visitors to your site by
hiding the geographic portion of each IP address
before the data is sent to Google. Options include:
Yes / No
According to Google, anonymizing IP addresses
can reduce the accuracy of geographic data in
the Analytics report.
180
Magento Enterprise Edition User Guide, Version 1.14.2
Chapter 9: Google Tools
Google Universal Analytics
Using Universal Analytics with Enhanced Ecommerce
Enhanced Ecommerce is a plugin for Google Universal Analytics that gives you insight into
the shopping and purchasing behavior of your customers. You can use Enhanced
Ecommerce to produce reports about key customer activities, such as when customers add
items the cart, begin the checkout process, or complete a purchase. You can also identify
and analyze patterns of shoppers who abandon their carts without making a purchase.
The following instructions show how to configure Google Tag Manager with Universal
Analytics to produce Enhanced Ecommerce data and reports. If you are currently using the
classic version of Google Analytics, you must first upgrade to Universal Analytics before
you can use Enhanced Ecommerce.
Tags Fired in Shopping Cart Shown in Debug Mode
Step 1: Sign Up for Google Accounts
1.
Sign up for a Google Tag Manager account, and complete the Magento configuration.
2.
Sign up for a new Google Universal Analytics account, or upgrade your classic Google
Analytics account to Universal Analytics. Then, complete the Magento configuration.
Step 2: Configure Enhanced Ecommerce
1.
Sign in to your Google Universal Analytics account.
2.
Create a new property for Enhanced Ecommerce analytics with the following settings:
Magento Enterprise Edition User Guide, Version 1.14.2
181
Google Universal Analytics
Chapter 9: Google Tools
Enhanced Ecommerce Property
SETTING
VALUE
ENABLE ECOMMERCE SETTINGS
Status
ON
Related Products
ON
ENHANCED ECOMMERCE SETTINGS
Enable Enhanced Ecommerce Reporting ON
Checkout Labeling
3.
182
(not required)
When complete, click Submit.
Magento Enterprise Edition User Guide, Version 1.14.2
Chapter 9: Google Tools
Google Universal Analytics
Step 3: Create Tags and Triggers
1.
Sign in to your Google Tag Manager account, and create the following triggers:
Google Tag Manager Triggers
NAME
2.
EVENT TYPE
AddToCart
Custom Event
Checkout
Custom Event
Checkout only
Page View
CheckoutOption
Custom Event
gtm.dom
Custom Event
ProductClick
Custom Event
PromotionClick
Custom Event
RemoveFromCart
Custom Event
FILTER
Page URL matches RegEx
/checkout/.*
Create the following Universal Analytics tags with the same basic configuration.
Universal Analytics Tags
NAME
TYPE
FIRING TRIGGERS
Add to cart tracking
Universal Analytics
AddToCart
Checkout option tracking
Universal Analytics
CheckoutOption
Checkout tracking
Universal Analytics
Checkout
Pageview tracking
Universal Analytics
gtm.dom
Product client tracking
Universal Analytics
ProductClick
Promo click tracking
Universal Analytics
PromotionClick
Remove from cart tracking
Universal Analytics
RemoveFromCart
Magento Enterprise Edition User Guide, Version 1.14.2
183
Google Universal Analytics
Chapter 9: Google Tools
Basic Tag Configuration
SETTING
3.
VALUE
Product
Google Analytics
Tag Type
Universal Analytics
Tracking ID
UA-XXX (The tracking ID from your Universal Analytics
account.)
Enable Enhanced
Ecommerce Features
True
Use data layer
True
Use Debug version
True
Complete the individual tracking configurations as follows:
a.
Enter the following Add to Cart tracking settings:
Add to Cart Configuration
SETTING
b.
VALUE
Track Type
Event
Category
Ecommerce
Action
Add to Cart
Trigger
AddToCart
Enter the following Checkout option tracking settings:
Checkout Option Configuration
SETTING
c.
184
VALUE
Track Type
Event
Category
Ecommerce
Action
Checkout Option
Trigger
CheckoutOption
Enter the following PageView tracking settings:
Magento Enterprise Edition User Guide, Version 1.14.2
Chapter 9: Google Tools
Google Universal Analytics
Page View Configuration
d.
SETTING
VALUE
Track Type
PageView
Trigger
gtm.dom
Complete the following Product Click tracking configuration:
Product Click Configuration
SETTING
e.
VALUE
Track Type
Event
Category
Ecommerce
Action
Product Click
Trigger
ProductClick
Complete the following Promotion Click tracking configuration:
Promotion Click Configuration
SETTING
f.
VALUE
Track Type
Event
Category
Ecommerce
Action
Promotion Click
Trigger
PromotionClick
Complete the following Remove from Cart tracking configuration:
Remove from Cart Configuration
SETTING
4.
VALUE
Track Type
Event
Category
Ecommerce
Action
Remove from Cart
Trigger
RemoveFromCart
When complete, Preview and Publish the tag.
Magento Enterprise Edition User Guide, Version 1.14.2
185
Google Universal Analytics
Chapter 9: Google Tools
Troubleshooting Tools
Both Tag Manager and Universal Analytics have debug modes with a variety of tools that
you can use to troubleshoot your integration.
Preview and Debug
Tag Manager’s debug preview mode shows tags as they are fired and their associated data
layers.
Tags Fired During Checkout
Google Analytics Enhanced Ecommerce makes it possible to send sales data, and
information about product impressions and promotions to the data layer, along with any
Google Analytics pageview or event. You can use the values in the data layer to measure
impressions and analyze customer actions.
186
Magento Enterprise Edition User Guide, Version 1.14.2
Chapter 9: Google Tools
Google Universal Analytics
Values in Data Layer
You also can use the JavaScript console in Chrome to see the output of events as it is sent
to Google.
Chrome JavaScript Console
Magento Enterprise Edition User Guide, Version 1.14.2
187
Google Universal Analytics
Chapter 9: Google Tools
Google “Classic” Analytics
The following instructions walk you through the process of setting up a basic Google
Analytics account. Because this version of Google Analytics is being discontinued, we
strongly recommend that you install a Google Universal Analytics account instead.
Process Overview:
Step 1: Set Up a Google Merchant Account
Step 2: Turn On Ecommerce Tracking
Step 3: Complete the Magento Configuration
Step 1: Set Up a Google Merchant Account
The first step is to establish a Google merchant account, and then verify and claim your
website URL. For detailed instructions, see: Google Merchant Center.
When you sign up for an account, a report appears that shows your new Google Analytics
account number in the following format: UA-XXXXXXX-1. Write this number down,
because it is required to complete the configuration for your store.
Step 2: Turn On Ecommerce Tracking
1.
Sign in to your Google Analytics account.
2.
On the main menu, select Admin.
The options in the Administration section are organized into three columns under Account,
Property, and View. If you have multiple accounts or stores, make sure that the Account
button is set to the correct account, and that the Property button is set to the correct store.
188
Magento Enterprise Edition User Guide, Version 1.14.2
Chapter 9: Google Tools
Google Universal Analytics
Google Analytics Admin
3.
In the View column, select the View Settings option.
4.
In the panel on the left, select Ecommerce Settings. Then, do the following:
a.
Click the Status switch to turn on Ecommerce Tracking. Then, click the Next step
button.
b.
Click the Submit button to save the setting. When the Success message appears at the
top of the page, you are done.
Ecommerce Tracking On
Magento Enterprise Edition User Guide, Version 1.14.2
189
Google Universal Analytics
Chapter 9: Google Tools
Step 3: Complete the Magento Configuration
1.
On the Admin menu, select System > Configuration. Then in the panel on the left, under
Sales, select Google API.
2.
Click to expand the Google Analytics Enhanced Ecommerce section, and do the
following:
Google Analytics Enhanced Ecommerce
a.
Set Enable to “Yes.”
b.
Set Account Type to “Google Analytics.”
c.
Enter the Google Analytics Account Number, or tracking code that you wrote down
when you signed up for the service.
d.
To anonymize part of your visitors’ IP address before it is sent to Google, set Enable IP
Anonymization to “Yes.”
According to Google, anonymizing IP addresses can reduce the accuracy of geographic
data in the Analytics report.
3.
190
When complete, click the Save Config button.
Magento Enterprise Edition User Guide, Version 1.14.2
Content Elements
In this section…
Magento CMS
Content Pages
Page Hierarchy
Blocks
Banners
Widgets
Variables
Markup Tags
Chapter 10:
Magento CMS
The old adage, “content is king” is more true now than ever before. The term, content
marketing refers to the art of promoting your products or services by providing valuable
information to your customers at no charge. The quality of your content helps
distinguish your store from others, increases your visibility to search engines, and
provides support to your customers. This soft-sell approach is often more effective than
advertising, builds credibility and trust, and can turn your store into a destination.
Your content should reflect the branding of your store, and be delivered with your
distinctive visual presentation and voice to convey your message. Use pictures to tell a
story. Educate, inspire, and entertain. With quality content, sometimes less is more.
Magento Enterprise Edition includes a powerful content management system (CMS)
that you can use to create rich content for your store. In this chapter, you will learn
how to use your store’s CMS tools to create new content, and incorporate existing
content to create a compelling experience that will keep customers coming back.
Topics in this chapter:
l
Content Pages
l
Page Hierarchy
l
Blocks
l
Banners
l
Widgets
l
Variables
l
Layout Updates
l
Markup Tags
Additional Resources
Curated Commerce
Magento Enterprise Edition User Guide, Version 1.14.2
193
CMS Tools
Chapter 10: Magento CMS
CMS Tools
Pages
Create pages with text, images, blocks, video, and
banners. In addition, you can use the Page
Hierarchy tool to provide structure and navigation
for your growing collection of content.
Static Blocks
The CMS makes it easy to create blocks of content
without writing any code. Blocks can contain text,
images, and even video, and can be assigned to
any part of the page layout.
Banners
Create banners for a promotion that are visible to
certain customer groups, or whenever price rule
conditions and coupons apply.
194
Magento Enterprise Edition User Guide, Version 1.14.2
Chapter 10: Magento CMS
CMS Tools
Widgets
Use the Widget tool to display dynamic data and
add blocks, banners, and interactive elements most
anywhere in your store.
Polls
Create polls to learn about your customers’ opinions
and preferences. They’re fun to take and see the
results!
Magento Enterprise Edition User Guide, Version 1.14.2
195
CMS Tools
Chapter 10: Magento CMS
Notes
196
Magento Enterprise Edition User Guide, Version 1.14.2
Chapter 11:
Content Pages
All content can be viewed in terms of its shelf life, just as any product in a store. Did
you know that the shelf life of social media content is less than twenty-four hours? The
potential shelf life of the content you create can help you decide where to invest your
resources.
Content with a long shelf life is sometimes referred to as evergreen content. Examples
of evergreen content include customer success stories, "how to" instructions, and
Frequently Asked Questions (FAQ.)
Other content is perishable by nature, such as events, industry news, and press
releases. One way to get more mileage out of perishable content is to use the Page
Hierarchy tool to create an archive of past content. You can organize articles from your
newsletter, press releases, and events by month and year, to show that you are active
and engaged.
Topics in this chapter:
l
Creating a Page
l
Using the Editor
l
Version Control
l
Page Hierarchy
Magento Enterprise Edition User Guide, Version 1.14.2
197
Core Content
Chapter 11: Content Pages
Core Content
The Magento demo store has examples of core content pages to help you get started. Before
launching your store, each page should be updated to reflect your message and brand.
Home
The demo “Home” page includes a banner, an image
carousel, several static blocks with links, and a list of
new products.
About Us
The “About Us” page is an example of page hierarchy
with a content navigation menu on the left. The page
has an image on the right, and another at the bottom
to indicate the end of the page.
Customer Service
The “Customer Service” page is another node in the
page hierarchy. The two headers on the page have
content that only becomes visible when the header is
clicked.
198
Magento Enterprise Edition User Guide, Version 1.14.2
Chapter 11: Content Pages
Core Content
Reward Points
The “Reward Points” page is also a node in the page
hierarchy, and explains how the reward program
works, and the exchange rate for reward points.
Privacy Policy
Your store’s “Privacy Policy” page should be updated
with your own information. As a best practice, your
privacy policy should explain to your customers the
type of information that your company collects and
how it is used.
Page Not Found
The “404 Page Not Found” page is named for the
response code that is returned when a page cannot
be found. URL redirects reduce the number of times
that this page appears. However, for those times
when it is necessary, you might as well take
advantage of the opportunity to offer some links to
products that the customer might find interesting.
Magento Enterprise Edition User Guide, Version 1.14.2
199
Creating a Page
Chapter 11: Content Pages
Enable Cookies
The “Enable Cookies” page appears when visitors to
your site do not have cookies enabled in their
browsers. The page provides step-by-step, illustrated
instructions to enable cookies for the most popular
browsers.
Service Unavailable
The “503 Service Unavailable" page is named for the
response code that is returned when the server is
unavailable. This page can be set to appear when
your store is in maintenance mode.
Creating a Page
The process of adding a new content page to your store is essentially the same for any type
of page you might want to create. You can include text, images, blocks of content, video,
and banners. In addition, you can use the Page Hierarchy tool to provide structure and
navigation for your growing collection of content.
Don’t forget that most content pages are designed to be read by search engines first, and by
people second. Keep the needs of each of these two very different audiences in mind when
choosing the page title and URL, composing the meta data, and writing the content.
Process Overview:
Step 1: Add a New Page
Step 2: Select the Page Layout
Step 3: Complete the Content
Step 4: Complete the Meta Data
Step 5: Publish the Page
200
Magento Enterprise Edition User Guide, Version 1.14.2
Chapter 11: Content Pages
Creating a Page
Step 1: Add a New Page
1.
On the Admin menu, select CMS > Pages > Manage Content.
2.
Click the Add New Page button.
3.
In the Page Information section, do the following:
Page Information
a.
Enter a Title for the new page.
b.
Enter a URL Key for the page that is based on the Title. It should be all lowercase
characters, with hyphens instead of spaces.
The URL Key is added to the base URL for your store, to create the online address for
the page.
4.
c.
In the Store View list, select each view where this page will be available.
d.
Set Status to “Disabled.” (This will be changed when the page is ready to publish.)
e.
Set Under Version Control to one of the following:
Yes
By default, your store keeps a backup of previous versions of each page.
Backup pages are numbered, as,“New Page 1,” “New page 2,” and so on.
No
Writes over previous versions of the page. This is the recommended
setting for content that is subject to frequent change.
With the required fields complete, click the Save and Continue Edit button.
Step 2: Select the Page Layout
1.
In the Page Information panel on the left, select Design.
2.
In the Page Layout section, set Layout to one of the following:
Magento Enterprise Edition User Guide, Version 1.14.2
201
Creating a Page
Chapter 11: Content Pages
l
1 column
l
2 columns with left bar
l
2 columns with right bar
l
3 columns
Page Layout
Step 3: Complete the Content
1.
In the Page Information panel on the left, select Content.
2.
In the Content Heading box, type the text you want to appear as the main heading at the
top of the page.
Complete the remaining content, as you want it to appear in the main content column,
according to the page layout selected. The content can include text, images, variables, and
widgets with dynamic data.
3.
Click the Show / Hide Editor button to display the WYSIWYG editor. You can format the
text with the toolbar buttons.
WYSIWYG Editor
4.
202
Click the Show / Hide Editor button again to return to the HTML mode. You can work in
either mode that you prefer.
Magento Enterprise Edition User Guide, Version 1.14.2
Chapter 11: Content Pages
Using the Editor
HTML Mode
5.
Click the Save and Continue Edit button.
Step 4: Complete the Meta Data
1.
In the panel on the left, select Meta Data.
2.
Complete the Keywords and Description for the page. This information is used by search
engines to index the page.
Step 5: Publish the Page
1.
In the panel on the left, select Page Information.
2.
Set Status to “Published.”
3.
If you're just starting out, set Under Version Control to “No.” You can learn how to use
version control later.
4.
Click the Save Page button.
When the page is complete, it can be added to the navigation of your store, linked to other
pages, or added as a link in the footer.
Using the Editor
The WYSIWYG editor gives you the ability to enter and format while working in a “What
You See Is What You Get” view of the content. If you prefer to work directly with the
underlying HTML code, you can easily change modes. The editor can be used to create
content for pages, blocks, and product descriptions. When working in the product catalog,
the editor is accessed by clicking the WYSIWYG Editor button.
For a complete list of toolbar buttons, see the Editor Toolbar in the appendix of this guide.
Editor Toolbar
Magento Enterprise Edition User Guide, Version 1.14.2
203
Using the Editor
Chapter 11: Content Pages
Inserting a Link
The easiest way to insert a link is to use the Link button in the editor toolbar. It doesn’t
require any knowledge of HTML and the result is the same.
To insert a link:
1.
Highlight the text where you want to create the link. Then, in the editor toolbar, click the
Link button.
Insert Link Button
2.
3.
In the Link URL field, enter one of the following:
l
The URL Key of a page in your store.
l
The full URL of an external page to be linked.
Set Target to one of the following:
l
Open link in the same window
l
Open in a new window
4.
In the Title field, enter the tooltip text that appears when someone hovers over the link.
5.
Click the Insert button to create the link.
Inserting Images
From the editor, you can insert an online image that resides on another server, or display
an image that has been uploaded to Media Storage.
204
Magento Enterprise Edition User Guide, Version 1.14.2
Chapter 11: Content Pages
Using the Editor
Media Storage
Method 1: Insert an Image from Media Storage
1.
If necessary, click the Show / Hide Editor button to display the code.
2.
Position the cursor where you want the code to be inserted. Then, click the Insert Image
button.
3.
Select the image that you want to use, and click the Insert File button.
4.
To view the image in WYSIWYG mode, click the Show / Hide Editor button.
Method 2: Insert an Image from Another Server
Use this method to insert an image that is available online, but resides on another server.
You must have the full URL of the image to complete the process.
1.
Click the Show / Hide Editor button to work in WYSIWYG mode.
2.
Position your cursor where you want the image to appear.
3.
On the Editor toolbar, click the Insert Image button. Then, do the following:
Insert Image Button
a.
In the Image URL field, paste the full Web address to the image.
b.
In the Image Description field, write a brief description of the image.
Magento Enterprise Edition User Guide, Version 1.14.2
205
Using the Editor
Chapter 11: Content Pages
c.
4.
In the Title field, write a relevant title for the image.
Click the Insert button to complete the process.
Adding a Widget
The Widget tool can be used to add a variety of content elements to the page, including
links to any content page or node, product, or category. Links can be positioned on the
page by block reference or incorporated directly into CMS content and email templates. You
can create links to the following four types of content:
l
CMS Hierarchy Nodes
l
CMS Pages
l
Catalog Categories
l
Catalog Products
Links can be displayed as a block, or used inline and incorporated into existing text. By
default, a link inherits its style from the location (block reference) according to the style
sheet (styles.css) of the theme.
To add a widget to a page:
1.
Open the CMS page to be edited.
2.
In the panel on the left, select Content. Then, use either of the following methods:
Method 1: WYSIWYG Mode
1.
Click the Show / Hide Editor button to display the page in WYSIWYG mode.
2.
Position the cursor in the text where you want the widget to appear.
3.
On the editor toolbar, click the Insert Widget
button.
Method 2: HTML Mode
From the HTML editor, click the Insert Widget button.
206
3.
When prompted, select the Widget Type. This example shows how to insert a link to a
product.
4.
You can leave the Anchor Custom Text field empty to use the product name.
5.
Enter a Anchor Custom Title for best SEO practice. (The title isn't visible on the page.)
6.
Set Template to one of the following:
l
To incorporate the link into text, select “Product Link Inline Template.”
l
To place the link on a separate line, select “Product Link Block Template.”
Magento Enterprise Edition User Guide, Version 1.14.2
Chapter 11: Content Pages
Using the Editor
Select the Template
7.
Click the Select Product button, and do the following:
a.
In the tree, navigate to the category you want.
b.
In the list, click the product that you want to include in the link.
Select the Product
c.
Click the Insert Widget button to place the link on the page. In the HTML, the link
markup tag appears at the top of the page, enclosed in double curly braces.
d.
If needed, use Cut (Ctrl + x) and Paste (Ctrl + v) to position the markup tag in the
code where you want the link to appear.
Widget Link Code
Magento Enterprise Edition User Guide, Version 1.14.2
207
Version Control
8.
Chapter 11: Content Pages
Click the Show / Hide Editor button to see the link in WYSIWYG mode.
Now you can continue editing the page, and incorporate the links into the rest of the
content.
Widget Links on CMS Page
Version Control
Magento’s version control system for CMS pages gives you the ability to create multiple
versions of a page, track the revision history of each, and restore previous versions. You can
separate the ability to create and publish content, based on permissions.
Pages under version control can be edited only from the Versions tab. Unlike other pages,
the Content tab no longer appears in the Page Information panel. However, a link to the
currently published version is included in the Page Information. If the page is not yet
published, and the Status is set to “Disabled,” a link to the version (and revision of the
version), is shown instead. No matter how many page versions and revisions of versions
exist, only one appears in the Manage Content list.
Under Version Control
208
Magento Enterprise Edition User Guide, Version 1.14.2
Chapter 11: Content Pages
Version Control
To add version control to a page:
1.
On the Admin menu, select CMS > Pages > Manage Content.
2.
In the list, click to open the page in edit mode.
3.
In the Page Information section, set Under Version Control to “Yes.”
4.
Click the Save and Continue Edit button.
5.
In the panel on the left, select Versions. Then, do the following:
Versions
a.
In the list, click to open the page in edit mode.
b.
In the Version Information section, set Access Level to one of the following:
l
Private
l
Protected
l
Public
Version Information
c.
If your store Admin has multiple users, select the Owner of the page.
6.
To revise a published page, in the panel on the left, select Versions, and edit the content,
as needed.
7.
To save the changes as a revision, but without publishing, click the Save Page button. The
revision is added to the list.
Magento Enterprise Edition User Guide, Version 1.14.2
209
Version Control
Chapter 11: Content Pages
Version Revisions
8.
To publish the changes, click the Publish button.
In the Page Information, the version number of the currently published revision is
incremented to reflect the change.
Make sure that the Status of the page is set to “Published” so the page is visible in the
store. If you need to return to Page Information, click the Back button a couple of times.
Currently Published Revision
Field Descriptions
FIELD
DESCRIPTION
Page Information
Under Version Control
The Under Version Control option is available for every CMS
page. Options include:
Yes
Multiple revisions of the page can be created,
published selectively, and restored as
needed.
No
Only one version of the page is saved, and
previous versions cannot be restored.
Version Information
210
Magento Enterprise Edition User Guide, Version 1.14.2
Chapter 11: Content Pages
Version Control
Field Descriptions (cont.)
FIELD
DESCRIPTION
Version Label
The name of the version is for internal reference, to help you keep
track of different versions. For example, you might create a
different version of the same page for each season.
Access Level
Establishes the permissions necessary to access the version.
Options include:
Owner
Private
Only the creator of the version can access
the content.
Protected
Only Admin users with Publish Revision
permission can access the content.
Public
All Admin users with CMS Page permission
can access the content.
By default, the Admin user who created the page. If the access
level is set to “Private,” and the owner is changed, the previous
owner will no longer have access to the content.
Editing a Versioned Page
To access the content section of a versioned page, select the Versions tab in the Page
Information panel. Initially, only one version is listed. When you select that version, you
are redirected to a new page that displays the version options and revision information.
Whenever changes to a revision are saved, a new revision is created. You can also save
changes as a new version.
Magento Enterprise Edition User Guide, Version 1.14.2
211
Version Control
Chapter 11: Content Pages
Revision Information
To edit a versioned page:
1.
Do one of the following:
l
l
In the panel on the left, select Versions. Then in the Version Revisions list, click to open
the revision you want to edit.
2.
Edit the content as needed.
3.
When complete, do one of the following:
l
l
212
To edit the currently published version, under Page Information, click the Currently
Published Revision link. The page revision opens in edit mode.
To save a new revision under the same version name, click the Save button.
To save the revision under a new version name, click the Save In New Version button.
When prompted, enter a name for the revision.
Magento Enterprise Edition User Guide, Version 1.14.2
Chapter 12:
Page Hierarchy
Your store’s page hierarchy system gives you the ability to organize your content pages
and add pagination, navigation, and menus. If you publish a large amount of content
on a regular basis, you can use page hierarchy to organize the content and make it easy
for people to find articles of interest.
Topics in this chapter:
l
Page Hierarchy Setup
l
Adding a Node
Page with Left Navigation
Magento Enterprise Edition User Guide, Version 1.14.2
213
Page Hierarchy Setup
Chapter 12: Page Hierarchy
Page Hierarchy Setup
Page hierarchy can be accessed from an individual CMS page, and also by using the
Manage Page Hierarchy command. The CMS Page Hierarchy configuration settings activate
the page hierarchy system and metadata, and determine the default menu layout.
Manage Hierarchy
The page hierarchy system uses nodes to identify related pieces of content, and to organize
content pages into a parent/child relationship structure. A parent node is like a folder that
can contain child nodes and pages. The relative position of each node and page in the
hierarchy is shown as a tree on the left side of the Manage Pages Hierarchy page. A node
can contain other nodes and content pages, and a single content page can be associated
with multiple nodes and other content pages in a parent/child or neighbor relationship.
To set up page hierarchy:
1.
On the Admin menu, select System > Configuration.
2.
In the panel on the left, under General, select Content Management.
3.
Click to expand the CMS Page Hierarchy section, and make any changes that are
necessary.
CMS Page Hierarchy
214
4.
Click to expand the CMS Versioning section, and make any changes necessary.
5.
Click the Save Config button to save your changes.
Magento Enterprise Edition User Guide, Version 1.14.2
Chapter 12: Page Hierarchy
Adding a Node
Field Descriptions
FIELD
SCOPE
DESCRIPTION
Enable Hierarchy
Functionality
Global
Activates the use of page hierarchy for your
content pages. Options include: Yes / No
Enable Hierarchy
Metadata
Global
Gives you the ability to associate meta data with
pages in the hierarchy. Options include: Yes / No
Default Layout for
Hierarchy Menu
Global
Determines the default menu style. Options
include:
Content
Left Column
Right Column
Adding a Node
The following example shows how to create a node with simple navigation to content
pages. Although the node does not have a content page associated with it, it does have a
URL Key which can be referenced elsewhere in your site.
For example, you can create a node called “Press Releases” with navigation to individual
press releases. Then, include the link on your “About Us” page. Or how about creating a
node with links to back issues of your newsletter?
Page Hierarchy with Nodes
Process Overview:
Step 1: Create a Node
Step 2: Add Pages to the Node
Step 3: Add Navigation
Magento Enterprise Edition User Guide, Version 1.14.2
215
Adding a Node
Chapter 12: Page Hierarchy
Step 1: Create a Node
1.
On the Admin menu, select CMS > Pages > Manage Hierarchy.
2.
Click the Add Node button.
3.
In the Page Properties section, type a Title for the node. Then create a suitable URL Key
using all lowercase characters, with hyphens instead of spaces.
4.
Click the Save Pages Hierarchy button to save the node. The node appears as a folder in
the tree.
Step 2: Add Pages to the Node
1.
In the hierarchy tree, click to open the node.
2.
Scroll down to the CMS pages section, and select the checkbox of each page you want to
include.
3.
Click the Add Selected Pages(s) to Tree button. Each selected page appears in the tree
below the node folder.
Step 3: Add Navigation
216
1.
In the tree, click to open the node.
2.
In the Pagination Options for Nested Pages section, set Enable Pagination to “Yes.”
3.
In the Navigation Menu Options section, and set Enable Navigation Menu to “Yes.”
4.
Scroll back up to the Node Properties section, and click the Preview link.
5.
Click the Save Pages Hierarchy button to save the settings.
Magento Enterprise Edition User Guide, Version 1.14.2
Chapter 13:
Blocks
A block is a modular unit of content that can be positioned most anywhere on the page.
Blocks can be used to display static information such as text, images, and embedded
video, as well as dynamic information.
You can use Magento Enterprise Edition’s content management system to create
custom blocks of content without writing any code. Blocks can contain text, images,
and even video, and can be assigned to any part of the page layout.
In addition, your store includes a selection of built-in blocks that make it easy to add
features and functionality to your store. Some built-in blocks are required components
of your store, while others are shopping tools that can be enabled or disabled according
to your preference. Many of the built-in blocks can be added to your store with the
Widget tool.
Blocks can also be defined and positioned by entering XML code in the Layout Update
box on the target page. Custom CMS blocks can be referenced and positioned without
writing any code by using the Widget tool.
Topics in this chapter:
l
Creating a Static Block
l
Positioning Blocks by Reference
Magento Enterprise Edition User Guide, Version 1.14.2
217
Creating a Static Block
Chapter 13: Blocks
Creating a Static Block
Magento gives you the ability to create blocks of content that can be used throughout your
store. Custom, static blocks of content can be added to any page, group of pages, or even to
another block. The carousel image slider on the home page of the demo store is generated
by code that is placed in a static block. The three smaller blocks below are also static
blocks.
Static Blocks on Home Page
To create a block:
1.
On the Admin menu, select CMS > Static Blocks.
2.
In the upper-right corner, click the Add New Block button. Then, do the following:
3.
218
a.
Assign a descriptive Block Title.
b.
Assign a unique Identifier to the block. Use all lowercase characters, with underscores
instead of spaces. The identifier is used for internal reference.
c.
Select the Store View(s) where this content block will be visible.
d.
Set Status to “Enabled” to make the block visible in the store.
e.
Complete the Content for the block. You can use the Editor to format text, create links
and tables, add images, video, and audio.
When complete, click the Save Block button.
Magento Enterprise Edition User Guide, Version 1.14.2
Chapter 13: Blocks
Positioning Blocks by Reference
General Information
Positioning Blocks by Reference
The code that controls the page layout and placement of blocks is written in XML. You may
have noticed references to XML Page Layout Updates throughout the Admin of your store.
Every product, category, and piece of content—whether it’s a page, block, banner, or app—
has a section where you can update the XML code that controls the positioning of the item.
The selection of available block references that is available varies by page type, and whether
the customer is logged in, or is visiting the as a guest.
The Widget tool makes it easy to position a block at a specific place on the page, and even
for a specific product or category. You can select each option from a list, rather than trying
to remember all of the possible combinations.
Magento Enterprise Edition User Guide, Version 1.14.2
219
Positioning Blocks by Reference
Chapter 13: Blocks
Category and CMS Pages
Block References
BLOCK REFERENCE
POSITION
Breadcrumbs
The navigation aid at the top of many pages that shows your
current location as a link. Any additional content placed in the
Breadcrumbs reference floats to the right of the breadcrumbs, if
displayed.
Left Column
Content is added to the left column.
Main Content Area
Content is added to the main content area.
My Cart Extra Actions
Content appears below the Cart Subtotal in the My Cart popup
located within the top link.
Navigation Bar
Content appears below the main navigation bar.
Page Bottom
Content appears at the bottom of the page.
Page Footer
Content appears above the footer of the page.
Page Header
Content appears below the header of the page.
Page Top
Content appears at the top of the page.
Right Column
Content appears in the right column.
Store Language
Content appears in the upper-left corner of the header.
Product Page
Block References
BLOCK REFERENCE
220
POSITION
Alert URLs
Content appears below the title of the product on the product
detail page.
Bottom Block Options
Wrapper
If custom options are added, content appears below the Add to
Cart button.
Breadcrumbs
Content appears to the right of breadcrumbs—the navigation aid
that provides links as a path—that’s showcased below the
navigation bar.
Info Column Options
Wrapper
If a custom options are added, content appears to the right. The
same location applies to configurable options.
Magento Enterprise Edition User Guide, Version 1.14.2
Chapter 13: Blocks
Positioning Blocks by Reference
Block References (cont.)
BLOCK REFERENCE
POSITION
Left Column
Content appears below the left column blocks.
Main Content Area
Content appears below the main content area.
My Cart Extra Actions
Content appears below the Cart Subtotal in the My Cart popup
located within the top link.
Navigation Bar
Content appears below the main navigation bar.
Page Bottom
Content appears at the bottom of the page.
Page Footer
Content appears above the footer of the page.
Page Header
Content appears below the header of the page.
Page Top
Content appears at the top of the page.
PayPal Express Checkout
(Payflow Edition) Shortcut
Wrapper
If the PayPal payment method is enabled, content appears
below the PayPal buy button.
PayPal Express Checkout
Shortcut Wrapper
If the PayPal payment method is enabled, content appears
below the PayPal buy button.
Product Tags List
Content appears below the products tag bar.
Product View Extra Hint
Content appears below the main top price of the product.
Right Column
Content appears below the right column blocks.
Store Language
Content appears to the right of the language chooser.
Tags List Before
Content appears above the Add Your Tags field.
Magento Enterprise Edition User Guide, Version 1.14.2
221
Positioning Blocks by Reference
Chapter 13: Blocks
Notes
222
Magento Enterprise Edition User Guide, Version 1.14.2
Chapter 14:
Banners
Banners can be used to display an image or block of content, and appear for a specific
period of time for a promotion. You can create banners that are visible to certain
customer groups, or whenever price rule conditions and coupons apply.
Topics in this chapter:
l
Creating a Banner
l
Using Banners with Price Rules
When designing banners for your store, you should take into consideration both the
page layout and the theme you are using. Banners are often designed to appear on a
specific page, and area of the page. Although the header and footer are a fixed width,
the width of the content area, and the sidebars, can vary according to theme and page
layout. When designing a banner with graphic images, it is important to understand
the page layout, so you can take advantage of the available space.
Banner on Home Page
Magento Enterprise Edition User Guide, Version 1.14.2
223
Creating a Banner
Chapter 14: Banners
Creating a Banner
A banner can be as simple as an image. or contain a combination of text and code that
triggers an event. After a banner is created, you can use the Widget tool to place it in your
store, and combine it with other banners in a rotating sequence.
To create a banner:
1.
On the Admin menu, select CMS > Banners.
2.
Click the Add Banner button. Then, do the following:
a.
Enter a descriptive Banner Name.
b.
Set Active to “Yes.”
c.
In the Applies To list, select one of the following:
l
Any Banner Type
l
Specified Banner Type
This setting determines where in the store the banner can be used. (To select more
than one, hold the Ctrl key down and click each option.)
Banner Properties
3.
224
d.
In the panel on the left, select Content. Then in the Default Content section, enter any
HTML code that is needed for the banner.
e.
To insert an image, click the Insert Image button. Then, select the image.
f.
To customize the content for a specific store view, clear the Use Default checkbox, and
enter the custom content for the each view.
When complete, click the Save Banner button.
Magento Enterprise Edition User Guide, Version 1.14.2
Chapter 14: Banners
Creating a Banner
Banner Content with HTML
Banner Type by Location
LOCATION
DESCRIPTION
Content Area
The width of the main content area varies, depending on the
column layout.
Footer
The bottom section of the page contains the footer links and
copyright notice.
Header
The top section of the page contains your logo, account links,
search box, and top navigation.
Left Column
The left column of a two- or three-column layout.
Right Column
The right column of a two-or three-column layout.
Magento Enterprise Edition User Guide, Version 1.14.2
225
Creating a Banner Rotator
Chapter 14: Banners
Creating a Banner Rotator
A banner rotator can be used to display a single banner, or multiple banners in a specific
sequence or random order. The next banner in the sequence appears when the page is
refreshed.
As a widget, the banner rotator can be assigned to a specific page, product, or category, and
placed most anywhere in your store. In addition, a banner rotator can be associated with a
specific shopping cart or catalog rule.
As an alternative, you can also use a jQuery slider or carousel that changes images
automatically, like the one on the home page of the Magento demo store. There is a wide
assortment of jQuery sliders available online, and many are free. To add a slider to your
store, first create a static block. Follow the slider instructions to add the jQuery code to the
block. Then, use the Widget tool to place the static block where you want it to appear in
your store.
Process Overview:
Step 1: Create the Individual Banners
Step 2: Create a Widget Instance
Step 3: Configure the Banner Rotator
Step 1: Create the Individual Banners
Create the individual banners that you want to include in the rotator.
Step 2: Create a Widget Instance
Follow the basic steps to create a widget.
l
Choose "Banner Rotator" as the type of widget.
l
Specify the page and location where it belongs. (See Banner Layout Update Options)
l
Choose the template to be used.
Step 3: Configure the Banner Rotator
226
1.
If necessary, select CMS > Widgets, and click to open the banner rotator that you created
in the previous step.
2.
In the left panel, click Widget Options to configure the banner. Then, do the following:
a.
Set Banners to Display to “Specified Banners.”
b.
(Optional) To limit the banner to a certain section of the store, set Restrict by Banner
Types to the section where you want it to appear.
c.
In the Rotation Mode list, select one of the following:
Magento Enterprise Edition User Guide, Version 1.14.2
Chapter 14: Banners
3.
4.
Creating a Banner Rotator
l
Do not rotate, display all at once
l
One at a time, Random
l
One at a time, Series
l
One at a time, Shuffle
To specify the banners you want to include, do the following:
a.
In the Specify Banners section, click the Reset Filter button to list all the available
banners. You can also use the search filters to find the banners you want to include.
b.
Select the checkbox of each banner you want to include in the rotator.
c.
To set the sequence of each banner in relation to the others, enter a number in the
Position column. If you wan the banner to appear in the first position, enter the
number 1.
When complete, click the Save button.
Banner Layout Update Options
OPTION
Display On Categories
DESCRIPTION
Determines the categories where the banner rotator appears.
Anchor Categories
Appears only on anchored category
pages listed in the layered navigation.
Non-Anchor
Categories
Appears only on non-anchored category
pages, which are category pages that
are not shown in the layered navigation.
Products
Displays the banner rotator for a specific
product, or type of product. Options
include:
All Product Type
Simple Product
Grouped Product
Configurable Product
Bundle Product
Virtual Product
Gift Card
Categories
Displays the banner rotator for only the categories selected.
Block Reference
Assigns the banner rotator to a specific location by reference.
Options include:
Magento Enterprise Edition User Guide, Version 1.14.2
227
Creating a Banner Rotator
Chapter 14: Banners
Banner Layout Update Options (cont.)
OPTION
DESCRIPTION
Breadcrumbs
Page Footer Before
Left Column
Page Footer Bottom
Main Content Area
Page Header
My Cart Extra
Actions
Page Top
Navigation Bar
Store Language
Right Column
Page Bottom
Template
Options include:
Banner Block Template
Banner Inline Template
Banner Widget Options
OPTION
Banners to Display
DESCRIPTION
Options include:
Specified Banners
Shopping Cart Promotions Related
Catalog Promotions Related
Restrict by Banner Types
Limits the banner to a certain section. Options include:
Content Area
Footer
Header
Left Column
Right Column
Rotation Mode
228
Select the rotation mode for the banners. Options include:
Do not rotate
Display one banner after the other, in a
stack where all are visible.
One at a time,
Random
Displays the banners that you specify in
a randomly generated order. Every time
the page is refreshed, a different (and
random) banner appears.
Magento Enterprise Edition User Guide, Version 1.14.2
Chapter 14: Banners
Using Banners with Price Rules
Banner Widget Options (cont.)
OPTION
Specify Banners
DESCRIPTION
One at the time,
Series
Displays the banners that you specify by
the order of their position every time the
page is refreshed.
One at the time,
Shuffle
Displays one banner at a time in a
shuffled position order. This option is
similar to the One at a time, Random
option, except that the same banner
does not repeat back-to-back (unless
you have only one banner).
Select the banners to include from the list of available banners.
Using Banners with Price Rules
Any banners you have created can be associated with both catalog and shopping cart price
rules for a promotion. To associate a banner with a price rule, you must first create the
banner and the price rule.
To associate a banner with a price rule:
1.
2.
On the Admin menu, select one of the following:
l
Promotions > Catalog Price Rules
l
Shopping Cart Price Rules
In the list, click to open the rule where you want to add the banner. Then, do the following:
a.
In the Price Rule panel on the left, select Related Banners.
b.
In the list, select the checkbox of each banner that you want to associate with the price
rule.
If your banners don’t appear in the table, click the Reset Filter button to clear filtering rules.
3.
When complete, click the Save Rule button.
Magento Enterprise Edition User Guide, Version 1.14.2
229
Using Banners with Price Rules
Chapter 14: Banners
Notes
230
Magento Enterprise Edition User Guide, Version 1.14.2
Chapter 15:
Widgets
A widget is a snippet of code that makes it possible to display a wide range of content
and place it at specific block references in your store. Many widgets display real-time,
dynamic data and create opportunities for your customers to interact with your store.
The Widget tool makes it easy to place existing content such as blocks, banners, and
interactive elements most anywhere in your store. In addition, the widget code that you
generate can be easily incorporated into other content directly from the editor.
You can use widgets to create landing pages for marketing campaigns, display
promotional content at specific locations throughout the store. Widgets can also be
used to add interactive elements and action blocks for external review systems, video
chats, voting, and subscription forms, or to provide navigation elements for tag clouds,
rotating banners, and image sliders.
Topics in this chapter:
l
Widget Types
l
Creating a Widget
l
Static Block Widget
l
New Products List
l
Banner Rotator
l
Order by SKU
l
Mini Shopping Cart
Magento Enterprise Edition User Guide, Version 1.14.2
231
Widget Types
Chapter 15: Widgets
Widget Types
Banner Rotator
Combines an assortment of banners into a single display, which can be set to rotate in a
series, random order, or shuffle. The banner can be configured to appear on a specific page
and location on the page.
CMS Hierarchy Node Link
Displays a link to a selected hierarchy node. Allows you to specify custom text and a link to
the node. When the link is complete, it can be used in content pages and blocks.
CMS Page Link
Displays a link to a selected page. Allows you to specify custom text and title. When the
link is complete, it can be used in content pages and blocks.
CMS Static Block
Displays a block of content at a specific location on a page.
Catalog Category Link
Displays a link to a selected catalog category. Allows you to specify custom text and a title.
Two templates are available: inline and block. When the link is complete, it can be used in
content pages and blocks.
Catalog Events Carousel
Displays a list of upcoming events.
Catalog New Products List
Displays a block of products which have been designated as new, for the duration of time
specified in the product record.
Catalog Product Link
Displays a link to a selected catalog product. Allows you to specify custom text and a title.
Two templates are available: inline and block. When the link is complete, it can be used in
content pages and blocks.
232
Magento Enterprise Edition User Guide, Version 1.14.2
Chapter 15: Widgets
Widget Types
Event
When the Event Widget is enabled, it appears on the home page and category pages. It
lists open and upcoming events, sorted by end date. If two or more events share the same
end date, the events are sorted based on the order specified in the configuration.
Gift Registry Search
Customers can search for public gift registries by name, or registry ID.
Order by SKU
The Order by SKU widget is a mini order form with two fields: SKU and Qty. It also
contains a link to upload a CSV file with order data from the customer's account
dashboard.
Orders and Returns
The Orders and Returns widget gives customers the ability to submit their own requests for
return merchandise authorization.
Recently Compared Products
Displays the built-in block of recently compared products. You can specify the number of
products included, and format them as a list or product grid.
Recently Viewed Products
Displays the built-in block of recently viewed products. You can specify the number of
products included, and format them as a list or product grid.
Wishlist Search
Displays a form that allows shoppers to search for wishlists.
Mini Shopping Cart
If the store has a responsive theme, the Mini Shopping Cart widget can be used to display
additional information, such as a banner or contact information, in the mini shopping cart.
Magento Enterprise Edition User Guide, Version 1.14.2
233
Creating a Widget
Chapter 15: Widgets
Creating a Widget
The process of creating a widget is nearly the same for each type. You can follow the first
part of the instructions, which is the same for all types, and then complete the last part
that is specific to the type of widget you want to create.
Process Overview:
Step 1: Choose the Widget Type
Step 2: Specify Where It Goes
Step 3: Select a Template
Step 4: Complete the Instructions by Type
Step 5: Check It Out!
Step 1: Choose the Widget Type
1.
On the Admin menu, select CMS > Widgets.
2.
Click the Add New Widget Instance button.
3.
In the Settings section, select the Type of widget you want to create. Then, click the
Continue button.
4.
In the Frontend Properties section, do the following:
a.
In the Widget Instance Title field, enter a descriptive title for the widget. This title is
for internal use only, and won’t be visible to your customers.
b.
Enter a number in the Sort Order field to determine the order of the block when listed
with others in the column. The top position is zero.
c.
Set Assign to Store Views to “All Store Views,” or to the view where you want the
widget to be available. To select more than one, hold the Ctrl key down and select each
option.
Step 2: Specify Where It Goes
234
1.
In the Layout Updates section, click the Add Layout Update button.
2.
Set Display On to the type of category or product page where you want the widget to
appear.
3.
In the Block Reference list, select the block or section of your page layout where you want
the widget to appear.
Magento Enterprise Edition User Guide, Version 1.14.2
Chapter 15: Widgets
Creating a Widget
Step 3: Select a Template
1.
2.
Set Template to one of the following:
Block Template
Formats the content so it can be placed as standalone unit on the
page.
Inline Template
Formats the content so it can be placed inside other content. For
example, a link that goes inside a paragraph of text.
Click Save and Continue Edit to save your changes and continue editing.
Step 4: Complete the Instructions by Type
The options for each type vary slightly, but the process is essentially the same.
l
Banner Rotator
l
CMS Static Block
l
Catalog New Products List
l
Order by SKU
l
Mini Shopping Cart
l
And more…
Step 5: Save Your Work and Check It Out!
1.
When complete, click the Save button.
2.
Follow the links in the message at the top of the workspace to update the index and page
cache.
3.
Go to your storefront and see how it looks!
Magento Enterprise Edition User Guide, Version 1.14.2
235
CMS Static Block Widget
Chapter 15: Widgets
CMS Static Block Widget
The CMS Static Block widget gives you the ability to place an existing CMS block most
anywhere in your store.
Step 1: Choose the Widget Type
1.
On the Admin menu, select CMS > Widgets.
2.
Click the Add New Widget Instance button.
3.
In the Settings section, set Type to “CMS Static Block.” Then, click the Continue button.
4.
In the Frontend Properties section, do the following:
a.
In the Widget Instance Title field, enter a descriptive title for the widget. This title is
for internal use only, and is not visible to your customers.
b.
Enter a number in the Sort Order field to determine the order of the block when listed
with others in the column. The top position is zero.
c.
Set Assign to Store Views to “All Store Views,” or to the view where the app will be
available. To select more than one, hold the Ctrl key down and select each option.
Step 2: Complete the Layout Updates
1.
In the Layout Updates section, set Display On to the category, product, or page where you
want the block to appear.
2.
To complete the Layout Updates, do the following:
a.
Select the Page where you want the block to appear.
b.
Select the Block Reference to identify the place on the page where the block will
appear.
c.
Accept the default setting for Template, which is set to "CMS Static Block Default
Template."
d.
Click Save and Continue Edit.
Step 3: Place the Block
1.
In the panel on the left, select Widget Options.
2.
Click the Select Block button.
Then in the list, click to select the block you want to place.
3.
When complete, click the Save button.
The new widget now appears in the Manage Widget Instances list.
236
Magento Enterprise Edition User Guide, Version 1.14.2
Chapter 15: Widgets
New Products List
4.
When prompted, follow the instructions at the top of the workspace to update the index
and page cache.
5.
Return to your storefront to verify that the block is in the correct location. To move the
block to a different location, you can reopen the widget and try a different page or block
reference.
New Products List
The list of new products is an example of dynamic content, and consists of live data that is
pulled from your product catalog. By default, the “New Products” list includes the first
eight of the most recently added products. However, it can also be configured to include
only products within a specified date range.
New Products List on Home Page
Process Overview:
Step 1: Set the Date Range for Each Product
Step 2: Create a Working Copy of the Widget
Step 3: Select the Location for the List
Step 4: Configure the List
Step 5: Preview Your Work
Magento Enterprise Edition User Guide, Version 1.14.2
237
New Products List
Chapter 15: Widgets
Step 1: Set the Date Range for Each Product
To make a product appear in the list by date range, the dates must be specified in the
product record. The product then appears in the New Products list during the date range
specified.
1.
On the Admin menu, select Catalog > Manage Products.
2.
Find the product you want to feature, and open the record. Then, do the following:
a.
In the Set Product as New From Date field, click the calendar
button and select
the first date that you want the product to be featured.
b.
In the Set Product as New To Date field, click the calendar
button and select the
last date that you want the product to be featured.
"Set Product As New " Date Range
3.
When complete, click the Save button.
4.
When you are prompted to reindex and refresh the page cache, click the links at the top of
the workspace, and follow the instructions.
The product will appear in the New Products list during this date range. Repeat this step
for each product that you want to feature.
Step 2: Create a Working Copy of the Widget
The code that determines the content of the list and its placement in your store is
generated by the Widget tool. To create your own working copy of the New Products list,
simply save a copy of the existing widget. Your working copy is a new “instance” of the
widget, and any changes you make will not affect the original.
238
Magento Enterprise Edition User Guide, Version 1.14.2
Chapter 15: Widgets
New Products List
1.
On the Admin menu, select CMS > Widgets.
2.
In the upper-right corner, click the Add New Widget Instance button.
3.
In the Settings section, do the following:
4.
a.
Set Type to “Catalog New Products List.”
b.
Select the Design Package/Theme that is used by the store.
Then, click the Continue button.
Widget Type
5.
In the Frontend Properties section, complete the following fields:
Widget Instance Title
Enter a descriptive title for your widget. This title is visible
only from the Admin.
Assign to Store Views
Select the store views where the widget will be visible. You
can select a specific store view, or "All Store Views."
Sort Order
(Optional) Enter a number to determine the order this items
appears with others in the same part of the page. (0 = first, 1
= second, 3= third, and so on.)
Widget Frontend Properties
Magento Enterprise Edition User Guide, Version 1.14.2
239
New Products List
Chapter 15: Widgets
Step 3: Select the Location for the List
1.
In the Layout Updates section, click the Add Layout Update button. Then, do the
following:
a.
Set Display On to “Specified Page.”
b.
Set Page to “CMS Home Page.”
c.
Set Block Reference to “Main Content Area.”
d.
Set Template to one of the following:
l
New Product Lists Templates
l
New Products Grid Template
Layout Updates
2.
Click the Save and Continue Edit button to save your changes.
Step 4: Configure the List
1.
In the panel on the left, select Widget Options.
2.
Set Display Products to one of the following:
3.
240
All Products
Lists products in sequence, starting with those most recently added.
New Products
Lists only the products which are identified as “New.” A product is
considered to be new during the date range specified in the “Set
Product As New From” date and “Set Product As New To” date.
fields of the product. The list will be blank if the date range expires
and no additional products have been set as "New."
Complete the remaining information as follows:
a.
To provide navigation control for lists with multiple pages, set Display Page Control
to “Yes.” Then, in the Number of Products per Page field, enter the number of
products you want to appear on each page.
b.
Set Number of Products to Display to the number of new products you want to
include in the list. The default setting is 10.
Magento Enterprise Edition User Guide, Version 1.14.2
Chapter 15: Widgets
c.
New Products List
In the Cache Lifetime (Seconds) field, select how often you want to refresh the list of
new products. By default, the cache is set to 86400 seconds, or 24 hours.
Widget Options
4.
When complete, click the Save button.
5.
When prompted to refresh the cache, click the link in the message at the top of the
workspace, and follow the instructions.
Step 5: Preview Your Work
1.
On the Admin menu, select CMS > Pages > Manage Content.
2.
Find the published page in the list, where you placed the New Products list. Then, in the
Action column, click the Preview link.
Magento Enterprise Edition User Guide, Version 1.14.2
241
Order by SKU Widget
Chapter 15: Widgets
Order by SKU Widget
The Order by SKU widget is a mini order form with two fields: SKU and Qty. It also
contains a link to upload a csv file with order data from the customer's account dashboard.
Order by SKU Widget
To create an Order by SKU widget:
1.
On the Admin menu, select CMS > Widgets. Then, click the Add New Widget Instance
button.
2.
In the Settings section, do the following:
Settings
3.
242
a.
Set Type to “Order by SKU” and configure other widget options.
b.
Select the Design Package/Theme that will be used with the widget.
c.
Click the Continue button.
In the Frontend Properties section, do the following:
Magento Enterprise Edition User Guide, Version 1.14.2
Chapter 15: Widgets
Order by SKU Widget
Frontend Properties
4.
a.
Enter the Widget Instance Title.
b.
In the Assign to Store Views list, select each view where the widget will be available.
c.
Enter a number in the Sort Order field to indicate the sequence of the Order by SKU
block in relation to other blocks in the column.
Click the Add Layout Update button. Then, do the following:
Layout Updates
5.
a.
Set Display On to the pages where you want the Order by SKU widget to appear.
b.
Select the Categories that you want to be used with the widget.
c.
Set Block Reference to the location on the page where you want the widget to appear.
In the panel on the left, click Widget Options. Then, do the following:
Widget Options
6.
a.
To include a link in the widget, set Display a Link to Loading a Spreadsheet to “Yes.”
b.
Enter the Link Text that you want to appear in the link.
When complete, click the Save button.
Magento Enterprise Edition User Guide, Version 1.14.2
243
Mini Shopping Cart Widget
Chapter 15: Widgets
Mini Shopping Cart Widget
You can use a widget to show relevant information to your customers when the mini
shopping cart is displayed in your store. For example, you might want to display a
promotional banner, or you could provide a phone number or other contact information.
The mini shopping cart widget can be used only with responsive web design themes.
Widget in Mini Shopping Cart
Process Overview:
Step 1: Choose the Widget Type
Step 2: Complete the Layout Updates
Step 3: Place the Block
Step 1: Choose the Widget Type
244
1.
On the Admin menu, select CMS > Widgets.
2.
Click the Add New Widget Instance button.
3.
In the Settings section, do the following:
a.
Set Type to “CMS Static Block.”
b.
Set Design Package/Theme to any responsive web design (RWD) theme. You must
select a responsive package/theme to use the mini cart widget.
c.
Click the Continue button.
Magento Enterprise Edition User Guide, Version 1.14.2
Chapter 15: Widgets
Mini Shopping Cart Widget
Widget Settings
4.
In the Frontend Properties section, do the following:
a.
In the Widget Instance Title field, enter a descriptive title for the widget. This title is
for internal use only, and is not visible to your customers.
b.
Enter a number in the Sort Order field to determine the order of the block when listed
with others in the column. The top position is zero.
c.
Set Assign to Store Views to “All Store Views,” or to the view where the app will be
available. To select more than one, hold the Ctrl key down and select each option.
Frontend Properties
Step 2: Complete the Layout Updates
1.
In the Layout Updates section, set Display On to the category, product, or page where you
want the block to appear.
2.
To complete the Layout Updates, do the following:
a.
Select the Page where you want the block to appear.
b.
Set Block Reference to “Mini-cart promotion block.”
c.
Accept the default setting for Template, which is set to “CMS Static Block Default
Template.”
d.
Click Save and Continue Edit.
Magento Enterprise Edition User Guide, Version 1.14.2
245
Mini Shopping Cart Widget
Chapter 15: Widgets
Step 3: Place the Block
1.
In the panel on the left, select Widget Options.
2.
Click the Select Block button. Then in the list, click to select the block you want to place.
3.
When complete, click the Save button.
The app appears in the Manage Widget Instances list.
246
4.
When prompted, follow the instructions at the top of the workspace to update the index
and page cache.
5.
Return to your storefront to verify that the block is in the correct location.
Magento Enterprise Edition User Guide, Version 1.14.2
Chapter 16:
Variables
Variables are reusable pieces of information that can be created once and used in
multiple places, such as email templates, blocks, banners, and content pages. Your
Magento store includes a large number of predefined attributes, and also gives you the
ability to create your own custom variables.
Topics in this chapter:
l
Predefined Variables
l
Custom Variables
Store Contact Information Variables
Magento Enterprise Edition User Guide, Version 1.14.2
247
Predefined Variables
Chapter 16: Variables
Predefined Variables
Predefined variables are easy to add to content pages, blocks, and email templates.
Inserting Predefined Variables
To add a variable to a page:
1.
On the Admin menu, select CMS > Pages > Manage Content. Then, click to open the
page.
2.
In the Page Information panel on the left, select Content. Then from the editor, do one of
the following:
l
Click the Insert Variable button.
l
If you prefer to work with the code, click the Show / Hide Editor button.
3.
Position the insertion point in the text where you want the variable to appear. Then, click
the Insert Variable button.
4.
In the list of available store contact variables, click the one you want to use.
5.
When complete, click the Save button.
To add a variable to a block:
248
1.
On the Admin menu, select CMS > Static Block. Then, click to and open the block.
2.
From the editor, do one of the following:
l
Click the Insert Variable button.
l
If you prefer to work with the code, click the Show / Hide Editor button.
Magento Enterprise Edition User Guide, Version 1.14.2
Chapter 16: Variables
Predefined Variables
3.
Position the insertion point in the text where you want the variable to appear. Then, click
the Insert Variable button.
4.
In the list of available variables, click to select the one you want to use.
5.
When complete, click the Save Block button.
To add a variable to an email template:
1.
On the Admin menu, select System > Transactional Emails.
2.
Do one of the following:
l
Click to edit a predefined template.
l
Click the Add New Template button to create a new one.
3.
In the Template Content box, position the insertion point where you want the variable to
appear. Then, click the Insert Variable button.
4.
In the list of available variables, click to select the one you want to use. Email templates
have an additional selection of variables.
5.
When complete, click the Save Template button.
Predefined Variables
STORE CONTACT VARIABLES
Store Contact Information
Base Unsecure URL
Base Secure URL
General Contact Name
General Contact Email
Sales Representative Contact Name
Sale Representative Contact Email
Custom 1 Contact Name
Custom 1 Contact Email
Custom 2 Contact Name
Custom 2 Contact Email
Store Name
Store Contact Telephone
Store Contact Address
Magento Enterprise Edition User Guide, Version 1.14.2
249
Custom Variables
Chapter 16: Variables
Template Variables
TEMPLATE VARIABLES
Store Url
Email Logo Image Url
Email Logo Image Alt
Customer Name
Store Name
Customer Account Url
Invoice Id
Order Id
Billing Address
Payment Details
Shipping Address
Shipping Description
Invoice Items Grid
Invoice Comment
Custom Variables
If you know a little basic HTML, you can create custom variables and incorporate them into
pages, blocks, banners, and email templates. When a variable is inserted into HTML, it is
formatted as a markup-tag, and enclosed in double curly braces.
{{CustomVar code= "store_hours"}}
To create a custom variable:
1.
On the Admin menu, select System > Custom Variable.
2.
Click the Add New Variable button.
3.
Enter an identifier in the Variable Code field. Use all lowercase characters, without spaces.
4.
Enter a Variable Name, which is used for internal reference. Then, do one of the following:
l
l
5.
250
In the Variable HTML Value text field, enter any content you want to include, using
basic HTML tags. This option allows you to format the value.
In the Variable Plain Value field, enter the variable value as plain text.
When complete, click the Save button.
Magento Enterprise Edition User Guide, Version 1.14.2
Chapter 16: Variables
Custom Variables
To add a variable to a banner:
1.
On the Admin menu, select CMS > Banners. Then, click to open the banner.
2.
In the Default Content section, click the Insert Variable button.
3.
In the list of available variables, select the one that you want to use..
4.
When complete, click the Save Banner button.
To add a variable to an email template:
1.
On the Admin menu, select System > Transactional Emails.
2.
Do one of the following:
l
Click to edit a predefined template.
l
Click the Add New Template button to create a new one.
3.
In the Template Content box, position the insertion point where you want the variable to
appear. Then, click the Insert Variable button.
4.
In the list of available variables, click to select the one you want to use.
5.
When complete, click the Save Template button.
Magento Enterprise Edition User Guide, Version 1.14.2
251
Custom Variables
Chapter 16: Variables
Notes
252
Magento Enterprise Edition User Guide, Version 1.14.2
Chapter 17:
Markup Tags
A markup tag is a snippet of code that contains a relative reference to an object in your
store, such as a page, block, or image. Markup tags can be incorporated into the HTML
content of CMS pages, blocks, images, and email templates.
Topics in this chapter:
l
Markup Tag Syntax
l
Using Markup Tags in Links
Magento Enterprise Edition User Guide, Version 1.14.2
253
Markup Tag Syntax
Chapter 17: Markup Tags
Markup Tag Syntax
Markup tags are enclosed in double, curly braces, and can be generated by the Widget tool,
or typed directly into HTML content. For example, rather than hard-coding the full path to
a page, you can use a markup tag to represent the store URL. The markup tags featured in
the following examples include:
Store URL
The Store URL markup tag represents the base URL of your website, and is used as a
substitute for the first part of a full URL, including the domain name. There are two
versions of this markup tag: One that goes directly to your store, and the other with a
forward slash at the end that is used when a path is added.
{{store url='apparel/shoes/womens'}}
Media URL
The dynamic media URL markup tag represents the location and file name of an image
that is stored on a content delivery network (CDN). The tag can be used to place an image
on a page, block, banner, or email template.
{{media url='shoe-sale.jpg'}}
Block ID
The Block ID markup tag is one of the easiest to use, and can be used to place a block
directly on a CMS page, or even nested inside another block. You can use this technique to
modify a block for different promotions or languages. The Block ID markup tag references a
block by its identifier.
{{block id='block-id'}}
Template Tag
A template tag references a PHTML template file, and can be used to display the block on a
CMS page or static block. The code in the following example can be added to a page or
block to display the Contact Us form.
“Contact Us” Template Tag
{{block type="core/template" name="contactForm"
template="contacts/form.phtml"}}
254
Magento Enterprise Edition User Guide, Version 1.14.2
Chapter 17: Markup Tags
Markup Tag Syntax
The code in the next example can be added to a page or block to display the a list of
products in a specific category, by category ID.
“Category Product List” Template Tag
{{block type="catalog/product_list" category_id="22"
template="catalog/product/list.phtml"}}
Non-Inline CSS Tag
Because many email clients do not support CSS, this markup tag provides a way to convert
the CSS styles that are used in email and newsletter templates to inline styles. The tag
references the non_inline_styles variable to point to a CSS file on the server for the styles
to be converted. The styles that are non-inline are copied to the <styles> tag of each
message or newsletter that is sent. This tag can be used only with templates for
transactional email and newsletters. To learn more, see the developer documentation.
{{var non_inline_styles.css}}
Widget Code
The Widget tool can be used to display lists of products, or to insert complex links, such as
one that goes to a specific product page, based on product ID. The code that is generated
includes the block reference, location of the code module, and corresponding PHTML
template. After the code is generated, you can copy and paste it from one place to another.
The code in the following example can be added to a page or block to display the list of
new products.
“New Products Grid” Code
{{widget type="catalog/product_widget_new"
display_type="new_products" products_count="10"
template="catalog/product/widget/new/content/new_grid.phtml"}}
The code in the next example can be added to a page or block to display a link to a specific
product, by product ID.
“Link to Product” Code
{{widget type="catalog/product_widget_link" anchor_text="My Product Link"
title="My Product Link"template="catalog/product/widget/link/link_
block.phtml" id_path="product/31"}}
Magento Enterprise Edition User Guide, Version 1.14.2
255
Using Markup Tags in Links
Chapter 17: Markup Tags
Using Markup Tags in Links
You can use markup tags with HTML anchor tags, and link directly to any page in your
store. The link can be incorporated into CMS content, such as a page, static block, banner,
or email template. You can also use this technique to link an image to a specific page.
Process Overview:
Step 1: Identify the Destination URL
Step 2: Add the Markup to the URL
Step 3: Complete the Anchor Tag
Step 1: Identify the Destination URL
If possible, navigate to the page that you want to link to, and copy the full URL from the
address bar of your browser. The part of the URL that you need comes after the “dot com
forward slash.” Otherwise, copy the URL Key from the CMS page that you want to use as
the link destination.
Full URL to Category Page
http://mystore.com/apparel/shoes/womens
http://mystore.com/apparel/shoes/womens.html
Full URL to Product Page
http://mystore.com/apparel/shoes/womens/nine-west-pump
http://mystore.com/apparel/shoes/womens/nine-west-pump.html
Full URL to CMS Page
http://mystore.com/about-us
256
Magento Enterprise Edition User Guide, Version 1.14.2
Chapter 17: Markup Tags
Using Markup Tags in Links
Step 2: Add the Markup to the URL
The Store URL tag represents the base URL of your website, and is used as a substitute for
the “http address” part of the store URL, including the domain name and “dot com.” There
are two versions of the tag, which you can use, depending on the results you want to
achieve.
store direct_url
Links directly to a page.
store url
Places a forward slash at the end, so additional references
can be appended as a path.
In the following examples, the URL Key is enclosed in single quotes, and the entire markup
tag is enclosed in double curly braces. When used with an anchor tag, the markup tag is
placed inside the double quotes of the anchor. To avoid confusion, you can alternate using
single-and double quotes for each nested set of quotes.
1.
If you are starting with a full URL, delete the “http address” part of the URL, up through
and including the “dot.com forward slash.” In its place, type the Store URL markup tag, up
through the opening single quote.
Store URL Markup Tag
http://mystore.com/apparel/shoes/womens
{{store url='apparel/shoes/womens'}}
Otherwise, type the first part of the Store URL markup tag, and paste the URL key or path
that you copied earlier.
Store URL Markup Tag with URL Key
{{store url='
{{store url='apparel/shoes/womens'}}
2.
To complete the markup tag, type the closing double quotes and double braces.
Magento Enterprise Edition User Guide, Version 1.14.2
257
Using Markup Tags in Links
Chapter 17: Markup Tags
Step 3: Complete the Anchor Tag
1.
Wrap the completed markup tag inside an anchor tag, using the markup tag instead of the
target URL. Then, add the link text, and closing anchor tag.
Markup in Anchor Tag
<a href="{{markup tag goes here}}">Link Text</a>
2.
Paste the completed anchor tag into the code of any CMS page, block, banner, or email
template, where you want the link to appear.
Complete Link with Markup
<a href="{{store url='apparel/shoes'}}">Shoe Sale</a>
258
Magento Enterprise Edition User Guide, Version 1.14.2
Design & Theme
In this section…
Your Store Design
Page Layout
Layout Updates
Page Setup
Your Store's Theme
Chapter 18:
Your Store Design
Magento provides a variety of easy-to-use design options that you can use to apply
your own customized look-and-feel to your store. To learn more advanced techniques,
such as how to use themes, skins, layouts, and blocks, see the Magento Design Guide.
Magento is an object-oriented environment with pages that are assembled from
separate components. For some, this approach requires a slightly different way of
thinking, because there isn’t a single HTML page that corresponds to any given page.
After you understand the basics, you’ll appreciate working in such a flexible and fluid
environment!
Topics in this chapter:
l
Uploading Your Logo
l
Uploading a Favicon
l
Welcome Message
l
Store Demo Notice
Additional Resources
Creating a Better Performing Magento Site by Design
Brand Strategy in an Omni-Channel World
Magento Enterprise Edition User Guide, Version 1.14.2
261
Uploading Your Logo
Chapter 18: Your Store Design
Uploading Your Logo
The size of the logo in the header is determined by your theme. If your theme has a sample
logo, you can right-click and download the logo to make sure the replacement logo is the
same size.
Logo with Alt Text
The logo image path points to its location on the server. What is actually a long path is
entered as a short path that is relative to the theme. For example:
Actual path:
skin/frontend/base/default/images/logo.gif
Relative path:
images/logo.gif
The header image filename is hard-coded into some of the theme files. Therefore, if you
change the file name of the logo file, you will also have to make some simple updates to
some source files. For non-programmers, the easiest approach is to use the default
filename, “logo.gif,” and write over the existing file.
To change the logo:
1.
On the server, copy your new logo file to the images folder of your theme. For example:
images/media/logo.png
2.
On the Admin menu, select System > Configuration. Then in the panel on the left, under
General, select Design.
3.
If you have multiple stores or views, set the Current Configuration Scope in the upper-left
corner to the store or view where the configuration applies. Then, clear the checkbox after
each field so new values can be entered.
4.
Click to expand the Header section. Then, do the following:
a.
If the path or file name has changed, enter it in the Logo Image Src field.
Logo Image Path
262
Magento Enterprise Edition User Guide, Version 1.14.2
Chapter 18: Your Store Design
5.
Uploading a Favicon
b.
In the Logo Image Alt field, enter the alt text for the image. If the configuration is for
a different language view, enter the alt text in the appropriate language.
c.
If your store uses a responsive theme, in the Small Logo Image Src field, enter the
path to a version of the logo that is optimized for small devices.
When complete, click the Save Config button.
Uploading a Favicon
Favicon is short for “favorite icon,” and refers to the little icon on the tab of each browser
page. Depending on the browser, the favicon also appears in address bar, just before the
URL.
Favicons are generally 16 x 16 pixels or 32 x 32 pixels in size. Although Magento accepts
.ico, .png, .jpg, .jpeg, .apng, and .svg file types, not all browsers support these formats. The
most widely-supported file format to use for a favicon is .ico. There are many free tools
available online that you can use to generate an .ico image or convert an existing image to
the .ico format.
Favicon in Address Bar
Process Overview:
Step 1: Create a Favicon
Step 2: Upload the Favicon to Your Store
Step 3: Refresh the Cache
Step 1: Create a Favicon
1.
Create a 16 x 16 or 32 x 32 graphic image of your logo, using the image editor of your
choice.
2.
(Optional) Use one of the available online tools to convert the file to the .ico format. Then,
save the file to your computer.
Magento Enterprise Edition User Guide, Version 1.14.2
263
Changing the Welcome Message
Chapter 18: Your Store Design
Step 2: Upload the Favicon to Your Store
1.
On the Admin menu, select System > Configuration.
2.
In the panel on the left, under General, select Design. Then, click to expand the HTML
Head section.
3.
To upload a favicon, click the Choose File button. Then, select the favicon file that you
prepared.
Uploading a Favicon
4.
To delete the current favicon, select the Delete Image checkbox.
5.
When complete, click the Save Config button.
Step 3: Refresh the Cache
1.
As soon as the favicon is uploaded, you are prompted to refresh the cache. Click the Cache
Management link in the message at the top of the workspace.
2.
In the list, select the Page Cache checkbox that is marked “Invalidated.”
3.
In the upper-right corner, set Actions to “Refresh” and click the Submit button.
4.
To view the new favicon, return to your storefront and press F5 to refresh the browser.
Changing the Welcome Message
The “Welcome” message in the header of the page expands to include the name of
customers who are logged in. You can change the text for each store or store view.
Welcome Text
To change the welcome message:
1.
264
On the Admin menu, select System > Configuration. Then in the panel on the left, under
General, select Design.
Magento Enterprise Edition User Guide, Version 1.14.2
Chapter 18: Your Store Design
Store Demo Notice
2.
If you have multiple stores or views, set the Current Configuration Scope in the upper-left
corner to the store or view where the configuration applies. Then, clear the checkbox after
each field so new values can be entered.
3.
Click to expand the Header section.
4.
Enter the Welcome Text that you want to appear in the header.
Changing the Welcome Text for a Store View
5.
When complete, click the Save Config button.
6.
When prompted to update the Page Cache, click the Cache Management link at the top of
the workspace. Then, follow the instructions to refresh the cache.
Store Demo Notice
If you are using a store as a demo, or if it is online but still “under construction,” you can
display a store demo notice at the top of the page. When you are ready to “go live” with the
store, simply remove the message.
To set the store demo notice:
1.
On the Admin menu, select System > Configuration. Then in the panel on the left, under
General, select Design.
2.
Click to expand the HTML Head section.
3.
Scroll down, and set the Display Store Demo Notice as needed.
4.
When complete, click the Save Config button.
Store Demo Notice
Magento Enterprise Edition User Guide, Version 1.14.2
265
Store Demo Notice
Chapter 18: Your Store Design
Notes
266
Magento Enterprise Edition User Guide, Version 1.14.2
Chapter 19:
Page Layout
The layout of each page in your store consists of distinct sections, or containers, that
define the header, footer, and content areas of the page. Depending on the layout, each
page might have one, two, three columns, or more. You can think of the layout as the
“floor plan” of the page.
Content blocks float to fill the available space, according to the section of the page
layout where they are assigned to appear. You will discover that if you change the
layout from a three-column to a two-column layout, the content of the main area
expands to fill the available space, and any blocks that are associated with the unused
side bar seem to disappear. However, if you restore the three-column layout, the blocks
reappear. This fluid approach, or liquid layout, makes it possible to change the page
layout without having to rework the content. If you are used to working with individual
HTML pages, you will discover that this modular, “building block” approach requires a
different way of thinking.
Topics in this chapter:
l
Standard Layouts
l
Storefront Examples
Magento Enterprise Edition User Guide, Version 1.14.2
267
Standard Layouts
Chapter 19: Page Layout
Standard Layouts
1 Column
The “1 Column” layout can be used to create a dramatic
home page with a large image or focal point. It’s also a
good choice for a landing page, or any other page that has
a combination of text, images, and video.
2 Columns with Left Bar
The “2 Columns with Left Bar” layout is often used for
pages with navigation on the left, such as a catalog or
search results pages with layered navigation. It is also an
excellent choice for home pages that need additional
navigation or blocks of supporting content on the left.
2 Columns with Right Bar
With a “2 Columns with Right Bar” layout, the main
content area is large enough for an eye-catching image or
banner. This layout is also often used for Product pages
that have blocks of supporting content on the right.
268
Magento Enterprise Edition User Guide, Version 1.14.2
Chapter 19: Page Layout
Standard Layouts
3 Columns
The “3 Column” layout has a center column that is wide
enough for the main text of the page, with room on each
side for additional navigation and blocks of supporting
content.
Empty
The “Empty” layout can be used to define custom page
layouts. To learn more, see the Magento Design Guide.
Magento Enterprise Edition User Guide, Version 1.14.2
269
Storefront Examples
Chapter 19: Page Layout
Storefront Examples
The column dimensions are determined by style sheet of the theme. Some themes apply a
fixed pixel width to the page layout, while others use percentages to make the page respond
to the width of the window or device.
Most desktop themes have a fixed width for the main column, and all activity takes place
within this enclosed area. Depending on your screen resolution, there is empty space on
each side of the main column.
1 Column Layout
The content area of a “1 Column” layout spans the full-width of the main column. This
layout is often used for a home page with a large banner or slider, or pages that require no
navigation, such as a login page, splash page, video, or full-page advertisement.
1 Column Layout
270
Magento Enterprise Edition User Guide, Version 1.14.2
Chapter 19: Page Layout
Storefront Examples
2 Columns with Left Bar
The content area of this layout is divided into two columns. The main content column
floats to the right, and the side bar floats to the left.
2 Columns Left Bar
2 Columns with Right Bar
This layout is a mirror image of the other two-column layout. This time, the side bar floats
to the right, and the main content column floats to the left.
Magento Enterprise Edition User Guide, Version 1.14.2
271
Storefront Examples
Chapter 19: Page Layout
2 Columns Right Bar
3 Columns
This layout has a main content area with two side columns. The left side bar and main
column are wrapped together, and float to the left. The other side bar floats to the right.
3 Columns
272
Magento Enterprise Edition User Guide, Version 1.14.2
Chapter 20:
Layout Updates
Before you begin working with custom layout updates, it is important to understand
how the pages of your store are constructed, and the difference between the terms
layout and layout update. The term layout refers to the visual and structural
composition of the page. However, the term layout update refers to a specific set of
XML instructions that determines how the page is constructed.
The XML layout of your Magento Enterprise Edition store is a hierarchical tree of
blocks. Some elements appear on every page, and others appear only on specific pages.
You can see how blocks are referenced by examining the layout update code for your
home page. To do so, simply open your CMS home page in edit mode, and select the
Design tab to view the Page Layout section. Depending on the theme, it might contain
instructions to remove blocks, unset blocks, and add blocks by referencing specific areas
of the page layout.
In many cases, the same result can be achieved with a widget. To place a block of
content with a widget, you must identify the page, and location on the page, where you
want the block to appear. You can use a widget to place a block on any generic page of
your store, including the home page and all CMS pages. However, to place a block in
the sidebar of a specific CMS page, you must make a layout update.
Topics in this chapter:
l
Placing a Block
l
Controlling Block Order
l
Standard Block Layout
l
Layout Update Syntax
l
Layout Update Examples
l
XML Load Sequence
Magento Enterprise Edition User Guide, Version 1.14.2
273
Placing a Block with a Layout Update
Chapter 20: Layout Updates
Placing a Block with a Layout Update
Blocks can be placed in the left or right column of a specific page by making a layout
update to the XML code. With a few simple changes to the code, you can position the block
in either column, and control its position in relation to other blocks.
As you work with the underlying code, you will encounter slightly different terminology.
For example, the term callout is sometimes used to refer to a block that is defined as a
layout update with XML code. The term sidebar refers to the left or right columns of the
page layout. For our general discussion, we use the terms block and column. However,
when entering layout update code, make sure to follow the syntax exactly as shown in the
example.
To place a block in a side column:
1.
On the Admin menu, select CMS > Pages > Manage Content.
2.
Click to open the CMS page. Then, in the panel on the left, select Design.
3.
In the Layout Update XML box, enter the code for the right or left sidebar, as shown in
example. Then, do the following:
a.
Change the reference name to identify either the “right” or “left” column.
b.
Change the block_id to the identifier of the block to be placed.
Code for CMS Block in Side Column
<reference name="right">
<block type="cms/block" name="right.permanent.callout">
<action method="setBlockId"><block_id>your-block-id</block_id></action>
</block>
</reference>
4.
274
When complete, click the Save Page button.
Magento Enterprise Edition User Guide, Version 1.14.2
Chapter 20: Layout Updates
Placing a Block with a Layout Update
Controlling Block Order
To control the order of blocks in an XML layout update, include a “before” or “after”
positioning property in the code. To place a block—either before, or after a specific block—
replace the hyphen with the block identifier, as shown in the following examples:
before="-"
Places the block at the top of the sidebar, before other blocks.
after="-"
Places the block at the bottom of the sidebar, after other blocks.
Code to Position CMS Blocks
<block type="cms/block" before="-" name="left.permanent.callout">
<block type="cms/block" before="some-other-block"
name="left.permanent.callout">
<block type="cms/block" after="-" name="left.permanent.callout">
<block type="cms/block" after="some-other-block"
name="left.permanent.callout">
Magento Enterprise Edition User Guide, Version 1.14.2
275
Standard Block Layout
Chapter 20: Layout Updates
Standard Block Layout
In the following diagram, the block names that can be used to refer to a block in the layout
are black, and the block types, or block class paths, are blue.
Standard Block Layout
276
Magento Enterprise Edition User Guide, Version 1.14.2
Chapter 20: Layout Updates
Standard Block Layout
Block Descriptions
BLOCK TYPE
DESCRIPTION
page/html
There can be only one block of this type per page. The block
name is "root," and, it is one of the few root blocks in the layout.
You can also create your own block and name it "root," which is
the standard name for blocks of this type.
page/html_head
There can be only one “head” block per page, and it is a child of
the root block. This block must not be removed from layout.
page/html_notices
There can be only one block of this type per page. The block
name is "global_notices," and it is a child of the root block. If this
block is removed from the layout, the global notices will not
appear on the page.
page/html_header
There can be only one block of that type per page. The block
name is "header," and it is a child of the root block. This block
corresponds to the visual header at the top of the page, and
contains several standard blocks. This block must not be
removed.
page/html_wrapper
Although included in the default layout, this block is deprecated,
and only is included to ensure backward compatibility. Do not
use blocks of this type.
page/html_breadcrumbs
There can be only one block of this type per page. The name of
this block is "breadcrumbs," and it is a child of the header block.
This block displays breadcrumbs for the current page.
page/html_footer
There can be only one block of this type per page. The block
name is "footer," and it is a child of the root block. The footer
block corresponds to the visual footer at the bottom of the page,
and contains several standard blocks. This block must not be
removed.
page/template_links
There are two blocks of this type in the standard layout. The
"top.links" block is a child of the header block, and corresponds
to the top navigation menu. The "footer_links" block is a child of
the footer block, and corresponds to the bottom navigation menu.
It is possible to manipulate the template links, as shown in the
examples.
Magento Enterprise Edition User Guide, Version 1.14.2
277
Layout Update Syntax
BLOCK TYPE
Chapter 20: Layout Updates
DESCRIPTION
page/switch
There are two blocks of this type in a standard layout. The
"store_language" block is a child of the header block, and
corresponds to the top language switcher. The "store_switcher"
block is a child of the footer block, and corresponds to the bottom
store switcher.
core/messages
There are two blocks of this type in a standard layout. The
"global_messages" block displays global messages. The
"messages" block is used to display all other messages. If you
remove these blocks, the customer won't be able to see any
messages.
core/text_list
This type of block is widely used throughout Magento, and is
used as a placeholder for rendering children blocks.
core/profiler
There is only one instance of this type of block per page. It is
used for the internal Magento profiler, and should not be used for
other purposes.
Layout Update Syntax
Custom layout updates can be applied to product category pages, product pages, and CMS
page to achieve a variety of results, such as:
<block>
Create new block.
<reference>
Update existing content.
<action>
Assign actions to blocks.
<remove>
Remove blocks.
Any change made to the layout is applied when the associated entity—which can be either
a product, category, or CMS page—becomes active in the frontend of the store.
Custom layout update instructions consist of well-formed XML tags, without the <?xml
...> declaration and root tag. As with normal XML, every tag must either be empty or
properly closed, as shown in the following examples:
<tag attribute="value" />
<tag attribute="value"> ... </tag>
278
Magento Enterprise Edition User Guide, Version 1.14.2
Chapter 20: Layout Updates
Layout Update Syntax
<block>
Creates a new block within the current context. Layout block nesting defines the ordering of
block initialization location of the blocks on the page.
Syntax
NAME
type
VALUE
*
block class path
An identifier of the block class path that corresponds to the class of
the block. See the list of the available block types below.
name
*
block name identifier
A name that can be used to address the block in which this attribute
is assigned. If you create a new block with the name that is the
same as one of the existing blocks, your newly created block
substitutes the previously existing block. See the list of names of
existing blocks below.
before
block name | '-'
Is used to position the block before a block with the name specified
in the value. If "-" value used the block is positioned before all other
sibling blocks.
after
block name | '-'
Is used to position the block after a block with the name specified in
the value. If "-" value used the block is positioned after all other
sibling blocks.
template
template filename
A template filename used for the specific block type. As you have
no way to see the list of template files, use whatever template
value is demanded for every block type listed below.
as
block alias
An alias name by which a template calls the block in which this
attribute is assigned. Sometimes it's necessary to specify the alias
for a specific block type.
Magento Enterprise Edition User Guide, Version 1.14.2
279
Layout Update Syntax
Chapter 20: Layout Updates
<reference>
Changes the context for all included instructions to a previously defined block. An empty
<reference> tag if of no use, because it affects only the instructions which are children.
Syntax
NAME
name
VALUE
*
block name
A name of a block to reference.
<action>
Used to access block API, in other words, call block's public methods. It is used to set up
the execution of a certain method of the block during the block generation. Action child
tags are translated into block method arguments. The list of all available methods depends
on the block implementation (e.g. public method of the block class).
Syntax
NAME
method
VALUE
*
block method name
A name of the public method of the block class this instruction is
located in that is called during the block generation.
<remove>
Removes an existing block from the layout.
Syntax
NAME
name
VALUE
*
block name
The name of the block to be removed.
<extend>
This instruction performs final modifications to blocks which are already part of the layout.
Every attribute in the <block> instruction—except for the block name—is subject for
change. In addition,the special attribute parent can be used to change the parent of the
block. Simply put the name of the new parent block into the <extend> instruction, and the
parent of the block that is referenced will be changed in the layout.
280
Magento Enterprise Edition User Guide, Version 1.14.2
Chapter 20: Layout Updates
Layout Update Syntax
Syntax
NAME
VALUE
*
name
block name
The name of any block to be extended.
*
any other
Any other attribute specific for the <block> instruction.
parent
block name
The name of the block that should become a new parent for the
referenced block.
*
Indicates a required value
Layout Update Examples
The following blocks types can be manipulated with custom layout instructions. Each
action must be specified using the full syntax of the instruction. In the following examples,
a simplified notation is used to refer to each action, which corresponds to the full syntax of
the instruction.
Full Syntax
?
<!-- Action can be specified inside either a <block>
or <reference> instruction. -->
<action method="someActionName">
<arg1>Value 1</arg1>
<arg2>Value 2</arg2>
<!--
-->
<argN>Value N</argN>
</action>
<!--
-->
Simplified Syntax
?
someActionName($arg1, $arg2, ..., $argN)
Magento Enterprise Edition User Guide, Version 1.14.2
281
Layout Update Syntax
Chapter 20: Layout Updates
page/template_links
Syntax
ACTION
DESCRIPTION
addLink($label, $url, $title, $prepare
Adds another link to the end of the list of existing links. Just
specify the $label (link caption), $url (link URL) and
$title (link tooltip), and you'll see a new link in the
corresponding place. The $prepare parameter must be
"true" if you want the URL to be prepared, or converted to
the full URL from the shortened URL. For example, the
newpage becomes BASE_URL/newpage if prepared.
removeLinkByUrl($url)
Removes a link from the block by its URL. Note that the
URL must be properly specified and exactly match
corresponding URL of the link you want to remove.
cms/block
Syntax
ACTION
setBlockId($blockId)
DESCRIPTION
Specifies the ID of a CMS block, so its content can be
fetched and displayed when the page is rendered.
?
<!--...-->
<reference name="content">
<block type="cms/block" name="additional.info" as="additionalInfo">
<action method="setBlockId"><id>additional_info</id></action>
</block>
</reference>
<!--
282
-->
Magento Enterprise Edition User Guide, Version 1.14.2
Chapter 20: Layout Updates
Layout Update Syntax
core/text
A core/text block can be used to enter free form text directly into the template.
Syntax
ACTION
DESCRIPTION
addText($textContent)
Specifies text to be rendered as the block's content. After
the text is specified, the layout update instructions must
continue to be a valid XML statement. If you use HTML
tags as part of the text, it is recommended to use:
<![CDATA[...]]>
?
<!--...-->
<reference name="content">
<block type="core/text" name="test.block">
<action method="addText">
<txt><![CDATA[<h2>ATTENTION!</h2><p>Check your options
carefully before you submit.</p>]]></txt>
</action>
</block>
</reference>
<!--
-->
page/html_welcome
This block can be used to duplicate the “Welcome, <USERNAME>!” message that appears in
the header block. When the user is not logged in, the welcome message specified in the
configuration appears.
Magento Enterprise Edition User Guide, Version 1.14.2
283
XML Load Sequence
Chapter 20: Layout Updates
XML Load Sequence
For developers, it is important to understand that blocks and layout updates must be
loaded in the correct order, in keeping with the rules of precedence and load sequence
which determine how the page is rendered. Magento supports the following page layout
scenarios:
Default Layout
The default layout consists of the elements that are visible from every page of the store.
Whether it is a menu item, or a shopping cart block, each item has a handle in the default
section of the layout definition.
Specific Pages
The second case allows you to create a different layout for a specific page. The XML layout
for specific pages is constructed in the same sequence that Magento loads modules, and is
determined by the system configuration.
In addition to the instructions in the layout update files that are specific to each module,
you can make a custom layout update that applies to a special case in the backend, that is
merged each time the special case occurs.
284
Magento Enterprise Edition User Guide, Version 1.14.2
Chapter 21:
Page Setup
The main sections of the page are controlled, in part, by a set of standard HTML tags.
Some of these tags control the selection of fonts, color, size, and background colors and
images that appear in each section of the page. Other settings control page elements
such as the logo that appears in the header, and the copyright notice in the footer. The
basic page properties can be set from the Admin.
Topics in this chapter:
l
HTML Head
l
Page Header
l
Page Footer
Magento Enterprise Edition User Guide, Version 1.14.2
285
HTML Head
Chapter 21: Page Setup
HTML Head
The HTML Head section corresponds to the <head> tag of an HTML page and can be
configured for each store view. In addition to meta data for the page title, description, and
keywords, it can include a link to the favicon and scripts. Instructions for search engine
robots and the display of the store demo notice are also configured in this section.
HTML Head Configuration
To configure the HTML Head:
286
1.
On the Admin menu, select System > Configuration. Then in the panel on the left, under
General, select Design.
2.
For multiple stores or views, set Current Configuration Scope in the upper-left corner to
the store or view where the settings apply. Then, clear the checkbox after each field so new
values can be entered.
3.
Update the fields as needed.
4.
When complete, click the Save Config button.
Magento Enterprise Edition User Guide, Version 1.14.2
Chapter 21: Page Setup
HTML Head
Field Descriptions
FIELD
SCOPE
DESCRIPTION
Favicon Icon
Store View
Uploads the small graphic image that appears in
the address bar and tab of the browser.
Default Title
Store View
The title in the title bar of each page when viewed
in a browser. The default title is used for all pages,
unless another is specified for individual pages.
Title Prefix
Store View
A prefix can be added before the title to create a
two- or three-part title. A vertical bar or colon can
be used as a separator after the prefix to
differentiate it from the main title.
Title Suffix
Store View
A suffix can be added after the title to create a
two-or three part title. A vertical bar or colon can
be used as a separator at the end of the prefix to
differentiate it from the text of the main title.
Default Description
Store View
A summary of your site for search engine listings,
not be more than 160 characters long.
Default Keywords
Store View
A series of keywords that describe your store,
each separated by a comma.
Default Robots
Store View
Instructions that tell search engines how to index
your site. Options include:
INDEX, FOLLOW
NOINDEX, FOLLOW
INDEX, NOFOLLOW
NOINDEX, NOFOLLOW
Miscellaneous Scripts
Store View
An input box for uploading miscellaneous scripts
to the server. For example, JavaScript that must
be placed before the <body> tag can be entered
here.
Display Demo Store
Notice
Store View
Controls the display of the demo store notice at
the top of the page. Options include: Yes / No
Magento Enterprise Edition User Guide, Version 1.14.2
287
Page Header
Chapter 21: Page Setup
Page Header
The Header section identifies the path to the logo file, and specifies the logo alt text and
welcome message.
Header Configuration
To configure the Header:
1.
On the Admin menu, select System > Configuration.
2.
In the panel on the left, under General, select Design.
3.
Click to expand the Header section, and make any changes necessary.
4.
When complete, click the Save Config button.
Field Descriptions
SCOPE
DESCRIPTION
Logo Image Src
Store View
Identifies the path to the logo that appears in the
header.
Logo Image Alt
Store View
The Alt text that is associated with the logo.
Small Logo Image Src
Store View
Identifies the path to a smaller version of the logo
that is used with responsive themes and
optimized for a small screen.
Welcome Text
Store View
The welcome message appears in the header of
the page and includes the name of customers who
are logged in.
FIELD
288
Magento Enterprise Edition User Guide, Version 1.14.2
Chapter 21: Page Setup
Page Footer
Page Footer
The Page Footer configuration section is where you can update the copyright statement
that appears at the bottom of the page, and enter miscellaneous scripts.
Footer Configuration
Field Definitions
FIELD
SCOPE
DESCRIPTION
Copyright
Store View
The copyright statement that appears at the
bottom of each page. To include the copyright
symbol, use the HTML character entity: ©
Miscellaneous HTML
Store View
An input box where you can upload miscellaneous
scripts to the server. For example, third-party
JavaScript— such as an analytics tracking
code—that must be placed after the <body> tag,
can be entered here.
Magento Enterprise Edition User Guide, Version 1.14.2
289
Page Footer
Chapter 21: Page Setup
Notes
290
Magento Enterprise Edition User Guide, Version 1.14.2
Chapter 22:
Your Store’s Theme
A theme is a collection of files that determines the visual presentation of your store.
You might think of a theme as the “window dressing” of your store. When you first
install Magento, the design elements of the store are based on the “Default” Theme. In
addition to the initial default theme that comes with your Magento installation, there
is a wide variety of themes that are available “off the shelf” on Magento Connect.
Magento themes include layout files, template files, translation files, and skins. A skin
is a collection of supporting CSS, images, and JavaScript files that together, create the
visual presentation and interactions that your customers experience when they visit
your store. Themes and skins can be modified and customized by a developer or
designer who has knowledge of Magento theme design and access to your server. To
learn more, see the Designer’s Guide to Magento.
Topics in this chapter:
l
Responsive Web Design
l
Using the Default Theme
l
Installing a New Theme
Magento Enterprise Edition User Guide, Version 1.14.2
291
Responsive Web Design
Chapter 22: Your Store’s Theme
Responsive Web Design
Responsive design is an approach to web page creation that flows the page layout to fit the
visitor’s screen size and orientation, and changes the layout accordingly. The Magento
default responsive theme features style sheets that support flexibility for layouts and
images, and helps provide a pleasing experience for site visitors using mobile devices. By
comparison, non-responsive sites or sites not optimized for smaller screens or mobile
devices are often slow or difficult to read, and offer a clunky mobile eCommerce experience.
Responsive Theme on Tablet and Smartphone
Benefits of using the Magento default responsive theme include:
l
l
l
292
You can get a tablet and smart phone friendly responsive site in about half the time as
before, speeding time to market and freeing up resources for other projects.
Your responsive site makes you better able to participate in the fast growing mobile
commerce space, and gives you the ability to create a website that is more easily
adapted to new opportunities and less expensive to maintain. A responsive site also
offers potential search engine optimization (SEO) benefits from using Google’s preferred
approach to mobile-optimizing sites.
You no longer need to develop separate content per device. The default theme is easy to
customize for simple sites, and provides a powerful starting point for developing themes
for more complex sites.
Magento Enterprise Edition User Guide, Version 1.14.2
Chapter 22: Your Store’s Theme
Using the Default Theme
Technical Information
Technologies used in Magento’s default responsive theme include Sass/Compass and
jQuery in noConflict() mode. Additional JavaScript libraries are discussed in more
detail in the Responsive Theme Developer’s Guide.
The responsive theme code is located on the server in the following directories, relative to
your Magento installation:
Code Location
app/design/frontend/rwd
skin/frontend/rwd
Using the Default Theme
The default Magento Enterprise Editiontheme uses Responsive Web Design (RWD)
principles. Responsive web design enables you to use a single theme to present your
storefront to your customers regardless of which device they use. The theme uses modern
technologies and incorporates best practices for mobile site experience.
To view the default theme:
1.
On the Admin menu, select System > Configuration.
2.
In the panel on the left, under General, select Design.
3.
Click to expand the Package section. The new responsive theme is enabled by default. The
default package name is “rwd.”
Default RWD Theme Package
4.
Click to expand the Themes section. The Default field shows the name of the default RWD
theme.
Magento Enterprise Edition User Guide, Version 1.14.2
293
Installing a New Theme
Chapter 22: Your Store’s Theme
Default RWD Theme
5.
When complete, click the Save Config button.
Installing a New Theme
Magento Connect contains hundreds of extensions, which as add-ons to Magento, can
extend the functionality or enhance the appearance of your store.
Magento Connect
To install a new theme:
294
1.
Go to Magento Connect.
2.
In the upper-right corner, click to extend the All Platforms list, and choose Enterprise
3.
You can browse through the available themes based on price or popularity, or do a keyword
search. For more information, click the thumbnail of any theme.
Magento Enterprise Edition User Guide, Version 1.14.2
Chapter 22: Your Store’s Theme
4.
Installing a New Theme
To get the registration key, you must be a registered Magento Enterprise Edition owner and
be logged into your account. Then, click the Install Now button to get the license key.
Install Now
5.
To complete the process, follow the instructions to install an extension from Magento
Connect.
To activate the theme for your store:
1.
On the Admin menu, select System > Configuration. In the panel on the left, under
General, select Design.
2.
Click to expand the Themes section. Then, do the following:
Themes
3.
In the Default field, enter the name of the theme. The name of the Magento demo store
theme is “mds.”
4.
If you want to switch to this theme as an alternate when your store is viewed with different
browsers or devices, do the following:
Magento Enterprise Edition User Guide, Version 1.14.2
295
Installing a New Theme
a.
Chapter 22: Your Store’s Theme
Click the Add Exception button.
The Add Exception button is used to use a different theme for specific browsers. For
example, a theme that is optimized for mobile can be used whenever a mobile device is
detected.
Add Exception
b.
In the Matched Expression field, enter the name of the browser or device that triggers
the use of the alternate theme. If there are multiple browsers, separate the name of
each with a vertical bar. For example, because the mobile theme can be used with
multiple devices, you can enter them all in the Match Expression field, as follows:
Android|Blackberry|Googlebot-Mobile|iPhone|iPod|mobi|Palm|Opera
Mini|Windows Mobile
c.
In the Value field, enter the name of the theme. In this example, the value is “Mobile.”
5.
Click the Save Config button on the top right of the page.
6.
Test the new theme from your store. If you installed an exception for different browsers,
view the store with each browser or device.
If the new theme uses a different page layout than your current home page, you might
need to change its page layout setting to match the theme.
296
Magento Enterprise Edition User Guide, Version 1.14.2
Appendix:
Editor Toolbar
Editor Toolbar
Editing Tools
Editing Tools
Undo
Redo
Cut
Copy
Paste
Magento Enterprise Edition User Guide, Version 1.14.2
297
Appendix: Editor Toolbar
Paste as Plain Text
Paste from Word
Find
Find and Replace
Spellchecker (not installed)
Mark as Deletion
Mark as Insertion
Citation
Abbreviation
Acronym
298
Magento Enterprise Edition User Guide, Version 1.14.2
Appendix: Editor Toolbar
Styles and Fonts
Styles and Fonts
Styles
Format
Font Family
Font Size
Character Format
Character Format
Bold
Italic
Underline
Magento Enterprise Edition User Guide, Version 1.14.2
299
Appendix: Editor Toolbar
Strikeout
Subscript
Superscript
Special Characters
Special Characters
Insert Symbol
Insert Non-Breaking Space
Insert Page Break
Color
Color
Select Text Color
300
Magento Enterprise Edition User Guide, Version 1.14.2
Appendix: Editor Toolbar
Select Background Color
Paragraph Format
Paragraph Format
Left Justify
Center
Right Justify
Full Justify
Outdent
Indent
Blockquote
Coding Tools
Magento Enterprise Edition User Guide, Version 1.14.2
301
Appendix: Editor Toolbar
Coding Tools
Remove Formatting
Cleanup Messy Code
Lists
Lists
Bulleted (Unordered) List
Numbered (Ordered) List
Rules
Rules
Insert Simple Horizontal Rule
Insert Formatted Horizontal Rule
302
Magento Enterprise Edition User Guide, Version 1.14.2
Appendix: Editor Toolbar
Links and Anchors
Links and Anchors
Insert/Edit Link
Remove Link
Insert/Edit Anchor
Images and Media
Images and Media
Insert/Edit Image
Insert Media
Tables
Tables
Magento Enterprise Edition User Guide, Version 1.14.2
303
Appendix: Editor Toolbar
Insert/Modify Table
Table Row Properties
Table Cell Properties
Insert Row Above
Insert Row Below
Remove Column
Remove Row
Split Merged Table Cells
Merge Table Cells
Layers
Layers
Insert New Layer
304
Magento Enterprise Edition User Guide, Version 1.14.2
Appendix: Editor Toolbar
Move Layer Forward
Move Layer Backward
Toggle Absolute Positioning
Variables, Attributes and Widgets
Variables, Attributes and Widgets
Insert Variable
Insert/Edit Attributes
Insert Widget
Workspace Preferences
Workspace Preferences
Toggle Fullscreen Mode
Magento Enterprise Edition User Guide, Version 1.14.2
305
Appendix: Editor Toolbar
Display Visual Control
Characters (On/Off)
Toggle Guidelines / Invisible
Elements
Set Typing Direction Left-toRight
Set Typing Direction Right-toLeft
Help
306
Magento Enterprise Edition User Guide, Version 1.14.2
API 142
Approve product review 79
Attribute
Index
Google Shopping 142
predefined 247
1
B
1 Column Layout 268, 270
banner 223
Banner
2
create 224
2 Columns
customer segments 55
with Left Bar 268, 271
Customer Segments 54
with Right Bar 268
locations 225
price rule 229
3
rotator 226
3 Column Layout 269, 272
Rotator 232
block
reference 219
4
product page 220
404 Page Not Found 199
Block 217, 247
create 218
A
ID, markup tag 254
About Us page 198
reference 227, 274-276
Access Level, page versions 211
category 220
Add
CMS pages 220
Banner 224
Brand loyalty 121
Exception, theme 296
Buy X, Get Y Free 33
to Wishlist 70
Allow
Gift Receipt 87
Printed Card 87
Anchor
C
Callout 274
Catalog
Category Link 232
category 227
Magento Enterprise Edition User Guide, Version 1.14.2
307
Index
Event Widget 124
Cross-sells 74
Events 124-125
Events Carousel 232
rules 39
CSS
New Products List 232
Price Rules 3-4
email templates 255
Currency
Product Link 232
Channels 141
to reward points 119
Custom
Club, membership 121
CMS 193
variable 247
Customer
Hierarchy Node Link 232
address, promotion 50
Page Link 232
balance, reward points 109
Page Versioning 213
group 49
Pages 197, 200
reward points 120
Static Block 232
Order Status, RSS feed 150
Widget 234
promotion 50
Column 267
segment 49
layout 274
create 51
Community
price rule 54
Poll 58
Service page 198
Compare Products 59, 75
Conditions, price rule 14
Contact Us
form 254-255
Content 193, 197
Area 225
page 200
Conversion page 175
Conversion tracking 169
Cookie, Limit Sending By 62
Copyright notice 289
Countdown ticker 122
Coupon 24, 149
code 42
D
Default
Robots 287
Title, page 287
Default theme 293
Design 261
Discount 4
Display
Gift Card Prices 88
Gift Wrapping Prices 88
Store Demo Notice 265, 287
Distributing newsletters 139
Double opt-in 136
Cron job 42
308
Magento Enterprise Edition User Guide, Version 1.14.2
Index
Open Graph 152
E
Ecommerce Tracking, Google Analytics 189
Editor toolbar 297
Editor, WYSIWYG 203
Email
Favicon 263, 287
Feed reader 149
Footer 225, 285, 289
Free
shipping, price rule 30
a Friend 58, 61
a Friend, configure 61
Reminder Rules 42
Reminder Rules, template 48
Email template
variables 247
Empty, page layout 269
Enable
Cookies 200
G
Gift
receipt 84
Gift Card 85
Gift Message 84
module, disable 89
Gift Options
Enhanced Ecommerce, Google 181
configure 87
Event
entire order 86
configuration 124
individual item 86
create 125
product 83
date, gift registry 102
Tax configuration 88
edit 125
taxes 88
invitations 129
Gift Registry 85
Selling restrictions 123
configure 95
Widget 122, 233
create 98
event ticker 123
event date 102
Events 121
owner notification 97
Evergreen content 193
Search 94, 105, 233
Extension
sharing 97
social media 151
storefront 94
updates 97
Widget 104
F
Facebook
extensions 151
workflow 93
Gift Wrapping 84
Design 90
Magento Enterprise Edition User Guide, Version 1.14.2
309
Index
Google 155
Include Gift Receipt 84
Analytics 155
Insert image 204
API for Shopping 142
Invitation 129
Classic Analytics 188
configure 129
Enhanced Ecommerce 181
Only 131
Merchant Center 142, 155-156
Reports 133
Product Listing Ads 156
IP Address, Limit Sending By 62
Reader 149
IP Anonymization, Google Analytics 179, 190
Shopping 156
Sitemap 155, 161
Tag Manager 169
L
Label
Universal Analytics 178, 181
Webmaster Tools 162
price rule 15
layout
Google API
Google Analytics 190
update 273
Layout
Google Merchant Center 188
update 217, 284
Layout Update 236
H
banner 227
Handle 284
syntax 278, 281
Header 225, 285, 288
widget 236, 240
welcome message 264
Hierarchy 213
Left Column 225
Link
menu 213
Home page 198
New Products list 237
image 204
Load sequence 284
Logo 288
HTML
header 262
editor 203
Logo Image Src 288
head 163
Loyalty program 109
Head 285-286
M
I
Magento
Image
URL 205
310
Connect 142, 152, 291
Design Guide 261
Magento Enterprise Edition User Guide, Version 1.14.2
Index
Magento Connect 294
Queue 139
Maintenance 200
reports 140
mode 200
templates 138
markup tag 207, 247, 253, 256
Node 214-215
Matched Expression 296
Non-inline CSS 255
Media
Storage 204
URL 204
URL, markup tag 254
O
Opt-in 136
Order
Members Only 121
by SKU 233
Membership 121
Meta
gift options 86
Order by SKU 242
Information
page 200
Orders and Returns 233
Owner, page version 211
Millennium Generation
customer segment 53
P
Mini Shopping Cart Widget 233, 244
Miscellaneous
HTML 289
Scripts 163, 287
Mobile
devices, matched expression 296
theme, install 295
Moderate, product reviews 79
page 208, 211
Page 197
configuration 285
create 200
Page Footer 289
Page Hierarchy 213
configuration 214
Page Layout 223, 267, 270
examples 270
N
Page Not Found 199
Navigation
menu 213
New
Products list 149, 232, 238
Newsletter 135
configuration 136
problems 140
Magento Enterprise Edition User Guide, Version 1.14.2
Page View Tracking, Google Analytics 188
Parent
Page Hierarchy 213
Pending
Reviews 79
Tags
moderate 68
311
Index
Permissions
Promotions 3
page versions 211
banners 223
Poll 58-59
Banners 229
Manager 63
Price Rules 33
Popular Tags 58, 66
Protected, Access Level 211
Price Rule
Public, Access Level 211
Banner 229
Publish
Catalog 4, 10
coupon 24
page 203
Publish Revision
customer segment 54
permission 211
promotions 33-34
Reward Points 120
Shopping Cart 12
Q
QR code 24
Privacy
policy 199
R
Private Sales 121
invitations 129
Private, Access Level 211
Product
Information 49
Rating, product 80
Recently Compared Products 233
Recently Viewed Products 77, 233
Redeem
reward points 109
list
by category 255
markup tag 255
new 255
promotion 50
Relationship Rules 39
reviews 78
guest 78
moderate 79
Product tag
by Admin 67
promotion_desecription, variable 46
promotion_name, variable 46
Refund
reward points 109
Registered customers
customer segment 54
Related
Banners 9, 19
Products 74
rules 39
Report
invitation 133
newsletter 140
wishlist 73
responsive theme 293
312
Magento Enterprise Edition User Guide, Version 1.14.2
Index
Reviews 60
Sitemap 161
Reviews and Ratings 79
SKU
Reward Points 109, 199
in price rules 10
configure 110
customer group 120
multiple 10
Slider
exchange rates 118
jQuery 226
Price Rule 120
Small Logo Image Src 288
priority 118
Social
product review 78
marketing 151
redeem 109
shopping 70
to currency 119
Spam 136
Right Column 225
Special Products, RSS feed 150
robots.txt 161, 164, 287
Static Block 236
Rotation Mode, banner 228
Store Demo Notice 265
RSS feed 149
Store URL, markup tag 254
Success page 175
S
Surveys 59, 63
Sales
channels 141
Syndicated content 149
Syntax
layout update 278
information, promotion 50
Sample
page 198
Selling restriction, events 123
Send Printed Card 86
T
Tag
products, Admin 67
Server 200
Tag Manager, Google 169
Service Unavailable 200
Tags
503 Service Unavailable 200
moderate 68
Shopping
product 66
tools 57
Shopping Cart
price rule 12, 24, 33-34, 109
promotion 50
Sidebar, block reference 274
Magento Enterprise Edition User Guide, Version 1.14.2
RSS feed 149
Targeted promotion 49
Tax
class
gift options 88
313
Index
Class
email reminder 46, 48
Gift options 88
gift options 88
Template
predefined 248
version control 211
Version Control 201
email reminder 48
Access Level 209
layout update, widget 234
VIP 121
tag 254-255
Vistors
variables 247
customer segment 54
Text
editor 203
theme 294
default 293
responsive 293
Theme
change 291
Toolbar, editor 297
Top Level Category, RSS feed 150
Transactional emails 61
Twitter 151
W
Welcome
message 264, 288
message, block 281
white list 139
Widget 206, 231, 234, 255
add to page 206
Banner 226
CMS Static Block 236
code 255
event 124
U
Gift Registry 104
Under construction 265
Mini Shopping Cart 244
Universal Analytics, Google 178, 181
New Products 238
Up-sell products 74
Order by SKU 242
rules 39
URL
Wishlist Search 72
Wishlist 59, 70
Key
configuration 71
node 215
in RSS feed 150
page 200
Reports 73
Search Widget 72, 233
V
WYSIWYG Editor 203
Variables 247
custom 250
314
Magento Enterprise Edition User Guide, Version 1.14.2
Index
X
XML 273, 275
Magento Enterprise Edition User Guide, Version 1.14.2
315
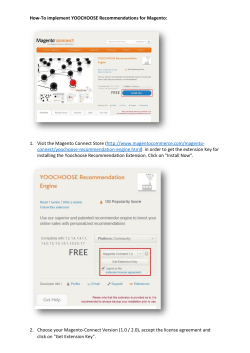
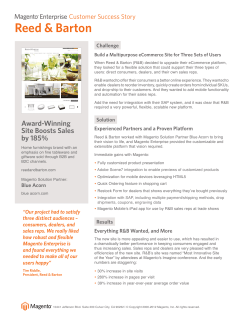

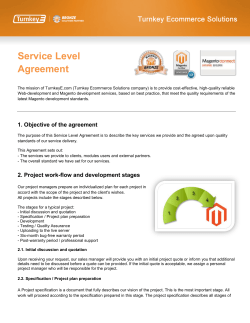
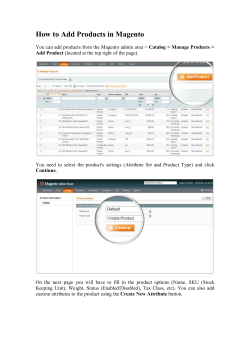


© Copyright 2026