
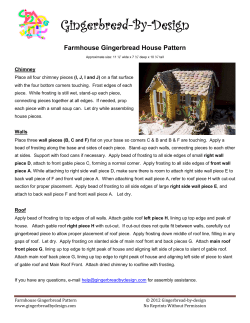
FINNLIFE LOG CABINS BUILD GUIDE, PARTS AND PLANS LIST
®
FINNLIFE
LOG CABINS
BUILD GUIDE, PARTS
AND PLANS LIST
Model: 155451
A.0. Introduction
Those lazy summer afternoons may be beckoning, but don’t Whoever does the job, the first stage is to familiarise yourself
rush to build your Finnlife Log Cabin. Take the time to
with these instructions. The trick is to be methodical and to
understand how it goes together, and you’ll enjoy many years plan ahead.
of trouble-free pleasure.
If you’re looking for information on a specific topic, refer to
No specialist skills are required. Anyone can build a Finnlife the contents list below or to the glossary.
log cabin, although some tasks may require more than one For a complete parts list and detailed wall and floor plans
pair of hands. Construction times will vary depending on your please see the back pages within this instruction manual.
skills and the number of people who help you.
Of course you don’t have to do it yourself. You could hand this
booklet to a professional builder, then sit back until he
presents you with the keys to your finished cabin.
B.0. Contents
Planning consent and building regulations
Tool list - what you need
Delivery, Checking and storage
Foundations & Preparations
Laying out, checking and sorting
Assembling your door & window frames
Attaching your door & window frame fascia's
Attaching your beading
Constructing your posts
Installing your floor beams
Laying your DPM (Damp Proof Membrane)
First layer of wall boards
Installing your door frame
Installing your post braces
Building up the walls
Installing your wall plate
!
The images displayed within this literature are for
illustration purpose only and generic for cabin build.
They may not appear exactly as your finished product.
Installing your gable triangle
Installing your gable battens
Installing your roof beams
Installing your roof panels
Eaves fascia boards
Laying roof shingle
Floor Panels
Air vents
Floor Plans
Exploded Diagram
Parts List
Timber treatments
Wood - a natural material
Health and safety
Customer service
Glossary
!
Before you commence with construction of your new log cabin
please ensure you have a complete set of components.
Using the checklist provided at the back of this booklet tick off
each part as you remove it from the transit packaging.
Planning consent and building regulations
In most cases you do not need planning permission to build a
log cabin in your garden; it is usually also exempt from building
regulations. It would be advantageous to contact your local
authority to ensure they are happy for you to proceed before
arranging installation.
Tool list - what you need
Chisel
Drill with timber bits
Hammer
Ladder
Mallet
Mitre square
Pencil
PVA glue
Safety gloves
Safety goggles
Saw
Screwdriver
Screwdriver (electric)
Sharp knife
Spirit level
Stiff brush
Tape measure
Quick grips
Clamps
Damp proof membrane
End grain preserver
Delivery, checking and storage
Your log cabin comes wrapped in polythene for protection, and
strapped to one or more pallets (depending on the model) for
ease of transport.
The transit packaging allows for ventilation: it is not waterproof.
Please store your wrapped cabin in a dry place, protected from
rain and sun. Ensure cabin components are not in contact with
the ground.
Laying out, checking and sorting
Before you begin to build you should check that
you have a complete set of components. Check off
each piece against the parts list as you remove it
from the transit packaging. In the unlikely event
that there is a missing component, or that a
component has been damaged in transit, please
contact the technical helpline, quoting the cabin
reference number displayed on the packing label
of the transit packaging.
As you check off components lay them out on the
ground around the site of the cabin. Place each
component close to where it will be used. Laying
out helps you visualise how the cabin goes
together, and it means that components are ready
to hand when you need them. You can use the
Building Plans and Parts List as a guide to what
goes where. Be careful not to lay components too
close to the cabin footprint. Give yourself adequate
room to work in.
!
Please note:
Do not leave parts directly on wet ground for extended periods, as excessive moisture
can damage or cause the timbers to swell.
!
Picture displayed is for
illustration purpose only
and may not represent
your specific model.
Foundations and preparation
You can build your log cabin on foundations of concrete or on compressed gravel. Whichever option you
choose, a firm and level base is essential. Time spent on the foundations is well invested. For your specific
base size please see your floor plan in the back of the booklet. An uneven or unstable base will affect the
final outcome of the log cabin, doors and windows will NOT function properly, walls may bow and joints may
not fit together.
Concrete option:
Remove all organic matter before you start work
on the foundations.
Concrete foundations should always be the exact
base size stated in the Floor Plan to minimise the
amount of water that the base will carry. It is
recommended the concrete base be 150mm thick.
Gravel option:
Remove all organic matter before you start work
on the foundations.
Foundations should always be laid larger than the
footprint of your cabin – 300mm wider in every
direction and 150mm thick when using
compressed type 1 gravel.
For compressed gravel foundations you should
use retaining boards to keep the gravel in place
and compressed.
Assembling your door frames
Your cabin comes supplied with door frames that do not
come pre-assembled.
They need to be assembled glued and screwed, since strong
PVA adhesive needs time to dry, you should assemble and
glue your door frames before you begin building your cabin.
The door frame is constructed of four parts the Door Jambs
left & Right, the Header and the Sill.
These will need to be constructed before you can
continue to build your cabin.
Completed door frame
Layout the four sides of the door frame on a
clean and level surface so that the hinges are on
the upper surface of the door jambs.
(Place a protective sheet on the ground if
necessary.)
Loosely arrange them to match the finished
frame.
Top (Header)
LH
Door Jamb
RH
Door Jamb
* Please note: The bottom of the door frame
(Sill) has a metal threshold.
Bottom (Metal) (Sill)
Starting with the header, run some glue in to the
corner joint.
Then slot in the left side door jamb ensuring a tight
fit.
Using the screws provided secure together.
Once tight wipe of any excess glue with a damp
cloth.
Repeat the process for the right hand door jamb.
Step 1
Now you will need to secure the sill (bottom) of the door
frame.
You will notice that the seal is constructed out of metal
and has turned up corners with holes in.
Align these holes to the door jambs ensuring you
have positioned them correctly.
The sill corners are designed to be positioned on
the outside edge of the frame so the fixings are hidden.
Using the fixings supplied secure into position.
Check cross diagonals to
ensure frame is square and
leave enough time for glue to
dry before installing
Step 2
Step 3
Attaching your door & window frame fascia's
!
Please note: Do NOT attach the double door fascia's for this model at this stage, as this will
effect installing the door frame into the building.
Please note: This section shows double doors, however the same principles apply to single doors & windows.
Once the door frame is complete the next step is to fit the
door frame fascias.
Place a protective sheet on the ground so the door frame
does not get damaged or marked, Then lay the door
frame face down flat on the ground.
Please note that the hinges will be laying towards
the ground.
Place all of the Fascia's in situ on the door
and window frames, once they are aligned
secure using the screws provided.
Top Tip:
To ease installation of your door or window
frames, do not fully tighten the screws until the
door and window frames are in position.
Insert your door or doors in to the door fame to
make sure they fit correctly.
You can adjust both doors by simply turning
the hinges on the frame sides of the doors.
Please make sure both doors open and close
freely.
Attaching your beading
Align the beading square on each door once
they are in the correct location fix to the door
using the screws provided.
Now remove both doors from the frame
before fitting the frame to the cabin.
!
Please note: The beadings are supplied with two size
screws, long screws for the horizontal beading, and short
screws for the vertical beading.
Please ensure that the correct screws are used in the
correct location, if wrong screws are used they may
damage the glass within the window or door.
Constructing your double door posts
You will need to join together the two front
corner posts.
Using the screws provided join together
the two halves ensuring they are square
and flush at the ends
4x
SC2
4x
SC2
Installing your
floor
beams
IlInsling
your
floor
beams
Your finished cabin rests on a series of beams known as floor beams. They provide a solid base and raise the cabin off the
ground for ventilation.
To prevent damp rising into your cabin, each floor beam should be covered by two strips of damp-proof membrane.
(Product not supplied)
You can purchase a sheet of commercial damp-proof membrane and cut into strips as required.
Floor beams are easy to identify. They are impregnated with a long-lasting preservative that makes them appear darker in
colour.
Although each beam is pressure treated, any freshly exposed timber or cuts must be treated with an end grain preserver.
(Product not supplied)
*The layout of floor beams depends on your cabin model; please refer to your Building Plans towards the end of this
guide.
Since all floor beams come in standard 2.4m lengths, you will have to join lengths of floor beams for walls which are in
excess of 2.4m.
Ensure you have checked off your components for your foundations, as you will need to cut these parts to the required
lengths.
The first stage in creating your base for your cabin is to form an external ring foundation which the cabin wall logs will rest
upon.
Cut some of the floor beams according to the floor beam layout , securing the beams together at 45° Use two screws at
either end. (Screws not supplied) .
Before installing the internal floor beams ensure the ring foundation is square and secure.
Ring Foundation
Floor Beams
Laying your DPM (Damp Proof Membrane)
Your cabin rests on a set of floor beams, these will be in contact with your foundation base.
We advise that you place a DPM (Damp Proof Membrane) on top of your ring foundation and floor beams to prevent
moisture ingress into the cabin walls.
Cut a sheet of DPM into strips roughly 68mm
wide for both the ring foundation and floor
beams.
!
It is critical to fit a DPM according to instructions.
Line your strips of DPM around the ring foundation.
Position the DPM to leave approx 18mm of
exposed area of ring foundation.
You will need to lay 2 layers of DPM around the
perimeter area of the ring foundation only.
You will find you have a large amount of excess
DPM on the inside edge of the ring foundation.
Do not worry at this stage as the bottom layer
will be positioned under your floor boards and
the top layer must be turned up and secured to
the cabin walls as instructed within this guide.
18mm
Cut further strips to the width of your central
floor beams. Approx 68 mm.
Lay these on top of the floor beams.
!
*Please note that when your cabin is fully
constructed, a line of sealant must be
applied around the base of the cabin walls,
between your ring foundation and the bottom of
the cabin.
This is to prevent moisture from sitting
on your ring foundation.
68mm
18mm
first layer of wall boards continued
Wall boards and posts have been machined for a secure fit. Before you use a wall board or post, it’s worth running a stiffbristled brush along the grooves and poking the bristles into the joints to remove any stray sawdust. Sawdust-free joints
result in a better fit. Walls are built by inserting wall boards into the posts at right angles to one another.
Individual wall boards are identified by reference to the Parts List featured towards the end of this guide, we
advise you measure them before continuing to construct, so that the correct wall boards are being used in the correct
position.
Start with a post and a couple of wall boards.
They form the corner structure of the cabin.
Position the post over the corner of the ring
foundation ensuring the post has a 10mm
overhang beond the ring foundation. See image.
Slot in a couple of wall boards into the post at
right angles ensuring they are pushed in firmly.
Ensure the post is in the vertical position and
the wall boards are level.(Use a spirit level to
check this.)
Secure corner bracket to the post and first two
wall boards approximately 65mm up from the
bottom edge and secure using the screws
provided.
65mm
!
Note.
There are different types of corner brackets,
please refer to parts list for details.
Repeat the process for the remaining walls.
Q128
Q928
Q928
Q128
Q928
Q928
Q128
Q428
Q428
60mm
Q428
KA1
KA1
Installing your door frame
Once you have attached all your corner brackets you will need to insert your door frames.
Door and frames do not come pre-assembled. If you have not yet put your door frame together, refer to Assembling
your door frame Section earlier for assembly details. Installing the assembled unit into your cabin is one job that could
benefit from a second pair of hands. All doors open outwards. Make sure you install them in the correct way.
!
Please note: We advise you to only position the door frame without the doors hung, as excess weight and
pressure on the frame will cause the frame to twist.
Please note:There may be a gap above the doors which will close up over time. (approx 30 - 50mm)The gap is
there to allow for settling within the building. Please do not block the opening as this may prevent the cabin
from settling naturally.
H
The posts and door frames are supplied with grooves in to
allow for a supporting piece of timber.
Insert the timber in to your posts and secure to the post using
the screws provided.
Once the timber battens have been fixed into position you will
need to install your door frame without the back fascias
attached.
Insert the frame into position and ensure the frame is tight to
the posts.
Check the frame is square and once you are happy with the
position, using the screws provided screw through the sides of
the door frame and into the supporting batten and the post
Once in the correct position attach the internal fascias
using the screws provided.
P1 & P2
Installing your door frame (Continued)
Insert your remaining door frame for the shed area and
secure to the wall boards at the correct height using the
KA brackets.
!
Caution!
Take care when opening the storage door as the
position of the door handle may come into contact
with the side wall window.
Do not allow the door to swing freely to prevent
damage.
!
sc1
KA1
65mm
BK2
Installing your post brace
The next procedure within your cabin build is to install your
post braces.
These help add additional support and strength to the
building during construction.
The top of the post has a rebate
to allow the post brace to sit
into position correctly.
Starting on the back wall of the building, position the post
brace into the post.
Using the next post brace as a guide, position so that the
outside edges are flush with each other.(See image)
Secure into position using the screws provided.
Repeat the process for the
remaining post supports,
ensuring they are sat on the
rebated area and are flush
on the outside edge.
Building up the walls
Continue to build your cabin by inserting wall boards into
your posts up to the 6th layer.
Remove the windows from the window frame, and slot the frame into
position.
Tap the frame down lightly to ensure they are seated
correctly.
Once the window frames are in position continue to insert
your remaining wall boards.
You will have two remaining Q928 brackets, these are to
positioned in the main room on the centre wall which
divides the building.
Position these brackets approximately 65mm down from the
top of the post.
Secure using the screws provided.
Please ensure that you only secure the wall bracket Q928 to
the wall boards only and not to the post,as this will allow
the wall boards to move in the post channel.
65mm
Installing your wall plate
The next stage is to install your wall plate ,this is
the platform for your roof beams to be attached to.
Locate your wall plate timbers and position them so
the inside edge of the wall plate is flush with the
inside edge of the post.
Using the screws supplied secure the first wall plate
into position screwing down into the post.
Installing your gable triangle
Completing the following steps will require an additional pair of hand's, as this part is very large and heavy.
The gable triangle will require accurate positioning over the centre wall.
Please note once the gable triangle is in position we would advise you to brace the triangle to prevent it from
moving or falling in high winds.
!
Position your gable triangle so it is central to the
centre wall.
You will notice the gable triangle will not sit
directly on the wall boards below.
!
Please note: do not fill the gap
between the gable triangle and the
centre wall as the space is required for
expansion.
Once the gable triangle is in position screw through
the the lower wall board of the gable triangle and
into the top wall plate.
!
Please ensure the gable triangle is
securely fixed into position before
releasing.
We advise you to put a temporary brace
into position to support before installing
your gable battens and roof beams.
Installing your gable battens
The gable triangle is supplied with a set of batten to cover
the gap between the gable triangle and the top of the
internal wall.
!
Please note: do not fill the gap
between the gable triangle and the
centre wall as the space is required for
expansion.
Position the batten so you can secure it to
the bottom edge of the gable triangle.
Using the fixings supplied screw through
into the gable triangle.
Installing your roof beams
Starting at the back of the ridge beam slot in the
two roof beam into the three way bracket.
Secure using the screws provided ensuring the
beams are fully inserted and flush on the top
edge.
!
The next process may require an
additional pair of hand as you will
need to lift the roof beams and
brackets into position.
Carefully lift the the back roof beams and bracket
into position, aline the ridge beam so it slots into the
cutout within the gable triangle
Position the lower ends of the roof beams so they
are central to the corner of the wall plate.
Ensure they do not overhang the wall plate and
secure into position using the screws provided.
NV1
Back Roof Beams
Y3
Y
Y3
Installing your roof beams (Continued)
Support the front end of the ridge beam temporarily.
Joint together the front three roof beams into the
bracket ensuring they are fully inserted and flush with
the top edge.
Secure using the screws provided.
!
The next process may require an
additional pair of hand as you will
need to lift the roof beams and
brackets into position.
Carefully lift the the front roof beams and bracket into
position, aline the bracket with the ridge beam so it
slots into position.
Screw the bracket to the centre ridge beam ensuring
it sits flush with the top and the ridge beam and
inserted fully into the bracket
Front Roof Beams
NV2
Y3
Y2
Y1
Installing your roof panels
The OSB roof panels are nailed in sequence to the underlying ridge and roof beams and wall plate.
Start at the front to give the best fit to highly visible panels. If later panels require trimming to fit,they’ll be the ones
out of sight at the back. You should aim to leave a gap of around 5mm between adjacent pairs of panel edges that
run parallel to the roof beams.
Z10
Layout the roof panels on the ground in a clockwise
order starting at the front. Check the tongue and
groove joints by slotting the panels for each of the
five roof sections together. Use a knife or chisel to
free any that don’t fit.
!
The next process will require an
additional pair of hand as you will
need to lift the roof panels into
position.
Z9
Starting at the front of the cabin, lift the joined
triangular structure on to the roof beams.
Press it tight against the four nails
protruding from the upper face of the roof beams.
Temporarily nail the roof panels to the roof beams
and wall plate. Do not drive the fixings all the way home
fully as you may need to make ajustments.
Remove the four guide nails as you continue to fit the
roof panels.
Z7
Z6
Z12
Z11
Z5
Z4
Z13
Z14
Z1
Measure and mark the midway points near the
upper and lower ends of all five roof beams. Drive a
single nail part way into each marked point on every
roof beam. The nails act as temporary guides.
Remove them later as you work round the roof.
Z8
Z2
Z3
Installing your roof panels (Continued)
Locate your next set of roof panels and position onto the
roof beams.
Adjust the panel to ensure it is positioned correctly and the
overhang on the lower section of the panel matches the
previous panel laid.
When lining up the panels ensure you leave a slight gap
between the panel sections on the roof joists.
This will allow you to reposition the panel later on should
further adjustments be needed.
You may need to re-align the roof panels to ensure a
better fit.
When all five roof sections are in place, and you are
happy, then fix the roof boards by driving down all
nails.
!
Once you have fitted all of the roof
panels, you may find that the bottom
edges (eaves) do not line up
perfectly. You can trim these
to fit.
Installing your eaves fascia
The eaves fascia boards are supplied oversize. Cutting them to fit is easiest if you line up each length in
turn along the eaves and mark them with mitre lines that correspond with the lines of the roof hips.
Choose an appropriate
length of eaves fascia board
for the eaves. Temporarily
nail it to the edge of the
overhanging roof panel. Do
not nail it all the way
because you will have to
remove it to trim the ends.
Make sure that the upper
edge of the fascia board is
flush with the upper surface
of the roof and that the
oversized ends are roughly
equal.
Mark mitres at both ends
across the upper edge of the
eaves fascia board. Use the
line of the roof hips as a
guide. Use a pencil to
extend it across the eaves
fascia board.
!
This cut is a componud
mitre. Take great care to
ensure tha both angles are
correct before cutting
Installing your eaves fascia (Continued)
Remove the board, cut to
size along the marked line,
then realign with the roof
panel and nail down securely.
Repeat the process for the
remaining roof eaves.
laying roofing shingle
!
Please note:
These illustrations shown within this section of the guide illiterate a general laying process
required to laying your roof shingle, further sections within this guide will display your specific
model.
Roofing shingles are rectangular. The lower half is cut in two places to give a decorative finish which gives the appearance of
individual shingles or tabs once laid. the upper half is coated with bitumen. With the exception of the first row, all shingles are laid
with the decorative flaps at the bottom. Lay roof shingles when the temperature is above 5°C. We recommend that you use a
bitumen shingle adhesive (NOT SUPPLIED) on the underneath of the tiles. This would be an extra measure to ensure longevity of
the shingle life. Proceed with caution when working on the roof: for your own safety, and to avoid damaging the shingles. The roof is
not designed to take the weight of a person. Always use a ladder which is secure, and on level ground. Be careful not to let sharp
tools damage the roofing materials or to let tools or materials fall on to people below.
Please note that for illustration purpose the shingles shown are green, however the colour of the shingle supplied within you cabin
are model specific.
The quantities of shingle included within your log cabin have been tested to ensure that you have enough coverage for the whole
roof. Here are some tips to help ensure you get the maximum coverage from the roofing shingles supplied.
*When counting shingles please note that 21 sheets are supplied with each pack. (See parts list for details)
*Each new row should be laid so that the decorative edge of the shingle finishes just above (2-3mm) the top of the slit in the tabs of
the shingle below.
*Any off-cuts should be used to either start a new row or end a row where possible.
*Many un-used off-cuts may be suitable for cutting into ridge caps.
Remove all debris and stray sawdust from the
roof. Drive home any protruding nail heads to
leave a flat surface.
Lay the first row of shingles with the green/black
face uppermost and the green flaps at the top.
Place the first shingle so that one side aligns with
the right-hand edge of the roof and the black
bitumen overhangs the eaves fascia board. Adjust
till the edge of the black bitumen extends about
10mm out from the edge of the eaves fascia
board. The 10mm overhang is known as the
'water drop edge'.
Please note if you intend to use a guttering system
with your cabin, please check you guttering
instructions before proceeding with the shingling
process.
Secure the shingle with four clout nails driven
through the bitumen patches on the shingle into
the roof boards. Complete the row by laying more
shingles edge-to-edge until the entire length of
the eaves is covered. Trim the excess from the
left-hand end of the roof. Retain cut pieces for
later use.
Begin the second row from the left-hand end. Lay
this row (and all subsequent rows) with the
green/black face uppermost and the green flaps
at the bottom.
Align the second row of shingles so that the
lower edge of the green flaps are just proud of
the roof edge. Secure with four clout nails driven
through the lower green part. Locate these nails
just below the line that separates black bitumen
from decorative green. Properly located nails will
be obscured by subsequent layers of shingles.
Trim the last shingle to fit. Retain cut pieces for
later use.
Lay the first shingle in row three so that the midpoint of the left-hand flap aligns with the edge of
the roof. Adjust its height until the tips of the
decorative flaps align above with the tops of the
slits between the flaps in the row below.
Nail down shingle as directed in the previous
stage.
From now on each row has to be parallel with the
row below to create an even pattern. Start every
row from the left-hand end of the roof. In each
case the first shingle in the row must be offset to
the left by half a flap, i.e. by one sixth of its total
length. That means that the centres of the flaps of
the current row will align with the gaps between
the flaps in the row below.
Continue laying shingle sheets from left to right,
edge-to-edge, to complete a full row. Trim the
excess from both ends and retain cut pieces for
later use.
Continue laying rows of shingles from left to right,
giving each row an extra half-flap offset to the left.
Where possible, use the trimmed pieces you
have already saved as the first or last shingles in
the row.
When you reach the final row, the upper edge of
the shingles will extend beyond the roof ridge.
Bend the excess over the ridge and nail it down.
Repeat the process for the opposite side.
Cut several roof shingles into thirds to create ridge
shingles. Cut them by extending the slits between
the flaps right through the bitumen layer.
You can do the same with any trimmed pieces left
over from lower rows.
To complete each ridge shingle, you should taper
the half containing the black bitumen. Start the
taper at the point where the original slit ended.
Finish it at the furthest edge of the black bitumen.
Take the taper in about 10mm at either side of
the bitumen.
Lay ridge shingles carefully over the ridge without
creasing. Begin from the front of the cabin by
laying a ridge shingle evenly across the roof ridge
so that the tip of the green edge is flush with the
leading edge of the roof boards. Secure by driving
two clout nails through the black bitumen on
either side of the roof ridge.
Lay the second and subsequent ridge shingles so
that the green half completely covers the bitumen
of the preceding shingle. In each case, drive clout
nails through the black bitumen to secure.
You will have laid the last ridge shingle when there
is no black bitumen showing after you have
trimmed it flush with the rear gable. Nail it to
secure.
Shaped roof models
!
Please note the drawings display within this section are for illustration purpose only and my not
represent your specific model.
The procedure for laying the roofing shingles remains the same. Lay the roof shingles when the
temperature is above 5°C
Roofing shingles (part ref RS6) are rectangular. The lower half of the face side is green and divided into three parts; the
upper half is black and coated with bitumen. With the exception of the first row, all shingles are laid with the green half
at the bottom.
Retain all trimmed pieces for later use on the ridge.
It’s probably best to start with one of the rear roof slopes. By the time you reach the highly visible front slopes, you will
be quite adept at laying roof shingles.
Ridge and hip shingles are created by cutting rectangular roof shingles into thirds.
Proceed with caution when working on the roof: for your own safety, and to avoid damaging the shingles. The roof is not
designed to take the weight of a person. Always use a ladder which is vertical, secure, and on level ground. Be careful
not to let sharp tools damage the roofing materials or to let tools or materials fall on to people below.
Remove all debris and stray
sawdust from the roof. Drive
home any protruding nail
heads to leave a flat surface.
Follow the laying roofing shingle
section for the laying process.
Each panel section of the roof
will need to be covered with
shingle and trimmed at the
edges of the boards / Hips.
Please retain the waste for
further use later on in the
shingling process.
Continue the process until
the entire roof is covered
and all the hips and ridges
have been trimmed.
Hips & Ridge caps.
Cut the ridge caps as shown
in the laying roof shingle section
ensuring you use the off-cuts
from the hips and ridges in
the previous section.
Next you will need to cover
the hips and ridges on the
roof using the ridge caps.
Please lay them in the
following order 1,2,3,4,5 as
shown.
Once you have laid the ridge
caps you roof should look
like this.
Row 5 should overlap the
other 4 hips.
You may need to trim the
corners of the ridge caps to
give the roof shingle an even
look all around.
floor panels
Lay the OSB floor panels last. That way you minimize the chance of getting them dirty when working on other
tasks. If panels don’t quite fit, use a knife or chisel to shave off excess timber.
Once the panels are down, you won’t know where the underlying floor beams are. It’s worth marking the
positions on the upper faces of the floor panels before they go down.
Some panels have pre-cut notches to fit around the door frames. Make sure they go in the right place.
Locate your floor panels and lay them out
on the floor in the order for each room.
VL4
VL3
VL2
Check the tongues and grooves on the
edges of the panels, ensure they are clean
and clear and ready for use.
VL1
VL5
VL7
Before you lay your first board you will need to
adjust the DPM (Damp Proof Membrane)
layers you laid previously at the start of the
build.
You will have laid two layers of DPM, the
floorboards will need to be positioned only on
the bottom layer of DPM.
(See illustration)
Wall Board
Floor Board
Top DPM
The top layer of DPM will need to be lifted up
and secured to the wall. You can temporally
tack the top layer to the wall - Keeping it clear
of the floorboards.
You will need to cut in the corners of the top
layer to allow you to turn the DPM up.
Ring Foundation
!
Do Not cut through the
bottom layer of DPM!
VL6
floor panels (continued)
Starting in the shed storage room, position the
first floor panel in front of the shed door.
You will need to ensure the floor beams laying
underneath the floor panels are supporting the
joint.
!
Do not secure the floor panel in
place yet as you may have to
manoeuvre the floor panel to
allow any remaining to fit into
place.
Locate the next panel this needs to be
positioned against the end wall of the building.
Ensure the cutout for the post slots around the
post correctly.
Before you insert you final board for the
shed / storage area, we advise you to mark
the centre positions of the floor beams on the
lower wall boards as this will assist you when
fixing the final floor panel.
Position the final board for the shed / storage
room ensuring the tongues and grooves slot
together.
Push the panel into position and push down.
Once your final board is in position secure all
panels using the fixing provided.
Next position the first floor panel on the front
wall in the main room.
Position the floor panel to ensure the post's
can fit into the panel correctly.
Before securing the panel into position
ensure the joint of the floor panel is central to
the floor beam.
floor panels (continued)
Locate your second panel for the main room
and position up to the front doors.
Ensure that panel slots over the posts
correctly and is pushed up to the walls.
Locate the third floor panel which is the
largest and ensure that the tongues and
groove slot together.
Push the panels together tightly to allow the
final panel to be put into place.
Locate your final floor panel, we advise
you to mark the centre positions of the
floor beams on the lower wall boards as
this will assist you when fixing the final
floor panel.
Position the final floor panel within the
main room, ensure it can slot over the
post and the tongue can slot into the
groove of the previously laid board.
Push the panel into position and finally
secure using the fixing supplied.
Air vents
Decide on the location of the air vents, this
should be on oppersite walls.
The first air vent should be placed on the 2nd
wall log from the bottom approximately
300mm in from the corner.
Use a 25mm spade bit or drill bit and drill 4
holes evenly as shown in the diagram.
Attach air vent face plate as shown in the
diagram using the fixings supplied.
Place the second air vent on the opposing
wall, on the second wall board below the
eaves height.
Position 300mm in from the corner.
Use a 25mm spade bit or drill bit and drill 4
holes evenly as shown (roof removed for
illustration).
Attach air vent facia plate as shown in the
diagram using the fixings supplied.
155451 Floor Plans
Floor Plan
4.140m
2.648m
1.070m x 1.310m
(Window)
1.502m
1.607m
r) 10
oo 1.9
(D x
0m
37
1.
m
1.
62
0m
(Window)
1.070m x 1.310m
(Door)
0.810m x 1.910m
1.495m
2.994m
Cabin walls.
Concrete foundation (optional) - this should be made to the same
dimensions as the stated floor plan.
Compressed gravel (optional) - this should be made 300mm larger
than the stated floor plan in each direction.
Base sizes shown are a minimum requirement.
Floor Beam Layout
4.117m
2.253m
1.640m
0.750m
1.849m
1.318m
0.568m
8m
60
1.
2.400m
2.980m
0.580m
2.730m
0.718m
0.544m
0.600m
0.544m
1.795m
0.728m
0.547m
0.800m
0.590m
0.143m 0.544m
1.807m
0.745m
1.649m
0.790m
2.400m
1.592m
0.194m
2.400m
2.750m
1.361m
2.638m
Exploded diagram
Z9
Z10
Z7
Z8
Z6
W2
Z5
Z11
Z12
Z4
Z13
Y3
G
T4
F1
T1
B
P
M1
Y2
C
T2
V1
M
R3
V1
P
W3
W4
Y
Y3
Y1
R5
Z3
Y3
P3
W1
Z2
Z1
Z14
W1
T3
T
K
R2
K
R
B1
F2
M1
F
B
F1
R4
R1
B
R
C
E
E
C
D1
D
P3
C
P1
P2
B
VP
H
VP
H
VL4
P1
P2
VL3
VL2
VL5
VL6
VP
VL7
VL1
VR
P
Parts list
155451 Parts List
list of parts
A
B
C
part ref. quantity checklist
2610
27
133
K
32
2610
27
133
M
16
1498
27
133
B
10
1535
27
133
B1
1
1333
27
133
M1
17
165
27
133
C
44
216
27
133
E
30
922
1800
Z1
1
434
1800
Z2
1
815
928
Z3
1
950
1106
Z4
1
1200
1805
Z5
1
950
1106
Z6
1
C
B
C
B
A
C
B
A
Z1
Z4
Z2
Z5
Z3
Z6
Continued...
list of parts
Z10
A
Z9
C
part ref. quantity checklist
1050
1202
Z7
1
1200
1800
Z8
1
1200
1800
Z9
1
1050
1202
Z10
1
Z11
601
595
Z11
1
Z12
1827
1200
Z12
1
910
1577
Z13
1
910
1577
Z14
1
Z8
Z13
B
Z7
Z14
930
32
57
F
2
1200
32
57
F1
4
1500
32
57
F2
2
27
G
1
C
B
A
2795
A
Continued...
list of parts
A
B
C
part ref. quantity checklist
2160
86
86
P
3
2160
55
86
P1
2
2160
55
86
P2
2
2160
86
86
P3
2
1890
27
38
H
2
1640
19
115
T
1
1645
19
115
T1
1
2806
19
115
T2
1
3024
19
115
T3
1
4188
19
115
T4
1
1960
18
55
W1
2
2700
18
55
W2
2
3300
18
55
W3
1
3600
18
55
W4
1
C
B
C
B
C
B
C
B
C
A
B
C
B
A
C
B
A
Continued...
list of parts
A
B
C
part ref. quantity checklist
1358
45
90
Y
1
1592
45
90
Y1
1
1577
45
90
Y2
1
2105
45
90
Y3
3
930
1960
DS128
1
1500
1960
DG328
1
1200
1460
WG228
2
A
C
B
A
A
A
C
A
Door Handle
Window Handle
D4
2
W7A
4
Continued...
list of parts
A
B
C
part ref. quantity checklist
Window Stay
W5A
4
Adjustable Corner Bracket
Q9-28
6
Wall Board Bracket
Q1-28
3
Wall Bracket
Q4-28
2
Door Frame Bracket
KA1
2
Air Vent
RO
6
60
4
SC5
50
40
4
SC3
125
30
4
SC3
25
20
4
SC1
4
20
4
BK2
170
45
2
DR
650
15
3
AS
960
Three-Way Bracket
NV1
1
Continued...
list of parts
A
B
C
Four-Way Bracket
part ref. quantity checklist
NV2
1
1632
34
115
R1
1
1631
34
115
R2
1
2720
34
115
R3
1
3010
34
115
R4
1
4133
34
115
R5
1
2400
28
68
VR
13
1695
200
VL1
1
2440
230
VL2
1
2440
1200
VL3
1
2440
1200
VL4
1
C
B
A
C
B
A
A
C
C
A
C
A
C
A
Continued...
list of parts
A
B
C
part ref. quantity checklist
C
1220
2440
VL5
1
2440
155
VL6
1
1355
200
VL7
1
A
C
A
A
C
C
B
A
2245
18
18
454
VP
7
A
3000
15
55
V1
2
RS6
189
C
B
Roof Shingles
Timber treatments
Your log cabin will last longer if you treat the timbers (interior
and exterior) with preservative. Do not treat your timbers until
you have completely finished building.
NB: DO NOT TREAT THE INTERNAL WALLS OF YOUR CABIN
IF YOU INTEND TO USE IT AS A SAUNA.
Wood - a natural material
Wood is a natural material. No two boards in your cabin are
alike. They will expand and contract to reflect changes in the
moisture content of their surroundings. They come with natural
markings and imperfections.
Expansion and contraction may cause slight deformation in
some of your cabin components. If joints are tight, they can be
eased by paring with a knife or a chisel.
After construction, the entire cabin will tend to settle. The
amount of settling varies from building to building. After a few
weeks, check joints and screws. Some screws may need to be
tightened or relocated. Doors and windows may need
adjustment.
After a while cracks may appear in some timbers. No need to
worry: cracks are natural. They will not reduce the strength or
the warmth of your cabin.
Health and safety
Take care when building your log cabin. Wear safety goggles
when drilling, cutting, or sawing; wear gloves when
hammering. Always cut away from you when you use a knife or
a chisel; do not wrap your fingers behind any piece of wood
that you are cutting or sawing.
Pay particular attention when using ladders or working on the
roof. Make sure your ladder is vertical, that it stands on firm
ground, and that it’s leaning on a solid object. Do not leave
heavy or sharp objects in places where they could fall down.
Wood creates splinters. You can minimise the chance of
catching a splinter in your hands by wearing safety gloves.
Take care when applying preservative. Follow the
manufacturer’s instructions if preservative gets in eyes or on
skin or clothes.
Keep children away from the area where you are working, and
away from ladders, tools and cabin components. Do not let
them climb on the cabin.
Customer service
If you want to discuss any aspect of the construction or care of
your cabin, or if you want to report a damaged or missing
component, please contact your technical team - their details
are stated on your confirmation letter, quoting the reference
number displayed on the transit packaging.
Glossary
Some of the terms used in these instructions may be unfamiliar. This is what they mean.
fascia
door and window surround
cabin reference number
unique reference number to identify your cabin in case of a
query – found on the packing label
cross-diagonal
measured length from corner to corner – when
cross-diagonals are equal, your cabin is square
DPM
damp proof membrane
eaves
lowest part of the roof slope
fascia board
board attached to eaves or gable to cover exposed edges of
roof boards
fascia cover board
board attached to eaves or gable to cover joint between roof
boards and fascia boards
frame capping
capping with an L-shaped cross-section for the topmost
architraves of doors and windows
gable
triangular section of wall between the two roof slopes
roof beam
intermediate supporting beam for roof
roof board
board that covers roof
tongue and groove
interlocking joint between wall boards and floorboards
wall board
interlocking wooden board used in main cabin construction
floor beam
darker impregnated beam that supports the floors
notes
For technical help, please refer to the telephone number
in your confirmatiion letter.
Metsä Wood is a wood products company delivering
service-oriented solutions developed in collaboration
with its customers. Its premium solutions are based on
ecological, high quality Nordic wood as a raw material.
Wood is the only building material that is truly renewable,
if well managed. Forest certification schemes give
assurance that the timber is legal and from sustainable
sources. Metsä Wood sources certified timber over
uncertified and is an approved Chain of Custody supplier.
The photographs in this brochure are for illustration
purposes only.
Metsä Wood reserves the right to change the range
without notice.
Every effort has been made to ensure that colours are
accurate within the limitations of natural lighting
conditions and the four colour printing process.
Riekko 2012 May 2012
METSÄ WOOD
Email: [email protected]
www.metsawood.co.uk


© Copyright 2026