
C Beginning Calligraphy by Mistress Ygraine of Kellswood
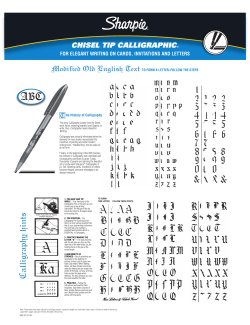
Beginning Calligraphy
by Mistress Ygraine of Kellswood
Calligraphy is the art of beautiful writing.
If you have ever had an interest in learning
calligraphy and have been too overwhelmed
by the amount of material available or too
intimidated by the talent of others to give it a try,
I hope to help you! My goal is to get interested
people started off in a non-discouraging fashion,
and to provide enough basic information that
you will know what to do with the many other
tools you are likely to come across if your interest
continues.
Materials:
My teachers’ opinions have differed as to what
type of pen beginners should use. Some believe
you should start with a pen you dip into ink, so
that your understanding of how to use the flow
of ink grows along with the rest of your skills.
Others feel that a more convenient pen form
frees you to concentrate on learning to form
letters correctly, since you have fewer things to
“mess with” and you aren’t fighting your tools.
For introductory classes like this, my own
philosophy leans to the latter approach. Since I
hope to get you “hooked” by helping you succeed
with your first attempts, and I don’t feel anyone
should sink a lot of money into something until
they’ve had a chance to try it, I bring a supply of
felt-tip calligraphy markers to loan.
When you’re ready to buy your own supplies,
please consider the following:
Markers -- are a fun way to get started. They
are inexpensive (about $2.00 each) and available
in a wide variety of colors and widths; they’re
great for informal notes and doodling; they are
portable, so you may have more opportunities
to practice. They have a relatively short useful
life since they tend to dry out quickly. Also, you
should not use markers on any work you hope
will be permanent, since the colors are not faderesistant over time.
Nibs and holders -- are the most widely used
tools. Holders usually cost about $1.00 each,
and nibs range from $0.50 to $1.50 each.
You can choose from holders made of wood
or plastic with round, square or three-sided
shafts -- pick what feels comfortable to your
hand. (Some scribes recommend unfinished
wood holders because they won’t get slippery
as you work.) Nibs which are readily available
are the Speedball “C” series and the Mitchell
Roundhand series. As these tools require you to
dip into an open bottle of ink, you need to be
careful where you work and how you carry the
ink and clean-up supplies.
Fountain or cartridge pens -- are a convenient
but more expensive solution. Such pens are
portable if handled with a bit of care. Rotring
art pens are highly recommended, but run
between $18 and $25 per pen; an ink cartridge
filler is available for about $8 which enables you
to use a wider variety of inks.
Cut your own! -- Truly traditional writing
implements can be made from feathers and
reeds. By using a sharp knife (a real “pen”
knife or an Exacto knife) and instruction from
a written source or experienced friend, your
writing implements can be both period and
free.
Ink -- There are many brands of ink available
and you will probably try many before settling
on a favorite. Higgins, Speedball and Pelican
© Susan Kell 1991 & 2007: Permission is hereby granted for this article to be copied and distributed in its entirety for educational
purposes; requests to publish all or part of this material in any form must be made to the author. [email protected]
Page 1
are popular. For easy clean-up, choose a watersoluble ink. India or other permanent inks
require pen cleaning solution or ammonia
for clean-up, but are more resistant to fading.
Follow manufacturer’s recommendations in
choosing ink to be used in fountain or cartridge
pens -- some inks can ruin these pens!
learning a new hand just a matter of practice.
They generally contain the following:
Nib size -- a mark showing the actual width of
the nib used to write the ductus sheet, this is the
widest stroke you will see used in the exercise or
hand illustrated.
Paper -- Try your chosen tools on whatever Pen angle -- compared to the writing line, the
paper is available to you. This will give you a
feel for what type of surface is comfortable for
you to write on. Some scribes prefer a smooth
or “plate” finish, others like a surface with more
“tooth” or texture. For practise, copier paper or
computer paper can be satisfactory, and they
are often thin enough to place over a sheet of
guidelines. For work you want to keep, choose
paper which is described as “rag” or “acid free” as
these are less likely to deteriorate over time.
Your work environment:
Choose
a comfortable seat or knee-chair
and a table or desk which give you a writing
surface slightly higher than your waist. If you
are right-handed, your light source should be
to your left so you aren’t writing in your own
shadow; put your light on your right if you are
left-handed. For added comfort, give yourself
an angled writing surface -- a fixed or portable
drafting board, a flat board propped in an open
desk drawer, or an empty wide 3-ring binder will
serve. If you’re using a bottle of ink, set it on a
dish (large enough to catch spills) with a paper
towel (for blotting your nib) within easy reach
from your work surface but not in the way of
your elbow!
To begin:
Exercises and writing styles (called “hands”)
are shown in most teaching books using what
are called ductus sheets. Once you know how
to translate the symbols used, these pages make
angle at which the flat edge of the nib will be
held while you write. For the hands you are
likely to learn with, this angle must stay the
same through every stroke to obtain the proper
thicks and thins.
Writing
angle -- the angle of the vertical
strokes to the writing line. This angle must
remain constant through every stroke. For
some hands this angle is perpendicular or at
90 degrees to the writing line (ex: Gothic and
Chancery). For other hands, it may be from 85
to 70 degrees (ex: Italic) or even parallel to the
writing line (ex: Celtic Half-Uncial).
Letter size -- the size of the letter bodies and
ascenders and descenders, shown as a multiple
of nib widths. In some hands, the tall strokes
(ascenders) or tails (descenders) will extend
the same height as the bodies of the letters (ex:
Chancery and Italic); in others, they will be
longer (ex: Batarde and Legende) or shorter (ex:
Gothic and Celtic Half-Uncial).
Strokes -- the separate strokes used to form
each letter, usually indicated by arrows which
are sometimes numbered.
Begin
with a page of pen manipulation
exercises. With each type of stroke, do two
or three and then STOP. Compare your most
recent stroke with the original you are copying.
Identify differences between your strokes and
the original, so you don’t keep practicing an
error repeatedly.
© Susan Kell 1991 & 2007: Permission is hereby granted for this article to be copied and distributed in its entirety for educational
purposes; requests to publish all or part of this material in any form must be made to the author. [email protected]
Page 2
* If the beginning or end of your strokes isn’t
sharp, or if the sides of your stroke are
jagged, the whole edge of your nib wasn’t
touching the paper through the whole
stroke.
* If your stroke tapers off or widens, the pen
angle wasn’t kept constant through the
whole stroke.
* If your strokes are consistently thicker or
thinner than the original, check your pen
angle, writing angle and letter size.
* If your stroke felt bumpy as you made it,
or if you got a spatter, you may have been
making a stroke in the wrong direction;
most strokes are pulled down or to the
right, not pushed up or to the left.
* If your ink is forming puddles, you may be
bearing down too hard as you write or you
might need to blot some excess ink from
the nib.
When you have tried a whole line of each
exercise and most of them look consistent,
give yourself a pat on the back (!) then, select
a hand to begin learning. Chancery is a good
period hand to begin with, since the pen angle
is a constant 45 degrees, the writing angle
is perpendicular to the writing line, and the
ascenders and descenders are equal to the letter
bodies. I wish you much enjoyment in your
scribbling, and may Titivillus never cause you
grief!
See the “Do It Yourself ” page at:
www.kellswood.com/krafts for current copies of
all my handouts.
© Susan Kell 1991 & 2007: Permission is hereby granted for this article to be copied and distributed in its entirety for educational
purposes; requests to publish all or part of this material in any form must be made to the author. [email protected]
Page 3
© Susan Kell 1991 & 2007: Permission is hereby granted for this article to be copied and distributed in its entirety for educational
purposes; requests to publish all or part of this material in any form must be made to the author. [email protected]
Page 4
© Susan Kell 1991 & 2007: Permission is hereby granted for this article to be copied and distributed in its entirety for educational
purposes; requests to publish all or part of this material in any form must be made to the author. [email protected]
Page 5


© Copyright 2026