ABC
docz
Explore
Log in
Create new account
Download
Report
No category
Double Tap - QuickPlan 3D
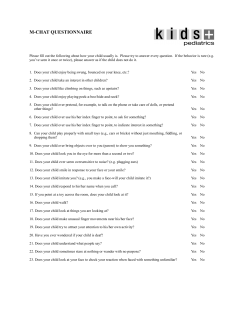
M-CHAT QUESTIONNAIRE RETYPED
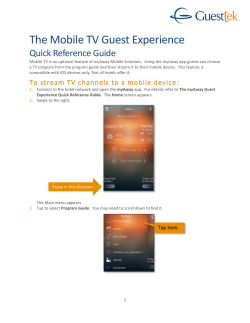
View the Mobile TV Guest Experience Guide
Luxurious interior design, compliments of Feldi Property Agents
AFFLUENT h o m e • l...
What Next? Transition from school and beyond
Set Up Email on an iPhone or iPad Question
PALMISTRY for love
CP911 Using NumSolve - ClassPad Help Series
Criminogenic Factors, Definition, Assessment and Intervention
Interior Design Assistant/Project Manager - Houston TX
© Copyright 2026
About abcdocz
DMCA / GDPR
Report