
Drawing to Scale: A Garden - Formative Assessment Lessons
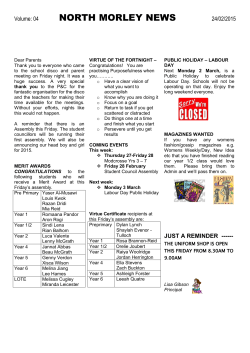
PROBLEM SOLVING
Mathematics Assessment Project
CLASSROOM CHALLENGES
A Formative Assessment Lesson
Drawing to Scale:
Designing a Garden
Mathematics Assessment Resource Service
University of Nottingham & UC Berkeley
Beta Version
For more details, visit: http://map.mathshell.org
© 2013 MARS, Shell Center, University of Nottingham
May be reproduced, unmodified, for non-commercial purposes under the Creative Commons license
detailed at http://creativecommons.org/licenses/by-nc-nd/3.0/ - all other rights reserved
Drawing to Scale: Designing a Garden
MATHEMATICAL GOALS
This lesson unit is intended to help assess how well students are able to interpret and use scale
drawings to plan a garden layout. This involves using proportional reasoning and metric units.
COMMON CORE STATE STANDARDS
This lesson relates to the following Mathematical Practices in the Common Core State Standards for
Mathematics:
2. Reason abstractly and quantitatively
4. Model with mathematics.
5. Use appropriate tools strategically.
This lesson gives students the opportunity to apply their knowledge of the following Standards for
Mathematical Content in the Common Core State Standards for Mathematics:
7-G: Draw, construct, and describe geometrical figures and describe the relationships between
them. Solve real-life and mathematical problems involving angle measure, area, surface
area, and volume.
7-EE: Solve real-life and mathematical problems using numerical expressions.
7-RP: Analyze proportional relationships and use them to solve real-world and mathematical
problems.
INTRODUCTION
This lesson unit is structured in the following way:
•
•
•
Before the lesson, students work individually on a task designed to reveal their current levels of
understanding. You review their responses and create questions to help them improve their work.
At the start of the lesson, students reflect on their individual responses and use your questions to
improve their work. They then work in small groups to analyze sample responses, and then
produce an improved solution to their own work. They then review the methods they have used.
In a follow-up lesson, students reflect on their work. If there is time, a further task is available.
MATERIALS REQUIRED
•
Each student will need copy of the task sheets, Design A Garden and Garden Plan, some blank
paper, a mini-whiteboard, a pen, an eraser, and a copy of the review questionnaire, How Did You
Work? The Garden Plan page should be copied at exactly 100% scale, so that the measurements
are accurate. If this is not possible, photocopy the rulers following Garden Plan, which should
then match the measurements on the Garden Plan. Each student will need one of these rulers. It
would be useful to have some spare copies of Garden Plan.
•
Each small group of students will need a new copy of the Garden Plan, a copy of each of the
Assistants’ Methods, a glue stick, a felt pen, and a large sheet of poster paper.
For the optional part of the follow-up lesson, a copy of the extension questions Mandy’s Second
Email will be needed for each group.
Provide short rules, meter rules, string, protractors, scissors, glue, card, plain paper, graph paper, and
colored pencils for students who choose to use them. There are some projector resources to support
whole-class discussion and to help introduce activities.
•
TIME NEEDED
20 minutes before the lesson, a 100-minute lesson (or two 50 minute lessons), and 10 minutes in a
follow-up lesson (or for homework). Timings given are approximate; actual timings will depend on
the needs of your students.
Teacher guide
Drawing to Scale: Designing a Garden
T-1
BEFORE THE LESSON
Assessment task: Design a Garden (20 minutes)
Have students complete this task, in class or
for homework, a few days before the
formative assessment lesson. This will give
you an opportunity to assess the work, and to
find out the kinds of difficulties students have
with it. You should then be able to target your
help more effectively in the follow-up lesson.
Designing a Garden
Show the class Slide P-1 of the projector
resource. Introduce the task briefly, helping
the class to understand the problem and its
context.
Here are some pictures of gardens that
have been designed. They are drawn
carefully to scale so that the customer
can get a good idea of what the finished
garden will look like.
In this task, you will be taking the role of
garden designers.
Does anyone have a nice-looking
garden? What do you have in it?
Has anyone ever used a garden
designer?
This is an opportunity for students to talk
briefly about any relevant experiences that
they may have, in order to help them to get
into the problem.
Now spend a few minutes reading the
first sheet, Design a Garden.
Give each student a copy of the assessment
task Design a Garden and Garden Plan. They
will also need some blank paper.
Projector Resources
Designing a Garden
P-1
Design a Garden
Imagine you are a garden designer.
You receive this email from a customer:
Dear Garden Designer,
I have moved into a house with a small garden that needs a total redesign.
Please design my garden for me. I have attached an accurate scale drawing of my
garden to this email. I’ve listed below some features I want in the garden. I will email
you later about some other things I also want.
To start, please could you draw these features accurately on the plan, showing where
you think they should go in the garden. Send me your plan with an explanation of your
thinking.
Best wishes,
Mandy
Shed
I’ve ordered this shed. It is 2 meters wide, 3.25 meters
long and 2.8 meters tall.
Decking for barbeques
I want some decking near the patio doors.
It should be big enough to seat at least six people.
Circular pond
I would like a circular pond.
I’d like its area to be about 7 m2.
Path and Borders
I would like some flower borders. These should not be
more than one meter wide as I find wider ones difficult
to look after.
I’d like a gravel path 1 meter wide to go from the shed
to the house and from the garden gate to the house.
I will cover the rest with grass.
Use the sheet Garden Plan to draw the features from the email.
Record all your calculations and reasoning on a separate sheet.
If you cannot photocopy or print the sheets at
Make sure to record the scale you use on the plan.
precisely 100%, print also some copies of the
paper rulers that are provided. (This will distort the plan and the rulers equally.) The paper rulers
work best if they are folded along the line next to the scale, to give a sharp, straight edge.
Student Materials
Teacher guide
Drawing to Scale: Designing a Garden
© 2012 MARS, Shell Center, University of Nottingham
Drawing to Scale: Designing a Garden
S-1
T-2
Garden Plan
Now look at the second sheet, Garden
Plan. What direction are you looking
from in this drawing?
The plan shows that the garden is 10
meters long.
Show your calculations and reasoning on
a blank piece of paper.
Students who sit together often produce
similar answers, so when they come to
compare their work, they have little to
discuss. For this reason, we suggest that when
students work individually on the assessment
task, you ask them to move to different seats.
At the beginning of the formative assessment
lesson allow them to return to their usual
seats. Experience has shown that this
produces more profitable discussions.
10 meters
Read through the resources carefully and
follow the instructions for designing the
garden.
Gate
Patio doors
Window
HOUSE
It is important that, as far as possible,
students are allowed to answer the questions without assistance. If they are struggling to get started,
ask questions to help students understand what is required, but make sure you do not do the task for
them. The questions corresponding to the first issue in the Common issues table might be helpful.
Student Materials
Drawing to Scale: Designing a Garden
© 2012 MARS, Shell Center, University of Nottingham
S-2
Assessing students’ responses
Collect students’ responses to the task. Make some notes on what their work reveals about their
current levels of understanding and their different problem solving approaches.
We suggest that you do not score students’ work. The research shows that this will be
counterproductive, as it will encourage students to compare their scores, and will distract their
attention from what they can do to improve their mathematics.
Instead, help students to make further progress by summarizing their difficulties as a series of
questions. Some suggestions for these are given in the Common issues table on the next page. These
have been drawn from common difficulties observed in trials of this unit.
We suggest you make a list of your own questions, based on your students’ work. We suggest that
you either write one or two questions on each student’s work, or give each student a printed version
of your list of questions and highlight questions appropriate to each particular student. If you do not
have time to do this, you could select a few questions that will be of help to the majority of students,
and write these on the board when you return the work to the students.
Teacher guide
Drawing to Scale: Designing a Garden
T-3
Common issues
Suggested questions and prompts
Student has little or no written work
Student lacks precision in their work
For example: Student writes the scale in words
or as an equality
• Which direction are you looking from when
you make a plan view?
• What useful information are you given?
Underline this. What do you need to find
out? How can you use the information you
know to do this?
• What do you mean by ‘is’ / ‘equals’? Can
you be more precise?
‘2 cm is 1 meter’ or ‘2 cm = 1 m’.
Student has difficulty in expressing a scale
Student does not calculate the scale ratio or has
calculated it incorrectly or the student has
drawn objects with no apparent calculations of
scale.
For example: The student has the scale ratio as
1 : 200 or 1cm : 4m.
Or: Student has expressed the scale ratio
unconventionally.
For example: In the scale ratio, the student
writes the figures in reverse order, e.g. 50 : 1
instead of 1 : 50.
Or: The student uses fractions in the scale
ratio, for example: 1 : 0.5.
• How long is the real-life garden in
centimeters? How long is the drawing in
centimeters?
Can you use this to figure out the scale?
• If an object on the plan is 1cm long, how
long is the real object? How do you know?
• Usually a scale ratio is written in the order
length on the plan : length in real life.
What is your scale ratio when written this
way?
• Can you write the scale ratio more simply,
without using fractions or decimals?
Or: The student has not calculated a unitary
scale ratio, for example: 2cm : 1m.
Student has difficulty calculating measures
on the plan
For example: The student has difficulty when
the actual lengths are not whole numbers.
Teacher guide
• How do you convert 1m in real life to a
measurement on the plan? What about 3m?
Now apply the same method to figure out
what the length 3.25 m is on the plan.
Drawing to Scale: Designing a Garden
T-4
Common issues
Suggested questions and prompts
Student does not calculate an appropriate
radius for the pond
For example: The student uses guess and
check unsuccessfully.
Or: The student does not use consistent units in
calculations.
• Can you draw a square with an area of 7m2?
Could this help you to draw a circle with a
similar area?
• Can you pick a radius for the pond and
work out what area that would give?
• What is the formula for the area of a circle?
Can you use this to figure out the radius of
the pond?
Student does not explain a method for
determining the area needed for the decking
• How much space do six people occupy
when sitting down? How much space do
you think you need to allow between them?
Student makes a technical error.
• How can you determine that your scale
is/measures are reasonable? What’s your
evidence?
• How can you verify that your design has
met all of Mandy’s requests?
Student produces a complete, correct
response
• Here is Mandy’s Second Email. Can you
work out some costs for the Garden Plan?
Teacher guide
Drawing to Scale: Designing a Garden
T-5
SUGGESTED LESSON OUTLINE
Individual work (15 minutes)
Return the assessment task to the students, along with some blank paper, and begin the lesson by
briefly reintroducing the problem.
If you did not add questions to individual pieces of work, write your list of questions on the board.
Students can then select questions appropriate to their own work.
Recall your work on the design task. What was the task about?
Today we are going to improve your work on this task.
I have looked over your papers and have some questions for you.
Work individually. Read my questions. Use the questions to figure out how to improve your work.
Write notes on the sheet, or on the blank paper, about what you think will improve your work.
While students are working, focus your attention on any students that struggled to begin the
assessment task, to identify the scale factor or make sense of the plan view. Give students time to
revise their work, using your written questions and notice changes they make. Use what you notice to
organize groupings for the next task. After ten minutes if there is any student who continues to
struggle beginning the task, drawing objects in plan view, or finding the scale factor, you might pair
him or her with a student who has succeeded on that part of the work in the next task.
Collaborative small group work: improving Garden Plan (25 minutes)
Give each small group a copy of the task sheet, Garden Plan, a large sheet of poster paper, a felt pen,
and a glue stick.
Slide P-2 of the projector resource summarizes the process students should follow:
Collaborating With Your Partner
•  Take turns explaining your Garden Plan to your partner. Explain how
you would improve your solution. Listen to each other carefully.
•  Ask ‘clarifying questions’ that will help you understand your partner’s
reasoning.
•  When you have both taken a turn, decide how to design a new,
better garden together.
•  Draw your plan on the Garden Plan sheet and stick it in the middle
of the poster paper.
•  Use the space around the edge to write your reasoning, decisions,
and calculations.
Projector Resources
Drawing to Scale: Designing a Garden
P-2
While students are working you have three tasks: to notice students’ strengths and difficulties, to
support their reasoning, and to ensure collaborative working.
Teacher guide
Drawing to Scale: Designing a Garden
T-6
Notice students’ strengths and difficulties
Note different approaches to the task and the assumptions students make.
Are there any students who struggle to imagine what objects would look like in plan view?
Do any students continue to struggle with using the scale? Notice how students express the scale
ratio, their use of units, and whether they express it in conventional form.
Are there any students struggling with calculating measures on the plan or translating measures on the
plan to real-life measures? They may be having difficulty working with scaling relationships.
Students might not recognize that there is a multiplicative relationship between the two measures, and
attempt to use additive methods. Other students might use informal methods, and they may then find
it difficult to perform calculations on non-integer values.
Do students struggle with the relationships between units? How do they handle moving to
relationships between units when area and volume are introduced?
Notice how students carry out their work. Do they plan, developing a strategy? Do students work
systematically? What do students do when they become stuck?
Do students check their work? Have students made practical mistakes such as placing the shed right
next to the window? Do students check whether answers are sensible by thinking about the context?
You may want to use the questions in the Common issues table to support your own questioning. If
the whole class is struggling on the same issue, you could write one or two relevant questions on the
board and hold a brief whole-class discussion.
Support students’ reasoning
Rather than resolve students’ difficulties for them, ask questions to support them in making progress.
You might ask strategic questions, to help them direct and organize their work:
What have you done so far?
Can you explain your strategy?
What math do you know about [working with scale ratios/the area of a circle]? How can you
use that to solve this problem?
If students have made errors, or are struggling to make progress with a particular part of the design,
ask more focused questions to help them make sense of the mathematics.
Think of a cuboid. If you were drawing a plan view, what would it look like?
Tell me the information given about measures on the Garden Plan sheet.
If students continue to struggle then move the lesson on to the Collaborative Analysis of Assistants’
Methods. These show a variety of approaches to drawing the pond feature. When students have
analyzed the sample work they are to return to improving their own garden design.
Develop collaborative working
Encourage students to take turns in talking, and to listen carefully to each other’s explanations. Ask
the students to be responsible for making sure that they all understand.
If one student dominates the written activities, encourage turn taking there, too. You can check that
there are samples of each student’s handwriting on the poster.
Make sure that all students in the group are able to explain what is written on the poster. If you see
one student writing an explanation, ask another student to explain to you how they figured out their
solution.
Teacher guide
Drawing to Scale: Designing a Garden
T-7
Poster gallery (20 minutes)
Organize students so that one stays with the group’s poster and the other visits other groups’ posters.
Give each student two sticky notes.
Slide P-3 of the projector resource summarizes the process students should follow:
Poster Gallery
•  Take turns explaining your garden plan to your partner.
•  Explain how you would improve your solution. Listen to each other
carefully.
•  If you are the visitor, read the poster. If there is math you do not
understand, ask clarifying questions.
•  If you are staying with your poster, explain the math to the visitor. If
you find things you could do to improve your poster, write them on
your sticky notes and attach those to your poster.
After five minutes, ask students to swap roles.
If you are planning to teach the unit over two class periods, this is a good place to break. Begin the
next lesson with a quick review of work so far, and then move on to the next activity.
Projector Resources
Drawing to Scale: Designing a Garden
P-3
Collaborative analysis of Assistants’ Methods (20 minutes)
Organize students into pairs or threes. Distribute copies of each of the Assistants’ Methods to each
group.
Imagine you have three assistants who have worked on designing this garden. Their work is
incomplete. They all use different methods in their work.
Your job is to try to understand what they have done and to improve their work.
Slide P-4 of the projector resource summarizes the process students should follow:
Collaborating With Your Partner
•
Choose one assistant’s work and read it carefully.
•
Answer the questions underneath.
•
Try to understand what they have done and think about how the
work could be improved.
•
Take turns explaining your thinking to your partner.
•
Listen carefully and ask clarifying questions.
•
When your group has reached its conclusions, write your ideas
below the assistant’s work.
•
Now check out another assistant’s work in the same way.
Projector Resources
Drawing to Scale: Designing a Garden
P-4
This task gives students an opportunity to evaluate different approaches to the task. The methods used
by the assistants are incomplete and contain some errors. They illustrate different strategies for
Teacher guide
Drawing to Scale: Designing a Garden
T-8
figuring out measures for the length of objects on the scale drawing and obtaining real-life measures
from the lengths drawn on the plan.
While students work, notice their strengths and difficulties, support their reasoning, and develop
collaborative working. Listen to students’ discussion of the explanations. Is there one particular
method that many students struggle to understand? Do any students reason strongly about a particular
method? Note this, and call on their expertise in later discussion.
Encourage students to focus on evaluating the math contained in the assistants’ work, rather than
surface features like neatness. Ask questions to help them articulate detailed and accurate reasoning
before they record their answers on the worksheets. For example, if students are struggling to find
ways to improve the work, suggest they try the methods out:
Use Bill’s rule to calculate the length of the shed.
Use Hina’s result for the radius of the pond on your drawing.
What do you think the horizontal and vertical lines on Lisa’s graph are about?
Use Lisa’s method to find the width of the shed.
Do you agree with their answers?
If one student writes an answer to a question, ask the other student to explain that answer. If one
student’s reasoning is incomplete, ask the other to help articulate the reasoning more fully.
Below, we discuss math issues arising from each of the Assistants’ Methods.
Assistant Bill
Bill has provided a ‘rule’ to use for
drawing the features in the plan. His
rule is a double number line,
specifying the relationship between
one set of numbers and another. The
scale of Bill’s rule is correct but he
does not make it explicit.
To measure more accurately Bill
could use millimeter-squared paper.
Bill uses his rule to accurately draw
five squares, representing 5m2. He
has also drawn four right triangles,
representing a further 2m2. Bill has
used this framework to sketch the
outline of a pond that has a surface
area slightly bigger than 7m2.
Bill has not found the radius on the plan for his radius of the garden pond in real-life.
Teacher guide
Drawing to Scale: Designing a Garden
T-9
Assistant Hina
Hina uses guess and check to
figure out the radius of the
pond. This method does
provide a correct answer. If an
exact measurement were
required, then an algebraic
method could be more
appropriate (and more
efficient).
Hina leaves her ratios in different units of measure but does not record the units, giving the ratio 1 : 2.
This is incorrect: the ratio is 1 cm : 0.5m or 1 : 50. The mathematical convention is, also, to write the
plan measure before the real-life length. In effect, Hina works with the ratio 1m : 2cm.
Assistant Lisa
Lisa uses an algebraic method to
figure out the radius of the pond.
She rounds π down to 3 (and does
not explain why he has done this),
and rounds the square root of
7
3
down to r = 1.5 m.
Calculating the surface area of the
pond from these values:
A = "r 2 = 3 #1.5 #1.5 = 6.75m 2
!
Lisa has used a graph to figure out the radius of the pond on the plan. She can read from the graph the
measurement of any garden length on the plan, and likewise read any plan length from a given garden
length. Lisa’s graphical method gives her a way of calculating the measures in Mandy’s first email. It
would be good to state the units for the variables on each axis.
However, the graph is not a good method for finer degrees of accuracy. For this Lisa could use
millimeter graph paper. Drawing a graph for this plan is not efficient for such a simple scale.
Teacher guide
Drawing to Scale: Designing a Garden
T-10
Whole-class discussion: comparing different approaches (20 minutes)
Hold a whole-class discussion to consider the different approaches used. Slides P-5 to P-7 may be
helpful with this discussion; they show the assistants’ methods.
Ask the students to compare and evaluate the methods:
Which do you think is the best method? Why? What are the advantages of that method?
Which of the assistants’ methods did you find most difficult to understand?
What was difficult about that method?
Which method might you use yourself? Why?
If the scale was more complicated, for example 1 : 25, which method would you prefer?
Follow-up lesson: Review work (10 minutes)
Remind students of their work on Designing a Garden, and the different methods they have seen and
used. Ask students to sit in the small groups in which they worked during the lesson. Return
individual and group scripts, and give students a few minutes to read their work.
Distribute the sheet How Did You Work? and ask students to complete this questionnaire.
The questionnaire should help students review their progress. Some teachers give this task for
homework.
Follow-up lesson: Optional extension work (30 minutes)
Hand out the Mandy’s Second Email sheet, if students have not already worked on it.
Mandy wants some costings for her garden. Can you estimate these for her?
Students could continue to work in the same groups or in different ones. If there is time, you could
hold a whole-class discussion in which students share their solutions.
Teacher guide
Drawing to Scale: Designing a Garden
T-11
SOLUTIONS
Assessment task: Design a Garden
The scale is calculated using the length of the garden on the plan, 20cm, and the given real-life
measure of 10 m. 1 cm on the plan is equivalent to 0.5m in the garden.
The scale is 1 : 50 or 1cm : 0.5m.
There are many ways students could draw the design. Below are some examples of how students
could efficiently figure out measurements on the plan of actual measurements in the garden.
A graphical method
Length on Plan (cm)
20
15
10
5
0
0
1
2
3
4
5
6
7
8
Length in Garden (m)
length in garde
length on plan
0
1
2
1
4
1 represents a m, then 1 m on the
More generally: If 1cm on the plan
6
1
8
1
plan.
10
1
9 10
1
ground represents a cm on the
!
A scale rule or double number line method
Length on Plan (cm)
0
2
4
6
0
1
2
3
8
4
10
12
14
16
18
5
6
7
8
9
20
10
Lengh in Garden (m)
Teacher guide
Drawing to Scale: Designing a Garden
T-12
Numerical Methods
The ratio is 1 : 50 or 1cm : 0.5m.
Given a length on the plan, the real-life length might be calculated by multiplying by 50 to find its
length in centimeters, or multiplying by 0.5 to find its length in meters.
Given a real-life length in meters, the plan length in centimeters might be found by dividing the
1
measure by 0.5 or multiplying by 0.5 = 2 .
Given a real-life length in centimeters, the plan length might be found by dividing the measure by 50,
1
or multipying by 50 = 0.02 .
!
Some students may attempt to use the method of setting up a proportion and cross-multiplying:
1: 50 = x :160
!
1
x
So 50 = 160
1"160
50
!
!
!
16
5
=x
= x = 3.2
This is a powerful method, but some students may have learned the procedure without linking it to
which variables stand in which multiplicative relationships, and which units are involved.
!
Teacher guide
Drawing to Scale: Designing a Garden
T-13
Garden Features
Students may use their own method, or one of the above methods to figure out the dimensions on the
plan of the garden features:
Feature
Dimensions on Plan
Shed
I’ve ordered this shed.
It is 2 meters wide, 3.25 meters long and
2.8 meters tall.
4cm × 6.5cm. Students do not need to calculate
the height because that is not represented on the
plan.
Decking for barbeques
I’d like this near the patio doors.
It should be big enough to seat at least six
people.
If the decking is rectangular then the dimensions
would be at least
3m × 3m.
This would be 6cm × 6cm on the plan.
πr2 = 7m2 so r = 1.5m
Circular pond
I would like a circular pond.
The plan radius should be about 3cm.
2
Counting squares to find a circle with area about
7m2 is an adequate method.
I would like some flower borders. I find
borders wider than a meter difficult to
garden.
The path and borders should be shown 2cm wide
and in appropriate places.
I’d like the surface area to be about 7m .
Path and Borders
I’d like a 1meter wide path to go from the
shed to the house and from the garden gate
to the house.
Extension:
Please tell me the approximate cost of the
gravel path you have drawn.
Extension:
The gravel should be about 8cm deep.
Cost of path =
Volume of path x 40 ($ per cubic meter)
Gravel costs $40 per cubic meter.
The volume of the path =
path length in meters x 1m x 0.08m.
(= Path length (m) x 3.2 ($ per m).)
Grass
Please tell me the approximate cost of the
grass area.
Grass costs $3 per square meter.
Students’ answers will vary. Some will try to
estimate the remaining area directly by dividing
the garden into pieces and estimating the area of
each piece. Others may find the combined areas
of the shed, the patio, the pond, the path and the
borders and subtract this total from the area of
the garden.
Teacher guide
Drawing to Scale: Designing a Garden
T-14
Design a Garden
Imagine you are a garden designer.
You receive this email from a customer:
Dear Garden Designer,
I have moved into a house with a small garden that needs a total redesign.
Please design my garden for me. I have attached an accurate scale drawing of my
garden to this email. I’ve listed below some features I want in the garden. I will email
you later about some other things I also want.
To start, please could you draw these features accurately on the plan, showing where
you think they should go in the garden. Send me your plan with an explanation of your
thinking.
Best wishes,
Mandy
Shed
I’ve ordered this shed. It is 2 meters wide, 3.25 meters
long and 2.8 meters tall.
Decking for barbeques
I want some decking near the patio doors.
It should be big enough to seat at least six people.
Circular pond
I would like a circular pond.
I’d like its area to be about 7 m2.
Path and Borders
I would like some flower borders. These should not be
more than one meter wide as I find wider ones difficult
to look after.
I’d like a gravel path 1 meter wide to go from the shed
to the house and from the garden gate to the house.
I will cover the rest with grass.
Use the sheet Garden Plan to draw the features from the email.
Record all your calculations and reasoning on a separate sheet.
Make sure to record the scale you use on the plan.
Student Materials
Drawing to Scale: Designing a Garden
© 2013 MARS, Shell Center, University of Nottingham
S-1
10 meters
Garden Plan
Gate
Patio doors
Window
HOUSE
Student Materials
Drawing to Scale: Designing a Garden
© 2013 MARS, Shell Center, University of Nottingham
S-2
Student Materials
Drawing to Scale: Designing a Garden
© 2013 MARS, Shell Center, University of Nottingham
S-3
cm
0
cm
0
0
cm
2
2
1
2
1
1
3
3
3
4
4
4
5
5
5
6
6
6
7
7
7
8
8
8
9
9
9
10
10
10
11
11
11
12
12
12
13
13
13
14
14
14
15
15
15
16
16
16
17
17
17
18
18
18
19
19
19
20
20
20
21
21
21
22
22
22
Assistant Bill’s Method
What is Bill’s method for calculating lengths on the plan?
Are there any problems with Bill's method?
Explain how Bill could overcome these problems.
Explain Bill's method for drawing the pond on the plan.
Student Materials
Drawing to Scale: Designing a Garden
© 2013 MARS, Shell Center, University of Nottingham
S-4
Assistant Hina’s Method
What is Hina’s method for calculating the radius of the pond on the plan?
How could Hina’s method be improved?
Student Materials
Drawing to Scale: Designing a Garden
© 2013 MARS, Shell Center, University of Nottingham
S-5
Assistant Lisa’s Method
What is Lisa’s method to find the radius of the pond on the plan?
Are there any problems with Lisa's method?
Explain how Lisa could overcome these problems.
Student Materials
Drawing to Scale: Designing a Garden
© 2013 MARS, Shell Center, University of Nottingham
S-6
Mandy’s Second Email
Hello again,
I need to know some costs of the things on your plan.
Please can you work these out for me?
Best wishes,
Mandy
Gravel path
Please tell me the approximate cost of the
gravel path you have drawn.
The gravel should be about 8 cm deep.
Gravel costs $40 per cubic meter.
Grass
Please tell me the approximate cost of the
grass area.
Grass costs $3 per square meter.
Student Materials
Drawing to Scale: Designing a Garden
© 2013 MARS, Shell Center, University of Nottingham
S-7
How Did You Work?
1. Please tick one sentence about your individual work:
Our group’s method was better than my own work.
Our group’s method was not better than my own work.
Explain your response:
2. Underline the part of the sentence that applies to your group’s work:
Our group method was similar to:
Bill’s Method
Hina’s Method
Lisa’s Method
None of the assistants’ methods.
If your work was similar to one of the assistant’s methods, answer
the question below:
If your work was similar to none of the assistants’ methods, answer
the question below:
I prefer our work/the assistant’s method because
Our work was different from every assistant’s method because
3. What advice would you give to a student about to start this task?
Student Materials
Drawing to Scale: Designing a Garden
© 2013 MARS, Shell Center, University of Nottingham
S-8
Designing a Garden
Projector Resources
Drawing to Scale: Designing a Garden
P-1
Collaborating With Your Partner
•  Take turns explaining your Garden Plan to your partner. Explain how
you would improve your solution. Listen to each other carefully.
•  Ask ‘clarifying questions’ that will help you understand your partner’s
reasoning.
•  When you have both taken a turn, decide how to design a new,
better garden together.
•  Draw your plan on the Garden Plan sheet and stick it in the middle
of the poster paper.
•  Use the space around the edge to write your reasoning, decisions,
and calculations.
Projector Resources
Drawing to Scale: Designing a Garden
P-2
Poster Gallery
•  Take turns explaining your garden plan to your partner.
•  Explain how you would improve your solution. Listen to each other
carefully.
•  If you are the visitor, read the poster. If there is math you do not
understand, ask clarifying questions.
•  If you are staying with your poster, explain the math to the visitor. If
you find things you could do to improve your poster, write them on
your sticky notes and attach those to your poster.
Projector Resources
Drawing to Scale: Designing a Garden
P-3
Collaborating With Your Partner
•
Choose one assistant’s work and read it carefully.
•
Answer the questions underneath.
•
Try to understand what they have done and think about how the
work could be improved.
•
Take turns explaining your thinking to your partner.
•
Listen carefully and ask clarifying questions.
•
When your group has reached its conclusions, write your ideas
below the assistant’s work.
•
Now check out another assistant’s work in the same way.
Projector Resources
Drawing to Scale: Designing a Garden
P-4
Assistant Bill’s Method
Projector Resources
Drawing to Scale: Designing a Garden
P-5
Assistant Hina’s Method
Projector Resources
Drawing to Scale: Designing a Garden
P-6
Assistant Lisa’s Method
Projector Resources
Drawing to Scale: Designing a Garden
P-7
Mathematics Assessment Project
CLASSROOM CHALLENGES
This lesson was designed and developed by the
Shell Center Team
at the
University of Nottingham
Malcolm Swan, Nichola Clarke, Clare Dawson, Sheila Evans,
Marie Joubert and Colin Foster
with
Hugh Burkhardt, Rita Crust, Andy Noyes, and Daniel Pead
It was refined on the basis of reports from teams of observers led by
David Foster, Mary Bouck, and Diane Schaefer
based on their observation of trials in US classrooms
along with comments from teachers and other users.
This project was conceived and directed for
MARS: Mathematics Assessment Resource Service
by
Alan Schoenfeld, Hugh Burkhardt, Daniel Pead, and Malcolm Swan
and based at the University of California, Berkeley
We are grateful to the many teachers, in the UK and the US, who trialed earlier versions
of these materials in their classrooms, to their students, and to
Judith Mills, Mathew Crosier, and Alvaro Villanueva who contributed to the design.
This development would not have been possible without the support of
Bill & Melinda Gates Foundation
We are particularly grateful to
Carina Wong, Melissa Chabran, and Jamie McKee
© 2013 MARS, Shell Center, University of Nottingham
This material may be reproduced and distributed, without modification, for non-commercial purposes,
under the Creative Commons License detailed at http://creativecommons.org/licenses/by-nc-nd/3.0/
All other rights reserved.
Please contact [email protected] if this license does not meet your needs.


© Copyright 2026