
How to Create Adobe PDF Files for Print and Press
How to Create Adobe PDF
Files for Print and Press
This book was created using Adobe Illustrator®, Adobe PageMaker®, Adobe Photoshop®, and
font software from the Adobe Type Library.
Adobe, the Adobe logo, AdobePS, Adobe Type Manager, Acrobat, Acrobat Exchange, ATM,
Distiller, PostScript Extreme, FrameMaker, Illustrator, InDesign, PageMaker, Photoshop,
PostScript, and PostScript 3 are trademarks of Adobe Systems Incorporated. Microsoft and
Windows are either registered trademarks or trademarks of Microsoft Corporation in the
United States and/or other countries. Apple, Macintosh, and TrueType are trademarks of
Apple Computer, Inc., registered in the United States and other countries. UNIX is a
registered trademark of the Open Group. All other trademarks are the property of their
respective owners.
©1999 Adobe Systems Incorporated. All rights reserved. Printed in the USA. BC1484 8/99
Table of Contents
Introduction . . . . . . . . . . . . . . . . . . . . . . . . . . . . . . . . . . . . . . . . . . . . . . . . . . 4
Step 1 - Setup . . . . . . . . . . . . . . . . . . . . . . . . . . . . . . . . . . . . . . . . . . . . . . . . 5
Software and setup for Windows® 95 and Windows 98. . . . . . . . . . . . . 6
Software and setup for Macintosh . . . . . . . . . . . . . . . . . . . . . . . . . . . . . . . 8
Step 2 - Creating PDF files . . . . . . . . . . . . . . . . . . . . . . . . . . . . . . . . . . . 11
Adobe FrameMaker® 5.5 or later . . . . . . . . . . . . . . . . . . . . . . . . . . . . . . . 12
Adobe Illustrator® 8.0 or later. . . . . . . . . . . . . . . . . . . . . . . . . . . . . . . . . . 16
Adobe InDesign®. . . . . . . . . . . . . . . . . . . . . . . . . . . . . . . . . . . . . . . . . . . . . . 19
Adobe PageMaker® Plus . . . . . . . . . . . . . . . . . . . . . . . . . . . . . . . . . . . . . . . 23
Macromedia FreeHand 8 or later . . . . . . . . . . . . . . . . . . . . . . . . . . . . . . . 27
QuarkXPress 3.32 (Macintosh only) . . . . . . . . . . . . . . . . . . . . . . . . . . . . 30
QuarkXPress 4.0 or later. . . . . . . . . . . . . . . . . . . . . . . . . . . . . . . . . . . . . . . 32
Step 3 - Streamline your review and markup. . . . . . . . . . . . . . . . . . .37
Annotating PDF documents . . . . . . . . . . . . . . . . . . . . . . . . . . . . . . . . . . . 38
Marking up PDF documents. . . . . . . . . . . . . . . . . . . . . . . . . . . . . . . . . . . 39
Appendix A - Other workflow considerations . . . . . . . . . . . . . . . . . 41
Working with Encapsulated PostScript® (EPS) files . . . . . . . . . . . . . . . 42
Working with Desktop Color Separation (DCS) files . . . . . . . . . . . . . 42
Working with multi-toned EPS files . . . . . . . . . . . . . . . . . . . . . . . . . . . . 43
Working with vector graphics . . . . . . . . . . . . . . . . . . . . . . . . . . . . . . . . . . 43
Bleeds . . . . . . . . . . . . . . . . . . . . . . . . . . . . . . . . . . . . . . . . . . . . . . . . . . . . . . . 43
Trappings . . . . . . . . . . . . . . . . . . . . . . . . . . . . . . . . . . . . . . . . . . . . . . . . . . . . 43
Open Prepress Interface (OPI) . . . . . . . . . . . . . . . . . . . . . . . . . . . . . . . . . 43
Naming PostScript files. . . . . . . . . . . . . . . . . . . . . . . . . . . . . . . . . . . . . . . . 43
Appendix B - Extending Adobe Acrobat . . . . . . . . . . . . . . . . . . . . . . 45
Acrobat plug-ins for print publishing . . . . . . . . . . . . . . . . . . . . . . . . . . . 46
Tools that support PDF. . . . . . . . . . . . . . . . . . . . . . . . . . . . . . . . . . . . . . . . 49
Conclusion . . . . . . . . . . . . . . . . . . . . . . . . . . . . . . . . . . . . . . . . . . . . . . . . . . 50
Glossary . . . . . . . . . . . . . . . . . . . . . . . . . . . . . . . . . . . . . . . . . . . . . . . . . . . . . 51
Introduction
Welcome to Adobe’s How to Create
Adobe PDF Files for Print and Press
book, a step-by-step guide that covers
the basics of creating Adobe Portable
Document Format (PDF) files for
prepress and print workflows. This
book tells you how you can use
Adobe Acrobat 4.0 software to easily
convert any document created in
your favorite page-layout or illustration application to a PDF file and
then distribute that file to a prepress
provider or service bureau for highquality publishing. Also, with the new
annotation features in Acrobat 4.0
software, you can streamline the
internal and external review processes
by allowing reviewers and clients to
make extensive remarks directly on
your PDF comps.
Benefits of PDF
One of the greatest challenges facing
anyone in professional publishing
today is the complexity of the printing workflow itself. Between the time
you create a document and send it off
to your print shop, there are a number of steps that take place before
your work actually gets printed.
Introducing PDF to your workflow
can streamline your printing process.
Based on the PostScript imaging
model, PDF is a flexible, cross-platform,
cross-application file format that
accurately displays and preserves fonts,
page layouts, and other graphical
elements in a document. PDF offers
unique benefits for both document
creators and professional print producers throughout the entire workflow.
4
PDF offers many benefits:
• PDF files are small and self-contained.
• Fonts, images, and graphics are
embedded within a PDF document,
streamlining electronic transmission
and preflighting.
• PDF files are independent of the
platform, operating system, and
authoring application and are viewable onscreen in Macintosh, Windows,
and UNIX® environments.
• One consistent, predictable, reliable
format can be used for all documents.
• PDF files are ideal for archival and
retrieval.
When producing PDF files, you can
choose to create either pre-separated
or composite PDFs. Working with
composite PDF files gives you advantages over pre-separated files, including the ability to soft proof or view
the file and make simple last-minute
changes to text and graphics prior to
final output. In addition, a reduced
file size makes file transfer over a
network much faster.
About this book
In How to Create Adobe PDF Files for
Print and Press, you’ll find the basic
procedures and techniques you need
to create PDF files for high-quality
output, including how to:
• Set up your printing environment
to create high-quality PDF files.
• Create a clean PostScript file from
any application, with specific instructions on how to create a PDF file
using the Macintosh and Windows
versions of Adobe FrameMaker 5.5,
Adobe Illustrator 8.0, Adobe InDesign,
Adobe PageMaker Plus, Macromedia
FreeHand 8, and QuarkXPress 3.32
(Macintosh only) and 4.0 or later.
• Create print- and press-optimized
PDF files using Adobe Acrobat 4.0
software.
• Streamline internal and external
review by allowing reviewers to make
extensive remarks directly on PDF
comps. Editors and clients can add
sticky notes, stamps, and handwritten
comments, and they can use highlight, strikethrough, and underline
tools to mark up text.
In addition to these steps, you’ll find
more information on advanced
techniques and specific workflow
issues in the appendixes. Even if
you’ve used Adobe Acrobat software
before, we recommend you start at
Step 1, “Setup,” before beginning any
of the other steps.
Step 1
Setup
Read this first
Before you start, read this
section.
This section describes the basics
of setting up your computing
environment to create PDF files
for high-quality output. To create
a PDF file that contains the right
information for high-quality
printing to composite digital
devices and imagesetters or
platesetters, you will need to do
the following:
1. Set up your AdobePS printer
driver.
2. Choose specific options for the
creation of PostScript language
files within the originating
application.
3. Create quality PostScript
language files and automatically
convert them into print- or pressoptimized PDF files.
Software and setup for Windows 95 and Windows 98
What you will need
Setting up Acrobat 4.0
Setting up AdobePS™ printer driver
Setting your AdobePS driver options
Setting your Acrobat Distiller options
Software and setup for Macintosh
What you will need
Setting up Acrobat 4.0
Setting up AdobePS™ printer driver
Setting your Acrobat Distiller options
Software & Setup
For Windows 95 and Windows 98
What you will need
This book assumes that you already
have the most current versions of
Adobe printer driver software installed
on your system. If you do not have
the most current versions, follow
these steps to download the software:
1. Go to www.adobe.com.
2. Select Free Plug-ins & Updates.
3. For AdobePS drivers, select Printer
Drivers.
3. Click the AcroDist icon, click Properties,
and then click the Version tab.
file (ADIST4.PPD) associated with
the driver.
Make sure the version is 4.0 or later.
Note: If you do not have AdobePS 4.2.4
installed, you can download it from
Adobe’s Web site as described earlier.
Setting up AdobePS printer driver
The AdobePS driver version 4.2.4
works on any printer that is equipped
with Adobe PostScript Level 2 or
Adobe PostScript 3™ printing technology. To find out which driver you
have installed on your system:
1. Choose Start > Settings > Printers.
Note: At the time of this publication,
AdobePS driver 4.2.4 is the most
current driver for Windows 95 and
Windows 98.
2. Right-click the Acrobat Distiller
printer icon, and then select Properties. (The Acrobat Distiller printer is
installed when you install Acrobat 4.)
Setting up Acrobat 4.0
1. Install Acrobat 4.0 or later on your
computer.
3. Click Paper, and then click About.
The printer driver should read
“AdobePS 4.2.4.”
2. Open the Acrobat 4.0 > Distiller
folder on your hard disk.
The About dialog box will also
mention the exact name of the driver
file (ADOBEPS4.DRV) and the PPD
The printer driver should read
AdobePS Version 4.2.4
Make sure the file
version is 4.0 or later
6
4. Click Details. Make sure that the
port name displayed in the Print to
the Following Port pop-up menu is
the path name for the PDF Output
folder within the Acrobat 4.0 folder.
(This folder is created when you
install Acrobat 4. Acrobat Distiller
automatically places PDF files here
after distilling documents.)
Setting your AdobePS driver
options
If you want, you can specify the
Acrobat Distiller printer as the
default printer, or you can choose this
printer within any application when
you want to create a PDF file.
Software & Setup
For Windows 95 and Windows 98
To specify the Acrobat Distiller
printer as the default printer:
you should refer to the instructions for
creating PDF files with InDesign.
CD-ROM, or to send to a client as a
publishing proof.
1. Choose Start > Settings > Printers.
Setting your Acrobat Distiller
options
Acrobat Distiller converts PostScript
files to PDF files. You do not need to
manually launch Distiller when
converting documents. However, you
do need to launch Distiller before you
generate PDF files to set default options.
Three default settings are available:
• The PressOptimized job options
are suggested for PDF files that will
be printed as high-quality final
output to an imagesetter or
platesetter, for example.
Acrobat Distiller should be displayed
in your list of printers.
2. Click the Acrobat Distiller printer
icon, and then choose File > Set as
Default.
Note: Adobe InDesign for Windows
uses AdobePS driver 4.3. This driver is
included with InDesign. Creating PDF
files with AdobePS driver 4.3 is slightly
different than creating PDF files with
AdobePS Driver 4.2.4. These differences
are explained in detail in the InDesign
for Windows 95 and Windows 98
section. If you install AdobePS driver
4.3 and want to create PDF files from
documents created with any of the
other applications covered in this book,
• The ScreenOptimized job options
are recommended for files that will be
displayed on the World Wide Web or
an intranet.
• The PrintOptimized job options
are recommended for PDF files that
are intended for desktop printers,
digital copiers, publishing on a
To set Distiller defaults:
1. Launch Acrobat Distiller.
2. Click the Job Options pop-up
menu, and then select the appropriate
option (PressOptimized, PrintOptimized,
or ScreenOptimized).
3. Quit Acrobat Distiller.
Acrobat Distiller will retain the default
settings until you change them.
Note: You cannot modify the three
predefined sets of Distiller job options.
However, you can create new sets based
on the default sets, or you can define
and save custom sets of options and use
them at any time.
Click on the Job Options pop-up
menu and choose PrintOptimized
or PressOptmized, depending on
how your PDF files will be used
Before creating a PDF file to send to
a commercial printer or a service
bureau, check with the provider to
find out what the output resolution
and other settings should be, or ask
them to provide a .joboptions file
containing their recommended settings.
You may need to customize the job
options for a particular provider and
then provide them with a .joboptions
file of your own.
7
Software & Setup
For Macintosh
What you will need
This book assumes that you already
have the most current versions of
Adobe printer driver software installed
on your system.
Note: At the time of this publication,
AdobePS driver 8.5.1 was the most
current driver for the Macintosh
operating system.
If you have a Chooser icon called
AdobePS, find out which driver
version you have installed on your
system. To identify the driver version:
1. Open the Extensions folder within
your System folder.
2. Click once on the AdobePS
Chooser extension, and then choose
File > Get Info.
If the version is not 8.5.1, install the
AdobePS printer driver version 8.5.1
or later on your system. (The AdobePS
8.5.1 printer driver is included on the
Acrobat 4 CD.)
Make sure the version is 8.5.1
8
Note: Adobe InDesign for Macintosh
uses AdobePS driver 8.6. This driver is
included with InDesign. Creating PDF
files with AdobePS driver 8.6 is slightly
different than creating PDF files with
AdobePS Driver 8.5.1. These differences
are explained in detail in the InDesign
for Macintosh section. If you install
AdobePS driver 8.6 and want to create
PDF files of documents you produce
with any of the other applications
covered in this book, you should refer
to the instructions for generating PDF
files with InDesign.
4. Close the Acrobat Distiller 4.0 Info
dialog box.
Setting up AdobePS printer driver
Before you begin converting documents into PDF files, you must first
select the AdobePS printer driver in
the Chooser.
To choose the AdobePS printer driver:
1. Open the Chooser (Apple menu >
Chooser) and click the AdobePS
driver icon.
3. Close the AdobePS Info dialog box.
2. Choose a PostScript printer from
the list of printers available under
Select a PostScript Printer.
Setting up Acrobat 4.0
1. Install Acrobat 4.0 or later on your
computer.
2. Close the Chooser window.
2. Open the Acrobat 4.0 > Distiller
folder on your hard disk.
3. Click the Acrobat Distiller 4.0 icon,
and then choose File > Get Info.
Make sure the version is 4.0 or later.
Make sure the version is 4.0 or later
Note: This book assumes that the
PDFPlugin file is in the Printer
Descriptions folder within your
System > Extensions folder. (The
PDFPlugin file is placed within the
Printer Descriptions folder when you
install Acrobat 4.0.) When you create a
Software & Setup
For Macintosh
PostScript file, the PDFPlugin is used
to automatically launch Acrobat
Distiller and generate a PDF file.
Setting your Acrobat Distiller
options
Acrobat Distiller converts PostScript
files to PDF files. You do not need to
manually launch Distiller when
converting documents. However, you
do need to launch Distiller before you
generate PDF files to set default options.
Three default settings are available:
• The ScreenOptimized job options
are recommended for files that will be
displayed on the World Wide Web or
on an intranet.
• The PrintOptimized job options
are recommended for PDF files
that are intended for desktop printers, digital copiers, publishing on a
CD-ROM, or to send to a client as a
publishing proof.
• The PressOptimized job options
are suggested for PDF files that will
be printed as high-quality final output
to an imagesetter or platesetter, for
example.
To set Distiller defaults:
1. Launch Acrobat Distiller.
2. Click the Job Options pop-up
menu, and then select the appropriate
option (PressOptimized,PrintOptimized,
or ScreenOptimized).
3. Quit Acrobat Distiller.
launched and generates a PDF file
from a PostScript file. After that,
Acrobat is launched and the PDF file
is opened.
Make sure that your computer has
sufficient RAM to run these applications. If there’s not enough memory,
Distiller may not launch. Similarly, if
there’s enough memory to run
Distiller, a PDF file will be created,
but if there’s not enough memory
remaining to launch Acrobat, the
PDF file will not be opened.
Acrobat Distiller will retain the
default settings until you change them.
The Acrobat application requires
17 MB of RAM; Acrobat Distiller
requires 12 MB. The instructions in
Step 2 of this book explain how to
automatically generate PDF files from
within several applications. In these
instances, Distiller is automatically
Note: You cannot modify the three
predefined sets of Distiller job options.
However, you can create new sets based
on the default sets, or you can define
and save custom sets of options and use
them at any time.
Click the Job Options pop-up menu
and choose PrintOptimized or
PressOptmized, depending on how
your PDF files will be used
Before creating a PDF file to send to
a commercial printer or a service
bureau, check with the provider to
find out what the output resolution
and other settings should be, or ask
them to provide a .joboptions file
containing their recommended settings.
You may need to customize the job
options for a particular provider and
then provide them with a .joboptions
file of your own.
9
Step 2
Creating PDF files
Before you start, read this
section.
This section describes the basic
techniques you will follow to
generate PostScript files and
convert them into PDF files.
Specifying the correct output
settings is an important step
because the content in the
PostScript files you generate
determines the data that appears
in your PDF file. For example, if
you forget to include a graphic in
your PostScript file, it will not
appear in your PDF file.
In this section of How to Create
Adobe PDF Files for Print and Press,
you will find basic step-by-step
instructions on how to create a
PDF file designed for a composite
PDF workflow. For more advanced
techniques, such as trapping and
OPI, see Appendix A.
Before you begin, make sure you
have installed Acrobat 4.0. You
may also want to set up your
Acrobat Distiller functions before
creating a PostScript file from
your application. To do so, see
Step 1 in this book.
Creating PDF files with the following applications
Adobe FrameMaker 5.5 or later
Adobe Illustrator 8.0
Adobe InDesign
Adobe PageMaker Plus
Macromedia FreeHand 8
QuarkXPress 3.32 (Mac only)
QuarkXPress 4.0 or later
Adobe FrameMaker 5.5 or later
For Windows 95 and Windows 98
Creating PDF files
You can generate PDF files from
individual FrameMaker documents
as well as from FrameMaker books.
When you generate a PDF version of
a book, you can create either a single
PDF file for the entire book or separate
PDF files for each document in the book.
To create a PDF file from a
FrameMaker document:
1. Open your document in
FrameMaker.
2. Choose File > Print.
3. In the Print dialog box, deselect
Last Sheet First.
Note: Because this book focuses on
creating print-ready PDF files, it does
not describe the Generate Acrobat
Data feature of FrameMaker.
This feature creates files that are
prepared for online use. If you are
interested in this capability, refer to the
FrameMaker manual or online help.
4. Check to see if the printer listed in
the Printer is Acrobat Distiller.
If not, click Setup. In the Print Setup
dialog box, select the Acrobat Distiller
printer choice. Click OK to return to
the Print dialog box.
5. Click Print.
Note: You do not need to select the
Print Only To File option in the Print
dialog box. If you select this option, a
PostScript file is generated in the
specified location, but the file is not
automatically converted into a
PDF file.
When you click Print, a PostScript file
is generated. Acrobat Distiller then
automatically launches, converts the
PostScript file into a PDF file, and
quits. (The PDF file is placed in the
PDF Output folder within the
Acrobat 4.0 folder; the PostScript file
is deleted. Distiller automatically names
the file by adding a “.pdf ” extension
to the original file name.) Finally, the
PDF file is opened in Acrobat.
To create a single PDF file from a
FrameMaker book:
1. Open the book (book) file. When
the book list appears, choose File > Print.
2. Choose File > Print.
3. In the Print File In Book dialog
box, click Print.
Deselect Last Sheet First
Check to see if the Printer
listed is Acrobat Distiller
12
Adobe FrameMaker 5.5 or later
For Windows 95 and Windows 98
4. In the Print dialog box, deselect
Last Sheet first.
5. Select Print Only To File.
If you want, you can specify a different path and file name for the
PostScript (.ps) file that’s created.
6. Click Print.
A PostScript file is generated in the
location specified in the Print dialog
box. At this point, you must use
Acrobat Distiller to convert the
PostScript file to a PDF file. To do so:
1. Launch Acrobat Distiller.
2. From the Job Options pop-up
menu, select PrintOptimized if you
intend to send the PDF file to a
desktop printer, a digital copier, a
CD-ROM, or to a client as a publishing proof; select PressOptimized for
PDF files that will be printed as highquality final output to, for example,
an imagesetter or platesetter.
one remaining in the Print list, click
Print. After you’ve created PostScript
files for the individual book files, use
Acrobat Distiller to convert them into
PDF files.
3. Select Open from the file menu and
open the PostScript file you saved earlier.
Note: Because this book focuses on
creating print-ready PDF files, it does
not describe the Generate Acrobat
Data feature of FrameMaker. This
feature creates files that are prepared
for online use. If you are interested in
this capability, refer to the FrameMaker
User Guide or online help.
4. In the Specify PDF File Name
dialog box, choose a storage folder
and assign a name to the PDF file;
then click Save.
If you want to create a separate PDF
file for each file in a FrameMaker
book, you must use the arrow keys in
the Print Files In Book dialog box to
generate PostScript files one file at a
time. Move the files you don’t want to
print to the Don’t Print list. When the
file you want to convert is the only
To create a PDF file for a
single book file, isolate it in
the Print list, and then
click Print.
13
Adobe FrameMaker 5.5 or later
For Macintosh
Creating PDF files
You can generate PDF files from
individual FrameMaker documents
as well as from FrameMaker books.
When you create a PDF version of a
book, you can create either a single
PDF file for the entire book or
separate PDF files for each document
in the book.
To create a PDF file from a
FrameMaker document or book:
1. Open your document in
FrameMaker.
2. Choose File > Page Setup, and
select the following options:
• For Format, select Acrobat PDF.
For Page Setup Options,
select Page Attributes
Select PostScript
Options from the popup menu, and then
deselect each option in
the PostScript Options
dialog box
14
When you select a Page Setup option
from the pop-up menu at the top of
the Page Setup dialog box, the
controls displayed in the rest of the
dialog box change.
3. Select PostScript Options from the
pop-up menu.
4. Deselect each option in the
PostScript Options dialog box, and
then click OK.
It is extremely important to make the
right choices in this dialog box.
Smoothing text or substituting fonts
can make files large and unwieldy.
5. Choose File > Print.
At the top left of the dialog box, you
should see Acrobat PDF. At the top
right, you should see Destination: File.
6. Select FrameMaker 5.5 from the
pop-up menu. Deselect Last Sheet First.
Note: Because this book focuses on
creating print-ready PDF files, it does
not describe the Generate Acrobat
Data feature of FrameMaker. This
feature creates files that are prepared
for online use. If you are interested in
this capability, refer to the FrameMaker
manual or online help.
7. Select Save As File from the popup menu, and then select the following options:
• For Format, select PostScript Job.
For Format For, select
Acrobat PDF
In the Print dialog box, select
FrameMaker 5.5 from the
pop-up menu, and then
deselect Last Sheet First
Adobe FrameMaker 5.5 or later
For Macintosh
• For PostScript Level, select the level
that is appropriate for your PDF file.
• For Data Format, select Binary.
• For Font Inclusion, select All.
Note: It is important to include all
fonts in your PostScript file. This will
help avoid missing fonts if you send
your files to a service bureau.
8. Select Printer Specific Options,
and then select a resolution:
• Select 1200 dpi if you want to
produce a print-optimized PDF file
that will be output to a color printer
or digital color copier. (The Distiller
PrintOptimized job option also uses
a resolution of 1200 dpi.)
• Select 2400 dpi if you want to
produce a press-optimized PDF file
that will be output on a printing
press or plotter. (Distiller’s
PressOptimized job option also uses a
resolution of 2400 dpi.)
9. Select other options from the popup menu to display different categories and make choices. When you
have selected all of your settings, click
Save Settings, and then click Distill.
When you click Save, a PostScript file
is generated. Acrobat Distiller then
automatically launches, converts the
PostScript file into a PDF file, deletes
the PostScript file, and then quits.
(Distiller automatically names the
PDF file by adding a “.pdf ” extension
to the PostScript file name and then
places the PDF file in the same folder
as the PostScript file.) Finally, the
PDF file is opened in Acrobat.
Your settings will be retained until
you save them again.
10. Select a location and choose a
name for the PostScript file; then
click Save.
In the Save As File dialog box, select the following options:
In the Print dialog box, select
FrameMaker 5.5 from the pop-up menu
and then deselect Last Sheet First
• For Format, select PostScript Job
• For PostScript Level, select the level that is appropriate
for your output device
• For Data Format, select Binary
• For Font Inclusion, select All
15
Adobe Illustrator 8.0
For Windows 95 and Windows 98
Creating PDF files
1. Open your document in Illustrator.
2. Choose File > Print.
3. If Acrobat Distiller is not selected
in the Name pop-up menu, select it.
4. From the PostScript pop-up, select
the level that is appropriate for your
PDF file.
5. Select the Force Fonts To Download option.
Note: It is important to include all
fonts in your PostScript file. This will
help avoid missing fonts if you send
your files to a service bureau.
6. Click OK.
When you click OK, a PostScript
file is generated. Acrobat Distiller
then automatically launches, converts the PostScript file into a PDF
file, and quits. (The PDF file is
placed in the PDF Output folder
within the Acrobat 4.0 folder; the
PostScript file is deleted. Distiller
automatically names the file by
adding a “.pdf ” extension to the
original file name.) finally, the PDF
file is opened in Acrobat.
Select Force Fonts to
Download option
In the Print dialog box,
the printer selected should
be Acrobat Distiller
16
Adobe Illustrator 8.0
For Macintosh
Creating PDF files
1. Open your document in Illustrator.
2. Choose File > Page Setup, and then
select the following options:
• From the Format For pop-up
menu, select Acrobat PDF.
When you select a Page Setup option
from the pop-up menu at the top of
the Page Setup dialog box, the
controls displayed in the rest of the
dialog box change.
• For Format, select PostScript Job.
It is extremely important to make
the right choices in this dialog box.
Smoothing text or substituting fonts
can make files large and unwieldy.
• For Font Inclusion, select All.
5. Choose File > Print.
3. Select Page Attributes in the pop-up
menu and make necessary changes to
the Paper, Orientation, and Scale
controls to fit your PDF document.
Select a Page Setup option, and
then modify the corresponding
settings as needed
4. Select PostScript Options from the
pop-up menu. Deselect each option
in the PostScript Options dialog box,
and then click OK to close the Page
Setup dialog box.
At the top left of the dialog box, you
should see Acrobat PDF. At the top
right, you should see Destination: File.
6. Select Save As File from the popup menu, and then select the following options:
For Format for, select
Acrobat PDF
• For PostScript Level, select the level
that is appropriate for your PDF file.
• For Data Format, select Binary.
Note: It is important to include all
fonts in your PostScript file. This will
help avoid missing fonts if you send
your files to a service bureau.
7. Select Printer Specific Options,
and then select a resolution:
• Select 1200 dpi if you want to
produce a print-optimized PDF file
that will be output using a color
printer or digital color copier.
Select PostScript Options from the
pop-up menu, and then deselect each
option in the PostScript Options
dialog box
17
Adobe Illustrator 8.0
For Macintosh
(Distiller’s PrintOptimized job
option also uses a resolution of
1200 dpi.)
9. Select a location and choose a
name for the PostScript file; then
click Save.
• Select 2400 dpi if you want to
produce a press-optimized PDF file
that will be output on a printing
press or plotter. (Distiller’s
PrintOptimized job option also uses
a resolution of 2400 dpi.)
When you click Save, a PostScript file
is generated. Acrobat Distiller then
automatically launches, converts the
PostScript file into a PDF file, deletes
the PostScript file, and then quits.
(Distiller automatically names the
PDF file by adding a “.pdf ” extension
to the PostScript file name and places
the PDF file in the same folder as the
PostScript file.) Finally, the PDF file is
opened in Acrobat.
8. Select other options from the popup menu to display different categories and make choices. When you
have selected all of your settings, click
Save Settings, and then click Distill.
Your settings will be retained until
you save them again.
In the Print dialog box, select Save As
File from the pop-up menu
18
Adobe InDesign
For Windows 95 and Windows 98
Creating PDF files
You can use either of two methods to
create PDF files from InDesign
documents: 1) You can generate a
PostScript file using the Print command
and then convert the PostScript file
into a PDF file with Acrobat Distiller;
or 2) you can use the Export command on the File menu to create a
PDF file directly from InDesign.
Note: InDesign requires AdobePS printer
driver version 4.3 or later. This driver
is included with InDesign. You should
install AdobePS 4.3 or later before you
attempt to print with InDesign.
To create a PDF file using the Print
command and Acrobat Distiller:
1. Open your document in InDesign.
3. If Acrobat Distiller is not selected
in the Name pop-up menu, select it.
To create a PDF file using the
InDesign Export feature:
4. Click on the Advanced Page Control,
Color, Scale And Fit, Graphics, Page
Marks, and Trapping tabs and choose
the settings in each pane that are
most appropriate for your PDF file.
Then click OK.
1. Open your document in InDesign.
When you click OK, a PostScript file
is generated. Acrobat Distiller then
automatically launches, converts the
PostScript file into a PDF file, deletes
the PostScript file, and then quits.
(Distiller automatically names the
PDF file by adding a “.pdf ” extension
to the PostScript file name and
places the PDF file in the same folder
as the PostScript file.) Finally, the
PDF file is opened in Acrobat.
4. Choose PDF Options, Compression, Pages And Page Marks, and
Security from the pop-up menu, and
then choose the settings that are most
appropriate for your PDF file.
2. Choose File > Export.
3. Select a storage folder for your PDF
file, select Adobe PDF from the Save As
Type pop-up menu, and then click Save.
5. Click Export.
A PDF file is created (“.pdf ” is added
to the name of the InDesign file) and
placed in the same folder as the
original document.
2. Choose File > Print.
Note: The Export feature does not use
Distiller; therefore, Distiller job options
will have no effect on the resulting PDF file.
In the Print dialog box, the printer selected
should be Acrobat Distiller
Choose PDF Options,
Compression, Pages And Page
Marks, and Security, and then
choose the settings that are
appropriate for your PDF file
19
Adobe InDesign
For Macintosh
4. Select PostScript Options from the
pop-up menu. Deselect each option
in the PostScript Options dialog box,
and then click OK to close the Page
Setup dialog box.
Creating PDF files
You can use either of two methods
to create PDF files from InDesign
documents: 1) You can generate
a PostScript file using the Print
command and then convert the
PostScript file into a PDF file with
Acrobat Distiller; or 2) you can use
the Export command on the File
menu to create a PDF file directly
from InDesign.
in the Printer Descriptions folder,
which is within the Extensions folder in
your System folder.
Note: InDesign requires AdobePS
printer driver version 8.6 or later.
This driver is included with InDesign.
You should install AdobePS 8.6 or
later before you attempt to print with
InDesign. When you install AdobePS
8.6, the Virtual Printer PPD is placed
When you select a Page Setup option,
the corresponding items in the rest of
the Page Setup dialog box change.
5. Choose File > Print. At the top left,
you should see Virtual Printer. At the
top right, you should see Destination:
File.
3. Select Page Attributes in the pop-up
menu and make necessary changes to
fit your document.
6. Select PostScript Settings from the
pop-up menu, and then select the
following options:
Select a Page Setup option, and
then modify the corresponding
settings as needed
20
To create a PDF file using Virtual
Printer and Acrobat Distiller:
1. Open your document in InDesign.
2. Choose File > Page Setup, and then
choose Virtual Printer from the
Printer pop-up menu.
It is extremely important to make the
right choices in this dialog box.
Smoothing text or substituting fonts
can make files large and unwieldy.
In the Save As File dialog box, select the following options:
• For Format, select PostScript Job
• For PostScript Level, select the level that is appropriate for
your output device
• For Data Format, select Binary
• For Font Inclusion, select All
Adobe InDesign
For Macintosh
• For Format, select PostScript Job.
• For PostScript Level, select the level
that’s appropriate for your output
device.
• For Data Format, select Binary.
• For Font Inclusion, select All.
Note: It is important to include all
fonts in your PostScript file. This will
help avoid missing fonts if you send
your files to a service bureau.
7. Select Printer Specific Options
from the pop-up menu:
• Select 1200 dpi if you want to
produce a print-optimized PDF file
that will be output on a color printer
or digital color copier. (The Distiller
PrintOptimized job option also uses
a resolution of 1200 dpi.)
• Select 2400 dpi if you want to
produce a press-optimized PDF file
that will be output on a printing
press or plotter. (The Distiller
PressOptimized job option also uses a
resolution of 2400 dpi.)
8. Select other items from the pop-up
menu to open different categories
and make choices. When you have
selected all of your settings, click Save
Settings, and then click Save.
Your settings will be retained until
you save them again.
9. Click Save.
A PostScript file is saved on the
desktop. At this point, you must use
Acrobat Distiller to convert the
PostScript file into a PDF file. To do so:
1. Launch Acrobat Distiller.
2. From the Job Options pop-up
menu, select PrintOptimized if you
intend to send the PDF file to a
desktop printer, a digitial copier, a
CD-ROM, or to a client as a publishing proof; select PressOptimized for
PDF files that will be printed as highquality final output to, for example,
an imagesetter or platesetter.
Select items from the pop-up menu to open
different categories and make choices
21
Adobe InDesign 1.0
For Macintosh
3. Choose Open from the File menu
and open the PostScript file you saved
earlier.
4. In the Specify PDF File Name
dialog box, choose a storage folder
and assign a name to the PDF file;
then click Save.
4. In the Export PDF dialog box,
choose PDF Options, Compression,
Pages And Page Marks, and Security
from the pop-up menu, and then
choose the settings that are most
appropriate for your PDF file.
5. Click Export.
To create a PDF file using the
InDesign Export feature:
A PDF file is saved in the folder you
chose in Step 3.
1. Open your document in InDesign.
Note: The Export feature does not use
Distiller; therefore, Distiller job options
will have no effect on the resulting
PDF file.
2. Choose File > Export.
3. Select a storage folder for your
PDF file, select Adobe PDF from the
Formats pop-up menu, and then
click Save.
Choose PDF Options, Compression, Pages And
Page Marks, and Security, and then choose the
settings that are appropriate for your PDF file
22
Adobe PageMaker Plus
For Windows 95 and Windows 98
Creating PDF files
You can use either of two methods
to create PDF files from PageMaker
documents: 1) You can generate
a PostScript file using the Print
command and then convert the
PostScript file into a PDF file with
Acrobat Distiller; or 2) you can use
the Export > Adobe PDF command
on the File menu (this method also
uses Acrobat Distiller).
Note: Before you create a PDF file
from a PageMaker document you
should copy the Acrobat Distiller
printer description (located in the
Xtras folder within the Distiller
folder) into a folder named Ppd4
within your PageMaker folder.
The complete path within your
PageMaker folder is:
...\Pm65\Rsrc\Usenglish\Ppd4.
In the Print Document dialog
box, select the Acrobat Distiller
3010.106 PPD
To create a PDF file using the Print
command and Acrobat Distiller:
1. Open your document in PageMaker
Plus.
2. Choose File > Document Setup,
select Acrobat Distiller from the
Compose To Printer pop-up menu,
and then click OK.
3. Choose File > Print. If you receive
an error message (for example,
“Cannot find ADCMYK4.PPD”),
ignore it.
Check to see if the printer is Acrobat
Distiller. If it is not, select Acrobat
Distiller from the Printer pop-up
menu.
4. For PPD, select the Acrobat Distiller PPD 3010.106.
5. Select Features, and then select
a resolution:
• Select 1200 dpi if you want to
produce a print-optimized PDF file
that will be output using a color
printer or a digital color copier. (The
Distiller PrintOptimized job option
also uses a resolution of 1200 dpi.)
• Select 2400 dpi if you want to
produce a press-optimized PDF file
that will be output on a printing
press or plotter. (The Distiller
PrintOptimized job option also uses
a resolution of 2400 dpi.)
6. Select Options.
7. From the Send Image Data pop-up
menu, choose Normal.
8. From the Data Encoding pop-up
menu, choose Send Binary Image Data.
9. From the Download Fonts pop-up
menu, choose PostScript and TrueType.
In the Print Options dialog box,
select PostScript and TrueType in
the Download Fonts pop-up menu
23
Adobe PageMaker Plus
For Windows 95 and Windows 98
10 . Click Print.
2. Choose File > Export > Adobe PDF.
When you click Print, a PostScript file
is generated. Acrobat Distiller then
automatically launches, converts the
PostScript file into a PDF file, and
quits. (The PDF file is placed in the
PDF Output folder within the
Acrobat 4.0 folder; the PostScript file
is deleted. Distiller automatically
names the file by adding a “.pdf ”
extension to the original file name.)
Finally, the PDF file is opened in
Acrobat.
3. In the General panel of the Export
Adobe PDF dialog box, check Distill
Now and choose Acrobat from the
Printer Style pop-up menu.
To create a PDF file using PageMaker’s
Export Adobe PDF feature:
6. Choose other options from the
pop-up menu and make the appropriate settings for your PDF file.
1. Open your document in PageMaker.
4. From the pop-up menu, choose
Format & Fonts. Make sure Embed
All Fonts is checked; choose Acrobat 4
from the Compatibility pop-up menu.
5. From the pop-up menu, choose
Miscellaneous and uncheck Override
Distiller Options.
8. Specify a name for your file and
choose a storage folder. If you want to
view your PDF file after it’s created,
check View PDF. If you want to
specify a base URL for the links in
your PDF file, check Base URL for
relative links and enter a URL in the
accompanying field.
9. Click Save.
When you click Save, a temporary
PostScript file is created. Acrobat
Distiller automatically launches and
converts the PostScript file into a
PDF file, and then quits. The PDF file
is then opened in Acrobat.
7. Click Export.
In the Print Options dialog box,
select PostScript and TrueType in
the Download Fonts pop-up menu
24
In the Export Adobe PDF dialog
box, click Distill Now and make sure
Acrobat is the selected Printer Style;
select options from the pop-up menu
and make settings as necessary for
your PDF file
Adobe PageMaker Plus
For Macintosh
Creating PDF files
You can use either of two methods to
create PDF files from PageMaker
documents: 1) You can generate a
PostScript file using the Print command and then convert the
PostScript file into a PDF file with
Acrobat Distiller; or 2) you can use
the Export > Adobe PDF command
on the File menu (this method also
uses Acrobat Distiller).
To create a PDF file using the Print
command and Acrobat Distiller:
1. Open your document in PageMaker
Plus.
2. Choose File > Print.
Check to see if the printer is your
default printer. If not, open the
Chooser (Apple menu > Chooser),
select the AdobePS printer driver, and
then choose your default printer from
the Select A PostScript Printer list.
3. For PPD, select Acrobat Distiller.
4. Select Features, and then select a
resolution:
• Select 1200 dpi if you want to
produce a print-optimized PDF file
that will be output using a color
printer or a digital color copier.
(Distiller’s PrintOptimized job
option also uses a resolution of 1200
dpi.)
• Select 2400 dpi if you want to
produce a press-optimized PDF file
that will be output on a printing
press or plotter. (Distiller’s
PrintOptimized job option also uses
a resolution of 2400 dpi.)
5. Select Options.
6. From the Send Image Data pop-up
menu, select Normal.
7. From the Data Encoding pop-up
menu, select Send Binary Image Data.
8. Deselect Use Symbol Font For
Special Characters.
9. Select Write PostScript To File.
If you want, you can click Save As to
choose the storage folder and assign a
file name for the PostScript (.ps) file
that’s created.
For PPD, select
Acrobat Distiller
Check to see if the printer is
Acrobat PDF
Select Features, and then
select either 1200 dpi or
2400 dpi resolution
In the Print Options dialog
box, select PostScript and
TrueType in the Download
Fonts pop-up menu
25
Adobe PageMaker Plus
For Macintosh
10. Click Save.
When you click Save, a PostScript file
is generated. At this point, you must
use Acrobat Distiller to convert the
PostScript file into a PDF file. To do so:
1. Launch Acrobat Distiller.
2. From the Job Options pop-up
menu, select PrintOptimized if you
intend to send the PDF file to a
desktop printer, a digital copier, a
CD-ROM, or to a client as a publishing proof; select PressOptimized for
PDF files that will be printed as highquality final output to, for example,
an imagesetter or platesetter.
3. Choose Open from the File menu
and open the PostScript file you saved
earlier.
In the Export Adobe PDF dialog box,
select Distill Now, View PDF Using,
and Include Downloadable Fonts;
uncheck Override Distiller’s Options
26
4. In the Specify PDF File Name
dialog box, choose a storage folder
and assign a name to the PDF file,
and then click Save.
7. Click PDF Options and modify the
settings as necessary for your PDF
file; then click OK.
To create a PDF file using the PageMaker
Export Adobe PDF feature:
8. Click Control and modify the
settings as necessary for your PDF
file; then click OK.
1. Open your document in PageMaker.
9. Click Export.
2. Choose File > Export > Adobe PDF.
10. Specify a name for your file and
choose a storage folder.
3. In the Workflow area, check Distill
Now and View PDF Using; then
choose a version of Acrobat from the
accompanying pop-up menu.
4. Select Include Downloadable Fonts
and uncheck Override Distiller’s Options.
5. From the PageMaker Printer styles
pop-up menu, choose Acrobat.
6. Select the appropriate paper size
and, if necessary, specify a page range.
11. Click Save.
When you click Save, a temporary
PostScript file is created. Acrobat
Distiller automatically launches and
converts the PostScript file into a
PDF file and then quits. The PDF file
is then opened in Acrobat.
Macromedia FreeHand 8
For Windows 95 and Windows 98
Creating PDF files
Note: At the time of this publication,
Macromedia FreeHand 8.01 was the
most current version. You can download the 8.01 update from
Macromedia’s Web site
(www.macromedia.com/support/
freehand/upndown).
1. Open your document in FreeHand.
2. Choose File > Print and select the
Acrobat Distiller printer.
3. Depending on the capabilities of
your printer, select Quality PS Level 1
or Quality PS Level 2 from the Print
Setting pop-up.
4. Check Use PPD, and then locate
and select the Acrobat Distiller PPD
(Acrobat 4.0 > Distillr > Xtras >
Adist4.ppd).
5. Click Setup. In the Print Setup
dialog box, choose the appropriate size
from the Paper Size pop-up. For wide
pages, choose Custom, and then enter
the width and height of the paper in
the pair of associated fields. Click OK
after you’ve selected a paper size.
automatically launches, converts the
PostScript file into a PDF file, and
quits. (The PDF file is placed in the
PDF Output folder within the
Acrobat 4.0 folder; the PostScript file
is deleted. Distiller automatically
names the file by adding a “.pdf ”
extension to the original file name.)
Finally, the PDF file is opened in
Acrobat.
6. Click OK.
7. In the Print dialog box, select
Uniform from the Scale % pop-up
menu.
When you click OK, a PostScript file
is generated. Acrobat Distiller then
Select Use PPD
and choose the
Acrobat Distiller
PPD
In the Print dialog
box, the printer
should be Acrobat
Distiller
Select Quality PS Level 1
or Quality PS Level 2,
whichever is appropriate
for your PDF file
Choose a size from the Paper Size pop-up menu
or choose Custom and enter width and height
values in the fields below
27
Macromedia FreeHand 8
For Macintosh
Creating PDF files
Note: At the time of this publication,
Macromedia FreeHand 8.01 was the
most current version. You can download the 8.01 update from
Macromedia’s Web site
(www.macromedia.com/support/
freehand/upndown).
1. Open your document in FreeHand.
2. Choose File > Page Setup, and then
select the following options:
• From the Format For pop-up
menu, select Acrobat PDF.
When you select a Page Setup option
from the pop-up menu at the top of
the Page Setup dialog box, the
controls displayed in the rest of the
dialog box change.
Select a Page Setup option, and
then modify the corresponding
settings as needed
28
3. Select Page Attributes in the pop-up
menu, and make necessary changes to
fit your document. If the document
has a custom page width, do not
change the selection in the Paper
pop-up menu or change the orientation (doing so will cause your PDF
page to rotate 90°).
4. Select PostScript Options from the
pop-up menu. Deselect each option
in the PostScript Options dialog box,
and then click OK to close the Page
Setup dialog box.
It is extremely important to make the
right choices in this dialog box.
Smoothing text or substituting fonts
can make files large and unwieldy.
5. Choose File > Print.
At the top left of the dialog box, you
should see Acrobat PDF. At the top
right, you should see Destination: File.
6. Choose FreeHand 8 from the popup menu, and then select the following options:
• For Print setting, select the level of
PostScript that’s appropriate for your
PDF file.
• Select Use PPD, and then click the
accompanying button and choose the
Acrobat Distiller printer description
(located in the Printer Descriptions
folder, which is within the Extensions
folder in your System folder).
• Select Uniform from the Scale %
pop-up menu.
7. Click Setup and choose a size from
For Format, select
Acrobat PDF
Select PostScript Options from the
pop-up menu, and then deselect each
option in the PostScript Options
dialog box
Macromedia FreeHand 8
For Macintosh
the Paper Size pop-up menu. For
wide documents, you must choose
Custom and specify a width and
height in the accompanying fields. If
you don’t specify a custom paper size
for a wide document, the resulting
PDF page is rotated 90°. Select
Automatic for Orientation.
8. Select Save As File from the popup menu, and then select the following options:
• For Format, select PostScript Job.
• For PostScript Level, select the level
that is appropriate for your PDF file.
• For Data Format, select Binary.
• For Font Inclusion, select All.
Note: It is important to include all
fonts in your PostScript file. This will
help avoid missing fonts if you send
your files to a service bureau.
9. Select Printer Specific Options,
and then select a resolution:
• Select 1200 dpi if you want to
produce a print-optimized PDF file
that will be output to a color printer
or a digital color copier. (The Distiller
PrintOptimized job option also uses
a resolution of 1200 dpi.)
• Select 2400 dpi if you want to
produce a press-optimized PDF file
that will be output on a printing
press or plotter. (Distiller’s
PressOptimized job option also uses a
resolution of 2400 dpi.)
10. Select other options from the
pop-up menu to display different
categories and make choices. When
you have selected all of your settings,
click Save Settings, and then click
Distill.
Your settings will be retained until
you save them again.
11. Choose a location and a name for
the PostScript file.
12. Click Save.
When you click Save, a PostScript file
is generated. Acrobat Distiller then
automatically launches, converts the
PostScript file into a PDF file, and
quits. (The PostScript file is deleted.
Distiller automatically names the
PDF file by adding a “.pdf ” extension
to the PostScript file name.) Finally,
the PDF file is opened in Acrobat.
For the Freehand 8 options in the Print dialog box, select the
following:
For the Save As File options in the Print dialog box, select the
following:
• Click Use PPD; then click the accompanying button and choose the
Acrobat Distiller printer description
• For Print Setting, select the PostScript level that’s appropriate for
your PDF file
• For Scale %, select Uniform
• For Font Inclusion, select All
• For Format, select PostScript Job
• For PostScript Level, select the level that’s appropriate for
your PDF file
• For Data Format, select Binary
• For Font Inclusion, select All
29
QuarkXPress 3.3.2
For Macintosh only
Creating PDF files
1. Open your document in
QuarkXPress 3.3.2.
4. Select QuarkXPress 3.3.2 in the
pop-up menu, choose the Acrobat
Distiller PPD, and then click OK.
2. Choose File > Page Setup, and then
select the following options:
5. Choose File > Print.
• For Format For, select Acrobat PDF.
When you select a Page Setup option,
the corresponding items in the rest of
the Page Setup dialog box change.
3. Select PostScript Options in the
pop-up menu. Deselect each option
in the PostScript Options dialog box.
It is extremely important to make the
right choices in this dialog box.
Smoothing text or substituting fonts
can make files large and unwieldy.
Select a Page Setup option, and
then modify the corresponding
settings as needed
30
6. Select Save As File from the popup menu, and then select the following options:
• For Format, select PostScript Job.
• For PostScript Level, select the
level that is appropriate for your
output device.
• For Data Format, select Binary.
• For Font Inclusion, select All.
For Format select
Acrobat PDF
Note: It is important to include all
fonts in your PostScript file. This will
help avoid missing fonts if you send
your files to a service bureau.
7. Select Printer Specific Options,
and then select a resolution:
• Select 1200 dpi if you want to
produce a print-optimized PDF file
that will be output using a color
printer or a digital color copier. (The
Distiller PrintOptimized job option
also uses a resolution of 1200 dpi.)
• Select 2400 dpi if you want to
produce a press-optimized PDF file
that will be output on a printing
press or plotter. (The Distiller
Select PostScript Options from the
pop-up menu. Deselect each option in
the PostScript Options dialog box
QuarkXPress 3.3.2
For Macintosh only
PressOptimized job option also uses a
resolution of 2400 dpi.)
8. Select other options from the popup menu to display different categories and make choices. When you
have selected all of your settings, click
Save Settings, and then click Distill.
Your settings will be retained until
you save them again.
When you click Save, a PostScript file
is generated. Acrobat Distiller then
automatically launches, converts the
PostScript file into a PDF file, and
then quits. (The PostScript file is
deleted. Distiller automatically names
the PDF file by adding a “.pdf ”
extension to the PostScript file
name.) Finally, the PDF file is opened
in Acrobat.
9. Choose a location and a name for
the PostScript file.
10. Click Save.
In the Save As File dialog box, select
the following options:
In the Print dialog box, select Save As
File from the pop-up menu
• For Format, select PostScript Job
• For PostScript Level, select the level
that’s appropriate for your output
device
• For Data Format, select Binary
• For Font Inclusion, select All
If you choose QuarkXPress 3.3.2
from the pop-up menu, the
QuarkXPress built-in print
options are displayed
31
QuarkXPress 4.0
For Windows 95 and Windows 98
Creating PDF files
1. Open your document in QuarkXPress
4.04 or later.
4. Click Setup, and then select
Acrobat Distiller from the Printer
Description pop-up menu.
Note: We recommend you download
the free 4.04 upgrade available on
www.quark.com, which contains a
number of important fixes.
This tab lets you choose any of several
predefined paper sizes or specify a
custom paper size. If you choose
Custom from the Paper Size pop-up
menu, you can specify the width and
height of the paper in the Paper Width
and Paper Height fields, respectively,
or you can let QuarkXPress determine
the paper height by choosing Automatic.
2. Choose File > Page Setup or File >
Print to open the Print dialog box.
3. Check to see if the Printer is Acrobat
Distiller. If not, select Acrobat Distiller
from the pop-up menu.
The Print dialog box contains five
tabs (Document, Setup, Output,
Options, and Preview). You can use
these tabs to customize your document. Use the Document tab to turn
the Separations option on or off. Use
the Output tab to select print color
and set resolution. Use the Options
tab to select settings, such as OPI.
If your page is wider than it is tall,
select the landscape icon next to
Orientation. (To see how the size of the
current document relates to the specified
paper size, click the Preview tab.)
5. Select Output, and then select a
resolution:
• Select 1200 dpi if you want to produce
a print-optimized PDF file that will
Open the Print dialog box,
and check to see if the Printer
is Acrobat Distiller
You can use these tabs to customize your document.
Select Setup, and then select the Acrobat Distiller from
the Printer Description pop-up menu
32
be output to a color printer or a
digital color copier. (The Distiller
PrintOptimized job option also uses
a resolution of 1200 dpi.)
• Select 2400 dpi if you want to produce
a press-optimized PDF file that will
be output on a printing press or plotter.
(The Distiller PressOptimized job option
also uses a resolution of 2400 dpi.)
6. When you have selected all of your
settings in each tab, click Print.
When you click Print, a PostScript file
is generated. Acrobat Distiller then
automatically launches, converts the
PostScript file into a PDF file, and quits.
(The PDF file is placed in the PDF
Output folder within the Acrobat 4.0
folder; the PostScript file is deleted.
Distiller automatically names the file
by adding a “.pdf ” extension to the
original file name.) Finally, the PDF
file is opened in Acrobat.
QuarkXPress 4.0
For Macintosh
Creating PDF files
1. Open your document in
QuarkXPress 4.0 or later.
Note: We recommend you download
the free 4.04 upgrade available on
www.quark.com, which contains a
number of important fixes.
2. Choose File > Page Setup or File >
Print to open the Print dialog box.
3. Select the Setup tab in the Print
dialog box, and then select the
Acrobat Distiller PPD from the
Printer Description pop-up menu.
This tab lets you choose any of
several predefined paper sizes or
specify a custom paper size. If you
choose Custom from the Paper Size
pop-up menu, you can specify the
width and height of the paper in the
Paper Width and Paper Height fields,
respectively, or you can let
QuarkXPress determine the paper
height by choosing Automatic.
If your page is wider than it is tall,
select the landscape icon next to
Orientation. (To see how the size of
the current document relates to the
specified paper size, click the Preview
tab.)
4. Select Page Setup at the bottom of
the dialog box.
5. For Format For, select Acrobat PDF.
When you select a Page Setup option
from the pop-up menu at the top of
the Page Setup dialog box, the
controls displayed in the rest of the
dialog box change.
6. Select PostScript Options in the
pop-up menu. Deselect each option
in the PostScript Options dialog box.
When you have finished, click OK to
return to the Print dialog box.
It is extremely important to make the
right choices in this dialog box.
Smoothing text or substituting fonts
can make files large and unwieldy.
The Print dialog box contains five
tabs (Document, Setup, Output,
Options, and Preview). You can use
these tabs to customize your document. Use the Document tab to turn
the Separations option on or off.
For Format select
Acrobat PDF
Select PostScript Options from the popup menu, and then deselect each option
in the PostScript Options dialog box
Select a Page Setup
option; then modify the
corresponding settings
as needed
In the Print dialog box, select Acrobat
Distiller from the Printer Description
pop-up menu
33
QuarkXPress 4.0
For Macintosh
Use the Output tab to select print
color and set resolution. Use the
Options tab to select settings, such
as OPI.
7. Select Output, and then select a
resolution:
• Select 1200 dpi if you want to
produce a print-optimized PDF file
that will be output to a color printer
or digital color copier. (Distiller’s
PrintOptimized job option also uses
a resolution of 1200 dpi.)
• Select 2400 dpi if you want to
produce a press-optimized PDF file
that will be output on a printing
In the Printer dialog box, select Save
As File from the pop-up menu
34
press or plotter. (Distiller’s
PressOptimized job option also uses a
resolution of 2400 dpi.)
• Select Composite Color for print
colors.
8. When you have selected all of your
settings, click Printer.
At the top left, you should see Acrobat PDF. At the top right, you should
see Destination: File.
9. Select Save As File from the popup menu, and then select the following options:
• For Format, select PostScript Job.
• For PostScript Level, select the level
that’s appropriate for your PDF file.
• For Data Format, select Binary.
• For Font Inclusion, select All.
Note: It is important to include all
fonts in your PostScript file. This will
help avoid missing fonts if you send
your files to a service bureau.
10. Select other items from the popup menu to open different categories
and make choices. When you have
selected all of your settings, click Save
Settings, and then click Distill.
Your settings will be retained until
you save them again.
In the Save As File dialog box, select the following options:
• For Format, select PostScript Job
• For PostScript Level, select the level that’s appropriate for
your PDF file
• For Data Format, select Binary
• For Font Inclusion, select All
QuarkXPress 4.0
For Macintosh
11. Select a location and choose a
name for the PostScript file; then
click Save.
When you click Save, a PostScript file
is generated. Acrobat Distiller then
automatically launches, converts the
PostScript file into a PDF file, and
quits. (The PostScript file is deleted.
Distiller automatically names the
PDF file by adding a “.pdf ” extension
to the PostScript file name.) finally,
the PDF file is opened in Acrobat.
35
36
Step 3
Streamline your
review and markup
Before you start, read this
section.
Using electronic annotation tools for internal and
external review
This section describes how you
can use the Adobe Acrobat 4.0
application to review and mark
up PDF files before they’re sent
to a printer.
Annotating and marking up PDF documents
Annotation tools
Markup tools
Acrobat 4.0 includes several
tools that let reviewers add
annotations to PDF documents.
For example, a client could use
Acrobat to add comments and
mark corrections when proofing
a publication before final output.
Clients don’t need the original
authoring application, and the
annotations they insert don’t
affect the original content.
(Note: Once you’ve created a PDF
file, anyone with a Macintosh,
Windows, or UNIX computer can
open, display, and print the file
using the free Acrobat Reader
application. Acrobat 4.0 software
is required if you want to modify
a PDF document.)
37
Streamline your review and markup process
Using electronic annotation tools
for internal and external review
After you’ve converted a document
into a print- or press-optimized PDF
file, the file is ready to be printed—
to a color laser printer, inkjet printer,
or digital copier if it’s a print-optimized file, or to a high resolution
imagesetter or platesetter if it’s a
press-optimized file. But a PDF file
doesn’t have to be sent straight to a
printer. Reviewers can use Acrobat
software’s versatile annotation and
markup tools to add such things as
electronic sticky notes and handwritten copyedits to PDF documents, and
they can add their comments directly
on the PDF documents without
modifying the originals.
38
Annotating and marking up
PDF documents
Before Acrobat software, the client
review process could be long and
problematic. Comps and prepress
proofs were sent by costly express
mail or courier services; if you really
wanted to ensure safe delivery, you
probably delivered them to your
client personally. If you were confident enough to send a comp on disk,
you had to make sure your client had
all the fonts used in the document, as
well as the correct version of the
authoring application. And there was
still no guarantee the client would see
the document as you intended.
Acrobat changed all of that with the
single-file convenience of PDF. Now,
e-mailing a PDF digital master to
clients is a widely accepted improvement to the client review process. You
can save time and money associated
with traditional forms of delivery,
and you can be sure your client sees
your document exactly the way you
designed it, with the layout, fonts,
and graphical elements intact.
The annotation and markup features
in Acrobat 4.0 streamline both the
internal and external review and
approval processes. Reviewers can
make extensive remarks directly on
your PDF comps.
Annotation tools
The Notes tool lets you add electronic
“sticky notes” to any page in a PDF
document. Users can open and close,
move, resize, and scroll a Note
window, which enables reviewers to
enter as much text as they want.
These electronic sticky notes are ideal
for making extensive, content-oriented
annotations. They can be sorted,
imported, exported, deleted, and
summarized for at-a-glance review.
Like the Notes tool, the Text Annotation tool lets you create a text annotation on any page in a PDF document
and then place it anywhere you want.
Unlike a note annotation, a text
annotation remains visible on top of
a page and cannot be closed. You can
specify the font, size, and color of a
text annotation, and you have the
option of adding a border and a
background color to the text field.
The Stamp tool allows you to apply a
graphic stamp to a document in
much the same way you would use a
rubber stamp on a paper document.
Acrobat includes several built-in
stamp designs, such as “Approved,”
and “Draft,” and you can create and
add your own stamps, such as happy
faces, to the selection list. After you
add a stamp to a page, you have the
option to associate a note with it.
The Annotations palette lists all of
the annotations in a PDF file and
sorts them by type, author, page
number, or creation date. You can use
the Annotations palette to navigate
from annotation to annotation, to
import, export, and delete annotations, and to search for keywords in
annotations.
The File Annotation tool lets you
embed a file at a selected location in a
PDF documet, so the reader can open
it for viewing. Rather than referencing the file, as you would with a link,
the file becomes part of the PDF
document. Thus, if you move the
PDF document to a new location, the
embedded file annotation automatically goes with it.
Markup tools
Acrobat offers two sets of markup
tools — graphic and text — that let
you insert copyedits, add handwritten
comments, draw attention to a
portion of a page, and more. You can
also add a note to a text or graphic
markup, if you want.
Add any of several
built-in stamps or
create your own
custom stamps
Add “sticky notes”
without affecting
the original layout
Use the text markup
tools to highlight,
strike-through, or
underline text
Use the graphic
markup tools to add
handwritten notes
and marks
Annotation tools
Notes tool
Text Annotation tool
Stamp tool
File Annotation tool
39
Streamline your review and markup process
The visual information you convey
with a graphic annotation can be
purely abstract or highly symbolic.
For instance, you might draw an
ellipse as an abstract representation
of the workflow process and attach
your comments about the workflow
in an associated note. Or you might
draw a rectangle that encloses a
graphic and write your critique on
the image in the associated note.
The Pencil tool creates a freeform
line. You can use this tool to add
copyediting symbols, handwritten
notes, or hand-drawn graphics.
The Rectangle tool creates a rectangle
boundary you can position over text
or graphics.
The Ellipse tool creates a circular
boundary you can position over text
or graphics.
The Line tool creates a straight line
from two specified points.
The Text Markup tools provide
several methods for visually marking
up text in a document. You can use
these annotations by themselves or in
conjunction with other annotation
types. For example, you may want to
highlight or strike through a section
of text, and then double-click to add
a Note window to explain your
reason for the markup.
The Highlight Text tool acts like a
felt-tip pen and lets you draw atten-
Text Markup tools
Graphic Markup tools
Highlight Text tool
Pencil tool
Strikethrough Text tool
Rectangle tool
Underline Text tool
Ellipse tool
Line tool
40
tion to text strings by applying a
highlight color of your choice.
The Strikethrough Text tool draws a
horizontal line through selected
text—handy for indicating text that
needs to be deleted.
The Underline Text tool adds a line
under selected text.
Appendix
Other workflow
considerations
This section takes you beyond
the basic steps of creating PDF
files for press and print
workflows. It explores more
complex print-related workflow
considerations — such as
trapping, OPI, and working with
bleeds — that may play an
important role in your PDF
workflow.
A
Working with Encapsulated PostScript (EPS) files
Working with Desktop Color Separation (DCS) files
Working with multi-toned EPS files or colorized TIFF files
Working with vector graphics containing custom color
gradients or blends
Bleeds
Trapping
OPI
Naming PostScript files
41
Other workflow considerations
Working with Encapsulated
PostScript (EPS) files
Encapsulated PostScript (EPS) is a
graphic file format. An EPS file is not
designed for printing. It is usually
incorporated in a page design and
then printed. Acrobat Distiller can
convert EPS files to PDF files, but,
unlike PostScript files, EPS files do not
have a defined page size and may not
include required fonts. The default
page size and resolution in Distiller’s
job options compensate for the lack
of a defined page size in EPS files.
Distiller gains access to font
information in two ways:
• The font is included in the PostScript
file that Distiller is converting.
• The font is available in a monitored
font location.
If you get font errors when trying to
convert an EPS file created in any
application other than QuarkXPress
(version 4.0 or later) to a PDF file,
you probably did not embed the fonts
in the EPS file when it was saved. To
eliminate font errors in PDF files,
embed fonts in EPS files when saving
the EPS file from the original application. In Adobe Illustrator software,
check “Include Document Fonts”
when creating an EPS file.
If a particular font is unavailable,
Distiller will substitute the Courier font.
Note: Distiller will substitute the Courier
font only if you previously disabled the
superatm and distsadb.dos files.
Distiller will also substitute Adobe
San/Serif MM fonts.
Depending on the operating system,
Distiller will monitor font folders and
use the fonts in those folders to convert
PostScript files with unembedded
fonts. If you need Distiller to monitor
font folders other than the default
folders, you can add those font
locations in Distiller.
Working with Desktop Color
Separation (DCS) files
DCS files are Encapsulated PostScript
(EPS) files that use a low-resolution
display image with high-resolution
data for color separations. DCS 1.0
files are composed of five parts: a
low-resolution file for placement,
and separations files for cyan,
magenta, yellow, and black. DCS 2.0
files support spot color separations
and can store all the separations in
one file.
While Adobe Acrobat Distiller 4.0
software or later versions support
both PostScript (*.ps) and EPS files,
they do not support Desktop Color
Separation (DCS) files. If you distill a
DCS file, Distiller may return the
error, “Warning: Empty Job. No PDF
file produced.” PDF files created from
DCS files will not appear or print as
expected (for example, only one
channel will appear).
1. Create a pre-separated “fat”
PostScript file that contains all the
image data, separated into the four
process-color channels prior to
distilling.
2. To retain a composite PostScript
workflow with your DCS images,
open the DCS file in an image-editing
program such as Adobe Photoshop,
and then save it as a CMYK, TIFF, or
EPS file.
3. Link the new image to your
document.
Note: To maintain a composite
PostScript workflow in QuarkXPress
4.0 or later, use the SmartXT XTension
from Total Integration to recombine
the DCS file into a single file when
creating a composite PostScript file.
There is no similar plug-in for PageMaker
at this time.
Check with your service provider to
see if their OPI server software can
handle the picture replacement of a
five-file DCS 1.0 image in a composite
PostScript workflow.
Note: It is not clear if OPI vendors
have a similar solution for DCS 2.0 files.
You can only create PDF files from
DCS files by saving them in EPS
format and then distilling the EPS
files. The EPS file format does not
support alpha channels, so you must
remove alpha channels from the DCS
files before saving them as EPS files.
When working with DCS files, we
recommend you follow these steps:
42
Working with multi-toned EPS
files or colorized TIFF files
Multi-toned images created in
Photoshop® 5.02 or later and placed
into QuarkXPress 4.04 and later
or InDesign will be retained in a
composite PDF file in the PostScript
generated by QuarkXPress or
InDesign is language Level 2 or Level 3.
These Postscript files will maintain
color information when converted to
PDF if Acrobat 4.0 compatibility is
selected in Acrobat Distiller.
Colorized TIFF files will not colorseparate properly when included in a
document printed to disk as a composite PostScript file. These images
contain additional spot color components that are not supported in
composite mode.
Multi-toned images — such as
duotones, tritones, and quadtones —
represent the use of a single gray
image to paint multiple color
components. For example, in a
duotone, a single gray image might
be used to paint the black component
as well as a spot-color component
(the tone reproduction is different for
the two color components). Because
these additional spot color components are not supported in composite
PostScript language Level 1 or
language Level 2 files, they will not
color-separate properly.
Working with vector graphics
containing custom color
gradients or blends
With Adobe Illustrator 8.01 or later,
vector EPS files that contain gradients
or blends of two custom or spot
colors will be maintained when you
create a composite PostScript file and
separate it at the RIP or convert it to
a PDF file.
Bleeds
To preserve bleed information, create
a PostScript file with a page size larger
than your original document. Using
Acrobat Distiller 3.0 PPD, you can
create custom page sizes from the
Page Setup or Print dialog box. To
create a larger page size, add approximately one inch to your document
size. For example, if your page width
is 8.5 inches, type in 9.5 inches. Select
registration and crop marks and set
the page orientation to Portrait. Your
resulting PDF file will be 9.5 by 12 inches.
Trapping
In order for Acrobat Distiller to
preserve trapping information in a
PDF file, you must include the
information in the composite
PostScript file.
Note: Some raster-based prepress
workflows ignore application trapping
information, so check with your service
provider about trapping.
OPI
With Acrobat Distiller 4.0 software or
later versions, you can specify that
Distiller read and preserve Open
Prepress Interface (OPI) 1.3 and 2.0
comments.
Naming PostScript files
Some Windows applications use .prn
extensions rather than the designated
.ps extension. If this occurs, you
should rename the file with a .ps
extension to enable the Acrobat
Distiller program to recognize and
process the file. Windows will add a
.prn suffix to the file.
The page layout application you are
using determines what document
trapping information you can include
in the composite PostScript file.
QuarkXPress 3.3.2 software or later
versions include document trapping
information only when creating preseparated PostScript files. On the
other hand, Adobe PageMaker 6.01
or later versions include document
trapping information in both composite
and pre-separated PostScript files.
If you are using QuarkXPress, you
may need to modify your workflow
(for example, use a post-processing
application to trap the file or use an
output device that supports in-RIP
trapping).
43
Appendix
Extending
Adobe Acrobat
In this appendix, you will find
important resources to help
you get the most out of the
capabilities of Adobe Acrobat
software. With third-party
plug-ins, you can take full
advantage of the many
features and possibilities
of PDF.
Acrobat plug-ins
Tools that support PDF
B
Extending Adobe Acrobat
Acrobat plug-ins
callas software
Pappelalle 9
D-10437 Berlin, Germany
Tel: +49.30.44390310
Fax: +49.30.4416402
www.callas.de
[email protected]
RGBGone, you can convert RGB to CMYK;
with pdfOutput Pro, you can print the
separations.
Enfocus Software Inc.
751 Laurel Street, Suite #626
San Carlos, CA 94070 USA
Tel: 650-631-8811 or 888-363-7993
Fax: 650-631-7211
www.enfocus.com
pdfToolbox
pdfToolbox features a number of plug-ins
that support the PDF based workflow, from
the creation of PDF files to output, from
preflighting to post-editing, as well as the
automation of major steps in your workflow.
• pdfBatchMeister: Applies pre-defined
Distiller settings to EPS and PostScript files
in batch mode.
• pdfOutput: Enables cross-platform EPS
file-generation.
• pdfInspektor: Preflights PDF files for
output by using individually customized
preflight profiles.
• pdfCrop&Measure: Crops and measures
areas and distances of PDF files.
• pdfCropMarks: Assigns crop marks to
PDF files.
• pdfBatchProcess: Brings the power of
pdfBatchmeister, pdfInspektor, pdfOutput
and pdfOutput Pro — as well as other
third-party plug-ins — under one roof
by automating all or a selection of these
plug-ins, based on a hot folder mechanism.
Enfocus Software NV
Kleindokkaai 3-5
B-9000 Gent
Belgium
Tel: +32 9 269 16 90
Fax: +32 9 269 16 91
www.enfocus.com
PitStop
Enfocus PitStop 4.0 adds powerful,
seamlessly integrated, and easy-to-use
preflight, editing, and correction capabilities
to Adobe Acrobat. Within PitStop, preflight
your PDF document; PitStop guides you to
any problem for automatic correction or
interactive editing.
Preflight
Provides comprehensive preflight checking
and reporting. Navigator guides users to
problems and suggests corrections, which
you can make either automatically or
interactively.
pdfOutput Pro
pdfOutput Pro lets you output separations
from PDF files from within Acrobat
Exchange on any PostScript device – even on
older PostScript Level 1 imagesetters or on
any PostScript desktop printer. Furthermore,
you may also create separated PostScript files
from your PDF files by printing separations
to a file.
Interactive editing
pdfOutput Pro/RGBGone (Bundle)
Automated global correction
The bundle of pdfOutput Pro (from callas
software) and PGBGone (from Quite
Software) covers the range of output tasks
required when you use RGB colors. With
Preflight enables graphical global change
and play-back of recorded checking and/
correction actions.
Add new or edit existing objects and text in
any PDF document. Edit text either by
paragraph or line by line. Use any font—
system or embedded—when editing text.
Change color and other attributes, such as
over print, on text, and objects. Copy and
paste objects and attributes.
Extensis Corporation
1800 S.W. First Avenue, Suite 500
Portland, OR 97201 USA
Tel: 503-274-2020
Fax: 503-274-0530
www.extensis.com
Preflight Pro
Preflight Pro preflights PDF documents,
checking for more than 40 different file
attributes to ensure that PDFs have been
created according to the correct specifications. The program quickly reports on font
embedding and subsetting, image resolution, compression settings, and other
attributes, catching potential output
problems early in the workflow. Preflight
Pro adds to Acrobat a floating palette that
helps users navigate, with a single click, to
each of the flagged problems in the PDF and
then automatically generates an electronic
job ticket. The program’s preflighting engine
also supports PageMaker, QuarkXPress,
Photoshop, Illustrator, Freehand EPS, and
Multi-Ad Creator2 files.
IPTech
994 Mill Street, Suite 200
San Luis Obispo, CA 93401
Tel: 805-541-3000
Fax: 805-541-3037
E-mail: [email protected]
URL: www.iptech.com
ImpozeIt
ImpozeIt replaces the expensive and timeconsuming task of manual stripping with
the precision and speed of digital page
imposition. With PDF In and PDF Out,
ImpozeIt fits smoothly into PDF workflows,
eliminating the need for PostScript filters
and allowing you to easily process files from
any application or platform. ImpozeIt
enables you to assemble easily and make
them instantly available for screen proofing
and text editing. Templates and wizards for
installation, configuration, and common
tasks give you quick results. Speed, completeness, and an intuitive GUI made
ImpozeIt a Hot Pick choice at Boston
Seybold 1999.
46
ImpozeIt is part of IPTech’s process-control
product line, which includes CanOPI (OPI)
and TurboRIP (Adobe PostScript 3 and
PDF raster image processor).
Plus, and OPI Doctor and Crackerjack 3.0
from Lantana.
OPI Doctor
39500 Stevenson Place, Suite 110
Fremont, CA 94539
Tel: 510-744-0282
Fax: 510-744-1307
www.lantanarips.com
PDF plug-ins available for Macintosh,
Windows (95/98/NT)
OPI Doctor allows general image manipulation and enables you to make adjustments
to Open Prepresss Interface (OPI) information within a PDF document so that PDF
files, proofs, and final prints come out right.
With OPI Doctor, you can include, extract,
or substitute images (skinny PDF to fat
PDF, or vice versa), verify and update links,
and perform other OPI-related functions.
Crackerjack 3.0
PDF Librarian
Crackerjack enables PDF-based color
production printing by providing expert
control over print output and high-end
devices such as imagesetters, proofers,
platesetters, and digital presses, through a
visually intuitive user interface. Crackerjack
allows tuning of position, scaling, separations, screening, printers’ marks, color
management, stored settings, and more for
different page ranges. Crackerjack 3.0 also
includes Crackerjack Pilot, a “hot folders”
automation option, which can be organized
by devices, classes of work, or customer; and
a choice of in-RIP separations for improved
performance or preseparated output to
support legacy products and applications.
Crackerjack supports either Acrobat 3.0
or 4.0.
PDF Librarian enables you to store digital
files within a PDF document for asset
management or archiving. This plug-in has
complete capabilities for managing,
extracting, and launching digital files.
Especially useful in engineering projects,
Web site management, and graphic arts,
PDF Librarian provides folder input,
compression, encryption, versioning, and
revision capabilities.
Lantana
PDF PowerPack
PDF PowerPack for Acrobat 3.0 is a bundle
of the leading graphic arts tools for PDF
production, plus an interactive tutorial CD.
The bundle includes CheckUp (preflight)
and PitStop (editing) from Enfocus;
Imposing Plus (imposition) from Quite, and
Crackerjack (output control) from Lantana.
Also included is a training and reference
CD, “Adobe Acrobat and PDF Workflow”
from Digital Media.
PDF PowerPack II
PDF PowerPack II for Acrobat 4.0 provides
all the latest tools for PDF production work.
The bundle includes Enfocus PitStop 4.0
(with integrated CheckUp), Quite Imposing
to the toolkit, Imposing Plus includes “Step
and Repeat,” manual imposition, page
numbering, and electronic masking tape.
PDF Bellhop
With PDF Bellhop, document creators can
turn a PDF file into a portable container for
file delivery to service providers. When
working with your PDF documents, you can
use PDF Bellhop to include and extract
source data, such as Quark files, images,
and fonts. In addition to graphics programs,
this plug-in is good for other applications.
PDF Valet
PDF Valet is a free, easy-to-use plug-in that
enables you to unpack digital files previously inserted by PDF Librarian or PDF
Bellhop into PDF documents. You can
down- load PDF Valet from the Lantana
Web site.
Quite Imposing and
Imposing Plus
Quite Imposing and Imposing Plus both
feature a toolkit for performing PDF
imposition, which is simple to learn,
powerful, and above all visual. In addition
Quite a Box of Tricks
Quite a Box of Tricks is an easy-to-use
toolkit for solving PDF problems. Quite
a Box of Tricks converts CMYK or
grayscale, thickens “hairlines,” shrinks
files for proofing by subsampling or extra
compression, changes all text to black,
and does much more. The software is
fully compatible with Acrobat 3.0 or 4.0
on Mac or Windows.
ScenicSoft Incorporated
1133 – 164 th Street SW
Lynnwood, WA 98037
Tel: 425-355-6655
Fax: 425-355 6898
www.scenicsoft.com
Preps
Preps Imposition Software is a print
management solution that runs on
Macintosh and Windows platforms. Preps
electronically imposes PDF pages into
signatures, dramatically cutting job costs
and production time. Preps also supports
PostScript, EPS, TIFF, DCS, and Xerox
XDOD files from more than 120 different
applications. Localized versions of Preps in
German, French, and Spanish are available
as part of the Preps standard product, and a
Japanese language version is available as
well. Preps is available in three different
versions: Preps XL, Preps Plus, and Preps
Pro. All versions ship with a fully integrated
Adobe PostScript 3 color previewer.
Preps XL
Preps XL is a complete on-demand solution
designed for those who require ease of use as
well as exceptional flexibility for assembling
and laying out jobs. Preps XL can print to
any black-and-white or color printer, and it
includes on-demand specific features such as
positioning of tabs and slip sheets, full
control over media and finishing options,
and built-in OPI.
47
Preps Plus
Preps Plus is designed for the demanding
commercial printer who requires features
and support for a wide variety of printing
workflows. Preps Plus includes features such
as an integrated color separator, shingling
and bottling capabilities, and automatic
and custom tiling. Preps Plus also ships with
a wide variety of template marks.
Preps Pro
Preps Pro delivers the most flexible and
powerful imposition solution available and
provides the ideal tool to facilitate the
integration of the on-demand workflow into
existing workflows. In addition to having all
the sophisticated offset features of Preps
Plus, Preps Pro delivers all the custom ondemand features included in Preps XL.
Ultimate Technographics Inc.
1950 Sherbrooke St. West
Suite 800, Montreal, Qc Canada H3H 1E7
Tel: 514-938-9050
Toll Free: 800-363-3590
Fax: 514-938-5225
www.ultimate-tech.com
The Ultimate On-Q Server
The Ultimate On-Q Server is the automated PostScript and PDF workflow
solution for prepress and printing professionals. On-Q is an ICC color-managed
workflow that includes trapping, OPI, and
imposition. The Ultimate On-Q Server is
the non-proprietary prepress solution for
professionals who need to integrate a
workflow solution into their shop. While
some workflow solutions necessitate costly
purchases to replace most of the hardware
in a shop, the On-Q Server easily integrates
with your existing server and output
device setup.
Impostrip
Impostrip replaces the manual and timeconsuming task of “stripping.” Before
Impostrip, documents were output one or
two pages at a time to an imagesetter, and
then manually stripped onto a plate for
printing. Times have changed since
Ultimate invented digital imposition more
than ten years ago. Some companies have
since tried to imitate Impostrip, but none
have achieved the level of quality and
accuracy the publishing and printing
industry demands — and gets — with
Impostrip. Impostrip imposes PostScript
and PDF documents from more than 150
applications for output to imagesetters and
platesetters. Impostrip also imposes jobs for
sheetfed and multiple-web presses and
provides sophisticated yet easy-to-use tools
to accomplish jobs faster than any application on the market.
Full Plate
Full Plate is the easiest way to automatically
or manually combine PostScript, PDF, and
Impostrip signature files for imposition on
film or on plates. Full Plate is the innovative
and and easy-to-use job ganging solution
(“ganging” is a printing term for maximizing the use of film, plate, and paper by
combining as many jobs as possible for
printing). Full Plate revolutionizes imposition by offering more integrated viewing
and document placement tools than any
other ganging application available. Using
every square inch of film, plate, and paper,
Full Plate ensures that your shop is not only
getting the most value from the consumables
you purchase, but also that jobs are printed
faster. Full Plate is the key to a profitable
prepress and print shop.
IMPress
IMPress is an easy-to-use PostScript and
PDF imposition solution for on-demand
printers. IMPress provides tools to manually
or automatically impose PostScript and
PDF files onto film or plate, or directly to
a digital press. IMPress is the imposition
solution of choice for on-demand printers,
corporate publishing departments, and
printers with small output devices
and presses.
UltimateFlow
UltimateFlow is a prepress OPI print
manager that enables you to manage an
automated trapping and imposition
workflow from a simple and intuitive
interface. UltimateFlow not only helps you
print faster, it’s a color management-savvy
workflow tool that supports ICC color
profiles. UltimateFlow is the productivity
solution for prepress and printing environments. Install UltimateFlow and you
instantly have an ICC-compatible workflow
that manages all of your print jobs to any
PostScript device—including proofers,
digital printers, imagesetters, and
platesetters. UltimateFlow also links to
Adobe Acrobat Distiller, enabling you to
add different distilling preferences to print
queues. Create PDF files on the fly, without
constantly and manually having to
reconfigure Distiller.
Trapeze
Trapeze is an automated, server-based
raster trapping solution that can be
integrated into any hardware and software
workflow. It is a non-proprietary solution,
which means it works with the equipment
you already have in your shop. Trapeze is
the PostScript and PDF trapping solution of
printing and prepress professionals around
the world. Trapeze integrates the most
precise and sophisticated technology
available on the market, including the
Adobe PostScript 3 RIP. No other trapping
solution offers an integrated print management system, with the ability to create
automated trap queues. Trapeze includes an
integrated print management system that
controls color management, load balancing,
and PDF creation, enabling you to complete
your jobs faster and more accurately.
48
Tools that support PDF
Enfocus Software Inc.
751 Laurel Street, Suite #626
San Carlos, CA 94070 USA
Tel: 650-631-8811 or 888-363-7993
Fax: 650-631-7211
www.enfocus.com
Enfocus Software NV
Kleindokkaai 3-5
B-9000 Gent
Belgium
Tel: +32 9 269 16 90
Fax: +32 9 269 16 91
www.enfocus.com
DoubleCheck
Enfocus DoubleCheck guarantees the
quality of PostScript and PDF documents in
a client-to-service provider print workflow.
With DoubleCheck, you can preflight and
automatically correct, convert, and normalize your PostScript, PDF, and EPS files
before before going into prepress production.
Imation Publishing Software
For more information
1011 Western Avenue, Suite 900
Seattle, WA 98104 USA
Tel: 206-689-6700
Fax: 206-689-6701
Ips.imation.com
Always check adobe.com/acrobat for
updated information, resources, and links to
third-party sites when you’re looking for
help or solutions. Do this especially if you
want PDF-related information about
repurposing documents, Web publishing,
CD publishing, Web capture and other
conversion tools and services, document
management, group collaboration, forms,
digital signatures, consulting and integration services, and training and developer
support.
PressWise 3.0
PressWise is digital imposition software that
lets you quickly and easily impose almost
any variety of flat and folding layouts.
PressWise accepts PostScript language and
PDF files from leading applications,
enabling compatibility with your existing
workflows. You can design and save
templates for your most common layouts,
including folding schemes, press marks, and
press sheet settings. For added precision,
view entire imposition layouts onscreen
either in keyline view or with page
elements visible.
OPEN
1800 S.W. First Avenue, Suite 500
Portland, OR 97201 USA
Tel: 503-274-2020
Fax: 503-274-0530
www.extensis.com
Imation OPEN software enables you to
automate time-consuming, repetitive
tasks—such as creating PDF files on a
server, converting PDF to PostScript, or
distributing PDF files to multiple recipients—within a distributed server environment. With OPEN, you can send files into
the Pipeline from anywhere on the network,
and OPEN controls the progress of the files
each step of the way.
Preflight Pro
Imation Corp.
Preflight Pro automates the entire preflight process, using the unique Pilot
feature to find and correct errors in
PageMaker, QuarkXPress, Photoshop,
Illustrator, Freehand EPS, and Multi-Ad
Creator2 files. With the program’s Automation feature, users can automatically
preflight, collect, and distill page-layout
documents into clean, error-free PDF files
by simply dropping them into designated
watch folders.
1 Imation Place
Oakdale, MN 55128-3414 USA
Tel: 888-466-3456 or 615-704-4000
Fax: 888-704-7100
www.imation.com
Extensis Corporation
Imation Media Manager
Media Manager is a client/server database
system that manages text, image, sound,
video, and other digitized media files from a
high-performance server. Customers use the
Media Manager PDF I Piece plug-in to
transparently catalog, preview, locate, and
retrieve their PDF documents from the
Media Manager database.
49
Conclusion
Congratulations! You have just
completed Adobe’s How to Create
Adobe PDF Files for Print and Press.
We hope you have learned a lot about
how you can use Acrobat to convert
your documents to PDF files and
optimize them for print and press. As
you continue to work with PDF files,
we encourage you to keep this
booklet close at hand so you can refer
to it when you need to review particular procedures.
For more information about
Adobe Acrobat and other Adobe
products, start with the Adobe
home page at www.adobe.com on
the World Wide Web.
For information on how to purchase
Adobe products in the U.S. and
Canada, please call 800-272-3623 or
contact your local Adobe Authorized
Reseller.
To download the free Acrobat
Reader, visit the Adobe home page
at www.adobe.com on the World
Wide Web.
For additional technical information,
see the Adobe CustomerFirst Support
Web pages at www.adobe.com/
supportservice/custsupport/.
50
Glossary
Adobe PostScript
A page description language developed by Adobe Systems Incorporated.
ATM®
Adobe Type Manager® software
created by Adobe Systems. ATM
provides crisp, clear type at any
point size onscreen and in print.
Black Generation
The representation of black using
only the K component, instead of a
combination of C, M, and Y.
Bleeds
Extending the image beyond the
finished trim size so that the image
runs right to the edge of the printed
sheet after trimming and binding.
Bitmap
Graphic images consisting of many
tiny cells of numerical computer data.
The number of cells determines the
resolution of the bitmap, while the
value of each cell establishes the
density or darkness of each cell and
therefore its tone.
CMYK
An acronym for the four process colors:
cyan, magenta, yellow, and black.
DCS
An acronym for Desktop Color
Separation, a data file standard
defined by QuarkXPress to assist in
making color separations with a
desktop publishing system. Using DCS,
five files are created: four color files
containing cyan, magenta, yellow, and
black image data, and a composite
color view file of the color image.
Driver
Software that aids in the transfer of
information between the computer
and the peripheral controlled by the
driver software program. In publishing, the most common drivers are
printer drivers.
Duotone
A halftone image created by overprinting two different halftone
screens of the same image with
different tonal values. Duotones are
printed using two black inks or a
black and a colored ink. Duotones are
created to increase the detail and
saturation of the black part of an
image, or to create a special effect.
EPS
An acronym for Encapsulated
PostScript, a file type that is created
by a wide variety of computer
programs. EPS files contain all of
the vector and bitmap information
necessary to image a single page.
These files are usually not intended
to be printed by themselves, but
are placed in a page design and
then printed.
Grayscale
Data represented by only the K
component.
In-RIP trapping
The process of trapping data inside
the RIP during the print process.
Monochrome
A single color. Monochrome usually
refers to a black-and-white image.
OPI
An acronym for Open Prepress
Interface, a communication connection developed by Aldus Corporation
that facilitates links between CEPS
and desktop publishing systems.
Using OPI, view files or high resolution scans can be transferred to
desktop publishing systems and
placed in page layout software. When
the page file is sent back to the CEPS
for processing and output, the high
resolution image data is automatically swapped for the view file. OPI is
frequently used by systems that seek
to maintain high-resolution image
data separate from page layout files.
OPI is often compared to DCS.
PDF
An acronym for Portable Document
Format. Created by Adobe Systems,
PDF is a file format used to represent
a document in a manner independent
of the application software, hardware,
and operating system used to create it.
PPD
An acronym for PostScript Printer
Description file. Each PostScript
printer has an associated PPD file,
which contains information used
by printer drivers and some applications to control the PostScript
creation criteria.
JPEG
An acronym for Joint Photographic
Experts Group, an ISO group that has
established a standard for the compression of bitmapped, scanned, and
rendered color images.
51
PressOptimized
A built-in set of Acrobat Distiller Job
Options recommended by Adobe to
create a PDF file optimized for
output to a press.
Trapping
The intentional overlapping of colors
along common boundaries to prevent
unprinted paper from showing in the
event of misregistration in printing.
PrintOptimized
A built-in set of Acrobat Distiller Job
Options recommended by Adobe to
create a PDF file optimized for
output to a four-color composite
printer.
UCR
An acronym for undercolor removal.
UCR is the technique for reducing
the cyan, magenta, and yellow
content in neutral gray shadow areas
of a reproduction and replacing them
with black ink so that the reproduction will appear normal but will use
less process color ink.
Quark PDF
A printer description file used by
QuarkXPress 3.3.1 and earlier versions of the software to read PPD
files. Quark PDF files are not used in
QuarkXPress 3.3.2 or later.
ZIP
A compression method that does not
remove data to achieve compression.
RGB
An acronym for red, green, and blue,
the three primary colors blended to
create the spectrum of colors displayed on a color monitor.
ScreenOptimized
A built-in set of Acrobat Distiller Job
Options recommended by Adobe to
create a PDF file optimized for
display on a monitor.
TIFF
An acronym for Tagged Image File
Format, a standard format developed
by Aldus Corporation for bitmap or
raster graphics — usually scanned
images. TIFF can handle a variety of
image data, from 8-bit black-andwhite images to 24-bit color RGB or
CMYK images.
52


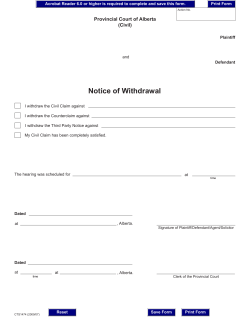

© Copyright 2026