
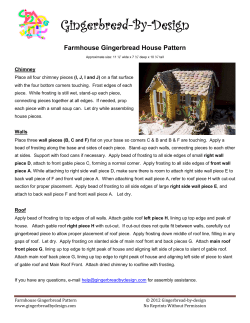
HOW TO BUILD AN INSULATED CATHEDRAL CEILING
HOW TO BUILD AN INSULATED CATHEDRAL CEILING
He lpful? 1
Sign in to vote
HOW TO BUILD AN INSULATED CATHEDRAL CEILING
Whether you decide to make it vented or unvented, get the details right — because every cathedral ceiling offers
opportunities to make big mistakes
P O STED O N NO V 18 2011 BY MA RTIN HOLLA DA Y, GBA A DVISOR
Although the GBA website already contains many articles
on the topic, we continue to receive frequent questions
about the best way to insulate a cathedral ceiling. It’s
therefore time to pull together as much information on
the topic as possible and publish it in one place, to clarify
the building science issues and code requirements
governing insulated sloped roofs.
In this blog, I’ll attempt to answer the following
questions:
Does a cathedral ceiling need to be vented?
What's the best way to build a vented cathedral ceiling?
What's the best way to build an unvented cathedral
ceiling?
What do building codes require?
What risky practices should be avoided?
What is a cathedral ceiling?
This article will discuss insulated sloped roofs. The
methods described here can be used to build an insulated
cathedral ceiling over a great room, a section of sloped
roof above a kneewall, or any similar section of insulated
sloped roof.
This type of roof differs from an uninsulated roof over an
unconditioned vented attic.
Image 1 of 2
Recessed can lights doomed this
cathedral ceiling. This ten-year-old
house included recessed can lights in
the unventilated cathedral ceiling. The
leaky light fixtures allowed moistureladen indoor air to enter the roof
assembly. When the moisture
encountered cold roof sheathing, it
condensed, leading to moisture
accumulation and rot.
A brief history of cathedral ceilings
Insulated cathedral ceilings are a relatively recent phenomenon. The craze for insulated cathedral
ceilings (and great rooms) really took off in the 1970s and 1980s, when examples began popping
up like mushrooms after a warm rain. In those days, most builders stuffed cathedral ceiling rafter
bays with fiberglass batts. Sometimes they included flimsy Proper-Vents between the fiberglass
and the roof sheathing, but often they just specified thin batts to ensure that there would be an
air space above the batts for ventilation.
The cathedral ceilings of the 1970s and 1980s were thermal
MORE INFORMATION
GBA Encyclopedia: Vented or
Unvented Attic?
GBA Details: Vented
cathedral ceiling
GBA Details: Unvented
cathedral ceiling
disasters. In most cases, these ceilings leaked air, leaked heat,
created monumental ice dams, and encouraged condensation
and rot. In many cases, roofers tried to solve these problems by
improving ventilation openings in the soffits and at the ridge;
these “improvements” often made every symptom worse.
Fortunately, most builders have learned a few lessons from
these disasters.
cathedral ceiling
Does a cathedral ceiling need to be vented?
GBA Details: Retrofit foam
Until recently, building codes required that insulated sloped roofs
for existing cathedral ceiling
include ventilation channels directly under the roof sheathing.
Creating a Conditioned Attic
Many builders still follow this time-tested technique.
How to Insulate a Cathedral
As building scientist Bill Rose has shown, code requirements for
Ceiling with Mineral Wool
roof venting were never based on research or scientific
Q&A: Upgrade to vented
principles. In a well documented JLC article on roof venting, Rose
cathedral ceiling
explained, “For the most part, the focus of codes, researchers,
Q&A: Adding insulation to an
designers, and builders on roof ventilation is misplaced. Instead,
existing cathedral ceiling
the focus should be on building an airtight ceiling, which is far
more important than roof ventilation in all climates and all
seasons. ... Once this is accomplished, roof ventilation becomes
pretty much a nonissue.”
For more information on roof venting, see two other articles by William Rose: “Early History of
Attic Ventilation,” and “Issues Related to Venting of Attics and Cathedral Ceilings.”
Because of their unscientific origins, code requirements for venting roofs are often misunderstood.
It's worth establishing a few basic facts:
Roof ventilation cannot be used to lower indoor humidity levels.
Builders should not encourage the migration of water vapor through a cathedral ceiling.
During the summer, roof ventilation does not significantly lower the temperature of asphalt
shingles or other types of roofing.
While roof ventilation can lower the risk of ice damming, it's essential for builders to limit the flow
of heat into roof ventilation channels by including one or more ceiling air barriers and by installing
thick insulation, so that as little heat as possible escapes from the home.
While roof ventilation can help dry out damp roof sheathing, it's essential to limit the flow of water
vapor escaping from the home so that the roof sheathing never gets damp in the first place.
How do I build a vented cathedral ceiling?
A vented cathedral ceiling only makes sense if the geometry of your roof is simple. The ideal roof is
a gable roof without any dormers or skylights. For ventilation to work, you need a straight shot
from your soffits to your ridge.
If your roof has a complicated geometry, with features like hips, valleys, and dormers, it's going to
be impossible to assure air flow through all of your rafter bays. If you're trying to insulate a roof
like that, consider building an unvented roof.
Ventilation channels are created by installing a material that can maintain a separation (an air gap)
between the insulation and the roof sheathing. This building component is known by a variety of
confusing names, including a ventilation (or vent) baffle, a ventilation (or vent) chute, a ventilation
(or vent) channel, or a Proper-Vent (a brand name).
The first vent baffles to hit the market — the classic Proper-Vent of the 1970s and 1980s — were
inexpensive, flimsy items made of thin polystyrene. These baffles have several drawbacks. Being
thin and flexible, they can’t resist the pressures from dense-packed cellulose or blown-in
fiberglass. And, as usually installed, they leak air.
Eventually, manufacturers began offering stiffer alternatives that are better able to resist the
pressures of dense-packed insulation. These products come and go, and many are no longer
available. At one time or another, it was possible to buy baffles made of polystyrene, cardboard,
vinyl, and compressed cellulose fibers. These days, the best available vent baffle is probably the
AccuVent baffle, which is made from stiff vinyl.
Some builders aren’t satisfied with commercially available vent baffles, so they make their own sitebuilt baffles. According to the International Residential Code (IRC), “A minimum of a 1-inch space
shall be provided between the insulation and the roof sheathing and at the location of the vent.”
Such a vent space can be created by installing 1 inch by 1 inch “sticks” in the upper corners of
each rafter bay, followed by stiff cardboard, thin plywood, OSB, fiberboard sheathing, or panels of
rigid foam insulation.
As with all types of vent baffles, it’s a good idea to pay attention to airtight construction methods,
especially if you will be installing air-permeable insulation in the rafter bays. Seal the edges of each
panel with caulk, and tape the seams between panels with a high-quality tape.
If you are choosing to build a vented roof assembly, don't forget to include soffit vents and ridge
vents.
Are my rafters deep enough?
Most rafters aren’t deep enough to accommodate the insulation needed to meet minimum Rvalues required by code, especially if the rafter bays include a ventilation channel. For example,
2x10 rafters are 9 1/4 inches deep, so they only provide room for about 8 1/4 inches of insulation
— in other words, about R-30 of fibrous insulation — if the rafter bay is ventilated. This is less
than the minimum code requirement in colder climates.
Builders solve this problem by sistering, furring down, or scabbing on additional framing below the
rafters to deepen the rafter bays. Another technique is to add a layer of cross-hatched 2x4s, 16
inches on center, installed beneath the rafters. It’s also possible to specify deep open-web trusses
or to use deep I-joists for rafters.
Another way to add R-value to your roof assembly is to include one or two layers of rigid foam in
the roof assembly — either above the roof sheathing or below the rafters. In addition to improving
the R-value of the roof assembly, a layer of rigid foam has another benefit: it interrupts thermal
bridging through the rafters.
Remember: if you choose to install rigid foam on top of your roof sheathing, don't install
ventilation channels under the roof sheathing; these two practices are incompatible.
Can I build an unvented roof assembly?
In recent years, most building codes have begun to allow the construction of unvented insulated
sloped roof assemblies. Many such roofs have failed over the years, however, so it’s essential to
get the details right.
First of all, you can’t use air-permeable insulation (for example, fiberglass batts, mineral wool
batts, dense-packed cellulose, or blown-in fiberglass) to insulate an unvented roof assembly
unless the roof assembly also includes a layer of air-impermeable insulation (either spray
polyurethane foam or rigid foam panels) directly above or directly below the roof sheathing.
The 2009 IRC defines air-impermeable insulation as “an insulation having an air permeance equal to
or less than 0.02 L/s-m² at 75 Pa pressure differential tested according to ASTM E 2178 or E
283.” Although spray foam insulation and rigid foam insulation can meet this standard, fiberglass
batts and dense-packed cellulose cannot.
If you want to use just one type of insulation in unvented rafter bays, you are limited to spray
polyurethane foam. Another possibility, of course, is to build your roof with structural insulated
panels (SIPs).
The code restrictions on the use of air-permeable insulation between rafters were developed to
prevent the roof sheathing from rotting. When fiberglass batts are installed in unvented rafter
bays, the batts allow moist indoor air to reach the cold roof sheathing. That leads to condensation
or moisture accumulation in the sheathing, followed eventually by sheathing rot. Since spray foam
prevents air movement, it almost eliminates this problem.
To summarize, there are three ways to build an unvented roof assembly:
Install spray foam (either open-cell foam or closed-cell foam) against the underside of the roof
sheathing, and no other type of insulation. Be sure that the thickness of spray foam is adequate
to meet minimum code requirements.
Install rigid foam insulation above the roof sheathing and air-permeable insulation between the
rafters. If you choose this method, it's possible to install vent channels between the top of the
rigid foam and the top layer of roof sheathing by installing a series of parallel 2x4s — one above
each rafter — extending from soffit to ridge.
Install a layer of closed-cell spray foam against the underside of the roof sheathing, and fill the
rest of the rafter cavity with an air-permeable insulation.
If I use a combination of foam and fluffy insulation, how thick should the foam be?
If you want to install a combination of rigid foam on top of your roof sheathing and air-permeable
insulation between your rafters, you need to be sure that your rigid foam is thick enough to keep
your roof sheathing above the dew point. Guidelines to achieve that goal are included in the 2009
International Residential Code (IRC).
According to section R806.4 of the 2009 IRC, “rigid board or sheet insulation shall be installed
directly above the structural roof sheathing as specified in Table R806.4 for condensation control.”
The table calls for a minimum of R-5 foam for Climate Zones 1-3, R-10 for Climate Zone 4C, R-15
for Climate Zones 4A and 4B, R-20 for Climate Zone 5, R-25 for Climate Zone 6, R-30 for Climate
Zone 7, and R-35 for Climate Zone 8.
After you have installed the code-mandated thickness of rigid foam above your roof sheathing,
you’re free to install as much fluffy stuff as you want between the rafters.
If you want to install a combination of closed-cell spray-foam on the underside of the roof
sheathing and air-permeable insulation between your rafters — an approach sometimes called
“flash and batt” — the spray foam must be “applied in direct contact with the underside of the
structural roof sheathing” and must also meet the requirements “specified in Table R806.4 for
condensation control.” These are the same requirements mentioned above: a minimum of R-5
foam for Climate Zones 1-3, R-10 for Climate Zone 4C, R-15 for Climate Zones 4A and 4B, R-20
for Climate Zone 5, R-25 for Climate Zone 6, R-30 for Climate Zone 7, and R-35 for Climate Zone
8.
Can I use dense-packed cellulose insulation in an unvented roof assembly?
In a word, no — the code explicitly forbids this method.
However, in some areas of the country, especially in the Northeast, insulation contractors have
been dense-packing unvented rafter bays with cellulose for years. Because the method has deep
roots in New England, many building inspectors accept such installations.
If you’re building a new house, however, here’s my advice: include ventilation channels under your
roof sheathing if you want to insulate with cellulose. Leaving out the ventilation channels is risky.
Do I need to install an air barrier under the insulation?
Yes, of course — especially if you are using fluffy insulation like fiberglass batts, blown-in
fiberglass, or dense-packed cellulose. (If you insulate your ceiling with spray foam, the spray foam
should create an air barrier, as long as the installer does a good job.)
If you are building a cathedral ceiling, the biggest air-barrier blunder is to install tongue-andgroove boards as your finish ceiling without first installing taped gypsum drywall. A board ceiling is
notoriously leaky, and this type of ceiling is often associated with roof sheathing rot.
What about recessed can lights?
Recessed can lights should never been installed in insulated rafter bays. Period, full stop, end of
story.
Recessed can lights take up room which should be filled with insulation; they give off heat, creating
thermal hot spots in your insulated roof; and they leak air. They should be removed from your
ceiling and deposited in front of a moving steam roller.
A good roof has airtight details and thick insulation
Now you know how to build an insulated sloped roof. To sum up:
Make sure the roof assembly is as close to airtight as you can make it. If you are using fluffy
insulation, you need two air barriers: one below the insulation, and one above the insulation.
Make sure to install insulation that provides at least the minimum code requirement for ceiling Rvalue. Insulation that exceeds the minimum code requirement is even better.
If possible, include a ventilation channel above the top of your insulation layer. The ventilation
channel will provide cheap insurance against moisture build-up, and will lower the chance of ice
damming.
Remember, an insulated sloped ceiling isn’t always a good idea. Sometimes a good old-fashioned
unconditioned attic is the best way to cap your house.
Last week’s blog: “More Energy Myths.”
Image Credits:
Peter Yost
Fine Homebuilding


© Copyright 2026