
Tactual Instructional Resources: Roger Bloom
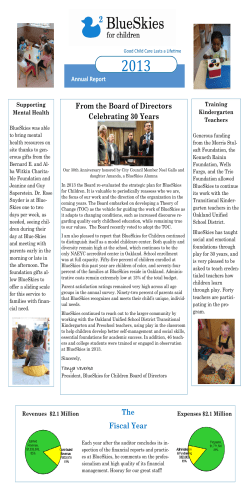
Insights 3-09v7.qxp
2/14/09
9:02 AM
Page 37
Insights on Learning Disabilities 6(1), 37-44, 2009
Copyright @ by LDW 2009
Tactual Instructional Resources:
For Whom, Why, and How to Get in Touch
Roger Bloom
Island Trees Memorial Middle School, New York
Many at-risk students are tactual learners who need hands-on instructional resources and strategies to concentrate on, process, internalize, and
retain new and difficult knowledge, concepts, or skills. This chapter provides several effective, research-based manipulatives for tactual students to
use and create as they begin to learn in ways that match their biological
strengths.
T
en-year old George struggled in school with social studies topics. At various times during parent meetings, George’s elementary teachers commented that he had trouble processing information, especially basic facts and vocabulary. They also thought that George regularly lost focus and concentration
during class.
When he did not meet the minimum requirements for achievement,
George was placed into an Academic Intervention Services class with a social
studies teacher named Mrs. Reynolds. Mrs. Reynolds assessed George for learning style, and among the many strengths his 14 page learning-style profile indicated, was that he could learn tactually by using his hands (strengths that many
mechanics, sculptors, and surgeons have). Mrs. Reynolds gradually introduced
George to tactual instructional resources such as Flip Chutes, Task Cards,
Electroboards, and Pic-A-Holes to help him master new and difficult information with those hands-on approaches
CREATING HANDS-ON, TOUCH-AND-GO RESOURCES
Mrs. Reynolds designed tactual resources to help George process information about the next social studies topic, the Three Branches of Government.
She scripted the essential facts and vocabulary related to Checks and Balances,
the Great Compromise, the Cabinet, the Supreme Court, the President and
Senate, Justice, the Bill of Rights, the Amendments, the House of
Representatives, Separation of Powers, the Constitution, Congress, and
Impeachment. Mrs. Reynolds thought that an Electroboard would be the perfect resource for all that information.
Insights on Learning Disabilities is published by Learning Disabilities Worldwide (LDW). For further
information about learning disabilities, LDW’s many other publications and membership, please visit our
website: www.ldworldwide.org.
37
Insights 3-09v7.qxp
2/14/09
9:02 AM
Page 38
Insights on Learning Disabilities 6(1), 37-44, 2009
Directions for Creating an Electroboard (Dunn & Dunn, 1993)
1. Take two pieces of heavy paper, oak tag, or poster board and use
scissors to cut them into two identical shapes and sizes (preferably
in a shape reflecting the topic to be studied).
2. On the left side of the chart, either draw or paste a computer printout of one of the words you want learned. On the right side of the
paper, randomly write or paste a computer printout of its meaning.
Place the items into two separate columns so that they do not
appear on the exact same line of the Electroboard. Follow suit for
each of the many words and their definitions that students need to
learn for this particular topic. Evenly divide the spaces between
each item.
3. Using a hole-puncher, punch out circles next to the graphic on the
left side of the chart and next to the word on the right side.
4. Place brass paper fasteners into the holes in the Electroboard with
the button-top appearing on the front.
5. Cut as many pieces of aluminum foil strips as necessary to extend
from each vocabulary word to its correct definition. Each one-inch
wide strip should be folded twice and smoothed to make a straight
edge connector.
6. On the back of the Electroboard, create circuits made with aluminum foil strips and masking tape. Attach the aluminum foil
strip to the question prongs of the paper fastener and to its corresponding definition or answer. Use masking tape to cover each aluminum-foil strip completely to avoid exposing any circuit strip.
Keep the prongs separated from others in the column on each side.
Telephone wire with exposed copper tips or long tie wraps will
serve as well as aluminum foil.
7. For each graphic word and appropriate answer on the electroboard, complete the process outlined in Step 6.
8. Using a continuity tester (that can be purchased in any Home
Depot or hardware store), touch each question with one prong of
the continuity tester and its corresponding answer with the other
prong. If the graphic and picture match, the light on the continuity tester will illuminate. Check that all circuits are properly connected and that there are no faulty connections among the circuits.
Avoid purchasing circuit testers or other devices that do not have
batteries and a bulb.
9. Tape the second piece of the poster board or oak tag to the back of
the first piece to hide every circuit. Then, seal the boarders of the
Electroboard with stronger tape such as mailing tape.
38
Insights 3-09v7.qxp
2/14/09
9:02 AM
Page 39
Insights on Learning Disabilities 6(1), 37-44, 2009
Figure 1. Sample Pic-A-Hole Courtesy of Susan Rundle, Director, International
Learning Styles Network
Getting in Touch With Electricity
On Monday morning, Mrs. Reynolds introduced the Three Branches
of Government by listing the topic’s essential vocabulary and facts on the chalk
board. After that, she met with George to explain how the electroboard could
help him learn and process new and difficult information. She asked him to use
the continuity tester to match each term with its correct definition based on the
vocabulary and concepts. When George made a correct match, the continuity
tester successfully lit-up. Mrs. Reynolds encouraged George to repeat the
process until he successfully had mastered the entire Electroboard vocabulary.
While using the Electroboard, George seemed enthusiastic and interested. Mrs.
Reynolds was thrilled that George mastered the vocabulary and necessary facts
for that topic on the Constitution.
THE HISTORY TASK
Based on this initial success, Mrs. Reynolds introduced other tactual
resources that George might use to learn. That evening she designed two sets of
Task Cards.
Directions for Creating Task Cards (Dunn & Dunn, 1993)
1. Purchase or obtain light-colored, 5 x 8 inch index cards.
2. On the left side of the card, script a vocabulary word, event, person’s name, and other required facts.
3. On the right side of each card, script the definition, meaning,
information, or picture that corresponds with the left side.
4. Laminate the index card.
39
Insights 3-09v7.qxp
2/14/09
9:02 AM
Page 40
Insights on Learning Disabilities 6(1), 37-44, 2009
5. Cut a creative shape from top to bottom to separate the left and
right sides of the index card, leaving the word (or question) on one
side and the definition (or answer) and picture on the other. Use
different designs for each set of Task Cards such as circles, angles,
or oblongs that fit into each other. They can be made into two,
three, or four-part sets, but always include an illustration related to
each set on one of the parts to attract global/visual learners.
6. You may alternate left and right sides if you wish to do so.
Figure 2. Sample Task Card. Courtesy of Susan Rundle, Director, International
Learning Styles Network.
Mrs. Reynolds designed Task Cards using the same vocabulary she had
placed onto the Electroboard. The next morning, Mrs. Reynolds asked George
to clear his desk and then placed the puzzle-like pieces of the Task Cards on the
table surface. She asked him to use the information he had learned the day
before to match the vocabulary terms with their correct meaning. In only a few
minutes, George successfully matched all the Task Cards on the first try! She
was surprised when George asked her if she would provide more of those
resources for upcoming units and lessons. He spontaneously said, “I love studying the Constitution this way!” Mrs. Reynolds was impressed by George’s attentiveness, enthusiasm, and retention of information. Her next venture was to
develop a Flip Chute for George!
Directions for Creating a Flip Chute (Dunn & Dunn, 1993)
1. Pull open the top of an empty half-gallon milk or juice container.
Wash and dry it thoroughly.
2. Cut the side folds on the very top portion of the milk or juice container along each crease. Flap them open but do not cut them off.
3. On the front edge, measure down: a. 1 1/2 inches, and b. 2 1/2 inches. Draw lines across the container and remove the resulting space.
4. Mark up from the bottom: a. 1 1/2 inches, and b. 2 1/2 inches. Draw
lines across the container and remove that slot as well.
40
Insights 3-09v7.qxp
2/14/09
9:02 AM
Page 41
Insights on Learning Disabilities 6(1), 37-44, 2009
5. Cut one 5 x 8 index card to measure 6 1/2 inches by 3 1/2 inches.
6. Cut a second 5 x 8 index card to measure 7 1/2 inches by 3 1/2 inches.
7. Fold down 1/2 inch at both ends of the smaller strip and fold down
1
/2 inch at one end of the longer strip.
8. Insert the smaller strip into the bottom opening with the folded
edge resting on the upper portion of the bottom opening. Attach
the strip with masking tape.
9. Bring the upper part of the smaller strip out through the upper
opening with the folded part going down over the center section of
the carton and attach the strip with masking tape. A loop will
appear inside the carton.
10. Working with the longer strip, fold down one end 1/2 inch. Insert
the folded end of the longer strip onto the bottom opening of the
container. Push the rest of the longer strip container until the folded part rests on the bottom part of the container and attach it with
masking tape.
11. Attach the upper edge of the longer strip with a small strip of masking tape to the back of the container, 5/8 of an inch from the top,
creating a slide.
12. Fold down the top flaps of the container and tape them in place,
forming a rectangular box.
13. Use small 2 x 2 1/2 inch cards to write the question on one side and
the answer on the flip side upside down. When you do that, the card
will flip out right-side up. Nip the upper right-hand top side of each
card to indicate to students which side of the card always gets
inserted into the upper part of the chute. Laminate the cards for
rapid delivery out the bottom after the question side has been
inserted into the top slot.
14. Decorate the Flip Chute with paint, colors, left-over wall paper and
try to develop some special effects related to the theme or lesson of
a particular unit of study. Creating the Flip Chute in the shape of
a building, a doll, or anything related to the topic makes it very
special to its users.
41
Insights 3-09v7.qxp
2/14/09
9:02 AM
Page 42
Insights on Learning Disabilities 6(1), 37-44, 2009
Figure 3. Sample Flip Chute Courtesy of Susan Rundle, Director, International
Learning Styles Network
Flipping Over for Tactual Learning
That evening, Mrs. Reynolds learned how to make a Flip Chute and
created questions for it on the Constitution topic, “The Family Tree of Liberty.”
To make the Flip Chute more appealing and directly related to the unit, she decorated it to resemble a tree (symbolic of the three branches of government). In
class the next day, she introduced the three branches of government and highlighted the specific powers of the Executive, Legislative, and Judicial. As the
other students in the class completed question-and-answer sheets to reinforce
the material, Mrs. Reynolds asked George to use the Flip Chute to master the
information. George placed the Flip Chute cards onto his desk with the questions facing upward. After reading and answering the question on the card,
George placed each, one at a time, inside the Flip Chute and pushed it onto the
slide. When the card came out of the bottom, it flipped over and revealed the
correct answer. Mrs. Reynolds encouraged George to take his time and, if he
answered the questions incorrectly, to consider why he had made an error.
George repeated this process with enthusiasm until he mastered all the content
and facts. After mastering the Electroboard, Task Cards, and Flip Chute,
George said, “I love learning this way!”
Choosing the Correct Answer
That evening, Mrs. Reynolds created a Pic-A-Hole. She thought it
would be effective because it permitted choices from among three or four possible alternatives, but still required manipulation. It made students think, was
self-corrective, and provided choices different from the three previous tactual
resources for students who liked variety.
42
Insights 3-09v7.qxp
2/14/09
9:02 AM
Page 43
Insights on Learning Disabilities 6(1), 37-44, 2009
The next day, Mrs. Reynolds removed a sample Pic-A-Hole card that
she had designed to show George how this resource worked. She opened the
Pic-A-Hole and removed question/answer cards from the package. She placed
an individual card into the question slot and asked George to answer the question: “Who was the first President of the United States?” On the bottom of the
question card were three possible answers above hole-punched circles: A.
Abraham Lincoln; B. George Washington; C. Theodore Roosevelt. Mrs.
Reynolds gave George a golf tee and asked him to place its point into the correct answer. He inserted the tee into answer B and successfully removed the
card. When examining the card, he noticed that the correct answer was holepunched and that two slits had been cut to the bottom to allow the card to be
removed. The incorrect answers did not have the slits and could not be
removed. To test the effectiveness of the Pic-A-Hole, Mrs. Reynolds asked
George to place another card into the question slot: This time it read, “Which
President created the New Deal?” The choices included: A. James Madison; B.
Ronald Reagan; and C. Franklin D. Roosevelt. Knowing that he would tease
Mrs. Reynolds by answering that question incorrectly, George placed the golf
tee in answer A’s hole. After unsuccessfully trying to remove the question card
several times. He exclaimed, “Pic-A-Holes are a great self-correcting resource! I
like using them!” (See Figure 1).
In Touch With Success
For the remainder of the term, Mrs. Reynolds created tactual resources
for her lessons and George remained focused every day. To Mrs. Reynolds’ surprise, George retained information that he had learned weeks earlier. To her surprise, several other students asked if they could use the tactuals she had created
for George. One of them said, “They look like fun! May I try learning that
way?” She protested that she did not have the time to create more than one of
each, and George immediately volunteered to make more Electroboards, Flip
Chutes, and Pic-A-Holes for the classmates who wanted to use them. Two or
three of the others said, “Show us how, and we’ll make our own! Just put what
we have to learn on the board and we’ll copy and place them in the right order!”
And, because they really wanted to try, she did, and then they did! And George
helped all of them.
Next Stages
Using empty cardboard boxes in which washing machines and refrigerators had been delivered to local stores, George and several classmates then created giant Map Electroboards depicting places and events during the American
Revolutionary War and the Civil War. Mrs. Reynolds then listed inference questions requiring higher-order thinking skills for use with the tactual strategies.
43
Insights 3-09v7.qxp
2/14/09
9:02 AM
Page 44
Insights on Learning Disabilities 6(1), 37-44, 2009
At the end of that semester, Mrs. Reynolds administered an exit test to see
whether George really needed to remain in an AIS class for social studies.
Although the minimum passing grade to exit the program was a Three, George
earned a perfect score of Four!
References
Dunn, R & Blake, B. (2008). Teaching Every Child to Read. Lanham, MD: Rowan & Littlefield
Education.
Dunn, R. & DeBello, T. (1999). Improved Test Scores, Attitudes, and Behaviors in A m e r i c a ’ s
Schools: Supervisors’ Success Stories. Westport, CT: Bergin & Garvey.
Dunn, R. & Dunn, K. (1993). Teaching Secondary Students Through Their Individual Learning
Styles. Needham Heights, MA: Allyn and Bacon.
Dunn, R. & Griggs, S.A. (2007). Synthesis of the Dunn and Dunn learning-style model research:
Who, what, when, where, and so what? NY: St. John’s University’s Center for the Study of
Learning and Teaching Styles.
Correspondence concerning this article should be addressed to: Roger Bloom, Island Trees
Memorial Middle School, New York. Email: [email protected]
44
© Copyright 2026