
Mail Guide
Mail Guide 013112 ©2008 Blackbaud, Inc. This publication, or any part thereof, may not be reproduced or transmitted in any form or by any means, electronic, or mechanical, including photocopying, recording, storage in an information retrieval system, or otherwise, without the prior written permission of Blackbaud, Inc. The information in this manual has been carefully checked and is believed to be accurate. Blackbaud, Inc., assumes no responsibility for any inaccuracies, errors, or omissions in this manual. In no event will Blackbaud, Inc., be liable for direct, indirect, special, incidental, or consequential damages resulting from any defect or omission in this manual, even if advised of the possibility of damages. In the interest of continuing product development, Blackbaud, Inc., reserves the right to make improvements in this manual and the products it describes at any time, without notice or obligation. All Blackbaud product names appearing herein are trademarks or registered trademarks of Blackbaud, Inc. All other products and company names mentioned herein are trademarks of their respective holder. RE7-MailGuide-2012 Contents WHAT IS IN THIS GUIDE?. . . . . . . . . . . . . . . . . . . . . . . . . . . . . . . . . . . . . . . . . . . . . . V INTRODUCTION TO MAIL . . . . . . . . . . . . . . . . . . . . . . . . . . . . . . . . . . . . . . . . . . . . . . 1 Navigate in Mail . . . . . . . . . . . . . . . . . . . . . . . . . . . . . . . . . . . . . . . . . . . . . . . . . . . . . . . . . . . . . . . . . . . . . 2 Mail User Options . . . . . . . . . . . . . . . . . . . . . . . . . . . . . . . . . . . . . . . . . . . . . . . . . . . . . . . . . . . . . . . . . . . . 6 Understand the Tabs on a Mail Task . . . . . . . . . . . . . . . . . . . . . . . . . . . . . . . . . . . . . . . . . . . . . . . . . . . . . 8 AVAILABLE MAIL TASKS . . . . . . . . . . . . . . . . . . . . . . . . . . . . . . . . . . . . . . . . . . . . . . . 11 AppealCards . . . . . . . . . . . . . . . . . . . . . . . . . . . . . . . . . . . . . . . . . . . . . . . . . . . . . . . . . . . . . . . . . . . . . . . Cards . . . . . . . . . . . . . . . . . . . . . . . . . . . . . . . . . . . . . . . . . . . . . . . . . . . . . . . . . . . . . . . . . . . . . . . . . . . . . Donor Acknowledgement Letters . . . . . . . . . . . . . . . . . . . . . . . . . . . . . . . . . . . . . . . . . . . . . . . . . . . . . . Envelopes . . . . . . . . . . . . . . . . . . . . . . . . . . . . . . . . . . . . . . . . . . . . . . . . . . . . . . . . . . . . . . . . . . . . . . . . . Follow-Up Letters . . . . . . . . . . . . . . . . . . . . . . . . . . . . . . . . . . . . . . . . . . . . . . . . . . . . . . . . . . . . . . . . . . . Honor/Memorial Acknowledgement Letters . . . . . . . . . . . . . . . . . . . . . . . . . . . . . . . . . . . . . . . . . . . . . Label Truncation Report . . . . . . . . . . . . . . . . . . . . . . . . . . . . . . . . . . . . . . . . . . . . . . . . . . . . . . . . . . . . . . Labels . . . . . . . . . . . . . . . . . . . . . . . . . . . . . . . . . . . . . . . . . . . . . . . . . . . . . . . . . . . . . . . . . . . . . . . . . . . . . Membership Card Truncation Report . . . . . . . . . . . . . . . . . . . . . . . . . . . . . . . . . . . . . . . . . . . . . . . . . . . Membership Cards . . . . . . . . . . . . . . . . . . . . . . . . . . . . . . . . . . . . . . . . . . . . . . . . . . . . . . . . . . . . . . . . . . Name Tags . . . . . . . . . . . . . . . . . . . . . . . . . . . . . . . . . . . . . . . . . . . . . . . . . . . . . . . . . . . . . . . . . . . . . . . . . Phonathon Forms . . . . . . . . . . . . . . . . . . . . . . . . . . . . . . . . . . . . . . . . . . . . . . . . . . . . . . . . . . . . . . . . . . . Place Cards . . . . . . . . . . . . . . . . . . . . . . . . . . . . . . . . . . . . . . . . . . . . . . . . . . . . . . . . . . . . . . . . . . . . . . . . Quick Letters . . . . . . . . . . . . . . . . . . . . . . . . . . . . . . . . . . . . . . . . . . . . . . . . . . . . . . . . . . . . . . . . . . . . . . . Receipt Report . . . . . . . . . . . . . . . . . . . . . . . . . . . . . . . . . . . . . . . . . . . . . . . . . . . . . . . . . . . . . . . . . . . . . Receipts . . . . . . . . . . . . . . . . . . . . . . . . . . . . . . . . . . . . . . . . . . . . . . . . . . . . . . . . . . . . . . . . . . . . . . . . . . . Reminder Report . . . . . . . . . . . . . . . . . . . . . . . . . . . . . . . . . . . . . . . . . . . . . . . . . . . . . . . . . . . . . . . . . . . . Reminders . . . . . . . . . . . . . . . . . . . . . . . . . . . . . . . . . . . . . . . . . . . . . . . . . . . . . . . . . . . . . . . . . . . . . . . . . Renewal Notices . . . . . . . . . . . . . . . . . . . . . . . . . . . . . . . . . . . . . . . . . . . . . . . . . . . . . . . . . . . . . . . . . . . . Volunteer Follow-Up Letters . . . . . . . . . . . . . . . . . . . . . . . . . . . . . . . . . . . . . . . . . . . . . . . . . . . . . . . . . . Truncation . . . . . . . . . . . . . . . . . . . . . . . . . . . . . . . . . . . . . . . . . . . . . . . . . . . . . . . . . . . . . . . . . . . . . . . . . 13 14 15 16 16 16 17 17 17 17 19 19 21 21 21 22 24 25 33 35 36 GENERAL TAB . . . . . . . . . . . . . . . . . . . . . . . . . . . . . . . . . . . . . . . . . . . . . . . . . . . . . . 41 Overview . . . . . . . . . . . . . . . . . . . . . . . . . . . . . . . . . . . . . . . . . . . . . . . . . . . . . . . . . . . . . . . . . . . . . . . . . . 42 Parts of the Screen Defined . . . . . . . . . . . . . . . . . . . . . . . . . . . . . . . . . . . . . . . . . . . . . . . . . . . . . . . . . . . 42 FIELDS TO INCLUDE TAB . . . . . . . . . . . . . . . . . . . . . . . . . . . . . . . . . . . . . . . . . . . . . . 53 Overview . . . . . . . . . . . . . . . . . . . . . . . . . . . . . . . . . . . . . . . . . . . . . . . . . . . . . . . . . . . . . . . . . . . . . . . . . . 54 Parts of the Screen Defined . . . . . . . . . . . . . . . . . . . . . . . . . . . . . . . . . . . . . . . . . . . . . . . . . . . . . . . . . . . 54 FILTERS TAB . . . . . . . . . . . . . . . . . . . . . . . . . . . . . . . . . . . . . . . . . . . . . . . . . . . . . . 59 Overview . . . . . . . . . . . . . . . . . . . . . . . . . . . . . . . . . . . . . . . . . . . . . . . . . . . . . . . . . . . . . . . . . . . . . . . . . . 60 Parts of the Screen Defined . . . . . . . . . . . . . . . . . . . . . . . . . . . . . . . . . . . . . . . . . . . . . . . . . . . . . . . . . . . 60 Use the Filters Tab to Limit the Records Receiving a Mailing . . . . . . . . . . . . . . . . . . . . . . . . . . . . . . . . 62 GIFT TYPES TAB . . . . . . . . . . . . . . . . . . . . . . . . . . . . . . . . . . . . . . . . . . . . . . . . . . . . 71 Overview . . . . . . . . . . . . . . . . . . . . . . . . . . . . . . . . . . . . . . . . . . . . . . . . . . . . . . . . . . . . . . . . . . . . . . . . . . 72 Parts of the Screen Defined . . . . . . . . . . . . . . . . . . . . . . . . . . . . . . . . . . . . . . . . . . . . . . . . . . . . . . . . . . . 72 ATTRIBUTES TAB . . . . . . . . . . . . . . . . . . . . . . . . . . . . . . . . . . . . . . . . . . . . . . . . . . . 75 Overview . . . . . . . . . . . . . . . . . . . . . . . . . . . . . . . . . . . . . . . . . . . . . . . . . . . . . . . . . . . . . . . . . . . . . . . . . . 76 Include or Exclude Records from a Mailing using Attributes . . . . . . . . . . . . . . . . . . . . . . . . . . . . . . . . . 76 Add, Update, or Delete Attributes from Records in a Mailing . . . . . . . . . . . . . . . . . . . . . . . . . . . . . . . . 78 INDIVIDUAL AND ORGANIZATION ADDRESS TABS . . . . . . . . . . . . . . . . . . . . . . . . . . . . . 83 Select an Address for an Individual . . . . . . . . . . . . . . . . . . . . . . . . . . . . . . . . . . . . . . . . . . . . . . . . . . . . . Understand Address Attributes . . . . . . . . . . . . . . . . . . . . . . . . . . . . . . . . . . . . . . . . . . . . . . . . . . . . . . . . Select an Address for an Organization . . . . . . . . . . . . . . . . . . . . . . . . . . . . . . . . . . . . . . . . . . . . . . . . . . Understand Contact Address Attributes . . . . . . . . . . . . . . . . . . . . . . . . . . . . . . . . . . . . . . . . . . . . . . . . . 84 86 88 95 SEGMENT TAB . . . . . . . . . . . . . . . . . . . . . . . . . . . . . . . . . . . . . . . . . . . . . . . . . . . . 103 Overview . . . . . . . . . . . . . . . . . . . . . . . . . . . . . . . . . . . . . . . . . . . . . . . . . . . . . . . . . . . . . . . . . . . . . . . . . 104 Parts of the Screen . . . . . . . . . . . . . . . . . . . . . . . . . . . . . . . . . . . . . . . . . . . . . . . . . . . . . . . . . . . . . . . . . 104 Segment a Mailing . . . . . . . . . . . . . . . . . . . . . . . . . . . . . . . . . . . . . . . . . . . . . . . . . . . . . . . . . . . . . . . . . 105 POSTAL SAVER TAB AND POSTAL DISCOUNTS . . . . . . . . . . . . . . . . . . . . . . . . . . . . . . 111 Install and Update PostalSaver . . . . . . . . . . . . . . . . . . . . . . . . . . . . . . . . . . . . . . . . . . . . . . . . . . . . . . . Qualify for Postal Discounts . . . . . . . . . . . . . . . . . . . . . . . . . . . . . . . . . . . . . . . . . . . . . . . . . . . . . . . . . . Run the Presort Wizard to Set PostalSaver Options . . . . . . . . . . . . . . . . . . . . . . . . . . . . . . . . . . . . . . . Load PostalSaver Options from an Existing Parameter File . . . . . . . . . . . . . . . . . . . . . . . . . . . . . . . . . 114 124 126 175 FORMAT TAB . . . . . . . . . . . . . . . . . . . . . . . . . . . . . . . . . . . . . . . . . . . . . . . . . . . . . 181 Format Tab: Miscellaneous . . . . . . . . . . . . . . . . . . . . . . . . . . . . . . . . . . . . . . . . . . . . . . . . . . . . . . . . . . 182 Format Tab: Output Options . . . . . . . . . . . . . . . . . . . . . . . . . . . . . . . . . . . . . . . . . . . . . . . . . . . . . . . . . Format Tab: Sort . . . . . . . . . . . . . . . . . . . . . . . . . . . . . . . . . . . . . . . . . . . . . . . . . . . . . . . . . . . . . . . . . . . Format Tab: Headings . . . . . . . . . . . . . . . . . . . . . . . . . . . . . . . . . . . . . . . . . . . . . . . . . . . . . . . . . . . . . . . Format Tab: Criteria . . . . . . . . . . . . . . . . . . . . . . . . . . . . . . . . . . . . . . . . . . . . . . . . . . . . . . . . . . . . . . . . Format Tab: Detail . . . . . . . . . . . . . . . . . . . . . . . . . . . . . . . . . . . . . . . . . . . . . . . . . . . . . . . . . . . . . . . . . Format Tab: Page Footer . . . . . . . . . . . . . . . . . . . . . . . . . . . . . . . . . . . . . . . . . . . . . . . . . . . . . . . . . . . . Format Tab: Report Footer . . . . . . . . . . . . . . . . . . . . . . . . . . . . . . . . . . . . . . . . . . . . . . . . . . . . . . . . . . . Format Tab: Name Formats . . . . . . . . . . . . . . . . . . . . . . . . . . . . . . . . . . . . . . . . . . . . . . . . . . . . . . . . . . 183 186 188 189 190 191 192 193 ERECEIPTS TAB . . . . . . . . . . . . . . . . . . . . . . . . . . . . . . . . . . . . . . . . . . . . . . . . . . . . 195 Overview . . . . . . . . . . . . . . . . . . . . . . . . . . . . . . . . . . . . . . . . . . . . . . . . . . . . . . . . . . . . . . . . . . . . . . . . . Parts of the Screen Defined . . . . . . . . . . . . . . . . . . . . . . . . . . . . . . . . . . . . . . . . . . . . . . . . . . . . . . . . . . Business Rules . . . . . . . . . . . . . . . . . . . . . . . . . . . . . . . . . . . . . . . . . . . . . . . . . . . . . . . . . . . . . . . . . . . . . Use the eReceipts Tab to Create and Send Receipts Using Email . . . . . . . . . . . . . . . . . . . . . . . . . . . . Resend eReceipts Due to a Failed Connection . . . . . . . . . . . . . . . . . . . . . . . . . . . . . . . . . . . . . . . . . . . 196 197 199 200 208 COMMON MAIL PROCEDURES . . . . . . . . . . . . . . . . . . . . . . . . . . . . . . . . . . . . . . . . . 211 Create a Mailing . . . . . . . . . . . . . . . . . . . . . . . . . . . . . . . . . . . . . . . . . . . . . . . . . . . . . . . . . . . . . . . . . . . Export a Mailing . . . . . . . . . . . . . . . . . . . . . . . . . . . . . . . . . . . . . . . . . . . . . . . . . . . . . . . . . . . . . . . . . . . Select an Addressee or Salutation for an Individual or Contact . . . . . . . . . . . . . . . . . . . . . . . . . . . . . Select an Addressee or Salutation for an Organization . . . . . . . . . . . . . . . . . . . . . . . . . . . . . . . . . . . . Send a Mailing as Email . . . . . . . . . . . . . . . . . . . . . . . . . . . . . . . . . . . . . . . . . . . . . . . . . . . . . . . . . . . . . Restart a Mail Printing . . . . . . . . . . . . . . . . . . . . . . . . . . . . . . . . . . . . . . . . . . . . . . . . . . . . . . . . . . . . . . Save a Parameter File . . . . . . . . . . . . . . . . . . . . . . . . . . . . . . . . . . . . . . . . . . . . . . . . . . . . . . . . . . . . . . . Delete a Parameter File . . . . . . . . . . . . . . . . . . . . . . . . . . . . . . . . . . . . . . . . . . . . . . . . . . . . . . . . . . . . . Create One Per Page Mailings . . . . . . . . . . . . . . . . . . . . . . . . . . . . . . . . . . . . . . . . . . . . . . . . . . . . . . . . 213 242 243 251 254 256 257 258 259 GLOSSARY . . . . . . . . . . . . . . . . . . . . . . . . . . . . . . . . . . . . . . . . . . . . . . . . . . . . . . . 275 INDEX . . . . . . . . . . . . . . . . . . . . . . . . . . . . . . . . . . . . . . . . . . . . . . . . . . . . . . . . . . 279 chapter What Is In This Guide? In the Mail Guide, you learn about all mail tasks, including producing Rolodex and index cards, receipts, reminders, appeal cards, acknowledgement letters, labels, and envelopes. You can learn how to automate many standard processes such as selecting addresses. It also explains how to use PostalSaver to reduce mailing costs by appropriately sorting your mailings. You can also learn about the following. • • • • • • “Create a Mailing” on page 213 Descriptions of “Available Mail Tasks” on page 11 How to use the “General Tab” on page 41 and all other tabs in Mail “Mail to an Organization’s Contacts” on page 91 “Segment a Mailing” on page 105 “Qualify for Postal Discounts” on page 124 How Do I Use These Guides? The Raiser’s Edge user guides contain examples, scenarios, procedures, graphics, and conceptual information. Side margins contain notes, tips, warnings, and space for you to write your own notes. To find help quickly and easily, you can access the Raiser’s Edge documentation from several places. User Guides. You can access PDF versions of the guides by selecting Help, User Guides from the shell menu bar or by clicking Help on the Raiser’s Edge bar in the program. You can also access the guides on our Web site at www.blackbaud.com. From the menu bar, select Support, User Guides. In a PDF, page numbers in the Table of Contents, Index, and all cross-references are hyperlinks. For example, click the page number by any heading or procedure on a Table of Contents page to go directly to that page. Help File. In addition to user guides, you can learn about The Raiser’s Edge by accessing the help file in the program. Select Help, The Raiser’s Edge Help Topics from the shell menu bar or press F1 on your keyboard from anywhere in the program. Narrow your search in the help file by enclosing your search in quotation marks on the Search tab. For example, instead of entering Load Defaults, enter “Load Defaults”. The help file searches for the complete phrase in quotes instead of individual words. i chapter 1 Introduction to Mail Navigate in Mail . . . . . . . . . . . . . . . . . . . . . . . . . . . . . . . . . . . . . . . . . . . . . . . . . . . . . . . . . . . . . . . . . . . . . . . . . . . . . AccessMail Tasks . . . . . . . . . . . . . . . . . . . . . . . . . . . . . . . . . . . . . . . . . . . . . . . . . . . . . . . . . . . . . . . . . . . . . . . . . . . . . . . . Mail Toolbar. . . . . . . . . . . . . . . . . . . . . . . . . . . . . . . . . . . . . . . . . . . . . . . . . . . . . . . . . . . . . . . . . . . . . . . . . . . . . . . . . . . . Buttons. . . . . . . . . . . . . . . . . . . . . . . . . . . . . . . . . . . . . . . . . . . . . . . . . . . . . . . . . . . . . . . . . . . . . . . . . . . . . . . . . . . . . . . . Mail User Options . . . . . . . . . . . . . . . . . . . . . . . . . . . . . . . . . . . . . . . . . . . . . . . . . . . . . . . . . . . . . . . . . . . . . . . . . . . Understand the Tabs on a Mail Task . . . . . . . . . . . . . . . . . . . . . . . . . . . . . . . . . . . . . . . . . . . . . . . . . . . . . . . . . . . . 2 3 4 5 6 8 Procedures Open a mail task or saved parameter file . . . . . . . . . . . . . . . . . . . . . . . . . . . . . . . . . . . . . . . . . . . . . . . . . . . . . . . . . . . . 3 Define user options. . . . . . . . . . . . . . . . . . . . . . . . . . . . . . . . . . . . . . . . . . . . . . . . . . . . . . . . . . . . . . . . . . . . . . . . . . . . . . 6 2 CHAPTER Communicating with constituents is a fundamental part of fundraising. The Raiser’s Edge contains many features to help you communicate easily and effectively. Mail is the central location for all mail tasks in The Raiser’s Edge. This includes producing Rolodex and index cards, receipts, reminders, appeal cards, acknowledgement letters, labels, and envelopes.With Mail, you can easily correspond with your constituents because it can automate many standard processes such as gathering data for mail merges and selecting addresses. Mail tasks such as Receipts or Appeal Cards are formatted to fit preprinted paper you can order from Blackbaud. Labels, Cards, and Envelopes mail tasks print directly from The Raiser’s Edge to your printer and do not require preprinted paper. You can use Letters mail tasks, such as Donor Acknowledgement Letters, to combine information from your database with letters you write in an application that supports mail merges. For example, in your word processor, you can write a donor thank-you letter containing merge fields. Then, you can use the Donor Acknowledgement Letters mail task to export specific information for a group of donors from The Raiser’s Edge to merge with the letter. If you use the optional modules Membership Management, Event Management, Volunteer Management, or Honor/Memorial Tracking, additional mail tasks are available. For example, when you have Membership Management, you can use the Membership Cards mail task to print membership cards that identify your members. You can also send renewal notices to remind and encourage your members to extend their membership. If you have Honor/Memorial Tracking, you can export fields using the Honor/Memorial Acknowledgement Letters mail task to create letters to send to tribute acknowledgees. If you use the optional module PostalSaver, the PostalSaver tab is available on most mail tasks. By using this tab, you can CASS-certify the addresses in each mailing and sort them by ZIP Code. By using CASS-certified addresses, your organization can qualify for additional postalsaver discounts. For more information about the PostalSaver tab and sorting your mailings, see the PostalSaver Tab & PostalSaver chapter. For more information about the address correction services, AddressAccelerator and AddressFinder, press F1 on any AddressAccelerator or AddressFinder screen to access the help file. Navigate in Mail The Mail page is the central location for mailings in The Raiser’s Edge. To access the Mail page, click Mail on the Raiser’s Edge bar. INTRODUCTION TO MAIL 3 Access Mail Tasks From the Mail page, you can access all mail tasks. A mail task is a screen divided into tabs. Each tab contains options, fields, and checkboxes that help you decide the constituents who receive the mailing, the fields to include in the mailing, and the format for the information in the mailing. Mail tasks are listed in alphabetical order on the left side of the Mail page. From the Mail page, you can also choose to open a saved parameter file. A parameter file contains a copy of the settings selected on each tab of a mail task for a particular mailing you designed. For example, if you print receipts for gifts donated in response to your Annual Mailing appeal, you can save the settings in the Receipts mail task as a parameter file. The next time you print receipts for gifts donated in response to the Annual Mailing appeal, you can open this parameter file, change the records receiving receipts, and print receipts using the same options, fields, and checkboxes as previous receipts for the Annual Mailing appeal. You can use these settings later if you need to send mail to the same group of constituents. For more information about saving parameter files, see “Save a Parameter File” on page 257. Open a mail task or saved parameter file 1. On the Raiser’s Edge bar, click Mail. The Mail page appears. Note: To scroll through the list of mail tasks on the left, click the up and down arrows on the scroll bar just to the right of the list. 4 CHAPTER 2. From the list on the left, select a mail task. For example, you can select Receipts. The list on the right displays all the parameters files saved for the Receipts mail task. Note: To resize the columns on the right, click on the white line in between the column headings and slide them. 3. To create new receipts, click New on the action bar. 4. To open an existing parameter file, highlight a parameter file in the list on the right and click Open on the action bar. 5. When the mail task appears, you can change the settings as necessary and run the mail task. For more information, see “Common Mail Procedures” on page 211 or see the specific chapter for the tab you are on. Mail Toolbar Note: You can set up a user option that enables you to view tooltips that explain the function of each toolbar command. Tooltips appear when you move your cursor across each item in the toolbar. For more information about setting up this user option, see the General Options section of the User Options chapter of the Program Basics Guide. The toolbar contains buttons representing commands common throughout Mail. You can use these buttons as alternatives to menu commands to save time when entering data into The Raiser’s Edge. Save a parameter file Preview the mailing Print the mailing INTRODUCTION TO MAIL 5 Export the mailing Send the mailing as email Add mail task to favorites Tip: If you use Microsoft Word to perform a mail merge, see The Raiser’s Edge & Microsoft Office Integration Guide for a procedure using the Word Merge Wizard. Access help from online help files, user guides, online support, or the Blackbaud Web site Perform mail merge Write a custom message on One Per Page forms Buttons At the bottom of each mail task, several buttons appear to help you navigate through the tabs and print the mailing. Go to the previous tab Go to the next tab Close the mail task Print the mailing Preview the mailing View a sample layout Export the mailing 6 CHAPTER Mail User Options User options are preferences you set that affect how The Raiser’s Edge looks and runs on the workstation you use. User options are login-specific, which means that if you log into any workstation using your password, your preferences are active on that workstation. When you log off that workstation, your preferences are not active for any other user. To establish user options, select Tools, User Options from the menu bar on the shell of The Raiser’s Edge. The Options screen appears so you can establish certain user options for Mail. From the Mail tab of the Options screen, you can decide the font and font size to use for the information printed by a mail task. You can also mark the Automatically save mail parameters on close checkbox, so the program automatically saves the options for the mail tasks you create. Also, the Printing tab impacts parameter files used when printing membership cards and renewal notices. Define user options This procedure explains how to set up user options specific to Mail. For more information about user options, see the User Options chapter of the Program Basics Guide. 1. From the menu bar on the shell of The Raiser’s Edge, select Tools, User Options. The Options screen appears. 2. Select the Mail tab. 3. From the list on the left, select All mailings. Checkboxes and fields appear on the right so you can format user options to automatically save parameter files and set font preferences. 4. To automatically save a parameter file containing the settings you select when setting up a mail task, mark Automatically save mail parameters on close. If you mark this checkbox, the program asks if you want to save a parameter file when you close a mail task. 5. To automatically make the screen full size when you preview a mailing, mark Automatically maximize preview window. The default for this checkbox is to be marked. INTRODUCTION TO MAIL 7 6. In the Font and Font size fields, select the font and size to use for your mailings. In the Font field, you can select any font installed on your workstation. However, use caution when you select the font size. Not all font sizes may work well with the mail task you want to use. Note: When you print membership cards, you can use the Membership Card Truncation Report mail task to determine whether the font size you select is too large for the information you want to include. For more information, see “Truncation” on page 36. 8 CHAPTER 7. From the list on the left, select Gift preferences. Checkboxes, fields, and options appear on the right so you can format user options to include anonymous gifts, print only gifts of a particular currency, and choose to display tax gifts in net or gross amount. 8. To include anonymous gifts during mail processing, mark Include anonymous gifts. Note: For a currency type to be available in the Currency filter field, you must set up the currency using the International link in Configuration. For more information, see the Configuration chapter of the Configuration & Security Guide. 9. When you print a mailing that contains gifts donated in a particular currency, you can filter the gifts that appear in the mailing by entering a currency in the Currency filter field. For example, if you want gifts donated only using Japanese yen to appear in the mailing, in the Currency filter field, select “Yen-Japan”. If you do not want to filter the mailing by currency, leave this field blank. 10. To print gift amounts using the currency in which the gift was donated, mark Print amounts using donor’s currency. 11. To save and apply your changes and keep the Options screen open, click Apply. To save your changes and exit the Options screen, click OK. To undo any changes you made and reestablish all program settings, click Reset to System Defaults. To exit User Options without saving your most recent changes, click Cancel. Understand the Tabs on a Mail Task Note: Not all tabs appear in all mail tasks. INTRODUCTION TO MAIL 9 When you open a mail task, a setup screen appears to help you select the constituents who should receive the mailing and the information to include on the mailing pieces. Go through the tabs to create a parameter file of your settings for a particular mail task, which can save and reuse for similar mailings later. To help you enter information in an easy and logical manner, every mail task has tabs. You can select a tab and enter information on the tab. The following tabs are available throughout the various mail tasks in Mail. • General Tab • Org. Address Tab • Fields to Include Tab • Segment Tab • Filters Tab • PostalSaver Tab • Gift Types Tab • Format Tab • Attributes Tab • eReceipts Tab • Ind. Address Tab 10 C H A P T E R chapter 2 Available Mail Tasks Appeal Cards . . . . . . . . . . . . . . . . . . . . . . . . . . . . . . . . . . . . . . . . . . . . . . . . . . . . . . . . . . . . . . . . . . . . . . . . . . . . . . 13 Types of Appeal Cards. . . . . . . . . . . . . . . . . . . . . . . . . . . . . . . . . . . . . . . . . . . . . . . . . . . . . . . . . . . . . . . . . . . . . . . . . . . 13 Standard Appeal Cards . . . . . . . . . . . . . . . . . . . . . . . . . . . . . . . . . . . . . . . . . . . . . . . . . . . . . . . . . . . . . . . . . . . . . . . 13 One Per Page Appeal Cards . . . . . . . . . . . . . . . . . . . . . . . . . . . . . . . . . . . . . . . . . . . . . . . . . . . . . . . . . . . . . . . . . . . 14 Custom Appeal Cards . . . . . . . . . . . . . . . . . . . . . . . . . . . . . . . . . . . . . . . . . . . . . . . . . . . . . . . . . . . . . . . . . . . . . . . . 14 Cards . . . . . . . . . . . . . . . . . . . . . . . . . . . . . . . . . . . . . . . . . . . . . . . . . . . . . . . . . . . . . . . . . . . . . . . . . . . . . . . . . . . . . 14 Donor Acknowledgement Letters . . . . . . . . . . . . . . . . . . . . . . . . . . . . . . . . . . . . . . . . . . . . . . . . . . . . . . . . . . . . . . 15 Envelopes . . . . . . . . . . . . . . . . . . . . . . . . . . . . . . . . . . . . . . . . . . . . . . . . . . . . . . . . . . . . . . . . . . . . . . . . . . . . . . . . . 16 Follow-Up Letters. . . . . . . . . . . . . . . . . . . . . . . . . . . . . . . . . . . . . . . . . . . . . . . . . . . . . . . . . . . . . . . . . . . . . . . . . . . 16 Honor/Memorial Acknowledgement Letters. . . . . . . . . . . . . . . . . . . . . . . . . . . . . . . . . . . . . . . . . . . . . . . . . . . . . 16 Label Truncation Report . . . . . . . . . . . . . . . . . . . . . . . . . . . . . . . . . . . . . . . . . . . . . . . . . . . . . . . . . . . . . . . . . . . . . . 17 Labels . . . . . . . . . . . . . . . . . . . . . . . . . . . . . . . . . . . . . . . . . . . . . . . . . . . . . . . . . . . . . . . . . . . . . . . . . . . . . . . . . . . . 17 Membership Card Truncation Report. . . . . . . . . . . . . . . . . . . . . . . . . . . . . . . . . . . . . . . . . . . . . . . . . . . . . . . . . . . 17 Membership Cards. . . . . . . . . . . . . . . . . . . . . . . . . . . . . . . . . . . . . . . . . . . . . . . . . . . . . . . . . . . . . . . . . . . . . . . . . . 17 Membership Card Types . . . . . . . . . . . . . . . . . . . . . . . . . . . . . . . . . . . . . . . . . . . . . . . . . . . . . . . . . . . . . . . . . . . . . . . . . 18 12-Field Membership Cards . . . . . . . . . . . . . . . . . . . . . . . . . . . . . . . . . . . . . . . . . . . . . . . . . . . . . . . . . . . . . . . . . . . 18 Preprinted Membership Cards . . . . . . . . . . . . . . . . . . . . . . . . . . . . . . . . . . . . . . . . . . . . . . . . . . . . . . . . . . . . . . . . . 18 Custom Membership Cards . . . . . . . . . . . . . . . . . . . . . . . . . . . . . . . . . . . . . . . . . . . . . . . . . . . . . . . . . . . . . . . . . . . 19 Name Tags . . . . . . . . . . . . . . . . . . . . . . . . . . . . . . . . . . . . . . . . . . . . . . . . . . . . . . . . . . . . . . . . . . . . . . . . . . . . . . . . 19 Phonathon Forms. . . . . . . . . . . . . . . . . . . . . . . . . . . . . . . . . . . . . . . . . . . . . . . . . . . . . . . . . . . . . . . . . . . . . . . . . . . 19 Place Cards . . . . . . . . . . . . . . . . . . . . . . . . . . . . . . . . . . . . . . . . . . . . . . . . . . . . . . . . . . . . . . . . . . . . . . . . . . . . . . . . 21 Quick Letters . . . . . . . . . . . . . . . . . . . . . . . . . . . . . . . . . . . . . . . . . . . . . . . . . . . . . . . . . . . . . . . . . . . . . . . . . . . . . . 21 Receipt Report . . . . . . . . . . . . . . . . . . . . . . . . . . . . . . . . . . . . . . . . . . . . . . . . . . . . . . . . . . . . . . . . . . . . . . . . . . . . . 21 Receipts . . . . . . . . . . . . . . . . . . . . . . . . . . . . . . . . . . . . . . . . . . . . . . . . . . . . . . . . . . . . . . . . . . . . . . . . . . . . . . . . . . 22 Types of Receipts. . . . . . . . . . . . . . . . . . . . . . . . . . . . . . . . . . . . . . . . . . . . . . . . . . . . . . . . . . . . . . . . . . . . . . . . . . . . . . . 23 Preprinted Receipts . . . . . . . . . . . . . . . . . . . . . . . . . . . . . . . . . . . . . . . . . . . . . . . . . . . . . . . . . . . . . . . . . . . . . . . . . . 23 One Per Page Receipts . . . . . . . . . . . . . . . . . . . . . . . . . . . . . . . . . . . . . . . . . . . . . . . . . . . . . . . . . . . . . . . . . . . . . . . 24 Custom Receipts . . . . . . . . . . . . . . . . . . . . . . . . . . . . . . . . . . . . . . . . . . . . . . . . . . . . . . . . . . . . . . . . . . . . . . . . . . . . 24 Reminder Report . . . . . . . . . . . . . . . . . . . . . . . . . . . . . . . . . . . . . . . . . . . . . . . . . . . . . . . . . . . . . . . . . . . . . . . . . . . 24 Reminders . . . . . . . . . . . . . . . . . . . . . . . . . . . . . . . . . . . . . . . . . . . . . . . . . . . . . . . . . . . . . . . . . . . . . . . . . . . . . . . . 25 Types of Reminders . . . . . . . . . . . . . . . . . . . . . . . . . . . . . . . . . . . . . . . . . . . . . . . . . . . . . . . . . . . . . . . . . . . . . . . . . . . . . 26 3-Column Reminders. . . . . . . . . . . . . . . . . . . . . . . . . . . . . . . . . . . . . . . . . . . . . . . . . . . . . . . . . . . . . . . . . . . . . . . . . 26 5-Column Reminders. . . . . . . . . . . . . . . . . . . . . . . . . . . . . . . . . . . . . . . . . . . . . . . . . . . . . . . . . . . . . . . . . . . . . . . . . 29 One Per Page Reminders . . . . . . . . . . . . . . . . . . . . . . . . . . . . . . . . . . . . . . . . . . . . . . . . . . . . . . . . . . . . . . . . . . . . . 32 Custom Reminders . . . . . . . . . . . . . . . . . . . . . . . . . . . . . . . . . . . . . . . . . . . . . . . . . . . . . . . . . . . . . . . . . . . . . . . . . . 32 Per Pledge and Per Installment Reminders . . . . . . . . . . . . . . . . . . . . . . . . . . . . . . . . . . . . . . . . . . . . . . . . . . . . . . . . . . 33 Renewal Notices . . . . . . . . . . . . . . . . . . . . . . . . . . . . . . . . . . . . . . . . . . . . . . . . . . . . . . . . . . . . . . . . . . . . . . . . . . . 33 Types of Renewal Notices. . . . . . . . . . . . . . . . . . . . . . . . . . . . . . . . . . . . . . . . . . . . . . . . . . . . . . . . . . . . . . . . . . . . . . . . 34 One Third, Two Thirds, and Full Page Notices. . . . . . . . . . . . . . . . . . . . . . . . . . . . . . . . . . . . . . . . . . . . . . . . . . . . . 34 Custom Renewal Notices . . . . . . . . . . . . . . . . . . . . . . . . . . . . . . . . . . . . . . . . . . . . . . . . . . . . . . . . . . . . . . . . . . . . . 35 Volunteer Follow-Up Letters . . . . . . . . . . . . . . . . . . . . . . . . . . . . . . . . . . . . . . . . . . . . . . . . . . . . . . . . . . . . . . . . . . 35 Truncation . . . . . . . . . . . . . . . . . . . . . . . . . . . . . . . . . . . . . . . . . . . . . . . . . . . . . . . . . . . . . . . . . . . . . . . . . . . . . . . . 36 Horizontal Truncation . . . . . . . . . . . . . . . . . . . . . . . . . . . . . . . . . . . . . . . . . . . . . . . . . . . . . . . . . . . . . . . . . . . . . . . . . . . 36 12 C H A P T E R Vertical Truncation . . . . . . . . . . . . . . . . . . . . . . . . . . . . . . . . . . . . . . . . . . . . . . . . . . . . . . . . . . . . . . . . . . . . . . . . . . . . . 37 A VA I L A B L E M A I L TA S K S 13 To help you communicate effectively with your constituents, The Raiser’s Edge comes with numerous standard mail tasks. This section includes a description of each available mail task in The Raiser’s Edge. AppealCards Note: You can customize your organization’s forms with your colors, logo, and personal messages. Blackbaud forms align with software printouts. For more information or to order Blackbaud standard forms, send an email message to [email protected] or call 1-866-4-BB-Forms (1-866-422-3676). You can view samples of forms at forms.blackbaud.com. To ask constituents for donations to your organization, you can send appeal cards. For example, you want to remind constituents to donate money to your 2004 Annual Fund. Because you already mailed letters that explain the goals of the 2004 Annual Fund, you want to send a brief appeal card to remind constituents to make a donation to this fund. On this appeal card, you can include a specific suggested donation amount for each constituent, which you can calculate by increasing a previous gift by a certain amount you specify. You can also print information about past gifts donated by the constituent. Appeal cards make it easy for you to track donations and evaluate the cost of the appeal versus the amount of money raised from the appeal. Also, you can update the No. solicited field on the General tab of an appeal record to include the constituents for whom you print appeal cards. You can print a Gift barcode on the appeal card, which you select on the Fields to Include tab. Printing a gift barcode on your appeal card makes your job much simpler when a gift arrives as a result of the appeal. A Gift barcode is made up of the Constituent ID, Fund ID, Appeal ID (or Package ID, if there is one), and a checksum digit that ensures data accuracy. When you receive the appeal card back from the donor with a gift, simply scan the barcode while you enter gift information in Batch and constituent, gift type, campaign, fund, and appeal information automatically fills in. This way, you ensure accuracy and cut down on data reentry. For more information about entering a gift from an appeal card through Batch, see the Batch Guide. Types of Appeal Cards The Appeal Cards mail task offers several ways to create appeal cards in Mail. You can print standard appeal cards that print information to match a preprinted form with your logo that you can order from Blackbaud. You can print a standard appeal card using a full page and add a custom message. You can also design your own custom appeal card form in an application that supports mail merges. Standard Appeal Cards Using standard appeal cards, you can print previous and suggested gift amounts for each constituent. The suggested gift amount for previous donors can be based on previous gifts the constituent donated or a new suggested gift amount. For example, a constituent made a $500 donation to your organization last year. You can print a suggested gift amount for this year’s donation, based on this gift amount. You can also specify a specific suggested gift amount, such as $1,000. For constituents who have never donated a new gift, you can print a separate suggested gift amount. Note: A barcode that contains only appeal information begins with an “A”. A barcode that includes appeal and package information begins with a “K”. To customize appeal cards for a specific appeal, you can include a short message such as “Please donate to the Library Fund.” Also, you can include a gift barcode that contains the Constituent ID, Fund ID, and Appeal or Package ID. Once you receive a gift donated in response to an appeal card, you can scan the gift barcode in Batch to quickly create a gift record. This automatically fills in the fields Constituent Name, Gift Type, Campaign, Fund, and Appeal or Package. For more information, see the Gift Batch chapter of the Batch Guide. 14 C H A P T E R Sample appeal card Note: You can customize your organization’s forms with your colors, logo, and personal messages. Blackbaud forms align with software printouts. For more information or to order Blackbaud standard forms, send an email message to [email protected] or call 1-866-4-BB-Forms (1-866-422-3676). You can view samples of forms at forms.blackbaud.com. Standard appeal cards print three per page. One Per Page Appeal Cards To add a custom message to your appeal cards, mark One per page on the General tab of the appeal cards mail task. Appeal cards then print one per page with the standard appeal card information appearing on the bottom third of the page and the top portion of the page can be used for a personal message. For more information, see “Create One Per Page Mailings” on page 259. Custom Appeal Cards Tip: If you only want to add a custom message to a standard appeal card, use the One per page checkbox, instead of creating an entire custom form and performing a mail merge. When you create custom appeal cards, you must design an appeal card form in an application that supports mail merges. On this appeal card form, add merge fields as necessary to personalize the appeal card for each constituent who receives the mailing. After you design a custom form, you can use the Appeal Cards mail task to gather information for the constituents who receive appeal cards and export this information as a data file to the application where you created the custom appeal card form. Once you export a data file, you can merge the information with the custom appeal card to create a personalized appeal card for each constituent who receives the mailing. To use the Appeal Cards mail task to export data, select Custom data file in the Card type field on the General tab. For more information, see “Export a Mailing” on page 242 in the Common Mail Procedures chapter. Cards Note: You can print labels, cards, or envelopes for honor/memorial constituents and event participants if you use the optional modules Honor/Memorial Tracking and Event Management, respectively. A VA I L A B L E M A I L TA S K S 15 Using the Cards mail task, you can print index cards or Rolodex cards for constituent, honor/memorial, relationship, and participant records. For example, you can print Rolodex cards for all major donors in your database. The Raiser’s Edge is compatible with many card types. However, if the card type you want to use is not compatible with The Raiser’s Edge, you can export the information gathered by the Cards mail task to an application compatible with the card type you want to use. Donor Acknowledgement Letters Note: To use a mail task in the Letters category, you should write a letter in an application that supports mail merges. You can use the Donor Acknowledgement Letters mail task to thank your constituents for the generous gifts they donated to your organization. For example, you have just received 50 gifts in response to the Adopt-a-Painting appeal you sent earlier in the month. In a word processor or other application, you can write a letter to thank donors for their interest and gifts. In this letter, insert merge fields, such as gift amount, to personalize the letter for each constituent. For example, you could write “Thank you for your gift of [merge field], which will be used to restore one of our many paintings in need of refurbishment.” Using the Donor Acknowledgement Letters mail task, you can export the corresponding fields to create a personalized thank-you letter for each of the 50 donors. If you use Microsoft Word to perform a mail merge, you can use the Word Merge Wizard. For more information, see The Raiser’s Edge & Microsoft Office Integration Guide. Not All Donor Acknowledgement Letters in a Mailing Print If donor acknowledgement letters do not print for all gifts or constituents included in the mailing, you can perform multiple tasks to easily resolve the issue. Verify donor acknowledgement letters print for all gifts or constituents in a mailing If gifts or constituents are missing from a donor acknowledgement letters mailing, do each of these tasks in order until the issue is resolved. 1. If the missing constituents do not have gifts, run a mail task, such as Quick Letters, that does not require the constituents to have gifts. 2. In Records, verify each missing gift is not acknowledged. On the Gift tab of each gift record, select Not Acknowledged in the Acknowledge field. 3. In Records, verify the letter code selected for each missing gift is correct. On the Gift tab of each gift record, select the correct letter code in the Letter field. 4. In Mail, verify the Donor Acknowledgement Letter task includes all letter codes for the gifts included in the mailing. On the Filters tab, include all the applicable letter codes in the Letters filter row. 5. If you use Microsoft Word to perform a conditional mail merge, be sure to include all letters for the gifts in the mailing. a. In Mail, set up all the parameters for the Donor Acknowledgement Letter task. For information about how to set up a Donor Acknowledgement Letter task, see “Create and send letters from Mail” on page 230. b. Use the Word merge wizard to perform a conditional mail merge using multiple documents. For each merge document, select a condition of Letter with the operator of “equal to” and select the applicable letter. For information about how to use the conditional mail merge in the Word Merge Wizard, see the The Raiser’s Edge & Microsoft Office Integration Guide. 16 C H A P T E R Envelopes Using the Envelopes mail task, you can print envelopes for constituents, honor/memorials, relationships, and participants. For example, when you send an appeal to a group of constituents, you can use the Envelopes mail task to print an envelope for each constituent who receives the appeal. Optional fields, such as an address barcode, the constituent ID, and the constituent’s birth date, can also be included on envelopes. The Raiser’s Edge is compatible with many standard envelope sizes. However, if the envelope size you want to use is not compatible with The Raiser’s Edge, you can export the information gathered by the Envelopes mail task to an application compatible with the envelope size you want to use. Follow-Up Letters Tip: If you use Microsoft Word to perform a mail merge, see The Raiser’s Edge & Microsoft Office Integration Guide for a procedure using the Word Merge Wizard. You can use the Follow-Up Letters mail task to correspond with constituents about actions entered on the Actions tab of their constituent records. For example, you can create letters to thank donors for having lunch with you or to confirm the details of a recent telephone call. The Follow-Up Letters mail task is similar to the other mail tasks in the Letters category in that it helps you export constituent information to another application to merge with an existing mail merge letter. In an application that supports mail merges, you can write a letter to correspond with a group of constituents concerning an action entered on their constituent records. In this letter, insert merge fields, such as Action type and Action date, to personalize the letter for each constituent. For example, you could write “Thank you for participating in [merge field] on [merge field].” Using the Follow-Up Letters mail task, you can export the Action type and Action date fields to create a personal letter for each constituent receiving a follow-up letter. Honor/Memorial Acknowledgement Letters Note: A tribute acknowledgee is a family member, friend, associate, or honoree who should be notified when a gift is donated on behalf of an honor/memorial constituent. The constituent who is being honored can also be an acknowledgee. If you use the optional module Honor/Memorial Tracking, you can export fields using the Honor/Memorial Acknowledgement Letters mail task to create notification letters for tribute acknowledgees. An acknowledgee is a person who has a relationship with an honor/memorial constituent and needs to be notified when a gift is donated on behalf of an honor/memorial constituent. For example, your organization is a church and William Hodges, one of the members of your congregation, is being honored on his 80th birthday. You can set up a tribute on William Hodges’s constituent record and list him and his two children in the Acknowledgees grid on the Tribute screen. When gifts are donated to your church in honor of William Hodges, you can use the Honor/Memorial Acknowledgement Letters mail task to notify William Hodges and his children of the gifts donated in his honor. You can use the Honor/Memorial Acknowledgement Letters mail task to select the fields to export to your word processor to merge with the notification letter you have written. When you run the Honor/Memorial Acknowledgement Letters mail task, you can also create a constituent query that contains all acknowledgees who receive a letter, including those who are not constituents in your database. Tip: If you use Microsoft Word to perform a mail merge, see The Raiser’s Edge & Microsoft Office Integration Guide for a procedure using the Word Merge Wizard. A VA I L A B L E M A I L TA S K S 17 When you work with the Honor/Memorial Acknowledgement Letters mail task, if you choose Selected Records and use a constituent query, the query must include honor/memorial acknowledgee records, not donor records. The same concept applies when you select One record, if it is a constituent record. However, when using a gift query, you must include the gift records of the donors. This concept also applies when you select One record and choose a gift record. For more information about Tribute, see the Tribute Data Entry Guide. Label Truncation Report To test the vertical and horizontal formatting selected for labels, you can use the label truncation report. This report lists the constituent’s name along with the information that does not fit on the label. You can print a label truncation report for constituent, honor/memorial, relationship, and participant records. When you print a truncation report, you must select a range of font sizes for the program to check and specify whether to check for vertical truncation, horizontal truncation, or both. For more information, see “Truncation” on page 36. Labels Using the Labels mail task, you can print labels for constituent, honor/memorial, relationship, and participant records. For example, you can print labels to affix to appeal packages for your constituents. The Raiser’s Edge is compatible with many standard label sizes. However, if the label size you use is not compatible with The Raiser’s Edge, you can export the information gathered by the Labels mail task to an application compatible with the label type you want to use. Membership Card Truncation Report If you use the optional module Membership Management, the membership card truncation report is available. You can use this report to test the vertical and horizontal formatting selected for membership cards. The membership card truncation report lists the member’s name with the information that does not fit on the membership card. For more information, see the Membership Card section or “Truncation” on page 36. Membership Cards Note: For more information about Membership Management, see the Membership Data Entry Guide. For more information about Membership Scanning, see the Membership Scanning Guide. If you use the optional module Membership Management, membership cards are available. You can send membership cards as a tangible token of the membership. To track member attendance at activities or events you sponsor, such as golf tournaments or dinners, you can add a barcode to the membership card. If you use the optional module Membership Scanning, you can scan in membership cards and view and update member information. Membership cards can also be used to provide benefits to your members. For example, if your organization is a zoo or museum, your members can receive discounts or free admission when they show their membership cards at the entrance or the gift shop. To print membership cards, you must click Members & Cards to enter information about the membership cards on the membership record. The program prints the number of membership cards entered on the New Joint Member or Card Recipient screen. For more information, see the Membership Data Entry Guide. 18 C H A P T E R Membership Card Types You can create several different types of membership cards in Mail. You can print 12-field or Preprinted membership cards, which require cards you can order from Blackbaud. If you do not want to print cards requiring standard or preprinted paper, you can design a custom membership card in an application that supports mail merges and export information using the Membership Cards mail task to merge with your custom membership card. 12-Field Membership Cards With the 12-field card, you can include up to 12 fields of your choice on the membership card. When you select the fields to use, a membership card graphic appears so you can see how the membership card looks with the fields you select. Preprinted Membership Cards Note: You can customize your organization’s forms with your colors, logo, and personal messages. Blackbaud forms align with software printouts. For more information or to order Blackbaud standard forms, send an email message to [email protected] or call 1-866-4-BB-Forms (1-866-422-3676). You can view samples of forms at forms.blackbaud.com. When you use the Preprinted card, the program automatically prints the constituent’s name, membership category, and membership expiration date on the card. You can also select the constituent ID, membership ID, or Social Security Number; the membership barcode; address barcode; endorsement line; address; and phone number to print on the card. A VA I L A B L E M A I L TA S K S 19 Custom Membership Cards When you create custom membership cards, you must design a membership card form in an application that supports mail merges. On this membership card form, add merge fields as necessary to personalize the membership card for each member. After you design a custom form, you can use the Membership Cards mail task to gather information for the members who receive cards and export this information as a data file to the application where you created the custom membership card form. Once you export a data file, you can merge the information with the custom membership card to create a personalized membership card for each member. To use the Membership Cards mail task to export data, select Custom data file in the Card type field on the General tab. For more information, see “General Tab” on page 41. Name Tags If you use the optional module Event Management, you can use the Name Tags mail task to print name tags for the participants of your event, dinner, or meeting. For example, if you hold an annual convention, you can print a name tag for each participant of the event. Name tags can also print for guests who do not have a participant record. The Raiser’s Edge is compatible with many types of name tags. However, if the name tag you want to use is not compatible with The Raiser’s Edge, you can export the information gathered by the Name Tags mail task to an application compatible with the name tag you want to use. You can also print Name Tags from participant records. For more information, see the “Participant Record” section of the Event Management Data Entry Guide. Phonathon Forms You can use the Phonathon Forms mail task to provide a detailed biographical and giving history for each constituent you intend to contact for donations over the telephone. When you contact the constituents, you can use the information on the phonathon forms to make each call more personal. You can choose to include on your phonathon forms the constituent’s address and multiple telephone numbers where she can be reached; total, average, and largest gift amounts given in the past; the constituent’s ID, profession, and whether her employer is a Matching Gift company. Note: You can customize your organization’s forms with your colors, logo, and personal messages. Blackbaud forms align with software printouts. For more information or to order Blackbaud standard forms, send an email message to [email protected] or call 1-866-4-BB-Forms (1-866-422-3676). You can view samples of forms at forms.blackbaud.com. In the top left section of the form, you can print a constituent’s personal information, such as the giving history or the names of family members. In the top right section of the form, you can record the telephone call outcome, including the pledge amount and comments. Phonathon forms also contain a section to record a new address for the constituent and a section to record the date you add this information in The Raiser’s Edge. If a constituent makes a pledge, you can detach the bottom section of the phonathon form to mail to the constituent as a pledge reminder. The pledge reminder section prints with the constituent’s address and has a place to write the pledge amount and date. You can print a Pledge barcode on the phonathon form, which you select on the Fields to Include tab. A Pledge barcode is made up of the Constituent ID, Fund ID, Appeal ID (or Package ID, if there is one), and a checksum digit that ensures data accuracy. When you receive the tear-off portion of the phonathon form back from the donor with a gift, simply scan the barcode while you enter gift information in Batch and constituent, gift type, campaign, fund, and appeal information automatically fills in. This way, you ensure accuracy and cut down on data reentry. For more information about the pledge barcode, see the Output Options section of the Format Tab chapter. For more information about scanning a gift or pledge barcode in Batch, see the Batch Guide. 20 C H A P T E R Note: A barcode on the top portion of the phonathon form that contains only appeal information begins with a “P”; one that contains appeal and package information begins with a “G”. A barcode on the bottom tear-off portion of the phonathon form that includes only appeal information begins with a “C”; one containing appeal and package information begins with an “F”. You can see the sections on the sample phonathon form. A VA I L A B L E M A I L TA S K S 21 Place Cards Note: For a participant to receive a name tag or place card, you must click Tags/Cards on the General 1 tab of a participant record and set up the name tag or place card information. If you use the optional module Event Management, you can use the Place Cards mail task to print place cards for the participants of your event, dinner, or meeting. For example, if you hold a formal dinner meeting, you can print a place card for each participant of the dinner. You can also print place cards for guests who do not have a participant record. The Raiser’s Edge is compatible with many types of place cards. However, if the place card you want to use is not compatible with The Raiser’s Edge, you can export the information gathered by the Place Cards mail task to an application compatible with the place card you want to use. You can also print Place Cards from participant records. For more information, see the “Participant Record” section of the Event Management Data Entry Guide. Quick Letters Tip: If you use Microsoft Word to perform a mail merge, see The Raiser’s Edge & Microsoft Office Integration Guide for a procedure using the Word Merge Wizard. The Quick Letters mail task provides a fast and easy way to create letters using information from The Raiser’s Edge. The fields included in this mail task, such as Constituent ID, Addressee/Salutation, and Address, are preselected and not editable, which enables the quick and easy export of the most basic mailing information from records in your database into the letter you have written. Quick Letters is a useful tool if you do not want to send personalized letters with, for example, donors’ specific gift amounts, but merely want to send off a quick, informative letter telling all your constituents about a meeting the following week. In the Quick Letters mail task, all fields but one are selected for you. In a word processor or other application that supports mail merges, you can write a letter, inserting merge fields for the basic mailing information included in Quick Letters, and export this preselected information from your database into your merged letter. If you use Microsoft Word to perform a mail merge, you can use the Word Merge Wizard. For more information, see The Raiser’s Edge & Microsoft Office Integration Guide. Receipt Report The receipt report lists all the gifts that have receipt numbers within a range you specify. To determine the constituents who received a receipt for their gifts, you can use the Receipt Report mail task. To verify you sent out all the receipts you printed, you can also use the receipt report as a checklist. For a gift to be included in the receipt report, the receipt number entered on the gift record must fall within the range specified in the Receipt Report mail task. Also, Receipted must be entered in the Receipt field on the gift record. Note: When you use the Receipts mail task, you can print a receipt report by marking Print receipt report on the Format tab. For more information, see “Format Tab” on page 181. 22 C H A P T E R The receipt report contains the constituent’s name; receipt number; gift date, amount, and type; the fund to which the gift is designated; and any information entered in the Reference field on the Gift tab of a gift record. You can customize the report by adding formatting, such as subtitles and footers. Receipts Note: For a constituent to receive a receipt for a gift, you must select Not Receipted in the Receipt field on the Gift tab of a gift record. A VA I L A B L E M A I L TA S K S 23 You can use the Receipts mail task to print receipts for every gift you enter in The Raiser’s Edge. Receipts confirm that your organization received the gift and help constituents track their donations for tax purposes. When you design the receipt, you can choose whether to print the total gift amount or only the tax-deductible portion of the gift. On the Bio 2 or Org 2 tab of a constituent record, you can select, in the Receipt type field, whether the constituent receives a receipt for every gift donated or a consolidated receipt that details all gifts donated within the date range you select on the Receipts mail task. For more information about how to select the type of receipt a constituent receives, see the Managing Biographical Information section of the Biographical Information chapter of the Constituent Data Entry Guide. When you print a receipt, the program can update the gift record with the receipt number and date and change the status of the gift to Receipted. Once a gift has a receipt number and a status of Receipted, the program does not receipt the gift again. When the program adds a receipt number, it does not delete an existing receipt number from the gift record unless the constituent receives a consolidated receipt. For example, if you print a consolidated receipt for gifts with a receipt number already entered on the gift record, the program assigns a new receipt number to all gifts that appear on the consolidated receipt. Types of Receipts You can use several different ways to print a receipt in Mail. You can use preprinted paper of a standard design, which you can order from Blackbaud, to print three receipts per page. You can use a standard preprinted receipt but print one per page and add a custom message to it. You can also create a custom receipt in an application that supports mail merges. Preprinted Receipts Note: You can customize your organization’s forms with your colors, logo, and personal messages. Blackbaud forms align with software printouts. For more information or to order Blackbaud standard forms, send an email message to [email protected] or call 1-866-4-BB-Forms (1-866-422-3676). You can view samples of forms at forms.blackbaud.com. The Preprinted receipt provides the constituent basic gift information such as the constituent’s name, eligible gift amount for tax purposes, and gift date. Preprinted receipts print three per page. You can also print the total gift amount, receipt number, value of benefits the constituent receives for the gift, year-to-date amount donated by the constituent, date you print the receipt, gift type, fund to which the gift is designated, constituent ID, Social Security Number, address, and address barcode. Sample Receipt 24 C H A P T E R One Per Page Receipts To add a custom message to your receipts, mark One per page on the General tab of the Receipts mail task. Receipts then print one per page, with the standard preprinted receipt information appearing on the bottom third of the page and the top portion of the page can be used for a personal message. For more information, see “Create One Per Page Mailings” on page 259. Custom Receipts Tip: To add a custom message to a standard preprinted receipt, use the One per page checkbox, instead of creating an entire custom form and performing a mail merge. When you create custom receipts, you must design a receipt form in an application that supports mail merges. On this receipt form, add merge fields as necessary to personalize the receipt for each constituent who made a donation to your organization. After you design a custom form, you can use the Receipts mail task to gather information for the constituents for which you want to print receipts and export this information as a data file to the application where you created the custom receipt form. Once you export a data file, you can merge information from your database with the custom receipt to create a personalized receipt for each constituent. To use the Receipts mail task to export data, select Create custom data file in the Receipt type field on the General tab. For more information, see “General Tab” on page 41. Reminder Report With the Reminder Report mail task, you can print a report to determine which constituents received pledge or recurring gift reminders, based on the selections you make in the Reminders mail task. You can also use this report to verify that a reminder was mailed to a constituent. You can print a reminder report only after printing pledge and recurring gift reminders. Note: You can also export the contents of the pledge reminders report as a data file or send the contents of the report as email. For more information, see “Export a Mailing” on page 242 and “Send a Mailing as Email” on page 254. The reminder report contains the name of each constituent who receives a reminder, the pledge or recurring gift date, the fund to which the pledge or gift was designated, the pledge or gift amount, and any information entered in the Reference field on the Gift tab of the gift record. The reminder report also lists the total number of pledges and the total monetary amount included in the report. To customize the report, you can add formatting such as subtitles and footers. A VA I L A B L E M A I L TA S K S 25 Sample Reminder Report Reminders You can send reminders to constituents who have an overdue or outstanding balance on a pledge or a recurring gift. When you send reminders to your constituents, you can improve the financial return for the pledges you received by reminding constituents to pay their pledges. You can send a pledge reminder that contains information about a pledge or pledge installment. The program selects the pledges for which you want to print reminders based on whether you choose to send reminders per pledge or pledge installment. To send a pledge reminder to a constituent, you must mark Send reminders on the Gift tab of a gift record. 26 C H A P T E R It is very important you understand how the program processes reminders so your reminders print correctly. The program selects the recurring gifts, pledges, or pledge installments that need reminders based on the start and end dates you enter when you set up the Reminders mail task. The start and end dates represent the date range that the original pledge gift date must fall between to be included in the process. On the General tab, in the Reminder type field, you select the type of reminder to print. You can create several types of reminders for pledges or recurring gifts in Mail. You can print the reminders on 3-column or 5-column forms you can order from Blackbaud. You can print a preprinted reminder using a full page and add a custom message. You can also design a custom reminder form in an application that supports mail merges and export the Raiser’s Edge data to merge with your custom reminder. For information about the reminder types, see “Types of Reminders” on page 26. On the General tab, you also select whether to print reminders per pledge or per installment. For information about per pledge and per installment reminders, see “Per Pledge and Per Installment Reminders” on page 33. In the Run date field on the General tab, enter the date to run the process. The program uses the run date to determine which pledge installments to include and to calculate the total balance due for those installments. Typically, if you select to include pledges that have gift dates within a “Specific range”, the run date is the same as the end date. For example, a constituent has a pledge with a gift date of 10/01/2007, with four monthly installments to be made on 03/15/2008, 04/15/2008, 05/15/2008, and 06/15/2008. For the constituent to receive a pledge reminder in March, the Start and End dates must contain 10/01/2007 to capture the original pledge. To capture the March pledge installment and calculate its amount due, the Run date must be on or after 03/15/2008. If the Run date is 04/15/2008, the March and April pledge installments are captured and the balance due includes the balance of both installments. The Fund Description does not print on reminders for split gifts. Instead, the following phrase prints: This pledge has been applied to multiple funds. Types of Reminders Note: We recommend you process pledge reminders at regular intervals. For example, process your pledge reminders on a weekly or monthly basis. There are several ways to create reminders for pledges or recurring gifts in Mail. You can print the reminders on 3-column or 5-column forms you can order from Blackbaud. You can print a preprinted reminder using a full page and add a custom message. You can also design a custom reminder form in an application that supports mail merges and export the Raiser’s Edge data to merge with your custom reminder. The following sections explain specific information about the 3-column, 5-column, one per page, and custom reminders. These sections also include examples illustrating how each reminder type prints when you select per pledge and per installment. When you select the type of reminder to create, you must also select whether to generate reminders per pledge or per installment. For information about the differences between a per pledge reminder and a per installment reminder, see “Per Pledge and Per Installment Reminders” on page 33. 3-Column Reminders Note: The reminder Run date is the date you print the reminders. A VA I L A B L E M A I L TA S K S 27 The 3-column reminder form displays the total amount of the pledge or recurring gift, amount paid, and amount due. You can print this reminder with the gift date, the reminder run date, or no date and the fund to which the pledge is designated. Total Pledge. The Total Pledge column displays the total amount of the pledge or recurring gift for which you are printing the reminder, regardless of whether you print reminders per installment or per pledge. For example, if you print a reminder for a pledge installment, the Total Pledge column displays the total amount pledged. If multiple installments for a single pledge fall within the start and end dates you select, the program prints a separate pledge reminder for each installment. Amount Paid. The Amount Paid column displays the total amount a constituent paid toward the pledge or recurring gift, regardless of whether you print reminders per installment or per pledge. Any write-offs or payments made are included in the calculation of the Amount Paid. For example, a constituent pledged $100 to your organization and has not yet made any payments. If you write off $25 on the pledge and print a reminder, the Amount Paid column displays $25. Balance. If you print reminders per installment, the Balance column displays the amount due for the installment for which you are printing the reminder. Any previous write-offs or payments to this installment are subtracted from the Balance. For example, a constituent pledged to give $100 to your organization in one installment and has not yet made any payments. If you write off $25 on the pledge and print a reminder, the Balance column displays $75. When you print reminders per pledge, the Balance column displays the balance due for the entire pledge as of the date you print or export the reminders. Any previous write-offs or payments to this pledge are subtracted from the Balance. 28 C H A P T E R Example for 3-Column Pledge Reminders Scenario: On January 1, 2001, Mary Sanders pledges to pay your organization $50 a month for a year. This is her installment and payment schedule as of June 15, 2001. Scenario: You are trying to learn the difference between 3-column pledge reminders printed per installment and per pledge, so you decide to print a pledge reminder for Mary using both options. When you set up the Pledge Reminder mail task, you enter a Start date of 05/15/2001; an End date of 06/15/2001; and a Run date of 06/15/2001. The Run date is the date you print the reminders. One Reminder per Installment Note: If multiple installments for a single pledge fall within the start and end dates you select, the program prints a separate pledge reminder for each installment. When you print Mary’s pledge reminder using the Per installment option, her only pledge installment falling within the start and end dates you selected is the installment due June 1, 2001. This is the 3-column pledge reminder that prints for Mary’s pledge installment due June 1, 2001. A VA I L A B L E M A I L TA S K S 29 The Total Pledge column displays the total amount Mary pledged to give to your organization. Because Mary pledged to give $50 a month for the next year, the Total Pledge is $600. The Amount Paid column displays the total amount she paid toward the pledge. Mary has paid four installments of $50, so the Balance is $200. The Balance column displays the total amount due for the installment due on 06/01/2001. Any previous write-offs or payments to this installment are subtracted from the Balance. Because you have not made any write-offs or payments for this installment, the Balance is $50. Mary’s unpaid installment due on 05/01/2001, is not included in the Balance because it does not fall between the start and end dates you selected. One Reminder per Pledge Note: You can customize your organization’s forms with your colors, logo, and personal messages. Blackbaud forms align with software printouts. For more information or to order Blackbaud standard forms, send an email message to [email protected] or call 1-866-4-BB-Forms (1-866-422-3676). You can view samples of forms at forms.blackbaud.com. When you print Mary’s pledge reminder using the Per pledge option, Mary does not receive a reminder because the gift date for her pledge, 01/01/2001, does not fall within the start and end dates you selected. If you change the Start date to 12/15/2000, and the End date to 01/15/2001, Mary’s pledge reminder prints as shown. Note: If Mary has multiple pledges to your organization, separate pledge reminders print for each pledge, unless you consolidate the pledge reminders. For more information about consolidating pledge reminders, see “Format Tab: Output Options” on page 183. The Total Pledge column displays the total amount Mary pledged to your organization for this pledge. Because Mary pledged to give $50 a month for the next year, the Total Pledge is $600. The Amount Paid column displays the total amount she paid toward the pledge. Mary has paid four installments of $50, so the Amount Paid is $200. The Balance column displays the total amount due for the pledge as of the Run date. Because you printed this reminder on 06/15/2001, the installments due between July and the end of the year are not included in the Balance because their due dates occur after the date you print the reminder. Because Mary has two unpaid installments due before 06/15/2001, the Balance is $100. 5-Column Reminders Note: You can customize your organization’s forms with your colors, logo, and personal messages. Blackbaud forms align with software printouts. For more information or to order Blackbaud standard forms, send an email message to [email protected] or call 1-866-4-BB-Forms (1-866-422-3676). You can view samples of forms at forms.blackbaud.com. 30 C H A P T E R The 5-column reminder displays the total amount of the pledge, total amount billed, total amount the constituent paid, planned payment, and total amount due. You can also print the gift date, the reminder run date, or no date and the fund to which the pledge or recurring gift is designated. Total Pledge. The Total Pledge column displays the total amount of the pledge for which you are printing the reminder, regardless of whether you are printing reminders per installment or per pledge. For example, if you print a reminder per installment, the Total Pledge column displays the total amount pledged. Total Billed. If you print reminders using the Per installment option, the Total Billed column displays the total amount of all paid and unpaid installments with a due date occurring before the due date of the installment for which you are printing the reminder. For example, a constituent pledged to give your organization $30 in three installments, which are due January 1, February 1, and March 1. The constituent pays the first installment but fails to pay the second installment. If you send a reminder for the third installment due on March 1, the Total Billed column displays $20. This amount is the total for all installments due before the installment for which you are printing the reminder. When you print reminders per pledge, the Total Billed column displays the total amount for all installments with a due date that occurs before the Run date, which is the date you plan to print the reminders. The Total Billed does not include any write-offs made to the pledge or installments. Total Paid. The Total Paid column displays the total amount the constituent has paid toward the pledge or recurring gift, regardless of whether you print reminders per installment or per pledge. Any write-offs or payments made for the pledge are included in the calculation of the Total Paid. For example, a constituent pledged $100 to your organization and has not yet made any payments. If you write-off $25 on the pledge and print a reminder, the Total Paid column displays $25. Planned Payment. When you print one reminder per installment, the Planned Payment column displays the amount due for the current installment. Any payments made toward the installment are not included in the Planned Payment. Any write-offs you made to the installment are subtracted from this amount. For reminders printed per pledge, this column displays the total amount of all installments with a due date that occurs before the Run date. Any write-offs made to the pledge or pledge installment for which you are printing the reminder is subtracted from the Planned Payment. For example, you are printing a per pledge reminder for a $100 pledge. Because you have written off $30 of this pledge, the Planned Payment column displays $70. Total Due. When you print one reminder per installment, the Total Due column displays the total amount due for the installment. Any write-offs or payments made to the installment are considered in the calculation of the Total Due. For reminders printed per pledge, this column displays the total amount due for the pledge as of the date you print the reminders. This column is calculated by subtracting the Total Paid amount from the Total Billed amount. A VA I L A B L E M A I L TA S K S 31 Example for 5-Column Pledge Reminders Scenario: On January 1, 2001, Mary Sanders pledges to pay your organization $50.00 a month for a year. This is her installment and payment schedule as of June 15, 2001. Scenario: You are trying to learn the difference between 5-column pledge reminders printed per installment and per pledge, so you decide to print a pledge reminder for Mary using both options. When you set up the Pledge Reminder mail task, you enter a Start date of 05/15/ 2001; an End date of 06/15/2001; and a Run date of 06/15/20011, which is also the day you print the pledge reminders. One Reminder per Installment Note: If multiple installments for a single pledge fall within the start and end dates you select, the program prints a separate pledge reminder for each installment. When you print Mary’s pledge reminder using the Per installment option, her only pledge installment falling within the start and end dates you selected is the installment due 06/01/2001. This is the 5-column pledge reminder that prints for Mary’s pledge installment due 06/01/2001. 32 C H A P T E R The Total Pledge column displays the total amount Mary pledged to give your organization. Because she pledged to pay $50 a month for the next year, the Total Pledge is $600. The Total Billed column displays the total monetary amount of all installments due before the June 1 installment. In this case, this is the sum of the installments due in January, February, March, April, and May. Total Billed does not include the amount of the installment for which you are printing the reminder. The Total Paid column displays the total for all payments Mary made toward the pledge. Because Mary paid four payments of $50, the Total Paid is $200. The Planned Payment column displays the total amount due for the installment due on June 1. Because no write-offs have been made for this installment, the Planned Payment is $50. The Total Due displays the amount due for the installment. Because you have not made any payments or write-offs to the pledge due on June 1, the Total Due is $50. One Reminder per Pledge When you print Mary’s pledge reminder using the Per pledge option, Mary does not receive a reminder because the gift date for her pledge, 01/01/2001, does not fall within the start and end dates you selected. If you change the Start date to 12/15/2000, and the End date to 01/15/2001, Mary’s pledge reminder prints as shown. Again, the Total Pledge column displays the total amount Mary pledged to your organization for this pledge. The Total Billed column displays the total monetary amount for all installments due before the Run date, which is June 15. In this case, this is the sum of the installments due in January, February, March, April, May, and June which equals $300. The Total Paid column displays the total for all payments Mary made toward the pledge. Because Mary paid four payments of $50, the Total Paid is $200. The Planned Payment column displays total amount of all installments with due dates occurring on or before the Run date. Because no write-offs have been made for this pledge, the Planned Payment is $300. The Total Due displays the amount due for the pledge and is calculated by subtracting the Total Paid amount from the Planned Payment amount. Therefore, the Total Due is $100. One Per Page Reminders To add a custom message to your reminders, mark One per page on the General tab of the Reminders mail task. Reminders then print one per page with the standard preprinted reminder information appearing on the bottom third of the page and the top portion of the page can be used for a personal message. For more information, see “Create One Per Page Mailings” on page 259. Custom Reminders Tip: If you only want to add a custom message to a standard preprinted reminder, use the One per page checkbox, instead of creating an entire custom form and performing a mail merge. A VA I L A B L E M A I L TA S K S 33 When you create custom reminders, you must design a custom reminder form in an application that supports mail merges. On this form, add merge fields as necessary to personalize the form for each constituent who receives a reminder. After you design a custom form, you can use the Reminders mail task to gather information about the constituents and pledges or recurring gifts and export this information as a data file to the application where you created the reminder form. Once you export a data file, you can merge the information from your database with the custom reminder form to create a personalized form for each constituent. For a detailed description of the calculated fields available in the Gifts folder on the Fields to Include tab for the Create custom data file Reminder type, such as Total pledge or Total paid, see the definitions in the section, “5-Column Reminders” on page 24. The following calculated fields appear only for Custom reminders: Total Pledge Balance. The Total Pledge Balance shows the amount of the master pledge minus payments and write-offs. This amount is not dependant on the Run date. Running Pledge Balance. The Running Pledge Balance shows the amount due for the pledge as of the Run date. If you select the Per pledge option on the General tab, the amount shown is for the master pledge. If you select Per installment, the calculated amount is for the installment. Per Pledge and Per Installment Reminders On the General tab, you select whether to print reminders per pledge or per installment. • To print one reminder per pledge, even if multiple installments are due for the pledge, select Per pledge. The program prints one reminder for every pledge with a gift date that falls within the date range you enter in the Include Gifts with these Dates frame on the General tab. For example, a constituent has an installment due on 01/15/2008 and 02/15/2008. If you select a start date of 01/01/2008 and an end date of 03/01/2008, two reminders print for this constituent. We recommend you enter a date range that includes the date of the original pledge. • To print one reminder per installment, select Per installment. The program prints on reminder for every installment that falls within the date range you enter in the Include Gifts with these Dates frame on the General tab. For example, a constituent has pledge installments due on 01/15/2008 and 02/15/2008. If you select a start date of 01/01/2008 and an end date of 03/01/2008, two reminders print for this constituent. If you select Per installment, you can select to include a Reminder barcode on the Fields to Include tab. If the constituent returns the reminder with his pledge or recurring gift payment, you can simply scan the barcode when you enter the gift in Batch, and information about the gift automatically fills in the gift fields. This helps ensure accuracy and cuts down on data reentry. For more information about how to scan a reminder barcode in Batch, see the Batch Guide. Your selection to run reminders Per pledge or Per installment affects the Installment Due On column on the Reminders Sent screen, accessible from the gift record. If you select Per pledge, the Installment Due On column lists the pledge date as the due date. If you select Per installment, the Installment Due On column lists the installment date as the due date. Renewal Notices Note: For a member to receive a renewal notice, you must mark Send renewal notices on the Membership tab of a membership record. 34 C H A P T E R If you use the optional module Membership Management, you can print renewal notices for memberships that have lapsed or will lapse. Sending renewal notices can increase your membership retention rate. For example, last year John Smith donated $50 to become a member of Friends of the Orchestra. His membership is scheduled to expire in three months. You can send him a renewal notice to encourage and remind him to extend his membership an additional year. If you do not send a renewal notice, John may forget to extend his membership or decide it is not worth the trouble to contact you again. For a member to receive a renewal notice, you must mark Print renewal notices on the Membership tab of a membership record. For more information about Membership Management, see the Membership Data Entry Guide. You can select on the Fields to Include tab to print a Renewal barcode. If the constituent returns the renewal notice with her payment, you can simply scan the barcode while you enter gifts in Batch, and information about the gift automatically fills in the appropriate fields. This way, you ensure accuracy and cut down on data reentry. The barcode begins with a “D” or “M”, depending on whether it is being sent to the donor or member. For more information about scanning a reminder barcode in Batch, see the Batch Guide. Types of Renewal Notices In Mail, you can print different types of renewal notices. You can print One third, Two thirds, or Full Page renewal notices using forms you can order from Blackbaud. You can also design a custom renewal notice form in an application that supports mail merges and export the data to the application to merge with the form. One Third, Two Thirds, and Full Page Notices The One third, Two thirds, and Full page renewal notices display the date you print the notice, the date the membership expires if the constituent renews the membership, and the current membership category. You can customize renewal notices by entering a short message that prints at the top of the notice. The renewal notice size you select determines the number of text lines available for an additional message. One third page forms have no text area; Two thirds page forms have 20 lines of space available for text; and Full page forms have 42 lines of space available for text. Sample One third page renewal notice Note: You can customize your organization’s forms with your colors, logo, and personal messages. Blackbaud forms align with software printouts. For more information or to order Blackbaud standard forms, send an email message to [email protected] or call 1-866-4-BB-Forms (1-866-422-3676). You can view samples of forms at forms.blackbaud.com. The One third page renewal notices print three per page. A VA I L A B L E M A I L TA S K S 35 Sample Full page renewal notice On the Full page renewal notice, you have space available to print a message. The two thirds page renewal notice is not pictured, but is useful if you want more print space than the One third page, but do not need the Full page renewal notice. Custom Renewal Notices When you create custom renewal notices, you must design a renewal notice form in an application that supports mail merges. On this renewal notice form, add merge fields as necessary to personalize the renewal notice for each member. After you design a custom form, you can use the Renewal Notices mail task to gather information for the members for which you want to print renewal notices and export this information as a data file to the application where you created the custom renewal notice form. Once you export a data file, you can merge the information with the custom renewal notice to create a personalized notice for each member. To use the Renewal Notices mail task to export data, select Create custom data file in the Notice type field on the General tab. For more information, see “General Tab” on page 41. Volunteer Follow-Up Letters Tip: If you use Microsoft Word to perform a mail merge, see The Raiser’s Edge & Microsoft Office Integration Guide for a procedure using the Word Merge Wizard. 36 C H A P T E R If you use the optional module Volunteer Management, the Volunteer Follow-up Letters mail task is available. Use this mail task to respond to volunteers about job assignments and specific information for those jobs. This mail task differs from the Follow-up Letters mail task in that it is used specifically for volunteers, instead of actions. The Volunteer Follow-up Letters mail task is similar to the other mail tasks in the Letters category. It helps you export constituent information to another application to merge with an existing mail merge letter. In an application that supports mail merges, you can write a letter to correspond with a group of volunteer records. In this letter, insert merge fields, such as Job Name and Start Date to personalize the letter for each volunteer. For example, you could write “Thank you for volunteering for [merge field] on [merge field].” Using the Volunteer Follow-up Letters mail task, you can export the Job Name and Start Date fields to create a personal letter for each volunteer who receives a follow-up letter. For more information about Volunteer Management, see the Volunteers & Jobs Data Entry Guide. Truncation With the Membership Card Truncation Report and Label Truncation Report mail tasks, The Raiser’s Edge offers you the ability to check how the information you choose to include on the card or label prints on the format you specify. You can also check the truncation on the Format tab of the Labels, Place Cards, Name Tags, and Membership Cards mail tasks. Note: If you have Membership Management, you can print membership cards for any membership in your database. For example, before you print membership cards, you can print a membership card truncation report to determine if the member’s biographical and address information is too long to fit on the membership card you designed. This report can check both horizontal and vertical truncation. It is important to understand how the program truncates text, to ensure that all the information fields you want to include d actually fit on the specified card, label, or name tag type. Horizontal Truncation Horizontal truncation checks to make sure the information you select to print fits horizontally on the card, label, or name tag you design and will not run off the sides. When the program checks for horizontal truncation, it determines which cards, labels, or name tags have too many characters on a single line for the current font and font size. When you check for horizontal truncation, you must specify a range of font sizes to test. You can test a maximum of 10 font sizes on each report. A VA I L A B L E M A I L TA S K S 37 At the top of the report, the card, label, or name tag type and font you selected on the mail task displays. Because you are checking both horizontal and vertical truncation, the report is divided into two sections. The Horizontal Truncations section determines the longest line on each card or label processed by the mail task. The Font Size table displays each font size within the font size range specified on mail task. For each card, name tag, or label, the report displays No if the information does not truncate using a particular font size and Yes if the information does truncate. Vertical Truncation When you check for vertical truncation, you must specify a range of font sizes to test. For each font size, the report displays the number of lines that fit vertically on the membership card you are using. Then, it prints the original and truncated membership card contents for every card, label, or tag that truncates, based on the fields and font size you select. You can test a maximum of 10 font sizes per report. Note: The membership barcode, expiration date, and membership category fields never truncate from the Preprinted membership card. For membership cards, the method the program uses to test vertical truncation depends on whether you use the Preprinted or 12-field membership card. When you use the Preprinted membership cards, you can select many fields to appear on the membership cards. However, all fields you select may not fit on the card. When you select more fields than the Preprinted membership card can accommodate, the program eliminates the fields from the membership card in this order: 1. Phone number 7. Address line 1 2. Constituent ID 8. City, State, ZIP 3. Address line 5 9. Address barcode 4. Address line 4 10. Endorsement line 5. Address line 3 11. Formatted name 38 C H A P T E R 6. Address line 2 When you use the 12-field membership card, the program does not truncate any fields from the card because you cannot select more than 12 fields to print on the card. However, you can check vertical truncation to determine whether the font size you use is too large for the line height of the card. When you select more fields than the label and font size can accommodate, the program eliminates fields from the label in this order: 1. <blank row(s)> 18. LOT 2. Attribute category 1, 2, 3, etc. 19. Address line 5 3. Relation 20. Address line 4 4. Birth date 21. Address line 3 5. Phone number 22. Address line 2 6. User defined message 23. Spouse name line 2 7. Membership renewal date 24. Spouse name line 1 8. Membership ID 25. Addressee line 2 9. Membership expiry date 26. Addressee line 1 10. Nickname 27. Country 11. Class of 28. Primary business name 12. Additional addr/sal 29. Address line 1 13. ID 30. City, State, ZIP 14. Segment appeal 31. Contact name line 2 15. Constituent code 32. Contact name line 1 16. Contact position 33. Barcode 17. CART 34. Endorsement line The Vertical Truncations section of the report displays the original and truncated information for each label in the mailing that truncates vertically. For example, you are printing a label for Mark Adamson. When you set up the Label Truncation Report mail task, you decide to check the font sizes between 10 and 19 to determine whether Mark’s information truncates. For Mark’s label, the program checks each font size, beginning with 10, to determine whether the information truncates vertically. When the program checks the font size 17, the user-defined message on Mark’s label truncates. For the font size 17, the program prints Mark’s original and truncated label in the report. Because Mark’s label also truncates vertically using the font sizes 18 and 19, the original and truncated label for the font sizes 18 and 19 is also included in the Vertical Truncations section of the report. A VA I L A B L E M A I L TA S K S 39 Sample Truncation Report 40 C H A P T E R chapter 3 General Tab Overview . . . . . . . . . . . . . . . . . . . . . . . . . . . . . . . . . . . . . . . . . . . . . . . . . . . . . . . . . . . . . . . . . . . . . . . . . . . . . . . . . . 42 Parts of the Screen Defined. . . . . . . . . . . . . . . . . . . . . . . . . . . . . . . . . . . . . . . . . . . . . . . . . . . . . . . . . . . . . . . . . . . . 42 42 C H A P T E R Overview No matter what mail task you use, the main purpose of the General tab is to help you select a base group of records to be processed. After you choose a base group of records, you can define this group using other options, fields, and checkboxes available on the General tab and other tabs in the mail task. Parts of the Screen Defined All available frames, fields, checkboxes, and options are listed in alphabetical order below with descriptions. Not all fields and options are pictured in the screen shots shown here or are available on all mail tasks. Action Priorities. In the Action Priorities frame, you can include actions based on the priority level entered on the General tab of an action record. To select the priority level for the actions in the mailing, mark the appropriate checkboxes in the Action Priorities frame. For example, if you are creating a general follow-up letter for normal and low priority actions, mark Normal priority and Low priority. Note: You must mark one or more checkboxes in the Action Progress frame because the program includes actions for follow-up letters based on the progress status you select. Action Progress. In the Action Progress frame, you can include actions based on whether the status entered on the General tab of an action record is Open or Completed. To select a progress status for the actions in the mailing, mark Open or Completed in the Action Progress frame. To include both Open and Completed actions, mark both checkboxes. Base Summary on Gifts with these Dates. See Date and Date to Use. Card type. See Type. G E N E RA L TA B 43 Check for horizontal truncations. Mark Check for horizontal truncation to check a mailing, such as membership cards, for horizontal truncation before you print the cards. For more information about how the program determines whether a mailing piece truncates, see “Horizontal Truncation” on page 36. Check for vertical truncations. Mark Check for vertical truncation to check a mailing for vertical truncation before you print. For more information about how the program determines whether a mailing piece truncates, see “Vertical Truncation” on page 37. Create for. In the Create for field, select the record type for which you want to print mailing pieces. You can select: • Constituents • Relationships • Honor/Memorials Note: In the Create for field, the Honor/Memorials option appears only if you use the optional module Honor/Memorial Tracking. The Participants selection appears only if you use the optional module Event Management. • Participants If you select Constituents, you can print, for example, a card for every constituent record in your database. However, constituents can be eliminated from the mailing using other options, fields, and checkboxes on the mail task. When you select Relationships, you can print a mailing piece for each relationship record in your database. If a relationship record is linked to multiple constituent records, a mailing piece prints for each. For example, John Smith has two children, Susan and Martha, and he is linked as a relationship on both of his daughters’ constituent records. Two cards will print for him. Or, for example, if you choose to include only selected records from a constituent query, when you select Relationships, you print mailing pieces for the relations of the constituents in the query. Addresses for relationships are taken from the relationship record. When an address is not present on the relationship record, an address is selected based on the selections made in Step 4 of the Ind. Address or Org. Address tab. When you select Honor/Memorials, you can print a card for all constituents with the Constituent is an Honor/Memorial checkbox marked on the Honor/Memorial tab of their constituent records. When you select Participants, you can print a mailing piece for each participant in your database. Addresses for participants are taken from the participant record. When an address is not present on the participant record, an address is selected based on your entry in the For records who do not have an address field on the Format tab. For more information, see “Format Tab: Output Options” on page 183. Note: If you sort the mailing using the PostalSaver tab or Sort on the Format tab, records appear in the output query using the same order. Create output query. An output query is a static query of all records included in a mailing. For example, when you print appeal cards for a group of constituents, you can create an output query that contains the names of all constituents who received an appeal card. Later, you can use this query to print address labels or envelopes for the constituents who received appeal cards. Note: Not all output query types are available for all mail tasks. Mark the Create output query checkbox on the General tab of the mail task you are using to see the selections available. To create an output query that contains the records included in the mailing, mark Create output query. When you mark this checkbox, on some mail tasks specify also whether to create a Constituent, Gift, Individual, Organization, Action, Job, Participant, or Membership output query.For more information about query types or creating and using queries, see the Query chapter of the Query & Export Guide. Credit Matching Gifts To. When a constituent donates a gift, a matching gift company can also donate a matching gift. When you create a mailing such as appeal cards, you must specify in the Credit Matching Gifts To frame how the program should credit the donor and the matching gift company in the giving summary. You can credit: 44 C H A P T E R • Donor • MG Company • Both Note: The information you enter in the Credit Matching Gifts To frame affects the way gift information prints in your mailing. It does not change the information entered on the Matching Gifts tab of a gift record. When you select Donor, the donor, or the employee of the matching gift company, receives credit for the matching gift. If you select MG Company, the matching gift company receives credit for the matching gift. When you select Both, both the donor and matching gift company receive full credit for the matching gift. Date. In the Date field, enter a date, such as Today, Yesterday, or <Specific Range>. When you select <Specific Range> in the Date field, the Start and End fields appear so you can enter the date range to use. For example, when you print appeal cards, you may want to print the constituent’s giving history for the last year. To enter this date range, in the Date field, select Last calendar yr. Date of Notice. In the Date of Notice field, enter the printing date for the renewal notices. The program uses the Date of Notice and Include Memberships that Expire within these Dates frame to determine whether a membership is eligible for a renewal notice based on the expiration date of the membership. Membership is tracked through Membership Management. Date to use. In the Date to use field, select whether you want the program to use the Gift date or the GL post date to determine if a gift should be included in the mailing. Exclude job assignments with letter sent. If you use the optional module Volunteer Management, mark this checkbox to exclude from the mailing job assignments that have Letter sent marked on the job assignment record. To send another letter to those volunteers who already have the Letter sent checkbox marked on their job assignment record, unmark Exclude job assignments with letter sent. Exclude members who have received notices after. You can exclude members from the mailing based on the mailing date of their last renewal notice. This date appears in the Renewal History grid on the membership record. If you mark Exclude members who have received notices, you must enter the date used to exclude memberships from the mailing. Membership is tracked through Membership Management. Note: On the Mail tab of User Options, you can select a default for the Form font and Font size fields. For more information about specifying user options, see “Mail User Options” on page 6. Font size. In the Font size field, select a size for the text on the mailing. The font size you select may impact the amount of information you can include on a mailing piece, such as labels. To size. In mail tasks with the To size field, you need to enter the range of font sizes to test on the truncation report. For example, if you want to determine labels that truncate when you use font sizes of 10 through 18, enter 10 in the Font size field and 18 in the To size field. You can test a maximum of 10 font sizes per report. Form font. In the Form font field, select the font to use for the text on the mailing pieces you are printing. To ease your selection, font names on the drop-down menu appear in their respective typeface. Form type. In the Form type grid, select the type of label, card, envelope, or name tag you want to use. The Type and Size columns list the available types and dimensions. The graphic to the left of each entry indicates the label type. For example, labels that print on a laser printer display a printer graphic next to the label type. The Across column displays the number of labels across the width of a sheet of labels and the Down column displays the number of labels down the length of a sheet. The Description column provides additional details about each label type. The Raiser’s Edge is compatible with many standard label and card sizes shown in the Form Type table. However, if the label, card, envelope, or name tag size you use is not available, you can use the mail task to export a data file containing the constituent’s name, address, and additional information so you can print labels or cards using another application. G E N E RA L TA B 45 Card Types The following card types are available for selection on the Cards and Place Cards mail tasks: Form types Height Width Columns per page Rows per page Avery® 5388 Index Card Index Card Rolodex Card 3 in. 1 1/2 in. 1 1/2 in. 2 in. 5 in. 4 in. 4 in. 4 in. 1 1 2 1 3 7 7 4 Envelope Sizes Envelope Type Size Description Size 10 Size 6 3/4 Monarch Size 9 Size 11 Size 12 International DL International C4 International C5 International C6 International C65 4 1/8 x 9 1/2 in. 3 5/8 x 6 1/2 in. 3 7/8 x 7 1/2 in. 3 7/8 x 8 7/8 in. 4 1/2 x 10 3/8 in. 4 3/4 x 11 in. 110 x 220 mm. 229 x 324 mm. 162 x 229 mm. 114 x 162 mm. 114 x 229 mm. Business Letter Letter Business Business Legal <Blank> <Blank> <Blank> <Blank> <Blank> Note: When you use the Labels mail task, in the Form type field, you can also select the card types available for the Cards mail task. For more information, see the section “Card Types” on page 45. 46 C H A P T E R Label Types Label Types Height Width Columns per page Rows per page Avery® 4013 Avery® 4014 Avery® 4015 Avery® 4021 Avery® 4022 15/16 in. 1 7/16 in. 15/16 in. 15/16 in. 1 15/16 in. 7/16 in. 15/16 in. 15/16 in. 15/16 in. 1 7/16 in. 1 7/16 in. 1 15/16 in. 15/16 in. 1 7/16 in. 1 7/16 in. 1 7/16 in. 15/16 in. 15/16 in. 1 in. 1 in. 1 1/3 in. 2 in. 2 3/4 in. 1 1/2 in. 1 1/3 in. 1 1/3 in. 2 5/6 in. 2 in. 1 in. 3 1/2 in. 4 in. 5 in. 3 in. 4 in. 1 1 1 4 1 12 8 12 12 6 3 1/2 in. 3 1/2 in. 3 1/2 in. 3 1/2 in. 4 in. 4 in. 3 1/2 in. 1 4 2 3 2 3 1 24 12 12 12 8 8 6 2 1/2 in. 3 1/2 in. 3 1/2 in. 3 1/2 in. 4 in. 4 in. 2 5/8 in. 4 in. 4 in. 4 in. 2 3/4 in. 4 in. 4 1/4 in. 4 in. 4 1/4 in. 4 1/4 in. 3 1/2 in. 2 1 2 3 1 3 3 2 2 2 3 2 2 2 3 2 4 12 8 8 8 12 12 10 10 7 5 3 6 7 7 10 5 11 Avery® 4027 Avery® 4029 Avery® 4030 Avery® 4031 Avery® 4032 Avery® 4033 Avery® 4035 Avery® 4037 Avery® 4060 Avery® 4061 Avery® 4062 Avery® 4065 Avery® 4067 Avery® 5160 Avery® 5161 Avery® 5162 Avery® 5163 Avery® 5196 Avery® 5197 Avery® 5662 Avery® 5962 Avery® 5660 Avery® 5663 Cheshire Name Tag Types Label Types Height Width Columns per page Rows per page Avery® 5390 Avery® 5392 Avery® 5395 Avery® 5095 Avery® 5895 Avery® 5883 3 1/2 in. 4 in. 3 3/8 in. 2 1/6 in. 3 in. 2 1/3 in. 2 2 2 4 3 4 3 1/2 in. 2 1/6 in. 2 4 G E N E RA L TA B 47 Note: If you choose to print a mailing piece for only one spouse, you can use addressees or salutations to include the other spouse. For more information about addressees and salutations, see the Biographical Information chapter of the Constituent Data Entry Guide. Head of Household Processing. In your database, you may have separate constituent records for two constituents who are married to or live with each other. In the Head of Household Processing frame, you can decide whether to print a card for one constituent or both. You can select: • Mail only to constituents marked ‘Head of Household’ • Mail to first constituent found • Mail to both constituents separately When you mark the Mail only to constituents marked ‘Head of Household’ option, a mailing piece prints for the constituent with the This individual is the “Head of Household” checkbox marked on the Spouse button of the constituent record. If you mark the Mail to the first constituent found option, a mail piece prints for the first constituent found. For example, you are creating cards for a query of constituents. Cards are processed for these constituents using the order the records appear in the query. If Jan Smith appears in the query before her husband John, a card prints for Jan and a card does not print for John. When you mark the Mail to both constituents separately option, a card prints for both constituents. Warning: The options in the Head of Household Processing frame do not affect records that are not constituents. For example, when you choose Relationships in the Create for field, any relationship who is not a constituent is not affected by your selection in the Head of Household Processing frame. The Head of Household Processing frame is used only when both people of the household are included in the query or mailing. If the Mail only to constituents marked Head of Household option is marked and both people are in the query, only the person marked Head of Household will receive the mailing. If only the person not marked Head of Household is in the query, that person will not be excluded from the mailing. Include. On every mail task, you need to select a base group of records to process. Once you select these records, you can use other options, checkboxes, and fields on the mail task to define the records included in the mailing. For example, you can use the Include button to include all constituent records in the mailing. Even though you are including all constituent records, a mailing piece does not necessarily print for each constituent record. You can use other tabs, such as the Attributes tab, to limit the records included in the mailing. To select the records for which you want to print a mailing, click Include. You can choose from the following menu selections. • All Records • Selected Records • One Record Note: If you select All Records, records can be eliminated by other criteria. For example, you can exclude deceased constituents by leaving the Deceased constituents checkbox unmarked in the Include these Constituents frame. • All records Choosing All records bases your mailing on all records in your database. This does not mean you cannot exclude records later using other factors, such as Attributes on the Attributes tab of the mail task. When you click Include and select All records, you are merely starting with a base group of all records in your database. When you select All records, “All records” displays next to the Include button. • Selected records 48 C H A P T E R Choosing Selected records means you want to run this mail task with a base group of selected records from your database, which you must have already defined in a Query. When you choose Selected records from the submenu, the Open Query screen appears. For more information about using the Open Query screen or queries, in general, see the Query & Export Guide. Choosing Selected records does not mean that you cannot further define parameter to exclude records from the mailing on other tabs in the mail task. However, the base group of records you begin with is already defined by the parameters you set in the query you are using. When you select a query, the query name displays next to the Include button. • One record When you select One record from the submenu, the Open screen appears so you can search for a specific record for which you want to print the mailing. For more information about using the Open screen, see the Program Basics chapter of the Program Basics Guide. When you select the record, the name displays to the right of the Include button. Include Actions with these dates. The Include Actions with these dates frame helps determine the actions receiving the mailing. For example, if you are creating follow-up letters for lunch meetings you attended last week, you can enter information in this frame so the program selects actions that occurred only last week. See also Date. Include Gifts with these Amounts. In the Include Gifts with these Amounts frame, specify a monetary range to select the gifts to include in the mail task. For example, you may want to print receipts only for major donors. See also Start amount and End amount. Include Gifts with these Dates. In the Include Gifts with these Dates frame, specify a date range used to select the gifts that require a mailing. See also Date and Date to use. Include Job Assignments with these Dates. This frame helps determine the volunteers who receive follow-up letters. For example, if you are creating Volunteer Follow-up letters for an Environmental Clean Up job this weekend, you can enter information in this frame so the program selects job assignments that occurred only last week. See also Date. Include Job Assignments with a Status of. In this frame, select to send letters to volunteers with a status of either Assigned, Requested, or Both on their job assignment records. When you select the Requested or Both options, the Requested on field becomes available so you can enter a date or date range for the request period. Note: Membership is tracked through Membership Management. For more information about the membership record, see the Membership Data Entry Guide. Include Memberships that Expire within these Dates. In this frame, you can select the memberships that require renewal notices. See also Date. Include Membership Transactions that Start within these Dates. In this frame, you can select the memberships that require membership cards. For example, to send membership cards to all new members who joined in the last two weeks, you can specify the expiration date of these memberships in the Include Membership Transactions that Start within these Dates frame. See also Date. Include Pledges with these Dates. When you print a pledge reminder report, you must specify in the Include Pledges with these dates frame a date range the program uses to select the pledges or to include in the report. See also Date and Date to use. For a detailed explanation about how the date range you select affects the reminders that print, see “Types of Reminders” on page 26. Include these Constituents. The Include these Constituents frame has three checkboxes you can use to include or exclude constituents based on their status. For a constituent to be included in your mailing, he must satisfy all selected criteria. Note: When you use a mail task, you can exclude inactive constituents from the mailing by leaving the Inactive constituents checkbox unmarked. G E N E RA L TA B 49 When you mark Inactive constituents, constituents with the Constituent is inactive checkbox marked on the Bio 1 or Org 1 tab of their constituent records are included in the mailing. If a constituent has no current interest in your organization, you can choose to mark the Constituent is inactive checkbox on the constituent record instead of deleting the record from your database. If you mark Deceased constituents, individuals with the Deceased? checkbox marked on the Bio 1 tab of their constituent records are included in the mailing. You may want to include deceased constituents in a mailing if the constituent’s spouse is still interested in your organization, but does not have a separate constituent record. You can modify the primary addressee and primary salutation to remove the deceased constituent from the mailing. For more information about the Addressees/Salutations tab of a constituent record, see the Biographical Information chapter of the Constituent Data Entry Guide. When you mark Constituents with no valid address, constituents with the Constituent has no valid addresses checkbox marked on the Bio 1 or Org 1 tab of their constituent records are included in the mailing. Include these Pledge Amounts. In the Include these Pledge Amounts frame, specify a monetary range for the pledges that you want to include in the pledge reminder report. For example, you may want to include only major donors in the report. See also Start amount and End amount. Include these Receipts. When you use Receipt Report mail task, you must select the receipt numbers to include in the report. In the Start receipt no. field, enter the lowest receipt number to include in the report. In the End receipt no. field, enter the largest receipt number to include in the report. All gifts within the receipt number range you enter print on the report. The program checks the Receipt no. field on all gift records meeting the specified criteria to determine if the receipt should be included in the report. If you enter a value in both the Start receipt no. and End receipt no. fields and the Receipt no. field on the gift record is blank, the gift is not included in the Receipt Report. However, if only the Start receipt no. or End receipt no. is entered on the General tab, gifts with blank receipt numbers are included in the report. Notice type. See Type. One per page. The One per page checkbox is available on the General tab of the Receipts, Reminders, and Appeal Cards mail tasks. Mark this checkbox if you want to create an optional full page receipt, reminder, or appeal card with a specialized message. When you mark this checkbox, more fields become available on the Fields to Include tab. For more information and a procedure on how to use this feature, see the section “Create One Per Page Mailings” on page 259. Note: The selection you make here on the General tab, either Per pledge or Per installment, affects gift fields you select on the Fields to Include tab, such as Gift Date and Amount. Also, if you select Per installment, the Reminder barcode becomes available for selection on the Fields to Include tab. Per Installment. If you select Per installment, one reminder prints for each pledge installment or recurring gift payment meeting your criteria. See also Type. Per Pledge. If you select Per pledge, one reminder prints for each pledge or recurring gift meeting your criteria. See also Type. For example, if a constituent has two overdue installments for a pledge and you select Per pledge, the constituent receives one reminder that contains information about both overdue installments. If you select Per installment, the constituent receives two reminders — one for each overdue installment. For more information about reminders per pledge and per installment, see “Per Pledge and Per Installment Reminders” on page 33. Reminder type. See Type. Run date. When you use the Reminders mail task, enter the date to run the process to determine which pledge installments to include and calculate the balance due for those installments. Typically, if you select to include pledges that have gift dates within a “Specific range”, the Run date is the same as the end date. Soft Credit Gifts To. When you add a new gift, you can use soft credits to credit multiple constituents for the same gift without duplicating a gift in your database. When you create appeal cards, you must specify in the Soft Credit Gifts To frame how the program should credit the donor and the soft credit recipients in the giving summary. You can credit: 50 C H A P T E R Note: The information you enter in the Soft Credit Gifts To frame affects the way gift information prints in your mailing. It does not change the information entered on the Soft Credit tab of a gift record. • Donor • Soft credit recipients • Both If you select Donor, the donor receives full credit for the gift and the soft credit recipients receive no credit for the gift. When you select this option, any soft credit recipients entered on the Soft Credit tab of the gift record do not receive credit in the mailing for the gift. When you mark Soft credit recipients, you need to select how to divide the gift amount between the soft credit recipients. If you select the Soft credit recipients option, the donor does not receive credit for the gift unless he is also a soft credit recipient. You can select Use distribution on gift, Full amount to all, or Split evenly. • If you select Use distribution on gift, the soft credit recipients are credited with the amount specified on the Soft Credit tab of the gift record. • When you select Full amount to all, each soft credit recipient receives credit for the full amount of the gift. • If you select Split evenly, the full amount of the gift is divided evenly between the soft credit recipients. When you mark Both, you must select how to divide the gift amount between the donor and the soft credit recipients. You can select Use distribution on gift, Full amount to all, or Split evenly. • When you select Use distribution on gift, the donor receives full credit for the gift and the soft credit recipients are credited with the amount specified on the Soft Credit tab of the gift record. • If you select Full amount to all, the donor and each soft credit recipient receive full credit for the gift. • When you select Split evenly, the amount of the gift is divided evenly between the donor and the soft credit recipients. If the donor is also a soft credit recipient, the donor is credited for the gift only once. Start amount and End amount. For some mail tasks, you can specify a monetary range for gifts, such as those appearing in the summary section of the phonathon form or included in a receipt report. For example, you may want to print receipts only for major donors. In the Start amount field, enter the smallest gift amount to include in the receipt report. In the End amount field, enter the largest gift amount to include in the receipt report. Start Printing in Row/Column. You can start printing labels, cards, envelopes, or name tags at any location on a sheet. For example, if you have a sheet of labels that is partially used, you can use the Start Printing in Row/Column fields to indicate the location of the first unused label on the sheet. If you select a tractor-fed label, the Start Printing in Row/Column fields are disabled because this label type has a single label on each line. Note: When you use the Receipts mail task, the program can automatically add the receipt number for each receipted gift in the Receipt no. field on a gift record when you print, export, or send the receipts as email. Start receipt no. The Start receipt no. field determines the first receipt number to be used for the receipts you are preparing to print. Receipts print in numerical order. After you print the receipts, the program stores the last receipt number and the next available number defaults into the Start receipt no. field the next time you print receipts. The program does not check for duplicate receipt numbers. If you change the default receipt number, you can create a duplicate receipt number. After you print the receipts, the program asks if you want to update the Receipt field to Receipted for all gifts included in the mailing. You must update the Receipt field on the gift record to add the receipt number to the gift record and if you want the program to record the last receipt number used. To size. See Font size. G E N E RA L TA B 51 Note: You can customize your organization’s forms with your colors, logo, and personal messages. Blackbaud forms align with software printouts. For more information or to order Blackbaud standard forms, send an email message to [email protected] or call 1-866-4-BB-Forms (1-866-422-3676). You can view samples of forms at forms.blackbaud.com. Type (example: Card type, Receipt type, Notice type, or Reminder type, depending on what mail task you are using). In the [Card] type field, you need to select whether to use the Standard form you can order from Blackbaud or to create a custom data file. Standard may be a 3 column or 5 column reminder; a 12-field or Preprinted membership card; or a one third, two thirds, or full page renewal notice. For more detailed information about selections for a particular mail task, see “Available Mail Tasks” on page 11. If you select Create custom data file in the [ ] type field, you can export information to the application where you created a custom form. After you export the data, you can perform a mail merge to create the custom appeal cards, receipts, reminders, and other forms. For more information, see “Send a Mailing as Email” on page 254. 52 C H A P T E R chapter 4 Fields To Include Tab Overview . . . . . . . . . . . . . . . . . . . . . . . . . . . . . . . . . . . . . . . . . . . . . . . . . . . . . . . . . . . . . . . . . . . . . . . . . . . . . . . . . . 54 Parts of the Screen Defined . . . . . . . . . . . . . . . . . . . . . . . . . . . . . . . . . . . . . . . . . . . . . . . . . . . . . . . . . . . . . . . . . . . 54 54 C H A P T E R Overview On the Fields to Include tab, you should select all fields you want to appear on your mailing piece. On some mail tasks, such as appeal cards, each field has a designated location, so it is not necessary to select the fields in a particular order. In other mail tasks, such as Envelopes, you must order the fields in the Fields to Export or Fields to Print box on the right how you want them to appear on the mailing pieces. Note: Depending on which mail task you use, the box on the right may be called Fields to Export or Fields to Print. Both work the same. They are named differently because for Letters and Custom mail tasks you need to export and the rest you print straight from Mail. See Fields to Export. Certain fields, such as Addressee, default into the Fields to Export box, to ensure you choose a name format to print on the mailing pieces. Highlight the field and click Options to select a name format for the addressee. Parts of the Screen Defined Available Fields. The Available Fields box contains all fields you can include on a mailing piece. The available fields change, depending on whether you select Standard or Create custom data file in the [ ] Type field on the General tab. When you select Standard, the Addressee defaults into the Fields to Export box. F I E L D S TO I N C L U D E TA B 55 Certain fields have options associated with them. When you move these fields to the Fields to Export box, the Field Options screen appears. For example, when you select the Suggested gift field, the Field Options screen appears so you can select the amount to ask for, based on previous gift amounts. Select which gift amount to base the suggested gift amount on, the amount to increase or decrease it, and whether it is in dollars or a percentage of the previous gift. After you select the options for a field, you can change the options by selecting the field in the Fields to Export box and clicking the Options button. Fields to Export. The Fields to Export box contains all fields included on the appeal card. To move a field from the Available Fields box to the Fields to Export box, highlight the field in the Available Fields box and click the single right arrow. For example, to include the Phone number field on an appeal card, highlight it in the Available Fields box and click the single right arrow to move the Phone number field to the Fields to Export box. Note: If you include a field in the mailing by mistake, select the field in the Fields to Export box or the Fields to Print box and click the single left arrow to move it back to the Available Fields box. The order you list the fields in the Fields to Export box is not important for the Appeal Cards mail task. Each field has a designated location to print on the appeal card, so it is not necessary to select the fields in a particular order. See also Fields to Print. Fields to Print. Depending on which mail task you use, the box on the right may be called Fields to Export or Fields to Print. Both work the same. They are named differently because for Letters and Custom mail tasks you need to export and the rest you print straight from Mail. See Fields to Export. Options. Using the Options button, you can access the Field Options screen for any field that has additional options. To access the Field Options screen for a particular field, select the field name in the Fields to Export box and click Options. Note: Select the Position field under the Relationships folder to print the position title for individuals or contacts, if the Print? checkbox next to the Position field on the General 1 tab of the relationship record is checked. The position prints for an individual only if you select to mail to the Primary business address or Spouse primary business address on the Ind. Address tab. 56 C H A P T E R When you select Create custom data file in the [Card] type field on the General tab, the Fields to Include tab appears as below. On the Fields to Include tab, select an Addressee or Salutation field in the Addressee/Salutation folder to format how a constituent’s name prints on the appeal card. The Customization Options screen for that particular selection appears. Select Individual, Organization, or Contact from the Constituent folder under Name Formats in the tree view on the left.For more information about selecting an addressee or salutation for an organization, see or “Select an Addressee or Salutation for an Organization” on page 251. F I E L D S TO I N C L U D E TA B 57 Send one letter to each acknowledgee. In the Send one letter to each acknowledgee field for Honor/Memorial Acknowledgement Letters, you can select whether to send a separate letter to an acknowledgee per gift or per tribute. If you choose per gift, acknowledgees receive a separate letter for every gift donated to a tribute. If you choose per tribute, each acknowledgee receives one letter that summarizes all the gifts donated. Note: If you select to print one letter per tribute, the Acknowledgee Letter field is not available in the Available Fields box on the left. For example, Sarah Williams is listed as an acknowledgee on a tribute honoring her husband’s birthday. When you create honor/memorial acknowledgement letters, you can select whether Sarah receives a separate letter for every gift donated to her husband’s tribute or a single letter summarizing all the gifts donated to her husband’s tribute. Number of gifts to consolidate. If you select per tribute in the Send one letter to each acknowledgee field, the Number of gifts to consolidate field is enabled. In this field, you need to enter the maximum number of gifts that can be acknowledged in one letter. For example, you are sending a letter to an acknowledgee who should be notified of four gifts donated to a tribute. If you enter 2 in the Number of gifts to consolidate field, only two gifts are acknowledged in this letter. 58 C H A P T E R chapter 5 Filters Tab Overview . . . . . . . . . . . . . . . . . . . . . . . . . . . . . . . . . . . . . . . . . . . . . . . . . . . . . . . . . . . . . . . . . . . . . . . . . . . . . . . . . . 60 Parts of the Screen Defined . . . . . . . . . . . . . . . . . . . . . . . . . . . . . . . . . . . . . . . . . . . . . . . . . . . . . . . . . . . . . . . . . . . 60 Use the Filters Tab to Limit the Records Receiving a Mailing . . . . . . . . . . . . . . . . . . . . . . . . . . . . . . . . . . . . . . . . 62 Procedures Select specific filters to limit the records receiving a mailing . . . . . . . . . . . . . . . . . . . . . . . . . . . . . . . . . . . . . . . . . . . 62 Select a query of campaigns, funds or appeals to limit the records receiving a mailing . . . . . . . . . . . . . . . . . . . . . 65 60 C H A P T E R Overview You can use the Filters tab to define the records selected by the mail task based on specific criteria. For example, you can use the Constituent Codes filter to print receipts for constituents with a constituent code of Board Member entered on a constituent record. Or, you are mailing a letter to all constituents, but you do not want to include constituents who do not want to be solicited by mail. To exclude constituents with “Do not mail” solicit codes listed on their records, choose Selected in the Include column for the Solicit Codes filter. Parts of the Screen Defined Filters. The Filters column lists all filters available to define the records processed by the mail task. Include. In the Include column, choose All or Selected to indicate whether to use specific criteria for a particular filter. For example, to include gifts donated to the 2006 Annual Fund in the giving summary for appeal cards, choose Selected in the Include column for the Funds filter. F I L T E R S TA B 61 Selected Filters. The Selected Filters column displays the criteria selected for a particular filter. For example, if you select All in the Include column for the Funds filter, <All Funds> appears in the Selected Filters column. If you choose Selected in the Include column, the binoculars appear in the Selected Filters column, so you can access the Selected Funds screen. For appeal card, donor acknowledgement letter, honor/memorial acknowledgement letter, membership card, Phonathon card, receipt report, receipt, reminder, and reminder report mail tasks, you can also choose to include selected criteria or a query of campaigns, funds, or appeals to which a gift must be donated for the gift to appear. To include selected criteria, choose Selected in the Include field. On the Selected Funds screen, you can choose specific funds to which a gift must be donated for the gift to appear in the giving history on an appeal card. To choose the selected funds, select the description in the box on the left and click the single right arrow to move it to the Include these Funds box on the right. For appeal card, donor acknowledgement letter, honor/memorial acknowledgement letter, membership card, Phonathon card, receipt report, receipt, reminder, and reminder report mail tasks, you can also choose a query of campaigns, funds, or appeals to which a gift must be donated for the gift to appear. To choose a query of funds, select Query in the Include field and enter the Query name. 62 C H A P T E R Use the Filters Tab to Limit the Records Receiving a Mailing On each mail task, you can use the Filters tab to limit the records included in the mailing. For example, if you are printing gift receipts, you may want to print receipts for gifts donated to the 2006 Annual Fund. The filters available depend on the mail task you are using. To limit the records included for some mail tasks, you can select a query of campaigns, funds, or appeals. Select specific filters to limit the records receiving a mailing Scenario: You are creating pledge reminders for all constituents in your database who donated to the 2006 Annual Fund. Although this procedure explains how to filter a mailing by fund, you can use the same steps to filter the mailing using any filters listed on the Filters tab. 1. From a mail task, select the Filters tab. For more information about opening a mail task, see “Access Mail Tasks” on page 3. F I L T E R S TA B 63 2. To include constituents who donated to the 2006 Annual Fund, choose “Include Selected” in the Include column for the Funds filter. The Selected Funds screen appears. Note: If you mark Show Inactive Funds on the Selected Funds screen and click Find Now, all inactive funds appear in the list on the left side of the screen. You can indicate a fund is inactive on the fund record. 3. In the Include field, choose Selected. 64 C H A P T E R 4. In the box on the left, select “2006 Annual Fund”. 5. Click the single right arrow to move the selection into the Include these Funds box on the right. 6. Click OK. You return to the Filters tab. In the Selected Filters column for the Funds filter, “2006 Annual Fund” appears. 7. To save the setting on this mail task, you must create a parameter file. For more information about saving a parameter file, see “Save a Parameter File” on page 257. F I L T E R S TA B 65 Select a query of campaigns, funds or appeals to limit the records receiving a mailing For appeal card, donor acknowledgement letter, honor/memorial acknowledgement letter, membership card, membership card truncation, phonathon form, receipt report, receipt, reminder report, and reminder mail tasks, you can select a campaign, fund, or appeal query to limit the records that receive a mailing. 1. From a mail task, select the Filters tab. For more information about opening a mail task, see “Access Mail Tasks” on page 3. 2. To include constituents who donated to funds in an existing fund query, choose “Include Selected” in the Include column for the Funds filter. 66 C H A P T E R The Selected Funds screen appears. 3. In the Include field, select Query. F I L T E R S TA B 67 4. In the Query name field, click the binoculars. The Open Query screen for Funds appears so you can search the database for the query to use. Warning: The results that appear in the grid must match all criteria you enter. Therefore, we recommend you search by only one or two of the most helpful criteria types. If you add too much criteria information in the Find Queries that meet these criteria fields, you can actually prevent the program from finding the query. 5. Under Find Queries that meet these criteria, decide what criteria to use to search for the query and select the information in the appropriate criteria fields. The criteria you can use includes the Query format, Query name, Description, the date the query was created, and the person who created the query. You can also select whether to Show merged queries only or search for an Exact match only. Note: If you do not know the correct spelling or number, you can enter the first few characters in the Find Queries that meet these criteria fields. For more information about how to use these fields, see the Program Basics Guide. 68 C H A P T E R 6. Click Find Now. If the search criteria entered matches a query in the database, it appears in the grid on the Open Query screen. Depending on how limited or detailed your criteria are, the program may find multiple queries. 7. In the grid, select the query of funds to use to filter the records and click Open. You return to the Selected Funds screen. In the Query name field, the selected query appears. F I L T E R S TA B 69 8. Click OK. You return to the Filters tab. In the Selected Filters column for the Funds filter, the selected query name appears. 9. To save the setting on this mail task, you must create a parameter file. For more information about saving a parameter file, see “Save a Parameter File” on page 257. 70 C H A P T E R chapter 6 Gift Types Tab Overview . . . . . . . . . . . . . . . . . . . . . . . . . . . . . . . . . . . . . . . . . . . . . . . . . . . . . . . . . . . . . . . . . . . . . . . . . . . . . . . . . . 72 Parts of the Screen Defined . . . . . . . . . . . . . . . . . . . . . . . . . . . . . . . . . . . . . . . . . . . . . . . . . . . . . . . . . . . . . . . . . . . 72 72 C H A P T E R Overview Tip: If you use Microsoft Word to perform a mail merge, see The Raiser’s Edge & Microsoft Office Integration Guide for a procedure using the Word Merge Wizard. On the Gift Types tab, you must select the gift types that should be included in the mailing. For example, you may have a specific acknowledgement letter for pledge gifts. You can use the Gift Types tab to include only pledge gifts in the export file for the acknowledgement letters. Parts of the Screen Defined Gift Types. The Gift Types box contains all the gift types available in The Raiser’s Edge. Fields disappear from the Gift Types box, as you move fields from the Gift Types box to the Include these Gift Types box. Include these Gift Types. The Include these Gift Types box contains the gift types you want to include in the giving summary information of the mailing. To select a gift type, highlight a gift type in the Gift Types box and click the single right arrow to move it to the Include these Gift Types box. If you do not move any gift types to the Include these Gift Types box, a message appears stating you need to include at least one gift type in the summary. Load All Defaults. You can click the Load All Defaults button to select the default gift types in the Include these Gift Types box. The default gift types are Cash, Pay-Cash, MG Pay-Cash, Pledge, Stock/Property, Stock/Property (Sold), Pay-Stock/Property, MG-Pay Stock/Property, Pay-Stock/Property (Sold), MG Pay-Stock/Property (Sold), Gift-in-Kind, Pay-Gift-in-Kind, MG Pay-Gift-in-Kind, Other, Pay-Other, MG Pay-Other, MG Pledge, Recurring Gift, and Recurring Gift Pay-Cash. Exclude zero amount gifts. You can mark Exclude zero amount gifts to exclude gifts from the giving summary entered as or adjusted to zero. For more information about adjusting a gift, see the Gift Records Guide. G I F T T Y P E S TA B 73 Use sale date for sold stock/property. When you mark Use sale date for sold stock/property, the gift date printed on the mailing is the date the stock/property was sold. If the sale date does not fall within the date range specified in the Base Summary on Gifts with these Dates frame on the General tab, the gift is not included in the summary. Use sale amount for sold stock/property. When you mark Use sale amount for sold stock/property, the program uses the stock/property sale amount as the gift amount. Subtract broker fee from sold stock/property. When you mark Use sale amount for sold stock/property, the Subtract broker fee from sold stock/property checkbox is enabled. If you mark Subtract broker fee from sold stock/property, the broker fees are subtracted from the gift amount included in the summary. For example, the gift amount for a sold stock/property gift is $1,000 and the broker fees for the sale are $100. When you mark Subtract broker fee from sold stock/property, a gift amount of $900 is included in the summary. If you do not mark this checkbox, a gift amount of $1,000 is included. Warning: If you include both pledge and pledge payment in the Gift Types box, the gifts are double-counted in the summary results. To view the actual gift balance, mark Use gift balance instead of gift amount. Use gift balance instead of gift amount. When you mark Use gift balance instead of gift amount, the remaining balance for a pledge gift is printed in the summary for the gift amount instead of the total gift amount. For example, a constituent, who made a pledge of $100 to your organization, has paid $30 toward the pledge. If you mark Use gift balance instead of gift amount, a gift amount of $70 is included in the giving summary for this pledge gift. Calculate gift balance based on date range, campaign, fund, and appeal. For pledge and recurring gifts, the gift amount can be based on the information entered on the Filters tab and the Include Gifts with these Dates frame on the General tab. To calculate balances based on the date range on the General tab and the filters specified on the Filters tab, mark Calculate gift balance based on date range, campaign, fund, and appeal. When you mark this checkbox, any portion of the gift amount that is not included in the dates selected in the Include Gifts with these Dates range or the filter criteria entered on the Filters tab is not included in the calculation. Warning: If you do not mark Calculate gift balance based on selected date range, campaign, fund and appeal, the true balance of the gift appears. The program calculates the balance as of the current date and includes the activity in all campaigns, funds, and appeals, not just those specified on the Filters tab. For example, a constituent donated a $100 pledge gift that is evenly split between the 2002 Annual Fund and the 2002 Membership Fund. When you use the Appeal Cards mail task, you enter 2002 Annual Fund in the Selected Filters column for the Funds filter on the Filters tab. If you mark Calculate gift balance based on date range, campaign, fund, and appeal, $50 is included in the summary as the gift amount because you filtered the mailing to include gifts donated only to the 2002 Annual Fund. If you do not mark this checkbox, a gift amount of $100 is included for this pledge gift. 74 C H A P T E R chapter 7 Attributes Tab Overview . . . . . . . . . . . . . . . . . . . . . . . . . . . . . . . . . . . . . . . . . . . . . . . . . . . . . . . . . . . . . . . . . . . . . . . . . . . . . . . . . . 76 Include or Exclude Records from a Mailing using Attributes . . . . . . . . . . . . . . . . . . . . . . . . . . . . . . . . . . . . . . . . . 76 Add, Update, or Delete Attributes from Records in a Mailing . . . . . . . . . . . . . . . . . . . . . . . . . . . . . . . . . . . . . . . . 78 Procedures Include or exclude records from a mailing using attributes . . . . . . . . . . . . . . . . . . . . . . . . . . . . . . . . . . . . . . . . . . . . 77 Add, update, or delete attributes on a record included in the mailing . . . . . . . . . . . . . . . . . . . . . . . . . . . . . . . . . . . 79 76 C H A P T E R Overview You can use the Attributes tab to filter records according to attributes entered on the Attributes tab of a constituent, gift, membership, participant, address, or action record. If you filter by attributes entered on constituent records, you affect the constituents who receive the mailing. By using attributes, you can accurately target the records for which you want to print your mailing. For example, you may want to exclude constituents with an attribute Category of Special Mailing Types and a Description of Do Not Solicit. When you print a mailing, you can also add, update, or delete attributes on records for which a mailing piece prints. For example, if all the constituents for which you print phonathon forms have an interest in volunteering, you can add an attribute with the Category of Interests and a Description of Volunteering to the Attributes tab of each constituent record. Include or Exclude Records from a Mailing using Attributes You can use the Attributes tab of a mail task to include or exclude records with specific attributes from a mailing. To include or exclude records using attributes, mark Include or Exclude Records With these Attributes on the Attributes tab of the mail task. When you mark this checkbox, the grid is enabled. In this grid, select whether to include or exclude records with matching attributes. Then, you must specify the record type to search for the attribute and enter the category and description of the attribute used to filter the records. If you enable the grid, you must enter at least one attribute in the grid. A T T R I B U T E S TA B 77 Include or exclude records from a mailing using attributes 1. From a mail task, select the Attributes tab. For more information about opening a mail task, see “Access Mail Tasks” on page 3. 2. Mark Include or Exclude Records With these Attributes. 3. In the Filter column, select whether to include or exclude records from the mailing based on the attribute you enter in the row. 4. In the Record Type column, select the record type you want the program to search for the attribute. For example, if you want the program to look for the attribute on a constituent record, select “Constituent” in the Record Type column. 78 C H A P T E R 5. In the Category and Description columns, select the attribute by which you want to include or exclude records. For example, you can select the attribute Category “Interests” and the Description “Contemporary Art”. 6. To add additional attributes to the grid, repeat steps 2 through 5. To be included in the mailing, a record must meet all criteria you specify. To save the setting on this mail task, you must create a parameter file. For more information about saving a parameter file, see “Save a Parameter File” on page 257. Add, Update, or Delete Attributes from Records in a Mailing To add, update, or delete an attribute from a record included in the mailing, you can mark Add, Update or Delete these Attributes for each Record on the Attributes tab of the mail task. When you mark this checkbox, the grid is enabled so you can add, update, or delete an unlimited number of attributes. If you enable the grid, you must add, update, or delete at least one attribute. To add an attribute to the records processed by the mail task, you must select Add in the Action column and specify a Type, Category, and Description. To update a Category, the Category must be present on the record or the update will not take place. To delete an attribute from a record, the record must contain a matching Type, Category, and Description. When you add, update, or delete an address attribute, only the addresses used in the mailing are changed. A T T R I B U T E S TA B 79 Add, update, or delete attributes on a record included in the mailing The program adds, updates, or deletes attributes when you print, export, or send the mailing as email. Attributes are updated after you receive the message “Did all [mail] print successfully?” and click Yes. Attributes are not updated when you preview the mailing. 1. From a mail task, select the Attributes tab. For more information about opening a mail task, see “Access Mail Tasks” on page 3. 2. Mark Add, Update or Delete these Attributes for each Record. 80 C H A P T E R 3. In the Action column, select whether to Add, Update, or Delete this attribute from the records included in the mailing. 4. In the Type column, select the record type for which you want the program to add, update, or delete the attribute. For example, if you want the program to add an attribute to a constituent record, select “Constituent” in the Type column. Note: You can define attribute categories using the Attributes link in Configuration. Once you define attribute categories, you can then define their corresponding description after selecting a Data Type using the Tables link. For more information, see the Configuration chapter of the Configuration & Security Guide. 5. In the Category and Description columns, enter the attribute you want to add, update, or delete from the records. For example, you may want to add an attribute with a Category of “Interests” and a Description of “Outdoor Activities”. Some categories and descriptions also allow for a Short description. 6. In the Date column, enter the date you want to associate with this attribute. 7. In the Comment column, enter any comments you want to associate with the attribute. A T T R I B U T E S TA B 81 8. To add additional attributes to the grid, repeat steps 3 through 7. 9. After you select all the attributes, you must print, export, or send the mailing as email to add, update, or delete the attributes from the constituent records. 82 C H A P T E R chapter 8 Individual and Organization Address Tabs Select an Address for an Individual . . . . . . . . . . . . . . . . . . . . . . . . . . . . . . . . . . . . . . . . . . . . . . . . . . . . . . . . . . . . . 84 Understand Address Attributes . . . . . . . . . . . . . . . . . . . . . . . . . . . . . . . . . . . . . . . . . . . . . . . . . . . . . . . . . . . . . . . . 86 Select an Address for an Organization . . . . . . . . . . . . . . . . . . . . . . . . . . . . . . . . . . . . . . . . . . . . . . . . . . . . . . . . . . 88 Mail Only to the Organization’s Address . . . . . . . . . . . . . . . . . . . . . . . . . . . . . . . . . . . . . . . . . . . . . . . . . . . . . . . . . . . 89 Mail to an Organization’s Contacts . . . . . . . . . . . . . . . . . . . . . . . . . . . . . . . . . . . . . . . . . . . . . . . . . . . . . . . . . . . . . . . . 91 Understand Contact Address Attributes . . . . . . . . . . . . . . . . . . . . . . . . . . . . . . . . . . . . . . . . . . . . . . . . . . . . . . . . . 95 If No Contact Address Attributes are Specified . . . . . . . . . . . . . . . . . . . . . . . . . . . . . . . . . . . . . . . . . . . . . . . . . . . . . . 96 Include Contacts with one of these address attributes, no address attributes, or different address attribute categories . . . . . . . . . . . . . . . . . . . . . . . . . . . . . . . . . . . . . . . . . . . . . . . . . . . . . . . . . . . . . . . . . . . . . . . . . . . . . . . . . 97 Only consider Contacts with one of these address attributes . . . . . . . . . . . . . . . . . . . . . . . . . . . . . . . . . . . . . . . . . . 98 If an Organization does not have a valid Contact with one of these attributes, consider Contacts with no attributes or with different attribute categories Checkbox Marked . . . . . . . . . . . . . . . . . . . . . . . . . . . . . . . 98 If an Organization does not have a valid Contact with one of these attributes, consider Contacts with no attributes or with different attribute categories Checkbox Not Marked . . . . . . . . . . . . . . . . . . . . . . . . . . . 100 84 C H A P T E R The Ind. and Org. Address tabs are where you select which address to mail to for each constituent who receives a mailing. You can choose to use seasonal dates, if some constituents have seasonal addresses. You can also use address attributes for individuals, organizations, and contacts at an organization to determine who should receive which mailing. Select an Address for an Individual Tip: If you use Microsoft Word to perform a mail merge, see The Raiser’s Edge & Microsoft Office Integration Guide for a procedure using the Word Merge Wizard. On the Ind. Address tab, you must select the address type for each individual constituent in the mailing. The program selects an address for each constituent using three steps and can consider seasonal addresses, address attributes, and specific address types. When the program is unable to find a valid address for a constituent, you can select an alternate address to use. It is important to indicate your preferences in each of the three steps so the program can choose the best address for each constituent. The addresses of each individual constituent who receives the mailing are processed using the three steps on the Ind. Address tab. For example, three individual constituents are receiving your mailing: Larry Smith, Melvin Thomas, and Cindy Harris. When the program chooses an address for each of these constituents, it begins with the first constituent in the list. To find an address for Larry Smith, the program compares Larry’s addresses entered on the Addresses tab of his constituent record with the information you enter in Steps 1 through 4. After the program finds a valid address for Larry, it uses Steps 1 through 4 to find a valid address for Melvin Thomas, and then finishes with Cindy Harris. Because the address used for each constituent is selected individually, different address types can be selected for constituents in the mailing list. For example, according to the information you enter on the Ind. Address tab, the Preferred Address can be selected for Larry Smith, the Business Address can be selected for Melvin Thomas, and the Summer Home address can be selected for Cindy Harris. INDIVIDUAL AND O R GA N I Z A T I O N A D D R E S S TA B S 85 Step 1. In Step 1, if seasonal addresses should be considered as eligible addresses for the mailing, mark Consider addresses with seasonal dates as of. When you mark this checkbox, you need to select a date, such as Today, Yesterday, or <Specific date>, in the corresponding field. When you select <Specific date>, the Date field appears so you can enter a date, such as 06/30/2003. The program uses the date you enter to determine whether a seasonal address is valid. For example, if you mark Consider addresses with seasonal dates as of, select <Specific date> in the corresponding field, and enter 12/01/2003 in the Date field, an address with Seasonal from date of 04/03 and a Seasonal to date of 07/03 is not selected for this mailing. If the program considers seasonal addresses, it selects the first valid seasonal address found. If a valid seasonal address is not found, the program uses your selections in Step 2. Note: The program checks only the address types listed in the Addresses to use box. If you want the program to check all address types during address processing, move all available address types from the Addresses box to the Addresses to use box. To consider the Preferred address and then all other addresses after that, if the Preferred address is not valid, select First Address Found. Step 2. In Step 2, specify the addresses to consider when a valid seasonal address is not found in Step 1 or if you did not consider seasonal addresses for the mailing. To select an address, highlight the address in the Addresses box and click the right arrow to move it to the Addresses to use box. If you list multiple addresses in the Addresses to use box, you need to sort the addresses in order of their importance. To move an address within the Addresses to use box, select the address and click the up or down arrow. For example, to include the Preferred address and the Primary business address, select them in the Addresses box and click the right arrow to move them to the Addresses to use box. If a constituent has both addresses in his record, you want to use the Preferred address. Because the program selects the address based on its position in the Addresses to use box, you must use the arrows to move the Preferred address to the beginning of the list. Step 3. In Step 3, you can use attributes to choose the address type to print by clicking the Address Attributes button. When you click Address Attributes, the Address Attributes to Consider screen appears. Note: If the attributes you selected do not fit in the area provided, an ellipsis appears at the end of the display. You can hold your cursor over the attribute to view a tool tip that displays the entire attribute. You can select an attribute category and description that, if present on an address, give it priority consideration to be used for the mailing. For example, to include addresses with the attribute Category of NCOA Confirmed? and a Description of Yes, enter the information on this screen. For more information about entering address attributes, see the Biographical Information chapter of the Constituent Data Entry Guide. After you enter the necessary address attributes, click OK. A display appears to the right of the Address Attributes button and lists the attributes you selected. When you do not specify any attributes, the label displays <No address attributes specified>. For more information, see “Understand Address Attributes” on page 86. 86 C H A P T E R Step 4. In Step 4, select the address type the program should use if it cannot find an address meeting your selections in Steps 1 through 3. You can print the individual’s name with no address, remove the record from printing in the mailing, or select a specific address to print. If you select a specific address to print, the Address to print field appears so you can select the address type to print on the mailing when no other valid address is found for the constituent. If no valid address has yet been found by this step in processing, the address type selected here prints regardless of selections made in previous steps. For example, the address selected here prints even if the Send mail to this address checkbox is unmarked. Understand Address Attributes You can use address attributes to specify particular mailing types, such as Newsletter, to send to an address. Use address attributes if, for example, you have constituents who want to receive their receipts at one address, but a newsletter at another address. This way, when you create and send your mailings, you can respect your constituents’ wishes while ensuring various mailings reach their appropriate destinations. You enter address attributes on the Attributes tab of an address record. INDIVIDUAL AND O R GA N I Z A T I O N A D D R E S S TA B S 87 Then, in Mail, select whether to consider certain address attributes when processing addresses for the mailing you are sending. It is important to note that address attributes, if included on the Ind. or Org. Address tab if you select to Mail only to the organization, are considered at all stages of address processing. You select address attributes by clicking the Address Attributes button in Step 3 on the Ind. Address tab or when you Mail only to the organization on the Org. Address tab. 88 C H A P T E R For example, if you select address attributes to consider and mark Seasonal address in Step 1, all seasonal addresses are checked first for the address attributes. Then, if no seasonal address is found, the program looks at address types selected in Step 2 for the specified address attributes. Then, on a second pass, if no address is found with the specified address attributes, any seasonal address is considered, followed by the address types in Step 2, and so on. If you choose to include address attributes for consideration when you create your mailing, the program looks at the Attributes tab of the address record for the constituent. Address attributes should not be confused with regular attributes on the Attributes tab of the constituent record. Access the address record by clicking the More button on the Bio 1 or Org 1 tab or through the Addresses tab. When you make selections on the Address Attributes to Consider screen, the program first checks all addresses for that particular address attribute Category and Description. • If address attributes are selected in Step 3, the program looks for addresses with the exact address attribute Category and Description first. • If an address contains no address attributes, it is still considered for processing. However, addresses with address attributes matching what is specified in Mail are given preference over addresses with no attributes. • If you have the seasonal checkbox marked in Step 1, the program checks for seasonal addresses first, and then address attributes you specify in Step 3. • If an address contains address attributes of an entirely different Category than the one you select in Step 3, it is still considered for processing. However, addresses with address attributes that match what is specified in Mail are given preference over addresses with a different address attribute Category. • If an address contains attributes of the same Category, but a different Description than the one defined in Step 3, then it is considered invalid and thrown out of processing. Processing for contact address attributes is different than for regular address attributes explained here. For more information, see “Understand Contact Address Attributes” on page 95. Select an Address for an Organization On the Org. Address tab, you must select the address type for each organization constituent in the mailing. Choose to Mail to contacts or Mail only to the organization. • If you Mail to contacts, the address entered on a contact’s record prints for the mailing. • If you Mail only to the organization, the address entered on the organization’s constituent record prints. INDIVIDUAL AND O R GA N I Z A T I O N A D D R E S S TA B S 89 When you select addresses for organizations, the selections available in the rest of the steps depend on what you select in Step 1. Depending on your selection in Step 1, the program selects an address for each constituent using three or four steps and considers address attributes and specific address types. When the program is unable to find a valid address for a constituent, you can select an alternate address. It is important to indicate your preferences in each step so the program can choose the best address for each constituent. The addresses of each organization constituent in the mailing list are processed using the three or four steps on the Org. Address tab, depending on your selection in Step 1. For example, you have three organization constituents in your mailing list: Baldwin Entertainment, City Insurance Company, and Outside Investments. When the program chooses an address for each of these constituents, it begins with the first constituent in the list. To find an address for Baldwin Entertainment, the program compares Baldwin Entertainment’s addresses with the information you entered in Step 1 through 4. After the program finds a valid address for Baldwin Entertainment, it uses Step 1 through 4 to find a valid address for City Insurance Company and then finishes with Outside Investments. Because the address used for each constituent is selected individually, different address types can be selected for constituents in the mailing list. For example, according to the information you enter on the Org. Address tab, the Preferred Address can be selected for Baldwin Entertainment, the Business Address can be selected for City Insurance Company, and the Mailing Address can be selected for Outside Investments. Mail Only to the Organization’s Address When you select addresses for organizations, the selections available in the rest of the steps depend on what you select in Step 1. When you select Mail only to the organization, the address entered on the organization’s constituent record prints. 90 C H A P T E R To print the organization’s address, the Org. Address tab appears as shown. Step 1. In Step 1, select Mail only to the organization. This selection in Step 1 affects the rest of the steps on this tab. If you select Mail to contacts, see “Mail to an Organization’s Contacts” on page 91 for more information. Step 2. In Step 2, specify the addresses to which you want to send the mailing. To select an address, highlight the address in the Addresses box and click the right arrow to move it to the Addresses to use box. If you list multiple addresses in the Addresses to use box, you must sort the addresses in order of their importance. To move an address within the Addresses to use box, select the address and click the up or down arrow. For example, to include the Preferred address and Business address, select them in the Addresses box and click the right arrow to move them to the Addresses to use box. If an organization has both addresses entered on the constituent record, you want to use the Preferred address. Because the program selects the address based on its position in the Addresses to use box, you need to use the arrows to move the Preferred address to the beginning of the list. INDIVIDUAL AND O R GA N I Z A T I O N A D D R E S S TA B S 91 Step 3. In Step 3, you can use address attributes to choose the address type to print. To access the Address Attributes to Consider screen, click Address Attributes. Note: If the attributes you selected do not fit in the area provided, an ellipsis appears at the end of the display. You can hold your cursor over the attribute to view a tool tip that displays the entire attribute. The program checks if the address attribute is present on the Attributes tab of the address record. For example, to include addresses with the attribute Category of NCOA Confirmed? and a Description of Yes, enter the information on this screen. For more information about entering address attributes, see the Biographical Information chapter of the Constituent Data Entry Guide. After you enter the necessary address attributes, click OK. A display appears to the right of the Address Attributes button and lists the attributes you selected. When you do not specify any attributes, the label displays <No address attributes specified>. For more information, see “Understand Address Attributes” on page 86. Step 4. In Step 4, select the address type the program should use if it cannot find an address type meeting your selections in Steps 1 through 3. You can print the organization’s name with no address, remove the record from printing in the mailing, or select a specific address to print. If you select a specific address to print, the Address to print field appears so you can select the address type to print on the mailing when no other valid address is found for the constituent. For example, the address selected here prints even if Send mail to this address is unmarked. Mail to an Organization’s Contacts When you select addresses for organizations, the selections available in the rest of the steps depend on what you select in Step 1. When you choose Mail to contacts, the address entered on a contact’s record prints for the mailing. 92 C H A P T E R If you want to print a contact’s address, the Org. Address tab appears as shown. Before you begin this procedure, we recommend you read “Understand Contact Address Attributes” on page 95. Step 1. In Step 1, select Mail to contacts to print a contact’s address. This selection in Step 1 affects the rest of the steps on this tab. If you select Mail only to the organization, see “Mail Only to the Organization’s Address” on page 89 for more information. Step 2. In Step 2, select the contact types you want to include by clicking Contact Information. When you click this button, the Contacts to Receive Mail screen appears. You can include all contact types or choose specific contact types. To select specific contact types, mark Include Selected Contact Types Only. If you do not mark this checkbox, all contact types are considered for the mailing. To select a specific contact type to use, select the contact type in the Contact types box and click the right arrow to move it to the Contact types to include box. INDIVIDUAL AND O R GA N I Z A T I O N A D D R E S S TA B S 93 If you list multiple contact types in the Contact types to include box, you must sort the contact types in the order of their importance. To move a contact type within the Contact types to include box, select the contact type and click the up or down arrow. For example, some of the organizations may not have a matching gift coordinator. To include the contact types Matching Gift and Corporate Donations in the mailing, select them in the Contact types box and click the right arrow to move them to the Contact types to include box. If an organization has both contact types on its record, you want to use the address for the matching gift. Because the program selects the contact type based on its position in the Contact types to include box, use the arrows to move Matching Gift to the beginning of the list. To filter contact attributes, click the Contact Attributes button. When you click the Contact Attributes button, the Contact Attributes to Consider screen appears. You can use the Filter, Category, Description, and Short Desc columns to include or exclude constituents based on filters. To save the changes, click OK. Warning: To ensure proper receipting and membership card usage, Print one for each contact found is not available for the Receipts or Membership Cards mail task. When more than one contact should receive a mailing, mark Print one for each contact found. If you do not mark this checkbox, the first contact that meets the address criteria is selected for the mailing. In the If a contact also receives this mailing as an individual field, you can select to Mail to the individual address only, Mail to the contact address only, or Mail to both addresses separately. After you select all the contact types you want to use, click OK. A display appears to the right of the Contact Types to Include button listing the contact types you selected. If you did not specify any contact types, the label displays <All contact types>. For information about selecting addressees and salutations for a contact, see “Select an Addressee or Salutation for an Individual or Contact” on page 243. Note: If the attributes you selected do not fit in the area provided, an ellipsis appears at the end of the display. You can hold your cursor over the attribute to view a tool tip that displays the entire attribute. 94 C H A P T E R In Step 2, you can include or exclude contacts’ addresses based on address attributes entered on the contact’s address record. Click the Contact Address Attributes button to access the Contact Address Attributes to Consider screen. Warning: If a contact’s address does not qualify for the mailing because of the address attribute filters, the contact is removed from the mailing. The program checks the Address Attributes tab of a contact’s relationship record to be considered for the mailing. For example, if you want to include addresses with the address attribute Category of Preferred Contact and a Description of Yes, enter the information on this screen. For more information about entering attributes, see the Biographical Information chapter of the Constituent Data Entry Guide. When you finish entering contact address attributes, click OK. A display appears to the right of the Contact Address Attributes button and lists the address attributes you selected. When you do not specify any address attributes, the label displays <No contact address attributes specified>. For more information, see the section “Understand Contact Address Attributes” on page 95. Warning: Contact address attributes entered on the Attributes tab of the Address screen of the contact’s relationship record are considered for filters, instead of regular attributes entered on the Attributes/Notes tab of the relationship record. To access the Address Attributes tab, click the More button on the General 1 tab of the contact’s relationship record. Step 3. In Step 3, you must select what the program should do if it cannot find a contact address meeting your selections in Steps 1 and 2. You can print the organization’s name with no address, remove the record from printing in the mailing, or select a specific address to print. If you select a specific address to print, the Address to print field appears so you can select the address type to print from the mailing. Please note that when you mail to contacts, the Alphabetical sort order you select on the Format tab of the mail task is based on the Organization name, even though the contact name is used as the addressee. For more information about sorting, see “Format Tab: Sort” on page 186. INDIVIDUAL AND O R GA N I Z A T I O N A D D R E S S TA B S 95 Understand Contact Address Attributes When you mail specifically to an organization’s contacts, you have various options to choose from. Decide how much emphasis to place on contact address attributes in the program’s selection process of which records to include in a mailing. You make these selections on the Contact Address Attributes to Consider screen. To access this screen, click the Contact Address Attributes button on the Org. Address tab of any mail task. This button is available when you choose Mail to contacts in Step 1 on the Org. Address tab. You can choose to search for specific and additional address attributes, search only specific contact address attributes, or search for specific attributes and also make a second pass through the system searching for contacts with additional address attributes, if no matches for the specified contact address attribute are found on a first pass. Your selection may depend on how you enter and use address attributes in your database. Read below to see how the different options affect contact address attribute processing. Because everyone uses contacts differently, contact address attribute processing is slightly different from regular address attribute processing for Individuals and Organizations. For more information about attribute processing for Individual or mailing only to an Organization’s address, see “Understand Address Attributes” on page 86. 96 C H A P T E R If No Contact Address Attributes are Specified Regardless of the option you select on the Contact Address Attributes to Consider screen, if no attributes are specified in the grid at the bottom of the screen, processing is as follows. If no contact address attributes are specified in the grid, the program starts with the first contact type in the Contact types to include list on the Contact to Receive Mail screen. To access this screen, click Contact Information on the Org. Address tab. The program considers these options in order: (If Contact types to include list is blank, the first valid contact found is used.) • The contact type on the contact record must match what is listed in the Contact types to include list on the Contacts to Receive Mail screen • The contact must be marked as Contact for the organization • The from/to dates on the contact must be valid as of today • The Do not mail to this contact checkbox must NOT be marked • If any of these fail, the next contact in the Contact types to include list is processed. Otherwise, the contact’s address is validated using the following criteria: • The Send mail to this address checkbox on the contact’s address must be marked • The valid from/to dates on the contact’s address must be valid as of today • The seasonal from/to dates on the contact’s address must be valid as of today • If any of these fail, the contact is not used and the program continues with Step 3 on the Org. Address tab, Specify what happens if no contact is found. • If the Print one for each contact found checkbox on the Contacts to Receive Mail screen (accessed by clicking Contact Information in Step 2 on the Org. Address screen) is marked, the process repeats for each contact in the Contact types to include list. If the Include Selected Contact Types Only checkbox on the Contacts to Receive Mail screen is NOT marked, all valid contacts are printed. • If the Print one for each contact found checkbox on the Contacts to Receive Mail screen is NOT marked, the program stops processing that organization record as soon as one contact is found. If the Contact types to include list is exhausted, the program uses the option you select in Step 3 on the Org. Address screen, Specify what happens if no contact is found. For more information, see “Mail to an Organization’s Contacts” on page 91. INDIVIDUAL AND O R GA N I Z A T I O N A D D R E S S TA B S 97 Include Contacts with one of these address attributes, no address attributes, or different address attribute categories If you select the Include Contacts with one of these address attributes, no address attributes, or different address attribute categories option on the Contact Address Attributes to Consider screen, the following is true: • If a contact’s address contains no address attributes, it is still considered for processing • If a contact’s address contains address attributes of an entirely different category than those specified in the grid on the Contact Address Attributes to Consider screen, it is still considered for processing • If an address contains attributes of the same category, but with a different description than those specified in the grid, it is excluded from processing. (This is consistent with version 6.x and Individual address processing.) If you select the Include Contacts with one of these address attributes, no address attributes, or different address attribute categories option on the Contact Address Attributes to Consider screen, processing is as follows: The program starts with the first contact type in the Contact types to include list on the Contacts to Receive Mail screen. Access this screen by clicking Contact Information on the Org. Address tab. (If the Contact types to include list is blank, the first valid contact found is used.) • The contact must not have an address attribute with the same attribute category but different description from any of the attributes specified in the grid. For this selection, the program only does a single pass through the system searching for valid contacts. Therefore, contacts with an address attribute category and description matching ones listed in the grid and contacts with no address attributes or attribute categories that are different than those listed in the grid are processed at the same time and are equally valid. The only contacts that are excluded based on this selection for address attribute processing are contacts with the same attribute category but different description. • The contact type on the contact record must match what is listed in the Contact types to include list on the Contacts to Receive Mail screen • The contact must be marked as Contact for the organization • The from/to dates on the contact must be valid as of today • The Do not mail to this contact checkbox must NOT be marked • If any of these fail, the next contact in the Contact types to include list is processed. Otherwise, the contact’s address is validated using the following criteria: • The Send mail to this address checkbox on the contact’s address must be marked 98 C H A P T E R • The valid from/to dates on the contact’s address must be valid as of today • The seasonal from/to dates on the contact’s address must be valid as of today • If any of these fail, the contact is not used and processing continues with the selection in Step 3 on the Org. Address tab, Specify what happens if no contact is found • If the Print one for each contact found checkbox on the Contacts to Receive Mail screen (accessed by clicking Contact Information in Step 2 on the Org. Address screen) is marked, the process repeats for each contact in the Contact types to include list. If the Include Selected Contact Types Only checkbox on the Contacts to Receive Mail screen is NOT marked, all valid contacts are printed. • If the Print one for each contact found checkbox on the Contacts to Receive Mail screen is NOT marked, the program stops processing that organization record as soon as one contact is found. If the Contact types to include list is exhausted, the program uses the selection in Step 3 on the Org. Address tab, Specify what happens if no contact is found. For more information, see “Mail to an Organization’s Contacts” on page 91. Only consider Contacts with one of these address attributes When you select the Only consider Contacts with one of these address attributes option on the Contact Address Attributes to Consider screen, the checkbox below it becomes active. You can either mark or leave unmarked the If an Organization does not have a valid Contact with one of these attributes, consider Contacts with no attributes or with different attribute categories checkbox. Marking or unmarking the checkbox determines whether or not there is a second pass through the system searching for valid contacts, if no exact matches are found for a contact on the first pass through the system. Read below to understand each option. If an Organization does not have a valid Contact with one of these attributes, consider Contacts with no attributes or with different attribute categories Checkbox Marked If the Only consider Contacts with one of these address attributes option is selected on the Contact Address Attributes to Consider screen and the If an Organization does not have a valid Contact with one of these attributes, consider Contacts with no attributes or with different attribute categories checkbox is marked, processing is as follows: INDIVIDUAL AND O R GA N I Z A T I O N A D D R E S S TA B S 99 Only contact addresses containing an address attribute category and description that exactly match one defined in the grid are considered for processing on the first pass through the system. If there are no matches for an organization record, the program runs through the processing again. On a second pass through the system, the program determines whether a contact’s address is valid, based on the following criteria: • If an address contains no address attributes, it is considered for processing • If an address contains address attributes of an entirely different category, it is considered for processing • If an address contains attributes of the same category, but with a different description, it is excluded from the processing. (This is consistent with version 6.x and Individual address attribute processing.) See below for more details about how the program processes addresses on each pass through the system. First Pass The program starts with the first contact type in the Contact types to include list on the Contacts to Receive Mail screen. To access this screen, click Contact Information on the Org. Address tab. (If Contact types to include list is blank, the first valid contact found is used.) • The contact must have an address attribute listed in the grid. For this selection, contact address processing does a first pass through the system looking for a valid contact. Contacts with a matching address attribute category and description are considered. However, contacts with no address attributes or attribute categories different from those listed in the grid are NOT processed on the first pass through the system. The only contacts that are included for this selection on the first pass through the system are contacts with the same attribute category and description listed in the grid. • The contact type on the contact record must match what is listed in the Contact types to include list on the Contacts to Receive Mail screen • The contact must be marked as Contact for the organization • The from/to dates on the contact must be valid as of today • The Do not mail to this contact checkbox must NOT be marked • If any of these fail, the next contact in the Contact types to include list is processed. Otherwise, the contact’s address is validated using the following criteria: • The Send mail to this address checkbox on the contact’s address must be marked • The valid from/to dates on the contact’s address must be valid as of today • The seasonal from/to dates on the contact’s address must be valid as of today • If any of these fail, the contact is not used and processing continues with the selection in Step 3 on the Org. Address tab, Specify what happens if no contact is found. For more information, see “Mail to an Organization’s Contacts” on page 91. • If the Print one for each contact found checkbox on the Contacts to Receive Mail screen (accessed by clicking Contact Information in Step 2 on the Org. Address screen) is marked, the process repeats for each contact in the Contact types to include list. If the Include Selected Contact Types Only checkbox on the Contacts to Receive Mail screen is NOT marked, all valid contacts are printed. • If the Print one for each contact found checkbox on the Contacts to Receive Mail screen is NOT marked, the program stops processing that organization record as soon as one contact is found. If the Contact types to include list is exhausted, the system does a second pass through the system using the following criteria. Second Pass The program starts with the first contact type in the Contact types to include list. (If Contact types to include list is blank, the first valid contact found is used.) • If a contact address has an attribute with the same category listed in the grid, but a different description, it is excluded from processing. However, for this selection, the program considers contacts with no address attributes or address attribute categories different from those specified in the grid. 100 C H A P T E R • The contact type on the contact record must match what is listed in the Contact types to include list on the Contacts to Receive Mail screen • The contact must be marked as Contact for the organization • The from/to dates on the contact must be valid as of today • The Do not mail to this contact checkbox must NOT be marked. • If any of these fail, the next contact in the Contact types to include list is processed. Otherwise, the contact’s address is validated using the following criteria: • The Send mail to this address checkbox on the contact’s address must be marked • The valid from/to dates on the contact’s address must be valid as of today • The seasonal from/to dates on the contact’s address must be valid as of today • If any of these fail, the contact is not used and processing continues with the selection in Step 3 on the Org. Address tab, Specify what happens if no contact is found. • If the Print one for each contact found checkbox on the Contacts to Receive Mail screen (accessed by clicking Contact Information in Step 2 on the Org. Address screen) is marked, the process repeats for each contact in the Contact types to include list. If the Include Selected Contact Types Only checkbox on the Contacts to Receive Mail screen is NOT marked, all valid contacts are printed. • If the Print one for each contact found checkbox on the Contacts to Receive Mail screen is NOT marked, the program stops processing that organization record as soon as one contact is found. If the Contact types to include list is exhausted, processing continues with the selection in Step 3 on the Org. Address tab, Specify what happens if no contact is found. For more information, see “Mail to an Organization’s Contacts” on page 91. If an Organization does not have a valid Contact with one of these attributes, consider Contacts with no attributes or with different attribute categories Checkbox Not Marked If the Only consider Contacts with one of these address attributes option is selected, but the If an Organization does not have a valid Contact with one of these attributes, consider Contacts with no attributes or with different attribute categories checkbox is NOT marked, a contact’s address must contain an attribute matching the exact attribute category and description defined in the grid on the Contact Address Attributes to Consider screen to be considered for processing. The program starts with the first contact type in the Contact types to include list on the Contacts to Receive Mail screen. To access this screen, click Contact Information on the Org. Address tab. (If the Contact types to include list is blank, the first valid contact found is used.) • The contact must have an address attribute category and description exactly matching one listed in the grid. For this selection, contact address processing does one pass through the system looking for a valid contact. Contacts with a matching address attribute category and description are considered. However, contacts with no address attributes or attribute categories that are different than those listed in the grid are NOT processed and are NOT valid. The only contacts that are included based on the address attribute processing are contacts with the same address attribute category and description. • The contact type on the contact record must match what is listed in the Contact types to include list on the Contacts to Receive Mail screen • The contact must be marked as Contact for the organization • The from/to dates on the contact must be valid as of today • The Do not mail to this contact checkbox must NOT be marked • If any of these fail, the next contact in the Contact types to include list is processed. Otherwise, the contact’s address is validated using the following criteria: • The Send mail to this address checkbox on the contact’s address must be marked INDIVIDUAL AND O R GA N I Z A T I O N A D D R E S S TA B S 10 • The valid from/to dates on the contact’s address must be valid as of today • The seasonal from/to dates on the contact’s address must be valid as of today • If any of these fail, the contact is not used and processing continues with the selection in Step 3 on the Org. Address tab, Specify what happens if no contact is found. • If the Print one for each contact found checkbox on the Contacts to Receive Mail screen (accessed by clicking Contact Information in Step 2 on the Org. Address screen) is marked, the process repeats for each contact in the Contact types to include list. If the Include Selected Contact Types Only checkbox on the Contacts to Receive Mail screen is NOT marked, all valid contacts are printed. • If the Print one for each contact found checkbox on the Contacts to Receive Mail screen is NOT marked, the program stops processing that organization record as soon as one contact is found. If the Contact types to include list is exhausted, processing continues with the selection in Step 3 on the Org. Address tab, Specify what happens if no contact is found. For more information, see “Mail to an Organization’s Contacts” on page 91. If the checkbox is unmarked, there is no second pass through the system. 102 C H A P T E R chapter 9 Segment Tab Overview . . . . . . . . . . . . . . . . . . . . . . . . . . . . . . . . . . . . . . . . . . . . . . . . . . . . . . . . . . . . . . . . . . . . . . . . . . . . . . . . 104 Parts of the Screen. . . . . . . . . . . . . . . . . . . . . . . . . . . . . . . . . . . . . . . . . . . . . . . . . . . . . . . . . . . . . . . . . . . . . . . . . 104 Segment a Mailing . . . . . . . . . . . . . . . . . . . . . . . . . . . . . . . . . . . . . . . . . . . . . . . . . . . . . . . . . . . . . . . . . . . . . . . . . 105 Procedures Segment a mail run . . . . . . . . . . . . . . . . . . . . . . . . . . . . . . . . . . . . . . . . . . . . . . . . . . . . . . . . . . . . . . . . . . . . . . . . . . . 108 104 C H A P T E R Overview On the Cards, Envelopes, Labels, and Quick Letters mail tasks, the Segment tab appears so you can include multiple queries in one mailing without having to worry about sending more than one piece of mail to a constituent. The Segment tab is also useful when you prepare a mailing to send out in several packages. For example, you are creating labels for your 2002 Direct Mailing appeal, which is divided into three packages. The package a constituent receives depends on previous gifts the constituent donated to your organization. Major donors who have contributed at least $5,000 receive a full-color brochure; previous donors receive a small booklet; and prospects receive a letter. You can use the Segment tab to create labels for each package all at the same time and prevent sending more than one package to a single constituent. Parts of the Screen Tip: If you use Microsoft Word to perform a mail merge, see The Raiser’s Edge & Microsoft Office Integration Guide for a procedure using the Word Merge Wizard. Segment mail run. To segment the mailing and enable the rest of the features on the Segment tab, mark Segment mail run. Update number solicited for each Appeal and Package. Mark this checkbox to automatically update the number of constituents solicited on the appeal record associated with this mailing to include the number of constituents this mailing is sent to, after you print, preview, or export the mailing. Marking this checkbox updates appeal and package information located on the General tab of an appeal record and the package record, accessed through the Packages tab of the appeal record. S E G M E N T TA B 10 Add Appeal and Package to Constituent record. Mark this checkbox to automatically add the associated appeal and package (defined in the Segment grid below) to the constituent record of each included in this mailing, once you print, preview, or export the mailing. Date. In the Date field, enter the date to record when you send the mailing. The Date field is available only if you mark Add Appeal and Package to Constituent record. Comment. In the Comment field, enter any notes to appear in the Comments column on the Appeals tab of the constituent record. The Comment field is available only if you mark Add Appeal and Package to Constituent record. Input Query. In the Input Query column of the Segment grid, list in order the queries you want to use to properly segment your mailing. Appeal. The Appeal column displays the appeal to which this solicitation is associated. Select from the table in this column or enter a new appeal, if you have rights to do so. Package. The Package column displays information from the Package tab of the appeal record. You must first enter package information on the Packages tab of the appeal record before it can be available for selection in the Segment grid in Mail. You cannot enter information directly into this column of the grid. For more information about creating packages, see the Appeals chapter of the Campaigns, Funds, & Appeals Data Entry Guide. Output Query. In the Output Query column, enter a name for the output query of constituents included in this segment of the mailing, once it is run (printed, previewed or exported.) Automatically overwrite existing queries. Mark this checkbox to automatically overwrite existing queries of the same name, if you enter a name in the Output Query column that is already saved in Query. The new output query generated by running this mailing replaces the existing query of the same name. Segment a Mailing Note: If you mark Segment mail run, you must click the Include button to select All Records on the General tab. If you include a query on the General tab by choosing Selected Records, only records present on both the General and Segment tabs are considered for the mailing. If the records do not appear on both tabs, the message, “No records meet criteria,” appears. If, for example, only one record from a query appears on both tabs, then only one label from that query will print. 106 C H A P T E R To segment a mailing, you must create a query of each group to include in the mailing. The Segment tab contains a grid you use to list all the queries you want to include. The order in which you list the queries is very important. The program removes duplicate constituents from the mailing based on the order in which you list the queries in the grid. For example, when you prepare to create labels for your 2002 Direct Mailing appeal, you create three queries — Major Donor Prospect, Previous Donors, and Prospects — to determine the constituents who should receive each package. All constituents in the Major Donor Prospect query are included in the Previous Donors query, but you do not want your major donors to receive two pieces of mail. Because you want major donors to receive a separate package, enter the Major Donor Prospect query in the first row of the grid. In the second row of the grid, enter the Previous Donors query. In the third row, enter the Prospects query. When the program processes the mailing, it first prints labels for all the constituents in the Major Donor Prospect query. Then, the program prints labels for all constituents in the Previous Donors query for whom a label has not yet been printed. Finally, the program prints labels for all constituents in the Prospects query who are not included in the other queries. For example, John Turner appears in both the Major Donor Prospect and Previous Donors queries. If you list the Major Donor Prospect query in the first row of the grid and the Previous Donors query in the second row, the program prints a label for John Turner with the Major Donor Prospect query and eliminates him from printing with the Previous Donors query. If you list the Previous Donors query before the Major Donor Prospect query, the program prints a label for John with the Previous Donors query and eliminates him from printing with the Major Donor Prospect query. You may be wondering, “How do I know in which group a constituent appears?”. The answer is Output Queries. Think of each row in the grid as a group. The first row contains the Major Donor Prospect group, the second row contains the Previous Donors group, and the third row contains the Prospects group. You can create an output query that contains all constituents included in a particular group. For example, you can create an output query called 2002 Annual Booklet that contains all constituents for whom a label printed with the Previous Donors group. This output query contains the constituents who appear in the Previous Donors query and not the Major S E G M E N T TA B 10 Donor Prospect query. For example, in the Segment grid, you list the Major Donor Prospect query followed by the Previous Donors query. John Turner, who is included in both queries, does not appear in the 2002 Annual Booklet output query because his label printed with the Major Donor Prospect group. Sarah McClain, who appears only in the Previous Donors query, is included in the 2002 Annual Booklet output query because her label is printed with the Previous Donors group. Note: To add or delete a row in the Segment grid, select a row in the grid and select Edit, Insert Row or Delete Rows from the menu bar. When you send mail to a group of constituents, you can record the appeal sent to each constituent on the Appeals tab of the constituent record. You can select a different appeal for each query listed in the Segment grid. If you choose to record the appeal on the constituent records, the program can automatically update the number solicited for each appeal. This number is listed in the No. solicited field on the appeal record. When you enter an appeal in the Appeal and Package columns, the appeal and package are added to constituent records even when the records are previewed. When you choose to create an output query of each segment in a mailing, you can mark Automatically overwrite existing queries if you do not want to receive a warning that a query in your database has the same name as an output query on the Segment tab. If you do not mark this checkbox, you receive a message when a query in your database has the same name as an output query. If you receive this message, you must change the name of the output query or mark Automatically overwrite existing queries. 108 C H A P T E R Segment a mail run When you segment a mail run, you must include all records in the mailing. To include all records, click the Include button on the General tab of the mail task. When the submenu appears, select All Records. If you choose Selected Records and include a query on the General tab of the mail task, a record must be present in both the query entered on the General tab and a query entered on the Segment tab to receive mail. For more information about the Include button, see the General tab section in this book for the mail task you are using. To record the package associated with each segment of the mailing, you must already have created the package on the Packages tab of the appeal record for it to appear for selection in the table on the Segment tab in Mail. For more information about creating packages, see the Appeals chapter of the Campaigns, Funds, & Appeals Data Entry Guide. Scenario: You are creating labels for your 2002 Direct Mailing appeal, which has been divided into three packages. The package a constituent receives depends on the donor’s status. Major donors receive a full-color photo booklet, previous donors receive a brochure, and prospects receive a letter. To segment the mailing, you created three queries: Major Donor Prospect, Previous Donors, and Prospects. You want to create output queries called 2002 Annual Full-Color Booklet, 2002 Annual Brochure, and 2002 Annual Letter to record the constituents who will receive each package. Also, you want to add the 2002 Direct Mailing appeal to the Appeals tab of each constituent record for which you print a label. 1. From a mail task, select the Segment tab. For more information about opening a mail task, see “Access Mail Tasks” on page 3. 2. To segment the mailing, mark Segment mail run. When you mark this checkbox, all fields on the Segment tab are enabled. Warning: If you mark Update number solicited for each Appeal and Package, you must enter an appeal and package for every input query you add in the Segment grid. S E G M E N T TA B 10 3. You can automatically update the number of constituents solicited on the 2002 Direct Mailing appeal record to include the constituents from this mailing, when the mailing is run. To do so, mark Update number solicited for each Appeal and Package. When you mark this checkbox, only constituents are included in this number. For example, if you create labels for participants of your event and mark this checkbox, only participants who are also constituents are included in the number solicited. The program adds the appeal and package to the constituent records when you preview, print, export, or email the mailing. Note: The appeal and package are added only to constituent records. For example, if you create labels for relationships and mark Add Appeal and Package to constituent record, the appeal and package you enter in the grid are added only to relationships who are constituents in your database. 4. To add the 2002 Direct Mailing appeal to the Appeals tab of constituent records included in this mailing, mark Add Appeal and Package to Constituent record. 5. In the Date field, enter the date 11/01/2002 to record when you send the mailing. You can also add any appeal notes in the Comment field. Comments appear in the Comments column on the Appeals tab of the constituent record. 6. In the first row of the Input Query column, click the binoculars to search for the Major Donor Prospect query. This is a dynamic query of all constituents who have given more than $5,000 to your organization. Input queries must be constituent queries and already exist in Query. 7. In the first row of the Appeal column, enter “2002 Direct Mailing”. 8. In the first row of the Package column, select “full-color photo booklet”. This is the package the first segment of the mailing, The Major Donor Prospects, will receive. You must already have created the package on the Packages tab of the appeal record for it to appear in the table here. For more information, see the Appeals chapter of the Campaigns, Funds, & Appeals Data Entry Guide. 9. In the first row of the Output Query column, enter “2002 Annual Full Color Booklet”. This is a new static query of all the constituents who receive the full color photo booklet. 10. In the second row of the Input Query column, click the binoculars to search for the Previous Donors query. This is a dynamic query of all constituents who have given money to your organization. 11. In the second row of the Appeal column, enter “2002 Direct Mailing”. 12. In the second row of the Package column, select “three-fold color brochure”. You must already have created the package on the Packages tab of the appeal record for it to appear in the table here. 13. In the second row of the Output Query column, enter “2002 Annual Booklet”. This is a new static query of all constituents who receive the brochure. 14. In the third row of the Input Query column, click the binoculars to search for the Prospect query. This is a dynamic query of all constituents who have never given money to your organization. 15. In the third row of the Appeal column, enter “2002 Direct Mailing”. 16. In the third row of the Package column, select “standard letter”. You must already have created the package on the Packages tab of the appeal record for it to appear in the table here. 110 C H A P T E R 17. In the third row of the Output Query column, enter “2002 Annual Letter”. This is a new static query of all constituents who receive the letter. Warning: If you mark Automatically overwrite existing queries, make sure you want to replace any existing queries of the same name with the constituents included in that segment from this mailing. 18. If you want to automatically overwrite any existing queries with the same name as entered in any row of the Output Query column, mark Automatically overwrite existing queries below the Segment grid. 19. To run the mailing, Print, Preview, or Export the mailing. The program adds the appeal and package to the constituent records and creates output queries when you preview, print, export, or email the mailing. To save the settings entered in this mail task, you need to create a parameter file. For more information, see “Save a Parameter File” on page 257. chapter 10 Postal Saver Tab and Postal Discounts Install and Update PostalSaver . . . . . . . . . . . . . . . . . . . . . . . . . . . . . . . . . . . . . . . . . . . . . . . . . . . . . . . . . . . . . . . 114 Qualify for Postal Discounts . . . . . . . . . . . . . . . . . . . . . . . . . . . . . . . . . . . . . . . . . . . . . . . . . . . . . . . . . . . . . . . . . 124 Requirements . . . . . . . . . . . . . . . . . . . . . . . . . . . . . . . . . . . . . . . . . . . . . . . . . . . . . . . . . . . . . . . . . . . . . . . . . . . . . . . . 124 Options. . . . . . . . . . . . . . . . . . . . . . . . . . . . . . . . . . . . . . . . . . . . . . . . . . . . . . . . . . . . . . . . . . . . . . . . . . . . . . . . . . . . . . 125 Run the Presort Wizard to Set PostalSaver Options . . . . . . . . . . . . . . . . . . . . . . . . . . . . . . . . . . . . . . . . . . . . . . 126 Sort Class and Piece Type Screen. . . . . . . . . . . . . . . . . . . . . . . . . . . . . . . . . . . . . . . . . . . . . . . . . . . . . . . . . . . . . . . . . 138 Presort Classifications . . . . . . . . . . . . . . . . . . . . . . . . . . . . . . . . . . . . . . . . . . . . . . . . . . . . . . . . . . . . . . . . . . . . . . . 138 Mail Piece Types . . . . . . . . . . . . . . . . . . . . . . . . . . . . . . . . . . . . . . . . . . . . . . . . . . . . . . . . . . . . . . . . . . . . . . . . . . . 141 Mail Piece Information Screen. . . . . . . . . . . . . . . . . . . . . . . . . . . . . . . . . . . . . . . . . . . . . . . . . . . . . . . . . . . . . . . . . . . 143 Sorting Preparation Screen. . . . . . . . . . . . . . . . . . . . . . . . . . . . . . . . . . . . . . . . . . . . . . . . . . . . . . . . . . . . . . . . . . . . . . 144 Sort Level Requirements. . . . . . . . . . . . . . . . . . . . . . . . . . . . . . . . . . . . . . . . . . . . . . . . . . . . . . . . . . . . . . . . . . . . . 148 Mailing and Permit Information Screen . . . . . . . . . . . . . . . . . . . . . . . . . . . . . . . . . . . . . . . . . . . . . . . . . . . . . . . . . . . 149 Mailing Permits . . . . . . . . . . . . . . . . . . . . . . . . . . . . . . . . . . . . . . . . . . . . . . . . . . . . . . . . . . . . . . . . . . . . . . . . . . . . 150 Mail Sort Discounts Screen. . . . . . . . . . . . . . . . . . . . . . . . . . . . . . . . . . . . . . . . . . . . . . . . . . . . . . . . . . . . . . . . . . . . . . 158 Destination Entry Discounts . . . . . . . . . . . . . . . . . . . . . . . . . . . . . . . . . . . . . . . . . . . . . . . . . . . . . . . . . . . . . . . . . . 161 Payment Method Screen . . . . . . . . . . . . . . . . . . . . . . . . . . . . . . . . . . . . . . . . . . . . . . . . . . . . . . . . . . . . . . . . . . . . . . . 161 Publication Information Screen . . . . . . . . . . . . . . . . . . . . . . . . . . . . . . . . . . . . . . . . . . . . . . . . . . . . . . . . . . . . . . . . . . 163 Label Layout Screen . . . . . . . . . . . . . . . . . . . . . . . . . . . . . . . . . . . . . . . . . . . . . . . . . . . . . . . . . . . . . . . . . . . . . . . . . . . 165 Label Layouts . . . . . . . . . . . . . . . . . . . . . . . . . . . . . . . . . . . . . . . . . . . . . . . . . . . . . . . . . . . . . . . . . . . . . . . . . . . . . . 167 Presort Reports Screen . . . . . . . . . . . . . . . . . . . . . . . . . . . . . . . . . . . . . . . . . . . . . . . . . . . . . . . . . . . . . . . . . . . . . . . . . 169 Postal Reports . . . . . . . . . . . . . . . . . . . . . . . . . . . . . . . . . . . . . . . . . . . . . . . . . . . . . . . . . . . . . . . . . . . . . . . . . . . . . 171 Load PostalSaver Options from an Existing Parameter File . . . . . . . . . . . . . . . . . . . . . . . . . . . . . . . . . . . . . . . . 175 Procedures Download and install the PostalSaver data files . . . . . . . . . . . . . . . . . . . . . . . . . . . . . . . . . . . . . . . . . . . . . . . . . . . . 114 Install the MailRoom ToolKit update files. . . . . . . . . . . . . . . . . . . . . . . . . . . . . . . . . . . . . . . . . . . . . . . . . . . . . . . . . . 118 Download and update the PostalSaver data files. . . . . . . . . . . . . . . . . . . . . . . . . . . . . . . . . . . . . . . . . . . . . . . . . . . . 121 Set the PostalSaver options . . . . . . . . . . . . . . . . . . . . . . . . . . . . . . . . . . . . . . . . . . . . . . . . . . . . . . . . . . . . . . . . . . . . . 126 Complete the Mail Piece Information screen . . . . . . . . . . . . . . . . . . . . . . . . . . . . . . . . . . . . . . . . . . . . . . . . . . . . . . . 143 Complete the Sorting Preparation screen . . . . . . . . . . . . . . . . . . . . . . . . . . . . . . . . . . . . . . . . . . . . . . . . . . . . . . . . . 145 Complete the Mailing and Permit Information screen . . . . . . . . . . . . . . . . . . . . . . . . . . . . . . . . . . . . . . . . . . . . . . . 149 Add a new mailing permit . . . . . . . . . . . . . . . . . . . . . . . . . . . . . . . . . . . . . . . . . . . . . . . . . . . . . . . . . . . . . . . . . . . . . . 151 Edit a mailing permit. . . . . . . . . . . . . . . . . . . . . . . . . . . . . . . . . . . . . . . . . . . . . . . . . . . . . . . . . . . . . . . . . . . . . . . . . . . 154 Copy a mailing permit. . . . . . . . . . . . . . . . . . . . . . . . . . . . . . . . . . . . . . . . . . . . . . . . . . . . . . . . . . . . . . . . . . . . . . . . . . 156 Delete a mailing permit . . . . . . . . . . . . . . . . . . . . . . . . . . . . . . . . . . . . . . . . . . . . . . . . . . . . . . . . . . . . . . . . . . . . . . . . 157 112 C H A P T E R Complete the Mail Sort Discounts screen. . . . . . . . . . . . . . . . . . . . . . . . . . . . . . . . . . . . . . . . . . . . . . . . . . . . . . . . . . 158 Enter the value of precanceled stamps. . . . . . . . . . . . . . . . . . . . . . . . . . . . . . . . . . . . . . . . . . . . . . . . . . . . . . . . . . . . 162 Calculate the minimum postage value of metered mail . . . . . . . . . . . . . . . . . . . . . . . . . . . . . . . . . . . . . . . . . . . . . . 162 Complete the Publication Information screen . . . . . . . . . . . . . . . . . . . . . . . . . . . . . . . . . . . . . . . . . . . . . . . . . . . . . . 164 Complete the Label Layout screen . . . . . . . . . . . . . . . . . . . . . . . . . . . . . . . . . . . . . . . . . . . . . . . . . . . . . . . . . . . . . . . 165 Add a new label layout . . . . . . . . . . . . . . . . . . . . . . . . . . . . . . . . . . . . . . . . . . . . . . . . . . . . . . . . . . . . . . . . . . . . . . . . . 167 Edit a label layout . . . . . . . . . . . . . . . . . . . . . . . . . . . . . . . . . . . . . . . . . . . . . . . . . . . . . . . . . . . . . . . . . . . . . . . . . . . . . 168 Copy a label layout . . . . . . . . . . . . . . . . . . . . . . . . . . . . . . . . . . . . . . . . . . . . . . . . . . . . . . . . . . . . . . . . . . . . . . . . . . . . 168 Delete a label layout . . . . . . . . . . . . . . . . . . . . . . . . . . . . . . . . . . . . . . . . . . . . . . . . . . . . . . . . . . . . . . . . . . . . . . . . . . . 169 Complete the Presort Reports screen . . . . . . . . . . . . . . . . . . . . . . . . . . . . . . . . . . . . . . . . . . . . . . . . . . . . . . . . . . . . . 169 Copy the PostalSaver options from an existing parameter file. . . . . . . . . . . . . . . . . . . . . . . . . . . . . . . . . . . . . . . . . 176 P O S T A L S A V E R TA B AND P O S T A L D I S C O U N T S 11 Mailings are important to your work as a nonprofit organization. PostalSaver is a valuable tool that enhances The Raiser’s Edge and automates the process of sorting mailings and completing reports. This saves you time and effort in qualifying mailings for postal discounts. Warning: PostalSaver is updated every two months. To make sure you have the most current version before you run PostalSaver, visit the Downloads page of the Blackbaud Web site at http://downloads.blackbaud.com. For information about downloading and updating PostalSaver, see “Install and Update PostalSaver” on page 114. When you use the optional module PostalSaver, the PostalSaver tab appears on most Mail tasks. With your selections on the PostalSaver tab, you create a parameter file that defines how to sort the mailing according to the ZIP Code and US Postal Service (USPS) regulations. You can print required reports complete with information. PostalSaver and the PostalSaver tab help you qualify for reduced rates offered for bulk mailings. You can use the PostalSaver tab in several Mail tasks. • Appeal Cards • Donor Acknowledgement Letters • Envelopes • Follow-up Letters • Honor/Memorial Acknowledgement Letters • Labels • Phonathon Forms • Receipts • Reminders • Renewal Notices • Volunteer Follow-up Letters 114 C H A P T E R If you include the Address barcode and Endorsement line fields on the Fields to Include tab, you can use the PostalSaver tab to sort your mailing and qualify for discounts offered by the US Postal Service. Run PostalSaver. To use the PostalSaver tab to sort and batch a mailing according to US Postal Service guidelines, mark Run PostalSaver. All selections on the PostalSaver tab are enabled. Note: The CASS certify addresses checkbox appears only if you use AddressAccelerator as your data service and, in User Options, enter a valid path to the AddressAccelerator data files. For more information, see the Data Health Center Guide. CASS certify addresses (this will not update addresses in the database). When you use AddressAccelerator as your data service, you can use the Coding Accuracy Support System (CASS) to certify all the addresses in a specific mailing before you print the mailing. To certify, mark CASS certify addresses. Changes to addresses are not updated on the constituent record. You must manually update address changes on the constituent record. Options. To set up how the program uses PostalSaver to sort and batch your mailing, click Options. You can select to run the Presort Wizard to set up the PostalSaver options or load the option settings from an existing parameter file to use as a template. Install and Update PostalSaver Warning: If you use AddressAccelerator as your data service, update the AddressAccelerator data files instead. When you update the AddressAccelerator data files, both PostalSaver and AddressAccelerator update. For more information about how to update the AddressAccelerator data files, see the Data Health Center Guide. The PostalSaver data files are updated every two months. To access the information in the PostalSaver data files, you must download and install them from www.blackbaud.com. P O S T A L S A V E R TA B AND P O S T A L D I S C O U N T S 11 If you work on a network, you can install the data files on the server or in a shared folder on any computer all users can access. To link the files to The Raiser’s Edge, you must enter the path to the data files in User Options. After you install the PostalSaver data files on a workstation or server for the first time, you must also update Satori MailRoom ToolKit. PostalSaver uses MailRoom ToolKit to sort your mailing and take advantage of postal discounts. Download and install the PostalSaver data files Warning: The Downloads page is a secured resource on the Blackbaud Web site. To access the Downloads page, you must log in. 1. Access the Downloads page of the Blackbaud Web site at http://downloads.blackbaud.com. 2. Click PostalSaver for the United States. The latest PostalSaver files appear for download. Warning: Download and installation instructions are included on the Downloads page. Read all Notes included with the download instructions. 3. Download and install any relevant PostalSaver updates. 116 C H A P T E R 4. Access and run the downloaded PostalSaverDatafiles.exe file. The InstallShield Wizard Preparing to Install screen appears. When the InstallShield wizard is configured, the InstallShield Wizard for PostalSaver Datafiles screen appears. P O S T A L S A V E R TA B AND P O S T A L D I S C O U N T S 11 5. To continue with the installation, click Next. The Choose Destination Location screen appears. 6. In the Destination Folder frame, enter the location where you want the wizard to install the PostalSaver data files. By default, the location is C:\Program Files\Blackbaud\Postal Tools. To map to a different location, click Browse. 7. Click Next. The wizard installs the PostalSaver data files, and the Setup Status screen tracks the installation progress. 118 C H A P T E R When the installation is complete, the InstallShield Wizard Complete screen appears. 8. Click Finish. Note: PostalSaver uses Satori MailRoom ToolKit to help sort your mailing and take advantage of postal discounts. If you install the PostalSaver data files on a server, you must install the MailRoom ToolKit update files on each workstation that uses PostalSaver. 9. Install the Satori MailRoom ToolKit update files. For a procedure on how to install the MailRoom ToolKit update files, see “Install the MailRoom ToolKit update files” on page 118. 10. Log into The Raiser’s Edge. 11. On the menu bar, select Tools, User Options. The Options screen appears. P O S T A L S A V E R TA B AND P O S T A L D I S C O U N T S 11 12. Select the File Locations tab. 13. On the AddressAccelerator Data Files row of the grid, click in the Location column. An ellipsis appears. 14. Enter the path to the PostalSaver data files. Note: By default, the PostalSaver data files are installed at C:\Program Files\Blackbaud\Postal Tools. To map to the location, click the ellipsis. The Browse for Folder screen appears so you can locate the data files. When you locate the files, select the folder and click OK. You return to the File Locations tab, and the selected Location appears in the AddressAccelerator Data Files row. 15. Click Apply. 16. Click OK. You return to the shell page of The Raiser’s Edge. Note: To get maximum performance from the newly installed data files, you may need to close and reopen The Raiser’s Edge or restart the workstation. You can now use PostalSaver to sort your mailing and take advantage of postal discounts. For information about PostalSaver and postal discounts, see “Qualify for Postal Discounts” on page 124. Install the MailRoom ToolKit update files After you install the PostalSaver data files on a workstation or server for the first time, run the installation wizard to install the Satori MailRoom ToolKit update files. If you install the PostalSaver data files on a server, you must install the MailRoom ToolKit update files on each workstation to use PostalSaver. PostalSaver uses MailRoom ToolKit to help sort your mailing and take advantage of postal discounts. 1. Update the PostalSaver data files. For information about how to update the PostalSaver data files, see “Download and install the PostalSaver data files” on page 114. 2. Access the Postal Tools directory where you have the PostalSaver data files installed on the workstation. By default, the location is C:\Program Files\Blackbaud\Postal Tools. 120 C H A P T E R 3. Run the Update.exe file. The MailRoom ToolKit - InstallShield Wizard Extracting Files screen appears and the wizard extracts the files needed to install the MailRoom ToolKit update files. When the wizard finishes extracting the necessary files, the MailRoom ToolKit Update Setup welcome screen appears. P O S T A L S A V E R TA B AND P O S T A L D I S C O U N T S 12 4. Click Next. The Choose Destination Location screen appears. 5. In the Destination Folder frame, enter the location where you want the wizard to install the MailRoom ToolKit update files. By default, the location is C:\Program Files\mailroom toolkit. To map to a different location, click Browse. 6. Click Next. A message appears to inform you that the wizard is installing the MailRoom ToolKit update files. 122 C H A P T E R When the update is complete, the InstallShield Wizard Complete screen appears. 7. Click Finish. Download and update the PostalSaver data files The PostalSaver data files are updated every two months. To update the PostalSaver data files used with The Raiser’s Edge, you must download and install them from www.blackbaud.com. Warning: The Downloads page is a secured resource on the Blackbaud Web site. To access the Downloads page, you must log in. 1. Access the Downloads page of the Blackbaud Web site at http://downloads.blackbaud.com. 2. Click PostalSaver for the United States. The latest PostalSaver files appear for download. P O S T A L S A V E R TA B AND P O S T A L D I S C O U N T S 12 Warning: Download and installation instructions are included on the Downloads page. Read all Notes included with the download instructions. 3. Download and install any relevant PostalSaver updates. 4. Access and run the downloaded PostalSaverDatafiles.exe file. The InstallShield Wizard Preparing to Install screen appears. When the InstallShield wizard is configured, the PostalSaver Datafiles Update screen appears. 124 C H A P T E R 5. Click Next. The wizard installs the PostalSaver data files, and the Setup Status screen tracks the installation progress. When the installation is complete, the InstallShield Wizard Complete screen appears. 6. To close the wizard, click Finish. P O S T A L S A V E R TA B AND P O S T A L D I S C O U N T S 12 Qualify for Postal Discounts Note: To access the PostalSaver tab checkboxes and options, you must include an address barcode, endorsement line, and correct label size for labels on the Fields to Include tab in the mail task. The Address barcode and Endorsement line cannot fit and are not available for labels less than 3” wide. These labels include Avery 5160, 4037, 5196, 5660, 5390, 5395, 5095, 5895, 5883, and L7161. To be eligible for certain discounts, you must sort your mailing according to the requirements of the US Postal Service. If you use the optional module PostalSaver, the PostalSaver tab appears on most mail tasks in Mail. To help you take advantage of the reduced rates for First or Standard Class mail, the PostalSaver tab batches and sorts addresses in ZIP Code order. In conjunction with PostalSaver, you can use the address correction and certification services AddressAccelerator, AddressFinder, or the one-time address correction service provided by the US Postal Service to take full advantage of discount mailing rates offered by the US Postal Service. For more information about address correction services, press F1 on any AddressAccelerator or AddressFinder screen to access the help file. For more information about address formatting requirements, see the US Postal Service Publication #28, Postal Addressing Standards. To receive this guide, or for more information about postal discounts, contact your nearest postal business center, visit the USPS Web site at www.usps.com, or contact the National Customer Support Center at 1-800-238-3150. Requirements To qualify for postal discounts, your mailing must meet minimum requirements: • Standard Mail – 200 pieces, Bulk Mail Permit • First Class Mail – 500 pieces, First Class Permit • Periodicals – No minimum, Periodicals Permit Note: For more information about permits, see USPS publications: Pub. 417, Nonprofit Standard Mail Eligibility and Quick Service Guide 703, Standard Mail—Nonprofit Eligibility. To acquire these publications, visit www.usps.com, or contact the National Customer Support Center at 1-800-238-3150. For more information about acquiring permits, contact your local post office, the nearest postal business center, or the National Customer Support Center at 1-800-238-3150. If you do not have enough records in your mailing, PostalSaver displays a message telling you so. To preview or print the mailing, click Yes. However, you cannot run PostalSaver or print reports that should accompany the mailing for postal discount purposes. If your mailing includes enough records to meet the USPS minimum requirements and you still receive this message, check the Presort Options you selected on the Presort Wizard. For more information about Presort Options, see “Run the Presort Wizard to Set PostalSaver Options” on page 126. 126 C H A P T E R Options When you mark Run PostalSaver on the PostalSaver tab, the Options button is enabled. To set up how the program uses PostalSaver to sort and batch your mailing, click Options. When you click Options, a submenu appears. Set options. To create a new parameter file for the mailing, select Set options. When you select Set options, the Presort Wizard opens so you can create a new parameter file for a mailing. For more information about how to create a new parameter file, see “Run the Presort Wizard to Set PostalSaver Options” on page 126. Load options from. To use an existing parameter file for the mailing, select Load options from. When you select Load options from, the Load Options screen appears. From the Load Options screen, you can select an existing parameter file from which to copy the PostalSaver options. For more information about copying an existing parameter file, see “Load PostalSaver Options from an Existing Parameter File” on page 175. P O S T A L S A V E R TA B AND P O S T A L D I S C O U N T S 12 Run the Presort Wizard to Set PostalSaver Options Warning: PostalSaver is updated every two months. To make sure you have the most current version before you run PostalSaver, visit the Downloads page of the Blackbaud Web site at http://downloads.blackbaud.com. For information about downloading and updating PostalSaver, see “Install and Update PostalSaver” on page 114. PostalSaver is a valuable tool that enhances The Raiser’s Edge by automating the process of sorting mailings and completing reports. This saves you time and effort in qualifying mailings for postal discounts. With your selections on the PostalSaver tab, you create a parameter file that defines how to sort the mailing according to the ZIP Code and US Postal Service (USPS) regulations. To create a new parameter file for the mailing, on the PostalSaver tab, click Options and select Set options. The Presort Wizard opens so you can create a new parameter file for a mailing. Set the PostalSaver options Note: For this procedure, Appeal Cards is used as an example mail task. Because the steps are similar, procedures for other mail tasks with the PostalSaver tab are not repeated in this section. Depending on the options you choose for other mail tasks, you may skip some of these steps and screens. 1. On the Raiser’s Edge bar, click Mail. The Mail page appears. 2. From the list of Mail tasks on the left, select Appeal Cards. 3. In the grid on the right, select an existing Appeal Cards mailing and click Open on the action bar or, to create a new one, click New. For information about how to create a mailing, see “Create a Mailing” on page 213. The New Appeal Cards screen appears. 128 C H A P T E R Warning: On the Fields to Include tab, you must include an address field or you cannot access the PostalSaver tab. On the Fields to Include tab, if you do not select Endorsement line and Address barcode, you get a message telling you so when you print the mailing. The Address barcode and Endorsement line cannot fit and are not available for labels less than 3" wide. These labels include Avery 5160, 4037, 5196, 5660, 5390, 5395, 5095, 5895, 5883, and L7161. 4. Select the PostalSaver tab and mark Run PostalSaver. 5. If you use AddressAccelerator as your data service and, in User Options, enter a valid path to the AddressAccelerator data files, the CASS certify addresses checkbox appears. To certify the addresses for the mailing, mark CASS certify addresses. Marking this checkbox certifies the addresses for this particular mailing only. The program does not correct or certify address information on the constituent record. You must manually update address changes on the constituent record. P O S T A L S A V E R TA B AND P O S T A L D I S C O U N T S 12 6. To create a new parameter file for the mailing, click Options and select Set Options. The Mailing Type screen of the Presort Wizard appears. On the Mailing Type screen, select to use Basic Intelligent Mail, which requires Intelligent Mail barcodes on mail pieces, or POSTNET, if your mail pieces will be Postnet barcoded or not barcoded. Note: To select an existing parameter file from which to use the selected postal discount options, click Options and select Load options from. For more information about using an existing parameter file, see “Options” on page 125. 130 C H A P T E R 7. Click Next. The Sort Class and Piece Type screen appears. On the Sort Class and Piece Type screen, select the presort classification and mail piece type of the mailing. Next to the box, the requirements for the selected mail piece type appear. For information about this screen, see “Sort Class and Piece Type Screen” on page 138. Warning: The dimensions you enter should conform to the dimensions specified by postal regulations for the selected mail piece type. For information about the dimensions specified by the postal regulations for each mail piece type, see “Mail Piece Types” on page 141. 8. Click Next. The Mail Piece Information screen appears. On the Mail Piece Information screen, enter the dimensions and weight of your mail piece. For information about how to complete this screen, see “Mail Piece Information Screen” on page 143. P O S T A L S A V E R TA B AND P O S T A L D I S C O U N T S 13 9. Click Next. The Mailing and Permit Information screen appears. On the Mailing and Permit Information screen, enter information about your mailing and select or create a mail permit. For information about how to complete this screen, see “Mailing and Permit Information Screen” on page 149. 10. Click Next. The Sorting Preparation screen appears. On the Sorting Preparation screen, select the sort level requirements of your mailing. From the Sorting Preparation screen, you can also specify advanced tray and sorting options. For information about how to complete this screen, see “Sorting Preparation Screen” on page 144. 11. Click Next. • If your mailing is a Basic Intelligent Mail mail type, the Intelligent Mail Settings screen appears. Go to step 12. • If your mailing is a POSTNET type, the Mail Sorts Discounts screen appears. Go to step 14. 132 C H A P T E R 12. On the Intelligent Mail Settings screen, select whether or not to sequence your mail pieces, and if they should be sequenced automatically or manually. If you select to sequence them manually, determine the starting piece, tray, and pallet. 13. Click Next. • If your mailing has a presort class of Periodical or Standard Mail, the Mail Sort Discounts screen appears. Go to step 14. • If your mailing has a presort class of First Class, the Tray or Sack Label Layout screen appears. Go to step 20. P O S T A L S A V E R TA B AND P O S T A L D I S C O U N T S 13 14. On the Mail Sort Discounts screen, select the mail sort discounts for which your Standard Mail or Periodical mailing qualifies. Select whether your mailing is eligible for a nonprofit rate or a destination entry discount. If your mailing has a sort class of Periodical, select whether it is eligible for a discounted in-county rate. For information about how to complete this screen, see “Mail Sort Discounts Screen” on page 158. 15. Click Next. • If your mailing permit has a permit type of Precanceled Stamps or Metered Mail, the Payment Method screen appears. Go to step 16. • If your mailing permit has a permit type of Prepaid, the Publication Information screen appears. Go to step 18. • If your mailing permit has a permit type of Permit Imprint or Precanceled Postmark, the Tray or Sack Level Layout screen appears. Go to step 20. 16. On the Payment Method screen, specify your postage statement options. • If your mailing permit has a permit type of Precanceled Stamp, enter the value of the stamp. • If your mailing permit has a permit type of Metered Mail, select whether to calculate the minimum postage value. 134 C H A P T E R The value you enter is subtracted from the postage due on your postage statement. For information about how to complete this screen, see “Payment Method Screen” on page 161. 17. Click Next. The Tray or Sack Label Layout screen appears. Go to step 20. 18. On the Publication Information screen, enter information about your periodical publication and select whether to print all pages of the USPS Form 3541, Postage Statement—Periodicals – One Issue or One Edition. For information about this screen, see “Publication Information Screen” on page 163. 19. Click Next. The Tray or Sack Label Layout screen appears. Note: If, at the Sort Class and Piece Type screen, you select to mail parcels or Periodical or Standard Mail flats, the Sack Label Layout screen appears. Otherwise, the Tray Label Layout screen appears. The information and options on both screens are identical. P O S T A L S A V E R TA B AND P O S T A L D I S C O U N T S 13 20. On the Tray or Sack Label Layout screen, select the printer type, enter information about the layout of the labels used on trays or sacks, and enter information about the company associated with the mailing. For information about this screen, see “Label Layout Screen” on page 165. 21. Click Next. The Presort Reports screen appears. On this screen, select the postal reports to print, select whether to generate container labels for sacks or trays, and specify which printer prints the reports or container labels. For information about completing this screen, see “Presort Reports Screen” on page 169. Note: If, at the Sort Class and Piece Type screen, you select a presort classification of “Periodical”, you can select to print a Detailed Zone Listing, which is not pictured here because this example uses a presort classification of “Standard Mail”. 136 C H A P T E R 22. Click Finish. You return to the PostalSaver tab. In the Category and Value columns, a summary of your selections appears. Note: For some mail tasks, such as labels, make sure you select a label size that fits an endorsement line, address barcode, and all fields you select to print. Otherwise, the mailing does not print. The 12-field membership card cannot fit an endorsement. 23. To preview the mailing, click Preview. If you have not included an endorsement line or address barcode for the mailing, you may receive a warning message. Note: The Address barcode and Endorsement line fields cannot fit and are not available for labels less than 3" wide. These labels include Avery 5160, 4037, 5196, 5660, 5390, 5395, 5095, 5895, 5883, and L7161. Do as follows: a. Click OK. You return to the mail task. P O S T A L S A V E R TA B AND P O S T A L D I S C O U N T S 13 b. Select the Fields to Include tab. c. In the Available Fields grid, select Endorsement line and Address barcode, and click the right arrow to add them to the Fields to Include box. d. Click Preview again. Note: Depending on how many records you include in your mailing, previewing and printing may take some time. 24. A message appears to tell you the mailing is being prepared. When the mailing is prepared, the preview screen appears. To close the preview, click the red “X” in the top left corner of the preview screen. You return to the mail task. 138 C H A P T E R 25. Select the PostalSaver tab. 26. To save the parameter file, select File, Save from the menu bar. The Save Mailing As screen appears. 27. In the Mailing name and Description fields, enter a name and description to help identify the parameter file. You can also select whether to allow other users to run or modify the mailing. 28. Click Save. Next time you run PostalSaver, to select this parameter file on a mailing to use the same settings, click Options and select Load options from. Note: For more information about how to sort mailings or qualify for postal discounts, contact your nearest postal business center or the USPS National Customer Support Center at 1-800-238-3150. 29. To close the mail task, from the menu bar, select File, Close. You return to the Mail page. P O S T A L S A V E R TA B AND P O S T A L D I S C O U N T S 13 Sort Class and Piece Type Screen On the Sort Class and Piece Type screen, you select the presort class and mail piece type of your mailing. In the list on the left, select the applicable option, for example, Standard Mail, Machinable Letters. To the right of the list, the requirements of the selected mail piece type appear. After you select the presort class and mail piece type of your mailing, click Next. The Mail Piece Information screen appears. For information about the Mail Piece Information screen, see “Mail Piece Information Screen” on page 143. Presort Classifications On the Sort Class and Piece Type screen, you select the presort class of your mailing. The presort class can be First Class, Periodical, or Standard Mail. First Class. Service presort guidelines, it can be discounted. Each presorted First Class mailing requires a minimum of 500 pieces, all of which must belong to the same mail piece type, such as letters, flats, postcards, or parcels. Presorted First Class mailings require a special permit and can be deposited only at a Business Mail Entry Unit. No entry point discounts are available for First Class mailings. A First Class mail item must weigh less than 13 ounces. The mail can be submitted as non-automation or automation-compatible, which includes a carrier route rate. Automation pieces require CASS certification. A completed PS Form 3600 must accompany First Class mailings as the Postage Statement. For more information about guidelines, contact the USPS National Customer Support Center at 1-800-238-3150. 140 C H A P T E R Sample PS Form 3600 – First Class mailings Post Office: Note Mail Arrival Date & Time United States Postal Service Postage Statement — First-Class Mail and Priority Mail Use this form for either First-Class Mail or Priority Mail. They may not be combined. Telephone Name and Address of Mailing Agent (If other than permit holder) Telephone Name and Address of Individual or Organization for Which Mailing Is Prepared (If other than permit holder) Dun & Bradstreet No. Mailing Date Dun & Bradstreet No. Federal Agency Cost Code Statement Seq. No. No. & type of Containers Mailer Permit Holder's Name and Address and Email Address, If Any CAPS Cust. Ref. No. Dun & Bradstreet No. Post Office of Mailing Processing Category Mailing Letters Type of Postage Flats Automation Flats (DMM 301.3) Permit Imprint Precanceled Stamps Metered Permit # Weight of a Single Piece Total Pieces ____ ____ . ____ ____ ____ ____ Parcels pounds For Mail Enclosed Within Another Class Library Mail Media Mail Parcel Post For Automation Carrier Route Rate Pieces, Enter Date of Address Matching and Coding (DMM 708.3.3) ____ ____ / ____ ____ / ____ ____ ____ ____ Parts Completed (Select all that apply) Total Weight Periodicals Bound Printed Matter Standard Mail For Automation Rate Pieces, Enter Date of Address Matching and Coding (DMM 708.3.3) ____ ____ / ____ ____ / ____ ____ ____ ____ A B C D E F S Total Postage (Add parts totals) Postage Rate at Which Postage Affixed (Check one) (DMM 234.1.1) Correct Lowest Neither _________ pcs. x $ _____ . ______ = Postage Affixed Net Postage Due (Subtract postage affixed from total postage) For USPS Use Only: Additional Postage Payment (State reason) For postage affixed add additional payment to net postage due; for permit imprint add additional payment to total postage. Total Adjusted Postage Affixed AIC 121 (First-Class Mail) Total Adjusted Postage Permit Imprint AIC 237 (Priority Mail) The mailer's signature certifies acceptance of liability for and agreement to pay any revenue deficiencies assessed on this mailing, subject to appeal. If an agent signs this form, the agent certifies that he or she is authorized to sign on behalf of the mailer and that the mailer is bound by the certification and agrees to pay any deficiencies. In addition, agents may be liable for any deficiencies resulting from matters within their responsibility, knowledge, or control. The mailer hereby certifies that all information furnished on this form is accurate, truthful, and complete; that the mail and the supporting documentation comply with all postal standards and the mailing qualifies for the rates and fees claimed; and that the mailing does not contain any matter prohibited by law or postal regulation. I understand that anyone who furnishes false or misleading information on this form or who omits information requested on this form may be subject to criminal and/or civil penalties, including fines and imprisonment. Certification Permit Imprint Only - Check One PM: Report Total Postage in AIC: Privacy Notice: For information regarding our Privacy Policy visit www.usps.com. Signature of Mailer or Agent Printed Name of Mailer or Agent Signing Form Telephone . Weight of a Single Piece ____ . ____ ____ ____ ____ pound USPS Use Only Total Pieces Are postage figures at left adjusted from mailer's entries? If yes, reason: Yes No Total Weight Total Postage Check One Presort Verification Not Scheduled Round Stamp (Required) Presort Verification Performed as Scheduled I CERTIFY that this mailing has been inspected concerning: (1) eligibility for postage rates claimed; (2) proper preparation (and presort where required); (3) proper completion of postage statement; and (4) payment of annual fee (if required). Verifying Employee's Signature Date Mailer Notified Contact Verifying Employee's Name PS Form 3600-R1, January 2006 (Page 1 of 3) PSN 7530-07-000-6217 By (Initials) Time AM PM This form and mailing standards available on Postal Explorer at pe.usps.com. Periodical. Periodicals are newspapers, magazine, and other publications issued regularly on a stated frequency (at least four times per year) and meet the other USPS requirements printed in the Domestic Mail Journal. Periodical mailings, which may be classified as letters or flats, do not have a minimum piece weight requirement. However, publishers and distributors must keep records showing the publication is distributed to a legitimate list of requestors or subscribers. Periodicals require a special permit and can be deposited only at a USPS acceptance center. They must meet specific packaging and sacking or traying requirements. The mail can be submitted as nonautomation or automation-compatible. Automation pieces require CASS certification. Use PS Form 3541 as the postage statement to accompany Periodical mailings. To figure out if you qualify for periodical rates, consult a periodicals specialist at the USPS Business Center. P O S T A L S A V E R TA B AND P O S T A L D I S C O U N T S 14 Sample PS Form 3541 – Periodical mailings United States Postal Service Post Office: Note Mail Arrival Date & Time Postage Statement — Periodicals One Issue or One Edition Noncommingled nonsubscriber copies over the 10% limit are not mailable at Periodicals rates. Entry Post Office Name, State, and ZIP+4 Mailer Publication Title and Owner or News Agent's Name Mailing Agent's Name, Address, Telephone Number, and Email Address If Any CAPS Customer Ref. ID Applicable Parts Completed (select all that apply) Mailing A B C D Rate Category Classroom Regular Publication No. Edition/Code Mailing Date Issue Date Issue Frequency Statement Sequence No. Weight of Single Ride-Along Weight per Copy for Issue (DMM 707.2.2 round off to 4 decimal places if necessary) ____ ____ . ____ ____ ____ ____ pounds 0 . ___ ____ ____ lb. ____ For Automation Rate Pieces, Enter Date of Address Matching and Coding (DMM 708.3.3) ____ ____ / ____ ____ / ____ ____ ____ ____ Combined Mailing (DMM 707.26) Nonprofit Yes (Attach List) Science-of-Agriculture Processing Category (DMM 601.1.1) Letters Flats Automation Flats Irregular Parcels Advertising Percentage in This Issue ____ ____ . ____ ____ % For Carrier Route Rate Pieces, Enter Date of Address Matching and Coding (DMM 708.3.3) For Carrier Route Rate Pieces, Enter Date of Carrier Route Sequencing (DMM 707.23.8.1) ____ ____ / ____ ____ / ____ ____ ____ ____ Part B - In-County Copies Subtotal 135 Postmaster: Report total postage in AIC 224 Total From Item B24 (Page 3) Postmaster: Report total postage in AIC 238 Total From Item C8 Postmaster: This total for mailer use only. Report totals separately as instructed above. (Add Subtotal plus Parts B & C) (Page 3) Total Postage The signature of the owner of the publication certifies acceptance of liability for and agreement to pay any revenue deficiencies assessed on this mailing, subject to appeal. If an agent signs this form, the agent certifies that he or she is authorized to sign on behalf of the owner of the publication and that the owner of the publication is bound by the certification and agrees to pay any deficiencies. In addition, agents may be liable for any deficiencies resulting from matters within their responsibility, knowledge, or control. The owner of the publication hereby certifies that all information furnished on this form is accurate, truthful, and complete; that the mail and the supporting documentation comply with all postal standards and the mailing qualifies for the rates and fees claimed; and that the mailing does not contain any matter prohibited by law or postal regulation. I understand that anyone who furnishes false or misleading information on this form or who omits information requested on this form may be subject to criminal and/or civil penalties, including fines and imprisonment. Privacy Notice: For information regarding our Privacy Policy visit www.usps.com. Owner or Agent's Name Name and Telephone Number of Contact Person in Publisher's Office Owner or Agent's Signature Dun & Bradstreet No. _________________ Round Stamp (Required) Verifying Employee's Signature USPS Use Only Postage Post Office Computed Weight per Copy (Round off to 4 decimal places if necessary) ____ ____ . ____ ____ ____ ____ pounds Total From Item D16 (Page 4) Postmaster: Report total postage in AIC Certification No Total From Item A47 (Page 2) Part D - Subtract - Outside-County Copalletization II Discount Part C - Foreign Copies Yes No. & Type of Containers ____ ____ / ____ ____ / ____ ____ ____ ____ Part A - Outside-County Copies Consolidated Postage Statement No Print Verifying Employee's Name Time AM PM Dun & Bradstreet No. ______________ PS Form 3541-1 January 2006 (Page 1 of 4) PSN 7530-07-000-6222 This form and mailing standards available on Postal Explorer at pe.usps.com. Standard Mail. Standard Mail is bound or printed material, such as brochures, catalogs, flyers, or small parcels weighing less than 16 ounces. Standard mailing pieces, which may be classified as letters, flats, or parcels, must contain a general message aimed at all recipients. Each standard mailing requires a minimum of 200 pieces or weight of 50 pounds. All pieces must belong to the same processing category, such as all letters, flats, or machinable parcels. Standard mail requires a special permit and can be deposited only at a USPS acceptance center. Standard mailings must meet specific packaging and sacking or traying requirements. They can be submitted as nonautomation or can qualify for carrier route (automation or line-of-travel sequence) rates. Automation and carrier route pieces require CASS certification. For more information about guidelines, contact the USPS National Customer Support Center at 1-800-238-3150. 142 C H A P T E R Sample PS 3602 – Standard mailings United States Postal Service Post Office: Note Mail Arrival Date & Time Postage Statement - Standard Mail Permit Holder's Name and Address and Email Address, If Any Name and Address of Mailing Agent Telephone Name and Address of Individual or Organization for Which Mailing Is Prepared (If other than permit holder) Telephone Mailer (If other than permit holder) CAPS Cust. Ref. No. Dun & Bradstreet No. Mailing Type of Postage Dun & Bradstreet No. Dun & Bradstreet No. Processing Category Post Office of Mailing Letters Flats Permit Imprint Precanceled Stamps Metered Permit # Bound Printed Matter Total Pieces 0 . ____ ____ ____ ____ ____ For Mail Enclosed within Another Class Library Mail Periodicals Media Mail ____ ____ / ____ ____ / ____ ____ ____ ____ 125 pcs B C D E F Postage Rate at Which Postage Affixed (Check one) (DMM 244, 344, 444) _________ pcs. x $ _____ Neither Correct Lowest Yes both 15 lbs. No For Enhanced Carrier Route Rate Pieces, Enter Date of Carrier Route Sequencing (DMM 245/345/445.6.10.1) ____ ____ / ____ ____ / ____ ____ ____ ____ ____ ____ / ____ ____ / ____ ____ ____ ____ A Detached Address Lables? (DMM 602.4) Total Weight If Sacked, Based on Parcel Post G Total Postage . ______ = H I J K L M S (Add parts totals) Postage Affixed (Subtract postage affixed from total postage) Net Postage Due For USPS Use Only: Additional Postage Payment (State reason) For postage affixed add additional payments to net postage due; for permit imprint add additional payment to total postage. Postmaster: Report Total Postage in (Permit Imprint Only) Certification pounds For Enhanced Carrier Route Rate Pieces, Enter Date of Address Matching and Coding (DMM 708.3.3) Parts Completed (Select all that apply) AIC 130 Total Adjusted Postage Affixed Total Adjusted Postage Permit Imprint The mailer's signature certifies acceptance of liability for and agreement to pay any revenue deficiencies assessed on this mailing, subject to appeal. If an agent signs this form, the agent certifies that he or she is authorized to sign on behalf of the mailer, and that the mailer is bound by the certification and agrees to pay any deficiencies. In addition, agents may be liable for any deficiencies resulting from matters within their responsibility, knowledge, or control. The mailer hereby certifies that all information furnished on this form is accurate, truthful, and complete; that the mail and the supporting documentation comply with all postal standards and that the mailing qualifies for the rates and fees claimed; and that the mailing does not contain any matter prohibited by law or postal regulation. I understand that anyone who furnishes false or misleading information on this form or who omits information requested on this form may be subject to criminal and/or civil penalties, including fines and imprisonment. Privacy Notice: For information regarding our Privacy Policy visit www.usps.com. Signature of Mailer or Agent 0 . ____ ____ ____ ____ pounds ____ Total Pieces Telephone Printed Name of Mailer or Agent Signing Form Weight of a Single Piece USPS Use Only Statement Seq. No. No. and type of Containers Weight of a Single Piece Automation Flats (DMM 301.3) Parcels For Automation Rate Pieces, Enter Date of Address Matching and Coding (DMM 708.3.3) Federal Agency Cost Code Mailing Date CMM Are postage figures at left adjusted from mailer's entries? If "Yes" state reason. Yes No Total Weight Round Stamp Total Postage Check One Presort Verification Not Scheduled (Required) Presort Verification Performed as Scheduled I CERTIFY that this mailing has been inspected concerning: (1) eligibility for postage rates claimed; (2) proper preparation (and presort where required); (3) proper completion of postage statement; and (4) payment of annual fee (if required). Verifying Employee's Signature Date Mailer Notified Contact Print Verifying Employee's Name PS Form 3602-R1 January 2006 (Page 1 of 6) PSN 7530-07-000-6209 By (Initials) Time AM PM This form and mailing standards available on Postal Explorer at pe.usps.com. Mail Piece Types On the Sort Class and Piece Type screen, you select the mail piece type of your mailing. Some mail piece types are classified as machinable or nonmachinable. Machinable mail pieces are machine readable, such as those with barcodes printed. The mail piece types include: • Letters – Standard mail pieces that can be up to 0.25” thick and range in size up to 11.5” wide. Nonmachinable letters that weigh 1 oz or less are subject to an additional nonmachinable surcharge. Note: Mail pieces that meet the specification of a flat but have an inconsistent thickness or are not flexible or rectangular are subject to parcel rates. • Flats – Large, flexible envelopes and other rectangular pieces that exceed at least one of the size specifications of letters or weigh over 3.5 oz, but do not exceed 15” wide, 12” high, or 0.75” thick. • Postcards – Privately-printed mailing cards that range in width between 5” and 6”. P O S T A L S A V E R TA B AND P O S T A L D I S C O U N T S 14 • Parcels – Boxes or other rigid, standard class mail pieces that exceed the maximum dimensions for letters or flats. • Not Flat-Machinable – Rigid, box-like pieces or flexible pieces that exceed the requirements for standard class flats. Standard class nonmachineable letters that weigh more than 3.3 oz. are subject to non-flat machineable rates. • Irregular Parcels – Boxes and other rigid standard class pieces that cannot be processed on Postal Service equipment and range in width between 6” and 26”, where the width plus girth does not exceed 108”. Note: The height is measured along the side perpendicular to the address. The selected mail piece type should conform to dimensions specified by postal regulations. Regulation Thickness Range Mail Piece Type Regulation Width Range Regulation Height Range Regulation Weight Range Machinable Letters 5” to 11.5” 3.5” to 6.125” 0.007” to 0.25” Up to 3.5 oz. First-Class Mail 6” to 15” Machinable Flats 5” to 12” 0.009” to 0.75” Up to 13 oz. 6” to 15” 5” to 12” 0.009” to 0.75” Up to 20 oz. 6” to 15” Periodicals Machinable Flats (Upgraded Flat Sorting Machine (UFSM) 1000) 5” to 12” 0.009” to 1.25” Up to 2 lb. Standard Mail 6” to 15” Machinable Flats 5” to 12” 0.009” to 0.75” Up to 16 oz. First-Class Mail 5” to 6” Machinable Postcards (single) 3.5” to 4.25” 0.007” to 0.016” Not applicable First-Class Mail 5” to 6” Machinable Postcards (double) 3.5” to 4.25” 0.014” to 0.032” Not applicable First-Class Mail 5” to 11.5” Nonmachinabl e Letters 3.5” to 6.125” 0.007” to 0.25” Up to 13 oz. Pieces over 3.5 oz are subject to Flat rates. Periodicals Machinable Flats (Automated Flat Sorting Machine (AFSM) 100) 144 C H A P T E R Mail Piece Type Regulation Width Range Regulation Height Range Regulation Thickness Range Regulation Weight Range Periodicals 5” to 11.5” Nonmachinabl e Letters 3.5” to 6.125” 0.007” to 0.25” Up to 8 oz. Standard Mail 5” to 11.5” Nonmachinabl e Letters 3.5” to 6.125” 0.007” to 0.25” Up to 16 oz. Pieces over 3.3 oz are subject to Non Flat-Machinabl e rates. First-Class Mail 4” to 15” Nonmachinabl e Flats 4” to 12” 0.009” to 0.75” Up to 13 oz. Periodicals 4” to 15” Nonmachinabl e Flats 4” to 12” 0.009” to 1.25” Up to 2 lb. Standard Mail 4” to 15” Nonmachinabl e Flats 4” to 12” 0.009” to 0.75” Up to 16 oz. First-Class Mail Up to 34” Parcels Up to 17” Up to 17” Periodicals Parcels Not applicable Up to 1.3” Up to 26”, where the width plus girth does not exceed 108” Up to 13 oz. Up to 2 lb. Standard Mail 6” to 34” Machinable Parcels 3” to 17” 0.25” to 17” 6 oz. to 16 oz. Standard Mail 4” to 15.75” Not Flat-Machinabl e 4” to 12” 0.009” to 1.25” Up to 16 oz. Standard Mail Up to 26”, Not applicable Not applicable Up to 16 oz. Irregular where the Parcels width plus girth does not exceed 108” Mail Piece Information Screen On the Mail Piece Information screen, you enter the dimensions and weight of your mail piece. You can base the thickness and weight specification on one or multiple mail pieces. Complete the Mail Piece Information screen Note: The height is measured along the side perpendicular to the address. P O S T A L S A V E R TA B AND P O S T A L D I S C O U N T S 14 1. Under Piece Dimensions, enter the height and width of one mail piece. To change the unit of measure, select “in” or “cm”. 2. In the Thickness field, enter the thickness based on a specified quantity of mail pieces. To change the unit of measure, select “in” or “cm”. 3. Under Piece Weight, enter the weight based on a specified quantity. To change the unit of measure, select “oz(s)”, “lb(s)”, “g(s)”, or “kg(s)”. 4. Click Next. Warning: The dimensions you enter should conform to the dimensions specified by postal regulations for the selected mail piece type. For information about the dimensions specified by the postal regulations for each mail piece type, see “Mail Piece Types” on page 141. • If the dimensions entered do not conform to postal regulations for the selected mail piece type, a message appears. To adjust the dimensions entered, click No. You return to the Mail Piece Information screen so you can adjust the Piece Dimensions or Piece Weight. • If the dimensions entered meet the postal regulations for the selected mail piece type, the Sorting Preparation screen appears. For information about this screen, see “Sorting Preparation Screen” on page 144. Sorting Preparation Screen On the Sorting Preparation screen, you select the sort level requirements of your mailing. The sort levels are the steps a mailing goes through for the discounting process at the post office. The entire mailing goes through the first sort level, and any part of it that does not meet the first level of requirements for postal discounts goes through the second sort level of processing. Any part that does not meet the second level of requirement goes through the third sort level, and so on. On the Sorting Preparation screen, you can specify advanced sorting options such as how to sort the output trays and handle unsorted mail pieces. You can also select which tray type to use for the mailing. 146 C H A P T E R Complete the Sorting Preparation screen Note: The sort level requirement options vary depending on the sort class, piece type, and first sort level you select. The number of sort levels shown depends on the sort levels you select. 1. Under Sort Levels, select the applicable sort level requirements for your mailing. In the First sort level field, select a sort level requirement. If applicable, select sort level requirements for subsequent sort levels. To not include any part of the mailing that does not go through the previous sort level, select “Exclude Remaining Records”. For information about the sort levels and the requirement options, see “Sort Level Requirements” on page 148. Note: If you select a sort level requirement of “Automation”, Pieces are barcoded is automatically marked and disabled. 2. If you select to mail Standard not flat-machinable mail pieces, Standard irregular parcels, or Standard letters with a sort level requirement of “Carrier Route (LOT)” and not “Automation”, the Pieces are barcoded checkbox in the Advanced Options frame is enabled. If your mailing is delivery point barcoded, mark Pieces are barcoded. Note: To return the options on the Presort Wizard sorting options screen to their default selections, click Reset. P O S T A L S A V E R TA B AND P O S T A L D I S C O U N T S 14 3. To set advanced sorting options for your mailing, click Sorting. The sorting options screen appears. The available sorting options vary depending on the sort class, piece type, and sort levels selected. Note: If you select to mail parcels or Periodical or Standard Mail flats, the Sack Order frame appears. Otherwise, the Tray Order frame appears. 4. Under Tray Order or Sack Order, select whether to sort the output trays or sacks by ZIP Code or presort level after the mail sort. Currently, you must put unsorted mail pieces at the beginning of the mailing. In the Unsorted Pieces frame, Place at the beginning of the mailing is automatically selected, and Place at the end of the mailing and Exclude from mailing are disabled. Note: If your mailing includes Standard machinable letters with a sort level requirement of “Carrier Route (LOT)”, you must separate the mailing by a three-digit ZIP code scheme. Create 3-digit carrier route trays is automatically marked, and the Carrier Route frame is disabled. 5. If you select a sort level requirement of “Carrier Route (LOT)” and not “Automation”, the Carrier Route frame under Optional Tray Types is enabled. In the Carrier Route frame, specify whether and how to separate 10 or more mail pieces into carrier route trays or sacks. • To separate 10 or more mail pieces by a five-digit ZIP code scheme, mark Only create full 5-digit carrier route trays or Only create full 5-digit carrier route sacks. • If you select to mail Standard nonmachinable letters, the Create 3-digit carrier route trays checkbox is enabled. To separate 10 or more mail pieces into carrier route trays by a three-digit ZIP code scheme, mark this checkbox. 6. If you select to mail First Class flats with a sort level requirement of “Automation”, the Prepare trays without bundling checkbox in the Other Options frame is enabled. To prepare the trays without bundling, mark this checkbox. 7. Mailers use a postage statement to record the number of mail pieces in a mailing and calculate the applicable postage. To use a simplified postage statement when possible, mark Use condensed postage statement if possible under Other Options. Under Other Options, Reduce overflow trays is currently disabled. 8. Click OK. You return to the Sorting Preparation screen. • If you select to mail parcels or Periodical or Standard Mail flats, the Sacks button appears. Go to step 9. • If you select to mail pieces other than parcels or Periodical or Standard Mail flats, the Trays button appears. Go to step 15. 148 C H A P T E R Note: To return the options on the Presort Wizard sacking options screen to their default selections, click Reset. 9. Verify the sack information that appears to the right of the Sacks button. To change the sack information, click Sacks. The sacking options screen appears. The available sacking options vary depending on the selected mail piece type. 10. If you select to mail Periodical flats, the Minimum Pieces field in the Sacking Options frame is enabled. In this field, enter the minimum number of flats in a sack in your mailing. 11. In the Maximum Pieces field, enter the maximum number of pieces in a sack in your mailing. 12. In the Maximum Sack Weight field, enter the maximum weight of the sacks in your mailing. To change the unit of measure, select “oz(s)”, “lb(s)”, “g(s)”, or “kg(s)”. 13. Under Bundling Options, in the Maximum Thickness field, enter the maximum thickness of the bundles in your mailing. To change the unit of measure, select “in”, “cm”, or “mm”. 14. Go to step 19. Note: To return the options on the Presort Wizard traying options screen to their default selections, click Reset. 15. Verify the tray information that appears to the right of the Trays button. To change tray information, click Trays. The Presort Wizard traying options screen appears. The available traying options vary depending on the selected mail piece type. P O S T A L S A V E R TA B AND P O S T A L D I S C O U N T S 14 16. Under Traying Options, select the type of tray to use. Note: Extended Managed Mail (EMM) trays are letter trays that measure 21 3/4” long, 11 1/2” wide, and 6 1/8” high. These trays must be used for tall letter-size mail that does not fit in a regular managed mail tray. • If you select to mail pieces other than First Class flats, in the Tray Type to Use field, select whether to use 1-foot and 2-foot trays, 1-foot trays only, 2-foot trays only, or Extended Managed Mail (EMM) trays. The default settings for the selected trays appear. • If you select to mail First Class flats, you must use tubs. The Tray Type to Use field is disabled, and the default settings for Tubs appear. To edit the default settings, enter new values in the Pieces Min/Max and Volume Min %/Max % fields for the selected tray type. We do not recommend changing the default settings. The default values that appear comply with the postal regulations for each selected tray type. 17. If you select to mail Periodical letters, the Periodical Piece Min field appears. In this field, enter the minimum number of letters to include in each tray. 18. Under Bundling Options, in the Maximum Thickness field, enter the maximum thickness of the packaging in your mailing. To change the unit of measure, select “in”, “cm”, or “mm”. Note: If you change the specifications from the default, a message appears. To keep your selections, click OK. You return to the Presort Wizard screen. 19. Click OK. You return to the Sorting Preparation screen. Your selected sack or tray information appears next to the Sacks or Trays button. 20. Click Next. The Mailing and Permit Information screen appears. For information about this screen, see “Mailing and Permit Information Screen” on page 149. Sort Level Requirements Note: The sort level requirement options vary depending on the sort class, piece type, and first sort level you select. The number of sort levels shown depends on the sort levels you select. On the Sorting Preparation screen, you select the sort level requirements of your mailing. The sort levels are the steps a mailing goes through for the discounting process at the post office. The entire mailing goes through the first sort level, and any part of it that does not meet the first level of requirements for postal discounts goes through the second sort level of processing. Any part that does not meet the second level of requirement goes through the third sort level, and so on. Presort. Presorted mail meets the requirements for the First Class Presorted Nonautomation rate. The mailing must contain at least 500 pieces of the same mail piece type. You can select “Presort” for only parcels or not flat-machinable Standard mail. Automation or Automation/Barcoded. Automation mailings must be 100% CASS certified and 100% barcoded. Pieces must also meet other requirements, such as proper address and barcode placement, correct tabbing on folded pieces, minimum rigidness, and certain size limitations. Nonautomation or Nonautomation/Nonbarcoded. Mailing pieces that do not meet Automation standards qualify as Nonautomation. Both letters and flats can be submitted as Nonautomation Standard Mail, which qualifies for the applicable presort rates. The mail is packaged and trayed or sacked according to the 3/5 presort specifications. The presort sequence is five-digit (10 or more pieces within a five-digit group), three-digit (10 or more pieces in a three-digit group), ADC (10 or more pieces within the ZIP range of an Area Distribution Center), and Mixed ADC (all leftover mail). 150 C H A P T E R Carrier Route (LOT). Carrier Route is a more detailed part of the address, beyond street and ZIP Code, to get your mail to its exact location via the route a mail person takes to deliver mail in a designated area. If a large portion of your Periodical or Standard mailing is in the same city route, rural route, highway control route, post office box section, or general delivery unit, you may qualify for Carrier Route Line of Travel (LOT) discounts. Only packages with 10 or more pieces to the same carrier route can qualify. Mailings may be delivery point barcoded and must be in line of travel or walk sequence order. A CASS certification form is required. Pieces that do not meet the carrier route minimums can be sorted again for Nonautomation rates. If the mailing is delivery point barcoded, mark Pieces are barcoded next to the Sorting button. Single Piece. Single Piece is a postage rate available for individual pieces of First Class and Standard mail. It is not available for Periodicals. Note: For more information about presort options and requirements, see USPS publications: Pub. 28, Postal Addressing Standards; Pub. 417, Nonprofit Standard Mail Eligibility; or Quick Service Guide 703, Standard Mail—Nonprofit Eligibility. For more information about presort options and requirements, contact your local post office, the nearest postal business center, or the USPS National Customer Support Center at 1-800-238-3150. Mailing and Permit Information Screen On the Mailing and Permit Information screen, you can enter information about your mailing. From the Mailing and Permit Information screen, you can also select or create a mailing permit for your mailing. The information you enter about your mailing and mailing permit is used to complete the postage statement required for your mailing. Complete the Mailing and Permit Information screen 1. In the Mailing Drop ZIP Code field under This Mailing, enter the ZIP Code of the post office where you drop off the mailing. 2. In the Mailing Date field, enter the date you drop off the mailing at the post office. Note: The Job ID field is not required, but we recommend entering an identification number to ensure proper labeling. P O S T A L S A V E R TA B AND P O S T A L D I S C O U N T S 15 3. To help identify the particular mailing for your organization, in the Job ID field, enter an identification number. 4. Some mailers require more than one postage statement for their mailings. When this happens, each postage statement receives a sequence number, for example “1 of 4”, “2 of 4”, and so on. If you use more than one postage statement for your mailing, in the Statement Number field, enter the sequence number of the postage statement. Otherwise, leave this field blank. 5. Under Mailing Permit, select a mailing permit from the Permits box. You can add, edit, copy, or delete mailing permits in the Permits box. For more information about mailing permits and the Permits box, see “Mailing Permits” on page 150. 6. Click Next. • If, at the Sort Class and Piece Type screen, you select a presort class of Periodical or Standard Mail, the Mail Sort Discounts screen appears. For information about this screen, see “Mail Sort Discounts Screen” on page 158. • If, at the Sort Class and Piece Type screen, you select a presort class of First Class, the Tray Label Layout screen appears. For information about this screen, see “Label Layout Screen” on page 165. Mailing Permits Note: Applying for a mailing permit is different than applying for nonprofit mailing privileges. If your mailing is eligible for the nonprofit rate, you should first decide how you want to pay for postage, then apply for your mailing permit, and then apply for nonprofit mailing privileges. For more information about the correct order to apply for mailing permits and nonprofit mailing privileges, contact your nearest postal business center or the USPS National Customer Support Center at 1-800-238-3150. A mailing permit is permission to use a certain postage payment method for bulk and discounted mailings. Various mailing permit types exists, depending on the mail piece type and postage payment method. For more information about mailing permits, or to apply for a mailing permit, contact your nearest postal business center or the USPS National Customer Support Center at 1-800-238-3150. On the Mailing and Permit Information screen, the Permits box displays the available mailing permits. Under Permit Holder, you can add, edit, copy, and delete mailing permits in the Permits box. 152 C H A P T E R Add a new mailing permit 1. Under Mailing Permit on the Mailing and Permit Information screen, click New. The permit screen opens. 2. Under Role in Mailing, specify if you are the Mail Owner or Mailing Agent. 3. If you selected Mailing Agent, under Permit Holder, select whether the permit holder is: My Company (Agent), Mail Owner, or Third Party. 4. Under Permit Information, enter the permit number, issuing post office, and date issued. If applicable, enter the Centralized Account Payment System (CAPS) customer ID. If you are a federal agency, in the Federal Agency Code field, enter your federal agency cost code. Otherwise, leave this field blank. Note: If you run a presort report before you do the actual mailing, we recommend you mail with Permit Imprint. The permit number is printed on the receipt you receive when you first apply for the permit and, if you mail with Permit Imprint, on the postage area of each mail piece. To apply for a permit to mail with Permit Imprint, contact your nearest postal business center or the USPS National Customer Support Center at 1-800-238-3150. 5. In the Permit Type field, select the permit type. • Permit Imprint – Permit imprint is a convenient way to pay for postage, especially for high volume mailings. If you have a certified imprint, you can print the postage information in the upper right corner of the mailing piece instead of using precanceled stamps or a postage meter. If you use your certified imprint on the mailing pieces, select “Permit Imprint”. • Metered Mail – With a postage meter, you can conveniently pay for postage and track postage costs for your organization. A postage meter prints postage directly on each mailing piece or onto a meter tape, which you affix to each mailing piece. If you use a postage meter for all of your mailing pieces with the same amount of postage or for each mailing piece with the exact postage due for that particular piece, select “Metered Mail”. • Precanceled Stamps – Precanceled stamps are bulk rate stamps that come in small, predetermined denominations and are specifically for presorted First Class and Standard Mail mailings. You can affix these stamps to envelopes at a lower postage rate and pay the difference when you drop off the mail at the post office. If you affix a bulk rate stamp with a predetermined value to each mailing piece, select “Precanceled Stamps”. P O S T A L S A V E R TA B AND P O S T A L D I S C O U N T S 15 • Precanceled Postmark – If you affix a precanceled postmark to each mailing piece, select “Precanceled Postmark”. • Prepaid – If, on the Sort Class and Piece Type screen, you select a presort class of “Periodical”, you must select “Prepaid”. Note: Centralized Account Payment System (CAPS) is an electronic postage payment system that provides an alternative to using checks and cash for postage and fees at multiple post offices. The nonprofit authorization number appears on the upper right corner of your original office of mailing authorization letter. For more information about CAPS or the nonprofit authorization number, visit www.usps.com, or contact the National Customer Support Center at 1-800-238-3150. 6. Click Next. If your role in the mailing is Mail Owner, the Mailing Permit Information screen appears. If your role in the mailing is Mailing Agent, the Mailing Agent screen appears. 7. If your role in the mailing is Mail Owner, under Permit Information, enter the permit holder’s contact information, and if applicable, enter the customer registration ID and nonprofit authorization number. 154 C H A P T E R 8. If your role in the mailing is Mailing Agent, under Mailing Agent, enter the agent’s contact information, and if applicable, enter the customer registration ID. 9. Under Mailer ID or Agent’s Mailer ID, enter the Mailer ID (MID) assigned by the United States Postal Service. To adjust the ranges associated with your Mailer ID, click Settings. The Mailer ID Setup screen appears. 10. Enter the Mailer ID assigned by the United States Postal Service, and a description to help you identify the Mailer ID. 11. Select Use Custom Range to specify the range for your mail piece, container, and pallet. The Raiser’s Edge will select the first unused numbers in the ranges as the piece identifier in the Intelligent Mail barcodes. Piece identifiers are required to receive Full Service Intelligent Mail discounts and services, and must be unique for at least 45 days prior to the date of the mailing. 12. Click OK. P O S T A L S A V E R TA B AND P O S T A L D I S C O U N T S 15 13. Click OK. The New Permit screen appears. 14. In the Name field, enter a name to help identify the permit. 15. Click OK. You return to the Mailing and Permit Information screen. In the Permits box, the new permit name appears. For information about the Mailing and Permit Information screen, see “Mailing and Permit Information Screen” on page 149. Edit a mailing permit 1. Under Mailing Permit on the Mailing and Permit Information screen, select the permit to edit in the Permits box. 156 C H A P T E R 2. On the action bar, click Edit. The Mailing Role and Permit Information screen appears. 3. Update the information as necessary. 4. Click Next. The Mailing Permit Information screen appears. You must enter a valid Mailer ID in order to create an Intelligent Mail barcode. 5. Update the information as necessary. 6. Click Finish. You return to the Mailing and Permit Information screen. For information about this screen, see “Mailing and Permit Information Screen” on page 149. P O S T A L S A V E R TA B AND P O S T A L D I S C O U N T S 15 Copy a mailing permit To create a new mailing permit with similar settings as an existing mailing permit, you can create a copy of the existing permit and make modifications for the new permit. By copying a mailing permit, you use the existing permit as a template for the new mailing permit. 1. Under Permit Holder on the Mailing and Permit Information screen, select the permit to copy in the Permits box. 2. On the action bar, click Copy. The copy template screen appears. 3. In the Old Template Name field, the name of the existing mailing permit appears. In the New Template Name field, enter a name to help identify the new mailing permit. 158 C H A P T E R 4. Click OK. You return to the Mailing and Permit Information screen, and the new mailing permit appears in the Permits box. 5. Edit the new mailing permit information as necessary. For more information about how to edit a mailing permit, see “Edit a mailing permit” on page 154. Delete a mailing permit Note: To keep a permit imprint account active, you must do a bulk mailing at least once every two years. If your permit imprint account is inactive, you must pay an application fee to reactivate it. For more information about permit imprint accounts, visit www.usps.com, or contact the National Customer Support Center at 1-800-238-3150. P O S T A L S A V E R TA B AND P O S T A L D I S C O U N T S 15 You may need to delete a mailing permit from the Permits box, such as an inactive permit imprint account. 1. Under Permit Holder on the Mailing and Permit Information screen, select the permit to delete from the Permits box. 2. On the action bar, click Delete. A message appears to confirm you want to delete the mailing permit. 3. Click Yes. You return to the Mailing and Permit Information screen, and the deleted mailing permit no longer appears in the Permits box. For information about the Mailing and Permit Information screen, see “Mailing and Permit Information Screen” on page 149. Mail Sort Discounts Screen On the Mail Sort Discounts screen, you can select the mail sort discounts for which your Standard Mail or Periodical mailing qualifies. You can select whether your mailing is eligible for a nonprofit rate or a destination entry discount. If your mailing has a sort class of Periodical, you can also select whether it is eligible for a discounted in-county rate. Complete the Mail Sort Discounts screen Note: If you are eligible for a nonprofit bulk permit, you can claim the nonprofit rate. If you are a nonprofit but you do your mailing in conjunction with a for profit organization, your mailing may not be eligible for nonprofit rates or discounts. For more information about rates classes or permits, contact your local post office, the nearest postal business center, or the USPS National Customer Support Center at 1-800-238-3150. 160 C H A P T E R 1. If you are eligible for a nonprofit bulk permit, under Eligibility Discount, mark Nonprofit rate. Note: For information about entry points, contact your local post office, the nearest postal business center, or the USPS National Customer Support Center at 1-800-238-3150. 2. If you deliver your mail to certain postal facilities, you can qualify for additional Destination Entry discounts. To see if you qualify for these discounts, consult your local bulk mail center. Under Destination Entry Discounts, your eligible mail drop post office locations available for a destination entry discount appear. The ZIP Code entered in the Mailing Drop ZIP Code field on the Mailing and Permit Information screen determines the mail drop post office locations that appear. Mark the checkbox next to the destination entry discount postal facility for which your mailing is eligible. If your mailing is eligible, you can mark more than one entry point. For information about the available Destination Entry Discounts, see “Destination Entry Discounts” on page 161. Note: To get DDU discounts, you must select at least one ZIP Code. 3. If you have a periodical or standard mailing, you can set up a Destination Delivery Unit (DDU) mailing to receive a discount when you properly prepare and present the mailing at the delivery unit that serves the delivery addresses on the mailing pieces. To set up a DDU rate: P O S T A L S A V E R TA B AND P O S T A L D I S C O U N T S 16 a. Mark Destination Delivery Unit (DDU) and click DDU ZIP Codes. The DDU ZIP Codes screen appears. b. In the DDU ZIP Codes box, make sure the ZIP Code for each area where you will deliver the mail to the Destination Delivery Unit appears. To add a new ZIP Code to the DDU ZIP Codes box, enter it in the New ZIP Code field and click Add. To remove a ZIP Code from the DDU ZIP Codes box, select it and click Remove. c. To return to the Mail Sort Discounts screen, click OK. Note: The in-county rate eligibility is determined on an issue-to-issue basis and is subject to your total paid distribution. For more information about in-county rates, contact your local post office, the nearest postal business center, or the USPS National Customer Support Center at 1-800-238-3150. 4. If your mailing has a presort class of Periodical, the In-County Discounts frame appears. Based on its paid distribution, your periodical mailing may be eligible for a discounted in-county rate. Under In-County Discounts, select whether your periodical qualifies for in-county rates. • If the mailing does not qualify for in-county rates, mark Mailing does not qualify for In-County rates. • If the mailing qualifies for in-county rates, mark Force ZIP Codes as In-County. 5. If you mark Force ZIP Codes as In-County, click ZIP Codes. The In-County ZIP Codes screen appears. In the In-County ZIP Codes box, make sure the ZIP Codes for all counties in which your mailing qualifies for an in-county rate appears. 162 C H A P T E R To add a new ZIP Code, enter it in the New ZIP Code field and click Add. To remove a ZIP Code from the In-County ZIP Codes box, select it and click Remove. To return to the Mail Sort Discounts screen, click OK. 6. Click Next. • If your mailing permit has a permit type of “Precanceled Stamps” or “Metered Mail”, the Payment Method screen appears. For information about this screen, see “Payment Method Screen” on page 161. • If your mailing permit has a permit type of “Prepaid”, the Publication Information screen appears. For information about this screen, see “Publication Information Screen” on page 163. • If your mailing permit has a permit type of “Permit Imprint” or “Precanceled Postmark” and you select to mail parcels or Standard Mail flats, the Sack Label Layout screen appears. Otherwise, the Tray Label Layout screen appears. The information and options on both screens are identical. For information about the Label Layout screen, see “Label Layout Screen” on page 165. Destination Entry Discounts If you deliver your mail to certain postal facilities, you can qualify for additional destination entry discounts. To see if you qualify for these discounts, consult your local bulk mail center. On the Mail Sort Discounts screen, you select the destination entry discounts for which your mailing is eligible. If your mailing is eligible more multiple discounts, you can select more than one entry point. Sectional Center Facility (SCF). An SCF is a postal facility that serves as the processing and distribution center (P&DC) for post offices in a designated geographic area, as defined by the first three digits of the ZIP Codes of those post offices. Some SCFs serve more than one 3-digit ZIP Code range. If you deliver your mail to a Sectional Center Facility, mark this checkbox. Bulk Mail Center (BMC). If your mailing has a presort class of Standard Mail, this checkbox is enabled. A BMC is a highly-mechanized mail processing plant that distributes standard mail in piece and bulk form. Only a few BMCs exist in the United States. If you deliver your Standard Mail mailing to a Bulk Mail Center, mark this checkbox. Area Distribution Center (ADC). If your mailing has a presort class of Periodical, this checkbox is enabled. An ADC is a mail processing facility that receives and distributes mail destined for a wide range of specific ZIP Codes. If you deliver your Periodical mailing to an Area Distribution Center, mark this checkbox. Destination Delivery Unit (DDU). The DDU rate is a discount or rate available to periodical and standard mailings properly prepared and entered by the mailer at the delivery unit that serves the delivery addresses on the mailing pieces. If you deliver your mailing to the DDU of the mail pieces, mark this checkbox. For more information about entry points, contact your local post office, the nearest postal business center, or the USPS National Customer Support Center at 1-800-238-3150. Payment Method Screen On the Payment Method screen, you can specify your postage statement options. If your mailing permit has a permit type of Precanceled Stamp, you can enter the value of the stamp. If your mailing permit has a permit type of Metered Mail, you can select whether to calculate the minimum postage value. The value you enter is subtracted from the postage due on your postage statement. P O S T A L S A V E R TA B AND P O S T A L D I S C O U N T S 16 Enter the value of precanceled stamps Precanceled stamps are bulk rate stamps that come in small, predetermined denominations and are specifically for presorted First Class and Standard Mail mailings. You can affix these stamps to envelopes at a lower postage rate and then pay the difference when you drop off the mail at the post office. If your mailing permit has a permit type of Precanceled Stamps, you can enter the value of the precanceled stamp on the Payment Method screen. 1. In the Postage Affixed field, enter the value of the precanceled stamp, for example “0.05”. The value you enter will be subtracted from the postage due on your postage statement. 2. Click Next. • If you select to mail parcels or Standard Mail flats, the Sack Label Layout screen appears. • If you select to mail items other than parcels or Standard Mail flats, the Tray Label Layout screen appears. The information and options on both Label Layout screens are identical. For information about the Label Layout screen, see “Label Layout Screen” on page 165. Calculate the minimum postage value of metered mail With a postage meter, you can conveniently pay for postage and track postage costs for your organization. A postage meter prints postage directly on each mailing piece or onto a meter tape, which you affix to each mailing piece. If your mailing permit has a permit type of Metered Mail, you can select whether to calculate the postage at the Payment Method screen. 1. If you meter all your mail pieces with the same amount of postage, mark Calculate minimum postage. The Postage Affixed field displays “Calculated” and the minimum postage value is subtracted from the postage due on your postage statement. 164 C H A P T E R If you meter each mail piece with the exact postage due for that particular piece, leave the Calculate minimum postage checkbox unmarked. The Postage Affixed field displays “Exact”, and your postage statement does not register a postage due amount for this option. 2. Click Next. The Sack Label Layout screen or Tray Label Layout screen appears. The information and options on both Label Layout screens are identical. For information about the Label Layout screen, see “Label Layout Screen” on page 165. Publication Information Screen On the Publication Information screen, you enter information about your Periodical publication. The program can use the information you enter on this screen with information about the selected mailing permit to complete USPS Form 3541, Postage Statement—Periodicals – One Issue or One Edition. P O S T A L S A V E R TA B AND P O S T A L D I S C O U N T S 16 Complete the Publication Information screen 1. Under Publication Information, in the Publication Title field, enter the title of your publication. 2. In the Publication Number field, enter the publication number, or volume, of your mailing’s periodical. 3. In the Edition Code field, enter the edition, or issue, number or code of your mailing’s periodical. 4. In the Issue Date field, enter the publication date of your mailing’s issue of the periodical. To select the date from a calendar, click the drop-down arrow. 5. In the Issue Frequency field, select how often your organization releases a new issue. 6. In the State & ZIP+4 field, enter the state and complete ZIP Code for the entry post office shown in the Entry Post Office field. The Entry Post Office field displays the post office entered as the issuing post office for the selected mailing permit. 7. In the Publisher Contact and Phone fields, enter the name and phone number of the contact for the publisher of the publication. 8. In the Advertising % and Non-Advertising % fields, enter a percentage of how much of the mailing’s issue is advertisements and how much is not. Warning: The ride-along weight entered cannot exceed the piece weight entered on the Mail Piece Information screen. 9. In the Ride-Along Weight field, enter the weight of the mailing’s issue based on a specified quantity of piece(s). To change the unit of measure, select “oz(s)”, “lb(s)”, “g(s)”, or “kg(s)”. 10. In the Options frame, to print all pages of the completed USPS Form 3541, Postage Statement—Periodicals – One Issue or One Edition, mark Print all pages from PS Form 3541. 11. To create firm packages, mark Create firm packages and, in the Minimum per package field, enter the minimum number of pieces to include in each package. Note: When you set up an Exceptional Dispatch mailing, Destination Delivery Unit (DDU) options do not apply. No postage discounts are applied to Exceptional Discount mailings. 166 C H A P T E R 12. If you mail a periodical with subscriptions of less than 25,000, you can set up an Exceptional Dispatch mailing and present the mailing directly at the destination facilities to improve delivery times. To set up an Exceptionable Dispatch mailing: a. Mark Exceptionable Dispatch and click ZIP Codes. The Exceptional Dispatch ZIP Codes screen appears. b. Enter the ZIP Codes of the post offices where you will present your mailing. To add a ZIP Code, enter it in the New ZIP Code field and click Add. The Exceptional Dispatch box displays all ZIP Codes included in the Exceptional Dispatch mailing. To remove a ZIP Code from the Exceptional Dispatch mailing, select it in the Exceptional Dispatch box and click Remove. c. Click OK. You return to the Publication Information screen. 13. Click Next. The Sack Label Layout or Tray Label Layout screen appears. The information and options on both Label Layout screens are identical. For information about the Label Layout screen, see “Label Layout Screen” on page 165. Label Layout Screen If, on the Sort Class and Piece Type screen, you select to mail parcels or Periodical or Standard Mail flats, the Sack Label Layout screen appears. Otherwise, the Tray Label Layout screen appears. The information and options on both screens are identical. On this screen, you can select the printer type and enter information about the layout of the labels used on trays or sacks. You also enter mailer information about the mailer. Complete the Label Layout screen Note: If, on the Sort Class and Piece Type screen, you select to mail parcels or Periodical or Standard Mail flats, the Sack Label Layout screen appears. Otherwise, the Tray Label Layout screen appears. The information and options on both screens are identical. The Sack Label Layout screen is shown. P O S T A L S A V E R TA B AND P O S T A L D I S C O U N T S 16 1. Under Printer Type, select the type of printer used to print the labels. You can select Laser or Inkjet or Dot Matrix. For accuracy and clarity, we recommend using a laser or inkjet printer. 2. Under Label Type, select whether the label measures 1 or 2 inches. 3. Under Label Layout, select a label layout from the Layouts box. You can add, edit, copy, or delete label layouts in the Layouts box. For more information about label layouts and the Layouts box, see “Label Layouts” on page 167. Note: To edit the details of the selected label layout, you can also click Edit in the Label Layout frame. For more information about editing the layout details, see “Edit a label layout” on page 168. 4. To view information about the selected label layout, click Details. The Presort Wizard label layout details screen appears. On this screen, you can view or edit the name, page dimensions, and label dimensions of the label layout. To return to the Label Layout screen, click OK. 168 C H A P T E R Warning: To make sure the tray or sack is correctly labeled, you should enter your company’s information in the Mailer Information frame. 5. Under Mailer Information, verify the company name is correct. The Company Name field displays the name entered on the selected mailing permit. 6. In the City, State & ZIP Code fields, enter the city, state, and ZIP Code for the company. 7. Click Next. The Presort Reports screen appears. For information about this screen, see “Presort Reports Screen” on page 169. Label Layouts If, on the Sort Class and Piece Type screen, you select to mail parcels or Periodical or Standard Mail flats, the Sack Label Layout screen appears. Otherwise, the Tray Label Layout screen appears. The information and options on both screens are identical. On the Tray or Sack Label Layout screen, the Layouts box displays the available layouts for your mailings tray or sack labels. Under Label Layouts, you can add, edit, copy, and delete label layouts in the Layouts box. Add a new label layout 1. Under Label Layout on the Label Layout screen, click New on the action bar. The Presort Wizard label layout details screen appears. 2. 3. 4. 5. In the Layout Name field, enter a name for the new layout. Under Page Dimensions, enter the page and margin dimensions. Under Label Dimensions, enter the quantity, dimensions, and pitch of the labels on the page. Click OK. You return to the previous Label Layout screen. In the Layouts box, the new label layout appears. For information about the Tray or Sack Label Layout screen, see “Label Layout Screen” on page 165. P O S T A L S A V E R TA B AND P O S T A L D I S C O U N T S 16 Edit a label layout 1. Under Label Layout on the Label Layout screen, select the label layout to edit in the Layouts box and click Edit on the action bar. The Presort Wizard label layout details screen appears. 2. Edit or update the name or dimensions as necessary. 3. To save the changes and return to the previous Label Layout screen, click OK. For information about the Tray or Sack Label Layout screen, see “Label Layout Screen” on page 165. Copy a label layout To create a new label layout with similar settings as an existing label layout, you can create a copy of the existing layout and make modifications for the new layout. By copying a label layout, you use the existing layout as a template for the new one and can easily modify your layout settings without overwriting the previous settings. 1. Under Label Layout on the Label Layout screen, select the label layout to copy in the Layouts box and click Copy on the action bar. The Presort Wizard copy template screen appears. 2. In the New Template Name field, enter a name to identify the new label layout. 3. Click OK. You return to the previous Label Layout screen. In the Layouts box, the new label layout appears. For information about the Tray or Sack Label Layout screen, see “Label Layout Screen” on page 165. 4. Edit the new label layout as necessary. For information on editing a label layout, see “Edit a label layout” on page 168. 170 C H A P T E R Delete a label layout 1. Under Label Layout on the Label Layout screen, select the label layout to delete in the Layouts box and click Delete on the action bar. A message appears to verify the deletion of the label layout. 2. To delete the selected label layout, click Yes. You return to the previous Label Layout screen. The label layout does not appear in the Layouts box. For information about the Tray or Sack Label Layout screen, see “Label Layout Screen” on page 165. Presort Reports Screen On the Presort Reports screen, you can select the postal reports to print. You can also specify which printer prints the reports. Complete the Presort Reports screen 1. Under Reports, the available postal reports appear. To print a report, mark its checkbox. For information about the available postal reports, see “Postal Reports” on page 171. Note: If you have a network of printers, you can route reports and labels to different printers for quicker processing time. P O S T A L S A V E R TA B AND P O S T A L D I S C O U N T S 17 2. After you select the postal reports to print, click Printer under Reports. The Print Setup screen appears. Configure the way reports are printed and designate a destination printer. When you are finished, click OK. You return to the Presort Reports screen, and the selected printer name appears to the right of the Printer button. 3. Under Container Labels, to print barcoded labels for sacks and trays, mark Generate. Typically, container labels are printed on heavier card stock and slide into the label sleeves on USPS sacks and trays. Sample Container Labels 4. If you mark Generate container labels, click Printer. The Print Setup screen appears. Configure the way labels are printed and designate a destination printer. After you configure the printing of the container labels, click OK. You return to the Presort Reports screen, and the selected printer name appears to the right of the Printer button. 5. Click Finish. You return to the PostalSaver tab. For more information about running the Presort Wizard, see “Run the Presort Wizard to Set PostalSaver Options” on page 126. 172 C H A P T E R Postal Reports With PostalSaver, several required and recommended postal reports are available to print. On the Presort Reports screen, you can select the postal reports to print. By printing these postage reports, you do not have to fill them out by hand. The program also calculates the amount of postage due and prints it on the postage statement. Qualification Report. The USPS Qualification Report is a required report that satisfies the USPS requirement for Presort Accuracy, Validation, and Evaluation (PAVE) Certified or Standardized Documentation. You must submit this report to the post office along with your mailing. The USPS uses this report to substantiate the presort groups you claim. Sample Qualification Report P O S T A L S A V E R TA B AND P O S T A L D I S C O U N T S 17 Postage Report. The Postage Report is a required report that prints the appropriate USPS postage statement form facsimile. PostalSaver prints all the necessary forms for Standard, First Class, and Periodical mailings, for both Profit and Nonprofit rates. • For Standard mail, use PS Form 3602-EZ, Postage Statement – Standard Mail – Easy – Nonautomation Letters or Flats; PS Form 3602-N, Postage Statement – Nonprofit Standard Mail; PS Form 3602-NZ, Postage Statement – Nonprofit Standard Mail – Easy – Nonautomation Letters or Flats; or PS Form 3602-R, Postage Statement – Standard Mail. • For First Class mail, use PS Form 3600-EZ, Postage Statement – First Class Mail – Easy – Nonautomation Letters, Cards, or Flats or PS Form 3600-R, Postage Statement – First Class Mail & Priority Mail. • For Periodicals, use PS Form 3541, Postage Statement – Periodicals – One Issue or One Edition. By printing these postage statements, you do not have to fill them out by hand. The program also calculates the amount of postage due and prints it on the report. CASS Report. If, on the PostalSaver tab, you marked CASS certify addresses, the CASS Report checkbox appears. The CASS Summary Report, also called PS Form 3553, verifies the CASS certification of your mailing list. If you use AddressAccelerator to CASS certify your mailing, you must print this form and submit it to the post office along with the mailing. The USPS uses this report to prove you CASS certified your mailing and qualify for the applicable postal discounts. 174 C H A P T E R Sample CASS Report (Form 3553) Mail Sort Summary. The Mail Sort Summary is a recommended report that details a breakdown of your mailing by package and container, including the total number of addresses, grouped in the postal presort order. While this report is not required by the USPS, it can help you organize your mail. As you prepare your mailing pieces, you can follow the report from top to bottom. The information included in the Mail Sort Summary matches exactly what prints on your tray labels. To make sure your mailing prints how you want, you can print this report first. P O S T A L S A V E R TA B AND P O S T A L D I S C O U N T S 17 Sample Mail Sort Summary ZIP Code Listing. The ZIP Code listing is a recommended report that details the ZIP Codes to which you are mailing. Container Listing. The Container Listing is a recommended report that details a breakdown of your mailing by pallets and container, including the destinations, preparation method, and sizes, and bundles, including the destinations, number of mail pieces, and total weight. While this report is not required by the USPS, it can help you organize your mail. Zone Listing Report. If, on the Sort Class and Piece Type screen, you select a sort class of Periodical, the Zone Listing Report checkbox appears. The Zone Listing Report is a recommended report that details the zone number for each three-digit ZIP Code to which you mail your periodicals. 176 C H A P T E R Sample Zone Listing Report Load PostalSaver Options from an Existing Parameter File PostalSaver is a valuable tool that enhances The Raiser’s Edge by automating the process of sorting mailings and completing reports. This saves you time and effort in qualifying mailings for postal discounts. With your selections on the PostalSaver tab, you create a parameter file that defines how to sort the mailing according to the ZIP Code and US Postal Service (USPS) regulations. After you create a parameter file, you can use it as a template for future mailings. By copying an existing parameter file, you use the existing file as a template for the new one and can easily modify your PostalSaver settings without overwriting the previous settings. P O S T A L S A V E R TA B AND P O S T A L D I S C O U N T S 17 Copy the PostalSaver options from an existing parameter file 1. On the Raiser’s Edge bar, click Mail. The Mail page appears. Note: For this procedure, Appeal Cards is used as an example mail task. Because the steps are similar, procedures for other mail tasks with the PostalSaver tab are not repeated in this section. Depending on the options you choose for other mail tasks, you may skip some of these steps and screens. 2. From the list of Mail tasks on the left, select Appeal Cards. 3. In the grid on the right, select an existing Appeal Cards mailing and click Open or, to create a new one, click New. For information about creating a mailing, see “Create a Mailing” on page 213. The Appeal Cards screen appears. Warning: On the Fields to Include tab, you must include an address field or you cannot access the PostalSaver tab. On the Fields to Include tab, if you do not select Endorsement line and Address barcode, you get a message telling you so when you print the mailing. The Address barcode and Endorsement line cannot fit and are not available for labels less than 3" wide. These labels include Avery 5160, 4037, 5196, 5660, 5390, 5395, 5095, 5895, 5883, and L7161. 178 C H A P T E R 4. Select the PostalSaver tab and mark Run PostalSaver. Note: Marking CASS certify addresses certifies the addresses for this particular mail run only. Address information is not corrected or certified on the constituent record. You must manually update any changed addresses on the constituent record. 5. If you use AddressAccelerator as your data service and, in User Options, enter a valid path to the AddressAccelerator data files, the CASS certify addresses checkbox appears. To certify the addresses for the mailing, mark CASS certify addresses. 6. To use an existing parameter file for the mailing, click Options and select Load options from. The Load Options screen appears. P O S T A L S A V E R TA B AND P O S T A L D I S C O U N T S 17 7. In the grid, the existing parameter files saved from previous mailings appear. To use an existing parameter file, highlight it in the grid and click Select. You return to the PostalSaver tab. In the Category and Value columns, a summary of the selected parameter file appears. 8. After you select the existing parameter file, you can change the set PostalSaver options as necessary for your mailing. To change the PostalSaver options, click Options and select Change options. The Presort Wizard appears and displays the settings of the existing parameter file. Adjust the settings as necessary. To move through the screens of the Presort Wizard, click Back or Next. For information about the screens of the Presort Wizard, see “Run the Presort Wizard to Set PostalSaver Options” on page 126. 180 C H A P T E R After you make the necessary adjustments, click Finish to return to the PostalSaver tab. 9. To preview the mailing, click Preview. Note: For some mail tasks, such as labels, make sure you select a label size that fits an endorsement line, address barcode, and all fields you select to print. Otherwise, the mailing does not print. The 12-field membership card cannot fit an endorsement. If you have not included an endorsement line or address barcode for the mailing, you may receive a warning message. Note: The Address barcode and Endorsement line fields cannot fit and are not available for labels less than 3" wide. These labels include Avery 5160, 4037, 5196, 5660, 5390, 5395, 5095, 5895, 5883, and L7161. Do as follows: a. Click OK. You return to the mail task. b. Select the Fields to Include tab. c. In the Available Fields grid, select Endorsement line and Address barcode, and then click the right arrow to add them to the Fields to Include grid. d. Click Preview again. Note: Depending on how many records you include in your mailing, previewing and printing may take some time. 10. A message appears telling you the mailing is being prepared and the preview screen appears. To close the preview, click the red “X” in the top left corner of the preview screen. You return to the mail task. P O S T A L S A V E R TA B AND P O S T A L D I S C O U N T S 18 11. Select the PostalSaver tab. 12. To save the new parameter file, select File, Save As from the menu bar. The Save Mailing As screen appears. 13. In the Mailing name and Description fields, enter a name and description to help identify the parameter file. You can also select whether to allow other users to run or modify the mailing. 14. Click Save. Note: For more information about sorting mailings or qualifying for postal discounts, contact your nearest postal business center or the USPS National Customer Support Center at 1-800-238-3150. 15. To close the parameter file, select File, Close from the menu bar. You return to the Mail page. 182 C H A P T E R chapter 11 Format Tab Format Tab: Miscellaneous . . . . . . . . . . . . . . . . . . . . . . . . . . . . . . . . . . . . . . . . . . . . . . . . . . . . . . . . . . . . . . . . . . 182 Format Tab: Output Options . . . . . . . . . . . . . . . . . . . . . . . . . . . . . . . . . . . . . . . . . . . . . . . . . . . . . . . . . . . . . . . . . 183 Format Tab: Sort . . . . . . . . . . . . . . . . . . . . . . . . . . . . . . . . . . . . . . . . . . . . . . . . . . . . . . . . . . . . . . . . . . . . . . . . . . . 186 Format Tab: Headings . . . . . . . . . . . . . . . . . . . . . . . . . . . . . . . . . . . . . . . . . . . . . . . . . . . . . . . . . . . . . . . . . . . . . . . 188 Format Tab: Criteria . . . . . . . . . . . . . . . . . . . . . . . . . . . . . . . . . . . . . . . . . . . . . . . . . . . . . . . . . . . . . . . . . . . . . . . . 189 Format Tab: Detail . . . . . . . . . . . . . . . . . . . . . . . . . . . . . . . . . . . . . . . . . . . . . . . . . . . . . . . . . . . . . . . . . . . . . . . . . 190 Format Tab: Page Footer . . . . . . . . . . . . . . . . . . . . . . . . . . . . . . . . . . . . . . . . . . . . . . . . . . . . . . . . . . . . . . . . . . . . 191 Format Tab: Report Footer . . . . . . . . . . . . . . . . . . . . . . . . . . . . . . . . . . . . . . . . . . . . . . . . . . . . . . . . . . . . . . . . . . . 192 Format Tab: Name Formats . . . . . . . . . . . . . . . . . . . . . . . . . . . . . . . . . . . . . . . . . . . . . . . . . . . . . . . . . . . . . . . . . . 193 182 C H A P T E R Format Tab: Miscellaneous The Miscellaneous checkboxes determine the appearance of monetary amounts on the mailing. For example, you can indicate whether to display decimals and a currency character. When you select Miscellaneous, a Sample Display appears so you can view a sample of your formatting selections. Show currency character. To print a monetary symbol, such as a $ sign, before monetary values, mark the Show currency character checkbox. Show 1000’s separator. To include commas in monetary values, mark the Show 1000’s separator checkbox. Show decimals. To display all monetary values with two decimal places, mark the Show decimals checkbox. Show percent sign. To display the percent symbol with percentages, mark the Show percent sign checkbox. The following table shows how each checkbox affects the amount 15,250. Option Show currency character Show 1000’s separator Show decimals Show percent Unmarked 15250 15250 15250 15250 Marked $15250 15,250 15250.00 15250% Show blanks instead of zero amounts. When a monetary amount equals zero, you can choose to omit the number instead of printing a zero by marking the Show blanks instead of zero amounts checkbox. Negative amount format. In the Negative amount format field, select whether negative amounts are displayed with the negative symbol, such as -100.00, or in parentheses, such as (100.00). Sample display. As you select the format for monetary values, you can view the Sample Display to determine whether the amounts are formatted correctly. F O R M A T TA B 18 Format Tab: Output Options Your settings on the Format tab for Output options determine the appearance of the mailing pieces. For example, you can decide whether addresses should appear without punctuation or in all capital letters. To access these options, select Output options from the list on the left side of the Format tab. All frames, fields, checkboxes, and options available for Output options are listed in alphabetical order below and described. Not all fields and options appear on all mail tasks. Add this appeal to the constituent’s record. To add the appeal entered in the Appeal ID field to the Appeals tab of a constituent record, mark Add this appeal to the constituent’s record. When you mark this checkbox, you can enter a Date to associate with this appeal mailing and any Comments about this appeal. The comments and date you enter appear on the Appeals tab of a constituent record. The appeal is added to the constituent record when you print, preview, or export the mailing. Amount to print. When you print receipts using the Preprinted form, you must select the monetary amount to print on the receipt in the Amount to print field. You can select gift amount or receipt amount. You may want to select the receipt amount to show the tax deductible portion of the gift. For example, a ticket for your annual awards banquet costs $100. A portion of the ticket price pays for the cost of food and the remainder is a donation to your organization. In this case, you may want to select receipt amount in the Amount to print field to show the amount of the ticket price that is a donation. Note: If you select the gift barcode to appear on the appeal card and you leave the Appeal ID field blank, the appeal section of the barcode prints as “00000”. Appeal ID. Using the Appeal Information frame, you can add an appeal to a constituent record and update the number solicited for the appeal. To print a gift or pledge barcode on mailings such as appeal cards, phonathon forms, reminders and renewal notices; add the appeal to constituent records; or update the number solicited for the appeal, select the ID for the appeal in the Appeal ID field. When you select an Appeal ID, the other fields in the Appeal Information frame are enabled. 184 C H A P T E R If the appeal you enter in the Appeal ID field is divided into packages, you can enter a package to associate with this mailing in the Package field. When you print a gift or pledge barcode on mailings such as appeal cards, phonathon forms, reminders, or renewal notices, the five-digit package ID in the barcode is taken from the package entered in this field. If you leave this field blank, the package section of the gift barcode prints as “00000”. Export address in ALL CAPS. See the description under Print address in ALL CAPS. Note: To print cards for participants or relationships, select either Participants or Relationships in the Create for field on the General tab. Participants is available only if you use the optional module Event Management. For records who do not have an address. When you print cards for participants or relationships, the program prints the address present on the participant record or the Relationship tab of the constituent record. When an address is not present on a participant record or Relationship tab of a constituent record, you must specify in the For records who do not have an address field whether to print the participant’s or relationship’s name with no address or to omit the participant or relationship without an address from the mailing. Include [ ] spaces before each line. To specify the horizontal position of the text on a card, mark Include [ ] spaces before each line. For example, your organization can have seasonal cards with a snowflake graphic on the left side of each card. You can adjust the position of the text on the card so it does not print over the graphic by marking this checkbox. When you mark this checkbox, enter the number of spaces you want to skip. You can skip between 1 and 99 spaces. Include total number of labels. When you mark Include total number of labels, the total number of labels processed prints on the label immediately following the last label printed by the mail task. Note: If the address printed on the mailing label or mail piece has no barcode, it is not authorized for PostalSaver, and the tray number does not print. Include Tray Number on each mailing label or mail piece. If you use PostalSaver and, on the PostalSaver tab, mark Run PostalSaver, the Include Tray Number on each mailing label or mail piece checkbox is available for appeal cards, envelopes, and labels. To print the tray number on each label, envelope, or appeal card of the mailing, mark this checkbox. If, on the PostalSaver tab, the Run PostalSaver checkbox is unmarked, this checkbox is disabled. Notes. Two thirds and Full page renewal notices have additional space to include a detailed message to your donors. You can enter 42 lines of test for Full page forms and 20 lines for two thirds page renewal notices. Omit punctuation from address (or export, card run, or mailing, depending on which mail task). To remove all commas, periods, and semicolons from the address, mark Omit punctuation from address. This includes any punctuation in the constituent’s name and address block. Package. If the appeal you enter in the Appeal ID field is divided into packages, you can enter a package to associate with this mailing in the Package field. When you print a gift barcode on the appeal card, the five-digit package ID in the barcode is taken from the package entered in this field. If you leave this field blank, the package section of the gift barcode prints as “00000”. F O R M A T TA B 18 Print address in ALL CAPS (Or may say Export, depending on which mail task). To print the entire address block, including the constituent’s name, in capital letters, mark Print address in ALL CAPS. Mailings with standardized addresses, which include no punctuation and capitalization throughout the address, are eligible for discounts offered by the US Postal Service. For more information about the PostalSaver tab and sorting your mailings, see the “Postal Saver Tab and Postal Discounts” on page 111. Print new number on separate mailing label or mail piece to use as notification for each new tray. If you use PostalSaver and, on the PostalSaver tab, mark Run PostalSaver, the Print new number of separate mailing label or mail piece to use as notification for each new tray checkbox is available for appeal cards, envelopes, and labels. To print the tray number on a separate mailing label or mail piece as a notification of each new tray, mark this checkbox. The mailing label or mail piece with the tray number cannot be mailed. If, on the PostalSaver tab, the Run PostalSaver checkbox is unmarked, this checkbox is disabled. Note: If the Include notes on receipt checkbox on the Benefits screen, accessed through the Benefits button on the gift record, is marked and Notes are entered, that message overwrites whatever you enter here on the Format tab and prints on the receipts. Print this message on each receipt. When you print receipts using the Preprinted form, you can enter a short message in the Print this message on each receipt field. This message displays below the address on each receipt and can be used to customize the receipt. For example, you can thank your donors for giving to a specific fund with the message, “Thank you for making a donation to the 2003 Annual Fund!” Print zero balance reminders. To print a reminder for a client who has purposely overpaid one or more installments for a pledge, mark Print zero balance reminders. For example, when you create reminders, you may have a client who has purposely overpaid several installments for a pledge. Because of this, the client may not be included when you create a monthly reminder. To ensure a reminder is printed for the client regardless, mark this checkbox. Skip [ ] lines before printing the first line. To specify the vertical position of the text on the label, mark Skip [ ] lines before printing the first line. For example, your organization may have seasonal labels with a preprinted holiday message at the top of the label. By marking this checkbox, you can adjust the position of the text on the label so it does not print over the preprinted message. When you mark this checkbox, you also need to enter the number of lines to skip. You can skip between one and four lines. If you include the Address barcode or Endorsement line fields in the mailing, this checkbox is disabled. Note: If you mark the Update number solicited checkbox, the No. Solicited field on the appeal record is updated even if the appeal cards do not print correctly. Update number solicited for this appeal. To update the number of constituents you contacted for the appeal entered in the Appeal ID field, mark Update number solicited. When you mark this checkbox, the program updates the No. Solicited field on the appeal record to include the constituents receiving appeal cards in this mailing. If you mark Update number solicited, the No. Solicited field on the appeal record is updated even if the appeal cards do not print correctly. 186 C H A P T E R Note: You should check your card stock to determine if you have preprinted or blank cards. Use blank cards. If, on the General Tab, you select Preprinted card as your card type, the Use blank cards checkbox is available. If you use new Blackbaud standard membership cards, which are blank, mark Use blank cards. If you use old Blackbaud standard cards, which are preprinted, you need only the constituent information to print and should not mark Use blank cards. Format Tab: Sort Note: The PostalSaver tab is available if you use the optional module PostalSaver. You can use Sort on the Format tab to specify the order the mailing pieces print. For example, you can choose to sort appeal cards alphabetically by constituent name. Sort is not available when you use the PostalSaver tab to run a postalsaver. Do not sort mailing. Mark the Do not sort mailing option if you want the mailing to print in the order processed by the program. For example, if you used the Include button on the General tab to print cards for a specific query, you can mark the Do not sort mailing option to print the mailing in the order the records are processed by the program. Sort by the following fields. To specify the order the mailing pieces print, mark the Sort by the following fields option. When you mark this option, the Available Fields and Sort Fields boxes are enabled so you can select the fields by which you want to sort the mailing. Note: The fields that appear in the Available Fields box depend on selections you make on previous tabs. F O R M A T TA B 18 Available Fields. The Available Fields box contains all fields available to sort mailing. When using the Appeal Cards mail task, the following fields are available to sort the order the appeal cards print. Sort Field Alphabetical Query ZIP Code Category Solicitor Action Date Segment Date Letter Types Notes Alphabetical is automatically available for all mail tasks except: Cards, Labels, and Label Truncation Report available if you select the Addressee field on the Fields to Include tab; Place Cards - according to the Participant Card Name field, which you select on the Fields to Include tab; and Name Tags- if you select the Participant Tag Name field on the Fields to Include tab. Query is available when you include a query in the mailing. If you sort by Query, the mailing is sorted the way the query is sorted. To include a query, click the Include button on the General tab and choose Selected Records. ZIP Code is available if you select ZIP Code or Address Block, which includes the ZIP Code, on the Fields to Include tab. Category is available when you print the membership category on the membership card or phonathon form. Solicitor is automatically available for the Phonathon Forms mail task Action Date is available when you include the Action date field on the Fields to Include tab for the Follow-Up Letters mail task. Segment is available when you mark the Segment mail run checkbox on the Segment tab for Quick Letters, Cards, and Labels. Date is available when you include the Gift date field in the acknowledgement letter and select per gift in the Select one letter to each acknowledgee field on the Fields to Include tab for Receipts, Donor Acknowledgement Letters, and Honor/Memorial Acknowledgement Letters. Letter Types is available when you include the Letter field in the acknowledgement letter and select per gift in the Select one letter to each acknowledgee field on the Fields to Include tab for Honor/Memorial Acknowledgement Letters. Sort Fields. The Sort Fields box contains all fields by which you want to sort the appeal cards. To sort a mailing, use the right arrow to move the fields by which you want to sort from the Available Fields box to the Sort Fields box. For example, to sort appeal cards alphabetically by constituent name, highlight Alphabetical in the Available Fields box and click the single right arrow to move Alphabetical to the Sort Fields box. Asc. and Desc. When you move a field to the Sort Fields box, you can select whether the program should sort in ascending or descending order. For example, if you choose to sort with the Alphabetical field, you can sort in ascending order (A to Z) or descending order (Z to A). To change the sort order to ascending, highlight the field name in the Sort Fields box and click Asc. To change the sort order to descending, highlight the field name in the Sort Fields box and click Desc. The sort order displays to the right of the field name. Up and Down arrows. You can sort a mailing using more than one field. For example, you can move ZIP Code and Alphabetical to the Sort Fields box. The order the fields are listed in the Sort Fields box affects the way the program sorts the appeal cards. If ZIP Code is listed first, all the items sort by ZIP Code, then sort alphabetically by constituent name within each ZIP Code. To change the order of the fields in the Sort Fields box, highlight the field you want to move and click the up or down arrow as necessary to move the field to the appropriate location. 188 C H A P T E R Format Tab: Headings When you use a report mail task, such as Reminder Report or Receipt Report, you can enter a heading that appears on the first page of the report. For example, you may want to add the heading “Annual Mailing Appeal Receipts.” Heading Format. In the Heading Format frame, you can enter a report title, such as “Annual Mailing Appeal Receipts.” To further explain the information included in the report, you can enter a subtitle. You can enter up to 50 characters in the Title and Subtitle fields. If you enter a title or subtitle, you need to specify the alignment of the text in the Align field. You can choose Left, Center, or Right alignment. You can mark the Print Organization name checkbox to print your organization’s name on the first line in the heading. Note: When you print the report date in the heading, the formats available correspond to the Windows formats defined in the Windows Control Panel. To view your Windows settings, select the Date tab on the Regional Settings Properties screen. Print Page Number in Heading. To print a page number at the top of the page, mark the Print Page Number in Heading checkbox. When you mark this checkbox, specify the format and alignment of the page number in the Format and Align fields. If you choose to print a page number in the heading, we recommend marking the Print report heading on each page checkbox so the page number prints on every page of the report. Print Report Date in Heading. To print the date of the report at the top of the page, mark the Print Report Date in Heading checkbox. When you mark this checkbox, specify the format and alignment of the report date in the Format and Align fields. Print report heading on each page. If you mark the Print report heading on each page checkbox, the heading prints at the top of each page in your report. If you do not mark the checkbox, the report date and page number print only at the top of the first page. F O R M A T TA B 18 Format Tab: Criteria You can use the Criteria checkboxes to print a summary of the settings you used to create a report mail task, such as Reminder Report or Receipt Report. Print Report Criteria. If you mark the Print Report Criteria checkbox, you can print the settings used to create your report. The Criteria to print box becomes enabled when you mark this checkbox. Criteria to print. To print information about a setting in the report, mark the checkbox next to the criteria name. For example, if you want to print information about the settings used to include constituents in the report, mark the Constituents to include checkbox. Include on. When you print report criteria, you need to specify where the program should print this information. You can print the criteria on the first page of the report or a separate page. 190 C H A P T E R Format Tab: Detail Using the Detail checkboxes and fields, you can determine specific information such as whether you want to print an ID for each constituent who appears a the report mail task, such as Reminder Report or Receipt Report. Amount to print. In the Amount to print field, select the monetary amount you want to print in the report. You can select the gift amount or receipt amount. You may want to select the receipt amount to show the tax deductible portion of the gift. For example, a ticket for your annual awards banquet costs $100. A portion of the ticket price pays for the cost of food and the remainder is a donation to your organization. You may want to select receipt amount in the Amount to print field to show the amount of the ticket price that is a donation. ID to print. In the ID to print field, select the type of ID you want to print for each constituent who appears in the receipt report. You can select None, Social Security Number, or Constituent ID. Print under name. If you print an ID for each constituent on the report, mark the Print under name checkbox if you want the ID to appear under the constituent’s name. If you do not mark this checkbox, the ID prints above the name. Include maiden name. To include a constituent’s maiden name in the receipt report, mark the Include maiden name checkbox. F O R M A T TA B 19 Format Tab: Page Footer When you print a receipt report, you can create a page footer to appear at the bottom of every page in a report mail task, such as Reminder Report or Receipt Report. Page Footer Text. In the Page Footer Text frame, you can enter up to 80 characters of text that prints at the bottom of every page in the report. For example, you may want to include a short description of the type of receipts included in the report. If you enter any information in the Text field, you need to specify the alignment in the Align field. You can choose Left, Center, or Right alignment. Print Page Number in Footer. To print a page number at the bottom of every page, mark the Print Page Number in Footer checkbox. When you mark this checkbox, use the Format and Align fields to specify the format and alignment of the report date. Note: When you print the report date in the footer, the formats available correspond to the Windows formats defined in the Windows Control Panel. To view your Windows settings select the Date tab on the Regional Settings Properties screen. Print Report Date in Footer. To print the date of the report at the bottom of every page, mark the Print Report Date in Footer checkbox. When you mark this checkbox, use the Format and Align fields to specify the format and alignment of the report date. 192 C H A P T E R Format Tab: Report Footer When you print a report mail task, such as Reminder Report or Receipt Report, you can create a report footer that appears on the last page of the report. Report Footer Text. In the Report Footer Text frame, you can enter up to 150 characters of text to print at the bottom of the last page of the report. For example, you may want to include a short description of the type of receipts included in the report. If you enter any information in the Text field, you need to specify the alignment of the text in the Align field. You can choose Left, Center, or Right alignment. F O R M A T TA B 19 Format Tab: Name Formats You can use Name formats to select the format of the addressee or salutation for each constituent in a report mail task, such as Reminder Report or Receipt Report. Individuals and organizations have separate formatting options. For more information about selecting addressees and salutations for individuals, see “Select an Addressee or Salutation for an Individual or Contact” on page 243. For more information about selecting an addressee or salutation for an organization, see “Select an Addressee or Salutation for an Organization” on page 251. 194 C H A P T E R chapter 12 eReceipts Tab Overview . . . . . . . . . . . . . . . . . . . . . . . . . . . . . . . . . . . . . . . . . . . . . . . . . . . . . . . . . . . . . . . . . . . . . . . . . . . . . . . . Parts of the Screen Defined. . . . . . . . . . . . . . . . . . . . . . . . . . . . . . . . . . . . . . . . . . . . . . . . . . . . . . . . . . . . . . . . . . Business Rules . . . . . . . . . . . . . . . . . . . . . . . . . . . . . . . . . . . . . . . . . . . . . . . . . . . . . . . . . . . . . . . . . . . . . . . . . . . . Use the eReceipts Tab to Create and Send Receipts Using Email. . . . . . . . . . . . . . . . . . . . . . . . . . . . . . . . . . . . Resend eReceipts Due to a Failed Connection. . . . . . . . . . . . . . . . . . . . . . . . . . . . . . . . . . . . . . . . . . . . . . . . . . . 196 197 199 200 208 Procedures Define the Mail options business rule . . . . . . . . . . . . . . . . . . . . . . . . . . . . . . . . . . . . . . . . . . . . . . . . . . . . . . . . . . . . 199 Create and send receipts using email . . . . . . . . . . . . . . . . . . . . . . . . . . . . . . . . . . . . . . . . . . . . . . . . . . . . . . . . . . . . . 201 196 C H A P T E R Overview You can use the eReceipts tab to configure and send gift receipts by email. Sending electronic receipts can be very beneficial in reducing the amount of paper and time used to return printed receipts to your donors. An eReceipts tab appears on the Receipts mail task when you select Create custom data file in the Receipt type field on the General tab. Using the eReceipts tab, you can create a Microsoft Word merge template to be used as a template for a PDF (Portable Document Format) file. The PDF file is sent as an email to the client. For example, you want to send electronic receipts for all gifts you received this week. Configure eReceipts the same way you configure regular receipts for mailing a hard copy receipt. First, use the various tabs for the Receipts mail task to define your gift type, the constituents to include, and additional filters. Then, use the eReceipts tab in the Receipts mail task to configure your email settings, text, and rules for the email. Merge the receipt data into a Microsoft Word template using the Merge button on the eReceipts tab. During the merge process, select whether you want to mark a gift as receipted, receipted and acknowledged, or not updated once you run the receipts. Once the merge is complete, a PDF file is automatically created from the Word document. The email is then sent automatically through SMTP, a subcomponent of Microsoft Internet Information Services (IIS), with the PDF file inserted into the email as an attachment. Warning: If you have a version of Microsoft Word prior to Word 2000, you can see the eReceipt options, but you cannot perform a mail merge using The Raiser’s Edge. To take full advantage of eReceipt functionality, you must have Word 2000 or higher installed on your computer. To use the features through a terminal session, Office must be installed on the Terminal or Citrix Server and published out to users. For The Raiser’s Edge to send eReceipts as email, you must specify a Simple Mail Transfer Protocol (SMTP) email server name and port number using the Mail options business rule link in Configuration. For more information about these settings, see “Business Rules” on page 199. To work with recurring queues and eReceipts, you must install Queue Service. Once you install Queue Service, it is logged on with a Local System account. To send eReceipts as email, you must change the service from the default Local System account to a user account with full rights. For more information about installing Queue Service, see the Recurring Queues chapter of the Queue for Task Scheduling Guide. When you send an eReceipt to a constituent and the email address is not valid or cannot be sent for various reasons, in many cases, the email bounces back to your server. Any bounced emails are sent to the email address you specify in the From field on the Write email message screen. You must manually handle each bounced email case. When you send eReceipts and the SMTP email server is unavailable (either because the server is down or the SMTP email server and port number information is incorrect in Configuration), an error message appears, indicating no connection to the server. At this point, you must resend the eReceipts. For more information about resending eReceipts, see “Resend eReceipts Due to a Failed Connection” on page 208. ERECEIPTS TA B 19 To view PDFs of eReceipts, the donor can use Adobe Acrobat Reader. Parts of the Screen Defined Send as eReceipts. Mark this checkbox to enable all options on the eReceipts tab. Click here to learn about eReceipts. Click this link to go directly to the eReceipts section of the help file for information about using this tab. 198 C H A P T E R Write message. Click this button to access the Write email message screen. On this screen, you can create a subject and text for the email message to be used for all eReceipts. You can also specify an email address in the From field. Any email that cannot be sent is bounced back to the email server specified in the From field. An email address is required in the From field and a subject must be entered as well. Note: Spell check does not automatically check every part of the email. To check the entire email, you must use spell check on the subject line and email text separately. The Edit menu offers cut, copy, and paste functionality. Use the Tools menu to access options for spell check and a thesaurus. You can also use the spell check button on the menu bar to spell check your email text. To insert a field into the body of the email message, on the menu bar, click Insert Field. A drop-down appears so you can select the field to insert in the email. Examples of fields to insert include address and gift information. Tip: You can use shortcut keys to move around The Raiser’s Edge without using your mouse. For example, press SHIFT + F7 on your keyboard to access a thesaurus to use on the Write email message screen. Email Types and Email Types to Use. The Email Types column displays email types for selection. The Email Types to Use column displays the type of emails to be used when sending the eReceipt. For example, if you select Home Email in the Email Types column, Home Email appears in the Email Types to Use column. You can use the single arrow in between the two columns to select the email type or you can double-click the email type. It is important to remember that email types are associated with specific address types, such as primary business or preferred address. You set up address processing preferences on the Ind. Address and Org. Address tabs on the Receipts mail task. When sending eReceipts, the options you select on these tabs affect whether or not the eReceipt can be emailed. For more information about options on these tabs, see “Individual and Organization Address Tabs” on page 83. Specify what happens if no email meets this criteria. Use this field to select an option to use when no email address meets the criteria you specified in the Email Types to Use column. You can select to remove the record which removes the record and places it in the exception query. You can also select to use the first email address found. When you select to use the first email address found and no email address exists, the record is removed and placed in the exception query. Create exception query. Mark this checkbox to create an exception query for those records with an unavailable or unusable email address. You can create a Constituent, Individual, Organization, or Gift query. ERECEIPTS TA B 19 Business Rules Business rules affect all workstations using The Raiser’s Edge. When you work with eReceipts using the Receipts mail task in Mail, you must specify an SMTP mail server and port number to be used when sending the eReceipt as email. You can specify these settings using the Mail options link on the Business Rules page. You can set business rules only if you have appropriate security rights established from the Security link of Administration. For more information about setting business rules, see the Configuration & Security Guide. Define the Mail options business rule 1. On the Raiser’s Edge bar, click Config. The Configuration page appears. Warning: When your eReceipts fail to send, double-check that the information you entered in Configuration is correct. When your eReceipts fail to send, you must recreate the eReceipts. For more information, see “Resend eReceipts Due to a Failed Connection” on page 208. 200 C H A P T E R 2. Click Business Rules. The Business Rules page appears. 3. From the tree view on the left, select Mail options. The mail options appear on the right. 4. Under When sending eReceipts use this, in the SMTP email server field, enter an SMTP server name. The server name you enter is used when emailing eReceipts. 5. In the Port Number field, enter a port number to be used when emailing eReceipts. When you enter an SMTP email server name, you must enter a port number to define the TCP/IP port. Port number 25 defaults in this field which is the Internet standard for receiving SMTP mail. However, you can enter a different port number in this field if needed. 6. After you make changes to business rules, your changes are updated right away. Use the eReceipts Tab to Create and Send Receipts Using Email Note: The eReceipts tab is only available when you have NetSolutions or Blackbaud NetCommunity and select Create custom data file in the Receipt type field on the General tab of the Receipts mail task. You can use all tabs in the Receipts mail task to define gift types, the constituents to include, and additional filters for your receipt. Use the eReceipts tab to configure your email settings, text, and rules for the email containing the eReceipt. ERECEIPTS TA B 20 Create and send receipts using email 1. From a Receipts mail task, select the General tab. For more information about opening a mail task, see “Access Mail Tasks” on page 3. 2. In the Receipt type field, select “Create custom data file”. You must select this to use the eReceipt functionality. 3. We recommend you mark the Create output query checkbox so that a query is created for any eReceipts that could not be sent to a constituent. 4. Make all other selections on the General tab as well as the remaining tabs. For more information about the available tabs for the Receipts mail task, see “Create mailings that print on forms” on page 213. 202 C H A P T E R 5. Select the eReceipts tab. 6. Mark the Send as eReceipts checkbox. When you mark this checkbox, all options on this tab are enabled. 7. To create the subject and body text of the email to send to your constituents, click Write message. The Write email message screen appears. 8. In the Subject field, enter a subject for the email. For this example, enter “Thank you for supporting ABC Organization”. Note: Click the spell check button on the menu bar to check the spelling in your email. 9. In the email message text box, you can enter text and insert fields, such as organization name and gift information. To insert fields into the text box, click Insert Field. A submenu appears so you can select from a category of fields. For example, click Insert Field and select Addressee/Salutation, <<Addressee/Salutation.Addressee>>. ERECEIPTS TA B 20 14. Fields available for selection include all fields that appear in the Available Fields box on the Fields to Include tab of the Receipts mail task as well the following fields: Email_Address, Email_Subject, and Email_Text. You cannot use the insert field functionality in the Subject field. Select additional fields to include and add any additional text to the email. Click OK. You return to the eReceipts tab. In the Select the order in which the email types should be considered frame, double-click Email in the Email Types box. Email now appears in the Email Types to Use box. You must select at least one email type to use. You can create and edit email types by clicking the Phone Types table on the Tables page of Configuration. For information, see the Configuration chapter of the Configuration & Security Guide. You can check a constituent’s email address from the Phones/Email/Links box on the Bio 1 tab of a constituent record. For more information, see the Constituent Data Entry Guide. In the Specify what happens if no email meets this criteria field, select “Use first email found”. When no criteria is met in the Email Types to Use box, the first email found for a constituent is the email address used. When you select “Remove record from run” in this field, an email for this constituent is not sent. In the Create an exception query to identify receipts that could not be emailed frame, mark the Create exception query checkbox and select “Constituent”. You can also select Individual, Organization, and Gift, depending on the type of query you want to create. An exception is created when no email address is found for a constituent record or if the Requests no email checkbox is marked on the Bio 1 or Org 1 tab of the constituent’s record. Click Merge. The Save Mailing As screen appears. 15. 16. 17. 18. In the Mailing name field, enter a name for this mailing. In the Description field, enter a description for the mailing. To allow other users to run this mailing, mark the Other users may run this Mailing checkbox. To allow other users to modify this mailing, mark the Other users may modify this Mailing checkbox. 10. 11. 12. 13. 204 C H A P T E R 19. Click Save. The Microsoft Word Mail Merge Wizard screen appears. 20. Click Next. The Update gifts screen appears. 21. To mark a gift as receipted, select Receipted. To mark a gift as receipted and acknowledged, select Receipted and Acknowledged. When you select Receipted and Acknowledged, the Acknowledge field on the gift record changes to Acknowledged and the Receipt field on the gift record changes to Receipted. If you do not want to update the gift, select Do not update. 22. Click OK. ERECEIPTS TA B 20 23. Click Next. The What type of Mail Merge do you want to run? screen appears. 24. To work with a simple mail merge using one document, select Perform a simple mail merge using only one document. When you select this option, you work with only one document to create the eReceipt. To work with a conditional mail merge using more than one document, select Perform a conditional mail merge using multiple documents. When you select this option, you work with more than one document to create the eReceipt. 206 C H A P T E R 25. Click Next. The Create the document and merge the data screen appears. 26. Click Create merge document. Microsoft Word opens and a blank Merge document appears. As you compose your merge document, you are going to insert merge fields into the letter. When The Raiser’s Edge converts the letter into a PDF file, the correct information is exported out of The Raiser’s Edge and appears in the designated areas (placeholders) of your letter. For more information about creating merge letters, see the Constituent Data Entry Guide and The Raiser’s Edge & Microsoft Office Integration Guide. ERECEIPTS TA B 20 27. To enter merge fields, leave your cursor flashing in the left corner of the work space of your letter and click Insert Raiser’s Edge field on the toolbar. 28. Select the merge fields you want to add, such as Email_Subject and Email_Text. To move down to the next line, press ENTER on your keyboard. 29. Add any additional fields to the letter and click Save and return to RE 7. You return to the Microsoft Word Mail Merge Wizard screen. To make any changes to the document you just created, click Edit merge document. 208 C H A P T E R 30. Click Finish. The Confirm File Location screen appears. 31. In the Save document as field, specify a location to save the document you just created. 32. Click OK. A preview of the merge letter you created appears in a Word document. The email has now been sent with a PDF attachment of the merge letter you created. The text of the email is the text you added on the Write email message screen on the eReceipts tab. Resend eReceipts Due to a Failed Connection Warning: When your eReceipts fail to send, you must first use the checklist below to recreate the eReceipts before you send another, separate batch of eReceipts. When you send eReceipts and the SMTP email server is unavailable (either because the server is down or the SMTP email server and port number information is incorrect in Configuration), an error message appears, indicating no connection to the server. At this point, The Raiser’s Edge has already generated the eReceipts. If you selected to update the gift record, the gift records are updated in the database as well. Therefore, you must resend the eReceipts. Use the checklist below to recreate the eReceipts to ensure the records in your database are correct. To find the starting receipt number, you can access the merge file you created during the initial eReceipt process. First, ensure the information you entered in Configuration for the SMTP email server name and port number is correct. You must establish a valid connection to your email server before the eReceipts can be sent. During the initial creation of your eReceipts, if you selected Receipted on the Update gifts screen, you must change the gifts back to Not Receipted. (If you selected Do not update on the Update gifts screen, you do not need to update any gifts in your database.) To update your gift records, move to the next step in the checklist. Warning: For more information about creating a gift query, see the Query &Export Guide. If you did not specify to create a gift query when creating your eReceipts, you must go back and recreate a query. You will then use the query to perform a global change to your database. Use some or all of the following query fields to create a query of the gifts updated when you initially created the eReceipts: • Receipt date (the date you created the initial eReceipts) • Receipt (initially set to Receipted) • Receipt Stack (the correct receipt stack when multiple receipt stacks are used) • Receipt number (the starting receipt number which you can access from the initial merge file you created) Warning: Before you perform a global change in The Raiser’s Edge, you should have a complete backup of your database. To successfully back up your data, you must first shut down the database. Once you create a gift query of the updated gifts or if you already created a gift query when you initially created the eReceipts, you can now perform a global change of gift records. Use the Globally Change Records link in Administration. For detailed information about performing a global change, see the Global Add, Delete, & Change Guide. Globally change the following fields: • Receipt (Replace “Receipted” with “Not Receipted”) ERECEIPTS TA B 20 • • • • Receipt number (Add blank) Receipt date (Add blank) Receipt Stack (Add blank; Canadian databases only if multiple receipt stacks are used) Acknowledged (If you selected to acknowledge your gifts, replace “Acknowledged” with “Not Acknowledged”) • Acknowledge date (Add blank; only if you selected to acknowledge your gifts) For a non-Canadian database, from the Mail page, open the original eReceipt. On the General tab, in the Starting receipt no. field, enter the original starting receipt number. On the eReceipt tab, click Merge. Your database is now correctly updated and the eReceipts have been sent successfully. Note: For more information about Canadian receipt stacks, see the Receipting Guidelines for Canada Guide. For a Canadian database, you must first change the starting receipt number in Configuration. From the Configuration page, select Business Rules, Gift options, Activity options. To access the Change Next Available Receipt Number screen, click Change Number. Click the up arrow next to the correct receipt stack. From the Mail page, open the original eReceipt. On the eReceipt tab, click Merge. Your database is now correctly updated and the eReceipts have been sent successfully. 210 C H A P T E R chapter 13 Common Mail Procedures Create a Mailing . . . . . . . . . . . . . . . . . . . . . . . . . . . . . . . . . . . . . . . . . . . . . . . . . . . . . . . . . . . . . . . . . . . . . . . . . . . 213 Mail Merge . . . . . . . . . . . . . . . . . . . . . . . . . . . . . . . . . . . . . . . . . . . . . . . . . . . . . . . . . . . . . . . . . . . . . . . . . . . . . . . . . . 230 Create a Custom Mailing . . . . . . . . . . . . . . . . . . . . . . . . . . . . . . . . . . . . . . . . . . . . . . . . . . . . . . . . . . . . . . . . . . . . . . . 239 Export a Mailing . . . . . . . . . . . . . . . . . . . . . . . . . . . . . . . . . . . . . . . . . . . . . . . . . . . . . . . . . . . . . . . . . . . . . . . . . . . 242 Select an Addressee or Salutation for an Individual or Contact . . . . . . . . . . . . . . . . . . . . . . . . . . . . . . . . . . . . . 243 From Individual . . . . . . . . . . . . . . . . . . . . . . . . . . . . . . . . . . . . . . . . . . . . . . . . . . . . . . . . . . . . . . . . . . . . . . . . . . . . . . . 245 From Configuration . . . . . . . . . . . . . . . . . . . . . . . . . . . . . . . . . . . . . . . . . . . . . . . . . . . . . . . . . . . . . . . . . . . . . . . . . . . 246 Use Individual Name . . . . . . . . . . . . . . . . . . . . . . . . . . . . . . . . . . . . . . . . . . . . . . . . . . . . . . . . . . . . . . . . . . . . . . . . . . 247 Addressee or Salutation Format Prints Incorrectly . . . . . . . . . . . . . . . . . . . . . . . . . . . . . . . . . . . . . . . . . . . . . . . . . . 250 Select an Addressee or Salutation for an Organization . . . . . . . . . . . . . . . . . . . . . . . . . . . . . . . . . . . . . . . . . . . . 251 Send a Mailing as Email . . . . . . . . . . . . . . . . . . . . . . . . . . . . . . . . . . . . . . . . . . . . . . . . . . . . . . . . . . . . . . . . . . . . . 254 Restart a Mail Printing. . . . . . . . . . . . . . . . . . . . . . . . . . . . . . . . . . . . . . . . . . . . . . . . . . . . . . . . . . . . . . . . . . . . . . . 256 Save a Parameter File . . . . . . . . . . . . . . . . . . . . . . . . . . . . . . . . . . . . . . . . . . . . . . . . . . . . . . . . . . . . . . . . . . . . . . . 257 Delete a Parameter File . . . . . . . . . . . . . . . . . . . . . . . . . . . . . . . . . . . . . . . . . . . . . . . . . . . . . . . . . . . . . . . . . . . . . 258 Create One Per Page Mailings . . . . . . . . . . . . . . . . . . . . . . . . . . . . . . . . . . . . . . . . . . . . . . . . . . . . . . . . . . . . . . . . 259 Simple One Per Page Mailings . . . . . . . . . . . . . . . . . . . . . . . . . . . . . . . . . . . . . . . . . . . . . . . . . . . . . . . . . . . . . . . . . . . 260 Conditional One Per Page Mailings . . . . . . . . . . . . . . . . . . . . . . . . . . . . . . . . . . . . . . . . . . . . . . . . . . . . . . . . . . . . . . . 267 Procedures Create mailings that print on forms . . . . . . . . . . . . . . . . . . . . . . . . . . . . . . . . . . . . . . . . . . . . . . . . . . . . . . . . . . . . . . 213 Create a labels, cards, envelopes, or name tags mailing . . . . . . . . . . . . . . . . . . . . . . . . . . . . . . . . . . . . . . . . . . . . . 221 Create and send letters from Mail . . . . . . . . . . . . . . . . . . . . . . . . . . . . . . . . . . . . . . . . . . . . . . . . . . . . . . . . . . . . . . . 230 Create custom mailings . . . . . . . . . . . . . . . . . . . . . . . . . . . . . . . . . . . . . . . . . . . . . . . . . . . . . . . . . . . . . . . . . . . . . . . . 239 Export a mailing to another application . . . . . . . . . . . . . . . . . . . . . . . . . . . . . . . . . . . . . . . . . . . . . . . . . . . . . . . . . . . 242 Define individual name formats . . . . . . . . . . . . . . . . . . . . . . . . . . . . . . . . . . . . . . . . . . . . . . . . . . . . . . . . . . . . . . . . . 247 Correct the format of an addressee or a salutation in a mailing . . . . . . . . . . . . . . . . . . . . . . . . . . . . . . . . . . . . . . . 250 Define organization name formats . . . . . . . . . . . . . . . . . . . . . . . . . . . . . . . . . . . . . . . . . . . . . . . . . . . . . . . . . . . . . . . 253 Send a mailing as email . . . . . . . . . . . . . . . . . . . . . . . . . . . . . . . . . . . . . . . . . . . . . . . . . . . . . . . . . . . . . . . . . . . . . . . . 254 Restart the printing of a mailing . . . . . . . . . . . . . . . . . . . . . . . . . . . . . . . . . . . . . . . . . . . . . . . . . . . . . . . . . . . . . . . . . 256 Save mail parameters . . . . . . . . . . . . . . . . . . . . . . . . . . . . . . . . . . . . . . . . . . . . . . . . . . . . . . . . . . . . . . . . . . . . . . . . . 257 Delete mail parameters . . . . . . . . . . . . . . . . . . . . . . . . . . . . . . . . . . . . . . . . . . . . . . . . . . . . . . . . . . . . . . . . . . . . . . . . 258 Create a simple one per page mailing . . . . . . . . . . . . . . . . . . . . . . . . . . . . . . . . . . . . . . . . . . . . . . . . . . . . . . . . . . . . 260 Create a conditional one per page mailing . . . . . . . . . . . . . . . . . . . . . . . . . . . . . . . . . . . . . . . . . . . . . . . . . . . . . . . . 268 212 C H A P T E R Many mail tasks in The Raiser’s Edge have similar tabs, options, fields, and checkboxes. For example, most mail tasks have an Attributes tab you can use to include or exclude records from the mailing. From the Attributes tab, you can also add, update, or delete attributes entered on the records processed by the mail task. Once you understand how to use the Attributes tab of a particular mail task, you understand how to use it for all mail tasks. This chapter explains the tabs and procedures common to all mail tasks. For information about a specific mail task, see the appropriate chapter in this manual. Create a Mailing The following procedures are example mailings. Some tabs, selections, checkboxes, and fields vary between mail tasks. For specific information about certain tabs or fields, see the chapter for the tab you are on. For information or tips specific to a certain mail task, see the section for the mail task in “Available Mail Tasks” on page 11. Create mailings that print on forms Follow this procedure if you are creating a mailing that uses preprinted forms, such as Appeal Cards, Membership Cards, Phonathon Forms, Receipts, Reminders, or Renewal Notices. Note: You can customize your organization’s forms with your colors, logo, and personal messages. Blackbaud forms align with software printouts. For more information or to order Blackbaud standard forms, send an email message to [email protected] or call 1-866-4-BB-Forms (1-866-422-3676). You can view samples of forms at forms.blackbaud.com. 1. Open the Receipts mail task. For more information about opening a mail task, see the section “Accessing Mail Tasks” in the Introduction to Mail chapter. The New Receipts screen appears. 2. On the General tab: • In the Receipt type field, select whether to print Preprinted receipts or Create custom data file. If you print the standard form, Preprinted receipts, you can order preprinted receipts customized with your organization’s logo and colors from Blackbaud or elsewhere and print them right at your printer. If you select Create custom data file, you will have to export the fields you select to a word processing program that supports mail merges. C O M M O N M A I L P RO C E D U R E S 21 If you choose not to use the standard or preprinted form and are creating your own custom forms in a word processing program that supports mail merges, see the procedure “Create custom mailings” on page 239. • Click Include to select a base group of constituent or gift records that need receipts. Choose One Record, Selected Records to use a query as your base group of records, or All Records. For more information about using the Open screen to find a query to use, see the Program Basics Guide. • In the Include Gifts with these Dates frame, enter a date or date range for the gifts for which you want to print receipts. Note: When a receipt run is complete, the last number added to the Receipt field on the gift is stored in your database. This number defaults into the Start receipt no. field the next time receipts are run. • In the Include Gifts with these Amounts frame, enter a minimum and maximum gift amount for which you want to print receipts. • Mark checkboxes in the Include these Constituents frame according to the information you want to include on the receipt. • In the Start receipt no. field, enter the receipt number with which to begin printing receipts. • Mark the Create output query checkbox to create a static constituent or gift query of the records that receive receipts. Note: The Addressee field defaults into the Fields to Export box, to ensure you choose a name format to print on the receipts. Highlight the field and click Options to select a name format for the addressee. 3. Select the Fields to Include tab. 4. On the Fields to Include tab, select the fields you want to include on the receipts by highlighting them in the Available Fields box and clicking the single right arrow to move them to the Fields to Export box. If you select any address or phone fields, you need to specify the address to use on the Ind. Address and Org. Address tabs. For more information, see “Individual and Organization Address Tabs” on page 83. 214 C H A P T E R Note: To see if a field has options available, highlight the field. If the Options button is disabled, the field does not have options. If the Options button is enabled, click it to access and select the available options for the particular field. 5. Click Options to select options for certain fields. For more information about selecting options for addressees or salutations, see “Select an Addressee or Salutation for an Individual or Contact” on page 243 or “Select an Addressee or Salutation for an Organization” on page 251. If you chose Create custom data file in the Receipt type field on the General tab, the Fields to Include tab appears differently than above. For more information about selecting fields for custom receipts, see “Create a Custom Mailing” on page 239. 6. Select the Filters tab. 7. On the Filters tab, select any filters you want to use to select the gifts for which you want to print receipts. For example, you may want to print receipts for all gifts with a constituent code of Board Member. For more information, see “Filters Tab” on page 59. C O M M O N M A I L P RO C E D U R E S 21 8. Select the Attributes tab. 9. On the Attributes tab, mark the Include or Exclude Records With these Attributes checkbox and in that frame enter any attributes to filter constituents or gifts for which a receipt prints. In the Add, Update, or Delete these Attributes frame at the bottom of the screen, mark the checkbox and enter any attributes you want to add, update, or delete on the constituent record included in this mailing. For more information, see “Include or Exclude Records from a Mailing using Attributes” on page 76 or “Add, Update, or Delete Attributes from Records in a Mailing” on page 78. 10. Select the Ind. Address tab. 216 C H A P T E R Note: The program checks only the address types listed in the Addresses to use box. If you want the program to check all address types during address processing, move all available address types from the Addresses box to the Addresses to use box. 11. On the Ind. Address tab, use the steps outlined on the tab to select an address type for each individual constituent for whom you are printing a receipt. For more information, see “Select an Address for an Individual” on page 84. 12. Select the Org. Address tab. Note: The program checks only the address types listed in the Addresses to use box. If you want the program to check all address types during address processing, move all available address types from the Addresses box to the Addresses to use box. 13. On the Org. Address tab, use the steps outlined on the tab to select the contacts for whom you are printing a receipt. If you are printing receipts only for organizations, select the address that should print on the receipt. For more information, see “Select an Address for an Organization” on page 88. C O M M O N M A I L P RO C E D U R E S 21 14. Select the Gift Types tab. Warning: If you do not move any gift types to the Include these Gift Types box, a message appears stating you need to select at least one gift type. 15. On the Gift Types tab, select the gift types for which you want to print receipts. All gift types default over to the Include these Gift Types box. For the gift types you do not want to include in the mailing, highlight the gift type in the Include these Gift Types box and click the single left arrow to move it back to the Gift Types box. You can mark the Exclude zero amount gifts checkbox if you do not want gifts with a gift amount of zero to receive a receipt. 16. Select the PostalSaver tab if you use the optional module PostalSaver. For more information about the PostalSaver tab, PostalSaver, and sorting your mailings, see “Postal Saver Tab and Postal Discounts” on page 111. 218 C H A P T E R 17. Select the Format tab. 18. On the Format tab: Note: The PostalSaver tab is available if you use the optional module PostalSaver. For more information about the PostalSaver tab, PostalSaver, and sorting your mailings, see “Postal Saver Tab and Postal Discounts” on page 111. • Select Miscellaneous from the list on the left to enter formatting preferences for monetary information printed on the receipts. • Select Output options from the list on the left to enter formatting preferences for the information printing on the receipts. • Select Sort from the list on the left to select a specific order to print the receipts. If you use the PostalSaver tab to sort the receipts, this option is not available. Warning: Click the binoculars at the top of the preview screen to search for specific information in the mailing preview. Be sure you are on the first page of the preview if you want to search all pages. The search looks only on the page you are viewing and pages after. For example, if you are on page three of the preview and click search, it will not find the information you are searching for on pages one and two. 19. After entering settings on the tabs of the mail task, click Preview. The preview screen appears. We recommend you preview your mailing before printing to help minimize printing errors. If you are creating a custom receipts in another application that supports mail merges, you need to export the information instead of printing. For more information, see “Create a Custom Mailing” on page 239 or “Send a Mailing as Email” on page 254. 20. When you are finished previewing the mailing, click Print. C O M M O N M A I L P RO C E D U R E S 21 If you marked the Create output query checkbox on the General tab, the Save Static Query screen appears. 21. In the Query name field, enter a name that describes the contents of this query. For example, you can enter “Receipts for 2003 Annual Fund.” 22. In the Description field, further describe the contents of this query. For example, you can enter “Receipts printed on 01/01/2004 for the 2003 Annual Fund.” 23. In the Query format field, the program defaults “Static” and disables the field because output queries must be static. For more information about static queries, see the Query chapter of the Query & Export Guide. Warning: If you do not mark the Other users may execute this query and the Other users may modify this query checkboxes, only the user who created the output query and users with Supervisor rights can access the output query. If you delete the user who created the output query, only users with Supervisor rights can access the output query. 24. To allow other users to use or change this query, mark the Other users may execute this query and Other users may modify this query checkboxes. 25. Click Save. A message appears telling you the mailing is being prepared. 26. After the receipts print to your default printer, a message appears asking if you would like to mark the gifts as receipted. 27. Click Yes to update the Receipt field on the Gift tab of a gift record to Receipted for each gift in this mailing. 220 C H A P T E R 28. A message appears asking if all receipts printed correctly. 29. If all receipts printed correctly, click Yes. If any receipt did not print correctly, click No. When you click No, the Restart Run screen appears. For more information about restarting a mailing, see “Restart a Mail Printing” on page 256. 30. To save the settings of this mail task, you need to create a parameter file. For more information, see “Save a Parameter File” on page 257. Create a labels, cards, envelopes, or name tags mailing Follow this procedure if you are using the Labels, Cards, Envelopes, Name Tags, or Place Cards mail tasks. 1. Open the Labels mail task. For more information about opening a mail task, see “Access Mail Tasks” on page 3. The New Labels screen appears. 2. On the General tab: • In the Create for field, select the record type for which you want to print labels — Constituents, Relationships, Honor/Memorials, or Participants. Note: Use labels large enough to fit all information you choose on the Fields to Include tab. • Click Include to select a base group of records that need labels. C O M M O N M A I L P RO C E D U R E S 22 • In the Form type field, select the label type you are using. In the Form font and Font size fields, select the formatting for the text on the labels. Note: The Head of Household Processing frame is used only when both people of the household are included in the query or mailing. If the Mail only to constituents marked Head of Household option is marked and both people are in the query, only the person marked Head of Household will receive the mailing. If only the person not marked Head of Household is in the query, that person will not be excluded from the mailing. • Select options in the Head of Household Processing and Include these Constituents frames according to the records that should receive labels. • Mark the Create output query checkbox if you want to create a static query of the records for which you print labels. 3. Select the Fields to Include tab. 4. On the Fields to Include tab: • Select the fields you want to include on the envelope by highlighting each field in the Available Fields box and clicking the single right arrow to move each over to the Fields to Print box individually. You can also click the double right arrow to select all fields. If you select any address or phone fields, you need to specify the address to use on the Ind. Address and Org. Address tabs. For more information, see “Individual and Organization Address Tabs” on page 83. Note: To see if a field has options available, highlight the field. If the Options button is disabled, the field does not have options. If the Options button is enabled, click it to access and select the available options for the particular field. • Click Options to select options for certain fields. When you select the Addressee or Additional Addressee fields on the Fields to Include tab, the Customization Options screen appears for that particular selection so you can format how the constituent’s name prints on the label. For more information, see “Select an Addressee or Salutation for an Individual or Contact” on page 243. 222 C H A P T E R 5. Select the Filters tab. 6. On the Filters tab, select any filters you want to use to choose records for which you want to print labels. For example, you may want to print labels for constituents whose records were updated as of 01/01/2003. For more information, see “Filters Tab” on page 59. 7. Select the Attributes tab. C O M M O N M A I L P RO C E D U R E S 22 8. On the Attributes tab, mark the Include or Exclude Records With these Attributes checkbox and in that frame enter any attributes to filter constituents for whom labels print. In the Add, Update, or Delete these Attributes frame at the bottom of the screen, mark the checkbox and enter any attributes you want to add, update, or delete on the constituent records for which labels print. For more information, see “Include or Exclude Records from a Mailing using Attributes” on page 76 or “Add, Update, or Delete Attributes from Records in a Mailing” on page 78. Note: The program checks only the address types listed in the Addresses to use box. If you want the program to check all address types during address processing, move all available address types from the Addresses box to the Addresses to use box. 9. Select the Ind. Address tab. Note: When printing labels for participants, the Ind. Address and Org. Address tabs are not present. The address entered on the participant record prints on the label. In the For records who do not have an address field on the Format tab, you need to select how the label should print if an address is not present on the participant record. 10. On the Ind. Address tab, use the steps outlined on the tab to select an address type for each individual constituent for whom you are printing a label. For more information, see “Individual and Organization Address Tabs” on page 83. Note: The program checks only the address types listed in the Addresses to use box. If you want the program to check all address types during address processing, move all available address types from the Addresses box to the Addresses to use box. 224 C H A P T E R 11. Select the Org. Address tab. 12. On the Org. Address tab, use the steps outlined on the tab to select the contacts for whom you are printing a label. If you are printing a label only for the organization, select the address that should print on the label. For more information, see “Individual and Organization Address Tabs” on page 83. Note: If you mark the Segment mail run checkbox, you must select All Records by clicking the Include button on the General tab. If you include a query on the General tab by choosing Selected Records, only records present on both the General and Segment tabs are considered for the mailing. If the records do not appear on both tabs, the message, “No records meet criteria,” appears. If, for example, only one record from a query appears on both tabs, then only one card from that query will print. C O M M O N M A I L P RO C E D U R E S 22 13. Select the Segment tab. 14. On the Segment tab: • Mark the Segment mail run checkbox if you want to print labels for records in several queries. • For each appeal, you can mark the Updated number solicited checkbox to include the constituents in this mailing in the No. solicited field on the General tab of an appeal record. When you mark this checkbox, you must enter an appeal in the Appeals column of the Segment grid for every input query listed in the grid. • To add an appeal to the Appeals tab of each constituent record included in the mailing, mark the Add appeal to constituent record checkbox and enter an appeal in the Appeal column of the Segment grid for each input query entered in the grid. Warning: The order you list the queries is very important. The program removes duplicate constituents from the mailing based on the order you list the queries in the grid. • Click in the Input Query column and use the binoculars that appear to search for the first query you want to use. Repeat for each row in the grid, for as many segments you want to divide your mailing into. • Select an appeal in the Appeal column. • Enter a name for the first segment of the mailing in the Output Query column. For example, enter “Mailing Segment 1” For more information, see “Segment a Mailing” on page 105. Note: If you are using PostalSaver for Postal Discounting and the label type you choose on the General tab cannot fit an address barcode and endorsement line, the PostalSaver tab is disabled. 15. Select the PostalSaver tab if you use the optional module PostalSaver. For more information about the PostalSaver tab, PostalSaver, and sorting your mailings, see the section “Postal Saver Tab and Postal Discounts” on page 111. 226 C H A P T E R 16. Select the Format tab. 17. On the Format tab: • Select Output options from the list on the left to enter formatting preferences for the information printing on the labels. Note: If you want the mailing to sort first by Segment, and then alphabetically within each segment, you must sort your queries alphabetically to get the desired sort order. • Select Sort from the list on the left to select a specific order to print the labels. If you use the PostalSaver tab to sort the envelopes, this option is not available. • Select Truncation reports to print a truncation report using the settings you selected on the Labels mail task. You can choose to check horizontal truncation, vertical truncation, or both. Warning: Click the binoculars at the top of the preview screen to search for specific information in the mailing preview. Be sure you are on the first page of the preview if you want to search all pages. The search looks only on the page you are viewing and pages after. For example, if you are on page three of the preview and click search, it will not find the information you are searching for on pages one and two. C O M M O N M A I L P RO C E D U R E S 22 18. After entering settings on the tabs of the mail task, click Preview. The preview screen appears. We recommend you preview your mailing before printing to help minimize printing errors. 19. When you are finished previewing the mailing, click Print. If you marked the Create output query checkbox on the General tab, the Save Static Query screen appears. 20. In the Query name field, enter a name that describes the contents of this query. For example, you can enter “Labels for Millennium Direct Mailing”. 21. In the Description field, further describe the contents of this query. For example, you can enter “Output query for labels printed on 01/01/2003 for the Annual Direct Mailing”. 22. In the Query format field, the program defaults “Static” and disables the field because output queries must be static. For more information about static queries, see the Query chapter of the Query & Export Guide. Warning: If you do not mark the Other users may execute this query and the Other users may modify this query checkboxes, only the user who created the output query and users with Supervisor rights can access the output query. If you delete the user who created the output query, only users with Supervisor rights can access the output query. 23. To allow other users to use or change this query, mark the Other users may execute this query and Other users may modify this query checkboxes. 228 C H A P T E R 24. Click Save. If you marked the Create exception query checkbox in the Print Truncation Reports before Label Run frame on the Format tab, the Save Static Query screen appears. 25. In the Query name field, enter a name that describes the contents of the exception query. For example, you can enter “Truncated Labels”. 26. In the Description field, the program defaults “Truncation Query” to further describe the contents of this query. You can change this description as necessary. 27. In the Query format field, the program defaults “Static” and disables the field because output queries must be static. For more information about static queries, see the Query chapter of the Query & Export Guide. Warning: If you do not mark the Other users may execute this query and the Other users may modify this query checkboxes, only the user who created the output query and users with Supervisor rights can access the output query. If you delete the user who created the output query, only users with Supervisor rights can access the output query. 28. To allow other users to use or change this query, mark the Other users may execute this query and Other users may modify this query checkboxes. 29. Click Save. A message appears telling you the mailing is being prepared. 30. After the labels print, a message appears asking if all labels printed correctly. 31. Click Yes if the labels printed correctly. If all labels did not print correctly, click No to access the Restart Run screen. For more information about restarting a mailing, see “Restart a Mail Printing” on page 256. 32. To save the settings of this mail task, you need to create a parameter file. For more information, see “Save a Parameter File” on page 257. C O M M O N M A I L P RO C E D U R E S 22 Mail Merge Tip: If you are using Microsoft Word to perform a mail merge, see The Raiser’s Edge & Microsoft Office Integration Guide for a procedure using the Word Merge Wizard. When you write a letter or create custom forms, you need to perform a mail merge to get Raiser’s Edge information into the document you created in a word processing program. Think carefully about the letter you want to write before you start extracting data from The Raiser’s Edge. Here is a list of steps to follow. Write your letter or create your custom form. Use a word processing program, such as Microsoft Word, that supports mail merges. Insert merge fields in this document where Raiser’s Edge information will go to personalize each letter or form. Name the merge fields the same names as Raiser’s Edge fields on the Fields to Include tab in Mail, such as <Gift date>. Think about who should be included in the mailing. Using Query and the tabs in Mail, determine the records you want to include in your data file. For more information about Query, see the Query & Export Guide. What Raiser’s Edge information do you want in each letter or custom form? Using the Fields to Include tab in a mail task, choose the Raiser’s Edge fields you want to include in your data file. Merge it. If you are using Microsoft Word, you can click the Send to Word merge wizard button on the toolbar of the mail task for a quick and easy way to perform a mail merge. If you are using any other word processing program, you must export Raiser’s Edge information. Use the following procedure to perform these steps. Create and send letters from Mail Follow this procedure if you are using any of the letters mail tasks, such as Donor Acknowledgement Letters, Volunteer Follow-Up Letters, Quick Letters, or Honor/Memorial Acknowledgement Letters. Tip: If you are using Microsoft Word to perform a mail merge, see The Raiser’s Edge & Microsoft Office Integration Guide for a procedure using the Word Merge Wizard. 230 C H A P T E R You can use this procedure to create an export file containing the information you want to include in a mail merge letter. To create the mail merge letter, you must first write a letter in an application that supports mail merges. 1. Open the Donor Acknowledgement Letters mail task. For more information about opening a mail task, see “Access Mail Tasks” on page 3. The New Donor Acknowledgement Letters screen appears. Note: When working with the Honor/Memorial Acknowledgement Letters mail task, if you choose Selected Records, and are using a constituent query, the query must include honor/memorial acknowledgee records, not donor records. The same concept applies when selecting One record, if it is a constituent record. However, when using a gift query, you must include the gift records of the donors. This concept also applies when you select One record and choose a gift record. 2. On the General tab: • Click Include to select a base group of constituents or gifts for which you want to print acknowledgement letters. • In the Include Gifts with these Dates frame, select a date or date range to further limit the gifts that receive acknowledgement letters in this mailing. • Mark options and checkboxes in the Soft Credit Gifts To, Include these Constituents, and Credit Matching Gifts To frames according to the information you want to include in the acknowledgement letter. • Mark the Create output query checkbox to create a constituent or gift query of the records included in the mailing. C O M M O N M A I L P RO C E D U R E S 23 3. Select the Fields to Include tab. 4. On the Fields to Include tab: • In the Send one letter to each donor field, select whether you want to write one acknowledgement letter per gift or per donor. • Select the fields you want to include in the export file by highlighting the field in the Available Fields box and clicking the right arrow to move it to the Fields to Export box. Open a folder to reveal the fields it includes by double-clicking on it. Use the up and down arrows to orders the fields as you want them to appear in the letter. If you select any address or phone fields, you need to specify the address to use on the Ind. Address and Org. Address tabs. For more information, see “Select an Address for an Individual” on page 84 and “Select an Address for an Organization” on page 88. Note: To see if a field has options available, highlight the field. If the Options button is disabled, the field does not have options. If the Options button is enabled, click it to access and select the available options for the particular field. • Click Options to select options for certain fields. If you select an Addressee or Salutation field on the Fields to Include tab, the Customization Options screen for that particular selection appears so you can select the type of addressee or salutation to use. For more information about selecting an addressee or salutation, see “Select an Addressee or Salutation for an Individual or Contact” on page 243 or “Select an Addressee or Salutation for an Organization” on page 251. Note: When working with follow-up letters, you can use Advocacy as a filter for action fields. For more informatoin about advocacy actions, see the Actions chapter of the Constituent Data Entry Guide. 232 C H A P T E R 5. Select the Filters tab. 6. On the Filters tab, select any filters you want to use to select records for this acknowledgement letter. For example, you may want to send acknowledgements for gifts donated only to the 2003 Annual Fund. For more information, see “Select specific filters to limit the records receiving a mailing” on page 62. 7. Select the Gift Types tab. Warning: If you do not move any gift types to the Include these Gift Types box, a message appears when you try to export the data, stating you need to select at least one gift type. C O M M O N M A I L P RO C E D U R E S 23 8. On the Gift Types tab, select the gift types for which you want to print acknowledgement letters. All gift types default over to the Include these Gift Types box. For the gift types you do not want to include in the mailing, highlight the gift type in the Include these Gift Types box and click the left arrow to move it back to the Gift Types box. Mark the checkboxes at the bottom of the screen, as necessary, to format gift dates and amounts included in the export file. 9. Select the Attributes tab. 10. On the Attributes tab, mark the Include or Exclude Records With these Attributes checkbox and in that frame enter any attributes to filter constituents or gifts receiving an acknowledgement letter. In the Add, Update, or Delete these Attributes frame at the bottom of the screen, mark the checkbox and enter any attributes you want to add, update, or delete on the constituent or gift records that receive an acknowledgement letter in this mailing. For more information, see “Include or Exclude Records from a Mailing using Attributes” on page 76 or “Add, Update, or Delete Attributes from Records in a Mailing” on page 78. 234 C H A P T E R 11. Select the Ind. Address tab. Note: The program checks only the address types listed in the Addresses to use box. If you want the program to check all address types during address processing, move all available address types from the Addresses box to the Addresses to use box. 12. On the Ind. Address tab, use the steps outlined on the tab to select an address type for each individual constituent receiving an acknowledgement letter. 13. Select the Org. Address tab. C O M M O N M A I L P RO C E D U R E S 23 Note: The program checks only the address types listed in the Addresses to use box. If you want the program to check all address types during address processing, move all available address types from the Addresses box to the Addresses to use box. 14. On the Org. Address tab, use the steps outlined on the tab to select the contacts to receive an acknowledgement letter. If you are sending the acknowledgement letter only to the organization, select the address that should receive the acknowledgement letter. 15. Select the PostalSaver tab if you use the optional module PostalSaver. For more information about the PostalSaver tab and sorting your mailings, see the section “Postal Saver Tab and Postal Discounts” on page 111. 16. Select the Format tab. 17. On the Format tab: • Select Miscellaneous in the list on the left to enter formatting preferences for monetary information in the export file. • Select Output options in the list on the left to enter formatting preferences for the information in the export file. Note: When printing acknowledgement letters for a group of donors, we recommend creating an output query containing the names of all constituents who received an acknowledgement letter. Later, you can use this query to print address labels or envelopes for the donors who received letters. • Select Sort in the list on the left to select a specific order for the information in the export file. 236 C H A P T E R 18. Click Export to create an export file. If you marked the Create output query checkbox on the General tab, the Save Static Query screen appears. 19. In the Query name field, enter a name that describes the contents of this query. For example, you can enter “2003 Annual Fund Acknowledgements.” 20. In the Description field, further describe the contents of this query. For example, you can enter “Acknowledgements for the 2003 Annual Fund for gifts received by 01/01/2004.” 21. In the Query format field, the program defaults “Static” and disables the field because output queries must be static. For more information about static queries, see the Query chapter of the Query & Export Guide. 22. To allow other users to use or change this query, mark the Other users may execute this query and Other users may modify this query checkboxes. 23. Click Save. The Export screen appears. 24. In the Export file type field, select the format of the export file. For more information about Export file types, see the Export Guide or the Export section of the Help File. 25. In the Export file name field, enter a file name and location where you want the export file to be stored. You can click the ellipsis to browse to a location. 26. If you want the first row of the export file to contain the Raiser’s Edge field names, mark the Include header checkbox. 27. To print a control report containing information about the export file, mark the Create control report checkbox. When you mark this checkbox, select whether you want to first Preview or Print the control report. We recommend printing a control report so you can maintain a record of the information in the export file. 28. Click Export Now to begin creating the export file. When the export is complete, you can open the export file in another application to merge this information with your acknowledgement letter. C O M M O N M A I L P RO C E D U R E S 23 After the export file has been created, a message appears asking if you want to note on the gift records included in the mailing they have been Acknowledged. Note: We recommend updating the Acknowledge field to Acknowledged after you print an acknowledgement letter for a gift so the gift cannot be acknowledged again. If you choose not to automatically mark gifts as Acknowledged, we recommend updating the Acknowledge field on each gift record in the mailing as soon as possible. 29. Click Yes if you want to enter Acknowledged in the Acknowledge field on each gift record that received an acknowledgement letter. Click No if you do not want to update the Acknowledge field. 30. If you chose to Preview the control report, the Preview screen appears. 31. Click Print at the top of the Preview screen to print the control report. 32. Close the Preview screen by clicking the X in the top right corner. You return to the mail task. 33. Save and close the mailing. For more information, see “Save mail parameters” on page 257. For more information about performing a mail merge, or creating or editing a letter for a mail merge, see The Raiser’s Edge & Microsoft Office Integration Guide. 238 C H A P T E R Create a Custom Mailing Note: Phonathon forms, do not have a field on the General tab to choose Create custom date file. However, you can still create a custom phonathon form by selecting which fields you want to include on the Fields to Include tab and exporting the mail task to a file that contains merge fields, instead of printing the mail task with the standard order for the fields. For more information about exporting Raiser’s Edge information from Mail, see the procedure “Export a mailing to another application” on page 242. For certain mail tasks, you can select in the Type field on the General tab whether to use a standard form or create your own. When you select Create custom data file in the Type field on the General tab for a mail task, the Fields to Include tab appears differently than when you select the standard forms. Create your own Appeal Cards, Receipts, Membership Cards, Renewal Notices, or Reminders by selecting from the available fields on the Fields to Include tab for custom forms and exporting the results to a file that contains merge fields. When you create a custom data file, you can order fields as you like and select as many as you want instead of printing the fields in the standard format created by Blackbaud. Create custom mailings Note: When you have NetSolutions or Blackbaud NetCommunity and select Create custom data file in the Receipt type field for the Receipts mail task, the eReceipts tab appears on the mail task. Use the eReceipts tab to create and send electronic receipts to your constituents through email. For more information, see “eReceipts Tab” on page 195. Creating a custom data file differs from using standard or preprinted formatting options in two main ways. The first difference is the default selections that appear on the Fields to Include tab. The second difference is that when you finish making selections in the mail task, you export the results instead of printing them. Before you begin a custom mailing, you must first create the custom form with merge fields in a word processing program that supports mail merges. 1. On the General tab of a mail task, select “Create custom data file” in the Type field. For example, if you are using Receipts, select “Create custom data file” in the Receipt type field. C O M M O N M A I L P RO C E D U R E S 23 2. Make all other selections on the General tab. For more information, see the General tab chapter. 3. Select the Fields to Include tab. 4. On the Fields to Include tab, select the fields you want to include on your custom receipts by highlighting them in the Available Fields box and clicking the single right arrow to move them to the Fields to Export box. Open a folder to reveal the fields it includes by double-clicking on it. Use the up and down arrows to orders the fields as you want them to appear in the receipt. If you select any address or phone fields, you need to specify the address to use on the Ind. Address and Org. Address tabs. For more information, see “Select an Address for an Individual” on page 84 and “Send a Mailing as Email” on page 254. If you select Addressee or Salutation fields, you must click Options and select name formats. For more information, see “Select an Addressee or Salutation for an Individual or Contact” on page 243 or “Select an Addressee or Salutation for an Organization” on page 251. 5. Make selections on the rest of the tabs. For more information, see the chapter in this guide for the tab you are on. Tip: If you are using Microsoft Word to perform a mail merge, see The Raiser’s Edge & Microsoft Office Integration Guide for a procedure using the Word Merge Wizard. 6. When you finish making selections for the mail task, click Export. The Export screen appears. 240 C H A P T E R 7. In the Export file type field, select the format of the export file. For more information about Export file types, see the Export Guide or the Export section of the Help File. 8. In the Export file name field, enter a file name and location where you want the export file to be stored. You can click the ellipsis to browse to a location. 9. If you want the first row of the export file to contain the Raiser’s Edge field names, mark the Include header checkbox. 10. To print a control report containing information about the export file, mark the Create control report checkbox. When you mark this checkbox, select whether you want to first Preview or Print the control report. We recommend printing a control report so you can maintain a record of the information in the export file. 11. Click Export Now. If you marked the Create output query checkbox on the General tab, the Save Static Query screen appears. 12. In the Query name field, enter a name that describes the contents of this query. For example, you can enter “2003 Annual Receipts”. 13. In the Description field, further describe the contents of this query. For example, you can enter Receipts printed on 12/15/2003 for gifts donated this year, to be sent to donors for tax purposes.” 14. In the Query format field, the program defaults “Static” and disables the field because output queries must be static. For more information about static queries, see the Query chapter of the Query & Export Guide. 15. To allow other users to use or change this query, mark the Other users may execute this query and Other users may modify this query checkboxes. 16. Click Save. The export process begins. When the export is complete, you can open the export file in another application to merge this information with your custom form. After the export file has been created, a message appears asking if you want records included in the mailing to be updated. Note: The message and records affected vary, depending on which mail task you are using. 17. If you want the records to be updated, click Yes. If you do not want to automatically update records, click No. C O M M O N M A I L P RO C E D U R E S 24 18. If you chose to Preview the control report, the Preview screen appears. 19. Click Print at the top of the Preview screen to print the control report. 20. Close the Preview screen by clicking the X in the top right corner. You return to the mail task. 21. Save and close the mailing. For more information, see “Save mail parameters” on page 257. Export a Mailing On occasion, you may need to export the results of a mail task to another application. For example, you can design custom receipts in another application. Then you can use Mail to compile the constituent information you need from The Raiser’s Edge and export this information to the application where you created the custom form. Export a mailing to another application Tip: If you are using Microsoft Word to perform a mail merge, see The Raiser’s Edge & Microsoft Office Integration Guide for a procedure using the Word Merge Wizard. From a mail task, select all tabs and fill in the parameters you need for the mailing. For information about the parameters available on each tab, see each chapter in this book for details about each tab. For more information about making selections in a mail task, see “Create a Mailing” on page 213. Note: You can also select from the menu bar, File, Export. 1. On the toolbar, click Export. The Export screen appears. 242 C H A P T E R 2. In the Format field, select how you want the program to arrange the data in the export file. For information about the available formats, see the Export chapter of the Query & Export Guide 3. In the Destination field, select where you want the program to put the export file. 4. Click OK. The Number and Date Format Dialog screen appears. 5. To use the same number formats you selected in the mail task, mark the Same number formats as in report checkbox. 6. To use the same data formats you selected in the mail task, mark the Same date formats as in report checkbox. 7. Click OK. The Choose Export File screen appears. 8. In the Save in field, select the directory where you want to save the export file. 9. In the File name field, enter a name for the export file. 10. Click Save. The export is complete. You can open the export file in an application compatible with the export file type you selected. Select an Addressee or Salutation for an Individual or Contact Note: To see if a field has options available, highlight the field on the Fields to Include tab. If the Options button is disabled, the field does not have options. If the Options button is enabled, click it to access and select the available options for the particular field. C O M M O N M A I L P RO C E D U R E S 24 On the Fields to Include tab, you can select the fields you want to appear on your form. When you select Addressee, Salutation, Additional Addressee, or Additional Salutation on the Fields to Include tab of a mail task, the Customization Options screen for that particular field option appears. The Customization Options screens appear so you can select the format of the addressee or salutation for each constituent’s name included in the mailing. For example, you can choose to format John Smith’s name as Mr. John Smith. The format for individual and contact varies from the formatting options for organization records. For more information about formatting organization names, see “Select an Addressee or Salutation for an Organization” on page 251. 244 C H A P T E R When you highlight Individual or Contact in the Constituent folder under Name Formats in the tree view on the left, the Addressee To Use frame appears on the right side of the screen and contains three options: • From individual • From Configuration • Use individual name From Individual When you select From individual, the Use this Addressee if present on the Individual field and the Otherwise use field appear in the Addressee To Use frame. In the Use this Addressee if present on the Individual field, you need to select the addressee format you want to use for the mailing. For example, if you want the name of each constituent to be formatted using the Primary Addressee, select Primary Addressee in the Use this Addressee if present on the Individual field. In the Otherwise use field, enter an alternate format if the first addressee is not present on a record. For example, if a constituent does not have a Primary Addressee entered on the Addressees/Salutations tab of his constituent record, the program uses the format selected in the Otherwise use field. If both addressee/salutation formats are not present on a record, the First name, Middle initial, and Last name print as they are entered in the name fields on the corresponding record. You can enter addressees and salutations in many areas of The Raiser’s Edge. When you select the From individual option, the location where the program looks for these addressees/salutations depends on the record type for which you are printing the mailing. For example, if you are printing pledge reminders for relationship records, the program looks for the addressee/salutation entered on a relationship record. C O M M O N M A I L P RO C E D U R E S 24 From Configuration When you select From Configuration, the Use this Addressee from Configuration field appears in the Addressee To Use frame. In this field, you need to select the addressee format you want to use for the mailing. You can select any format entered in the Addressee/Salutations link of Configuration. For more information about the Addressee/Salutations link of Configuration, see the Configuration chapter of the Configuration & Security Guide. Note: An embedded addressee/salutation contains the Constituent Addr/Sal field. For example, you may have an addressee formatted Constituent Addr/Sal, Pres. When you use this addressee, you need to select a format for the Constituent Addr/Sal field. For more information about embedded addressee/salutations, see the Configuration chapter of the Configuration & Security Guide. If you select an embedded addressee/salutation in the Use this Addressee from Configuration field, the Use this Addressee if present on the Individual field and the Otherwise use field appear below the Use this Addressee from Configuration field. 246 C H A P T E R In the Use this Addressee if present on the Individual field, select the addressee format you want to use for the embedded Constituent Addr/Sal field. The program checks the Addressees/Salutations tab of a constituent record to determine whether this format is entered. In the Otherwise use field, enter an alternate format if the first addressee is not present on a record. If both addressee/salutation formats are not present on a record, the First name, Middle initial, and Last name print as they are entered in the name fields on the corresponding record. You can enter addressees and salutations in many areas of The Raiser’s Edge. When you select an embedded addressee/salutation, the location where the program looks for an addressee/salutation for the Constituent Addr/Sal field depends on the record type for which you are printing the mailing. For example, if you are printing pledge reminders for relationship records, the program looks for the addressee/salutation entered on a relationship record. Use Individual Name When you select Use individual name, all fields in the Addressee To Use frame are disabled and the program prints the name as it is entered in the name fields on the corresponding record. For example, if you are printing pledge reminders for constituents, the program formats the constituents’ names using First name, Middle initial, Last name as they are entered in the name fields on the Bio 1 tab of the constituent records. Define individual name formats You use the Individual selection to specify the addressee format used for individual constituents. For example, you can choose the format for constituent Mary E. James to be Ms. M. James. Note: Follow these steps also when selecting salutations for Individuals, addressees or salutations for Contacts, and addressees or salutations for Solicitors. The Customization Options for Solicitor Name screen appears when you select the Solicitor Name field, located under the Gifts folder on the Fields to Include tab. C O M M O N M A I L P RO C E D U R E S 24 1. From a mail task, select the Fields to Include tab. For more information about opening a mail task, see “Access Mail Tasks” on page 3. 2. From the Available Fields box, highlight Addressee and click the single right arrow to move it to the Fields to Export box. The Customization Options for Addressee screen appears. On the Customization Options for Addressee screen of a mail task, select Individual in the Constituent folder under Name Formats on the left side of the screen. 3. Select From individual in the Addressee To Use frame to print one of the name formats listed on the Addressees/Salutations tab of a constituent record. Note: If neither addressee or salutation is present on a constituent record, the program formats the name as it is entered in the name fields on the Bio 1 tab of a constituent record. 248 C H A P T E R In the Use this Addressee if present on the Individual field, click the down arrow and select an addressee to use for the constituent. In the Otherwise use field, select an alternative addressee to use, if the first choice is not present on the constituent record. 4. To print one of the name formats listed in the Addressees/Salutations option of Configuration, select the From Configuration option. The Addressee To Use frame appears as shown. Note: If you select an embedded addressee/salutation in the Use this Addressee from Configuration field, two additional fields appear so you can select the format for the embedded addressee/salutation. For more information on embedded addressee/salutations, see the Configuration chapter of the Configuration & Security Guide. 5. In the Use this Addressee from Configuration field, click the down arrow and select an addressee to use for the constituent. If the addressee is not present on a constituent record, the program formats the constituent’s name as it is entered in the name fields on the Bio 1 tab of the constituent record. C O M M O N M A I L P RO C E D U R E S 24 6. Select Use individual name to use the constituent’s Full name, Middle initial, and Last name as they are entered in the name fields on the Bio 1 tab of a constituent record. All other fields in the Addressee To Use frame are disabled. After you select the addressee you want to use to format individual constituent names, you can select other options for the mailing or run the mail task. Addressee or Salutation Format Prints Incorrectly In Mail, you select an addressee or a salutation to use for a task. If the format of an address or a salutation prints incorrectly, you can perform multiple tasks to easily resolve the issue. Correct the format of an addressee or a salutation in a mailing If the format of an addressee or a salutation prints incorrectly, do each of these tasks in order until the issue is resolved. 1. Verify the selected addressee or salutation is correct. For information about how to select the format for an addressee or a salutation, see “Define individual name formats” on page 247 or “Define organization name formats” on page 253. 2. If you select From Configuration on the Customization Option screen, verify the addressee or salutation is correct in Configuration. For information about addressees and salutations in Configuration, see the Configuration and Security Guide. 3. If you select From individual on the Customization Option screen, verify the addressee or salutation is correct on the constituent record. For example, if you select From individual and select Primary Addressee, verify the primary addressee is correct on the constituent record. For information about addressees and salutations on constituent records, see the Constituent Data Entry Guide. 4. If you select From individual and Primary Addressee on the Customization Option screen and the addressee is correct in the Primary Addressee field on the constituent record but prints incorrectly, verify you do not have an additional addressee/salutation type named “Primary Addressee”. This can be easily confused with the addressee/salutation type in the Primary Addressee field on the Addressee/Salutation tab on the constituent record. In Configuration, you can rename the additional addressee/salutation type to something other than “Primary Addressee”. 250 C H A P T E R Select an Addressee or Salutation for an Organization Note: To see if a field has options available, highlight the field on the Fields to Include tab. If the Options button is disabled, the field does not have options. If the Options button is enabled, click it to access and select the available options for the particular field. On the Fields to Include tab, you can select the fields you want to appear on your form. C O M M O N M A I L P RO C E D U R E S 25 When you select Addressee, Salutation, Additional Addressee, or Additional Salutation on the Fields to Include tab of a mail task, the Customization Options screen for that particular field option appears. When you select Organization in the Name formats folder, the Include Constituent ID checkbox appears. Include Constituent ID. To print the organization’s constituent ID after the organization name, mark the Include Constituent ID checkbox. Note: If you select Mail to contacts on the Org. Address tab and also choose to Include Constituent ID here, the Organization’s Constituent ID will print next to the Organization’s name. The Customization Options screens appear so you can select whether to include the constituent ID for the organization, which will print with the organization name on the mailing. For information about selecting on the Org. Address tab whether to print an organization’s contact name with the name of the organization or to print only the name of the organization, see “Send a Mailing as Email” on page 254. Individual and Organization records have separate formatting options. For more information about formatting individual names, see “Select an Addressee or Salutation for an Individual or Contact” on page 243. 252 C H A P T E R Define organization name formats When printing addresses for organizations, you can select whether to include a Constituent ID when printing the organization’s name. For information about selecting on the Org. Address tab whether to print an organization’s contact name with the name of the organization or to print only the name of the organization, see “Send a Mailing as Email” on page 254. 1. From a mail task, select the Fields to Include tab. For more information about opening a mail task, see “Access Mail Tasks” on page 3. 2. From the Available Fields box, highlight Addressee and click the single right arrow to move it to the Fields to Export box. The Customization Options for Addressee screen appears. 3. On the Customization Options screen of a mail task, select Organization in the Constituent folder under Name Formats on the left side of the screen. C O M M O N M A I L P RO C E D U R E S 25 Note: When you mark the checkbox, the sample display shows how the organization name will appear with the constituent ID. 4. To include the Constituent ID when printing the organization’s name, mark the Include Constituent ID checkbox. 5. Click OK. You return to the Fields to Include tab. After you select the addressee/salutation you want to use to format organization names, you can select other options for the mailing on other tabs or run the mail task. Send a Mailing as Email If your organization uses an online messaging system that is MAPI (Messaging Application Program Interface) compliant, you can send information gathered in The Raiser’s Edge to other users. MAPI, a standard set by the Microsoft Corporation for Windows, is compatible online messaging systems and applications. MAPI offers a layer of communication between applications created by different software developers. It allows seamless access to select the best applications, instead of choosing one simply because it is compatible. Send a mailing as email 1. From a mail task, select all tabs and fill in the parameters you need for the mailing. For information about the parameters available on each tab, see each chapter in this book. For more information about opening a mail task, see “Access Mail Tasks” on page 3. 2. Click the Send as Mail button on the toolbar. The Export screen appears. 3. In the Format field, select the how you want the program to arrange the data in the export file. For information about the available formats, see the Query chapter of the Query & Export Guide 4. In the Destination field, Microsoft Mail (MAPI) automatically defaults. Because you are sending Raiser’s Edge information by email, you do not need to change this entry. 5. Click OK. The Number and Date Format Dialog screen appears. 6. To use the same number formats you selected in the mail task, mark the Same number formats as in report checkbox. 7. To use the same data formats you selected in the mail task, mark the Same date formats as in report checkbox. 254 C H A P T E R 8. Click OK. The Send Mail screen appears. 9. In the To field, enter the email address of the person who should receive the output from the mail task. 10. In the Cc field, enter the email addresses of the people who should receive copies of this email. 11. In the Subject field, enter a title for the email. For example, you can enter “Annual Fund Receipts for March 1, 2003”. 12. In the Message field, enter any text you want to appear with the Raiser’s Edge information you are sending. Note: This message corresponds to the mail task you are using. For example, if you are sending donor acknowledgement letters, the program asks “Would you like to mark the gifts as having been acknowledged?” C O M M O N M A I L P RO C E D U R E S 25 13. Click Send. The email is sent to the addresses listed in the To and Cc fields on the Send Mail screen. A message appears asking if you want to update the records included in the mailing. 14. To enter Receipted in the Receipt field on all the gift records processed in the mailing, click Yes. The program marks the gifts as receipted. Restart a Mail Printing When you print a mailing, you may encounter problems, such as your printer jamming. These problems can cause your mail task to stop printing. Instead of rerunning the entire mailing, you can start printing at the point when the paper jammed. You can also delete a record from the mail run from the Restart Run screen. Restart the printing of a mailing 1. From a mail task, select all tabs and fill in the parameters you need for the mailing. For information about the parameters available on each tab, see each chapter in this book. For more information about opening a mail task, see “Access Mail Tasks” on page 3. 2. Click Print. The program processes the mailing. 3. After the program processes the mailing, a message appears. Note: To delete a record from the mail run, highlight the row and press DELETE on your keyboard. 256 C H A P T E R 4. To rerun the mailing, click No. The Restart Run screen appears. Note: You can click the Find button to search for a specific record in the mailing. 5. In the Records Included in Run grid, highlight the record where the printing should begin. 6. Click OK to restart the mailing. Save a Parameter File A parameter file contains the settings for a particular mailing you design. For example, if you create a standard phonathon form, you can save the settings you select in the mail task as a parameter file. You can then call up the file at a later date, when you need the standard form for another phonathon. Save mail parameters 1. From a mail task, select all tabs and fill in the parameters you need for the mailing. For information about the parameters available on each tab, see each chapter in this book. For more information about opening a mail task, see “Access Mail Tasks” on page 3. 2. On the toolbar, click Save. The Save Mailing As screen appears. 3. In the Mailing name field, enter a title for the parameter file. 4. In the Description field, enter information describing the use of the mailing. 5. To allow others to use the parameter file, mark the Other users may run this Mailing checkbox. If the mailing contains sensitive information, you may want to restrict access to the parameter file by leaving this checkbox unmarked. C O M M O N M A I L P RO C E D U R E S 25 6. To allow others to make changes to this parameter file, mark the Other users may modify this Mailing checkbox. 7. Click Save. The parameter file is saved to the database. You can view saved parameter files on the right side of the Mail page for each mail task when it is highlighted on the left. 8. From the menu bar, select File, Close to close the mail task. Delete a Parameter File If a parameter file is no longer necessary, you can delete it. When you delete a parameter file, you are removing a copy of the settings used for a specific mailing. The mail task is still available to use. Delete mail parameters 1. On the Raiser’s Edge bar, click Mail. The Mail page appears. 2. From the list on the left, select the type of mailing you want to delete. For example, select Renewal Notices. The existing parameter file “Renewal Data file” appears on the right side of the screen. 3. Highlight the file you want to delete. For example, highlight “Renewal Data file”. 4. Click the Delete link. A message appears asking if you are certain you want to delete the parameter file. 5. Click Yes to delete the mailing. The parameter file is removed from your database. 258 C H A P T E R Create One Per Page Mailings At times, you may want to send a standard form from The Raiser’s Edge Mail, but add a personal message to it. You can do this without creating a custom form in a separate word processing program and performing a mail merge. The One per page checkbox is available on the Reminders, Appeal Cards, and Receipts mail tasks. With this feature, you can choose to print a customizable full page reminder, appeal card, or receipt, instead of the standard preprinted version. For example, on pledge reminders you send to donors, you may want to add a personal message thanking them for their gifts to a certain fund and updating them on campaign progress. When you mark the One per page checkbox on the General tab, the Write custom message button appears on the toolbar of the mail task you are using. To create your custom message, click Write custom message to access the wizard that takes you through the steps of creating your customized full page receipts, reminders, and appeal cards. You write a custom message and perform a mail merge within the mail task with the help of the Custom Message Wizard. You can create a Simple one per page mailing or a Conditional one per page mailing. Simple one per page mailings use one customized message. Conditional one per page mailings create various versions of customized messages, depending on which merge field you select as a condition. C O M M O N M A I L P RO C E D U R E S 25 Simple One Per Page Mailings A simple one per page mailing combines data from The Raiser’s Edge with a customized message you write. If you are familiar with mail merges, the process is similar. However, you do not have to export data from The Raiser’s Edge to an outside word processing program. The mail merge for one per page mailings is performed within the program with the help of a wizard. All messages contain the same type of information, so you only have to write one message. However, each mailing recipient receives a personalized message with information specific to him, such as Gift date and Amount. If you want to create various versions of a message based on a conditional field, see the section “Conditional One Per Page Mailings” on page 267. Create a simple one per page mailing Scenario: You want to send pledge reminders with more than the basic information about the monetary amount due. You want to include a custom message, as well, thanking donors and updating them on the progress of your campaign. Use the One per page checkbox and Custom Message Wizard on the Reminders mail task to create and send full page reminders including a personalized message. 1. Create a new Reminders mail task. For more information, see “Create mailings that print on forms” on page 213. Note: You can customize your organization’s forms with your colors, logo, and personal messages. Blackbaud forms align with software printouts. For more information or to order Blackbaud standard forms, send an email message to [email protected] or call 1-866-4-BB-Forms (1-866-422-3676). You can view samples of forms at forms.blackbaud.com. 2. In the Reminder type field, select either “3 column” or “5 column”. This is a standard preprinted pledge or recurring gift reminder with preprinted fields that match what prints from The Raiser’s Edge. 260 C H A P T E R For more information about what is included in a 3 column and a 5 column reminder, see “Types of Reminders” on page 26. 3. To add a custom full page message to your reminder, mark the One per page checkbox. When you mark the One per page checkbox, the Write custom message button appears on the toolbar. 4. Make the rest of your selections on the General tab. For more information about the available fields and checkboxes, see the General tab chapter. For a similar procedure, see “Create mailings that print on forms” on page 213. C O M M O N M A I L P RO C E D U R E S 26 5. Select the Fields to Include tab. Because you marked the One per page checkbox on the General tab, the Additional Message Fields folder appears in the tree view on the left. It contains additional available fields to select to use in your customized letter as merge fields. 6. Certain preprinted fields default to the Fields to Export list on the right. Double-click the Preprinted Fields folder in the Available Fields box on the left and select any additional preprinted fields you want to include on the reminders. To select a field, highlight it in the list on the left and click the right arrow to move it to the Fields to Export box. 262 C H A P T E R 7. Select merge fields under the Additional Message Fields folder to use in the customized message you want to write. For example, select Salutation; under Gifts, select Amount, Campaign description, Gift date, Solicitor Name; under Attributes, select # of Family Members, Committees, and Organization Type. 8. Continue defining the mailing parameters by making selections on the remaining tabs of the mail task. For more information, see “Create mailings that print on forms” on page 213 or the chapter in this book for the current tab. When you finish making selections on all other tabs, click Write custom message on the toolbar at the top of the screen to create your special message for the reminders. The Custom Message Wizard opens to the Welcome screen. C O M M O N M A I L P RO C E D U R E S 26 9. Select Simple one per page mailing. To create a Conditional one per page mailing, see the procedure “Create a conditional one per page mailing” on page 268. These options are similar to performing a simple or conditional mail merge when you write a letter or create a custom form in your word processing program, such as Microsoft Word. 10. Click Next. The Write the one per page custom message screen appears. 11. Click the Write custom message button in the middle of the screen. A word processing screen appears. 12. Begin typing your custom message for the reminders. You can select your font, size, and alignment at the top of the screen, just as you would in a word processing program. 264 C H A P T E R When you are ready to insert a merge field into the body of the letter, click Insert Field on the toolbar in the top left of the screen. Select the field under the appropriate folder you want to use. Folder and field names match the folders you opened and fields you selected on the Fields to Include tab in previous steps of this procedure. 13. When you finish typing the custom message and including merge fields, click OK. You return to the Write the one per page custom message screen. 14. If you want to edit your message, click the Write Custom Message button again to return to the letter. If you are finished, click Finish. You return to the mail task. C O M M O N M A I L P RO C E D U R E S 26 15. To see an example of how the layout of the reminder looks with the custom message at the top and the preprinted reminder at the bottom, click Layout. 16. To close the layout preview, click the “X” in the top right corner of the screen. You return to the tabs of the mail task. 17. To preview each reminder in the mailing with the appropriate information from The Raiser’s Edge filled in for merge fields, click Preview. The preview screen appears. Warning: We recommend you establish data entry protocols among all Raiser’s Edge users prior to entering data and creating mailings. When data is entered in the program consistently and correctly, it can be used and outputted properly and as expected. For more information, see the Data Entry Protocol chapter of the Program Basics Guide. To see examples of other organizations’ policies and procedures manuals go to www.blackbaud.com/ support/shareddocs/repolicy.asp. 266 C H A P T E R If a record does not have information entered in a field you inserted in the custom message, the information will be omitted and your message will not make sense. We recommend you preview each custom message to ensure each is correct and complete. 18. When you finish previewing the mailing or layout, click the “X” in the top right corner to close the screen. A message appears asking if you want to record the mailing in each gift’s reminder history. 19. To record this pledge reminder mailing on the reminder history of each gift record included in this mailing, click Yes. The reminder history is accessed through the History button on the Gift tab of a gift record. For more information about gift records, see the Gift Records Guide. 20. If you want to make changes to the custom message, click Custom Message Wizard on the toolbar again and follow the previous steps. When you are ready to print the mailing, click Print. 21. Save the parameter file you just created for future use and close the mail task. For more information, see “Save a Parameter File” on page 257. Conditional One Per Page Mailings For conditional one per page mailings, you use specific information from your database to create various versions of customized messages. If you are familiar with mail merges, the process is similar. However, you do not have to export data from The Raiser’s Edge to an outside word processing program. The mail merge for one per page mailings is performed within the program with the help of a wizard. Conditional one per page mailings differ from simple one per page mailings in that you create and use various versions of customized messages. The program selects which custom message to use while processing, based on the condition you select. You create several custom messages, but all are processed at the same time, saving you time and effort. Each recipient receives a personalized message with information specific to her, such as Last Fund donated to and Bank name. C O M M O N M A I L P RO C E D U R E S 26 If you want to create and use only one custom message, see the section “Simple One Per Page Mailings” on page 260. Create a conditional one per page mailing 1. Create a new Receipts, Reminders, or Appeal Cards mail task. For more information, see “Create mailings that print on forms” on page 213. 2. Make selections on the General tab to define your parameters for the mailing. For more information, see the General Tab chapter and “Create a simple one per page mailing” on page 260. Be sure to select in the Type field “Standard” appeal cards “Preprinted receipts”, or “3 column” or “5 column” reminders. The One per page checkbox is not available for the Create custom forms selection. 268 C H A P T E R 3. Mark the One per page checkbox. 4. Select the Fields to Include tab. Because you marked the One per page checkbox on the General tab, the Additional Message Fields folder appears in the tree view on the left. It contains additional available fields to select to use in your customized letter as merge fields. 5. Certain preprinted fields default to the Fields to Export box on the right. Double-click the Preprinted Fields folder in the Available Fields box on the left and select any additional preprinted fields you want to include on the mailing. To select a field, highlight it in the list on the left and click the right arrow to move it to the Fields to Export box. C O M M O N M A I L P RO C E D U R E S 26 Note: For more information about selecting Options for selected fields, see the Fields to Include chapter. 6. Select merge fields under the Additional Message Fields folder to use in the customized messages you want to write. For example, you may want to include in your custom messages Salutation; under Gifts, Largest gift amount, Largest gift date, and Last gift campaign; and under Relationships, Bank name. 7. On the toolbar, click Write custom message to create your special message. The Custom Message Wizard opens to the Welcome screen. 8. Select Conditional one per page mailing. For more information about creating a Simple one per page mailing, see “Create a simple one per page mailing” on page 260. 9. Click Next. The Choose your conditional field screen of the Custom Message wizard appears. The list includes the fields you selected on the Fields to Include tab. Select the merge field you want to use as the condition for which record receives which custom message. For example, select Last gift campaign if you want donors to receive different messages, based on the campaign to which they last gave a gift. You can only select one field to use as a condition. 270 C H A P T E R 10. Click Next. The Conditional custom messages screen of the wizard appears. On this screen, you can add or remove conditional message criteria. Once created, the conditional messages associated with the mailing are listed in the grid. Use the up and down arrows on the action bar to arrange the order the conditions are evaluated. You cannot run a conditional one per page mailing without setting up at least one conditional message from this screen. 11. To create new conditional message criteria, click New Message on the action bar. The Conditional Custom Message screen appears. Note: For a more detailed explanation of conditional one per page mailings, read the descriptions of conditional mail merges in The Raiser’s Edge & Microsoft Office Integration Guide. 12. The conditional field you selected, for example, Last gift campaign, appears at the top of the Conditional Custom Message screen. Select from the drop-down the operator to complete the statement “Use this message when [conditional field] is...”. For example, you can select “equal to”, “not equal to”, or “greater than”. Think about the message you want to write and the reasons you want someone to receive this specific message. For this example, select “equal to”. The statement reads “Use this message when Last gift campaign is equal to...”. C O M M O N M A I L P RO C E D U R E S 27 13. Select a value in the this value field to complete the conditional statement. For example, a completed statement reads “Use this message when Last gift campaign is equal to Annual Campaign”. 14. Click Write Custom Message. A word processing screen appears. The condition you just selected appears at the top of the screen to remind you which message you are writing. 15. Type your message. Click Insert Field to insert a merge field into the body of the message you selected on the Fields to Include tab of the mail task. The Raiser’s Edge fills in information specific to each record included in the mailing according to the merge field selected, such as Bank name. 16. When you are finished typing the message, click OK. You return to the Conditional Custom Message screen where you selected the operator (“equal to”) and value (“Annual Campaign”) to complete the conditional statement. 272 C H A P T E R 17. In the Message description field, enter a description of what this message contains. For example, enter “Customized message to donors whose largest gift went to previous Annual Campaign”. 18. Click OK. You return to the Conditional custom messages screen. The Description, Operator, and Condition of the custom message you just created appear in the grid. 19. On the action bar, click New Message again to create a different customized message for the condition you selected.The Conditional Custom Message screen appears again. 20. Follow the previous steps. For example, if your first message was for records whose “Last gift campaign is equal to Annual Campaign”, you may want to create a custom message for donors’ last gifts given to all other campaigns. In this case, select “not equal to” as the operator and select “Annual Campaign” as the value. 21. Click Write custom message. The word processing screen appears again so you can type a different custom message based on the new criteria you just selected. During processing, the program matches the defined condition to what is on each record included in the mailing and selects the appropriate custom message in the grid to use. The mailing is not processed until you click Print on the mail task. 22. When you finish typing the second custom message, click OK. You return to the Conditional Custom Message screen. 23. In the Message description field, enter a description of the second letter. C O M M O N M A I L P RO C E D U R E S 27 24. Click OK. You return to the Custom Message Wizard. The new conditional message you just created appears in the grid. 25. On the action bar, click Default Message to assign a default message to be used on records that do not meet any of the field conditions. The word processing screen appears so you can type a default custom message to be used for those records that do not match the defined criteria you previously selected. Follow the previous steps to create the default message. 26. When you finish typing the default message, click OK. You return to the Conditional custom messages screen. The Default Message button displays “<Defined>”. The Description, Operator, and Condition of all custom messages you created appear in the grid. 27. Click Finish. You return to the mails task tabs. Continue defining the mailing parameters by making selections on the remaining tabs of the mail task. For more information, see “Create mailings that print on forms” on page 213 or the chapter in this book for the current tab. Warning: We recommend you establish data entry protocols among all Raiser’s Edge users prior to entering data and creating mailings. When data is entered in the program consistently and correctly, it can be outputted properly and as expected. For more information, see the Data Entry Protocol chapter of the Program Basics Guide. To see examples of other organizations’ policies and procedures manuals go to www.blackbaud.com/ support/shareddocs/repolicy.asp. 28. To preview the mailing, click Preview. If a record does not have information entered in a field you inserted in the custom message, the information is omitted and your message will not make sense. We recommend you preview each custom message to ensure each is correct and complete. 29. From the preview screen, click Print to print the mailing. 30. Save and close the mailing. For more information, see “Save a Parameter File” on page 257. 274 C H A P T E R chapter 14 Glossary ADC. ADC stands for Area Distribution Center, a mail processing facility that receives and distributes mail for specific ZIP Codes. Address Barcode (BC). A barcode is a series of vertical lines representing the ZIP+4 code, digits from the address line, and a check digit. Automation-Compatible mail requires a delivery point barcode (referred to as an address barcode in The Raiser’s Edge) printed on each mailing piece. It can be placed at the bottom or top of a label or mailing piece. Select an address barcode to print on a mailing piece from the Fields to Include tab of a mail task. Automation. See the entry under Presort Options in this section. Barcode (BC). See Address barcode. BMC. BMC stands for Bulk Mail Center, which is a highly-mechanized mail processing plant that distributes Standard Mail (A) and Periodicals in bulk form and Standard Mail (A) in piece and bulk form. There are only a few BMCs in the US. CART. CART stands for Carrier Route. This refers to the addresses served by a postal employee. In other words, the carrier route is the route the postal carrier takes to deliver mail. A carrier route can include city, rural, and highway contract routes. If you add Carrier Route (CART) information to an address on a mailing piece, you may be eligible for further postalsaver discounts, as it helps the US Postal Service deliver your mail more quickly and efficiently. See also the Carrier Route entry under Presort Options in this section. CASS certification. CASS (Coding Accuracy Support System) certification is a process used by the US Postal Service to ensure a specific level of quality in a mailing list. The objective of CASS certification is to increase the accuracy of the carrier route, ZIP Code, ZIP+4 code, and delivery point codes in addresses on your mailing list. A mailing list must be CASS certified every 180 days to be eligible for postalsaver discounts. DDU. DDU stands for the Destination Delivery Unit. Periodical and Standard Mail mailings that are properly prepared and dropped off at the DDU that serves the delivery addresses on the mailing pieces are eligible for the DDU discount rate. Note: The Address barcode and Endorsement line cannot fit and are not available for labels less than three inches (3”) wide. These labels include: Avery labels 5160, 4037, 5196, 5660, 5390, 5395, 5095, 5895, 5883, and L7161. Endorsement Line. The Endorsement line satisfies a number of postal requirements and is used in PostalSaver to help qualify mailings for postalsaver discounts. This line consists of a row of asterisks, followed by packaging information and, in sorts above Non-automation level, additional information is included. The Endorsement line must be printed as the top line on a label or mailing piece. Select the endorsement line to print on a mailing piece on the Fields to Include tab of a mail task. Enhanced Carrier Route. See the entries under Presort Options in this section. Form 3553. Form 3553, or the CASS Summary Report, verifies the CASS certification of your mailing list. The data service you use to CASS certify your mailing prints this report, which is required by the Post Office to verify CASS certification and qualify mailings for postalsaver discounts. 276 C H A P T E R Gift barcode. For Appeal Cards, select Gift barcode to ensure accuracy and cut down on data reentry. Printing a gift barcode on your appeal card makes your job much simpler when a gift arrives as a result of the appeal. A Gift barcode is made up of the Constituent ID, Fund ID, Appeal ID (or Package ID, if there is one), and a checksum digit that ensures data accuracy. When you receive the appeal card back from the donor with a gift, simply scan the barcode while entering gift information in Batch and constituent, gift type, campaign, fund, and appeal information automatically fills in. For more information about entering a gift from an appeal card through Batch, see the Batch Guide. Line of Travel (LOT). The Line of Travel is the direction or movement the mail carrier takes along her route. Line of Travel information is required for Standard mailings to receive the Basic Enhanced Carrier Route rate. See also the Enhanced Carrier Route entry under Presort Options in this section. Mailing piece. In this book, a mailing piece is defined as one single piece from a mailing created by any mail task in The Raiser’s Edge. For example, one appeal card would be a mailing piece from the Appeal Cards mail task. This term is used throughout this guide when referring to mailings or mail tasks, in general. Mail task. A mail task is the location for all fields and options, fields, and checkboxes specific to a particular mailing process, such as printing labels or appeal cards. The fields and options, fields, and checkboxes for a mail task are arranged on tabs so you can access all the information quickly and easily. AddressFinder. AddressFinder is a database of Change of Address forms submitted by individuals who have moved to a new address. Companies licensed by the US Postal Service can compare this database with your mailing list to find new addresses for individuals who have moved. AddressFinder can reduce the number of undeliverable pieces and reduce the total cost of your mailings. Nonautomation. See the entry under Presort Options in this section. Non-machineable. Non-machineable mail items cannot be read by USPS sorting machines or are not barcoded and therefore cannot qualify for automation rates. OCR. OCR stands for Optical Character Reader, which is an automated mail sorting machine that reads the address information on a letter-size mailing piece and sprays the corresponding barcode into it. Package. You can use packages to track historic and statistical information for different facets of a single appeal. For example, your Winter Mailing Appeal may consist of a newsletter sent to minor donors, a glossy brochure sent to mid-level donors, and a full color booklet sent to major donors. By tracking separate packages, you can analyze the effectiveness of each individual solicitation of an appeal. Parameter file. A parameter file contains all the settings, or parameters, you select for a particular mail task. For example, if you create envelopes for your Annual Mailing appeal, you can save the settings you select in the Envelopes mail task as a parameter file. Later, you can open this parameter file and rerun the mailing or alter the settings as necessary to create a new mailing. PAVE. PAVE stands for Presort Accuracy Validation and Evaluation, which refers to a voluntary program where the USPS test the accuracy of presort software and hardware in correcting and standardizing addresses. Presort Options: Presort options are the various ways to prepare and submit your mailings to get the greatest postalsaver. With PostalSaver, the possible presort options are: Presorted-Upgradeable, Automation, Nonautomation, and Enhanced Carrier Route. Each presort option is detailed below: • Presorted-Upgradeable. Presorted mail meets the requirements for the Presorted automation-compatible rate. Upgradeable mail is mail the Postal Service can process on a multi-lane optical character reader (OCR) to apply a barcode. Upgradeable mail is letter size, Automation-Compatible, with machine-printed non-script addresses, OCR read area, barcode-clear zones that meet reflectance requirements, and paper that can accept ink. First-class mailings must contain at least 500 pieces and they all must be the same type, such as letters. Standard mailings must contain at least 200 pieces. • Automation. Automation refers to sorting letters or flats that are eligible for automation rate discounts. Automation mailings must be 100% CASS certified and 100% barcoded. Pieces must also meet other requirements, such as proper address and barcode placement, correct tabbing on folded pieces, minimum rigidness and certain size limitations. G L O S S A R Y 27 • Enhanced Carrier Route (LOT). Carrier route is a more detailed part of the address, beyond street and ZIP Code, to get your mail to its exact location. If a large portion of your mailing is in the same city route, rural route, highway control route, post office box section, or general delivery unit, you may qualify for Carrier Route discounts. Only packages with 10 or more pieces to the same carrier route, which is the route the mail person takes to deliver mail in her designated area, can qualify. An Enhanced Carrier Route (LOT) mailing must have at least 200 pieces and is eligible to receive the Basic Rate. Mailing pieces must be 100% CASS certified within 90 days and must be sorted in line-of-travel (LOT) or walk sequence (WS) order. A CASS certification form is required. Pieces which do not meet the carrier route minimums can be resorted for Nonautomation rates. • Enhanced Carrier Route (Auto). Enhanced Carrier Route (Auto) Presorted-Upgradeable See the entry under Presort Options in this section. SCF. An SCF is a Sectional Center Facility which serves as the processing and distribution center (P&DC) for post offices in a designated geographic area, as defined by the first three digits of the ZIP Codes of those post offices. Some SCFs serve more than one 3-digit ZIP Code range. Tray. Use a mail tray to group mailing pieces when preparing mailings to qualify for postalsaver discounts. The USPS uses trays as a basic unit to measure mail quantity. Truncation report. A truncation report checks whether the information you select to print will fit vertically or horizontally on a membership card, as you defined it to print. If the information truncates, that means letters, words, or lines are cut off. Use the Membership Card Truncation Report mail task to check how member information truncates before you print membership cards. US Postal Service. For more information about sorting mailings, obtaining address updates from the USPS, or qualifying for postalsaver discounts, contact your nearest Postal Business Center or the National Customer Support Center at 1-800-238-3150, or visit the USPS Web site at www.usps.com. See also the following USPS publications: • Pub. 28, Postal Addressing Standards • Pub. 417, Nonprofit Standard Mail Eligibility Walk Sequence (WS). •WS stands for Walk Sequence, which refers to the order a mail carrier physically delivers mail for a route, “house by house”. This information is required on mailing pieces to qualify for carrier route discounts. ZIP Code. ZIP stands for Zoning Improvement Plan. The coding system identifies the post office or metropolitan area associated with an address. ZIP Code is a registered trademark of the USPS. ZIP + 4 code. This is a four-digit enhancement to the 5-digit ZIP code that identifies a specific range of delivery addresses. 278 C H A P T E R Index Numerics 1/2-field membership card 18 3-column reminder 26 5-column reminder 29 A access, see navigate acknowledgement letter 15 add attributes to record 78 address attribute 86 attribute for contact 95 contact for organization 91 individual, select for 84 organization, select for 88 addressee contact, select 243 individual, select 243 organization, select 251 anonymous gifts, include 8 appeal card 13 attribute address 86 contact address 95 attributes tab 75 automatically maximize preview window 6 automatically save mail parameters 6 B buttons 5 C card appeal 13 create mailing 221 index 14 membership 17 place 21 Rolodex 14 class, mail 138 conditional one per page mailing 267 contact address attribute 95 addressee, select 243 organization, for 91 salutation, select 243 create card mailing 221 custom mailing 239 envelope mailing 221 form mailing 213 label mailing 221 letter mailing 230 name tag mailing 221 one per page mailing 259 receipts through eReceipts 200 criteria 189 currency filter 8 custom appeal card 14 mailing, create 239 membership card 19 receipt 24 reminder 32 renewal notice 35 D define user options 6 delete attributes from records 78 mailing 258 detail 190 dimensions, mail piece 143 discount, sort 158 donor acknowledgement letter 15 E email gift receipts 196 mailing 254 envelope 16 create mailing 221 eReceipts create 200 port number 200 resend due to failed connection 208 send 200 280 server, select 200 tab 195 exclude records using attributes 76 export a mailing 242 F failed connection, resend eReceipts 208 fields to include tab 53 filters tab 59 follow-up letter 16 volunteer letter 35 font 7 footer page 191 report 192 form create mailing 213 phonathon 19 format name 193 format tab 181 criteria 189 detail 190 headings 188 miscellaneous 182 name format 193 output options 183 page footer 191 report footer 192 sort 186 full page renewal notice 34 G General tab 41 gift preferences 8 receipts, email 196 gift types tab 71 H headings 188 honor/memorial acknowledgement letter 16 horizontal truncation 36 I include records using attributes 76 index card 14 individual address tab 83 addressee, select 243 salutation, select 243 install PostalSaver 114 installment, one reminder per 28 L label create mailing 221 layout 165 print 17 truncation report 17 letter create mailing 230 donor acknowledgement 15 follow-up 16 honor/memorial acknowledgement 16 quick 21 send 230 volunteer follow-up 35 load PostalSaver options from existing file 175 M mail merge 230 Mail task appeal card 13 card 14 donor acknowledgement letter 15 envelope 16 follow-up letter 16 honor/memorial acknowledgement letter 16 label 17 label truncation report 17 membership card 17 membership card truncation report 17 name tab 19 phonathon form 19 place card 21 quick letter 21 receipt 22 receipt report 21 reminder 25 reminder report 24 renewal notice 33 tabs, defined 8 truncation 36 volunteer follow-up letter 35 membership card 17 card truncation report 17 merge mail 230 miscellaneous 182 monetary amount appearance 182 multiple queries 104 I N D E X 281 N name format 193 name tag create mailing 221 mail task 19 navigate in Mail buttons 5 opening a mail task 3 toolbar 4 tab 111 update 114 preferences, see user options preprinted membership card 18 receipt 23 presort report 169 publication information 163 Q O one per page appeal card 14 create mailing 259 receipt 24 reminder 32 one reminder per installment 28 pledge 29 one third page renewal notice 34 open, see navigate organization address tab 83 addressee, select 251 salutation, select 251 output options 183 P page footer 191 payment method 161 periodical publication 163 permit, mail 149 phonathon form 19 piece dimensions 143 mail 138 place card 21 pledge, one reminder per 29 port number of eReceipts 200 Postal Discount 111 PostalSaver install 114 label layout 165 load options from existing file 175 mail information 149 payment method 161 permit 149 piece dimensions 143 presort report 169 publication information 163 run 126 sort 138 sort discount 158 qualify for Postal discount 124 quick letter 21 R receipt mail task 22 report 21 records to process, select 42, 62, 76 reminder mail task 25 report 24 renewal notice 33 report footer 192 label truncation 17 membership card truncation 17 presort 169 receipt 21 reminder 24 restart mailing 256 Rolodex card 14 run PostalSaver 126 S salutation contact, select 243 individual, select 243 organization, select 251 save mailing 257 segment tab 103 select records to process 42, 62, 76 send letter 230 receipts through eReceipts 200 set PostalSaver options 126 simple one per page mailing 260 SMTP email server 200 sort 186 class 138 discount 158 mail, automate 112 piece 138 282 standard appeal card 13 T tabs attributes 75 eReceipts 195 explained 8 fields to include 53 filters 59 format 181 general 41 gift types 71 individual address 83 organization address 83 PostalSaver 111 segment tab 103 tag, name 19 toolbar 4 truncation horizontal 36 report label 17 membership card 17 vertical 37 two thirds page renewal notice 34 U update attributes in records 78 PostalSaver 114 user options 6 user options, defined 6 V vertical truncation 37 volunteer follow-up letter 35
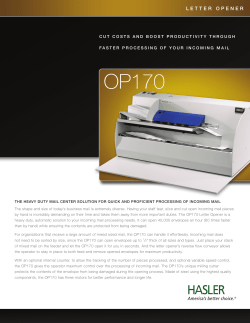

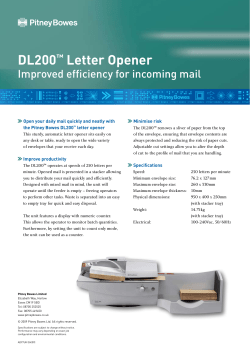


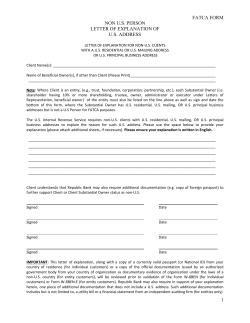


© Copyright 2026