
Document 333297
AT&T
Practice
ATT-TP-76417
Issue 3, 10/08/14
ATT-TP-76417
AT&T Fiber Optic Connector & Adapter Inspection and
Cleaning Standards
Abstract:
Presented in this document are the AT&T standards for inspecting and cleaning of fiber optic connectors &
adapters. This document provides guidelines and procedures for the proper optical fiber connector & adapter
inspection and cleaning process. This document is to be used by all AT&T Authorized Installation Vendors.
The baseline steps are always to inspect, clean if necessary and inspect again using an approved Video Scope
before terminating any fiber connector.
Audience:
The Primary Audience for this document are all contracted installation vendors doing work for AT&T. The Secondary
Audience for this document are AT&T personnel in the following disciplines; Implementation Engineering, Advanced
Technical Support - ATS, Quality Assurance - AQA, Network Planning, Network Operations, New Technology
Introduction, Outside Plant and LABS.
Effective Date:
September 1st, 2014
Published :
Issue 3, 10/08/14
Expires On:
Expiration upon reissue
Related Documents:
ATT-TP-76900
Canceled Documents:
N/A
Issuing Department:
NP&E - Global Engineering Support
Business Unit:
AT&T Network Operations
©2014 AT&T Intellectual Property. All rights reserved.
i
AT&T
Practice
ATT-TP-76417
Issue 3, 10/08/14
Points Of Contact:
See Contact List
Author(s):
Mike Yeilding ATTUID my1515
©2014 AT&T Intellectual Property. All rights reserved.
ii
AT&T
Practice
ATT-TP-76417
Issue 3, 10/08/14
Table Of Contents
INTRODUCTION
Reason For Current Issue
1.
2.
3.
4.
Reason For Current Issue
Safety And Training
Definition Of Terms For This Document
Inspection and Cleaning Flow
4.1. Inspection and Cleaning Flowchart
4.2. Expounding on The Flow
4.2.1.
What Shall Be Cleaned
4.2.2.
Start
4.2.3.
First Inspection of Connector End Face
4.2.4.
First Dry Clean
4.2.5.
Second Inspection of Fiber End Face
4.2.6.
Second Dry Clean
4.2.7.
Third Inspection of Fiber End Face
4.2.8.
Third Dry Clean
4.2.9.
Fourth Inspection of Fiber End Face
4.2.10.
First Wet Clean
4.2.11.
Fifth Inspection of Fiber End Face
4.2.12.
Second Wet Clean
4.2.13.
Sixth Inspection of Fiber End Face
5.
Four Types of Ferrule Polish
6.
What Should I Expect to See?
7.
Items To Be Cleaned
8.
Fiber End Face Inspection and Optical Loss Testing
9.
Inspection Test and Optical Loss Recording Documentation Examples
10. Fiber Connector Inspection Documentation Requirements
11. Optical Loss Testing
11.1. Optical Loss Testing Procedure A
11.2. Optical Loss Testing Procedure B
12. Inspection Tools
12.1. AT&T Installation Supplier Approved Fiber Inspection Video Scopes
12.2. JDSU Fiber Inspection Individual Items
©2014 AT&T Intellectual Property. All rights reserved.
iii
2
2
3
5
5
6
7
8
8
9
9
9
9
10
10
10
11
11
11
13
15
34
36
38
47
49
49
50
51
53
57
AT&T
Practice
ATT-TP-76417
Issue 3, 10/08/14
12.2.1.
12.2.2.
JDSU LC Tips and Adapters
12.2.3.
JDSU SC Tips and Adapters
12.2.4.
JDSU ST Tips and Adapters
12.2.5.
JDSU Universal Patch Cord Tips
12.2.6.
FBPP-BAP1 Barrel Assembly for Probe
12.2.7.
JDSU Universal Patch Cord Adapters for Patch Cord Module
12.2.8.
JDSU Mating Adapters - MTP, SC, LC
12.2.9.
JDSU APC Tips and Adapters
13. Cleaning Products
13.1. Quick Guide For Cleaning Tools
13.2. Dry Cleaning Products and Instructions for Use
13.2.1.
Storing Dry Cleaning Products
13.2.2.
Cleaner Fiber Optic MPO
13.2.2.1.
User Instructions for CLEANER FIBER OPTIC MPO
13.2.2.1.1. Cleaning In Adapters with the CLEANER FIBER OPTIC MPO
13.2.2.1.2. Cleaning MPO Jumpers with the CLEANER FIBER OPTIC MPO
13.2.3.
Ferrule Mate 2.5mm (SC, SCAPC, FC, ST) Male and Female
13.2.3.1.
User Parts Key for Ferrule-Mate SFM-250 Fiber Optic Connector
59
59
60
61
62
63
64
65
66
67
68
69
69
70
71
72
73
74
75
Cleaner
13.2.3.2.
Cleaning an SC Connector In an Adapter with the Ferrule-Mate
76
SFM-250
13.2.3.3.
Cleaning an SC Connector with the Ferrule-Mate SFM-250
13.2.4.
Ferrule Mate 1.25mm (LC, MU) Male and Female
13.2.4.1.
User Parts Key for Ferrule-Mate SFM-125 Fiber Optic Connector
77
78
79
Cleaner
13.2.4.2.
Cleaning an LC Connector In an Adapter with the Ferrule-Mate
80
SFM-125
13.2.4.3.
Cleaning an LC Connector with the Ferrule-Mate SFM-125
13.2.5.
Alcoa FCC-02R Fiber Optic Connector Cleaner
13.2.5.1.
User Instructions for Alcoa FCC-02R Fiber Optic Connector Cleaner
13.2.6.
Cleaner, Fiber Optic Connector Universal
13.2.6.1.
User Instructions for Cleaner, Fiber Optic Connector Universal
13.2.7.
FiberSwiper
13.2.7.1.
User Instructions for FiberSwiper
13.2.8.
In-situ Connector Cleaner SC
©2014 AT&T Intellectual Property. All rights reserved.
iv
81
82
83
85
86
91
93
95
AT&T
Practice
ATT-TP-76417
Issue 3, 10/08/14
13.2.8.1.
User Instructions for In-Situ Connector Cleaner SC
13.2.9.
In-Situ Connector Cleaner LC
13.2.9.1.
User Instructions for In-Situ Connector Cleaner LC
13.3. Wet Cleaning Products
13.3.1.
Cleaner Fiber Wipe Premoistened
13.3.1.1.
User Instructions for Cleaner Fiber Wipe Premoistened
13.3.2.
Wet Cleaning an MPO Connector with MPO Cleaner
13.3.3.
Wet Cleaning an SC Connector In Adapter with the Ferrule-Mate
13.3.4.
SFM-250
Wet Cleaning an LC Connector In Adapter with the Ferrule-Mate
SFM-125
Female Connector Cleaner SC or LC
13.3.5.
13.3.6.
User Instructions for Female Connector Cleaner SC or LC
14. Miscellaneous Cleaning Procedures
14.1. Procedures
14.1.1.
Adapter Cleaning
14.1.1.1.
Single Ferrule Adapter Cleaning
14.1.1.2.
Multi-Ferrule Adapter Cleaning
14.1.2.
Ferrule Cleaning Single
15. Contact List
16. Revision Log
A.1. DOCUMENT SPECIFIC ACRONYMS
A.2. NETWORK ACRONYMS DICTIONARY
Revision Log
ACRONYMS
©2014 AT&T Intellectual Property. All rights reserved.
v
95
97
97
99
99
100
101
101
103
104
104
106
106
106
108
110
111
112
112
113
113
112
113
AT&T
Practice
ATT-TP-76417
Issue 3, 10/08/14
©2014 AT&T Intellectual Property. All rights reserved.
vi
AT&T
Practice
ATT-TP-76417
Issue 3, 10/08/14
Reason For Current Issue
Issue Number
Date
Description
3
10/08/14
Published By
my1515
To view updated content in a document, look for the green 'NEW/UPDATED' indicators. Use the arrows to navigate to
the previous or next NEW/UPDATED indicators, if they exist. Authors making content changes may choose not to use
the indicator for updates, e.g., spelling corrections.
INTRODUCTION
CAUTION: The methods and criteria in this document were developed to protect the integrity of the
AT&T optical network by stringent use of the proper Inspection and Cleaning methods before mating
any optical connector. Irreparable damage can be caused by mating dirty connectors even one time.
REMEMBER:No Job is So Important and No Service is So Urgent-That We Cannot Take the Time to Perform
Our Work Safely.
Inspect, Clean If Necessary and Inspect Again
One important thing to remember in handling fiber optic connectors is that the fiber end face and ferrule must be
absolutely clean before connections are made. Dust, lint, oil, or other foreign particles obscure the end face, compromising the integrity of the optical signal being sent over the fiber. From the optical signal’s point-of-view, dirty connections are like dirty windows.
It is difficult to picture the size of a fiber optic connector core without some reference. Single-mode fibers have cores
that are only 8-9 µm (µm = micron or micrometer) in diameter. As a point of reference, a typical human hair is 50-75
µm in diameter, approximately 6-9 times larger than the Single-mode core! Dust particles can be 20 µm or larger in
diameter and particles smaller than 1 µm can be suspended almost indefinitely in the air. A 1 µm dust particle landing
on the core of a single-mode fiber can cause up to 1dB of loss. Larger dust particles (9 µm or larger) can completely
obscure the core of a single-mode fiber. Fiber optic connectors need to be inspected and cleaned if necessary every
time they are mated; it is essential that fiber optics users develop the necessary discipline to always Inspect, Clean if
necessary, and Re-Inspect all optical connectors before they are mated. Inspection must ALWAYS precede and follow
cleaning of connectors.
It is also important to cover a fiber optic connector when it is not in use. Unprotected connector ends are most often
damaged by impact, such as hitting the floor. Most connector manufacturers provide some sort of protection boot or
cap. This item is most commonly referred to as a “dust” cap. The best protectors or “caps” cover the entire connector
end, but they are generally simple closed-end plastic tubes that fit snugly over the ferrule only. These boots will protect
the connector's polished ferrule end from impact damage that might crack or chip the polished surface, however, the
connector must be inspected before use to insure the protective cover did not contaminate the end face. Remember,
this is intended to be a protective cover for the end of the fiber connector itself against damage, it is not intended to
soley prevent dust build up on the fiber end face.
2014 AT&T Intellectual Property. All rights reserved.
1
AT&T
Practice
ATT-TP-76417
Issue 3, 10/08/14
CAUTION: INSPECTION shall ALWAYS precede cleaning or mating of optical connectors to
prevent permanent damage or contamination of the connectors that could lead to service
interruptions.
1. Reason For Current Issue
DATE
ISSUE
DESCRIPTION
3
Complete re-write of Section 9 - Inspection Test and Optical Loss Recording Documentation Examples and
Section 10 - Fiber Connector Inspection Documentation Requirements.
9/24/2014
2
Changed sketch 77, 78, 79 & 80 references on pages 40 and 41 to figures
27, 28, 29 &30 on same pages respectively.
09/02/2014
1
Initial Release
10/7/2014
2. Safety And Training
First and foremost, it is extremely critical that all installation technicians working on fiber optic technology take proper
precautions with regard to laser transmissions that will be concentrated and directed toward the working employee. Do
not expose eyes to this optical transmission and insure that all end caps and/or terminators are properly placed on all
connector ends. All AT&T personnel associated with fiber optic technology must read and adhere to ATT-770-000-013,
Safety Guidelines for Fiber Communications Systems.
IMPORTANT:
2014 AT&T Intellectual Property. All rights reserved.
2
AT&T
Practice
ATT-TP-76417
Issue 3, 10/08/14
All Inspection Scopes contained in this document are Video type scopes or indirect image converters as
defined by ATT-770-000-013. This document does not support the use of any Non-video type or direct viewing
Inspection Scope.
3. Definition Of Terms For This Document
•
Adapter - A device allowing two connectors to mate. Adapters are made up of a sleeve contained within a
housing.
•
Adapter Housing - The bulk of the adapter that allows compatible connectors to latch, screw, or snap in place.
•
Alignment Sleeve - The sleeve within an adapter that aligns one ferrule to another when two connectors are
mated.
•
APC Angled Physical Contact - An “angled physical contact” connector is polished on an 8 degree angle. When
compared with a normal “physical contact” (PC) connector, an APC connector exhibits better reflectance properties (<- 60dB, because the angled polish reduces the amount of light reflected at the connector interface).
NOTE: APC connectors shall not be mated with UPC, SPC, or PC connectors as this may cause irreparable
damage to both connectors.
•
Buffer - An outer coating that protects the optical fiber.
•
Bulkhead - Interface of an optical card or a module that you connect an optical connector into (i.e. adapter &
connector on a faceplate or the port or an optical module…)
•
Cable - One or more fibers encompassed by strength members and covered by a protective jacket.
•
Caution - Items designated in the text as a caution. This could include important information regarding procedure
or possible issues of which to be aware.
•
Cladding - The glass surrounding the fiber core.
•
Connector - A termination at the end of a fiber or optical cable that enables repeated connections to components
or other fibers and cables.
•
Contamination or Contaminant - Loose foreign material, debris, or residual film from solvent or cleaning material present to a great extent on the optical connector end-face.
•
Core - The innermost part of an optical fiber.
•
Danger - Items designated in the text as a danger. This could include important information regarding danger that
could result in injury or bodily harm.
2014 AT&T Intellectual Property. All rights reserved.
3
AT&T
Practice
ATT-TP-76417
Issue 3, 10/08/14
•
Defects - Defined as “permanent non-linear features”. This includes embedded contamination, pits, etc.
•
Ferrule - The part of the connector that aligns the fiber so that optical connections can be made.
•
Fiber - A strand of glass used for the transmission of optical signals.
•
Grading - The process used to identify the Zones on the fiber face and determine the size and number of
contaminants, defects or scratches that are present.
•
In-situ - The condition describing a connector attached or an integral part of a chassis or backplane while
inspecting or cleaning.
•
IPA - Isopropyl alcohol also known as propan-2ol.
•
Mating - Securing of one connector to another.
•
MPO - “Multi-path Push On” connector.
•
Pit - Irregular shaped feature on the optical connector end-face (hole, bump or grain) caused by poor cleaning,
improper polishing or handling processes. (Also see Defect)
•
PC Physical Contact - Designed to eliminate connector loss caused by gaps between two fiber ends, physical
contact polish (PC) was the first type available. Originally flat, PC ferrules were later slightly curved--a principle
then applied to FC, SC, ST and D4 connectors--to optimize connection. The result: typical insertion loss values of
0.2 dB for single mode fibers and maximum return loss values of 35 dB.
•
Polish or Polished - Fiber optic connectors are often polished after termination to remove surface defects and to
improve optical qualities such as insertion loss and back reflection. PC and UPC connectors are polished flat
(perpendicular to the length of the straight fiber), whereas APC connectors are polished on an 8 degree angle
from the flat. In all of these cases, the ferrule end face adopts a dome-shaped geometry that yields good mating
properties in the connector.
•
Scratch - Permanent linear feature on the optical connector end-face caused by poor cleaning or by connector
polishing processes.
•
SPC - Was applied to FC and ST connectors, which provided return loss values of 40 dB while maintaining 0.2
dB insertion loss.
•
UPC Ultra Physical Contact - Describes connectors that undergo extended polishing to render the fiber end
face more suitable than an ordinary PC connector for optical contact with another fiber. UPC connectors, for
example, exhibit better reflectance properties (< -55dB).
•
µm Micron or Micrometer - A unit of length equal to one millionth of a meter or one thousandth of a millimeter.
One micron equals 0.00004 of an inch.
•
Warning - Items designated in the text as a warning. This could include important information regarding potential
hazards.
2014 AT&T Intellectual Property. All rights reserved.
4
AT&T
Practice
ATT-TP-76417
Issue 3, 10/08/14
4. Inspection and Cleaning Flow
This section contains a Flow Chart that outlines the steps for Inspecting and Cleaning optical fiber connectors such as
the LC, SC, MPO, and ST that are commonly used within AT&T for connections between optical equipment where
jumpers are required (the preceding connector types listed are intended to be examples only and are not inclusive to
all optical connector types found in AT&T's network). The Flow Chart is followed by a sub section that further explains
each box in the Flow Chart.
CAUTION: It is critical that all optical connectors, including test equipment, are cleaned to the
standards set forth in this document before mating to maintain the integrity of AT&T's optical
network.
4.1. Inspection and Cleaning Flowchart
CAUTION: Inspection shall ALWAYS precede cleaning or mating of optical connectors to prevent
damage or contamination of the connector.
Figure 1: Inspection and Cleaning Flowchart
2014 AT&T Intellectual Property. All rights reserved.
5
AT&T
Practice
ATT-TP-76417
Issue 3, 10/08/14
4.2. Expounding on The Flow
2014 AT&T Intellectual Property. All rights reserved.
6
AT&T
Practice
ATT-TP-76417
Issue 3, 10/08/14
We have a flow chart above to remind us of the appropriate steps, but what do they mean. Please read and understand the following before beginning Inspection and Cleaning activities.
4.2.1. What Shall Be Cleaned
The rule of thumb is as follows: Always clean and inspect both the male and female connectors before mating the two
together. Thus, it follows that any connection made outside of the manufacturer's sealed network equipment, wherever
it is located, must have the mating pair cleaned and inspected. This includes connections within the Fiber Distribution
Frame (FDF) or between the FDF and any Network Transport or Switch equipment. This would also include any transport or switch internal bay footprint connections. The example below shows where the connectors must be cleaned:
Figure 2: What shall be cleaned
Under normal circumstances, AT&T personnel and their authorized contractors do not need to open sealed network
equipment to clean the connectors within the product (Refer to figure above “Do not inspect or clean here”). It is anticipated that all external connectors that are affixed to network equipment will require cleaning.
Once the connector has been cleaned, the connector may be left in one of the following states:
1. Terminate the connector on another clean mating connector.
2014 AT&T Intellectual Property. All rights reserved.
7
AT&T
Practice
ATT-TP-76417
Issue 3, 10/08/14
2. Place a dust cap over the connector. The connector must be re-inspected to verify that the dust cap was not dirty.
3. Place a terminator that has also been cleaned on the cleaned connector. The connector must be re-inspected to
verify that the terminator was not dirty when placed. Connectors that are not properly terminated through the use of a
dust cap, terminator or not mated at the time of cleaning will require re-inspection and possible re-cleaning upon
subsequent termination at a later date and time.
4.2.2. Start
This is the beginning. The user is preparing to make an optical connection at a Network Element, Patch Panel, Fiber
Distribution Frame, Test Set, or other connection point.
IMPORTANT:
All test set connectors, guides, adapters, fiber test cords or jumpers that could cause contamination, shall be
inspected and cleaned before you proceed. See Section Titled “What Shall Be Cleaned”
4.2.3. First Inspection of Connector End Face
CAUTION: Only Test Sets and Cleaning Supplies that are AT&T Approved For Use Shall be Used
For These Procedures
NOTE:
Movable contaminants are never acceptable anywhere on the end face of a connector.
1.
The user prepares the AT&T approved fiber inspection & testing device for use and removes the protective cover
from the fiber jumper or adapter and immediately places the cover in an ESD bag for storage.
2.
The user then makes the connection between the inspection scope and the optical connector and observes the
condition of the fiber end face making sure that all junctioning components are seated properly for testing.
3.
Once all testing components are seated properly the user will initiate the first inspection test which will be
performed automatically by the AT&T approved fiber inspection & testing device.
4.
If the fiber end face on initial inspection test gets a “Pass” reading the connector is ready for use.
5.
If the fiber end face on the initial inspection test gets a “Fail” reading then proceed to the section titled “First Dry
Clean”.
2014 AT&T Intellectual Property. All rights reserved.
8
AT&T
Practice
ATT-TP-76417
Issue 3, 10/08/14
4.2.4. First Dry Clean
1.
Choose the appropriate Dry Clean product for the type connector being cleaned.
2.
Follow the procedure for the Dry Clean product chosen to clean the connector end face and proceed to section
titled “Second Inspection of Fiber End Face”.
4.2.5. Second Inspection of Fiber End Face
1.
The user then makes the second connection between the inspection scope and the optical connector and
observes the condition of the fiber end face making sure that all junctioning components are seated properly for
testing.
2.
Once all testing components are seated properly the user will initiate the second inspection test which will be
performed automatically by the AT&T approved fiber inspection & testing device.
3.
If the fiber end face on second inspection test gets a “Pass” reading the connector is ready for use.
4.
If the fiber end face on the second inspection test gets a “Fail” reading then proceed to the section titled “Second
Dry Clean”.
4.2.6. Second Dry Clean
1.
Choose the appropriate Dry Clean product for the type connector being cleaned.
2.
Follow the procedure for the Dry Clean product chosen to clean the connector end face and proceed to the
section titled “Third Inspection of Fiber End Face”.
4.2.7. Third Inspection of Fiber End Face
2014 AT&T Intellectual Property. All rights reserved.
9
AT&T
Practice
ATT-TP-76417
Issue 3, 10/08/14
1.
The user then makes the third connection between the inspection scope and the optical connector and observes
the condition of the fiber end face making sure that all junctioning components are seated properly for testing.
2.
Once all testing components are seated properly the user will initiate the third inspection test which will be
performed automatically by the AT&T approved fiber inspection & testing device.
3.
If the fiber end face on third inspection test gets a “Pass” reading the connector is ready for use.
4.
If the fiber end face on the third inspection test gets a “Fail” reading then proceed to the section titled “Third Dry
Clean”.
4.2.8. Third Dry Clean
1.
Choose the appropriate Dry Clean product for the type connector being cleaned.
2.
Follow the procedure for the Dry Clean product chosen to clean the connector end face and then proceed to the
section titled “Fourth Inspection of Fiber End Face”.
4.2.9. Fourth Inspection of Fiber End Face
1.
The user then makes the fourth connection between the inspection scope and the optical connector and observes
the condition of the fiber end face making sure that all junctioning components are seated properly for testing.
2.
Once all testing components are seated properly the user will initiate the fourth inspection test which will be
performed automatically by the AT&T approved fiber inspection & testing device.
3.
If the fiber end face on fourth inspection test gets a “Pass” reading the connector is ready for use.
4.
If the fiber end face on the fourth inspection test gets a “Fail” reading then proceed to the section titled “First Wet
Clean”.
4.2.10. First Wet Clean
2014 AT&T Intellectual Property. All rights reserved.
10
AT&T
Practice
ATT-TP-76417
Issue 3, 10/08/14
1.
Choose the appropriate Wet Clean and Dry Clean product for the type connector being cleaned.
2.
Follow the procedure for the Wet Clean product chosen followed immediately by Dry Clean product to clean
connector end face and proceed to section titled “Fifth Inspection of Fiber End Face”.
NOTE: Wet Cleaning MUST always be immediately followed (before solvent dries on end face) by the appropriate Dry Clean.
4.2.11. Fifth Inspection of Fiber End Face
1.
The user then makes the fifth connection between the inspection scope and the optical connector and observes
the condition of the fiber end face making sure that all junctioning components are seated properly for testing.
2.
Once all testing components are seated properly the user will initiate the fifth inspection test which will be
performed automatically by the AT&T approved fiber inspection & testing device.
3.
If the fiber end face on fifth inspection test gets a “Pass” reading the connector is ready for use.
4.
If the fiber end face on the fifth inspection test gets a “Fail” reading then proceed to the section titled “Second Wet
Clean”.
4.2.12. Second Wet Clean
1.
Choose the appropriate Wet Clean and Dry Clean product for the type connector being cleaned.
2.
Follow procedure for the Wet Clean product chosen followed immediately by Dry Clean product to clean the
connector end face and proceed to “Sixth Inspection of Fiber End Face”.
NOTE: Wet Cleaning MUST always be immediately followed (before solvent dries on end face) by the appropriate Dry Clean.
4.2.13. Sixth Inspection of Fiber End Face
1.
The user then makes the sixth connection between the inspection scope and the optical connector and observes
the condition of the fiber end face making sure that all junctioning components are seated properly for testing.
2014 AT&T Intellectual Property. All rights reserved.
11
AT&T
Practice
ATT-TP-76417
Issue 3, 10/08/14
2.
Once all testing components are seated properly the user will initiate the sixth inspection test which will be
performed automatically by the AT&T approved fiber inspection & testing device.
3.
If the fiber end face on sixth inspection test gets a “Pass” reading the connector is ready for use.
4.
If the fiber end face on the sixth inspection test gets a “Fail” reading the connector is unusable and needs to be
replaced.
2014 AT&T Intellectual Property. All rights reserved.
12
AT&T
Practice
ATT-TP-76417
Issue 3, 10/08/14
5. Four Types of Ferrule Polish
The ferrule (made of metal or ceramic) is the central part of the male connector and is designed to both align and
protect the fiber core during connection. The ferrule tip is polished to ensure a smooth finish on the fiber end. Polish
can also minimize connector loss or back reflection, depending on the angle used. There are four types of polish: PC,
super PC (SPC), ultra PC (UPC) and angled PC (APC).
NOTE: Industry standards typically follow this color scheme for identifying connector types; A.) Singlemode
PC, SPC and UPC connectors will be blue in color. B.) Multimode PC, SPC and UPC connectors will be beige in
color.C.) Singlemode APC connectors will be green in color.
PC Designed to eliminate connector loss caused by gaps between two fiber ends, physical contact polish (PC) was the
first type available. Originally flat, PC ferrules were later slightly curved--a principle then applied to FC, SC, ST and D4
connectors--to optimize connection. The result: typical insertion loss values of 0.2 dB for singlemode fibers and
maximum return loss values of 35 dB.
APC APC was the next polish developed. For this connector, the ferrule end was cut to an 8° angle, eliminating almost
all reflections at the connector end and giving a final return loss specification of 60 dB.
NOTE: APC connectors shall not be mated with UPC, SPC, or PC connectors including those on test equipment as
this may cause irreparable damage to both connectors.
SPC SPC polish appeared next and was applied to FC and ST connectors, which provided return loss values of 40 dB
while maintaining 0.2 dB insertion loss.
UPC Further work introduced UPC connectors, bringing return loss on non angled connectors down to 55 dB in singlemode fibers. This performance was obtained by perfecting the polishing technique and adjusting the curvature at the
ferrule end. UPC polish is available for almost all singlemode connectors such as FC, SC, and ST.
Compatibility Due to their 8° angled design, APC connectors are not compatible with PC, SPC or UPC types. Do Not
Mate APC connectors with other types. If an APC connector is inadvertently mated with another type connector, both
shall be inspected immediately for damage.
PC, SPC and UPC connectors are all compatible and any cross between them will typically generate an insertion loss
of 0.2 dB. Return loss is more difficult to predict when different polishes are cross-connected, but it generally falls
somewhere between the individual return loss specifications for each polish. For example, an FC/SPC to FC/UPC
connection might give an insertion loss of 0.2 dB and a return loss of approximately 48 dB.
Test instruments equipped with UPC connectors would be capable of measuring PC, SPC and UPC systems without
affecting their normal performance, however test instruments equipped with APC connectors are not capable of
accurately measuring SPC and UPC systems.
Notice the distinct difference in angle between the UPC and APC endfaces.
CAUTION: Mating APC with any other type connector will cause damage to both connectors.
2014 AT&T Intellectual Property. All rights reserved.
13
AT&T
Practice
ATT-TP-76417
Issue 3, 10/08/14
Figure 3: UPC & APC End Face Comparison
2014 AT&T Intellectual Property. All rights reserved.
14
AT&T
Practice
ATT-TP-76417
Issue 3, 10/08/14
6. What Should I Expect to See?
Figure 4: SM SC Fiber End Face - Clean
Figure 5: SM SC Fiber End Face - Dirty
2014 AT&T Intellectual Property. All rights reserved.
15
AT&T
Practice
ATT-TP-76417
Issue 3, 10/08/14
Figure 6: SM SC Fiber Test - Pass
2014 AT&T Intellectual Property. All rights reserved.
16
AT&T
Practice
ATT-TP-76417
Issue 3, 10/08/14
Figure 7: SM SC Fiber Test - Fail
2014 AT&T Intellectual Property. All rights reserved.
17
AT&T
Practice
ATT-TP-76417
Issue 3, 10/08/14
Figure 8: SM LC Fiber End Face - Clean
2014 AT&T Intellectual Property. All rights reserved.
18
AT&T
Practice
ATT-TP-76417
Issue 3, 10/08/14
Figure 9: SM LC Fiber End Face - Dirty
2014 AT&T Intellectual Property. All rights reserved.
19
AT&T
Practice
ATT-TP-76417
Issue 3, 10/08/14
Figure 10: SM LC Fiber Test - Pass
2014 AT&T Intellectual Property. All rights reserved.
20
AT&T
Practice
ATT-TP-76417
Issue 3, 10/08/14
Figure 11: SM LC Fiber Test - Fail
2014 AT&T Intellectual Property. All rights reserved.
21
AT&T
Practice
ATT-TP-76417
Issue 3, 10/08/14
Figure 12: SM ST Fiber End Face - Clean
2014 AT&T Intellectual Property. All rights reserved.
22
AT&T
Practice
ATT-TP-76417
Issue 3, 10/08/14
Figure 13: SM ST Fiber End Face - Dirty
2014 AT&T Intellectual Property. All rights reserved.
23
AT&T
Practice
ATT-TP-76417
Issue 3, 10/08/14
Figure 14: SM ST Fiber Test - Pass
2014 AT&T Intellectual Property. All rights reserved.
24
AT&T
Practice
ATT-TP-76417
Issue 3, 10/08/14
Figure 15: SM ST Fiber Test - Fail
2014 AT&T Intellectual Property. All rights reserved.
25
AT&T
Practice
ATT-TP-76417
Issue 3, 10/08/14
Figure 16: MM SC Fiber End Face - Clean
2014 AT&T Intellectual Property. All rights reserved.
26
AT&T
Practice
ATT-TP-76417
Issue 3, 10/08/14
Figure 17: MM SC Fiber End Face - Dirty
2014 AT&T Intellectual Property. All rights reserved.
27
AT&T
Practice
ATT-TP-76417
Issue 3, 10/08/14
Figure 18: MM SC Fiber Test - Pass
2014 AT&T Intellectual Property. All rights reserved.
28
AT&T
Practice
ATT-TP-76417
Issue 3, 10/08/14
Figure 19: MM SC Fiber Test - Fail
2014 AT&T Intellectual Property. All rights reserved.
29
AT&T
Practice
ATT-TP-76417
Issue 3, 10/08/14
Figure 20: MM LC Fiber End Face - Clean
2014 AT&T Intellectual Property. All rights reserved.
30
AT&T
Practice
ATT-TP-76417
Issue 3, 10/08/14
Figure 21: MM LC Fiber End Face - Dirty
2014 AT&T Intellectual Property. All rights reserved.
31
AT&T
Practice
ATT-TP-76417
Issue 3, 10/08/14
Figure 23: MM LC Fiber End Face - Dirty.jpg
Figure 22: MM LC Fiber Test - Pass
2014 AT&T Intellectual Property. All rights reserved.
32
AT&T
Practice
ATT-TP-76417
Issue 3, 10/08/14
Figure 23: MM LC Fiber Test - Fail
2014 AT&T Intellectual Property. All rights reserved.
33
AT&T
Practice
ATT-TP-76417
Issue 3, 10/08/14
7. Items To Be Cleaned
2014 AT&T Intellectual Property. All rights reserved.
34
AT&T
Practice
ATT-TP-76417
Issue 3, 10/08/14
NOTE: ASK, Could it come in contact with the Connector End Face or Ferrule? IF Yes, Inspect,
Clean, Inspect It.
Here are a few items to consider:
•
Test Fiber Cords or Jumpers
•
Test Sets adapters and probes
•
Inspection Scope adapters and probes
•
Alignment Sleeves
The test cords used with test sets and the test sets are frequently the most overlooked connector components for
cleaning. The typical practice of testing fiber at the job site rarely includes routine inspection and cleaning of the reference cords that the technician carries with the optical test sets; that is, unless an obvious insertion loss problem develops during the test process. Often, after such an insertion loss problem has developed while testing, the reference
(test) cord may have already encountered physical damage. In many cases, the damage may not even be detectable
when inspecting the connector end faces with an Optical Scope. The problem that can occur is the reference (test)
cord connectors may pick up contamination in the form of dust particles, or microscopic materials ground off from the
mating adapter's alignment sleeve. All of these contaminants affect the final test outcome due to attenuation caused
either from obstructing light in the fiber or from the air gap created between the two mating connectors. The reference
(test) cord connectors can then transfer this debris from port to port, compounding the issue during repetitive tests and
potentially threatening the quality of the installed connectors. The transference or these materials can affect the
immediate test and can also permanently damage both connectors creating unnecessary replacement costs of expensive equipment such as Optical Transceivers.
The installation Vendor shall take the following actions to maximize the life of cord sets:
•
Inspect the connector of the Optical Test set before every use.
•
Clean the connector of the Optical Test set before every use as necessary.
•
Inspect the connector of the equipment (i.e. OCn cards, Fiber Cross connects) that the test cord will be mating
with before every use.
•
Clean the connector or the equipment (i.e. OCn cards, Fiber Cross connects) that the test cord will be mating with
before every use as necessary.
•
Place connector protectors (dust covers or terminators) on test cords between use.
•
Replace the reference or test cords at such time that the connectors cannot be suitably cleaned for use between
tests or the test signal is degraded when the test cord is used.
•
Clean the sides of the ferrule for your test or reference cords or jumpers.
2014 AT&T Intellectual Property. All rights reserved.
35
AT&T
Practice
ATT-TP-76417
Issue 3, 10/08/14
8. Fiber End Face Inspection and Optical Loss Testing
1.
The user prepares the AT&T approved fiber inspection & testing device for use at the “A” location of the fiber and
removes the protective cover from the fiber jumper or adapter and immediately places the cover in an ESD bag
for storage.
2.
The user then makes the connection between the inspection scope and the optical connector and observes the
condition of the fiber end face making sure that all junctioning components are seated properly for testing.
3.
Once all testing components are seated properly the user will initiate the first inspection test which will be
performed automatically by the AT&T approved fiber inspection & testing device.
4.
If the fiber end face on initial inspection test gets a “Pass” reading the connector is ready for use.
5.
If the fiber end face on the initial inspection test gets a “Fail” reading then proceed to the section titled “First Dry
Clean”.
6.
Once fiber end face passes inspection the enter Note Image as (Location) - Fiber (channel #) A i.e. Fiber 1A
7.
Before saving first inspection result go to MENU, MORE and CREATE NEW GROUP •Type [channel #A] on base
Fiber name and save test result. Example: “Fiber 1A”, “Fiber2A”, “Fiber3A”, etc…. for the total number of fibers to
be tested.
8.
Insert test jumper/s into the adapter for fiber under test
9.
Start the optical power meter; select the correct wavelength (the same wavelength as Optical Light Source at the
“Z” Location.
10.
Record power level in dB by clicking “Save
11.
Repeat the same procedure for each remaining patch cord or fiber in a given cable.
All “A” Location optical loss readings shall be saved with the corresponding fiber end face test results as shown in
Figure 24 below.
Figure 24: Fiber 1 A Location Example
2014 AT&T Intellectual Property. All rights reserved.
36
AT&T
Practice
ATT-TP-76417
Issue 3, 10/08/14
All “Z” Location fiber end face inspection test results shall only contain the fiber end face test result. The optical loss
reading result shall not be captured/saved with the “Z” location test results.Refer to Figure 25 below.
Figure 25: Fiber 1 Z Location Example
2014 AT&T Intellectual Property. All rights reserved.
37
AT&T
Practice
ATT-TP-76417
Issue 3, 10/08/14
9. Inspection Test and Optical Loss Recording Documentation
Examples
2014 AT&T Intellectual Property. All rights reserved.
38
AT&T
Practice
ATT-TP-76417
Issue 3, 10/08/14
The following Figures, 26A thru 26F are an example of what the required consolidated documentation shall look like
once all fiber inspection, cleaning and ORL testing has been completed.
Figure 26A: Index of consolidated fiber inspection report for location “A” fibers.
2014 AT&T Intellectual Property. All rights reserved.
39
AT&T
Practice
ATT-TP-76417
Issue 3, 10/08/14
2014 AT&T Intellectual Property. All rights reserved.
40
AT&T
Practice
ATT-TP-76417
Issue 3, 10/08/14
Figure 26B: Consolidated fiber inspection report for location “A” fibers.
2014 AT&T Intellectual Property. All rights reserved.
41
AT&T
Practice
ATT-TP-76417
Issue 3, 10/08/14
2014 AT&T Intellectual Property. All rights reserved.
42
AT&T
Practice
ATT-TP-76417
Issue 3, 10/08/14
Figure 26C: Individual fiber inspection reports provided in consolidated report for location “A” fibers.
Figure 26D: Index of consolidated fiber inspection report for location “Z” fibers.
2014 AT&T Intellectual Property. All rights reserved.
43
AT&T
Practice
ATT-TP-76417
Issue 3, 10/08/14
2014 AT&T Intellectual Property. All rights reserved.
44
AT&T
Practice
ATT-TP-76417
Issue 3, 10/08/14
Figure 26E: Consolidated fiber inspection report for location “Z” fibers.
2014 AT&T Intellectual Property. All rights reserved.
45
AT&T
Practice
ATT-TP-76417
Issue 3, 10/08/14
2014 AT&T Intellectual Property. All rights reserved.
46
AT&T
Practice
ATT-TP-76417
Issue 3, 10/08/14
Figure 26F: Individual fiber inspection reports provided in consolidated report for location “Z” fibers.
10. Fiber Connector Inspection Documentation Requirements
1. All fiber inspection test results for each job shall be accumulated into two consolidated .pdf report files as illustrated
in Figures 26A thru 26F.
2014 AT&T Intellectual Property. All rights reserved.
47
AT&T
Practice
ATT-TP-76417
Issue 3, 10/08/14
2. One .pdf file shall be for the “A” location end fibers and one .pdf file shall be for the “Z” location end fibers.
3. The “A” location consolidated report shall be named FBR_INSP_A.
4. The “Z” location consolidated report shall be named FBR_INSP_Z.
5. The “A” location consolidated report shall contain the fiber end face test results and the ORL test results as illustrated in Figures 26B and 26C.
6. The “Z” location consolidated report shall contain only the fiber end face test results as illustrated in Figures 26F and
26F.
7. All consolidated reports shall contain at a minimum the following information:
A.Report Date - Example: 10/6/2014 6:27.04 PM
B. Company Name - Example: Big Time Fiber Testing Company
C.Location - Example: SNDGCA02 i.e. CLLI Code
D.Operator - Example: Levi Strauss i.e. testers name
E.File Name - Example: FBR_INSP_A or FBR_INSP_Z as appropriate.
F.Fiber Type - Example: Single-mode or Multi-mode as appropriate.
G.Job ID - Example: 12344321 i.e. TEO Number
H.Relay Rack Example: RR126.01
I.Panel/Shelf Example: 8
J.Tray/Slot Example: B or 4 as appropriate and if applicable.
K.Port Example: 24
L.TX or RX Example: TX or RX as appropriate.
8. All consolidated reports shall be in numeric sequential order on a per job basis.
9. Once the consolidated fiber inspection test result .pdf files have been created, they shall be placed into EJF using
the form FBR_INSP_A or FBR_INSP_B as appropriate.
10. Consolidated .pdf reports shall not exceed 4MB in size.
11. As many consolidated .pdf reports as are necessary to record the fiber inspection test results per job may be
placed into EJF.
12. When multiple consolidated .pdf reports are required to record job information, the following naming convention
shall be used: FBR_INSP_A V1, FBR_INSP_A V2, FBR_INSP_A V3 etc.
2014 AT&T Intellectual Property. All rights reserved.
48
AT&T
Practice
ATT-TP-76417
Issue 3, 10/08/14
Note: EJF system should automatically record next sequential version.
13. If a job is being done in a region of the business or for a specific equipment type, service or project that does not
utilize the EJF system, all test results shall be placed on a CD, or portable disc drive and stored in the completed job
folder (formerly referred to as the yellow wallet).
14. The only required use for the Fiber Connector Inspection Test Record will be to record the number of cleanings
required for any given fiber to pass inspection. There is no longer a requirement to use this form to capture, store and
report fiber inspection data. The Fiber Connector Inspection Test Record shall be placed in EJF per the current BAU
process.
11. Optical Loss Testing
2.7.2 The following procedures shall be used to test, measure and record loss on newly installed cables, jumpers and
patch cords. This shall apply to factory formed as well as field formed connectorized cables, jumpers and patch cords.
Singlemode and Laser Optimized OM3/OM4 fibers shall be tested with the light source set at 1310nm. All contracted
Installation Suppliers shall first perform an inspection of all testing jumpers and fibers when calibrating the loss testing
meter(s) per ATT-TP-76417. The Installation Supplier shall follow the inspection, (cleaning if necessary) and grading
procedures in ATT-TP-76417 for all fiber end-faces at each end (A&Z) (cable, jumper or patchcords) and record and
maintain the inspection results on a consolidated.pdf report file. The Installation Supplier shall perform an end to end
dB loss test and the result shall also be recorded on a consolidated .pdf report file. The Installation Supplier shall
provide and place both the fiber end face inspection test results and optical loss measurements as part of the required
Job Documentation into the Electronic Job Folder (EJF).
11.1. Optical Loss Testing Procedure A
This procedure shall be used when testing patch cords or multi-stranded cables between the FDF and Network Equipment.
Note: Refer to Figure 27 and Figure 28 Below for Illustration.
1. Connect the Test Jumper between the light source and optical power meter.
2. Set reference to a zero value.
3. Disconnect the Test Jumper from the optical power meter.
4. Connect one end of the newly constructed jumper to the end of the Test Jumper using an adapter.
5. Connect the other end of the newly constructed jumper to the optical power meter.
6. Using either the FiberChekPro software or JDSU hand held device, record dB loss measurement and save file as
part of the “A” location fiber inspection test if loss reading meets AT&T standards.
7. If, jumper loss reading is greater than 0.80dB, the installation supplier shall follow cleaning procedures in ATTTP-76417 and retest.
a. If, after cleaning and retesting, the loss is still greater than 0.80dB, the jumper is not acceptable and shall be
replaced.
2014 AT&T Intellectual Property. All rights reserved.
49
AT&T
Practice
ATT-TP-76417
Issue 3, 10/08/14
b. If testing is done between two FOT panels, 0.75 dB is added to the maximum allowable loss. The 0.75dB takes into
account the loss in the (2) bulk head connectors. In this case the loss shall be less than 1.55 dB.
Reference ANSI/TIA/EIA 568-B.3 -Optical Fiber Cabling Components Standards
The maximum loss allowed on a fiber cable (inside only) is calculated as follows:
0.75 dB (2) Connectors (Mated Pair) + 1.0 dB/Km of fiber cable + 0.3 dB per fusion or mechanical splice.
8. A copy of the “A” location fiber inspection test along with the optical loss reading shall be placed into a consolidated .pdf report file..
9.Once all fiber inspection and optical loss readings have been tabulated into a consolidated .pdf report file, the
consolidated .pdf report file.shall be placed into the EJF per ATT-TP-76417.
Figure 27: Test Jumper
Figure 28: Test Jumper/Adapter/Patch Cord
11.2. Optical Loss Testing Procedure B
This procedure shall be used when testing patch cords or multi-stranded cables going between FDF line-ups.
Note: Refer to Figure 29 and Figure 30 Below for Illustration
1. Connect the Test Jumper between the light source and optical power meter.
2. Set reference to a zero value.
3. Disconnect the Test Jumper from the optical power meter.
4. Connect one end of the newly constructed jumper to the end of the Test Jumper using an adapter.
5. Connect the other end of the newly constructed jumper to the optical power meter.
6. Using either the FiberChekPro software or JDSU hand held device, record dB loss measurement and save file as
part of the “A” location fiber inspection test if loss reading meets AT&T standards.
7. If jumper loss reading is greater than 0.80dB, the installation supplier shall follow cleaning procedures in ATTTP-76417 and retest.
a. If, after cleaning and retesting, the loss is still greater than 0.80dB, the jumper is not acceptable and shall be
replaced.
2014 AT&T Intellectual Property. All rights reserved.
50
AT&T
Practice
ATT-TP-76417
Issue 3, 10/08/14
b. If testing is done between two FOT panels, 0.75 dB is added to the maximum allowable loss. The 0.75dB takes into
account the loss in the (2) bulk head connectors. In this case the loss shall be less than 1.55 dB.
Reference ANSI/TIA/EIA 568-B.3 -Optical Fiber Cabling Components Standards
The maximum loss allowed on a fiber cable (inside only) is calculated as follows:
0.75 dB (2) Connectors (Mated Pair) + 1.0 dB/Km of fiber cable + 0.3 dB per fusion or mechanical splice.
8. A copy of the “A” location fiber inspection test along with the optical loss reading shall be placed into a consolidated .pdf report file.
9.Once all fiber inspection and optical loss readings have been tabulated into a consolidated .pdf report file, the
consolidated .pdf report file shall be placed into the EJF per ATT-TP-76417.
Figure 29: Test Jumper/Adapter/Patch Cord
Figure 30: Test Jumper/Adapter/Patch Cord/Adapter/Test Jumper
All fibers shall be installed prior to inspection and loss testing. Fiber loss readings shall be made on all fiber cabling
between the equipment and fiber distributing frame with the results documented on a consolidated .pdf report file per
ATT-TP-76417 and accepted by the AT&T Representative.
All fiber loss testing for fibers going between the FDF and transport equipment shall be tested through the bulk head at
the FDF.
All fiber loss testing for fibers going between FDF's or between an FDF and a fiber termination panel (FTP) shall be
tested through the bulk heads at each panel location.
12. Inspection Tools
2014 AT&T Intellectual Property. All rights reserved.
51
AT&T
Practice
ATT-TP-76417
Issue 3, 10/08/14
CAUTION: Inspection shall ALWAYS precede cleaning or mating of optical connectors to prevent
damage or contamination of the connectors.
IMPORTANT: All Inspection Scopes contained in this document are Video type scopes or indirect
image converters as defined by ATT-770-000-013 . This document does not support the use of any Nonvideo type or direct viewing Inspection Scope.
2014 AT&T Intellectual Property. All rights reserved.
52
AT&T
Practice
ATT-TP-76417
Issue 3, 10/08/14
12.1. AT&T Installation Supplier Approved Fiber Inspection Video
Scopes
Any of the following fiber inspection kit options provided in Figures 31, 32 and 33 are approved for use including the
additional optional test equipment shown in Figure 34.
Figure 31: Fiber Inspection Kit Option 1
Figure 32: Fiber Inspection Kit Option 2
2014 AT&T Intellectual Property. All rights reserved.
53
AT&T
Practice
ATT-TP-76417
Issue 3, 10/08/14
Figure 33: Fiber Inspection Kit Option 3
2014 AT&T Intellectual Property. All rights reserved.
54
AT&T
Practice
ATT-TP-76417
Issue 3, 10/08/14
Figure 34: Additional Optional Test Equipment
2014 AT&T Intellectual Property. All rights reserved.
55
AT&T
Practice
ATT-TP-76417
Issue 3, 10/08/14
WARNING: Interconnecting APC with other connector types will result in poor test results and/or
service interruption and can cause permanent damage to the connectors. Do not attempt to connect an
APC connector to PC, UPC, or SPC connectors.
2014 AT&T Intellectual Property. All rights reserved.
56
AT&T
Practice
ATT-TP-76417
Issue 3, 10/08/14
12.2. JDSU Fiber Inspection Individual Items
The individual items listed in the following table can be added to the (3) inspection test kit options listed in figures 31,
32 and 33 to expand their inspection capabilities. See figures and more explanations on the following pages.
Vendor Part #
Description
FBPT-SC-A6
Set Test Tip-SC Bulkhead Angled 60 Degrees
FBPT-U12-A6
Set Test Tip-1.25mm-Uni Blkhd Angled 60 Degree
FBPT-SC-APC*
Set Test Tip SC-APC Bulkhead
FBPT-LC-APC
Set Test Tip LC-APC Bulkhead
FBPT-U25M*
Set Test Tip Universal 2.5mm Patch-cord
FBPT-U25MA*
SET TEST Tip Universal 2.5mm APC Patch cord
FBPT-U12M*
Set Test Tip Universal 1.25mm Patch cord
FBPT-U12MA-SF*
Set Test Tip Universal 1.25mm APC Patch cord
FMAE-U25
Set Test Adapter Universal 2.5mm Patch cord
FMAE-U12
Set Test Adapter Universal 1.25mm Patch cord
FMAE-MTPA
Set Test Adapter MTP/MPO APC Patch cord
FBPP-BK1
Set Test Kit-Extra Batt Tray Charger w/12 Batts
FBPT-ST*
Set Test Tip ST Bulkhead
FBPT-ST-A6
Set Test Tip ST Bulkhead Angled 60 Degrees
FBPT-LC*
Set Test Tip LC Bulkhead
FBPT-LC-L
Set Test Tip LC Bulkhead Long Reach
FBPT-SC*
Set Test Tip SC Bulkhead
FBPP-BAP1
Barrel Assembly for Probe (Required for use with FBPTST, -LC, -SC, -SC-APC, -U25M, -U25MA, -U12M, U12MA-SF)
FBPP-HSC11
Set Test Large Hard Case
FBPP-MK1
Set Test Mating Adapters - MTP SC LC (1 ea.)
FBPP-BAP1 is required to between the FBP-P1 or FBP-P5 Probe Microscope and this
Tip.
2014 AT&T Intellectual Property. All rights reserved.
57
AT&T
Practice
ATT-TP-76417
Issue 3, 10/08/14
Delivery Interval is two weeks.
2014 AT&T Intellectual Property. All rights reserved.
58
AT&T
Practice
ATT-TP-76417
Issue 3, 10/08/14
12.2.1.
12.2.2. JDSU LC Tips and Adapters
The FBPT-LC is used with the JDSU P-5000i Fiber Inspection Probe inspect LC fiber end faces terminated in
bulkheads.
The FBPT-LC-L is longer than FBPT-LC for reaching into tight spots and is used with the JDSU P-5000i Fiber Inspection Probe to inspect LC fiber end faces terminated in bulkheads.
The FBPT-U12-A6 is angled for reaching into tight spots and is also used with the JDSU Fiber Inspection Probe to
inspect 1.25mm fiber end faces terminated in bulkheads.
Figure 35: JDSU LC Tips and Adapters
2014 AT&T Intellectual Property. All rights reserved.
59
AT&T
Practice
ATT-TP-76417
Issue 3, 10/08/14
12.2.3. JDSU SC Tips and Adapters
The FBPT-SC is used with the JDSU P-5000i Fiber Inspection Probe to inspect SC fiber end faces terminated in
bulkheads.
The FBPT-SC-A6 is angled for reaching into tight spots and is also used with the JDSU P-5000i Fiber Inspection Probe
to inspect SC fiber end faces terminated in bulkheads.
Note: These tips can be used with SC Mating adapter seen in section titled “JDSU Mating Adapters - MTP, SC, LC” to
inspect patch cords..Both ends of a patch cord can be inspected and left in place for protection in the Mating Adapter
when clean while inspecting and cleaning bulk head adapters.
Figure 36: JDSU SC Tips and Adapters
2014 AT&T Intellectual Property. All rights reserved.
60
AT&T
Practice
ATT-TP-76417
Issue 3, 10/08/14
12.2.4. JDSU ST Tips and Adapters
The FBPT-ST is used with the JDSU P-5000i Fiber Inspection Probe to inspect ST fiber end faces terminated in
bulkheads.
The FBPT-ST-A6 is angled for reaching into tight spots and is also used with the JDSU P-5000i Fiber Inspection Probe
to inspect ST fiber end faces terminated in bulkheads.
Figure 37: JDSU ST Tips and Adapters
2014 AT&T Intellectual Property. All rights reserved.
61
AT&T
Practice
ATT-TP-76417
Issue 3, 10/08/14
12.2.5. JDSU Universal Patch Cord Tips
The FBPT-U25M is used with the JDSU P-5000i Fiber Inspection Probe to inspect 2.5 patch cord connectors such as
ST or SC.
The FBPT-U12M is used with the JDSU P-5000i Fiber Inspection Probe to inspect 1.25 patch cord connectors such as
LC.
NOTE: No mating adapter is required to inspect patch cord connectors when using these tips however, these tips can
not be used to inspect in bulkheads.
Figure 38: JDSU Universal Patch Cord Tips
2014 AT&T Intellectual Property. All rights reserved.
62
AT&T
Practice
ATT-TP-76417
Issue 3, 10/08/14
12.2.6. FBPP-BAP1 Barrel Assembly for Probe
FBPP-BAP1 Barrel Assembly for JDSU P-5000i Fiber Inspection Probe is required for use with Probe Tips FBPT-ST, LC, -SC, -SC-APC, -U25M, -U25MA, -U12M, and -U12MA-SF. The Barrel Assembly is placed between the Probe
Microscope and the Probe Tip as shown in Figure 39 “FBPP-BAP1 Barrel Assembly Installation” below. Only one
Barrel Assembly is required for each Probe Microscope.
Figure 39: FBPP-BAP1 Barrel Assembly
Figure 40: FBPP-BAP1 Barrel Assembly Installation
2014 AT&T Intellectual Property. All rights reserved.
63
AT&T
Practice
ATT-TP-76417
Issue 3, 10/08/14
12.2.7. JDSU Universal Patch Cord Adapters for Patch Cord Module
The FMAE-U25 is used with the FIT-ATT-18 kit to inspect 2.5mm patch cord connectors such as SC or ST.
The FMAE-U12 is used with the FIT-ATT-18 kit to inspect 1.25mm patch cord connectors such as LC.
NOTE: First, Inspect patch cord, clean if needed, and reinspect. When patch cord is clean, leave it in place for protection and proceed to inspect the bulkhead connector. When the bulkhead connector is clean it is time to make the
connection.
Figure 41: JDSU Universal Patch Cord Adapters for Patch Cord Module
2014 AT&T Intellectual Property. All rights reserved.
64
AT&T
Practice
ATT-TP-76417
Issue 3, 10/08/14
12.2.8. JDSU Mating Adapters - MTP, SC, LC
The FBPP-MK1 Mating Adapters set consists of the three adapters shown below that are used to place the appropriate
patch cord/s in one side and the corresponding Bulkhead tip on the other side for inspection of patch cord connectors.
NOTE: These adapters can be used with the tips listed in sections titled “JDSU LC Tips and Adapters”, “JDSU SC Tips
and Adapters”, and “JDSU MPO APC Tips and Adapters” to inspect patch cords.
Figure 42: JDSU Mating Adapters
2014 AT&T Intellectual Property. All rights reserved.
65
AT&T
Practice
ATT-TP-76417
Issue 3, 10/08/14
12.2.9. JDSU APC Tips and Adapters
CAUTION: The following four parts MUST NOT be used with non-APC type connectors. Most APC
connectors will have green shell or boot as an indicator.
The FBPT-LC-APC is used with the JDSU P-5000i Fiber Inspection Probe to inspect the LC-APC patch cord connectors.
The FBPT-SC-APC is used with the JDSU P-5000i Fiber Inspection Probe to inspect the SC-APC patch cord connectors.
The FBPT-U12-MA-SF is used with the JDSU P-5000i Fiber Inspection Probe to inspect the 1.25mm APC patch cord
connectors in a bulkhead.
The FBPT-U25-MA-SF is used with the JDSU P-5000i Fiber Inspection Probe to inspect the 2.5mm APC patch cord
connectors in a bulkhead.
Figure 43: JDSU APC Tips and Adapters
The following graphic is used to illustrate the green shell and boot. Some will have both as shown below others may
have only the shell or boot in green.
Figure 44: APC Connector
2014 AT&T Intellectual Property. All rights reserved.
66
AT&T
Practice
ATT-TP-76417
Issue 3, 10/08/14
13. Cleaning Products
CAUTION: Inspection shall ALWAYS precede cleaning or mating of optical connectors to prevent
damage or contamination of the connector.
This section contains a table named “Quick Guide For Cleaning Tools” that shows some high level information to help
select the correct cleaning tool for your application. This section also includes complete descriptions of each cleaning
tool approved for use in AT&T and the instructions for using that tool.
Things to remember when choosing tools for cleaning:
•
You must clean both male and female, some tools do both.
•
Cleaner Fiber Wipe Premoistened shall be kept available.
•
In-Situ Cleaners are handy for cleaning in and around adapters.
2014 AT&T Intellectual Property. All rights reserved.
67
AT&T
Practice
ATT-TP-76417
Issue 3, 10/08/14
13.1. Quick Guide For Cleaning Tools
Name
Connector Type/s
Cleaner Fiber Optic MPO
Male and Female
MPO/MPT
X
X
X
X
Ferrule Mate 2.5mm (SC,
SCAPC, FC, ST) Male and
Female
2.5mm (SC, SCAPC,
FC, ST)
X
X
X
X
Ferrule Mate 1.25mm (LC,
MU) Male and Female
1.25mm (LC, MU)
X
X
X
X
Alcoa FCC-02R Fiber Optic
Connector Cleaner (Cletop
Type)
SC, D4, FC, LC, and
ST
X
X
ST, SC, FC, LC, or
Cleaner, Fiber Optic ConnecD4. MT-RJ, MPO, or
tor Universal
MTP
X
X
X
X
FiberSwiper
SC, D4, FC, LC, and
ST, SCAPC
IN-situ Connector Cleaner
SC (Swab)
2.5mm (SC, SCAPC,
FC, ST)
Male
Female
In-Situ Connector Cleaner LC
1.25mm (LC, MU)
(Swab)
ST, SC, FC, LC, or
Cleaner Fiber Wipe PremoisD4. MT-RJ, MPO, or
tened
MTP
Bottled Alcohol
Dry
Wet
X
X
X
X
X
X
X
X
Not Recommended for the procedures in this document. Procedures are provided to
use Cleaner Fiber Wipe Premoistened in place of Alcohol.
NOTE: AT&T prefers to use the Dry Clean process for fiber cleaning, however “Cleaner Fiber Wipe Premoistened” is
approved for use when at least 3 dry cleaning attempts have failed to produce acceptable results when inspection
procedures are performed. Wet cleaning must always be followed immediately by dry cleaning before the liquid has
an opportunity to dry.
2014 AT&T Intellectual Property. All rights reserved.
68
AT&T
Practice
ATT-TP-76417
Issue 3, 10/08/14
13.2. Dry Cleaning Products and Instructions for Use
CAUTION: Only AT&T Approved For Use Test Sets and Cleaning Supplies Shall be Used For These
Procedures
Dry Cleaning is the AT&T preferred method of cleaning fiber end faces when inspection reveals the necessity for cleaning.
NOTE: Inspection of connectors must be performed before and after cleaning.
13.2.1. Storing Dry Cleaning Products
All optical cleaning products shall be kept in a clean and dry environment protected from temperature extremes. It is
recommended that all cleaning products be kept in air and moisture tight bags until just before use. Keep alcohol
products and dry products stored in separate bags to avoid cross contamination in the event of alcohol leakage. If
electrostatic protective, air, and moisture tight bags are available they should work very well. An antistatic bag shall
always be available to store protective connector caps for future use.
CAUTION: Do not leave any of these products in direct sunlight such as the dash or seat of a vehicle.
Damage can occur to these tools.
2014 AT&T Intellectual Property. All rights reserved.
69
AT&T
Practice
ATT-TP-76417
Issue 3, 10/08/14
13.2.2. Cleaner Fiber Optic MPO
The MPO Cleaner is primarily a dry cloth cleaning tool designed for cleaning the ferrule end faces of MPO multi-fiber
connectors that are In-situ or contained within adapters and optical transceivers or fiber jumpers. This tool effectively
cleans all fibers at once without the use of alcohol in most cases and is capable of cleaning MPO ferrules with or
without guide pins. Procedures are also provided in this document to use the MPO fiber cleaner with alcohol . The
PAN for this product can be found at ATT-TELCO-PAN-OUTSIDEPLANT-2005-0031
Figure 45: MPO Cleaner
Ordering Information Item is Non-Stock. Delivery interval is 20 Days
DESCRIPTION - CLEANER FIBER OPTIC MPO
# OF Wipes 500
NARRATIVE - AN MPO Cleaner Device designed for cleaning the ferrule end faces of MPO connectors. This device
cleans all 12 fibers at once. Capable of cleaning ferrules with or without guide pins.
PID - 310095690
2014 AT&T Intellectual Property. All rights reserved.
70
AT&T
Practice
ATT-TP-76417
Issue 3, 10/08/14
13.2.2.1. User Instructions for CLEANER FIBER OPTIC MPO
It is essential to be familiar with the parts of the cleaner before attempting to use the cleaner. The following illustration
labels the parts that are important.
Figure 46: MPO Cleaner Parts
•
Dial - A toothed thumb wheel to advance the Cleaning Tape. All of the small teeth produce a quiet click as the
wheel is turned but the larger teeth produce a louder click that signals the end of a cleaning cycle.
NOTE: Do not attempt to move the Dial in the opposite direction as this will damage the tool.
•
Main Body - The body of the unit that is grasped by the user during cleaning.
•
Cleaning Tape - The Cleaning Tape is pressed against the connector to be cleaned and advanced by turning the
Dial.
•
Cap - The Cap is used during storage of the MOP Cleaner.
•
Guide - The Guide is removed when cleaning adapters or put in place over the Cleaning Tape for cleaning
jumpers or storage.
2014 AT&T Intellectual Property. All rights reserved.
71
AT&T
Practice
ATT-TP-76417
Issue 3, 10/08/14
13.2.2.1.1. Cleaning In Adapters with the CLEANER FIBER OPTIC MPO
This procedure is for Dry Cleaning an MPO connector, procedures are provided for the Wet followed by Dry clean at
Wet Cleaning an MPO Connector with MPO Cleaner .
NOTE: Inspection of connector must be performed before and after cleaning.
Note: Place all protective caps removed from adapters into a clean anti-static bag.
Figure 47: Clean Connector in Adapter
2014 AT&T Intellectual Property. All rights reserved.
72
AT&T
Practice
ATT-TP-76417
Issue 3, 10/08/14
13.2.2.1.2. Cleaning MPO Jumpers with the CLEANER FIBER OPTIC
MPO
This procedure is for Dry Cleaning an MPO connector, procedures are provided for the Wet followed by Dry clean at
Wet Cleaning an MPO Connector with MPO Cleaner .
NOTE: Inspection of connector must be performed before and after cleaning.
Note: Place all protective caps removed from adapters into a clean anti-static bag for storage.
Figure 48: Clean Connector of MPO Jumper
2014 AT&T Intellectual Property. All rights reserved.
73
AT&T
Practice
ATT-TP-76417
Issue 3, 10/08/14
13.2.3. Ferrule Mate 2.5mm (SC, SCAPC, FC, ST) Male and Female
This disposable cleaning device is for cleaning any 2.5 mm PC or APC connectors. With the simple push of the button,
the tool uses a twisting motion to break loose any dirt that has accumulated on the fiber face, and then a sweeps it
away when the cleaning tape advances. This process is more effective than cleaning swabs, or sticks, and it leaves no
residue. This technology is effective for cleaning connectors that are plugged into the backside of a panel or on the
inside of an enclosure. In addition to this unique ability, the Ferrule Mate's dust cap also has a flip-open end for inserting any ferrule or connector for cleaning. The Ferrule-Mate can be used for Dry or Wet cleaning. The Wet Cleaning
Procedure can be found in Section “ Wet Cleaning an SC Connector with the Ferrule-Mate SFM-250 “.
Figure 49: Ferrule Mate 2.5mm
Ordering Information Item is Non-Stock.
DESCRIPTION - Ferrule Mate SFM-250
# OF Wipes 350
NARRATIVE - Fiber optic cleaning tool suitable for cleaning SC/FC/ST Connectors.
PID: 310111984
2014 AT&T Intellectual Property. All rights reserved.
74
AT&T
Practice
ATT-TP-76417
Issue 3, 10/08/14
13.2.3.1. User Parts Key for Ferrule-Mate SFM-250 Fiber Optic Connector
Cleaner
Figure 50: Parts Key for Ferrule-Mate SFM-250
In some cases the Cleaning Cloth on the Ferrule-Mate can become misaligned or fall off of the tip. Simply grasp the
Body of the Ferrule-Mate in one hand and the Cleaning Tip in the other. Push the Cleaning Tip and Stopper toward the
Body as far as it will go and then return the Cleaning Tip and Stopper to their original positions. Verify the Cleaning
Cloth has been realigned across the end.
Figure 51: Realign Ferrule Mate
2014 AT&T Intellectual Property. All rights reserved.
75
AT&T
Practice
ATT-TP-76417
Issue 3, 10/08/14
13.2.3.2. Cleaning an SC Connector In an Adapter with the Ferrule-Mate
SFM-250
This the Dry cleaning procedure for the Ferrule-Mate, the Wet Cleaning Procedure can be found in Section “ Wet
Cleaning an SC Connector In an Adapter with the Ferrule-Mate SFM-250 “.
NOTE: Inspection of connector must be performed before and after cleaning.
Note: Place all protective caps removed from adapters into a clean anti-static bag.
Figure 52: Cleaning SC Connector In an Adapter
2014 AT&T Intellectual Property. All rights reserved.
76
AT&T
Practice
ATT-TP-76417
Issue 3, 10/08/14
13.2.3.3. Cleaning an SC Connector with the Ferrule-Mate SFM-250
This the Dry cleaning procedure for the Ferrule-Mate, the Wet Cleaning Procedure can be found in Section “ Cleaner
Fiber Wipe Premoistened “.
NOTE: Inspection of connector must be performed before and after cleaning.
Note: Place all protective caps removed from jumpers into a clean anti-static bag.
Figure 53: Cleaning an SC Connector
2014 AT&T Intellectual Property. All rights reserved.
77
AT&T
Practice
ATT-TP-76417
Issue 3, 10/08/14
13.2.4. Ferrule Mate 1.25mm (LC, MU) Male and Female
This disposable cleaning device is for cleaning any 1.25 mm PC or APC connectors. With the simple push of the
button, the tool uses a twisting motion to break loose any dirt that has accumulated on the fiber face, and then a
sweeps it away when the cleaning tape advances. This process is more effective than cleaning swabs, or sticks, and it
leaves no residue. This technology is effective for cleaning connectors that are plugged into the backside of a panel or
on the inside of an enclosure. In addition to this unique ability, the Ferrule Mate's dust cap also has a flip-open end for
inserting any ferrule or connector for cleaning. The Ferrule-Mate can be used for Dry or Wet cleaning. The Wet Cleaning Procedure can be found in Section “ Wet Cleaning an LC Connector with the Ferrule-Mate SFM-125 “.
Figure 54: Ferrule Mate 1.25mm
DESCRIPTION - Ferrule Mate SFM-125
# OF Wipes 350
NARRATIVE - Fiber optic cleaning tool suitable for cleaning LC/MU Connectors.
PID: 310111992
2014 AT&T Intellectual Property. All rights reserved.
78
AT&T
Practice
ATT-TP-76417
Issue 3, 10/08/14
13.2.4.1. User Parts Key for Ferrule-Mate SFM-125 Fiber Optic Connector
Cleaner
NOTE: The following graphic represents a Ferrule-Mate SFM-125 for 1.25 mm connectors such as LC.
Figure 55: Parts Key for Ferrule-Mate SFM-125 (LC Connectors)
In some cases the Cleaning Cloth on the Ferrule-Mate can become misaligned or fall off of the tip. Simply grasp the
Body of the Ferrule-Mate in one hand and the Cleaning Tip in the other. Push the Cleaning Tip and Stopper toward the
Body as far as it will go and then return the Cleaning Tip and Stopper to their original positions. Verify the Cleaning
Cloth has been realigned across the end.
Figure 56: Realign Ferrule Mate
2014 AT&T Intellectual Property. All rights reserved.
79
AT&T
Practice
ATT-TP-76417
Issue 3, 10/08/14
13.2.4.2. Cleaning an LC Connector In an Adapter with the Ferrule-Mate
SFM-125
This is the Dry cleaning procedure for the Ferrule-Mate, the Wet Cleaning Procedure can be found in Section “ Wet
Cleaning an LC Connector In an Adapter with the Ferrule-Mate SFM-125 “.
NOTE: Inspection of connector must be performed before and after cleaning.
Note: Place all protective caps removed from adapters into a clean anti-static bag.
Figure 57: Cleaning LC Connector In an Adapter
2014 AT&T Intellectual Property. All rights reserved.
80
AT&T
Practice
ATT-TP-76417
Issue 3, 10/08/14
13.2.4.3. Cleaning an LC Connector with the Ferrule-Mate SFM-125
This is the Dry cleaning procedure for the Ferrule-Mate, the Wet Cleaning Procedure can be found in Section “ Cleaner
Fiber Wipe Premoistened “.
NOTE: Inspection of connector must be performed before and after cleaning.
Note: Place all protective caps removed from jumpers into a clean anti-static bag.
Figure 58: Cleaning an LC Connector
2014 AT&T Intellectual Property. All rights reserved.
81
AT&T
Practice
ATT-TP-76417
Issue 3, 10/08/14
13.2.5. Alcoa FCC-02R Fiber Optic Connector Cleaner
The AFL FCC-02R is designed to remove dust, dirt, oil and grease from the ferrule end faces of SC, D4, FC, LC, and
ST fiber optic connectors. The FCC-02R is designed for 400 wipes.
Figure 59: Alcoa FCC-02R Fiber Optic Connector Cleaner
Ordering Information Item is Non-Stock. Delivery interval: 5 Days.
DESCRIPTION - CLEANER, FIBER OPTIC CONNECTOR FCC-02R
# OF Wipes 400
NARRATIVE This is a fiber optic cleaning cartridge for SC, ST, D4 & FC Connectors.
PID - 301039228
The following is a Reel Replacement that is less than 25% of the cost of the complete cleaning unit. Cost per
wipe drops by almost 75% by reusing the existing housing and replacing the used cleaner tape.
DESCRIPTION - REEL, REPLACEMENT FCC-4
# OF Wipes 400
NARRATIVE - Replacement reel for cleaner, fiber optic connector FCC-02R.
Fiber Optic Connector PID - 301039236
2014 AT&T Intellectual Property. All rights reserved.
82
AT&T
Practice
ATT-TP-76417
Issue 3, 10/08/14
13.2.5.1. User Instructions for Alcoa FCC-02R Fiber Optic Connector
Cleaner
While this tool can be used in either hand it is designed to be grasped in the users left with the advance lever facing left
as seen below.
Figure 60: Cletop_in_hand
1.
Grasp the Alcoa FCC-02R Fiber Optic Connector Cleaner in your left hand with the advance lever facing left and
under your thumb.
2.
Grasp the fiber connector with your right hand as you would a pencil with the connector end as the writing end.
3.
Push the advance lever away from you and down to expose the two cleaning surfaces.
4.
Take note of the wiping direction indicated by the arrows on top of the Connector Cleaner.
5.
Place the fiber connector on the left most cleaning surface at the end of the slot closest to the wiping direction
label.
2014 AT&T Intellectual Property. All rights reserved.
83
AT&T
Practice
ATT-TP-76417
Issue 3, 10/08/14
•
UPC connectors will be placed perpendicular to the cleaning surface
•
APC connectors will be placed at an 8o angle. Grasp the connector between right thumb and forefinger with
the key facing left, place the connector in contact with the cleaning surface and slightly lean the top of the
connector in the direction you will be wiping.
Figure 61: KEY on SC APC
6.
Turn the connector 1/2 turn clockwise and then 1/2 turn counterclockwise.
7.
Drag the connector the length of the slot.
8.
Repeat steps 5 - 7 in the right most slot.
9.
Release the advance lever to hide the cleaning surfaces.
10.
Re-inspect
2014 AT&T Intellectual Property. All rights reserved.
84
AT&T
Practice
ATT-TP-76417
Issue 3, 10/08/14
13.2.6. Cleaner, Fiber Optic Connector Universal
The Connector Cleaning Cassette uses a special cloth tape over two pin-clearance runners to clean the connector end
face of either MT-RJ, MPO, or MTP© connectors which have guide pins. The center section of the cleaning area
between the two runners may be used to clean any pin-less connector, including single fiber connectors ST, SC, FC,
LC, or D4. This unit is only required when cleaning MT-RJ, MPO, or MTP© jumpers which have guide pins. See Figure
65 “MT-RJ or MTP/MPO connectors with Guide Pins” below for an example.
Figure 62: Universal Fiber Optic Cleaner
Ordering Information Item is non-stock. Delivery interval is 3 days.
DESCRIPTION - CLEANER, FIBER OPTIC CONNECTOR UNIVERSAL
# OF Wipes Unable to determine
NARRATIVE The Universal Connector Cleaning Cassette used to clean the connector end face of either MT-RJ, MPO,
or MTP connectors that have guide pins. May be used to clean ST, SC, FC, LC, and D4 connectors.
PID - 301053872
No Replacement Reel available.
2014 AT&T Intellectual Property. All rights reserved.
85
AT&T
Practice
ATT-TP-76417
Issue 3, 10/08/14
13.2.6.1. User Instructions for Cleaner, Fiber Optic Connector Universal
It is essential to learn the physical layout of the Universal Connector Cleaning Cassette before commencing with cleaning operations. The Universal Connector Cleaning Cassette uses a special cloth tape over two pin-clearance runners to
clean the connector end face of either MT-RJ or MTP® connectors which have guide pins (see Figure 65 below titled
“MT-RJ or MTP/MPO connectors with Guide Pins”). The center section of the cleaning area between the two runners
may be used to clean any pin-less connector, including single fiber connectors (ST®-compatible, SC, FC, or D4). The
following figure can be used to get familiar with each of the parts of the Universal Connector.
•
Cleaning Strip - This is surface that the connector face will pass across to remove contaminants. Always move
connector in the direction of the arrows on the flap. Never use the exact same path twice.
•
Flap - Protects the “Cleaning Strip” when not in use and labels the 3 different areas of the cleaning strip.
•
Pin clearance runners - Appear as humps under the cleaning strip. The Guide Pins of some MT type connectors
will straddle these humps.
•
Toothed Wheel - This wheel is used to advance the Cleaning Strip to expose a clean surface.
Figure 63: Universal Fiber Optic Cleaner
2014 AT&T Intellectual Property. All rights reserved.
86
AT&T
Practice
ATT-TP-76417
Issue 3, 10/08/14
The following figure shows the direction to move the Toothed wheel to advance the Cleaning Strip. One stroke of the
Toothed wheel only advances the Cleaning Strip by one third of an inch which means that the user must stroke the
Toothed wheel at least 3 times to get a clean ribbon in the area being used. Also note that if the user is cleaning an
MTP/MPO connector, the next strokes of the Toothed wheel moves dirty Cleaning Strip into the Pin-less area. If the
user picks up the Universal Connector and is not sure what area is clean, it requires 9 - 10 strokes to reveal a
completely new 3 inch Cleaning strip.
Figure 64: Toothed Wheel and Direction of Ribbon Advance
2014 AT&T Intellectual Property. All rights reserved.
87
AT&T
Practice
ATT-TP-76417
Issue 3, 10/08/14
The following figure illustrates cleaning an MTP with Guide Pins type connector. The guide for the MTP/MPO is slightly
wider than the guide for the MT-RJ on the opposite end.
Figure 65: MT-RJ or MTP/MPO connectors with Guide Pins
2014 AT&T Intellectual Property. All rights reserved.
88
AT&T
Practice
ATT-TP-76417
Issue 3, 10/08/14
The following figure shows an angle on the surface to cleaned. The user must insure that the surface to be cleaned is
held flat against the Cleaning strip on the Universal Connector Cleaning Cassette. The user can readily observe the
angle (if present) when viewing the connector from the side as shown below .
Figure 66: MPO Connector with Angle
The user shall hold an angled MPO connector at an 8o angle to the cleaning surface as shown below to insure
complete contact.
Figure 67: Connector Cleaning Angle
2014 AT&T Intellectual Property. All rights reserved.
89
AT&T
Practice
ATT-TP-76417
Issue 3, 10/08/14
The following illustration indicates the proper direction for cleaning a multiple fiber connector (i.e. MPO, MPT, or MTRJ). Always clean in one direction. Do not clean perpendicular to the arrow shown below as this moves contamination
from one fiber to the next. Excessive pressure or scrubbing can damage the fiber.
Figure 68: Wipe Direction
NOTE: This unit is only required when cleaning MT-RJ, MPO, or MTP© connectors which have guide pins. Other
cleaning units may be less expensive per wipe and more suited to the task if not cleaning MT-RJ, MPO, or MTP©
connectors which have guide pins.
NOTE: Inspection of connector must be performed before and after cleaning.
1.
Advance reel 9-10 of the Toothed Wheel strokes to insure a contaminant free cleaning surface.
2.
Open the flap on the cleaning cassette.
3.
Use the label on the inside of the flap to choose the appropriate cleaning area.
4.
Use a single wipe along the cleaning tape in the direction indicated on the flap label.
5.
Reinspect
6.
If required after inspection, advance the tape with 3 strokes of the Toothed Wheel and repeat Steps 2 through 4.
2014 AT&T Intellectual Property. All rights reserved.
90
AT&T
Practice
ATT-TP-76417
Issue 3, 10/08/14
13.2.7. FiberSwiper
Reference ATT-TELCO-PAN-2003-3327 , FiberSwiper Connector Cleaner Approval for Use, Issue 1, dated December
2003 manufactured by Neptec Optical Solutions Inc. This document may be obtained internally within AT&T through
the APEX.
The FiberSwiper is a pocket-sized connector cleaner (4.37 long x 2.25 wide and 0.40 high inches). The FiberSwiper®
offers a compact ESD-dissipative case for storage and use of six cards, each containing 13 individual slots for cleaning
(78 cleans total per pack). Each cleaner card has a perforated cover that protects each cleaning slot until used.
•
Pocket-sized connector cleaner (same thickness as a CD jewel case) 111(L) x 57(W) x 10.2(H) mm
•
ESD material is used in the fabrication of the FiberSwiper® to eliminate static for use in sensitive areas
•
Each FiberSwiper® holds 6 cards that clean 13 connectors each (78 cleans/6-pack)
•
A perforated cover protects each cleaning slot until used
•
Removes and retains oil, dirt and other contaminants without solvents for superior results over competing
products
•
One swipe cleaning requirement per connector end for a more cost effective solution
Figure 69: FiberSwiper
Figure 70: FiberSwiper Refill
2014 AT&T Intellectual Property. All rights reserved.
91
AT&T
Practice
ATT-TP-76417
Issue 3, 10/08/14
Ordering Information Item is Non-Stock.
DESCRIPTION - CLEANER FIBERSWIPER
# OF Wipes 78
NARRATIVE - A POCKET SIZED CONNECTOR CLEANER HOLDS SIX CLEANER CARDS THAT CLEAN 13
CONNECTORS EACH
PID - 400166880
The following are Replacement Cleaner cards. This represents a 50% cost savings from buying a new kit.
Ordering Information Item is Non-Stock.
DESCRIPTION - CLEANER FIBERSWIPER CARDS
# OF Wipes 78
NARRATIVE PACKAGE OF 6 REPLACEMENT CLEANER CARDS FOR FIBERSWIPER
PID - 400166898
2014 AT&T Intellectual Property. All rights reserved.
92
AT&T
Practice
ATT-TP-76417
Issue 3, 10/08/14
13.2.7.1. User Instructions for FiberSwiper
Use the following instructions along with the corresponding illustrations for the FiberSwiper connector cleaner.
NOTE: Inspection of connector must be performed before and after cleaning.
1.
Using the built in thumb slot, remove the lid from the base.
2.
Remove one cleaning card from the base.
3.
Turn the lid upside down to expose the pad and slide back on to the base.
4.
Insert the cleaning card into the lid over the pad, by sliding it into the side rails.
5.
Place the entire unit on a flat surface with the cleaning card facing up and remove the plastic protecting shield
from the cleaning slot to be used.
6.
With the end face of the connector
7.
A.
For UPC connectors (almost all of what AT&T uses) hold the connector perpendicular to the cleaning
surface, place the connector into one end of the slot, twist one half turn while applying slight downward
pressure, and then swipe along the slot to the opposite end using slight pressure.
B.
For APC connectors hold the connector at a slight angle (as seen below in B) and orient the connector with
key on the left and then swipe along the slot to the opposite end using slight pressure
Re-inspect
Figure 71: FiberSwiper Cleaning Illustrations
2014 AT&T Intellectual Property. All rights reserved.
93
AT&T
Practice
ATT-TP-76417
Issue 3, 10/08/14
2014 AT&T Intellectual Property. All rights reserved.
94
AT&T
Practice
ATT-TP-76417
Issue 3, 10/08/14
13.2.8. In-situ Connector Cleaner SC
Most fiber panels have alignment sleeves that mate the two male connectors with one another at the panel wall. There
are other instances where the male connector seats into a female connector (especially on network equipment). When
a female connector is present, another cleaner product needs to be used for this purpose. The male connectors, In-situ
connectors and the alignment sleeve must be cleaned before the connection is made. This is primarily a Dry Clean
product however it can also be used when dampened with alcohol without adverse effects to the cleaner tip.
NOTE: This item can also be used for cleaning Alignment Sleeves and Ferrules .
Figure 72: Connector Cleaner SC
Ordering Information Item is Non-Stock.
DESCRIPTION - CLEANER SPLIT SLEEVE TIP
# OF Wipes Per Pack 5
NARRATIVE - Designed to clean hard to reach areas and 2.5MM adapters. No alcohol or solvents necessary.
PID - 301053468
13.2.8.1. User Instructions for In-Situ Connector Cleaner SC
NOTE: Inspection of connector must be performed before and after cleaning.
NOTE: Please keep opened packages of swabs in separate clean and moisture free bag. This bag could be placed
inside a larger bag of cleaning materials to keep all together with the exception of alcohol cleaners.
2014 AT&T Intellectual Property. All rights reserved.
95
AT&T
Practice
ATT-TP-76417
Issue 3, 10/08/14
Figure 73: In-situ Cleaning
1.
Check tip of cleaner for obvious defects (i.e. rip of white cloth, contamination or foreign objects adhered to the
white cloth or body).
2.
Insert the cleaner into the sleeve parallel to the sides and without touching the sides.
3.
Press firmly (200 - 300 g) but do not bend stick.
NOTE: A torn cloth can expose the fiber to damage.
4.
Rotate the stick (clockwise only) 4 - 5 times while pressing as above.
NOTE: Never rotate the stick in a counter clockwise direction.
5.
Continue to rotate stick while withdrawing from sleeve.
6.
Used Cleaner must be discarded after a single use. Do not perform a second wiping with this stick.
2014 AT&T Intellectual Property. All rights reserved.
96
AT&T
Practice
ATT-TP-76417
Issue 3, 10/08/14
13.2.9. In-Situ Connector Cleaner LC
Most fiber panels have alignment sleeves that mate the two male connectors with one another at the panel wall. There
are other instances where the male connector seats into a female connector (especially on network equipment). When
a female connector is present, another cleaner product needs to be used for this purpose. The female, male connectors and the alignment sleeve must be cleaned before the connection is made. This is primarily a Dry Clean product
however it can also be used when dampened with alcohol without adverse effects to the cleaner tip.
NOTE: This item can also be used for cleaning Alignment Sleeves and Ferrules .
Figure 74: Connector Cleaner LC
Ordering Information Item is Non-Stock.
DESCRIPTION - CLEANER SPLIT SLEEVE TIP FOR LC
# OF Wipes Per Pack 5
NARRATIVE - Designed to clean hard to reach areas and 1.25MM adapters. No alcohol or solvents necessary.
PID - 301116471
13.2.9.1. User Instructions for In-Situ Connector Cleaner LC
NOTE: Inspection of connector must be performed before and after cleaning.
NOTE: Please keep opened packages of swabs in separate clean and moisture free bag. This bag could be placed
inside a larger bag of cleaning materials to keep all together with the exception of alcohol cleaners.
2014 AT&T Intellectual Property. All rights reserved.
97
AT&T
Practice
ATT-TP-76417
Issue 3, 10/08/14
Figure 75: In-Situ Cleaning
1.
Check tip of cleaner for obvious defects (i.e. rip of white cloth, contamination or foreign objects adhered to the
white cloth or body).
2.
Insert the cleaner into the sleeve parallel to the sides and without touching the sides.
3.
Press firmly (200 - 300 g) but do not bend stick.
NOTE: A torn cloth can expose the fiber to damage.
4.
Rotate the stick (clockwise only) 4 - 5 times while pressing as above.
NOTE: Never rotate the stick in a counter clockwise direction.
5.
Continue to rotate stick while withdrawing from sleeve.
6.
Used Cleaner must be discarded after a single use. Do not perform a second wiping with this stick.
2014 AT&T Intellectual Property. All rights reserved.
98
AT&T
Practice
ATT-TP-76417
Issue 3, 10/08/14
13.3. Wet Cleaning Products
IMPORTANT: Wet cleaning of fiber end faces shall only be used after 3 dry cleaning attempts have
failed to produce acceptable results. Wet cleaning must always be followed by dry cleaning before the
liquid has a chance to dry.
13.3.1. Cleaner Fiber Wipe Premoistened
If an alcohol based cleaning material is used, the pre-moistened wipe is the preferred item in order to reduce contamination. This is a pre-moistened, lint-free, non-abrasive 3" x 4" wipe saturated with 99% Isopropyl Alcohol and 1%
deionized water.
CAUTION: Do not store where temperatures may exceed 120o F/49o C. Prolonged exposure to
sunlight or other sources of heat can cause bursting of packet. Chemical contact with flames or very
hot surfaces can cause ignition.
Figure 76: Pre-Moistened (Alcohol) Wipes
Ordering Information Item is Non-Stock.
DESCRIPTION - CLEANER FIBER WIPE PREMOISTENED 200 CASE
# OF Wipes Per Pack 400
NARRATIVE - PreMoistened Individually wrapped wipes.
PID - 300079076
2014 AT&T Intellectual Property. All rights reserved.
99
AT&T
Practice
ATT-TP-76417
Issue 3, 10/08/14
13.3.1.1. User Instructions for Cleaner Fiber Wipe Premoistened
NOTE: Inspection of connector must be performed before and after cleaning.
1.
The user must have a Dry Type cleaner (i.e. Alcoa FCC-02R Fiber Optic Connector Cleaner immediately available for use.
2.
Open a PreMoistened Individually wrapped wipe by tearing or cutting across the top of the package.
3.
Grasp the wipe by one corner and carefully remove from package while avoiding contact with one side of the
wipe.
4.
Do not unfold wipe. This provides a padding to avoid excessive pressure against the connector end face and
provides protection from contamination such as oils from hands.
5.
Either hold the wipe in your hand or place on a suitable flat surface. (Avoid prolonged contact with Alcohol)
6.
Choose a path near one edge, place connector in contact with the wipe at one end, twist the connector one
quarter turn clockwise, then one quarter turn counter clockwise, and wipe the connector along the length of the
pad. (See Figure “Premoistened Wipe Usage”)
7.
Choose a path near the opposite edge , place connector in contact with the wipe at one end, twist the connector
one quarter turn clockwise, then one quarter turn counter clockwise, and wipe the connector along the length of
the pad a second time. (See Figure “Premoistened Wipe Usage”)
8.
Immediately (Do Not allow the connector to air dry) use a Dry Type cleaner such as Alcoa FCC-02R Fiber Optic
Connector Cleaner to dry the connector end face.
9.
Dispose of PreMoistened Individually wrapped wipe.
Figure 77: Pre-Moistened Wipe Usage
2014 AT&T Intellectual Property. All rights reserved.
100
AT&T
Practice
ATT-TP-76417
Issue 3, 10/08/14
13.3.2. Wet Cleaning an MPO Connector with MPO Cleaner
Figure 78: MPO Cleaner Wet/Dry Clean
13.3.3. Wet Cleaning an SC Connector In Adapter with the Ferrule-Mate
SFM-250
NOTE: Inspection of connector must be performed before and after cleaning.
Note: Place all protective caps removed from adapters into a clean anti-static bag.
2014 AT&T Intellectual Property. All rights reserved.
101
AT&T
Practice
ATT-TP-76417
Issue 3, 10/08/14
Figure 79: Wet Cleaning an SC Connector with the Ferrule-Mate SFM-250
2014 AT&T Intellectual Property. All rights reserved.
102
AT&T
Practice
ATT-TP-76417
Issue 3, 10/08/14
13.3.4. Wet Cleaning an LC Connector In Adapter with the Ferrule-Mate
SFM-125
NOTE: Inspection of connector must be performed before and after cleaning.
Note: Place all protective caps removed from adapters into a clean anti-static bag.
Figure 80: Wet Cleaning an LC Connector with the Ferrule-Mate SFM-125
2014 AT&T Intellectual Property. All rights reserved.
103
AT&T
Practice
ATT-TP-76417
Issue 3, 10/08/14
13.3.5. Female Connector Cleaner SC or LC
Use the same Swabs that are used for Dry Cleaning Cleaner Fiber Wipe Premoistened .
13.3.6. User Instructions for Female Connector Cleaner SC or LC
NOTE: Inspection of connector must be performed before and after cleaning.
1.
Determine if an SC or LC In-situ Connector Cleaner is needed and have at least two ready for use.
2.
Check tip of In-Situ Connector Cleaner for obvious defects (i.e. rip of white cloth, contamination or foreign objects
adhered to the white cloth or body).
3.
Lightly dampen white cloth on tip with alcohol. This may be accomplished by:
A.
Open a “Cleaner Fiber Wipe Premoistened” as seen above (do not remove wipe from foil package).
B.
Insert white cloth tip of the In-Situ Connector Cleaner into the package between folds of alcohol wipe if
possible and squeeze firmly (this will apply a sufficient amount of alcohol).
C.
Withdraw the In-Situ Connector Cleaner and place Cleaner Fiber Wipe Premoistened and package aside.
NOTE: An alternate method would be to use one of the two products listed under “Bottled Alcohol”. Only a single
drop shall be applied to the cleaner.
4.
Insert the cleaner into the adapter sleeve parallel to the sides and without touching the sides.
5.
Press firmly (200 - 300 g) but do not bend stick.
NOTE: A torn cloth can expose the fiber to damage.
6.
Rotate the stick (clockwise only) 4 - 5 times while pressing as above.
NOTE: Never rotate the stick in a counter clockwise direction.
7.
Continue to rotate In-Situ Connector Cleaner while withdrawing from sleeve.
8.
Immediately use a second In-Situ Connector Cleaner to perform a Dry Cleaning operation using instructions in
either the instructions found in “In-Situ Connector Cleaner LC” or “In-Situ Connector Cleaner SC” section of this
document.
9.
Used In-Situ Connector Cleaner must be discarded after a single use. Do not perform a second wiping with this
stick.
2014 AT&T Intellectual Property. All rights reserved.
104
AT&T
Practice
ATT-TP-76417
Issue 3, 10/08/14
NOTE: Over saturating the swab with alcohol could result in excess liquid being dropped inside
the Alignment Sleeve which could cause negative results.
CAUTION: Only AT&T Approved For Use Test Sets and Cleaning Supplies Shall be Used For These
Procedures
2014 AT&T Intellectual Property. All rights reserved.
105
AT&T
Practice
ATT-TP-76417
Issue 3, 10/08/14
14. Miscellaneous Cleaning Procedures
CAUTION: Inspection shall ALWAYS precede cleaning or mating of optical connectors to prevent
damage or contamination of the connector.
Fiber optic connectors must be inspected and cleaned before every mating in order to insure optimum performance. If
a clean dust cap is placed on a connector, the end face must still be inspected prior to mating or installation.
Alignment sleeves and adapter housings must be cleaned if they have been contaminated with a dirty connector.
If a connector is mated while contaminated, especially with hard contaminant particles, fiber end-face damage may
occur or the contaminant may get firmly bonded to the fiber end-face. This type of contaminant requires polishing to
remove the contamination.
14.1. Procedures
This section is divided into the two parts:
•
Adapter or Bulkhead Cleaning
•
Ferrule Cleaning
14.1.1. Adapter Cleaning
This section applies to the cleaning of unmated single ferrule fiber optic adapters (The metal or plastic body that mates
two connectors of same or different types). The process steps described in this section are for the blind cleaning of an
adapter sleeve.
This section is further divided into two sections:
2014 AT&T Intellectual Property. All rights reserved.
106
AT&T
Practice
ATT-TP-76417
Issue 3, 10/08/14
•
Single Ferrule adapter Cleaning
•
Multi-Ferrule adapter Cleaning
2014 AT&T Intellectual Property. All rights reserved.
107
AT&T
Practice
ATT-TP-76417
Issue 3, 10/08/14
14.1.1.1. Single Ferrule Adapter Cleaning
Refer to figure “Cleaning Alignment Sleeve” for a picture view of single ferrule adapter cleaning. Refer to In-Situ
Connector Cleaner LC or In-Situ Connector Cleaner SC for recommended cleaning supplies.
Figure 81: Cleaning Alignment Sleeve
1.
Remove the protective caps from the adapter housing and store in a clean ESD plastic bag.
2.
Take a new and clean alignment sleeve cleaner (swab) and insert into the adapter.
3.
The alignment sleeve is slightly larger than the Cleaning Swab so it must be pressed against the side very lightly
while maintaining contact along the length of the sides of the adapter and moved around the circumference.
Note: Excessive pressure on the swab toward the side of the alignment sleeve can cause bending and loss of
contact inside the adapter.
4.
Remove the swab from the adapter.
5.
If the adapter is not to be used immediately, place clean dust caps on. Otherwise, insert clean connectors into the
adapter.
Important Notes:
•
Solvents (i.e. IPA) or compressed air shall not be used for adapter cleaning.
2014 AT&T Intellectual Property. All rights reserved.
108
AT&T
Practice
ATT-TP-76417
Issue 3, 10/08/14
•
Each swab is used once and disposed of to reduce the risk of cross-contamination between adapters.
2014 AT&T Intellectual Property. All rights reserved.
109
AT&T
Practice
ATT-TP-76417
Issue 3, 10/08/14
14.1.1.2. Multi-Ferrule Adapter Cleaning
Refer to figure “Multiple Fiber Ferrule” for a view of multi-fiber ferrule adapter cleaning. Refer to In-Situ Connector
Cleaner LC or In-Situ Connector Cleaner SC for suggestions of recommended cleaning supplies.
Figure 82: Multiple Ferrule Adapter
This section applies to the cleaning of unmated multi-ferrule fiber optic adapter. The process steps described in this
section are for the blind cleaning of the adapter as there are currently no tools to inspect the cleanliness of the adapter
sleeve.
1.
Remove the protective caps from the adapter housing and store in a clean ESD plastic bag until the cleaning of
the adapter housing and alignment sleeve is completed.
2.
Take a new, clean alignment sleeve cleaner (swab) and insert into the adapter to clean all the internal surfaces of
the adapter. Check for any apparent dirt remaining in the adapter. Repeat the process if necessary.
3.
If the adapter is not to be used immediately, place a clean dust cap on the adapter. Otherwise, insert a clean
connector into the adapter.
Important Note: • Solvents (i.e. IPA) shall not be used for adapter cleaning, as there is no way to determine if
residues are still present after cleaning and the solvent could get trapped in the many crevices of the adapter.
2014 AT&T Intellectual Property. All rights reserved.
110
AT&T
Practice
ATT-TP-76417
Issue 3, 10/08/14
14.1.2. Ferrule Cleaning Single
Refer to figure “Cleaning the Ferrule” for a view of single ferrule cleaning. Refer to In-Situ Connector Cleaner LC or InSitu Connector Cleaner SC for suggestions of recommended cleaning supplies.
Figure 83: Cleaning the Ferrule
1.
Remove the protective caps from the ferrule and store in a clean ESD plastic bag until cleaning the ferrule is
completed.
2.
Take a new and clean swab and place the side of the swab against the side of the Ferrule as shown in the figure
above.
3.
Move the swab counter clockwise around the Ferrule while twisting the swab clockwise.
2014 AT&T Intellectual Property. All rights reserved.
111
AT&T
Practice
ATT-TP-76417
Issue 3, 10/08/14
15. Contact List
Name
ATTUID
Phone #
Department / Responsibility
Mike Yeilding
my1515
(858) 621-4651
NP&E - GES/Principal - Product Development Engineer
Don Mitrano
dm1614
(718) 520-5170
NP&E - GES/Principal - Product Development Engineer
16. Revision Log
DATE
ISSUE
DESCRIPTION
3
Complete re-write of Section 9 - Inspection Test and Optical Loss Recording Documentation Examples and
Section 10 - Fiber Connector Inspection Documentation Requirements.
9/24/2014
2
Changed sketch 77, 78, 79 & 80 references on pages 40 and 41 to figures
27, 28, 29 &30 on same pages respectively.
9/8/2014
1
Initial Issue
10/7/2014
Revision Log
Issue Number
Date
Description
3
10/08/14
2014 AT&T Intellectual Property. All rights reserved.
112
Published By
my1515
AT&T
Practice
ATT-TP-76417
Issue 3, 10/08/14
2
09/24/14
1
09/08/14
my1515
Initial Release
Acronyms
A.1. DOCUMENT SPECIFIC ACRONYMS
N/A
A.2. NETWORK ACRONYMS DICTIONARY
Refer to ATT-000-000-020, Network Acronyms Dictionary.
2014 AT&T Intellectual Property. All rights reserved.
113
my1515

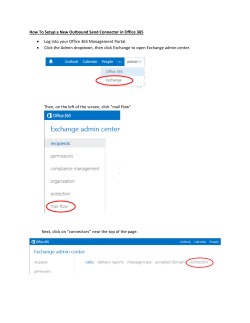
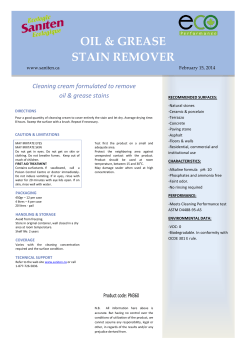


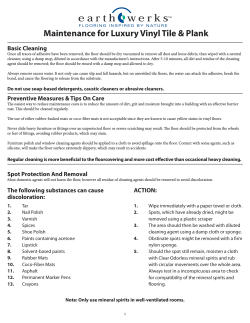


© Copyright 2026