
USER GUIDE for Marketing Publishing
USER GUIDE for Marketing Advertising Mail • Sustainable® Advertising Mail Publishing Publishing Mail General Correspondence Business Mail 1st Class • Business Mail MACHINE-READABLE (Mailmark™ barcode) Mailmark™ barcode machine-readable letters and large letters Effective for Royal Mail Mailmark® mailings Issued 31st March 2014 Effective from 31st March 2014 Issued: 31st March 2014 / Effective: 31st March 2014 Page 1 MACHINE-READABLE (Mailmark™ barcode) Mailmark™ barcode machine-readable letters and large letters Contents 1. Introduction..................................................................................................................... 3 2. Products which can be sent as Mailmark™ barcode enabled machine-readable letters 4 3. Products which can be sent as Mailmark™ barcode enabled machine-readable large letters .................................................................................................................................. 4 4. Quality Assurance Process .............................................................................................. 5 5. Address Quality ............................................................................................................... 6 6. Addressing standards...................................................................................................... 7 7. Addressing structure and layout ................................................................................... 10 8. Fonts ............................................................................................................................. 11 9. Punctuation ................................................................................................................... 13 10. Delivery Address Block recommendations for Mailmark™ barcode letter and large letter formats .................................................................................................................... 14 11. Delivery Address Block clear zone for Mailmark™ barcode letter and large letter postings ............................................................................................................................. 16 12. Return Addresses ........................................................................................................ 19 13. Business Mail 1st Class and Business Mail with Machine-readable Advanced options (Business Mail Advanced or BMA) ..................................................................................... 20 14. Mailmark™ barcode enabled letter format mail piece specification .......................... 25 15. Mailmark™ barcode specifications.............................................................................. 40 16. Mailmark barcode enabled large letter format mail piece specification .................... 48 Royal Mail, the cruciform, Royal Mail Advertising Mail, Sustainable, Royal Mail Publishing Mail, Royal Mail Business Mail, Royal Mail Mailmark and Mailmark are trade marks of Royal Mail Group Ltd. © Copyright Royal Mail Group Ltd 2014. All rights reserved. Royal Mail Group Limited, registered in England and Wales, number 4138203, registered office: 100 Victoria Embankment, London, EC4Y 0HQ. Issued: 31st March 2014 / Effective: 31st March 2014 Page 2 1. Introduction PLEASE NOTE: References in this section to the 'user guide' are references to the 'User Guide - Effective for Royal Mail Mailmark® Mailings' (found at www.royalmail.com/mailmark), unless stated otherwise. You can reduce the cost of your letter and large letter format mailings by making them machinereadable. This section of the user guide sets out the design and technical requirements and recommendations to enable you to meet the Mailmark™ barcode specifications for letter formats and large letter formats. The Mailmark™ barcode option has been designed for machine-readable items. It is not to be used with items that require manual handling. For full product and presentation requirements please refer to the specific product sections of the user guide for your chosen product. Please note that some of the Mailmark™ barcode elements and specifications within this section are recommendations and not requirements. The Mailmark™ option allows the performance of your mailing to be monitored and measured by the addition of a Mailmark™ barcode to your items. This enables Batch level reporting with item level exceptions and so gives you greater transparency of mailings. Whilst using the Mailmark™ option does permit some flexibility, complying with our recommendations in this section of the user guide will ensure that the performance of your mailing is maximised. Mailmark™ requirements Requirements set out in this section of the user guide are those that you absolutely must meet in order to access the Mailmark™ option. Failure to do so may lead to an error surcharge or reversion irrespective of the item's performance. Mailmark™ recommendations Recommended mailing item elements are those that we strongly recommend you comply with, but do not need to be strictly abided by. You acknowledge that, where you you have not followed our Mailmark™ barcode specification recommendations, and we can link poor Batch level or mailing item performance to that, you may be invoiced an error surcharge that covers the operational costs associated with sub-optimal operation. Using this section For your ease of use this section of the user guide sets out: generic requirement and recommendations for address quality, address standards, font and print quality etc specific advice for: st • Business Mail 1 Class and Business Mail with machine-readable Advanced options • Mailmark™ barcode letters • Mailmark™ barcode large letters Issued: 31st March 2014 / Effective: 31st March 2014 Page 3 2. Products which can be sent as Mailmark™ barcode enabled machine-readable letters Category Product Name Marketing Products Advertising Mail™ Non Sorted Low Sort Sustainable® Advertising Mail Low Sort (Entry Level) Low Sort (Intermediate Level) Business Mail 1st Class Non Sorted Low Sort Business Mail Non Sorted Low Sort General Correspondence Options 3. Products which can be sent as Mailmark™ barcode enabled machine-readable large letters Category Product Name Marketing Products Advertising Mail Non Sorted Low Sort Sustainable Advertising Mail Low Sort (Entry Level) Low Sort (Intermediate Level) Publishing Mail Low Sort Business Mail 1st Class Non Sorted Low Sort Business Mail Non Sorted Low Sort Publishing Products General Correspondence Options Please note: For Low Sort item choices, you can send your machine-readable large letters using the segregated bundles option. Please refer to the 'Containerisation' section of the user guide for full details. Issued: 31st March 2014 / Effective: 31st March 2014 Page 4 4. Quality Assurance Process When using the Mailmark™ option we are able to assess the performance of your mailing. There is therefore no need for an upfront accreditation check of your mail piece design or address, postcode and Delivery Point Suffix 1 (DPS) accuracy. You need to be able to create and apply Mailmark™ barcodes to your items and you must be able to create and upload eManifests to the eManifest Handling System. If you would like to check that you can do so successfully please contact us for support at [email protected]. For our Advertising Mail & Sustainable Advertising Mail you will need to supply us with evidence that you have adhered to certain data, use of sustainable resources and recyclability requirements amongst other things. Please see the 'Advertising Mail' and 'Sustainable Advertising Mail' sections of this user guide for more detail. 1 A DPS indicates the particular premises within the set that have the same postcode Issued: 31st March 2014 / Effective: 31st March 2014 Page 5 5. Address Quality There is no minimum level of address and postcode accuracy for Business Mail 1st Class, Business Mail and Publishing Mail Mailmark™ barcode enabled mailings but this does not mean that address quality is not important and every item should have a full and accurate address and postcode. The performance of your mailing is optimised when: each mail piece is well designed the address and postcode on the item is consistent with the postcode and DPS in the Mailmark™ barcode on the mail piece and in the eManifest ® all address, postcode and DPS elements match the correct record held in PAF Our sorting machines use PAF® as one source of data to successfully sort and sequence your mail pieces without manual or other intervention. This is why we advise you to ensure that as many mail pieces as possible in your mailing have a correct address, postcode & DPS that are accurately matched to PAF®. We expect our sorting machines to call on other sources of data to be able to sort and sequence a greater proportion of mail pieces in a mailing than are fully and accurately matched to PAF®. If, however, poor mail piece design or poor address accuracy mean that Mailmark™ barcode items require manual or other intervention then a surcharge may be payable or appropriate pricing adjustment may be made. If address and postcode accuracy drops below 90% (or 95% for Sustainable Advertising Mail Intermediate) when compared to PAF® you may see an invoice adjustment to cover the costs of us conveying poorly addressed mail pieces. Issued: 31st March 2014 / Effective: 31st March 2014 Page 6 6. Addressing standards Addressing inland mail So that an item can be correctly delivered it is required that a delivery address is present on every mail piece (on the same side as the payment indicator) and contains at least: 1. the recipient’s name (unless the service in question requires all mail pieces to be sent to named recipients this can be ‘The Occupier’ or similar) 2. the geographic address which consists of: one of the following premise elements: • organisation (e.g. Royal Mail) • sub-building (e.g. South Wing) • building number (e.g. 34) • building name (Bell House) one of the following thoroughfare elements: • Dependent thoroughfare (e.g. 1 Acacia Avenue)) • Thoroughfare (e.g. Western Road) one of the following locality information elements: • Double dependent locality (e.g. Otterley) • Dependent locality (e.g. Hedge End) • Post Town (e.g. OXFORD), and 3. the postcode Other elements may be included. If there is no thoroughfare element contained in the PAF® this need not be included. The Delivery Address Block may optionally contain an additional single line of mailer defined information (MDI) (for example a reference number or SSC) immediately above the recipient’s name on a single line. mailer defined information* Recipient element Premise elements Thoroughfare elements Locality elements Postcode This MDI is optional e.g. ZW4367 Name Title Organisation Sub-building Building name Building number Dependent thoroughfare Thoroughfare Double dependent locality Dependent locality Post Town Postcode D Faydherbe Operations Director Royal Mail South Wing Bell House B 25 Bell Complex 1 Acacia Avenue Western Road Otterley Hedge End OXFORD OX4 5ZZ *see address structure and layout for details on mailer defined information Issued: 31st March 2014 / Effective: 31st March 2014 Page 7 To optimise the performance of your Mailmark™ barcode enabled mailing we recommend that every mail piece has an address set out in a manner that makes them machine readable. We recommend you ensure that: no element is wrapped over two or more lines where two elements appear on the same line (e.g. premise and thoroughfare elements (e.g. 300 Western Road)) they are only separated by one or two character spaces no two elements are separated by punctuation no two words are more than 5mm apart there are no blank lines all lines in the Delivery Address Block are left justified the post town is on a line of its own the postcode is the last element of the delivery address and is on a line of its own the County is not included the Country is not included The recommended layout for the last two lines of a delivery address is set out below: Post Town POSTCODE The following layouts are not recommended but are acceptable as long as there is no other text on the front of the mail piece or insert 2 that looks like an address Post Town County POSTCODE County POSTCODE Post Town County POSTCODE Thoroughfare or Locality element Post Town POSTCODE Premise elements You must include at least one of the four Premise elements, so that a single delivery point is defined. You don’t have to include all the premise elements, even if they are included in PAF®, but building numbers must be applied on the same line as the Dependent thoroughfare or Thoroughfare information. Organisation Royal Mail Sub-building South Wing Building name Bell House Building number B 25 Bell Complex 2 includes any areas of an insert which may appear in the window of the mail item arising from insert movement Issued: 31st March 2014 / Effective: 31st March 2014 Page 8 Thoroughfare elements PAF® will give one of three possible combinations but please note that: 1. the Dependent thoroughfare descriptor (Avenue, Road, Street, Lane, etc.) must be applied on the same line as the Dependent thoroughfare information (e.g. Acacia) 2. the Thoroughfare descriptor (Road, Street, Lane, etc.) must be applied on same line as the Thoroughfare information (e.g. Western). Please note that: if there is no Thoroughfare there is no need to include anything in this part of the address if there is a Thoroughfare but not a Dependent thoroughfare then include the Thoroughfare if there is both a Dependent thoroughfare and a Thoroughfare then include the former. If 3. space allows you can also include the Thoroughfare, though it’s not compulsory building numbers must be applied on the same line as the Dependant thoroughfare or Thoroughfare information Dependent thoroughfare 1 Acacia Avenue Thoroughfare Western Road Locality elements You must include at least one locality element. You don't have to include them all, even if they are included in PAF®. To optimise the performance of your Mailmark™ enabled mailing we recommend that you include the Post Town and that every Post Town has the first character(s) in capital letters (e.g. Coventry, Milton Keynes, Ross-On-Wye). Double dependent locality Otterley Dependent locality Hedge End Post Town OXFORD Postcode To optimise the performance of your Mailmark™ barcode enabled mailing we recommend that: every delivery address contains the full and accurate postcode. In order to be full and accurate the postcode must be able to generate an address from PAF® which can be matched to the minimum requirements above (at least one premise element, one thoroughfare element and one locality element). there must be one or two character spaces between the two parts of the postcode. Typically, the first part (i.e. OX4) is the outward code and this identifies a post town or a district within a post town, the second (i.e. 5ZZ) is the inward code which represents the street information. The postcode should always appear in UPPER CASE letters and numerals on the last line of the delivery address. Post Town OXFORD Postcode OX4 5ZZ Issued: 31st March 2014 / Effective: 31st March 2014 Page 9 7. Addressing structure and layout The following three elements of an address, when combined, are classed as the Delivery Address Block: 1. mailer defined information – this is an optional line of reference information printed as part of the Delivery Address Block 2. recipient details 3. geographical address and postcode There must only be one Delivery Address Block on the item and it must be on the same side as the payment indicia used. Issued: 31st March 2014 / Effective: 31st March 2014 Page 10 8. Fonts There are a variety of fonts you can use, but to optimise the performance of your Mailmark™ barcode enabled mailing we recommend you use one font from the list set out in the 'Preferred Fonts' table wherever possible. We also recommend you regularly check the quality of your print output for clarity. It is recommended that: you do not use any serif, handwritten, italic, script, bold or underlined fonts or the computer zero symbol Ǿ the font is of the same size, type, colour and in the case of large letter postings, larger than that used in any return address information. Non-proportionally spaced fonts are preferred as is addressing in Title Case (with the postcode always in numerals and UPPER CASE letters) you use fonts or Typefaces with the following characteristics: • size – Height: 2mm min; 7mm max. Width: 7mm max • dimension – minimum ratio of lower case height (b) to upper case height (a) of between 2:3 and 3:4. A ratio of width (c) to height (a) of approximately 2:3 • consistency – each line of the address should be of the same typeface and size • quality – characters should be complete, clear, uniform and of high resolution, with individual stroke thickness of between 8% and 16% of the height of the character the material on which the delivery address is printed: • is at least 35% in the red region (600nm) when measured by a spectral reflectometer • is white, cream, buff or other light or pastel shade that has a minimum reflectance difference of at least 30% contrast – there should be a contrast between the characters and the background on which they are printed of at least 50% (55% if it is to be read through a window). Please note, positive contrast or inverse printing (address block lighter than the background) is not permitted character spacing – there should be a fixed pitch of between 10 and 12 characters per inch (or between 10 and 12 point size), with clear vertical gaps of at least 0.25mm between the extremities of adjacent characters if you are using proportionally spaced text, you keep spacing of at least +0.75, as this significantly improves the rate at which addresses can be read line spacing – you should have uniform spacing between all lines of the address, of at least 1mm 4mm and there are no blank lines Issued: 31st March 2014 / Effective: 31st March 2014 Page 11 Preferred Fonts Non-Proportionally Spaced Preferred Fonts (7) Size 10-12pt Acceptable Proportionally Spaced Fonts (22) Size 10- 12pt Courier Courier New letter Gothic Lucida Console Lucida Sans Typewriter OCR B Word Gothic Arial Avant Garde Calibri Estrangelo Edessa Eurostile Frankfurt Gothic Franklin Gothic (Book) Gautami Geneva Gill Sans Helvetica Issued: 31st March 2014 / Effective: 31st March 2014 Latha Lucida Sans Mangal News Gothic MT Optima Ravi Shruti Trebuchet MS Tunga Univers Ve r d a n a Page 12 9. Punctuation To optimise the performance of your Mailmark™ barcode enabled mailing we recommend that: punctuation and non-alpha numeric symbols are only used in the delivery address where it appears in the corresponding PAF® record. For full details on allowable punctuation within a PAF® record please see PAF Digest, available from www.royalmail.com or contact a member of your account team outside of the delivery address and postcode, punctuation is only used in the recipient’s name, title, department or in the mailer defined information (MDI) above the address within the Delivery Address Block punctuation is not used to separate address elements or components within an address element Alternatively, you may remove all punctuation from the address, even if it is contained in the corresponding PAF® record. Issued: 31st March 2014 / Effective: 31st March 2014 Page 13 10. Delivery Address Block recommendations for Mailmark™ barcode letter and large letter formats The Delivery Address Block is defined by having an imaginary rectangle drawn around the outer extremities of the address including the recipient's name and, where included, the MDI. Letter format items To optimise the performance of your Mailmark™ barcode enabled mailing we recommend that the Delivery Address Block: is beneath and to the left of the indicia which must always appear in the top right hand corner of the mail piece, whether it is landscape or portrait is at least 15mm from the short edges of the mail piece is at least 18mm from the long edge of the mail piece furthest away from the indicia is at least 40mm from the long edge nearest the indicia if there is something else on the mail piece which looks like an address when positioned near the top, the postcode is at least 50mm from the long edge of the mail piece nearest to the indicia has edges that each are parallel with one of the four edges of the mail piece (i.e. it should not be skewed (i.e. squashed or stretched in any direction to form a parallelogram that does not have four 90 degree vertices)) or rotated (i.e. it retains four 90 degree corners but no longer has edges that are parallel with the edges of the mail piece) and we strongly recommend that the Delivery Address Block does not fall into the Route & Tag clear zone areas Large letter format items To optimise the performance of your Mailmark™ barcode enabled mailing we recommend that the Delivery Address Block: is beneath and to the left of the indicia which must always appear in the top right hand corner of the mail piece whether it is landscape or portrait is at least 40mm from the top edge of the mail piece is at least 15mm from the left and right edges of the mail piece and we strongly recommend that the Delivery Address Block does not fall into the Tag clear zone area Please note: We recomend that there is no more than 20mm of excess poly along one short edge and along one long edge of the item (i.e. when the insert is tapped into a corner of the wrap, there is a maxiumum of 20mm excess poly along one short edge and along one long edge). Please include the amount of excess poly in your calculations when working out the position of the Delivery Address Block. For example, if you have 10mm of excess poly then please make sure the Delivery Address block is at least 25mm (10mm for excess poly plus standard 15mm recommendation) from the left and right edges of the mail piece. For letter and large letter formats where you have chosen to have MDI we recommend that it: is in a single line which has no more than sixty-four characters is above the recipient’s name is left justified and aligned with the rest of the elements in the Delivery Address Block maintains the same line spacing as the rest of the Delivery Address Block uses typeface as opposed to pictures or non-typeface graphics It is a requirement that you do not include any type of barcode as MDI above the recipient’s name. Issued: 31st March 2014 / Effective: 31st March 2014 Page 14 Please note: You may wish to use the spare space available within the 2D data matrix Mailmark™ barcode for MDI by placing the data you would put into a line of MDI into the spare space within the 2D data matrix Mailmark™ barcodes. You can place the 2D data matrix Mailmark™ adjacent to a Delivery Address Block similar to where you may place your pack reference numbers or SSC. Issued: 31st March 2014 / Effective: 31st March 2014 Page 15 11. Delivery Address Block clear zone for Mailmark™ barcode letter and large letter postings Recommendations to optimise the performance of your Mailmark™ barcode enabled mailing No other text/information that could be construed as a delivery address should be included on the front of the mail piece. This includes any areas of an insert which may appear in the window of the mail item arising from insert movement. with the exception of the Mailmark™ barcode (see next point), there should be a clear area of 5mm or more around the extremities of the full Delivery Address Block. By clear we mean clear of print, patterning, graphics or any text, including when the mail piece is tapped in turn on each of the four sides We anticipate that the most likely position for a Mailmark™ barcode to appear will be adjacent to the Delivery Address Block 3. A Mailmark™ barcode may encroach on the 5mm clear zone which is recommended around the Delivery Address Block but there must always (and, for clarity, this is a requirement, not a recommendation) be a clear zone of: at least 2mm between the Delivery Address Block and a 4-state Mailmark™ barcode at least 4 times the size of the modules in the Mailmark™ barcode between the Delivery Address Block and a 2D data matrix Mailmark™ barcode. A 2D data matrix is made up of modules and these can vary in size from 0.5mm and 0.7mm. The clear zone must therefore be at least 2mm when printed at 0.5mm and at least 2.8mm when printed at 0.7mm. If a Mailmark™ barcode is placed adjacent to the Delivery Address Block then the imaginary rectangle drawn around the outer extremities of the Mailmark™ and the Delivery Address Block forms the Delivery Address & Mailmark™ Block (Delivery Address & Mailmark™ Block). The following diagrams show the 2mm clear zone required between a 4-state Mailmark™ barcode and the Delivery Address Block (not to scale): For further information relating to Mailmark™ when not adjacent to the Delivery Address Block please see chapter 15 of this section of the user guide. Issued: 31st March 2014 / Effective: 31st March 2014 Page 16 3 Please note: The same principle applies to a gap between a 2D data matrix Mailmark™ barcode and the Delivery Address Block. It is mandatory that the Mailmark™ barcode and required clear zone remains visible at all times. The left, right, top and bottom edges of the Delivery Address Block must be at least 2mm away from the edge of any label, and, can only be this close, if there is a total of 5mm clear area between the left, right, top and bottom edges of the Delivery Address Block and any print, graphics or patterning on the envelope or any othe r surrounding material. Please note: There is a requirement for there always to be a gap of at least four times module size between a 2D data matrix Mailmark™ barcode and the edge of any label and there must always be a gap of 2mm between a 4-state Mailmark™ barcode and the edge of any label. For a 2D data matrix Mailmark™ barcode the clear zone must be at least 2mm when printed at 0.5mm and at least 2.8mm when printed at 0.7mm. Inserts where the Delivery Address Block or Delivery Address & Mailmark™ Block is on an insert within a window or viewed through polymer, the Delivery Address Block or Delivery Address & Mailmark™ Block (with the exception of the MDI (if present), Recipient’s name & title and Organisation name) must be fully visible, with the left, right and bottom edges of the Delivery Address Block or Delivery Address & Mailmark™ Block (with the exception of the MDI (if present), Recipient’s name & title and Organisation name) at least 2 mm away from the window edge or at least four times module size between a 2D data matrix Mailmark™ barcode and the edge of a window) if the Mailmark™ barcode appears directly below the Delivery Address Block no clear zone is required within the window above the Delivery Address & Mailmark™ Block. In this situation some or all of the MDI (if present), the Recipient’s name and title and the Organisation name may tap out of the window (to the top or to the right) as long as they are capable of being tapped back in there remains the recommendation of a 5mm clear zone around the top, bottom, left and right edges of the Delivery Address Block or Delivery Address & Mailmark™ Block, which is free from text, graphics or patterning. Therefore the clear zone recommendations that are not met within the window can be met through the provision of further clear zones on the envelope please note that the window edge itself is not considered an infringement of the 5mm Address Block clear zone but it is an infringement on the Mailmark™ clear zone no part of the Delivery Address Block (aside from the MDI (if present), Recipient’s name & title and Organisation name) should tap out of the window on a paper envelope or the ‘clear’ window area on a polymer envelope or polywrapped item Issued: 31st March 2014 / Effective: 31st March 2014 Page 17 During design, printing and enclosing, you should take into account the various tolerances associated with these processes to ensure that every mail piece within your mailing meets the recommendations set out in this chapter. The recommedations and requirements set in this chapter apply at all times, including after the mail item is tapped on any of its four edges to induce maximum insert movement. For clarification, please see the diagram below showing a Delivery Address Block with the 2mm and 5mm clear zones represented in a window (not to scale): The shaded area represents the section of the envelope Please note: Whilst the window edge within the 5mm zone should be clear of print, graphics or patterning, it can be any colour as long as it is clear, solid and meets the print contrast ratio recommendations. A Mailmark™ barcode may appear above, below, to the left or to the right of the Delivery Address Block and can appear (window size permitting) vertically as well as horizontally. It is recommended that the Mailmark™ barcode used is always parallel with one edge of the Delivery Address Block and with one edge of the mail piece. Issued: 31st March 2014 / Effective: 31st March 2014 Page 18 12. Return Addresses Requirements If customers would like us to return undeliverable items to them then they must include a return address on the outside of the mail piece in a manner that we can machine read them and this must have the words ‘Return Address’ on it’s own on the first line (in the position normally taken by the recipient’s name in a delivery address). Recommendations you should apply a valid UK return address to all your mail as this not only allows us to return items which cannot be delivered but helps you maintain accurate address files we recommend that the return address (if included): • is entirely within 40mm of the top of the mail piece (preferably the reverse but alternatively on the front) • is entirely at least 75mm from the right hand edge if on the front of the mail piece • includes all the elements of the geographic address, including the postcode, laid out below the ‘Return Address’ line of text and as per layout recommended for a delivery address • is, if on the front of the mail piece, made up of font that is smaller in size than the font that is used in the delivery address • is one of the non-proportional fonts that is recommended for the Delivery Address Block the postcode of the return address should be encoded into the Mailmark™ barcode (where the Mailmark™ barcode chosen has that data field) Please note: For mail pieces that are classified as large letters because they are thicker than 5mm, we will only be able to process returned items if the return address is placed on the reverse of the mail piece within 40mm of the top. Issued: 31st March 2014 / Effective: 31st March 2014 Page 19 13. Business Mail 1st Class and Business Mail with Machinereadable Advanced options (Business Mail Advanced or BMA) Specific requirements & recommendations 4 5 a licence plate must be printed on every envelope outer in your Business Mail 1st Class and Business Mail with Machine-readable Advanced option mailings. This can be done by yourself or your envelope supplier for BMA letters bearing a PPI (i.e. mailings posted on Account) the licence plate consists of licence text and a licence barcode. Your unique licence number appears in the licence text and is encoded in the licence barcode. The licence barcode also encodes information regarding the format of your mail pieces and service speed of your mailing for franked letters (i.e. posted through a meter) the licence plate consists only of the licence text that includes service name, class and your unique licence number. Licence barcodes are not required on franked BMA itelms. The franked impressions are printed using blue ink. Franked impression users can also use blue ink for other Royal Mail products The next generation of meter machines is now available from meter suppliers. These will print a new style of meter impression that includes a meter specific type of Mailmark™ barcode on each item that is franked through them. Machine-readable Advanced items franked through a meter must continue to show a machine-readable address and licence text 4 (but not licence barcode) alongside the new meter impression. The licence barcode is not required and must not be printed on Machine-readable Advanced items franked through a meter. please note that it is not possible for any meter to produce artwork that is required for BMA letters bearing a PPI 5 and licence barcode as meters cannot produce the required licence barcode you can use the same BMA licence number on envelopes, provided the same (and correct) Account number is used for that particular licence number, to post BMA mail from more than one posting site (for example where you may want to use a single set of printed envelopes). The discount you will receive will be based on the minimum volume threshold (for a discount) being achieved at each posting site, i.e. a discount will be available for each posting which reaches at least 500 items per posting site, per day. A discount will not be awarded on BMA postings which are less than 500 items per posting site, per day always use envelopes printed with a BMA licence number supplied by Royal Mail and the related licence barcode (for items posted on account). There will be one licence number for 1st Class and one for 2nd Class for PPI mailings (i.e. posted on Account) we strongly recommend that you use the Business Mail Advanced Artwork Generator which will produce a graphic of the PPI indicia, the licence plate text (including the licence number) and the related licence barcode although not recommended, you may create a PPI mail piece using the individual elements by downloading the PPI indicia and using an encoder to create the barcode. The sections below set out the information you will need if you choose to create your mail piece in this way 3 lines of text stating service used, class and licence number Previously some meter machines were used to produce the licence plate text required for PPI letters. Issued: 31st March 2014 / Effective: 31st March 2014 Page 20 licence plate (made up of licence text and licence barcode) position for PPI mail pieces (i.e. posted on Account): Please note: We will print route and tag codes in the location shown by the amber coloured barcodes above and below the address on the right hand side of the mail piece. Licence plate position for franked mail pieces (i.e. posted through a meter): Issued: 31st March 2014 / Effective: 31st March 2014 Page 21 Example of BMA meter impression and licence text when franked through a new generation meter machine: licence text requirements: • the licence number is contained within the licence text which will have the following key words and attributes: for First Class mailings: Advanced Mail First Class TEST-TEST-TEST and for Second Class mailings: Advanced Mail Second Class TEST-TEST-TEST • in the licence number (represented by alpha characters), the ‘TEST-TE is the Advanced licence ID and ‘ST-TEST’ are the related 'Reed-Solomon' error correction characters. There must be no spaces in the licence number (just hyphens). • the licence text sits within an imaginary box called the licence text box. This licence text box length (from left to right) must be greater or equal to 35mm and less than or equal to 50mm licence text box clear zone Make sure there is a clear zone around the licence text box (an imaginary box drawn around the licence text) (illustrated in figure on previous page by the larger box surrounding the smaller box with the licence text in it). The clear zone around the licence text box has to have these dimensions: • left and right (with a return address block or company logo): not less than 10mm • left and right (with no return address block or company logo): not less than 5mm • top: 10mm exact • bottom for PPI mail pieces (i.e. posted on Account): 5mm exact between the bottom of the licence plate text and the top of the licence plate barcode. • bottom for franked mail pieces (i.e. posted through a meter): not less than 10mm • a clear zone of 10mm left, right and above the licence plate text box is recommended • the left side of the licence plate should be between 135mm and 120mm from the right side of the mail piece. 135mm is recommended Issued: 31st March 2014 / Effective: 31st March 2014 Page 22 licence barcode clear zone Make sure there is a clear zone around the licence barcode (illustrated in figure above by the larger box surrounding the licence barcode) of 2mm on all sides. The top side of this clear zone can overlap with the bottom edge of the clear zone around the licence text. licence plate tolerance For both PPI and franked items, the licence plate has a vertical print tolerance of +/- 2mm and a horizontal tolerance of +/- 2mm. The licence plate must maintain the positional and clear zone constraints. printing requirements & recommendations: • PPI users should print the PPI, licence plate & Licence barcode in black ink • the easiest way to generate the PPI, the licence plate & Licence barcode is to the use the Artwork Generator design tool which is available on our website. We strongly recommend that you use the Artwork Generator to produce a graphic that should be placed in the top right hand corner of the item. • the following advice is for customer who choose not to use the Artwork generator design tool: The licence barcode is made up of encoded content which is outputted as a string of text that consists of four characters: D, A, F and T. A licence barcode font (called 4State Jack 1 Barcode 130319B.ttf – see below) is then applied which presents each character as a bar. D becomes a 'Descender' bar, A becomes an 'Ascender' bar, F becomes a 'Full' bar, and T becomes a 'Track' bar. An example of minimum and maximum dimensions is shown below: • the printing of the licence plate must be no more than +/-5° to the horizontal plane Issued: 31st March 2014 / Effective: 31st March 2014 Page 23 licence plate text specifications: • licence plate text must be 12pt with normal character spacing • the fonts for the entire licence plate must be: - OCR-B (preferred) - Letter Gothic - Lucida Console • text must be left justified • there must be no font mix within the licence plate • there must be no use of bold, italic or underlined text • the first character of each key word must be upper case, all other characters must be lower case • the licence number characters must be all upper case • the line spacing must be normal single line spacing • there must be no outline box • the licence number and correct characters will be subject to the following character set: ABCEGHJKLRSTUXYZ technical requirements: Please refer to the OCR requirements within the User Guide for size, thickness, weight, flexibility, material, paper colour, reflective difference, paper weight, absorbency, sealing, perforations (please note that no perforations are permitted along the long edge of the mail piece where the licence block is located), one piece mailers, advertising windows, opacity, reflectivity, addressing standards & location, definition of an address block and clear zones, window material & location, printing & print contrast, background, company logos, indicia area, clear zones, tag and route code zones, recommended addressing standards, address layout and fonts together with advice about punctuation. Please note the OCR address fonts, format and clear zones are recommended for our Machine-readable Unsorted Advanced product option to maximise the level of discounts received. They are not mandatory but non-OCR readable addresses can reduce the overall discount available from the mailing. return address: • with franked and PPI letters, you can print the return address block to the left of the Advanced licence plate, so long as you respect the clear zone. You may limit the line length of the return address block in order to achieve the clear zone tolerance • it is recommended that return addresses are on the back of the envelope Issued: 31st March 2014 / Effective: 31st March 2014 Page 24 14. Mailmark™ barcode enabled letter format mail piece specification Mail piece specification requirements mail pieces must be rectangular (oblong) or square all four sides of a mail piece must be straight the intersection of each side of a mail piece must be 90˚ Please note: Unless stated otherwise all other guidelines set out in this chapter 14 are recommendations. When posting ‘one piece mailers’ please refer to the relevant section for the sealing requirements. Flaps The opening flaps should be gummed and sealed as far along the edge as possible and that the remaining three edges are fully & totally sealed. The sealing recommendations vary depending on whether the mail pieces are presented in bags or trays. Sealing Tolerances Trayed Mail For DL and C5 letters with rectangular or trapezium shaped opening flaps presented in trays only, there is a recommended tolerance of up to 35mm from the left and right edges and 35mm from the top edge where the flaps do not have to be gummed or sealed. See figure 1a and figure 1b. Figure 1a - Envelope Flap Sealing – Trayed letters – Example 1 (not to scale): Issued: 31st March 2014 / Effective: 31st March 2014 Page 25 Figure 1b - Envelope Flap Sealing – Trayed letters – Example 1 (not to scale): Issued: 31st March 2014 / Effective: 31st March 2014 Page 26 Sealing Tolerances Bagged Mail For bagged DL and C5 letters with rectangular and trapezium shaped opening flaps there is a recommended tolerance of up to 25mm from the right and left edges and 35mm from the top edge where the flaps do not have to be gummed or sealed. See figure 2a and figure 2b. Figure 2a - Envelope Flap Sealing – Bagged letters - Example 1 (not to Scale): Figure 2b - Envelope Flap Sealing - Bagged letters - Example 2 (not to scale): Issued: 31st March 2014 / Effective: 31st March 2014 Page 27 Sealing Advice (for envelope edges, not including the closing flap) The objective is that the sealed side seams cannot easily be lifted. This is achieved if the glue is close enough to the edge. The envelope will have a fold and an opening flap. It should be sealed continuously and securely on the remaining sides which are not the closing flap i.e. the glue used to seal the sides must be in the form of a continuous seal and placed in such a position that the two elements of unglued paper cannot be easily lifted, separated, folded or torn. Inserts Items must not have contents that burst out of and cause damage to the envelope (or One Piece Mailer) or that move to such a degree that the envelope buckles as it passes through our machines. It is therefore recommended that the largest paper insert does not move as follows: for letters up to 2mm thick, no more than 30mm within the envelope or One Piece Mailer for letters over 2mm and up to 5mm thick, no more than 20mm within the envelope or One Piece Mailer for large letters which are 10g or more in weight no more than 20mm within the envelope The paper used for the insert should have an opacity value of at least 85% (BS ISO 2471) so that anything printed on the reverse of the insert does not interfere with the read of the delivery address or Mailmark™ barcode. Insert requirements You must not include any metal item in letters that is larger than a standard paperclip or staple as our machines will reject these items automatically. However, metal coins or discs (for example) are acceptable for large letter postings. Letter format mail piece dimensions Dimension requirements To ensure machineability, mail pieces must be oblong (portrait or landscape) or square with four straight sides and with four right-angled (90°) corners. The required dimensions are set out in the table below. Weight maximum: 100gms maximum for Advertising Mail Multi-stage: 15gms Thickness minimum: 0.25mm maximum: 5mm Height* minimum: 90mm maximum: 165mm Length* minimum: 140mm maximum: 240mm Square items minimum 140mm x 140mm maximum 165mm x 165mm Business Mail minimum 110mm x 145mm x 0.25mm Advanced maximum 165mm x 240mm x 5mm *These dimensions apply to the finished mail piece Please note: To continue to meet our clear zone requirements you may need to use the smaller size PPI design of 14mm x 54mm when using smaller envelopes. Issued: 31st March 2014 / Effective: 31st March 2014 Page 28 Material It is recommended that: the paper used for the envelope and the paper which the address is printed on must be more than 85% opaque to prevent any character on the reverse side showing through (BS ISO 2471 paper and board) the paper has porosity of < 700 ml/minute the paper has absorbency of 15-35gsm of water in one minute the paper has a density no less than 70g per square metre (gsm) postcards are made of paper with a density no less than 200gsm and must be at least 0.25mm thick Material requirements envelopes must be made out of paper only. You cannot use polythene, plastic or transparent items or envelopes with apertures. All poly wrapped items, regardless of dimensions, must either be sent as large letter format if they meet the requirements for the large letter machine-readable specification or using a manual option ® to benefit from Sustainable Advertising Mail you must adhere to additional requirements – see the product specific 'Sustainable Advertising Mail' section of this user guide for more information Perforations It is recommended that the mail piece has perforations or tear-off strips that meet the specifications detailed below in order to ensure they can be processed efficiently and without any damage being caused. You have the option of using either ‘Roulette’ or ‘Zip Strip’ perforations, or designing a ‘Pressure Seal’ envelope which effectively has double roulette perforations on the reverse. Please note: If you wish to post items with either a ‘roulette’ perforation or a ‘zip strip’, you have the option of getting any new mail piece designs checked prior to posting. 6 Roulette Perforations It is recommended that: the perforations be die cut into the items, the cut being the hole, and the bridge being the paper that is left intact and subsequently torn when the mail piece is opened. See figure 3. Figure 3: the paper weight for the items is ≥ 100gsm 6 Please note that this service is due to be available in late 2013. Issued: 31st March 2014 / Effective: 31st March 2014 Page 29 the perforations should be located to both ‘short’ sides of the mail piece, and one of the long sides of the mail piece, i.e. only three sides should be perforated, as illustrated in figures 4, 5 and 6 the perforations be inset from the edge of the mail piece by 12 ± 1mm, as illustrated in figures 4, 5 and 6 the cut of the short side perforations be set at 1.3 to 2mm and with a bridge of 0.8mm, as illustrated in figure 7. Each cut should be of uniform size and each bridge should be of uniform size the cut of the long side perforations be set at 0.5 to 1.4mm and with a bridge of 0.4mm, as illustrated in figure 7. Each cut should be of uniform size and each bridge should be of uniform size the cuts are rectangular in shape and have a width of 0.1mm the short side perforations extend from each edge of the envelope, as illustrated in figures 4, 5 and 6 the long side perforation do not extend beyond the short side perforations, as illustrated in figures 4, 5 and 6 the indicia is not printed over the perforations. Please note that this effectively reduces the area available for your indicia as follows: • in landscape orientation where the indicia is adjacent to both ‘long’ edge and ‘short’ edge perforations the indicia should be inset and be 12 ± 1mm on 2 sides,as illustrated in figure 2. This limits the area available for your indicia to a maximum of 64mm by 29mm • in landscape orientation where the indicia is adjacent to just the ‘short’ edge perforation the indicia is recommended to be inset on one side by 12 ± 1mm,as illustrated in figure 5. This limits the area available for your indicia to a maximum of 64mm by 40mm • in portrait orientation where the indicia is adjacent to just the ‘short’ edge perforation the indicia is recommended to be inset on one side by 12 ± 1mm,as illustrated in figure 6a. This limits the area available for your indicia to a maximum of 75mm by 29mm • in portrait orientation where the indicia is adjacent to both ‘long’ edge and ‘short’ edge perforations the indicia is recommended to be inset and be 12 ± 1mm on two sides,as illustrated in figure 6b. This limits the area available for your indicia to a maximum of 64mm by 29mm no other colour is visible through the perforations in the Tag and Route clear zones the perforated edges are securely sealed all round from the perforation to the letter edges the glue does not run out onto the outside of the mail item or produce protruding mounds on the mail item the glue is fully cured before you give your mailing to us the tensile strength of the glue is 4.5N and fibre tear must be exhibited on separation Issued: 31st March 2014 / Effective: 31st March 2014 Page 30 Figure 4- Perforated mail piece – Top (not to scale): Figure 5 - Perforated mail piece - Bottom (not to scale): Issued: 31st March 2014 / Effective: 31st March 2014 Page 31 Figure 6 - Recommended Perforated mail piece – Portrait (not to scale): 6a. Horizontal perforation to the left: 6b. Horizontal perforation to the right: Figure 7 – Recommended Perforation Dimensions (not to scale): Issued: 31st March 2014 / Effective: 31st March 2014 Page 32 ‘Pressure Seal’ envelope A Pressure Seal Envelope is a single sheet of paper which has been folded either two or three times to make a DL or C5 size mail piece. The short sides need to be sealed and are opened by means of a standard perforation. One long side has to be a fold, the other will be sealed and have effectively a ‘double’ perforation to allow the item to be fully opened. The short sides have perforations through all layers of the letter (there will be three layers of paper for DL or two layers of paper for C5 size mail pieces). The long side has a Roulette perforation that does not go through to the front of the mail piece. The item is opened by removing the short edge perforated strips first and then tearing back the tear off strip on the reverse. Design and general requirements the item must be produced from a single sheet of paper inserts are not permitted DL design must be > 100gsm (3 ply) C5 design must be > 150gsm (2 ply) landscape or portrait are permitted items must not be square perforations to be on both short sides the Roulette Tear strip must be on the back of the letter the longest edge from the indicia must be a fold (bottom edge for Landscape, left side for portrait) Perforated strip (short edges) It is recommended that: the Roulette Perforation specification is followed the cut of the Perforated Strip perforations be set at 1.3mm – 2mm and with a bridge of ≥ 0.8mm the cuts be rectangular in shape and have a width of ≤ 0.1mm Perforated strip (long edge on reverse) It is recommended that: there is only one Roulette Tear strip on each letter the strip be die cut into the letter the strip be placed on the back of the letter (i.e. the side which does not have the delivery address and PPI) and should run parallel to the long edge to the strip be > 10mm from the long edge of the letter & should be > 10mm wide the cut be set at < 3.3mm with a bridge of > 0.6mm, as illustrated in figure 8 below each cut be of uniform size each bridge be of uniform size the cuts be rectangular in shape and have a width of < 0.1mm the ‘long’ perforation may extend into the ‘short’ side perforations. If this occurs, it is recommended to be securely sealed i.e. the strips totally sealed along their length the edge between the tear strip and the edge of the letter be securely sealed along its entire length sealing adhesive be < 80 microns thick the glue does not run outside the mail item or produce protruding mounds glue be fully cured before the mail is presented to us the tensile strength of the glue be > 4.5N and fibre tear should be exhibited upon separation Figure 8 – Recommended ‘Pressure Seal’ envelope perforations & dimensions (not to scale): Issued: 31st March 2014 / Effective: 31st March 2014 Page 33 Zip Tie Perforations Recommendations the Zip Tie should be die cut into the item the paper weight for the item should be be ≥ 150gsm the items may be presented in both landscape and portrait orientation the Zip Tie should always be placed on the back of the items the Zip Tie may be positioned either horizontally or vertically, but the ‘Tear’ direction of the Tie is dependant upon the orientation of the mail piece. Figure 9 and figure 10 below illustrate the back of landscape and portrait oriented mail, the orientation, and ‘Tear’ directional requirements (the relative position of the Indicia on the front of the mail piece being illustrated). Issued: 31st March 2014 / Effective: 31st March 2014 Page 34 Figure 9 - Zip Tie Orientation – Landscape Mail (not to Scale): Figure 10 - Zip Tie Orientation – Portrait Mail (not to Scale): the Zip Tie should be located on a flap that is ≤ 40mm wide as illustrated in figure 11 the Zip Tie should be positioned ≥ 9mm from the edge of the flap, as illustrated in figure 11 Figure 11 - Zip Tie & Envelope Flap (not to Scale): the dimensional recommendations for the cut of the Zip Tie are provided in figure 12 Issued: 31st March 2014 / Effective: 31st March 2014 Page 35 Figure 12- Zip Tie Dimensions (not to Scale): all cuts and bridges should be of uniform size the cuts should be rectangular in shape and have a width of ≤ 0.1mm the glue used to seal the flap should not run out onto the outside of the mail item or produce protruding mounds on the mail item the glue should be fully cured prior to presentation of the mailing to us the tensile strength of the glue must be ≥ 4.5N and fibre tear should be exhibited on separation Issued: 31st March 2014 / Effective: 31st March 2014 Page 36 Flexibility It is recommended that items are flexible enough to be capable of being processed in our sorting machines without damage to the machine, the mail piece, or other mail pieces. Each mail piece should therefore be capable of being transported around a pulley with a radius of 140mm with a maximum force of 26 Newtons: Items that are too stiff will not be able to meet this recommendation as shown below. Your account handler will have access to a tool that will be able to check if your mail piece meets this recommendation. Issued: 31st March 2014 / Effective: 31st March 2014 Page 37 Window envelopes - general It is recommended that: the maximum gloss value of the window material is to be 150 when measured at 60º in accordance with ASTM 2457 ‘Standard Test Method for Specular Gloss of Plastic Films’ the window haze should not exceed 75% in accordance with ASTM D1003 ‘Standard Test Method for Haze of Plastic Films’ the window should be robust enough not to become deformed. It should be fixed to the envelope evenly across the surface area it is in contact with only one window (two at maximum) appears on the front of the mail piece and the window(s) do(es) not take up more than 50% of the surface area of the surface area Windows on the reverse 7 Window properties letter format mail pieces only maximum of one window permitted on each side front window dimensions (see figures 13 & 14): • rectangular < 174mm long < 45mm high back window dimensions (see figure 15): • circular < 48mm diameter Window position The perimeter of the window must be 31mm plus or minus 2mm from the bottom of the envelope and centred along the long edge. Figure 13 – Letter with Front & Back Windows – Back View (not to Scale): 7 The ‘reverse’ of the window is classed as the side of the envelope which does not have the payment indicia and the Delivery Address Block Issued: 31st March 2014 / Effective: 31st March 2014 Page 38 Clear zones for letter format mail pieces Clear zones are the areas on your posting you should leave free of any markings and, in some instances, window material. They are used by our machines to identify the Delivery Address Block, Delivery Address & Mailmark™ Block and Mailmark™ barcode and then a clear area is required for us to print and read the tag and route codes. You are recommended to leave a clear zone on the item where we can apply a unique tag code. For landscape items this area starts 60mm from the bottom edge up to 10mm high, stretching 100mm from the right hand edge. Portrait items should be considered to be landscape with the indicia in the top left hand corner and tag code clear zone as set out for landscape mail pieces. We also recommend that you leave a route code clear zone that starts from the bottom edge up to 18mm high, stretching to 130mm in from the right hand edge of your mail piece. Please note that a Mailmark™ barcode and associated clear zone must not infringe on the tag or route code clear zones. Issued: 31st March 2014 / Effective: 31st March 2014 Page 39 15. Mailmark™ barcode specifications Please note: All specifications set out in this paragraph 15 of the user guide are requirements unless stated otherwise. Mailmark™ barcodes can be either a: 2D data matrix Mailmark™ barcode, or 4-state Mailmark™ barcode 2D data matrix Mailmark™ barcodes There are three types of 2D data matrix Mailmark™ barcodes: 1. Type 7 2. Type 9 3. Type 29 2D data matrix Mailmark™ barcodes vary in size and shape and contain different quantities of space for non Royal Mail use. 2D data matrix Mailmark™ barcodes are made up of black & white square modules. Each module must be printed with minimum size of 0.5mm x 0.5mm and a maximum size of 0.7mm x 0.7mm. Modules must always be square so it is not acceptable to print with a module size of 0.5mm x 0.6mm or 0.7mm. Example of a 2D data matrix Type 7 Mailmark™ barcode Minimum size 12mm x 12mm when printed with 0.5mm x 0.5mm module size. Total of 51 characters, 6 characters are not used by Royal Mail. Example of a 2D data matrix Type 9 Mailmark™ barcode Minimum size 16mm x 16mm when printed with 0.5mm x 0.5mm module size. Total of. 90 characters, 45 characters are not used by Royal Mail. Example of a 2D data matrix Type 29 Mailmark™ barcode Minimum size 8mm x 24mm when printed with 0.5mm x 0.5mm module size. Total of 70 characters, 25 characters are not used by Royal Mail. Important note: No information (confidential or otherwise classified) should be placed in the spare space within the 2D data matrix Mailmark™ barcode that could or would place anyone in danger of breaching their or our data protection obligations. Issued: 31st March 2014 / Effective: 31st March 2014 Page 40 4-state Mailmark barcodes There are two types of 4-state Mailmark barcode: 1. Barcode L (long) 2. Barcode C (consolidated) Example of a 4-state Mailmark Barcode L Length up to 89mm. No space for non Royal Mail use. The document, “Which Mailmark barcode is right for me” which can be found on our website, may help you work out which Mailmark barcode will best suit your needs. Background Reflectance (BR) and Reflective Difference (RD) requirements 4-state Mailmark barcodes only In order to provide sufficient reflectance from the mail piece material that allows sufficient light to be reflected back, a BR value of a minimum of 35% is required. Mail pieces not meeting this requirement will appear as a block of dark grey or even black, making it impossible to identify the Mailmark™ barcode on the mail piece. In order to provide sufficient contrast between the mail piece material and the printed Mailmark barcode, the RD between the mail piece background and the BR must be a minimum of 30%. Mail pieces not meeting this requirement will appear as black making it extremely difficult to distinguish the Mailmark barcode from the mail piece material. 2D data matrix Mailmark™ barcodes A 2D data matrix Mailmark™ barcode is a specified format of a Data Matrix type ECC200 code complying with the international standard ISO/IEC 16022 whose data content matches a configurable set of characters for the first six characters of the data. The supported formats from ISO/IEC 16022 and the data content are as –set out in the 'Mailmark™ Barcode Definition' document. 2D data matrix Mailmark™ barcodes must be printed according to the international standard. Characteristics of 2D data matrix Mailmark™ barcodes a 2D data matrix Mailmark™ barcode is a Data Matrix type ECC200 code complying with the international standard ISO/IEC 16022. Version of ISO specification is ISO/IEC 16022:2006 a 2D data matrix Mailmark™ barcode can be any of the following formats of Data Matrix type ECC200, as defined in ISO/IEC 16022: • 24x24 modules (also known as Type 7) • 32x32 modules (also known as Type 9) • 16x48 modules (also known as Type 29) 2D data matrix Mailmark™ barcode symbols must have a module size in the range of 0.50 – 0.70mm the 2D data matrix Mailmark™ barcode must not appear within 15mm of the short edges of the mail piece, within 18mm of the long edge furthest from the indicia (for landscape items this is the Issued: 31st March 2014 / Effective: 31st March 2014 Page 41 bottom edge) or in an area that must be kept clear of text or graphics as set out elsewhere in this chapter the 2D data matrix Mailmark™ barcode symbol must be printed on a background that is of consistent contrast by design, with a positive contrast for the symbol (dark on a light background). Note: Certain recycled paper does give an inconsistent background, but this is acceptable so long as the print quality criteria are achieved. Note the codes are always positive contrast there must always be a clear zone of at least four times module size around any 2D data matrix Mailmark™ barcode symbol the 2D data matrix Mailmark™ barcode symbols can be orientated vertically or horizontally but are required to have edges that are parallel with the edges of the mail piece the 2D data matrix Mailmark™ barcode is differentiated from other Data Matrix symbols that may be present on the mail piece by a defined string of six characters in the first part of the data within the code. All systems that are required to read and extract data from the 2D data matrix Mailmark™ barcode shall have a configurable file that can contain up to one hundred different six character strings to identify a 2D data matrix Mailmark™ barcode type from other Data Matrix codes. The configurable file shall, for each of the 2D data matrix Mailmark™ barcode types defined by the six character string: • assign the precedence of each 2D data matrix Mailmark™ barcode string where more than one 2D data matrix Mailmark™ barcode exists on a mail piece • set the threshold limit for the minimum amount of unused error correction by the ECC algorithm that is allowed before rejecting the code read The representation of the six character string within the configuration file shall comprise of characters A – Z, 0 – 9, or Space. No wild cards will be used the 2D data matrix Mailmark™ barcode is differentiated from other Data Matrix symbols by a defined string of six characters in the first part of the data within the code. Each of the Royal Mail products that use the 2D data matrix Mailmark™ barcode has the following data strings in the first part of the data content: • UPU identifier – one Characters (J) • Royal Mail identifier assigned by the UPU – three Characters (e.g. GBA, or GB<SPACE>) • Information (Product) type ID – one Character • Information type ID version number – one Character each attribute within any 2D data matrix Mailmark™ barcode is of a fixed and defined length. This is to ensure that any individual attribute can be located by specifying the start character of the attribute with reference to the start of the character string the information within the 2D data matrix Mailmark™ barcode symbol shall comply with the C40 encodation scheme (Character set) as described within ISO 16022. All data that is within the code shall comply with the C40 Basic Character set (Uppercase Alphas, Numerals and SPACE only) the data within the code will not comply with optional message structures that are referenced from ISO 16022, such as ISO 15434 or 15418. The data will be a single continuous string of data with no header, footer or data identifiers included for Sorted and Unsorted Business, Advertising & Publishing Mail and Response Services 2D data matrix Mailmark™ barcode, the information contained in the barcode is not sensitive, as much of it can be found within human readable information on the mail item, and the Mailmark™ Supply Chain ID is not relevant to any other Royal Mail or customer account information. There is therefore no requirement for encryption all of the attributes must start at a defined point in the data string, so any missing or optional attributes must be filled with the SPACE character unless otherwise stated in the barcode definition. The one exception to this rule is the customer data space that is available in some codes. Any unused customer data space shall not be filled with space characters as this maximises the amount of error correction employed in the Mailmark™ barcode Issued: 31st March 2014 / Effective: 31st March 2014 Page 42 where space characters have been inserted into the code for the purposes of padding out the code as outlined above, these padding characters will not be included in the data fields after the parsing of the barcode information following barcode reading Issued: 31st March 2014 / Effective: 31st March 2014 Page 43 4-state Mailmark™ barcode 4-state Mailmark™ barcodes look like the existing 4-state barcodes that are used for Barcode option mailings as they use a similar looking 4-state font. However, they differ from the existing Barcodes as they are made up of encoded content, and the bars within the 4-state Mailmark™ barcodes do not combine, in groups, to represent alphanumeric characters. The encoded content will be output as a string of text that consists of the following 4 characters: 1. D for Descender bar 2. A for Ascender bar 3. F for Full bar 4. T for Track bar The DAFT text strings when presented in the 4-state font form the 4-state Mailmark barcode. The diagram below shows a Full bar followed by a Descender bar, an Ascender bar and a Track bar. An encoder and the 4-state font (4State Jack 1 Barcode 130319B.ttf) is available at www.royalmail.com/mailmark. You are strongly advised to use this font with a point size of between 19.5 and 22.5 which will produce a correct barcode. The following advice is provided for reference, and some is valid even if you do use the font, but we do not recommend trying to re-create this font. All systems that are required to read and extract data from 4-state Mailmark™ Barcode C and Barcode L shall have a configurable file that can contain up to one hundred different two character strings to identify different data fields within the code. The configurable file shall for each of the 4-state Mailmark Barcode C and Barcode L defined by the two character string: assign the precedence of each 4-state Mailmark Barcode C and 4-state Mailmark Barcode L strings where more than one barcode Mailmark exists on a mail piece set the threshold limit for the amount of error correction by the ECC algorithm that is allowed before rejecting the code read The representation of the two character string within the configuration file shall comprise of characters 0– 9 only. No wild cards will be used. Optical specifications the Mailmark™ barcode must be printed so that it contrasts with the background, (typically black bars on a white background) and the print quality shall be consistent throughout the code the optical characteristics of the printed Mailmark barcode's characters can vary substantially depending on the varied print processes used to produce them and the quality of the substrate onto which they are printed. Please make sure that the reflectance and print quality characteristics are maintained within acceptable limits, to ensure the reading process is reliable Issued: 31st March 2014 / Effective: 31st March 2014 Page 44 Print Contrast Ratio (PCR) The PCR is an indication of how well the printed Mailmark™ barcode on the mail piece stands out from the background. For 4-state Mailmark™ barcode mail this must be a minimum of 40%. Positive Contrast or Inverse Printing (barcode lighter than the background) is not permitted. Symbology, dimensions and tolerances measurement When 4-state Mailmark barcodes are magnified, their edges may not always be clearly defined, making accurate measurement more difficult. In order to ensure that measurements are within required specifications, it is necessary to define the edges between each light and dark element of the barcode. The edge of a bar is defined as: "the position where the apparent reflectance is exactly halfway between the minimum and maximum reflectance values of the adjacent bar and space, when viewed using a circular sample aperture of less than 0.6X, where X is defined as the nominal width of the bars in the code" Dimensions The 4-state Mailmark Barcode C contains 66 bars The 4-state Mailmark Barcode L contains 78 bars The 4-state Mailmark barcode has been developed for use with most common printing systems. However, as many of these systems might not be able to match ideal requirements, we have also incorporated systems that read an imperfect 4-state Mailmark barcode to the extent those practical algorithms will allow. Dimension recommendations It is recommended that: bar width is set at 0.54mm (with width tolerance of +/- 0.05mm) the Ascender and Descender height is set at 1.9mm the track bar is 1.4mm high (with height tolerances of+/- 0.1mm) the pitch is 21.2 (+/- 0.2) bars per inch (25.4mm) Dimension requirements 4-state Mailmark barcode edges must be sharp and clearly defined to help eliminate misreading. For clarification, to ensure that this form of code can be read: • the width requirements apply throughout the whole bar i.e. no part of the bar can be less than 0.38mm wide or greater than 0.64mm wide • the print quality must be consistent throughout the code and there must be no gaps between the printed dots within a bar there must be between 20 and 24 bars per 25.4mm which must be equally spaced the 4-state Mailmark™ barcode must be a continuous string of characters and must not include gaps or space characters Issued: 31st March 2014 / Effective: 31st March 2014 Page 45 Required dimensions for the 4-state Mailmark barcode Vertical alignment The track element of the bars must be symmetrical about the centre line of the code +/- 10% of the height of the centre line. Issued: 31st March 2014 / Effective: 31st March 2014 Page 46 Clear Zones for all Mailmark™ barcodes The clear zone is the area covered by the code with an additional square or rectangular border of at least: 2mm for 4-state Mailmark™ barcodes on all sides 4 times module size for 2D data matrix Mailmark™ barcodes on all sides The clear zone consists of a background with constant reflectance, to comply with the optical specification in this chapter of the user guide for 4-state barcode Mailmark™ barcodes and the ISO specification for 2D data matrix Mailmark™ barcodes. It is a requirement that no other text, graphic, picture, window edge, one piece mailer flap, perforations etc appear in the area taken up by the Mailmark™ barcode and associated 2mm or 4 times module size clear zone. The minimum module size is 0.5mm x 0.5mm; in which case the required clear zone is 2mm. The maximum module size is 0.7mm x 0.7mm; in which case the required clear zone is 2.8mm. It is a requirement that you do not place a border or lines around the Mailmark™ barcode or the associated clear zone. Location for all Mailmark barcodes Requirements To optimise the performance of your Mailmark™ barcode enabled mailing it is a requirement that the Mailmark™ barcode and associated clear zone: is on the same side of the envelope as the indicia and Delivery Address Block is beneath the indicia is at least 15mm from the short edges of the mail piece is at least 18mm from the long edge furthest away from the indicia (i.e. the bottom edge of a landscape mail piece) does not infringe on any other clear zone set out in this guide or other literature (e.g. the clear zone that is required around the indicia and the route and tag clear zones) has opposite edges that each are parallel with one another (i.e. it should not be skewed (i.e. squashed or stretched in any direction to form a parallelogram that does not have 4 90 degree vertices)) Recommendations We recommend that the four edges of the Mailmark barcode and clear zone remain parallel with the four edges of the mail piece. Issued: 31st March 2014 / Effective: 31st March 2014 Page 47 16. Mailmark barcode enabled large letter format mail piece specification Mail piece specification requirements all mail pieces must be rectangular (oblong) or square all four sides of a mail piece must be straight the intersection of each side must be 90˚ Please note: Unless stated otherwise all other guidelines set out in this chapter 16 are recommendations. Getting started with the large letter format Please check the entry requirements i.e. volume, sortation levels and labelling found in the relevant section of this user guide for each product, available on www.royalmailtechnical.com. If you meet the requirements for your chosen product, you must then meet the following requirements: your items must be within the large letter format but we will permit C5 (162mm x 229mm) items which are polywrapped (these will be charged at large letter format) Address standards and printing We recommend that you follow the addressing standards and Delivery Address Block requirements as set out in this chapter of the user guide in order to maximise the performance of your Mailmark™ barcode enabled large letter format mailings. Large letter format mail piece dimensions Please note: The following large letter format mail piece dimensions apply to the finished mail piece i.e. the outer covering and including the contents. Weight Thickness Height Length Square items minimum: 10g maximum: 750g minimum: 1mm maximum: 10mm minimum: 162mm maximum: 245mm minimum: 229mm maximum: 345mm minimum 229mm x 229mm maximum 245mm x 245mm Issued: 31st March 2014 / Effective: 31st March 2014 Page 48 Technical recommendations & requirements for paper and polymer envelopes and polywrapped large letter items For ease of use, this element of the user guide has been separated into general recommendations and requirements which cover paper and polymer envelopes and polywrapped mail pieces, then requirements specific to all three outer covering options are listed. Design of Logos or Advertising To reduce any potential for address interpretation errors, we do not recommend that logos and/or advertising look like an address, geographical location, country or a Royal Mail bag or bundle label, and they must not be printed in the Delivery Address Block, over the Mailmark™ barcode, in any clear zones around either the Delivery Address Block and/or the Mailmark™ barcode, or in the indicia area. Slogans where the company name contains the words ‘Return’, ‘Address’ and ‘Undelivered’ are not recommended. Please note: Other logos and advertising may go into the general indicia area (40mm x 75mm) (see figure 14) but must not go into the indicia’s clear area which varies as follows: Response services is variable (please refer to the Response Services specification) PPIs require 2mm clear around the image Figure 14: Issued: 31st March 2014 / Effective: 31st March 2014 Page 49 Inserts It is recommended that: for any insert other than the paper contents, they are fixed in position so they don’t move around during processing. You can use glue or self adhesive tabs to fix any inserts inserts other than paper that are placed in an envelope are recommended to be fixed in position and attached to the insert, so that they cannot move around during the processing of the mail item. The inserts may include small metal objects such as keys, coins, and badges where you have ‘step changes’ in the thickness of the mail piece, the spatial distortion (i.e. variation in the thickness of the contents - see figure 15), should not be more than 50% of the thickness of the item up to a maximum of 10mm and the address should be on the flat side of any item. It cannot be placed on any irregular or convex shaped sides Figure 15: Paper envelopes For paper envelopes, depending on the thickness of your item, to prevent damage to your item and other mail pieces, there are limitations on how much ‘empty’ envelope you are recommended to have i.e. the thicker the item, the less ‘empty’ the envelope we recommend (see figure 16). The following applies to the movement of the largest paper insert: if your item is up to 2mm thick then there is no restriction on the lateral movement of the largest paper insert up to the maximum envelope size of 345mm for any item which has a thickness of 2mm or more, the lateral movement of the insert within the letter is recommended to be 20mm or less Figure 16: Issued: 31st March 2014 / Effective: 31st March 2014 Page 50 Polymer envelopes For polymer envelopes or polywrapped items, where the polymer is transparent only the largest insert must be visible to the front of the large letter, and we recommend that the lateral movement is less than 20mm (see figure 17). There is no requirement for the content to be referenced to the bottom left corner. We recommend that there is no more than 20mm along the long edges and no more than 20mm along the short edges. Please note: For polymer envelopes or polywrapped items you will need to allow for any lateral movement when defining the Delivery Address Block location. The assumption must be made that the poly may fold during processing and, should this happen, we still need a defined clear area from the edge to ensure the Delivery Address Block can be read. Figure 17: Material - Construction Paper envelopes It is recommended that: you do not include perforations the envelope paper weight = 70gsm minimum the paper weight for single piece (folded & sealed) mail pieces = 100gsm minimum the paper weight for large letter sized postcards = 200gsm minimum Polymer envelopes and polywrap polymer envelopes and polywrap must be made of polymer film e.g. polyethylene materials produced from polymer fibres that are randomly distributed and non-directional (laid as a web) and bonded together by heat and pressure are not acceptable e.g. Tyvek Issued: 31st March 2014 / Effective: 31st March 2014 Page 51 Material - general recommendation and requirements Absorbency (paper based envelopes): 15–35g of water in one minute (BS EN 20535 – p[aper and board (determination of water absorptiveness) Glue: any adhesives used in the production of envelopes are recommended not to leak onto the open surface of the envelope and produce protruding mounds and is recommended to be fully cured when the mail is presented to Royal Mail. It is a requirement that mail pieces are not stuck together as we may not be able to read items that are and your reports will appear incomplete. When polymer envelopes are used, it is recommended that the glue is stronger than the polymer and does not produce protruding moulds on the mail item Opacity: ≥ 85 % (BS ISO 2471 - paper and board (determination of opacity (paper backing)) Porosity: < 700 ml/minute (BS 6538-2 - air permeance of paper and board) Rigidity / Stiffness: it is recommended that the acceptable rigidity / stiffness is ≥ 8N.mm. There is no upper limit on mail piece stiffness Rigidity and stiffness can be measured as follows (see also figure 18): • a single large letter should be placed on a flat surface with the shortest edge of the large letter overhanging a straight edge of a flat surface by a horizontal distance of 100mm • the leading edge of the large letter is then released and allowed to bend down under its own weight • if the leading edge drops to 40mm or more, then the stiffness is less than 8N.mm and the large letter on machine-readable Figure 18: Separation: the items must not be stuck together and it is recommended that they are capable of separating to allow them to be effectively processed. When placed on a slope of 65º to the horizontal, it is recommended that the items are capable of separating, by sliding one from another, under the force of gravity (see figure 19) Issued: 31st March 2014 / Effective: 31st March 2014 Page 52 Figure 19: Shape: items are required to be rectangular or square within the permitted dimensions and can be laid out (address and payment indicia) in landscape or portrait format. We do require you to ensure that the four sides are all straight lines and intersected by a 90º angle Polywrap outer the film is required to be intact, undamaged and must not be punctured or torn apart from perforations (although perforations are not recommended) it is recommended that the film is sufficiently strong enough to tolerate handling without tearing or splitting at the seals the film must be > 15 µm (15 microns) thick when measured at any point on the large letter other than the seal it is recommended that any text printed on the film adheres to the film and must not break up or wear during processing any Mailmark™ barcode printed on the film must adhere to the film and must not break up or wear during processing only a single layer of film must cover the Delivery Address Block and Mailmark™ barcode Print contrast recommendations the Print Contrast Ratio for addresses printed on envelopes must be ≥ 50 % the Print Contrast Ratio for addresses printed on window inserts must be ≥ 55 % the Minimum Reflective Difference must be ≥ 30 % the Minimum Background Reflectance must be ≥ 35 % inverse printing i.e. negative contrast is not permitted (i.e. address block lighter than background) Issued: 31st March 2014 / Effective: 31st March 2014 Page 53 Sealing This section is divided into the paper and polymer/polywrap recommendations and requirements as they are different. Paper envelopes it is recommended that the paper envelopes are sealed securely on the back, front and edges a tolerance of 35mm x 25mm is permitted on the opening flap. Regardless of whether the opening flap is placed on the front or reverse of the item (the front being where the Delivery Address Block and the payment Indicia are located) it is recommended that it is sealed to within 35mm from the fold of the envelope and 25mm from the envelope side. Figure 20: Figure 21: Issued: 31st March 2014 / Effective: 31st March 2014 Page 54 Polymer envelopes It is recommended that: polymer envelopes are sealed along all the edges and have the opening flap on the back (see figure 20 and figure 21) the opening flap is sealed to within a minimum of 25mm from the fold of the envelope flap and 25mm from the sides of the envelope (see figure 22) Figure 22: Polywrapped items Items which are poly wrapped must be securely sealed on the front, back and side edges. The recommendations for any seal which runs along the length, or width, of the item are as follows: the seal should be sealed at each end along the full length of the seal the free edge of the seal should be less than 30mm deep the preferred location for the seal is the back of the large letter due to the recommedations for the seal when placed on the front, it cannot be across the width of the mail piece (but if on the reverse it can) If you have chosen not to have the seal on the reverse and have placed it on the front then please ensure you also meet the following requirements: the seal must not be over the Delivery Address Block or over the Mailmark™ barcode the seal must be towards the bottom of the large letter and be no more than 90mm from the bottom edge (see figure 23) Issued: 31st March 2014 / Effective: 31st March 2014 Page 55 Figure 23: Windows (paper envelopes) Although you are only permitted one window on your mail piece, you do have the option of using this window for either the Delivery Address Block or for advertising information. You do need to ensure that the window is not an open space i.e. there must be a transparent film covering the aperture and that it is square or rectangular (circular windows are not permitted). As we do not wish to limit your options when it comes to designing or purchasing window envelopes, we do not have any specific requirements for the strength of the window but we do recommend that when we receive the items from you: the window film is not flimsy i.e. should be sufficient strength & quality that it is not visibly creased or crumpled that it is flat and securely and evenly sealed to the inside of the envelope, and that the corners of the aperture are curved rather than straight as this will help prevent damage occurring when the items are going through the final machine sortation stage it does not take up more than 25% of the surface area on the side where it is found the window area where it is used for an address should fall within the Delivery Address Block area – please see figures 24, 25, 26 and 27 Gloss (window and poly film): The gloss value should be ≤ 150 (American standards of testing and materials (ASTM) 2457 Measured at 60 degrees) Haze (window and poly film): The haze value should be ≤ 75 % (ASTM D1003-00 Procedure A (Hazemeter)) Issued: 31st March 2014 / Effective: 31st March 2014 Page 56 Delivery Address Block and Mailmark barcode when printing the Delivery Address Block it is recommended that the maximum characters per line of the address block is sixty four. Please ensure that the content of one address line is not wrapped onto a second line i.e. Team Valley Trading Estate must be printed on the same line and not spread over two it is recommended that you use one of the fonts and sizes (detailed earlier in this section of the user guide) and ensure that each line of the address has characters which are the same font and point size and that the spacing between the words is less then 5mm. Please note: The figures (24 a, b & c, 25 a, b & c, 26 a & b and 27 a & b) shown are separated into paper and poly, trayed and untrayed and includes C5 (162mm x 229mm) format because of the smaller area, due to the PPI and return address area, permitted for the Delivery Address Block. The Delivery Address Block should not and the Mailmark™ barcode cannot be located in the following areas (see also figures 24 a, b & c, 25 a, b & c, 26 a & b and 27 a & b): Paper envelopes: the indicia area (40mm from the top of the envelope x 75mm from the right) the return address area (40mm down from the top and no less than 75mm from the right ) the ‘Tag Code Zone’ (referenced on the longest edge of the large letter, 33mm up from the bottom right corner and covering an area 30mm high and 110mm long) a ‘frame’ around the item (15mm around the perimeter i.e. the bottom, left and right edges) over the edge of the envelope flap Polymer envelopes or polywrapped items: the indicia area (40mm from the top of the envelope x 75mm from the right) the return address area (40mm down from the top and no less than 75mm from the right) the ‘Tag Code Zone’ (referenced on the longest edge of the large letter, 33mm up from the bottom right corner and covering an area 30mm high and 110mm long – this must include the lateral movement i.e. the excess poly of which 20mm is the maximum recommended) a ‘frame’ around the perimeter of the item (up to 35mm i.e. a mandatory 15mm and the remaining clear area is the excess poly of which 20mm is the maximum recommended. Therefore, if for example, your mail piece only had 10mm excess polywrap then you would be expected to leave 25mm clear) over the edge of the envelope flap Label and Tag code application areas To allow you to have as creative a specification as possible we have removed any mandatory requirements specific to areas where our Tag codes or labels and Tag codes will be affixed. The information within this section will allow you to make an informed decision when it comes to designing your creative artwork or Direct Mail. Please be aware that when you tray the mail, there will be fewer areas where the barcode or label with a barcode could be applied. This is because the mail will then only be presented to the machine in one of two ways. However, when mail is bagged it has to then be tipped and trayed at the receiving office and this increases the likelihood of the Tag code or label and Tag code being applied to any one of four areas. Issued: 31st March 2014 / Effective: 31st March 2014 Page 57 In general, if you have a plain paper outer envelope then a Tag code will be sprayed directly onto the item, and if you have a very creative mail piece, or if it is polywrapped or in a poly envelope, then a label will be applied and a Tag code sprayed onto the label. Please note: these defined areas relate to how the mail is presented to the machines, so there may be instances where a label could be applied a little higher or slightly more towards the left than indicated. This applies to polywrapped items specifically and is purely because the excess poly around the insert may fold ‘the bottom edge’ of a mail piece is always the longest edge on which the mail piece will be ‘fed’ through and presented to the machine. Items are always processed in ‘landscape format’, trayed square items are processed with the Delivery Address Block and PPI uppermost with the PPI to the top right Trayed Trayed items are presented to the machines as follows the Delivery Address Block and payment indicia will be located accordingly: landscape items (figures 24a ,24b, and 24c) - the address will be upright and the payment indicia in the top right hand corner portrait items (figure 25a, 25b and 25c) - the item will be rotated to lie on one of the longest edges so that the payment indicia is vertical in the top left hand corner and the address in a vertical position Paper envelope, polymer envelope & polywrap items When you tray your items, because the orientation of the mail piece within the tray affects how it is ‘fed’ through the machine there will be one possible area where we will apply a label if necessary and spray a ‘tag code’ mark – please note that you must include the ‘excess poly’ to the area below (i.e. add a maximum of 20mm to the right and 20mm to the bottom): starts from the right hand edge and 33mm from the bottom edge the code application area is 110mm long and 30mm high Issued: 31st March 2014 / Effective: 31st March 2014 Page 58 Segregated bundles, bagged or in ALPs When the items are in bags or ALPs, the items are presented i.e. in landscape orientation. They are only put to the machine along one of their longest edges. Therefore, Tag code marks could be applied in one of two areas for item above C5 (162mm x 229mm), or one of four areas for items C5 size or below. Paper envelope, polymer envelope & polywrap items When you do not present your items in trays, because the orientation of the mail piece is not pre-defined there will be two possible areas where we will apply a label if necessary and spray a ‘tag code’ mark please note that you must include the ‘excess poly’ to the area below (i.e. add a maximum of 20mm to each edge): 1. starts in from the bottom right hand edge and 33mm up from the bottom edge, and is 110mm long and 30mm high 2. starts from the top left hand edge and 33mm down from the top left edge, and is 110mm long and 30mm deep Please note: For polymer envelopes or polywrapped items you will need to allow for any lateral movement when defining the Delivery Address Block location. The assumption must be made that the poly may fold during processing and, should this happen we still need a defined clear area from the edge to ensure the delivery address can be read. See figures 26a and 26b and figures 27a and 27b. Issued: 31st March 2014 / Effective: 31st March 2014 Page 59 Figure 24a- (trayed PPI landscape paper) (not to scale): This figure indicates that if you were to tray landscape items then any code marks would be applied in the bottom right corner. It is required that Mailmark™ barcodes are only applied to the blue shaded area and recommended that they appear near the Delivery Address Block. Issued: 31st March 2014 / Effective: 31st March 2014 Page 60 Figure 24b- (trayed landscape poly) (not to scale): This figure indicates that if you were to tray landscape items then any adhesive label and code marks would be applied in the bottom right corner. It is required that Mailmark™ barcodes are only applied to the blue shaded area and recommended that they appear near the Delivery Address Block. Issued: 31st March 2014 / Effective: 31st March 2014 Page 61 Figure 24c (trayed poly C5 – 162mm x 229mm - landscape) (not to scale): This figure indicates that if you were to tray C5 items then any adhesive label and code marks would be applied in the bottom right corner. It is required that Mailmark™ barcodes are only applied to the blue shaded area and recommended that they appear near the Delivery Address Block. - 229 - 240mm - 103mm - 75mm - Extended Indicia Area Indicia Area - 162 - 165mm - For PPI Designs 3&4 - 40mm - - 28mm - Delivery Address Block Area Flats Tag Clear Zone 15 mm - 63mm - 15 mm - 110mm - 150mm - Issued: 31st March 2014 / Effective: 31st March 2014 Page 62 Figure 25a (trayed portrait paper) (not to scale): This figure indicates that if you were to tray a portrait item then any code marks would be applied in the bottom left corner if the Indicia was in the top right corner. It is required that Mailmark™ barcodes are onlyapplied to the blue shaded area and recommended that they appear near the Delivery Address Block. - 162 - 245mm - 103mm - 75mm - Extended Indicia Area Indicia Area For PPI Designs 3&4 - 40mm - - 28mm - - 229 - 345mm - Flats Tag Clear Zone - 150mm - 110mm - Delivery Address Block Area 15 mm - 63mm - Issued: 31st March 2014 / Effective: 31st March 2014 15 mm Page 63 Figure 25b (trayed portrait poly) (not to scale): This figure indicates that if you were to tray a portrait item then any label and code marks would be applied in the bottom left corner if the Indicia was in the top right corner. It is required that Mailmark™ barcodes are only applied to the blue shaded area and recommended that they appear near the Delivery Address Block. - 162 - 245mm - 75mm - - 40mm - Indicia Area - 229 - 345mm - Flats Tag Code Label Area 15mm + Lateral Movement - 110mm + Lateral Movement - Delivery Address Block Area 63mm + Lateral Movement 15mm + Lateral Movement Issued: 31st March 2014 / Effective: 31st March 2014 Page 64 Figure 25c (trayed portrait poly C5 – 162mm x 229mm) (not to scale): This figure indicates that if you were to tray a portrait item then any code marks would be applied in the bottom left corner if the Indicia was in the top right corner. It is required that Mailmark™ barcodes are only applied to the blue shaded area and recommended that they appear near the Delivery Address Block. - 162 - 165mm - 103mm - 75mm - Extended Indicia Area Indicia Area For PPI Designs 3&4 - 40mm - - 28mm - Delivery Address Block Area Flats Tag Code Label Area - 110mm + Lateral Movement - - 229 – 240mm - 63mm + Lateral Movement 15mm + Lateral Movement Issued: 31st March 2014 / Effective: 31st March 2014 Page 65 Figure 26a (untrayed landscape paper) (not to scale): This figure indicates that if you were to bag or present a landscape item in an ALP then there would be two possible areas where a code mark would be applied: bottom right and top left. It is required that Mailmark™ barcodes are only applied to the blue shaded area and recommended that they appear near the Delivery Address Block. - 229 - 345mm - - 150mm - 15 mm - 110mm - - 63mm - - 40mm - - 162 - 245mm - Flats Tag Clear Zone Delivery Address Block Area Flats Tag Clear Zone - 40mm - - 63mm - 15 mm - 110mm - 150mm - Figure 26b (untrayed landscape poly) (not to scale): This figure indicates that if you were to bag or present a landscape item in an ALP then there would be two possible areas where a label and code mark would be applied: bottom right and top left. It is required that Mailmark™ barcodes are only applied to the blue shaded area and recommended that they appear near the Delivery Address Block. - 229 - 345mm - - 40mm - Flats Tag Code Label Area - 162 - 245mm - 63mm + Lateral Movement - 110mm + Lateral Movement - Delivery Address Block Area - 40mm - 15mm + Lateral Movement 63mm + Lateral Movement Flats Tag Code Label Area 15mm + Lateral Movement - 110mm + Lateral Movement - Issued: 31st March 2014 / Effective: 31st March 2014 Page 67 Figure 27a (untrayed portrait paper) (not to scale): This figure indicates that if you were to bag or present a portrait item in an ALP then there would be two possible areas where a code mark would be applied: bottom right and top left, if the indicia is in the top right corner. It is required that Mailmark™ barcodes are only applied to the blue shaded area and recommended that they appear near the Delivery Address Block. - 162 - 245mm 15 mm - 40mm - - 63mm - - 150mm - 110mm - Flats Tag Clear Zone - 229 - 345mm - - 110mm - 40mm - - 150mm - Flats Tag Clear Zone Delivery Address Block Area - 63mm - 15 mm Figure 27b (untrayed portrait poly) (not to scale): This figure indicates that if you were to bag or present a portrait item in an ALP then there would be two possible areas where a code mark would be applied: bottom right and top left, if the indicia is in the top right corner. It is required that Mailmark™ barcodes are only applied to the blue shaded area and recommended that they appear near the Delivery Address Block. - 162 - 245mm 63mm + Lateral Movement 15mm + Lateral Movement - 229 - 345mm - Flats Tag Code Label Area - 110mm + Lateral Movement - - 40mm - 63mm + Lateral Movement - 110mm + Lateral Movement - - 40mm - Flats Tag Code Label Area Delivery Address Block Area 15mm + Lateral Movement
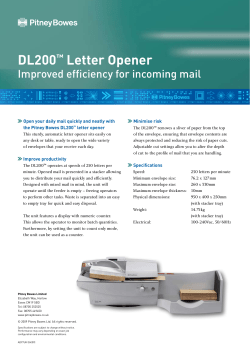
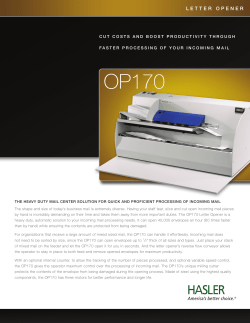
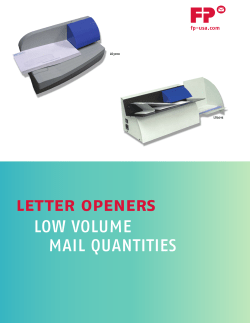


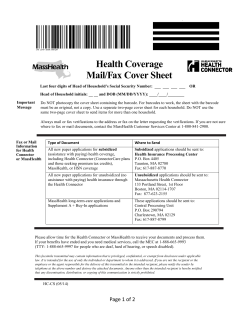


© Copyright 2026