
Internet Service Guide
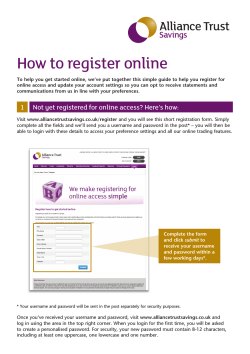
Internet Service Guide
Data Help Desk
1-877-673-1868
www.logixcom.com
TABLE OF CONTENTS
GETTING STARTED…………………………………………………
PAGE 2
STANDARD NETWORK SETTINGS ……………
PAGE 3
ADVANCED NETWORK SETTINGS ……………
PAGE 5
DOMAIN NAME SERVICE ………………………………………
PAGE 7
EMAIL SERVICES ……………………………………………………
PAGE 9
USING YOUR LOGIX HOSTED EMAIL ………
PAGE 9
PERSONAL USER ADMINISTRATOR …………
PAGE 14
LOGIX WEBMAIL ………………………………………
PAGE 16
MICROSFT OUTLOOK E-MAIL SET UP………
PAGE 17
HOSTING YOUR OWN E-MAIL ……………………
PAGE 21
LOGIX WEB HOSTING ……………………………………………
PAGE 23
SM
………………………………………………………
PAGE 26
GLOSSARY ………………………………………………………………
PAGE 29
MONSTERBOX
Page 1 of 29
Data Help Desk
1-877-673-1868
www.logixcom.com
GETTING STARTED
Who needs this User Guide?
Customers who will be connecting their network to LOGIX’ Internet service.
Why this User Guide?
This guide explains how to make the physical connection from the LOGIX router to
your network.
STEP 1i
Locate the LOGIX router.
The router is usually
located in your telephone
or computer room.
Note: Pictures are examples; the router LOGIX provides your
company may differ slightly.
STEP 2i
Locate the “CONNECT TO LOGIX INTERNET HERE” sticker on the
LOGIX router. The arrow points to the Ethernet Port labeled
“10/100 BASE T” or “Ethernet.”
STEP 3i
Plug a CAT5 Ethernet Cable into the Ethernet Port (10/100 BASE T) of the LOGIX
router and the other end into your network hub or switch.
Note: If connecting a single computer, router, or firewall to the LOGIX router, use
a CAT5 Ethernet Crossover Cable between the LOGIX router and your equipment.
See “Making Advanced Connections to the LOGIX Router” on Page 6 for additional
information.
Page 2 of 29
Data Help Desk
1-877-673-1868
www.logixcom.com
STANDARD NETWORK SETTINGS
Who needs this User Guide?
Customers who need instructions on configuring their computers to accept the
LOGIX Internet service. The information provided in this guide is for Windows XP
and similar operating systems. Consult your Network Administrator or the LOGIX
Data Help Desk for assistance with other operating systems.
Why this User Guide?
This guide will take you through setting up a standard configuration using DHCP
(Dynamic Host Configuration Protocol) on your computer(s). Follow these steps for
each computer on your network that will be connecting to the LOGIX Internet.
STEP 1i
Go to Start>Settings>Network Connections>Local Area Connection...
Once on "Local Area Connection", right click and select "Properties.”
Page 3 of 29
Data Help Desk
1-877-673-1868
www.logixcom.com
STEP 2i
Click on "Internet Protocol (TCP/IP)" and
then click on "Properties.”
STEP 3i3and
Within the “Internet Protocol (TCP/IP)
Properties" window, select the bullets next
to "Obtain an IP address automatically"
AND "Obtain DNS server address
automatically.” Click on the "OK" button
and then click on the "OK" button again to
apply the settings to the "Local Area
Connection Properties.” After you click on
the "OK" button, the computer may pause
for 3-10 seconds while attempting to
obtain an IP address.
STEP 4i
You are now finished. Click on the
“Internet Explorer” icon to begin using LOGIX Internet.
Page 4 of 29
Data Help Desk
1-877-673-1868
www.logixcom.com
ADVANCED NETWORK SETTINGS
This section provides the advanced network information for customers who will be
connecting a firewall, router, or using static IP’s on their network.
INTERNET CONNECTION DETAILi
LOGIX provided your company with a customized Internet Connection Detail form
during the installation process. This document contains your:
•
•
•
Account information
IP information
Default LAN settings
For a current copy of your Internet Connection Detail please contact the LOGIX
Data Help Desk at 1-877-673-1868.
Below is a sample of an Internet Connection Detail form.
Internet Connection Detail
Note: By default, LOGIX Communications deploys equipment with NAT (Network
Address Translation) and DHCP (Dynamic Host Configuration Protocol) activated.
To deactivate these settings contact the LOGIX Data Help Desk at
1-877-673-1868.
Page 5 of 29
Data Help Desk
1-877-673-1868
www.logixcom.com
DNS RESOLVERSi
DNS Resolvers take a Domain Name and determine its corresponding IP address.
Below are the location-specific DNS Resolver IP’s for your router, firewall, or
computers using static IP addresses.
Location
Primary
Secondary
Third (if needed)
Austin
Dallas/Ft. Worth
Houston
Oklahoma
San Antonio
Tulsa
66.196.216.10
66.196.212.10
66.196.216.10
216.201.128.10
66.196.216.10
216.201.128.10
66.196.212.10
216.201.128.10
66.196.212.10
66.196.212.10
66.196.212.10
66.196.212.10
216.201.128.10
66.196.216.10
216.201.128.10
66.196.216.10
216.201.128.10
66.196.216.10
MAKING ADVANCED CONNECTIONS TO THE LOGIX ROUTERi
If connecting a single computer, router, or firewall to the LOGIX router, use a
CAT5 Ethernet Crossover Cable between the LOGIX router and your equipment.
The CAT5 crossover cable has the transmit and receive pairs reversed. See the
diagram below.
•
Pin 1 on connector A should be wired to
pin 3 on connector B.
•
Pin 2 on connector A should be wired to
pin 6 on connector B.
•
Pin 3 on connector A should be wired to
pin 1 on connector B.
•
Pin 6 on connector A should be wired to
pin 2 on connector B.
•
Pins 4, 5, 7, and 8 are not used.
Page 6 of 29
Data Help Desk
1-877-673-1868
www.logixcom.com
DOMAIN NAME SERVICE
Who needs this User Guide?
Customers who will transfer their domain name(s) to LOGIX for hosting.
Why this User Guide?
This guide outlines the domain name hosting and transfer process.
UNDERSTANDING DOMAIN NAME SERVICES (DNS)i
Your company’s domain name (i.e. samplecompany.com) uniquely identifies your
company to the rest of the world. Your company must purchase a domain name
from a domain name registrar. Common registrars are Network Solutions,
GoDaddy, or Register.com. LOGIX does not sell, renew or transfer domain
names.
Domain Name Hosting, also known as DNS Hosting, is often confused with Web
Hosting and E-mail Hosting. One of the functions of DNS Hosting is to direct traffic
to your website. Another function of DNS Hosting is to direct incoming
E-mail to your E-mail provider.
Note: LOGIX can provide DNS Hosting (see Page 8), E-Mail Hosting (see Page 9),
and/or Web Hosting (see Page 23).
TRANSFERRING YOUR DNS TO LOGIXi
STEP 1i
Contact the LOGIX Data Help Desk at 1-877-673-1868 to place or confirm your
DNS hosting order.
Note: If your domain name is transferred to LOGIX prior to the completion of
your LOGIX DNS order, your website and E-mail associated with this domain name
will be interrupted.
Page 7 of 29
Data Help Desk
1-877-673-1868
www.logixcom.com
STEP 2i
Contact your domain name registrar to request your domain name(s) transfer to
LOGIX.
STEP 3i
Follow the instructions provided by your registrar to initiate the domain name(s)
transfer. You will need to provide the registrar the following server names for each
domain name hosted by LOGIX:
PRIMARY NAME SERVER
faith.logixcom.net
IP Address: 216.201.128.10
SECONDARY NAME SERVER
meredith.logixcom.net
IP Address: 66.196.216.10
Confirm that the server entries above are the only ones listed for your domain.
Note: It takes up to 48 hours for the new server information to propagate
throughout the Internet. After 48 hours, if LOGIX is providing E-mail hosting
and/or Web hosting for the domain name(s) you have transferred, refer to Email Hosting (see Page 9) and/or Web Hosting (see Page 23).
If Logix is not providing E-mail hosting, contact your E-mail hosting company and
get the name of their E-mail hosting server. Call the LOGIX Data Help Desk at 1877-683-1867 and ask to update your MX record using the E-mail server name
provided by your E-mail hosting company.
If Logix is not providing Web hosting, contact the company that is hosting your
website and get the IP address of their Web hosting server. Call the LOGIX Data
Help Desk at 1-877-683-1867 and ask to update your World Wide Web (WWW)
record using the IP address provided by your web hosting company.
Page 8 of 29
Data Help Desk
1-877-673-1868
www.logixcom.com
USING YOUR LOGIX HOSTED E-MAIL
Who needs this User Guide?
Your company’s employee commonly referred to as the “E-mail Administrator” who
will be responsible for administering the LOGIX hosted E-mail.
Why this User Guide?
This guide explains how to add, change, and delete E-mail accounts.
Note: Before you begin administering your LOGIX hosted E-mail accounts, it is
necessary to be set up as the “E-mail Administrator” with LOGIX. If you do not
have an administrator username and password, call the LOGIX Data Help Desk at
1-877-673-1868.
STEP 1i
Go to
www.logixcom.com/logix-customer-tools.php “Domainl Administrator.”
Page 9 of 29
Data Help Desk
1-877-673-1868
www.logixcom.com
STEP 2i
A new window will open that
contains the LOGIX E-mail
Administrator. Click on “Domain
Administrator.”
Tip: Save the link
admin.logixonline.com to your
Favorites so you can access this
page directly.
STEP 3i
Enter your username, password
and your company’s domain and
click “Continue.”
xxx-user
Note: When entering your
username you must include the
prefix provided to you by
LOGIX. The example shown has
“xxx-“ as the prefix.
Forgot your prefix or password?
Call the LOGIX Data Help Desk at 1-877-673-1868.
Page 10 of 29
Data Help Desk
1-877-673-1868
www.logixcom.com
STEP 4i
This screen lists your current
E-mail accounts. To add E-mail
accounts, click on “Add
Account.”
Fill out the Full Name, Email
Address, Username, and
Password. Click on “Build
Account.”
Note: In step 3, the format of
the username required a
prefix. There is no need to
enter this prefix when
populating the Username field
in this step.
Page 11 of 29
Data Help Desk
1-877-673-1868
www.logixcom.com
STEP 5i
To edit an account click “edit” to the
right of the E-mail account you wish
to change.
First you will see an overview of the
E-mail account you want to edit.
You can:
•
Update the Display Name
•
Change Password
•
Add or Change where the
E-mail’s are forwarded
•
Add or Change Alias(es)
•
Remove User
After each modification click
“Update” to confirm your changes.
Page 12 of 29
Data Help Desk
1-877-673-1868
www.logixcom.com
STEP 6i
Each time you click “Update,”
a confirmation in red will be
displayed. Make all your
account updates and then
click “LOGOUT” located on
left hand side of the screen.
If you have not previously completed your MX record updates or E-mail program
setup, you must complete steps 7 and 8.
STEP 7i8
This step should be coordinated to ensure that there is no interruption of your
E-mail service. After completing your E-mail account(s) setup, you will need to
coordinate your company’s Mail Exchanger (MX) record update. Contact your DNS
hosting company to have your MX record changed to “smtp0.logixcom.net.”
If LOGIX is hosting your DNS, contact the LOGIX Data Help Desk at
1-877-673-1868.
STEP 8i
Next you will need to configure your E-mail programs (i.e. Outlook, Outlook
Express, Eudora) (see Page 17) for Microsoft Outlook instructions. Visit the LOGIX
website www.logixcom.com/userguides for additional user guides for other E-mail
programs. If you will not be using an E-mail program, you can access your E-mail
using LOGIX Webmail at webmail.logixonline.com (see Page 16 for more
instructions on LOGIX Webmail).
Page 13 of 29
Data Help Desk
1-877-673-1868
www.logixcom.com
Personal User Administrator
Who needs this User Guide?
E-mail users that have been set up with LOGIX hosted E-mail and would like to
change their personal E-mail account settings.
Why this User Guide?
This guide explains how to change your personal E-mail password, personal
preferences, out of office reply, and other settings.
STEP 1i
Go to the following website logix.com/logixcustomer-tools.php
click “Personal User
Administrator.”
STEP 2i
Enter your username and
password then click
“Continue.”
Page 14 of 29
Data Help Desk
1-877-673-1868
www.logixcom.com
STEP 3i
This page displays your
personal account profile. You
can change your password and
out of office reply. Once you
have completed your changes,
click “Update,” and then click
“LOGOUT.”
Page 15 of 29
Data Help Desk
1-877-673-1868
www.logixcom.com
LOGIX WEBMAIL
Who needs this User Guide?
Customers who will be accessing their LOGIX E-mail account(s) via the Internet.
Why this User Guide?
This guide explains how to access your LOGIX web-enabled E-mail account from
anywhere in the world.
STEP 1i
Access the Internet and go to
http://mail.logixonline.com
STEP 2i
Enter your username and
password. Click “Continue”
and you will have access to
your personal Inbox.
STEP 3i
From here you can compose,
read, reply, forward, and
delete your E-mails.
STEP 4i4
When you are finished, click
“Sign Out.”
Note: After 1 hour of
inactivity, you will
automatically be signed out.
Page 16 of 29
Data Help Desk
1-877-673-1868
www.logixcom.com
MICROSOFT OUTLOOK E-MAIL SETUP
Who needs this User Guide?
Customers who need instructions setting up Microsoft Outlook or updating their
E-mail settings for LOGIX hosted E-mail.
Why this User Guide?
This guide explains how to set up Microsoft Outlook E-mail. There are many
versions of Microsoft Outlook, therefore the instructions may vary slightly for your
version. For additional user guides refer to the LOGIX website
http://www.logixcom.com/tools/userguides.html.
STEP 1i
Open Microsoft Outlook, from the main
menu bar, select Tools, then E-mail
Accounts. LOGIX supports all
versions from Outlook 2000-2010.
STEP 2i
Under "E-mail" click "Add a
new E-mail account" then click
"Next.”
To “View or change existing
E-mail accounts” skip to
Step 6 on Page 19.
Page 17 of 29
Data Help Desk
1-877-673-1868
www.logixcom.com
STEP 3i
Select "POP3", click "Next" to
continue.
STEP 4i
In the Your Name field, enter
your full name. In the E-mail
Address field, enter your Email address.
Enter “mail.logixonline.com" in
both Incoming mail server
(POP3) and Outgoing mail
server (SMTP) fields.
In the User Name field enter
your LOGIX E-mail username. In the Password field, enter your password. Click
"Next" to continue.
Note: When entering Logon Information, your User Name must include the prefix
provided to you by LOGIX.
Tip: Forgot your prefix or password?
Call the LOGIX Data Help Desk at 1-877-673-1868.
Page 18 of 29
Data Help Desk
1-877-673-1868
www.logixcom.com
STEP 5i
Click "Finish" to save. This will
take you back to Outlook.
To set up E-mail accounts on
each computer repeat steps 1
through 5.
STEP 6i
To make changes to your E-mail
account profile, go to Tools, then
E-mail Accounts. Click "View or
change existing e-mail accounts"
and click "Next.”
STEP 7i
Click on the E-mail account
profile name you want to change
and click "Change...".
Page 19 of 29
Data Help Desk
1-877-673-1868
www.logixcom.com
STEP 8i8
In the Your Name field, enter
your full name. In the E-mail
Address field, enter your E-mail
address.
Enter “mail.logixonline.com" in
both Incoming mail server
(POP3) and Outgoing mail
server (SMTP) fields.
In the User Name field enter
your LOGIX E-mail username. In
the Password field, enter your password. Click "Next" to continue.
Note: When entering your username you must include the prefix provided to you
by LOGIX.
Tip: Forgot your prefix or password?
Call the LOGIX Data Help Desk at 1-877-673-1868.
STEP 9i
Click "Finish" to save. This will
take you back to Outlook.
Your E-mail account profile
changes are now complete.
Page 20 of 29
Data Help Desk
1-877-673-1868
www.logixcom.com
HOSTING YOUR OWN E-MAIL
Who needs this User Guide?
Customers who have their own E-mail server and will be hosting their own E-mail.
Why this User Guide?
This guide explains how to update your E-mail DNS settings.
LOGIX HOSTED DNSi
If LOGIX is hosting your DNS, call the LOGIX data help desk at 1-877-673-1868
and provide them with your E-mail server Host Name and IP address. This
information will be used to update your Mail Exchange (MX) record. Upon request
your reverse DNS record can be updated at this time.
Note: It is strongly recommended that you request a reverse DNS record to
prevent your email from being blocked by other E-mail servers that check for
reverse DNS verification.
DNS HOSTED BY AN ALTERNATE PROVIDERi
If LOGIX is not hosting your DNS, contact the company that is hosting your DNS
and provide them with the Host Name and IP address of your E-mail server. This
information will be used to update your Mail Exchange (MX) record.
Note: It is strongly recommended that you request a reverse DNS record to
prevent your email from being blocked by other E-mail servers that check for
reverse DNS verification. Contact the LOGIX data help desk at 1-877-673-1868 to
add a reverse DNS record.
Page 21 of 29
Data Help Desk
1-877-673-1868
www.logixcom.com
BACK-UP E-MAIL SERVICEi
Upon request, LOGIX provides customers who host their own E-mail with Back-Up
E-mail service. In the event of an extended power outage or similar occurrence,
LOGIX Back-Up E-mail service will store E-mail for your domain up to a week.
Once your server becomes available, your E-mail will be automatically delivered to
your E-mail server. LOGIX does not keep copies of these E-mails.
Note: To add Back-Up E-mail service to your account contact a “live” Customer
representative at 1-877-673-1868.
Page 22 of 29
Data Help Desk
1-877-673-1868
www.logixcom.com
LOGIX WEB HOSTING
Who needs this User Guide?
Customers who use LOGIX to host their website.
Why this User Guide?
This guide explains how to upload your website files to use LOGIX Web Hosting.
NOTE: LOGIX will provide you with your FTP IP address, User Name, and Password
during the installation process.
STEP 1i
Open Internet Explorer.
In the address bar enter your
FTP IP address in the following format
and click “Enter.”
Example: ftp://216.201.128.7
STEP 2i
Enter the LOGIX provided User Name and
Password. Click “Login.”
NOTE: The Login Anonymously and Save
Password boxes should remain unchecked.
Page 23 of 29
Data Help Desk
1-877-673-1868
www.logixcom.com
STEP 3i
Your FTP window will open.
STEP 4i4
Locate the website files you
wish to upload.
Page 24 of 29
Data Help Desk
1-877-673-1868
www.logixcom.com
STEP 5i
Select the files to be
uploaded by clicking on Edit,
then Copy. Right click in the
FTP window, and then left
click Paste. Your files are
now uploaded to the FTP site
root directory.
Note: On the FTP site, your main web page (usually called index.htm or
default.htm) must be in the root directory, not in a subfolder.
STEP 6i
When you are ready to activate your website on LOGIX, contact the company that
is hosting your DNS to update your World Wide Web (WWW) record. If LOGIX is
hosting your DNS, call the LOGIX data help desk at 1-877-673-1868.
Note: This is an important step to complete the activation of your website on
LOGIX. Once it is completed your website will be available to view within 2 hours.
Page 25 of 29
Data Help Desk
1-877-673-1868
www.logixcom.com
MONSTERBOX
SM
Who needs this User Guide?
SM
SM
Customers who request LOGIX Monsterbox . LOGIX Monsterbox is a simple and
secure* way to share large files. Share your architectural drawings, medical
records, photographs, graphics files and music with your employees and/or clients.
Why this User Guide?
This guide will take you through the simple, step-by-step details to set up and use
LOGIX Monsterbox .
SM
LOGIX will provide you:
1. One Personal FTP IP Address
2. One Primary & One Secondary User Name
3. One Primary & One Secondary Password
STEP 1i
Open Internet Explorer.
In the address bar enter your
FTP IP address in the following
format.
Example: ftp://216.201.128.7
*Security is a function of those who have access to the secondary user name and password.
Page 26 of 29
Data Help Desk
1-877-673-1868
www.logixcom.com
STEP 2i
Once you have entered the IP
address click Go or press Enter
and the following box will
appear.
STEP 3i
Enter your User Name and password.
The Login Anonymously and Save
Password boxes should
remain unchecked.
STEP 4i
Click “Login” and the following screen will
appear:
Page 27 of 29
Data Help Desk
1-877-673-1868
www.logixcom.com
STEP 5i
Locate the files you wish to upload. Right click on the file, and scroll down, and left
click on “Copy.” Go back to your FTP screen. Right click in the FTP window, and
left click on “Paste.”
Congratulations, you have successfully uploaded your files!
If you need to upload additional files repeat Step 5.
Page 28 of 29
Data Help Desk
1-877-673-1868
www.logixcom.com
GLOSSARY
DHCP – Dynamic Host Configuration Protocol - A protocol for automatically assigning
IP configurations to workstations.
DNS – Domain Name Service – A service that translates domain names into IP
addresses.
DNS Hosting – A service provided to host your DNS records. One of the functions of DNS
Hosting is to direct traffic to your website. Another function of DNS Hosting is to direct
incoming E-mail to your E-mail provider.
DNS Resolvers – The translation of a domain name to determine its IP address.
Domain Name – A domain name is the core of your company's online identity. Once you
have registered your domain name no other company may use that identity online.
(Example: abccompany.com)
FTP – File Transfer Protocol - A standard Internet protocol used to exchange files
between computers on the Internet.
IP Address – Internet Protocol Address- A unique address that network devices use
to identify and communicate with each other on a network.
MX Record – Mail Exchange Record- A type of DNS record that determines where
Internet E-mail should be routed. The MX record points to the server where your E-mail
will be delivered.
NAT – Network Address Translation - NAT translates the private IP Addresses in the
internal network into a public IP Address. NAT operates on a router or firewall, usually
connecting two networks together.
POP3 – Post Office Protocol – The protocol most commonly used for retrieving E-mail.
Root Directory – The root directory is the directory within the FTP site that includes all
other directories. When you upload your website files, your main web page (usually called
index.htm or default.htm), must be in the root directory, not in a subfolder.
SMTP – Simple Mail Transfer Protocol – The protocol most commonly used for sending
E-mail.
Web Hosting – A service that allows others to view your website via the Internet.
WWW Record – World Wide Web – The DNS entry that points to your website.
Page 29 of 29


© Copyright 2026