ABC
docz
Explore
Log in
Create new account
Download
Report
technology and computing
software
Document 426626
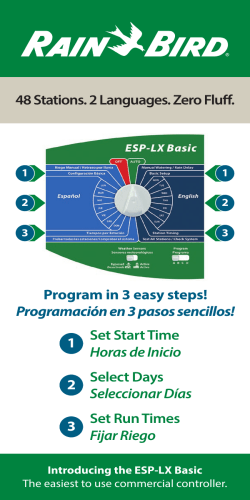
Set Start Time Select Days Set Run Times Horas de Inicio
. So Playing video games can get expensive,
The sky within your reach... air traffic controller Requirements For more information
Features General Description •
How to Change the Chiller Digital Controller STEP 1 STEP 2 STEP 3
How to assemble a HHO Generator and why it works Home
Instruction Manual PWM Driver 5A-LP2 Luci Pte. Ltd.
How To Easily Make Your Own UC3842 PWM IC Tester
UI Design Patterns for the Web and Desktop
Storm & Storm X Controller Manual
© Copyright 2026
About abcdocz
DMCA / GDPR
Report