
Some tips on R
Some tips on R
January 8, 2015
0.1
Some help for R
In this short notebook, I will go through a few basic examples in R that you may find useful for the course.
These are just some of the things I find useful. Feel free to search around for others.
For those of you who have done some programming before, you will notice that R is a functional programming language.
0.1.1
Functions
You might get tired of always typing http://stats191.stanford.edu/data. You could make a small function
In [1]: %%R
useful_function = function(dataname) {
return(paste("http://stats191.stanford.edu/data/", dataname, sep=’’))
}
useful_function("groundhog.table")
[1] "http://stats191.stanford.edu/data/groundhog.table"
Let’s load the heights data with less code
In [2]: %%R
h.table = read.table(useful_function("groundhog.table"), header=TRUE, sep=’,’)
head(h.table)
1
2
3
4
5
6
year mintemp shadow
1990
24
N
1991
23
Y
1992
22
Y
1993
16
Y
1994
12
Y
1995
13
N
Or, for all data sets in the course directory, we might try
In [3]: %%R
course_dataset = function(dataname, sep=’’, header=TRUE) {
read.table(useful_function(dataname), header=header, sep=sep)
}
head(course_dataset(’groundhog.table’, sep=’,’))
1
1
2
3
4
5
6
year mintemp shadow
1990
24
N
1991
23
Y
1992
22
Y
1993
16
Y
1994
12
Y
1995
13
N
Note that I didn’t use return in the function above. By default, R will return the object in the last line
of the function code.
In [4]: %%R
test_func = function(x) {
x^2
3
}
test_func(4)
[1] 3
0.1.2
Source
When working on a particular project or assignment, it is often easiest to type commands in a text editor
and rerun them several times. The command source is an easy way to do this, and it takes either the name
of a file or a URL as argument. Suppose we have a webpage http://stats191.stanford.edu/R/helper code.R
In [5]: import urllib
print urllib.urlopen(’http://stats191.stanford.edu/R/helper_code.R’).read()
course dataset = function(dataname, sep=’’, header=TRUE) {
read.table(useful function(dataname), header=header, sep=sep)
}
Then, we can execute this as follows
In [6]: %%R
source("http://stats191.stanford.edu/R/helper_code.R")
head(course_dataset("groundhog.table", sep=’,’))
1
2
3
4
5
6
year mintemp shadow
1990
24
N
1991
23
Y
1992
22
Y
1993
16
Y
1994
12
Y
1995
13
N
As you go through the course, you might copy this file to a your computer and add some other useful
functions to this file.
For larger collections of functions, R allows the creation of packages that can be installed and loaded with
a call to the library function. Documentation on packages can be found here.
2
0.1.3
Concatenation, sequences
Many tasks involving sequences of numbers. Here are some basic examples on how to manipulate and create
sequences.
The function c, concatenation, is used often in R, as are rep and seq
In [7]: %%R
X = 3
Y = 4
c(X,Y)
[1] 3 4
The function rep denotes repeat.
In [8]: %%R
print(rep(1,4))
print(rep(2,3))
c(rep(1,4), rep(2,3))
[1] 1 1 1 1
[1] 2 2 2
[1] 1 1 1 1 2 2 2
The function seq denotes sequence. There are various ways of specifying the sequence.
In [9]: %%R
seq(0,10,length=11)
[1]
0
1
2
3
4
5
6
7
8
9 10
In [10]: %%R
seq(0,10,by=2)
[1]
0
2
4
6
8 10
You can sort and order sequences
In [11]: %%R
X = c(4,6,2,9)
sort(X)
[1] 2 4 6 9
Use an ordering of X to sort a list of Y in the same order
3
In [12]: %%R
Y = c(1,2,3,4)
o = order(X)
X[o]
Y[o]
[1] 3 1 2 4
A word of caution. In R you can overwrite builtin functions so try not to call variables c:
In [13]: %%R
c = 3
c
[1] 3
However, this has not overwritten the function c.
In [14]: %%R
c(3,4,5)
[1] 3 4 5
Other variables to be careful are the aliases T for TRUE and F for FALSE. Since we compute t and F
statistics it is natural to also have variables named T so when you are expecting T to be TRUE you might get
a surprise.
In [15]: %%R
c(T,F)
[1]
TRUE FALSE
For other style advice, try reading Hadley Wickham’s style guide. This is part of a fairly extensive online
book. Google also has a style guide.
0.1.4
Indexing
Often times, we will want to extract a subset of rows (or columns) of a vector (or matrix). R supports using
logical vectors as index objects.
In [16]: %%R
X = c(4,5,3,6,7,9)
Y = c(4,2,65,3,5,9)
X[Y>=5]
[1] 3 7 9
4
Suppose we have a data.frame and want to extract from rows or columns. Rows are the first of two
indexing objects while columns correspond to the second indexing object. Suppose we want to find take the
mother and daughter heights where the daughter’s height is less than or equal to 62 inches. Note the “,” in
the square brackets below: this tells R that it is looking for a subset of rows of the data.frame.
In [17]: %%R
library(alr3)
data(heights)
head(heights)
subset_heights = heights[heights$Dheight <= 62,]
print(c(nrow(heights), nrow(subset_heights)))
Loading required package: car
[1] 1375 354
0.1.5
Plotting
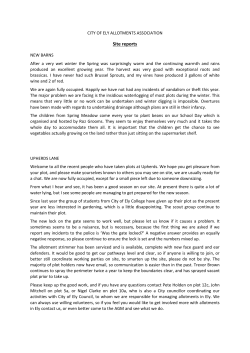
R has a very rich plotting library. Most of our plots will be fairly straightforward, “scatter plots”.
In [18]: %%R
X = c(1:40)
Y = 2 + 3 * X + rnorm(40) * 10
plot(X, Y)
5
The plots can be made nicer by adding colors and using different symbols. See the help for function par.
In [19]: %%R
plot(X, Y, pch=21, bg=’red’)
6
You can add titles, as well as change the axis labels.
In [20]: %%R
plot(X, Y, pch=23, bg=’red’, main=’A simulated data set’, xlab=’Predictor’, ylab=’Outcome’)
7
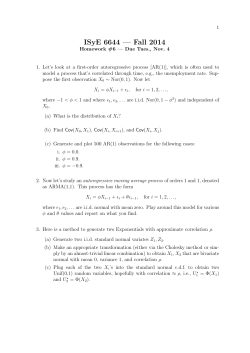
Lines are added with abline. We’ll add some lines to our previous plot: a yellow line with intercept 2,
slope 3, width 3, type 2, as well as a vertical line at x=20 and horizontal line at y=60.
In [21]: %%R
plot(X, Y, pch=23, bg=’red’, main=’A simulated data set’, xlab=’Predictor’, ylab=’Outcome’)
abline(2, 3, lwd=3, lty=2, col=’yellow’)
abline(h=60, col=’green’)
abline(v=20, col=’red’)
8
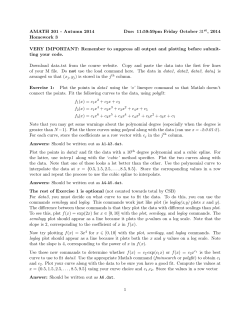
You can add points and lines to existing plots. In this example, we plot the first 20 points in red in one
call to plot, then add the rest in blue with an orange line connecting them.
In [22]: %%R
plot(X[1:20], Y[1:20], pch=21, bg=’red’, xlim=c(min(X),max(X)), ylim=c(min(Y),max(Y)))
points(X[21:40], Y[21:40], pch=21, bg=’blue’)
lines(X[21:40], Y[21:40], lwd=2, lty=3, col=’orange’)
9
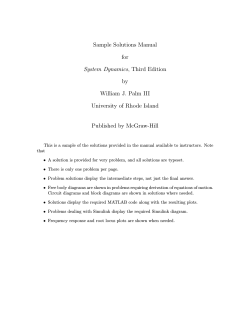
You can put more than one plot on each device. Here we create a 2-by-1 grid of plots
In [23]: %%R
par(mfrow=c(2,1))
plot(X, Y, pch=21, bg=’red’)
plot(Y, X, pch=23, bg=’blue’)
par(mfrow=c(1,1))
10
0.1.6
Saving plots
Plots can be saved as pdf, png, jpg among other formats. Let’s save a plot in a file called “myplot.jpg”
In [24]: %%R
jpeg("myplot.jpg")
plot(X, Y, pch=21, bg=’red’)
dev.off()
quartz_off_screen
2
In [25]: from IPython.display import Image
Image(’myplot.jpg’)
11
Out[25]:
Several plots can be saved using pdf files. This example has two plots in it.
In [26]: %%R
pdf("myplots.pdf")
# make whatever plot you want
# first page
plot(X, Y, pch=21, bg=’red’)
# a new call to plot will make a new page
plot(Y, X, pch=23, bg=’blue’)
# close the current "device" which is this pdf file
dev.off()
quartz_off_screen
12
2
0.1.7
Loops
It is easy to use for loops in R
In [27]: %%R
for (i in 1:10) {
print(i^2)
}
[1]
[1]
[1]
[1]
[1]
[1]
[1]
[1]
[1]
[1]
1
4
9
16
25
36
49
64
81
100
In [28]: %%R
for (w in c(’red’, ’blue’, ’green’)) {
print(w)
}
[1] "red"
[1] "blue"
[1] "green"
Note that big loops can get really slow, a drawback of many high-level languages.
0.1.8
Builtin help
R has a builtin help system, which can be accessed and searched as follows
> help(t.test)
> help.search(’t.test’)
Many objects also have examples that show you their usage
> example(lm)
In [29]: %%R
help(t.test)
R Help on ‘t.test’t.test
package:stats
S t u d e n t’ s t- T e s t
13
R Documentation
D e s c r i p t i o n:
Performs one and two sample t-tests on vectors of data.
U s a g e:
t.test(x, ...)
## Default S3 method:
t.test(x, y = NULL,
alternative = c("two.sided", "less", "greater"),
mu = 0, paired = FALSE, var.equal = FALSE,
conf.level = 0.95, ...)
## S3 method for class ’formula’
t.test(formula, data, subset, na.action, ...)
A r g u m e n t s:
x: a (non-empty) numeric vector of data values.
y: an optional (non-empty) numeric vector of data values.
alternative: a character string specifying the alternative hypothesis,
must be one of ‘"two.sided"’ (default), ‘"greater"’ or
‘"less"’. You can specify just the initial letter.
mu: a number indicating the true value of the mean (or difference
in means if you are performing a two sample test).
paired: a logical indicating whether you want a paired t-test.
var.equal: a logical variable indicating whether to treat the two
variances as being equal. If ‘TRUE’ then the pooled variance
is used to estimate the variance otherwise the Welch (or
Satterthwaite) approximation to the degrees of freedom is
used.
conf.level: confidence level of the interval.
formula: a formula of the form ‘lhs ~ rhs’ where ‘lhs’ is a numeric
variable giving the data values and ‘rhs’ a factor with two
levels giving the corresponding groups.
data: an optional matrix or data frame (or similar: see
‘model.frame’) containing the variables in the formula
‘formula’. By default the variables are taken from
‘environment(formula)’.
subset: an optional vector specifying a subset of observations to be
used.
na.action: a function which indicates what should happen when the data
contain ‘NA’s. Defaults to ‘getOption("na.action")’.
14
...: further arguments to be passed to or from methods.
D e t a i l s:
The formula interface is only applicable for the 2-sample tests.
‘alternative = "greater"’ is the alternative that ‘x’ has a larger
mean than ‘y’.
If ‘paired’ is ‘TRUE’ then both ‘x’ and ‘y’ must be specified and
they must be the same length. Missing values are silently removed
(in pairs if ‘paired’ is ‘TRUE’). If ‘var.equal’ is ‘TRUE’ then
the pooled estimate of the variance is used. By default, if
‘var.equal’ is ‘FALSE’ then the variance is estimated separately
for both groups and the Welch modification to the degrees of
freedom is used.
If the input data are effectively constant (compared to the larger
of the two means) an error is generated.
V a l u e:
A list with class ‘"htest"’ containing the following components:
statistic: the value of the t-statistic.
parameter: the degrees of freedom for the t-statistic.
p.value: the p-value for the test.
conf.int: a confidence interval for the mean appropriate to the
specified alternative hypothesis.
estimate: the estimated mean or difference in means depending on
whether it was a one-sample test or a two-sample test.
null.value: the specified hypothesized value of the mean or mean
difference depending on whether it was a one-sample test or a
two-sample test.
alternative: a character string describing the alternative hypothesis.
method: a character string indicating what type of t-test was
performed.
data.name: a character string giving the name(s) of the data.
S e e A l s o:
‘prop.test’
E x a m p l e s:
15
require(graphics)
t.test(1:10, y = c(7:20))
# P = .00001855
t.test(1:10, y = c(7:20, 200)) # P = .1245
-- NOT significant anymore
## Classical example: Student’s sleep data
plot(extra ~ group, data = sleep)
## Traditional interface
with(sleep, t.test(extra[group == 1], extra[group == 2]))
## Formula interface
t.test(extra ~ group, data = sleep)
In [30]: %%R
example(lm)
lm> require(graphics)
lm> ## Annette Dobson (1990) "An Introduction to Generalized Linear Models".
lm> ## Page 9: Plant Weight Data.
lm> ctl <- c(4.17,5.58,5.18,6.11,4.50,4.61,5.17,4.53,5.33,5.14)
lm> trt <- c(4.81,4.17,4.41,3.59,5.87,3.83,6.03,4.89,4.32,4.69)
lm> group <- gl(2, 10, 20, labels = c("Ctl","Trt"))
lm> weight <- c(ctl, trt)
lm> lm.D9 <- lm(weight ~ group)
lm> lm.D90 <- lm(weight ~ group - 1) # omitting intercept
lm> ## No test:
lm> anova(lm.D9)
Analysis of Variance Table
Response: weight
Df Sum Sq Mean Sq F value Pr(>F)
group
1 0.6882 0.68820 1.4191 0.249
Residuals 18 8.7292 0.48496
lm> summary(lm.D90)
Call:
lm(formula = weight ~ group - 1)
Residuals:
Min
1Q
-1.0710 -0.4938
Median
0.0685
3Q
0.2462
Max
1.3690
Coefficients:
Estimate Std. Error t value Pr(>|t|)
groupCtl
5.0320
0.2202
22.85 9.55e-15 ***
groupTrt
4.6610
0.2202
21.16 3.62e-14 ***
--16
Signif. codes:
0 ‘***’ 0.001 ‘**’ 0.01 ‘*’ 0.05 ‘.’ 0.1 ‘ ’ 1
Residual standard error: 0.6964 on 18 degrees of freedom
Multiple R-squared: 0.9818,Adjusted R-squared: 0.9798
F-statistic: 485.1 on 2 and 18 DF, p-value: < 2.2e-16
lm> ## End(No test)
lm> opar <- par(mfrow = c(2,2), oma = c(0, 0, 1.1, 0))
lm> plot(lm.D9, las = 1)
# Residuals, Fitted, ...
lm> par(opar)
lm> ## Don’t show:
lm> ## model frame :
lm> stopifnot(identical(lm(weight ~ group, method = "model.frame"),
lm+
model.frame(lm.D9)))
lm> ## End Don’t show
lm> ### less simple examples in "See Also" above
lm>
lm>
lm>
17
0.1.9
Distributions in R
In practice, we will often be using the distribution (CDF), quantile (inverse CDF) of standard random
variables like the T, F, chi-squared and normal.
The standard 1.96 (about 2) standard deviation rule for α = 0.05: (note that 1-0.05/2=0.975)
In [31]: %%R
qnorm(0.975)
[1] 1.959964
We might want the α = 0.05 upper quantile for an F with 2,40 degrees of freedom:
In [32]: %%R
qf(0.95, 2, 40)
18
[1] 3.231727
So, any observed F greater than 3.23 will get rejected at the α = 0.05 level. Alternatively, we might have
observed an F of 5 with 2, 40 degrees of freedom, and want the p-value
In [33]: %%R
1 - pf(5, 2, 40)
[1] 0.01152922
Let’s compare this p-value with a chi-squared with 2 degrees of freedom, which is like an F with infinite
degrees of freedom in the denominator (send 40 to infinity). We also should multiply the 5 by 2 because it’s
divided by 2 (numerator degrees of freedom) in the F.
In [34]: %%R
c(1 - pchisq(5*2, 2), 1 - pf(5, 2, 4000))
[1] 0.006737947 0.006780121
Other common distributions used in applied statistics are norm and t.
0.1.10
Other references
• An Introduction to R
• R for Beginners
• Modern Applied Statistics with S
• Practical ANOVA and Regression in R
• simpleR
• Introduction to R
• R Reference Card
• R Manuals
• R Wiki
In [35]:
19


© Copyright 2026