
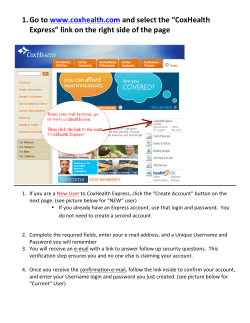
tu medconnect login page
TransUnion Healthcare Solutions
MedConnect Web-Portal Guide
January 16, 2015
Version 2.0
© 2014 TransUnion LLC
All Rights Reserved
No part of this publication may be reproduced or distributed in any form or by any means,
electronic or otherwise, now known or hereafter developed, including, but not limited to, the
Internet, without the explicit prior written consent from TransUnion LLC.
Requests for permission to reproduce or distribute any part of, or all of, this publication
should be mailed to:
Law Department
TransUnion
555 West Adams
Chicago, Illinois 60661
The “T” logo, TransUnion, and other trademarks, service marks, and logos (the
“Trademarks”) used in this publication are registered or unregistered Trademarks of
TransUnion LLC or their respective owners. Trademarks may not be used for any purpose
whatsoever without the express written permission of the Trademark owner.
transunion.com
2 | © 2014 TransUnion LLC All Rights Reserved
Table of Contents
Table of Contents ................................................................................................................................................................. 3
TU MEDCONNECT LOGIN PAGE .................................................................................................................................... 4
ENTERING THE PORTAL: ............................................................................................................................................. 4
SECURITY QUESTIONNAIRE .......................................................................................................................................... 5
RESETTING YOUR PASSWORD ................................................................................................................................. 5
SEARCH PAGE .................................................................................................................................................................... 6
ELIGIBILITY, COVERAGE AND BENEFIT INFORMATION SUMMARY ................................................................. 10
HISTORY PAGE................................................................................................................................................................. 12
INTERPRETING RETURNS ON THE HISTORY PAGE .......................................................................................... 13
PROCESSING UNSUCCESSFUL RETURNS .......................................................................................................... 14
IMPORTANT TIPS ......................................................................................................................................................... 16
TransUnion Healthcare Solutions: Investigations into Search Results ...................................................................... 16
PAYER STATUS ................................................................................................................................................................ 17
PAYER DOWN TIMES ...................................................................................................................................................... 18
MY PROFILE ...................................................................................................................................................................... 19
PASSWORD MANAGEMENT...................................................................................................................................... 19
MY ACCOUNT .................................................................................................................................................................... 20
EDITING THE SECURITY QUESTIONNAIRE .......................................................................................................... 20
BATCH ELIGIBILITY.......................................................................................................................................................... 21
Batch Summary Page .................................................................................................................................................... 21
VIEWING BATCH DETAILS ......................................................................................................................................... 22
BATCH ELIGIBILITY, COVERAGE AND BENEFIT INFORMATION SUMMARY ................................................... 23
3 | © 2014 TransUnion LLC All Rights Reserved
TU MEDCONNECT LOGIN PAGE
ENTERING THE PORTAL:
Open a browser and enter www.meddatahealth.com on address bar.
You should see the TransUnion Login screen where you can enter your user name and password:
The password is case sensitive and requires a special character. Enter the
user name and password in the space provided on the MedConnect Log-In
window. Click Log In. A successful login attempt will take you tothe Eligibility
Payers Page.
An unsuccessful login attempt will result in the following response:
Invalid User Name or Password
Note: Passwords are case sensitive
If you experience difficulty reaching the website or the Member Login screen try the following:
•
•
Verify that your URL address bar reads: www.meddatahealth.com
Verify that you have Internet access. Try to access another website to determine if you are experiencing problems
with your Internet Service Provider.
• The Transunion Healthcare website is compatible with most browser types. For best results we recommend the latest
version of IE.
• See the TransUnion Healthcare Solutions Login Guide for additional information. The guide is located on the TransUnion
Healthcare Solutions login page and can be accessed via the LOGIN GUIDE link in the BEFORE CONTACTING CUSTOMER
SUPPORT section.
Contact TransUnion Healthcare Solutions Support at 877-633-3282 if you continue to have difficulty with reaching the
website or entering your user name and password.
REQUESTING A NEW LOGIN
If you do not have a login please contact your manager or supervisor. Depending on the account type, the manager may be able to
create the login for you. If the manager or supervisor does not have Client Administrative access to the account, then they can send
us an email request to have an access added. The email address is [email protected] and the email should include the
following:
Manager’s name and position title
Clinic Name
Name of user to add/change or delete.
4 | © 2014 TransUnion LLC All Rights Reserved
SECURITY QUESTIONNAIRE
The Security Questionnaire will show each time you log in until it has been
completed and is a requirement of the Password Reset function.
Complete the Security Questionnaire requirement by clicking on NEXT and
answering the questions on each screen. The system will save your
information so that you can easily reset your password if it is forgotten.
You have the option to change your security answers and email address on file
at any time by selecting MY PROFILE>my account from the navigation bar.
If you do not receive the notification:
•
•
•
The email address may be incorrect.
The email may have been sent to a spam or junk folder
Your email account may be blocked from receiving outside emails. Check with your IT
Department if you think this is the case.
RESETTING YOUR PASSWORD
If you have completed the security questionnaire, you will be able to
utilize the Password Reset option from the member login screen.
You will need to answer your security questions and enter your email
address. If the system is able to verify your answers then a
temporary password will be sent to the email address we have on
file. You will be asked to reset your password once you log in.
NOTE:
PASSWORDS CANNOT BE VERIFIED BY PHONE UNLESS YOU ARE ABLE TO CORRECTLY IDENTIFY AT LEAST 90% OF THE
PASSWORD WE HAVE ON FILE. IF YOU HAVE FORGOTTEN YOUR PASSWORD ENTIRELY, OR THE RESET PASSWORD OPTION IS NOT AVAILBLE TO
YOU, YOU CAN EMAIL [email protected] AND REQUEST A PASSWORD REMINDER. YOUR EMAIL SHOULD INCLUDE YOUR FULL
NAME, YOUR USER NAME, YOUR CLINIC NAME AND A NOTE THAT YOU NEED YOUR PASSWORD INFORMATION.
PASSWORDS CAN ONLY BE VERIFIED OR RELEASED TO THE INDIVIDUAL REQUESTING THEIR OWN PASSWORD
INFORMATION. IF YOU DO NOT HAVE A PASSWORD ISSUED TO YOU UNDER YOUR OWN NAME PLEASE CONTACT YOUR
MANAGER OR SUPERVISOR AND HAVE THEM SEND A LOGIN REQUEST FOR YOU. THE EMAIL CAN BE SENT TO
[email protected] AND MUST INCLUDE THE POSITION TITLE OF THE REQUESTOR, YOUR NAME, THE CLINIC NAME AND
A NOTE THAT A NEW LOGIN IS NEEDED FOR THE PERSON INDICATED
5 | © 2014 TransUnion LLC All Rights Reserved
SEARCH PAGE
Upon successful login, you will be directed to the Eligibility Search Page. You can access other sections of the Site (Home Page,
My Profile) by clicking on the navigation menu bar. You can also navigate to various products by selecting the PRODUCTS tab
on the main menu bar at the top of the page. A drop menu will appear listing the system functions available to your access.
Highlight and click on the desired function to access your selection.
A separate window will appear when “Referrals” or “Reporting” is selected from the menu.
•
IMPORTANT INFORMATION FOR REFERRAL USERS
All eligibility searches performed from the referral’s Member screen will no longer be searchable from the Eligibility
History Page on the eligibility portal. Therefore, it is important to run the eligibility search through the Member History
page on the referral site and then create the member file via the Eligibility Benefit and Summary screen so that a copy of
the search can be retained with the member file. Please see the Referral Training Manual for instructions on how to
create the member file using eligibility.
Users that access multiple clinics for Referrals/Reporting have the option of using only one login for those clinics on the
new system. Once REFERRALS or REPORTING is selected from the PRODUCTS menu, a list of all clinics available
will appear. Click on the appropriate clinic name to show the referral or reporting access for that location. If you have
difficulty accessing the product of your choice, please contact TransUnion Operations Support at 877-633-3282.
**Please note that the multiple site/single login access does not apply to the eligibility portion of the website.
•
When an ancillary product is selected, the original transunionhealth.com window will remain open with the last
function selected displayed. You may return to the main website at any time without closing the secondary window.
6 | © 2014 TransUnion LLC All Rights Reserved
Upon successful login, you will be directed to the ELIGIBILITY SEARCH Page.
The Eligibility Payers list is alphabetized and shows a customized list of all payers available to a user for eligibility inquiry.
There are three ways to locate a payer:
1. Use the scroll bar located on the right side of the Eligibility Payers list to locate the desired payer and double click on
the payer name to bring up the search options for that particular payer.
2. Use the scroll bar located on the right side of the Eligibility Payers list to locate the desired payer, highlight your selection
and press <Enter> on your keyboard to bring up the search options for that particular payer..
3. Single click on any payer from the list. You will see TYPE TO SEARCH appear on the payer list. Type the payer name
until the desired payer shows on the search list. Once the payer is highlighted, then press <Enter> on your keyboard or
double click on the highlighted listing to bring up the search options for that particular payer.
7 | © 2014 TransUnion LLC All Rights Reserved
Once an insurance plan has been selected, please verify that the payer name shows on the title bar of the search box.
You must enter in specific, payer-required data in order to perform an eligibility search. A copy of the patient’s insurance card is
the best source of this data as it should match the payer database.
Determine the patient’s relationship to the policyholder (subscriber). Then select a search criteria option from the Search Options
Menu. Some plans allow only subscriber searches, however, if a dependant search option is available then use the Relation
indicators to select the appropriate relationship. These search options are applicable to the relation status and vary from plan to
plan.
Self – patient is the subscriber
Spouse – patient is the husband or wife to the subscriber
Child – patient is minor dependent to the subscriber
Other Adult – patient is over the age of 18 but covered under another adult’s policy. College age students will typically fall into this
category.
The current date of service is listed in the Date of Service Start and End date fields. Enter in the desired date range if you wish to
change the default date setting. Most payers allow searches for up to one year prior to the day of the search.
Once the search option is selected the search box will automatically display text fields related to the criteria chosen. All fields
must be completed unless otherwise specified. If there is an error or omission in one of the date fields, a note describing the error
will appear below the search box. For example:
8 | © 2014 TransUnion LLC All Rights Reserved
Make any necessary corrections and then submit the inquiry by clicking on the SUBMIT button.
There is a 30 second interval given for the results to come back. Most benefits will return within a few seconds and once completed
the summary will automatically appear on your screen.
However, various issues can lengthen the amount of time waiting on a response for any given search.
You can determine whether or not a payer is having transmission delays by reviewing the PAYER STATUS window located under
SYSTEM on the Toolbar. See page 16 for more details on monitoring PAYER STATUS.
IMPORTANT TIPS
The success of your search is dependent upon entering the information as accurately as possible. If you are having trouble
submitting your search, please verify the following:
•
Check the PAYER NAME on the search box. It should match the payer that was selected from the payer list.
•
If you are searching for a spouse/child/other adult then a dependent level search option should be used, if available.
•
Use the member card for reference.
•
Opt for the subscriber ID or SSN search, if at all possible. Searches that involve the member’s name can be challenging
since they depend on an exact spelling match for a successful result.
9 | © 2014 TransUnion LLC All Rights Reserved
ELIGIBILITY, COVERAGE AND BENEFIT INFORMATION
SUMMARY
The amount of detail shown on the Eligibility, Coverage and Benefit Information form is payer dependent. It is recommended that
the benefit detail be reviewed in its entirety, especially if you are unfamiliar with the plan.
While the benefit details found on an eligibility inquiry will vary from payer to payer, common details can be found within each
return
ID – System assigned ID that is specific to the individual return.
Payer Name - Insurance Company Name
Provider ID – System assigned ID that is specific to the provider
Provider NPI – The National Provider Identification number associated with the search Subscriber and/or Dependent
Detail – May include First and Last Name, Subscriber ID Group ID, Date of Birth and Subscriber Address and Employer.
Eligibility Status – May return Active Coverage, Inactive, Subscriber/Insured Not Found, etc.
and can also include Coverage, Policy, Service, Plan and Network descriptions if applicable.
10 | © 2014 TransUnion LLC All Rights Reserved
Payer Address – Not available on all plans
Service Type(s) Display – list of services available in Eligibility/Benefit Information. Eligibility/Benefit Information – Available
on “Eligible” returns only. Benefit descriptions and content will vary among plans.
Back To Top – This link is provided in each section of the return. Selecting it will return the user from any section on the
page, back up to the beginning of the benefit form.
Print – Use to print a copy of the return. Note: Only services that are selected under the
Service Types to Display menu will be printed.
EDIT – Edit and resubmit the inquiry.
DISPLAYING AND PRINTING BENEFIT DETAILS
The list of services in the SERVICE TYPE(S) DISPLAY window will vary among payers and plans. Each benefit section
described in the benefit detail body is given a listing in the display window.
By default, each of the benefit section details available will be shown in their entirety in the summary. To customize your view to
show only specific benefits on the return, DE-SELECT the benefit by clicking on the black check mark next to the benefit
description as shown below. Only the remaining selected benefits will be outlined in the benefit detail. Benefits can be re-selected
at any time by clicking on the box next to the desired benefit description.
•
•
•
Click “Show All” to reload all service types to the view
Click “Hide All” to remove all service types from the view
Use the scroll bar located to the right of the screen to view the entire return.
Click on the link to the benefit detail to go directly to the description on the summary page.
To print out a copy of the return, click on the PRINT button located at the upper right hand corner of the screen. Only the
benefits selected on the Service Type Display Window will be printed.
11 | © 2014 TransUnion LLC All Rights Reserved
HISTORY PAGE
The History Page acts as a repository of all searches performed by the clinic. They are listed in chronological order
with the most recent at the top. Previously submitted returns can be found on the website’s History Page for a period
≤ 90 days unless otherwise specified. Here, you can access previous searches to review or edit and resubmit past
inquiries.
Up to 250 items can be viewed at a time. Use the Page Size drop menu to select the number of items (up to 200) that
can be viewed on a single page. To scroll through the pages, select a page number or use the toggle buttons.
SEARCH for a specific return by clicking your mouse in one or more of the text boxes located at the top of the History
page and enter the appropriate search criteria. Press <Enter> on the keyboard to run the search or click the APPLY
button. The system will retrieve all transactions performed in the past 90 days that contain the criteria you enter.
SORT the returns by clicking on the column headers. This can be done before or after a search for specific types of
returns has been performed.
Click REMOVE to restore the History page to the original settings.
Editing a previously submitted response: To edit a transaction, click on the Edit button located at the right side
of the transaction summary line. You will be brought back to the Eligibility Search Page with the previously submitted
search criteria already populated. You can then edit any field and try the search again.
You can also resubmit a successfully completed return to verify that the member’s policy is still active by searching for
the patient’s last valid return and then clicking on the EDIT button. When the search screen appears, click “SUBMIT”.
It is not necessary to edit any data prior to submitting the new search.
Viewing the Summary: Click on the VIEW button located on the right side of the transaction summary line to view
a previously submitted search result.
12 | © 2014 TransUnion LLC All Rights Reserved
INTERPRETING RETURNS ON THE HISTORY PAGE
The eligibility responses are color coded on the History page for easy identification. A color legend is provided at
the bottom of the History page.
Eligible – Gray – Indicates a successful search for the member. Review summary for benefit details
Eligible Other – Turquoise – Indicates involvement as a third party benefit administrator. The name of the
insurance company that holds the actual benefit information on the patient should be listed under the
Eligibility/Benefit Information section of the return. That company will need to be contacted to verify the benefits for
the patient.
Not Found – Orange - Indicates that the member was not found. The reasons that the patient was not found can vary
and the eligibility summary should be reviewed for the specific error. For example, the patient is not a policyholder with
this insurance OR there might be an error in the data submitted. Depending on the search criteria used, check the ID
number, patient name and/or date of birth for accuracy. Use the insurance card to verify data, but be aware that it may
be necessary to call the insurance company to confirm what data they have on file for the
patient. Make any necessary corrections and resubmit the inquiry.
Please review the section on PROCESSING UNSUCCESSFUL RETURNS for additional information on Patient Not Found
and other rejection responses.
Inactive – Brown - The member data was found but the policy is no longer active. The patient may be still be with
the insurance company but under a different policy number, or they may be covered under a different carrier
altogether. Contact the patient to determine possible carrier changes.
Waiting – Beige – There is an error with the transmission. Please contact Operations Support at: 877-732-6853 to
determine the cause of the issue.
Payer Not Responding – Blue – A problem has occurred with the transmission process while submitting this inquiry
and the payer is unable to respond. This status is usually temporary. TransUnion Healthcare Solutions monitors the
system for these responses and will resubmit the inquiry for a period of 24 hours or until a valid response is received.
The History page should be monitored for a change of status.
•
You can determine whether or not a payer is having transmission issues by reviewing the PAYER
STATUS. See page 16.
13 | © 2014 TransUnion LLC All Rights Reserved
Provider Ineligible – Dark Gray – In the majority of cases, this response will indicate that that the provider is not
contracted with the payer or an enrollment obligation has not been completed.
•
Certain payers require special enrollment to access member benefit details.
Enrollment requirements that have not been fulfilled can result in a Provider Ineligible error response.
To view the list of payers requiring special enrollment go to SYSTEM and then select PAYER
ENROLLMENT.
Please contact MedData Customer Support at 877-633-3282 for assistance in determining the cause of the issue
Invalid Request – Gold – Response indicates an unidentified Payer ID, missing data element, incorrect mapping of
a Payer ID or other similar issue.
Please contact TransUnion Healthcare Solutions Support at 877-732-6853 or email
[email protected] for assistance in determining the cause of the issue.
PROCESSING UNSUCCESSFUL RETURNS
An inquiry that does not return with an eligible response requires investigation. The error response can be found in the
Eligibility Status section of the benefit return. The course of action will depend upon the cause of the rejection.
Patient Not Found – The patient is not a policyholder with this insurance OR there might be an error in the data
submitted. Depending on the search criteria used, check the ID number,
patient name and/or date of birth for accuracy. Use the insurance card to verify data, but be aware that it may be
necessary to call the insurance company to confirm what data they have on file for the patient. Make any necessary
corrections and resubmit the inquiry.
**HINT** - Opt for the subscriber ID or SSN search if at all possible. Searches that involve the
member’s name can be challenging since they depend on an exact spelling match for a successful
result.
•
•
•
•
Invalid/Missing Date of Birth – See “Patient Not Found” above.
Invalid/Missing Subscriber/Insured Name or ID – See “Patient Not Found” above.
Subscriber/Insured Not Found – See “Patient Not Found” above.
DOB does not match – See “Patient Not Found” above.
Inactive – The member data was found but the policy is no longer active. The patient may still be with the insurance
14 | © 2014 TransUnion LLC All Rights Reserved
company but under a different policy number, or they may be covered under a different carrier altogether. Contact the
patient to determine possible carrier changes.
Invalid/Missing Provider Identification – May indicate contractual issues between provider and payer, an
unfulfilled enrollment requirement, mapping issue or an incorrect or missing National Provider Identification number
has been submitted. TransUnion Healthcare Solutions Support can assist you in determining the cause of the
rejection.
•
Certain payers require special enrollment to access member benefit details.
Enrollment requirements that have not been fulfilled can result in a Provider Ineligible error response.
To view the list of payers requiring special enrollment go to SYSTEM and then select PAYER
ENROLLMENT
Required Application Data Missing – Response indicates a missing data element, incorrect mapping of a Payer ID
or other similar issue. Please contact TransUnion Healthcare Solutions Support at 877-633-3282 or email
[email protected] for assistance in determining the cause of the issue.
Cannot Process/Unable to Respond – A problem has occurred with the transmission process while submitting this
inquiry and the payer is unable to respond. This status is usually
temporary. TransUnion Healthcare Solutions monitors the system for these responses and will resubmit the inquiry for
a period of 24 hours or until a valid response is received. The History page should be monitored
for a change of status.
15 | © 2014 TransUnion LLC All Rights Reserved
IMPORTANT TIPS
The success of your search is dependent upon entering the information as accurately as possible. If you are having
trouble submitting your search, please verify the following:
•
Check the PAYER NAME on the search box. It should match the payer that was selected from the payer list.
•
If you are searching for a spouse/child/other adult then a dependent level search option should be used, if
available.
•
Use the member card for reference.
• Opt for the subscriber ID or SSN search, if at all possible. Searches that involve the member’s name can be challenging
since they depend on an exact spelling match for a successful result.
TransUnion Healthcare Solutions: Investigations into Search
Results
In the event a discrepancy is found between the information returned on the system and the information verified by
a direct representative at the insurance company, TransUnion Healthcare Solutions will open an investigation into the
cause of the discrepancy.
In order to open a ticket with the payer the following conditions must apply:
•
A valid discrepancy must be found – conflicting or erroneous benefit/plan/payer information and unsuccessful
searches performed using valid member/payer information are considered legitimate discrepancies.
•
Discrepancy must be confirmed by the insurance company’s representative – For example, the system
returned a “Patient Not Found” response but the insurance representative verbally confirms that the search
criteria being entered on the system matches the policy information.
•
Contact information (name/phone number) for the representative giving the confirmation, a fax copy of
the payer’s benefit verification or a copy of the payer’s proprietary screen shot showing the discrepancy
must be provided.
•
Investigation requests should be initiated by calling Operations Support at 877-732-6853 or email
[email protected] unless otherwise directed.
16 | © 2014 TransUnion LLC All Rights Reserved
PAYER STATUS
The Payer Status page can be found under the SYSTEM Menu. You can determine whether or not a payer is having transmission
issues by reviewing the PAYER STATUS window. The Hourly Payer Status listing depicts the success rate of payer
transmissions. The % Failed column lists the percentage of failed transmissions for the given payer over the past hour with 100%
indicating that ALL transmissions are currently returning with PAYER NOT RESPONDING on the eligibility response.
Submissions in a PAYER NOT RESPONDING status will be automatically resubmitted to the payer for a 24 hour period OR until a
valid response is received. The History page should be monitored for changes to the status of a return. It may be helpful to
document the Tracking ID of a return that needs to be monitored. The Tracking ID is located on the left side of the History page
and can be entered in the search box. Press Enter to see the most current status of that return. It is not necessary to rerun the search
unless the 24 hour mark for the submission has passed and
the response has not changed.
17 | © 2014 TransUnion LLC All Rights Reserved
PAYER DOWN TIMES
Many insurance companies schedule times for routine system maintenance. Submission on any inquiry during these periods of
maintenance may result in a Payer Not Responding or other error. To view the maintenance schedule for any payer go to SYSTEM
and then select PAYER DOWN TIMES.
Use the search field to enter the payer name. Partial spelling is allowed. Searches are case sensitive.
Select the
icon to see the search filter options. Select CONTAINS or EQUAL TO to submit the search. (For best results,
use the CONTAINS option)
18 | © 2014 TransUnion LLC All Rights Reserved
MY PROFILE
PASSWORD MANAGEMENT
For security purposes, your password is set to expire every 60 days. A new password can also be created on demand. The sixty
day expiration period is reset every time the password is changed. If the password is allowed to expire then the password change
screen will automatically appear after a log in attempt is made.
To Change the Password
Select MY PROFILE and then PASSWORD MANAGEMENT.
Enter the new password on the following screen and then select CHANGE PASSWORD.
PROBLEMS CHANGING YOUR PASSWORD?
•
•
•
•
Make sure that your new password follows the rules listed on the Password Change screen.
Do NOT save your new password to your web browser settings.
Before you enter the new password, check your keyboard and make sure that the Cap
Lock is OFF and the Number Lock button is ON.
Make sure that you click on Change Password when you are finished. Pressing <Enter>
on the keyboard will NOT save the new password.
19 | © 2014 TransUnion LLC All Rights Reserved
•
After clicking on Change Password, you should see a confirmation screen showing you that the new password has been
saved along with verification of the new password. If you do not see the confirmation screen then you should attempt to
change the password again.
MY ACCOUNT
A security questionnaire is provided the first time a user logs onto the system and every time thereafter until it is
completed in full.
To complete the questionnaire it will be necessary to provide an email address and answer three security questions. Follow the
prompts on the questionnaire to enter the information. This data will only be requested again as part of the Password Reset
function. Please note that the password reset option will not function until the questionnaire has been completed.
Press FINISH to save your changes. You will receive an email notification at the address provided on the questionnaire.
If you do not receive the notification:
• The email address may be incorrect.
• The email may have been sent to a spam or junk folder
• Your email account may be blocked from receiving outside emails. Check with your IT Department if you think this is the
case.
EDITING THE SECURITY QUESTIONNAIRE
Log in to the system, select MY PROFILE and then MY ACCOUNT.
Make any necessary changes and verify the answers. Press FINISH to save your changes. You will receive an email notification
at the address provided on the questionnaire.
20 | © 2014 TransUnion LLC All Rights Reserved
BATCH ELIGIBILITY
Batch eligibility is a highly customized service typically utilized to automatically verify patient eligibility before an appointment.
This is done by receiving a file from your office in a variety of methods and formats and the resulting data is transferred to the
website for review on the Batch Summary Page. The main objective of the Batch report is to alleviate the need to perform on
demand eligibility searches for every patient seen in the office on a given day.
Set up for Batch eligibility services requires the collaboration between the client’s IT or Technical Support contact and the Batch
Enrollment Team at TransUnion Healthcare Solutions. Please call 877-732-6853 or email [email protected] if you
are interested in Batch services.
Batch Summary Page
The BATCH SUMMARY PAGE stores the processed Batch files and makes them available to view. Files will be stored for
a period of 21 days, but the time limit for storage of the Batch files can be reconfigured upon request.
BATCH ID - This is an internal ID created by TransUnion Healthcare Solutions when the file is processed.
DESC – This is a client ID, the format of which can unique to the report. Its purpose is to help the user identify a
particular report. This is especially useful in situations where a user sees reports for multiple locations. If no client
ID is provided when the batch file is sent for processing then an ID will be created by TransUnion Healthcare
Solutions.
BATCH RECEIVED - Shows the date and time stamp for when batch is created. This time stamp is for the overall file –
each individual inquiry will also receive a separate date and time stamp.
A count is provided to show how many total records are RECEIVED and COMPLETED within a batch file. The types of
responses (Eligible, Not Found, etc) are also counted and are shown in their respective columns.
Select the VIEW button to see the details of a report.
21 | © 2014 TransUnion LLC All Rights Reserved
VIEWING BATCH DETAILS
The Batch Detail page provides many of the same functions as the standard Eligibility History Page including search and
sorting capability (see page 11 for detailed descriptions of the functions of the History page).
•
The Edit function is NOT available on the Batch Detail page.
In addition to the standard functionality, the Batch Detail can be exported in different formats.
Export to an Excel file which can then be sorted, filtered and printed as needed by the user or users at a clinic.
The option to export the history to comma separated values or CSV format is also available. This format is most often used by the
client’s technical support staff to move the data between different programs that support the CSV format.
Press VIEW to see the details of an individual return.
22 | © 2014 TransUnion LLC All Rights Reserved
BATCH ELIGIBILITY, COVERAGE AND BENEFIT INFORMATION
SUMMARY
The detailed response received on a batch file is similar to the response for a standard eligibility search. (See page 9-10, 14-15 for
detailed information on reviewing the return and interpreting responses). The ability to Edit and Resubmit the summary is not
available in Batch.
You may navigate to other parts of the Batch file by selecting the following located on the top right corner of the response:
BATCH SUMMARY – return to the Batch Summary view
BATCH DETAIL – return to the Batch Detail view
Print Page – Prints a copy of the return. Only the benefits selected on the Service Type Display Window will be printed.
23 | © 2014 TransUnion LLC All Rights Reserved


© Copyright 2026