
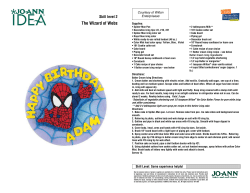
Cut-Out Sugar Cookies with Royal Icing a recipe from www.maureenabood.com
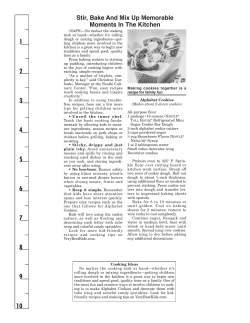
Cut-Out Sugar Cookies with Royal Icing
a recipe from www.maureenabood.com
These make excellent holiday cookies, decorated with colored royal icing or colored sparkling sugar. The
cookie recipe comes to me from my dear friend Rebecca, who I met in culinary school and who
happened to be making these cookies for her son’s birthday at the same time I was making them for the
bridal shower. She found the recipe in the book Confetti Cakes for Kids. The recipe can be doubled
easily, just divide the dough in two before the chilling and rolling process.
For the cookies
3 cups (11 oz.) all-purpose flour (preferably unbleached)
1 teaspoon baking powder
1 teaspoon salt
6 oz. unsalted butter, softened
½ cup (4 oz.) sugar
1 egg
1 teaspoon vanilla
Sift or whisk together the flour, baking powder and salt to evenly distribute the ingredients.
In a stand mixer fitted with the paddle attachment, mix the butter until soft. Add the sugar and mix until
light and fluffy. Add the egg and vanilla and mix on medium speed until combined. Be sure to stop the
mixer and scrape down the sides of the bowl all the way down to the bottom to ensure even mixing as
you go.
Turn off the mixer and add half of the flour. Mix on the lowest speed with very brief on-off turns until it
is just incorporated, then on low until you can no longer see any flour. Add the rest of the flour in the
same manner, mixing just until combined.
Turn the dough out onto a lightly floured work surface (it will have many crumbs) and push together
into a ball. Flatten the ball into a disk and cover with plastic wrap. Chill for 30 minutes.
Roll out the dough evenly to ¼ inch thick between two pieces of parchment paper. The thickness of the
cookie is important especially if you are going to decorate with royal icing. You may need to hold the
parchment in place with something heavy (or another set of hands if someone is around) as you roll.
Chill the rolled out dough between the parchment on a baking sheet for at least one hour.
Remove one of the sheets of parchment from the rolled dough and cut out the cookies, arranging the
cutter as close as possible for each cut to maximize the number of cookies out of each roll-out. The less
the dough is handled, the more tender the cookie will be. Do pull up the remainder dough after the
cutouts have been lifted to a parchment lined baking sheet. Chill the remainder dough in a plastic
wrapped disc and repeat the process.
Transfer the cut-out cookies to a parchment lined baking sheet. Chill the cutouts on the baking sheet for
15 minutes in the freezer or 30 minutes in the refrigerator.
Preheat the oven to 350 degrees. Gently press decorating sugar into cookies now if using. Bake the
cookies until light golden brown. The large wedding cake cookie took 17 minutes to bake properly;
smaller cookies may take only 10 minutes. Watch them closely and turn the sheet as needed for even
baking.
Cool the cookies on wire racks completely before decorating.
For the Royal Icing
4 cups powdered sugar, sifted
3 tablespoons meringue powder (find it online or at craft stores)
6-10 or more tablespoons warm water
Mix all ingredients on low speed using the whisk attachment in a standing mixer, until stiff peaks form.
Different consistencies of icing are needed for various tasks: thicker icing is necessary to pipe the outer
edges of the cookie and to decorate the top, but not so thick that you can barely squeeze it out of the
piping bag. Thinner icing is necessary to flood the cookie with icing—the icing should run in a ribbon off
of the whisk into the bowl of icing, forming a line that stays on top of the icing briefly before sinking in.
If you are coloring the icing, divide it into bowls at this stage and add very small amounts of coloring at a
time (a little goes a long way). Adding a small amount of brown to any color can give it depth. Be sure to
keep the icing covered directly on the surface with plastic wrap at all times, or a skin will form. The icing
will keep in the refrigerator for several days; be sure to reconstitute it by stirring it vigorously and adding
a touch of warm water as needed.
To spread or ‘flood’ the outlined cookie with icing, spooning it on and pushing it into the corners with
the back of the spoon rather than piping it makes the flooding easier to control, I found. Let the flooded
icing dry on the cookies overnight in a cool, dry place.
Pipe your decoration on the cookies, first practicing your design on waxed paper. Let the piped design
dry before handling the cookies.


© Copyright 2026