
Document 82349
Notable alumni include Anthony Bourdain,
chef, author, and television personality;
Anne Burrell, from Food Network’s Secrets
of a Restaurant Chef; and Cat Cora, from
Food Network’s Iron Chef America.
The Everyday Gourmet: Baking Pastries and
Desserts was filmed on location at the CIA’s
campus at Greystone in California’s
Napa Valley.
A unique collaboration…
The Great Courses, leaders in lifelong learning
“Pure intellectual stimulation that can be popped into the
[audio or video] player anytime.”
—Harvard Magazine
“Passionate, erudite, living legend lecturers.
Academia’s best lecturers are being captured on tape.”
—The Los Angeles Times
“A serious force in American education.”
—The Wall Street Journal
partners with…
The Culinary Institute of America, leaders in culinary education
“The CIA has been setting the standard for excellence in professional
culinary education for more than 60 years.”
—Martha Stewart, entrepreneur and domestic lifestyle innovator
“[A]n institution that has truly changed the way the world looks
at food.”
—Anthony Terlato, chairman of Terlato Wine Group
and Wine Enthusiast’s Man of the Year in 2003
“It’s the best culinary school in the world.”
—Paul Bocuse, world-renowned French chef
The Everyday Gourmet: Baking Pastries and Desserts
The Everyday Gourmet: Baking Pastries
and Desserts is taught by Chef Stephen
L. Durfee, Certified Executive Pastry Chef,
Certified Hospitality Educator, and Pastry
Instructor at The Culinary Institute of
America (CIA), the world’s premier
culinary college. Founded in 1946 as a
school to train returning World War II
veterans in the culinary arts, the CIA has
grown from its original enrollment of 50
students and three faculty members to
include more than 2,800 undergraduate
students, more than 140 chefs and
instructors, and four campuses. The
Institute also offers continuing education
programs for food service professionals,
wine professionals, and food enthusiasts;
publishes textbooks and cookbooks;
operates nine student-staffed restaurants;
and hosts the Worlds of Flavor Conference
and Festival.
The Everyday Gourmet
Baking Pastries and Desserts
Chef Stephen L. Durfee
The Culinary Institute of America
Does the idea of baking make you think of
a warm kitchen and delicious smells? Or
does it make you think of burned piecrusts
and crooked cakes? No matter what baking
brings to your mind, this course, taught by
an award-winning pastry chef from The
Culinary Institute of America, is designed
to increase your skills in both the art and
the science of baking.
In six comprehensive lessons, you’ll gain a
greater understanding of essential processes
in baking, no matter what level you start
from. You’ll learn what mixing method to
use for cookies versus cakes and why dough
needs to rest after you handle it, as well as
insider tips and techniques for “gilding the
lily”—adding the perfect finishing touches to
your creations and giving them the unique
presentations they deserve.
Throughout the course, you’ll learn
professional methods for organizing your
workspace, handling your tools, choosing
and measuring ingredients, and judging
results. With The Everyday Gourmet: Baking
Pastries and Desserts, you’ll create not only
pies, cakes, pastries, and biscuits but
delectable new memories of your skills in
the kitchen for friends and family to share.
Chef Stephen L. Durfee is a Pastry Instructor at The
Culinary Institute of America at Greystone in California’s
Napa Valley. A winner of the James Beard Award for
Outstanding Pastry Chef, he has practiced his art at some
of the world’s leading restaurants and hotels, including The
French Laundry in Yountville, California, and the Wheatleigh
in Lenox, Massachusetts. Chef Durfee has twice been chosen
to participate in the U.S. selection for the World Chocolate
Masters competition and served as chocolatier for the U.S.
team at the Coupe du Monde de Pâtisserie in Lyon, France.
THE GREAT COURSES ®
Corporate Headquarters
4840 Westfields Boulevard, Suite 500
Chantilly, VA 20151-2299
USA
Phone: 1-800-832-2412
www.thegreatcourses.com
Look for our gourmet cooking, healthy
cooking, and other Great Courses
related to food and wine at
www.thegreatcourses.com.
Cover Images: © iStockphoto/Thinkstock. © Marcy McDonald.
Course No. 9253 © 2012 The Teaching Company.
OI9253A
PUBLISHED BY:
THE GREAT COURSES
Corporate Headquarters
4840 Westfields Boulevard, Suite 500
Chantilly, Virginia 20151-2299
Phone: 1-800-832-2412
Fax: 703-378-3819
www.thegreatcourses.com
Copyright © The Teaching Company, 2012
Printed in the United States of America
This book is in copyright. All rights reserved.
Without limiting the rights under copyright reserved above,
no part of this publication may be reproduced, stored in
or introduced into a retrieval system, or transmitted,
in any form, or by any means
(electronic, mechanical, photocopying, recording, or otherwise),
without the prior written permission of
The Teaching Company.
Stephen L. Durfee, C.E.P.C.,
C.H.E.
Pastry Instructor
The Culinary Institute of America
at Greystone
C
hef Stephen L. Durfee is a Pastry
Instructor at The Culinary Institute
of America (CIA) at Greystone in
California’s Napa Valley; he has been on staff
at the CIA since November 2000. He is a
Certified Executive Pastry Chef and a Certified
Hospitality Educator.
Formerly the pastry chef of The French Laundry in Yountville, California,
Chef Durfee was part of the restaurant’s 1994 opening team. He spent more
than five years at the popular restaurant, running the garde-manger and fish
stations before assuming responsibility for the Pastry Department. While at
The French Laundry, he won the 1998 James Beard Award for Outstanding
Pastry Chef and was named one of the Top Ten Pastry Chefs in America in
1999 by Pastry Art & Design and Chocolatier magazines.
Other professional experience includes working as a pastry chef at
Charles Nob Hill in San Francisco, California, and the Wheatleigh in
Lenox, Massachusetts, and as a pastry instructor at Peter Kump’s New
York Cooking School, where he earned his certificate in
Pastry and Baking in 1991. Chef Durfee also has
traveled and worked in France, where he
apprenticed at restaurants in Paris
and Chambéry.
Chef Durfee has participated in
and judged numerous professional
competitions. In 2007, he represented
the CIA at the National Pastry Team
Championship, where his team
collected a bronze medal. He has
twice been chosen to participate in the U.S. selection for the World Chocolate
Masters competition and, in 2010, finished in third place. Chef Durfee served
as chocolatier for the U.S. team at the Coupe du Monde de Pâtisserie in
Lyon, France. ■
i
Table of Contents
LESSON GUIDES
Lesson 1
Handle with Care—Basic Doughs���������������������������������������������������������1
Lesson 2
Mixing It Up—Methods for Cakes�������������������������������������������������������� 11
Lesson 3
Blue-Ribbon Winners—Pies and Biscuits�������������������������������������������21
Lesson 4
Lighter Than Air—Cream Puffs������������������������������������������������������������34
Lesson 5
Simple to Elegant—Custards��������������������������������������������������������������46
Lesson 6
Final Touches—Mousse and Dessert Sauces�������������������������������������58
SUPPLEMENTAL MATERIAL
Recipe List�������������������������������������������������������������������������������������������67
Glossary����������������������������������������������������������������������������������������������68
Bibliography�����������������������������������������������������������������������������������������71
Photographic Credits............................................................................73
ii
Handle with Care—
Basic Doughs
M
Lesson 1
any people are interested in learning how to bake, but they’re
intimidated because they think baking is too complicated or
scientific. In these lessons, we’ll learn that there is science behind
baking, but once you understand this science—what happens when you overaerate a custard or what chemical reaction takes place when baking soda is
mixed with cocoa powder—you’ll get much better results. These lessons
include techniques, ingredient lists, and instructions for making a variety
of desserts, dessert toppings, and quick breads, as well as tips for
figuring out what may have gone right or wrong with your finished
products. This first lesson begins with an overview of basic doughs
for cookies and pound cake.
General Tips
Perhaps the most important first step
in baking is to organize your tools in a
clean workspace with plenty of room to
move around. As you work, try to keep
the workspace clean; stack dirty dishes in
one place on the countertop.
One of the greatest tools for cleanup in the kitchen
is a plastic scraper. You can use it to move any excess
dough to one place on the countertop or clean your hands off with it.
The proper method for measuring flour is to scoop the flour into the measuring
cup and then level it off by tapping. Some recipes call for you to dip and sweep,
which means pushing the cup through the flour and then sweeping it off at the top.
Allow eggs to sit on the counter and come to room temperature before you
incorporate them into a dough. If the eggs are too cold, they will be difficult
to blend in to the dough, but if they’re at room temperature, they will be much
easier to emulsify into the butter/sugar mixture. If the eggs aren’t incorporated
properly, the dough may spread or color unevenly when baked.
If you’re using a mixer to make cookie dough, use the paddle tool, not the
whisk. Remember to stop the mixer periodically to scrape down the sides of
the bowl and make sure the ingredients are evenly distributed.
1
2
When you’re placing cookies on a baking tray, remember that they will spread
and change shape a little as they bake. Space them apart on the tray so that they
don’t spread into each other.
Prepare a cake pan by putting a piece of parchment paper across the bottom to
ensure the cake won’t stick. You can also brush the pan with a bit of softened
butter and dust it with flour.
Make sure you bake cookies and cakes in a preheated oven, generally 325° to
350°, and choose the proper baking pans. Thin, flimsy baking trays often lead
to burned cookies. If you’re using
dark cookware, be aware that your
finished cakes will be darker in
Measuring Ingredients
color. Fill cake pans about twothirds full with batter.
Creaming
The first basic technique to master
in baking is creaming. You may
be familiar with the creaming
method from making a variety of
cookies and cakes. The creaming
method involves using four basic
ingredients that we’ll come across
again and again in baking: sugar,
butter, eggs, and flour.
Thinking about the functions
of these ingredients can help
take some of the mystery out of
baking. Our basic ingredients can
be divided into two categories:
liquefiers or stabilizers. Liquefiers
are ingredients that make doughs
become softer and perhaps make
them spread; in our short list of
ingredients, the liquefiers are
sugar and butter. Stabilizers are
ingredients that help doughs hold
together—here, eggs and flour. If
you’re trying to determine what
went wrong in a finished product,
it may be helpful to think about the
roles of the ingredients.
Probably the biggest obstacle to
getting consistent results in baking
is making proper measurements.
Most recipes call for measuring
ingredients in terms of weight, and
weight measurements are the
most accurate.
Note that volume measurements are
based on water. If you measure out
1 cup of water and put it on a scale,
the water would weigh 8 ounces.
But if you measure 1 cup of flour
and put it on a scale, the flour won’t
weigh anywhere near 8 ounces. This
is a point of confusion for
many people.
Lumps in your ingredients, such
as sugar and flour, can affect the
weight and, thus, the volume in
measuring. If your ingredients are
lumpy, sift them before measuring.
If you’re analyzing a finished product
to figure out what went right or
wrong, the first question to consider
is: Did you measure the ingredients
correctly?
3
Flavoring ingredients include such things as salt (to ensure the dough
isn’t bland), chocolate chips, raisins, or nuts. These ingredients add flavor
and texture, but they don’t influence the formation of the dough or how
it behaves.
The object of creaming is to incorporate air into a sugar/butter mixture. The
more air that’s incorporated, the more tender the resulting dough will be. But
for cookie or tart dough, too much air may cause the cookies to spread too
much or the dough to rise too much.
Many people use a mixer for putting together a basic dough with the
creaming method, but if you’re just getting started, try making the dough by
hand—work with a wooden spoon or, literally, your hands. Certainly, using
a mixer can make things a little bit easier and cleaner, but if you really want
to understand what’s taking place when you’re mixing
up a dough, actually using your hands will help you
see how the dough comes together. People were
making cookies long before mixers were
invented, so it is possible to make them
by hand!
Using a Mixer
There are some definite
advantages to using a
mixer—it’s cleaner and
easier—but there are also
a couple of disadvantages,
particularly, the tendency
to overmix the dough.
When you set the speed of
your mixer, remember that it’s
replacing the work of your hands. If you think about how fast you use your
hands to work with the dough, you’ll realize that you don’t need to crank the
mixer up to high!
If you notice uneven results with a tray of cookies—some of them look
great, some of them have spread too much, and some of them haven’t spread
enough—it’s likely that you didn’t scrape down the mixing bowl as you
worked. The butter and sugar accumulated at the bottom of the bowl, and
the flour remained on top. If you’re mixing dough by hand, you don’t usually
run into this problem, but if you’re using a machine, you need to stop it
periodically to properly scrape down the sides of the bowl.
4
Creaming Method: Basic Cookie Dough
Ingredients
• 5 oz sugar
• 10 oz butter
• 1 egg
• ½ tsp salt
• 16 oz all-purpose
flour
To begin making a basic dough, sift the sugar if necessary to remove any lumps
and check the butter to make sure it is at room temperature; if you can dent the
butter by pressing it with your finger, the temperature should be about right. If
the butter is too cold, it will be difficult to mix, and if it’s too soft, the dough
will not come together correctly and may be a bit greasy. You can soften the
butter by pressing it with the palm of your hand right on the countertop.
As the butter begins to soften under your hand, mix in some of the sugar. At this
point, you may want to transfer the butter to a bowl. Mix in the rest of the sugar
using a wooden spoon, a rubber spatula, or a scraper. It may take a few minutes
to get the sugar blended in properly with the butter. As you’re blending the sugar
and butter, you’re incorporating a certain amount of air into the mixture, and the
more air that’s present, the more tender the mixture will be.
When you’re making cookies or tart dough, you don’t necessarily want a lot of
air in the mixture, because the cookies will spread too much or the dough will
rise too much—the dough will be too tender and too
fragile. This is a good reason to make dough by
hand rather than using a mixer; you’re unlikely
to overmix the dough if you’re working with
your hands, but with a machine, overmixing is
always a possibility.
Once the sugar and butter are
blended together, it’s time to
introduce an egg. Crack the egg
on the countertop rather than the
side of the bowl to avoid getting
any bits of shell in the dough. Then
empty the egg into the bowl and blend
it with the other ingredients.
5
Next, mix in the flour and salt. The dough will be fairly dry and crumbly
because it is tender. As you work with it, you’ll feel it start to pull together and
become more uniform. In a machine, the flour would be blended evenly in the
dough very quickly, but again, you want to be careful that you don’t overmix.
When you’re finished blending, cover the dough with a piece of plastic wrap
and put it in the refrigerator for about 30 minutes to firm up.
Creaming Method: Sugar Cookie Dough
Ingredients
• 10 oz sugar
• 16 oz butter
• 2 tsp vanilla
• 2 eggs
• 24 oz flour
• 1 tsp salt
extract
For this recipe, we’ll use a mixer. But as we said, creaming is about
incorporating air into a butter/sugar blend, and the more air that’s incorporated,
the more fragile the dough will be. When you’re using the mixer, you need to
avoid overmixing, or the dough will be too tender and may break.
Put the butter and sugar in the bowl and turn the mixer on to a medium speed.
Remember, the machine is taking the place of your hands in working the butter
and sugar, so you don’t need to turn it up to a high speed.
While the mixture is being blended, stop the bowl periodically and scrape
down the sides to ensure an even distribution of ingredients. Look for a visible
lightening of color in the mixture; the butter should change from yellow to
almost white. That’s evidence of air being blended inside the mixture.
Once the sugar and butter are blended together, stop the mixer, scrape down the
sides of the bowl, and add the eggs, salt, and vanilla. Again, as you allow those
ingredients to mix, keep scraping the sides of the bowl. If the eggs are too cold
and aren’t mixing well, you may have to turn up the speed on the mixer.
The next step is to add the flour, but first, turn the mixer to a slow speed or
you’ll end up wearing most of the flour! As we said, the function of flour is
to hold the dough together. The more you mix in the flour, the more elastic
the dough becomes. You want to mix in the flour just enough so that all the
6
7
ingredients are well blended. At that point, scrape the sides of the bowl one
more time and turn the dough out on the countertop to finish it with your hands.
Wrap the dough in plastic and refrigerate it for about 30 minutes. When the
dough is cold, remove it from the refrigerator and shape your cookies (see
“Shapes for Cookies”). Place the cookies on a baking tray lined with parchment
paper and bake until golden.
Shapes for Cookies
The basic creaming method for making cookie dough yields an interesting
variety of finished products. After you’ve made your dough, you can cut it with
cookie cutters, scoop it with an ice cream scoop, cut it from a log shape, or put
it into a pastry bag and pipe out decorative shapes.
If you want to roll out the dough and use cookie cutters, start by dusting the
countertop and the top of the dough with a little bit of flour to keep the dough
from sticking. Roll the dough out fairly quickly, especially if you’re in a warm
room, because cold dough is much easier to work with.
When you’ve got the dough rolled out to an even thickness, dip a cookie cutter
in flour and press it straight down into the dough. Carefully remove the cookie
to a baking tray lined with parchment paper. Try to be economical with the
dough as you cut. You can reroll the scraps and cut more cookies, but the best
cookies come from the first roll. As you reroll, more flour is incorporated into
the dough, which can change the texture of the cookies.
8
One of the easiest techniques for shaping cookies is to roll the dough into a log
in a piece of parchment paper, refrigerate it for about 15 minutes, and then cut
it into pieces. Even easier than that is scooping the dough with an ice cream
scoop, although for this method, the dough should be a little bit warmer. Scooped
cookies are uniform in size and shape and spread to a nice round finish. This
method is often used for chocolate chip, oatmeal, and raisin cookies.
If you want a more decorative look for your cookies, you can use a pastry bag.
For this technique, the dough must be softened back to room temperature. You
will also need to cut the opening of the bag so that the dough will fit through
the tip properly. Don’t work with too much dough at a time or the bag will
burst. Hold the bag over the surface of the baking tray and pipe straight down.
Piping is a variation of using an old-fashioned cookie press.
You can put a cherry or a nut on top of each cookie or sprinkle them with sugar
for a decorative finish.
Creaming Method: Pound Cake
Ingredients
• 8 oz butter
• 8 ½ oz sugar
• 3 eggs
• 3 egg yolks
• 2 tsp vanilla
• 7 oz cake flour
• ¾ tsp baking
powder
• ½ tsp salt
extract
Use the creaming method to blend the butter and sugar, then add the eggs,
egg yolks, salt, and vanilla. Once those are blended, add the flour and baking
powder. Notice that this dough, or batter, is much softer than the cookie dough.
Again, be careful in mixing. An overmixed cake will be full of holes once it’s
baked, while one that’s undermixed will have very little structure; it may stick
to the bottom of the pan or be gummy.
Transfer the batter to a loaf pan or a decorative ring pan. To get a nice crack
in the center, wet your finger and run it down the center of the batter in the
pan. That creates a weak spot in the center of the cake so that as it rises, it will
develop a decorative crack.
Bake at 325° for about 1 hour, until golden.
9
Important Terms
flavorings: Ingredients, such as salt, chocolate chips, raisins, or nuts, that add
flavor and texture to a dough but don’t influence the formation or behavior of
the dough.
liquefiers: Ingredients that make doughs become softer and perhaps make
them spread, commonly, sugar and butter.
stabilizers: Ingredients, such as eggs and flour, that help doughs hold together.
Mixing It Up—
Methods for Cakes
F
Lesson 2
or many people, the excitement in baking lies in making different
types of cakes, and whether it’s a humble pound cake or the most
show-stopping wedding cake, all cakes are made with just a few
basic mixing methods. In the last lesson, we saw the creaming method of
mixing, in which air is incorporated into butter; once that air is exposed to
heat, it expands, causing the cake to rise. In this lesson, we’ll look at two
additional methods of mixing—the combination method and the foaming
method—and we’ll apply these in making a devil’s food, a chiffon, and an
angel food cake.
General Tips
Put dry ingredients that tend to become lumpy, such as cocoa powder, flour,
confectioners’ sugar, baking powder, or baking soda, through a sifter, a
fine-mesh sieve, or a tamis (drum sieve) before you use them in making
a batter.
Cake flour is a low-gluten flour that is perfect for making cakes. Because it’s
high in starch, cake flour is less likely to develop an elastic quality when it’s
mixed, giving the cake a better texture. The high starch content, however,
means that cake flour has a tendency to become lumpy; again, make sure you
sift it before preparing your batter.
Place the tamis, or drum sieve, on a piece of parchment paper or wax paper. Then,
push dry ingredients through the fine mesh with your hand to ensure that no
lumps remain.
11
Basic Mixing Methods
As we saw in the last lesson, the creaming method of mixing—used, for
example, in making pound cake—incorporates air into butter. When that air
is exposed to a hot oven, it expands and causes the cake to rise in the pan.
This is called leavening. A pound cake doesn’t really leaven much because,
ultimately, not that much air is incorporated into the butter. Even a properly
made pound cake will be fairly dense; for light and airy cakes, a different
mixing method is necessary.
With the combination method of mixing, some form of chemical leavener,
such as baking powder or baking soda, is moistened with either water or
milk, resulting in a chemical
reaction: the formation of carbon
dioxide bubbles. When those
Preparing Your Pans
bubbles are exposed to heat, they
expand, causing the cake to rise.
If you’re using a flat-bottomed pan,
Devil’s food cake and muffins
such as a loaf pan or a ring pan, it’s
or quick breads are made using
helpful to put a piece of parchment
this method.
paper on the bottom of the pan to
ensure that you can tip the cake out
without difficulty.
You can then grease and flour the
pan or use the pan without grease
or flour. If you’re using butter, soften
it in the microwave until it reaches a
mayonnaise consistency; then brush
the butter on top of the paper in the
bottom of the pan. You can also use
pan spray, but butter tastes better.
After you’ve buttered the inside of
the pan, tip a spoonful of flour into
it, turning the pan as you do to coat
it with a light dusting. You need just
enough flour to form a grip surface
on the inside of the pan; the object
here is to give your cake a little bit of
a handhold to climb up the walls of
the pan. If you grease the pan only
and don’t flour it, the finished cake
may pull away from the sides of the
pan and shrink a little.
12
The foaming method of mixing
is the most complex of the three.
Here, eggs (either whole or
separated into yolks and whites)
are whipped to incorporate
air, then folded into other cake
ingredients. Again, when exposed
to heat, the air in the eggs
expands and causes the cake
to rise, resulting in a light and
delicate cake.
Testing for Doneness
Just as an accomplished chef
can test the doneness of a piece
of meat with his or her hand, a
baker can test doneness by gently
pressing on the top of a cake and
watching for it to spring back.
You can also insert a toothpick or
a bamboo skewer into the center
of the cake and lift it out. If the
skewer looks wet, that’s an indication that the center of the cake hasn’t baked
all the way through. Of course, you insert the skewer into the center of the cake
because that’s the part that cooks last.
Finally, you can use a thermometer to test for doneness. Insert a thermometer
into the center of the cake and look for a reading of 195° to 205°.
Removing Cake from the Pan
Allow the cake to cool for about 30 minutes inside the pan before you try to
take it out. If you let it cool any longer, it will likely get moist on the inside and
some pieces of it may break off.
To remove the cake from the pan, use an offset spatula or a paring knife. Press
the spatula against the inside of the pan and turn the pan counterclockwise.
Once you’ve gone all the way around the pan, turn the cake upside down onto
your hand or a plate. If the cake sticks to the bottom, give the pan a gentle tap.
Peel off the parchment paper and transfer the cake to a plate. If you’re planning
to freeze the cake, leave the parchment paper on to make the cake easier to wrap.
Combination Cake: Devil’s Food
Ingredients
• 2 ½ oz cocoa
powder
• 14 oz sugar
• 14 oz boiling water
• 5 oz canola oil
• 3 eggs
• 1 tsp vanilla extract
• 10 oz flour
• 1 ½ tsp baking
soda
• Pinch salt
To begin making a devil’s food cake, put the cocoa powder through a sifter,
then whisk it with a little bit of hot water to make a mixture that is similar in
consistency to chocolate syrup. Make sure the mixture is completely smooth.
Set it aside to cool for a few minutes before adding the eggs; otherwise, you’ll
end up with chocolate scrambled eggs!
13
Next, blend the dry ingredients—regular granulated sugar, salt, and baking
soda. Don’t confuse baking soda with baking powder. Baking soda is an
alkali and must be mixed with some form of acid in order for the required
chemical reaction to take place. In a devil’s food cake, the acid to be mixed
with the baking soda is cocoa powder. When these two are blended together,
an immediate chemical reaction takes place, which means that the ingredients
can’t be combined in advance. The chemical reaction will start as soon as the
acidic mixture and the alkaline mixture are combined—bubbles will be created
inside the batter. At that point, you need to get the mixture into the oven as
soon as possible.
Sift the all-purpose flour into the other dry ingredients. This step eliminates
lumps in the flour and aerates it somewhat. Then mix the dry ingredients well.
To the cooled cocoa mixture, add the oil, vanilla flavoring, and eggs. Again,
make sure the cocoa mixture is cool enough (room temperature) so that it
doesn’t cook the eggs or become gummy when added to the flour.
Stir the wet mixture into the dry and blend until the two are thoroughly
combined. Remember that flour, especially all-purpose flour, has the tendency
to become somewhat elastic in texture. If you mix it too much, the batter could
get stretchy. Don’t beat the dry and wet ingredients; just mix them until the
flour is thoroughly distributed and you don’t see any lumps.
14
Divide the batter into two pans and put it into the oven immediately. The cake
is done when it springs back from a light touch and has a glossy sheen on the
surface. Remove the cake from the pan after about 30 minutes, and allow it to
cool completely before frosting.
Egg Foam Cake: Chiffon
Ingredients
•3
Tbs plus 1 tsp
canola oil
• 3 egg yolks
• ⅓ cup water
•1
tsp vanilla
extract
•1
½ cups cake flour, sifted
before measuring
•⅓
cup plus
⅓ cup sugar
•1
½ tsp baking
powder
• ¼ tsp salt
• 3 egg whites
Egg foams are commonly made for classic sponge cakes, and they can be
divided up into two general categories: whole-egg and separated-egg foams.
This chiffon cake uses a separated-egg foam, resulting in a light, fluffy texture.
To start the chiffon cake, make a blend of egg yolks and oil. In effect,
this mixture mimics mayonnaise, and in fact, some cakes are made with
mayonnaise. Beat the egg yolks and gradually emulsify some vegetable oil into
the yolks. Here, we’re not foaming the egg yolks; we’re just blending them
and emulsifying the fat together. Once the yolks and oil are blended, dilute the
mixture with a little bit of water and add the vanilla flavoring.
Sift together the cake flour and baking powder, and add the salt and half of the
sugar. Stir the dry ingredients together until well mixed. You can also make a
chocolate version of this cake by substituting cocoa powder (about ¼ cup) for
a portion of the flour.
Next, make the meringue, or egg-white foam. Use room-temperature egg
whites; if the eggs are cold, the meringue will be very slow to develop. Make
sure you don’t get any yolk into the egg whites, because any added fat will
minimize the aeration of the whites. You will add the remaining sugar to the
meringue as you make it to ensure that it doesn’t become too dry.
15
Add the egg whites to the bowl of a mixer. When you’re making a meringue,
you’re trying to balance volume, which you get by trapping air in the whipped
egg whites, with stability, because you don’t want all the bubbles to pop when
you fold the meringue into the batter.
Mix the egg whites at medium speed. When the eggs become frothy and
opaque (after a minute or so—they should look like the froth on top of a glass
of beer), begin adding the sugar in a gradual stream, like a gentle rain. Adding
the sugar faster will overwhelm the egg whites and cause them to drop and
lose volume. As you add the sugar, the eggs will become frothier, resembling
shaving cream. At this point, you can add the sugar a little faster and turn up
the speed on the mixer. Be careful not to overdevelop the meringue because it
will become dry. You want it to be a little bit fluid so that when you fold it into
the batter, it doesn’t break apart into chunks.
16
Look for the meringue to become creamy in appearance, like whipped
cream. It has reached the perfect stage when it takes on a thick, rich, almost
lustrous quality.
Now, blend the egg yolk mixture into the dry ingredients. Don’t beat the
mixture; just make sure it is evenly blended, with no lumps left in the flour.
Next, fold in the meringue. (Don’t leave the meringue sitting for too long, or it
will start to become firm.) Mix the meringue only until you don’t see any white
stripes inside the bowl.
Pour the batter into a prepared pan (see “Preparing Your Pans”) and put it in
the oven. The cake is done when it springs back from a light touch or when a
toothpick or skewer inserted into the center of the cake comes out clean. Allow
the cake to cool in the pan for about 30 minutes before removing. When it’s
completely cool, frost with whipped cream or buttercream.
17
Egg Foam Cake: Angel Food
Ingredients
• 3 ¾ oz cake flour
•5
oz confectioners’
sugar
• ¼ tsp salt
•1
3 oz egg whites,
•1
½ tsp cream
of tartar
•8
oz granulated
sugar
• 1 tsp vanilla extract
room temperature
Angel food cake is a variation of an egg foam cake that uses only meringue
and no egg yolks; thus, it has a light texture and a creamy quality, and it’s low
in fat.
First, sift the flour and confectioners’ sugar through a fine-mesh screen onto
a piece of parchment or wax paper. Using the paper will allow you to easily
transfer the sifted ingredients to the mixing bowl.
The next step is to make a stiff meringue. This recipe includes a bit of cream of
tartar, which is a buffered form of tartaric acid that will allow you to whip the
meringue until it’s much stiffer without it becoming too dry.
Again, pour room-temperature egg whites into the mixing bowl and whip
them on medium high until they become frothy and opaque. Pour a little salt
into the egg whites to help break them up and make them more fluid. Salt
relaxes the protein in the egg whites so that the mixture will hold the foam
more effectively.
Once the egg whites have reached the frothy and opaque stage (and no longer
look yellow), start adding the granulated sugar (in a gentle rain) and the cream
of tartar.
Allow the meringue to take its time to develop. In the last recipe, for chiffon
cake, we added baking powder, a chemical leavener, to make the cake rise.
In the angel food cake, the only leavening is coming from the air that you’re
beating into the egg whites, so it’s important to do a careful job here. Once you
start seeing traces of the mixer’s whisk in the mixture, you can add the sugar a
little faster.
18
You want to whip this egg white a little bit more than you did with the chiffon
cake. Because you will fold the flour into the meringue (rather than the
meringue into a batter), it can be a little bit stiffer. Turn the mixer up to high
speed for a minute or so and allow the meringue to become full. The more air
you can beat into it, the better it will hold later on.
You can also raise and lower the whisk somewhat
so that you’re not just whipping the mixture on
the bottom.
When the meringue is full, turn the mixer
down and add vanilla or other flavoring,
such as lemon zest or almond extract.
Without some flavoring, the cake will be
a bit too aggressively sweet. Then, turn the
mixer off.
Sift the dry ingredients again into the meringue so
that they are nicely scattered across the top and don’t
deflate the meringue. Scatter a portion of the dry ingredients across the top,
then carefully fold them in. Sift and fold the dry ingredients in two or three
steps. As you fold, the goal is not to lose any volume in the meringue to ensure
that the finished cake is delicate.
Transfer the batter to an angel food cake pan. The tube shape of this pan
ensures that the cake is heated from the inside out, as well as from the outside
in, allowing a nice crust to form on both sides. The crust should have a
caramelized, crunchy quality.
19
A meringue will pull away from something that’s greasy, so don’t grease the
pan. To prepare an angel food cake pan, wipe the inside with a wet cloth or
paper towel or spray it with a fine mist of water. The wetness on the inside
will allow the batter to grip the sides of the pan and ensure that the cake
won’t collapse.
To avoid spilling the batter, transfer it to the pan using a large ice cream scoop
or guiding it with a rubber spatula or scraper. Bake the cake for about 45
minutes to an hour and then let it cool upside down so that it doesn’t collapse.
Even when it’s cooked, angel food cake is still a very delicate foam; turning it
upside down to cool will allow its own weight to help it retain its light quality.
If your pan doesn’t have “feet” on the sides that allow you to turn it upside
down, invert it on a glass soda bottle.
Angel food cake can be served right side up or upside down, depending on
whether you like the caramelized part on the top or the bottom. You can use a
serrated knife to cut angel food cake or pull it apart using two forks.
Because angel food cake is sweet by itself, you might want to garnish it
with something acidic and fruity, such as cut-up strawberries lightly macerated
with sugar and lemon. You can also gild the lily with some delicately
whipped cream.
Important Terms
combination method: A method of mixing in which some form of chemical
leavener, such as baking powder or baking soda, is moistened with either water
or milk, resulting in the formation of carbon dioxide bubbles that expand when
exposed to heat.
creaming method: A method of mixing that incorporates air into butter to
cause dough to rise when exposed to heat; used to make crumbly doughs.
foaming method: A method of mixing in which eggs (either whole or
separated) are whipped to incorporate air; the air in the eggs causes dough to
rise when exposed to heat.
leavening: The process of rising when a dough or batter is exposed to heat;
also, ingredients that cause rising, such as baking soda.
tamis: A drum sieve.
20
Blue-Ribbon Winners—
Pies and Biscuits
P
Lesson 3
astry doughs fall into two main categories that are defined by their
textures: crumbly or flaky. In our first lesson, we discussed crumbly
doughs made by the creaming method, which is how butter is distributed
evenly throughout a dough. In this lesson, we’ll see how to make a flaky dough
using the rubbed-in dough method, and we’ll learn how to make the two most
common types of rubbed-in doughs, those for piecrusts and biscuits.
General Tips
Use cold butter to make the dough for a piecrust or biscuits; otherwise, the
butter may be absorbed into the flour, and the dough will yield results that have
a heavy texture.
Overworked dough may shrink and develop a tough texture. For example,
overworked dough in a piecrust may cause the crust to shrink away from the pan
when it’s baked. This is a result of overdevelopment of the elasticity in the flour.
Every time you apply pressure to a dough, it will have the tendency to shrink;
always give dough an opportunity to chill in the refrigerator between making
and shaping or baking it.
Piecrust
Ingredients
• 2 ½ cups flour
• ½ tsp salt
• 10 oz cold butter
• 5 oz ice water
Typically, a piecrust is made by hand, but it can also be made in a food
processor. Start out with the flour and butter that is cold and has been cut
into small cubes. Toss the butter with the flour so that all the pieces are
21
evenly coated. Use your hands to literally rub the butter into the flour. The
goal is to get the butter pieces distributed throughout the flour yet make
sure they remain independent, that is, in discrete pieces. When you add
water to the dough later on and roll it out, the pieces of butter will be
flattened, and when you put the piecrust in the oven, they will expand in
a flat, lateral network that will make the dough rise unevenly and lead to
a flaky texture.
Having cold butter is important for this method. If the butter is warm, it
could become greasy and be absorbed into the flour; that could lead to a
dough that has an unpleasant, leaden texture. The butter should be cold
enough so that you can press it through your fingers but not so cold that it
is difficult to work with. You want to be able to break it up into pieces that
are about the size of peas.
Alternatively, you can put the dough on the counter and chop it up with a bench
scraper, a couple of knives, or a pastry blender to help cut the butter into small
pieces. It may take a few minutes to get the butter rubbed in thoroughly.
Next, add the salt (to keep the dough from becoming bland) and the water.
Use a plastic scraper to mix the water in with the dough, turning the bowl as
you go. If the dough starts to stick to the scraper, push it off with your fingers.
22
You’re not necessarily trying to make the dough come together in a ball
inside the bowl; you just want to make sure that it has been evenly moistened.
When it reaches that point, stop using the scraper and transfer the dough to
the countertop.
Gently knead the dough to bring all of it together; again, don’t overwork it.
Use the heel of your hand to press it together to make sure the butter is evenly
mixed throughout. At this point, the dough may feel tender and little bit wet.
When you put it in the refrigerator, the texture of the dough will have a chance
to even out, so it won’t feel wet when you take it out.
Allow the dough to rest and chill in the refrigerator for about 30 minutes before
rolling (see “Rolling Piecrust Dough”). Roll out the crust, transfer to a pie pan,
and trim and finish the edge.
Rolling Piecrust Dough
After you’ve combined your ingredients for a piecrust dough and gently
kneaded the dough to bring it together, allow it to rest and chill in the
refrigerator for about 30 minutes before you roll it out; otherwise, the dough
will be too soft to work with. Putting the dough in the refrigerator lets the
butter firm up and makes the dough easier to handle.
When you remove the dough from the
refrigerator, cut it in half. Generally
speaking, you want about 1
ounce of dough per inch of
diameter of your pie pan.
For a 9-inch diameter pan,
use about 10 ounces of dough. That
will ensure a round shape for your crust.
Many people run into problems shaping piecrust dough into a circle
when they roll it out. To get an even, round roll, first dust the countertop with
a little flour to keep the dough from sticking. Then press the dough with your
hands to make it look approximately like a hamburger patty. Again, don’t
knead it too aggressively, or it will become too elastic or glutinous.
Once you have a round shape, dust the top of the dough with a bit more flour—
just enough to keep the rolling pin from sticking. Press the rolling pin into the
dough without rolling; pick up the dough, rotate it a quarter of a turn, and press
again. Pressing helps the dough roll out in an even fashion; if you were to just
start rolling right away, the crust would probably be thin at the edges.
23
24
You should try to work quickly as you’re shaping the dough; if it warms up too
much, it will be difficult to handle.
Keep pressing and turning the dough to maintain a consistent round shape. This
technique also ensures that the dough doesn’t stick to the countertop because
you’re turning it a bit every time you press it.
When you reach the point where you can’t press the dough any more, start
rolling. Rather than rolling to the edge, just roll in small increments and keep
turning the dough. Think of maintaining the general round shape without
going off the edge. Again, because you’re turning it, you’re rolling the entire
piece of dough. If the dough starts to stick to the countertop, dust a little more
flour underneath.
Keep your pie pan nearby to give you a good idea of the size your crust needs
to be as you’re rolling. Don’t make it too big, or it will be difficult to handle.
The finished round should overhang the edges of the pie pan by about half an
Roll out about 1 ounce of dough per inch of diameter of your pie pan. Fold the
dough in half and transfer it carefully to the pie pan, then unfold it and press it
into the bottom of the pan. Trim off the excess dough and crimp the edge with
your fingers.
25
inch or so; you will trim it after it’s in the pan. Before you pick it up, use the
palm of your hand to feel the crust and make sure it’s even all around.
To transfer the dough, fold it in half, pick it up gently from underneath, and
set it in the pan carefully. Unfold it and press it gently into the bottom of the
pan. Trim the dough with a pair of kitchen scissors so that it hangs about half
an inch away from the pan all the way around. Fold the overhang under to give
the crust an even edge, sort of like hemming a dress. Once it’s evenly folded,
check to make sure that it has a consistent look around the outside.
You can leave the edge of the piecrust folded or finish the edge by pressing
it with a fork, fluting it, or crimping. (Pastry crimpers can be used to give a
decorative finish.) To crimp the edge with your fingers, make a V with your
thumb and forefinger and press it on the outside of the shell. At this stage, you
could freeze the piecrust for later filling.
Every time you apply any pressure to the dough, it will have the tendency to
shrink; give your piecrust an opportunity to rest and chill in the refrigerator for
another 15 minutes before baking or filling.
Blind Baking
The technique of blind baking
is used for pies that have
a custard filling, such as a
chocolate or banana cream pie
or a lemon meringue pie. Here,
the crust is baked before the pie
is filled.
For this technique, line the unbaked pie shell with
parchment paper, then pour baking beans (dry beans from the grocery store)
or pie weights into the shell. Fill the shell evenly with about half an inch of
beans, pressing them to the edges.
Poking holes in the bottom of the crust to prevent the dough from bubbling up
is called “docking,” but this step is not necessary when you line the crust with
beans in blind baking.
Bake the crust until it is an even golden brown color.
26
Butter v. Shortening
Shortening is almost pure fat, so using shortening instead of butter yields a
flaky, delicate piecrust. But shortening doesn’t taste as good as butter does;
further, a piecrust made with shortening may not have a golden brown color
when baked. Piecrusts made with shortening are also
extremely fragile and may break when
you remove the baking beans.
Use a blend of butter and
shortening to get a flaky
crust that also has the
color and flavor you can
get only from butter.
Dough-Topped Pies
Fruit pies can be done with a simple
bottom crust and, perhaps, a crumb or streusel
topping, but a more elegant fruit pie generally has a rolled-dough top. For this,
you can use one sheet of dough to cover the top of the pie and cut some holes
in it, or you can make a lattice top. A lattice top is not really very complicated
to make, but it gives your pie a great wow factor!
For the first option, a single sheet of dough covering the top of the pie, spoon
the filling into the pie shell in the pan, then brush a little bit of beaten egg
around the edges of the shell before covering it with a second piece of rolledout dough. Trim the edge of the second piece of dough with a pair of scissors
and flute it.
To make a lattice top, start with a piece of rolled-out dough that has been
chilled in the refrigerator. Again, give the dough enough time to chill and relax
so that you don’t have to worry about it shrinking as you cut it. Use a ruler and
a crimped pastry wheel, a pizza wheel, or a knife to cut strips of dough that are
about ⅜ inch wide (or wider or narrower, depending on the look you want).
Take the time to cut the strips carefully, keeping the width consistent.
The next step is simply to weave the strips together. Instead of assembling the
lattice on top of the pie, you can make it off to the side on a piece of cardboard
or the back of a cookie sheet. Then, put it in the freezer for about 10 minutes
before transferring it to the top of the pie in the pan.
Again, brush the edges of the filled crust with a bit of egg; then slide the frozen
lattice onto the top of the filled crust. Wait a few minutes for the frozen lattice
27
28
to soften a bit before you press the edges of the two crusts together; otherwise,
you might tear the bottom crust. You can then trim and flute the edge.
Biscuits
Ingredients
• 24 oz flour
• 2 oz sugar
•1
½ oz baking
powder
• 8 oz butter
• 4 oz eggs
•1
2 oz
buttermilk
• ½ oz salt
Good biscuits are often described as being tender and flaky, a texture that
comes from both high-quality ingredients and the mixing method. If you can
make a piecrust, then you can make biscuits, too.
Combine the ingredients in the same fashion as you did for piecrust, rubbing the
butter into the dry ingredients until it’s blended into pea-size pieces. The little bit of
sugar in the biscuits will give them a tender texture and a nice flavor and help them
to brown.
After you’ve blended in the butter, stir in the buttermilk and eggs. The
biscuit dough will be much softer than the piecrust dough because you’re
using more liquid. Again, don’t overwork the mixture, or the biscuits
will have a tough, disagreeable texture. Stir until all
the ingredients are just combined—kneading is
not necessary.
Transfer the dough to a piece of plastic wrap
and press it down to flatten it. Wrap the
dough in the plastic and put it in the
refrigerator for 15 or 20 minutes to
firm up.
Remove the dough from the
refrigerator, flour the countertop, and
roll the dough as you did for piecrust.
Start by pressing the dough, then dust it a
29
30
bit with flour and use the rolling pin. Don’t scatter too much flour on top of the
biscuit dough, or the flour will burn when the biscuits go into the oven. Roll the
dough out to about ½ inch thick.
Dip a straight cutter into some flour and press it straight down into the dough.
Don’t screw the cutter as you press. This will ensure that you get an even rise.
If you find that the dough is sticking when you push down, you may need to
return it to the refrigerator for a few minutes. Try to get as many biscuits as
you can from the first roll because rerolled biscuit dough has a tough texture.
If you do reroll the scraps, push them together very gently and give the dough
one soft knead across the top before pressing it back out. Biscuits made from
overworked dough won’t spring up and will be tough and dry on the bottom.
Place the biscuits on a baking sheet and put them into the oven. Biscuits
usually bake for a short time (8–10 minutes) at a high temperature (425°) to
get a golden finish on the outside but a texture that is not dry and crumbly in
the center.
Scones
Ingredients
• 30 oz flour
•3
½ Tbs baking
powder
• 1 ½ tsp salt
• 7 oz sugar
•1
0 oz fruit
(e.g., currants
or raisins)
•1
qt heavy
cream
Scones are similar to biscuits, but they have their own distinct set of rules for
mixing. Instead of butter, heavy cream is used in making scones to give them
their characteristic crumbly texture.
Blend the dry ingredients and fruit together. Add the heavy cream and stir
the mixture together until it’s just blended, being careful not to overmix. It’s
best to do this blending by hand rather than in a machine to avoid making the
dough tough.
Once the dough is blended and evenly moistened, it will be very soft. Again,
wrap it in plastic and put it in the refrigerator for about 30 minutes.
31
32
Remove the dough from the refrigerator, press and roll it out, and cut it into
wedges using a knife or a bench scraper. There’s no waste with this cutting
method, so you don’t have to worry about rerolling the dough.
Transfer the wedges to a baking sheet, brush the tops with a little bit of milk
(to keep them moist), and sprinkle them with sugar. The sugar not only adds
sweetness but will give the baked scones a crunchy texture.
Again, bake the scones at a high temperature (375°) for a short time (15–20
minutes). Look for a golden, crunchy, sugary finish across the top. Note that
scones will not puff up the way biscuits do, but they will be delightfully tender
on the inside because of the heavy cream used in blending.
Important Terms
blind baking: Baking a piecrust before filling; this technique is used for pies
that have a custard filling, such as chocolate or banana cream pie.
docking: In blind baking, the practice of pricking holes in the bottom of a
piecrust to prevent the dough from bubbling up. Docking is not necessary if pie
weights or baking beans are used.
pie weights: Small ceramic or stainless-steel balls that are used to weigh down
a piecrust for blind baking. Dried beans from the grocery store may also be
used for this purpose.
33
Lighter Than Air—
Cream Puffs
P
Lesson 4
âte à choux, or choux paste, is one of the classic doughs. Although
it’s sometimes called cream puff pastry, it actually has many other
applications. The same dough can be used to make cream puffs, chocolate
éclairs, profiteroles, and even profiteroles that might be fashioned into a glorious
croquembouche. The method for making pâte à choux is unique in that it’s a
twice-cooked pastry dough. In this lesson, we’ll learn how to make that dough,
as well as a cream for filling your pastries and two glazes for topping them.
General Tips
When you’re making pâte à choux, add the eggs one at a time. After incorporating
the first egg, you may want to add just a portion of the second. If the dough still
looks dry, you can add the rest of the second egg or even a little bit of a third.
Practice holding your whisk as you would a pencil to avoid tiring out your
shoulder muscles.
In making pastry cream, add the flavoring as the last step. If you add vanilla
or alcohol-based flavorings earlier in the process, the high heat at which the
cream is cooked will cause the flavoring to evaporate.
If you’re using chocolate from a candy bar to make ganache, chop it finely
with a serrated bread knife.
To pipe éclairs, hold the pastry bag at an angle, touch it to the surface of the
parchment paper, squeeze and lift the bag slightly, and allow the dough to come
straight out. To pipe cream puffs, point the bag downward, squeeze, and twist the
bag to form a small ball.
34
Pâte à Choux
Ingredients
• ½ cup water
• ½ cup milk
• ½ tsp salt
• ½ tsp sugar
• 4 oz butter
• 1 cup flour
• Up to 4 eggs
Pâte à choux, or choux paste, is a classic pastry dough. Although it is sometimes
called cream puff pastry, it actually has many other applications. We’ll use
the same dough to make cream puffs (or profiteroles) and chocolate éclairs.
The method for making pâte à choux is unique in that it’s a twice-cooked
pastry dough.
We start by pouring a mixture of milk and water into a pan on the stove. Some
recipes use only water or only milk, but the combination of the two gives the
finished product a nice flavor and color.
To the milk and water, add a little bit of salt and sugar for flavoring and some
butter. Make sure the butter is softened before you put it in the pan; otherwise,
the liquid will boil away while you’re waiting for the butter to melt.
Bring the mixture to a boil. If you’re cooking over a gas flame, adjust the
flame so that it doesn’t go over the side of the pan, which could cause the milk
to burn.
When the mixture has reached a boil, take it off the heat and add the flour all at
once. Typically, you use bread flour for this dough because you want the dough
to be sticky and elastic. When you pipe and bake the dough, it will expand
tremendously, and in order to hold all that air in, it needs to be fairly firm.
At this point, the mixture will look like mashed potatoes, and it won’t have
much structure. Return the pan to low heat and stir. The mixture will now
tighten up to form a ball, and some of the moisture will evaporate, so the dough
will be a little bit drier. Keep stirring to make sure the dough doesn’t stick and
burn on the bottom of the pan.
As you stir, open the mixture up a bit so that you can expose the inside to the
direct heat of the fire. It may be a little tiresome to beat this mixture, but you
35
36
want to be careful that you don’t let it scorch in the pan. After the dough comes
together to form a ball, keep stirring and let it roast for about 1 minute to
1 ½ minutes over direct heat. You want the dough to get a starchy finish on the
outside; that’s a good indication that it’s starting to dry out. If you cook it for
too long, however, the butter will break out of the mixture, and it will begin to
look greasy.
Once the dough is sufficiently dried out, take it off the heat. Transfer it to a
mixer bowl, turn the mixer on low, and add the eggs in one at a time.
There are two critical stages in making pâte à choux. The first is on the stove,
when you’re drying the mixture out. Again, if you don’t go far enough here,
the mixture could be too wet, and if you go too far, you might scorch it, or
it might separate into a greasy ball. The second critical stage is in adding the
eggs. Although all pâte à choux recipes are written with a specific amount of
egg, you should think of the egg as being a variable. You add the eggs one at a
time because you’re trying to achieve a very specific texture. After you add the
first egg, you may want to add just part of the second one.
After you incorporate the eggs, you’ll notice the dough starting to get a little
firmer. Stop the mixer and scrape down the bowl. If the dough looks dry, you
can add the rest of the second egg. You want the dough to have a soft, creamy,
supple quality and be shiny.
You can now transfer the finished pâte à choux mixture to a pastry bag and pipe
out different shapes for éclairs and profiteroles (see “Piping Pastry Dough”).
To bake the piped pastries, start off at a higher temperature (about 400°) and
allow the dough to puff up in the oven for 10 or 15 minutes. Once the dough
has expanded, it’s very fragile, so you’ll need to turn the oven down and dry
the pastries out for an additional 15 or 20 minutes at a lower temperature
(325°). After they’re done, the pastries are ready for filling. For this, you can
use a classic pastry cream, or you can split the pastries in half and fill them
with whipped cream.
Piping Pastry Dough
Before you begin, draw lines on a piece of parchment paper to serve as a guide
when you’re piping and ensure that the piped shapes are uniform. Place a
second piece of parchment paper over the first and pipe directly on that. Use a
little bit of dough to stick the parchment paper down so that it doesn’t lift up as
you pipe. Keep in mind that this dough will expand, so you need to allow space
between the piped shapes.
37
You can use either a plain tip or a star-shaped tip to pipe pastry dough. To fill
the bag, fold it over your hand, then press some of the choux paste mixture
inside the bag.
For éclairs, don’t pipe downward onto the paper. Instead, hold the pastry bag at
an angle, touch it to the surface of the paper, squeeze, and let the dough come
straight out. Then touch down on the paper and pull away. As you’re piping,
you’re actually lifting the bag so that the dough falls exactly where you want
it to.
To make cream puffs, point the bag downward, squeeze, and twist the bag to
make a ball shape.
If you’re not going to glaze the finished pastries, you can brush the piped
shapes with a bit of beaten egg to give them a shine.
Churros
Baking is just one of the ways that you can treat pâte à choux. You can also
deep-fry it for some wonderful Mexican-style churros.
For this, you prepare the same pâte à choux mixture and transfer it to a pastry
bag with a star tip. Then, heat a pan of vegetable oil to about 350°, hold the tip
of the bag over the hot oil, pipe out the pastry directly into the oil, and cut it off
with your finger. If you’re nervous about working over hot oil, you could also
pipe the churros onto a piece of parchment paper, chill them a bit, and then slip
the entire piece of paper into the hot oil.
38
After the churros are nicely browned (about 4 or 5 minutes), take them out
of the hot oil and drain them on paper towels. Then toss them in a cinnamon
sugar mixture.
Pastry Cream
Ingredients
• 2 cups milk
• ½ cup sugar
•1
½ oz
cornstarch
• 2 eggs
• 1 egg yolk
•1
tsp vanilla
Optional:
•¼
cup whipped
cream
•L
iqueur,
eau-de-vie,
or extract
to taste
extract
Pastry cream is a classic stovetop-cooked custard, similar to vanilla pudding,
that forms the foundation for many dessert fillings.
Start by putting a blend of milk and a sprinkle of sugar into a pan and bringing
the mixture to a boil. The little bit of sugar keeps the milk from scalding on
the bottom of the pan. As you’ll see, one difference between pastry cream and
custard is that the pastry cream mixture is boiled when it’s done. With custard,
you have to be very careful not to boil the mixture so that it doesn’t curdle.
Making pastry cream is actually somewhat related to making a gravy because
it has some cornstarch in it that allows it to thicken and avoid curdling.
Blend the rest of the sugar with the cornstarch; then, beat in the eggs. Whisk
the mixture carefully to make sure it has no lumps. If you have lumps now, you
won’t be able to get rid of them later on.
When the milk has reached a simmer, pour a little of it into the egg mixture.
This process is called tempering. If you were to just put the egg mixture into
the hot milk, the eggs would scramble immediately. Instead, you introduce a
little of the hot milk into the eggs to warm them up gradually. After you’ve
tempered the egg mixture, spoon it into the pan with the milk.
Turn the heat down a bit and whisk constantly. At first, the mixture will look
fairly fluid, but it will thicken up rather abruptly and come to a bubbling boil.
39
Turn the heat down a little bit, grip the whisk tightly in the palm of your hand,
and really work it so that no lumps form in the mixture. Cook the cream in this
way for about a minute so that it loses any starchy flavor, then take it off the heat.
The last step is to gently stir in the flavoring. Pastry cream is typically flavored
with vanilla, either vanilla extract or a vanilla bean. It can also be flavored with
an infusion of milk and coffee beans, a cinnamon stick, or a bit of orange zest.
Or you can add chocolate to the finished mixture, as well as different liqueurs.
At this stage, a little bit of butter may be added to enrich the pastry cream, or
you might wait for it to cool off and then fold in some whipped cream.
Chocolate Ganache
Ingredients
• 5 oz cream
• 1 oz corn syrup
• 8 oz finely chopped chocolate
Ganache is classically the foundation for chocolate truffles and other types of
candies, but we’ll use it as a glaze for éclairs. The ratio of chocolate and cream
in the recipe depends on what you’re using the ganache for—a glaze for a cake,
a dessert sauce, or a filling for chocolate candy.
Bring the heavy cream and corn syrup to a boil. Corn syrup helps make the
mixture shiny and sweetens it a bit. It also helps prevent the sugar from
crystallizing out of the chocolate and gives you a smoother glaze.
When the cream is at a rolling boil, take it off the heat and pour it over the
finely chopped chocolate in a bowl. Make sure the chocolate pieces are very
small; otherwise, you’ll find that the cream cools off before the chocolate is
sufficiently melted. When you go to emulsify the mixture, it will be likely to
separate and become gritty.
When it’s used as a glaze for éclairs, chocolate ganache doesn’t really need
to be flavored, but if you’re using it for the center of a chocolate candy, you
might want to infuse some flavor into the cream or add some liqueur to the
finished product.
40
41
Allow the cream and chocolate to rest for about 30 seconds without stirring
the mixture. Once the chocolate has started to melt, whisk it in the center
of the bowl, using a whisk, a rubber spatula, or an immersion blender.
Note that chocolate ganache is an emulsion, much like mayonnaise is an
emulsion. You whisk it starting in the center of the bowl and then slowly
whisk in larger circles out toward the edge of the bowl to incorporate the
entire mixture.
Look for the mixture to become shiny and thick. When it does, allow it to
chill for a little while and then use it as a glaze for filled éclairs (see “Filling
Pastries”). Carefully dip the tops of the éclairs into the ganache.
Hard Caramel Glaze
Ingredients
• 24 oz sugar
• 4 oz corn syrup
• 8 oz water
Working with caramel can be dangerous; handle it carefully so that you don’t
get burned. To start the caramel glaze, dissolve the sugar with just enough
water so that it resembles wet sand. Add a little bit of corn syrup to prevent
the sugar from crystallizing. If you don’t add corn syrup, the finished caramel
syrup may become very cloudy. Sugar naturally exists in a crystalline format,
which you’re changing into a syrup. Corn syrup will help to keep it in the stage
that you’re looking for.
Once you have thoroughly mixed the sugar, water, and corn syrup, don’t stir it
any more. If you’ve splashed the insides of the pan, use a brush dipped in cold
water to wash down the sides. Bring the mixture to a boil, putting a lid on the
pan so that the moisture of the boiling syrup will wash down the sides.
It takes several minutes to cook out the syrup so that the moisture is evaporated,
but then, the sugar will start to turn a light brown color. To judge the color, dip
a light-colored spoon into the mixture and take it out to look at it. Don’t let the
caramel get too brown because then it will become bitter.
42
Take the pan off the heat and allow it to sit for a few seconds until the bubbles
start to dissipate. Then, dip the pan at an angle into ice water. If you place the
flat bottom of the pan in the water all at once, the hot caramel could bounce up
and splash on you.
Wait for the mixture to cool to the point that it has a honey-like texture
throughout. To use as a glaze, hold a pastry in one hand, dip it very carefully
into the caramel syrup, and let the excess syrup drip off. Remember, the
caramel is still hot. You may want to keep some ice water nearby so that if you
accidentally drip caramel syrup on your fingers, you can cool them off quickly.
A cream puff dipped in caramel will have a crunchy texture across the top that
contrasts beautifully with the light texture of the cream inside.
If you’re making a croquembouche—a tower of cream puffs glazed with
caramel—you’ll need to put the syrup back on the stove periodically to keep
it soft and fluid. A croquembouche is a traditional French wedding cake that
resembles a Christmas tree.
Filling Pastries
As soon as it’s made, pastry cream will look soft and soupy, but as it cools off,
it will thicken considerably. To cool it, transfer it to a bowl and put a piece
of plastic wrap right on the surface to prevent a skin from forming, then put
the bowl in the refrigerator or a larger dish of ice water. Don’t leave it out at
room temperature.
After the pastry cream has cooled completely, it will likely be too thick to use
for filling a dessert. If that happens, soften it by beating it with a whisk or use a
mixer with a paddle attachment.
Fill éclairs by poking two small holes in the bottom of the pastry with a paring
knife or chopstick. Poke the tip of a pastry bag through to the hollow cavity and fill
each hole with pastry cream.
43
Top cream puffs with a hard caramel glaze or chocolate ganache. Carefully dip the
tops of the pastries into the glaze. When the glaze has set, cut off the top of each
pastry with a serrated knife, fill with whipped cream, and reattach the top.
To fill a glazed cream puff, use a serrated knife to clip off the top of the pastry.
Open it carefully and fill it with a bit of whipped cream, then put the top back
on, like a little hat.
For chocolate éclairs, rather than cutting the top, you fill them from underneath.
Poke two small holes in the bottom of the baked chocolate éclair with a sharp
paring knife or a chopstick. The éclairs are hollow, so you need to poke through
to the cavity inside. Use a pastry bag with a small tip to fill each hole of the
éclair with pastry cream. If the cream starts to come back out of the first hole,
then you know it’s filled.
44
Important Terms
churro: A Mexican pastry made with choux paste that is deep-fried and tossed
in cinnamon sugar.
croquembouche: A traditional French wedding cake consisting of a tower of
cream puffs glazed with caramel.
ganache: A glaze or sauce used as a topping for pastries and cakes.
pâte à choux (choux paste): Pastry dough used to make éclairs, cream puffs,
and so on.
profiterole: A cream puff; a small pastry ball filled with whipped cream or
pastry cream.
tempering: The process of introducing a small amount of a hot ingredient
to a cold ingredient before heating the mixture. Tempering prevents the cold
ingredient, especially eggs, from cooking prematurely.
45
Simple to Elegant—
Custards
C
Lesson 5
ustards are a great dessert choice largely because they’re simple to make,
yet they can lead to an elegant and sophisticated final product. On top of
that, most of the ingredients that go into custards are things you already
have around the kitchen, so making one doesn’t take a lot of planning. In this
lesson, we’ll make a sample from each of the two major categories of custard:
those prepared on the stovetop and those prepared in the oven.
General Tips
A general rule for making custard is to use a low temperature and cook it over
an extended period of time. Think of this as the low-and-slow technique.
Always strain custard through a fine-mesh sieve to avoid having any
undissolved sugar, bits of vanilla bean, or pieces of egg in the finished dessert.
Avoid over-aerating a custard mixture, which will cause the custard to rise (or
soufflé) when you bake it. If you’ve ever seen a cheesecake or pumpkin pie that
has a crack across the middle, that means it was over-aerated, or over-blended, in
the mixing process and then has risen and fallen back down when baked.
Crème Anglaise
Ingredients
• 2 cups milk
• 2 cups cream
• 1 vanilla bean
• ½ cup sugar
• 8–10 egg yolks
Crème anglaise is probably the most basic of all custards, but the preparation
is a little bit tricky because, unlike the pastry cream we made in our previous
lesson, crème anglaise has the potential to overcook and become scrambled.
46
Crème anglaise can be used as a dessert sauce, as the foundation for such
elegant desserts as Bavarian cream, and as a base for ice creams.
The ingredient list for crème anglaise is much like that for pastry cream, but
it omits cornstarch, and it’s for that reason that this mixture must be cooked
very carefully.
Pour the blend of milk and cream into a saucepan and bring to a boil. The
proportions of these two ingredients can vary, depending on the desired
outcome for the sauce. Pour a portion of sugar in with the milk to keep the
milk from scorching when it comes to a boil and then add the vanilla bean (see
“Vanilla Infusion”).
Separate the egg yolks into a bowl and add some sugar. Note that if you just
pour the sugar on top of the egg yolks and walk away, within a short period of
time, the egg yolks will start to scorch. The sugar literally cooks the egg yolks.
It’s important that you whisk the mixture to blend it fairly quickly.
For crème anglaise, make a vanilla infusion with a blend of milk and cream. Whisk
the egg yolks and sugar together, and then temper the eggs with the hot milk
mixture. Transfer the egg yolks to the boiling milk on the stove and whisk until
thickened.
47
As you stir, the egg yolk and sugar mixture will start to thicken up; you’ll be
able to form a small ribbon in the blend.
When the milk and sugar mixture comes to a simmer, take it off the stove and
temper the hot milk into the egg yolks. If you like, use a ladle to add a small
portion of the liquid to the egg yolks—about a third or a half of the hot milk.
Remember, the reason for doing this is to gradually raise the temperature of the
egg yolks to avoid scrambling them prematurely. This is part of the low-andslow technique.
Transfer the egg yolks back to the boiling milk on the stove and turn the heat
down lower if necessary. As you whisk, you’ll notice that the mixture is getting
frothy on top, which makes it difficult to judge how the sauce is thickening.
At this point, put your whisk aside and use a wooden spoon to stir the mixture
very slowly. Make sure you stir completely around the saucepan and through
the middle so that the sauce doesn’t scorch on the bottom.
When the sauce has thickened, turn off the stove. Test the thickness of the
sauce (see “Judging Sauce”), and if it starts to drip, return the sauce to low heat
and stir it gently for a few more minutes.
The next step is to strain the finished sauce through a fine shinwa strainer
into a bowl that is sitting in an ice-water bath. Press on the strainer
to make sure all of the mixture goes through, including some
of the vanilla seeds, which make the finished sauce look
sophisticated. Check the bottom of the saucepan to
make sure you don’t see any
scrambled egg inside.
Crème anglaise can be kept
in the refrigerator for about
four or five days.
Vanilla Infusion
Vanilla beans come in many different varieties and from different sources
all around the world. Bourbon vanilla beans, from the Bourbon Islands of
Madagascar, have a robust vanilla flavor. Vanilla beans from Mexico also
have great flavor, and the prized vanilla beans from Tahiti have a unique
floral quality.
Using a vanilla bean in making custard is not unlike making a cup of tea: The
longer you leave the teabag in the hot water, the more flavor you’ll get. This
method for imparting flavor is called infusion.
48
To make a vanilla infusion, choose a plump, fragrant vanilla bean. The flavor
of vanilla beans comes from the pod itself and the seeds on the inside. Use a
paring knife to slice the bean down the middle and scrape out the seeds.
Remember, if you’re using extract to make a vanilla sauce, you add it at the
final stage. But if you’re using vanilla bean for flavoring in the sauce, add it to
the milk as you bring it to a boil. You can also put the vanilla bean into the milk
several hours or the night before you plan to make the sauce. To get the fullest
flavor out of the vanilla bean, a longer infusion time is a good idea.
Vanilla beans are rather expensive. After you’ve used one to make a sauce, you
can rinse it off in hot water and dry it to be saved and used in another recipe.
Judging Sauce
The thickness of a sauce, such as crème anglaise, tells you whether or not it
has been fully cooked. To judge the thickness, run a wooden spoon through the
sauce and lift it up to see how the sauce drips off the spoon. Note that you can’t
use a rubber spatula for this test, because the sauce will roll off the surface.
The classic test here is to see whether or not the sauce holds its shape when you
draw a line on the back of the spoon with your finger. If the line stays intact,
the sauce has reached the nappé stage. If it starts to drip, return the sauce to
low heat and stir it gently for a few more minutes.
You can also use a thermometer to judge whether the sauce is done. Look for
a reading of 180° to 182°. Make sure you don’t touch the thermometer to the
bottom of the pan; you want to take the temperature of the sauce itself, not
the saucepan.
A sauce has reached the nappé stage when it coats the back of a spoon and a line
drawn through it with a finger stays intact.
49
A sauce that has been prepared properly will coat the back of a spoon and
have a glossy, luxurious quality. An undercooked sauce will run on the plate
and won’t have the proper mouthfeel. An overcooked crème anglaise will be
eggy—leaving an unpleasant scrambled egg quality in the mouth—and it may
smell somewhat sulfurous, like overcooked eggs.
Butterscotch Pudding
Ingredients
•1
0 oz brown
sugar
• 4 oz sugar
• 3 oz cornstarch
• 2 tsp salt
• 60 oz milk
• 3 eggs
• 2 egg yolks
• 2 oz butter
•1
oz vanilla
extract
Making pudding is very similar to making pastry cream. Pudding can be eaten
as a dessert by itself—perhaps with a little whipped cream on top—or can be
used to make cream pie.
For this butterscotch pudding, combine milk and sugar in a saucepan, bring
the mixture to a boil, and then temper it into a blended mixture of eggs and
cornstarch. After the mixture has been combined and brought back to a full
boil, take it off the heat.
Next, add vanilla extract and the butter, which enriches the custard, gives it a
buttery flavor, and enhances the mouthfeel. At this point, the mixture will look
very fluid; it will take a while to set completely.
To make a pie, pour the custard into a blind-baked pie shell. Of course, you
could make a vanilla-flavored custard and add some bananas for a banana
cream pie or make a chocolate-flavored pudding for a chocolate cream pie.
You can also combine the pudding with some sponge cake and fruit to make
a classic trifle. If you plan to chill the custard to enjoy it as pudding, put a
piece of plastic wrap right on the surface to prevent a skin from forming across
the top.
50
Crème Caramel (Flan) and Crème Brûlée
Ingredients
Cinnamon Flan:
•1
cup plus an
additional ⅓ cup
sugar
• ¼ cup water
• 1 ¼ cups milk
• ¾ cup cream
• 1 cinnamon stick
•1
vanilla bean, split
• 3 eggs
•L
arge bowl of
Crème Brûlée:
•1
pt heavy
cream
•1
vanilla bean,
split
•⅓
cup sugar
(plus extra to
caramelize the top)
• 6 egg yolks
ice water
Crème caramel and crème brûlée are two variations of classic oven-baked
custards. Both of them involve using the standard custard technique, but for a
typical crème caramel, you use a deep ramekin, and for a crème brûlée, you
use a shallow ramekin.
To begin, prepare caramel on the stovetop following the same process we used
in the previous lesson when we made profiteroles. You may want this caramel
to be slightly dark to give a little bit of bitterness to the finished product.
Spoon a small amount of hot caramel into the bottom of a ramekin. Pick up the
ramekin and give it a twist to make sure that the caramel is evenly coated on
the bottom.
Two different preparations are required for the custard in these desserts. A
crème caramel, or a flan, is a lean custard. It has a certain rubbery quality to it.
A crème brûlée is much richer and much fattier.
For the crème caramel, blend warm milk that has been infused with vanilla
and cinnamon into the whole eggs. Because this custard uses whole eggs, it
has much more protein than a custard that uses only egg yolks. Egg whites
make the custard a bit more rubbery or elastic. Note that this is an oven-baked
51
52
custard, not a stovetop custard, so the milk that is added to the eggs is not at the
point of boiling.
Crème brûlée is made with egg yolks and heavy cream, which means that it’s
much fattier and has a rich, decadent mouthfeel.
Strain the custard through a fine-mesh sieve and then pour it into prepared
ramekins. For the crème caramel, fill the deep ramekin right up to the top. For
the crème brûlée, partially fill the shallow ramekin. The crème brûlée will look
thin when you pour it into the ramekin, but because it is a rich egg yolk and
cream mixture, it will thicken up considerably to a luxurious texture.
Bake both custards at a low temperature (300° to 325°) in a water bath, or bainmarie, for about 30 or 40 minutes. Using the water bath allows the custard to
cook a little more gradually because the water temperature won’t ever reach
as high as the oven temperature. Fill the pan for the bain-marie with water to
about half the depth of the ramekin.
Test the custards for doneness by gently jiggling them and looking for a small
wiggle in the custard. Remove the pan of hot water carefully from the oven,
allow the ramekins to cool off, and wipe them dry. Refrigerate for a couple of
hours or overnight.
To take a crème caramel out of its ramekin for a more elegant presentation, use
a teaspoon to break it carefully away from the edge. Then turn it upside down
onto a plate and remove the ramekin with a fast jerking motion. The custard
will come out of the ramekin and leave a bit of sauce on the plate.
53
The method for finishing a crème brûlée involves building a caramel layer
across the top. Blot the surface of the crème brûlée with a paper towel to absorb
any excess moisture, then spoon some granulated sugar on top.
Classically, crème brûlée is finished with an iron called a salamander, but
nowadays, most people use a propane torch. Hold the torch about 3 or 4 inches
over the surface of the crème brûlée to gradually warm the sugar and yield a
caramelization. Remember that brûlée means “burn”; it’s acceptable to get a
dark caramel here.
French-Style Buttercream
Ingredients
•1
2 oz sugar
• 4 oz water
•6
egg yolks
•1
6 oz butter, softened
•F
lavoring (vanilla extract and brandy)
as needed
French-style buttercream is an incredibly rich and luxurious frosting with a
wonderful mouthfeel. Other types of buttercreams are made with egg whites
only and are meringue based.
We start by making a mixture called a sabayon, a sauce consisting of egg
yolks, sugar, and wine, liqueur, or brandy. First, heat sugar and water to make
a syrup and then add a little bit of vanilla extract and brandy. To the syrup, add
egg yolks and put the mixture over hot water on the stove. Be careful that the
flame is not so high that it starts to come up over the sides of the pan.
Cook and stir until the egg yolks start to thicken, which may take some time—
2 or 3 minutes. Look for the egg yolk mixture to “hold a ribbon,” meaning that
when you pull the mixture up and drape it over itself, you will be able to see
some shape in the eggs. If you can see the bottom of the bowl when you’re
whisking, that’s also a good indication that the mixture is thickening. As with
any other cooked-egg mixture, such as the crème anglaise we made earlier,
there is a danger of overcooking, so be careful that you don’t go too far.
54
Transfer the sabayon to a mixer and whip it on high speed until it cools to room
temperature. Add the softened butter after the mixture has cooled; otherwise,
the butter will melt, and you won’t get the volume or texture you’re looking
for in the finished product. Add the butter in pieces, allowing it to blend into
the sabayon. Again, if the butter is too hard, it won’t blend in, and you’ll end
up with a lumpy mixture. Wait for each piece to blend in before you add more.
Once you’ve added all the butter, turn the mixer back up to high speed to make
sure that it’s thoroughly incorporated. Use the finished buttercream to frost a
cake or freeze it for future use.
Frosting a Cake
It’s not unusual for a finished cake to form a dome. To make it level for frosting,
trim the top with a long, serrated cake knife. The trimmings can be dried out
and ground to make cake crumbs for another use.
To divide the cake into layers, hold the serrated knife level about one-third of
the way down the cake and make a score mark around the outside by turning
the cake and sawing a bit back and forth. Once you’ve
gone all the way around, push the knife forward
and cut toward the center; this method
generates fewer crumbs. Take the top third
off and repeat the process for the next
layer. Sweep away any crumbs on your
work surface so they don’t appear on the
finished cake.
A turntable allows you to get an even, level
distribution of buttercream as you’re frosting a
cake, but you can also hold the cake in the palm of
your hand. If you’re using a turntable, place a piece of cardboard on top as a
base for the cake, and make sure you place the cake in the center.
Make each layer of frosting about half the thickness of the cake layer itself.
Remember, you’re making a birthday cake, not a birthday frosting, so the
emphasis should be on the cake!
When you add the second layer on top of the first, press it flat with your hand;
if the cake is delicate or moist, press it with a second piece of cardboard. Use
the same amount of frosting on the second layer as you did on the first.
Try to get an even layer across the top without any crumbs. To form the crumb
coat, hold your palette knife at an angle close to the blade and seal the edge.
At this point, you may want to refrigerate the cake to give the crumb coat a
chance to firm up before you apply the finish coat.
55
To frost a cake, first even off the top by trimming with a serrated knife. Create
layers by scoring around the outside of the cake, and then cutting through the
center. Make each layer of frosting about half the thickness of the layer. Seal the
edge of the crumb coat (on the top layer) with a palette knife, add a little more
frosting for the finish coat, and decorate with a topping, such as crumbs
of croquant.
For the finish coat, add a little more frosting across the top and sides, if
necessary. For our chiffon cake with buttercream, add some crumbs of
croquant, a caramelized hazelnut mixture, as a final touch.
Slip your palette knife between the bottom of the cake and the cardboard to
remove the cardboard and transfer the cake to a presentation plate.
Important Terms
bain-marie: A water bath; used to allow food to cook gradually. The term also
refers to the vessel that holds the water in this technique.
croquant: A caramelized hazelnut mixture that can be crumbled over cakes or
eaten like peanut brittle.
56
crumb coat: A thin layer of frosting that seals the cake to ensure no crumbs
will appear in the finish coat.
infusion: The process of steeping ingredients, such as vanilla beans, in a hot
liquid to impart flavor.
mouthfeel: The way a food feels in the mouth, particularly its texture
and consistency.
nappé stage: The point in the thickening of a sauce when the sauce coats the
back of a spoon and holds a line drawn through it with a finger.
palette knife: A knife with a rounded blade used for spreading.
ramekin: A small dish used for baking and serving individual portions of food
or desserts.
sabayon: A sauce consisting of egg yolks, sugar, and wine or liqueur.
salamander: A small iron used to brown the top of a dish, such as crème brûlée.
shinwa strainer: A fine-mesh, cone-shaped sieve.
soufflé: The act of rising when baked; also a light dish made with beaten egg
whites that rises in the oven.
trifle: A dessert made of layered sponge cake, fruit, and custard.
57
Final Touches—Mousse
and Dessert Sauces
P
Lesson 6
anna cotta and chocolate mousse are both easy to make yet offer lots
of possibilities for elegant presentations. Panna cotta has the rich,
luxurious quality of a custard, but in fact, it’s a cream-based dessert
that’s thickened with gelatin. Mousse can also be based on cream, but some
recipes start off with a sabayon base, similar to the buttercream
we made in an earlier lesson. In other recipes, a
meringue is folded into the mousse. Panna
cotta, in particular, is a great recipe to have
in your repertoire because it can be
made a day ahead for a party. For a
unique approach, try serving either of
these desserts in wine or martini glasses
and spooning a delicious sauce on top.
General Tips
When you’re blending any mixture, resist the temptation to move your body
around. Try to stand straight and move the food around to accommodate your
body motions; that way, you won’t wear yourself out so quickly.
Before you make chocolate mousse, have a plan in mind. Have your serving
dishes ready, and think about how you’re going to get the mousse into the
dish—by just spooning it in or transferring it to a pastry bag. You want to
58
avoid having the mousse set up before you’re ready to get it from one place
to another.
As mentioned in an earlier lesson, making caramel can be dangerous; it’s
definitely not a technique that you want children to try on their own.
The sauces used to garnish and complement restaurant desserts give them
an extra touch of elegance. In addition to chocolate and caramel sauces, try
fruit sauces.
Panna Cotta
Ingredients
•1
cup plus an
•1
envelope (¼
additional 1 ¼
oz) powdered
cups milk
• ½ cup sugar
• 1 vanilla bean
gelatin
•1
cup heavy
cream
Panna cotta, which literally means “cooked cream,” has the rich, luxurious
quality of a custard, but in fact, it’s not a custard; it’s a cream-based dessert
thickened with gelatin. Some variations of panna cotta use milk products that
are a little acidic, such as buttermilk, yogurt, or crème fraîche. Note that
gelatin is an animal-based product, which means that this dessert is not suitable
for vegetarians.
The first step in making panna cotta is to hydrate the gelatin. Pour a portion of
the milk into a bowl and sprinkle the gelatin over a broad surface area so that it
will hydrate quickly and evenly. This step is called blooming. Gelatin cannot
be hydrated in a warm liquid, so make sure the milk is cold or at least cool.
Take the time to do this step carefully; if you splash the gelatin or don’t get it
evenly distributed over the top of the milk, it may not become fully hydrated,
and the final product will have bits of undissolved gelatin in it.
It takes about 5 minutes to properly hydrate gelatin after you’ve got it evenly
sprinkled over the top of the milk. During that time, you’ll see that the surface
of the milk becomes very rippled. After a couple of minutes, you can gently cut
the surface with a whisk to expose a little bit of new milk, again, to ensure that
all the gelatin becomes equally hydrated.
59
Next, dissolve the sugar into the cream in a saucepan. At this point, you might
flavor the cream with a vanilla bean, coffee beans, cinnamon sticks, orange
zest, or any type of fruit puree. You could even substitute fruit puree for some
of the milk in this recipe.
Bring the cream to a boil and pour it into the bloomed gelatin mixture. Stir it
around so that it’s thoroughly dissolved. If you’re using flavoring extract, add
that now, along with the reserved milk, to cool off the mixture more quickly. If
the cream mixture is too hot when you pour it into a ramekin, it may separate
into layers with the cream floating on top. Strain the mixture through a finemesh sieve and then pour it into dessert dishes or martini glasses. Refrigerate
for several hours or even a day or two.
Whipped Cream
Whipped cream is a component of many desserts and can be made in many
different textures. In a mousse, for example, the cream is under-whipped and
remains quite fluid. The catchphrase to remember when you’re making a
mousse is: “If it’s not pourable, it’s deplorable!”
Whipping the cream beyond the texture for a mousse yields the texture you
might want as a dollop on top of a finished dessert. Here, the cream is just
starting to hold its shape.
If you keep whipping the cream, you’ll reach the stage at which it could be put
into a pastry bag and piped into cream puffs.
At this point, if you overdo the whipping, you can gradually stir in a little bit
of liquid cream to deflate the whipped cream and make it more fluid; then, you
begin the whipping process again. Note that this is not a way to fix a broken
60
or ruined whipped cream, but it can certainly soften the cream back to a fluid
texture for making a mousse.
Cream that is over-whipped becomes very thick and grainy. It starts to look
like butter and, in fact, will eventually completely separate into fat and water.
Once cream has reached that stage, there is nothing you can do to rescue it.
Whatever texture you’re trying to reach, remember that it’s important to start
off with cold cream right from the refrigerator.
Chocolate Mousse
Ingredients
• 16 oz cream
•8
oz halfand-half
• 1 oz sugar
• 3 egg yolks
•1
2 oz
chocolate
•1
oz espresso
or liqueur
Chocolate mousse is a remarkably versatile component for desserts. You can,
of course, eat it by itself, or you can use it to fill a cake. Making chocolate
mousse combines a few of the techniques we’ve already learned.
Start by blending a crème anglaise. Remember that with crème anglaise, you
cook it just to reach the nappé stage. If you overcook it, it will be curdled and
not very attractive in its texture. If you undercook it, then the mousse won’t
have the proper texture either. Make sure you strain the crème anglaise to
remove any remaining small bits of egg.
Next, pour the crème anglaise over chopped chocolate, just as if you were
making a ganache. This variation is called an egg ganache and is frequently
used for making centers for candies.
Allow the chocolate to rest for a few minutes so that it will start to melt,
then blend the mixture. If you think your chocolate may be too cold to melt
completely, you can heat the mixture in the microwave for a few seconds,
or you can partially melt the chocolate in the microwave before adding the
crème anglaise. Notice that this mixture is much, much thicker than the glaze
we made in an earlier lesson because there’s a higher proportion of chocolate
61
to hot liquid in this recipe. When the crème anglaise and the chocolate are
thoroughly blended, you can add some brandy or other flavoring if you like.
When you’re preparing a chocolate mousse, it’s important to understand that
the cream is the aerator, not the stabilizer, of the mousse. The mousse will set
up because the chocolate has cocoa butter, which will firm up as it’s cooled.
Resist the temptation to over-whip the cream. Remember, if the cream isn’t
pourable, it’s deplorable.
Before adding the whipped cream, test the temperature of the chocolate
mixture with a thermometer—it should be about 95°—or have a taste of it; if it
feels like it’s about body temperature, you can proceed. If the chocolate is too
hot when you add the cream, the cream will deflate, and the mousse will be too
dense. If the chocolate mixture is too cold, the cream could separate and break,
becoming grainy.
Fold the whipped cream in all at once and keep blending until it’s thoroughly
mixed, with no white or brown stripes. Again, you may be surprised at how
fluid the mixture is.
Frosting a Cake with Mousse
Many cakes served in restaurants use mousse instead of traditional frosting,
and the method used for frosting a cake with mousse is certainly much faster
than spreading a buttercream.
If necessary, trim the cake to fit inside a stainless-steel cake ring, remembering
to save the cake crumbs for another use. Place the first layer of cake inside the
ring and pour some of the mousse on top. Then fit the second layer of cake
Unmolding and Presenting a Cake
To unmold a cake from a cake
ring, give the ring short bursts of
heat from a propane torch as you
turn it. The idea here is to melt
the cream in the mousse in order
to remove the cake from the ring.
Don’t heat up the mousse too
much, though, or the glaze will
melt over the sides of the cake.
To transfer the cake to a
presentation plate, move both
62
the cake and the cardboard it’s
sitting on to the plate. Insert a
spatula between the cake and
the cardboard and slide the
cardboard out.
Dress up the cake with crème
anglaise sauce, vanilla custard,
caramel sauce, chocolate and
honey sauce, or whipped cream;
then add some shavings from a
bar of chocolate.
carefully on top of the first and pour on the rest of the mousse. Smooth the
surface with an offset spatula.
In restaurants, these desserts are often made in individual ring molds, using the
same technique for frosting.
Put the mousse cake into the refrigerator or freezer to set up. Although the
mousse will seem very soft at this point, it will firm up to allow you to cut even
slices from the cake.
63
To top the mousse cake, prepare the same chocolate glaze that we made for
chocolate éclairs. If the glaze sets up prematurely, you may need to warm it
in the microwave to make it fluid again, but be careful not to overheat it, or it
could break and separate.
Pour the glaze over the top of the cake and use a spatula to push it out to the
side. Don’t worry if it dribbles over the ring mold because that will be removed
before serving. After glazing, put the cake back into the refrigerator for about
10 or 15 minutes.
Caramel Sauce
Ingredients
• 24 oz sugar
• 4 oz corn syrup
• 8 oz water
• Cream
The process for making caramel sauce begins in the same way as the caramel
glaze we made for profiteroles earlier. Combine sugar and corn syrup in a pan
and cook until it reaches a deep amber color. Remember that it’s hard to judge
the color of caramel while it’s cooking. It always looks darker in the pan than
it actually is. Try dripping a small amount onto a piece of white cardboard or a
plate to judge the color. Make sure you don’t take the caramel too far, or it will
be burned and bitter tasting.
When the caramel reaches the appropriate color, carefully add some cream.
Again, making this sauce is dangerous. Even at a boil, the temperature of
cream is at least 100° different from the temperature of cooked sugar. Add the
cream very slowly, or the mixture might splash up out of the pan. It’s also wise
to use a slightly larger saucepan than you think you might need because the
mixture will expand quite a bit.
You may notice that the cream and caramel mixture will boil for quite a
while, even though you’ve taken it off the heat. Although it looks fluid
when it’s hot, as it cools, the mixture will thicken to the point that it can’t
be used as a sauce. You can thin it out with a bit of liqueur, fruit puree,
water, or more cream.
64
Chocolate Sauce with Honey
Ingredients
• 16 oz heavy cream
• 2 oz honey
• Vanilla extract (to taste)
• 12 oz melted chocolate
Chocolate sauce comes in many variations. In some recipes, you make a syrup,
bringing sugar and water to a boil and adding chocolate; in other recipes,
chocolate sauce is made using cocoa powder. This chocolate sauce with honey
is a variation of ganache, which is a typical chocolate sauce.
Start by heating the cream and adding some honey. Instead of pouring the
cream over the chocolate, warm the chocolate in the microwave or over a
double boiler and then add it to the simmering cream. Allow the mixture to
rest briefly before you stir.
At this point, you can add vanilla extract or liqueur. You might also combine
the chocolate with caramel. Caramelize a little bit of sugar first and deglaze it
with the cream (see “Caramel Sauce”); then add chocolate sauce to the caramel.
Blend the chocolate with the flavoring. If you find that the sauce thickens too
much as it cools, blend it with a little water to thin it out. Chocolate sauce has a
long shelf life and can be kept for weeks in the refrigerator.
Important Terms
blooming: Term for the process of spreading gelatin on a liquid to hydrate it.
crème fraîche: Soured cream.
double boiler: Essentially, a two-piece pot; boiling water in the lower pot is
used to heat delicate ingredients, such as chocolate, in the upper pot.
65
66
Recipe List
Lesson 1
Lesson 4
Basic Cookie Dough������������������� 5
Pâte à Choux������������������������������� 35
Sugar Cookie Dough������������������ 6
Pastry Cream������������������������������� 39
Pound Cake������������������������������� 9
Chocolate Ganache��������������������� 40
Hard Caramel Glaze�������������������� 42
Lesson 2
Devil’s Food Cake�������������������� 13
Lesson 5
Chiffon Cake��������������������������� 15
Crème Anglaise��������������������������� 46
Angel Food Cake��������������������� 18
Butterscotch Pudding������������������ 50
Crème Caramel (Flan)����������������� 51
Lesson 3
Crème Brûlée������������������������������ 51
Piecrust����������������������������������� 21
French-Style Buttercream����������� 54
Biscuits����������������������������������� 29
Scones������������������������������������ 31
Lesson 6
Panna Cotta��������������������������������� 59
Chocolate Mousse����������������������� 61
Caramel Sauce���������������������������� 64
Chocolate Sauce with Honey������ 65
67
Glossary
bain-marie: A water bath; used to allow food to cook gradually. The term also
refers to the vessel that holds the water in this technique. (See double boiler.)
bench flour: Small bit of flour scattered on the work surface (“bench”) to
prevent dough from sticking as it is rolled or kneaded.
blind baking: Baking a piecrust before filling; this technique is used for pies
that have a custard filling, such as chocolate or banana cream pie.
blooming: Term for the process of spreading gelatin on a liquid to hydrate it.
churro: A Mexican pastry made with choux paste that is deep-fried and tossed
in cinnamon sugar.
combination method: A method of mixing in which some form of chemical
leavener, such as baking powder or baking soda, is moistened with either water
or milk, resulting in the formation of carbon dioxide bubbles that expand when
exposed to heat.
creaming method: A method of mixing that incorporates air into butter to
cause dough to rise when exposed to heat.
crème fraîche: Soured cream.
croquant: A caramelized hazelnut mixture that can be crumbled over cakes or
eaten like peanut brittle.
croquembouche: A traditional French wedding cake consisting of a tower of
cream puffs glazed with caramel.
crumb coat: A thin layer of frosting that seals the cake to ensure no crumbs
will appear in the finish coat.
docking: In blind baking, the practice of pricking holes in the bottom of a
piecrust to prevent the dough from bubbling up. Docking is not necessary if pie
weights or baking beans are used.
double boiler: Essentially, a two-piece pot; boiling water in the lower pot is used
to heat delicate ingredients, such as chocolate, in the upper pot. (See bain-marie.)
68
flavorings: Ingredients, such as salt, chocolate chips, raisins, or nuts, that add
flavor and texture to a dough but don’t influence the formation or behavior of
the dough.
foaming method: A method of mixing in which eggs (either whole or
separated) are whipped to incorporate air; the air in the eggs causes dough to
rise when exposed to heat.
ganache: A glaze or sauce used as a topping for pastries and cakes.
infusion: The process of steeping ingredients, such as vanilla beans, in a hot
liquid to impart flavor.
leavening: The process of rising when a dough or batter is exposed to heat;
also, ingredients that cause rising, such as baking soda.
liquefiers: Ingredients that make doughs become softer and perhaps make
them spread, commonly, sugar and butter.
mouthfeel: The way a food feels in the mouth, particularly its texture and
consistency.
nappé stage: The point in the thickening of a sauce when the sauce coats the
back of a spoon and holds a line drawn through it with a finger.
palette knife: A knife with a rounded blade used for spreading.
pâte à choux (choux paste): Pastry dough used to make éclairs, cream puffs,
and so on.
pie weights: Small ceramic or stainless-steel balls that are used to weigh down
a piecrust for blind baking. Dried beans from the grocery store may also be
used for this purpose.
profiterole: A cream puff; a small pastry ball filled with whipped cream or
pastry cream.
ramekin: A small dish used for baking and serving individual portions of food
or desserts.
rubbed-in dough method: A method of mixing in which butter or shortening
is literally rubbed in to flour with the hands; used for making flaky doughs,
such as those for piecrusts and biscuits.
69
sabayon: A sauce consisting of egg yolks, sugar, and wine or liqueur.
salamander: A small iron used to brown the top of a dish, such as
crème brûlée.
shinwa strainer: A fine-mesh, cone-shaped sieve.
soufflé: The act of rising when baked; also a light dish made with beaten egg
whites that rises in the oven.
stabilizers: Ingredients, such as eggs and flour, that help doughs hold together.
tamis: A drum sieve.
tempering: The process of introducing a small amount of a hot ingredient
to a cold ingredient before heating the mixture. Tempering prevents the cold
ingredient, especially eggs, from cooking prematurely.
trifle: A dessert made of layered sponge cake, fruit, and custard.
70
Bibliography
Note: All books listed below are available on the website of The Culinary
Institute of America at http://www.ciaprochef.com/fbi/enthusiasts.html.
Conniff-Dobrich, Cate. Seasons in the Wine Country: Recipes from The
Culinary Institute of America at Greystone. San Francisco: Chronicle Books,
2010.
Coppedge, Richard J., Jr. Gluten-Free Baking with The Culinary Institute of
America: 150 Flavorful Recipes from the World’s Premier Culinary College.
Holbrook, MA: Adams Media, 2008.
The Culinary Institute of America. Baking at Home with The Culinary Institute
of America. New York: Wiley, 2004.
———. Breakfasts & Brunches. New York: Lebhar-Friedman, 2005.
———. Cookies at Home with The Culinary Institute of America. New York:
Wiley, 2011.
———. Cooking at Home with The Culinary Institute of America. New York:
Wiley, 2003.
———. The Culinary Institute of America Cookbook: A Collection of Our
Favorite Recipes for the Home Chef. New York: Lebhar-Friedman, 2008.
———. Gourmet Meals in Minutes. New York: Lebhar-Friedman, 2004.
———. Grilling: Exciting International Flavors from the World’s Premier
Culinary College. New York: Lebhar-Friedman, 2006.
———. Healthy Cooking at Home with The Culinary Institute of America.
New York: Wiley, 2011.
———. The New Book of Soups. New York: Lebhar-Friedman, 2009.
———. One Dish Meals. New York: Lebhar-Friedman, 2006.
———. The Professional Chef. 9th ed. New York: Wiley, 2011. (The
online version of this book can be found at https://www.inkling.com/store/
professional-chef-cia-9th/.)
71
———. Vegetables. New York: Lebhar-Friedman, 2007.
———, Mark Erickson, and Lisa Erickson. Cooking for One: A Seasonal
Guide to the Pleasure of Preparing Delicious Meals for Yourself. New York:
Lebhar-Friedman, 2011.
——— and Ben Fink. Hors d’Oeuvre at Home with The Culinary Institute of
America. New York: Wiley, 2007.
——— and Darra Goldstein. Baking Boot Camp: Five Days of Basic Training
at The Culinary Institute of America. New York: Wiley, 2007.
——— and Peter P. Greweling. Chocolates & Confections at Home with The
Culinary Institute of America. New York: Wiley, 2009.
——— and Katherine Polenz. Vegetarian Cooking at Home with The Culinary
Institute of America. New York: Wiley, 2012.
———, Gianni Scappin, Alberto Vanoli, and Steven Kolpan. Italian Cooking
at Home with The Culinary Institute of America. New York: Wiley, 2011.
——— and Martha Rose Shulman. Culinary Boot Camp: Five Days of Basic
Training at The Culinary Institute of America. New York: Wiley, 2006.
Fischer, John W., and Lou Jones. Bistros and Brasseries: Recipes and
Reflections on Classic Café Cooking. New York: Lebhar-Friedman, 2008.
Kastel, Eric W., Artisan Breads at Home. New York: Wiley, 2010.
Scappin, Gianni, and Vincenzo Lauria. A Tavola! Recipes and Reflections on
Traditional Italian Home Cooking. New York: Lebhar-Friedman, 2009.
Shulman, Martha Rose. Spain and the World Table. New York: DK Adult,
2011.
72
Photographic Credits
Page i: © iStockphoto/Thinkstock.
Page 1: © iStockphoto/Thinkstock.
Page 2: © Getty Images/Thinkstock Images/Comstock/Thinkstock.
Page 4: © Getty Images/Hemera Technologies/PhotoObjects.net/Thinkstock.
Page 5:
© Hemera/Thinkstock.
Page 6: © Getty Images/Jupiterimages/Comstock/Thinkstock, © iStockphoto/Thinkstock.
Page 7:
© iStockphoto/Thinkstock.
Page 8:
© iStockphoto/Thinkstock.
Page 9
© iStockphoto/Thinkstock.
Page 13: © iStockphoto/Thinkstock.
Page 14: © Getty Images/Jupiterimages/Comstock/Thinkstock.
Page 15: © Hemera/Thinkstock.
Page 16: © Getty Images/Jupiterimages/Comstock/Thinkstock.
Page 17: © iStockphoto/Thinkstock.
Page 18:© Getty Images/Hemera Technologies/PhotoObjects.net/Thinkstock, © Getty Images/
Jupiterimages/Comstock/Thinkstock, © iStockphoto/Thinkstock.
Page 19 © Hemera/Thinkstock.
Page 21: © iStockphoto/Thinkstock.
Page 22: © iStockphoto/Thinkstock.
Page 23: © iStockphoto/Thinkstock.
Page 24: © iStockphoto/Thinkstock.
Page 26: © Brand X Pictures/Thinkstock.
Page 27: © iStockphoto/Thinkstock.
Page 28: © Getty Images/Jupiterimages/Comstock/Thinkstock.
Page 29: © Getty Images/Jupiterimages/Comstock/Thinkstock, © iStockphoto/Thinkstock.
Page 30: © Getty Images/Jupiterimages/Comstock/Thinkstock.
Page 31: © iStockphoto/Thinkstock.
Page 32: © iStockphoto/Thinkstock.
Page 35: © Getty Images/Jupiterimages/Comstock/Thinkstock, © iStockphoto/Thinkstock.
Page 36: © iStockphoto/Thinkstock.
Page 38: © iStockphoto/Thinkstock.
Page 39: © Getty Images/Jupiterimages/Comstock/Thinkstock, © iStockphoto/Thinkstock.
Page 40: © iStockphoto/Thinkstock.
Page 41: © iStockphoto/Thinkstock.
Page 42: © Getty Images/Jupiterimages/Comstock/Thinkstock, © iStockphoto/Thinkstock.
73
Page 45: © Marcy McDonald.
Page 46: © Getty Images/Jupiterimages/Comstock/Thinkstock, © iStockphoto/Thinkstock.
Page 48: © iStockphoto/Thinkstock.
Page 50: © iStockphoto/Thinkstock.
Page 51: © iStockphoto/Thinkstock.
Page 52: © iStockphoto/Thinkstock.
Page 53: © iStockphoto/Thinkstock.
Page 54: © Getty Images/Jupiterimages/Comstock/Thinkstock, © iStockphoto/Thinkstock.
Page 55: © iStockphoto/Thinkstock.
Page 57: © iStockphoto/Thinkstock.
Page 58: © iStockphoto/Thinkstock, © Getty Images/Jupiterimages/Comstock/Thinkstock.
Page 59: © Getty Images/Jupiterimages/Comstock/Thinkstock, © iStockphoto/Thinkstock.
Page 60: © iStockphoto/Thinkstock.
Page 61: © Getty Images/Jupiterimages/Comstock/Thinkstock, © iStockphoto/Thinkstock.
Page 63: © Marcy McDonald.
Page 64: © Getty Images/Jupiterimages/Comstock/Thinkstock, © iStockphoto/Thinkstock.
Page 65: © iStockphoto/Thinkstock.
Page 66: © iStockphoto/Thinkstock.
Page 67: © Zoonar/Thinkstock.
Page 70: © iStockphoto/Thinkstock.
Page 75: © Hemera/Thinkstock, © Zoonar/Thinkstock.
74
Notes
Notes
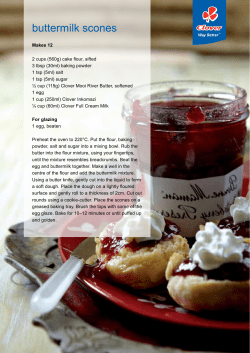
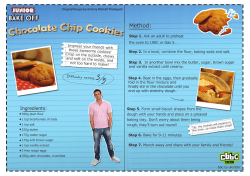
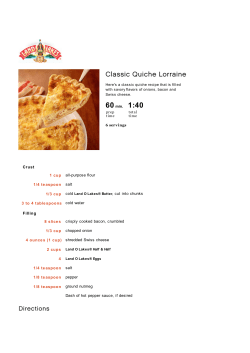
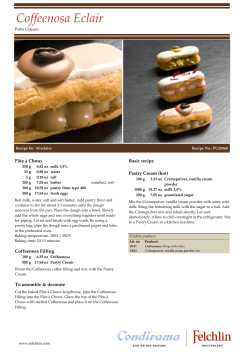
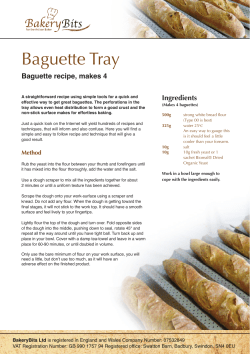
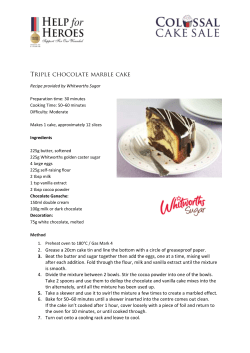
© Copyright 2026