
Kambrook - New Zealand Kambrook - Australia Private Bag 94411
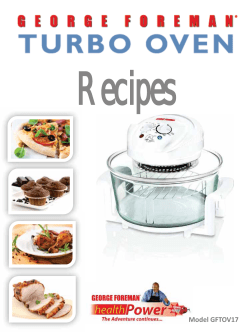
Kambrook - Australia
Building 2, Port Air Industrial Estate
1A Hale Street
Botany NSW 2019
Australia
Customer Service Line 1300 139 798
Customer Service Fax 1800 621 337
www.kambrook.com.au
Kambrook - New Zealand
Private Bag 94411
Botany, Manukau
Auckland 2163
New Zealand
Customer Service Line/
Spare Parts 0800 273 845
Customer Service Fax 0800 288 513
www.kambrook.co.nz
Due to continual improvement in design or otherwise, the product you
purchase may differ slightly from the illustration in this book. Issue C13
Turbo
Convection
Oven
KOT900
Instruction Booklet
Important
Please retain your instruction
book for future use.
In the event that you need some assistance with your
Kambrook appliance, please contact our Customer Service
Department on 1300 139 798 (Australia) or 0800 273 845
(New Zealand). Alternatively, visit us on our website at
www.kambrook.com.au or www.kambrook.co.nz
Contents
Kambrook Recommends
Safety First
p4
Your Kambrook Turbo
Convection Oven
p6
Quick Start Guide
p7
Using Your Kambrook Turbo
Convection Oven
p9
Troubleshooting Guide
p17
Care, Cleaning and Storage
p19
Recipes
p20
Kambrook Recommends Safety First
IMPORTANT: Please retain your
instruction book for future use.
At Kambrook, we believe that safe performance is the first priority in any
consumer product, so that you, our valued customer can confidently
use and trust our products. We ask that any electrical appliance that
you use be operated in a sensible fashion with due care and attention
placed on the following important operating instructions.
Important Safeguards For Your Kambrook
Turbo Convection Oven
• To eliminate a choking hazard for young
children, remove and safely discard the
protective cover that is fitted to the power
plug on the Turbo Convection Oven.
• Carefully read all instructions before
operating the Turbo Convection Oven and
save for future reference.
• Remove any packaging material and
promotional stickers before using the Turbo
Convection Oven for the first time.
• Do not place the Turbo Convection Oven
on the edge of a bench or table during
operation. Ensure the surface is level, clean
and free of water and other surfaces.
• Do not use on a sink drain board.
• Do not place the Turbo Convection Oven on
or near a hot gas or electric burner, or where
it could touch a heated oven. Use the Turbo
Convection Oven well away from walls.
• Do not use the Turbo Convection Oven near
flammable substances.
• When using the Turbo Convection Oven,
provide adequate space above and on all
sides for air circulation.
• The Turbo Convection Oven is not intended
to be operated by means of an external
timer or separate remote control system.
• Always ensure the Turbo Convection Oven is
properly assembled before use.
• Use only the glass bowl supplied. Do not use
any other bowl inside the base stand.
• Only the glass cooking bowl is designed to
contain food or liquid.
4
• Never operate the Turbo Convection
Oven without food or liquid in the glass
cooking bowl.
• Do not use this Turbo Convection Oven for
anything other than its intended use.
• The glass bowl and lid has been specially
treated to make it stronger, more durable
and safer than ordinary glass, however it is
not unbreakable. If struck extremely hard it
may break or weaken the glass and could
shatter later for no apparent cause.
• Extreme caution must be used when the
Turbo Convection Oven contains hot food,
and liquids.
• Do not move the Turbo Convection Oven
during cooking.
• Always have the glass lid placed
correctly into position on the glass
cooking bowl throughout operation of the
Turbo Convection Oven unless stated in the
recipe to have it removed.
• Always switch off the Turbo Convection
Oven, then switch off at the power outlet,
then unplug and allow to cool before
cleaning, before attempting to move the
appliance, dissembling, assembling and
when storing the Turbo Convection Oven.
• Do not touch hot surfaces. The glass lid, glass
cooking bowl and extension ring become
extremely hot when used. Use the base
handles to move Turbo Convection Oven
and use lid handle to remove the glass lid
from the glass cooking bowl. Use oven mitts
to remove the removable glass cooking bowl
when hot.
• Do not immerse the glass lid in water or any
other liquid.
• Do not place the glass cooking bowl when
hot on any hot surface that may be affected
by heat.
• Do not place anything on top of the glass
lid of the Turbo Convection Oven when
assembled, when in use and when stored.
Do not use accessories other than those
provided with the appliance.
• Keep the base stand, glass cooking bowl
and glass lid clean. Follow the cleaning
instructions provided in this book.
Important Safeguards For All Electrical
Appliances
• Fully unwind the power cord before use.
• Connect only to 230V or 240V power outlet.
• Do not let the power cord hang over the
edge of a bench or table, touch hot surfaces
or become knotted.
• To protect against electric shock, do not
immerse the power cord, power plug or
appliance in water or any other liquid,
unless it is recommended in the
cleaning instructions.
• The appliance is not intended for use by
persons (including children) with reduced
physical, sensory or mental capabilities,
or lack of experience and knowledge,
unless they have been given supervision or
instruction concerning use of the appliance,
by a person responsible for their safety.
• Children should be supervised to ensure that
they do not play with the appliance.
• It is recommended to inspect the appliance
regularly. Do not use the appliance if the
power supply cord, plug, connector or
appliance becomes damaged in anyway.
Return the entire appliance to the nearest
authorised Kambrook Service Centre for
examination and/or repair.
• Any maintenance other than cleaning
should be performed at an authorised
Kambrook Service Centre.
• This appliance is for household use only.
Do not use this appliance for other than its
intended use. Do not use in moving vehicles
or boats. Do not use outdoors. Misuse may
cause injury.
• The installation of a residual current device
(safety switch) is recommended to provide
additional safety protection when using
electrical appliances. It is advisable
that a safety switch with a rated residual
operating current not exceeding 30mA be
installed in the electrical circuit supplying
the appliance. See your electrician for
professional advice.
• Always turn the appliance to the OFF
position, switch off at the power outlet
and unplug at the power outlet when the
appliance is not in use.
• Before cleaning, always turn the appliance
to the OFF position, switch off at the power
outlet, unplug at the power outlet and
remove the power cord, if detachable, from
the appliance and allow all parts to cool.
• Do not place this appliance on or near
a heat source, such as hot plate, oven
or heaters.
• Position the appliance at a minimum
distance of 20cm away from walls, curtains
and other heat or steam sensitive materials
and provide adequate space above and on
all sides for air circulation.
• Avoid sudden temperature changes. Do
not place frozen or very cold foods into the
glass bowl when it is hot. Do not place the
glass bowl when hot into cold water as it may
break the glass bowl.
• Do not use the glass bowl in a conventional
oven. Do not place the glass bowl onto a
heat gas or electric burner.
• Do not use a damaged or cracked
glass bowl.
• Avoid scalding from escaping steam
when removing the glass lid from the
removable bowl when hot by carefully
lifting the lid angled away from yourself.
WARNING: Do not operate the appliance
on an inclined surface.
5
Your Kambrook Turbo Convection Oven
1. 10L glass cooking bowl
7. High Rack
2. Glass lid and motor housing
8. Low Rack
3. Plastic stand with cool touch
handles and heat resistant base
4. Digital display panel with pre-set
cooking functions, allowing you to
manually adjust if required.
5. POWER/START button, allowing
you to pause or cancel
cooking process
6. Lid Handle, automatically turns off
the unit when lifted up. Must be
in the downward position for the
unit to commence cooking
6
Not Shown
•
•
•
Lid Holder
Tongs
Stainless steel extension ring for
5L greater volume
Quick Start Guide
Assembly and Operation of Turbo Convection Oven
1.
2.
3.
Place the glass cooking bowl
onto the plastic stand.
Place the low or high rack into
the glass cooking bowl.
Place the selected food item
into the glass cooking bowl and
onto the rack.
4.
5.
6.
Place the extension ring
onto the glass cooking bowl
(optional).
Place the glass lid onto the
glass cooking bowl.
Press the lid handle into the
downward position.
Turning the Turbo Convection Oven Power ON and
Adjusting Cooking Time and Temperature
1.
2.
3.
Plug the power cord into a
230V or 240V power outlet and
switch power outlet ‘On’.
Press and hold the ‘POWER/
START’ button (for 3 seconds)
until the digital control panel
illuminates.
Select the desired pre-set
cooking function.
7
Quick Start Guide
continued
Turning the Turbo Convection Oven Power ON and
Adjusting Cooking Time and Temperature...continued
4.
5.
6.
Adjust the cooking time
if required or as per recipe
guidelines. Press the ‘+’ button
to increase the cooking
temperature and the ‘-‘ button
to decrease the cooking
temperature.
Adjust the cooking temperature
if required or as per recipe
guidelines. Press the ‘+’ button
to increase the cooking
temperature and the ‘-‘ button
to decrease the cooking
temperature.
Press the ‘POWER/START’ button
and allow to cook.
Using the Turbo Function
Turning the Turbo
Convection Oven OFF
1.
2.
1.
For an additional 10 minute
cooking time, press the ‘TURBO’
button.
Press the ‘POWER/START’ button
and allow to cook.
Once the timer has counted
down and finished cooking
switch the Turbo Convection
Oven ‘OFF’ at the power outlet
and unplug power cord from
the power outlet.
8
Using Your Kambrook Turbo Convection Oven
Before first use
Remove and safely discard any
packaging material and promotional
labels before using the Turbo
Convection Oven for the first time.
Wash the glass cooking bowl in hot,
soapy water, rinse and dry thoroughly.
Do not immerse the glass lid in water
or any other liquid. Wipe the glass lid
and plastic stand with a damp cloth
and dry with a soft dry cloth.
Operating Instructions
1. Make sure that the power outlet is
switched OFF.
2. Position the Turbo Convection
Oven on a dry, clean and
level surface and place the
glass cooking bowl onto the
plastic stand.
3. Place the low rack or high rack
into the glass cooking bowl (refer
to recipe guidelines for correct
rack to be used).
4. Place the selected food item to
be cooked into the glass cooking
bowl and onto the rack.
5. Place the extension ring onto
the glass bowl if suggested in
recipe guidelines.
6. Place the glass lid onto the
glass cooking bowl, making
sure that the handle of the
glass lid is fully locked into the
downward position.
IMPORTANT: The Turbo
Convection Oven will not
work unless the safety handle
is fully locked into the downward
position. If you need to remove
the glass lid during the cooking
process, lifting the safety handle
will stop the heating element
and the turbo fan until you
resume by pressing the safety
handle downward into the locked
position and then pressing the
‘POWER/START’ button.
Caution: During the
cooking process, the
heating elements will
occasionally turn on
and off to ensure that the
desired temperature is
maintained. When the set
temperature is reached,
the heating elements turn
off but the motor fan inside
the lid will keep running
to provide even heat
circulation inside the bowl.
7. Plug the Turbo Convection Oven
into a 230v or 240v power outlet
and turn on at the power outlet.
The unit will emit a “BEEP” sound.
8. Press and hold the ‘POWER/
START’ button for approximately
3 seconds until the timer and
temperature indicators illuminate
on the digital display panel.
9. Select the desired pre-set
cooking function and then press
the ‘POWER/START’ button to
commence cooking.
9
Using Your Kambrook Convection Oven
10. If required, adjust the preset cooking time or cooking
temperature. Refer to ‘Using the
Temperature Function’ and ‘Using
the Time Function’ on page 10.
11. Once the timer has counted
down and finished cooking,
switch the Turbo Convection
Oven ‘OFF’ at the power outlet
and unplug power cord from
the power outlet.
Caution: Always place
the glass lid onto the
metal lid holder after
removing from the glass
bowl as it may burn the
bench surface.
Caution: Always use a
tea towel or oven mitt to
remove the extension ring
before removing cooked
food from the glass
cooking bowl.
Rest the extension ring on
a heat-resistant surface to
prevent heat damage to
bench surface.
12. Remove the glass lid and rest
on lid holder (see Fig.1). Using a
tea towel or oven mitt remove
the extension ring from the glass
cooking bowl and rest on a heat
resistant surface.
continued
Fig. 1
Caution: Be careful of
the connected power
cord whenever handling
the glass lid, especially
when hot.
Caution: Always
remove the extension
ring before removing
or turning food in the
Turbo Convection
Oven to prevent
accidental scalding.
13. Using a tea towel or oven mitt
remove the cooked meal from
the Turbo Convection Oven.
14. Wait until the Turbo Convection
Oven has cooled completely
before cleaning. Follow the
‘Care, Cleaning and Storage’
instructions on page 16.
NOTE: Always use tongs to
remove the low rack or high rack.
10
Caution: Care must be
taken when removing
cooked meal from glass
cooking bowl as surface
may be extremely hot.
Caution: Do not use
plastic containers or
plastic wrap in the Turbo
Convection Oven.
Caution: Food must be
placed on the high rack
or low rack in the glass
cooking bowl. Make sure
there is space between
the food and the bottom
of the glass cooking
bowl and the glass lid to
allow airflow circulation.
Caution: Avoid
knocking or touching the
appliance while it is in
operation.
NOTE: Do not move the appliance
while it is switched on or hot.
Functions of Your Kambrook
Turbo Convection Oven
The digital control panel has 5
pre-set cooking settings including
a Cookies, Pizza, Pastry, Cake and
Roast Setting.
Additionally, there are 3 other
function settings: Re-heat, Turbo and
Clean. The table below outlines the
setting, temperature and default time
of each pre-set setting.
Pre-set Temperature
setting
Time
Cookies
170˚C
8 Minutes
Pizza
230˚C
12 Minutes
Pastry
220˚C
20 Minutes
Cake
160˚C
40 Minutes
Roast
190˚C
40 Minutes
Re-heat
70˚C
20 Minutes
Clean
70˚C
10 Minutes
Turbo
250˚C
10 Minutes
* Please note the above pre-set
cooking temperatures and cooking
times are only recommended settings;
please refer to recipe guidelines for
correct temperature and cooking
times and adjust accordingly.
Using the Temperature
Function
The Temperature Function
allows you to manually adjust the
pre-set temperature. The cooking
temperature can be increased
or decreased in 10˚C increments
between 50˚C-250˚C.
To adjust, press the ‘+’ button to
increase the cooking temperature
and the ‘-’ button to decrease the
cooking temperature. This allows
greater control over cooking time if
portion sizes or the recipe requires the
time or temperature be adjusted.
11
Using Your Kambrook Convection Oven
NOTE: The pre-set settings are only
a guideline and temperature and
time may need to be manually
adjusted depending on the food
being cooked.
Using the Time Function
The Timer Function allows you
change the pre-set cooking time.
Cooking time can be increased or
decreased in 1 minute increments
between 0-119 minutes. To adjust,
press the ‘+’ button to increase the
cooking time and the ‘-’ button to
decrease the cooking time.
Once the desired pre-set cooking
function has been selected and
cooking temperature and time
is adjusted, if required, press
the ‘POWER/START’ button to
commence cooking process.
Once the timer reaches 0:00,
the appliance will emit a series of
beeping sounds indicating that the
cooking process has completed.
To stop the cooking process before
the timer has counted down, press
the ‘POWER/START button once. The
timer and temperature indicators on
the digital display panel will display
0.00. Press and hold the ‘POWER/
START’ for 3 seconds. The appliance
will emit a beep sound and the time
and temperature indicators on the
digital display panel will turn off.
continued
NOTE: Before the cooking time has
completed, the pause function
can be activated by simply lifting
the handle. To resume cooking
process, push the lid handle into
the downward position and press
the ‘POWER/START’ button to
continue cooking process.
Other Functions
Re-heat
The ‘RE-HEAT’ function provides a low
heat for 20 minutes and is great for
re-heating meals quickly. Use the low
rack and ensure to use the extension
ring to evenly re-heat food.
If re-heating is required, press the
‘RE-HEAT’ button, then press the
‘POWER/START’ button to activate.
Turbo
The ‘TURBO’ function provides full heat
for an additional 10 minutes. If you are
roasting and require extra time, press
the ‘TURBO’ button then press the
‘POWER/START’ button to activate.
NOTE: All timings and temperatures
will vary dependant on factors such
as brand, liquid content, humidity
levels, temperature of food etc. The
timings and temperatures supplied
are only a guide.
Clean
The ‘CLEAN’ function is a self-cleaning
function to make cleaning the Turbo
Convection Oven easier. See page
18 for operation details.
12
Using the Extension Ring
Cake
The extension ring allows greater air
circulation to simulate a fan forced
oven. It adds an extra 5 litres to the
capacity of the oven, allowing you to
bake larger foods in the same amount
of time.
No pre-heating is necessary in the
Turbo Convection Oven when baking.
Ordinarily, the centre of a cake
batter will be moist, while the section
closest to rim of the baking pan will be
cooked first. We recommend using an
18cm round cake tin and the stainless
steel extension ring. Always place
the cake tin on the low rack, never
directly onto the bottom of the glass
cooking bowl. Cooking time depends
entirely upon the size of cake you
are making but it is easy to monitor
its progress with the see-through glass
cooking bowl. For more even cooking
results, bake the cake for the first 15
minutes and then cover the top of
the cake tin with aluminium foil for the
remaining time.
NOTE: Ensure that the extension
ring is fitted properly on top of the
glass bowl. If not fitted correctly it
can slip when placed on top.
Caution: Always remove
the extension ring before
removing or turning food
in the Turbo Convection
Oven to prevent
accidental scalding. Rest
the extension ring on a
heat-resistant surface to
prevent heat damage to
bench surface.
Pressure Express
Cooking Guide
Cookies
The Turbo Convection Oven cooks
cookies in a matter of minutes. You
can cook on the high rack and the
low rack. Use the extension ring for
even heat distribution.
Pizza
The pizza can be prepared outside
of the Turbo Convection Oven and
placed on the high rack. Use the
extension ring to improve airflow and
ensure a crispy base. For best results,
we suggest using thin crust pizzas.
13
Using Your Kambrook Convection Oven
continued
Roast - Beef, Lamb, Pork Roast
HINT: Lining the bottom of the glass bowl with aluminium foil (leaving an inch
of rim) will catch drippings for easy cleaning. To let hot air circulate freely, use
the low rack. The fan forced motor cooks meat evenly and seals in the juices.
Place meat directly on to the low rack with the skin facing downwards. Half way
through the cooking time, turn the meat skin side up and continue to roast for
the remaining time. Refer to the following cooking table for suggested cooking
time and temperature recommendations.
Roast
Amount
Time
Temp
Extension
Rack
Turned
Lamb Roast Boneless
1kg
50 Minutes
180
Yes
Low
Yes
Lamb Roast Boneless
1.1kg
55 Minutes
180
Yes
Low
Yes
Lamb Roast Boneless
1.2kg
55 Minutes
180
Yes
Low
Yes
Lamb Roast Boneless
1.3kg
60 Minutes
180
Yes
Low
Yes
Lamb Roast Boneless
1.4kg
65 Minutes
180
Yes
Low
Yes
Lamb Roast Boneless
1.5kg
70 Minutes
180
Yes
Low
Yes
Lamb Roast With Bone
1kg
60 Minutes
180
Yes
Low
Yes
Lamb Roast With Bone
1.1kg
65 Minutes
180
Yes
Low
Yes
Lamb Roast With Bone
1.2kg
65 Minutes
180
Yes
Low
Yes
Lamb Roast With Bone
1.3kg
70 Minutes
180
Yes
Low
Yes
Lamb Roast With Bone
1.4kg
75 Minutes
180
Yes
Low
Yes
Lamb Roast With Bone
1.5kg
80 Minutes
180
Yes
Low
Yes
Lamb Roast No Bone
1kg
50 Minutes
180
Yes
Low
Yes
Lamb Roast No Bone
1.1kg
55 Minutes
180
Yes
Low
Yes
Lamb Roast No Bone
1.2kg
55 Minutes
180
Yes
Low
Yes
14
Roast
Amount
Time
Temp
Extension
Rack
Turned
Lamb Roast No Bone
1.3kg
60 Minutes
180
Yes
Low
Yes
Lamb Roast No Bone
1.4kg
65 Minutes
180
Yes
Low
Yes
Lamb Roast No Bone
1.5kg
70 Minutes
180
Yes
Low
Yes
Pork Roast No Bone
500g
50 Minutes
180
Yes
Low
Yes
Pork Roast No Bone
750g
55 Minutes
180
Yes
Low
Yes
Pork Roast No Bone
1kg
60 Minutes
180
Yes
Low
Yes
Pork Roast No Bone
1.5kg
80 Minutes
180
Yes
Low
Yes
Beef Roast No Bone
500g
30 Minutes
180
Yes
Low
Yes
Beef Roast No Bone
750g
40 Minutes
180
Yes
Low
Yes
Beef Roast No Bone
1kg
50 Minutes
180
Yes
Low
Yes
Beef Roast No Bone
1.5kg
70 Minutes
180
Yes
Low
Yes
Roast - Whole Roast Chicken
HINT: Lining the bottom of the glass cooking bowl with aluminium foil will catch
drippings for easy cleaning. To let hot air circulate freely, use the low rack. The
fan forced motor cooks the chicken evenly and seals in the juices. Place the
chicken directly on to the low rack and refer to the following cooking table
for suggested time and temperature recommendations. Allow to stand for 10
minutes before removing from the Turbo Convection Oven.
15
Using Your Kambrook Convection Oven
Amount
Time
Temp
1.7kg
65 Minutes
180
Yes
Low
1.6kg
60 Minutes
180
Yes
Low
1.5kg
60 Minutes
180
Yes
Low
1.4kg
55 Minutes
180
Yes
Low
1.3kg
55 Minutes
180
Yes
Low
1.2kg
50 Minutes
180
Yes
Low
continued
Extension Rack
Pastry - Pre-cooked Pastry (thawed)
Thawed pastries can be placed onto the low rack and cooked for between
8 and 15 minutes at 220°C.
Pastry - Pre-cooked Pastry (frozen)
Frozen pastries can be placed onto the low rack and cooked for between
20 and 30 minutes at 190°C.
16
Troubleshooting Guide
Problem
Possible
Solution
Turbo Convection Oven light turns
off and on
• Turbo Convection Oven is
cycling and will continue
to cook
• During the cooking
process, the heating
elements will
occasionally turn
on and off to ensure
that the desired
temperature is
maintained. When
the set temperature is
reached, the heating
elements turn off but
the motor fan inside
the lid will keep running
to provide even
heat circulation inside
the bowl
Need to add or adjust food
during cooking
• To add more food or allow
more even cooking results
• Remove lid and
extension ring, if used,
from the glass cooking
bowl and place food
contents into the
bowl or turn food as
required. Replace lid
and extension ring
onto glass cooking
bowl, push the safety
locking handle
downward into the
locked position
and press ‘POWER/
START’ button
Timer is beeping
• Turbo Convection Oven
has finished cooking on the
selected setting
• Remove lid and
extension ring, if used,
from the glass cooking
bowl and remove food
contents
Setting cannot be selected
• Safety locking handle is not
pushed downward into the
locked position
• Push the safety locking
handle into the
downward
locked position
Food is not fully cooked through
• Setting time was not long
enough or temperature was
not high enough
• Refer back to recipe
guidelines and
increase time or
temperature
as necessary
17
Troubleshooting Guide
Problem
Food is over cooked or burnt
continued
Possible
• Setting time was too long or
the temperature was too high
Solution
• Refer back to recipe
guidelines and lower
time or temperature as
necessary
• Ensure correct rack is
used during cooking
and extension ring is
used when necessary
Meat is undercooked
• Roast meat was too large
in size
• Meat needs more
cooking time
• Replace glass lid
and extension ring, if
required, and reset the
cooking time or use
the ‘TURBO’ setting
to add an additional
10 minutes to your
cooking time
• Turn meat during
cooking process to
ensure meat is cooked
right through
18
Care, Cleaning and Storage
It is important to clean the
Turbo Convection Oven after each
use for good food safety hygiene
and to prevent a build up of grease,
residue or any unpleasant odours.
1. Before cleaning, switch ‘OFF’
and unplug power cord from the
power outlet and ensure that
the Turbo Convection Oven has
cooled down completely.
2. Remove the glass lid and wipe
over with a damp cloth and
polish with a soft dry cloth.
Do not place the lid with motor
housing into a dishwasher or into
any water.
3. The glass cooking bowl, lid holder,
tongs, high rack and low rack can
be washed in warm soapy water
using a mild household detergent.
Rinse with hot water and dry
thoroughly. Do not use abrasive
cleaners, steel wool, or metal
scouring pads as these
can damage the surfaces.
4. Always store the Turbo
Convection Oven in an upright
position. Do not store anything
on top of the Turbo Convection
Oven. Store on the bench top or
in a cupboard.
NOTE: The glass cooking bowl is
dishwasher safe, however care
should be taken not to chip or
crack the glass cooking bowl. The
high rack, low rack and lid holder
may be washed in the sink. If there
is any tough residue, soak for 20-30
minutes in warm soapy water and
clean with a soft cloth.
Self-Cleaning Function
The Turbo Convection Oven is fitted
with a self-cleaning function.
Ensure that the unit has cooled
down before cleaning.
1. Remove any leftover food scraps
from the glass cooking bowl.
2. Add a few drops of dishwashing
detergent and at least 5 litres
of water.
3. Place the glass lid on top of the
glass cooking bowl and push the
lid handle into the downward
locked position. Press and hold
the ‘POWER/START’ button for 3
seconds until the digital control
panel illuminates.
4. Press the ‘CLEAN’ button and
then press the ‘POWER/START’
button. The Turbo Convection
Oven will begin swirling the soapy
water around the glass bowl.
5. When self-cleaning function has
finished, switch off at the power
outlet and unplug the appliance
from the power outlet.
6. Remove the glass lid and wipe
with a damp cloth and polish
with a soft dry cloth. Do not place
the lid with motor housing into
a dishwasher or into any water.
Rinse the glass cooking bowl in
warm water to remove all soap
residues. Allow to drip dry or dry
using a soft cloth.
7. Store the Turbo Convection Oven
in an upright position. Do not
store anything on top of the Turbo
Convection Oven. Store on the
bench top or in a cupboard.
IMPORTANT: Do not immerse the
glass lid, power plug or power cord
in water or any other liquid as this
may cause electrocution.
19
Recipes
Macaroni and Cheese
Potato Bake
Makes 4 serves
Makes 4 serves
250g macaroni pasta
50g butter
1/3 cup plain flour
500ml full cream milk
1 tsp salt
½ cup parmesan cheese, grated + 1 tbsp
to bake
½ cup tasty cheese, grated
150ml pure cream
150ml milk
2 x 59g free range eggs
¼ tsp ground white pepper
1 tsp salt
2 medium potatoes, thinly sliced
1 small brown onion, thinly sliced
½ cup tasty cheese, grated
½ cup parmesan cheese, grated
1. Place the low rack into the base of the
glass cooking bowl.
2. Cook the pasta according to the
manufacturer’s instructions. Drain and
set aside.
3. Place the butter into a 2 litre
saucepan and melt over a low heat.
Add the flour and stir using a whisk
until combined. Allow to bubble and
cook for 1 minute and then gradually
add the milk half a cup at a time,
whisking constantly until it forms a
thick sauce.
4. Add the salt, ½ cup parmesan cheese
and ½ cup tasty cheese and stir well
to combine.
5. Pour the pasta and white sauce into
a 2 litre heat proof crockery, or glass
bowl and stir well to combine. Sprinkle
1 tablespoon of parmesan cheese
over the top of the macaroni.
6. Place into the glass cooking bowl and
onto the rack. Place the extension ring
on top and secure the lid.
7. Select ‘ROAST’ setting and adjust the
cooking time to 15 minutes and adjust
the cooking temperature to 200˚C
8. Press the ‘POWER/START’ button and
allow to cook.
20
1. Place the low rack into the base of the
glass cooking bowl.
2. In a jug, add the cream, milk, eggs,
salt and pepper and whisk with a fork
to combine.
3. In a 2 litre heat proof crockery, or glass
bowl, layer the potatoes and onions
alternatively and then pour the cream
mixture over the top.
4. Sprinkle with cheese and cover the
dish with aluminium foil and place into
the glass cooking bowl and onto the
rack. Place the extension ring on top
and secure the lid.
5. Select ‘ROAST’ setting and adjust the
cooking time to 70 minutes and adjust
the cooking temperature 160˚C.
6. Press the ‘POWER/START’ button and
allow to cook.
Lasagna
Makes 4 serves
50g butter
1/3 cup plain flour
500ml full cream milk
1 tsp salt
½ cup parmesan cheese, grated + 1 tbsp
to bake
½ cup tasty cheese, grated
2 tbsp olive oil
1 brown onion, finely diced
2 cloves garlic, minced
400g lean beef mince
1 carrot, grated
2 cups tomato passata sauce
250g instant lasagna pasta sheets
1 cup mozzarella cheese, grated
6. Top with grated mozzarella cheese
and cover with aluminium foil. Place
into the oven bowl and onto the rack.
Place the extension ring on top and
secure the lid.
7. Select ‘ROAST’ setting and adjust the
cooking time to 40 minutes and adjust
the cooking temperature to 180˚C.
8. Press the ‘POWER/START’ button and
allow to cook.
NOTE: For a golden result, remove
the aluminium foil 10 minutes
before the cooking time finishes.
2. Place the butter into a 2 litre
NOTE: Tomato passata sauce is a
traditional Italian tomato puree
that comes in a 1 litre glass bottle.
You can find it in your supermarket
near the canned tomatoes.
3. In a frypan, heat the oil over a
NOTE: Depending on the size of
your heat proof cooking bowl, you
may end up with left over white
sauce or meat sauce. You can
freeze the left overs in air tight
containers for up to 3 months and
use them at a later date.
1. Place the low rack into the base of the
glass cooking bowl.
saucepan and melt over a low heat.
Add the flour and stir using a whisk
until combined. Allow to bubble and
cook for 1 minute and then gradually
add the milk half a cup at a time,
whisking constantly until it forms a
thick sauce. Add the salt, ½ cup
parmesan cheese and ½ cup tasty
cheese and stir well to combine.
medium heat and then add the
onion, garlic and mince and sauté
until the mince is golden brown. You
may have to break up the chunks of
mince using a wooden spoon.
4. Stir through the carrot and passata
sauce and allow to simmer for
5 minutes.
5. Using a 2 litre heat proof crockery, or
glass dish, add ½ cup of the meat
mixture to the base of the dish. Follow
with a layer of lasagna pasta sheets
and then a layer of white sauce.
Repeat until you reach the top and
finish with a layer of white sauce.
21
Herbed Roast Chicken
Honey Mustard Beef Roast
Makes 1.5kg chicken
Makes 1kg roast
1.5kg chicken, rinsed
4 slices white bread
1 small brown onion
2 cloves garlic
1 tbsp parsley
1 tbsp mint
1 tbsp basil
2 sprig thyme
2 tbsp olive oil
1kg boneless beef roast
1 tbsp seeded mustard
2 tsp honey
1 tsp corn flour
1. Place the low rack into the base of the
glass cooking bowl.
2. Using a food processor, place the
bread, onion, garlic and herbs into
the food processor bowl and pulse
until it forms a fine crumb. Pour the
stuffing out into a bowl and shape
into an oval.
3. Push the stuffing into the chickens
cavity and tie the legs together with
kitchen string.
4. Place the chicken into the oven
bowl and onto the rack. Place the
extension ring on top and secure
the lid.
5. Select ‘ROAST’ setting and adjust the
cooking time to 60 minutes and adjust
the cooking temperature to 180˚C.
6. Press the ‘POWER/START’ button and
allow to cook.
22
1. Place the low rack into the base of the
glass cooking bowl.
2. Place the roast into the glass cooking
bowl and onto the rack, skin side
down. Place the extension ring on
top and secure the lid. Select ‘ROAST’
setting and adjust the cooking time
to 25 minutes and adjust the cooking
temperature to 180°C.
3. Press the ‘POWER/START’ button and
allow to cook.
4. Remove the glass lid and place onto
the lid holder. Remove the extension
ring and turn the roast over so that the
skin is facing upwards.
5. In a bowl, combine the mustard,
honey and corn flour. Brush onto
the roast using a pastry brush and
then place the extension ring on top
and secure the lid. Select ‘ROAST’
setting and adjust the cooking time
to 30 minutes and adjust the cooking
temperature to 180°C.
6. Press the ‘POWER/START’ button and
allow to cook.
Minted Lamb Roast
Root Vegetable Salad
Makes 1kg roast
Makes 4 serves
1kg boneless lamb leg
2 tbsp mint, finely shredded
¼ tsp ground white pepper
2 tsp flaked salt
30g butter, melted
125g sweet potato, 1cm diced
100g potato, 1cm diced
100g pumpkin, 1cm diced
1 carrot, 1cm diced
1 small brown onion, cut into 1/8ths
2 tbsp vegetable oil
2 tsp flaked salt
2 cups rocket lettuce
1 tbsp caramelised balsamic vinegar
1 tbsp balsamic vinegar
2 tbsp olive oil
1. Place the low rack into the base of the
glass cooking bowl.
2. Place the roast into the oven bowl
and onto the rack, skin side down.
Place the extension ring on top and
secure the lid.
3. Select ‘ROAST’ setting and adjust the
cooking time to 25 minutes and adjust
the cooking temperature to 180˚C.
4. Press the ‘POWER/START’ button and
allow to cook.
5. Remove the lid and place onto the
lid holder. Remove the extension ring
and turn the roast over so that the skin
is facing upwards.
6. In a bowl, combine the mint, pepper,
salt and butter. Brush onto the roast
using a pastry brush and then place
the extension ring on top and secure
the lid.
7. Select ‘ROAST’ setting and adjust the
cooking time to 30 minutes and adjust
the cooking temperature to 180˚C.
8. Press the ‘POWER/START’ button and
allow to cook.
1. Place the low rack into the base of the
glass cooking bowl and set aside a
22cm round oven tray.
2. In a bowl, combine the sweet
potato, potato, pumpkin, carrot,
onion, vegetable oil and salt and
toss to combine. Pour the vegetables
onto the oven tray and place into
the oven bowl and onto the rack.
Place the extension ring on top
and secure the lid.
3. Select ‘ROAST’ setting and adjust the
cooking time to 30 minutes and adjust
the cooking temperature to 200˚C.
4. Press the ‘POWER/START’ button and
allow to cook.
5. In a bowl, combine the rocket lettuce,
roasted vegetables, balsamic vinegar
and olive oil and stir until completely
coated. Serve immediately.
NOTE: For more even cooking, stir the
vegetables half way through cooking.
23
Gooey Chocolate Chip Cookies
Makes 40
185g butter, softened
1 cup brown sugar
½ cup caster sugar
1 tsp vanilla essence
2 x 59g free range eggs
2 cups plain flour
½ cup self raising flour
½ tsp baking powder
2 tbsp cocoa powder
100g white chocolate chips
100g dark chocolate chips
100g caramel chips
1. Place the low rack into the base of the
glass cooking bowl and line 2 x 18cm
round baking trays with canola oil
spray and baking paper.
2. Using an electric mixer, cream
the butter, sugars and vanilla until
lightened in colour and thickened,
approximately 3 minutes on a
high speed.
3. Scrape down the sides of the bowl
and add the eggs one at a time,
beating well after each addition.
Fold through the flour, baking
powder, cocoa powder and
chocolate chips on the lowest
speed until just combined.
4. Roll tablespoon sized balls and place
onto the oven trays. Gently press
down, making sure the cookies are
placed 5cm apart.
5. Place into the glass cooking bowl
select the ‘COOKIES’ setting and
adjust the cooking time to 12
minutes or cook until cookies are
golden brown.
6. Press the ‘POWER/START’ button and
allow to cook.
7. Repeat until all cookies are cooked
and then allow to cool on cake
cooling racks.
24
NOTE: If cookie dough is too soft,
place into the refrigerator for 10 minutes
to set slightly.
NOTE: Caramel chips can be
found next to the chocolate chips
in the supermarket. If you cannot
find caramel chips, use milk
chocolate chips.
Vanilla Butter Cake
Banana and Coconut Loaf
Makes 18cm cake
Makes 1 loaf
125g butter, softened
½ cup caster sugar
1 tsp vanilla essence
½ tsp vanilla bean paste
2 x 59g free range eggs
1 ½ cups self raising flour
½ cup milk
¼ cup pure icing sugar, sifted, to serve
2 (220g) bananas
2 x 59g free range eggs
1 tsp vanilla essence
2 tbsp honey
½ cup brown sugar
¼ cup vegetable oil
½ cup milk
½ cup desiccated coconut
2 cups self raising flour
½ cup sour cream
1. Place the low rack into the base of the
glass cooking bowl and line an 18cm
cake tin with canola oil spray and
baking paper.
2. Using an electric mixer, cream
the butter, sugar and vanillas until
lightened in colour and thickened,
approximately 3 minutes on a
high speed.
3. Scrape down the sides of the bowl
and add the eggs one at a time,
beating well after each addition until
heightened and thick, approximately
1 minute.
4. Fold through the flour and milk on the
lowest setting until just combined.
5. Pour into the prepared cake tin and
spread evenly using a pallet knife.
Cover with aluminium foil and place
into the oven bowl and onto the rack.
Place the extension ring on top and
secure the lid.
6. Select ‘CAKE’ setting and adjust the
cooking time to 60 minutes and adjust
the cooking temperature to 180˚C.
7. Press the ‘POWER/START’ button and
allow to cook.
8. Allow to stand for 5 minutes and then
turn out onto a cake rack to cool. Dust
with icing sugar before serving.
1. Place the low rack into the base of the
oven bowl and line a 20cm x 15cm
bar cake tin with canola oil spray and
baking paper.
2. Using a food processor, place all
ingredients into the bowl and pulse
until just combined, approximately
30 seconds.
3. Pour into the prepared cake tin and
spread evenly using a pallet knife.
Place into the glass cooking bowl and
onto the rack. Place the extension ring
on top and secure the lid.
4. Select ‘CAKE’ setting and adjust the
cooking time to 15 minutes and adjust
the cooking temperature to 180˚C.
5. Press the ‘POWER/START’ button and
allow to cook.
6. Remove the lid and the extension
ring and wrap a layer of aluminium
foil over the top of the cake. Place
into the oven bowl and onto the rack.
Place the extension ring on top and
secure the lid.
7. Select ‘CAKE’ setting and adjust the
cooking time to 70 minutes and adjust
the cooking temperature to 180˚C
8. Press the ‘POWER/START’ button and
allow to cook.
9. Allow to stand for 5 minutes and then
turn out onto a cake rack to cool.
25
Lemon and Poppyseed
Syrup Cake
Makes 18cm cake
¼ cup poppy seeds
¼ cup milk
180g butter, softened
1 cup caster sugar
1 tbsp lemon zest
3 x 59g free range eggs
2 cups self raising flour
½ cup apple juice
1. Place the low rack into the base
of the oven bowl and line an 18cm
cake tin with canola oil spray and
baking paper.
2. Place the poppy seeds and milk into a
small jug and set aside for 15 minutes.
3. Using an electric mixer, cream the
butter, sugar and lemon zest until
lightened in colour and thickened,
approximately 3 minutes on a
high speed.
4. Scrape down the sides of the bowl
and add the eggs one at a time,
beating well after each addition until
heightened and thick, approximately
1 minute.
5. Fold through the flour, apple juice,
milk and poppy seeds on the lowest
setting until just combined.
6. Pour into the prepared cake tin and
spread evenly using a pallet knife.
Place into the oven bowl and onto the
rack. Place the extension ring on top
and secure the lid.
7. Select ‘CAKE’ setting and adjust the
cooking time to 15 minutes and adjust
the cooking temperature to 180˚C.
8. Press the ‘POWER/START’button and
allow to cook.
26
9. Remove the lid and the extension
ring and wrap a layer of aluminium
foil over the top of the cake. Place
into the oven bowl and onto the rack.
Place the extension ring on top and
secure the lid.
10.Select ‘CAKE’ setting and adjust the
cooking time to 70 minutes and adjust
the cooking temperature to 180˚C.
11.Press the ‘POWER/START’button and
allow to cook.
12.Allow to stand for 5 minutes and then
turn out onto a cake rack to cool.
Meat Lovers Pizza
Makes 2 pizzas
250g bakers flour
120ml warm water
20ml olive oil
1 tsp dried yeast
1 tsp salt
1 tsp sugar
2 tbsp BBQ sauce
2 tbsp tomato paste
100g Danish salami, thinly sliced
100g diced bacon
2 thick sausages, cooked, diced
2 cups grated pizza cheese
7. Place the extension ring on top and
secure the lid. Select the ‘PIZZA’
setting and then press the ‘POWER/
START’ button and allow to cook.
8. When the pizza is cooked, repeat to
make the second pizza.
NOTE: If you prefer your pizza to
be crispier on top, simply select the
‘TURBO’ setting after cooking.
1. Using an electric mixer, place the
flour, water, oil, yeast, salt and sugar
into a bowl and knead on a low
speed for 1 minute. Cover the bowl
with cling wrap, place into a warm
space and allow to rise for 1 hour.
2. Place the high rack into the base of
the glass cooking bowl and line a
20cm round oven tray with canola oil
spray and baking paper.
3. Turn the dough out onto a lightly
floured surface and knead gently until
it forms a smooth dough ball. Cut into
2 pieces and roll each dough ball out
into a 20cm round pizza base and
place onto the prepared tray.
4. Place one pizza base into the glass
cooking bowl and onto the rack.
Place the extension ring on top and
secure the lid.
5. Select the ‘PIZZA’ setting and then
press the ‘POWER/START’ button and
allow to cook.
6. Remove the lid and the extension ring
and flip the pizza base over. Spread
the base with 1 tbsp BBQ sauce and 1
tbsp tomato paste and then top with
half of the salami, bacon, sausage
and cheese.
27
Antipasto Pizza
Makes 2 pizzas
250g bakers flour
120ml warm water
20ml olive oil
1 tsp dried yeast
1 tsp salt
1 tsp sugar
2 tbsp tomato paste
1 tbsp basil leaves, finely chopped
1 clove garlic, minced
½ cup pitted olives
½ cup sundried tomatoes
½ cup chargrilled capsicum
½ cup artichoke hearts
2 cups grated pizza cheese
1. Using an electric mixer, place the
flour, water, oil, yeast, salt and sugar
into a bowl and knead on a low
speed for 1 minute. Cover the bowl
with cling wrap, place into a warm
space and allow to rise for 1 hour.
2. Place the high rack into the base of
the glass cooking bowl and line a
20cm round oven tray with canola oil
spray and baking paper.
3. Turn the dough out onto a lightly
floured surface and knead gently until
it forms a smooth dough ball. Cut into
2 pieces and roll each dough ball out
into a 20cm round pizza base and
place onto the prepared tray.
4. Place one pizza base into the glass
cooking bowl and onto the rack.
Place the extension ring on top and
secure the lid. Select ‘PIZZA’ setting
and then press the ‘POWER/START’
button and allow to cook.
5. Remove the lid and the extension ring
and flip the pizza base over.
6. In a bowl, combine the tomato paste,
basil and garlic and spread half of it
onto the base and then top with half
of the olives, tomatoes, capsicum and
artichoke and cheese.
28
7. Place the extension ring on top and
secure the lid. Select the ‘PIZZA’
setting and then press the ‘POWER/
START’ button and allow to cook.
8. When the pizza is cooked, repeat to
make the second pizza.
NOTE: If you prefer your pizza to
be crispier on top, simply select the
‘TURBO’ setting after cooking.
NOTE: Artichoke hearts can be
found in the same section of your
supermarket as jarred olives, sundried
tomatoes and char grilled capsicum.
Raspberry and White Chocolate
Cookies
Makes 40
180g butter, softened
1 cup caster sugar
1 tsp vanilla essence
2 x 59g free range eggs
2 cups plain flour
½ cup self-raising flour
½ tsp baking powder
100g white chocolate chips
¼ cup raspberry jam
1. Place the low rack into the base of the
glass cooking bowl and line 2 x 18cm
round baking trays with canola oil
spray and baking paper.
2. Using an electric mixer, cream
the butter, sugar and vanilla until
lightened in colour and thickened,
approximately 3 minutes on a high
speed.
3. Scrape down the sides of the bowl
and add the eggs one at a time,
beating well after each addition. Fold
through the flours, baking powder,
chocolate chips and raspberry jam on
the lowest speed until just combined.
Almond Croissants
Makes 4 Croissants
100g butter
1/3 cup pure icing sugar, sifted
¼ cup plain flour
1 ½ cup almond meal
1 tsp water
4 medium sized croissants
¼ cup sliced almonds
1. Place the low rack into the base of the
glass cooking bowl and line a 20cm
round oven tray with canola oil spray
and baking paper.
2. Using a food processor, place the
butter, sugar, flour, almond meal
and water into the bowl and pulse
until smooth.
3. Slice the croissants in half and place
the bases onto the prepared baking
tray and spread with almond paste,
reserving 1/4 of the mixture. Place
the croissant tops back on top and
spread with remaining almond paste
and sprinkle with almonds.
4. Place into the glass cooking bowl and
onto the rack. Place the extension ring
on top and secure the lid.
4. Roll tablespoon sized balls and place
5. Select the ‘PASTRY’ setting and
5. Place into the glass cooking bowl
6. Press the ‘POWER/START’ button and
onto the oven trays. Gently press
down, making sure the cookies are
placed 5cm apart.
select the ‘COOKIES’ setting and
adjust the cooking time to 12
minutes or cook until cookies are
golden brown.
adjust the cooking time to 8 minutes
and adjust the cooking temperature
to 200°C.
allow to cook.
6. Press the ‘POWER/START’ button and
allow to cook.
7. Repeat until all cookies are cooked
and then allow to cool on cake
cooling racks.
29
Mini Sausage Rolls
Makes 12
2 sheets ready frozen rolled puff pastry,
thawed
8 beef and herb sausages
1 tbsp milk
2 tbsp sesame seeds
1. Place the low rack into the base of the
glass cooking bowl and line a 20cm
round oven tray with canola oil spray
and baking paper.
2. Slice the pastry sheets into 4 squares
and place a sausage into the centre
of each one. Roll the pastry over to
cover the sausage and place 4 onto
the prepared tray.
3. Place into the glass cooking bowl and
onto the rack. Place the extension
ring on top and secure the lid. Select
the ‘PASTRY’ setting and adjust the
cooking temperature to 200°C.
4. Press the ‘POWER/START’ button and
allow to cook.
5. Remove the lid and the extension ring
and flip the sausage rolls over. Using a
pastry brush, lightly brush over each
roll and sprinkle with sesame seeds.
Place the extension ring on top and
secure the lid. Select the ‘PASTRY’
setting and adjust the cooking
temperature to 200°C.
6. Press the ‘POWER/START’ button and
allow to cook.
7. When the sausage rolls are cooked,
repeat to make the remaining
sausage rolls.
30
Notes
31


© Copyright 2026