
Document 89882
Downloaded from:
“The Dump” at Scoutscan.com
http://www.thedump.scoutscan.com/
Editor’s Note:
The reader is reminded that these texts have been written a long time ago.
Consequently, they may use some terms or use expressions which were current
at the time, regardless of what we may think of them at the beginning of the
21st century. For reasons of historical accuracy they have been preserved in
their original form.
If you find them offensive, we ask you to please delete this file from your
system.
This and other traditional Scouting texts may be downloaded from the Dump.
WOODCRAFT
WISDOM
By
J. G. CONE
Illustrated by the Author
LONDON
C. ARTHUR PEARSON, LIMITED
TOWER HOUSE, SOUTHAMPTON STREET
STRAND, W.O.2
1
WOODCRAFT
IN my camp-fire pow-wows, I rarely mention how we did our scouting in
the very early days. I have found it is not exactly wise, because one may be
considered somewhat of a boaster, or perhaps looked upon as one of those
folk who never fail to repeat, “Now when I was your age I did this and I did
that.”
The early days cannot really be compared with the conditions of today. It is
true that many things have changed, but there is one thing which has not
altered and that is Woodcraft. Nature has not changed at all. The trees, the
wild flowers, the birds, the animals, the wind and the rain are still the same
today as they were forty-two years ago. Tracking, trailing, stalking, observing, pioneering, the study of nature and all those activities which go to
make up what is known as Woodcraft were there long before we were
called Boy Scouts.
Let me yarn of the years, say 1906-7. I can recall when, with a bow of
willow and a few arrows made of straight hazel sticks, we played Indians
and cowboys. We revelled in putting up an imaginary fight against the
settlers. Our prairie was the heath land, our pine forest in the Rockies was
the woods where we erected our bivouacs and bivvies. Sometimes we
would be the settlers moving across the country. We would send out scouts
to watch for hostile Indians, and the redskins would be on the look out for
them. On our imaginary bronchos we would race back with information,
and prepare for battle. That was scouting before it was called Scouting. In
these games we climbed trees, hid ourselves, followed trails, made camp
fires, rigged up shacks, learned quite a lot about the trees, the birds and their
eggs, which, I am now sorry to say, were often collected.
It was great fun trying to emulate the backwoodsman, and it was the stuff
we were so keen on. It was Woodcraft. We had very few other things to do
and consequently we had to make our own recreations. That is why, I
repeat, conditions were much different then to what they are today.
Then came Scouting. In 1908, B.P. gave us Scouting for Boys. Here was
something which was what we wanted. We were given a lead. Our gang
formed themselves into the Wolf Patrol. We could get into some sort of
order. We could have all our excitement and adventure, and at the same
time be useful and do a bit of good. There was a lot more to learn. It was
tough going at first. We had no real equipment, no headquarters where we
could meet, except the corner of the street, under the gas lamp, but on
Saturday afternoons we were back to our old playground, the heath land.
We had then to make and do, to use our imagination and improvise - billycans from tins with wire handles, tents from tarpaulins. Shops hadn’t got as
far as stocking Scout gear.
We read in Scouting for Boys that we should acquire the knowledge of
animals, birds, reptiles, fish, insects, plants and trees. B.P. told us how to
stalk, how to hide ourselves, how to observe, how to read signs, how to
make camp gadgets. All this can be summed up in one word - Woodcraft.
We were filled with tremendous enthusiasm. B.P. gave us just the guidance
we needed, although we didn’t realise it then.
In these days of hustle, mechanisation and mass production, we are liable to
let this part of our training get crowded out. We must not lose our grip. The
skill of the backwoodsman must not be lost. The adventurous spirit, the
knowledge of the wide open spaces, and nature, God’s wonderful creation,
must not be forgotten.
Of course, it is understood that we who live in the towns and cities, ‘mid
bricks and mortar, cannot spend all our time in the wide-open spaces, but
we can get out
whenever possible. We can be woodcraft minded - that is, alert, observant,
useful and self-reliant. We can create a woodcraft atmosphere in our
headquarters, and in our den. Make them look like places where those who
follow the woodcraft trail gather together. We should endeavour to be
useful and make things for ourselves, as B.P. put it - “Pioneers are always
handymen.” There are regulation belts, hats and other parts of Scout
uniform, but the pioneer or bushman was not like us. These fellows had to
make them. I am not suggesting that Scouts should not wear the regulation
belt and hat, but a good Scout will endeavour to make a plaited waistband
and other parts of camp equipment.
In my book Make and Do the Woodcraft Way, how to make many things are
described, and in response to those who have read it, this little book has
been written as a further instalment. In the chapters which follow, it is
hoped that the ideas given therein may prove a helpful guide to all those
who wish to seek knowledge and adventure in the great out-of-doors, to
keep alive the spirit of the backwoodsman, and enjoy making and doing
things the Woodcraft Way. To symbolise all our activities I give you a sign
which was created many moons ago - the Sign of Woodcraft.
First - the Tree. The tree of knowledge - knowledge of all that is good and
evil - knowledge of the arts and sciences - knowledge of the stars, wind, the
rain - knowledge of the woods, of the wood folk and the great out-of-doors.
Next, the Horns - the Horns of Power - power
attained through the tree of knowledge - knowledge
is power.
Then, the Circle. The circle of unity, eternity, forever,
unity of the great Universe - unity of our world-wide
brotherhood of Scouts.
2
THE DEN
WHEN we think of the word “Den” or talk of the Scout Den, don’t we
imagine straight away a place where the gang meets, where all the souvenirs
collected from the various expeditions, hikes and camps are hung about. We
never picture the den looking like a front parlour of a suburban villa. No, a
den has to have the atmosphere of the backwoods, although it may be
surrounded by the bricks and mortar of an industrial town.
As much as we would like to, we cannot all fix up our den in the heart of
the pine forest or backwoods, but we can bring the backwoods atmosphere
into our den and make it look like a pioneer’s log cabin in the heart of the
bush. It is all a part of woodcraft, and no den, when possible, should have
bare drab walls without any sign or resemblance of the woodcraft touch. A
stranger walking in should be able to tell at a glance that he is in a Den, and
it should be an interesting place for anyone to visit.
What Scout, Senior Scout or Rover hasn’t a bit of woodcraft spirit in him?
Is there a Scout who is not thrilled at the thought of the life of those old
pioneers and their cabins, their life in the Rockies, their adventures on the
plains? We are not all able to lead that kind of life but it is part of our
training to copy their example and lead a clean life in the great out-of-doors
as much as we can. That is why we should furnish our headquarters to
resemble as much as possible the homes of those sturdy fellows.
It is realised that lots of troops are unable to decorate their headquarters as
they wish because the place does not belong to them and it is used for other
purposes when they are not meeting, but there are many who have their own
Show and have not yet made a den of it. This little chapter is specially
written to meet many requests for ideas on how to set about decorating.
There are several things to consider before you start furnishing. It is like
going into an empty house. The first thing to consider is wall decoration
before anything can be hung up. Then there is the ceiling and the floors.
These should all be considered in the general scheme of things.
If it is a brick or plaster wall then it can be painted. If it is a wooden wall
then lots more can be done in the way of decoration because wooden walls
can be made to look like a real log cabin. Ceilings, if they are plaster, will
either have to remain whitewashed or papered and panelled.
Nothing can be laid down as a rule, but must be left to individual ideas.
The main idea is to effect a wood craft setting; therefore vivid wallpapers
and friezes are taboo. If money will run to it, panelling brick or plaster
walls, either in log cabin style or squares, is the ideal. Failing this, papering
in imitation wood panelling is the next best thing, and when this is
varnished it looks quite effective. Wooden walls need no treatment beyond
varnish.
A plaster or wooden ceiling can be made to look really good by fixing up
imitation beams to represent a shack. On these can be hung all kinds of
woodcraft gadgets and souvenirs.
In my den which of course isn’t as big as one which could be used for a
patrol or troop, I have a solid oak beam 6 inches x 6 inches running right
across the centre. To this beam I added four more, crisscross fashion, as
shown in Figure No. I. These extra beams are not solid but made up of three
long pieces screwed together as shown in the section. Although they are
hollow they appear to be solid, as all traces of joining have been removed,
the edges and surfaces made rough, and, with a few imitation cracks put in,
stain and varnish applied, one cannot tell the difference between the real
and the imitation.
If funds will allow, a beamed ceiling looks most effective, especially if the
bottom plank of the beam is left uncut, that is the outside of the tree trunk
with the bark stripped off. To match this treatment, the walls of the den can
be treated by fixing planks of floorboard vertically against the wall to give
the appearance of a wooden framework holding up the roof.
Fig. 2 shows the effect of flat panelling. This is made of lengths of batten,
anything from 1 inch X 4 inches to 2 inches x 6 inches according to the area
of the ceiling to be covered. This panelling should be stained and varnished.
The squares in between the beams can either be whitewashed if it is a
plaster ceiling, or papered and painted white. Once the ceilings are panelled
and painted, it will last for years, and is really the most economical in the
end.
Panelling the walls of a den is not such a colossal task as one would
imagine.
Fig. 3. shows what appears to be a somewhat ambitious and expensive
attempt. To panel a large area entirely in timber would certainly be
expensive, but this need not be so, because the whole wall can be “papered”
with imitation wood. This paper, which can also be obtained in panels, is
now on the market, and although it is among the best quality of wall
coverings, it is by far the cheapest to use. Once applied properly and
varnished it will last very many years. This paper of course is only suitable
for flat plaster walls.
There are a few points to remember regarding the application of this
material. The walls should be washed down if distemper has been
previously applied. If papered, this should be stripped off. The walls should
be sized very well. The paper should be pasted twice, one coat being
applied, allowed to soak in well before another coat is put on. The walls
should also be “pasted,” the strip of paper applied and pressed firmly down
with a soft rag to remove all bumps caused by air between wall and paper.
Slats of thin timber can now be nailed on the top of this covering to form
panels as shown. These should be stained to tone with the background, and
the whole, both wood and paper, given a couple of coats of varnish. A shelf
running all round the top of the panelling may be added if desired. The
panelling should not reach to the top of the ceiling, but 18 inches to 24
inches left to form a frieze.
In Fig. 4 you will see depicted yet another method of treating walls. This is
suitable for either rough brickwork, plaster or wood, and is composed of the
“first cuts” off logs, the section of which is shown in the sketch. This timber
should be stripped of bark, stained and varnished. The corner-pieces should
be cut as illustrated.
The electric lamps can be made to look like old-time chandeliers and
candle-holders. One often sees loads of logs being taken round for sale as
winter fuel. So even if you live in the town you can get the material from
which useful and artistic articles can be made.
Things made from rough wood are most attractive and are really woodcraft
style. They are produced cheaply and quite easily made. Provided the wood
is not “green,” but well dried out, the articles will last for years.
Table lamps, chandeliers, chairs, tables, cupboards. hat-racks, benches and
forms are some of the very many things that can be made.
Joining the wood together is quite simple. The joints should be a good fit,
but not necessarily equal to that of an expert carpenter or cabinet maker.
Nails and screws can be used for fixing together, but it is far better to make
use of wooden pegs. Small nails are used for any small pieces of
ornamentation. The bark of the wood can be left on provided it is intact, that
is, not cut or split here and there. Stripping and treating with stain and
varnish makes a nice job.
To begin with, I am showing you a few ideas on how to make joints. This is
the most important point to produce a good strong article with rough wood.
To do this you must have a decent saw and sharp chisels.
Much of the marking out will have to be done by guesswork, as obviously
with material of this kind one cannot use the usual thumb gauge, set square,
etc., as is done on planed wood, so every care should be taken when
measuring up for grooves, etc. Remember, it is easy to cut a piece off, but
impossible to put a piece on, so cut under rather than over.
If the hut contains a fireplace this too can have a log surround made to fit
and cover up the modem tiling. Log fireplaces are quite simply made. The
main thing is to obtain a decent sound log for the two side pieces. This
should be cut straight down the centre. You can get this done at a timber
yard where there is a circular saw. The whole surround can quite easily be
made. Each piece of wood round the mantelpiece is screwed to a piece of
batten. This batten is then screwed to the bottom of the mantel board which
is screwed to the top of the side logs. The other pieces of log underneath the
mantel board are screwed to pieces of batten which are let into grooves in
the side logs, as shown in the diagram. A slow-combustion stove is O.K.
and needs no alteration.
With regard to the floors, nothing can be done if these are concrete or tiled,
and nothing need be done if the floor is of plain floor boarding beyond
keeping it clean and laying limo strips down where wear occurs.
After the walls, ceiling and floor have been completed, the next thing to
think about is furnishing with woodcraft furniture.
3
WOODCRAFT TROPHIES
CUPS and shields are the usual kinds of trophies which are given to the
winning team or individuals for various sports events or contests. These are
all very good, but I think an original trophy is much better, and I suggest the
award of a hand-made article, more in keeping with Scout activities: one
which would indicate at a glance what event it represents. Several attempts
have been made by manufacturers to produce trophies cast in metal
representing a cricketer, a swimmer, foot-bailer, crossed rackets, hockey
sticks, and so on, which are mounted on the top of a cup or fixed to a large
metal plaque. These are quite good but here again they are not unique.
Many of each kind are made. I think a carved trophy of an original design,
symbolising the activity for which it is competed is what we should aim at.
From time to time I have designed woodcraft trophies and each one which I
have worked out has been different. The designs which are given in this
chapter are merely suggestions. The same symbols can be used but arranged
in a different form. Of course there may be some who are unable to carve or
have no means of getting one made. In this case some other ready-made
article could be adopted, such as a well-polished tent peg, mounted on a
small wooden base. It doesn’t cost much I know, but it is a good trophy to
award to the best camper of the year.
I am not suggesting that you should scrap all those cups and shields which
have generously been given to the troop by some prominent local body.
Keep these by all means, but the next time you want to award a Troop
Trophy, work out one the woodcraft way.
Start off with a good straight rough holly or ash stick about 5 feet long.
Don’t have the broomstick kind of thing. Bark should be left on and the
branches cut off to within about half an inch. A holly is of course the real
thing for this. Carve the top into a symbol, representing the particular
activity for which the staff is to be competed. The carving should be painted
in brilliant colours; an undercoat of white paint applied first will give
brilliance to the colours. You can varnish afterwards.
Do not be afraid of the carving. A rough cut-out symbol is what is wanted.
The symbols are just roughly cut out, but they convey the idea.
The winners of the staff can be indicated by whittling or burning out their
patrol sign and date. Avoid the use of metal discs. Keep the whole thing a
woodcraft trophy.
There are lots of activities for which a trophy can be awarded. For instance,
give one for hiking, marathon, camping, swimming, scouting, handwork,
football, cricket or shooting.
WOODCRAFT TOTEMS
There is nothing new in totems. The totem of the Indian is an emblem or
badge of an individual, or tribe or clan, usually represented by an animal
taken by them on account of a supposed relationship. They are not
worshipped by them but are regarded more or less as their tribal symbol,
just in the same way as a lion is representative of England, the tiger of
India, the eagle of America, the bear of Russia, the kangaroo of Australia
and so on.
We of the Scout movement take an animal or bird to represent our patrol,
and consequently we should learn the habits, colouring, calls and all there is
to know of the particular creature. Every patrol should be proud of its patrol
sign or totem. There are also individual totems which are symbols of the
woodcraft names awarded to Scouts for some particular ability, maybe for
swimming (Otter) ; running (Deerfoot) ; observation (Eagleye) and so on.
These totems can be carved on the top of a Scout staff and the majority of
the sketches in this chapter are designed for this purpose.
A troop totem is a much larger affair and should include all the totems or
patrol animals or birds of the various patrols. This should be carved out of a
large piece of pine log and set up in the entrance of the Scout Headquarters
or placed in a suitable spot in the permanent camping ground if the troop is
fortunate enough to possess one.
It should be remembered that the designs are symbols; therefore it is not
necessary for one to be a professional woodcarver or sculptor. The Indians
were not expert woodcarvers but they knew how to symbolise their totem
signs. These are more or less caricatures, the prominent features being
brought out in the design; for example, on many Indian totems you will find
that the eagle is depicted with a large beak and claws which are the
prominent features of the bird.
You will see that the suggestions for totems illustrated in this book are all
cut straight - that is, there are no curves. This simplifies carving and makes
it possible for anyone, who is able to use a small saw, to cut out a totem.
Carving your Totem. - My carving all started with a Scout knife and a piece
of stick. I used to spend a lot of time when in camp whittling and carving. I
use practically the same thing today except for the addition of a few files,
small penknife, small saw (for getting off the rough stuff), bits of glass,
sandpaper.
The wood is tough - so much the better for carving. Soft wood is liable to
break away and so spoil your efforts. In carving any shape on your staff, I
have found it best to cut it out roughly first. You can do this with a saw or
coarse file. Never mind the fiddling bits - like making a drawing, rough it
out first. Be very careful because if you cut away too much you cannot put a
piece on, so remember better too little than too much. Don’t be in a hurry. It
needs patience. I have drawn a few sketches to give you an idea of how to
proceed. Follow these and you should make a good job of it.
If I actually made all the totems I illustrate I would have a tremendous
collection and it would take me all my time to produce them. How then do I
know the practicability of the suggestions I give if I don’t actually carve
them all out of wood? Well, I work it out first by sketches, all in straight
lines, and when I have done this to my satisfaction, I get a potato and then
carve it out according to the sketch. By this method I know that the carving
is practical and I could carve a wooden - afterwards.
Tools. - I have already mentioned the tools I use for small individual
totems, but there are a few larger ones required for big totems. These
consist of a sharp tenon saw, one or two chisels of various sizes, a mallet, a
plane for smoothing, one or two small wood files of various shapes and of
course glass paper.
Colouring your Totem. - After carving, the totem should be smoothed over
with fine glass paper and then given two coats of white undercoating paint.
Do not paint too thickly. When this has been thoroughly dried, paint in
bright colours. The paintwork should be well varnished. Totems look much
better after the colouring begun to age and is not so brilliant. If paint is not
used at all, then stain the totem with wood dye and varnish.
Colours all have their place in the general scheme of things and each colour
has its significance; therefore a little thought should be given when painting
a totem. If the colouring is used for purely decorative purposes, then
consideration should be given to the blending.
The interior of a building is usually decorated in colours which are pleasing
and restful to the eyes. For example, one never sees the walls of a hospital
ward painted a vivid red, or the interior of a theatre or cinema black. Telephone kiosks, fire alarms, post-boxes are all painted red to give them
prominence, while police call-boxes are painted blue. Therefore it will be
seen that colours have their purpose.
Apart from decoration, many colours are used to signify a particular
meaning: red for danger; black for sorrow, mourning, darkness; white for
purity, peace faith, gaiety; green for fertility, all clear, and so on.
When painting your totem you should consider whether it is merely to look
pretty or whether you really want the colour to represent something. For
instance, the wavy representing water would be painted blue and white; the
sun would be painted yellow, the fire orange, the trees green with the trunk
brown. Each patrol of course has its own particular colour. There is yellow
for Cubs, green for Scouts, maroon for Senior Scouts and red for Rovers, so
when painting the symbols representing any of these sections of the
movement, the appropriate colour should be used. There are no signs or
symbols by which colours can be represented in woodcraft picture writing,
therefore when it is necessary to depict a colour, actual colour should be
shown.
Individual Totems. - These represent the woodcraft name a Scout and are
usually carved on the top of the Scout staff. When doing this it should be
realised that as the staff is used for many purposes, the totem should not be
of a delicate design where there are small thin pieces which could easily be
knocked off. If the design is one where outstretched wings are incorporated,
these can easily be made detachable.
Patrol Totems. - These are representative of the patrol emblem and are
carved on a larger scale than a Scout staff totem. The totem can also be
carved separately and fixed to the top of a pole. The pole itself can contain a
record of the patrol activities, woodcraft names of its members, whittled or
carved from top and bottom. A pole about 6 to 7 feet high and 4 to 5 inches
wide at top makes a substantial affair.
Troop totems. - A nice thick pine anything from 8 to 9 feet high (adding say
3 feet to go into the ground) is really what is required for a good troop
totem. With a pole of this size there is great scope for all manner of records.
Each patrol can be represented together with records of special
achievements, such as the winning of various trophies, summer camps and
so on. Like a well-written log book, this is something which can be handed
down as the years go by. My own totem is now over 30 years old and is
looked upon as a family heirloom, and doubt be handed down from one
generation to another.
THE PATROL SIGN
Here are a few simple drawings for your patrol signs. See now that all your
patrol kit is properly marked with these signs.
I have found that canvas can be effectively marked with Indian ink. If you
carry canvas water buckets you should also differentiate between drinking
and washing water buckets by marking them; drinking water marked as at A
and washing water as at B, as shown in sketch.
4
CAMPING IN COMFORT
I HAVE said that those who rough it when camping are not camping at all.
If you camp properly you will camp in comfort. The old-timer will always
be comfortable and warm, whether it be hail, rain or snow. Yes, even
camping in the snow a real camper will not feel cold. There are already
many books written on camping out; therefore it is not proposed to go into
the general principles of the art, with which most of you are familiar, but to
yarn about the ways of the backwoodsman and old-timer.
Many commence camping at Easter, and the nights can be very cold and
often there is a keen wind at this time of the year. Naturally they go fully
prepared. A serviceable tent is needed, not necessarily made of thick duck
material. A lightweight with a flysheet is just as good.
(1) The Tent. - Before you set out on a camping expedition, whether troop,
patrol or just two or three, you should always see that each tent is quite
sound. That is of course if it is not a new one, but has been used before.
Examine seams, edges, wall joins, eyelets, etc. Stitch up or reinforce where
there is any sign of excessive wear and tear. Check at the top where pole
fits. Replace any missing eyelets or guy ropes. Fit new guy lines where they
are required. Examine poles. If bamboo, see that there is no sign of splitting.
Count out your pegs. See that there are sufficient sound ones with two or
three to spare. Remember a good mallet. (Not a hammer; this will break
pegs.) If your tent needs water-proofing, a preparation can be purchased for
this purpose. If the fabric has rotted then it’s not worth waterproofing. If
you haven’t a valise for your tent, make one. A sandbag is quite suitable.
(2) Groundsheet and Blankets. - See that your groundsheet is waterproof.
If it is a rubber-covered one, and you find when unfolding it that it has stuck
together, there isn’t a lot you can do about it because the rubber has
perished. Get a new one, and before putting it away next time see that it is
clean and rub the rubber side over with French chalk. Roll it instead of
folding if it is not being used for some time. See that the eyelets are O.K.,
and have a few metal skewers to peg it to the ground.
Now about blankets. See that these are clean and dry. You will find a pillow
comfortable, so fix yourself up with a small linen bag. This, stuffed with
clean dry straw, bracken or grass, makes quite a good pillow, but be sure
that whatever it is stuffed with is perfectly dry.
(3) Cooking Utensils. - These should have been put away since last season
after being thoroughly cleaned dried and greased to prevent rust. If you
didn’t do this, well you’ve got to see they are fit to use now. Well now,
briefly there should be billy-cans and fry pan (one fits into the other), small
enamel plate, canvas water bucket and the usual pothooks and hangers; a
jack-knife with tin opener, flour and tea bags, containers for butter, sugar
and other foodstuffs, also a container for condiments.
(4) Sanitary Gear. - Unless you are going to a permanent campsite where
you know lats., etc., are already erected, you should see that you have lat.
screens, and that these are quite sound and complete with poles and guy
lines. Don’t just rig up any old piece of sacking full of rents and tears, slung
up anyhow. It doesn’t look at all good, and decent lat. screens are just as
important as other parts of a good camp layout.
To dig the pits you must have a spade or entrenching tool. I know you do
not usually carry a spade on a hike, but a small strong trowel with a short
detachable handle will serve the purpose for digging a small pit. It takes
longer, but does the trick. If you are taking a trek cart, take a small pick and
shovel. Don’t forget disinfectant powder. A sandbag makes a good wastepaper bin.
(5) Ablutions. - See that you have a place for washing. No bench is needed
for one or two fellows hiking or camping together, but for a couple of
patrols or more you should have some canvas or metal wash bowls.
These, for a long - camp, should be fixed up on an ablution bench. A piece
of canvas cut to shape and fastened to short poles or sticks on the site can be
easily made.
(6) Other Gear. - An axe is needed for chopping wood and for making
camp gadgets. If you find that someone has been chopping flints with it, get
it ground and sharpened, and see that it is not ill-used again.
A length of rope and some strong twine is useful to rope off the kitchen and
for fixing up other things. Make a wooden drill for making holes in the
ground in which to push the forked sticks when making your kitchen
gadgets.
You will find it much easier. This is shown among the camp gadgets.
DRYING CLOTHES
It is not usual for a Scout to get soaked so that he has to dry his clothes, but
it does happen that a patrol is caught in a sudden downpour of rain without
raincoats. The job then, of course, is to dry the gear, and if there isn’t much
sun, rig up a drying rack, and it doesn’t take long. The sketch shows you
how. After you have fixed up the rack, light a good fire in the centre, using
some hefty pieces of wood to make a good supply of hot embers. When the
sparks and smoke have died down, you can hang your shirts, shorts,
stockings and other wet articles of clothing round the rack to dry.
CAMP FIRES
The cooking fire should be carefully dug and not too large.’ Concentrated
heat is the idea, so dig the fire trench just large enough to take all the billycans and deep enough to hold a nice lot of wood ash. Dig the trench running
parallel to the direction of the prevailing wind and on the leeward side of
the camp. One fellow should be made responsible for the cooking fire and
camp kitchen. The sketches clearly show you the various kinds of cooking
fires. These can be enlarged according to the number of utensils to be
placed on the lire at once.
Woods to Use. - A camper cannot always pick and choose the kind of wood
to burn, but whatever wood is used, dead wood is the best to keep the fire
going. There is really a lot one can learn about camp fires and the woods to
use. An old-timer doesn’t just throw a chunk of wood upon the embers and
expect it to burn. Maybe it will and maybe it won’t. Fires want feeding
properly. To keep a fire in when you are not cooking, it should be fed
occasionally with a few pieces of dry wood.
Oak, ash, pine, beech, sycamore, maple are all good woods to burn. Apple
is also good and gives off a very nice perfume when burning. Chestnut is
not too good. One of the woods to avoid if possible is poplar. This will
scarcely burn at all if wet and will give off a thick acrid smoke which
irritates the eyes. So don’t use this for a camp-fire sing song. Elm is not
good. Spruce should be burned with care because of its liability to give off
sparks which may alight on a tent or blankets and burn a hole in them.
Don’t fret if your wood is soaking wet. You can kindle it quite easily. Just
take hold of a bundle of fine twigs. It doesn’t matter how wet they are. Lay
them across the fire trench, then take a sheet of newspaper, twist it up in the
form of a whisk, light one end and hold it underneath the twigs.
As the paper burns, push the flames under the twigs and by the time the
whisk has burned away your twigs will be well alight. This is illustrated
with the camp fires.
Of course, you must have some more twigs ready to feed the fire. It works
all right, so just fold up a couple of sheets of newspaper and pack them
away just in case.
If you haven’t a newspaper handy to light your fire by this method, then you
can search around underneath the hedges, and you will find a sufficient
number of very thin twigs with which to start your fire in the usual way. Of
course, you can keep a few dry twigs under cover, in case it turns out wet.
5
HOW TO BUILD SHACKS AND
SHELTERS
CAMPING WITHOUT A TENT
LET’S get out into the heart of the forest, across the rolling plains. We are
carrying all our kit - blankets, groundsheets, pots and pans, food and all the
little things that are necessary. Let us be like the old backwoodsman,
exploring new territory, blazing a new trail, steering our course by the stars,
packing down for the night, after a long day’s tramp, ‘neath the starry sky,
or in the shelter of a rock on the mountainside - a wanderer into the
unknown.
You’ve read all about these stout fellows. You’ve been thrilled at their
adventures, their spirit of determination, their fight against the elements and
how these chaps in the early days won through against great odds. Those
were the days. But don’t think all this adventure is a thing of the past,
something only to be read about in books or acted by film stars on the
movies. Oh no!
There is still adventure in abundance. We cannot all pack up and hike into
the heart of the Rockies, or trek through the jungle, because there is a job of
work to do here in our own home town. We can, however, copy the
example of the pioneer and get out with a rucksack and staff into the great
out-of-doors. We can practise living as simply as he lived.
We can learn to steer a course by the stars and, at the close of day, we can
learn how he cooked his meal on the embers of a small camp fire and slept
quite comfortably in the open beneath the canopy of Heaven. These fellows
were not burdened with the weight of a tent, poles and pegs. They relied on
the natural resources for a night’s shakedown - sometimes sleeping in the
open by he fire, sometimes in a dugout or in the shelter of a tree, or in a
shack roughly built of leafy branches to protect them from the elements.
For a long stay the old pioneer would build a more permanent type of
structure with logs. Then came the real log cabin, the very mention of which
captures our imagination. Our thoughts at once fly to the backwoods with a
great longing to be right there. Don’t let us just wish. Let’s be practical, and
see how we would get on out in the wilds with no sign-posts.
Of course, we cannot just wander about the countryside hacking away at
trees and shrubs, but there are many such places where we can obtain the
necessary material, such as a wood or copse, where permission can be
obtained to cut a few small leafy branches to build a “bivvy.” Get out and
away without a tent and see how you would fare as a backwoodsman on the
trail.
6
CAMP KIT
OF course one of the main items of camp kit is the tent. Many folk would
probably say that a tent is the most important item, but there are several
other items just as important which are required for camping out. A
waterproof groundsheet is most essential, as any old-timer will tell you.
However, with regard to the tent, there are quite a variety, from one-man
hike to large patrol tents, which can be purchased nowadays, so it is not
proposed to yarn about these. All the information can be obtained from the
various manufacturers’ catalogues.
For lone camping I use the one-man Hike. This is a single pole with one
front guy line, and can be used with or without a flysheet.
For two or three campers, I do not think one can do better than use the “A”
type; some are with and some are without walls. For a long stay anywhere it
is preferable to have a tent with walls, and also, I believe in having a
flysheet. The sketches will give you some idea of shapes of the most
common types in use.
A Scout, or anyone else for that matter, is always proud of something he has
made himself. I know this is so of the fellows I have met, who have made
their own tents. I have found that they put all kinds of extra work into their
handiwork, which is not always found in the factory-made article. Those
who wish to make their own tent will find the following hints useful.
Having decided on the approximate size and shape of the tent required, the
first thing to do is to make a scale model using stiff drawing paper. When
working out measurements - the width of material to be used must of
necessity be taken into consideration. Some material is 36 inches wide,
some 54 inches wide; therefore to avoid cutting material to waste, you work
out the dimensions according to the width of the material.
For instance, as the seams of the material in the roof should always run
down the tent and not across, two widths of 36 inch material will make a
small tent 6 feet long while three widths will make a larger tent 9 feet long.
The larger tent will of course have two seams running down the roof. From
the sketches it will be seen how the material can be cut economically
without any awkward angles, thus avoiding any waste.
It always pays in the long run to tape all seams. Sewing together is a
colossal task by hand, so if you haven’t a sewing machine, arrangements
should be made for the loan of one.
Commence first by sewing together the pieces comprising the roof, with
one row of stitching; then tape these seams with 1 inch tape, two rows of
stitching, thus each seam has three rows of stitching. After finishing the
roof, stitch on the doors, finishing up with the walls, if walls are being used.
It is easier to tape all seams as you go along. A double tape should be used
along the ridge of the tent. The sides of the roof should be turned in and
taped, all corners and ends of seams being reinforced with small pieces of
material, as shown in the sketch.
When this has all been completed, it must be decided whether eyelets or
tape and rings are to be used to fix on the guy lines. If the material used is
lightweight, i.e. balloon or parachute fabric, then rings and tapes are best.
For Green Duck, which is a much thicker material, brass eyelets can be
used. These can be purchased at most ironmongers, and can be fixed on the
required position, usually at the ends of the seams, as shown in the sketches.
For the top of the tent where the pole will come, a hole should be cut and
reinforced with a metal ring. Another method is to use a large eyelet. Before
inserting the eyelet or ring, the tent should of course be rein forced with
another piece of the duck for strength.
Around the bottom of the walls and the doors a piece of good-quality
Hessian about 6 inches wide should be sewn. This is known as the sod sheet
and is tucked under the waterproof sheet to prevent draught. One door each
end should also have a strip sewn down the edge. This strip is clipped to the
other door when they are closed to prevent draught. The doors can either be
fastened by tapes or press studs on the inside and outside as illustrated.
The Poles. - It is quite easy to judge the length of the pole required by
measuring from the apex of the tent to the bottom of the door. About an
inch should be allowed to enable the top to be pointed to fit into the eyelet
at the top of the tent. The poles can either be made of a good straight ash
pole or straight bamboo. I emphasise straight because this is essential and
care should be taken when making the centre joint. See that the tube, which
should be a drawn brass, fits in line with the half pole to which it is fitted. If
bamboo is used, a wooden plug should be made to fit into the hollow at the
top, the pointed end fitting into the eyelet in the tent. See sketch.
Making a Flysheet . - This is quite easy and is done precisely the same way
as making the roof of the tent, except that it should of course be a little
longer from top to bottom, but the length from pole to pole will be the same.
A porch each end is quite easily made by cutting a full length of material in
halves, then cut each half again diagonally and sew together.
With a flysheet it is always best to use a ridge pole. This pole can be in
either two or three sections fitted together with drawn brass tube. With the
aid of strips of strong canvas, the tent is hung on the ridge pole. In this case
the tent poles should be at least an extra 6 inches longer and should be
passed right through the top of the tent as illustrated. A small brass or steel
rod should be fitted in the top of each pole, these rods being passed through
a small hole in each end of the ridge pole. This is really a simple operation
and the fitting of a flysheet does ensure protection against all weathers,
especially if the tent is made of lightweight material. The flysheet can also
be used as an awning in the sunny weather.
REPAIRING A TENT
Treated properly, a tent should last a good number of years. For instance my
one-man lightweight has been used by me nearly twenty years and is still
quite serviceable. There is only one patch in this where a field mouse
nibbled its way through the side. This tent is described in my previous book
Make and Do the Woodcraft Way.
The secret of keeping a tent in good condition is to examine the weak spots;
in other words, examine the parts where wear and strain are likely to occur
most. These are at the top where the pole goes through the tent; the corners
to which guy lines are fixed and often flap if the lines are not kept taut, and
again if they are not eased off a bit in wet weather. The doors should also be
watched, and tapes kept sewn on. In fact, the tent should have regular
examination for signs of wear.
There are of course times when accidents do happen; someone tripping over
a guy line will tear away the tape or eyelet; a little slit may occur through
something sticking into it; a spark may burn a tiny hole, and damage may be
caused in many other ways. If anything does happen the repair should be
carried out properly. It is no good just sewing up a hole in the roof with
cotton. If there are signs of the top giving way where the pole is held, then
reinforce.
If the eyelet has been pulled out it may mean a new patch and eyelet.
Remember a stitch in time will save a big patch. Wind can play havoc with
a tent so always see that the guy-lines are securely fastened to the tent and
the tent securely fastened to the ground. A few sketches of general methods
of repair are given here which have been found quite successful. Of course a
lot depends upon the extent of the damage.
ENLARGING A TENT
When necessary a tent can usually be made longer but not wider without a
considerable amount of alteration. It can be made higher by the addition of
an extra piece being sewn to the walls and doors. If the tent has no walls, it
is quite simple to raise the height by fitting walls. If this is done, a piece
must be added to the bottom of each door. This will not give any more floor
space and is hardly worth doing unless the tent is made larger as described
by the following methods.
One of the simplest methods is to add a piece on the bottom of the doors at
one end, and then fix a detachable flap from the top of the doors to the
bottom by press studs, the doors being kept pulled open, as shown in the
sketch (Method A).
A permanent enlargement can be made by letting another strip of material in
the centre and also on the walls. This will make the tent much longer in
proportion to the width, as shown in Method B.
Another method which I have found very effective is to remove the doors
from one end and make this end a half pyramid or half a bell. This method
gives a little extra work but the space provided by it will be found very
useful for storage of kit at night and the tent does not look out of proportion.
The exact measurements can easily be ascertained by pitching the tent and
fixing sticks in the ground where the walls of the extension is proposed, and
fastening string from the top of the tent to the ground. You can then take the
necessary measurements from these as shown in sketches marked C.
In all cases it is advisable to use the same kind of material as that of which
the tent is made when making enlargements, i.e. do not sew duck to a
lightweight fabric. Of course a complete Duck flysheet can be used over a
lightweight tent.
CANVAS EQUIPMENT
Before buckets and bowls were invented, or rather mass produced, the
primitive man used skins for holding and carrying water. Later came the
making of earthenware vessels. Even today we still find that water is carried
in skin bags across the desert by the camel trains. The Turkish bath is not a
product of the later ages. The Indian had one. He had a large hole hollowed
out in the ground inside an enclosed “Tipi.” The hollow was lined with
skins to make it watertight and then filled with cold water. Large stones
were made hot in the fire, then taken to the Tipi and placed in the cold
water. The stones naturally made the water hot. All openings of the Tipi
being closed, the steam given off from the water made what is known now
as a Turkish bath.
Today it is easy to buy all the gear you want, but there just isn’t any fun in
it. Does a real camper pay someone to take his tent, pitch it and lay out his
camp, cook his meals? Not he, because it wouldn’t be camping. He likes to
do all these things himself. A real old-timer doesn’t rely on the Universal
Stores either. He likes to make all his things. As well as his tent, there are
lots of other items of kit which he makes. This brings us back to buckets
and bowls. Of course it is easy to buy them in the same manner as it would
be to pay someone to pitch the tent and do the cooking, but it just isn’t
done.
When you go away with a troop, quite a number of things are provided;
water buckets, washbowls, dixies and so forth are packed on the trek-cart so
that the individual has no need to worry, but for a short week-end camp of
two or three, things are different. The troop utensils are far too large and
cumbersome to carry in a rucksack, so the real woodcraft Scout has his own
for such occasions. With some odd pieces of waterproof canvas, it is an
easy matter to make things to one’s own individual requirements. Of course,
these are not made all at once. As time goes by, experience shows that there
is a necessity for this and that, and so bit by bit a real comprehensive
camping kit is built up.
The sketches I have drawn will give you an idea how to start about making
these things. The square-type bucket shown in Fig. 1 is very simple and is
quite efficient. As will be seen, it should be made from one piece, but if this
is not possible, the bottom can be made separately. A point to remember is
that the top edges should be hemmed and the edge of the hem should be on
the inside of the articles when they have been stitched together and turned
inside out.
Fig. 2 is the round-type bucket, a bit more complicated. Here the bottom is
cut separately. Note how the sides of the bucket slope inwards towards the
top.
The bowl and bath shown in Figs. 3 and 4 are made precisely the same way
except that the sides of the bowl (Fig. 3) slope outwards towards the top.
This is done to prevent the sides from touching the forked sticks when
erected. The loops are used for this purpose.
The bath is used for standing in when washing one’s feet and legs. Here the
sides slope inwards towards the top as in the case of the buckets. Here
again, as in the case of Figs. 1 and 3, the bottom can be made separately if
the material used isn’t large enough to cut all in one piece.
A word or two with regard to stitching together. This should be done with
fairly strong sewing thread, on a machine if one is available. If not, it should
be done by hand, using a run and back stitch. Remember to do the corners
well and each end, fastening off with an extra stitch or two. These canvas
articles will probably leak a little when dry and first used, but as the
material gets wet, they will be quite watertight. The handles can either be of
rope through small eyelets, or can be made of a strip of material stitched on.
There are many other articles of camp kit which will be found most useful
and can be made from odd pieces, such as a hold-all, a very useful part of
kit, in which to carry needles, pins, cotton, buttons and so on. Remember “a
stitch in time . .
Instead of just pushing your cutlery into your rucksack with the possibility
of the fork penetrating some article of clothing, just make a little case for
them. Your toilet requisites also need a container - towel, soap, toothbrush,
toothpaste, face flannel, nail-brush, hairbrush and comb can all be neatly
rolled up together in a little case of thin canvas or linen.
So much for canvas kit, but there are many other articles which are required
to hold food. Food bags to hold bread, tea, sugar, flour and other
commodities are always carried by a good camper. Fats and suchlike should
be packed in plastic or metal containers. If the latter is used, then the fats,
such as butter, lard, etc., should be wrapped in greaseproof paper first. The
sketches will give you some idea how these are made.
7
CAMP-FIRE COSTUMES
NOW we all like to dress up and put on some sort of costume to suit the
particular occasion. For the camp fire it is a habit for everyone to put a
blanket round the shoulders. These blankets get ornamented from time to
time with signs and symbols, then cut a bit here and there, until they
eventually develop into robes used only at the camp fire.
At a properly organised camp fire a programme is arranged beforehand.
One person is made responsible for this and acts as Camp Fire Leader.
Another looks after the fire and ensures that there is sufficient fuel and
keeps it burning brightly. There’s nothing like a blazing fire to brighten
things up. These are the two principals of the camp fire and they wear camp
- fire robes or robes of office. The Fire Keeper and other costumes I have
given in Make and Do the Woodcraft Way.
I am now giving you designs for the Camp Fire Leader, Keeper of the Camp
(Sanitation, Garbage, etc.), First Aid Man, Totem Keeper, Camp Cook,
Troop Leader and Patrol Leader. They are very simple. The decorations can
either be cut out of coloured material and sewn on to an ordinary blanket, or
the robe can be made in the form of a fringed jerkin decorated likewise as
shown in the sketches. Coloured braid or wool make effective decorations.
Whatever symbols you use, let them mean something. Be original. Include
your woodcraft name somewhere and make the signs bold, not skimpy
things which cannot be recognised unless examined very carefully. Let the
colours be brilliant. The signs used in my illustrations are easily recognised.
In that of the Camp Fire Leader, the winged heart means happiness, joy,
gladness (glad heart) and the mask is laughter. The heart also means good
health, as shown in the Keeper of the Camp.
With regard to the camp-fire blanket, I have given you an illustration
showing how to cut this out from an ordinary blanket, also designs for
decoration. The heads of animals or birds are usually placed on the back.
Here are a few hints on how to transfer a design to the material.
First of all, draw out your design on a piece of tracing paper, then with a
fine needle prick out the lines on the paper. Lay this in position on the
material from which the design is to be cut, keeping it firm with pins and
quite flat, design side upwards. Stretch the material as much as possible,
then take some French chalk and powder over the holes. Use French chalk
for dark material or a dark powder for white material so that the spots will
show up. Now just pencil or paint over the dotted lines on the material and
cut out the design, allowing about inch all round for turning under when
stitching to the blanket. When you have completed the design, pin it in
position on your blanket and sew it all round the edges with a blanket stitch.
If you have not a special camp-fire blanket, here is the way to fold one of
your other blankets, so that it makes a good ceremonial dress. Place the
whole of the blanket lengthwise behind you so that the centres of the two
sides come in front of you. Now the top end of the blanket is carried over
your shoulders and the other ends tucked under the front of the blanket and
held in place with a pin. The sketch makes this quite clear.
It almost appears to be a tradition for fellows at camp to wear some sort of
camp headgear. Apart from parades, the Scout hat is rarely worn because,
no doubt, of its size and shape. In scouting games and boisterous camp
activities, the broad brim of a Scout hat usually suffers badly when rolled
upon, the brim resembling a switchback railway. This is probably one of the
reasons for the adoption of a variety of camp headgear which is so often
seen.
Some of these head coverings (they can hardly be
called hats) are real souvenirs emblazoned with all
kinds of badges collected at various camps, at
home and abroad, usually by barter and exchange
from members of other troops. Quite interesting
they are too. Some fellows seem to turn all sorts of
things into camp headgear, from the crown of a
bowler hat to a kiddy’s Tam O’shanter. Some of
the varieties serve a useful purpose as a sun
protector whilst others are just ornamental.
The Scout scarf worn over the head, with the ends hanging down at the back
of the neck is quite good to wear as a neck shade. An old felt hat which can
be tucked away in a kit-bag, a beret or a monk’s cowl are just the things.
Lots of them come in handy as part of a costume when giving a camp-fire
item. The sketches below give some idea of what can be used when you are
thinking of making camp headgear.
A woggle is quite an important part of a Scout’s dress. You may be
interested to read how I made mine. It is a bone one. Many years ago I saw
an old bone underneath a hedge, smothered with ants. I liked the look of it
because it was a nice oval shape. I picked it up, cleaned it and then I cut the
bone up into lengths, allowing a little over the actual depth. Next I filed out
the centre with a half-round file and also filed the outside a bit to make it
quite uniform. Now having sketched out the design I wanted to carve I
marked it out in pencil.
The carving on my woggle is in relief and also undercut. I commenced by
scraping away the outer line of the symbol which happened to be my totem
sign. When this was finished I filed the rest of the waste away. I did my
scraping with a file and penknife. I find a knife quite useful if the blade is
kept sharp. After I had cleared away the surplus I carefully carved out the
details of the design. This has to be done very carefully so it cannot be
rushed.
Having completed the detail I then commenced the undercutting. This was
slowly done with a thin pointed blade of a penknife. That was the centre
completed. The edge was then carved as shown in the sketch. The whole
was smoothed over, scrubbed with soap and water, then polished. I have
made a sketch of my woggle together with a few suggestions for other
designs.
Quite good woggles can be made from old briar pipes, and a fine polish can
be made on them too. Just cut off. the bowl to the length required, then
scrape away the charred part of the inside. You can carve these quite well.
ROPE SANDALS
To make a pair of rope sandals for camp, some quarter-inch rope as used for
clothes line is needed, and for an average size pair of say, 10 inches from
heel to toe, you will want at least 8 yards. Get also a pair of socks, not
woollen ones of course, but cork, leather or other similar material. These
should be a size larger than your foot - or alternatively, cut a pair from an
old felt hat, but remember, when doing so, not to cut them too small. You
can always cut them down to fit inside the sandals when finished.
With the aid of the sketch, you can see how to start off with the sewing of
the rope together. Fig. 1 shows you how to commence. You can see the size
of the first coils in relation to the size of the sock. Next sew the rope round
to the shape as shown in Fig. 2. Here again you can see the length of the
other coil. When you have sewn this together continue on round and round
as shown in Fig. 3. Fasten off by flattening or tapering the end of the rope
as shown.
A word on sewing. This is done on the inside of the rope as shown in Fig. 4.
Keep the rope flat all the time to prevent it twisting, and don’t pull too
tightly round the toes and heels. If you sew on the inside by pushing your
needle in horizontally, you should have no stitches showing when they are
drawn together.
Use strong waxed thread doubled and a thick needle. You will find the rope
stitches together quite neatly. Keep on going round until you have a sole
large enough for your foot. Right. The soles are made. Now for the heel
pieces and front band. Fig. 5 shows you the shape to which these should be
cut. Make a paper pattern first to get the correct size. At the top you will see
a series of small slits. These are to take the webbing tie-up. The V-cut at the
back when sewn up will help it to cling to the heel.
Turn up along the dotted line and sew to the top of the outer coil of rope.
Sew it on strongly as it has to hold the sandal firmly on the foot. Likewise
the front band. This is just a wide strip. Of course strong elastic is a good
material to use. Having done all this, place your felt or leather sock in each
and you have a real pair of rope sandals.
8
NATURE STUDY
IT is a great thing to be on a hike in the country, and be able to recognise
the various kinds of trees, to know the different varieties of birds, to tell
them by their flight or by their peculiar notes. It really does make a walk
very much more interesting. Nature is an ever-open book. There is always
something to learn, and woodcraft nature lore embraces so many things,
each one being really a study in itself. There are the trees, the wild flowers,
the birds, insects, the furry folk, the fish in the streams and rivers, the stars,
the clouds, the wind and the rain.
One might ask, what is there to know about the rain? Can everyone tell
when rain is likely? Does everyone know the various cloud formations and
what they foretell? The backwoodsman, the pioneer and those folk who
lived in the forests and bush got to know all these things because they lived
next to nature. They knew how to forecast the weather by the wind and
clouds. They obtained their sense of direction by the stars, and could tell the
hour of the day by the sun. These fellows had no books to guide them and
they were never taught these things at school.
We can never hope to know our woodcraft as those old-timers did because
they were born and bred wood-craftsmen and lived all their lives among the
trees and wild folk. They knew the trails as well as we know the streets of
our own home town. Modern civilisation with its brick and mortar has put
many of us out of touch with nature, and has shut us off from the great outof-doors for the best part of our lives so that when we get out into the
country we appear to be in a different world. We feel a little lost.
It is like visiting a museum without a guide. We see the exhibits but know
nothing about their origin or their history. With someone to guide us or with
a descriptive catalogue the visit is made most interesting and becomes
worth while. All those who wish to follow the woodcraft trail should learn
something about the countryside and the wonders of nature.
To write all there is to know about the countryside is impossible within the
space of this chapter. There are many books already available which give all
the detailed information of every wild creature as well as the trees and so
forth. These notes are therefore to help those who, having read about the
identification of particular birds, animals, etc., wish to be more practical and
actually observe them in their natural surroundings. This chapter is just a
guide to observation.
Observing is an art and there is a lot to learn to make it a success. There are
two kinds of observers. One is the casual observer, that is one who observes
things but is not actually engaged upon looking for the things he observes.
The other is the real observer, the wood-craftsman, the one who actually
goes out to look for those things he wishes to see.
Before the days of aircraft, men had no fear of being attacked from the sky,
consequently he was never trained to meet an enemy from above. Neither
was he very much worried about an approach in the rear of his defence line.
Nowadays men have to keep watch in all directions. It is a question of allround defence, and consequently he must avoid all those things which make
him conspicuous, such as shape, shine and shadow.
The shape of a man or of a particular thing is quite easily observed by a
keen observer, therefore the shape must be broken up by the addition of bits
and pieces of tree branches, earth, etc., or by concealment amongst the
available foliage. The shine or glitter of metal, such as a hat badge, buttons
or metal parts of equipment, spectacles and so on are all likely to reveal a
person. These shiny objects are therefore dulled or covered up. Although
concealed from the view of the observer at eye level a shadow cast along
the ground is soon spotted from above or cast on a tree trunk or wall it can
easily be seen from below. My sketch will show you what I mean.
All this is known as field craft, the art of concealment and camouflage. An
observer of nature must therefore be as alert and as cunning as the wild folk
whose very existence depends upon being wary and conscious of danger
from above and below.
In military operations a reconnaissance party, that is a party of two or three
men who are sent out on a mission to observe the enemy and bring back
information as to his whereabouts, strength and probable intentions, would
weigh up a few details before commencing their task. First there is “what”
are they going to observe, “where” it is to be observed, “when” to observe
and finally “how” to observe - that is what cover for concealment is
available. This plan of operation is precisely what the observer of wild life
has to follow before going out on an expedition of observation.
For example, if it is desired to study the haunts and habits of such creatures
as the water vole, moorhen or wild duck, one would obviously wander
along the banks of the river, where also would be found the willow tree.
Again to observe the squirrel, the jay, woodpigeon, woodpecker, blackbird,
thrush and suchlike, one would naturally look for these in the woods, whilst
the plover, curlew, lark would be found in the open countryside.
The average folk on a ramble through the countryside would probably see
and hear nothing, except perhaps the scurry of a startled rabbit or the squeak
of a frightened bird. But for these sudden happenings the woods seem
devoid of wild life. Sit quietly in the shadow of a tree, or amongst the
undergrowth, keep perfectly still and listen. Your patience will not be long
before it is rewarded by many sounds and a glimpse of the dwellers of the
woodland, which is actually teeming with wild life.
Tap two small pebbles together or clip two coppers between the thumb and
forefinger and listen. Soon the answer will come from robin redbreast who
has probably been watching from above. Having studied the rules of
observation, take a little walk into the country and practise this game of
patience. Choose an inconspicuous spot with a good field of view, sit
comfortably and above all keep perfectly still, avoiding the movement of
the hands or head. Listen and watch. The trained observer would notice
many things which the ordinary folk would miss. A slight rustle among the
dried leaves and a field mouse is on the move. It may not be seen at once
but with a little patience its presence is revealed moving cautiously in and
out of the undergrowth. The slightest movement of hand or foot and it has
disappeared.
Sit amongst the rushes beside the river, watch the opposite bank among the
overhanging trees where the roots protrude from the dark muddy soil. The
water vole can frequently be observed running about and swimming across
the water. Maybe a kingfisher with its brilliant blue feathers will be seen, or
a moorhen. Sometimes a pied wagtail will show itself, dabbling in the mud
with its long tail bobbing up and down. A gaily coloured dragonfly will
hover quite near over the water then suddenly dart off higher up the stream.
From the many books on birds, animals, etc., the beginner should make a
few notes as to when and where a particular creature is to be seen, making
special note of the peculiar markings to assist in the identification of the
particular specie. Begin in a simple way by locating the more common
creatures first.
Quite a variety of birds can be observed even in the towns. A little
encouragement is all that is needed. It is quite easy to make a small bird
table. Bird tables can really be made of any old thing. Even a broken, plate
placed on the ground would do, but they should be raised off the ground as
a protection of the feathered friends against prowling cats.
A neat little covered-in table makes an ornament to any garden, however
small, and it is very interesting and restful to watch the birds feeding. The
illustrations given show two or three different kinds.
Fig. 1 is a simple wooden tray type nailed to a pole. The bottom of a box
will easily make this.
Fig. 2 is constructed from rough batten and board, the roof of which is made
of feather edging or weatherboard. The addition of a roof gives added
weather protection to the actual table or tray. This roof can be thatched as
shown in Fig. 4. The table can either be made a fixture by fastening it to a
pole sunk in the ground, or made on a stand so that the whole can be stood
upon crazy paving and moved to any desired position.
Fig. 3 is merely the end of an oil drum fixed to a post. An ordinary tea tray
would do just as well, but the disadvantage of a metal table is that rainwater
will collect on the top unless there are holes in the bottom for it to drain
away.
Fig. 4 shows a more elaborate attempt, and straw is made use of for
thatching. Straw covers which are taken off wine bottles will be found quite
good for thatching. Thatching is not a difficult art in this instance, even
though house thatching is a trade in itself. Like tiling, the straw should be
laid on the bottom of the roof first so that each layer overlaps the other. The
straw is easily held firm with small nails and strong string. This, like the
woodwork of the roof, should be treated with creosote to prevent rot.
Place the table in a spot not too near the house, where it can be observed
easily from the window and you will be surprised at the different kinds of
birds that will be seen feeding from it. Of course, to attract a variety of
species it is necessary to put out more than just bread-crumbs. Various
kinds of bird seed can be bought and sprinkled over, together with a piece
of apple, nuts or fat meat. The latter can be hung on a string for the blue tits.
Don’t forget a little dish of water. This should not be too big otherwise it
will be used as a splash bath, and very little water will be left for drinking
purposes. Use a small meat jar.
Nest-boxes are also quite easily made from a small wooden box. I have
shown you three types in my illustration.
Fix one up on the south side of the garden shed or even on a pole. The little
blue tits are sure to discover it and commence building a wonderful nest.
They fly to and fro unceasingly from dawn to dusk, carrying pieces of grass,
wool, moss, feathers and all kinds of material. The sight of six or seven tiny
little yellow youngsters flying around after being pushed out of the nest-box
is worth seeing. They will settle on your shoulders if
you stand still. Be sure the hole in the nest-box is
only small, otherwise larger birds will use the box.
The rarer birds will of course not be found in the
neighbourhood of a town, but the robin, starling,
chaffinch, greenfinch and of course the common
chirpy sparrow, etc., can be seen.
Bird watching is a very fascinating hobby. Many lovers of nature, especially
amongst the camping fraternity, spend a great many hours in search of a
glimpse of the more rare species. These fellows are usually armed with a
notebook or nature diary, in which is recorded what, where and when an
uncommon bird is seen. They soon get to know much about their habits and
haunts from this practical experience. To assist them in their search, and in
order to get a close-up view, many provide themselves with an optical
instrument, such as a telescope or field glasses. There are two kinds of the
latter, one being prismatic binoculars and the other non-prismatic, or to give
them their correct name “Galilean binoculars”.
For those readers who wish to provide themselves with such equipment, the
prismatic binocular is by far the best, being easier to carry than the
telescope. They also have a much larger magnification than the nonprismatic, and a wider field of view. Again the telescope requires some kind
of tripod upon which to rest it. Binoculars of various degrees of
magnification or power can be obtained quite easily, and the experience of
many has proved that prismatic binoculars with a magnification of 6 x is the
most suitable for the bird watcher.
Observation and hide-outs, from which one can watch a particular area, are
often erected. To do this it is not necessary to transport a ready-made bulky
affair. The best and most effective hides can be made almost entirely from
the material available on the spot. A few forked sticks rigged up in the
manner of building a shack, with a few pieces of Hessian, foliage, etc.,
arranged so that it will blend with the surroundings, leaving an aperture
from which to observe, make a good hide-out. This should not be made a
fixture, but should be constructed so that it can be moved to another
position if necessary. This is where the art of camouflage will be found
useful.
In my book Make and Do the Woodcraft Way I gave you some useful
information with regard to the identification of trees, birds, furry folk, the
stars and the clouds, so I do not propose to deal with these items again, but,
as I have already mentioned, you can find many books on these subjects.
9
SKETCHING
Every Scout should practise the art of sketching. It is a real woodcraft
activity. To be able to express oneself by means of pictures or, shall we say,
picture writing, needs just practice. Who does not admire those delight-full
little sketches which our Founder drew from time to time? How many of us
have not expressed the wish to be able to draw as he did? Well, as I have
already said, to do this needs just practice. The Chief gave this advice and
also said, “Draw anything and everything at any odd moment.”
Drawing is an ancient art. Before the days of the alphabet, pens and pencils,
the primitive man wrote messages and expressed his thoughts by sketches,
scratching these on stone and bone. In this way, they learned to draw.
Examples of these early sketches are shown in the chapter on woodcraft
picture writing. Even now, some of the uncivilised natives can, with just a
piece of charred wood for a pencil and coloured mud as paint, make quite
good pictures of the wild animals.
To be able to draw is a matter for the individual. No art school ever made an
artist. The art school can only give guidance, teach the rules and give a
criticism. The pupil must make himself master of the art.
Like other arts and crafts, there are rules to be observed. This is the ground
work, which the art school teaches, and once the ground work has been
mastered and the rules are followed, sketching becomes quite easy, and you
will find that your drawings are in proportion. What I mean is that if you
were sketching a human figure, for instance, you would not get the legs too
long or the body short. Try this by drawing a centre line, then marking off
the position of the various parts of the body as shown on the next page.
This rule cannot be applied to buildings and other objects because the
length, breadth and height vary in each, but the measurements of these in
relation to each other can be determined by holding a pencil vertically at
arm’s length, using the thumb for measuring on the pencil to find out in
what proportion the length compares with the height or the depth. The
centre of the object can also be found by this method. The pencil is of
course held vertically for height and horizontally for length.
To begin with, draw as few lines as possible. When you have mastered the
art, you can then attempt to put in the various details. Fig. 3 gives some idea
of how simple sketches should be made.
Panorama Sketching. - To see the countryside from a hill-top is really a
glorious sight. Here one can catch a bird’s eye view of the landscape,
stretching far away into the horizon. It is most interesting to study the
scenery, picking out the various kinds of trees, the fields of different crops,
the farm houses, the village church with its tower or steeple nestling
amongst the trees.
To be able to sketch a panorama is not a difficult task with the aid of a little
gadget which can easily be made. This consists of a strip of transparent
celluloid which is divided up into squares. It is quite a good thing for the
celluloid to be fixed into a thin frame of stiff cardboard as shown in the
sketch.
A length of string is fixed to one side of the framework. The use of this
enables one who is sketching the scenery to place the various objects in
their correct position. To do this, the paper or sketch-block is divided lightly
with pencil into squares similar to the celluloid. By taking the celluloid and
holding it at a distance from the eyes, the landscape is viewed through the
squares marked on the celluloid.
The nearer the celluloid is held to the eyes, the larger will be the field of
view; therefore it should be decided how much of the landscape it is proposed to sketch, then adjust the distance from the eyes accordingly. To keep
this at the right distance every time a measurement is made, the string
mentioned above is used. This is held by the teeth or tied to a button on the
coat, the string being lengthened or shortened according to the field of view
required.
Some object on the landscape should be taken as a central point; the centre
lines on the celluloid should cut through this whenever a measurement is
taken. The landscape can be divided up into three parts, foreground, middle
distance, horizon. Let us view the scene through the celluloid.
The centre object is perhaps the church steeple. This is just above the
middle distance. The steeple is now drawn in on the sketch-block accordingly, i.e. on the centre line just above the centre horizontal line. Let us now
take another prominent feature.
This may be perhaps a cottage on the right which is seen just inside the third
square from the right and second square from the bottom. The cottage is
now drawn in the sketch-block in the relative position, and so on.
When all the prominent features, such as hills, buildings, large trees, roads,
etc., have been put in lightly, the panorama sketch can then be completed by
adding a little light and shade. Objects which are in the foreground should
be drawn darker than those in the middle distance, where the objects should
have very little detail, while objects on the horizon should be very faint
without detail. This gives the appearance of distance. The sketch gives an
idea of the various stages of construction of a panorama sketch.
When making sketches of buildings, ancient monuments, and suchlike
which we often see when out on a ramble, there are a few simple rules to be
adhered to if the perspective of the sketches is to be made correctly. One
must remember that all lines above your eye level will slope down towards
the horizon, all those below will slope upwards towards the horizon. All
horizontal lines will eventually meet at what is known as the vanishingpoint.
Another thing is that the nearest point of the object which you are drawing
will be the lowest. Further, when making a sketch, it is always best to
actually build up the object by drawing in lightly the lines which cannot be
seen. By this method one cannot fail to get the correct shape. Let us prove
all this by making same simple drawings of a matchbox.
The drawing of a steeple or tower on a church is made quite simple by
drawing a vertical line from the centre of the base. The exact centre of the
base is found by drawing two diagonal lines from the corners as shown in
the sketch. Where these diagonal lines cross will of course be the centre.
The apex of the roof is found in the same manner.
If these simple rules are always applied, one cannot fail to make a success
of sketching.
10
SIGNS AND SYMBOLS
SINGS and symbols are as old as the hills. Long before the alphabet was
thought of, signs were used by man to express his thoughts, to convey
messages from one to another, as a means of keeping records and for many
other purposes.
There are hundreds of signs with which we are all familiar. We have only to
look around us to see the vast number of signs and symbols which are being
used everywhere every day. These signs are readily understood by anyone,
and the object of them is to convey to the observer information, warnings or
instructions at a glance no matter what nationality he may be.
On many occasions a visitor to a foreign country who does not understand
the language has found that by drawing simple signs and symbols he has
made himself understood quite easily. Children, before they can read or
write, are given picture books, because they can at once understand a
picture. We have only to draw simple little signs and the smallest child will
know what they are meant to convey at once. This is really picture writing.
This picture writing has gradually increased right from the early ages. Even
the cave dwellers scratched pictures on the rocks. Some of these can be seen
today in many parts of the world.
Consider the Road Signs. These are amplified by the written word, but the
symbols are shown for quick recognition from a distance.
Take an Ordnance Map. Glance over this and you will find very many signs
and symbols which are easily recognisable. Trees, buildings, roads and
rivers, wind-mills and railways are denoted by signs in place of the written
word.
Just study the coat-of-arms of our various towns and cities, the trade marks
of manufacturers and even the symbols of various countries, such as the lion
of England, the maple leaf of Canada, and many others too numerous to
mention.
Woodcraft picture writing is a combination of signs and symbols which we
use to illustrate our various activities by recording them in our log books, or
by a more solid method of carving them on our totems. A log book
illustrated with small sketches, signs and symbols is the real thing. There is
no comparison between that and an ordinary minute book. A woodcraft log
book is alive and, to make the book more interesting, the Keeper of the Log
should endeavour to add little thumbnail sketches. Little drawings of
objects, such as buildings, churches, trees, bridges and so forth are not at all
difficult, and these only require a mere outline, devoid of any minute
details, so don’t try to put in too much.
If you want to draw figures in action, practise depicting the action with just
a line or two. Never mind about shoulder knots, scarf, garters or any dress at
all. Take a mental snapshot of the movement; when you do this you don’t
see anything else. When you’ve practised the art, then you can dress the
figure later.
In my talks on this, I usually end up by getting some fellows to “have a go”
with the blackboard and chalk. The result is that they are always surprised
at their ability. This is because they have never thought of trying it before,
as they didn’t think they could do it. It only needs a little practice and will
be found quite fascinating. It is just a matter of observation. If a map is
necessary, this can be amplified by a simple little sketch of interesting
building, cross roads ,bridges and so on. If all the details of a building are
required for a complete write-up, then it is quite good to insert a small photo
graph or cutting from a picture. For instance, a really good detailed sketch
of a particular camp could not be made, so a small photograph is used.
Again a group picture of the troop could be inserted with the date. With too
many photographs, the log book would develop into a photographic album,
so keep to thumb nail sketches as much as possible. In Make and Do the
Woodcraft Way, illustrations are given on how to write messages, and
letters, and how to keep records in woodcraft picture writing. Since this was
written, many readers have asked me to give the woodcraft sign for such
words as “it ,” ‘“for”, “whilst,” “the”.
Now this can not be done. A message or record is not written as one would
write in ordinary longhand.
Just two or three symbols can be used for a whole sentence, the “of’s” and
“the’s” being left out. There are several examples given in my illustrations.
The arrow which is a universal sign of direction can be used for very many
words. An arrow pointing towards an object would obviously be “to” or
“towards,” while an arrow pointing in the opposite direction would mean
“away from.” Remember then that an arrow pointing to the right in a
message means “to,” and one pointing to the left means “from.” Using a
circle to represent any particular place or object, the signs will give you the
idea how the arrow can be used for many purposes. The time of day can
also be denoted by means of an arrow, together with the Roman figures for
the actual hour. Let me give you the signs for day and night, morning and
evening. In these sketches, the horizontal line represents the horizon, and
the sun rising on the left and setting on the right.
Now let us use the arrow in conjunction with these signs. Yesterday, today
and tomorrow, morning, afternoon and evening can all be symbolised as
follows:
Particular days of the week are shown thus:
The months are shown like this:
The months signs shown above are only applicable to the Northern
Hemisphere, as the seasons differ to those in the Southern Hemisphere. For
those who live in the southern part of the Globe, the following moon or
month signs have been devised:
The signs for the four seasons, which will be seen are combinations of three
months each, are depicted by these signs:
The sign for a year is very simple. This is shown by the symbol for snow,
i.e. three curly vertical lines, and a circle or curved line running from one
side of the snow to the other, meaning from snow to snow or winter to
winter - one year.
With a combination of the day, the month and the year, (the actual year
being inserted in Roman figures in the circle), the date can easily be shown.
Here is an example:
In the sketches on page 99 there are examples of how our various scouting
activities can be depicted by drawing small pin-men sketches. These will be
found very useful as none can fail to understand the signs because of the
actions. You really draw the individual carrying out the particular activity,
such as walking, running, swimming, climbing, and all the rest of the
training which we do. This method is very similar to that used hundreds of
years ago by the Indians, Egyptians and others of ancient times.
Our notices which we use in camp should all be done in picturesque signs.
It is in keeping with the woodcraft way of doing things. There are many of
these, such as “This way to the camp,” which can be depicted by a wigwam
and an arrow. This is a sign which everyone could understand.
Then there are signs which should be posted up outside the tent wherein
dwells such fellows as “The Fire Keeper,” “The First Aid Man,” “The
Keeper of the Camp,” and so on. These can be made of wood, gaily painted,
and used year after year. being handed from one to another whenever
somebody else takes over the particular duty. The same signs can be placed
on the Camp Fire Blankets of those who hold the office. A few suggestions
of camp signs are shown on page 101.
It is not possible to show here all the symbols for every word which may be
required. This would more than fill a few books. Those which are shown are
given as a lead. Many of these are from ancient picture writings and are still
used today.
There is a distinct sign for man and woman, also male and female. The
latter are taken from the mathematical signs. This applies also to the signs
given for plus, minus, divide, therefore, because, equal, unequal and so on.
With the sign for man and woman, together with the use of the arrow,
symbols can be devised to denote relationship, such as father, mother, son,
daughter, and with the key given in the examples below, a combination of
various symbols can be arranged to show any relationship which may be
required right down to great-great-grandfather or grandmother.
The sketch below is a typical example of how to send a letter in woodcraft.
In this it should be noted that it is not addressed as one would an ordinary
letter, that is
“Dear So-and-So,” neither does it end in the usual way, such as “Yours
sincerely.”
It is simply addressed thus: “To Eagleye - Greeting,” and ending with
“Peace Good Hunting” or “Peace and Good Camping, smooth trailing,
happy landing” (for air scouts), “Fair winds and smooth sailing” (sea
scouts).
I have given you the interpretation of this letter at the end of this chapter,
but try to read it first.
SYMBOLS FOR TOWNS
When you are away at the summer camp, find out something about where
you are staying. Turn up local history, seek out places of interest or sketch
the coat-of-arms, then devise a symbol to represent the town. Carve this on
your staff with the date of the camp. Put it in the log book. If you saw some
of the symbols I have drawn below, I don’t think you would fail to
recognise the towns which they are supposed to represent, although they are
not the coat-of-arms of the particular place. They represent (1) London, (2)
Blackpool, (3) Dover, (4) Salisbury, (5) Coventry, (6) Isle of Wight.
SMOKE SIGNALS
This is how you make smoke signals. You want
a calm day. Light a fire and
get plenty of red embers, then lay on some damp
leaves or grass. This causes a volume of smoke.
You know what an allotment fire is like when it
is banked up with clods of grass. Now you want
a large wet sack or old blanket. Lay this over the
fire. The smoke will then be dispersed. Remove
one side and up goes a column of smoke. You
form the dots and dashes by rolling back the sack
at short and long intervals. It’s a slow method,
but a real Indian way.
THE INTERPRETATION OF WOODCRAFT
LETTER
PINEWOOD, CAMP,
Thursday, 7th April, 1950.
To BUFFALO - Greetings.
Saturday morning hike to Stonehenge (Salisbury) meet me, Eagleye, 7 a.m.
bring two days food. Wait over bridge to meet three Rover Scouts from
Scotland, who are hiking to London, camping two nights, going Monday.
Peace and Good Hunting,
EAGLEYE.
THE SIGN OF SILENCE
This sign takes the form of a totem, carved
or cut out in wood, set up on a staff or hung
in a prominent position where it can be seen
by everyone, whenever silence is required.
When the camp is closed for the night and
all are turning in, the sign should be set up
in the centre of the site and taken down
again at reveille.
To keep the troop or patrol on the alert, the sign is put up occasionally
during the day. When this is done, everyone in camp carries on whatever
they are going without talking - like the old Indian, in silence.
This is good practice and it is surprising how many activities can be carried
out in perfect silence. Just another woodcraft way of doing things. Try it.
PITCHING CAMP IN SILENCE
By using sign language a patrol or troop can arrive at the camp site, pitch
tents, and lay out the whole of the camp very speedily without a word being
spoken. Of course, this requires practice and organisation, in that every
Scout should know his job and get on with it. Striking camp and clearing of
the whole site, with the troop ready to leave, can also be done in a very
short time if it is well planned out. Here again, each Scout must know his
job.
It means real teamwork from beginning to end, and once the fellows are
used to doing things this way, everything runs smoothly without waste of
time. Isn’t this far better than leaving things to a few fellows? Each Scout
can do his share.
Try it out in a small way with your patrol. You can practise tent-pitching
and striking, camp lay-out, fire lighting, dixie boiling, etc.
To give out instructions without speaking a word, means that few simple
hand signs are used. These are as illustrated. Each fellow should get to
know them.
11
CAMP-FIRE SING-SONG
A CAMP-FIRE sing-song is one of the big items of camp. There is a great
deal of romance and lots of fun, and a camp without a camp fire is not
complete. This event should not be just a scratch affair, but should be
properly organised, and each camper should be prepared to contribute to the
programme - whether as a single tarn or in a concerted item. There are
many little booklets obtainable which give the details of campfire activities;
therefore this little chapter is devoted to the arrangements necessary for the
proper organisation.
The camp fire should always open and close with a little ceremony, because
there is more to it than a pile of wood. Imagine a camp without the
traditional camp fire, without the merry gatherings around its glowing
embers - no sound of songs or the crackle of burning timber. There is
romance in the fire and the smell of wood smoke.
From the moment when man first discovered the means of liberating the
stored up heat of the sun, and turned it into a visible flame, fire has been
one of man’s great gifts from God throughout the ages. When the bitter
winds of winter swept through the primitive forests, it served to keep man
warm. When the wild beasts were on the prowl in search of their victims,
the bright glow of the fire kept them at bay.
The Indian, the pioneer and the backwoodsman all had their council and
camp fires. Whenever men met in peace, it was always around a lire. So
today the same fire burns at all our camps; it is the fire of friendship, and
the fire of brotherhood.
To carry out the Ceremony of the Camp Fire, a campfire chief or leader
must be appointed. A leader’s task is no simple job; whoever does it must
therefore have plenty of “go” and really lead the singing. There must also be
someone responsible for the laying, lighting and maintenance of the fire.
This fellow is the Keeper of the Fire. He should know how to really light a
fire and keep it going properly, so that it does not die down, with the
inevitable result that it becomes a smoky affair when more wood is put on.
This makes it very uncomfortable for those people who happen to be seated
in the way of the wind. It is a matter of “Keep the Camp Fire Burning.”
Both the Camp Fire Leader and the Fire Keeper should wear an
appropriately decorated Camp Fire Blanket, or, if you like, ceremonial
robes. These things do really make the camp fire gathering picturesque. I
have shown you how to make these robes in one of the previous chapters.
Well, so much for the camp fire and all that it means. The fire having been
laid ready for lighting when the moment arrives, all are standing around in a
circle ready for the little opening ceremony. The Camp Fire Leader steps
forward to the centre, and the Fire Keeper kneels on one knee ready to
kindle the fire which of course should not fail to burn up. The Camp Fire
Leader says a few words of welcome to the visitors, and proceeds with the
ceremony which might well be something on these lines C.F. L. Keeper of the Fire, kindle the spark, make the fire to burn, that the
flames may rise within this, our Camp Fire Circle.
K. of F. It shall be done. I am the Keeper of the Fire. I make the Fire to
burn.
(Lights the fire. This is done by lighting a torch first, then
applying the torch to various parts of the pile.)
(Slowly.) First the Spark, then the Smoke, then the Fire - the Fire the symbol
of ceaseless energy. The Fire that has burned throughout the countless ages.
The Fire that sheltered the ancient folk from the bitter winds of winter. The
Fire that guarded them from the beasts of prey. The Fire around which men
gathered in council and in peace That same Fire now burns within our
midst. The Fire of Friendship and Brotherhood. The Fire of Peace. Burn.
Fire burn. The Fire shall never die.
THE TROOP.
The Fire shall never die.
(C.F. L. gives sign to sit. All sit.)
C.F. L.
With song and jest we’ll do our best
To make our Camp fire bright.
So let your voices ring aloud
And echo in the night.
We’ll turn our troubles into joy
Our little worries bury,
So while the Fire of Friendship burns,
Come let us all make merry.
(Opening Chorus by all.)
When the last item has been rendered the camp fire could close as follows:
C. F. L.
This is the end of our story,
The Fire is burning low,
The day is done
So ends our fun.
‘Tis time for all to go.
(C.F. L. gives the sign to stand. All stand.)
C.F. L. Keeper of the Fire, our camp fire being ended, I call upon you to
watch the flames until nothing but the white wood ash remains. These you
will scatter to the four winds of heaven. You will then replace the soil so
that those who follow shall read no sign to tell that once fire burned upon
this ground.
K. of F. It shall be done.
Then follows a closing hymn, prayers and the breakaway in silence.
There are other ceremonies which can be carried out around the camp fire,
such as the presentation of badges, the awarding of special honours,
trophies, etc. There are lots of troops who give special awards to members
of the troop for some outstanding achievement. Many moons ago in my
troop an award of a very small Jay’s feather was given to those who did
some special act. It was not too easy to get a “feather in your hat.” These
awards were always given round the camp fire.
No Scout could use a woodcraft name unless he earned it, and it was given
to him with due ceremony. This always took place round the fire because
without the fire the ceremony could not be carried out. The ceremony was a
simple naming ceremony. The troop is assembled by patrols in a circle
round the fire. The S. M. or G. S. M. steps forward in to the centre holding a
piece of birch-bark and proceeds “Brother Scouts - we have assembled this - sun of the - moon to award to
one amongst you who has been tried and proved worthy to receive a
woodcraft name. John Brown, I call upon you to step forward and stand
within our midst.
(JOHN BROWN stands before the G. S. M.)
G. S. M. Upon this birchbark strip is written the name “John Brown.” I
commit this to the fire so that it shall burn, and as it rises up in smoke the
name will leave you. Because of your great skill and prowess as a runner,
you have proved yourself worthy to receive a woodcraft name - henceforth
amongst us here assembled you will be known as “Deerfoot.” You may now
carve your sign upon your staff and set up your totem.”
The G. S. M. then hands Deerfoot a piece of hazel wood, upon which is
written the woodcraft name. He shakes hands with the candidate. The troop
then spells out the name loudly D-E-E-R-F-O-O-T, Deerfoot. The candidate then salutes and goes back to his place. Several Scouts can be named at
the same time.
There is nothing like putting over a few stunts or a burlesque or two to
make a camp fire go with a bang, whether it be held round an imitation
camp fire in a hail, or round a blazing fire at camp. By the way, when you
make that imitation fire see that it really lights up and looks like a real
glowing camp fire with the red glow shining on all the faces - not just a
bundle of dying embers. Put two or even three bulbs underneath. Make it
flicker also. I have made a little sketch to show you how to do this.
If you are giving a show indoors you will have every opportunity of
collecting together or making the necessary props. and costumes which may
be required, so little need be said about the ways and means of acquiring
them under these circumstances. It is when away at camp one meets with
difficulty. With a camp-fire show held prob ably on the last evening of your
summer camp, when invitations are extended to some of the local
inhabitants, such as the farmer, on whose land you are camping, his wife,
and other folk in the district, it is a different proposition unless you go
prepared. One doesn’t usually carry a complete theatrical outfit, but there
are just one or two things which can quite easily be included in the camp
gear. So if you have a particular skit which your patrol usually does which
requires one or two things, such as moustaches, hats, and a little make-up,
go prepared to put it over by slipping these things in your kit.
When away at camp you must also use your imagination and improvise
from the few things available. It may of course be possible to borrow a few
items locally, such as an old suit of clothes, skirts and hats. It is great fun
rigging up pantomime horses, making oneself into an ancient Briton, a
Roman Gladiator, bull fighter, Indian, Spivs and so on. Remember these
stunts are burlesque and however ridiculous the costumes look, the more the
fun.
I am giving you some ideas which I hope will help you to improvise these”
get-ups.” Here are one or two things which need no illustrations.
Chain Armour - This can be made by brushing washing-up coarse mesh
swabs with stove polish.
Hair - This can easily be made from crepe hair, which is sold in plaited
lengths. Hair can also be made from wool, tow or unwound rope. These are
quite effective when pulled out and tucked under the sides of a hat. Crepe
hair can be bought in various colours.
The costume of an ancient Briton is quite easily made from a couple of old
sacks. One is used as a jumper, and the other is cut up to bind round the legs
and feet. The jumper should be a loose fit and should be smeared here and
there with charcoal, red brick, etc., to make it represent skin. Long hair can
be made as already stated from rope or tow. A stone axe or club is quite
easily made from material available.
Sacking can also be used with success for an Indian costume. The sides of
the trousers and bottom of the jumper should be frayed out and should hang
loose. If no large feathers are obtainable, these look quite effective if made
from white cardboard, blackened at the tip and lined down the sides.
The Pirate shown in the sketch is made up from a coloured shirt, a pair of
striped pyjamas, rubber top boots and a coloured scarf for the head. A black
eye shield is easily made from a piece of cardboard. As for the cutlass and a
dagger, these can quite easily be made from a piece of thin wood, such as a
strip off an orange box. A little aluminium paint will give them a metallic
effect.
Noise Effects. - When doing a camp-fire show, it may be necessary to
produce various noises, such as that of a train, a galloping horse and so on.
This is how some of them can be made:
Aeroplane. - Elastic band on wire, swung round on the end of string.
Horse. - Two half coconut shells clapped together.
Train starting off. - Two pieces of coarse glass paper rubbed together.
Thunder. - Sheet of tin shaken.
Rain. - Peas shaken around a tin bowl.
Make Up. - Grease paints may be a bit difficult to obtain when away at
camp but if it is necessary to make up at all, burnt cork can be used to
blacken the face for a nigger minstrel. Red ochre or even cocoa would do
for an Indian, but when red is required, then it is quite easy to get a lipstick.
A little blacking will do no harm for marking in black whiskers or eyebrows
and crowsfeet at the corners of the eyes.
Improvised Camp Fire Orchestra. - There are several ways to make
musical instruments when in camp, and you can have a bit of fun forming
an impromptu orchestra. One way of making a good whistle is to select a
piece of green willow or sycamore in the spring or early summer. Cut off a
piece about 5 or 6 inches long. Cut through the bark all round where shown
in the illustration. Then cut the end of the stick on the slant, and also cut a
notch out of the top. When this has been done it is necessary to slide the
bark off the stick without breaking it. This is done by dipping the stick in
water and gently tapping all round without injuring the bark. The stick
should be dipped in water several times while you are tapping. After this
you should be able to slip off the bark complete. Clean off the sticky sap.
Now the notch in the centre part should be enlarged by cutting with a sharp
knife, and a strip of wood should be cut off the top as illustrated.
All you have to do now is to slip the bark back on to the stick again, and the
whistle should blow with a shrill clear note. If you want to make a whistle
on which you can play a tune cut several notches in the stick and join these
up by cutting a long notch in the centre stick as shown in the sketch.
You can make a flute quite easily by removing the pith from a piece of elder
or syringa with a wire drill by just twisting and pulling. Then cut or burn
out the holes as shown, blocking up one end with a disc of wood. You blow
this as an ordinary flute.
The Pipes of Pan are made in the same way as the flute. The lengths of each
pipe are cut to give the various notes. The bottom ends are blocked up, and
the pipes are bound together by two thin strips of wood and string.
It’s fun whilst in camp to have a competition to see which Scout can make
the best musical instrument from materials to be found in and around the
camp.
Music can also be obtained from a few bottles. These should be as far as
possible the same size and they should be hung on a pole. To get the
different notes add various quantities of water, and tap with the handle of a
fork.
Pieces of iron piping, saucepans, large tins hung on string all go to make up
a percussion band, not forgetting the music that can be produced by “paper
and comb,” tin whistle, harmonica, Jew’s harp and other instruments which
can be packed into the pocket.
Get your orchestra together and appoint a conductor, complete with baton.
To ensure success, have a few rehearsals.
Impromptu stunts, improvised orchestras and choruses make any camp fire
go with a swing, and never fail to leave behind memories of happy days
which we shall always remember.
CONCLUSION
THE fire bums low and we have talked of many things, which are but few
along the way of Woodcraft - for Woodcraft is a never-ending trail. There is
always new ground to be covered, new signs to be found, so lay on the logs.
Let the fire burn brightly that many may see its glow, that it may guide
them along the trail of the great out-of-doors. May these few pages help to
encourage the spirit of Woodcraft.
Peace and smooth trailing.
J. G. CONE

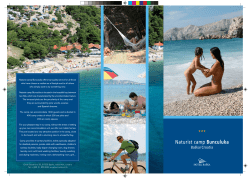


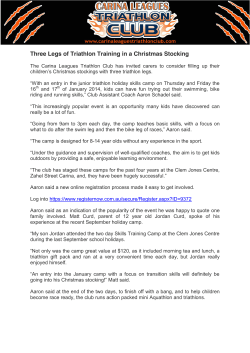


© Copyright 2026