
Patterns never felt better! That’s right, now available
Patterns never felt better!
That’s right, now available
in designer prints and trendy
colors, our fabulous felt goes
from kid's stuff to totally hip stuff!
felt in print & pattern
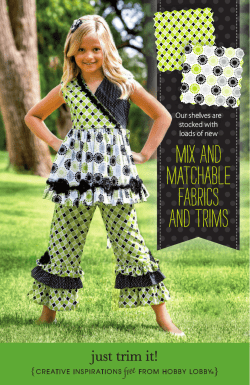
{C R E AT I V E
I N S P I R AT I O N S
free F R O M H O B B Y LO B B Y }
®
well said|Let the writing on your wall begin
with felt! Start with a base fabric—just stretch it
across a blank canvas and staple it to the back of
the wooden frame. Now stencil your letters onto our
fabulous felt squares; then cut them out and glue
them into place.
Tip: To make patterned letters pop, try backing
them with a contrasting solid. Simply glue the
cutout to the coordinating fabric. Then trim around
the edges, leaving the desired border.
sitting pretty|Don’t limit your words to the
wall space. Let the quotes continue…on the couch!
Just remember, glue will damage upholstery. So
save this trick for flea market finds and slipcovers.
2
Hobby Lobby Product Inspirations
From the walls to the lamps to the place you put your feet
up, transform
your favorite space into a happy place —with felt! That
doesn’t have to
mean primary colors and kitschy patterns. Our newest
felt squares are all about chic, grownup, absolutely on-trend
style.
off the stem|Soft felt flowers are fabulous
on a made-to-cuddle accent pillow. The simple
spiral blooms—see the technique up close on the
next page—are mounted on circles of felt and
hot-glued to the pillow as shown.
deer one|Haven’t you heard? Hooves are
hip—and that’s great news for this quirky handmade
appliqué. For a similar look, trace the silhouette of
your choice (or refer to our template on pg. 11) onto
a felt square. Now cut it out and machine-stitch it to
a basic throw pillow.
3
Hobby Lobby Product Inspirations
A pair of pretty pillows
gets a felt fix! Scroll
down to find out just
how we pulled off this
totally unique look.
supplies:
•
•
•
•
Pillow Cover
Pillow Form
Felt Squares
Cutting Mat
•
•
•
•
Rotary Cutter
Ruler
Scissors
Hot Glue Gun & Sticks
1. Lay felt squares on a cutting mat. Using a ruler for
a straight edge, cut strips of felt 1½" wide with a
rotary cutter.
2. Fold strips in half
lengthwise, and
hot glue the edges
together.
3. Fringe felt by cutting
about halfway
through the folded
edge at evenly
spaced intervals.
4
Hobby Lobby Product Inspirations
4. Roll strips into spirals,
securing them with hot glue
as you work. Tip: For
larger flowers, glue
2-3 strips end
to end. Once
finished,
mount the
flowers on
felt circles
and hot glue
to the pillow.
star attraction|We
zigzag-stitched wide strips of felt
to basic cotton fabric for this
on-canvas design. Then we
added a simple star appliqué
(refer to pg. 13 for template)—
stitch around it first with
embroidery thread for a finished
look and then glue star onto
canvas. A two-toned felt flower
was the perfect finishing touch.
5
Hobby Lobby Product Inspirations
«
flag along|This easy
pennant banner would
work for a wall, but we
chose to drape it across a
fabric-covered canvas. The
festive felt triangles are simply
hot glued to the ribbon.
You can brighten up a boring workspace with little more than a stack of our
fabulous patterned felt squares. That goes for made-from-scratch decorations and
revamped office standards like lamps, pencil cups and trashcans. We’re talking
easy, budget-friendly projects!
Hobby Lobby Product Inspirations
6
banner day|Layer your felt projects for instant dimension
and interest. That’s what makes our pennant banner pop. We
glued the felt cutouts together for this design. Then we clipped
them to some basic jute twine. Tip: The miniature clothespins are
sold in the Scrapbooking Department.
deep pockets|This chair-mounted
notebook caddy is a fun, no-sew project. To
make it, we cut out a series of felt squares,
finishing the edges with pinking shears.
Then we glued them together.
Hobby Lobby Product Inspirations
7
flower power|Here’s a new take
on ordinary felt flowers! Simply cut out three
different sized circles of felt and finish the edges
with pinking shears. A thumbtack in the middle
of the smallest circle holds the flower together
and serves as the flower’s center. Make the stem
from a row of thumbtacks, and use them to hold
the “leaves” in place.
penciled in|We couldn’t forget to jazz
up the pencil cup! This exotic giraffe-print felt is
simply adhered to the cup with tacky craft glue.
Now you’ve got a cute container for pens, pencils,
and other desktop details. As you can see, we’re
totally wild about felt!
Hobby Lobby Product Inspirations
8
coasting along|When you need a fashionable place for your coffee mug,
try some cute felt coasters. Cut out several different sized circles of felt—we used
both solid and patterned—and give the edges some interest with pinking shears.
Use fabric glue to adhere the circles together. Cups never had it so cozy!
bird’s-eye view|This sweet
desktop decoration is so sweet and
so simple to create. We cut out our
adorable birdie (template on pg. 14)
and hand stitched around the edges,
leaving an opening for the filling. We
then stuffed our feathered friend with
fiberfill. He’s perched atop heavy-gauge
wire that we coiled to form the base.
9
Hobby Lobby Product Inspirations
shade aid|Fluff up a basic lampshade with a field of little
felt flowers. Use the petal template provided on the last page for
your shape, and then cut. You’ll need four petals per flower. Now
gather and layer petals to form a bloom, stitching as you work.
Hobby Lobby Product Inspirations
10
template
11
Hobby Lobby Product Inspirations
(for printed felt deer from pg. 3)
template
(for printed felt squirrel from pg. 3)
Hobby Lobby Product Inspirations
12
template
13
Hobby Lobby Product Inspirations
(for printed felt star from pg. 5)
CUTTING
LINE
(for felt bird from page 9 and lampshade flower from pg. 10)
STITCHING
LINE
template
©2012 Hobby Lobby® - Photography by Sanford Mauldin • Crafts - 947408
www.hobbylobby.com •
• www.getinspiredbyhl.com
DO NOT ALLOW CHILDREN TO COMPLETE PROJECTS ALONE. ADULT SUPERVISION REQUIRED.


© Copyright 2026